Why start this series in the 2020, when everything is about cloud, and Microsoft is pulling the plug on its “on-premise” certificates including MCSA, MCSE on Windows Server on 31.01.2021. Why even bother?
For a start… This series is obviously aimed at those of you who are just starting in IT, and want to pursue a career in IT infrastructure/services.
Although everything today is about cloud, Windows Server is still everywhere and will be for some time, since not every workload is suited for cloud, be it practical, security or regulatory reasons. That may change in future, but for now it is like that…
Also, I think that mastering Windows Server 2019 will help you understand basic concepts of services and IT infrastructure.
And in the end, Microsoft Azure is built on Windows Server 2019 at the moment, so if you have a chance to work on ASDK (Azure Stack) you will benefit from this knowledge, because you will understand how it is all connected and working.
This “Server Basics” series will not go into details too deep, the goal is to make you act and try technology by doing something practical and simple that works. That way you will quickly get the result which will make you excited about technology and push you to explore more.
Before you start…
Where to get the Windows Server 2019 installation?
No need for piracy, Microsoft offers trial version of software that will work for 180 days (and more) and is fully functioning.
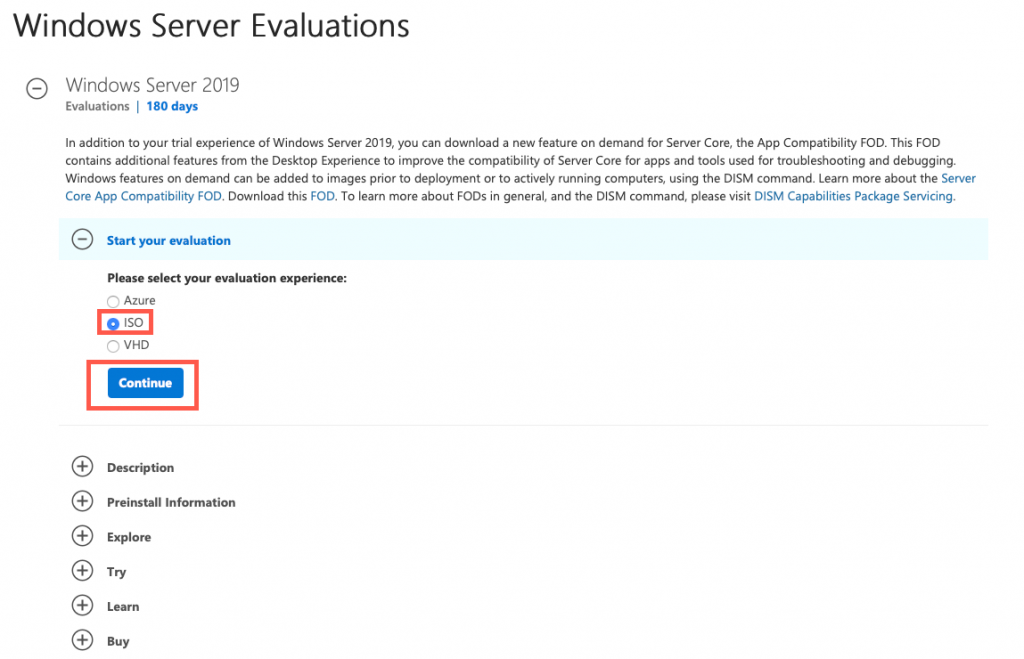
You can get the software here – https://www.microsoft.com/en-us/evalcenter/evaluate-windows-server-2019
Select ISO image and click on Continue
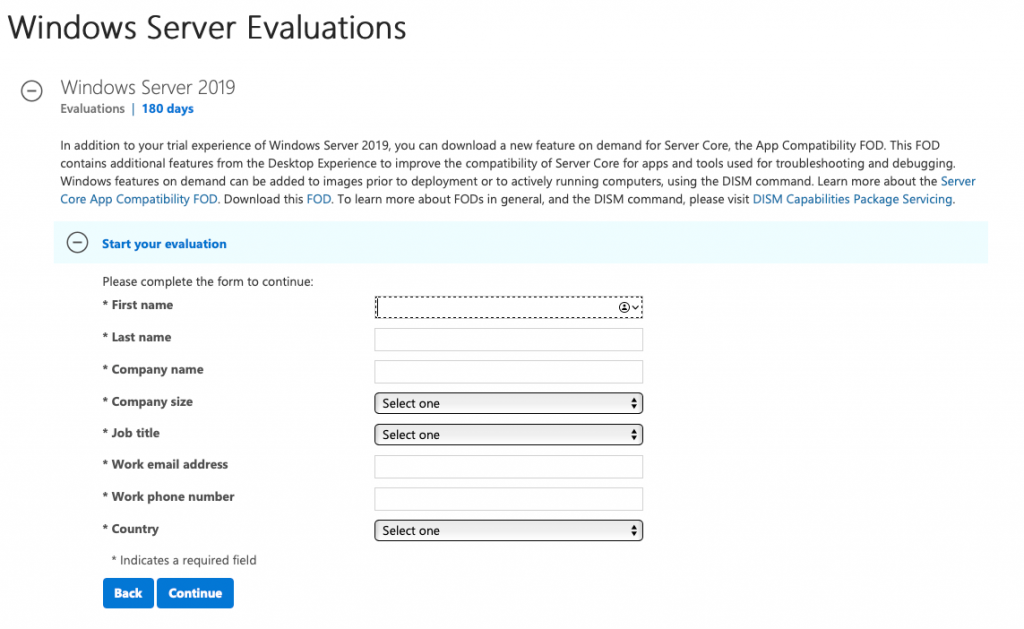
You will be asked for your details, and after you enter everything select Continue
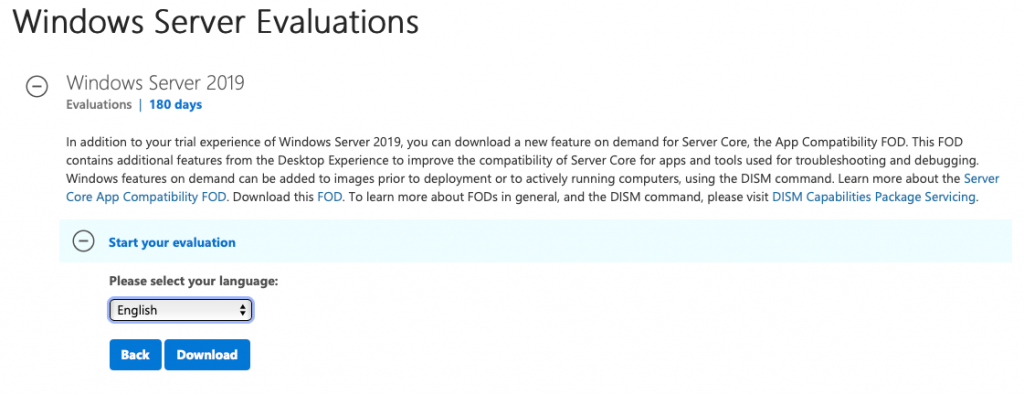
You will then select the language and click on Download…
If you are planing to do Windows Server 2019 installation on physical machine you will have to “burn” ISO image you downloaded to CD or USB stick (USB preferably) – you can do that with a tool called Rufus, you can find it here – https://rufus.ie/
Installation on Hardware or Virtual Machine?
Hardware
If you are installing on a physical machine (bare metal) there are a couple of thing to be aware of:
Minimal requirements are (same goes for virtual machines (VMs)) – 1.4Ghz 64bit CPU (it is very important you have 64bit capable CPU, otherwise this won’t work), 512MB of RAM – 2GB of RAM is minimal for graphic environment (which we will do) and 4GB is optimal in my experience. 32GB of disk space, 1Gbit ethernet, 1024×768 screen resolution, keyboard/mouse.
My advice would be to have CPU with multiple cores (2 or more if you can afford), at least 16GB of RAM (the more the better) 1TB disk drive at minimum for testing, if you plan to do LAB and test Windows Server 2019 and its services.
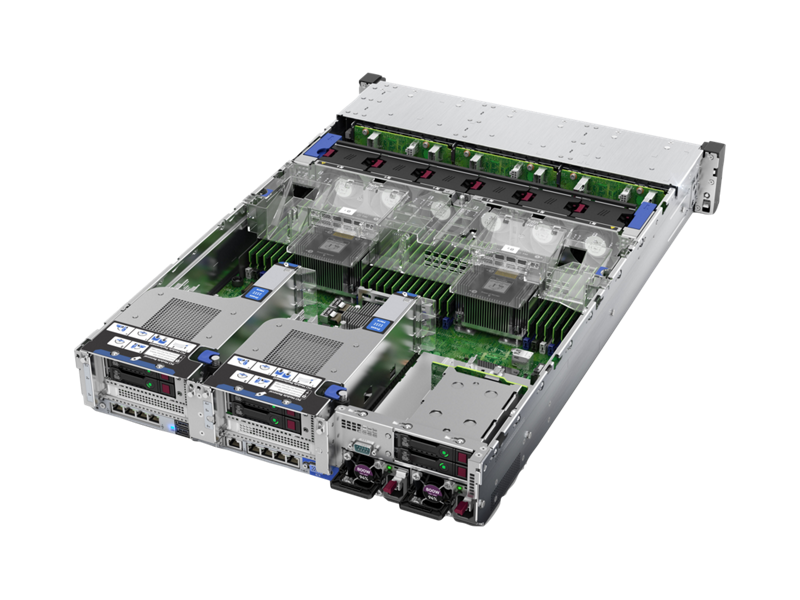
If you are installing on a server, be sure that you first upgraded all the firmwares on your machine. Also, create RAID field on the server on which you will place your Windows Server 2019 installation.
Make sure you set boot device in BIOS to USB stick (or whatever you burned your Windows Server 2019 installation to)
In the end have storage drivers (raid controller) or motherboard storage drivers at hand – Windows Server recognises a huge variety of storage controllers but you never know… Better to be prepared then to waste time. If you are practicing on Dell, HP, Lenovo server equipment, you are covered out of the box.
If you don’t have a server at hand and you are practicing in home lab on “desktop” grade hardware, no worries, installation should work, just make sure you have minimal requirements covered in your PC or laptop. There may be an odd driver issue to resolve if you have “exotic” configuration, so be aware of that.
Virtualization:
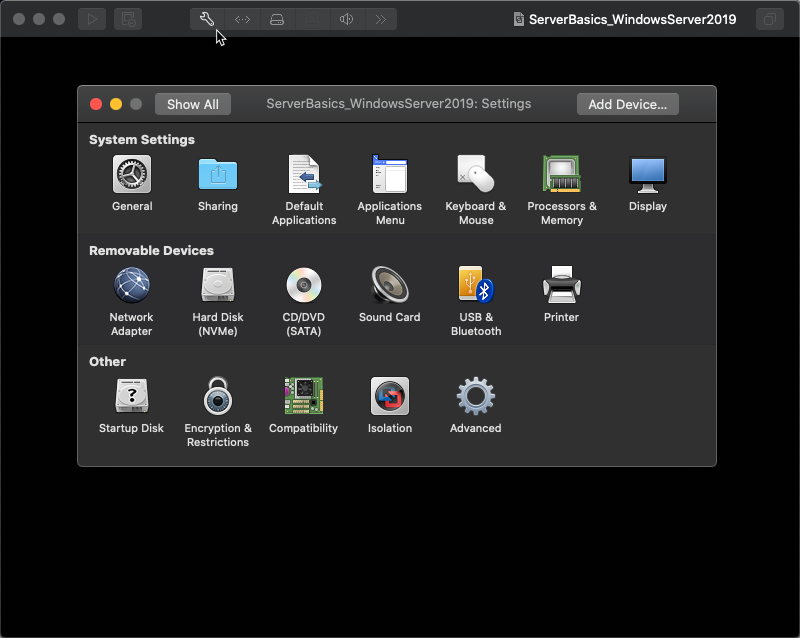
With virtual machines you just need to mount Windows Server 2019 ISO image we downloaded earlier after you created empty VM for your Windows Server 2019 ISO install. Procedure depends on the virtualisation software you are using, I can show you VMware vSphere, but more or less all the virtualisation softwares are same with these options, it just depends how you navigate to the option you need.
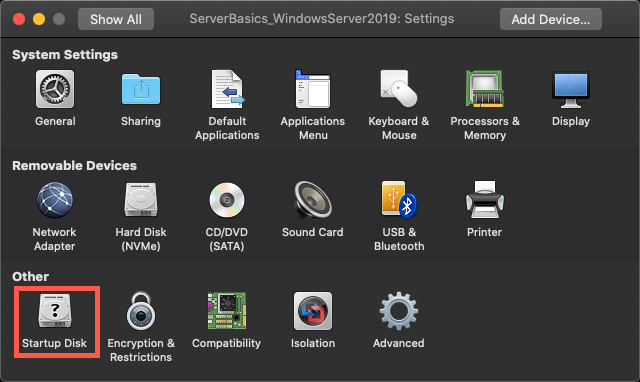
In vSphere you click on settings on virtual machine you created, it is a little wrench on the top of the screen. Under Removable Devices section you will select CD/DVD (SATA)
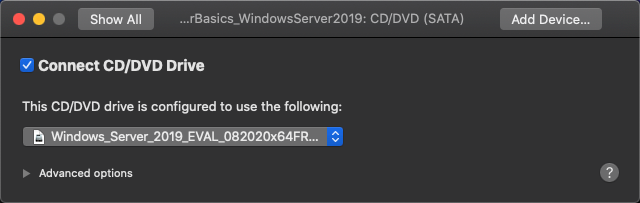
Click on the selection box and select “Choose a disc or disc image…”
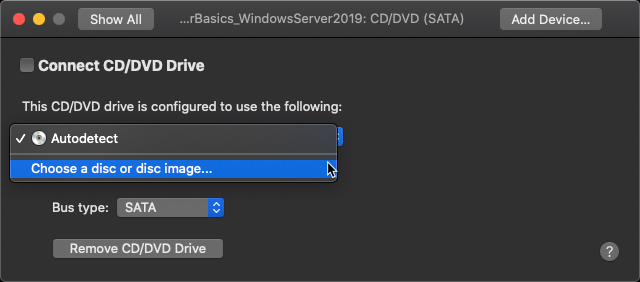
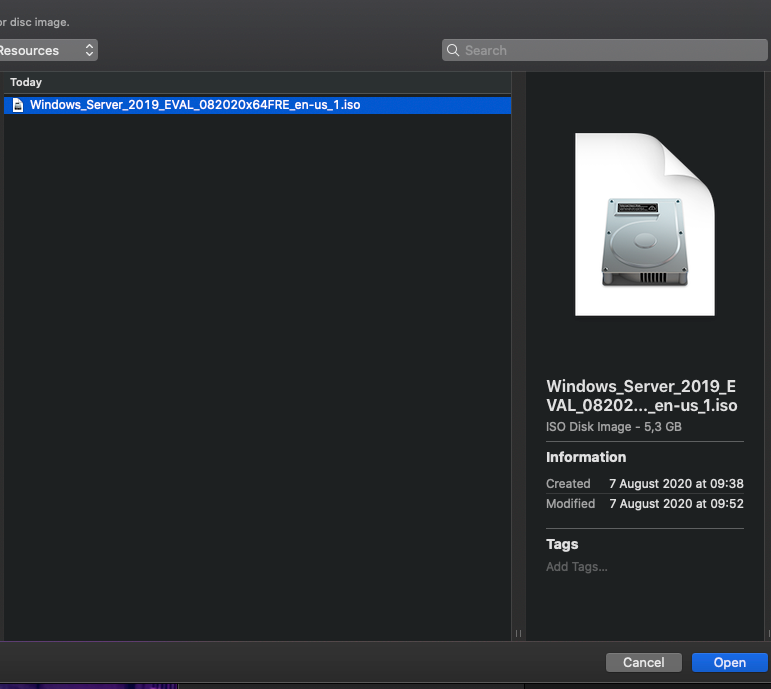
Navigate to the location you downloaded your Windows Server 2019 ISO image and select it.
Now that we selected our ISO image, make sure you selected “Connect CD/DVD Drive” checkbox and then back to the main settings screen.
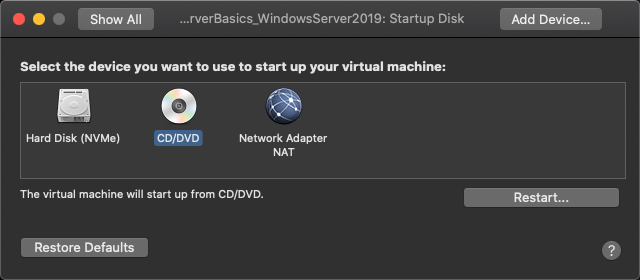
We need to set one more thing so we are sure that we will boot from our ISO image
Under Other Section select “Startup Disk”
Select CD/DVD as your startup device.
Again, settings in your virtualisation software may differ from this, so explore or Google for the steps you need.
Goal is clear whatever method – hardware or software you are using – mount Windows Server 2019 image we downloaded earlier and select it as bootable device. Also change hardware settings (CPU, RAM, disk) to the settings I mentioned above.
Installation
Now, to the final step, installation of our first Windows Server 2019 machine.
If you are doing it on physical machine be sure you set the USB stick (or CD/DVD if you burned downloaded ISO image to it) as main bootable device in BIOS (probably under boot menu) and in your virtualisation software follow steps I mentioned earlier.
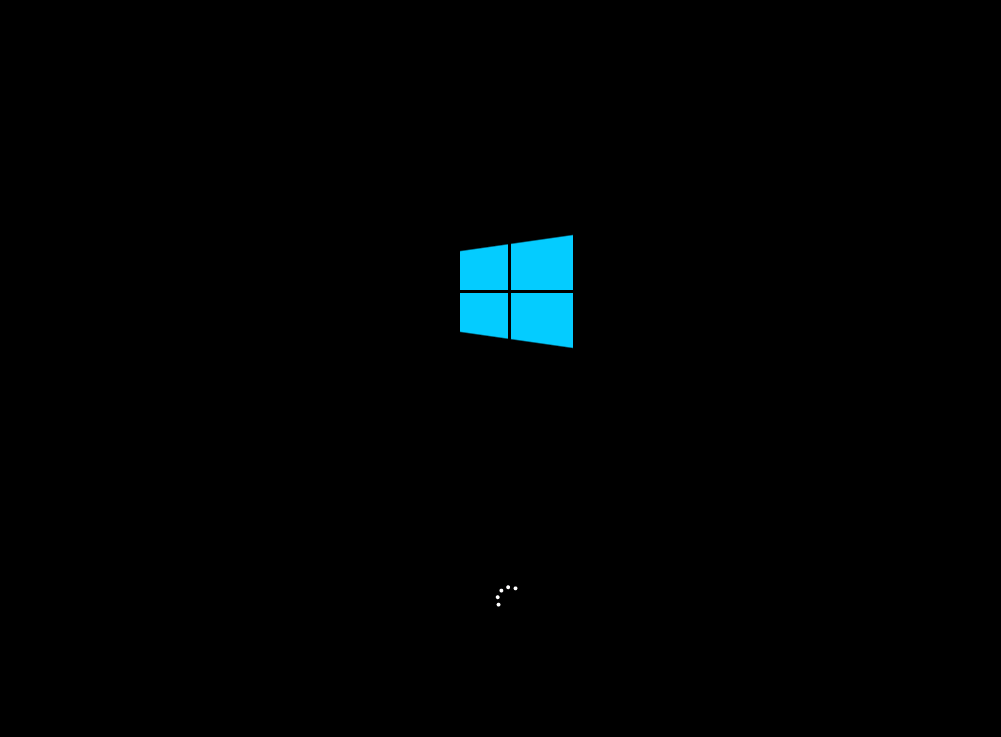
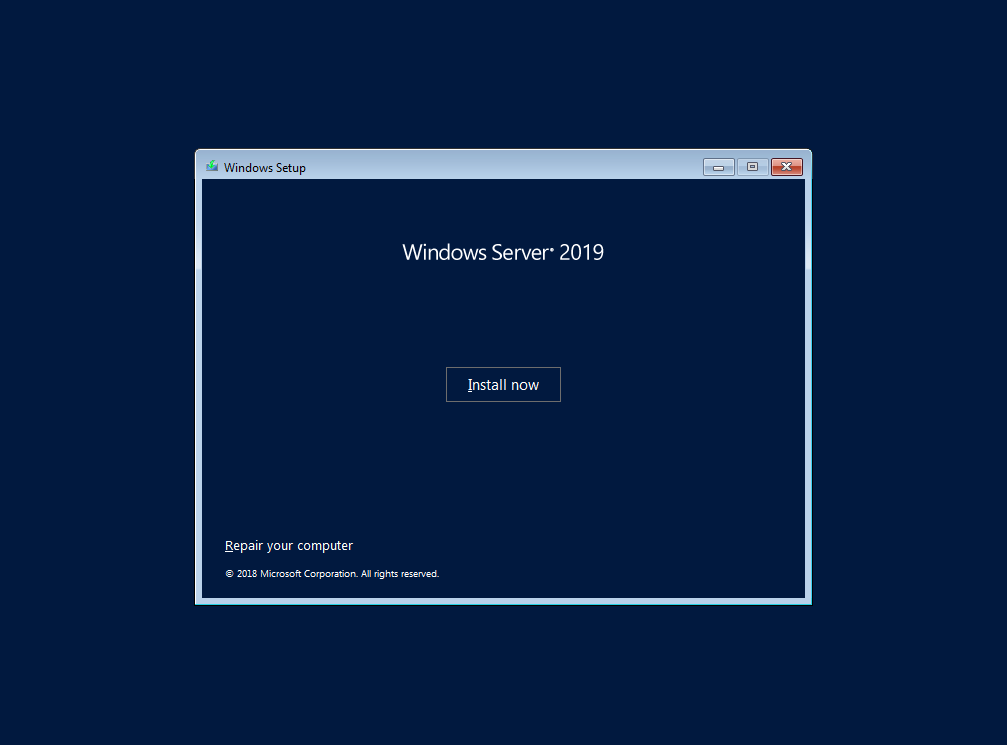
If you did everything correctly, you will be greeted with this screen…
“Press any key to boot from CD or DVD” – press a key on your keyboard to boot from it…

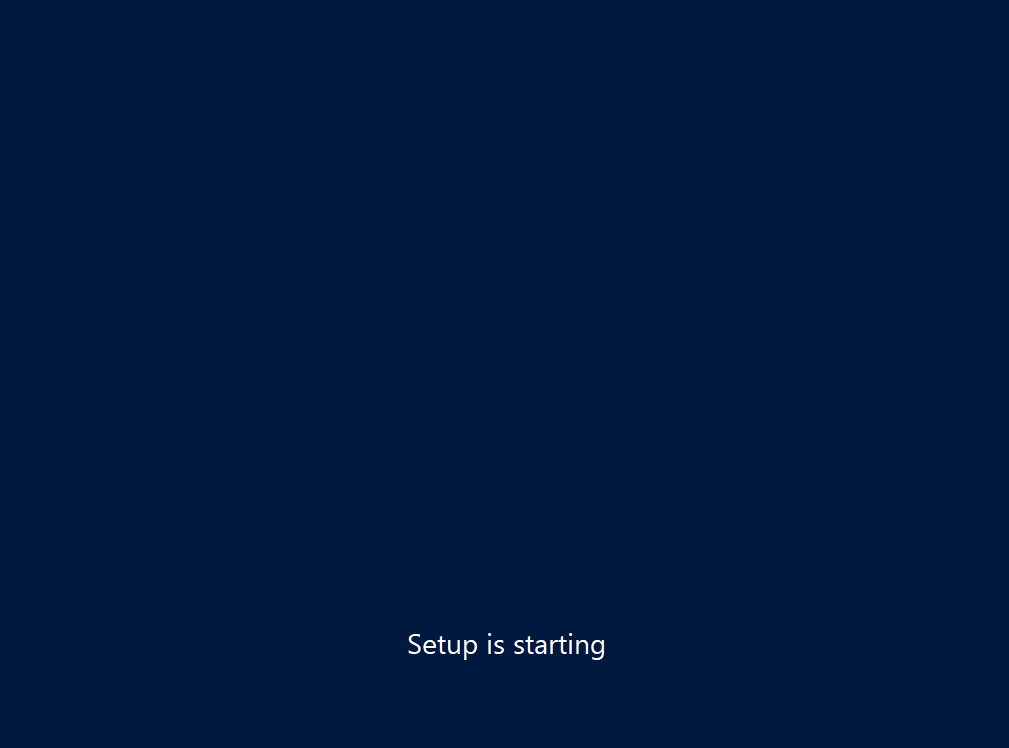
Wait…
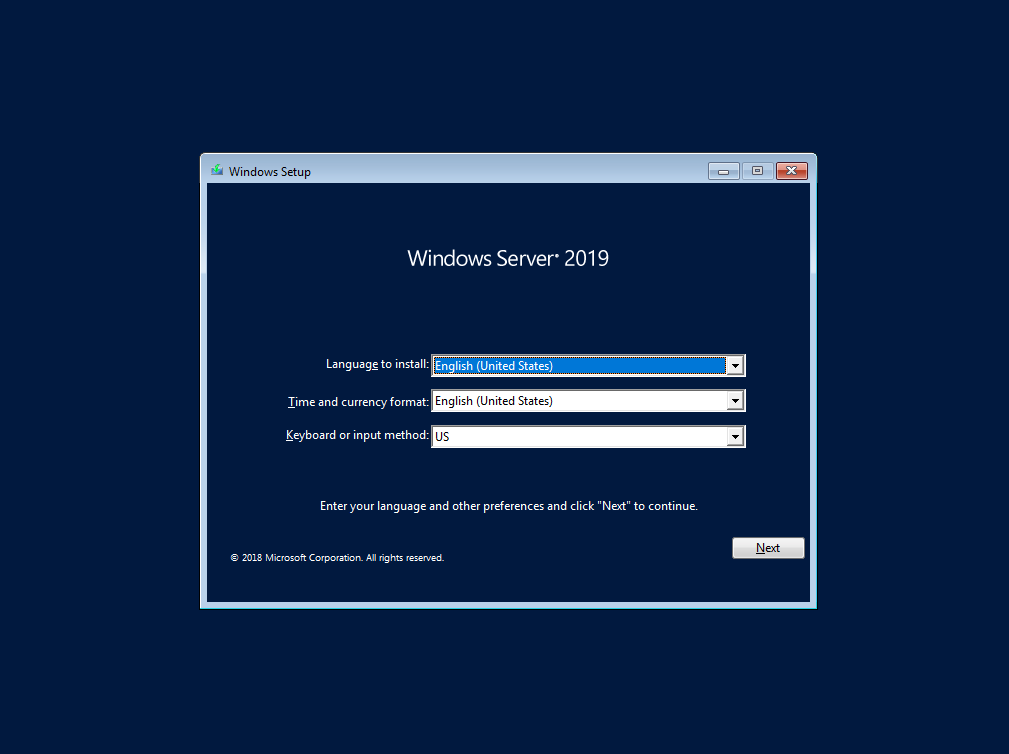
Language to install: Select language you wish your Windows Server installation to be – I will select English
Time and currency format – again, select your local settings
Keyboard or input method – select a keyboard layout, I will select English keyboard layout.
Install now…
…
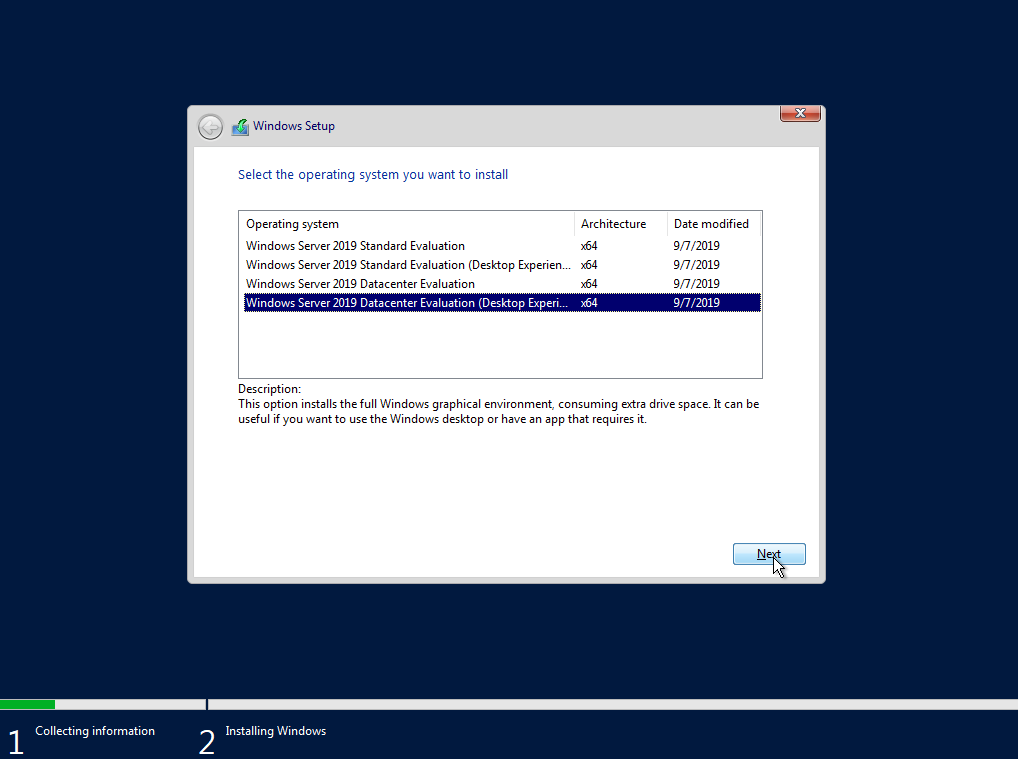
We will select Windows Server 2019 Datacenter Evaluation (Desktop Experience)
Read agreement, select “I accept…” and click on Next

Select “Custom: Install Windows only (advanced) option
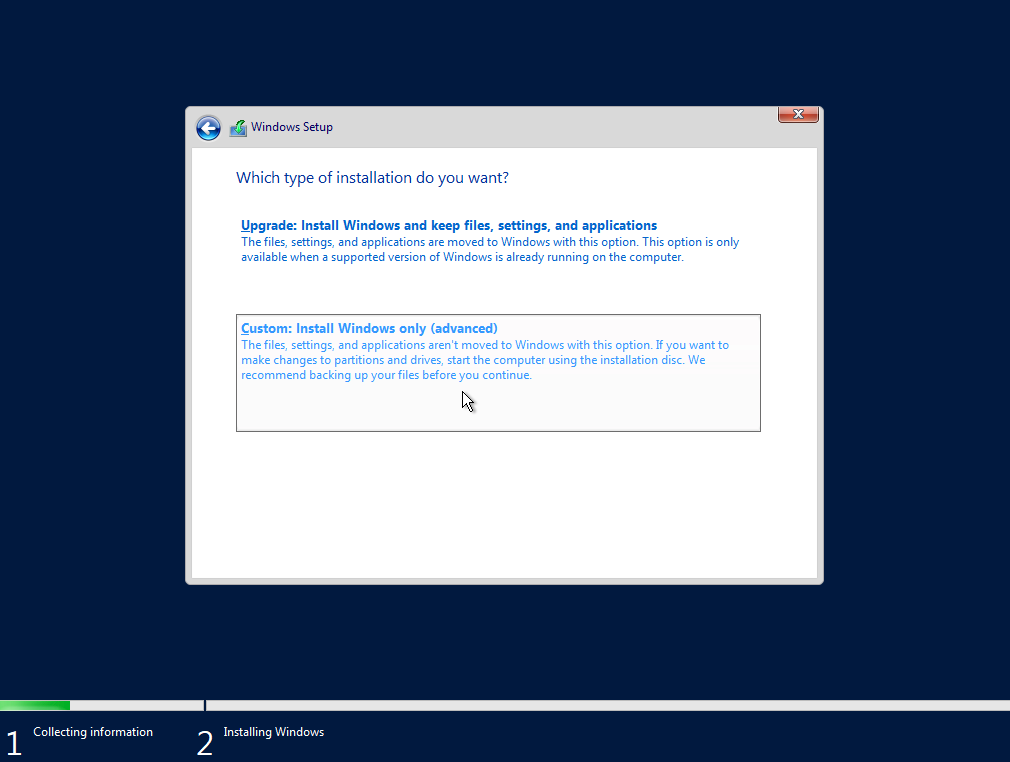
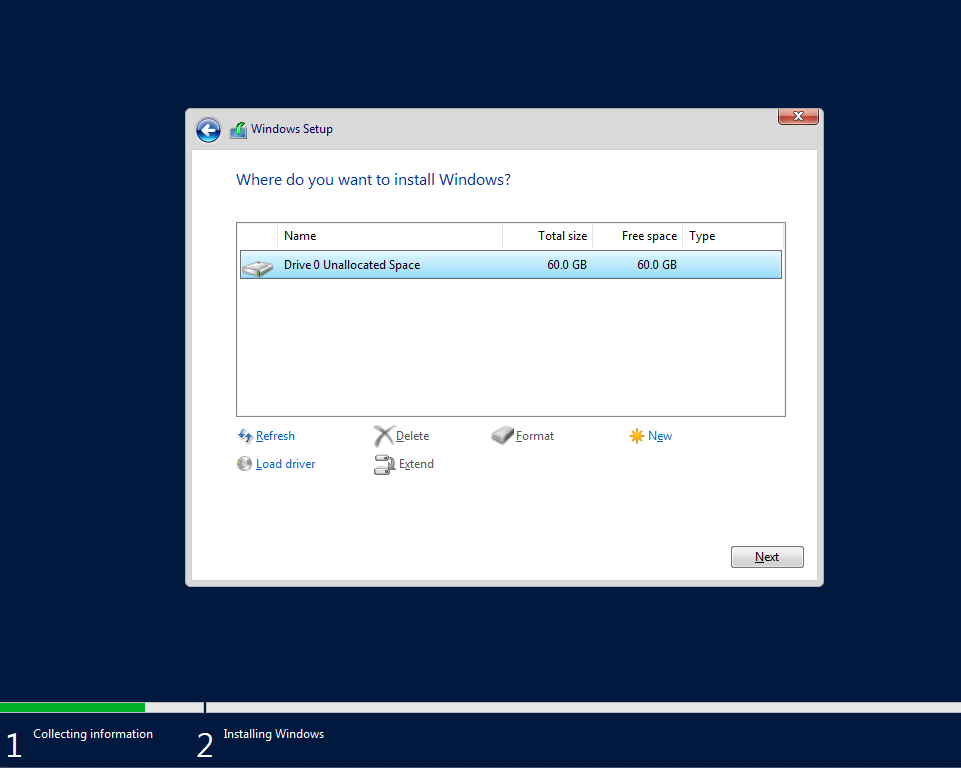
Now, select the disk you prepared for this installation. If this is a blank screen for you, you will need to prepare and load drivers for your storage controller (or RAID controller) I mentioned before. Copy drivers (drivers need to be for the Windows Server 2016/19 or some Windows 10 will even work) to USB, plug it in your machine and click on the Load driver on bottom of the screen. Then browse to your driver, select it and hope for the best.
Also, make sure disk you are installing on is empty with no important data on it, this operation will delete everything on it.
If you can see your disk on the screen below, then select Next and the installation will start…
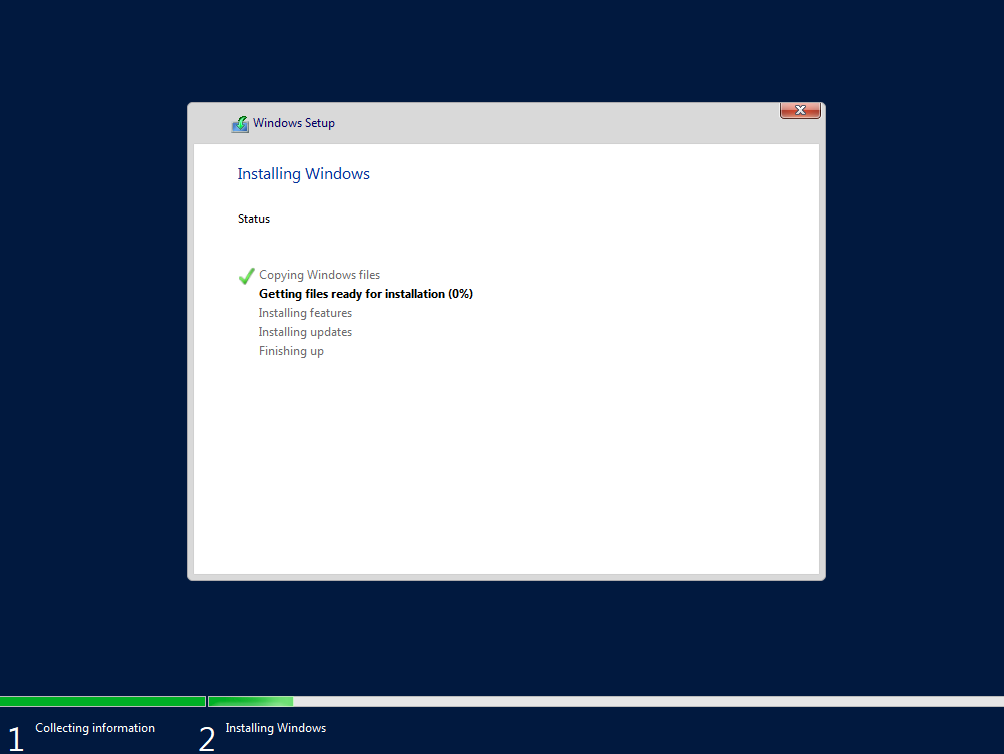
We will now wait a bit… Waiting depends primarily on the speed of your PC, it may take longer on be very quick to install…
After you reached last step you will get restart screen…
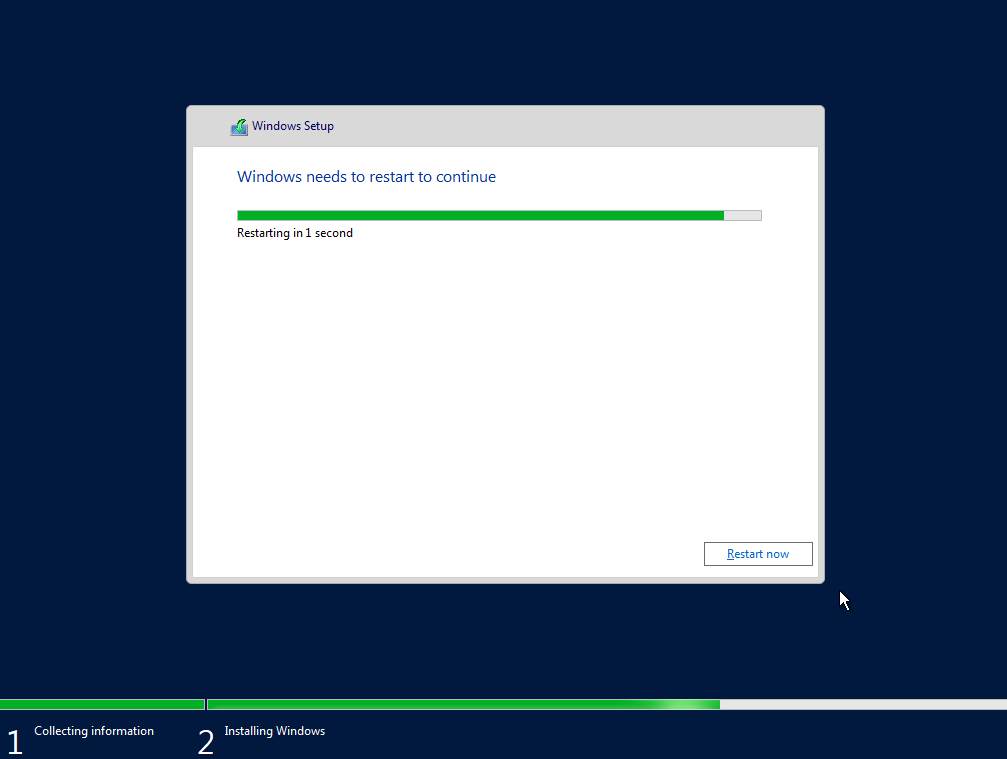
Let the computer/VM restart and this time let it pass “Press any key to boot from CD or DVD” – do not press any key on that screen.
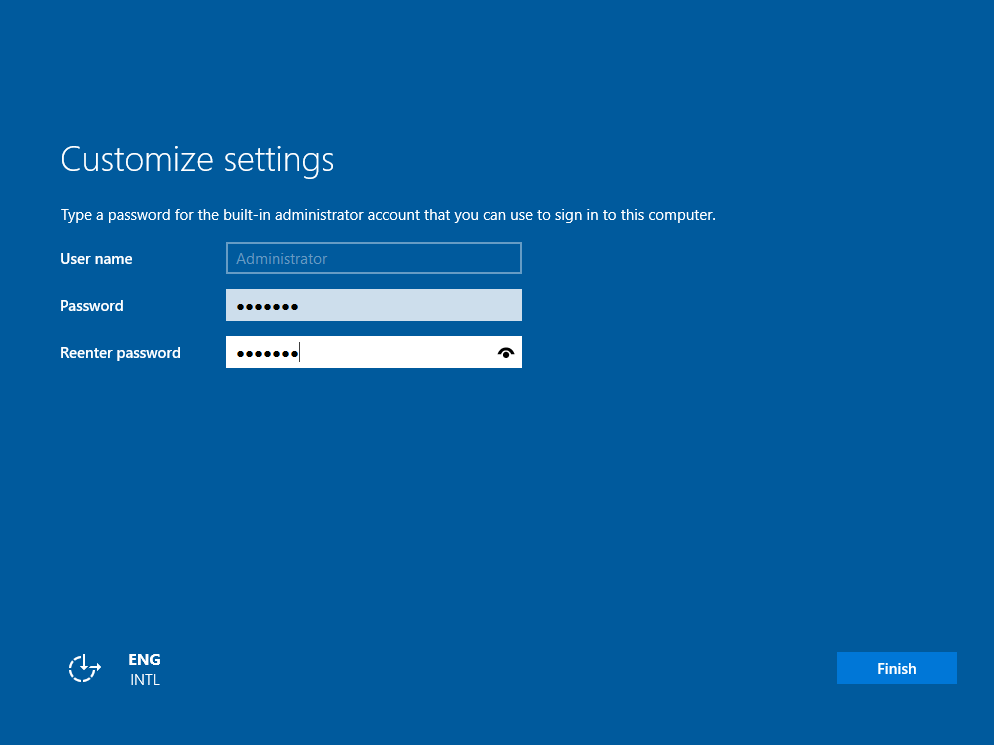
You will be greeted with this screen… Enter password of your selection for your installation. Always make sure you use strong passwords (Minimum 12 signs – combination of letters, numbers, special chars…)
Click on Finish
That is it, you are greeted with lock screen
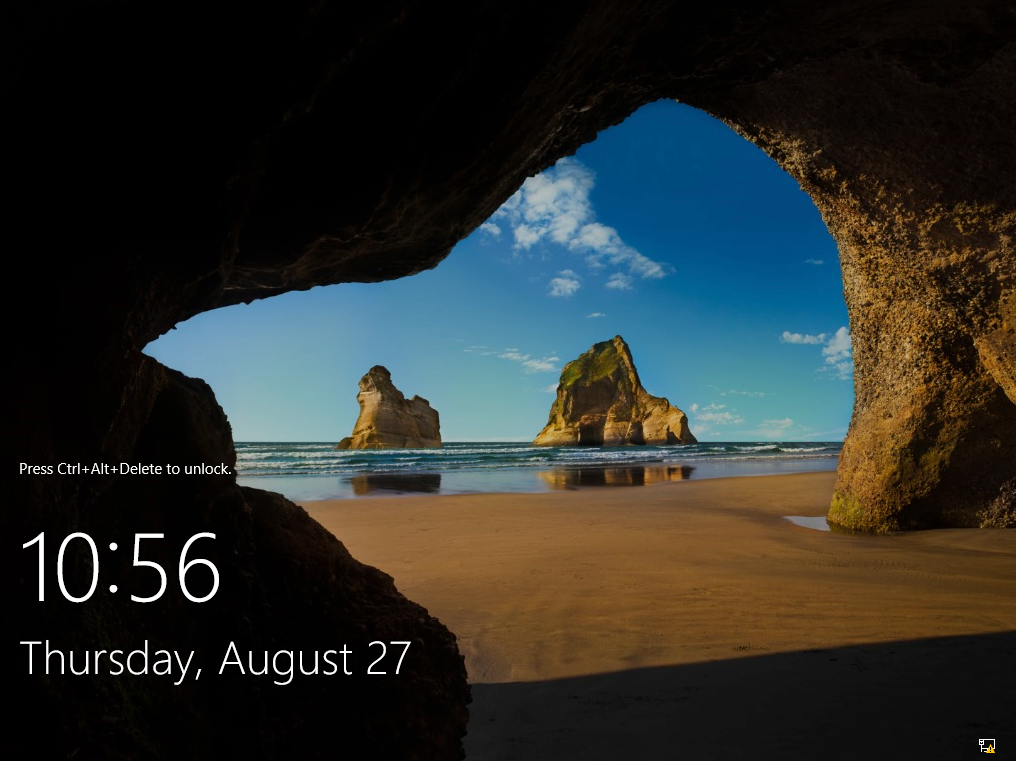
Press CTRL+ALT+DEL if you did install on physical machine, if you done install on a VM, look for a CTRL+ALT+DEL shortcut in a menu.
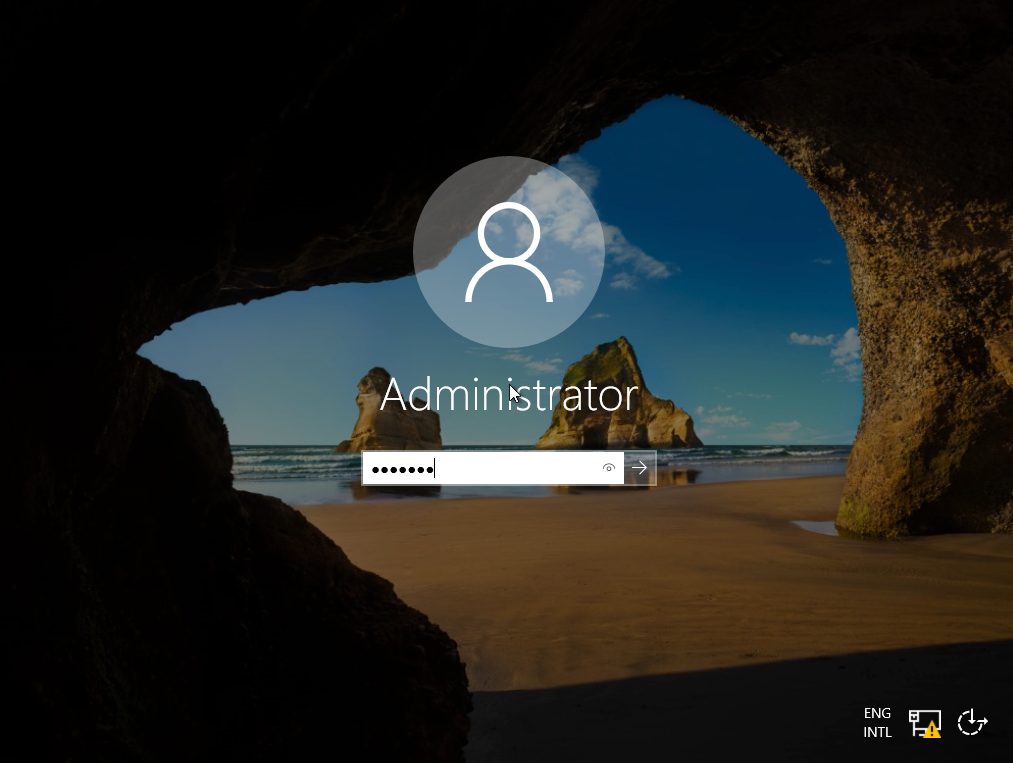
Enter your password and press enter on a keyboard.
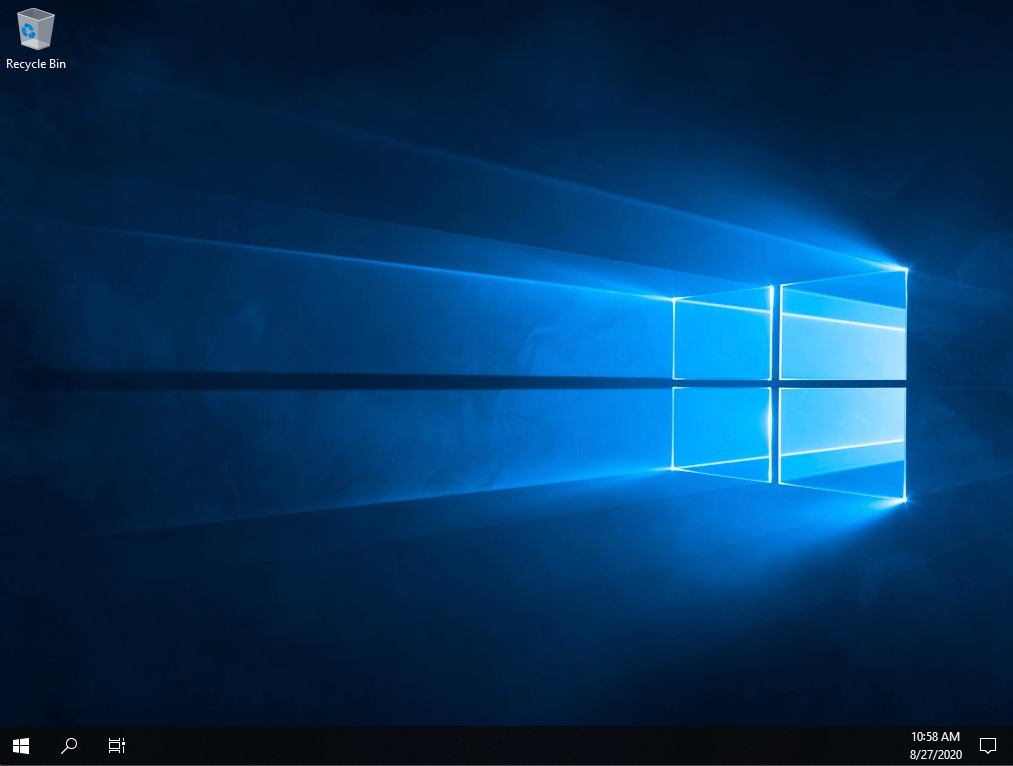
Congratulations, you did your first Windows Server 2019 installation.
In the future I will try to expand this “Server Basics” series with more tutorials on how to configure your Windows Server 2019 installation and set various services on it (DHCP, DNS, file share, failover…)
I have a very busy schedule, so I can’t promise much, but I will try to write as much as time allows.
If you are interested in a video version of this tutorial – here is the video:
Other tutorials in this series:
Server basics 02: First steps adter Windows Server 2019 install
Server Basics 03: How to install Hyper-V
Server Basics 04: How to create VM on Hyper-V
Server Basics 05: How to create virtual machine template
Server Basics 06: How to create windows domain
Server Basics 07: How to create user in domain, join computer to domain
Server Basics 08: How to create DHCP server
Server Basics 09: How to configure Groupe Policy Part1
Server Basics 10: How to configure Groupe Policy Part2
Server Basics 11: How to create iSCSI Target in Windows Server
Server Basics 12: How to create file server (DFS) in Windows Server