Ok, so we prepared everything for our next enterprise service – file share. File shares can be found in every company. File shares are useful if used with measure and not as a main business application.
We are going to deploy file shares not by simply clicking on folder and creating file share (which is a legit way to do it.). We are going to create DFS file shares.
https://docs.microsoft.com/en-us/windows/win32/dfs/distributed-file-system-dfs-functions
Why DFS? DFS will provide us universally named files shares and it is practical in many cases. You can swap file servers, add them, remove them, and your clients will always see file shares under same file path. There are other benefits for using DFS, but lets stick with this for now.
We will create \\informatiker.local\WorkDocs DFS namespace.
Users in our domain will see it that way, and no matter which file servers are under it (SBasicsDFS1, DFS2…) users will always see it under this name, so you don’t need to worry about swapping servers, naming them. As long as your files are intact, users don’t care about the file path. This is also great if you are using links to your files in various documents, tutorials in the company – they will be persistent.
Before we begin
I created new machine for our file server – machine name is:
SBasicsDFS1
((Don’t mind screenshots and text below, you should always name your machine with less than 15 characters)
IP address: 10.0.0.34
Machine is joined to informatiker.local domain
I also attached iSCSI target from ServerBasicsISCSI machine and formated it as a D drive.
Installation
We will go to Server Manager (I won’t go through whole wizard, we done it many times already in this series) and under Server Roles | expand File and Storage Services | File and iSCSI Services and select DFS Namespaces.
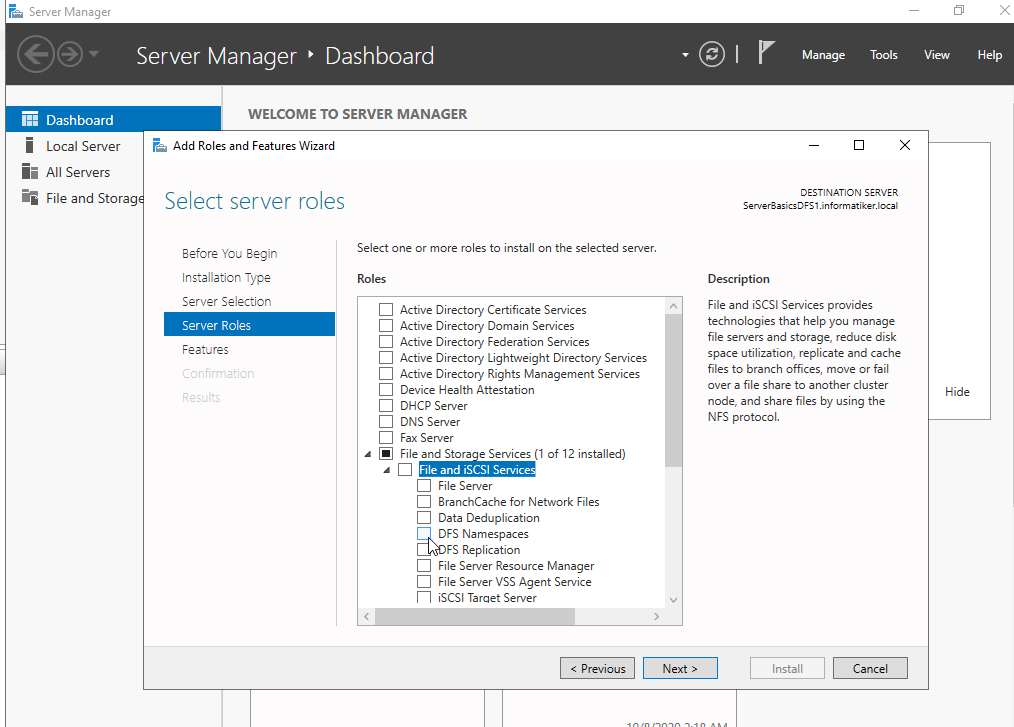
Additional screen will pop-up | select Add Features
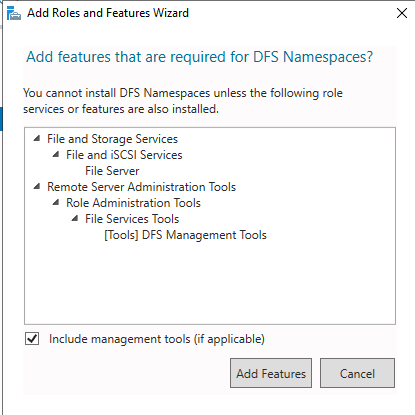
While on this screen I will also select DFS Replication although we will not need it now, since we will have only one DFS server.
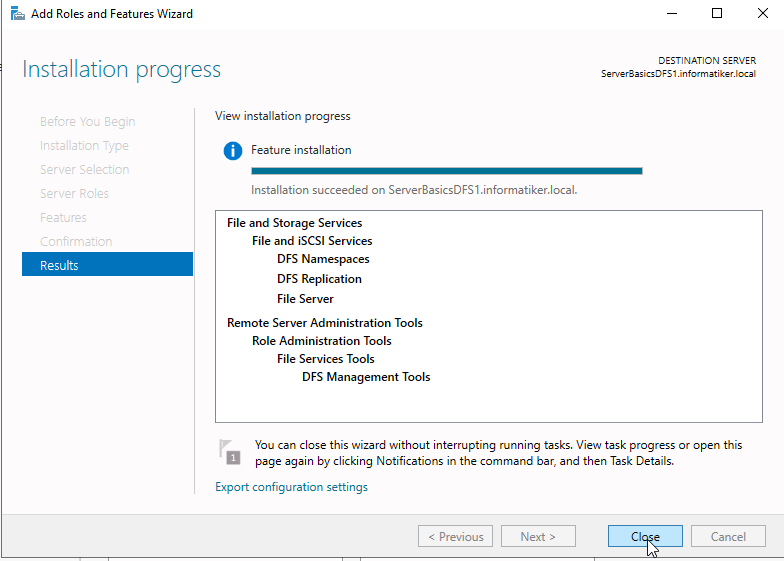
Select Next and finish Wizard.

Installation is done, I will close dialog and reboot machine.
Configuration
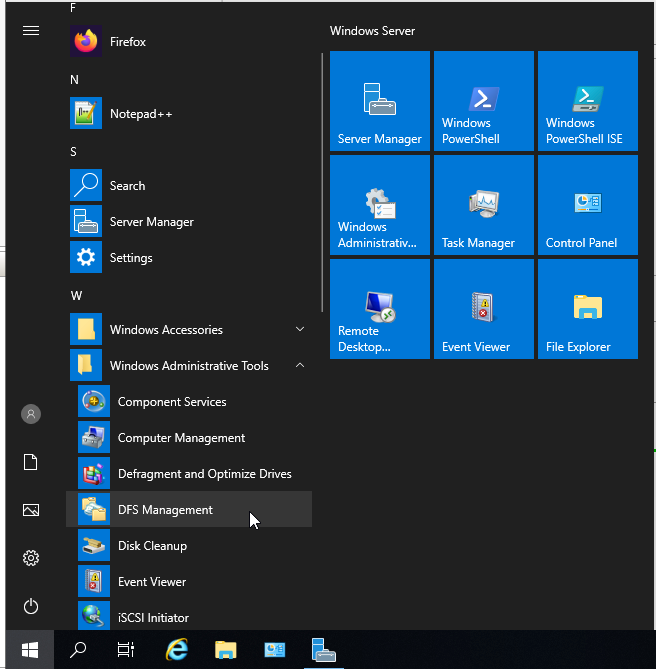
You will find DFS Management under Start | Windows Administrative Tools | DFS Management
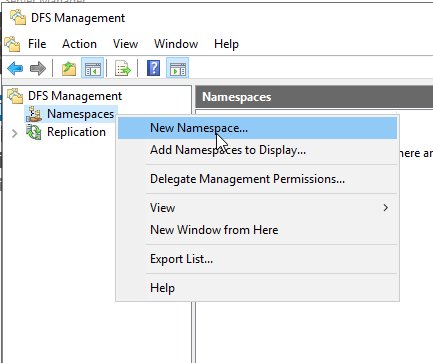
We will focus on Namespaces in this guide, Replication is topic for some other time. Right click on Namespaces and select “New Namespace”.
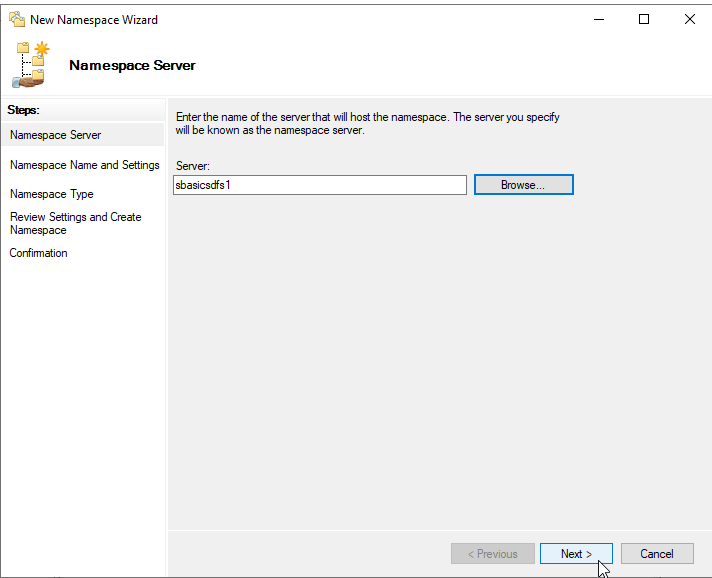
Namespace server will be the machine we are setting DFS on (SBasicsDFS1) | Next
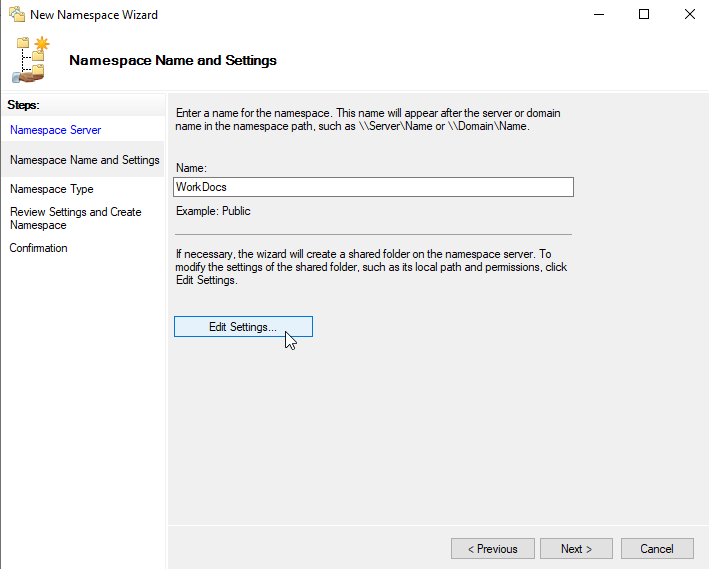
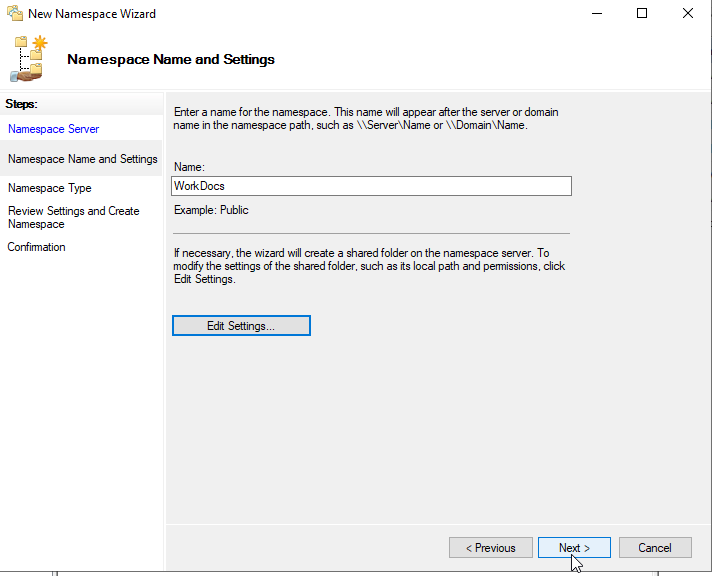
Next screen is Namespace Name and Settings. I will name this Namespace “WorkDocs”.
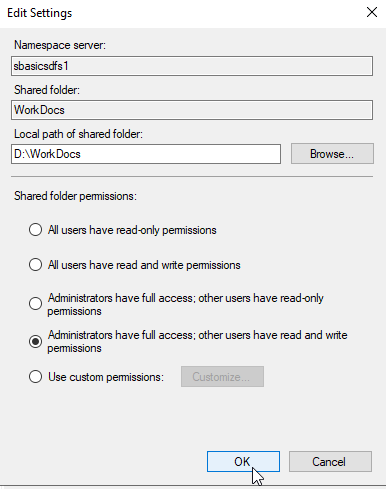
Before we go further, I will also create folder named “WorkDocs” on my D drive (attached ISCSI target)

Now, on Namespace Name and Settings click on Edit Settings

Under Local path of shared folder select D:\WorkDocs and under Shared folder permissions you will need to select permissions for the shared folder. In this scenarios I will select Administrators have full access: other users have read and write permissions. OK
Permissions are whole another topic, and you will need to research it (if I find time, I will write about it) if you want to limit your users or departments in which folder they are able to read, write…
Next
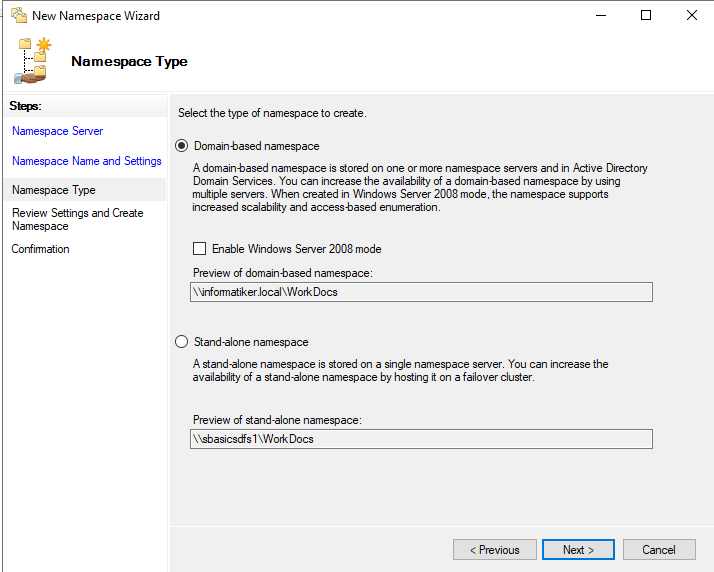
I will select “Domain-based namespace” and ujncheck Enable Windows Server 2008 mode, since this is WS 2019 test lab and no old machines are included in it.
This is the beauty of DFS, user will see our fileshare as \\informatiker.local\WorkDocs
So underneath we can add, remove file servers, for users nothing will change. Many benefits in this scenario.
Next
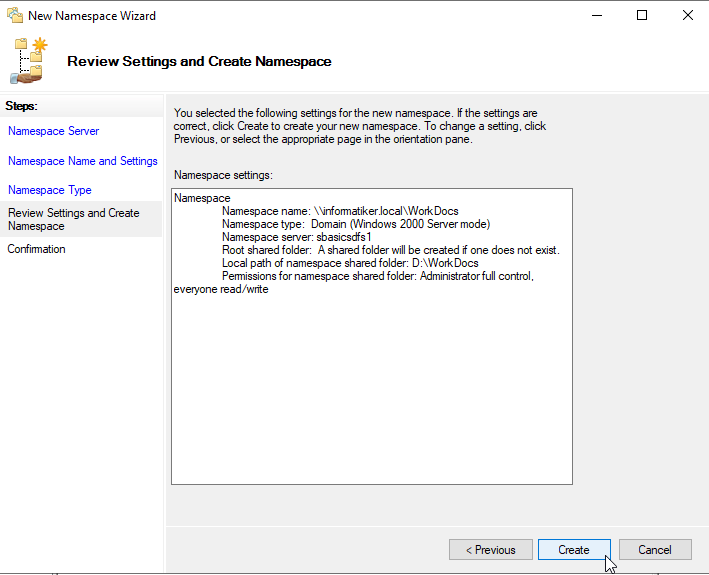
Review settings and click on Create
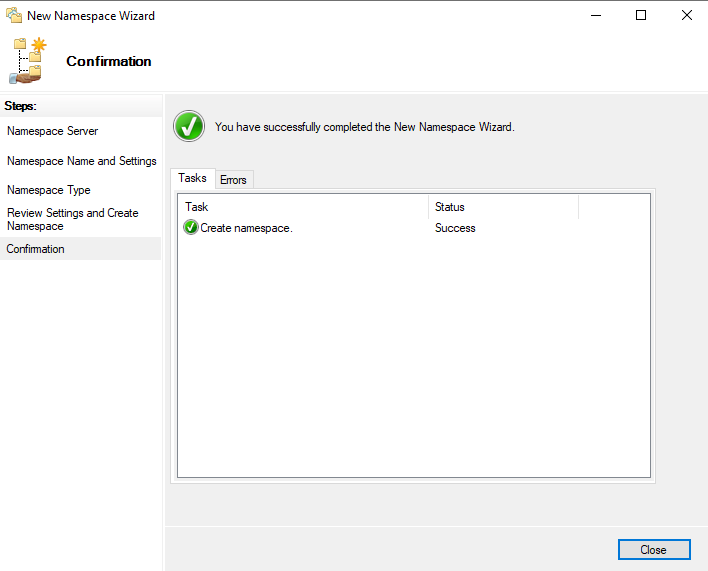
Success.
We will now check from our client machine if this work, and will also create one test file.
I will log in as Ana P from SBasicsCL1 client machine. In file explorer I will simply type in
\\informatiker.local\WorkDocs
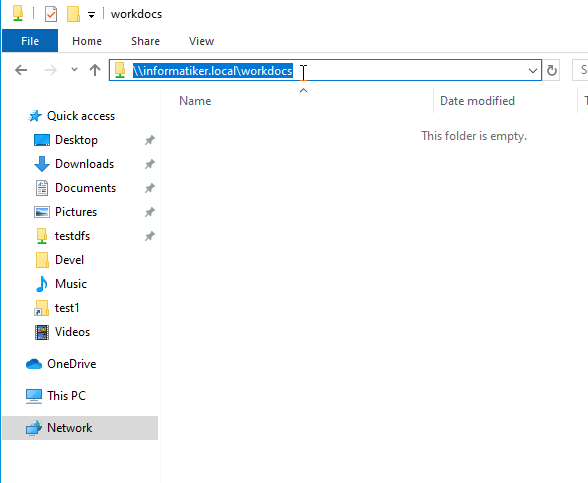
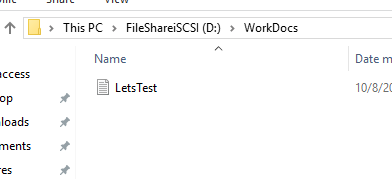
It works, I will create simple .txt document named LetsTest in \\informatiker.local\workdocs on client machine and then see on server if everything is ok.
File appeared ok.
We can now say that we have file server on our network. It is simple, you will want to create permissions for your folder, maybe make redundant or highly available your file server, but that is theme for another day.
Add your file share to entire domain via Group Policy
You will probably want to deploy your file shares to your clients. You can do that manually by going from machine to machine, or you can do it via group policy automagically.
I will create shortcut to \\informatiker.local\workdocs on the desktop of our Development memebers.
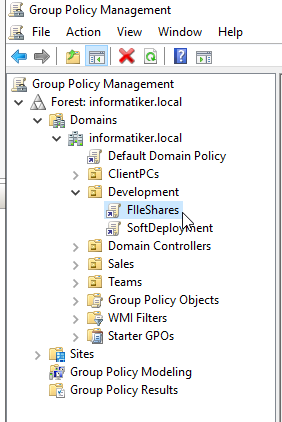
So, I will head to my domain controller (ServerBasicsAD) and in Group Policy Management under Development OU create new GPO named FilesShares
I will not describe whole procedure of creating Group Policy, it is well described in ServerBascis10 and ServerBasics11 articles on my blog.
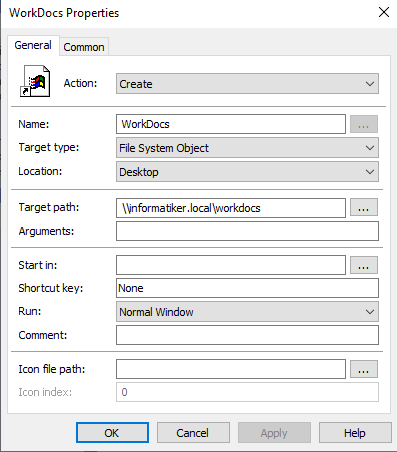
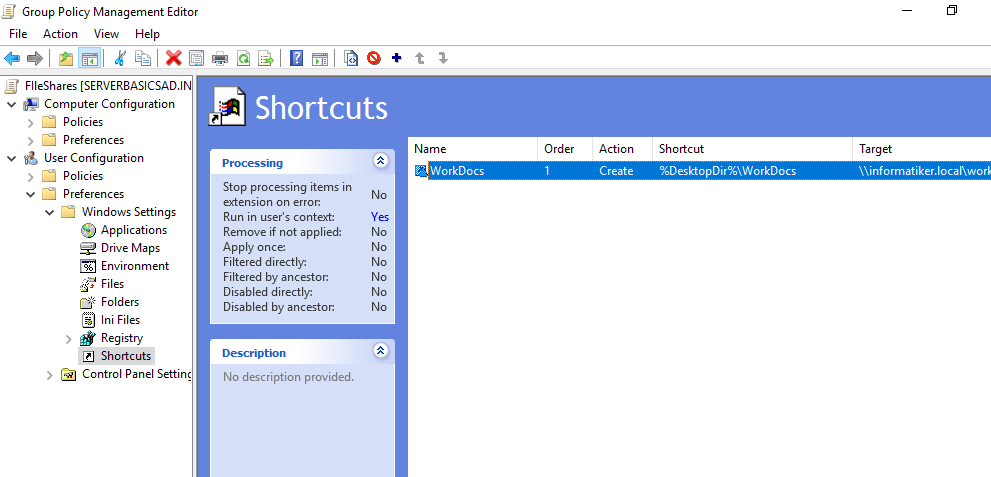
Under User Configuration | Preferences | Windows Settings | Shortcuts we will define our shortcut.
Action will be Create, I will name shortcut WorkDocs, location will be Desktop (this is where it will appear on client machines) and Target path is \\informatiker.local\workdocs
Leave everything else as default and click on Apply | OK
This is how it looks like after creation.
Confirm and close all dialogs in Group Policy Management
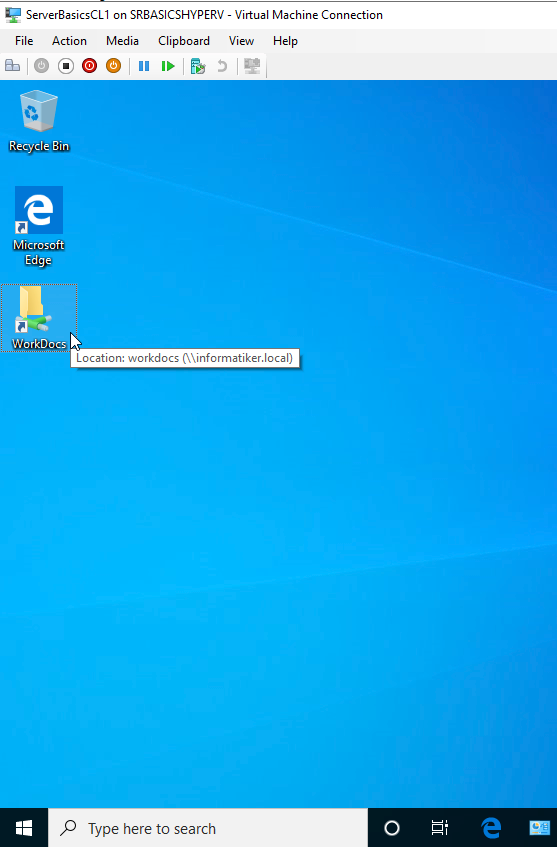
I will reboot ServerBasicsCL1 machine, on which Ana P is logged, and she is member of Development group.
After reboot WorkDocs shortcut is visible
That is it, as a bonus you learned how to deploy file shares on large scale.