We done a lot so far in this series, and next step will be to prepare Windows Server as iSCSI target for various services, mostly for high availability, redundancy, file share roles…
Where would you use iSCSI Target? In a bigger (serious) company or enterprise you will have storage systems that will host your critical data. There are many types of storage devices (SAN, NAS, DAS…) and many different ways you can connect your storage to your server and present disks/data from your storage to your server.
iSCSI is one of the protocols for connection, it is common, and we will use it a lot in this series, since it is easy to setup, Windows can simulate it, and it is crucial part of some scenarios we will do.
Before we begin
iSCSI Target
This is a machine which will be “host” for a disks on our network.
I deployed one new machine (Windows Server 2019) named SBasicsISCSI. This will be iSCSI Target Machine
(Don’t mind screenshots and text below, you should always name your machine with less than 15 characters)
Machine is on IP address 10.0.0.33, and is joined to domain informatiker.local
InfoAdmin is local administrator on ServerBasicsISCSI machine. Check ServerBasics 08 to learn how to add domain admin as local admin on created VM.
Besides system disk, I added additional 40GB drive to the ServerBasicsISCSI VM as a D drive.
iSCSI Initiator
This is a machine we will mount created disks to, from our host (iSCSI Target) via network (iSCSI)
I also created machine (Windows Server 2019) named ServerBasicsDFS1. This will be iSCSI Initiator machine, and later on, it will host our file server.
Machine is on IP address 10.0.0.34, joined to domain…
Installation
We are starting on ServerBasicsISCSI machine which will serve as ISCSI target.
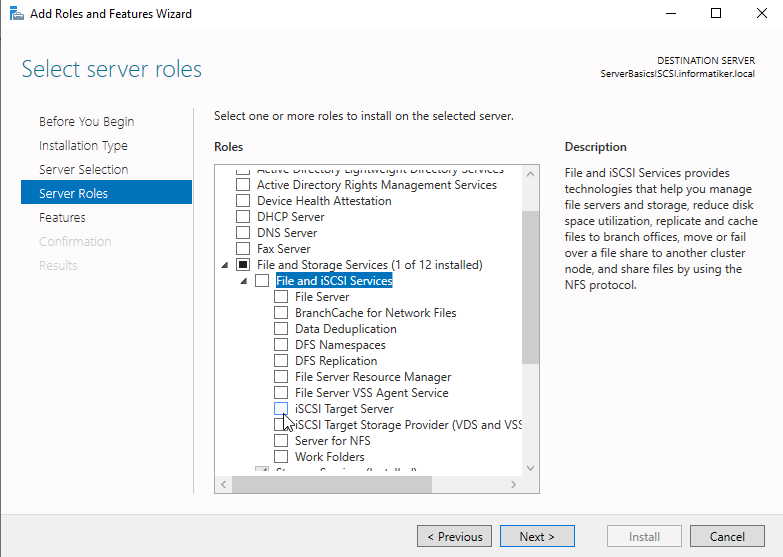
Start Server Manager | Add Roles and Features | On Server Roles screen select File and Storage Services | expand File and iSCSI Services | Select iSCSI Target Server
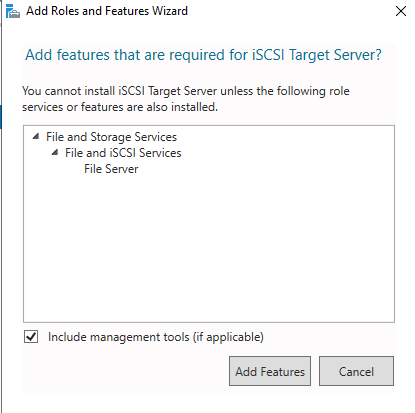
Additional pop-up will appear, select Add Features
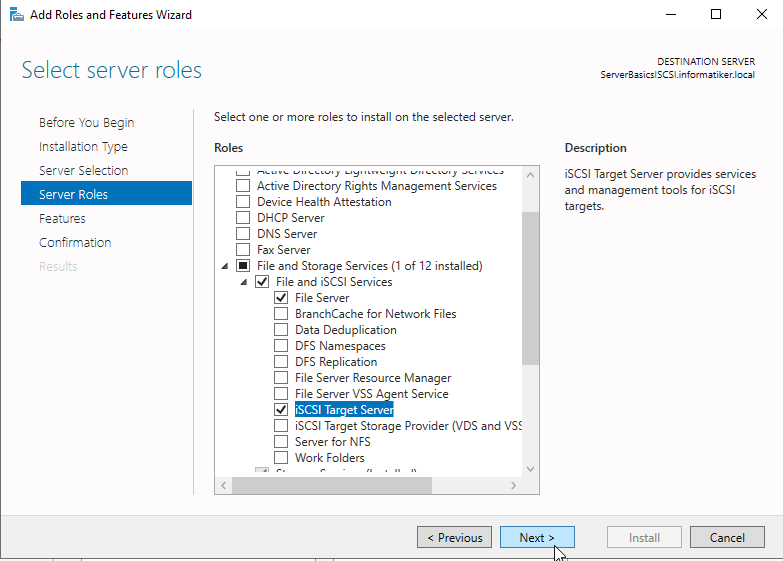
Next
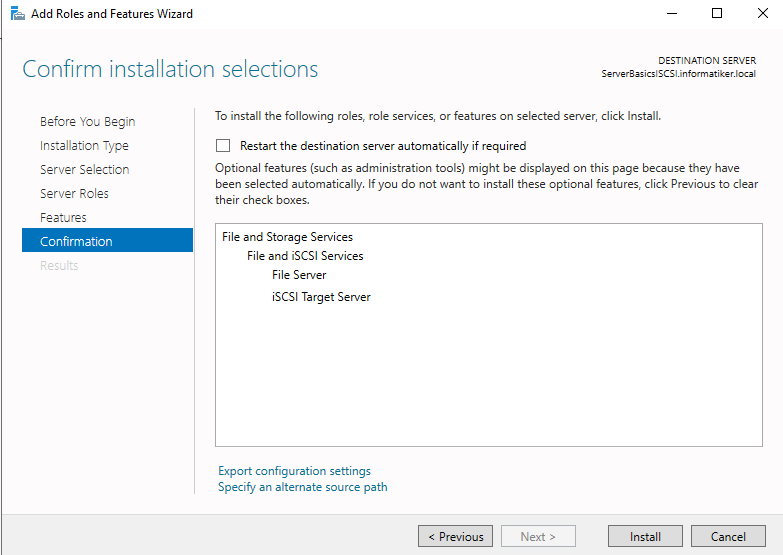
Click Next until screen below – confirm with Install
I will reboot server after installation.
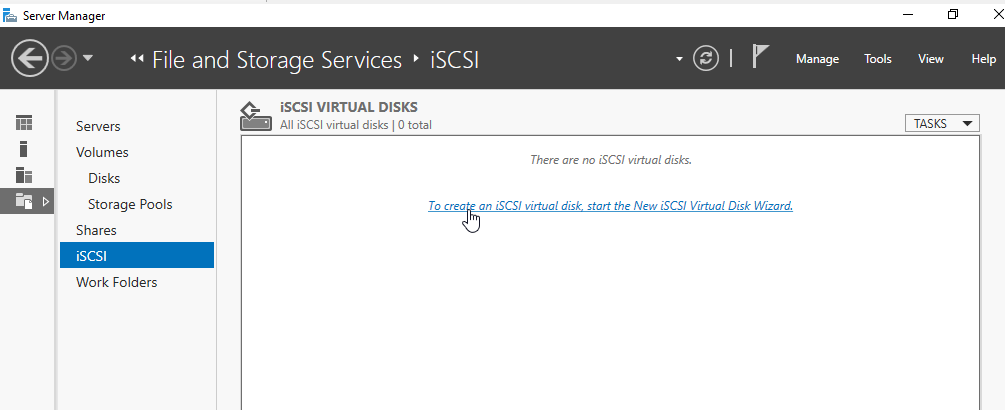
After reboot, go to Server Manager | click on File and Storage Services on the left side of the screen.
Select iSCSI from the menu and then click on ” “To create an iSCSI virtual disk, start the New iSCSI Virtual Disk Wizard” dialog.
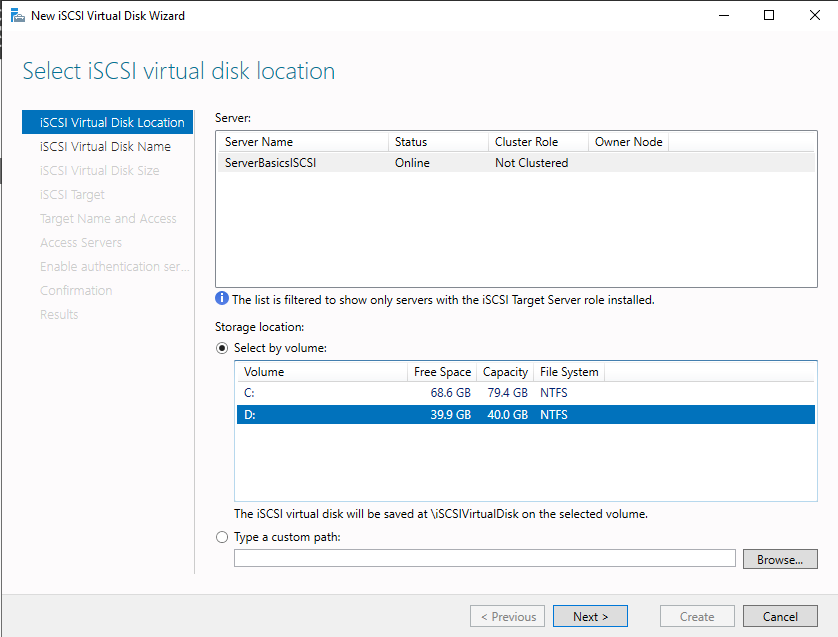
Select Server (local machine) in my case ServerBasicsISCSI, and under Storage location I will select D drive, since that is a drive I added just for iSCSI purposes. Next
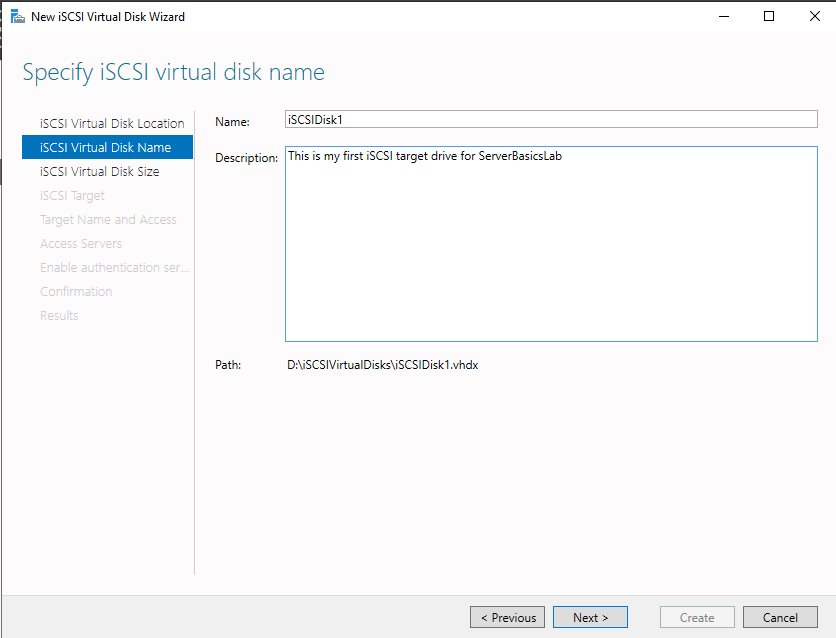
On next screen you will have to name the machine. I will name it iSCSIDisk1. Next
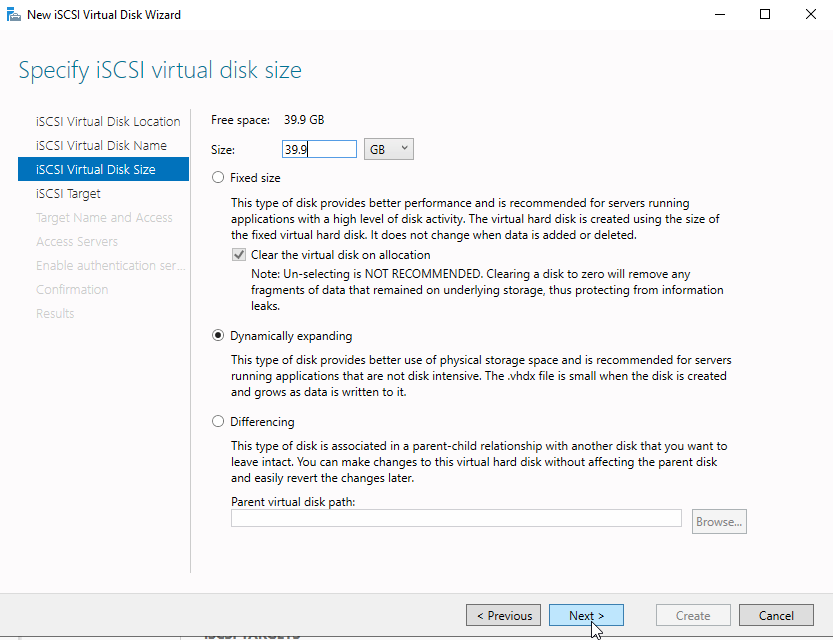
For this scenario I select “Dynamically expanding” and selected the whole drive 39.9GB. Next
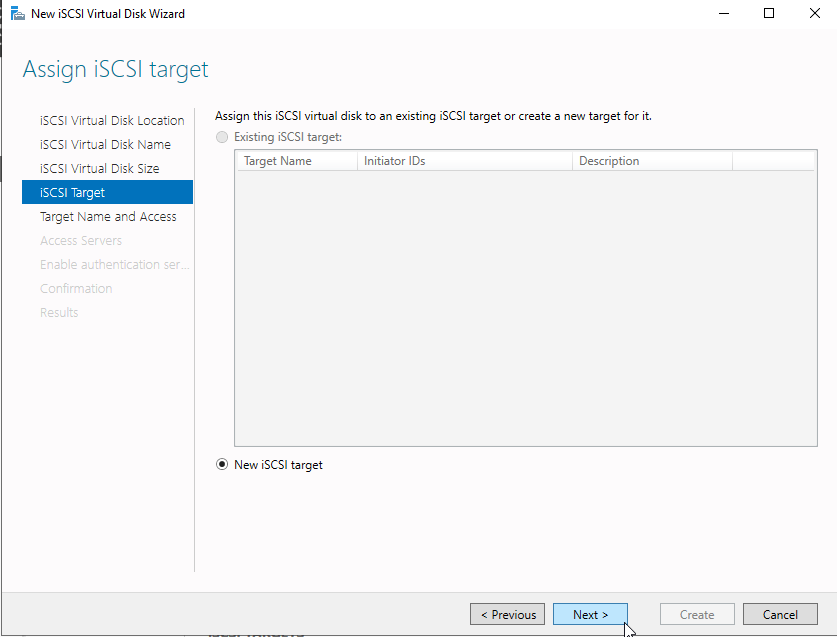
We need “New iSCSI target”. Next
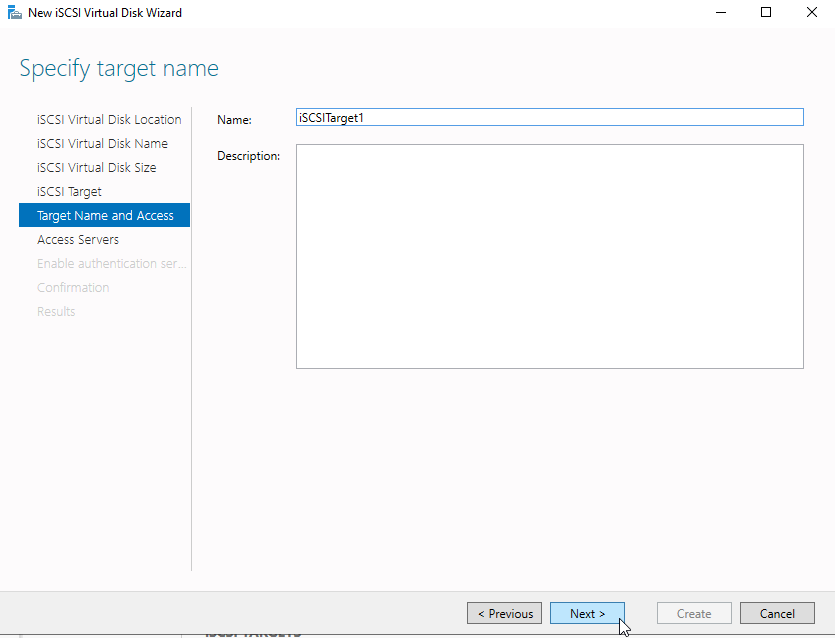
I will name my target “iSCSITarget1” and select Next.
Next step is going to ask us for a few details of a server that will connect to this drive and use it (iSCSI Initiator). We will pause a bit on ServerBascisISCSI (iSCSI Target) server and head to ServerBasicsDFS1 server (iSCSI Initiator).
Again – We will now switch to the second machine – ServerBasicsDFS1, and configure few details there.
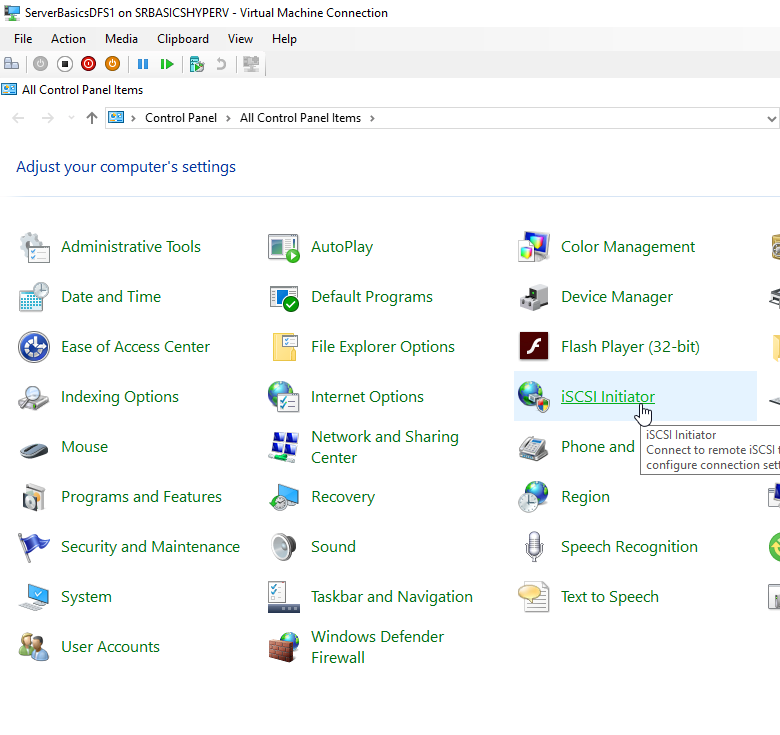
On ServerBasicsDFS1 machine, go to Control Panel | Select iSCSI Initiator.
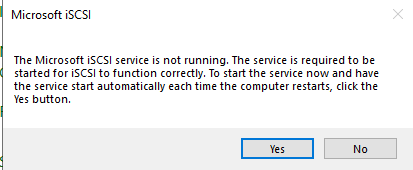
Since we are starting iSCSI Initiator service for the first time, we need to start iSCSI service. Select Yes
Once again click on iSCSI Initiator in Control Panel
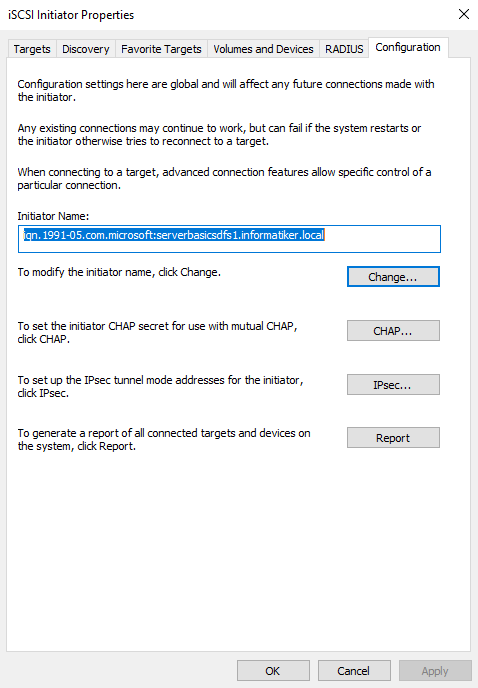
After iSCSI Initiator Properties window opens, go to Configuration tab and copy Initiator Name from there – we need whole value.
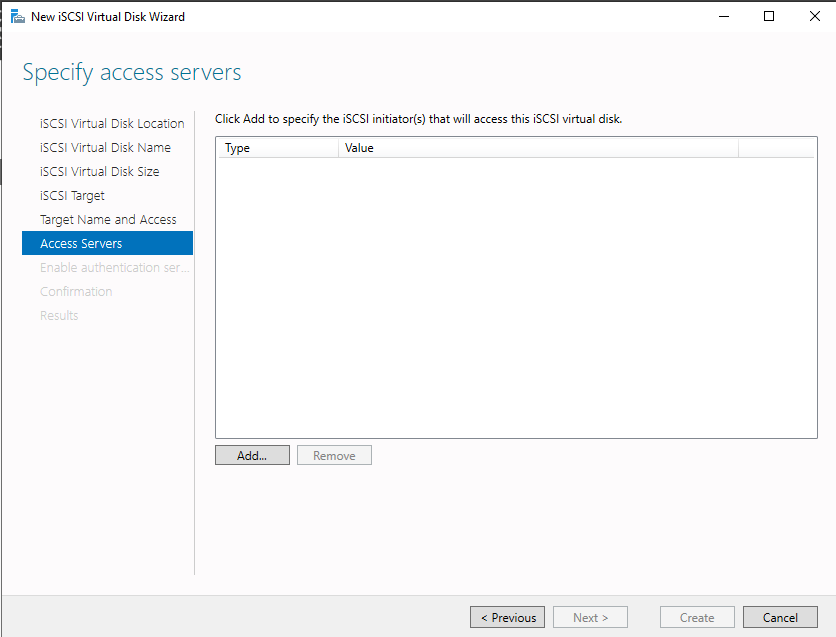
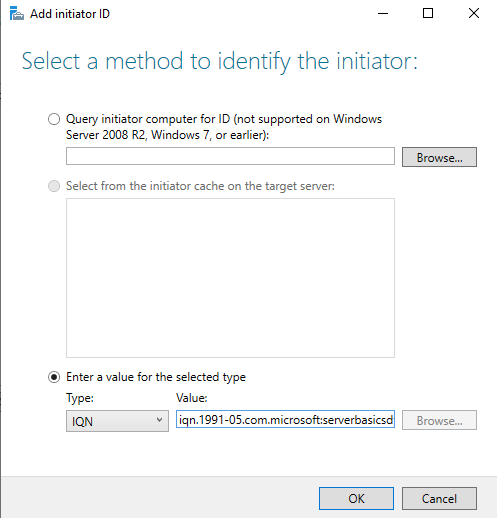
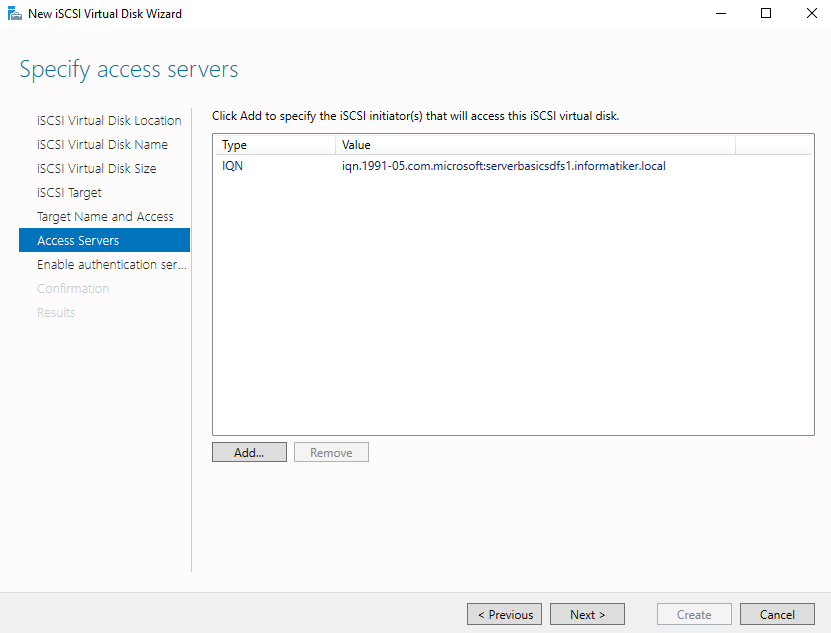
Ok, back to ServerBasicsISCI server and open wizard we left at Access Server screen. Click on Add and enter Initiator Name you just copied (remembered) from ServerBasicsDFS1 server.
Select “Enter a value for the selected type”, select IQN under type, and paste (or enter) value from ServerBasicsDFS1 Initiator Name field. OK
This is how Access Servers screen on ServerBasicsISCI server should look now. Select Next.
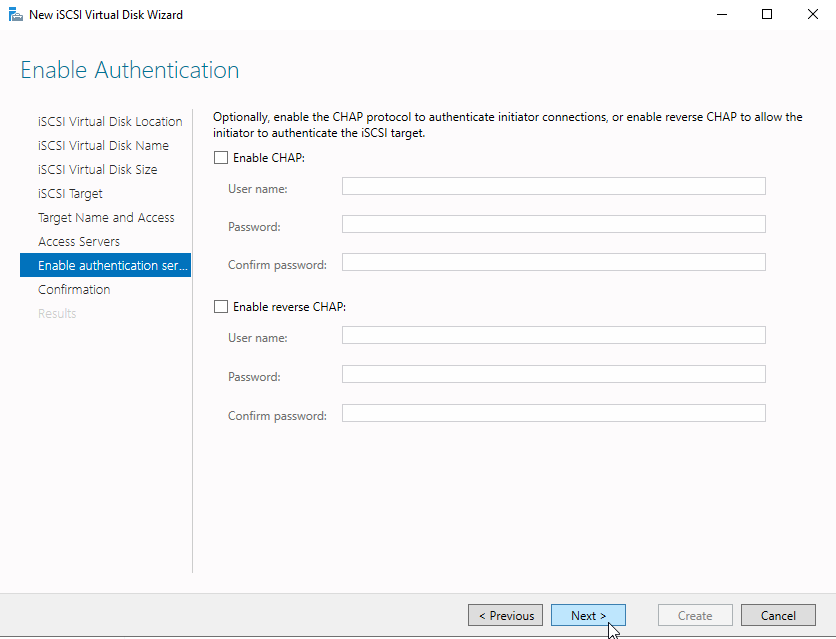
I will not select any authentication for this lab, we will keep it simple for the first steps. Later on, when you get hang of it, authentication should be enabled, but for this lab, we will leave it unchecked. Next
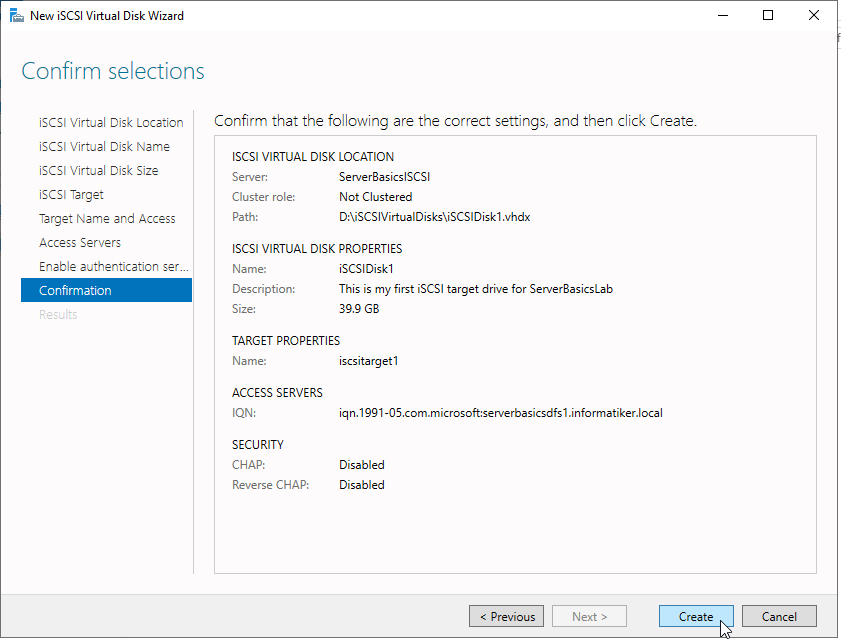
Check all the values and select Create.
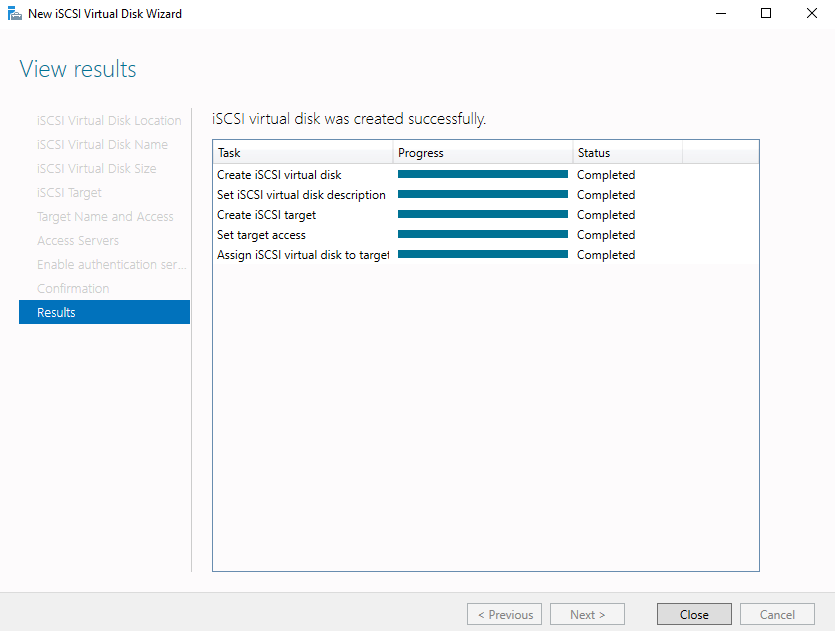
If everything went ok, you should get Completed on all items. Close
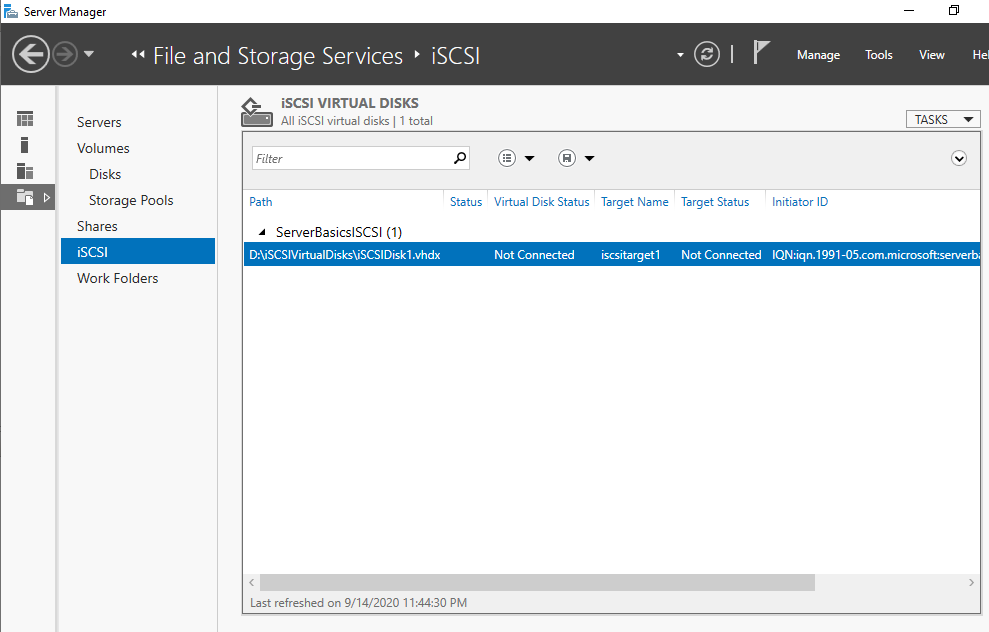
Now, on Server Manager your iSCSI menu should look like this. iSCSI Target is created but still not connected to the Initiator (ServerBasicsDFS1)
Ok, now back to our ServerBascisDFS1 machine, to which we will attach drive from ServerBasicsISCSI server.
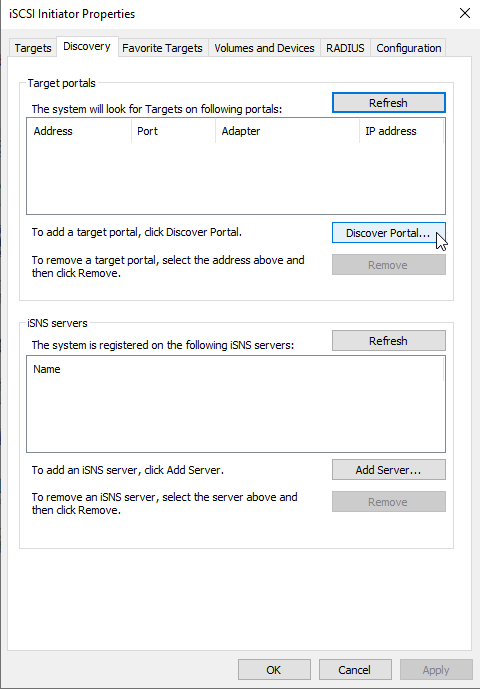
Go to Control Panel | iSCSI Initiator | on Discovery Tab under Target portals click on “Discover Portal…”
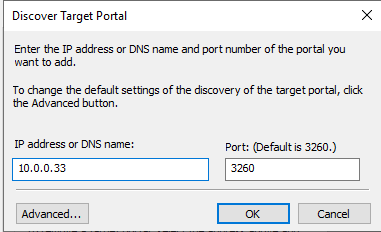
Enter IP address of ServerBasicsISCSI machine (10.0.0.33) leave port as it is and select OK.
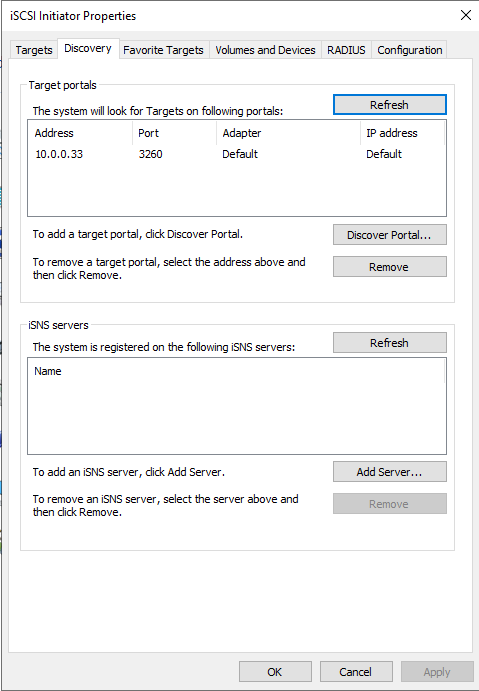
If everything went ok, you should see 10.0.0.33 at your Target portals, without any error.
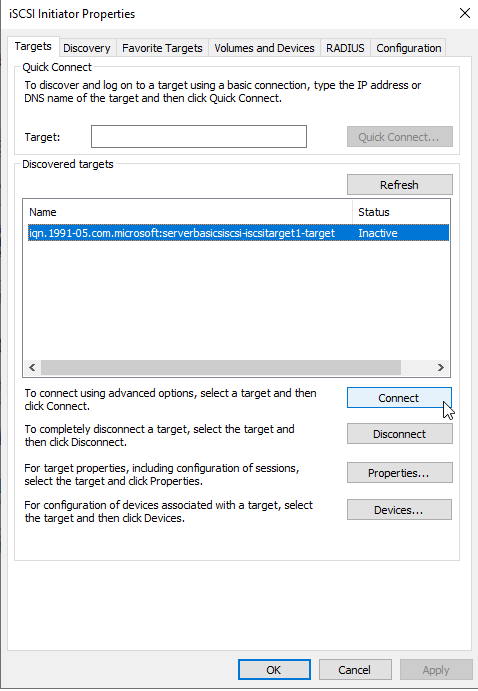
On the Targets tab, you should now see target we created earlier – ISCSITarget1. Select Connect.
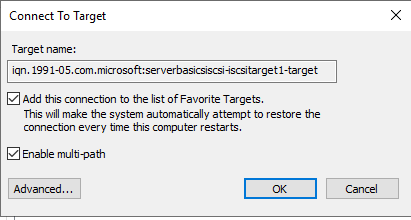
Confirm name of the Target, and select both check boxes below. OK
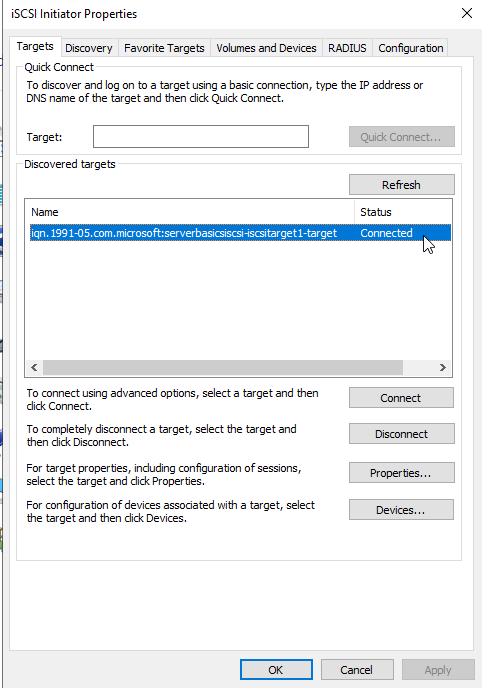
Now status of the target should be connected.
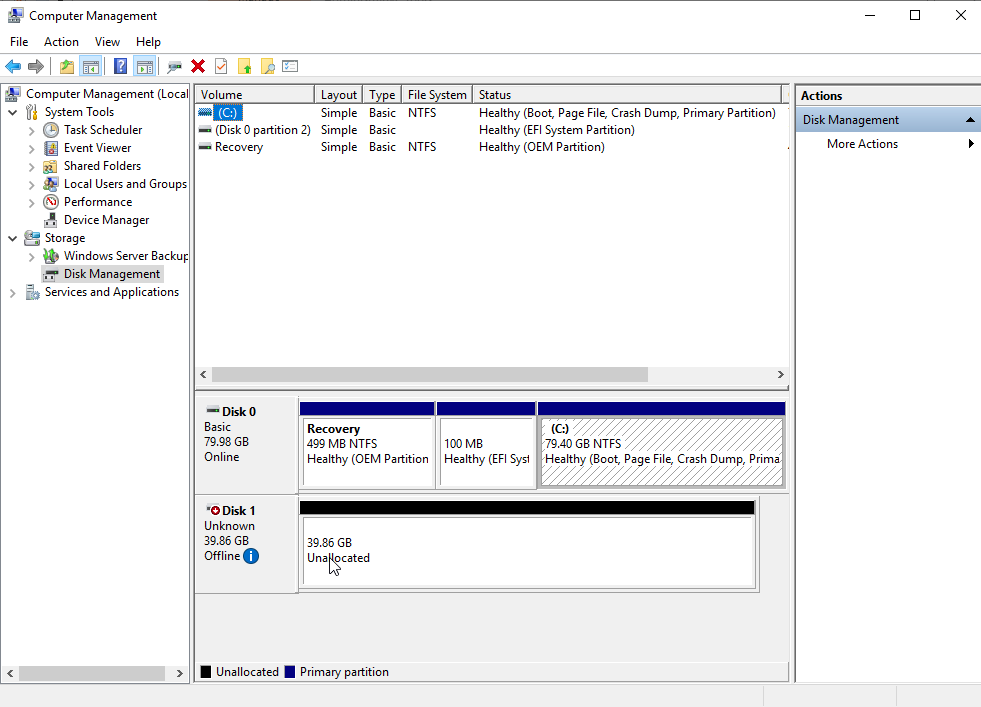
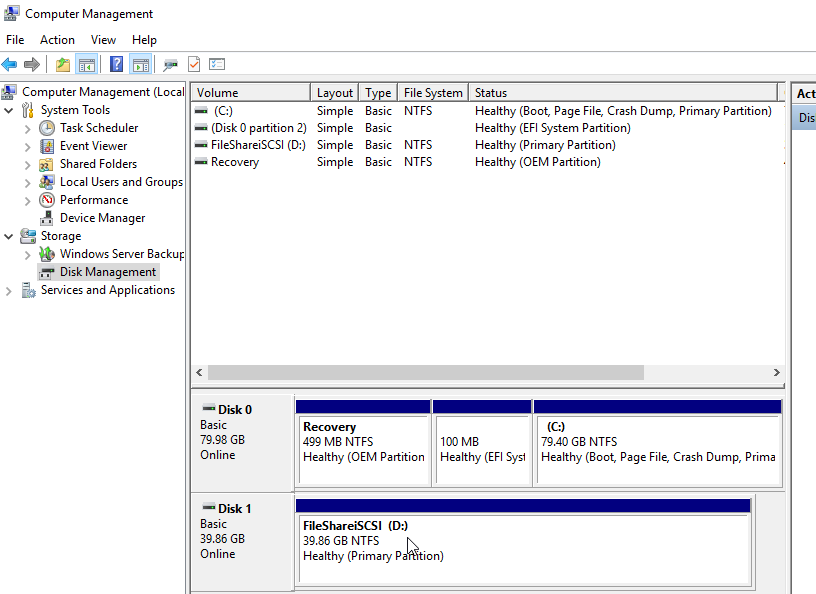
And if you go to the Control Panel | Administrative Tools | Computer Management | Under Storage – Disk Management you should see another offline/unformatted disk drive. That is the drive from the ServerBasicsISCSI machine.
I initialised drive, mounted it and formated as D:\ on my ServerBasicsDFS1 machine. I named the drive FileShareiSCSI.
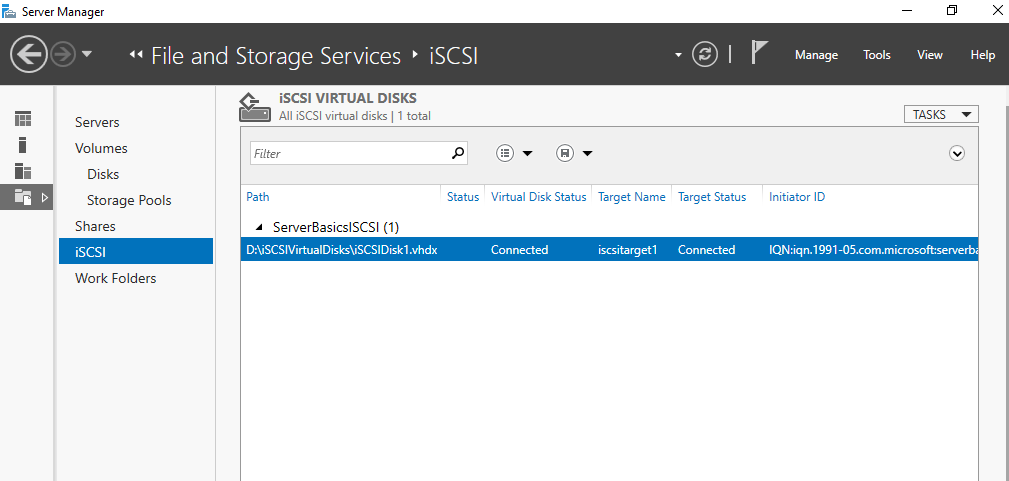
One more place to check is everything ok – on ServerBasicsISCSI machine, go to Server Manager | File and Storage Services | iSCSI – virtual disk and target status should now be connected.
Ok, that is it, we connected drive from ServerBasicsISCSI machine to ServerBasicsDFS1 machine via iSCSI. iSCSI will be important for us in various other scenarios we will go through.
Problems
Although I’m doing this on a completely fresh Windows Server 2019 installations, I had a small problem. Soon after I created Target and after I entered IP of the iSCSI Target in Discovery Target Portal Dialog on Initiator machine (ServerBasicsDFS1) I got Connection Failed error.
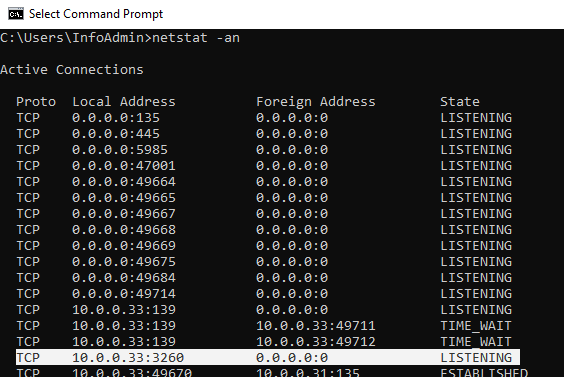
Quick look on ServerBasicsISCSI machine resolved it. I went to command prompt and entered following command
netstat -anYou should search for IP address + 3260 port in Listening state.
There were none in my listings of netstat.
So, I went to Control Panel | Administrative Tools | Services and restarted Microsoft iSCSI Target Server service.
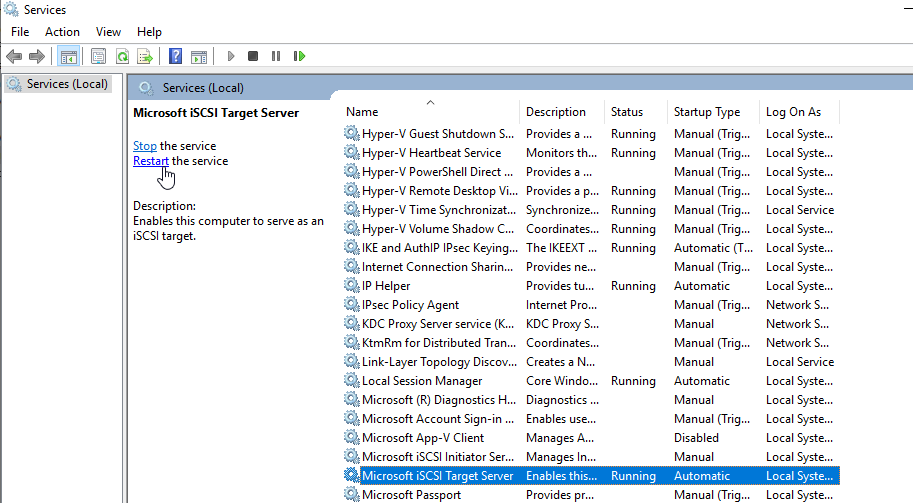
Soon after that, I repeated netstat -an command. Port was active and listening.
Really weird glitch, since reboot or shutdown server, didn’t help. After this service restart, everything worked, and I successfully finished tutorial.
Conclusion
iSCSI will be used in many of scenarios we will do ahead (failover, clustering…) so make sure you go through this part. In the past I done this on a FreeNAS (now TrueNAS), but now for all my Microsoft labs I just use Windows Server as iSCSI target. In production I do not use iSCSI on Windows Server, I use iSCSI or other protocols for connecting drives from storage to servers, but in this lab it will be perfect to learn many services.