We did a lot in a Server Basics series, and next step will be to create groups and users to our domain we created earlier. After we are done with that, we will add computer to our newly created domain.
Before we begin
For this guide, we will need another machine. I will install Windows 10 Pro and it will server typical client machine on which we can test our services we will establish during Server Basics series.
It is important that you install Windows 10 Pro machine, since Home version does not support domain.
Windows 10 machine will represent typical user PC in a company.
I will install that VM in Hyper-v and it will be part of the lab. I will call it ServerBasicsCL1.
If you are not sure how to install a VM in Hyper-V, revisit ServerBasics 04 I already wrote.
First Client:
Name of the Windows 10 Pro client: SBasicsCL1
(Don’t mind screenshots below, you should always name your machine with less than 15 characters)
IP address: 10.0.0.51
Subnet mask: 255.255.255.0
Gateway: 10.0.0.1
DNS: 10.0.0.31
This PC will be assigned to user ana.p from Development
Second Client:
Name of the Windows 10 Pro client: SBasicsCL2
(Don’t mind screenshots below, you should always name your machine with less than 15 characters)
IP address: 10.0.0.52
Subnet mask: 255.255.255.0
Gateway: 10.0.0.1
DNS: 10.0.0.31
This PC will be assigned to user stephan.d from Sales
How to create Organizational Unit in Active Directory
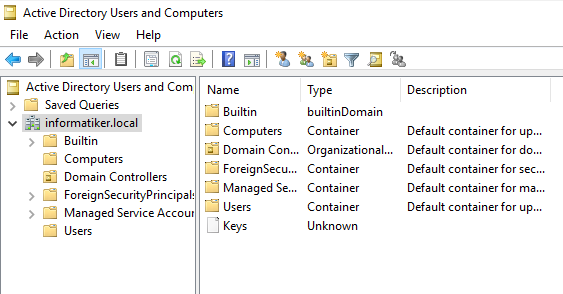
Ok, before we start with the client we will first head to our domain controller (ServerBasicsAD VM) and click on
Start | Windows Administrative Tools | Active Directory Users and Computers
Expand informatiker.local domain. Under it you will see various folders – all of these folders have either users or computer in them.
My advice would be same as with VMs we created in Hyper-V – organize everything from the beginning.
These things grow quickly, and if you don’t organize accordingly, you will get lost in jungle of accounts.
For this guide, I will create two Organizational Units (OU) – Development and Sales. Imagine Organizational Units as folders in which you will put files that correspond to the name/topic of the folder.
So in Development OU we will put all the users that are in Development department, and in Sales OU we will put all the users that are in Sales department.
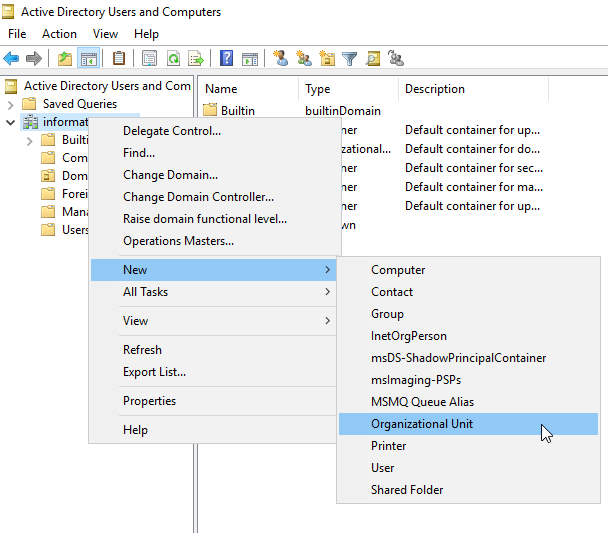
Right click on a domain name (informatiker.local) | New | Organizational Unit
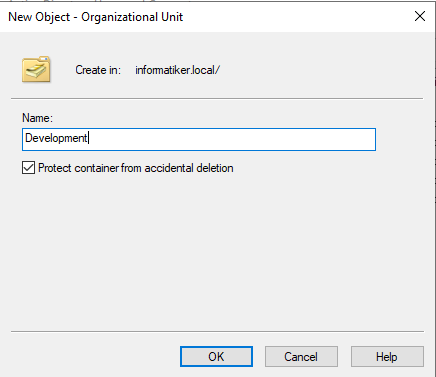
Name your OU (mine will be Development), leave “Protect container from accidental deletion” selected and confirm with OK.
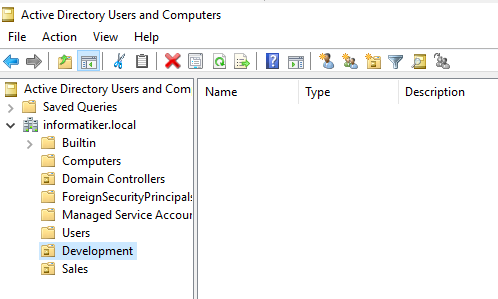
Repeat this for Sales OU.
Now, we have two OUs created.
We will create two users in Development OU and two users in Sales OU.
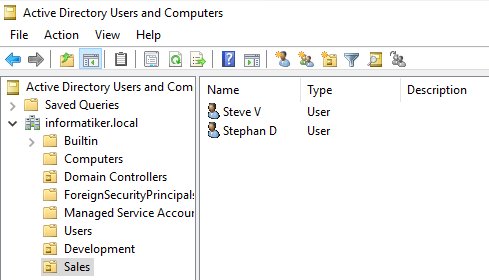
In Development OU users will be: Ana P and Eva M and in Sales OU we will have Steve V and Stephan D.
We will start by creating user Ana P in Development OU.
Right click on Development OU | New | User
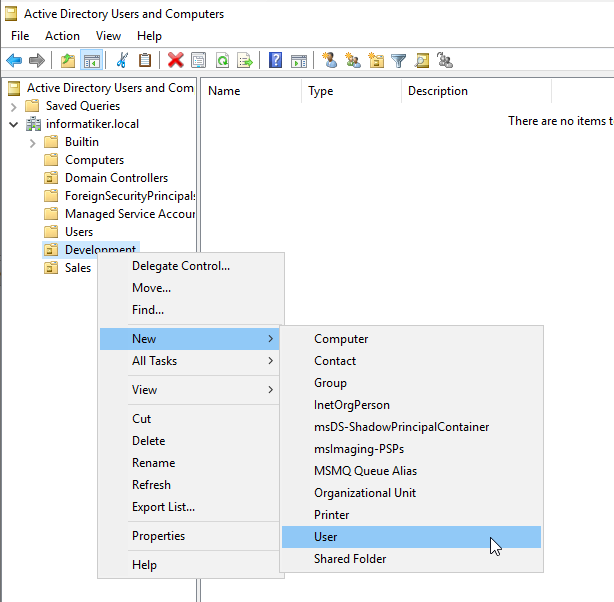
In new window enter First name of the user, last name, full name will be populated then.
Create User logon name: I used ana.p as a User logon name, you can select format that fits you best.
Next
Also a quick tip, maybe you started in a company that is very small in size, and you decide to create usernames with only first name. If company ever grows in size it will quickly backfire. Best practice would be to create a User logon name (and email) with full (first,last) name of the person.
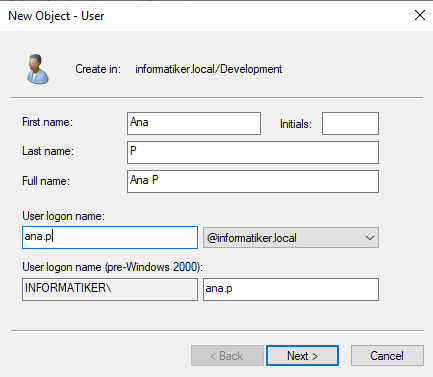
Enter initial password for your user. Under options, I selected Password never expires for this lab, but also very viable option would be to select “User must change password at next logon” so users can set their own passwords.
Make sure that you enforce password complexity first, before enabling this for users (we will get to that in Group Policy)
Next
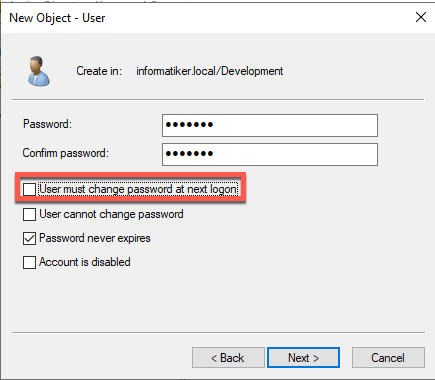
Finish
Ok, repeat that for the rest of the users, and add them to their OU.
these are my results…

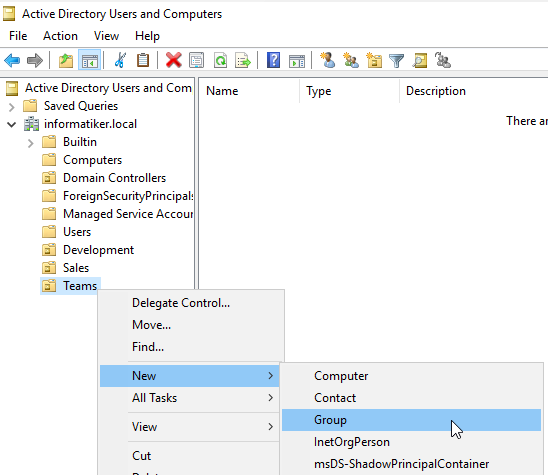
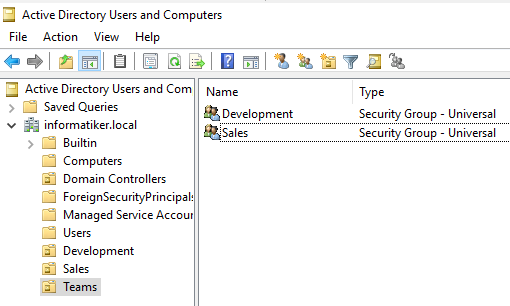
Before we leave, we will create one more thing. Another OU named Teams, and inside Teams OU we will create two groups.
Development and Sales.
What is the meaning of groups?
Let’s say you have 100 users in your company (50 in Sales, 50 in Development) and you have a file share with important documents that only Development people should be allowed to access. So, Sales should not even see these files.
You can add 50 users from Development one by one to that file share and grant them access, or you can do it granting Development group access.
You will have to add each of Development users to the Development group one by one, but you will only have to do it once. You can use groups for mailing, permissions in apps, file shares… Pretty convenient after you set it.
Ok, onto business.
Create Teams OU, and then right click on it | New | Group
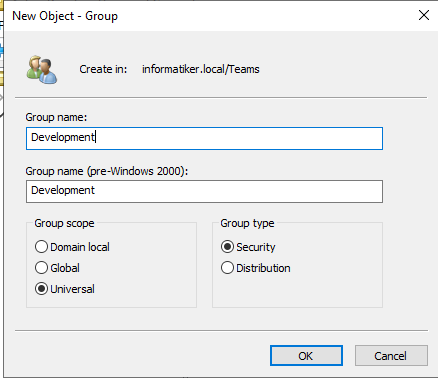
Set Group name: I will set it as Development. Group scope should be “Universal” and Group Type “Security”
OK
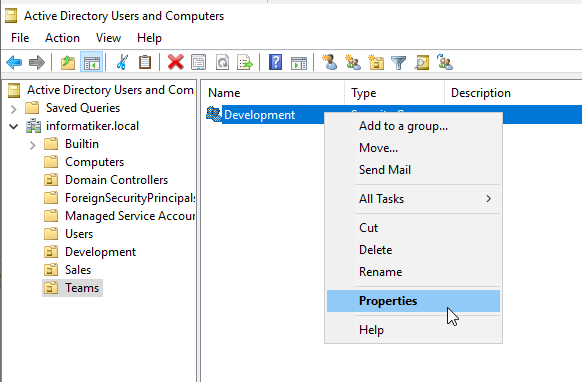
Right click on created group and select Properties
Go to Members tab and click on Add, enter usernames of Ana and Eva from Development OU to add them to Development group. Confirm with Apply | OK
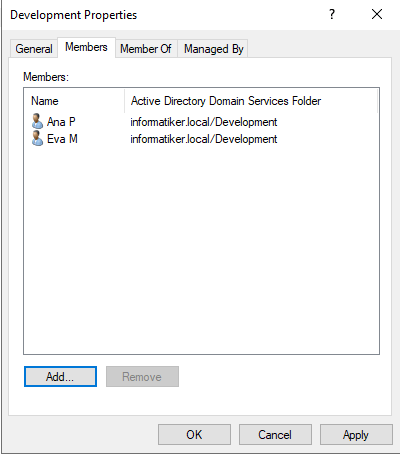
Repeat process for Sales and add Steve and Stephan as members to it.
This should be final result.
Ok, we are done with basic administration of users in active directory.
Now, lets head to our Windows 10 Pro Client machine.
How to a add computer to domain
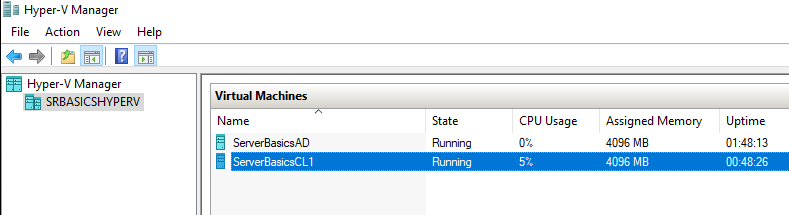
I finished installing Windows 10 Pro client PC on my Hyper-V virtualization platform.
So currently, this is how my Hyper-V looks like.
I set the name for the machine I mentioned at the start (ServerBasicsCL1), and I also set fixed IP settings as I mentioned at the beginning (10.0.0.51 IP of the Windows 10 Pro client).
After the first install you can specify any user you wish, because after we join domain we will use domain users. Local users you defined at the beginning will stay on that PC, so make sure you have great password for them, because local users can also be vector of attack on a network.
Be sure that in DNS of your Windows 10 Pro machine you enter DNS of your domain controller. IP of mine is 10.0.0.31
If you don’t enter DNS of your domain controller, you will not be able to join domain.
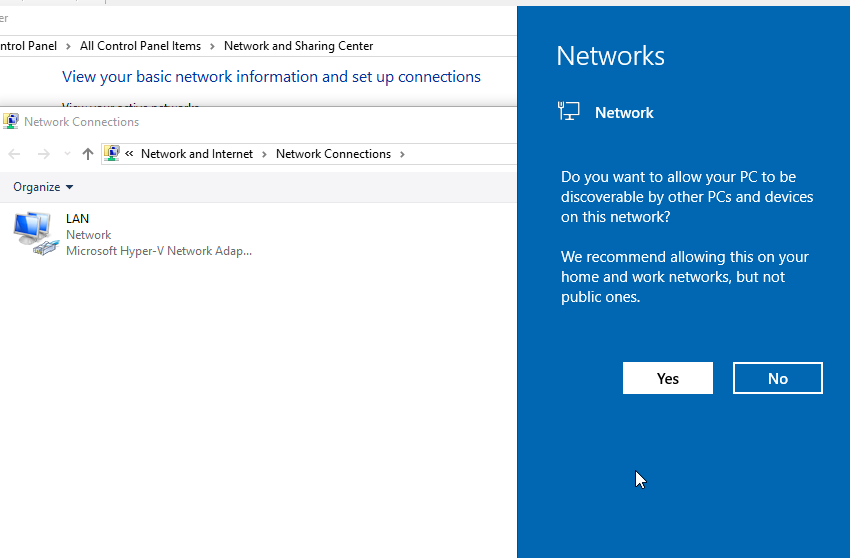
After you enter IP settings, always make sure you select yes on this screen
If you are still not sure how to set name of the machine and fixed IP, be sure to check ServerBasics 02 guide on my blog. And if even that doesn’t help, maybe you should consider learning basics of the desktop environment first.
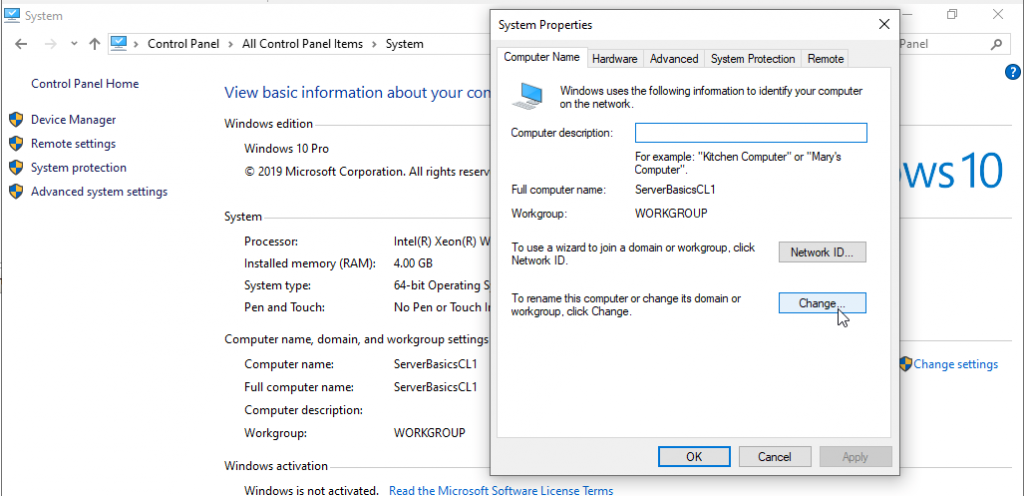
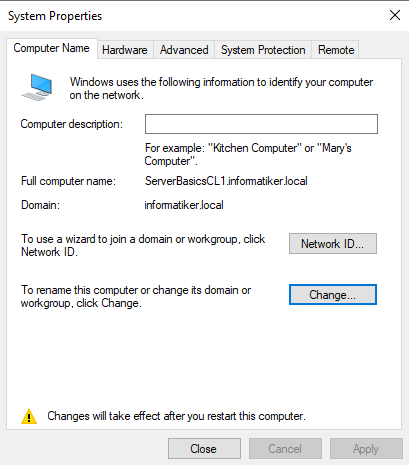
Ok, lets head to our Windows 10 Pro CL1 PC to Control Panel | System | Select “Change settings” under Computer name, domain and workgroup settings section | Stay on Computer Name tab and click on Change
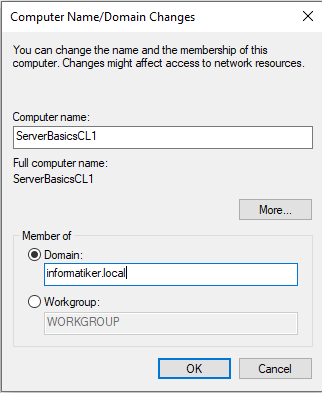
Under Member of section change fro mWorkgroup to Domain and enter name of the domain. Name of my domain is – informatiker.local
Click on OK
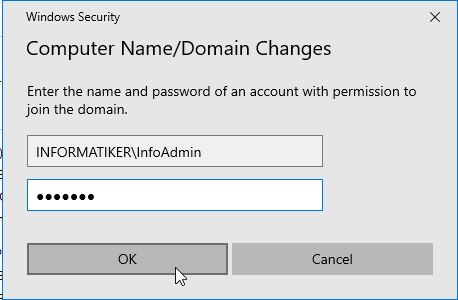
If you done everything correctly you will be presented with additional screen that will ask for username and password. You will need to enter your domain admin username and password.
Enter username in this form DOMAINNAME\domainadmin
In my case it is INFORMATIKER\InfoAdmin
Enter password for the user and click OK.
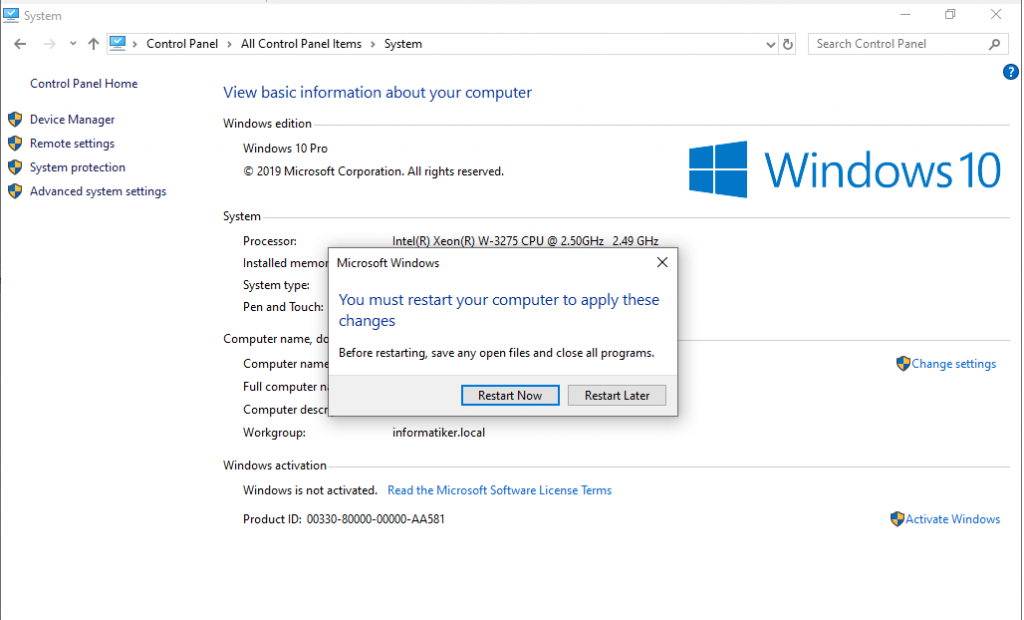
That was a success, computer is joined to the domain.
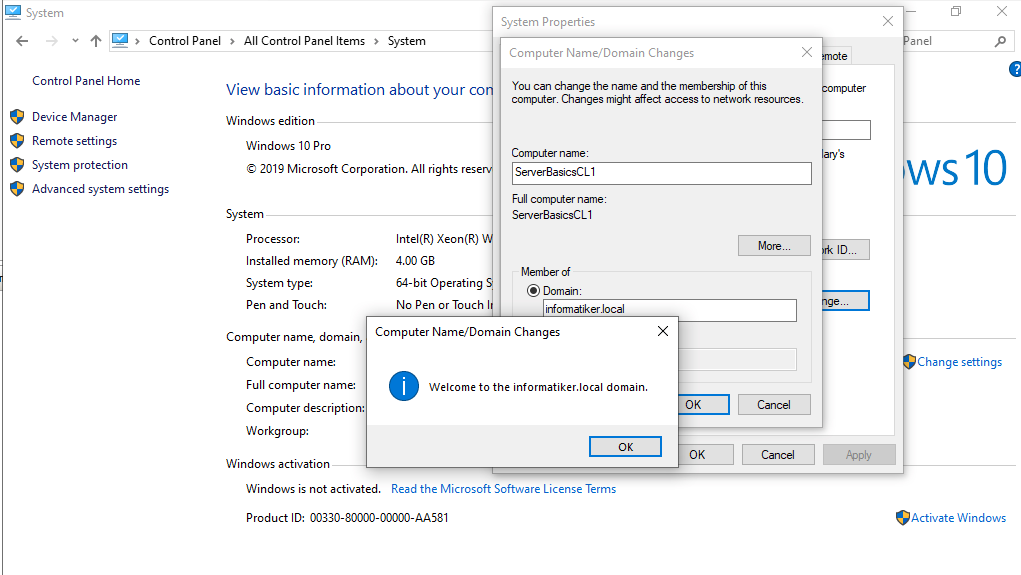
We will also need to reboot

Select Close
Restart Now
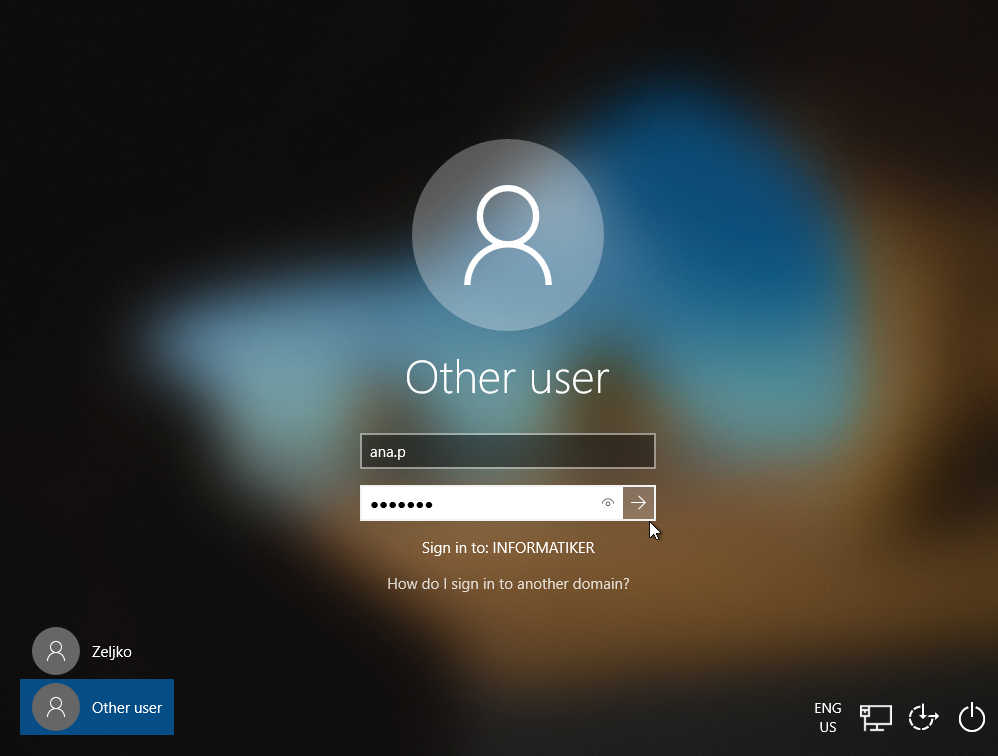
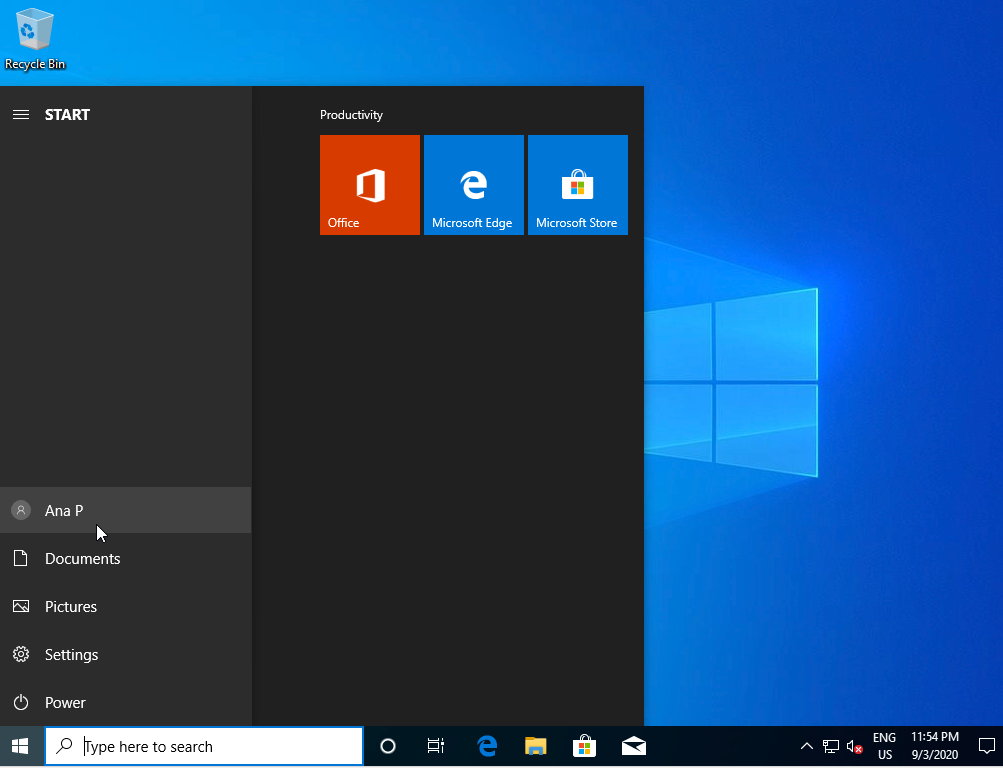
After reboot, at the login screen, we will try to login as a domain user ana.p from Development department.
Notice, how “Sign in to” under password field show our domain name (INFORMATIKER)
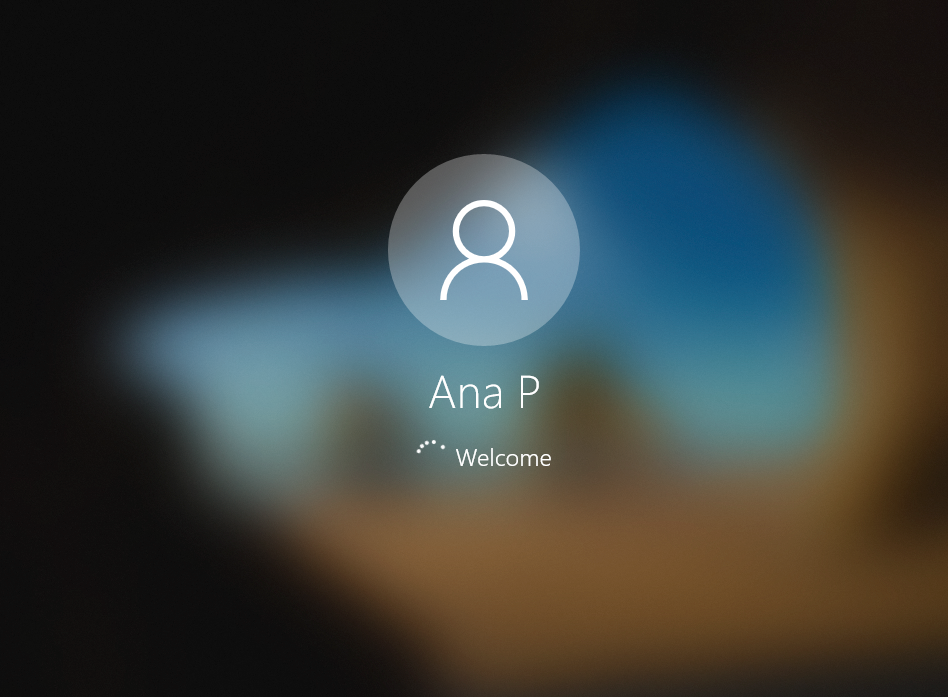
Smashing success, we are logged in with domain account.
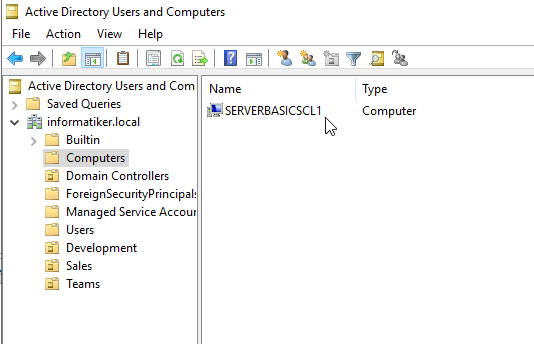
Lets just head back to our domain controller to Active Directory Users and Computers and see if ServerBasicsCL1 is added to our domain computers.
Yes, it is. You can do the same story for computers as we did with users. We could create DevelopmentPCs OU and move PCs from Computers OU to appropriate department OU we created for PCs. It is all up to you.
You can repeat this procedure yourself for a second PC and sign in Stephan from Sales.
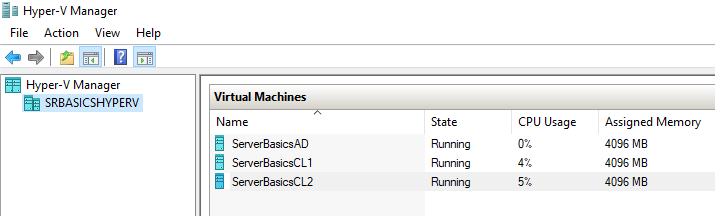
This is how so far our lab looks like. We have a domain controller and two clients, one for Sales department, and other for Development.
In this short guide you learned basic tasks in active directory, how to create user, groups, add computers to domain…
Active directory is much more than this, but this is a solid start for basic tasks.
Here is the version of this article on video