After we are done with the Windows Server 2019 installation – see here what shell we do next? There are a couple of things that I found useful for every Server installation, so I will share that with you…
For many of these steps, internet connection will be crucial, so make sure your server has internet connection for this short tutorial.
Create New Administrator Account
First step will be creation of the new Administrative account. Many times attacks on your Server will assume that you use “Administrator” as your main admin account. So we want to use something else. I will create account named “InfoAdmin” and use it for every scenario we will do in Server basics series.
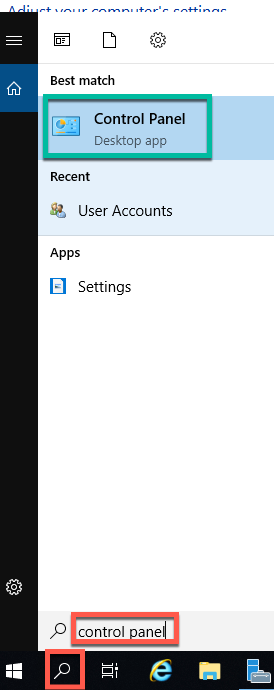
Type in into search – Control Panel , select Control Panel
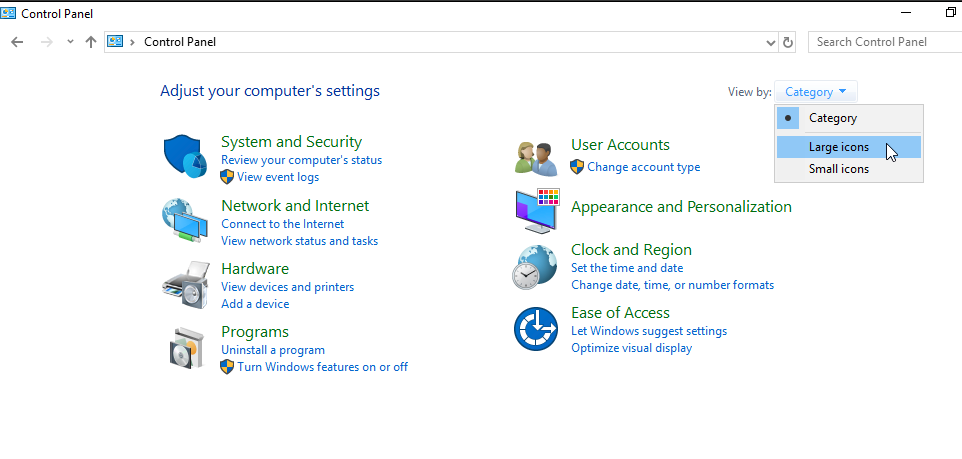
In the top right corner view will be set as “Category”, change that to “Large icons”
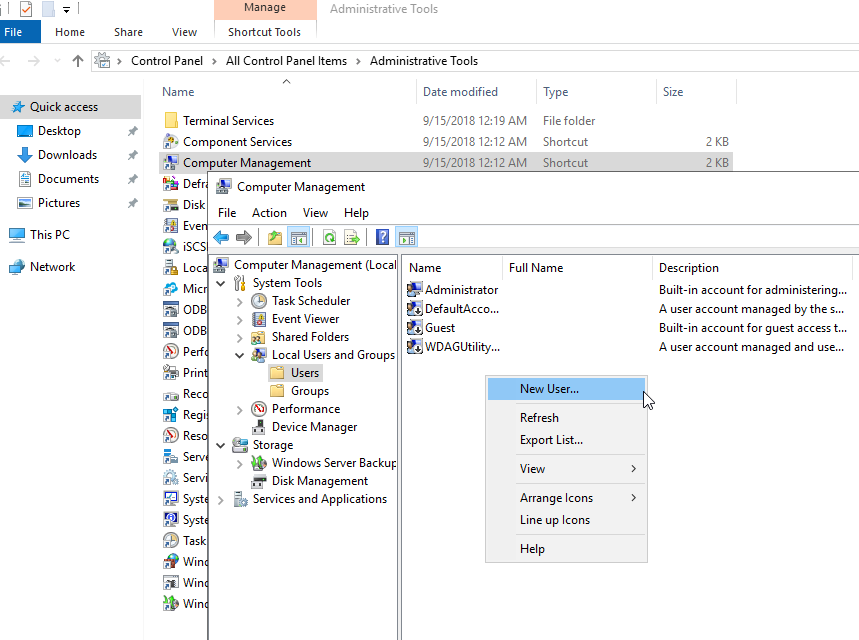
Then head to Administrative Tools | Computer Management | new Window will open, select under System Tools – Local Users and Groups | expand it, and select Users | When you selected Users menu, right click into middle window and select New User
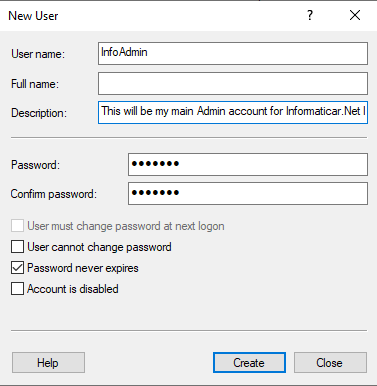
Under User name enter desired name for your user, you can also specify full name if you wish. You can also enter Description, this is useful, especially if you will have different account for many services.
Select strong password, and mark “password never expires”. Even Microsoft does not see practice of frequent password changes as good one.
When you are done – click on Create button.
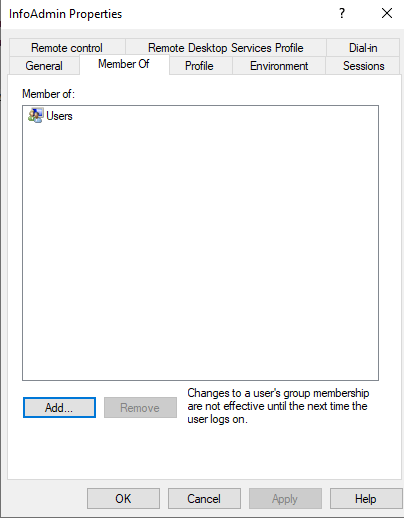
User InfoAdmin is now created. Right click on it and select Properties.

Select “Member Of” tab and click on Add at the bottom of the screen.
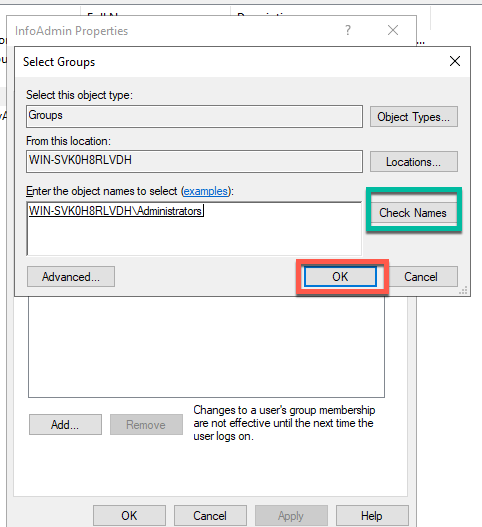
Type into “Enter the object names…” field – Administrators | then click on “Check Names”, you should get something like this below (WIN-SVK… is name of my Server 2019 VM, don’t let that bother you, that will be different in your case). Confirm with OK if everything is OK.
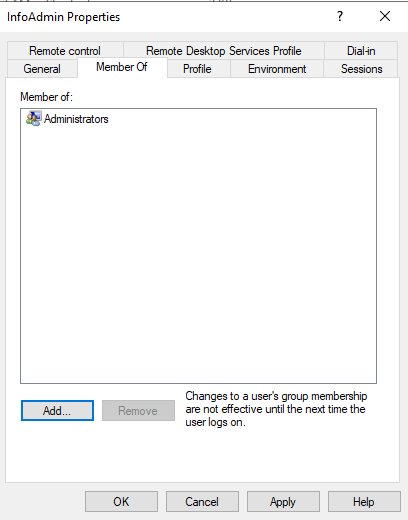
Remove Users so that your “Member Of” tab looks like this below – only has Administrators group on it. Confirm with Apply, OK.
Now, this first task was really step by step, further on, I won’t screenshot every single detail. I Will give you path and actions, and you can follow them.
Log out from Administrator Account and login into your new account – that is InfoAdmin in my lab.
Go back to the – Control Panel | Administrative Tools | Computer Management | System Tools | Local Users and Groups | Users | right click on Administrator | Properties | Go to tab Member Of | Select Account is disabled | Apply | OK
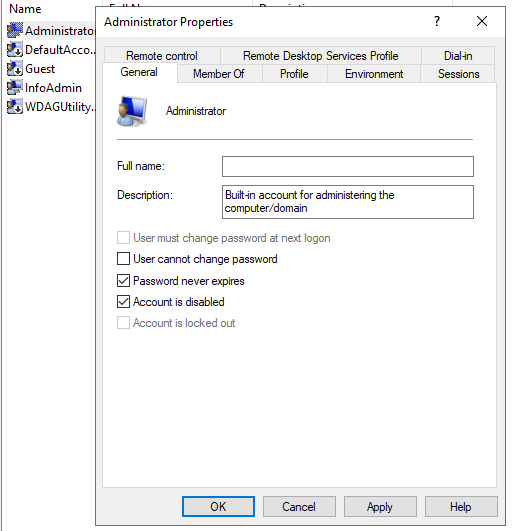
Ok, now the only account that is enabled and available is InfoAdmin.

Now, after this essential step we can go further.
Install Drivers or Virtualization Software Tools
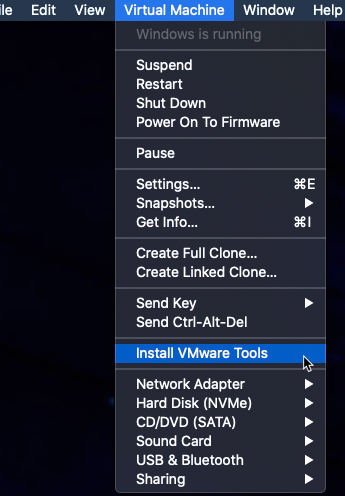
If you installed your Windows Server 2019 on physical machine, make sure you have drivers for every crucial component (video, chipset, storage, network) and install all drivers necessary. If you installed in VirtualBox or some of the VMware virtualisation software, it would be great for you to install Tools that are included with your virtualisation software.
In case of VMware – VMware Tools will give your Windows Server 2019 maximum compatibility with your VMware virtualisation platform.
Set fixed IP address
Servers should have fixed IP addresses. It is requirement for many services (Active Directory, High Availability) and you should make that a practice in every LAB or production you do.
Dedicate range of local fixed IPs to crucial IT equipment. I will assign IP address 10.0.0.30 to my first server.
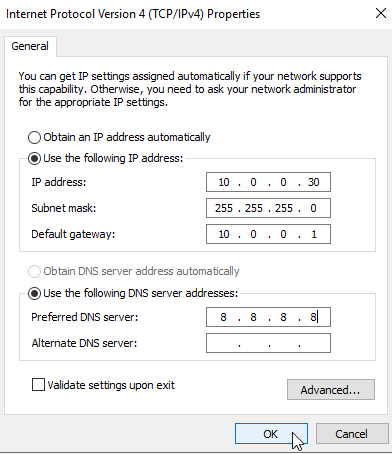
IP address: 10.0.0.30 Subnet mask: 255.255.255.0 Gateway: 10.0.0.1
DNS server: 8.8.8.8
These DNS servers will change on our other server machines later on in this lab.
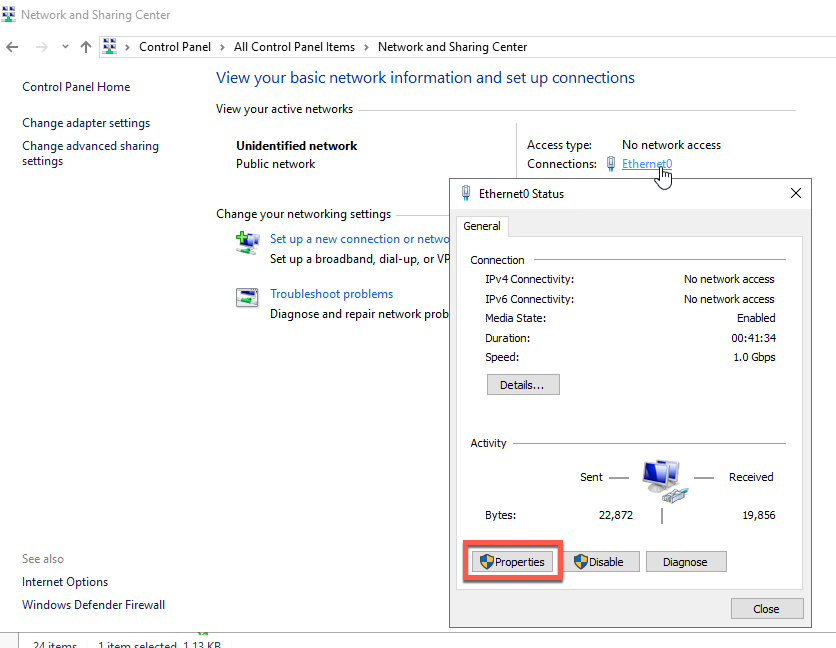
To set fixed IP, head to Control Panel | Network and Sharing Center | Left click on your network adapter located in the central screen under “View your active networks” in Connections part. Click on Properties when new windows opens.
Select Internet Protocol Version 4 (TCP/IPv4) and click on Properties
Select “Use the following IP address” and enter IP addresses you have in your local range. These are my settings.
Also select “Use the following DNS server addresses:” and enter DNS servers you like (I used DNS provided by Google) OK when you are done.
Before we close completely Networking window, deselect “Internet Protocol Version 6 (TCP/IPv6)” under “This connection uses the following items:”
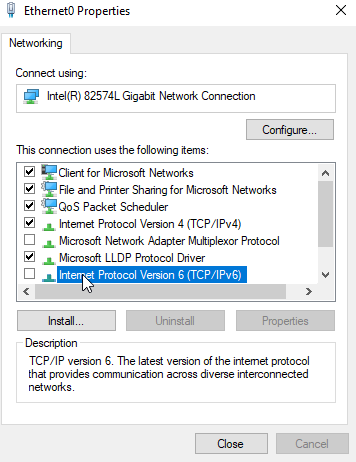
After you done that, click on close.
Many services still have problems with IPv6, so it is smart to turn it off.
Change your server name
Before you start your lab (or production environment) it would be nice to define server and computer naming policy. I will name this machine SBasicsHyperV. This will be HyperV virtualisation host for my Server Basics series lab.
!!!! Name your machines only with characters and with less than 15 signs. Throughout this tutorial you will see that I named sometimes machines with more than 15 signs – that is only for this tutorial, to make you easier follow it, it real life, long names of the machines can even cause troubles
Control Panel | System | on the main screen under “Computer name, domain, and workgroup settings” select “Change Settings
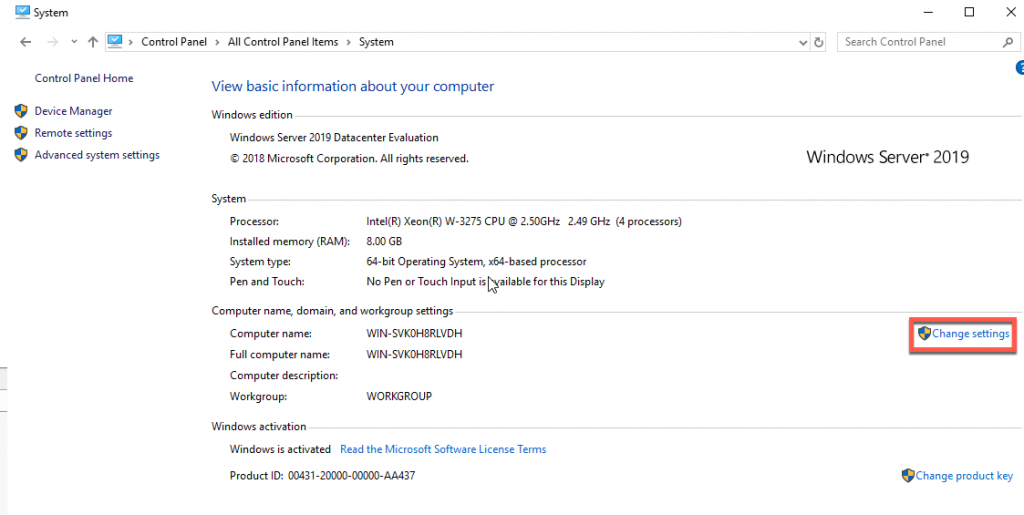
Under “Computer Name” tab click on “Change” button. New window will open and under “Computer name:” enter name you like for your server. After you are done, click on OK. New window will appear prompting you to reboot. Select OK, and after that – reboot you server and then we can continue.

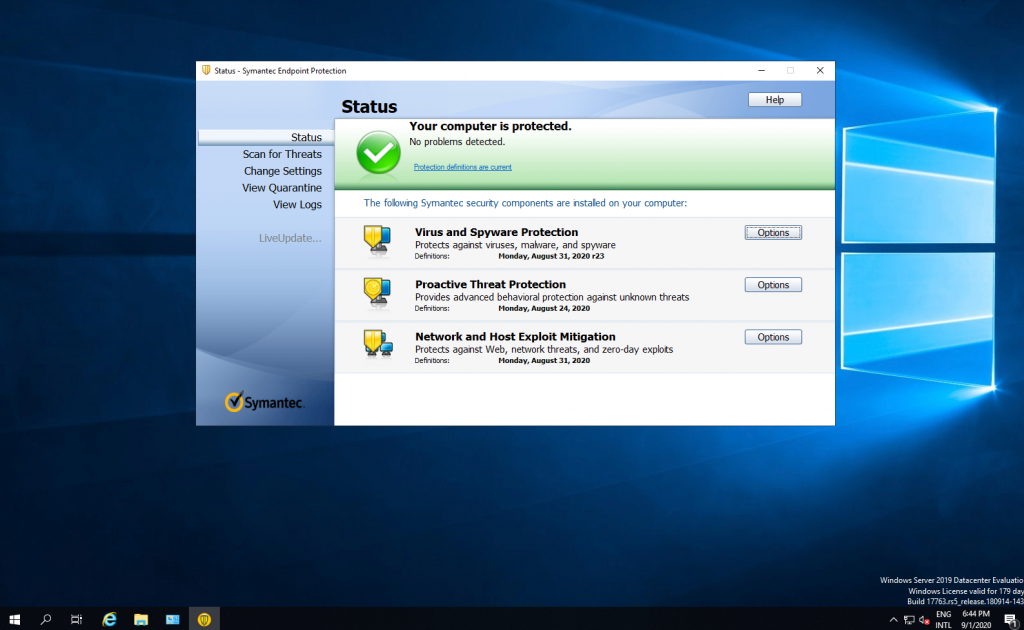
Install Antivirus
This should be step zero, most important of all the steps, but steps above also can be done first, especially if you don’t have drivers on your machine.
In most of my projects I use Symantec, but if you find something else that suits you, go ahead.
Patch you Windows Server (regularly)
Patching your Windows Server installation is one of the most important tasks. You need to patch your software on monthly basis. Microsoft has “patch Tuesday” and int occurs regularly every month on second Tuesday. If the patch is extremely critical you will want to patch right away, if not, you can wait and see experience of others (or test in your test environment) and then patch when you are sure you won’t break something in production.
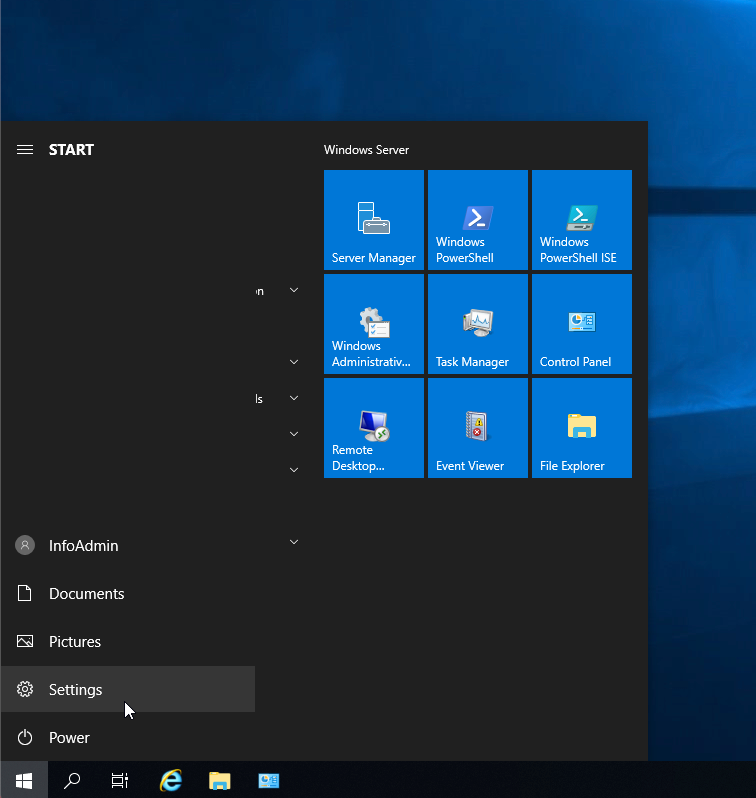
Click on Start button in down left corner and click on Settings
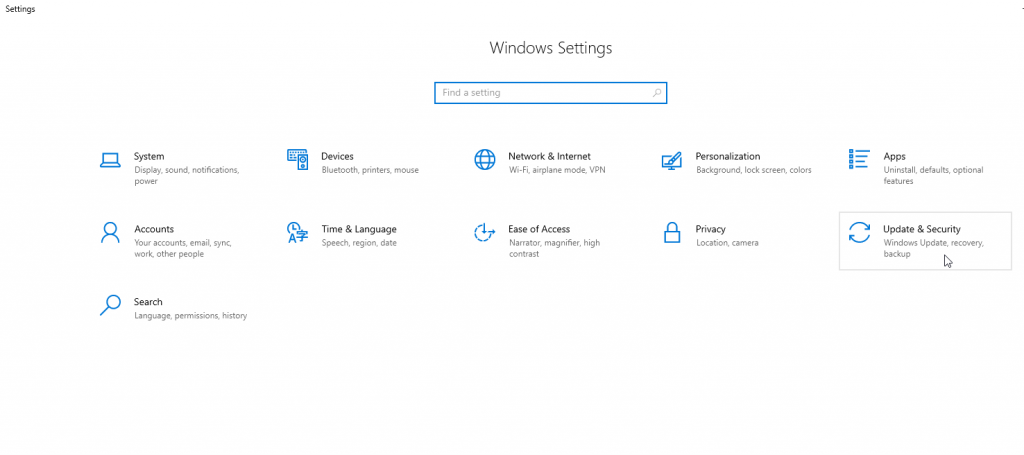
Select Update & Security
Download and install all available patches

At the bottom of Windows Update screen there is option “Change Active Hours”. Set this option, otherwise you will witness reboots of your production server during working hours.
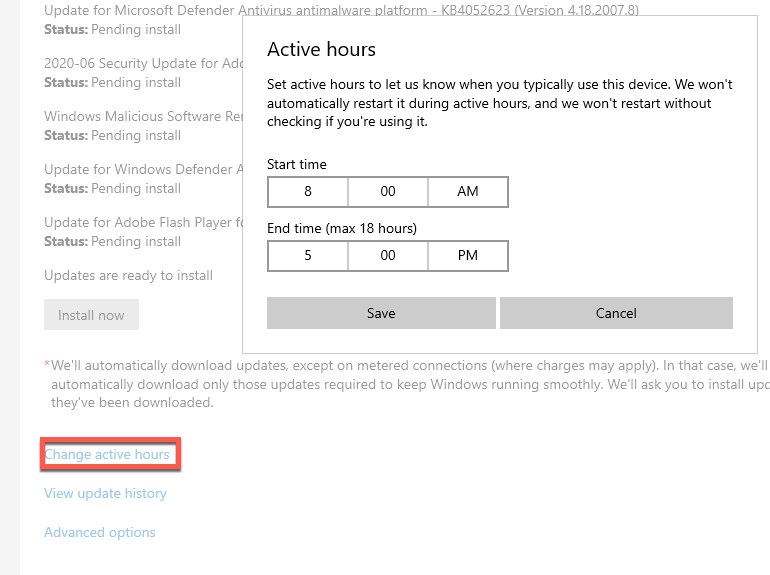
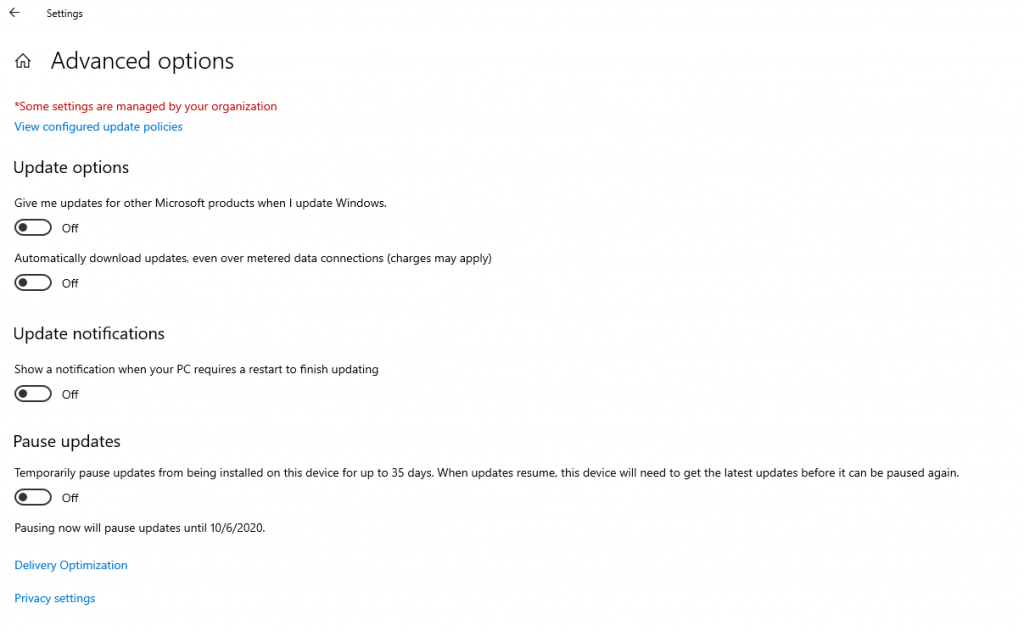
Also, under “Advanced options” which is also located on the bottom of Windows Update menu you can delay updates for 35 days, set Windows Update to download patches for other Microsoft products, and so on…
Basic Security Settings
First of all, leave your Windows Firewall always ON, do not turn it off, learn what ports your services need to go through it, set it up accordingly, but do not turn firewall down.
Next we will head to Control Panel | Administrative Tools | Local Security Policy

In Local Security Policy, we will set few things under Account Policies and Local Policies
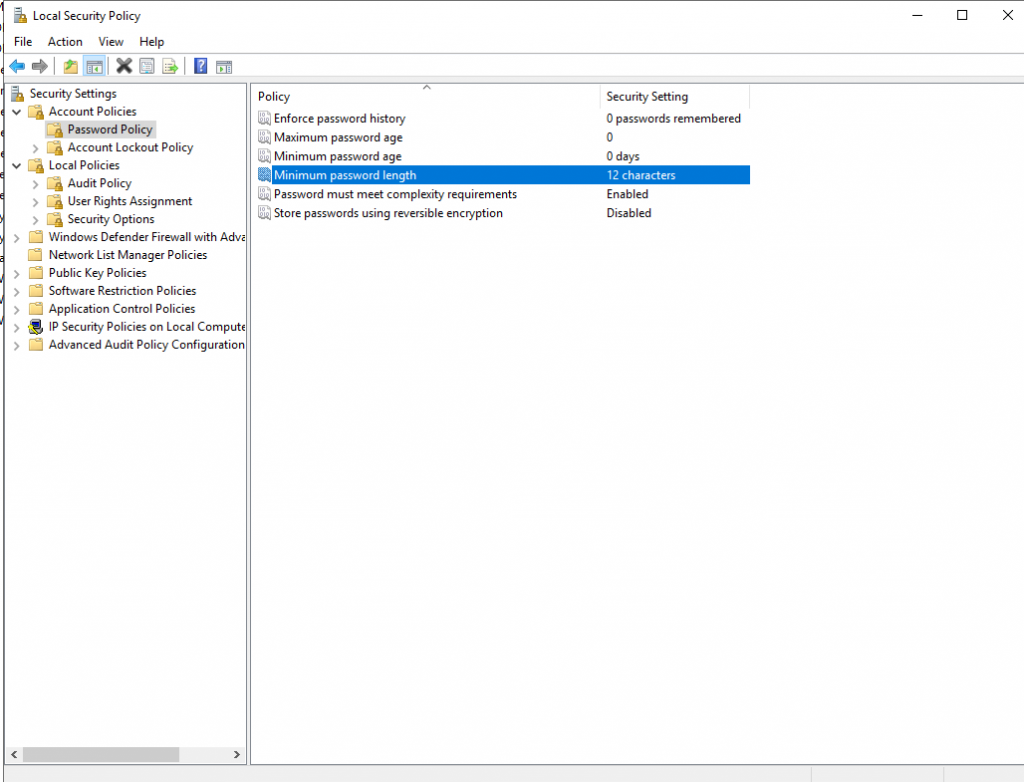
First – Account Policies | Password Policy.
I will set Minimum Password Age to 0 (zero) and Minimum password length to 12 characters.
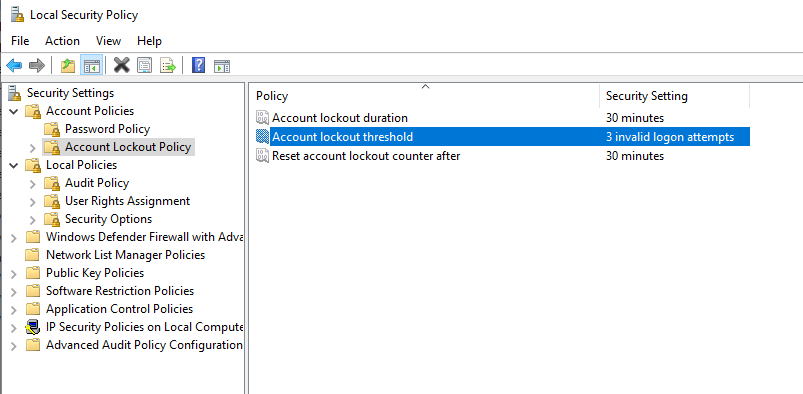
Account Policies | Account Lockout Policy – Account lockout threshold – 3 invalid logon attempts – Account lockout duration and reset account lockout is set to 30 minutes. You can set how you like it. If somebody tries to brute force your Windows Server password, after three misses, that IP address will be unable to try logon for 30 minutes.
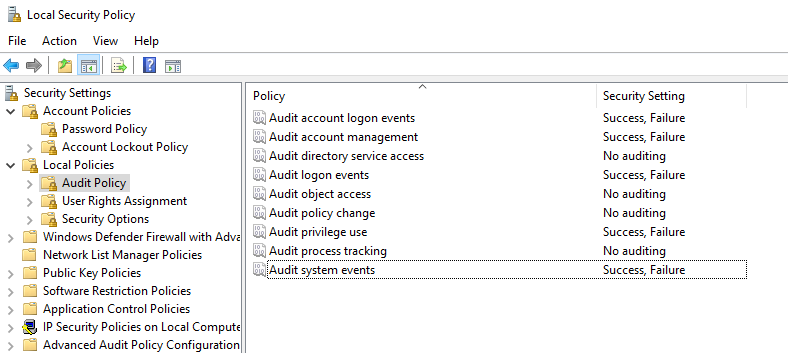
We will move on to the Local Policies | Audit Policy. Here we will set logging parameters for few things.
Every of the options I set below has a description card you can see for more details.
When you click, for example on “Audit account logon events”, explain tab looks like this.
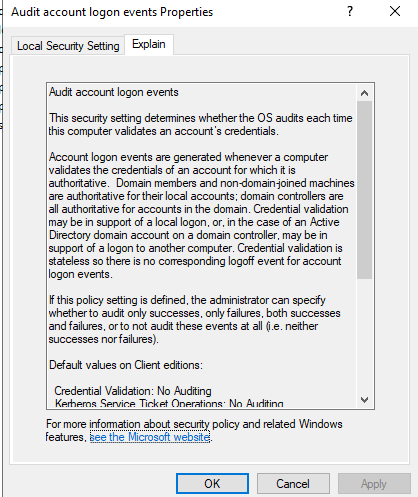
Almost every item in Local Security Policy has explain tab, so you can go through settings that you find interesting, read more, and if you find them useful – enable them.
You can see how I set audit for few things that I find important in my everyday use, you are free to configure all to your needs, of course. This is just my generic/basic workflow.
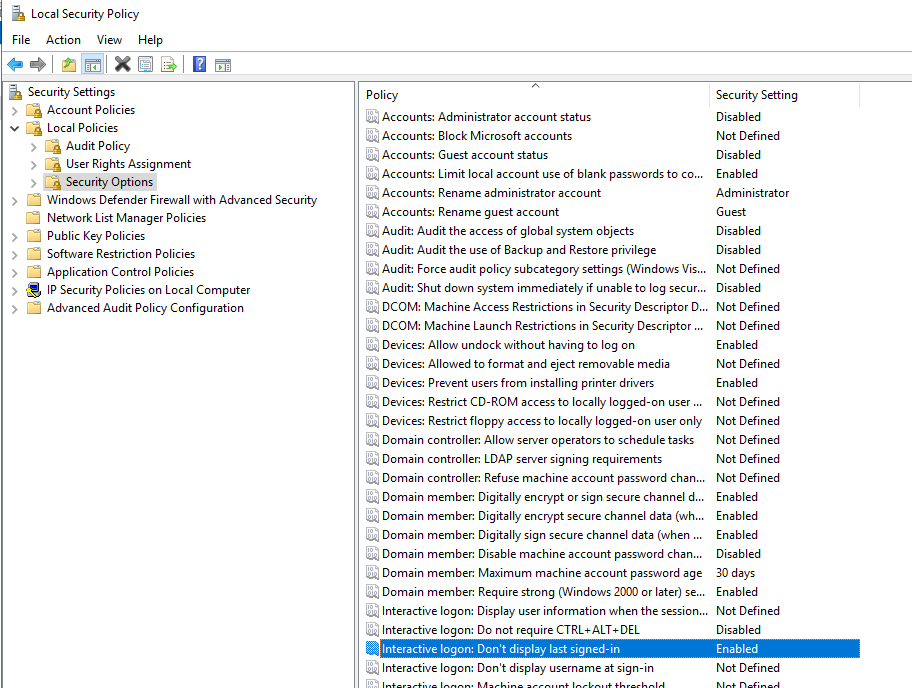
The last thing we will set here is in Local Policies | Security Options
First thing we done in this tutorial was to change main Administrative account, right? It does not matter much if it is displayed on login screen.
This is especially important for web services. You don’t want usernames on your login screen.
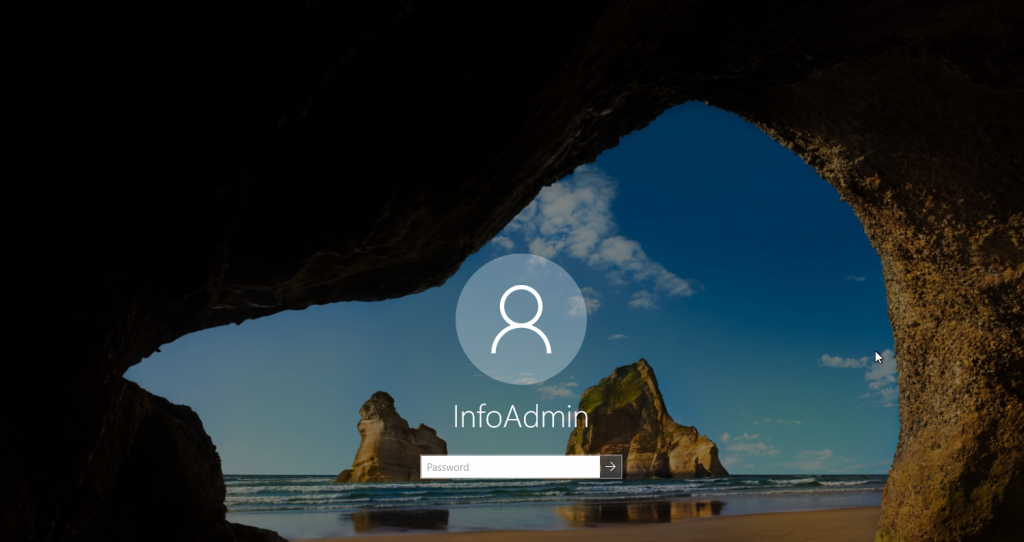
So, go to Local Policies | Security Options | Interactive logon: Don’t display last signed-in and Enable it.
When you reboot (or log-out) next time, your login screen will look like this.

Much better.
Conclusion
These are most basics things I do to every Windows Server 2019 install. Of course there are a lot more things to do, but this is my essential workflow for every Windows Server installation.
When we move on to more complex configurations, things will add up, but for a clean install – this is it.
If you are interested in video version of this article, here it is on YouTube