We went through the basic Windows Server 2019 install here, and we have done some basic configuring for it here, and in the last tutorial we deployed Hyper-V (here) which will be the platform for all our future installations in this series.
Now we will deploy our first virtual machine on Hyper-V
Let’s go.
For this tutorial we will need Windows Server 2019 installation media again, since we will be installing it once again.
So prepare your Windows Server 2019 installation image.
Create a VM
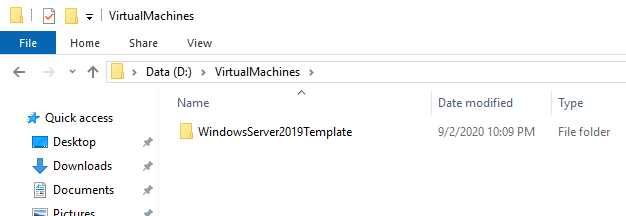
Before we begin, I specified in a tutorial before this (Hyper-V installation) a place where I will store all my VMs. It is in D:\VirtualMachines .
VM will be called WindowsServer2019Template. I will create subdirectory named WindowsServer2019Template in D:\VirtualMachines.
If you follow my tutorial by word, you will have structured VMs, each in its own subfolder.
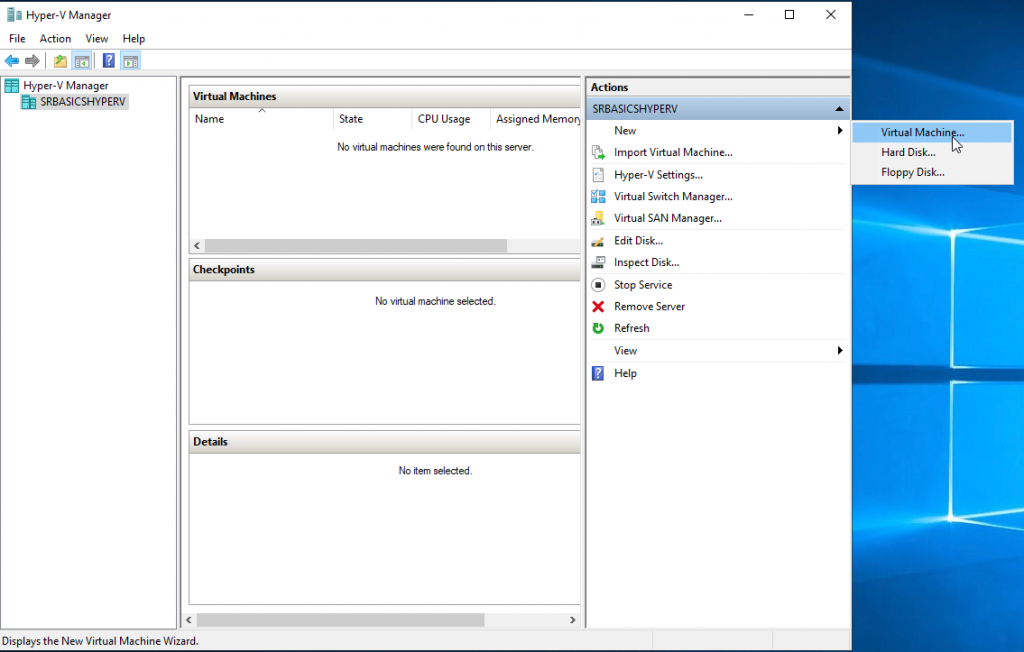
Go to the Hyper-V Manager and from the Action menu on the top right part of the screen select New | Virtual Machine
Next
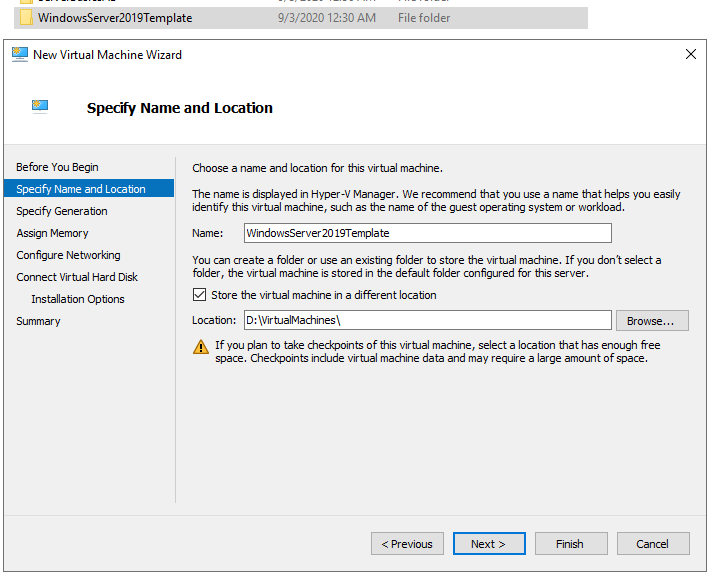
Name of my VM will be “WindowsServer2019Template”. Make sure that the name and letters are the same as in created subfolder we did earlier.
I will reuse this VM later as template for all my other VMs in this lab, so that I why I selected that name for a VM.
I will also click on “Store the virtual machine in a different location”. This is needed so it will put config file in a subfolder we created. Just specify D:\VirtualMachines (or folder you selected as a location for your VMs) don’t enter into any subfolders!
Next
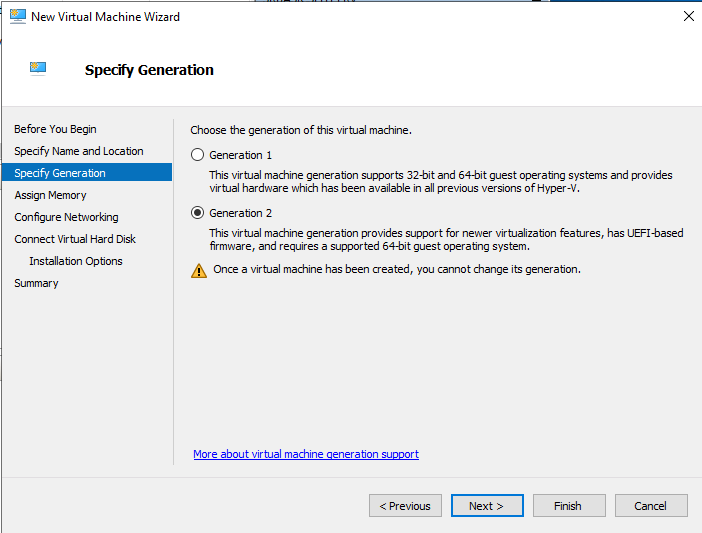
I will select Generation 2 VM. Next
Quick explanation here – not all VMs will work as Generation 2. Windows Server 2019 works perfectly, but many linux distros (pFSense for example) will work only as eneration 1 machine, so have that in mind.
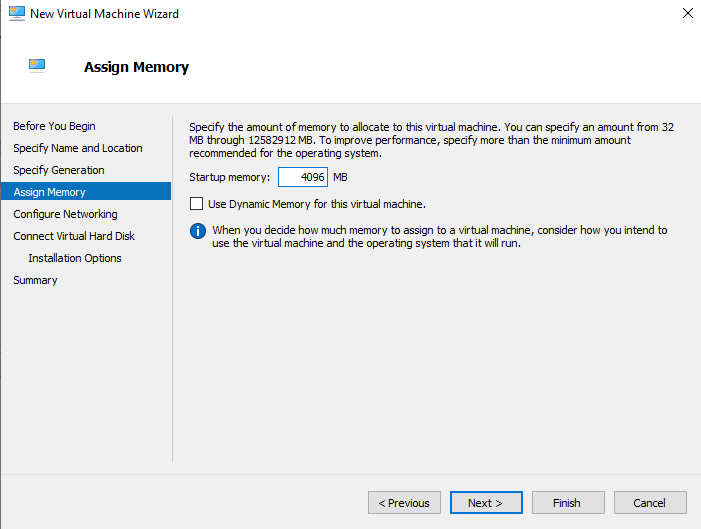
I will assign 4GB of RAM to this VM. Next
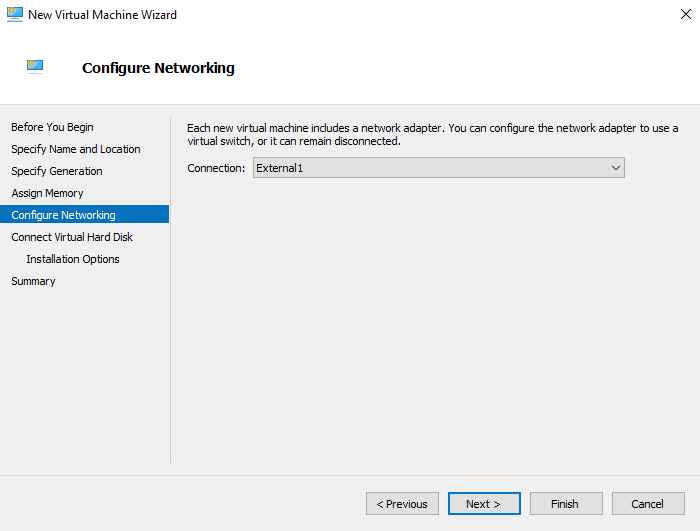
We created network for Hyper-V in Hyper-V installation tutorial, so I will now just select it here. Next
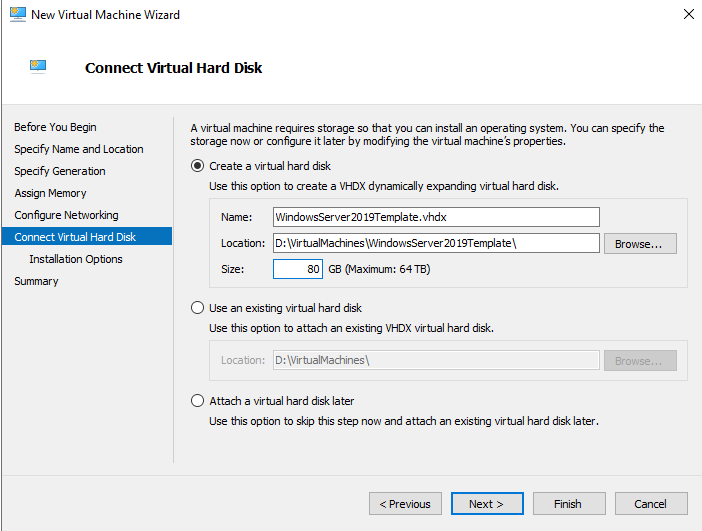
On the next screen we will select “Create a virtual hard disk”, name is ok, location is ok, for a size, I gave it 80GB. 40GB would be a minimum for Windows Server 2019 install. Also select location for your VM and specify path to a subfolder we already created (D:\VirtualMachines\WindowsServer2019Template).
Next
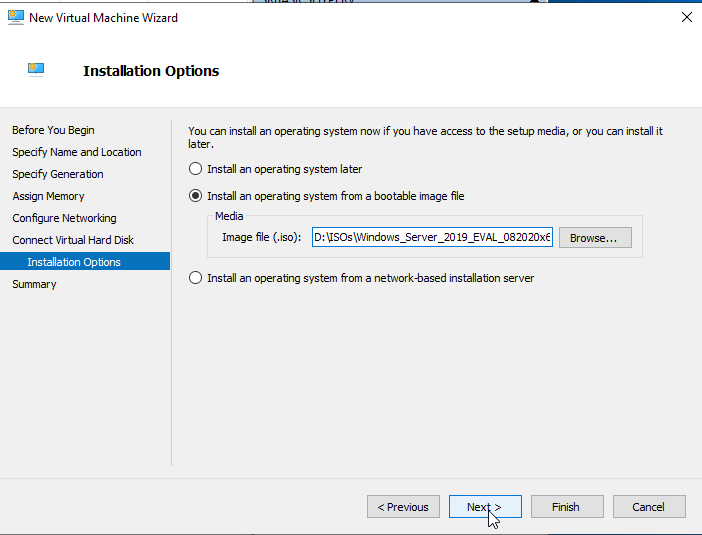
I will select “Install an operating system from a bootable image file” and navigate to the location where I saved my Windows Server 2019 iso image by clicking on Browse…
Next
Check your settings and confirm by clicking on Finish.
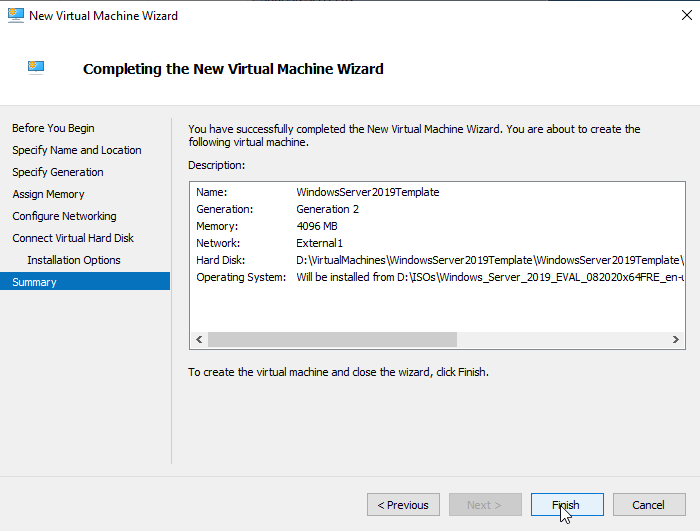
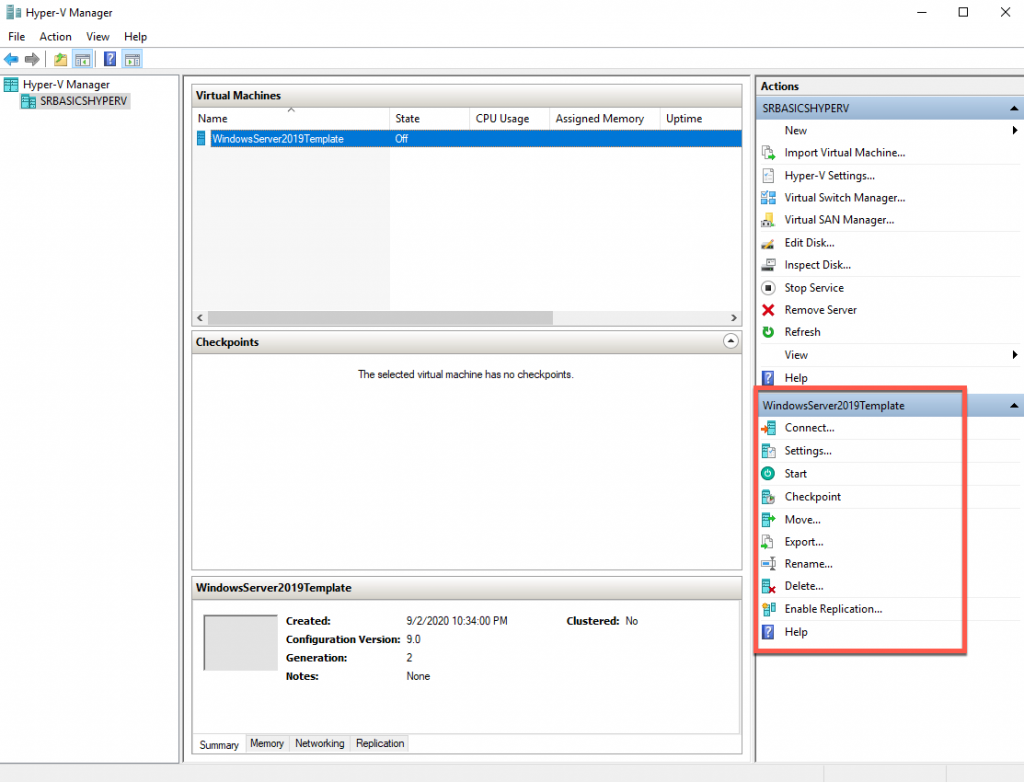
Congrats, we created our first VM. Now, lets double click on it.
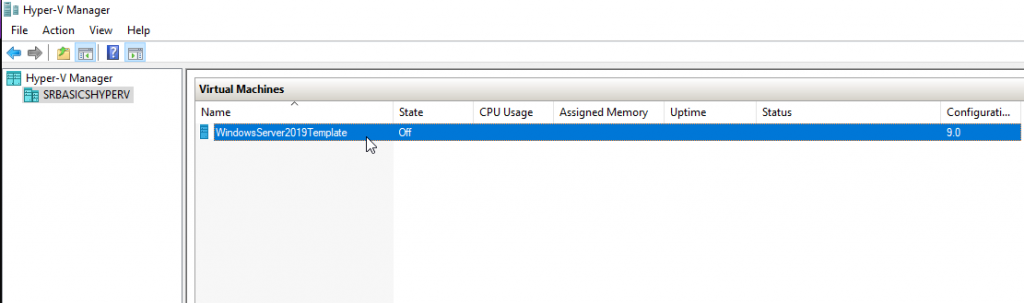
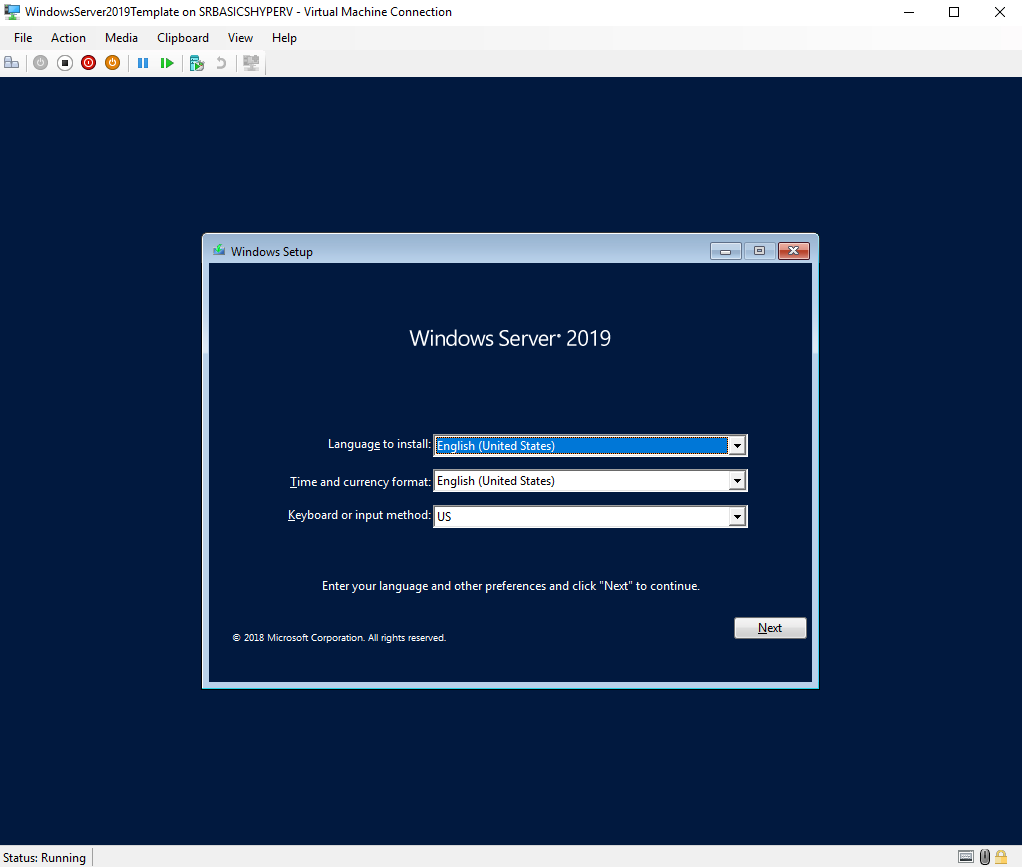
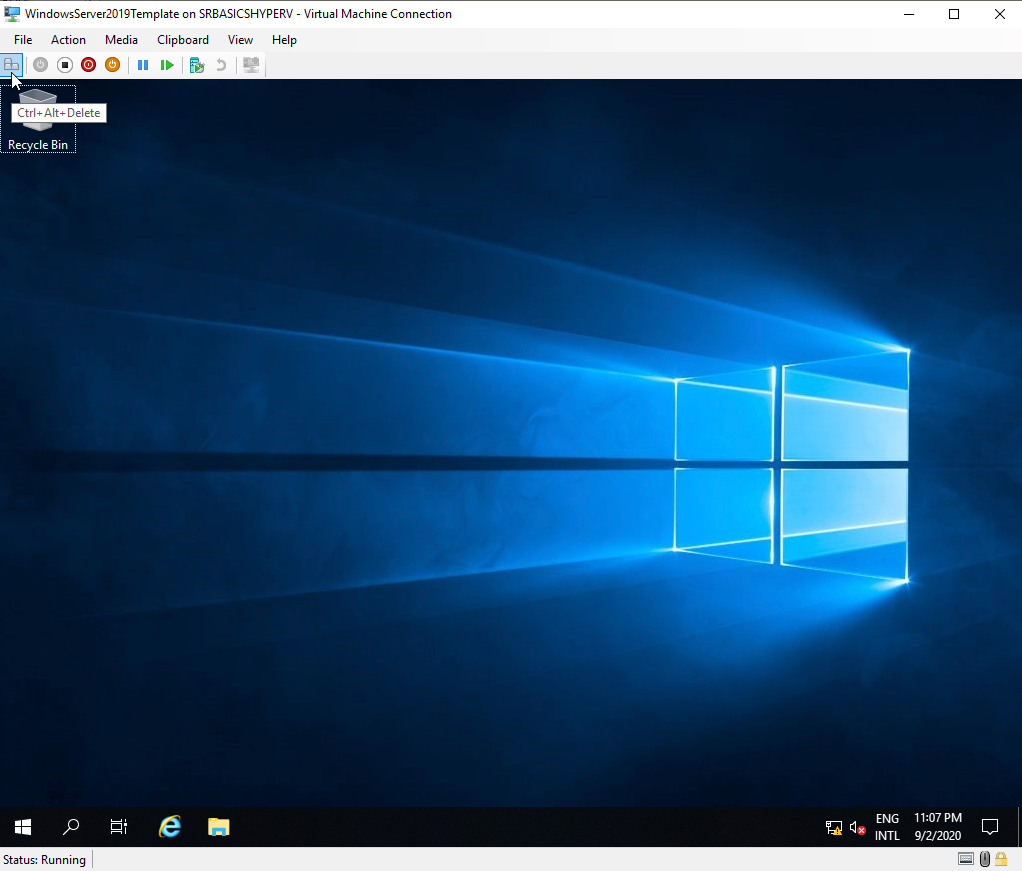
New window will appear and you can click Start on it, and the VM will spring to life (If you followed everything ok).

I will not go through Windows Server 2019 installation, since we have done that at the beginning of the Server Basics series, and you can follow that tutorial for the installation.
Configuration of a VM
I will quickly go through few options of a VM.
On top bar of the VM Console there is a row of buttons, if you go over them with your mouse you will see that the first button is Ctrl+Alt+Del button, other are turn off, shut down, save, pause, reset… Click on them and test them out. For example, you ask yourself what is a difference between shut down and turn off button, both do the same thing, no? Shut Down will gracefully turn of your VM, while turn off will mostly be used if your VM is non responsive and you need to force it to turn off. Something as if you pressed physical power off button on your server, pc.
If you select VM you created and look at the right bottom portion of Hyper-V Manager screen you will see couple of options. Connect button will start console (screen above this) through which you can control your VM, Start will turn on your VM… I will not cover each and every button, many of them are self explanatory.
However, we will go quickly though Settings… This is a place where you can add/remove resources for your VM, and configure various tweaks and features.
If you click on Settings of your VM, you will see quite a few things…
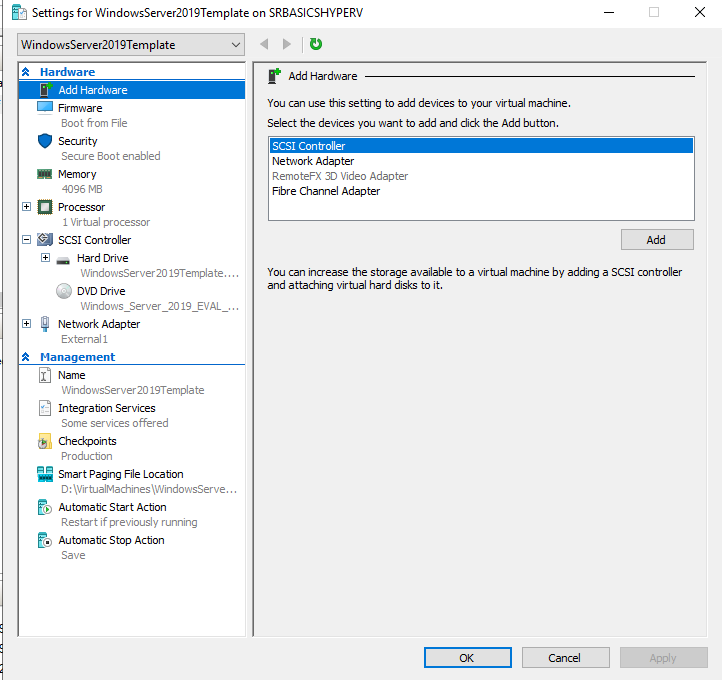
I will just quickly explain each section.
Hardware:
Add Hardware – you can add another disk, network adapter, FC adapter or GPU to already created VM, you will do that from here.
Firmware – you will set your boot device of a VM here.
Security – You will here enable Shielded Machine and UEFI Secure Boot if you selected generation 2 VM.
Memory – you can decrease/increase VM RAM memory in here.
Processor – you can add/remove CPU cores from your VM here.
SCSI Controller – you can see here two items on my SCSI controller. Hard Drive – that is 80GB disk I defined during setup. In settings of your Hard Drive you have option to move physical location of your VM drive, since it is a .vhdx file on a disk. You can also expand your disk drive if it almost full, you can compact it so it takes less disk space on your physical machine, and you can also convert it to other format.
DVD Drive is a place where you will mount/dismount your iso images.
Network Adapter is place where you will define settings for your VMs network card. You can assign it to a different switch here.
Under Management section:
You can define name here, integration services (time sync, os shutdown, heartbeat…) checkpoints if you wish and automatic start and stop actions.
I personally don’t use automatic Start Action for crucial services, and also have Save as a Stop Action.
Conclusion
Congratulations, you now know how to create VM in Hyper-V and you also know where to find options and set resources for created VM.
In next one, we will learn how to create VM image, so you don’t have to install your VM from scratch every time.
If you are interested in video version of this article, here is the link