We learned how to install Hyper-V role on our Windows Server 2019 installation – see here and created our first VM in Hyper-V – see here.
Now, we will need to install Windows Server 2019 multiple times on our Hyper-V machine during this ServerBasics series. So, in order to save time, I will show you simple process of creation of Windows Server 2019 VM template so you don’t have to install your VMs from scratch every time.
Before we begin
Before we start this process, make sure you installed all the tools and apps you will often use, for example, install Firefox, Notepad++, or any tool you will use often on your Windows Server 2019. With this template method, your server settings and account will be reverted to stock, but that is not huge problem, since in the future we will create domain and create policies, so that will not be a huge deal.
Sysprep
Ok, let’s say you installed all the tools you need… I installed Firefox and Notepad++ and in the end, we will see if these apps are available after sysprep and new VM deployment.
Why is it important to sysprep your machine before using it as a template?
One very important thing is that every Windows install has its own SID value. Sysprep creates new SID value for you. If you were to just copy and reuse your “template” without syspreping, many Windows services (especially high availabilty features) won’t work, because of the same SID on multiple machines.
Ok, lets continue…
Start VM which you will use as a reference image for all future VMs, in my case that is WindowsServer2019Template VM I created earlier (as shown in previous tutorial).
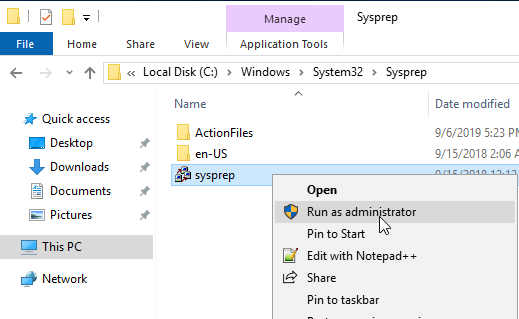
Open File Explorer and go to C:\Windows\System32\Sysprep
Right click on sysprep and select “Run as Administrator”
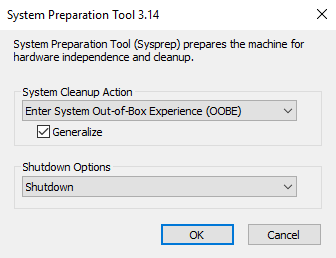
These are my settings for sysprep- Enter System Out-Of-Box Experience (OOBE) | Generalize | Shutdown – confirm with OK
After this process is done, your VM will shutdown. Before we continue, one more thing to check.
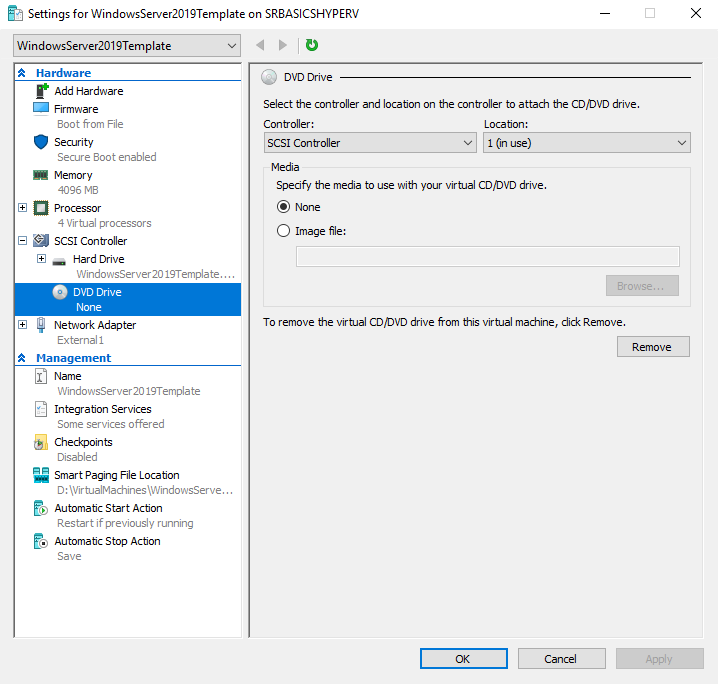
Go to the Settings of your VM in Hyper-V Manager (we went through that in VM creation) and select None under DVD Drive. Also, if you are planing to use this image across different Hyper-V hosts, make sure you also clear your current network adapter. Network adapter is not a huge problem, but DVD Drive with attached iso image can be.
After you went through settings, you are done, You have your VM template prepared.
How to use created template?
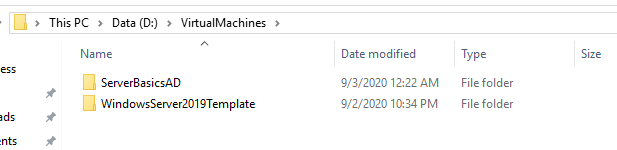
My template is created in D:\VirtualMachines and I named folder WindowsServer2019Template. If you followed my first VM creation tutorial, you know that I named it that way.
From now on, I will just use this VM for entire lab we are going to do through ServerBasics series.
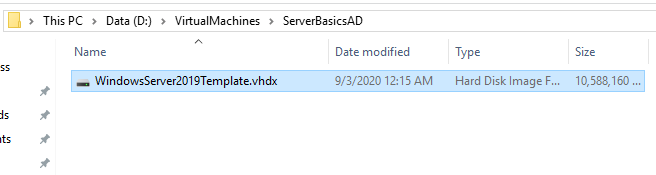
First, I will create ServerBasicsAD subfolder in D:\VirtualMachines. ServerBasicsAD will be the name of my new VM.
I found that the way I’m going to show you is most trouble free way. Especially if you are new in all this.
Go to D:\VirtualMachines\WindowsServer2019Template where virtual hard disk of our template machine resides and right click, select copy on WindowsServer2019Template.vhdx file.
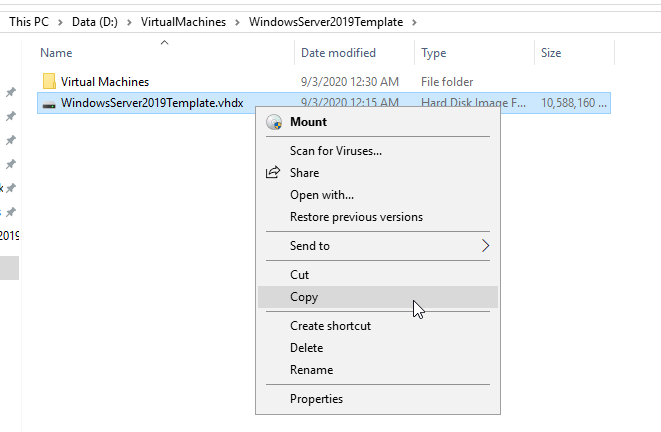
Paste that file into D:\VirtualMachines\ServerBasicsAD folder.
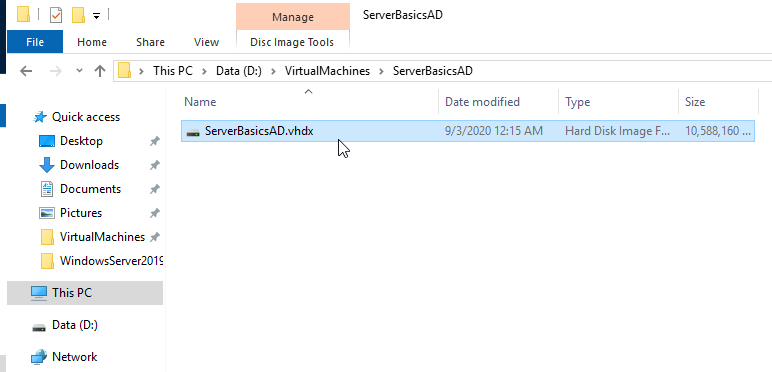
Rename pasted file WindowsServer2019Tempalte.vhdx to ServerBasicsAD.vhdx
Ok.
Why I’m I doing this this the way I’m doing? Hyper-V has confusing naming (at least for me) and puts files of VMs all over the place with strange naming. The way I’m doing this, my configuration files and virtual hard drive (.vhdx) files are all in one place, in folders named same way as VM is named. This way, if you have 40,50-100VMs you will easily navigate them, with less chance to mess up something.
Now back to the Hyper-V Manager. Go to Actions – New – Virtual Machine…
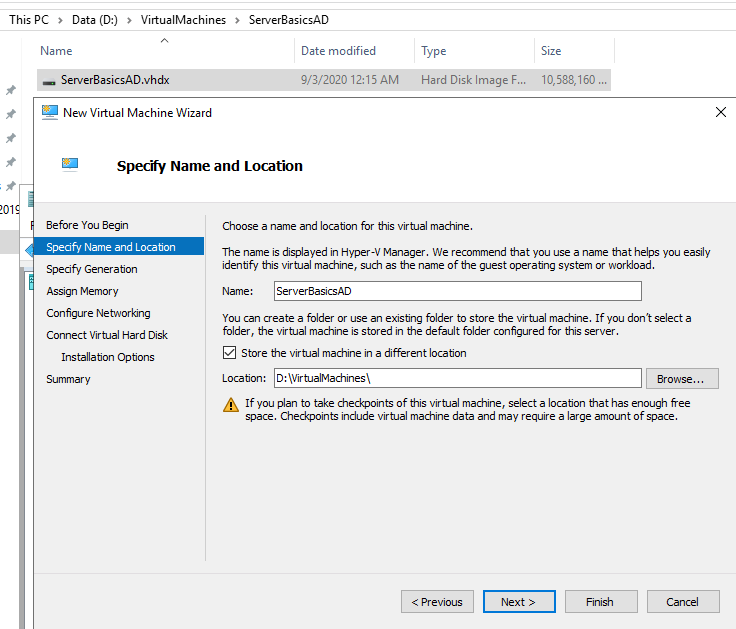
Name the machine ServerBasicsAD (exact same name of the folder we created earlier) and select “Store the virtual machine in different location” and select folder where you put your VMs (D:\VirtualMachines). Don’t enter into created ServerBasicsAD subfolder!
Next
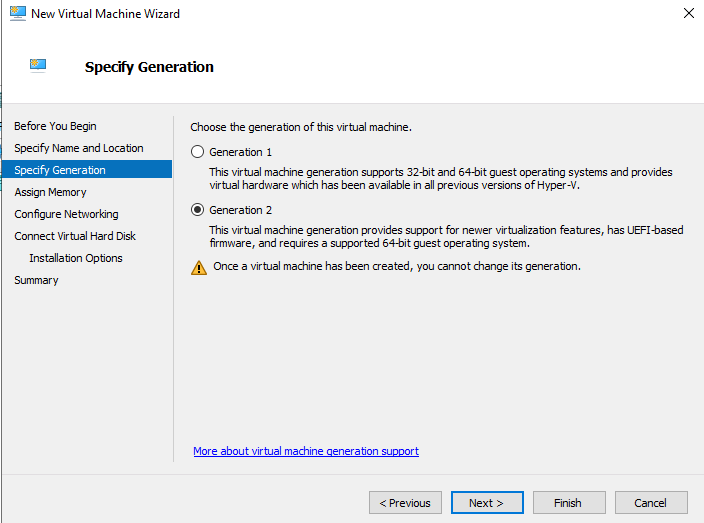
Select Generation 2 | Next
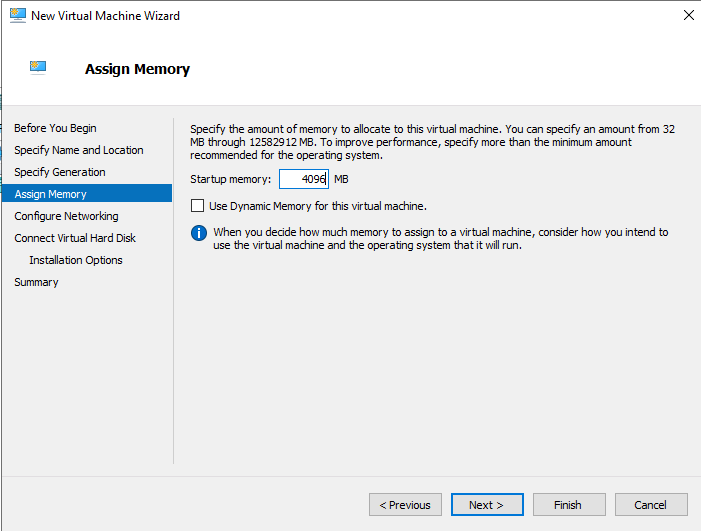
Assign RAM | Next
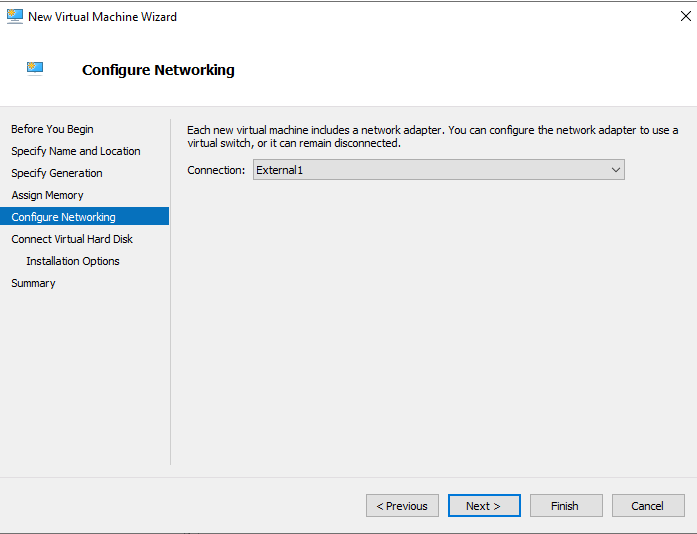
Select network connection | Next
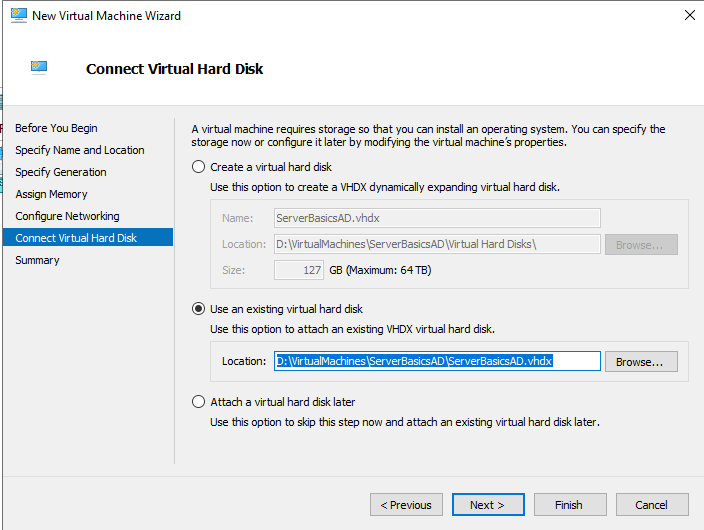
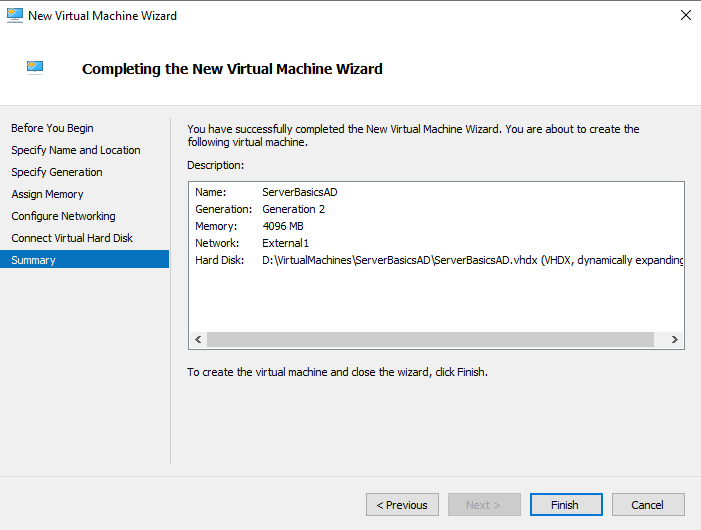
On Virtual Hard Disk screen select “Use an existing virtual hard drive” and browse to the location you copied your vhdx. You can see location of mine below (D:\VirtualMachines\ServerBasicsAD\ServerBasicsAD.vhdx). ServerBasicsAD.vhdx is renamed template virtual hard drive we copied earlier.
Next
Finish
Start your VM…
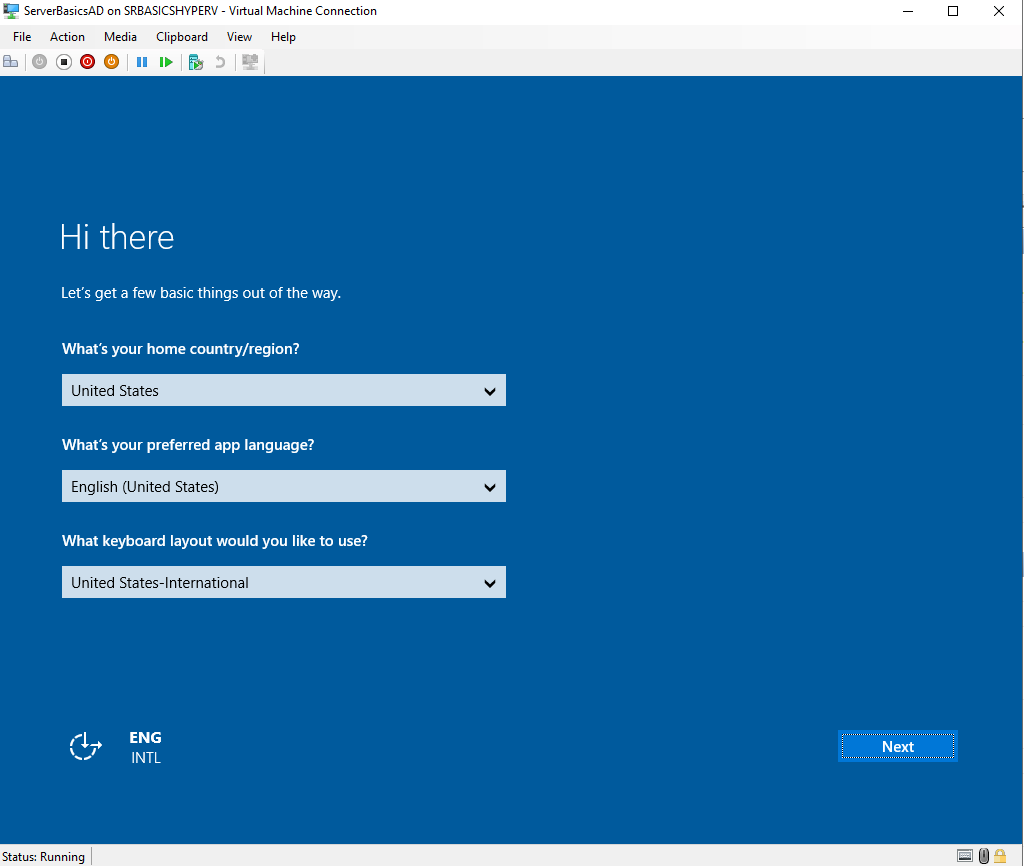
You will be greeted with this screen.Set your language/keyboard preferences… Next
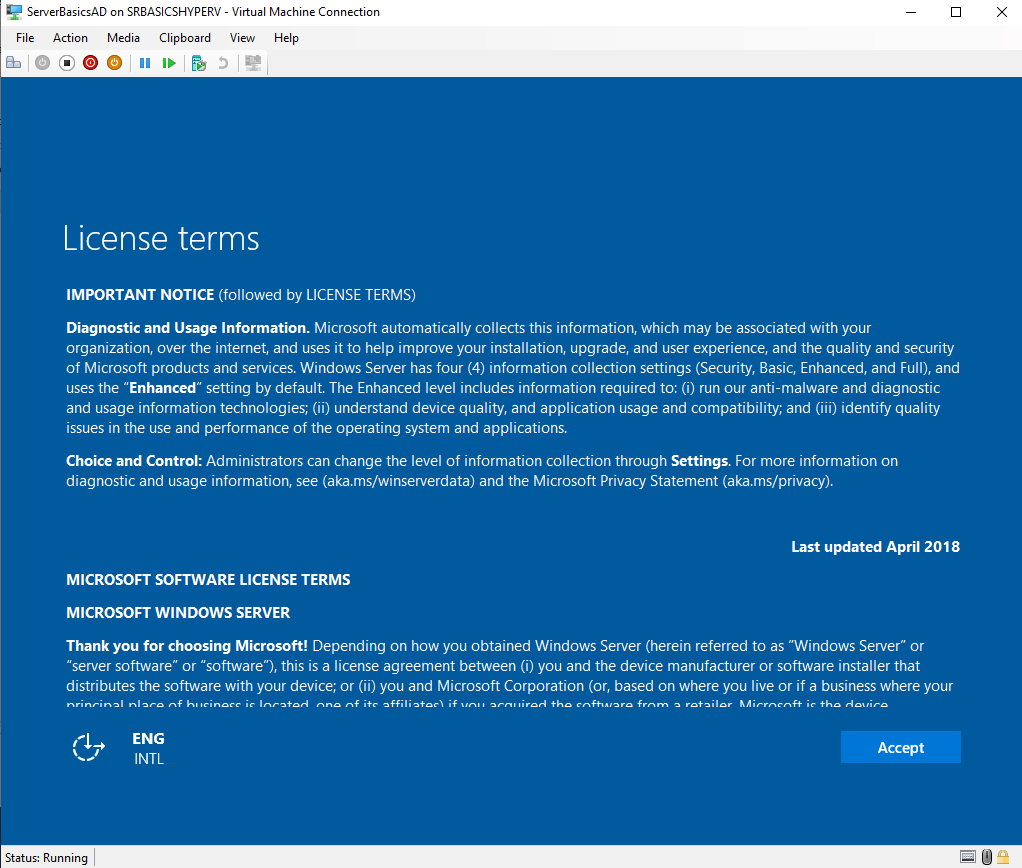
Accept
Set Admin pass… Finish
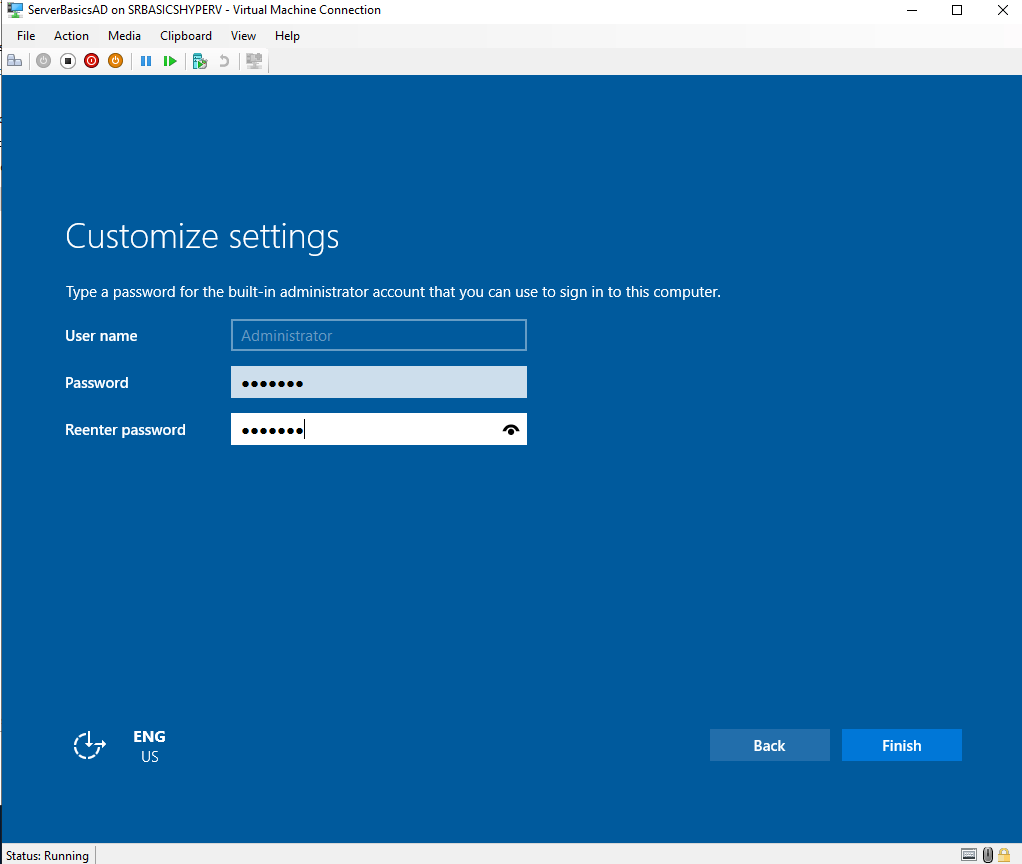
That is it… We are at the login screen

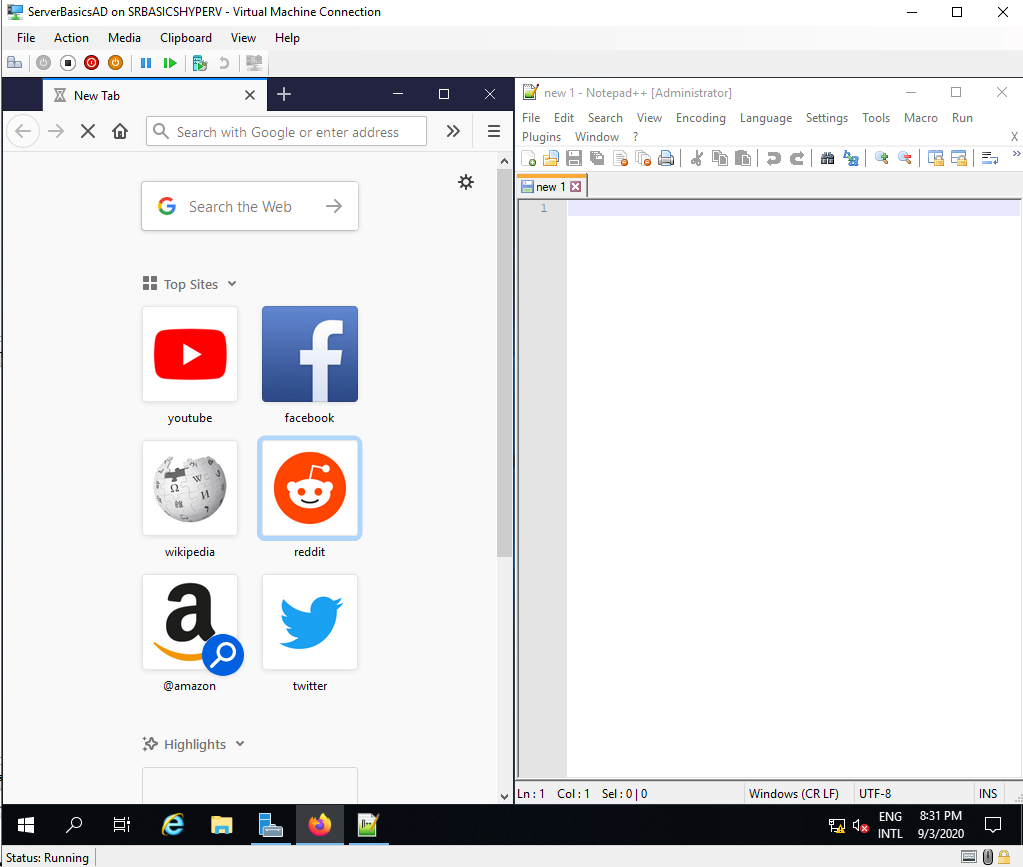
Now, lets see if the Firefox and Notepad++ from the beginning of this story are in the VM.
Yes, everything is still in :)
You will have to reconfigure your Windows Server 2019, in terms of users and settings.
But, once we learn how to setup Active Directory and Group Policy, these will also be automagically applied, and deployment of a new VM will be a breeze.
But now, you learned how to create simple template, so you don’t have to install Windows Server 2o19 from scratch every time, the process of bringing new VMs up will take you only a few minutes once you have templates ready.
If you are interested in video version of this article, here is the link