AD Certificate services has many predefined templates for different usage (35 different if I counted well). We are going to look at some of them, customize them and look at the best practices.
For the beginning of this guide, few important things you should have in mind when it comes to Certificate Templates
- always create duplicate of default template and modify that duplicate – we have modification examples in Part 4 of PKI series
- give duplicate a descriptive and understandable name, so you know in the future what is template for.
- Check security settings, and consider how to set it optimal for your needs, default settings (SHA1) are not adequate.
- Only allow access to users/groups who need it, and only for certain template
- Important certificates should not have auto enroll
- delete certificate template if you don’t need it, and don’t issue certs you have no intention of using
Now, here is a list of available templates:
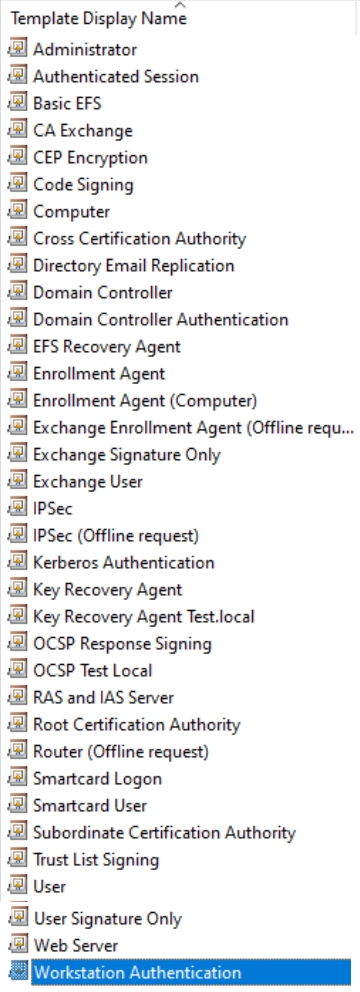
We are going to modify User, Computer and Web Server templates for usage within domain, these are the ones I personally use the most in my environment. Smartcard are something that is configured sometimes, but the three I mentioned are main.
Let’s start
User Certificate Template Creation
User should have emails entered in their AD account, or errors will occur when issuing user certificates.
This is done on CA1 server.
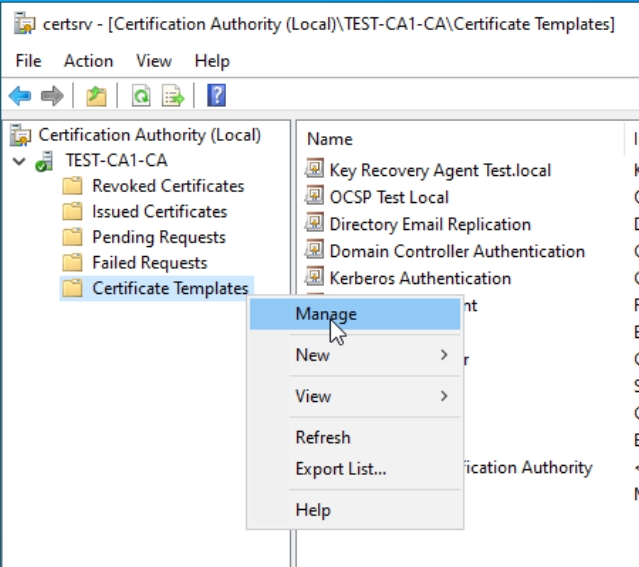
Open Certificate Authority console (certsrv.msc) right click on Certificate Templates and select Manage
That is going to be starting point for all three Templates. I will go detailed through User Template, and next two will be simply described.
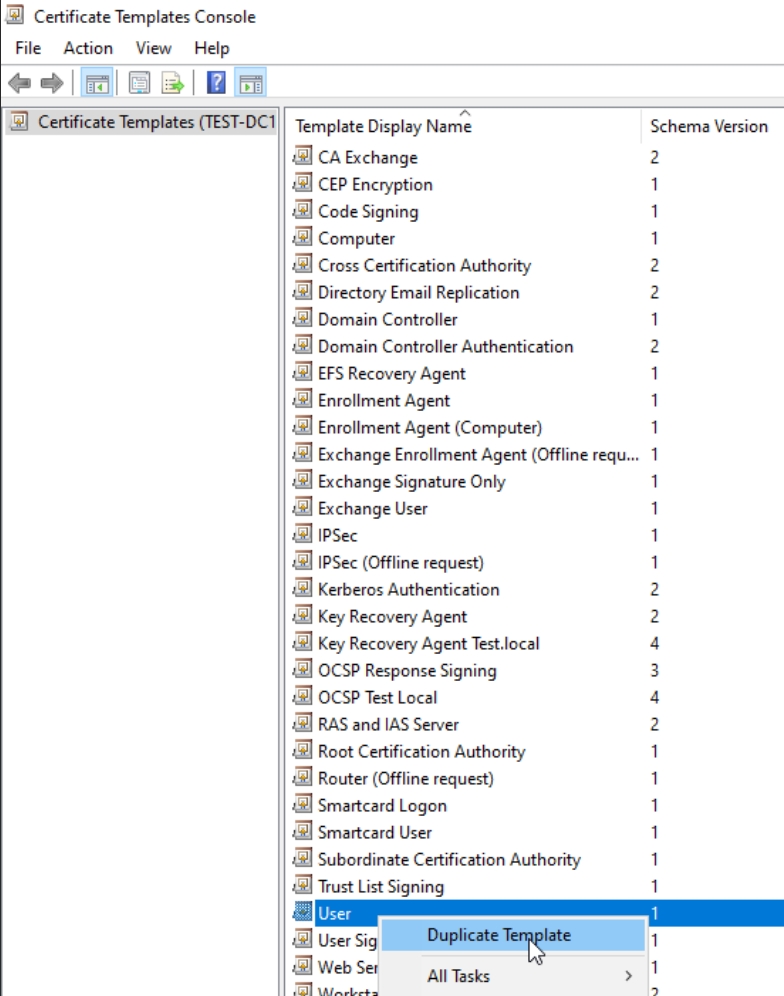
Right click User Template and select Duplicate Template
Compatibility tab – Certificate Authority should be Windows Server 2016 and Certificate recipient Windows 10 / Windows Server 2016

General tab – Template display name – I just add domain FQDN in naming – User test.local.
Validity 1 year, Renewal, 6 weeks, Publish certificate in AD and Do not automatically reenroll should be checked.

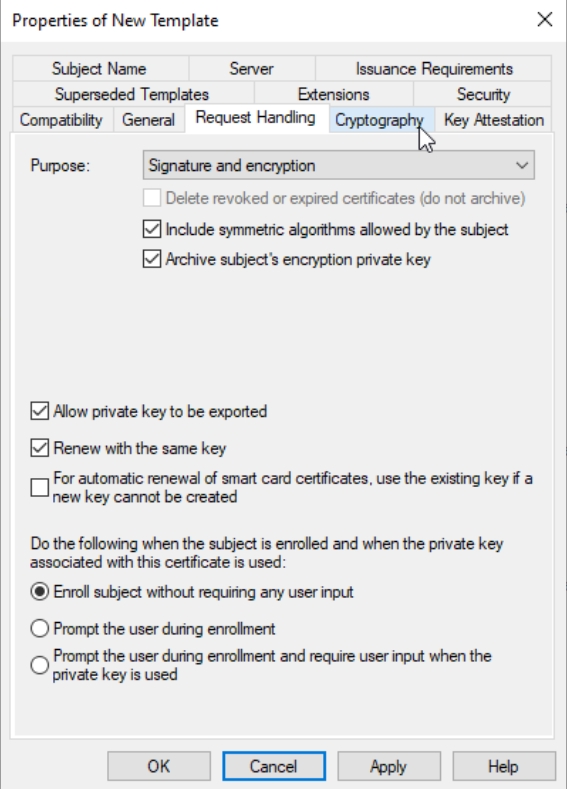
Request Handling tab – Purpose: Signature and encryption. Include symmetric algorithms and Archive subjects encryption private key – should be enabled/checked (confirm pop-up). Allow private key to be exported and Renew with the same key should also be checked/enabled. Everything else leave as it is.
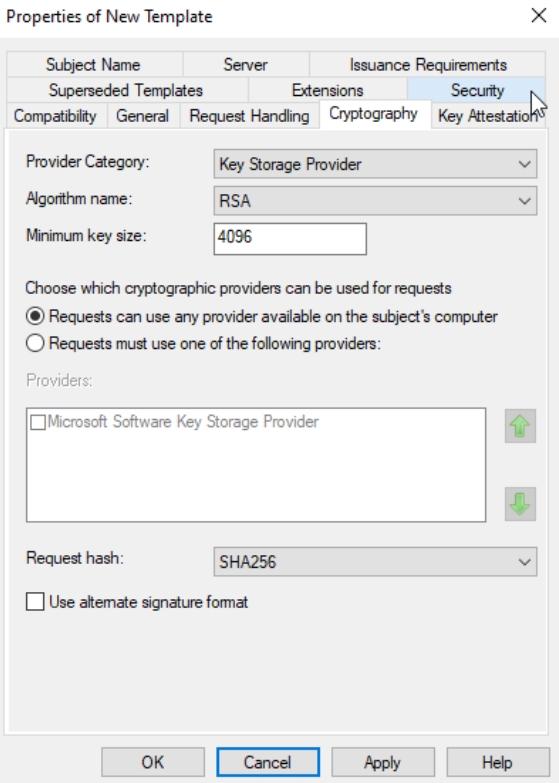
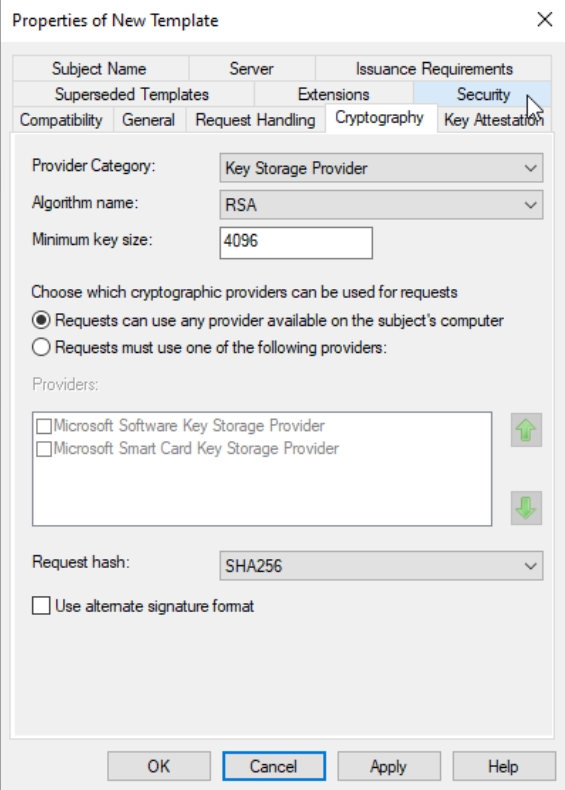
Cryptography tab – Provider Category: Key Storage Provider, Algorithm: RSA, Minimum key size: 4096 and Request hash: SHA256
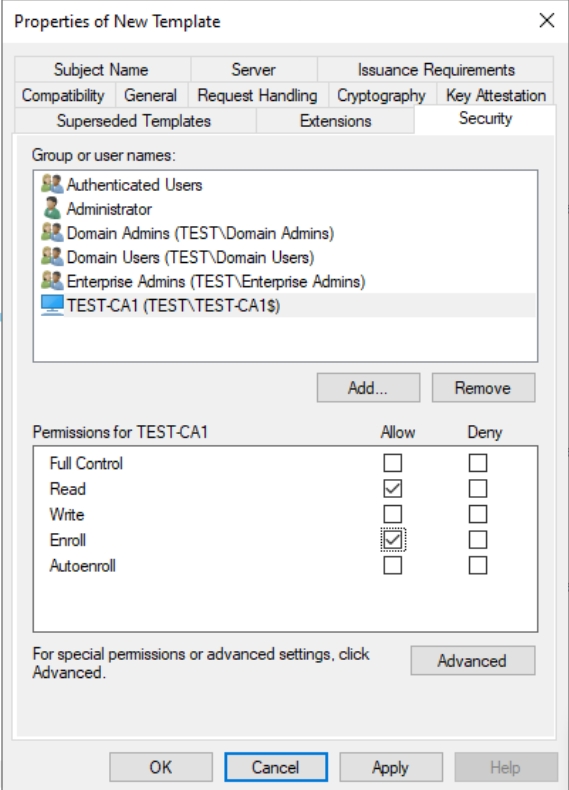
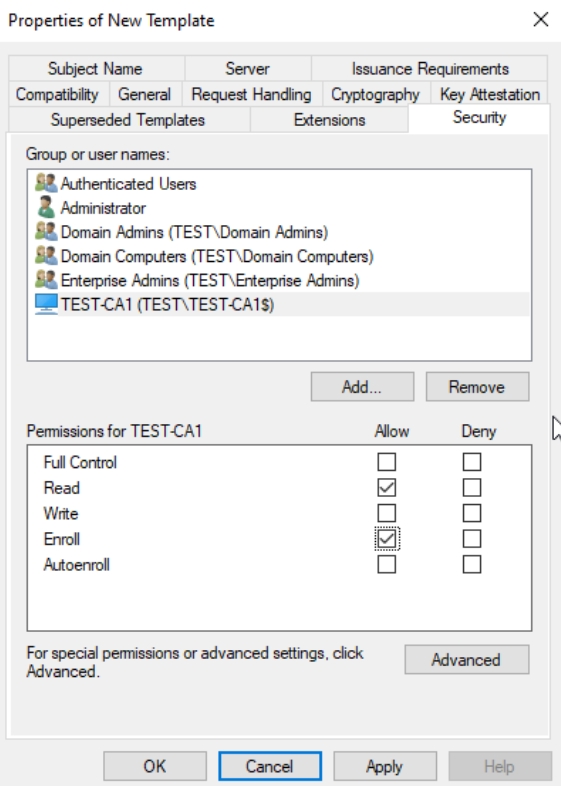
Security tab: You should add CA1 server as computer (TEST-CA1).
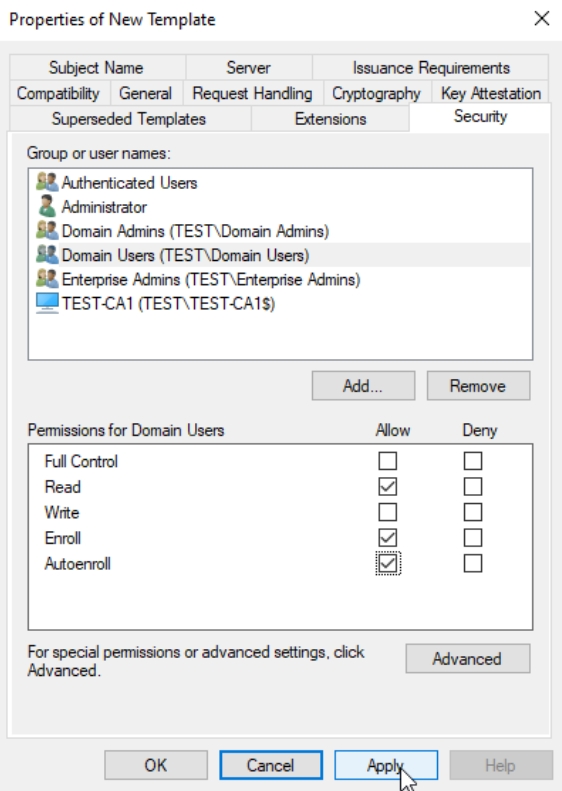
Domain users: Read, Enrol, Autoenroll
CA1: Read, Enroll
Apply, OK and close Certificate Template window.
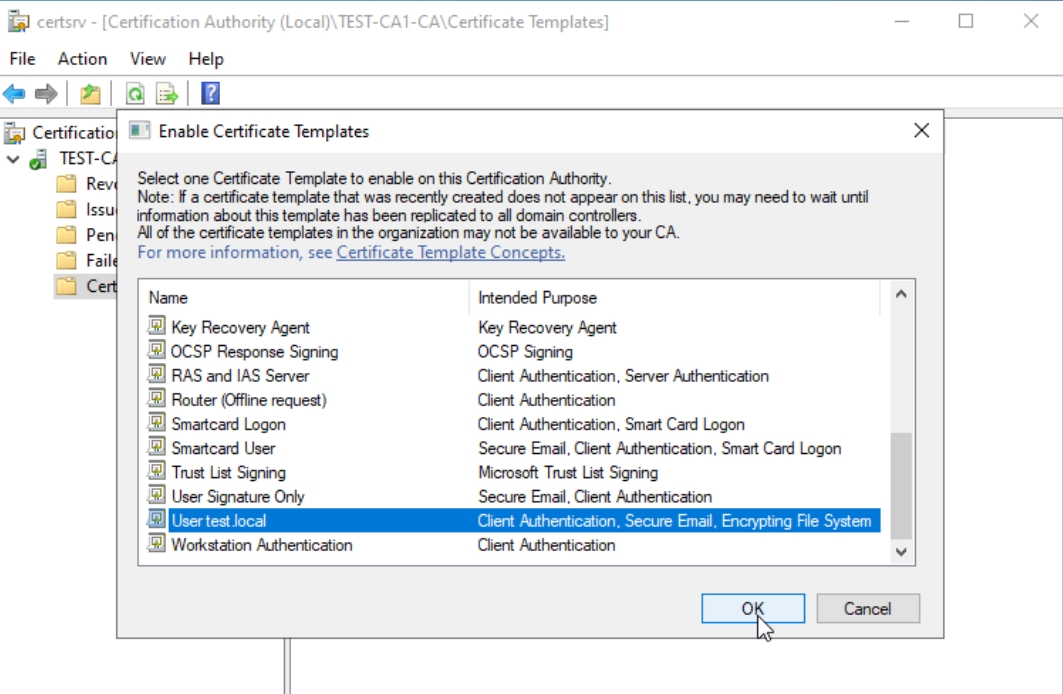
In Certificate Authority console, right click on Certificate Templates, New, Certificate Template to Issue
We need to enable template we created.
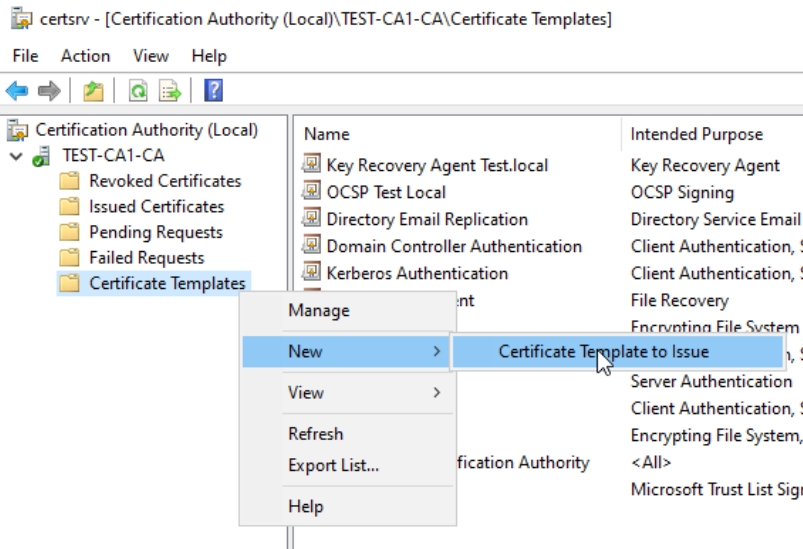
We will select User test.local template and press ok, now it will be added to our templates.
User Certificate Auto-Enrollment
Auto-Enrollment will allow users withing test.local domain to automatically receive certificates from AD CS. We will use template defined above. Now, we need to go to DC1 and open group policy there (gpmc.msc)
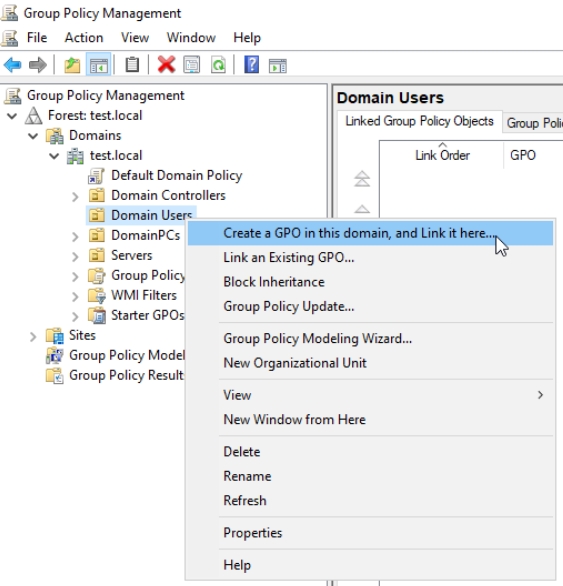
I have Domain Users OU created in which I put my domain users. We will create new GPO on that in my case.
Right click on Domain Users (or your OU where domain users are) and click “Create a GPO in this domain, and Link it here…” I will name Policy “User Cert Enroll” and press OK, without changing anything else.
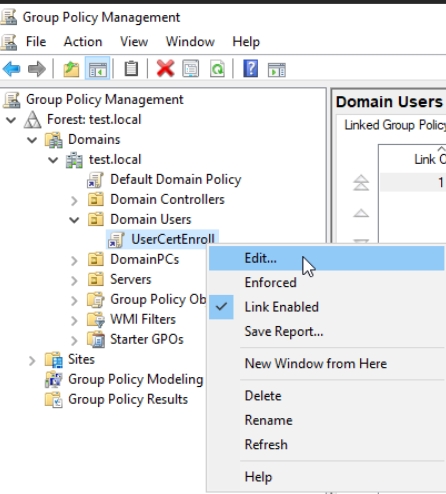
New GPO is created under Domain Users named UserCertEnroll – right click on it and select Edit…
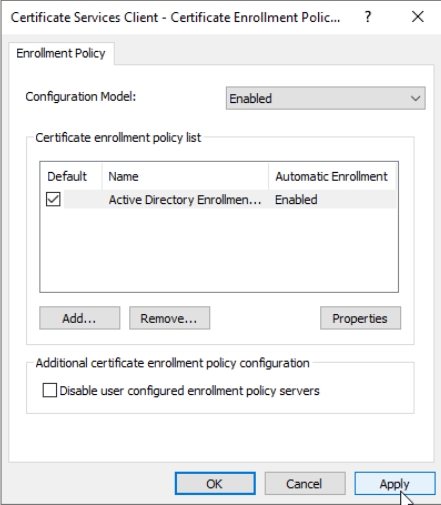
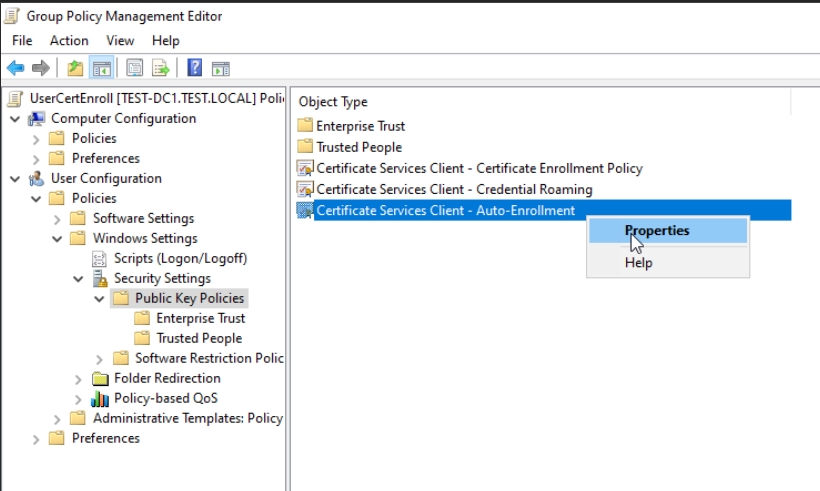
Navigate to User Configuration | Policies | Windows Settings | Security Settings | click on Public Key Policies. Select Certificate Services Client – Certificate Enrollment Policy and right click on it, select Properties
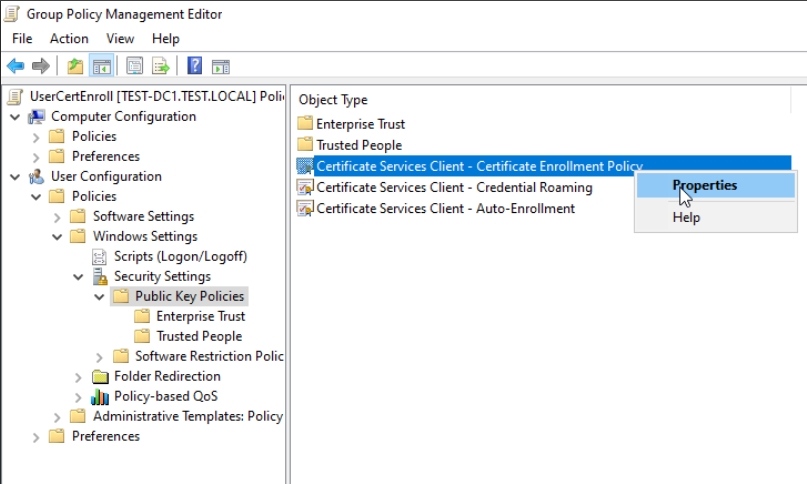
In Configuration Model click on Enabled, leave everything as is and press Apply | OK
Now, select Certificate Services Client – Auto-Enrollment – right click and select Properties
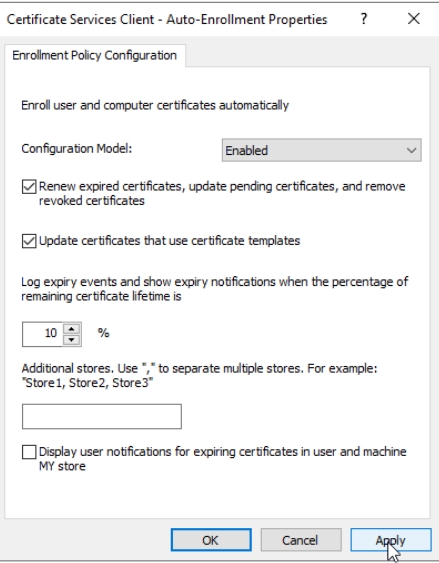
In Configuration Model select Enabled, and make sure that Renew expired certificates, update pending certificates… and Update certificates that use certificate templates is selected/enabled. Leave everything else default/as is. Apply | OK
We can now close Group Policy.
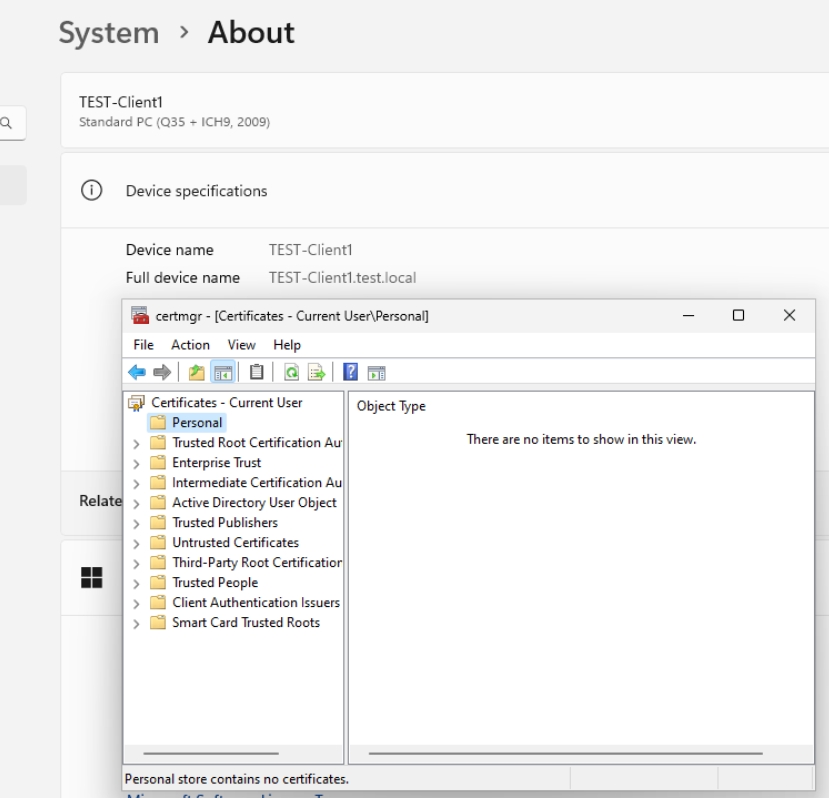
Now, I opened Local User Certificate Store on Client1 machine (Windows 11 with domain user) before configuring group policy. Start certmgr.msc on Client1 and check Personal store – empty
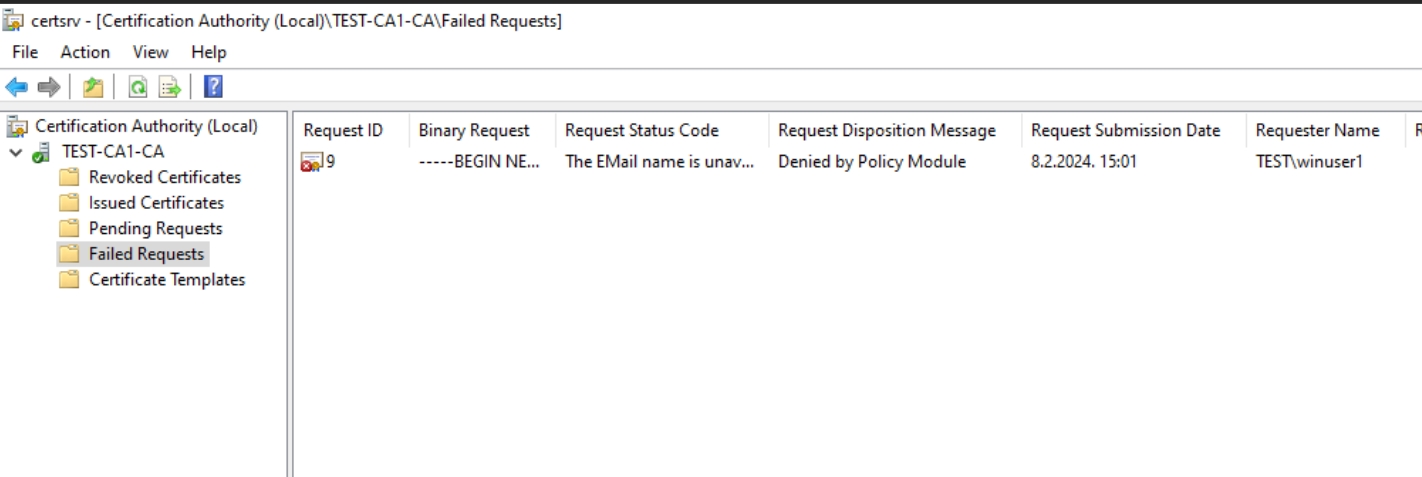
Now, even after some time I didn’t get certificate for my WinUser1, reason is simple, on CA1 server in Certification Authority console in failed requests I can see that certificate is denied because missing email. I did this on purpose, to demonstrate this problem. I will add email for winuser1.
Now, if you try from Certification Authority console on CA1 to reissue the certificate after you add email (by right clicking on it), you will get “The request is missing a required private key for archival by the server error 0x80094804. This is not how it is done in this case, simply reboot Client1 machine and login with winuser1 will do the trick and new certificate will be issued.
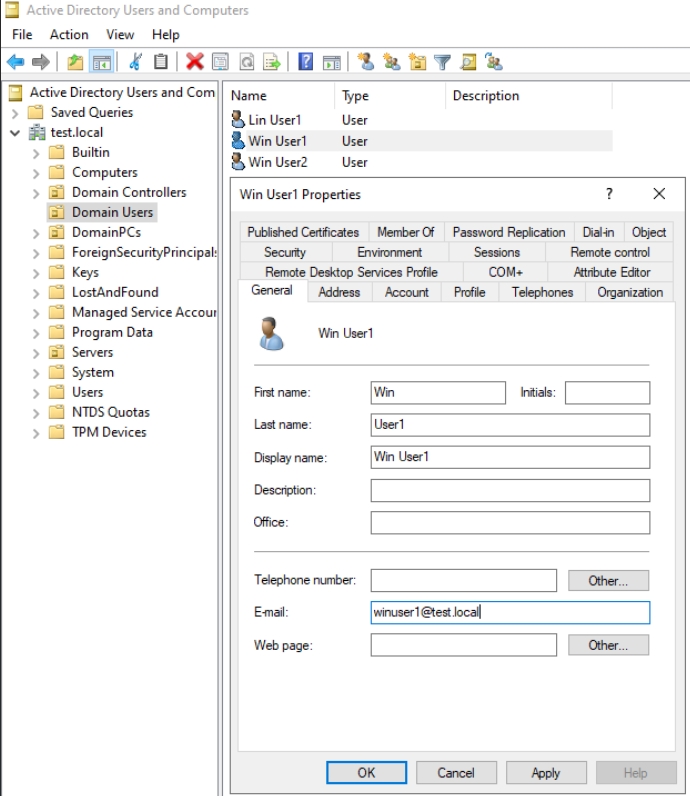
On DC1 I added email for winuser1
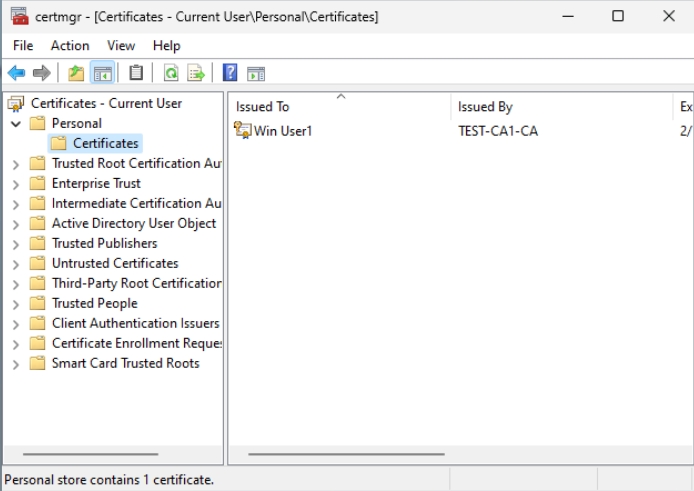
After reboot of Client1 machine and logging in again with winuser1 I can now see valid certificate.
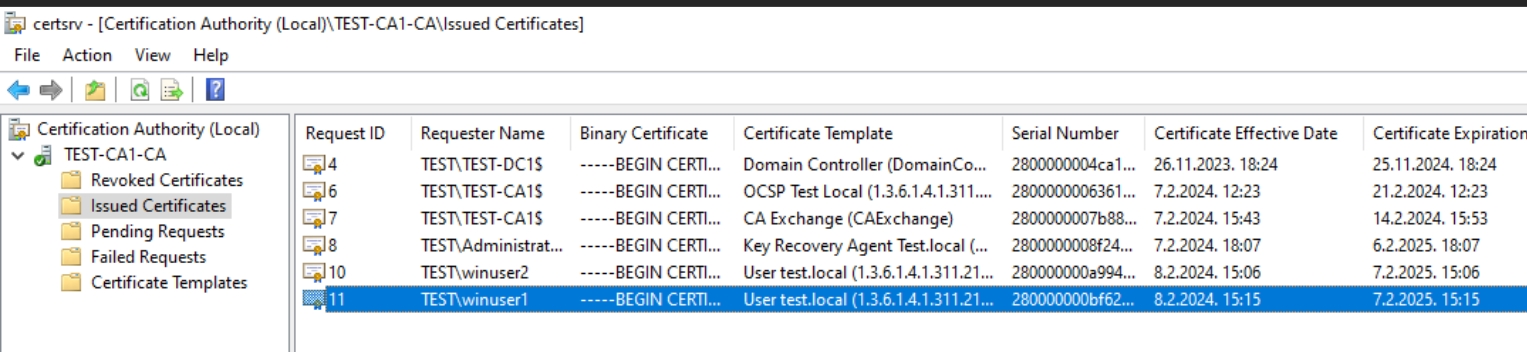
I can also see this certificate on CA1 in Certification Authority console under Issued Certificates
Now, we are done with this part, our user certificates are auto enrolled by User test.local template. Brilliant!
User Certificate Private Key Recovery
In the distant past, I had problems with lost private keys, and well, it wasn’t very pleasant, I lost access to my encrypted files. If you utilize User certificates, be aware that files can be lost, emails can be lost if encrypted with user keys. Also, if you use them for VPN, that will also be lost. You can issue new private key to user, but you won’t have access to content that was encrypted with old key.
We already set in previous parts private key recovery, and we added to User Template option to archive keys. Let’s check how to recover user private key.
I created Winuser3 account which is logged in into Client1 machine. We will now try to recover private key for Winuser3
On CA1 server in C:\ create C:\CertRecover directory
Now, open Certification Authority console (certsrv.msc) and expand console until you see Issued Certificates folder. We want to recover key for Winuser3, so we will right click on it and select Open
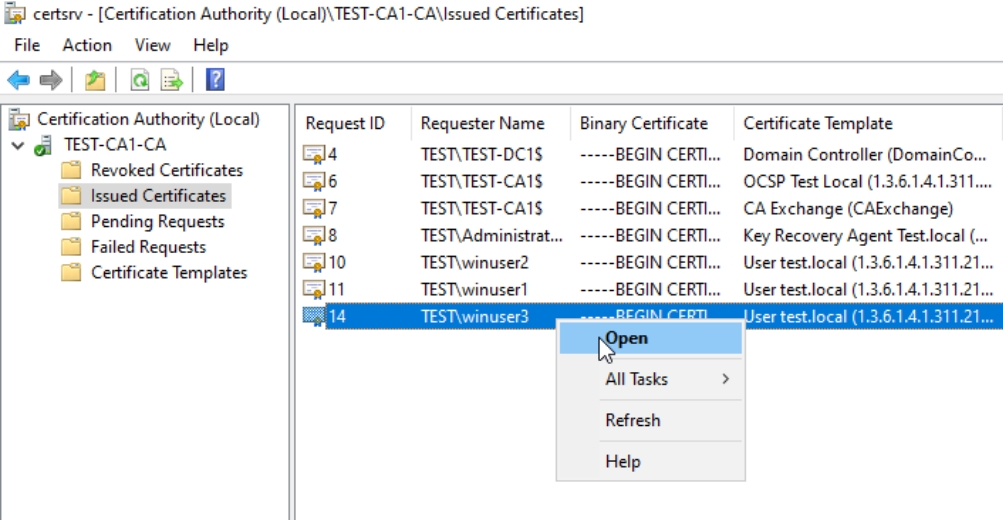
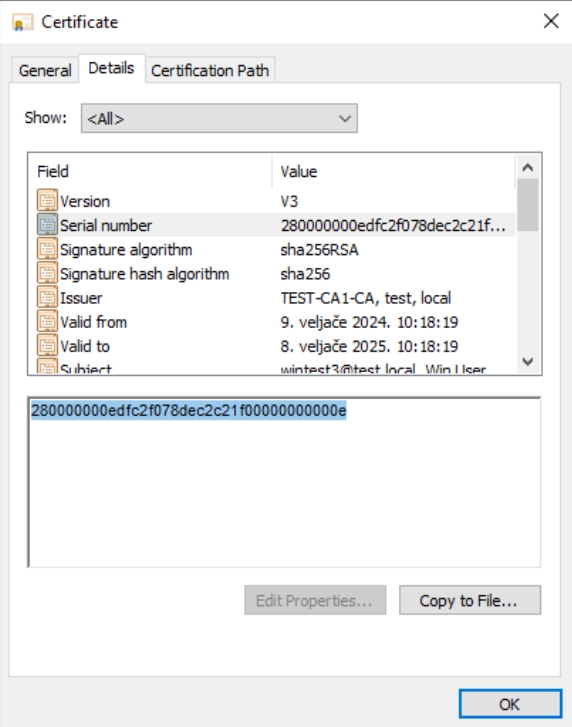
Find Serial number field, and copy serial number, stay on this screen, don’t close it.
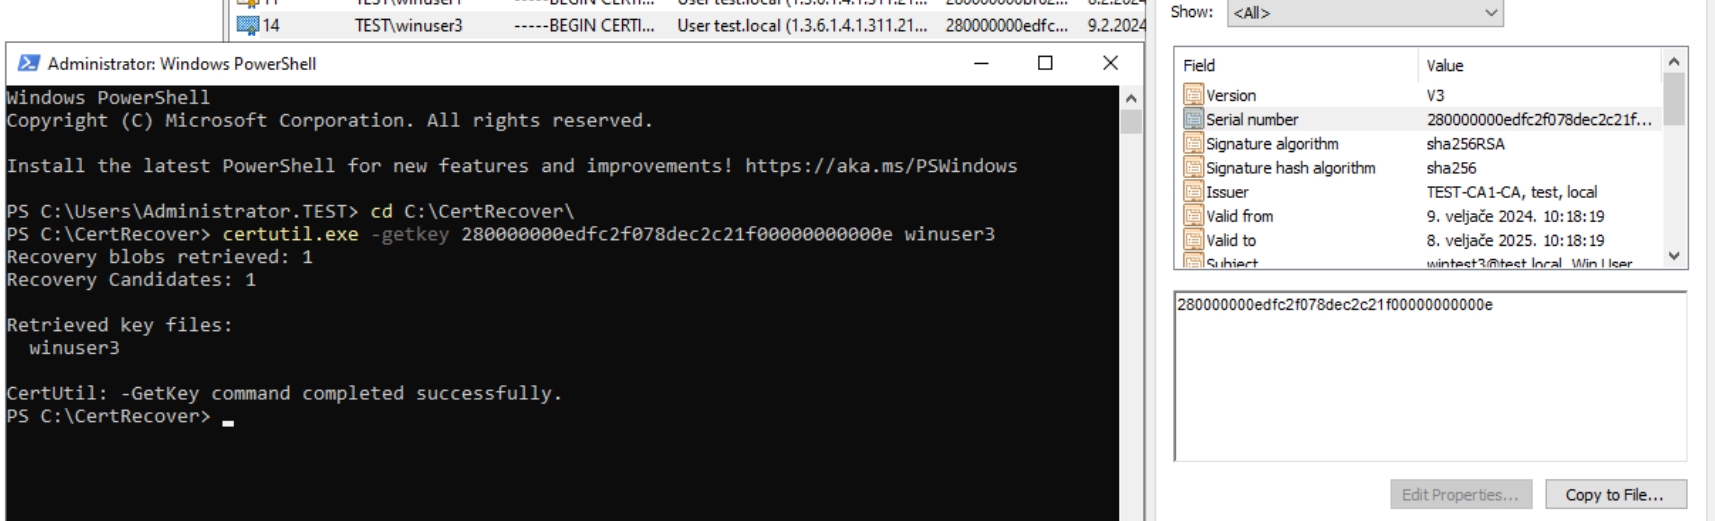
Open Powershell as admin and navigate to C:\CertRecover directory
Type in following command – change serialnumber to your serial which your retrieved, and username for the user which lost key.
certutil.exe -getkey serialnumberoftheuserkey usernamewhichlostkeyThis is how it looks in my case
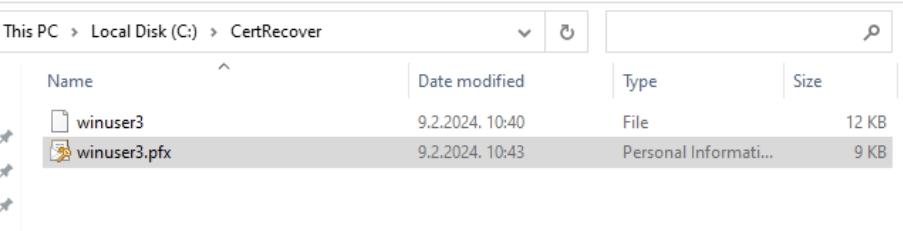
Ok, we only have now one file in C:\CertRecover folder, we will now convert it to .pfx file with following command. Change winuser3 for the username you added at first command.
You will be asked for a password to protect key, enter it, and remember it.
certutil.exe -recoverkey .\winuser3 winuser3.pfx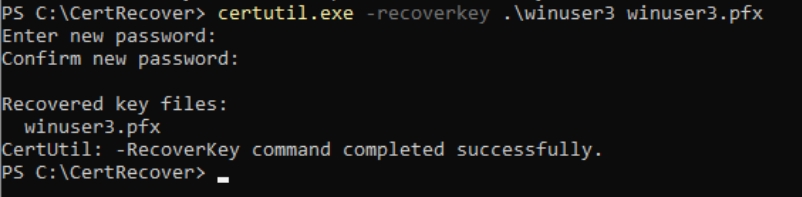
Now in C:\CertRecover on CA1 you can see private key for winuser3, now you can copy it to their PC and import it by right clicking on Personal store and selecting import in certmgr.msc.
I don’t have to emphasize that these certificates have to be stored safe and secure.
Computer Certificate Template Creation
Next, we will create Computer Certificate Template, it is primary used for machines and main uses are disk encryption, 802.1x authentication, VPN and MDM management.
This is separate certificate from User Certificate.
Following steps are done on CA1, procedure of how to get to Certificate Template is the same as in User Example.
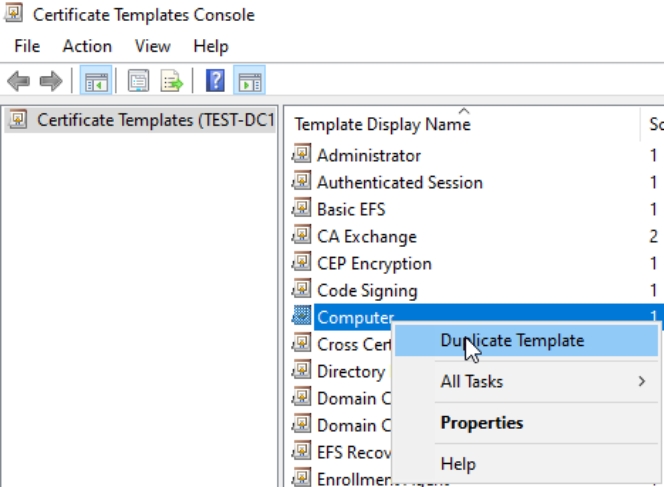
Duplicate Computer Template
Compatibility tab | Windows Server 2016, Windows 10 / Windows Server 2016

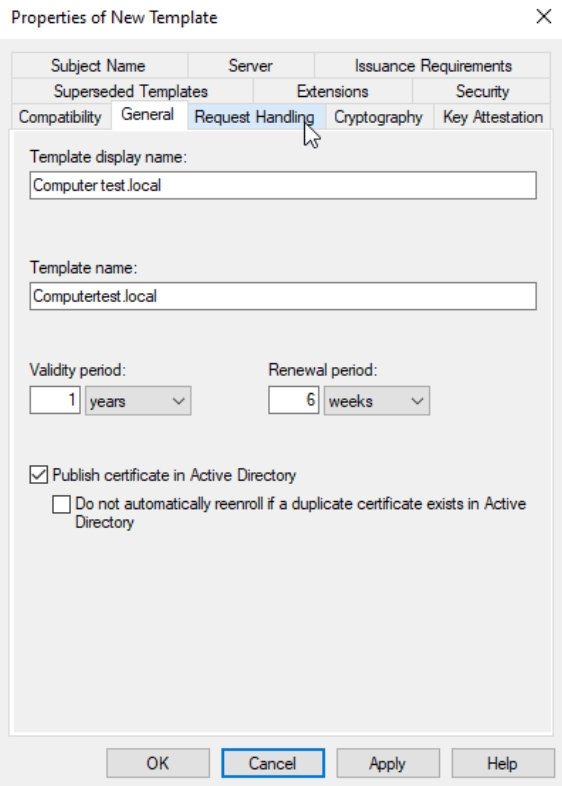
General tab | rename Template, Validity 1 year, Renewal 6 weeks, Enable/check Publish certificate in Active Directory
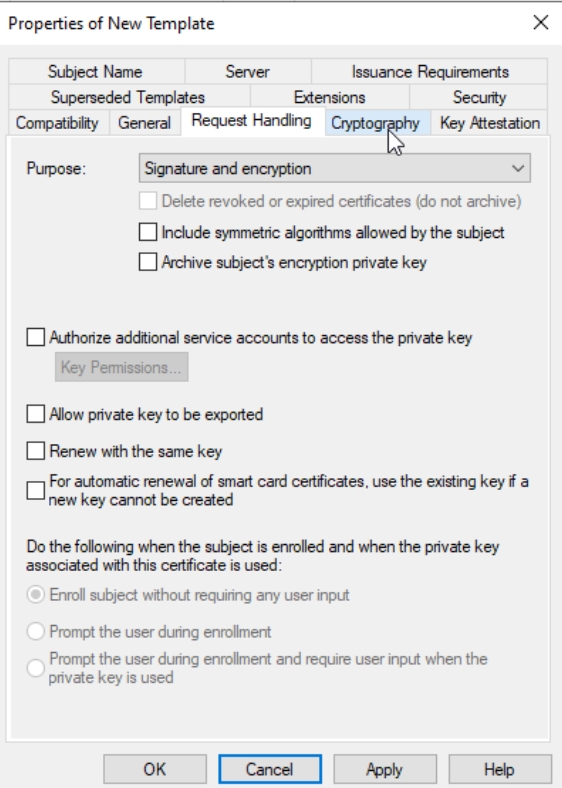
Request Handling | Purpose: Signature and encryption – everything else leave default.
Cryptography | Provider: Key Storage Provider | Algorithm: RSA | Minimum key size: 4096 | Request hash: SHA256
Security | TEST-CA1 computer (Click Add, under Object types select Computers, enter Computer Name, and Add it) – Read and Enroll permissions
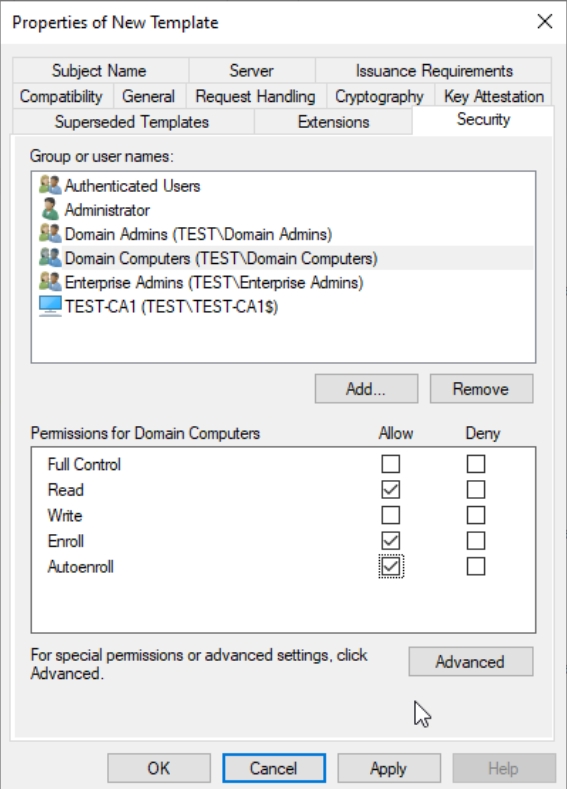
Domina Computers – Read, Enroll, Autoenroll
Click Apply, OK, to close console.
Navigate to Certificate Templates, right click, select New, Certificate Template To Issue, select template that we just created.

Press OK, to close, template is now issued.
Computer Certificate Auto-Enrollment
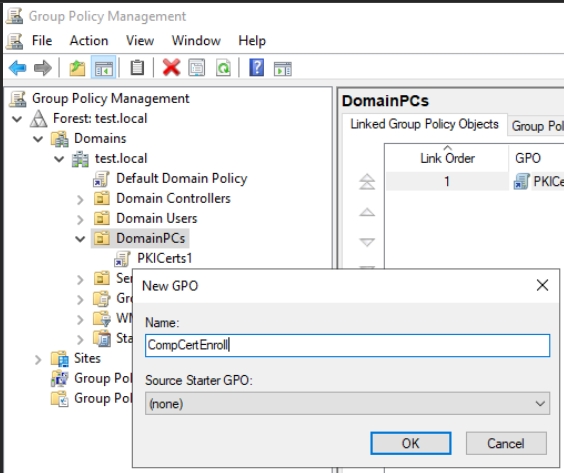
We will now add group policy rule so that our machines enroll automatically. Let’s start on DC1 by adding GPO to DomainPCs OU.
Start gpmc.msc
Right click on DomainPCs, select Create a GPO in this domain, name it and click OK. Now, right click on the created GPO (CompCertEnroll) and select Edit
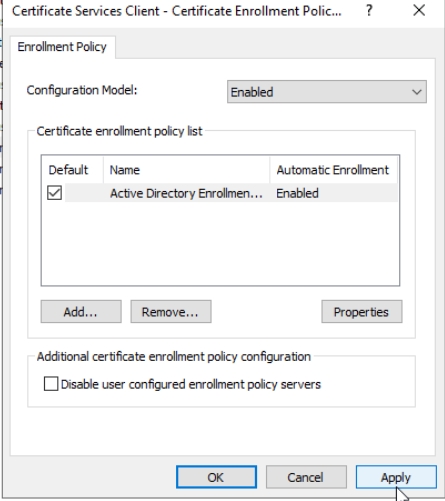
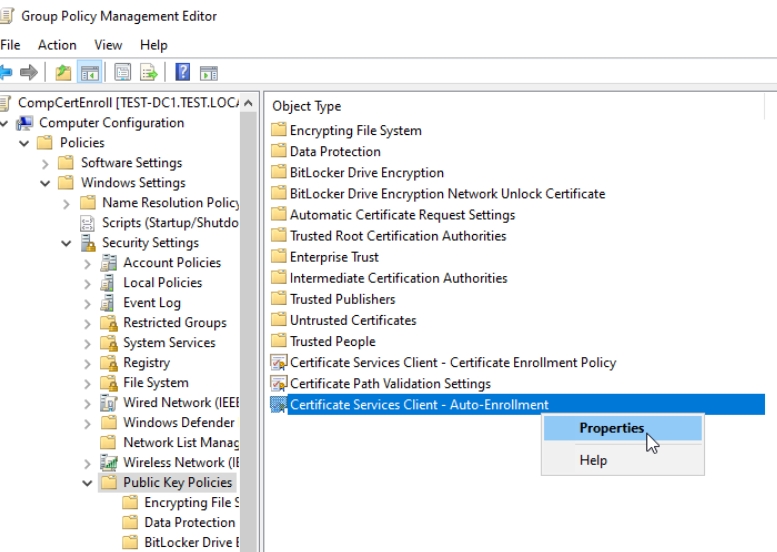
Navigate to Computer Configuration | Policies | Windows Settings | Security Settings | click on Public Key Policies. Select Certificate Services Client – Certificate Enrollment Policy and right click on it, select Properties

Configuration Model: Enabled – everything else by default – Apply | OK
Now, select Certificate Services Client – Auto-Enrollment – right click and select Properties
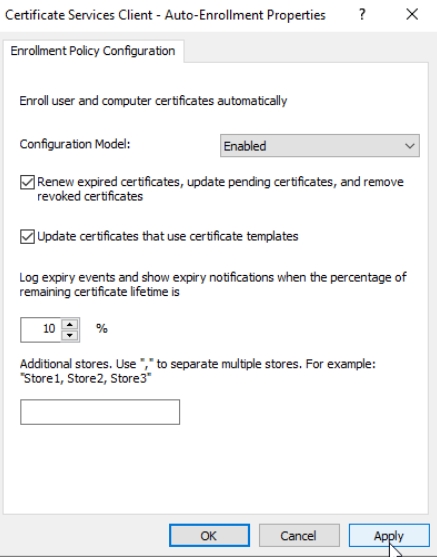
In Configuration Model select Enabled, and make sure that Renew expired certificates, update pending certificates… and Update certificates that use certificate templates is selected/enabled. Leave everything else default/as is. Apply | OK
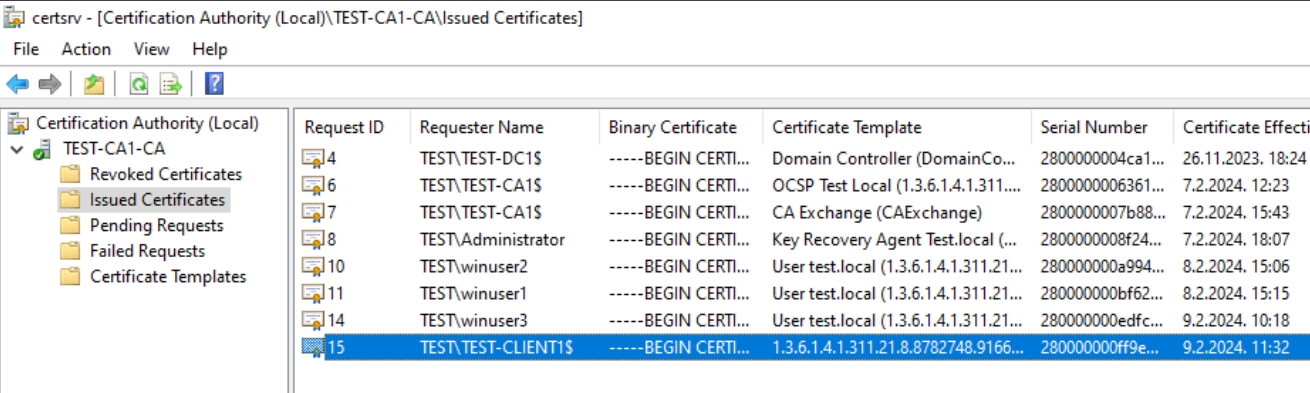
This will take some time to propagate, you can always force group policy update on Client machine by running gpupdate /force, and reboot client machine. On client machine you can check if certificate is added by running local machine certificates snap-in (certlm.msc), and check in Personal store. On CA1 it can be seen in Issued Certificates in Certification Authority console.
We did it nice

Web Server Certificate Template
Since this guide is getting way tooo long, this will be almost last topic we will cover in part 6
Web server certificate can be used to enable SSL on IIS, but also to manage Linux web servers. We covered User Template in details, if you are missing some step here, or not sure how I got to some screen, refer to that guide. I will mention here only important steps.
Right click on Web Server Template and select | Duplicate Template
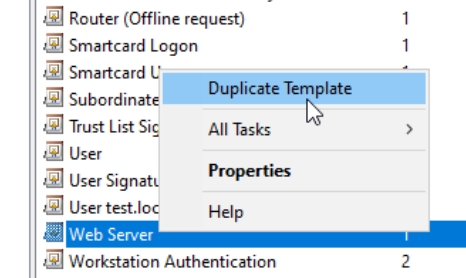
By now you should know the drill :)
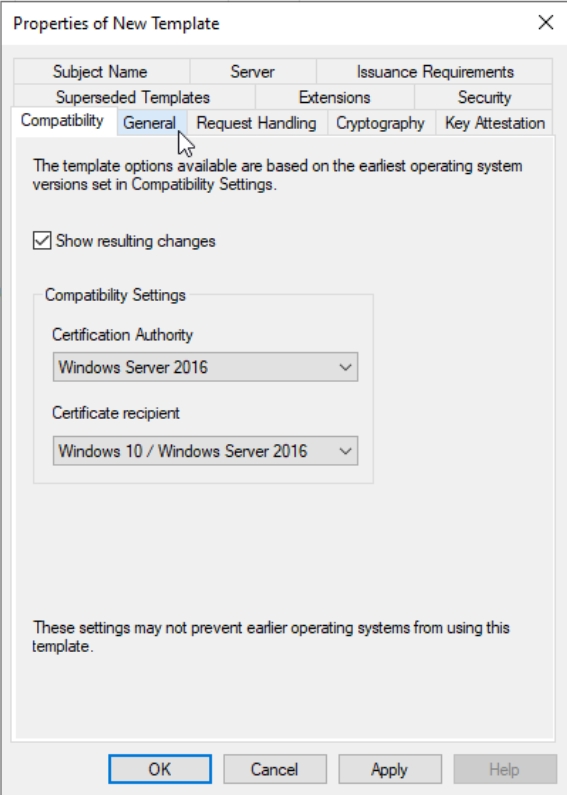
Compatibility tab | Windows Server 2016, Windows 10 / Windows Server 2016
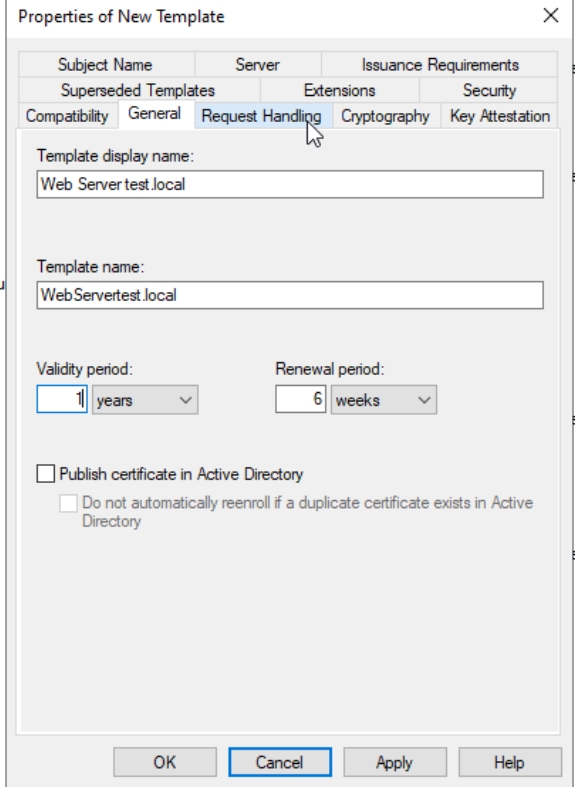
General tab | rename Template, Validity 1 year, Renewal 6 weeks .Leave everything else as is, don’t enable anything!!
Request Handling | Purpose: Signature and encryption – everything else leave default.

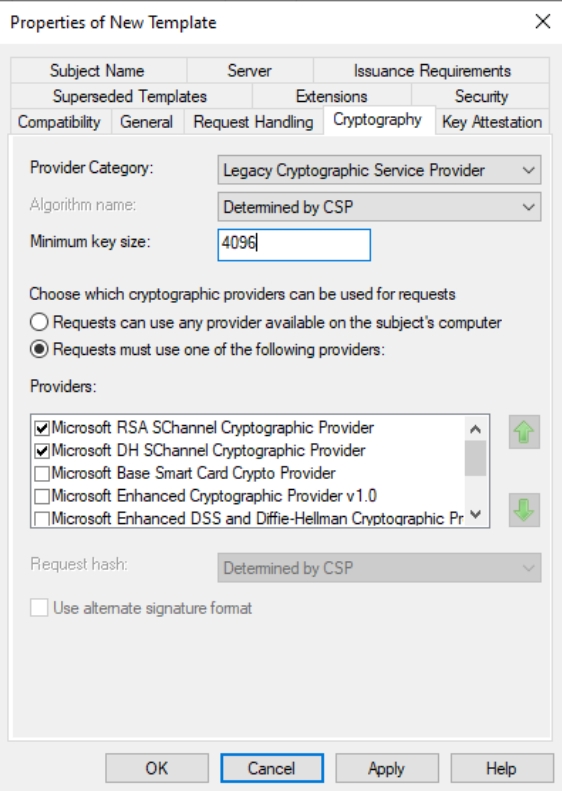
Leave Legacy Cryptographic Service Provider, Algorithm: Determined by CSP, Minimum key size: 2048 (you can leave 2048, I changed to 4096) – leave everything else as is.
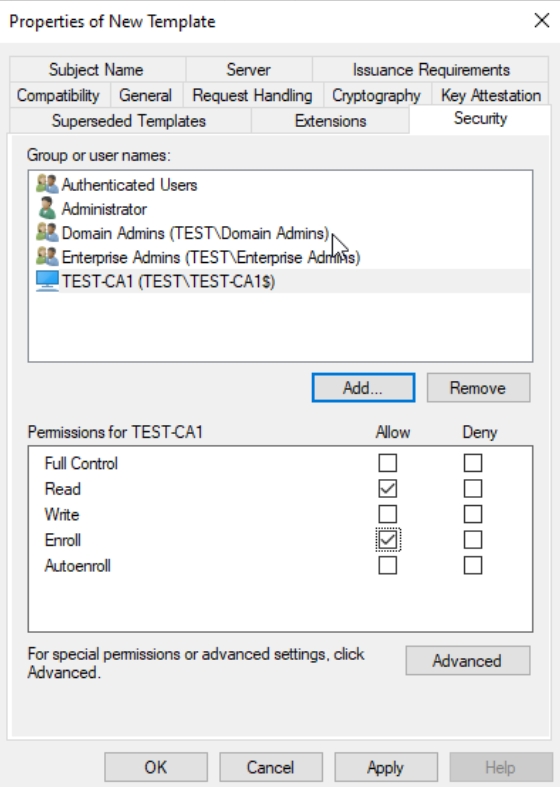
Security – Add TEST-CA1 (Click Add, under Object types select Computers, enter Computer Name, and Add it) – Read and Enroll permissions
Domain Admins – Read, Write, Enroll, Autoenroll permissions
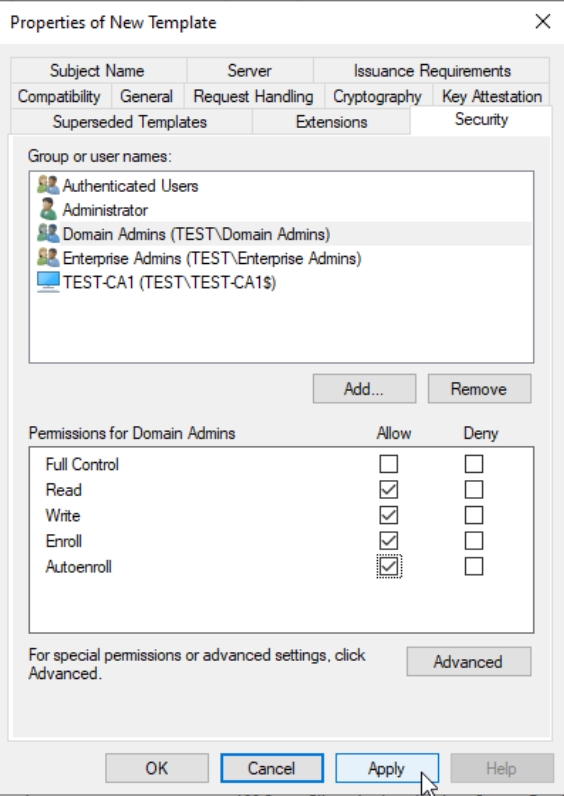
Click Apply and OK – we are done with the Web Server Template, we just need to publish it now.
If you wish, you can add other groups that can request Web Server certificate (IT dept, developers…), it does not to be only Domain Admins.
Navigate to Certificate Templates, right click, select New, Certificate Template To Issue, select template that we just created.
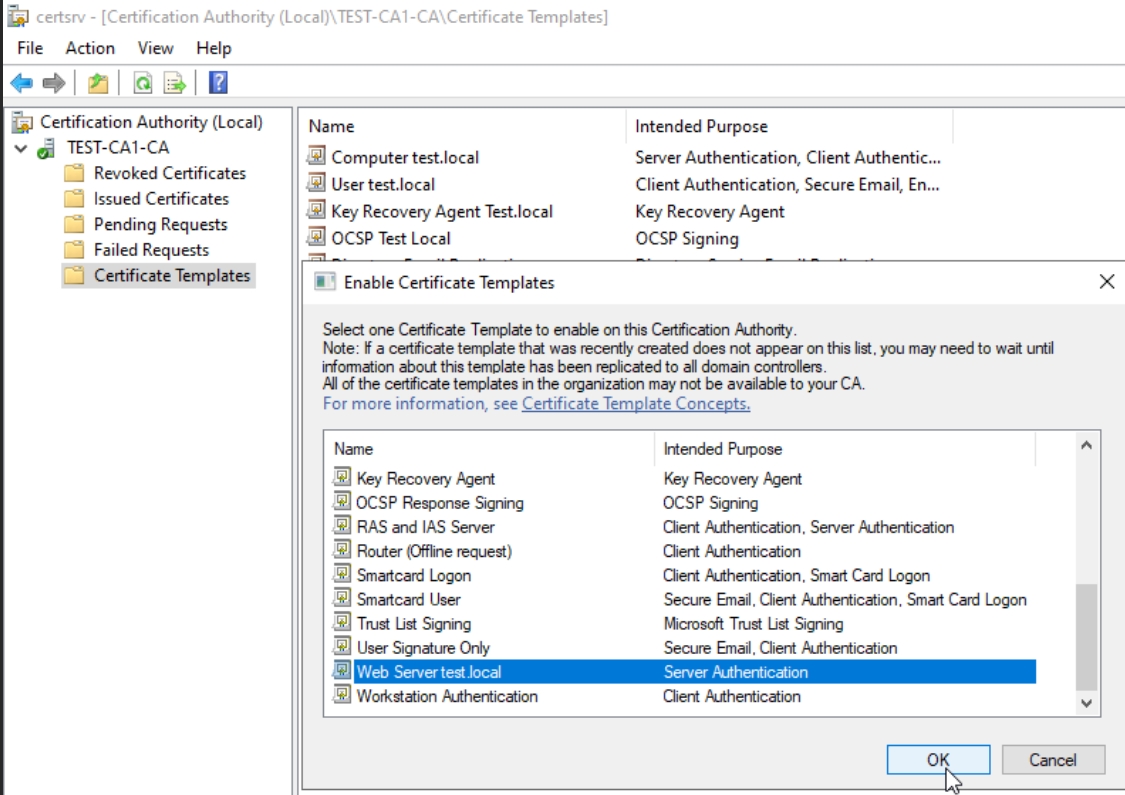
Ok, we are almost done.
If you need web server certificate for Linux, I won’t be describing it here, because I have few tutorials on that topic.
How to create certificate request on Linux – https://www.informaticar.net/how-to-renew-certificate-on-ubuntu/
Apache – How to install LAMP Stack – https://www.informaticar.net/install-lamp-stack-on-ubuntu-server-20-04/
Enable SSL on Apache / LAMP Stack – https://www.informaticar.net/enable-https-on-ubuntu-web-server-20-04/
Nginx – How to install LEMP Stack – https://www.informaticar.net/install-lemp-stack-on-ubuntu-22-04/
I think we are going to stop here, because, this is becoming too long. I will cover a few more topics regarding PKI on Windows Server, but for this one it is enough, we have templates for users, computers and web servers ready for our environment.
Implementing Two-Tier PKI on Windows Server 2022 – Part 1
Implementing Two-Tier PKI on Windows Server 2022 – Part 2
Implementing Two-Tier PKI on Windows Server 2022 – Part 3
Implementing Two-Tier PKI on Windows Server 2022 – Part 4
Implementing Two-Tier PKI on Windows Server 2022 – Part 5
Implementing Two-Tier PKI on Windows Server 2022 – Part 6 – you are here
Implementing Two-Tier PKI on Windows Server 2022 – Part 7