I’ve been creating my web services on LAMP stack (Linux,Apache,MySQL(MariaDB), PHP) for a long time. Nginx looks like good alternative in some scenarios (light, fast websites) so I’m more and more interested in using Nginx in some scenarios. So, here we will cover LEMP stack install (Linux, Nginx, MySQL(MariaDB), PHP). Nginx is pronounced sa Engine-X, so that is where E comes from in LEMP.
Let’s start.
Base for my LEMP stack will be latest version of Ubuntu Server 22.04 (22.04.3) at the time of writing.
Ubuntu
First, we will bring our installation up to date by running
sudo apt update
sudo apt upgrade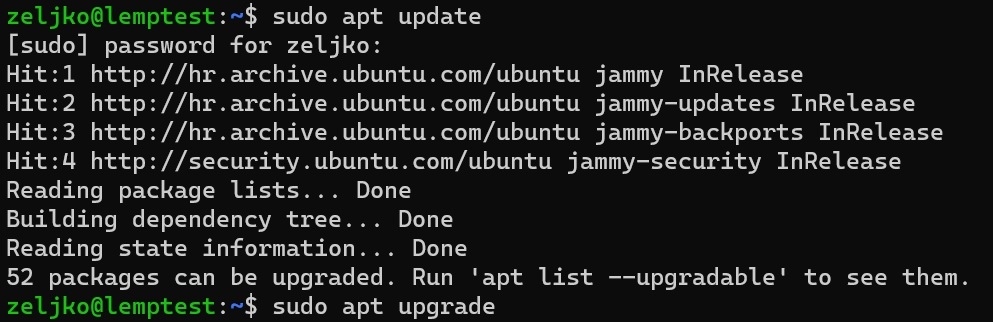
After all packages are up to date, we can continue further.
Nginx install
Next component we will install is NginX. In case you are looking at this at some distant future, you can look at the reference documentation at this link.
We will install Prebuild Stable release, and we will use Official Nginx Repo install, it is useful. We have a bit more work in the beginning, but later on it will be easier to maintain and update.
Check again before beginning for Ubuntu updates
sudo apt update
sudo apt upgrade
Let’s begin
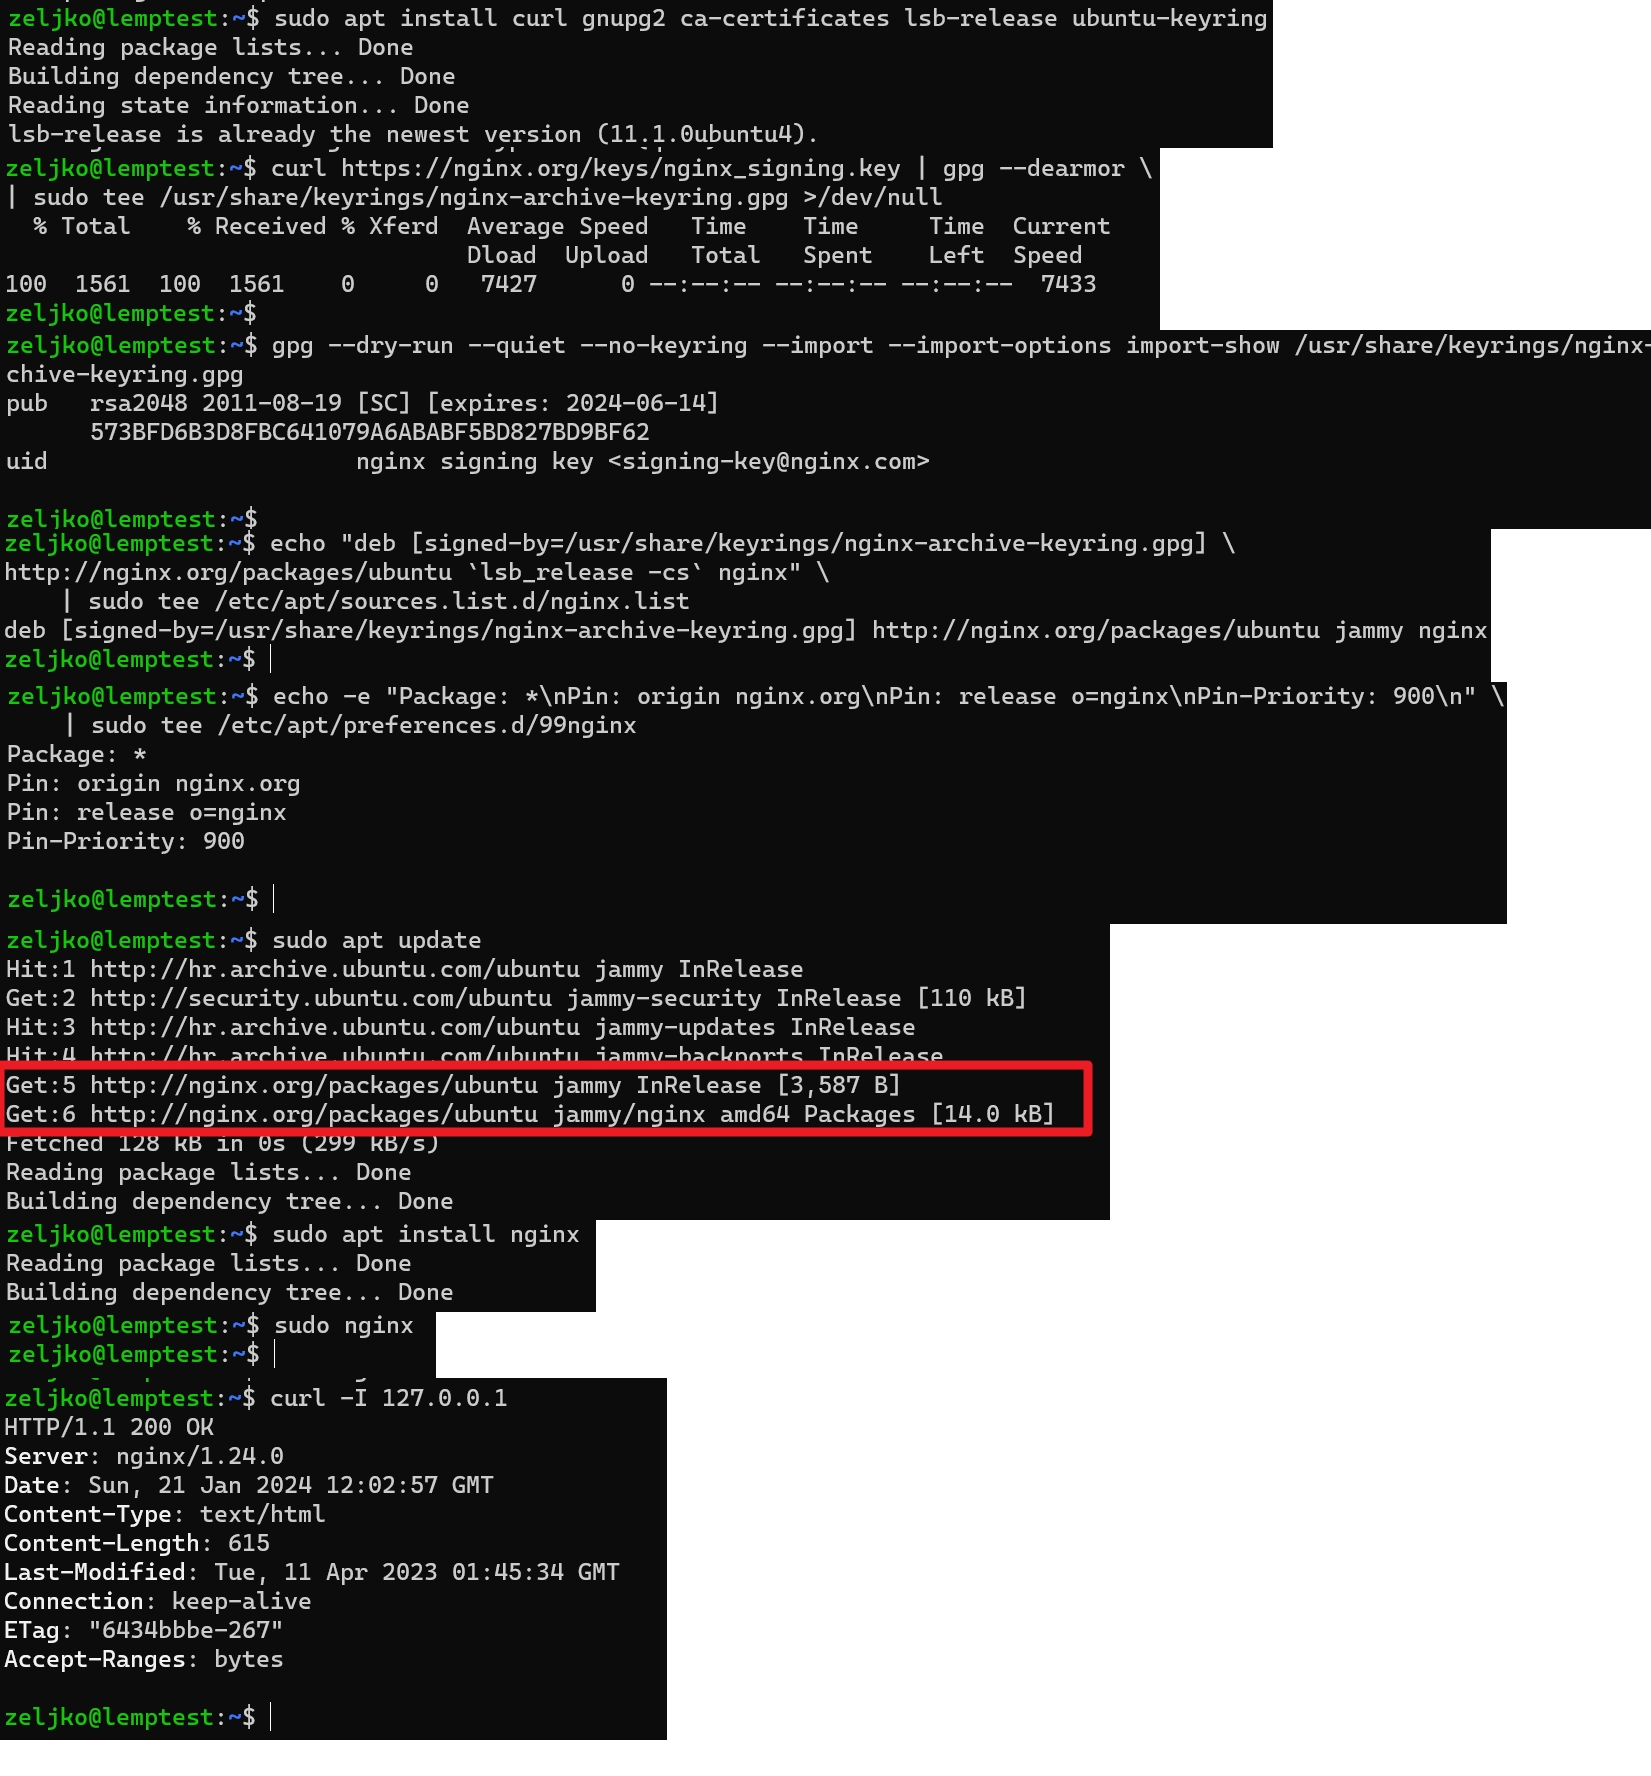
sudo apt install curl gnupg2 ca-certificates lsb-release ubuntu-keyringConfirm installations by pressing y and just select ok if you have some pop-ups along the installer.
Next command, we will import official nginx signing key so apt could verify the packages authenticity
curl https://nginx.org/keys/nginx_signing.key | gpg --dearmor \
| sudo tee /usr/share/keyrings/nginx-archive-keyring.gpg >/dev/null
Now we need to verify that we have a proper key
gpg --dry-run --quiet --no-keyring --import --import-options import-show /usr/share/keyrings/nginx-archive-keyring.gpgCurrent output (valid until 14.06.2024) should have. You can always check current value at this link under Ubuntu section.
573BFD6B3D8FBC641079A6ABABF5BD827BD9BF62Now we will set apt repo for STABLE Nginx packages
echo "deb [signed-by=/usr/share/keyrings/nginx-archive-keyring.gpg] \
http://nginx.org/packages/ubuntu `lsb_release -cs` nginx" \
    | sudo tee /etc/apt/sources.list.d/nginx.list
We now have to pin Nginx packages to prefer them over distro ones
echo -e "Package: *\nPin: origin nginx.org\nPin: release o=nginx\nPin-Priority: 900\n" \
    | sudo tee /etc/apt/preferences.d/99nginx
We will refresh repos now and install Nginx. Repos should now also list Nginx. Confirm prompts that will pop-up during install.
sudo apt update
sudo apt install nginx
Let’s start the Nginx
sudo nginxAnd finally, let’s check if Nginx is running
curl -I 127.0.0.1It, is, we are at the 1.24.1 version
On this link you can always check what the latest version is, and latest stable version at the time of writing is 1.24.1
Here is one big image of entire process.
Set permissions on important folders
www-data user should be owner of /usr/share/nginx folder and subfolders, let’s enter the command
sudo chown www-data:www-data /usr/share/nginx/ -R
sudo chown www-data:www-data /usr/share/nginx/html -R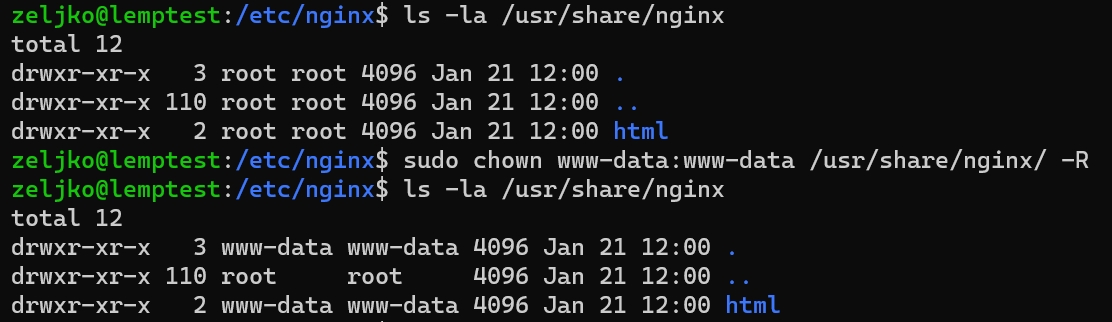
Set Nginx to start after server reboot or shutdown
sudo systemctl status nginx
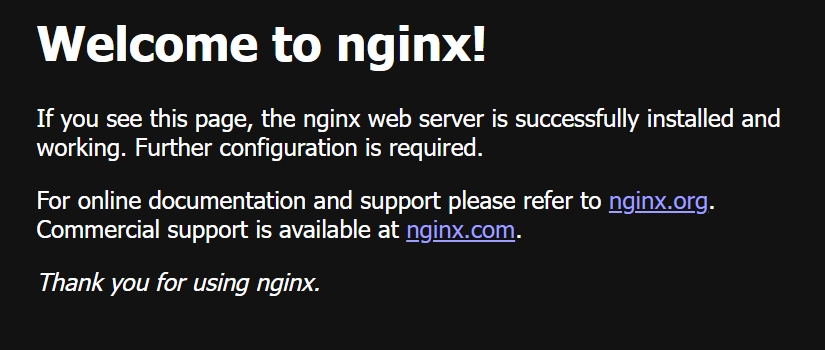
sudo systemctl enable nginxWe are done with Nginx install. If you enter in your browser http://YourLocalIPAddressOfNginxInstall you’ll get
Nginx Firewall rules
I use ufw, so my rules will be
sudo ufw allow http
sudo ufw allow https

To check status of the firewall
sudo ufw status

Before enabling firewall, check if you have other vital rules added, like ssh, so you don't cut yourself out of the server

sudo ufw allow ssh

Or custom ports, like for example 222

sudo uf allow 222

To enable firewall
sudo ufw enable
Important Nginx locations
/etc/nginx/conf.d – will host configuration files for you website
/usr/share/nginx/ – will host website itself at this location.
We are now done with web server component.
Install MariaDB
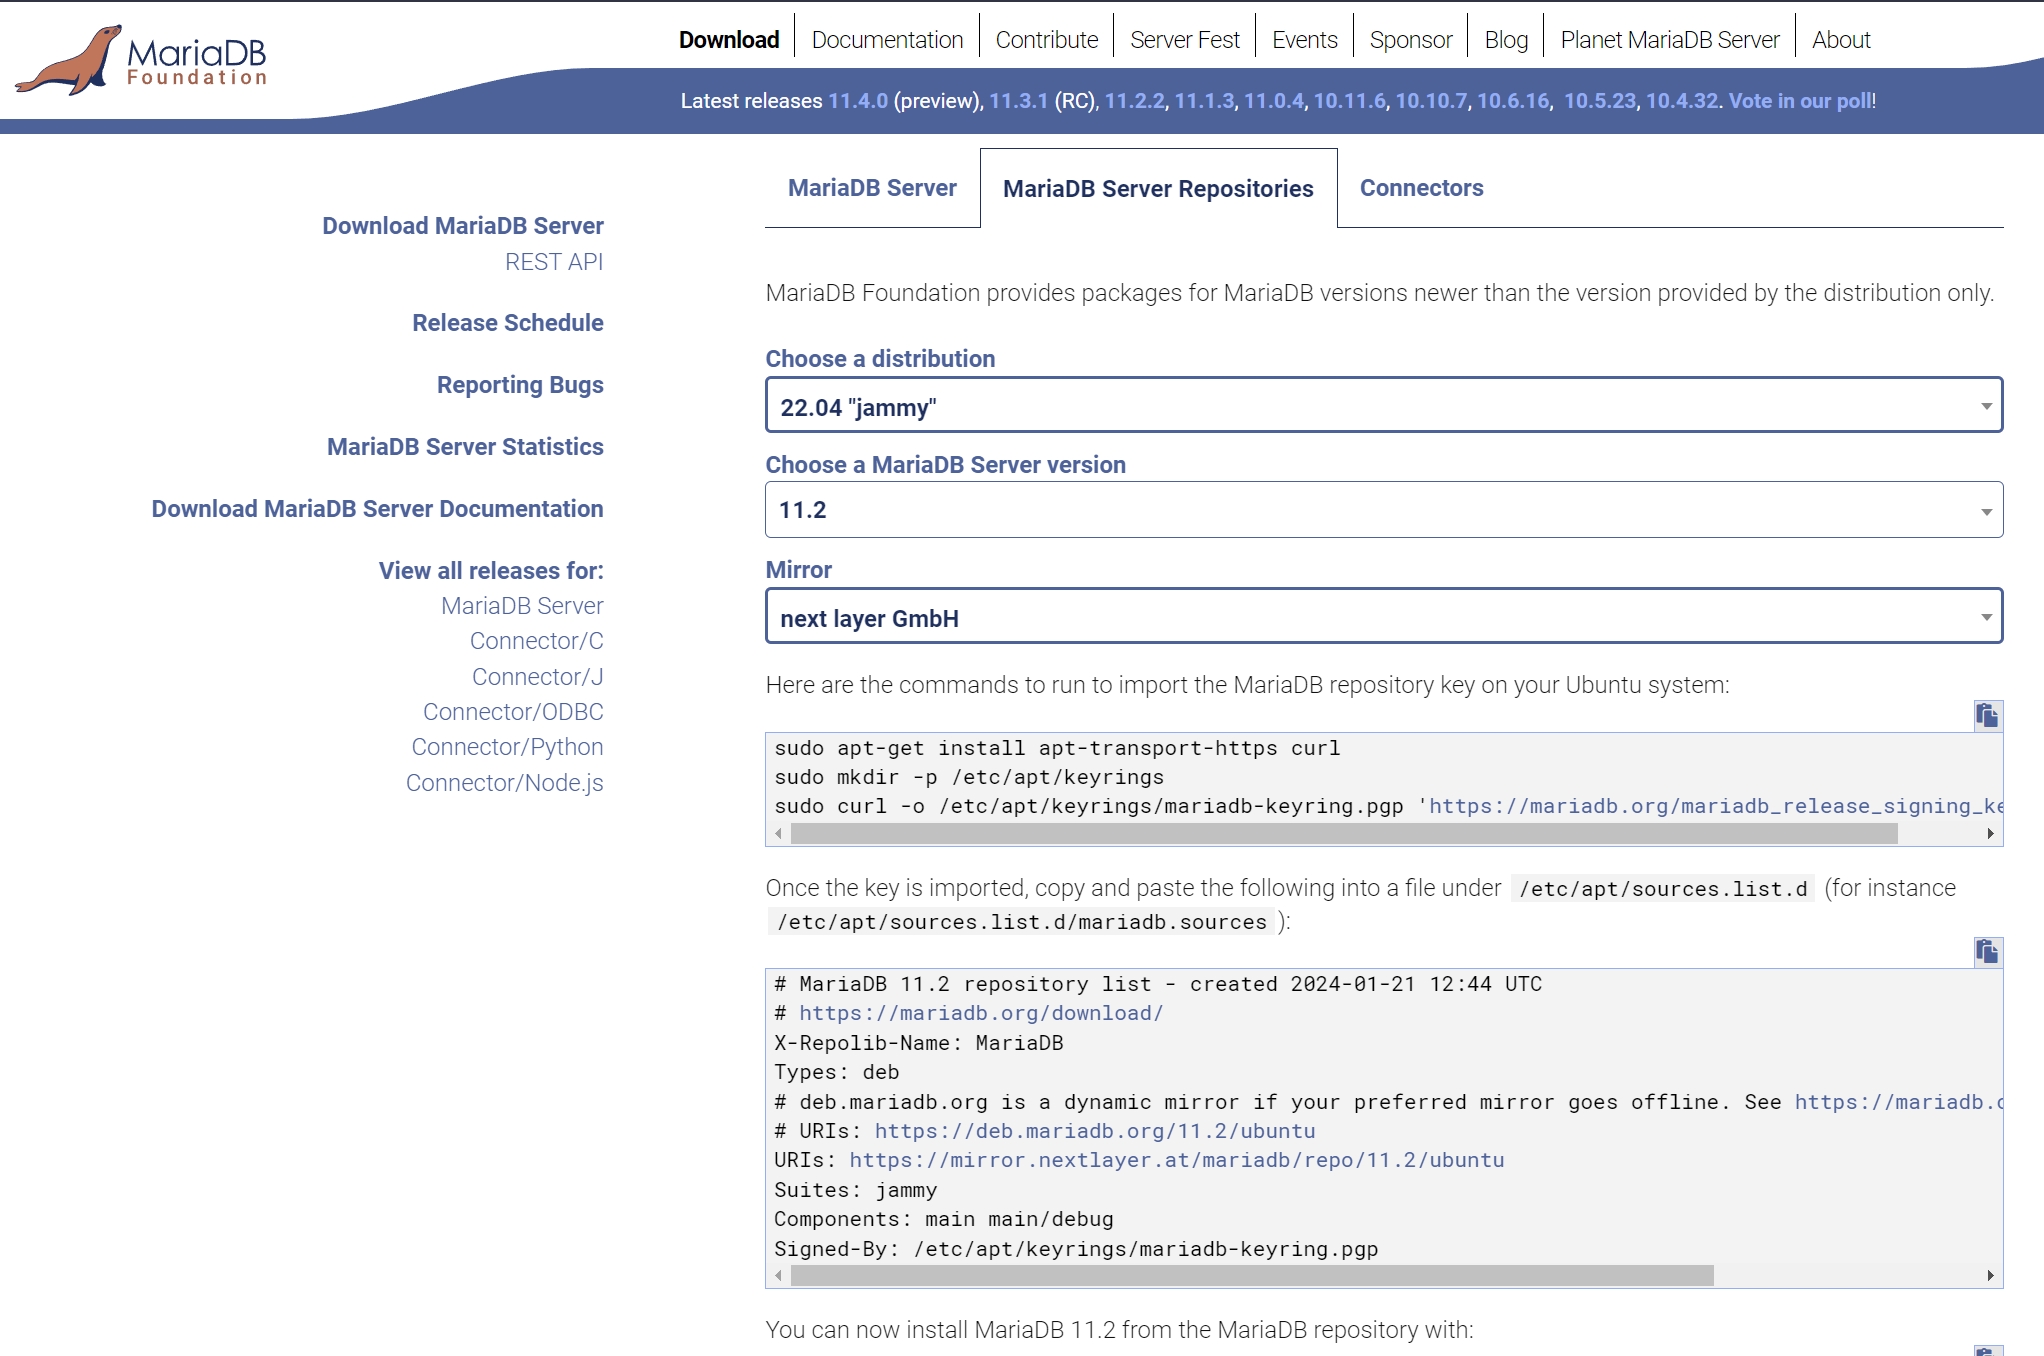
We will install MariaDB directly from the source, not from default Ubuntu repos. Ubuntu LTS doesn’t have latest version installed. Here is how we will install it. First, go to the MariaDB Server Repositories website and there select your OS and version of MariaDB to install. I will select Ubuntu 22.04 jammy and MariaDB 11.2 which is latest stable. Under Mirrors, select the one closest to your location.
Be sure to check this site from time to time, this will change with future OS and MariaDB versions…
We will now run three first commands: (confirm with y and ok if needed)
sudo apt-get install apt-transport-https curl

sudo mkdir -p /etc/apt/keyrings

sudo curl -o /etc/apt/keyrings/mariadb-keyring.pgp 'https://mariadb.org/mariadb_release_signing_key.pgp'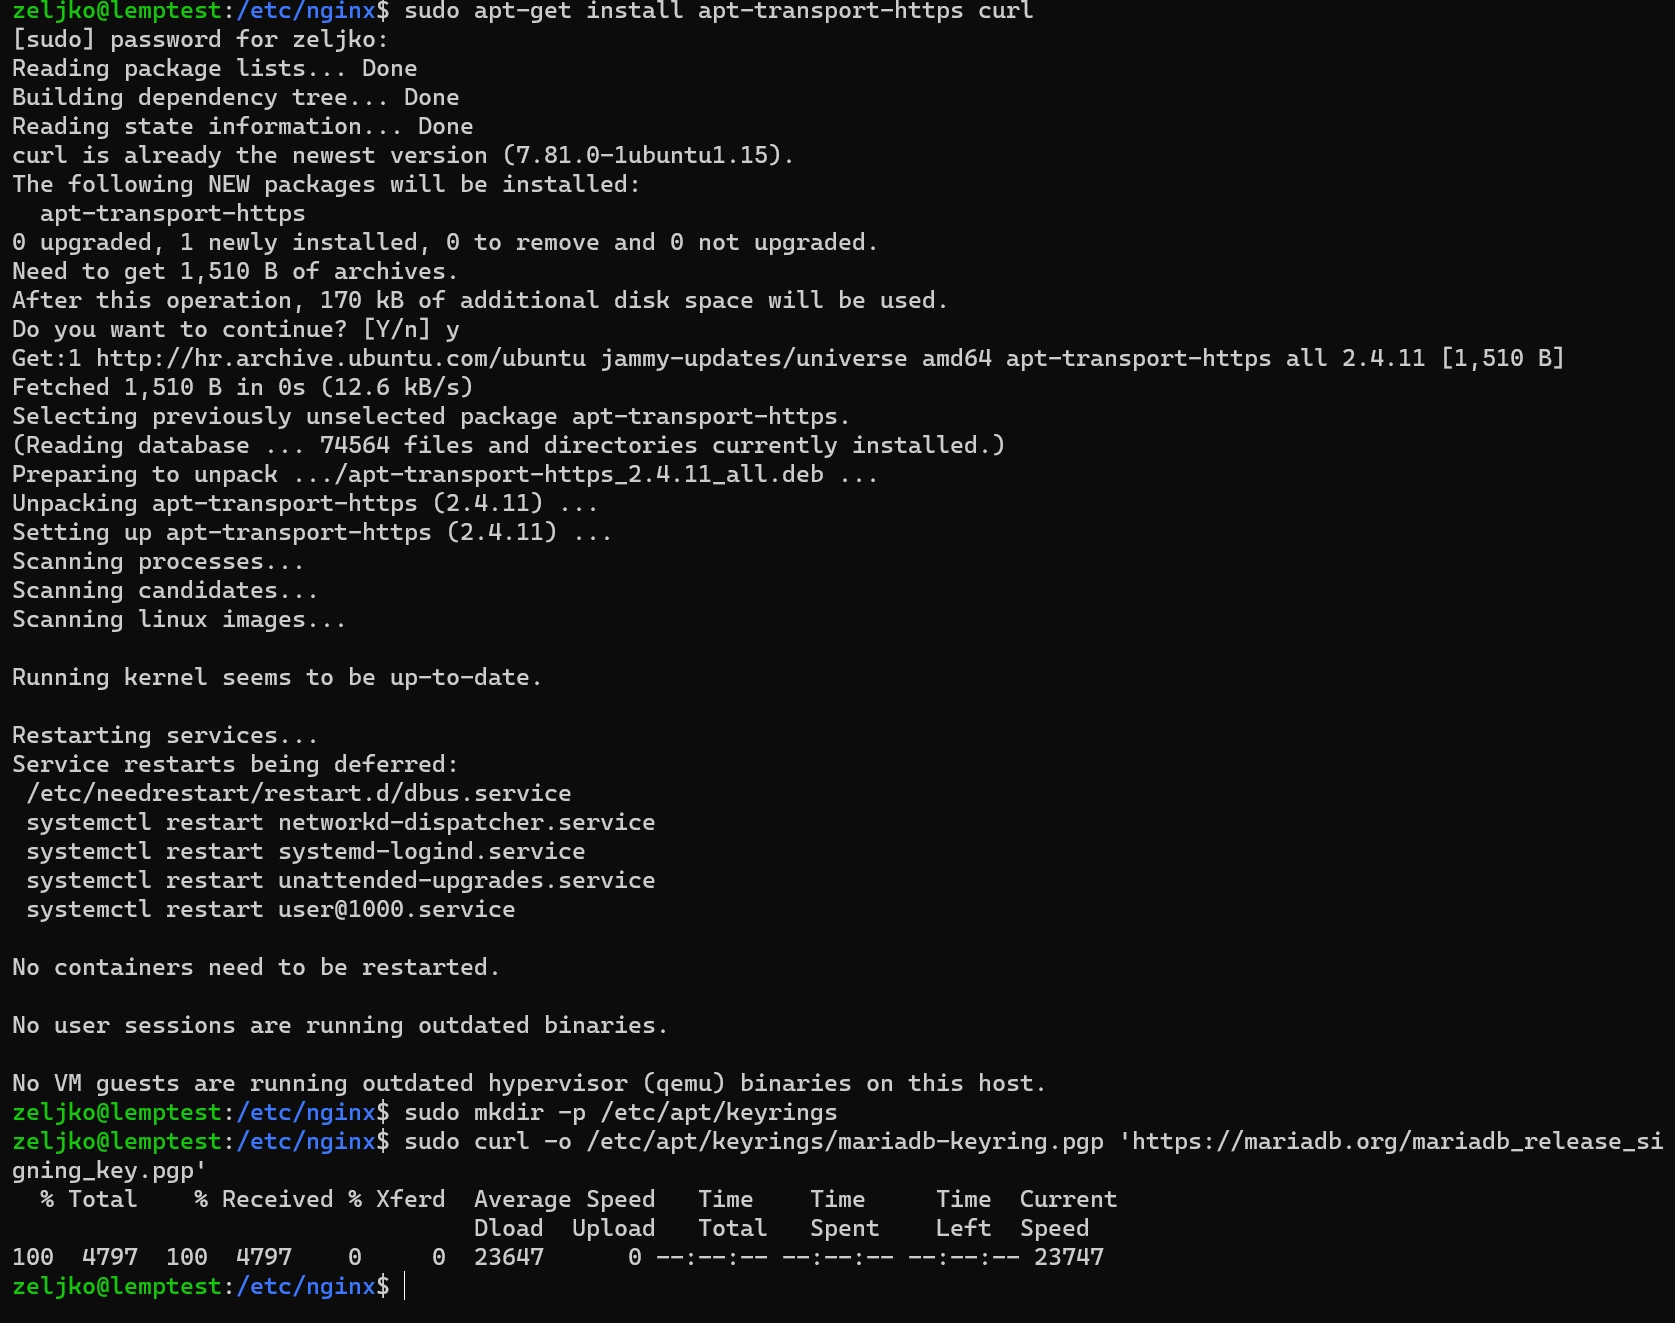
Now, we will edit sources list, by running following
sudo nano /etc/apt/sources.list.d/mariadb.sources
And paste following
# MariaDB 11.2 repository list - created 2024-01-21 12:44 UTC
# https://mariadb.org/download/
X-Repolib-Name: MariaDB
Types: deb
# deb.mariadb.org is a dynamic mirror if your preferred mirror goes offline. See https://mariadb.org/mirrorbits/ for details.
# URIs: https://deb.mariadb.org/11.2/ubuntu
URIs: https://mirror.nextlayer.at/mariadb/repo/11.2/ubuntu
Suites: jammy
Components: main main/debug
Signed-By: /etc/apt/keyrings/mariadb-keyring.pgp
Save file and exit
Now we will run following
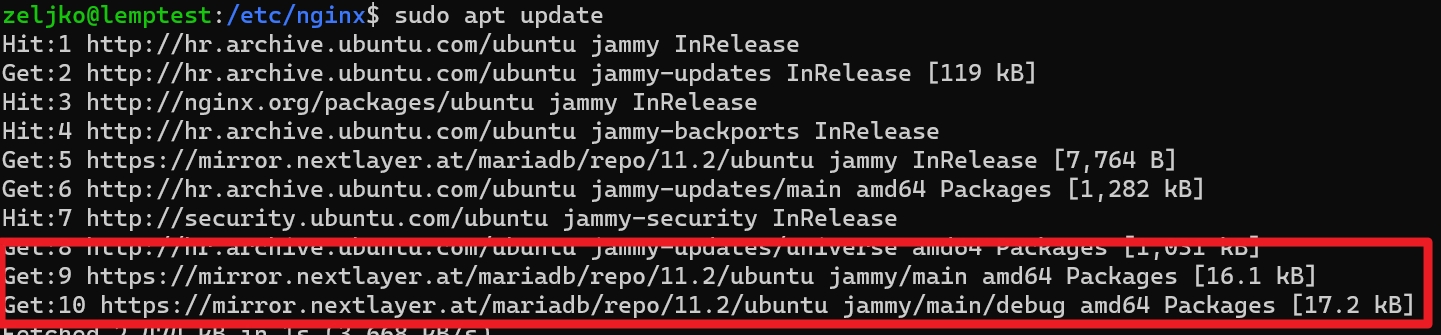
sudo apt update
sudo apt-get install mariadb-server
We can now see MariaDB repos added after we ran sudo apt update
Let’s check if MariaDB is running
sudo systemctl status mariadb
Now we will enable the MariaDB to start after reboot or shutdown
sudo systemctl enable mariadbWe will now secure our MariaDB installation
sudo mysql_secure_installation
You will probably ask yourself, why did I skip setting root password – that is very dangerous security oversight. For 10.4 MariaDB uses Unix socket authentication, so there is no need for setting root password.

First press Enter
Second – n
Third – n
Remove anonymous users – y
Disallow root login remotely – y
Remove test database – y
Reload privilege tables – y

To login to MariaDB use
sudo mariadb -u root
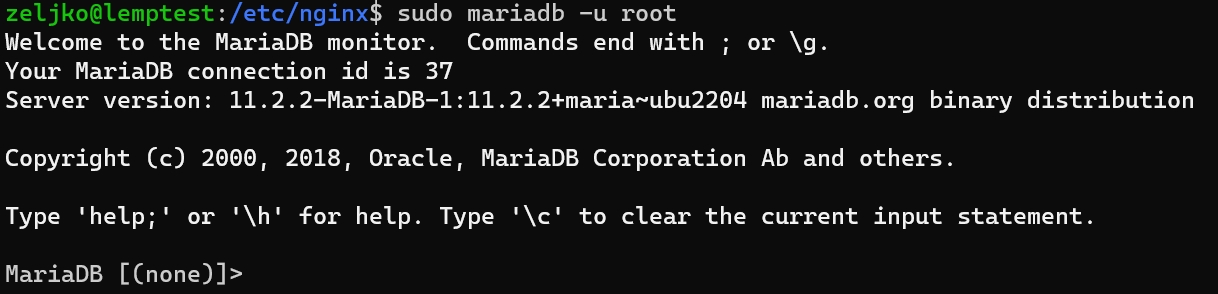
To exit type – exit
Install PHP
Last component we need is PHP. Current version is 8.3
First, we will add another repo, which will help us automatically update PHP and download new versions. Be aware, when new PHP is downloaded and installed, you may have issues with your web components, and may need to reconfigure them or attach to them new PHP. Just have that in mind.
We will now add new repo
sudo add-apt-repository ppa:ondrej/php
sudo apt-get update
We will now install PHP. Have in mind if you will install WordPress, Nextcloud or some other web service, you may also need additional PHP components which are not installed here.
sudo apt install php8.3 php8.3-fpm php8.3-mysql php-common php8.3-cli php8.3-common php8.3-opcache php8.3-readline php8.3-mbstring php8.3-xml php8.3-gd php8.3-curl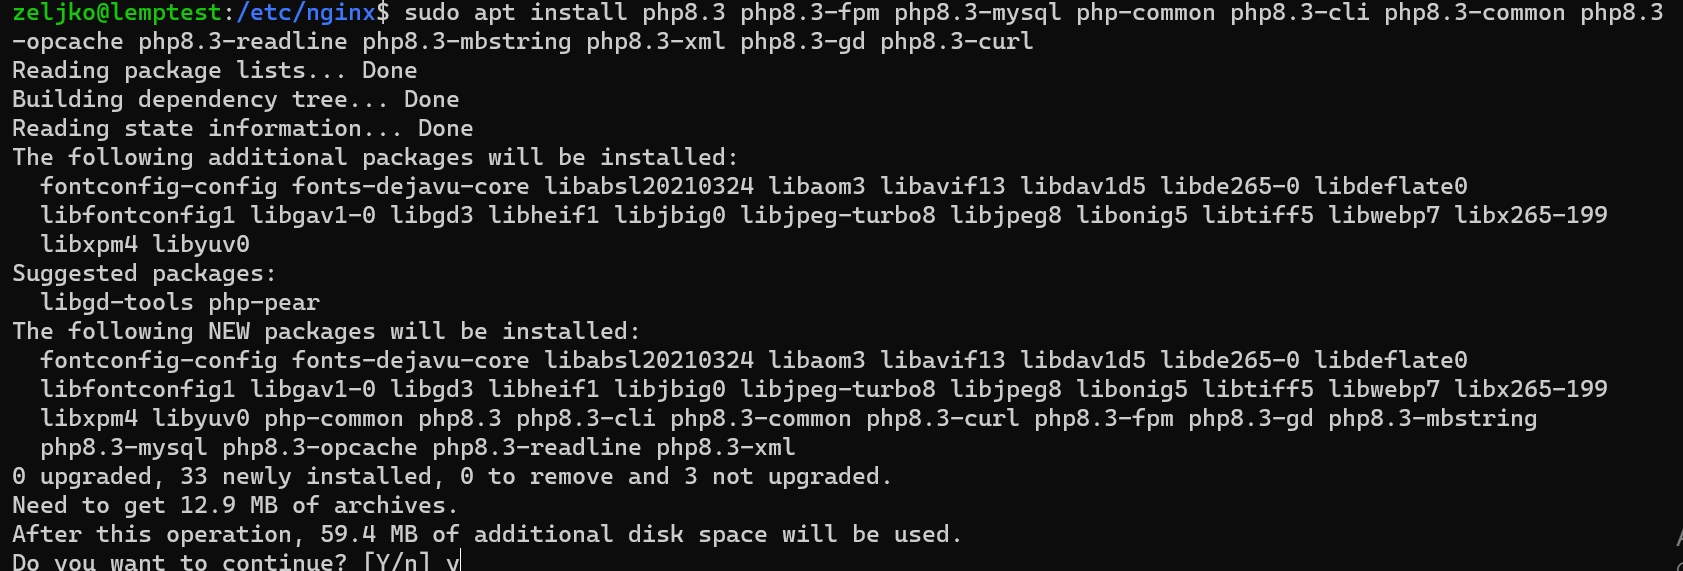
To check php8.3-fpm status and enable it on startup type in following
sudo systemctl status php8.3-fpm
sudo systemctl enable php8.3-fpm
Now, before we test PHP, there is one important thing to do – PHP doesn’t play nice with Nginx out of the box, like Apache does, so we need to configure couple of things first.
Configure Nginx to work with PHP
First, we will head to /etc/php/8.3/fpm/php.ini and change uncomment line cgi.fix_pathinfo and change value from 1 to 0
sudo nano /etc/php/8.3/fpm/php.ini
cgi.fix_pathinfo=0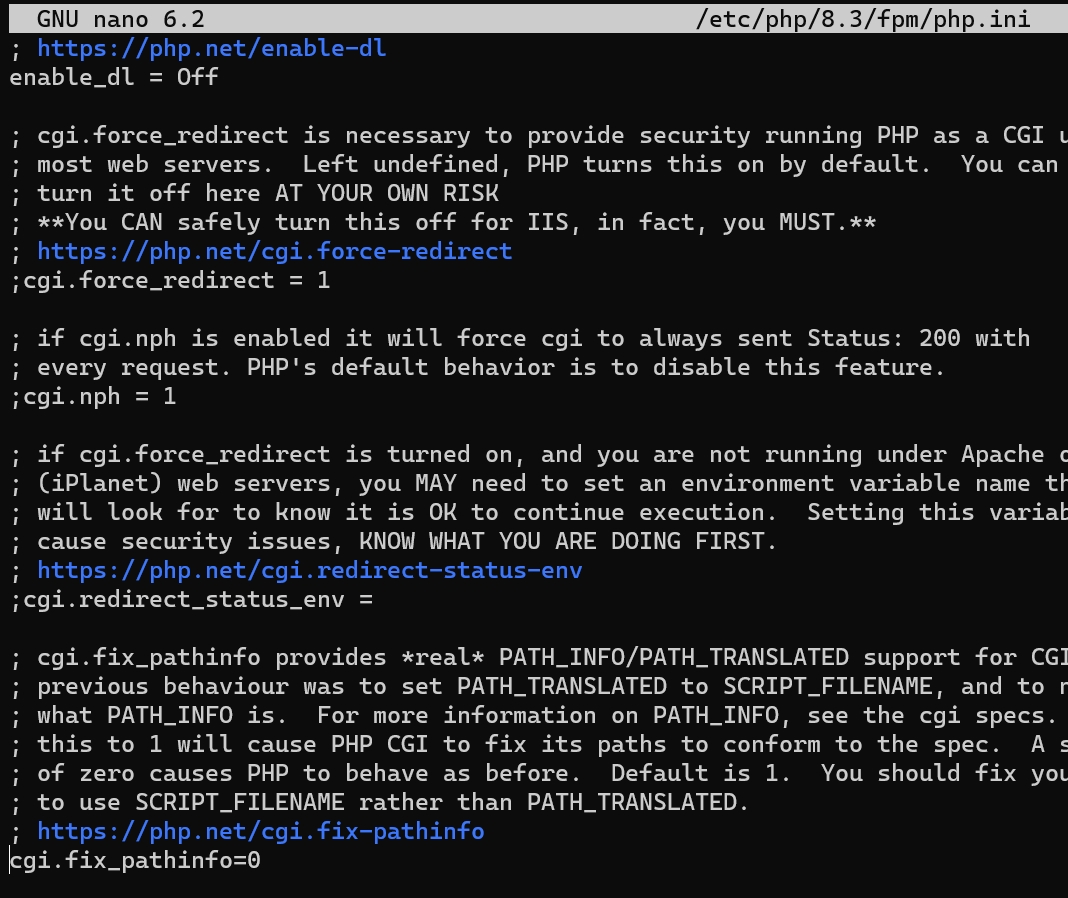
Next we will go to /etc/nginx/nginx.conf and change user value from nginx to www-data (this will come in handy if you plan to install Nextcloud). This is optional step.
sudo nano /etc/nginx/nginx.conf
user www-data;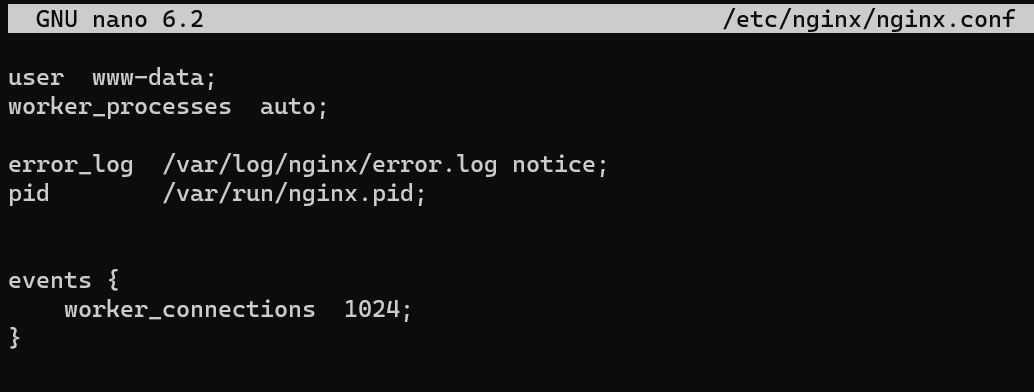
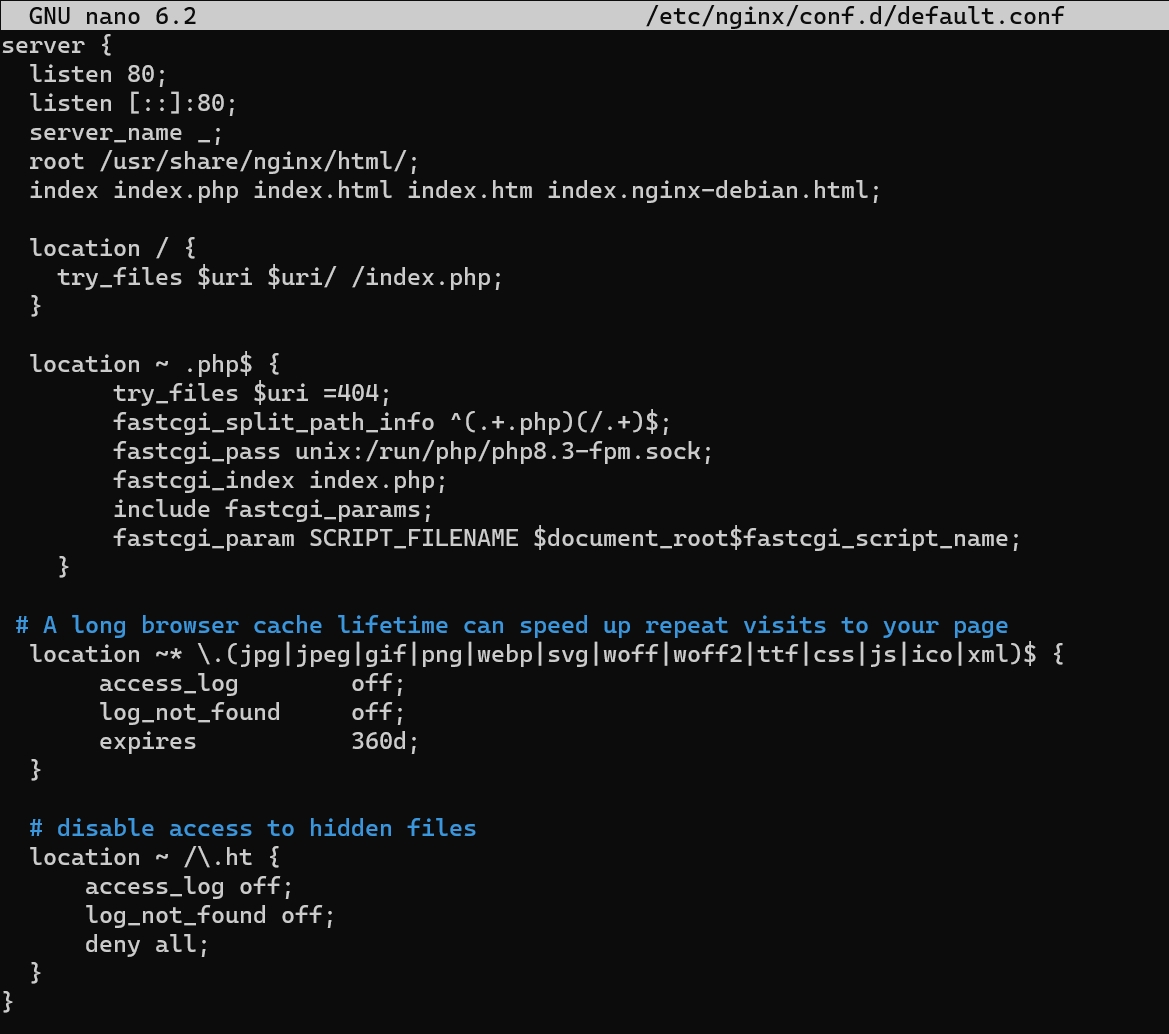
Now, the last part, we will modify /etc/nginx/conf.d/default.conf file, and rewrite it
sudo nano /etc/nginx/conf.d/default.confPaste following in
server {
  listen 80;
  listen [::]:80;
  server_name _;
  root /usr/share/nginx/html/;
  index index.php index.html index.htm index.nginx-debian.html;

  location / {
    try_files $uri $uri/ /index.php;
  }

  location ~ .php$ {
        try_files $uri =404;
        fastcgi_split_path_info ^(.+.php)(/.+)$;
        fastcgi_pass unix:/run/php/php8.3-fpm.sock;
        fastcgi_index index.php;
        include fastcgi_params;
        fastcgi_param SCRIPT_FILENAME $document_root$fastcgi_script_name;
    }

 # A long browser cache lifetime can speed up repeat visits to your page
  location ~* \.(jpg|jpeg|gif|png|webp|svg|woff|woff2|ttf|css|js|ico|xml)$ {
       access_log        off;
       log_not_found     off;
       expires           360d;
  }

  # disable access to hidden files
  location ~ /\.ht {
      access_log off;
      log_not_found off;
      deny all;
  }
}
For the end, we will test our configuration and restart services
sudo nginx -t
sudo systemctl restart php8.3-fpm
sudo systemctl restart nginx
Nginx may came out with error, and won’t start/restart. If that is the case, just reboot the server.

Test PHP and NginX
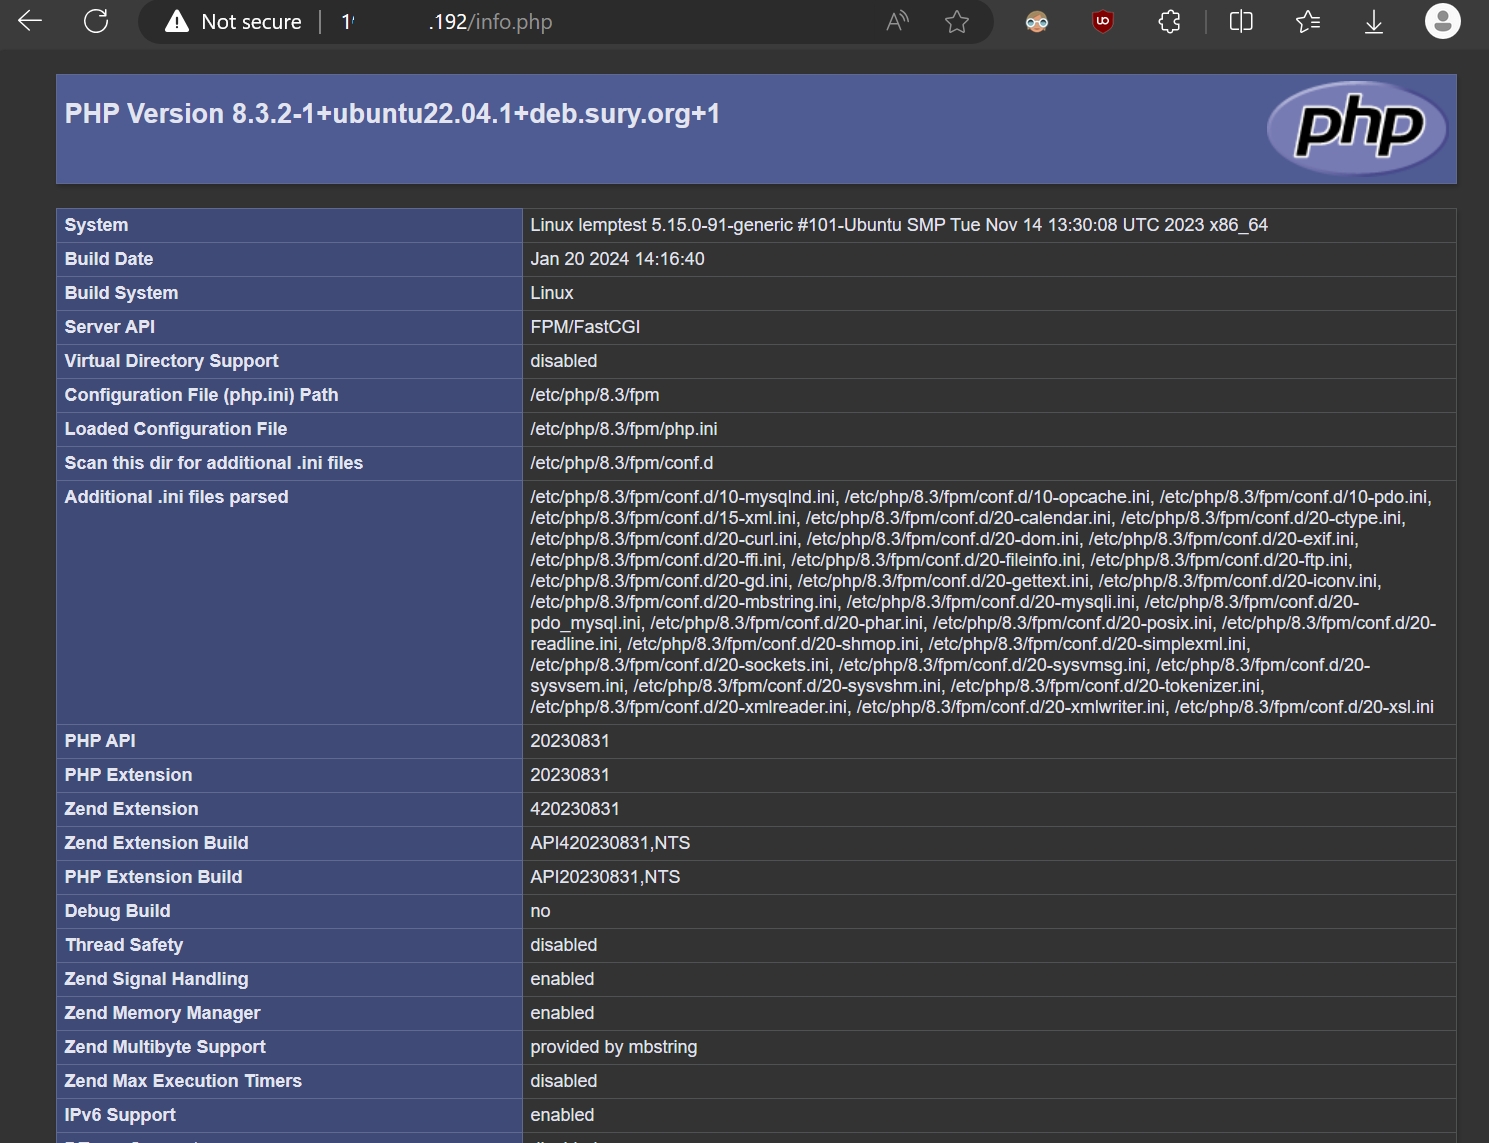
For the end, let’s test our PHP on Nginx. We will create new file and type in it one command
echo '<?php phpinfo(); ?>' | sudo tee -a /usr/share/nginx/html/info.php > /dev/nullNow, if we type in http://ipaddressonLEMPserver/info.php we should get following if we done everything correctly
It is running!!
After test is successful, we will remove the info.php from the site, it is security risk.
sudo rm /usr/share/nginx/html/info.php
And that is that, we successfully set our LEMP stack. I won’t be covering HTTPS here, since this is already too long. HTTPS portion will be covered in separate guides.