You got your WordPress website up and running on Ubuntu, and got some content on your web or blog. Smart thing would be to backup your content and website. In this guide we will go through process of backing up WordPress website based on LAMP stack.
If you have your WordPress web set on LAMP stack this is guide for you.- Here is LAMP stack guide https://www.informaticar.net/install-lamp-stack-on-ubuntu-server-20-04/ and here is WordPress on LAMP stack install – https://www.informaticar.net/how-to-install-wordpress-on-ubuntu-server-20-04/ . It would be smart to have backup of the website from time to time. Backup can be done in various ways, in this guide we will go through manual database, files and configuration backup of our WordPress website. I will be using my blog as example for this guide.
I will also prepare new VM with LAMP stack installed, so we can also test restore procedure.
Some data in this guide will be blurred, since it is production environment.
Backup of the website
First, we will do (MariaDB) database backup.
We will first login to the MariaDB and check what databases we have, and the name of the database we want to backup. I want to backup DB named informaticar.
mysql -u root -p (this could also be sudo mysql -u root depending on which version of MariaDB you are running)
show databases;
exit;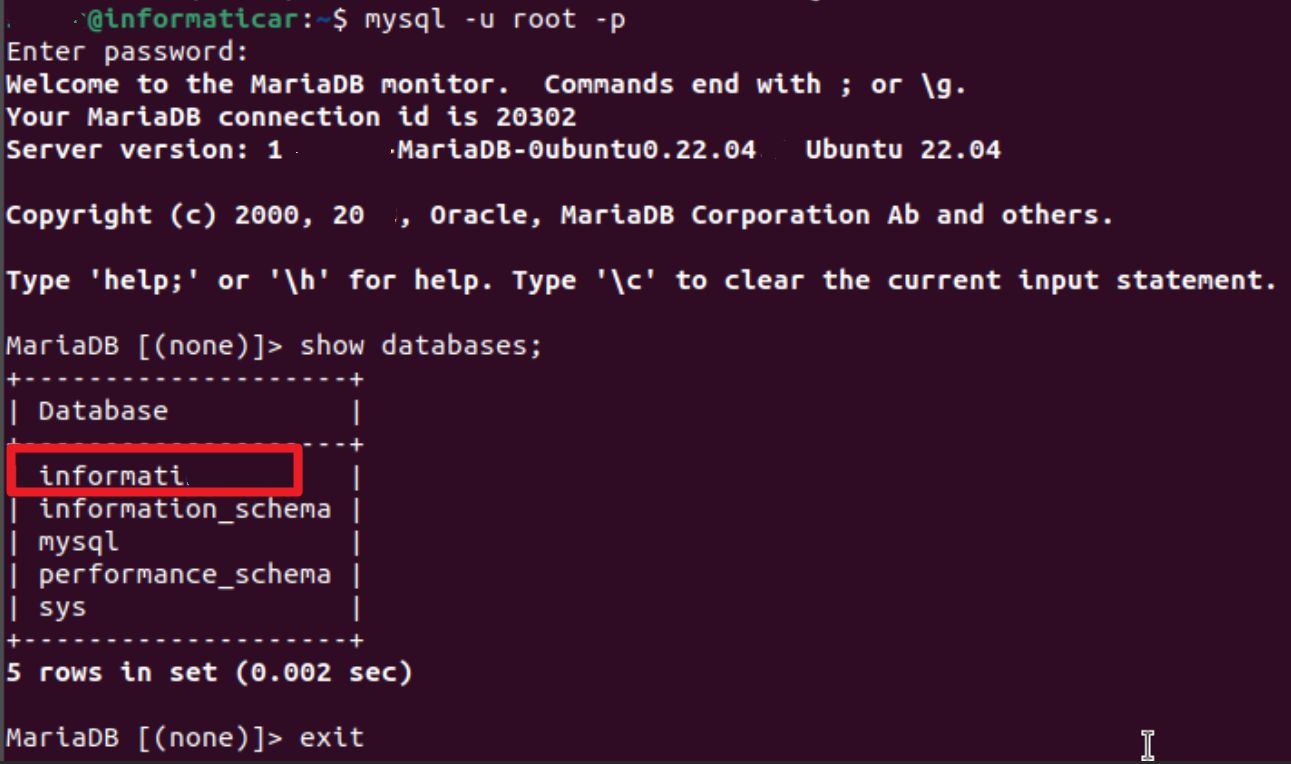
To export the database, navigate to the directory you wish to export to, for example, /home/yourusername/Downloads and type in following:
mysqldump -u username -p databasenameyouwishtoexport > DBname23012024.sqlLet’s look how it goes in my case, so, my command is mysqldump -u root (user is root) -p informaticar (name of the database I wish to export) > informaticar23012024.sql (name of the export file – I put name of the database and date I exported it).
You will be asked a password for your root user for MariaDB, and export will begin. It will be saved in the directory where you currently are. I’m in my home directory.

We now have our database exported.
We can check if we have right database by running
head -n 5 DBname23012024.sql
Next step is wordpress website files.
WordPress website files
We will now backup our website.
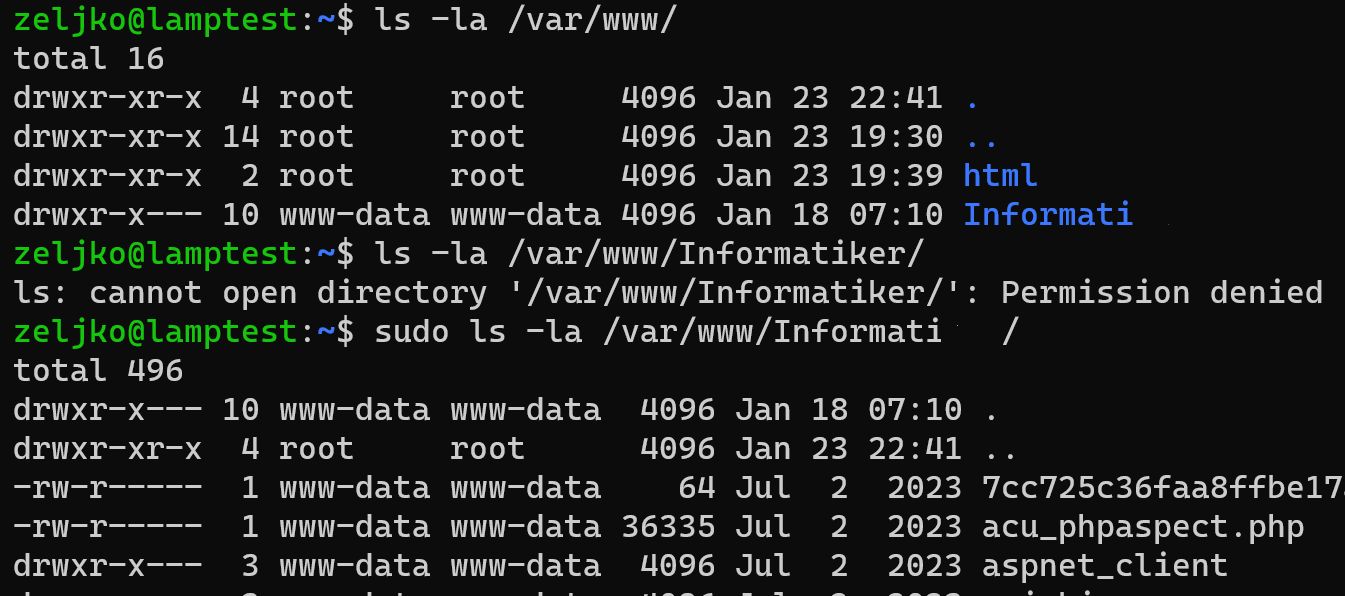
We will first navigate to /var/www/ directory
cd /var/wwwMy website is in /var/www/Informaticar directory. So, I need to backup that folder completely.
To do this, I will enter following command:
sudo tar -cpvzf /home/yourusername/informaticar23012024.tar.gz (path and name of the archive, for a name of the archive I used website name + date) Informaticar (folder we will archive)
sudo tar -cpvzf /home/yourusername/informaticar23012024.tar.gz Informaticar
Backup will take some time, and all the files will be listed…
These are the switches we used in the command:
c – create
p – preserve permissions
v – verbose
z – uses gzip for archiving
f – specify filename of the archive
Backup Apache configuration for website
Last part is Apache config file we created for our website.
Apache configuration is usually located at /etc/apache2/sites-available/
My Apache config file is name informaticar.conf. I will copy it to my home folder. Here is the command:
sudo cp /etc/apache2/sites-available/youwebsiteconfig.conf /home/yourusername/
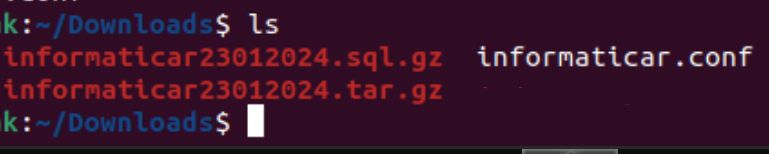
Now, after we are done, we should have three files in our home folder. One is Apache config file, one file is our website database (sql – screenshot depicts sql.gz), and one is our website files (tar.gz).

Certificates
If you have certificates for your website and don’t have them on the second location – you should backup them also. I always have certificates on multiple locations backed up, so I won’t be going through this process.
What now?
These files residing on the same VM, is not a backup. We need to transfer these to another system. I will assume other system is also Linux (Ubuntu) and will use SCP to transfer the files.
Transfer backup to another machine
As I said, machine that we will transfer backup to is also Ubuntu. Now, we will do this from the machine we wish to transfer backup to. Not the machine we backed up earlier.
Machine we backed up earlier should have SSH enabled and active for this to work. Let’s do it.
So, we will connect to the backed up machine where we did WordPress backup from the machine we wish to transfer backup to. The command will look like specified below:
On the machine you wish to transfer backup to, open terminal and type in following
scp -P 22 yourusername@IPADDRESSOFBACKUPEDMACHINE:/home/yourusername/DBname23012024.sql (this part of the command is for the backed up machine, it contains username that has right to access machine via SSH, IP address of the machine and then after (:) sign, location where backup is saved). Second part of the command – /home/zeljko/Downloads is location on local machine where backup will be saved.
I hope I managed to explain at least in somewhat coherent way.
scp -P 22 yourusername@IPADDRESSOFBACKUPEDMACHINE:/home/yourusername/DBname23012024.sql /home/zeljko/Downloads
We need to do this two more times for two other files:
scp -P 22 yourusername@IPADDRESSOFBACKUPEDMACHINE:/home/yourusername/informaticar23012024.tar.gz /home/zeljko/Downloads

scp -P 22 yourusername@IPADDRESSOFBACKUPEDMACHINE:/home/yourusername/youwebsiteconfig.conf /home/zeljko/Downloads
Now, after this is done, and we have all three files on another physical machine, we can say that we have backup.
Next step should be to check if the backup that we have is ok. Because backup without validation is not worth much.
Restoring backup
New server you wish to restore you website to should have LAMP stack installed. In case you don’t have that prepared, here is the guide – https://www.informaticar.net/install-lamp-stack-on-ubuntu-server-20-04/
You also need all three files (sql.gz, tar.gz and conf) we created earlier already copied to new machine. SCP command can be used, or you can have your own method.
First we will restore database
Restore Database
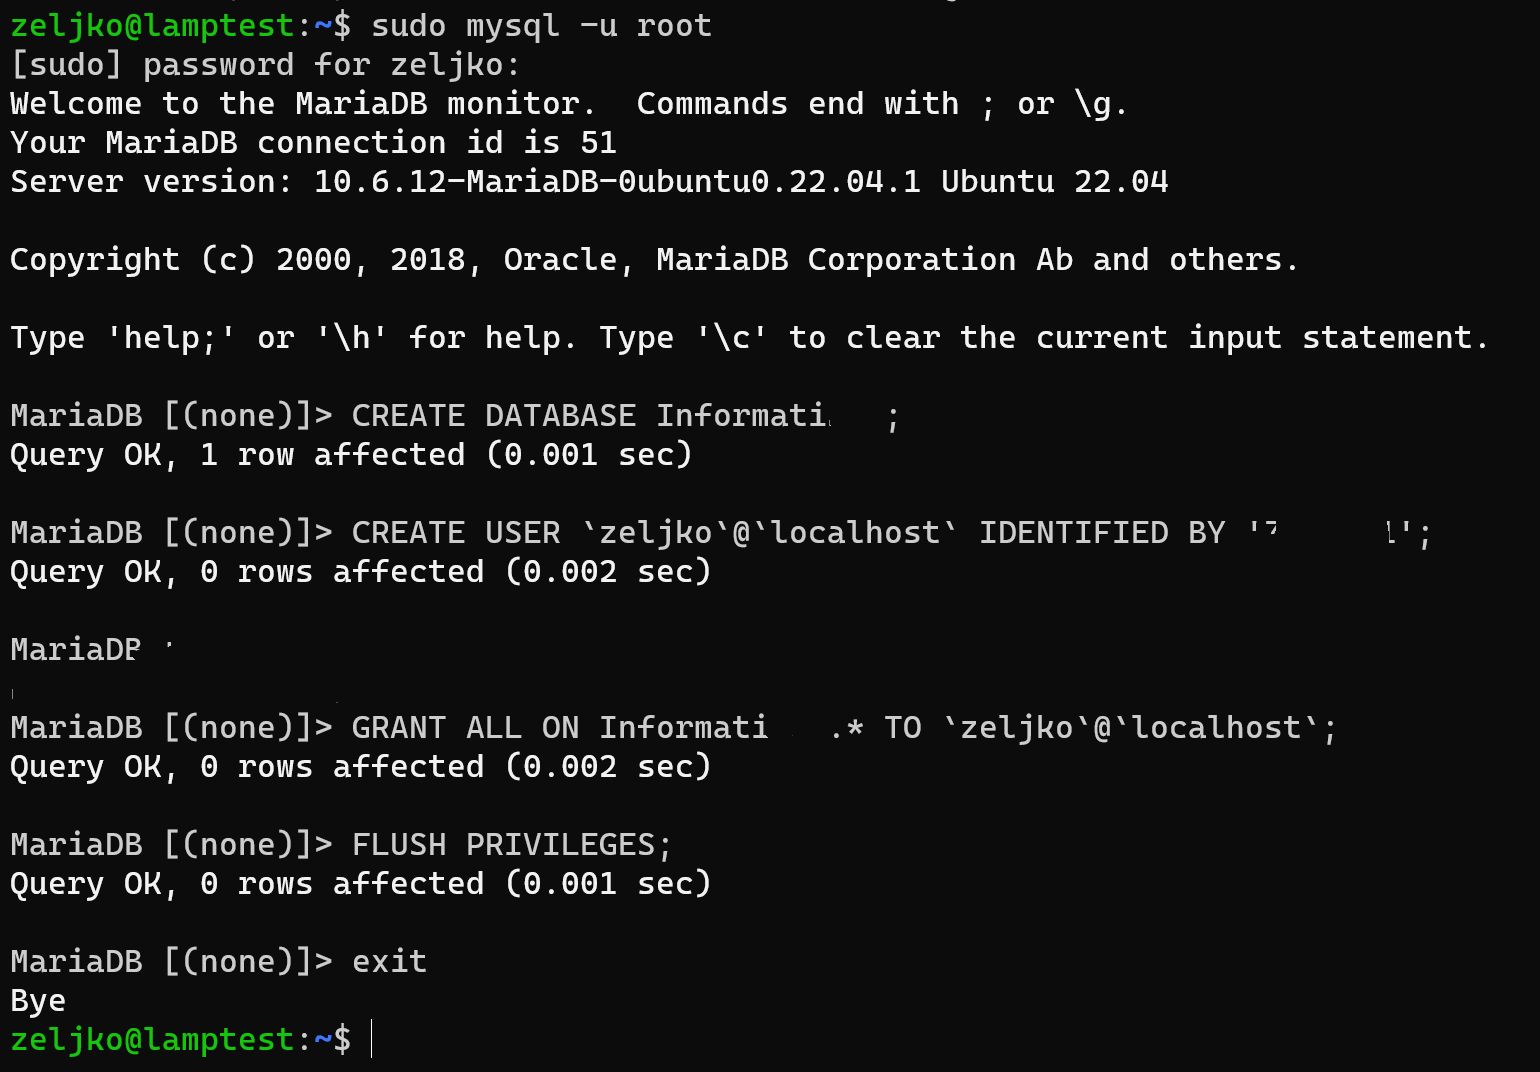
We will create new database (with the same name that backup database has). We will also create a user and password. If you have values you had set on original database, that is great.
Let’s begin
sudo mysql -u root (or mysql -u root -p on some older DBs)

CREATE DATABASE yourdatabasename;
CREATE USER `dbusername`@`localhost` IDENTIFIED BY 'dbpassword';
GRANT ALL ON yourdatabasename.* TO `dbusername`@`localhost`;
FLUSH PRIVILEGES;
exit
We now have empty database created.
We will now go back to the directory where we copied backup to. In my case that is /home/zeljko/ folder.We will now use our MariaDB database export and import it into database we created above
We will use user we created for the database to restore the database!!!! In my case it is zeljko
mysql -u zeljko -p yourdatabasename < DBname23012024.sql

In my case command looks like depicted below. Database name is Informaticar, we created it above, and DB we are importing into it is named informaticar23012024.sql. Password you are asked is your system user password.
Ok, we should be done. Next we will restore our website files.
Restore WordPress website files
First we will add additional PHP components that we need for wordpress, and that are not installed in LAMP guide.
sudo apt install php-curl php-gd php-mbstring php-xml php-xmlrpc php-soap php-intl php-zipNext we will restart Apache web server
sudo systemctl restart apache2
Now, from the directory where we copied tar.gz we will simply extract it to the /var/www/ folder
In my case command looks like this:
sudo tar -xvzf informaticar23012024.tar.gz -C /var/www/
now, everything is extracted. You website folder, in my case Informaticar, should have www-data set as user and group on entire folder. If it does not, please check my WordPress guide to see how to change permissions – https://www.informaticar.net/how-to-install-wordpress-on-ubuntu-server-20-04/
Copy Apache configuration file
Last step would be to copy your Apache configuration file to /etc/apache2/sites-available/
In my case, from the directory that informaticar.conf is located, I will run:
cp informaticar.conf /etc/apache2/sites-available/Now, I often do test restores of my blog and webservices, and I don’t need https, I just want to see if my backup is working. SO, in that case I just create new conf file in /etc/apache2/sites-available/ and copy following into it:
<VirtualHost *:80>
    ServerName localhost
    ServerAlias localhost
    ServerAdmin webmaster@wordpress.local
    DocumentRoot /var/www/Informaticar

    <Directory /var/www/Informaticar>
        Options -Indexes +FollowSymLinks
        AllowOverride All
        DirectoryIndex index.php
    </Directory>

    ErrorLog /var/log/wordpress-error.log
    CustomLog /var/log/wordpress-access.log combined
</VirtualHost>
After we created or restored our conf file, we need to run few commands (replace Informaticar with your website/config name)
sudo a2enmod rewrite
sudo apache2ctl configtest
sudo a2ensite Informaticar
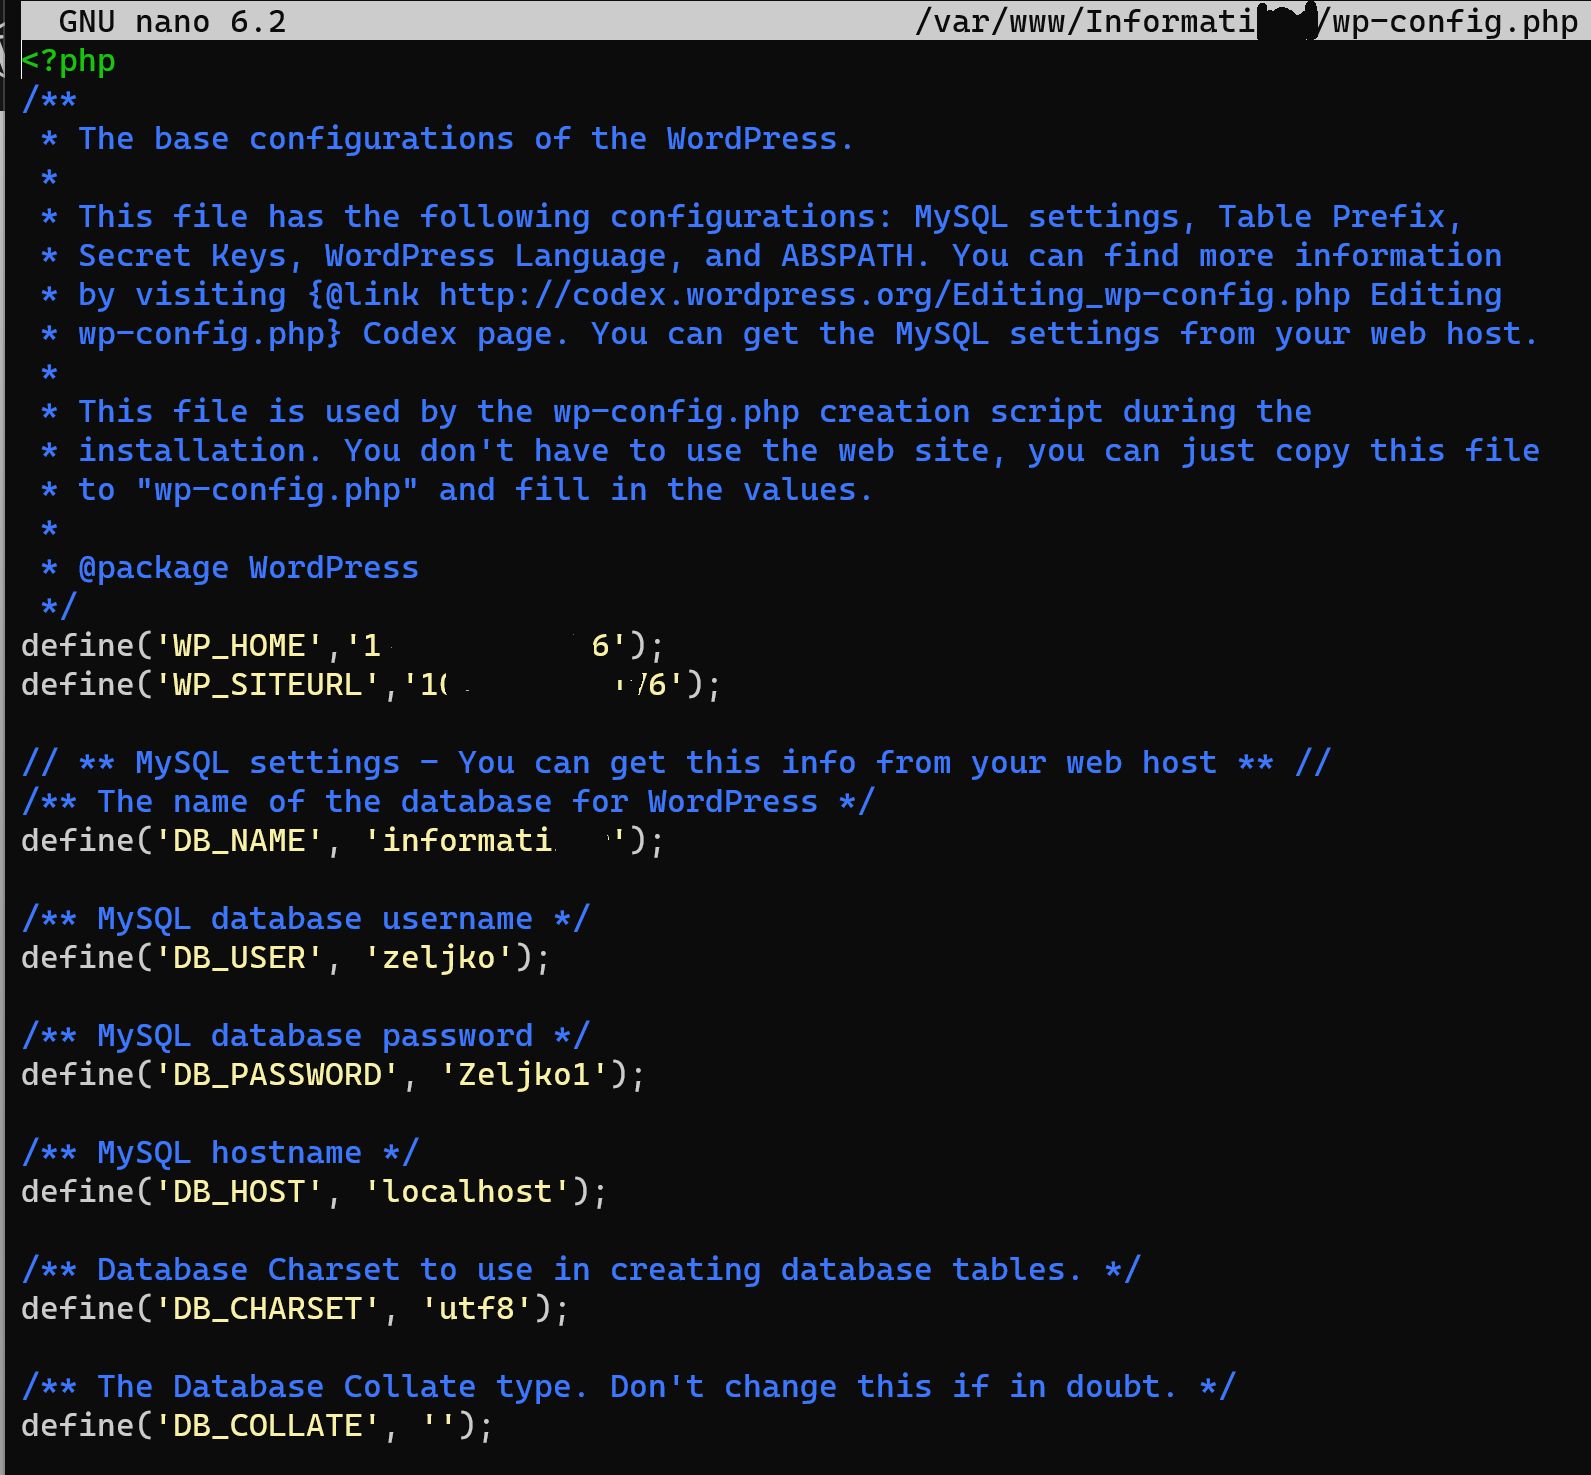
sudo systemctl restart apache2Last thing we need to visit is wp-config.php inside /var/www/yourwebsitename – look out for IP addresses, database username and file and other things that you changed. If you restored your website the same way – domain name is same, database user and pass are same on new system, you are fine, but if you defined some new values, you’ll need to change them here.
Also, when I’m doing local restores, just to check if backup is fine, I change WP_HOME and WP_SITEURL to local IP address.
For example
define( ‘WP_HOME’, ‘http://192.168.1.10’ );
define( ‘WP_SITEURL’, ‘http://192.168.1.10’ );
After you checked all the things, reboot you server.
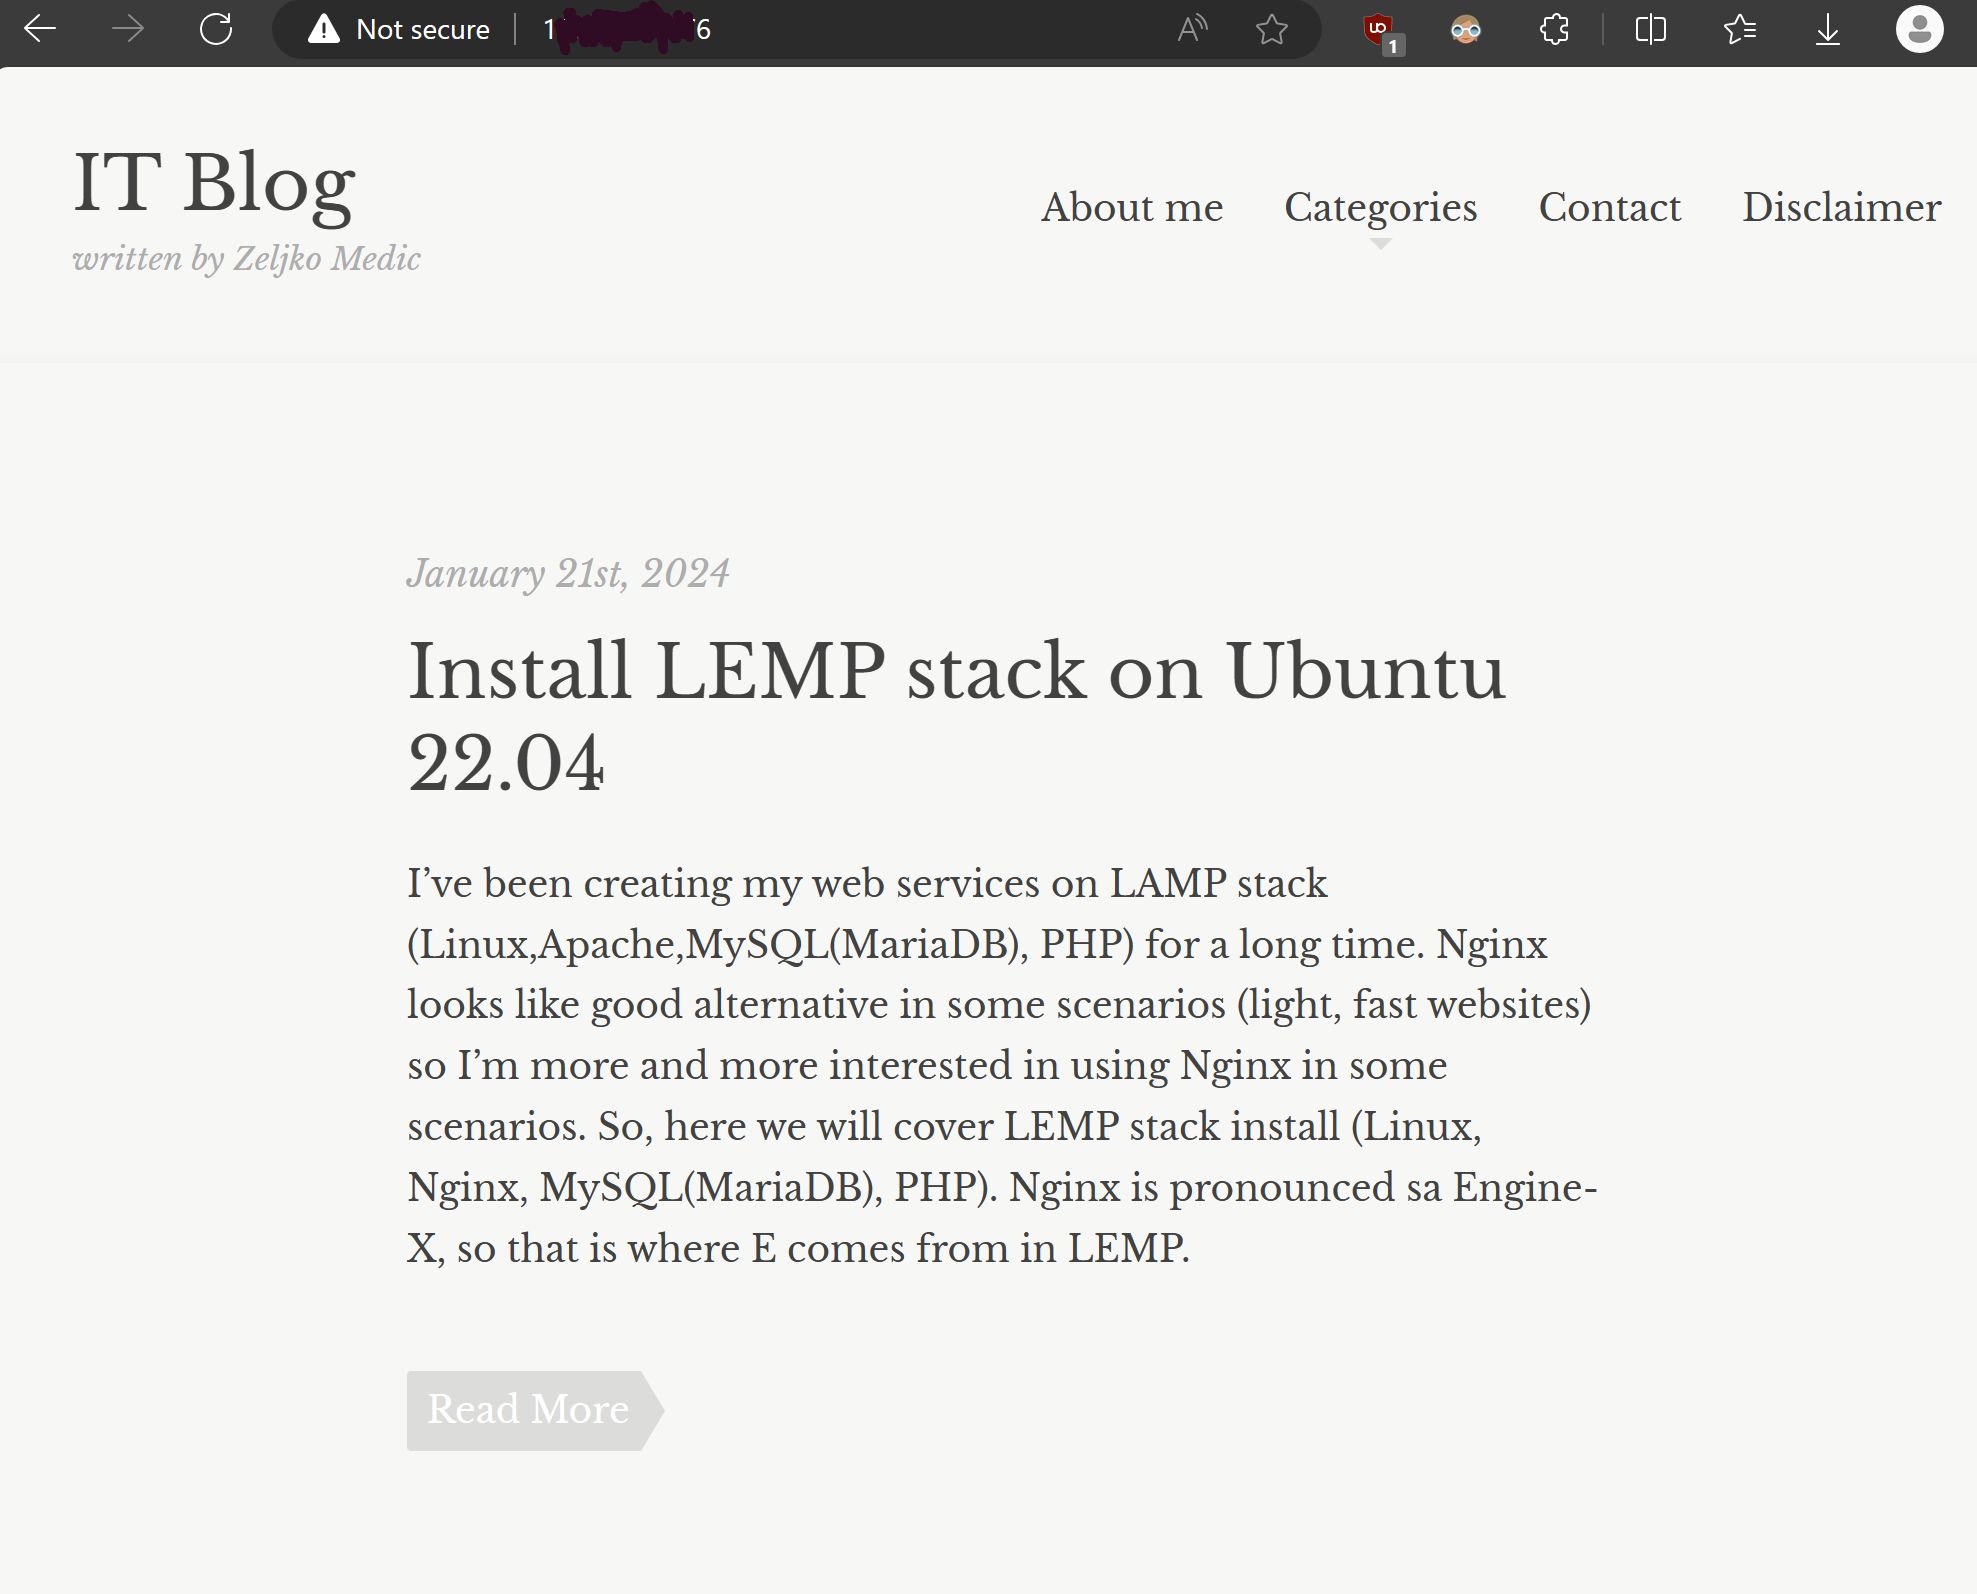
Result should look like this – backup is restored locally and it works!!
Conclusion
This isn’t one of my best guides, I’m writing this very late at night/early in the morning, and am not the most concentrated. I hope you will grasp something in this guide for yourself and manage to use it.