Let’s Encrypt is hot stuff – you can use it for free and automagically renewing certs, but, I still buy my own certs. That means that I get to renew my certs, every year. I’m mostly in Microsoft camp, so all of my cert reissuing I also did on Windows Server mostly. But times have changed, I do this also on Linux now (Ubuntu) and in this guide I would like to show you how to do generate csr and reissue a cert on Ubuntu.
I will do this from Ubuntu 22.04 and I’m using Namecheap for my SSL certs – not sponsored – I just like the service and use it for a couple of years now.
Also, I’m doing this for actual domain, so few details will be blurred out.
First of all, let’s install OpenSSL on the machine you will generate certificate on.
sudo apt install openssl -yIt will then install OpenSSL on your system, and maybe the OpenSSL is already installed, as it was in my case.
Now, let’s reissue certificate for our domain.
Change YOURDOMAINNAME for you actual domain name – my would be in this case informaticar.net
openssl req -newkey rsa:4096 -keyout YOURDOMAINNAME.key -out YOURDOMAINNAME.csrIf we look into this command, we can conclude following:
req – we will generate certificate request
-newkey rsa:4096 – OpenSSL will create new 4096 bit RSA private key. You can also use 2048 bit, but I would recommend it to be 4096 if there are no some specific restrictions.
-keyout – this is name and location of the private key
-out – CSR file that we will send to certificate authority for certificate renewal.
Additionally, if you want, you can specify after rsa:4096 -nodes switch – which will generate private key (.key) file without password. I don’t want that.

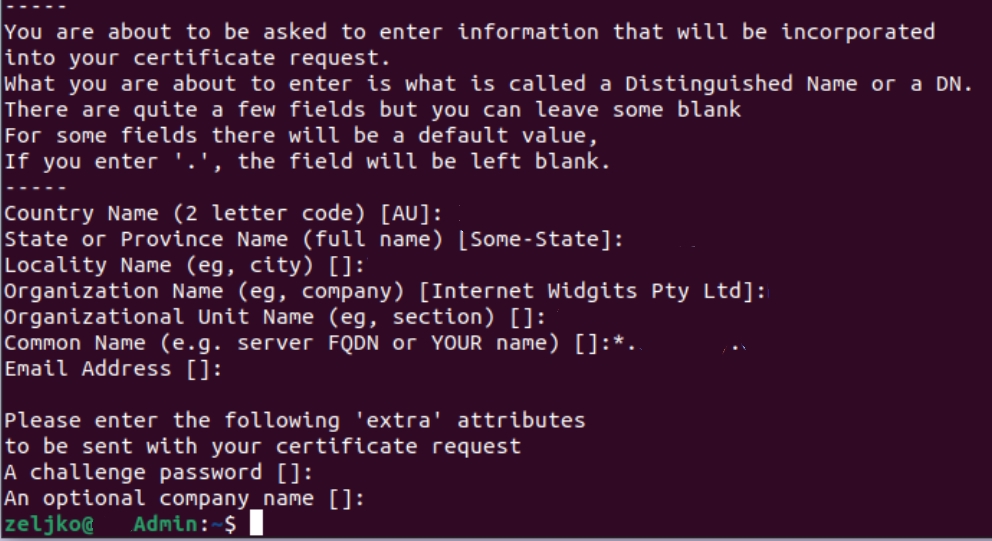
After you type in your command – you will need to enter additional info – I skipped the password part – you will get it, and will need to enter password for your private key – REMEMBER IT, IT IS VERY IMPORTANT
Country name – enter you country name in two letter code – germany would be DE, Croatia would be HR, USA would be US…
State – enter state
Locality name – enter city
Organization name – name of the company, blog, whatever, that is relevant for the certificate.
Organizational Unit name – it can be department, section – I usually use IT department
Common name – most important part, name of the domain you wish to renew or make certificate for – in my case that would be informaticar.net, or if it is wildcard certificate, then it would be *.informaticar.net – * indicating subdomains.
Email address is optional, and challenge password and optional company name are optional, and I don’t enter them.
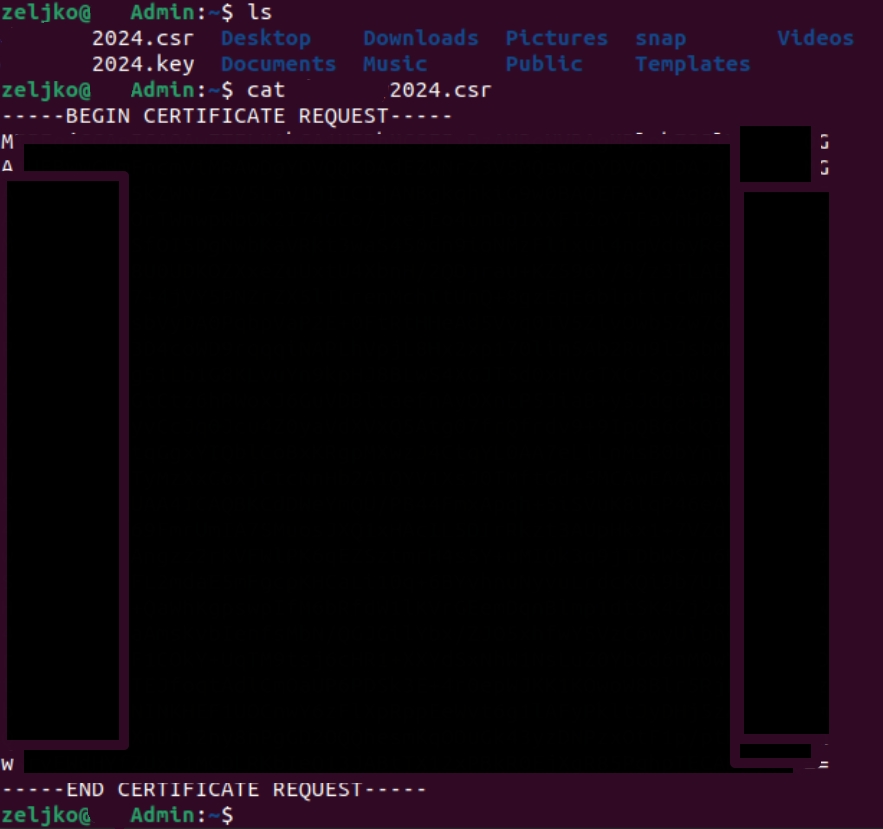
Now, both .key and .csr files are in the directory where you currently are, you can check that by typing in ls command
also if you enter following command
cat YOURDOMAINNAME.csrYou will see the content of csr file, that content you need to copy to your certificate authority (namecheap in my case)
Don’t send .key file to anyone, it is private key for your certificate, keep it private and secure!!!
Now, you will copy content of that .csr file (all the lines, including begin certificate request and end certificate request) to Namecheap and continue process of renewal
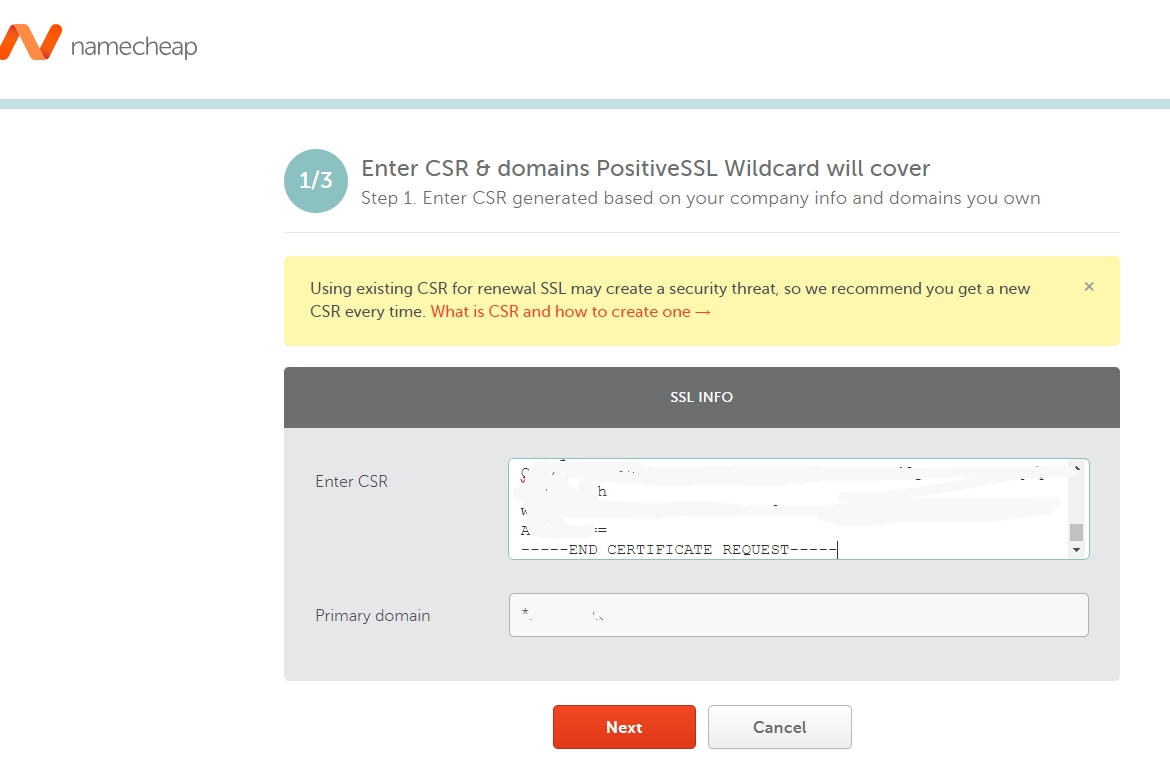
You will get back the certificate and .crt file.
You already have private key (.key) file, we generated it at the beginning with .csr file. Copy .key file we generated at the beginning and .crt file we got back from CA and you have your certificate renewed!
This procedure has to be done on every certificate renew!