In part 1 of Two-Tier PKI implementation on Windows Server 2022 we did some introduction to PKI, you can check LAB config and offline Root CA setup. In this part we will go a bit further and work on Subordinate CA.
Introduction
Please refer to Part 1 of this guide to understand what is all about. Also, before we start, read introduction part of Part 1 – I cannot be responsible if you mess up anything with this – purpose of these articles is only for testing and learning – I cannot be held responsible for any type of damage you do with this (financial, physical, emotional…) PKI is tricky thing and you should learn about topic before following this.
For LAB setup and additional details look into Part 1 of the guide.
Test-CA is already part of the test.local domain. Let’s start configuring.
Please do not turn of Root CA until you are done with entire PKI implementation!
Subordinate CA Configuration
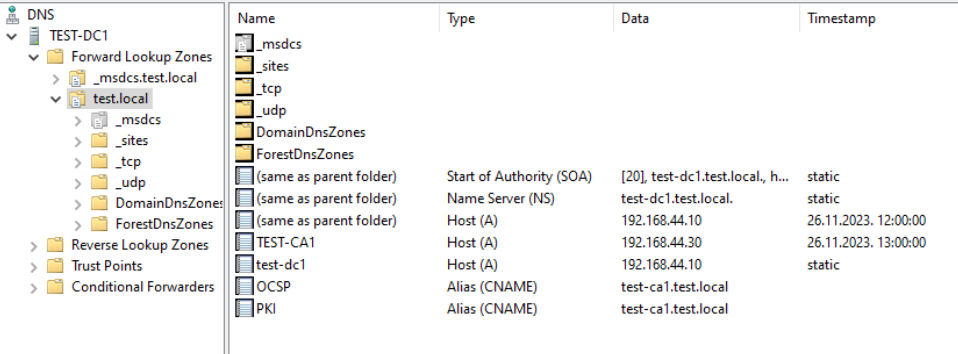
First step will be done on our domain controller in DNS zone (in my case test.local) we should add following CNAME records
OCSP.test.local
PKI.test.local
In alias name of the new CNAME record enter OCSP (and for second record enter PKI)
In FQDN field of the CNAME record enter test-CA1.test.local (name and domain of subordinate CA) – and for second PKI record also test-CA1.test.local
This is how everything should look like
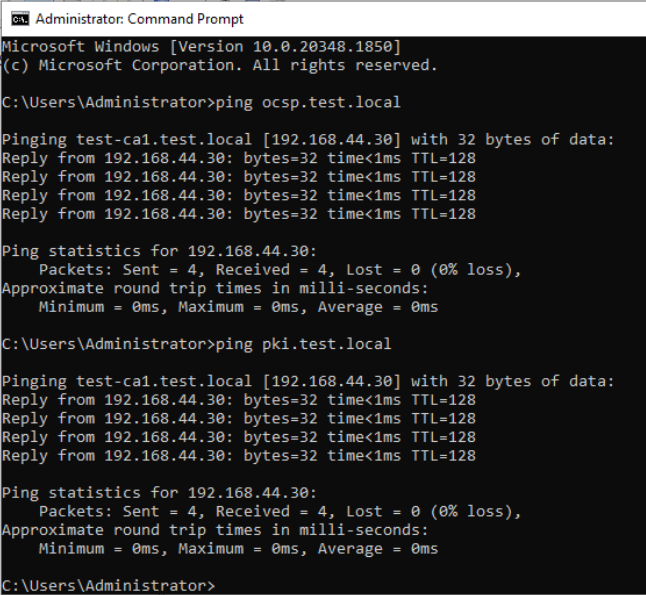
If we did ok, when we ping from our client addresses pki.test.local or oscp.test.local it should resolve to IP of subordinate CA
We are now moving onto Subordinate CA for configuration, which in my case is named Test-CA1
First, like with Root CA, we need to create CAPolicy.inf file and put it into root directory of Windows – C:\Windows\CAPolicy.inf
If you have your PEN number, modify OID line in InternalPolicy section to OID=1.3.6.1.4.1.XX (XX being your PEN number)
Here is the CAPolicy.inf file we need for Subordinate CA
[Version]
Signature="$Windows NT$"
[PolicyStatementExtension]
Policies = AllIssuancePolicy, InternalPolicy
Critical = FALSE
[AllIssuancePolicy]
OID = 2.5.29.32.0
[InternalPolicy]
OID = 1.2.3.4.1455.67.89.5
Notice = "The Test.local Certification Authority is internal only."
URL = http:∕∕pki.test.local∕cps.html
[Certsrv_Server]
RenewalKeyLength = 4096
RenewalValidityPeriod = Years
RenewalValidityPeriodUnits = 5
AlternateSignatureAlgorithm = 0
LoadDefaultTemplates = 1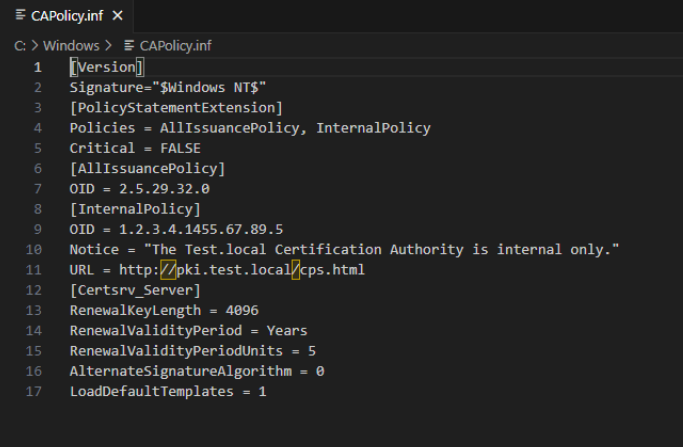
Now, let’s head for AD CS role installation.
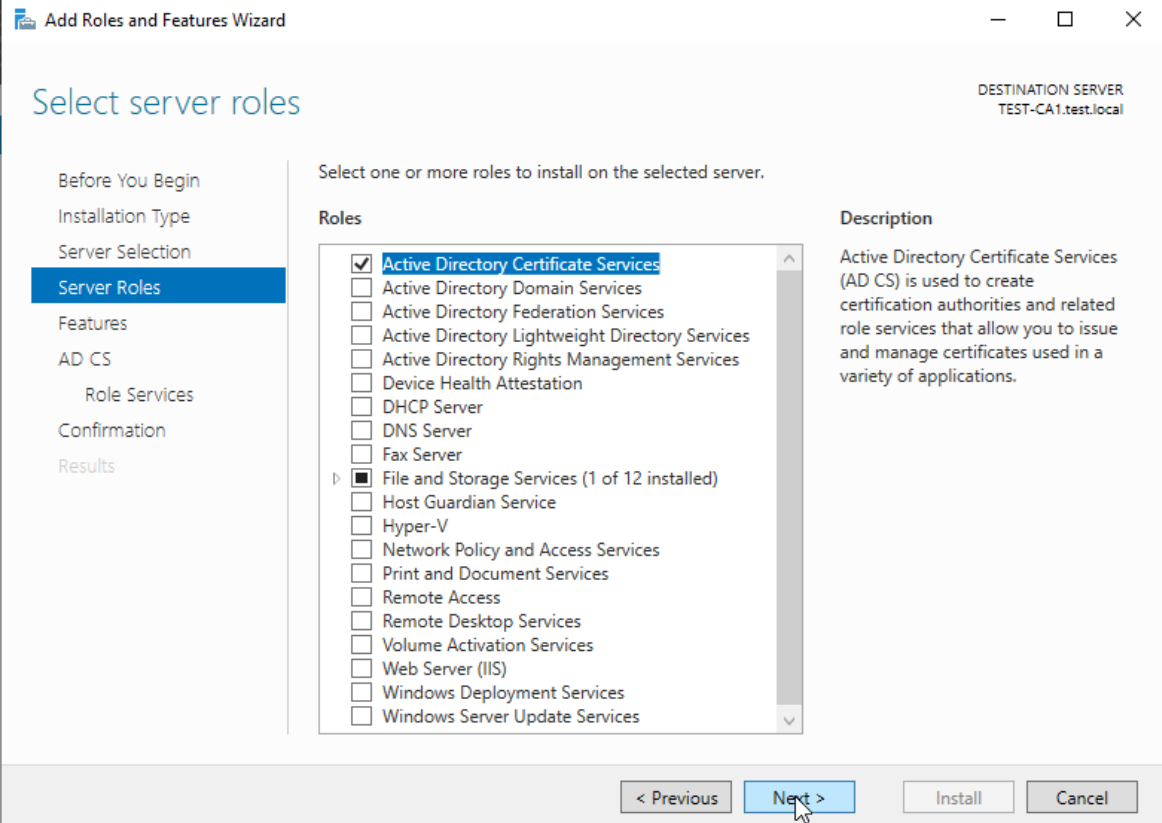
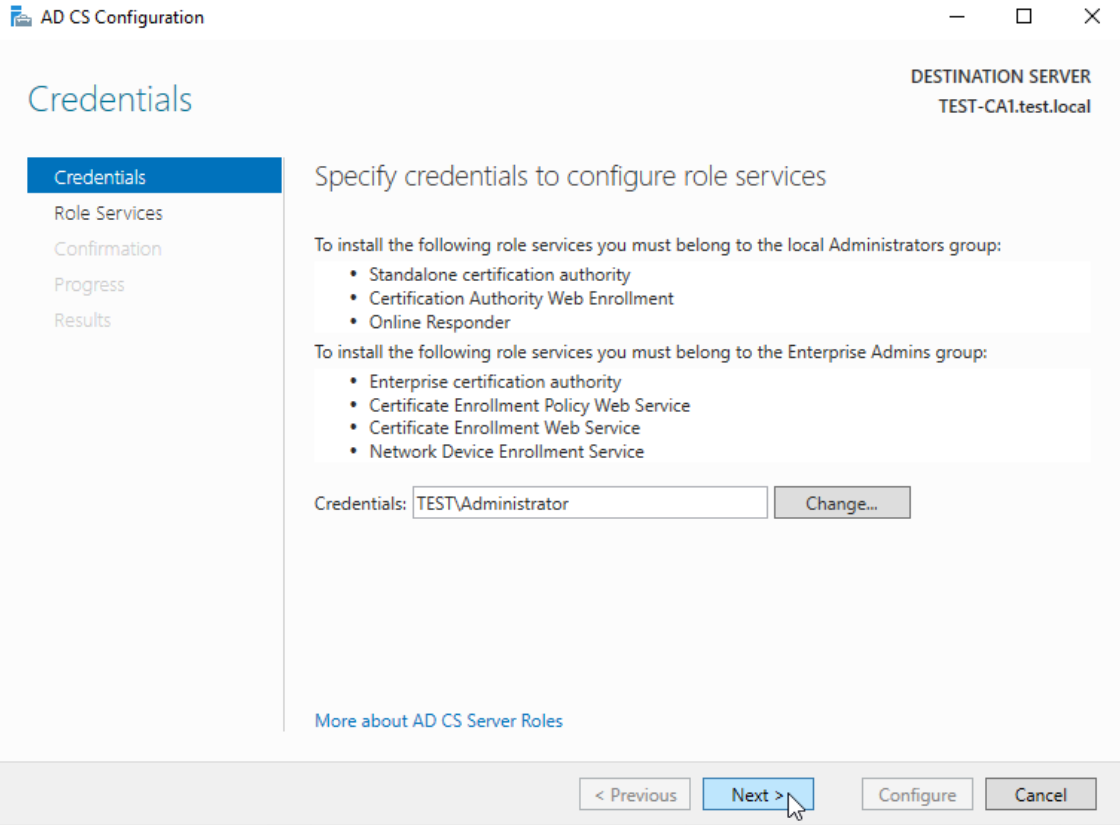
Before we begin, make sure you are logged in to the Subordinate CA as Domain Administrator! Otherwise we will have problems installing and configuring! We will do the installation throufh Server Manager. Again, as in Part 1, I assume you know Windows Server very well, so I won’t screenshot every step in adding roles in Server Manager.
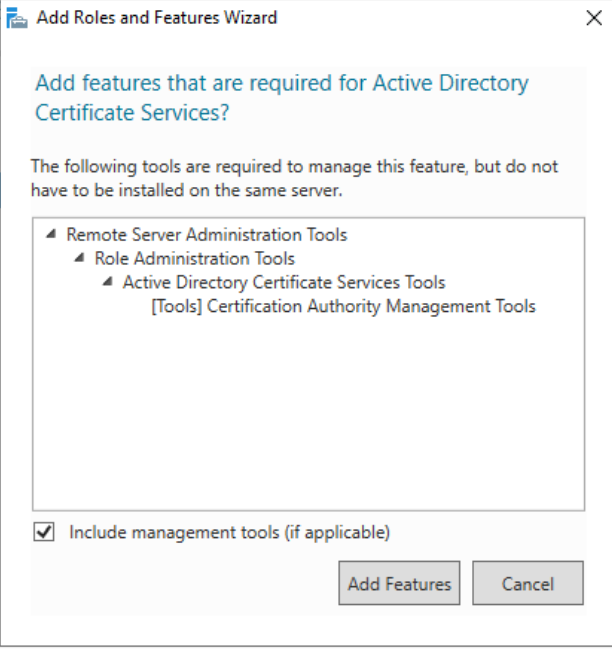
Select Active Directory Certificate Services and confirm pop-up window
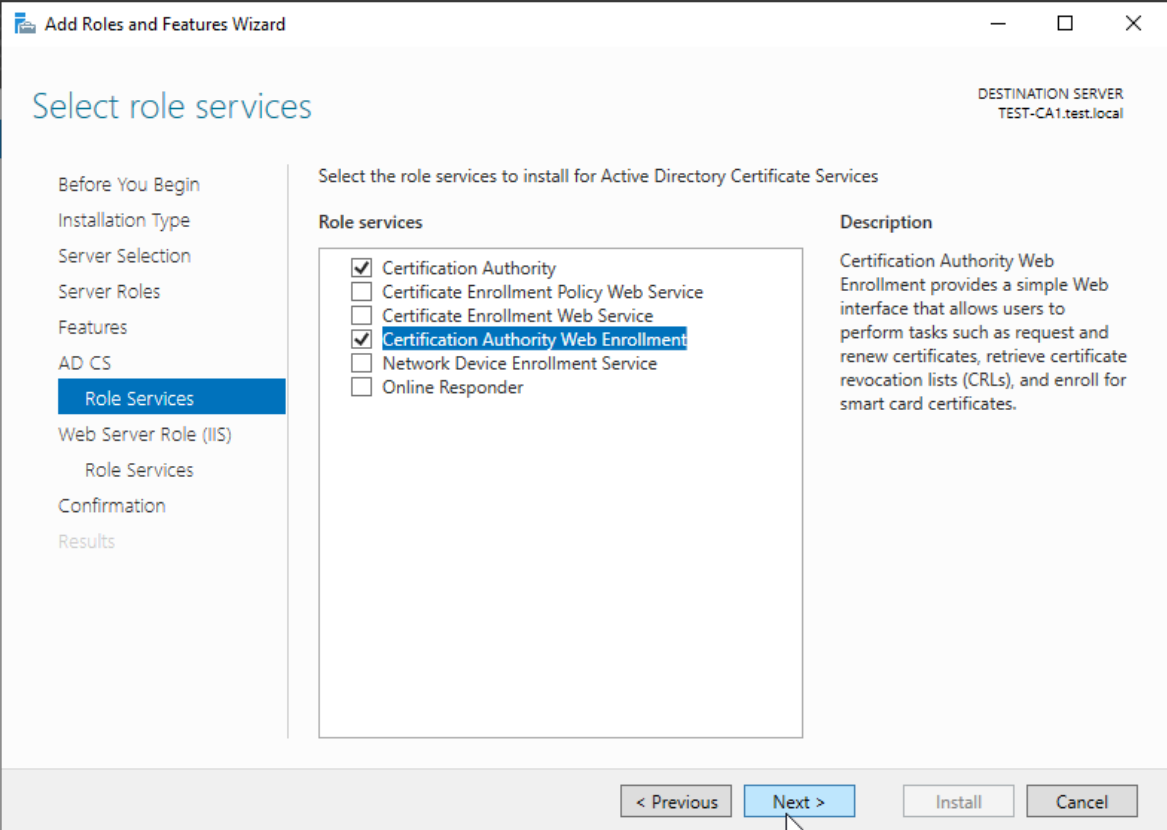
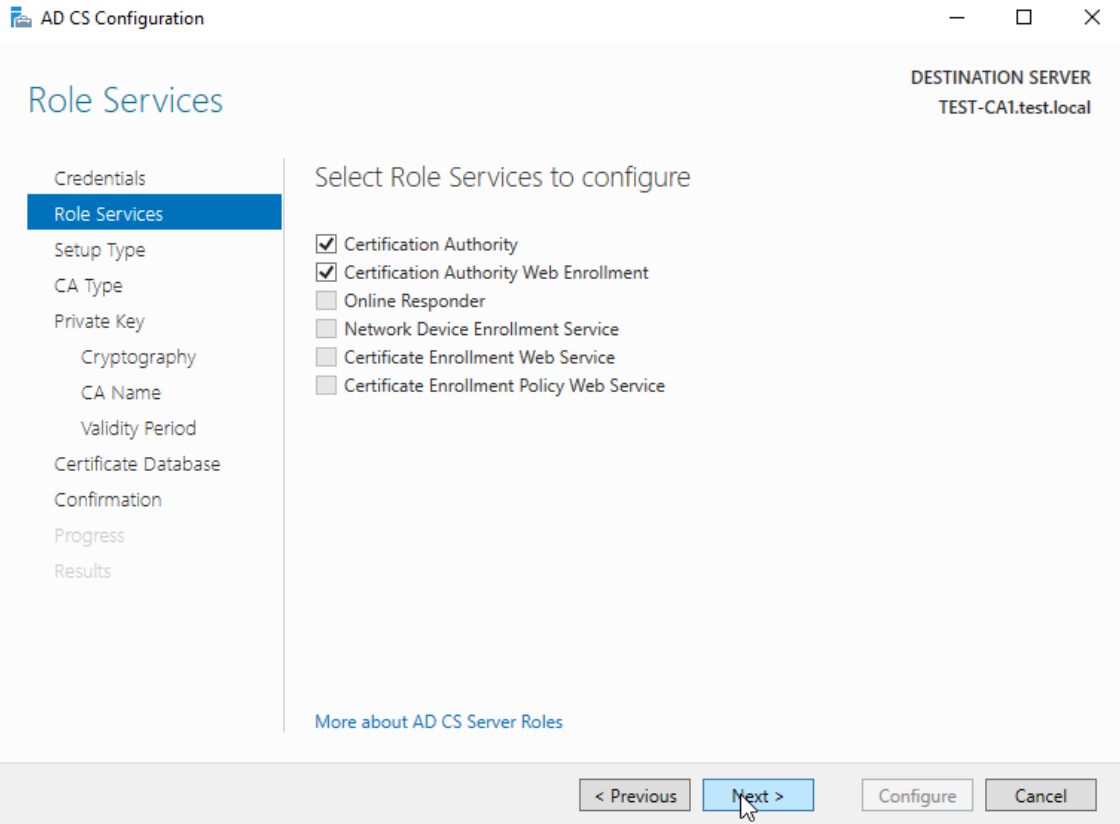
Select Certification Authority and Certification Authority Web Enrollment – confirm additional pop-up – Next
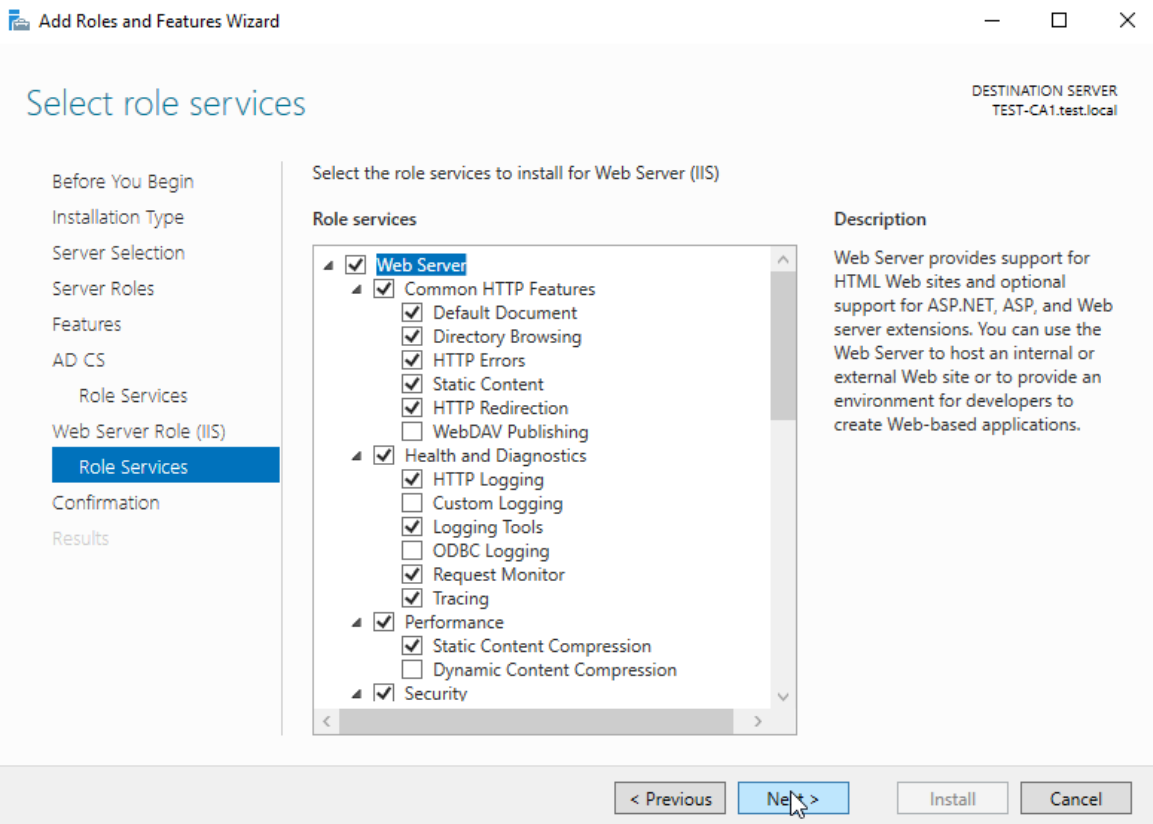
On Web Server Screen just confirm everything and click Next
We will now configure Subordinate CA with following settings:
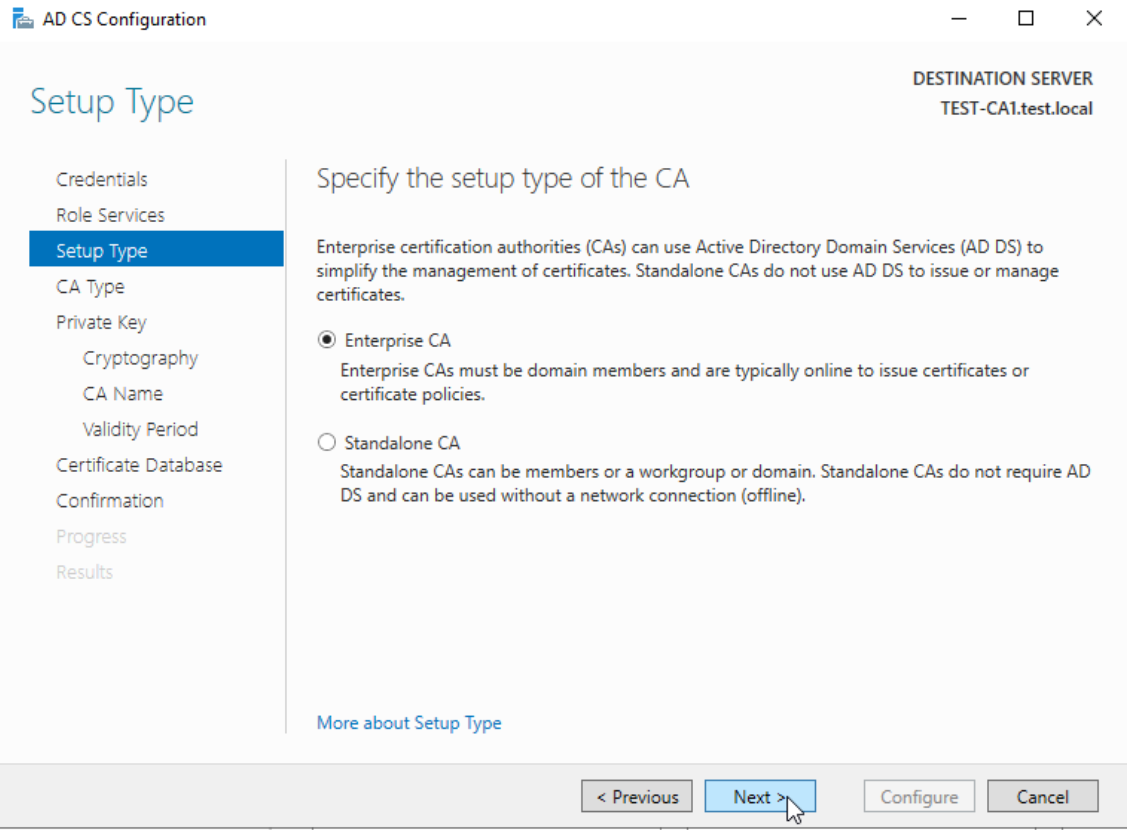
Certificate Authority Setup Type: Enterprise CA
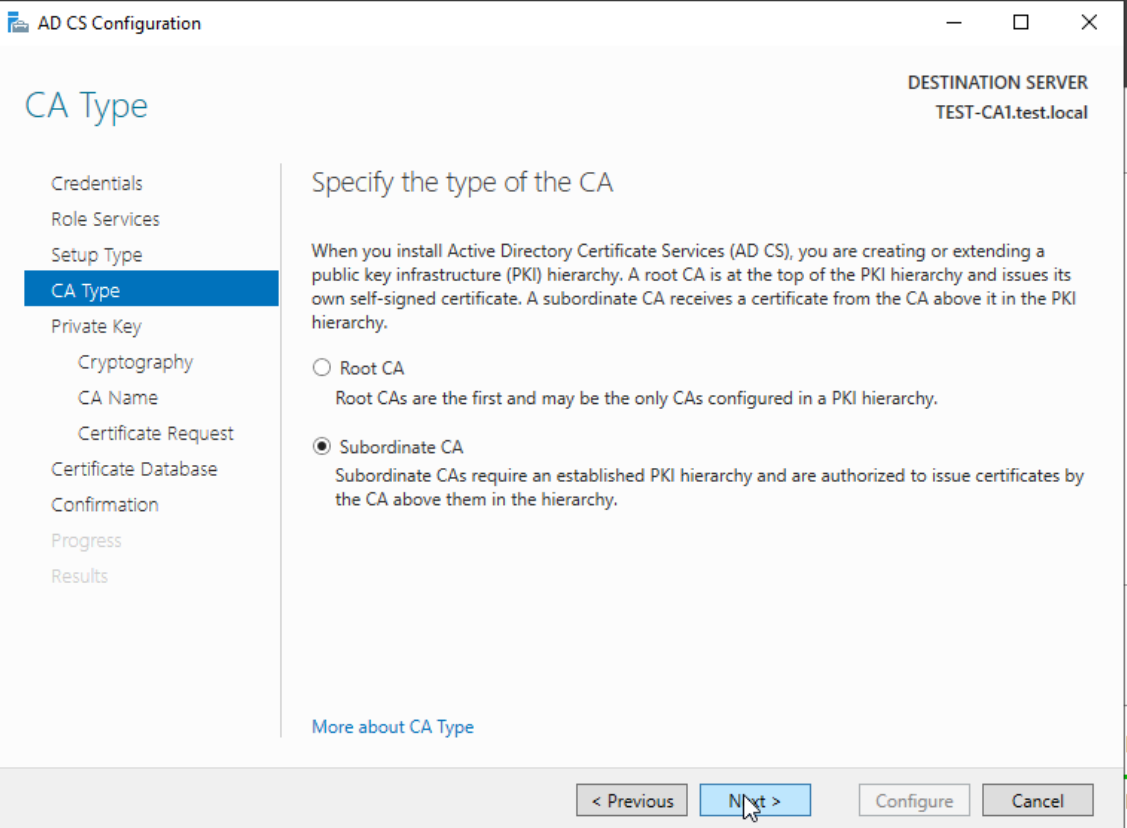
Certificate Authority Type: Subordinate CA
Cryptographic Provider: RSA#Microsoft Software Key Storage Provider
Key Length: 4096 Bits
Signature Hash Algorithm: SHA256
CA Common Name: Test-CA1-CA
Validity Period: 5 years
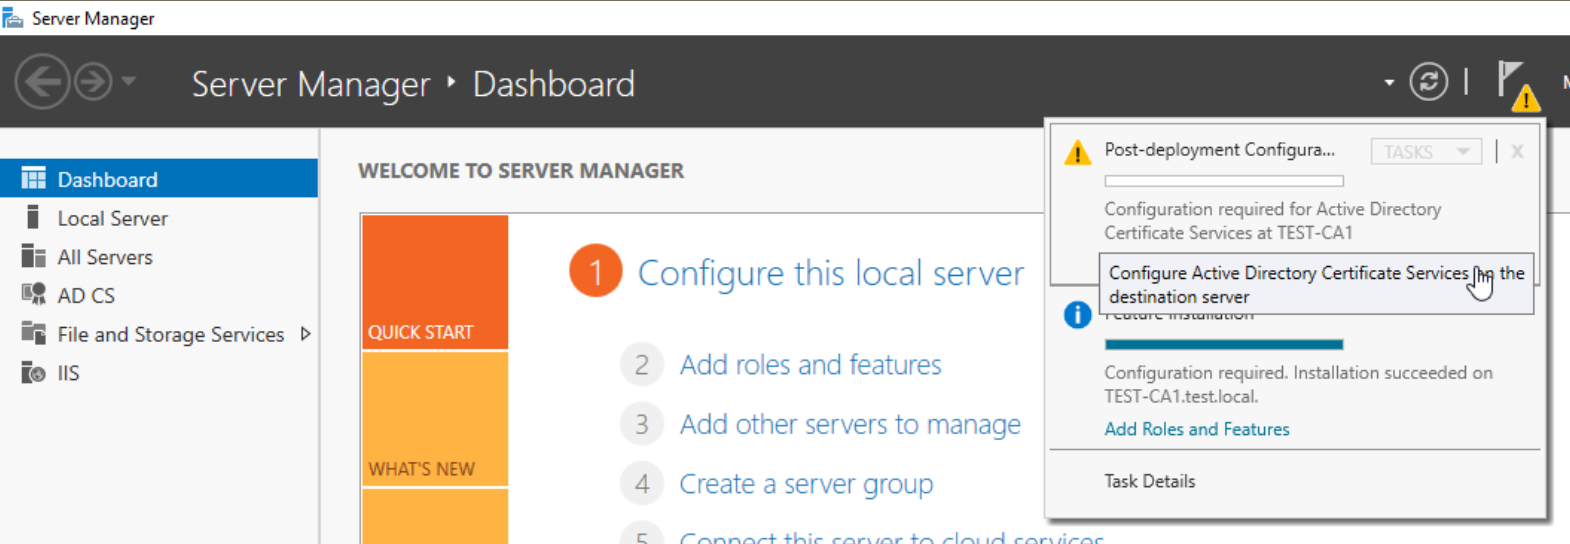
Again, we will do this part in Server Manager since I had issues with Powershell. From Server Manager select Configure Active Directory Certificate Services to the destination server
We will use domain administrator!!
We wkill select Certification Authority and Certification Authority Web Enrollment – Next
Enterprise CA – Next
Subordinate CA – Next
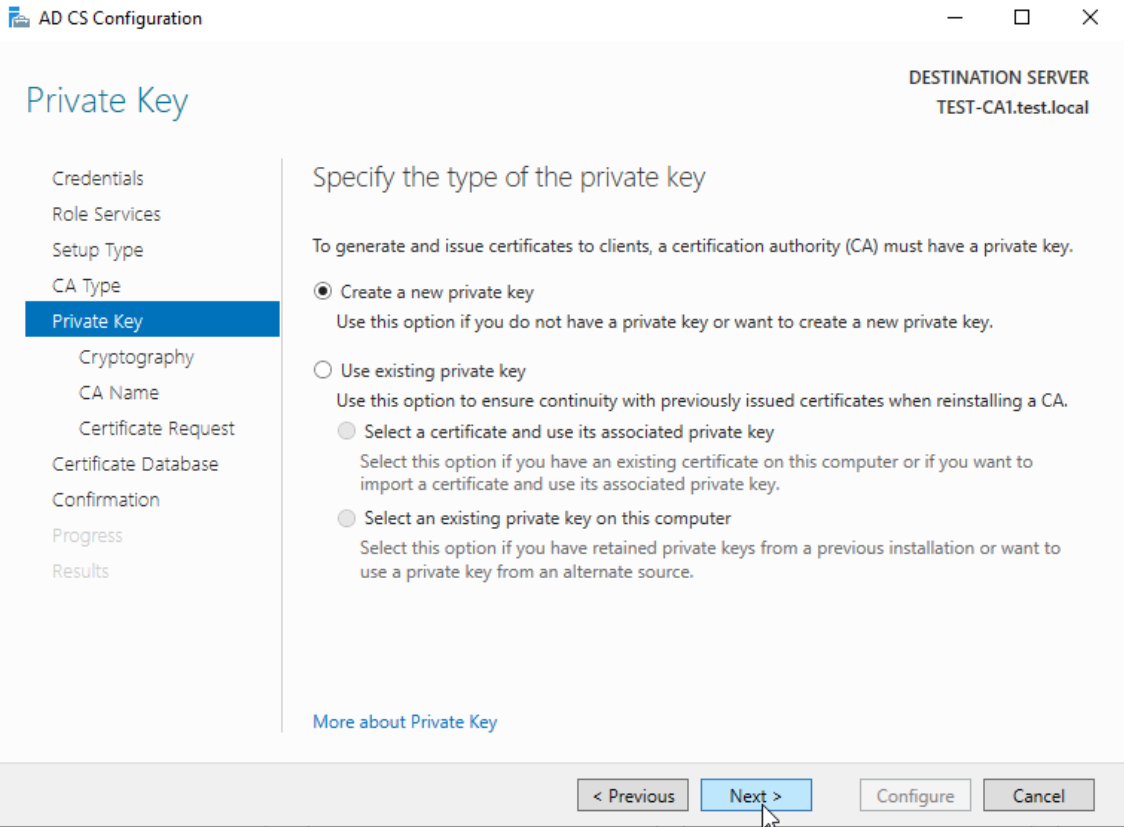
Create a new private key – Next
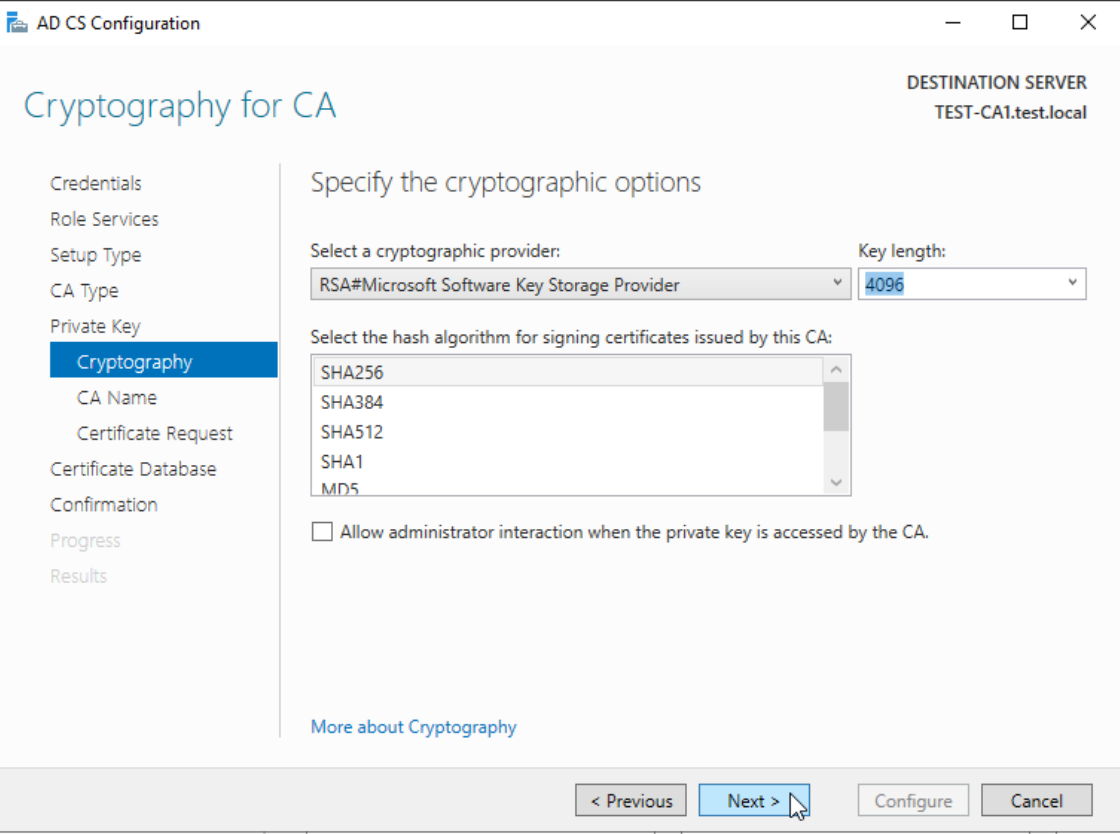
RSA#Microsoft Software Key Storage Provider, Key length 4096, SHA256
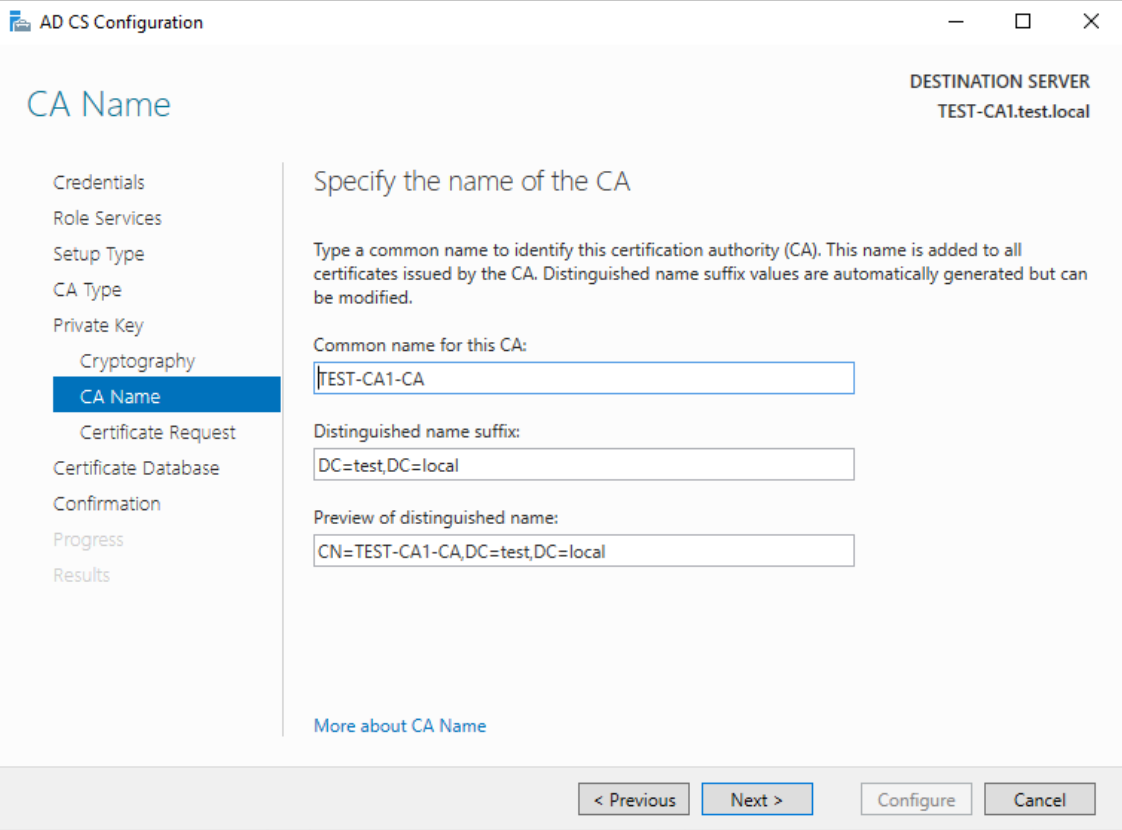
Common name – I will change to TEST-CA1-CA, rest leave as is, don’t touch – Next
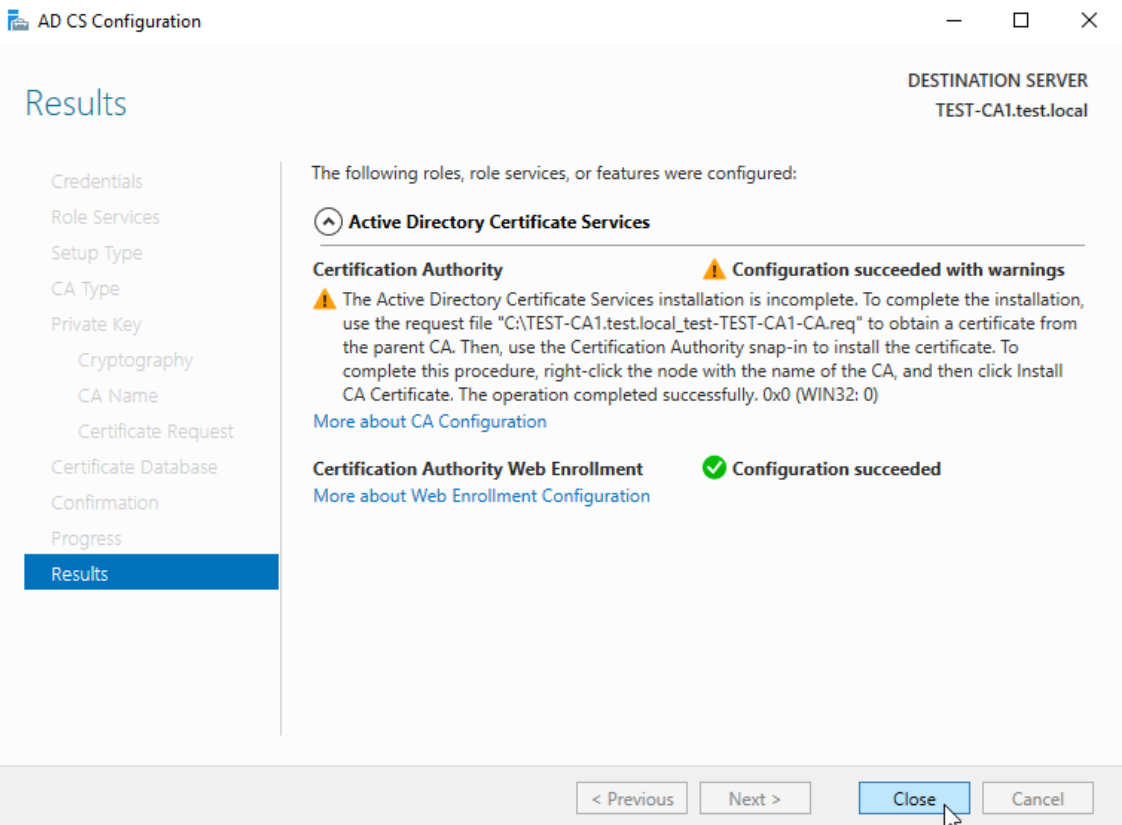
I will save cert request in default location (root of C:\) and click on Next
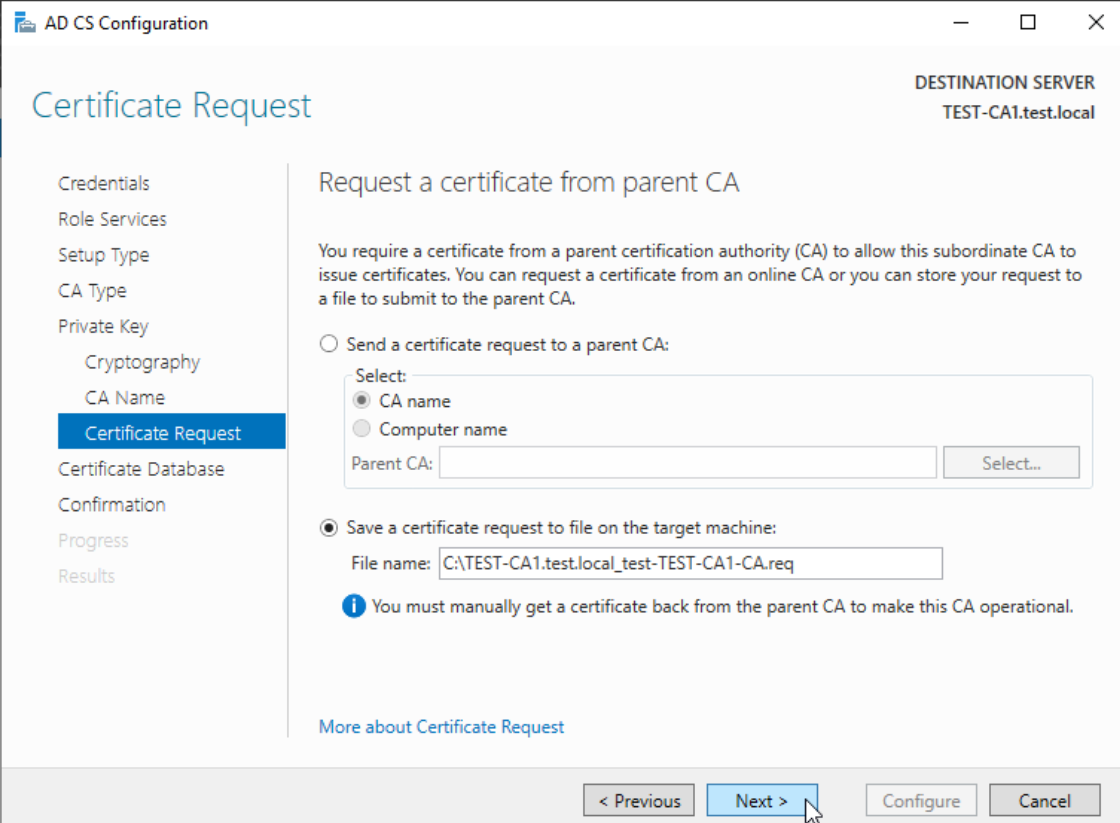
Result is expected – we need to send generated .req file to Root CA and issue a certificate.
Ok so we did something, but we are not done. We need to issue Subordinate certificate from Root CA. We will do this on Root CA.
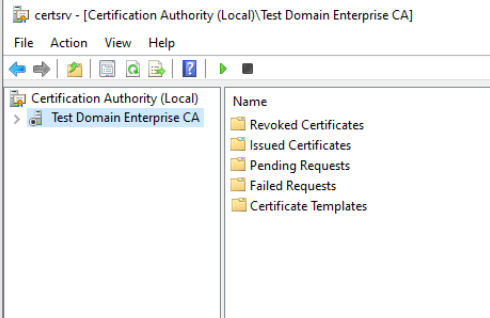
Let’s now validate what we’ve done by starting certsrv.msc on Subordinate CA
So, service is stopped. It will be stopped until we get certificate from Root CA. In the process above, we created certificate request, which will have to go through Root CA.
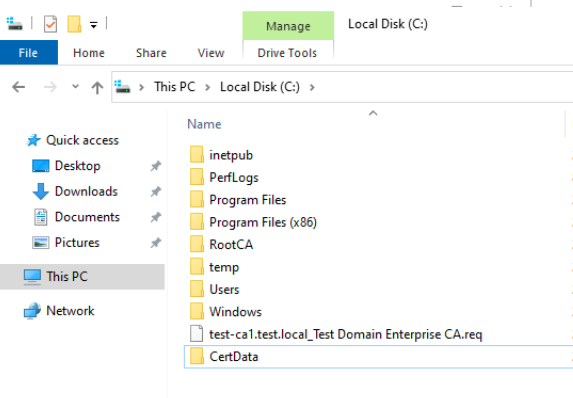
On C:\ I created CertData folder – which will host all the important stuff for our certs. Also, as you can see there is also a .req file in the root of the C drive which we will need to copy to Root CA via USB or Virtual floppy.
.req file form Subordinate CA to Root CA
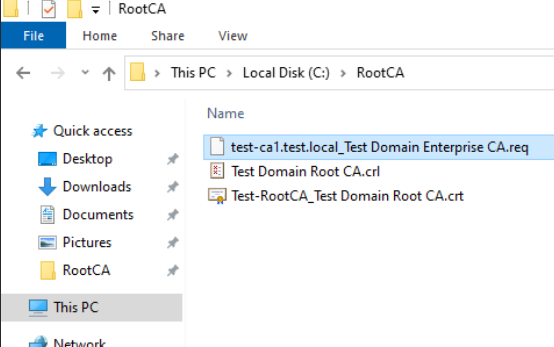
We need created test-ca1.test.local_Test Domain Enterprise CA.req to transfer for Subordinate CA (Test-CA1) to Root CA – Test-RootCA machine. As I mentioned in the first part – having Root CA on the netowrk is not smart idea. Copy file to USB drive or Virtual floppy (if you are dealing with Hyper-V) and transfer .req file from Subordinate to Root CA.
I copied the .req file to C:\RootCA on Root CA server
Now, let’s leave that there and do one more thing before we get back to issuing Subordinate Certificate.
Creating CertData virtual directory
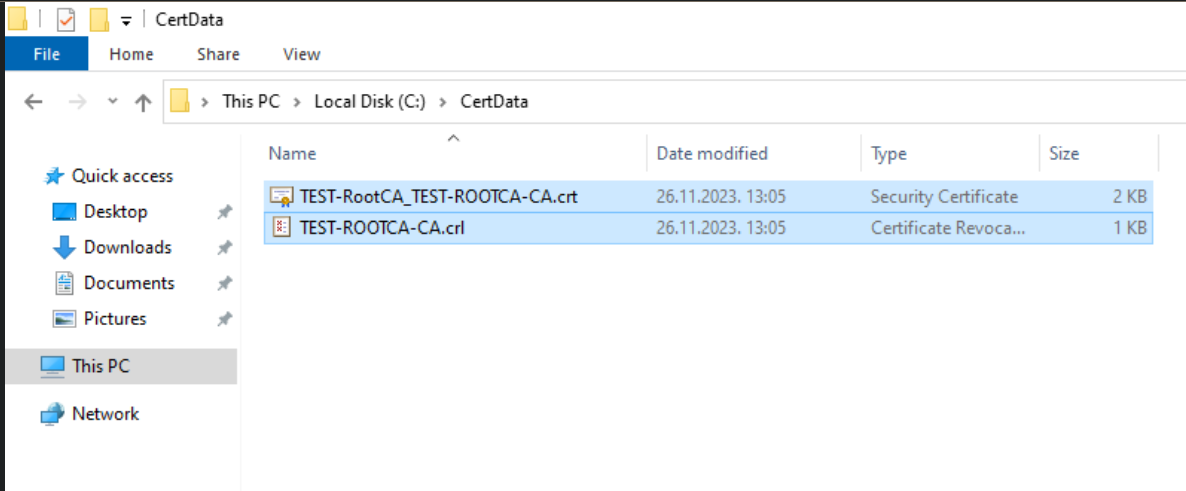
On Subordinate CA (Test-CA) we create C:\CertData folder, to that folder we need to copy .crl and .crt file we created on the Root CA in the first part of the guide.
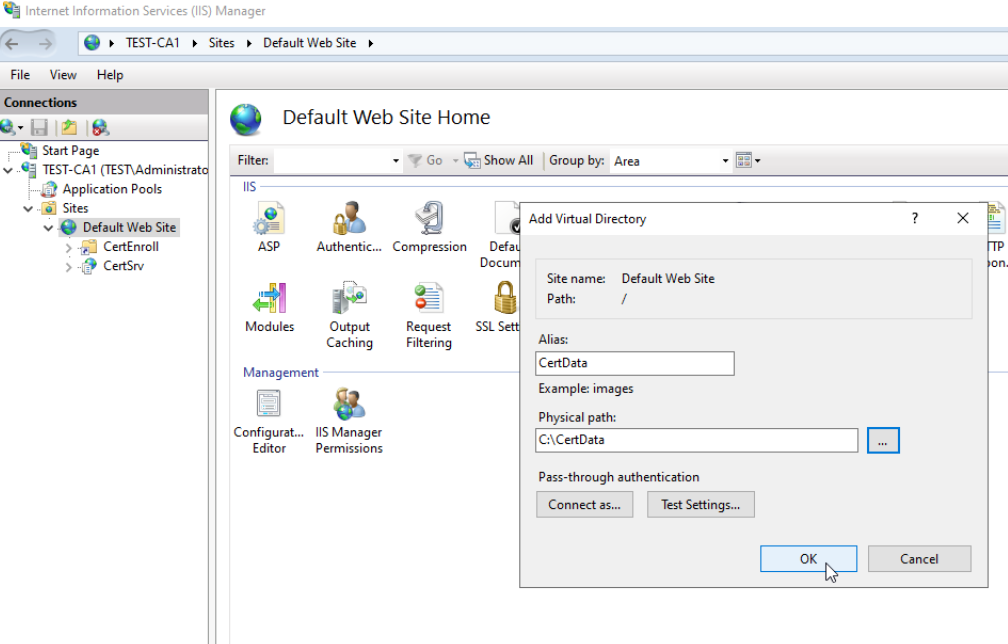
Now, we will create virtual directory for those files on Subordinate CA
Start IIS Manager
Expand Sites and right click on Default Web Site and select Add Virtual Directory – for Alias enter CertData and for physical path C:\CertData – confirm with ok and select newly created virtual directory.
Select Directory Browsing in main window of CertData virtual dir and click on Enable
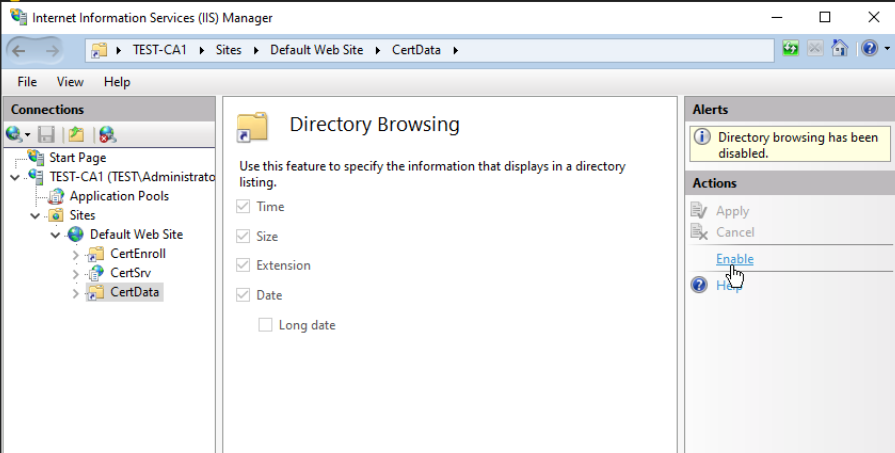
After this I restarted IIS.
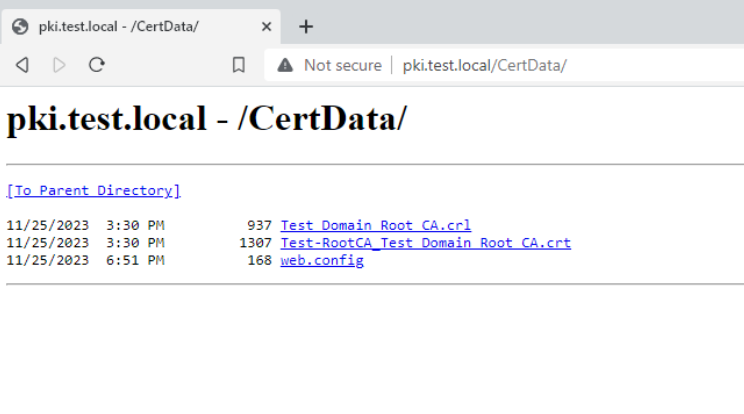
Let’s quickly validate what we’ve done. From Client machine I will try to access in browser following link
http://pki.test.local/CertData/
All good!!
Enable Double Escaping in IIS
On Subordinate CA, while we are still in IIS, go to Default Website, from middle window select Request Filtering – when Request Filtering opens, select Edit Feature Settings – New window will open – select Allow double escaping. Confirm with OK. Restart IIS.
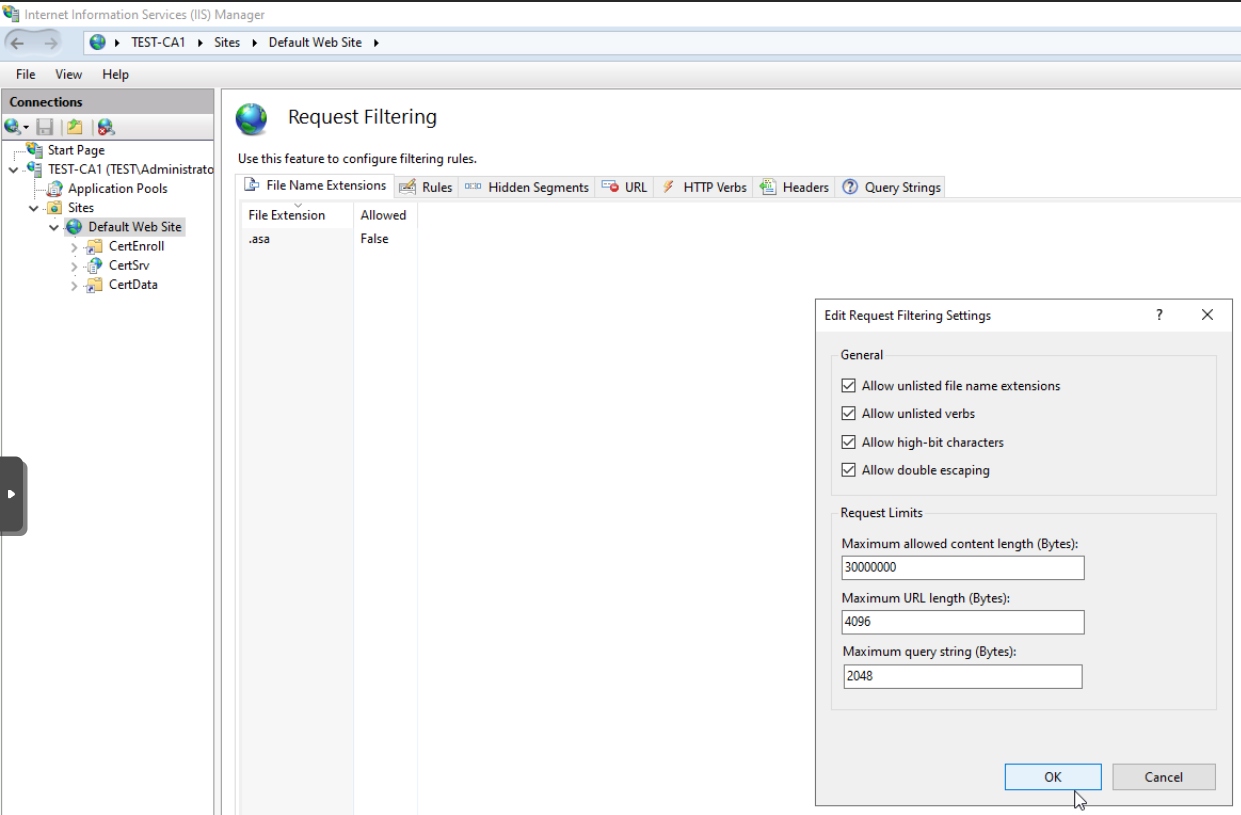
This is pretty important and should be done, since there will be problems with deploying Delta CRL and validation of PKI.
Subordinate Cert Creation
Ok, we already copied .req file from Subordinate CA to Root CA. Let’s now create certificate for Subordinate CA.
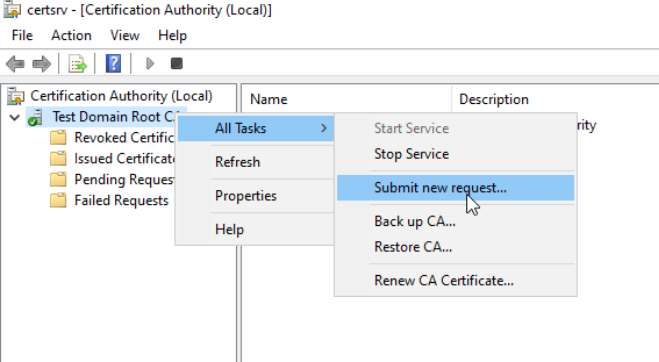
On the Root CA start Certification Authority console (certsrv.msc)
Right click on Root CA, select All Tasks and Submit new request…
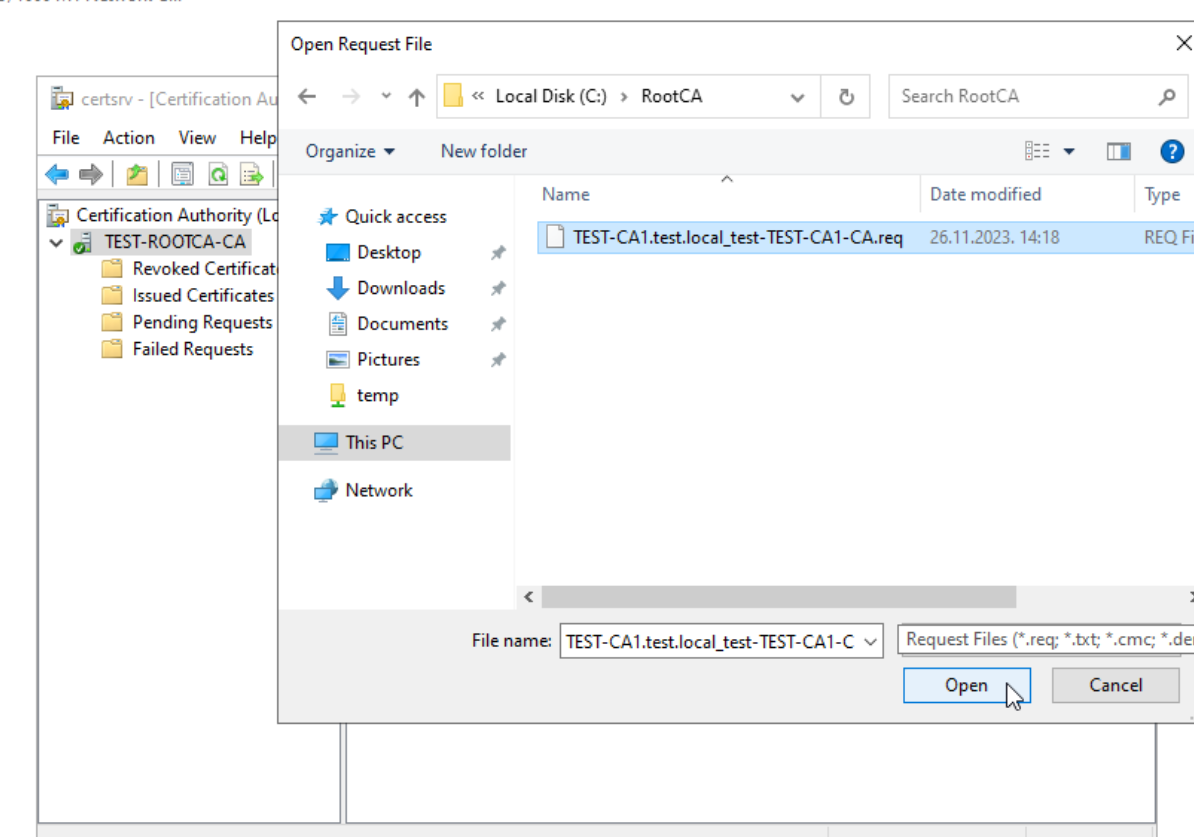
Browse to C:\RootCA and select .req file from Subordinate CA
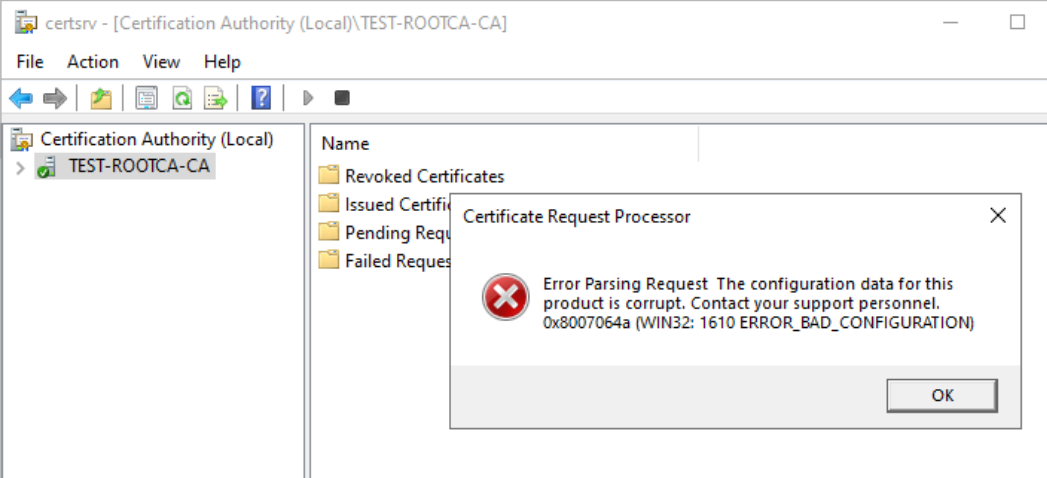
At this point I would get sometimes when I practice in labs with Windows Server 2022 this error – Error Parsing Request The configuration data for this product is corrupt. Contact your support personel. 0x8007064a. (WIN32: 1610 ERROR_BAD_CONFIGURATION) The error was result of inaccurate CDP and AIA commands, I did something wrong, space or deleted something – so be careful when you are configuring CDP and AIA on Root CA
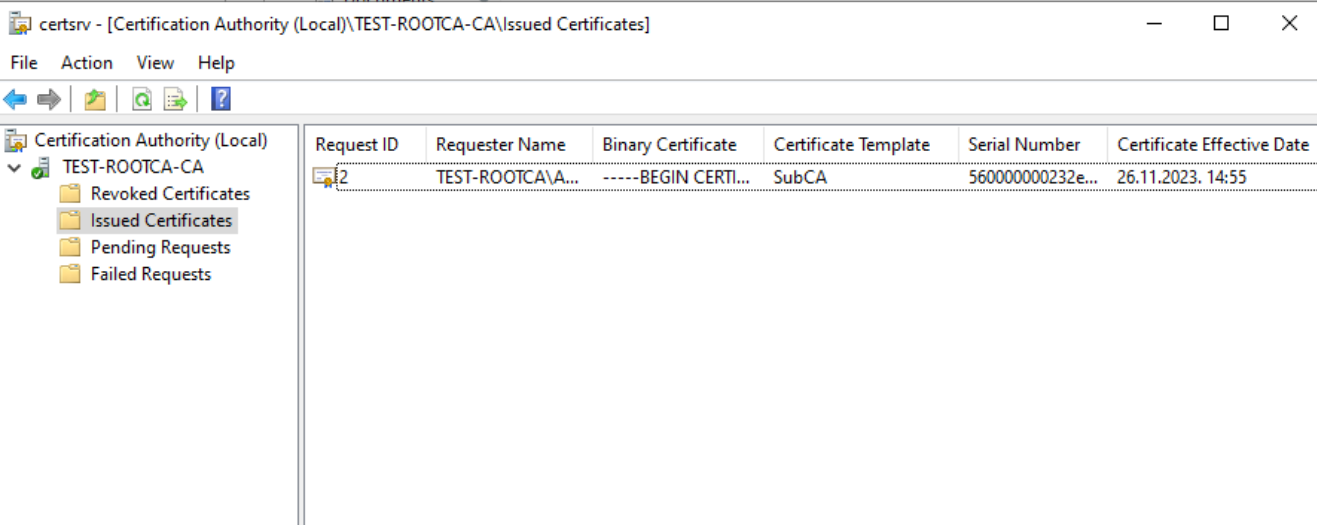
Ok, let’s proceed, now, right click on request id 2 and select All Tasks – Issue
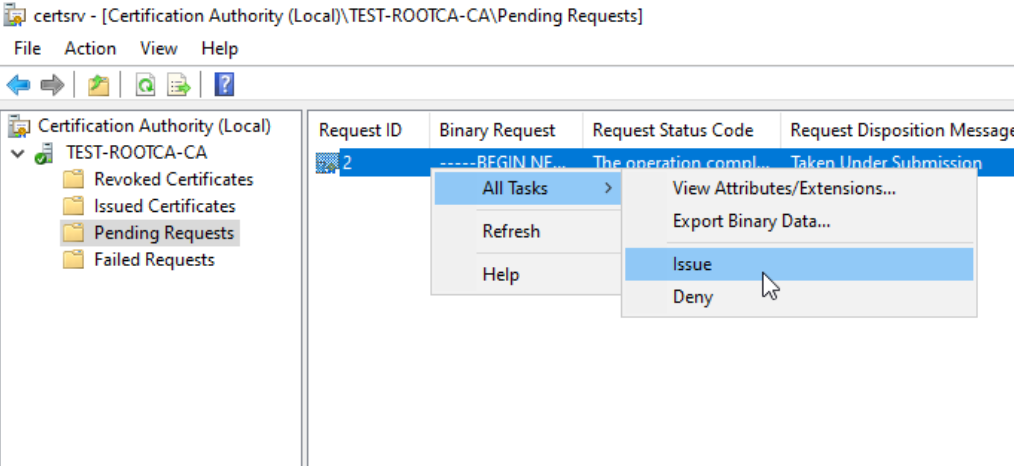
We did it, certificate is now in Issued Certificates
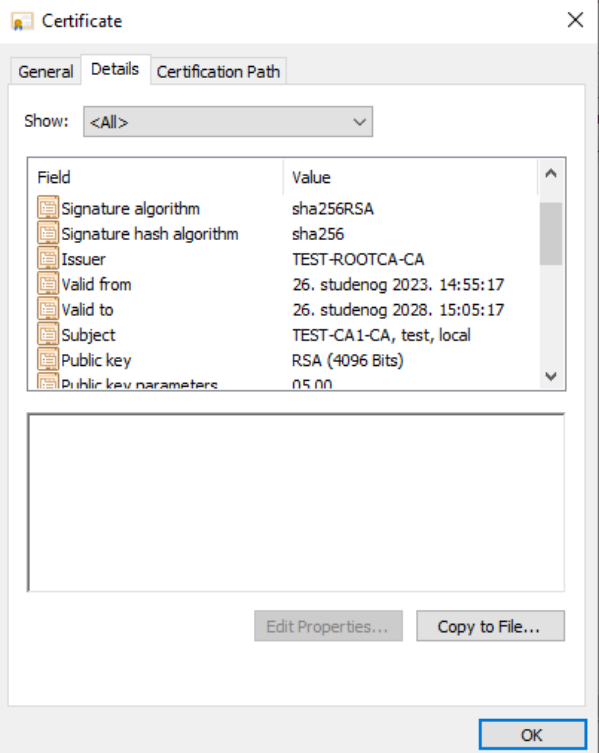
If we double click on the certificate we will see that it is valid for 5 years
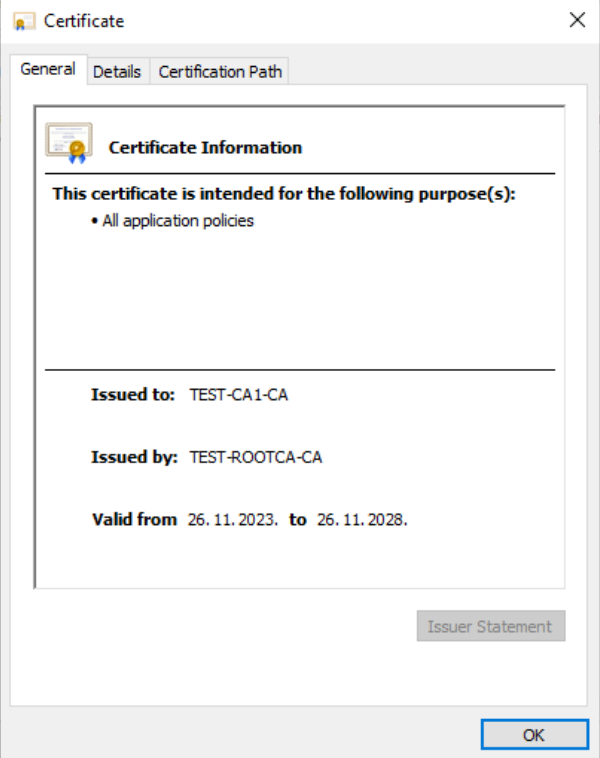
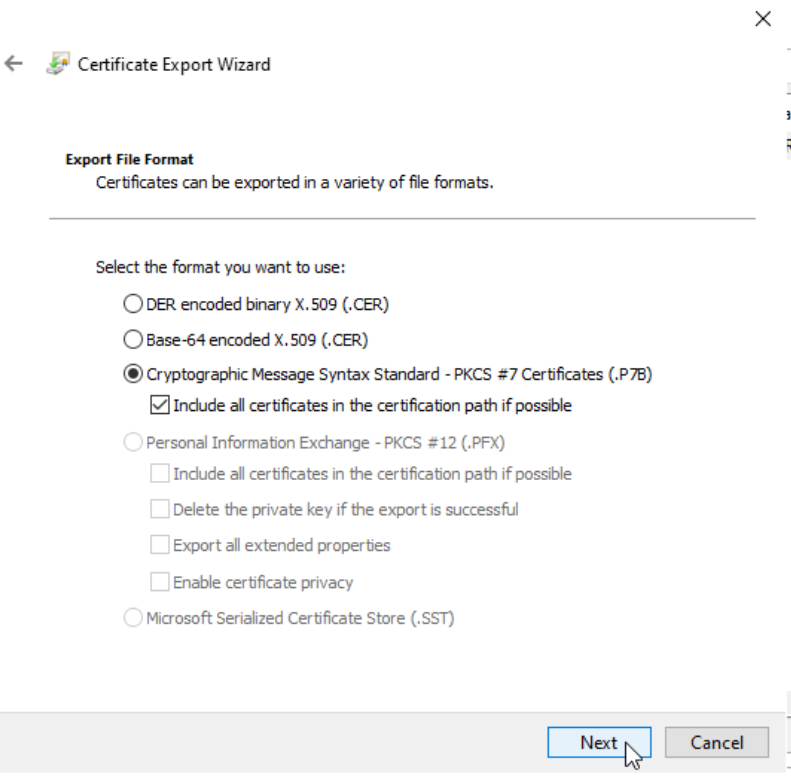
And RSA 4096, SHA256… While we are on Details tab, we will click on Copy to File…
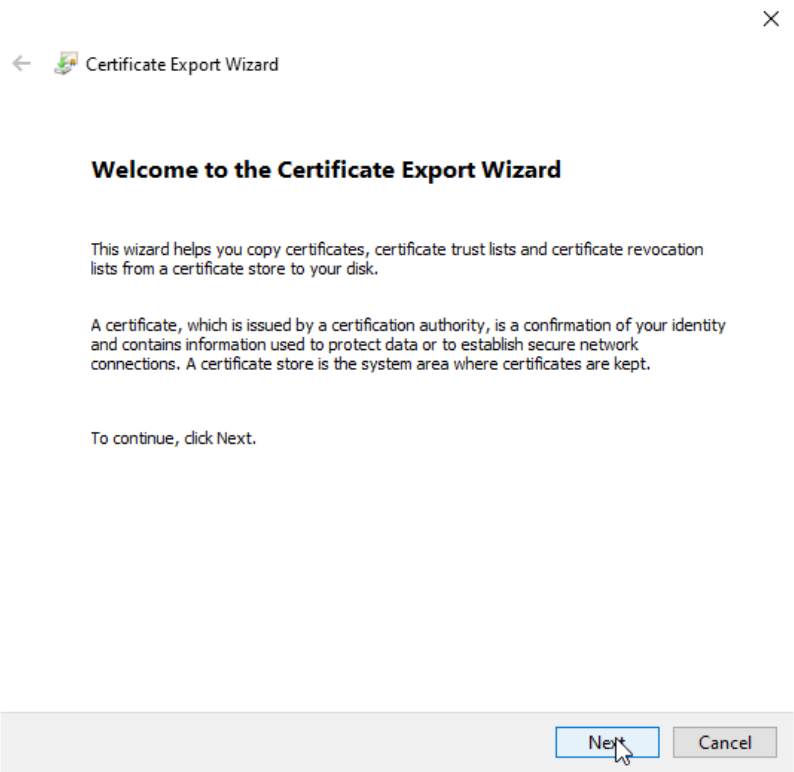
From Copy to File… we will start Certificate Export Wizard – click Next
We will select .P7B and “Include all certificates in the certification path if possible.
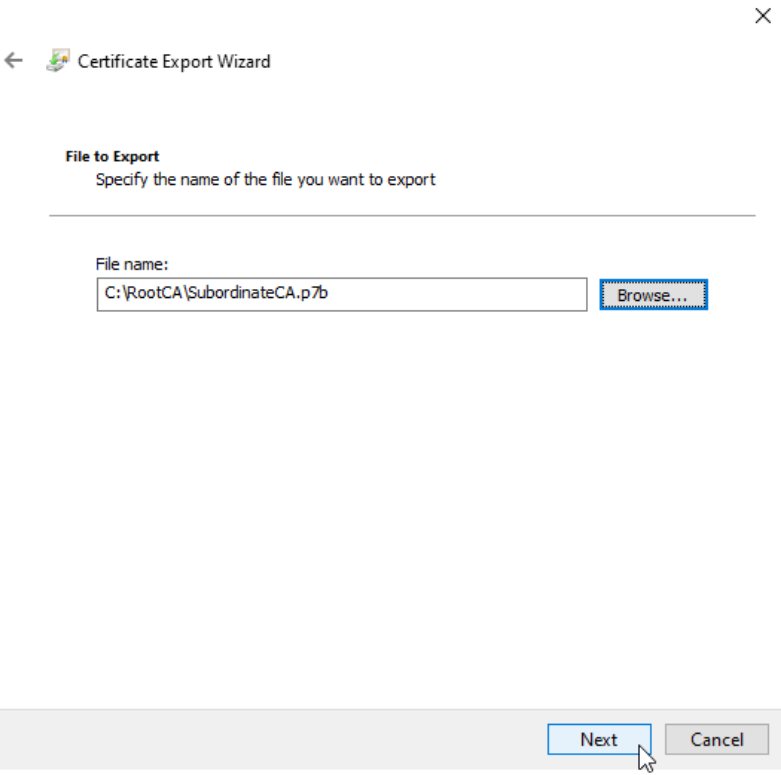
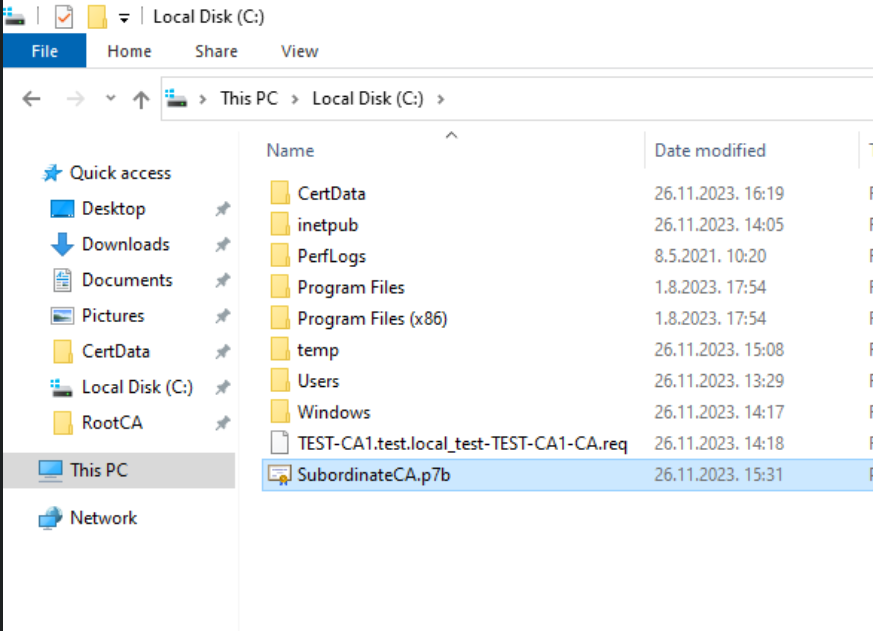
I will save it in C:\RootCA folder as SubordinateCA.p7b
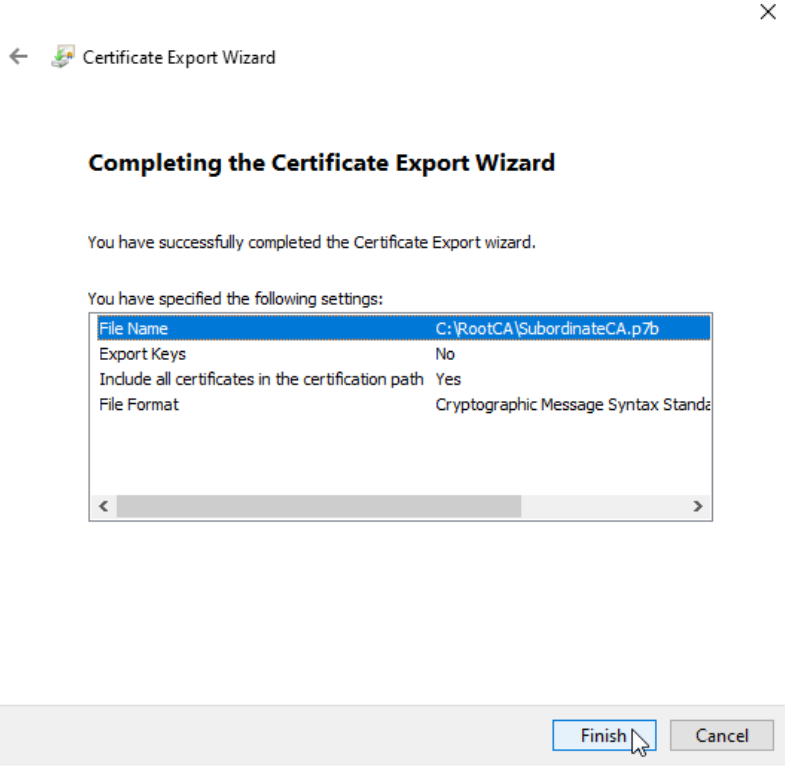
Ok, we are done.
Now, we need to transfer SubordinateCA.p7b from RootCA to SubordinateCA (Test-CA1). You can use usb drive, virtual floppy, or network, it is all up to your, your company and security posture at your company. We discussed this in the first part.
I copied SubordinateCA.p7b to C:\ on Test-CA1
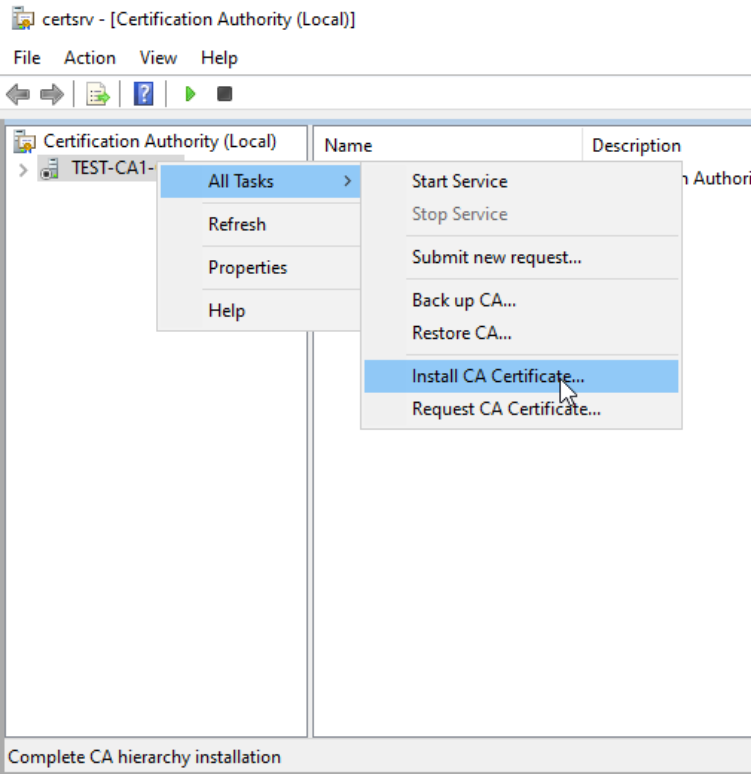
Now we are ack on the Subordinate CA (TEST-CA1) and will continue our work on it.
Start certsrv.msc – right click on your server – select All Tasks – Install CA Certificate…
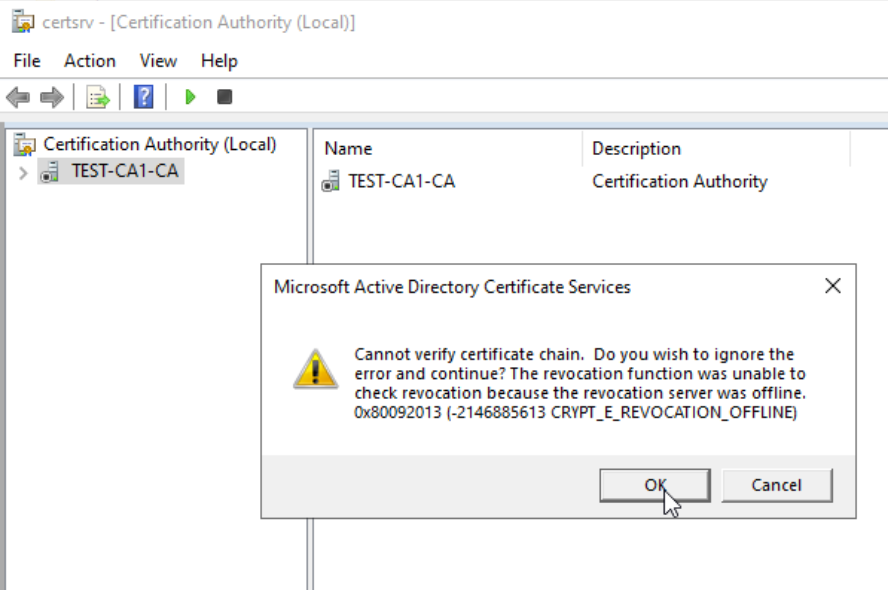
I got error that says “Cannot verify certificate chain.” Do you wish to ignore the error and continue? The revocation function was unable to check revocation because the revocation server was offline 0x80092013 . I will confirm with OK.
We will try and start the service now

Ok, bump in the road again…
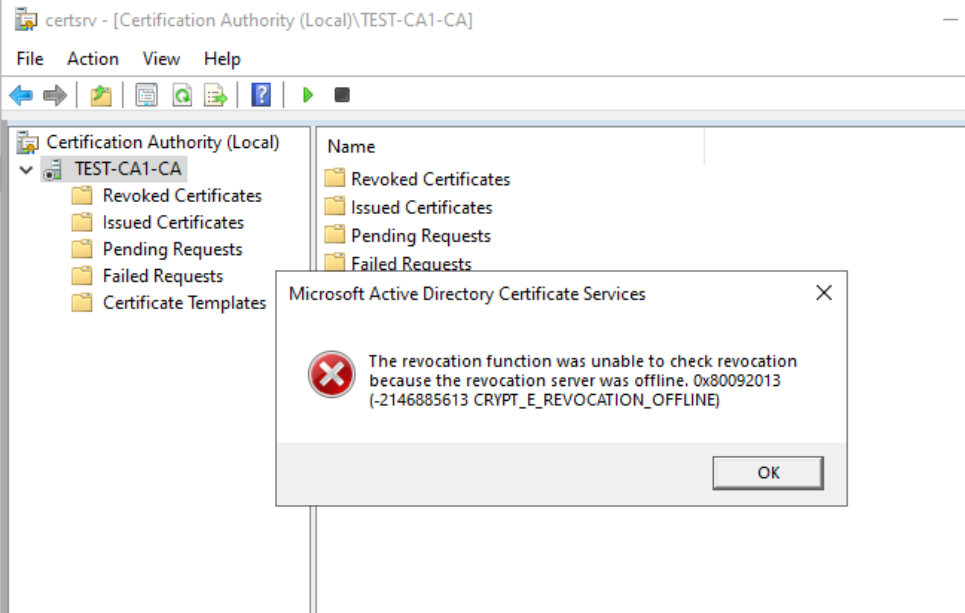
On Subordinate CA, start command prompt as admin and type in following command
certutil –setreg ca\CRLFlags +CRLF_REVCHECK_IGNORE_OFFLINEIf we try to start server then again…
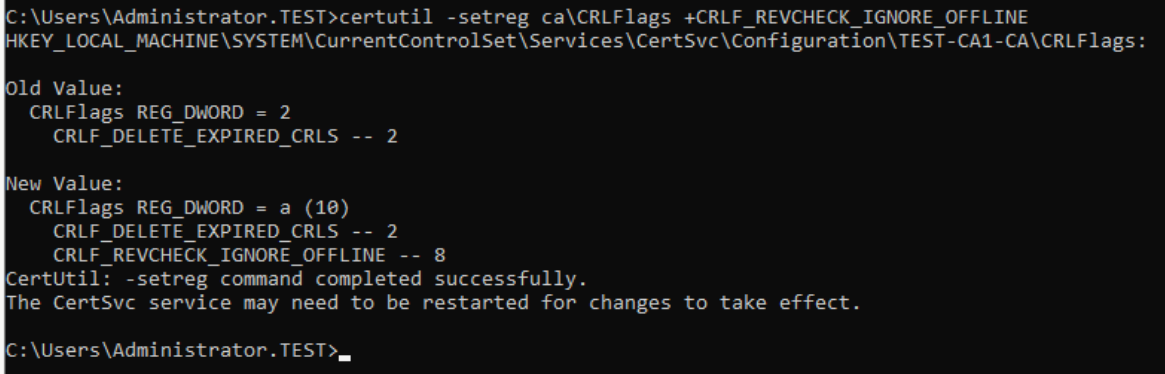
It works now! The error above happened because Root CA is offline at the time of issuance or Subordinate CA.

Set Maximum Certificate Age
We want certs that our Test-CA1 issues to be valid only a year. Open Powershell as admin and type in
certutil.exe -setreg CA\ValidityPeriodUnits 1
certutil.exe -setreg CA\ValidityPeriod "Years"
net stop CertSvc
net start CertSvc

We will also set a few other things while we are at it
Certutil -setreg CA\CRLPeriodUnits 1
Certutil -setreg CA\CRLPeriod “Weeks”
Certutil -setreg CA\CRLDeltaPeriodUnits 1
Certutil -setreg CA\CRLDeltaPeriod “Days”
Certutil -setreg CA\CRLOverlapPeriodUnits 12
Certutil -setreg CA\CRLOverlapPeriod “Hours”
net stop CertSvc
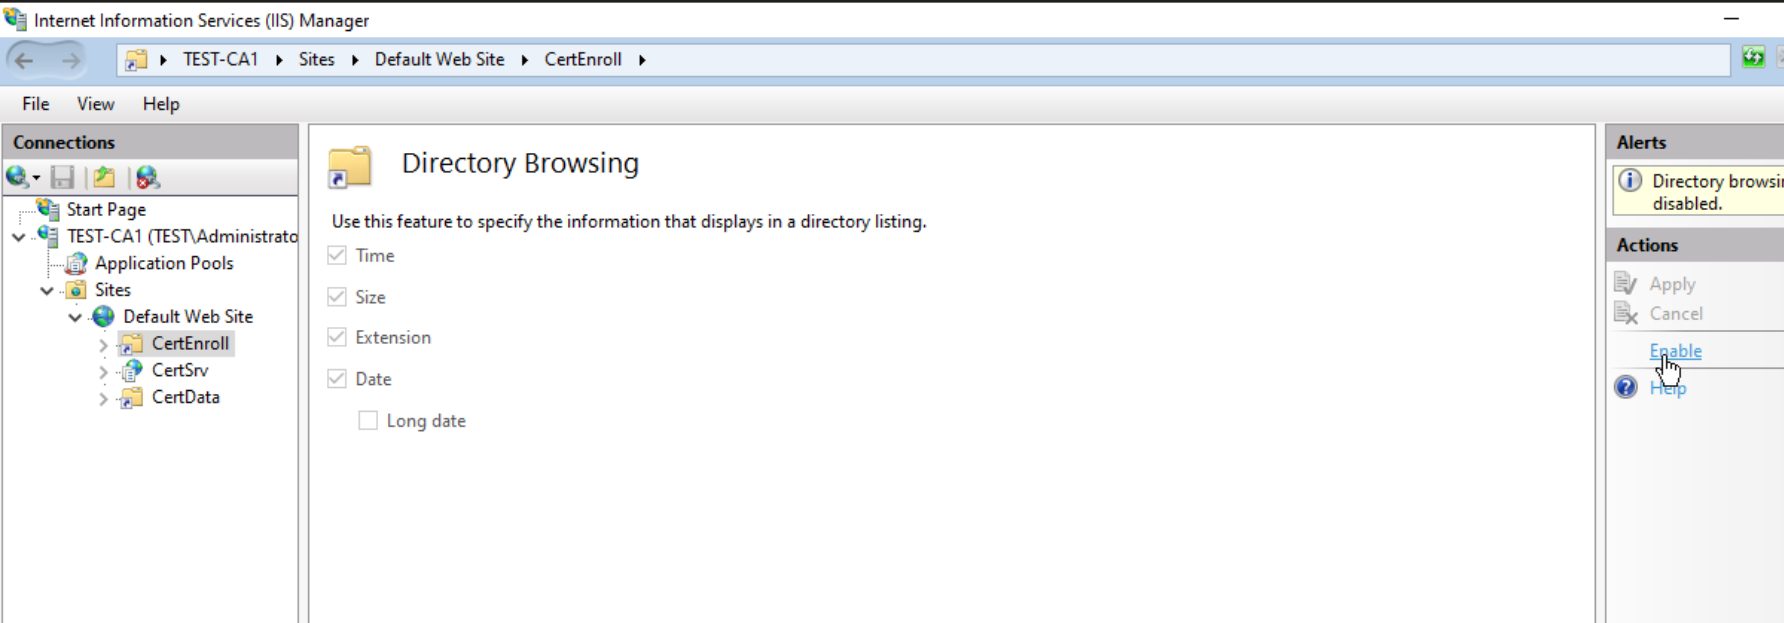
net start CertSvcNext stop is IIS, we will select CertEnroll and from the main screen select “Directory Browsing” – Enable. After that restart IIS
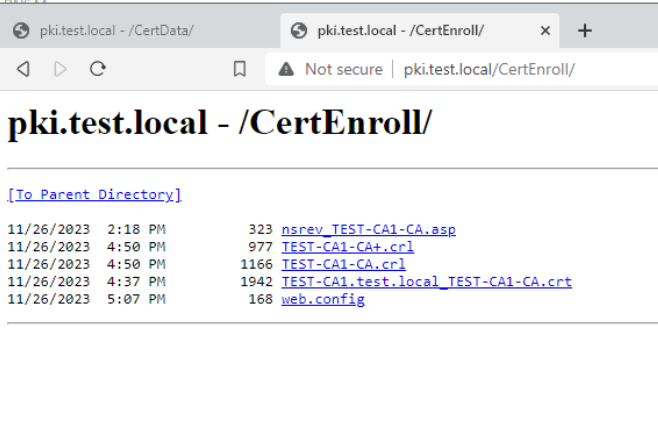
Now, let’s test the link http://pki.test.local/CertEnroll
Works
If you click on files you should also be able to download them. If not – check double escaping we mentioned and configured earlier.
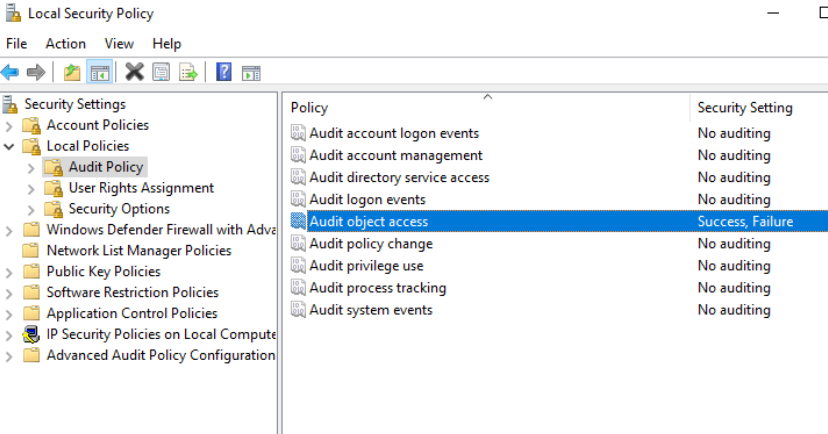
Enable Auditing
Audit object access in Local Security Policy should be enabled for both failure and success
Open Powershell as admin and type in
certutil.exe -setreg CA\AuditFilter 127
net stop CertSvc
net start CertSvc
Subordinate CA CDP and AIA Configuration
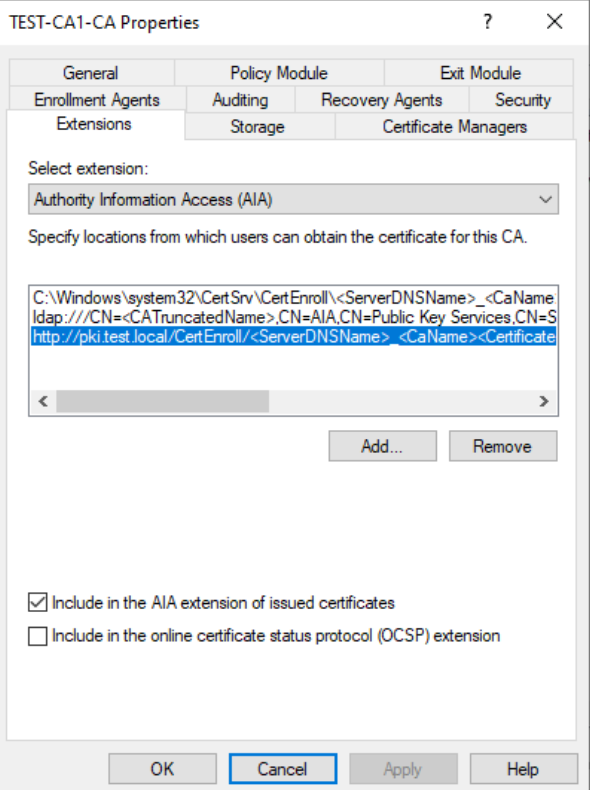
We will repeat CDP and AIA configuration also on Subordinate CA. Run COmmand Prompt as admin and type in following (in one line)
AIA
certutil -setreg CA\CACertPublicationURLs “1:C:\Windows\system32\CertSrv\CertEnroll\%1_%3%4.crt\n2:ldap:///CN=%7,CN=AIA,CN=Public Key Services,CN=Services,%6%11\n2:http://pki.test.local/CertEnroll/%1_%3%4.crt”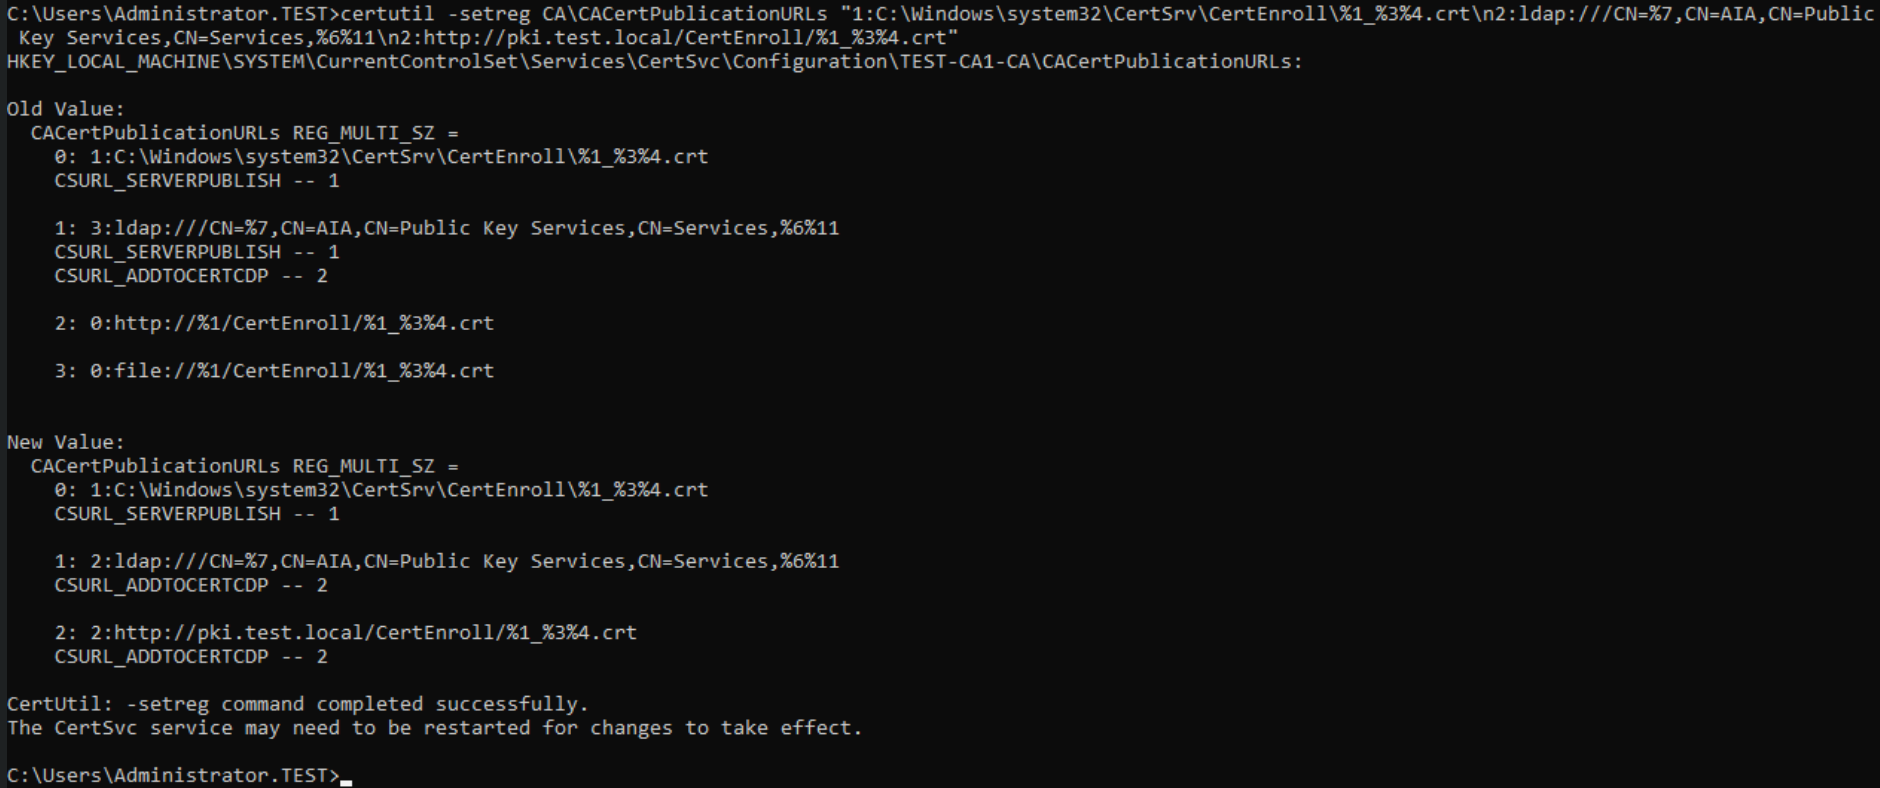
CDP
certutil -setreg CA\CRLPublicationURLs “65:C:\Windows\system32\CertSrv\CertEnroll\%3%8%9.crl\n79:ldap:///CN=%7%8,CN=%2,CN=CDP,CN=Public Key Services,CN=Services,%6%10\n6:http://pki.test.local/CertEnroll/%3%8%9.crl”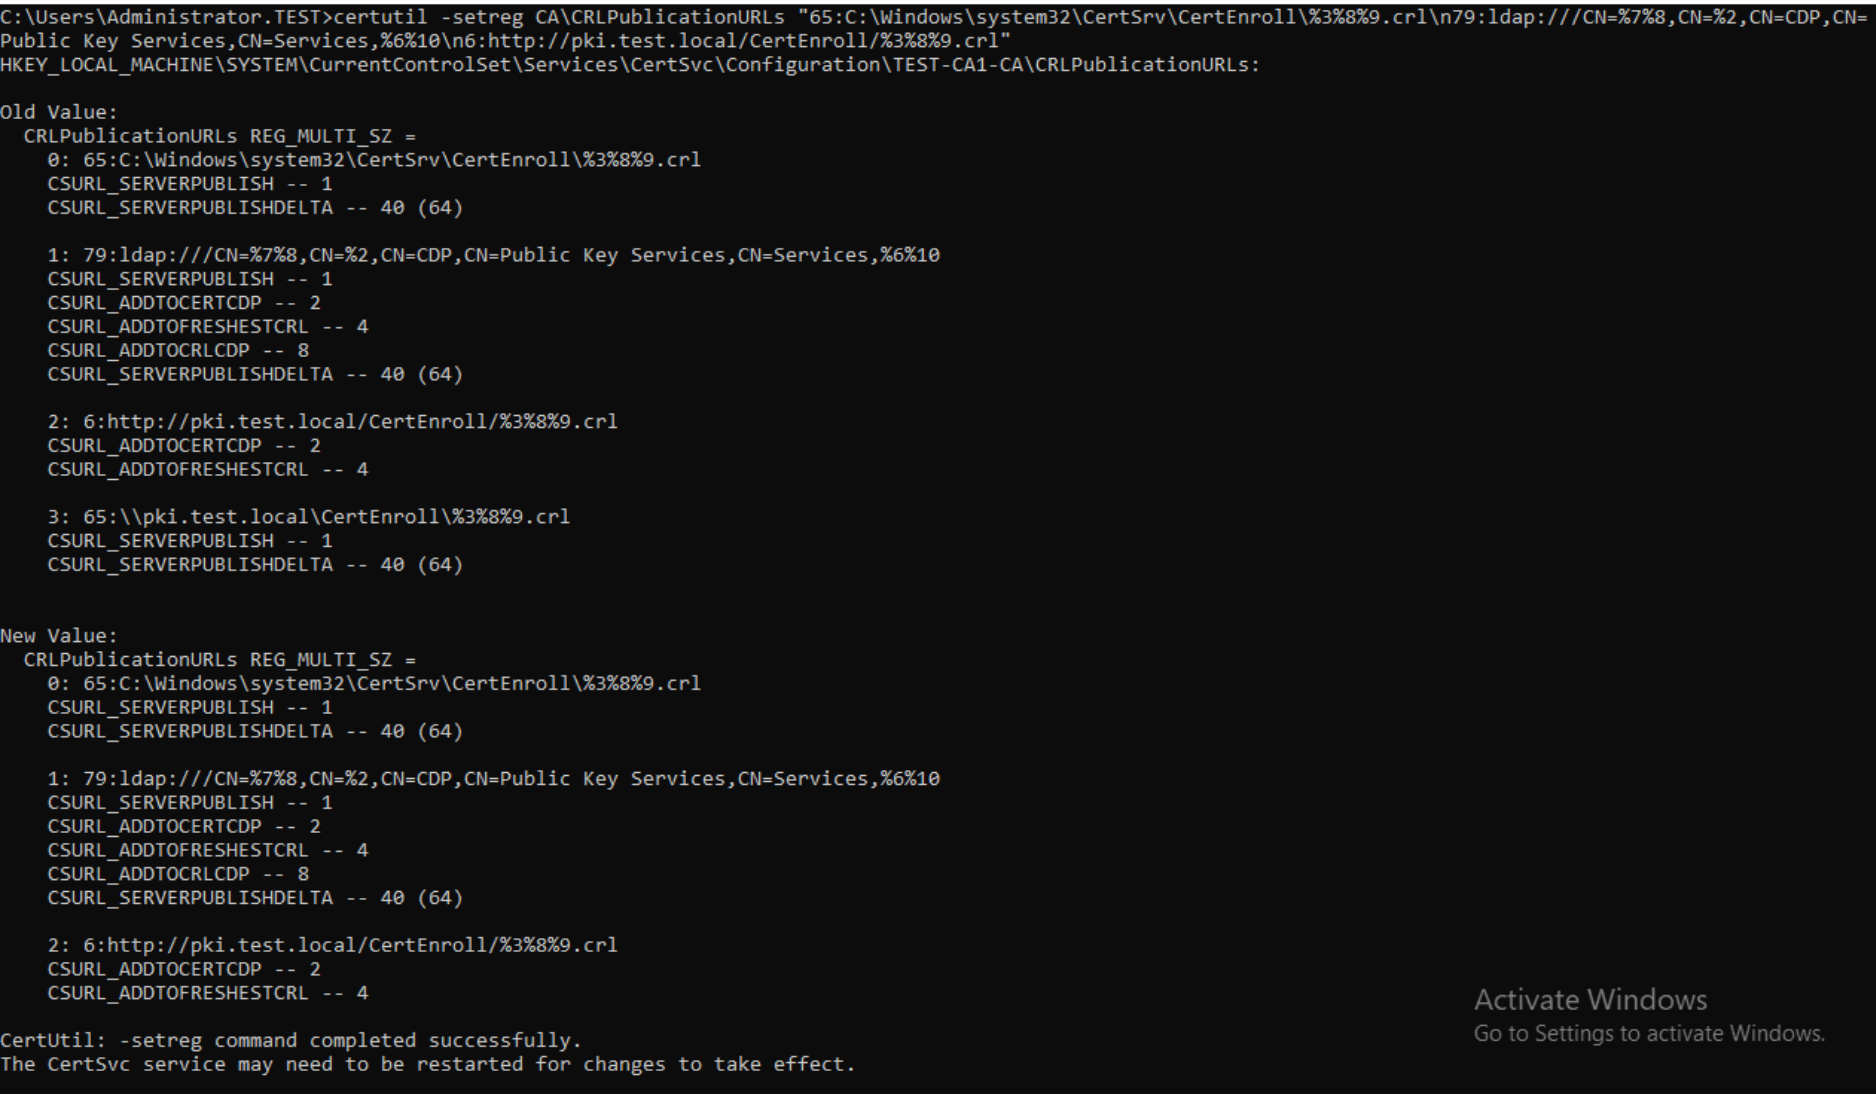
Check values with
certutil -getreg CA\CRLPublicationURLs
certutil -getreg CA\CACertPublicationURLs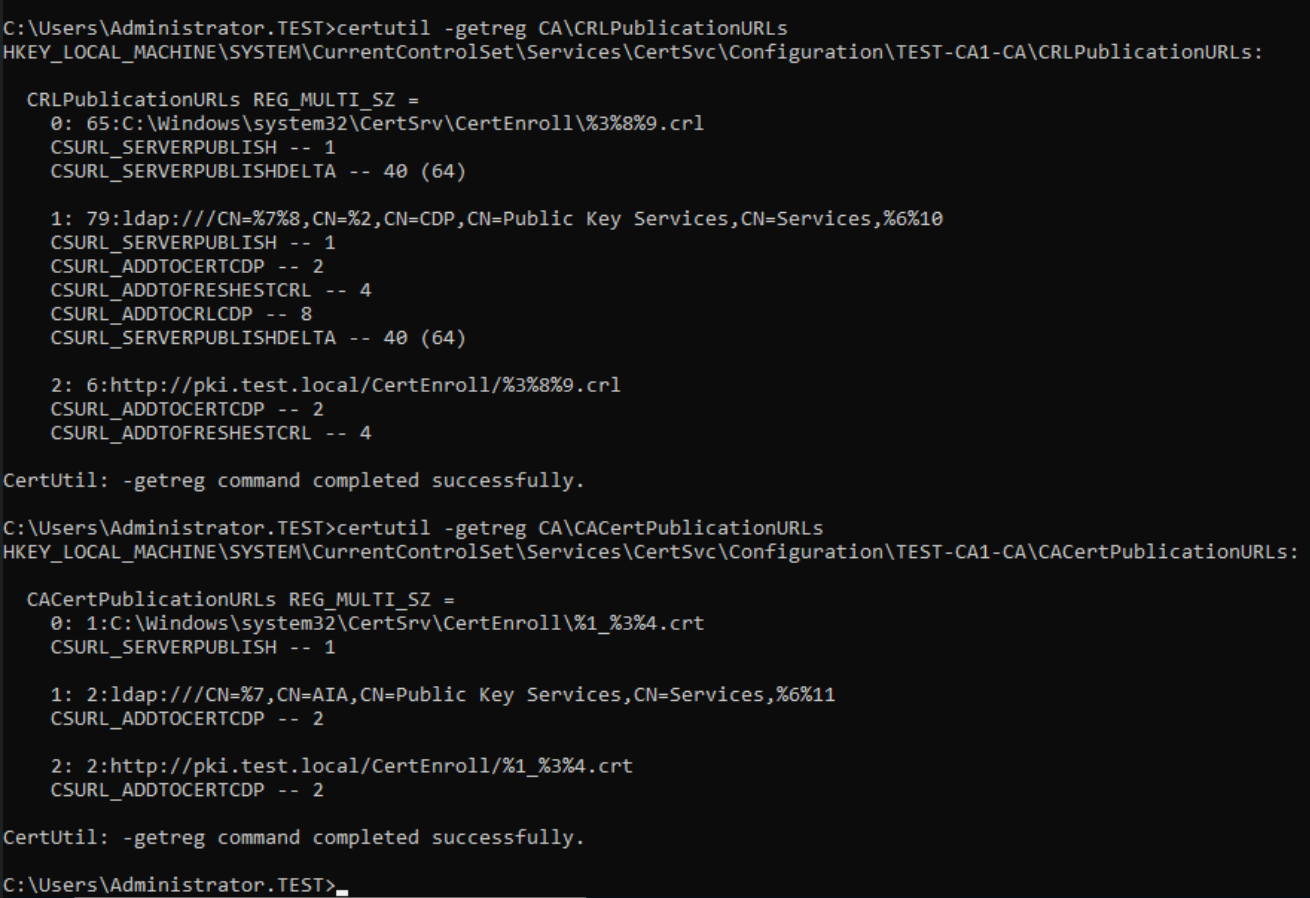
Let’s restart the services
net stop CertSvc
net start CertSvc
and publish them
certutil -crl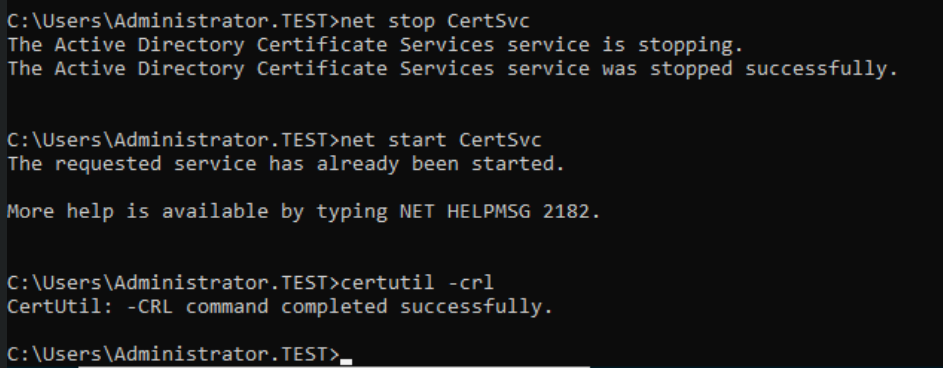
Open certsrv.msc – select Properties of the server and select Extension tab. On CDP select http and make sure that Include in CRLs… and Include in CDP… are selected.
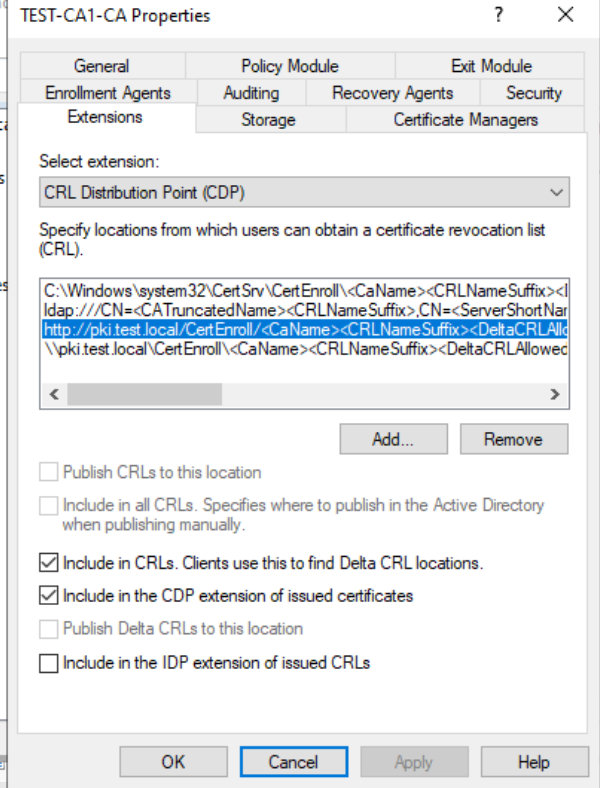
For AIA make sure that when you select http link “Include in AIA extension” is selected.
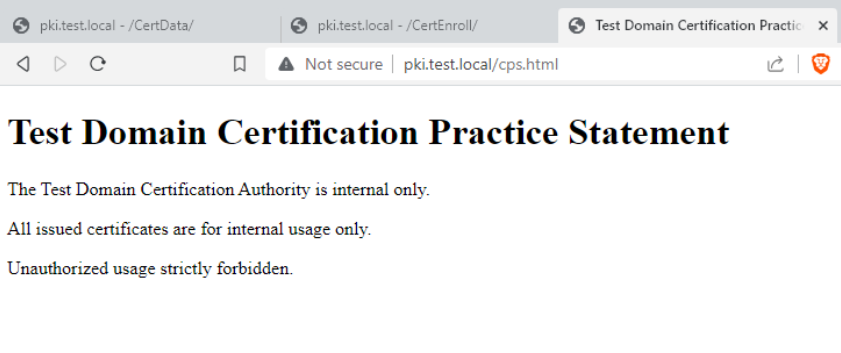
Certificate Practice Statement Document
You can use this to inform your users of Certificate Authority policies.
Create cps.html and copy following code in it. Then copy cps.html to c:\inetpub\wwwroot
<!DOCTYPE html>
<html>
<head>
<meta charset="utf-8">
<title>Test Domain Certification Practice Statement</title>
</head>
<body>
<h1>Test Domain Certification Practice Statement</h1>
<p>The Test Domain Certification Authority is internal only.</p>
<p>All issued certificates are for internal usage only.</p>
<p>Unauthorized usage strictly forbidden.</p>
</body>
</html>
Works fine, and you can edit it according to your needs
Firewall rules
Firewall should be on, following rules should be enabled
Echo Request - ICMPv4-in (ICMP) so we can ping
World Wide Web Services HTTP Traffic-In TCP/80
World Wide Web Services HTTPS Traffic-In TCP/443
Add Root CA to Active Directory
Root CA is offline, so we need to add it AD, so Active Directory is aware that there is another Certificate Authority. Run Powershell as admin and type in following
certutil.exe -dspublish `
-f "C:\CertData\test-rootca_TEST-ROOTCA-CA.crt" RootCA

certutil.exe -addstore `
-f root "C:\CertData\test-rootca_TEST-ROOTCA-CA.crt"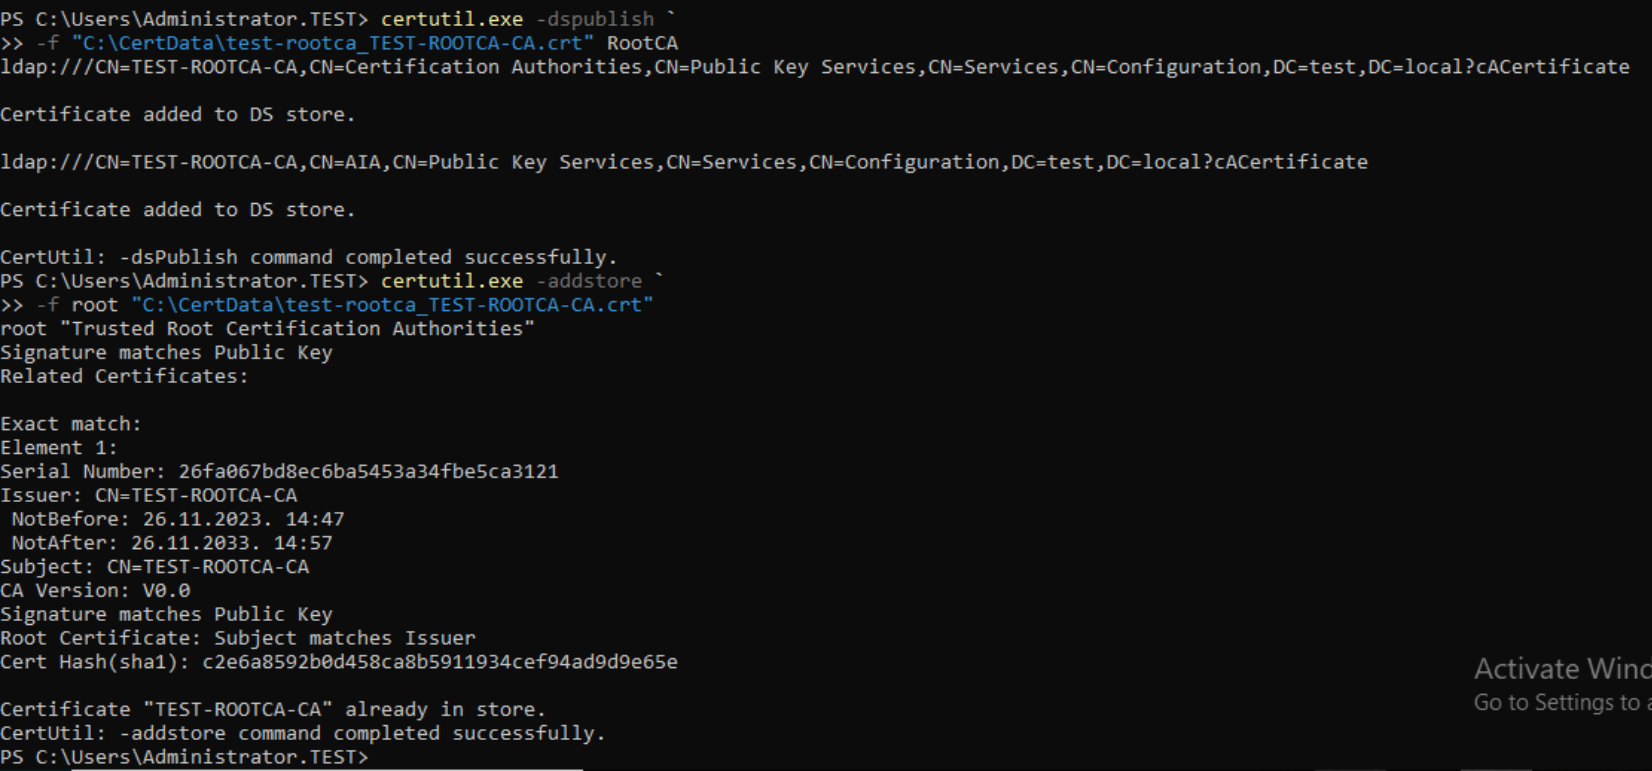
and then one more
certutil.exe -addstore `
-f root "C:\CertData\TEST-ROOTCA-CA.crl"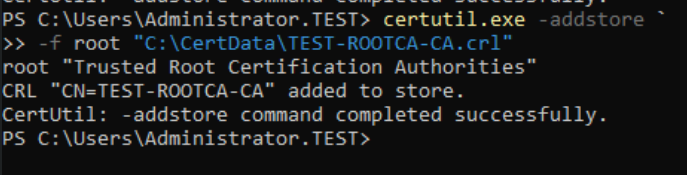
Not everything went well for me from Powershell, so I opened Command Prompt (as admin) and navigated to C:\CertData where I have RootCA crl and crt file. From there I executed following command
certutil -f -dspublish TEST-ROOTCA-CA.crlI had problems with CDP in PKIVIEW and this is the command I was missing.

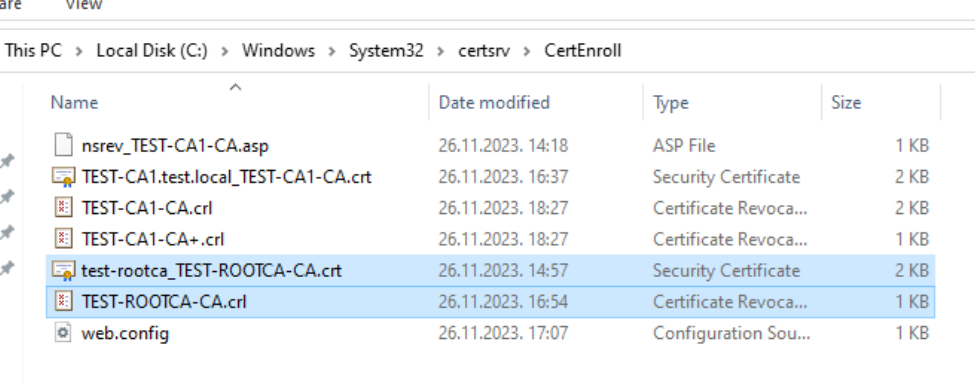
Before we conclude, make sure you copy ROOTCA crl and crt files from C:\CertData to C:\Windows\System32\certsrv\CertEnroll folder
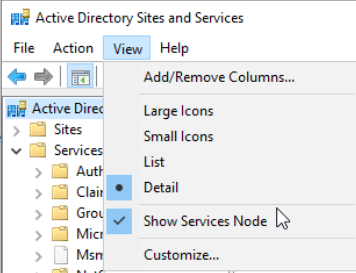
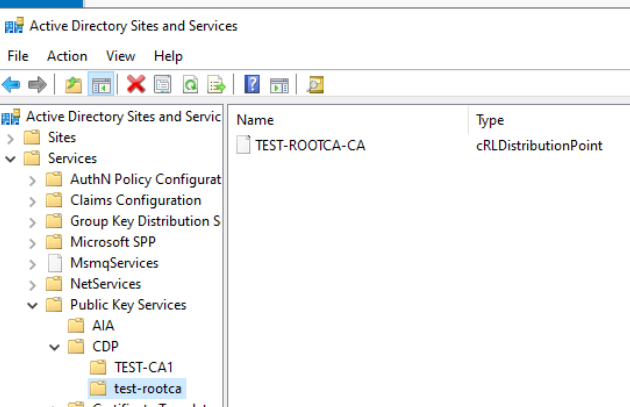
Let’s now quickly jump to our Domain Controller and open Active Directory Sites and Services – select Active Directory Sites and Services on the top – clik on View and select Show Services Node
Open Public Key Services and click on AIA – you should see both CA1 and ROOTCA.
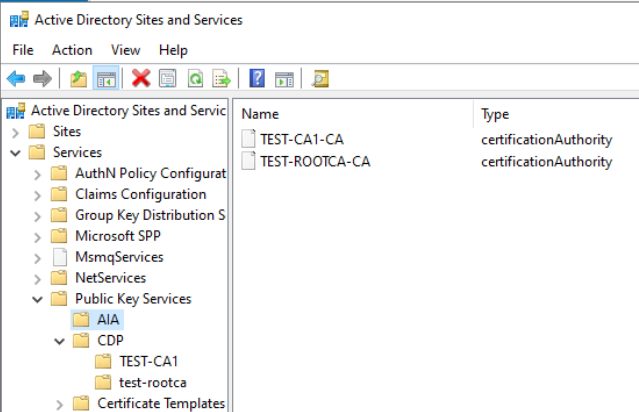
Under CDP you should have two subfolders named TEST-CA1 (SubordinateCA) and test-rootca (Offline Root CA) both should have distrib points inside.
Ok, we now went through all.
Now, we can finally verify our PKI infrastructure, and see if everything works.
Verifying PKI infrastructure
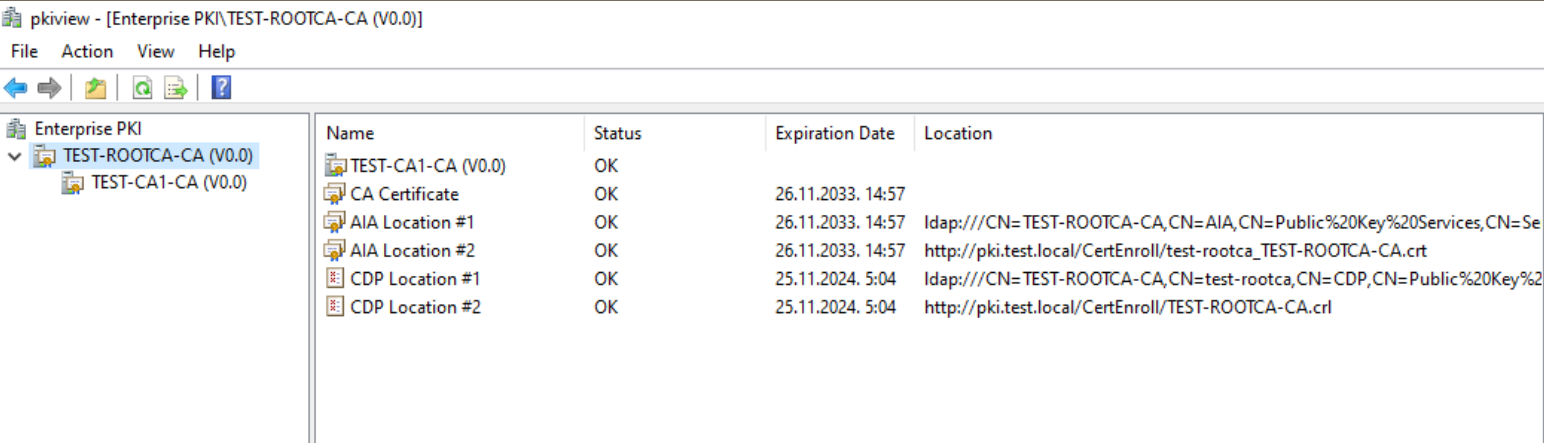
On TEST-CA1 run pkiview.msc
There shouldn’t be any red crosses or unable to download statuses for our offline Root CA
Same goes for Subordinate CA.
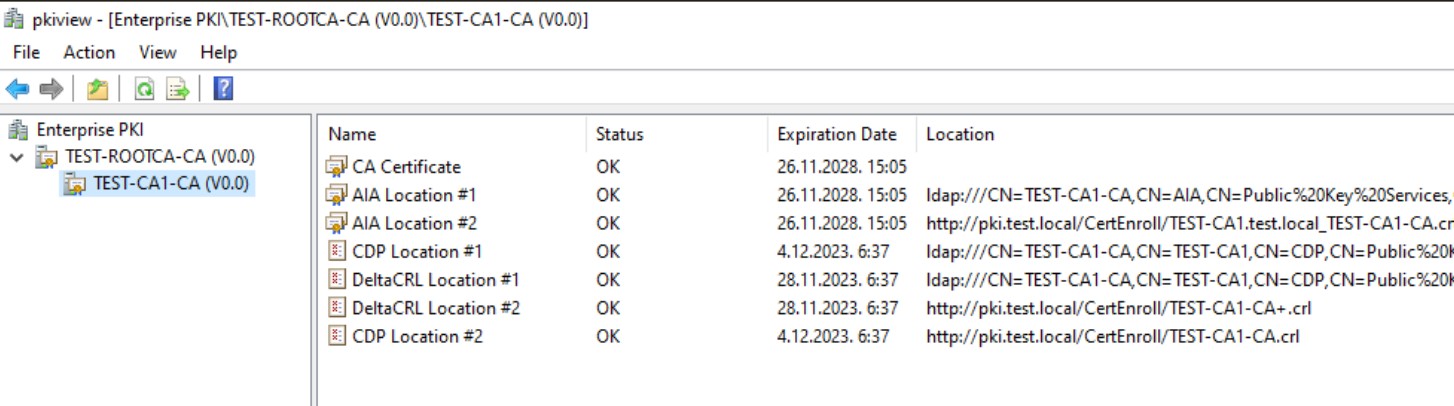
I gave you few hints above, I had problems with offline root ca, with complete CDP part and one AIA http link. Solution was to copy rootca crl and crt files to C:\Windows\System32\certsrv\CertEnroll as I mentioned above, and to execute extra dspublish command for crl in command prompt – and that fixed all.
We have functional Two-Tier CA!!!!
Please do not turn of Root CA until you are done with entire PKI implementation!
More details and how to’s on topic to follow.
Implementing Two-Tier PKI on Windows Server 2022 – Part 1
Implementing Two-Tier PKI on Windows Server 2022 – Part 2 – you are here
Implementing Two-Tier PKI on Windows Server 2022 – Part 3
Implementing Two-Tier PKI on Windows Server 2022 – Part 4
Implementing Two-Tier PKI on Windows Server 2022 – Part 5
Implementing Two-Tier PKI on Windows Server 2022 – Part 6
Implementing Two-Tier PKI on Windows Server 2022 – Part 7