We went through LAMP stack installation on Ubuntu Server. Now we will enable https by installing mod_ssl and creating self-signed certificate.
Before we begin
As a prerequisite, you should have Apache2 installed and firewall configured for port 443. I already went through that.
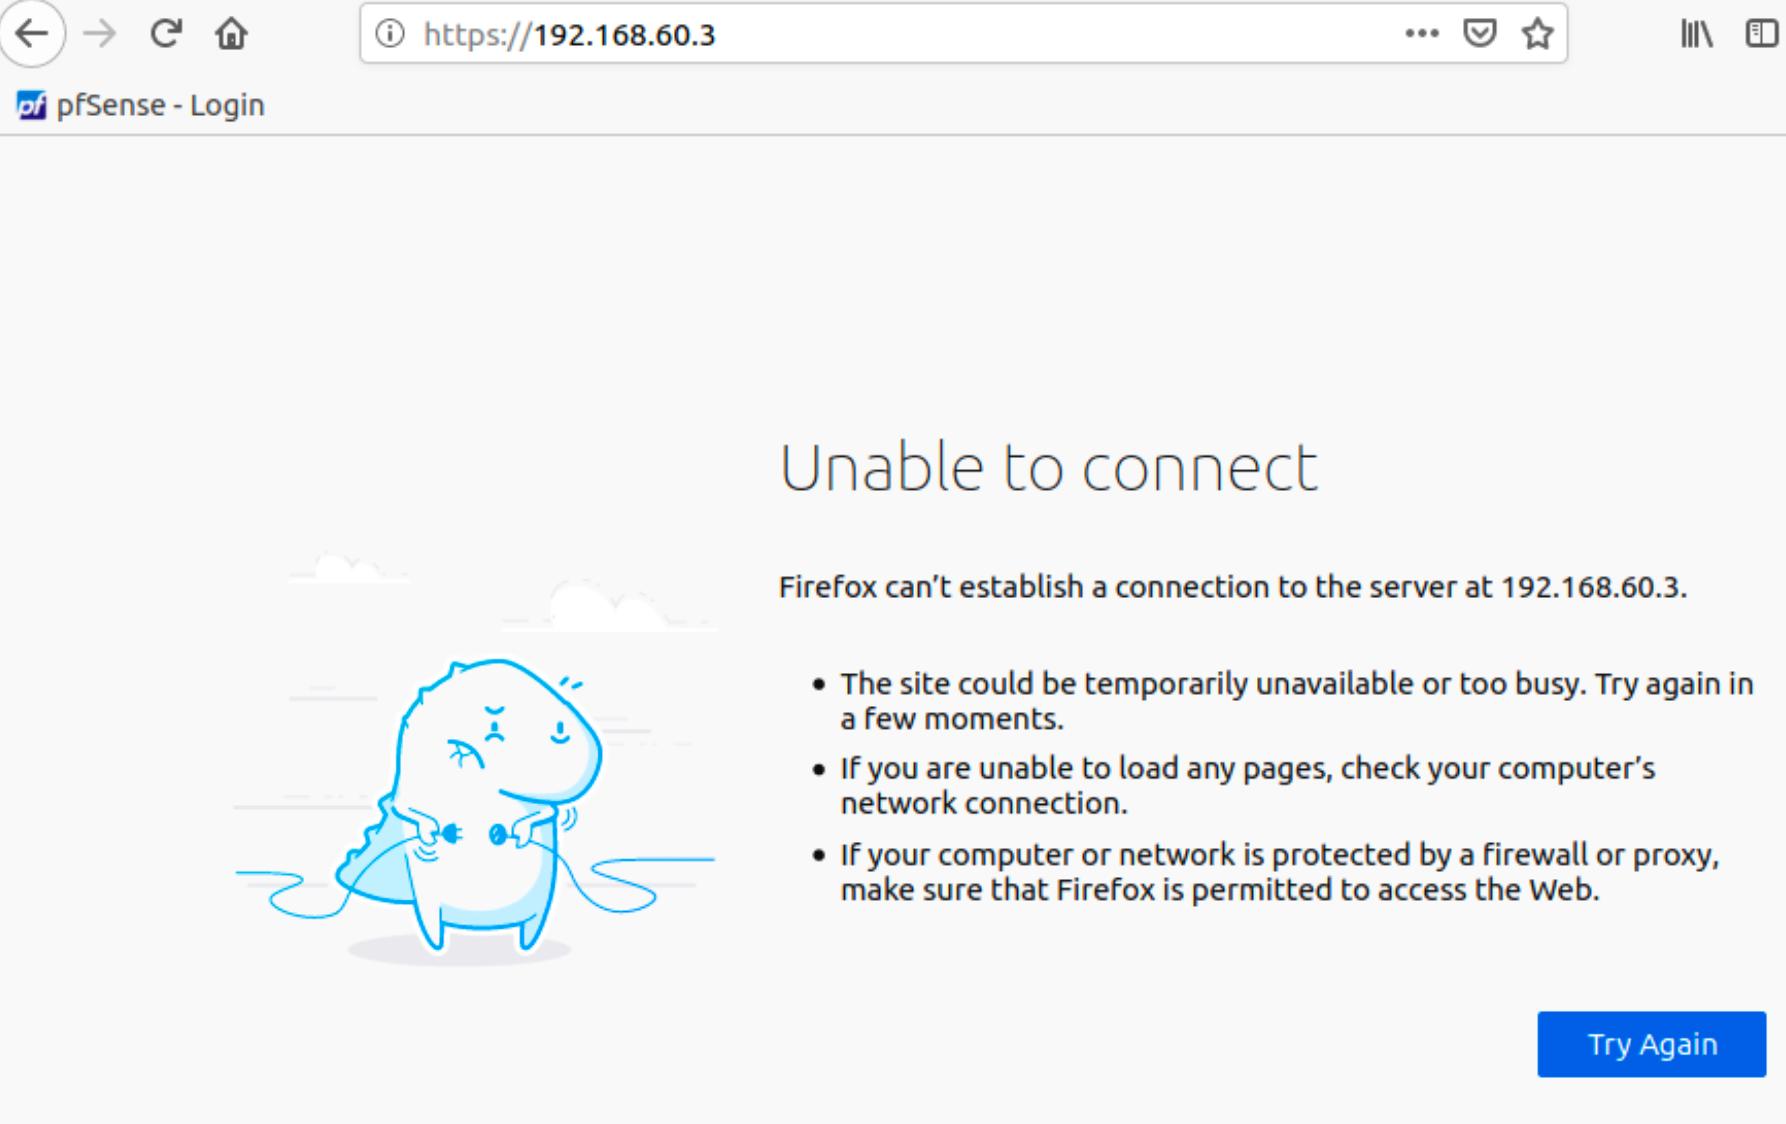
I have web server on address http://192.168.60.3
If I try to reach it on https://192.168.60.3 this is what I get
Enable mod_ssl
mod_ssl is apache module which enables ssl/https.
We need to enable it
sudo a2enmod ssl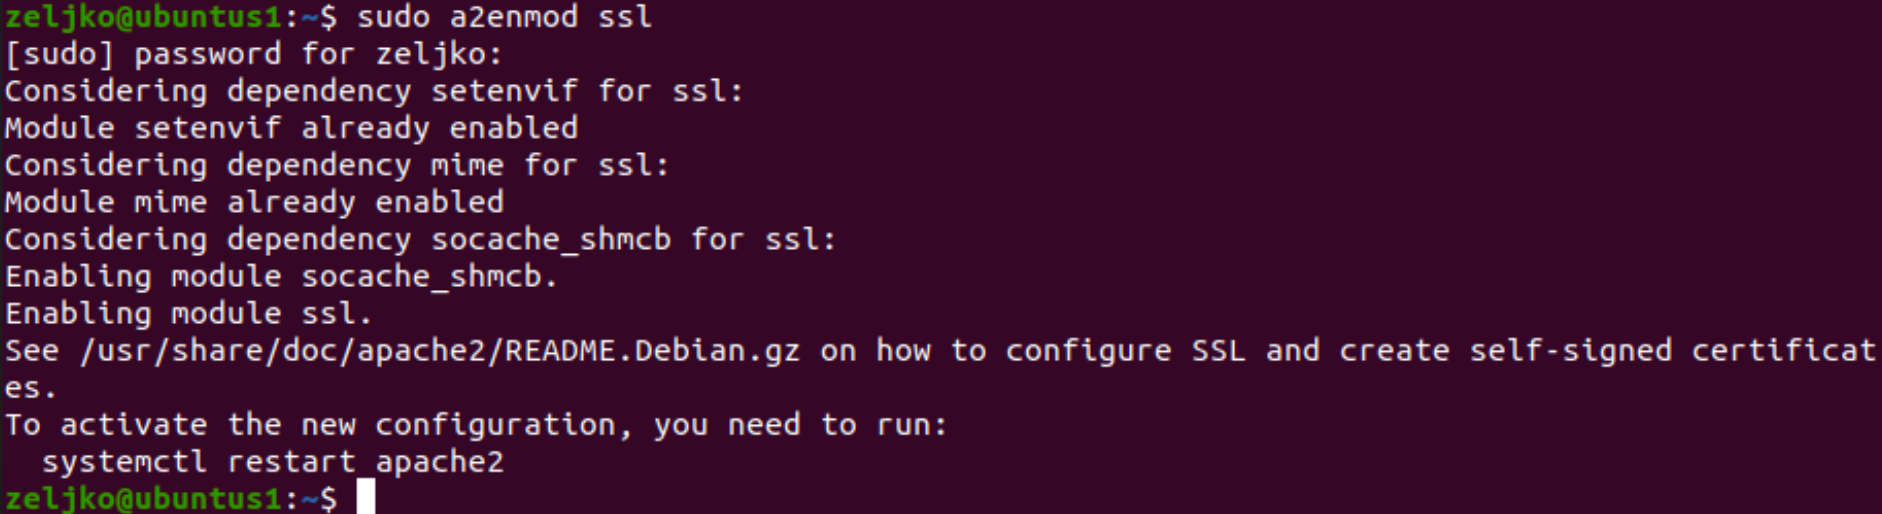
As last sentence suggest, we should restart apache2
sudo systemctl restart apache2
Create SSL Certificate
Following command will create self signed certificate with public and private key named ssl1. Cet will be valid for 1 year (365 days)
sudo openssl req -x509 -nodes -days 365 -newkey rsa:2048 -keyout /etc/ssl/private/ssl1.key -out /etc/ssl/certs/ssl1.crt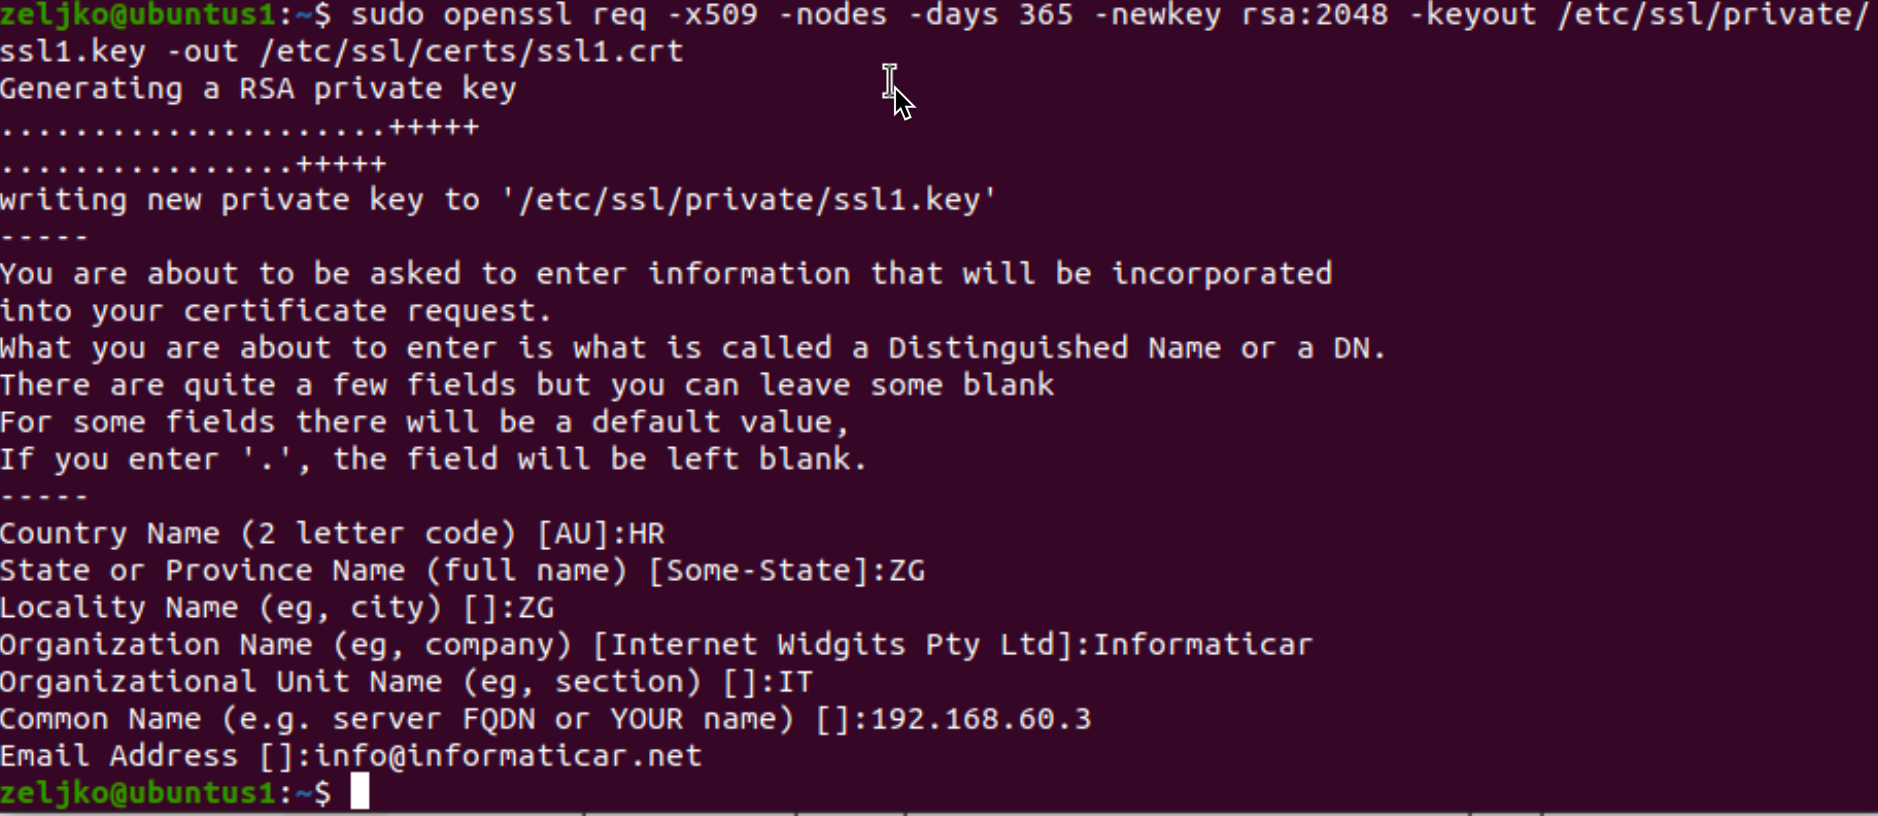
Country Name (2 letter code) [XX]:HR
State or Province Name (full name) []:YourState
Locality Name (eg, city) [Default City]:YourCity
Organization Name (eg, company) [Default Company Ltd]:YourCompany
Organizational Unit Name (eg, section) []:YourDept
Common Name (eg, your name or your server's hostname) []:your_domain_or_ip
Email Address []:email@domain.xxx
!!! For this test in common name I entered my IP address – in that field in production system you will put domain name of your web.
In my case that would be informaticar.net
Configure Apache to use SSL
We need to create new config file in /etc/apache2/sites-available to enable ssl to work.
Enter following
sudo nano /etc/apache2/sites-available/your_domain_or_ip.confI will enter 192.168.60.3.conf for a name.

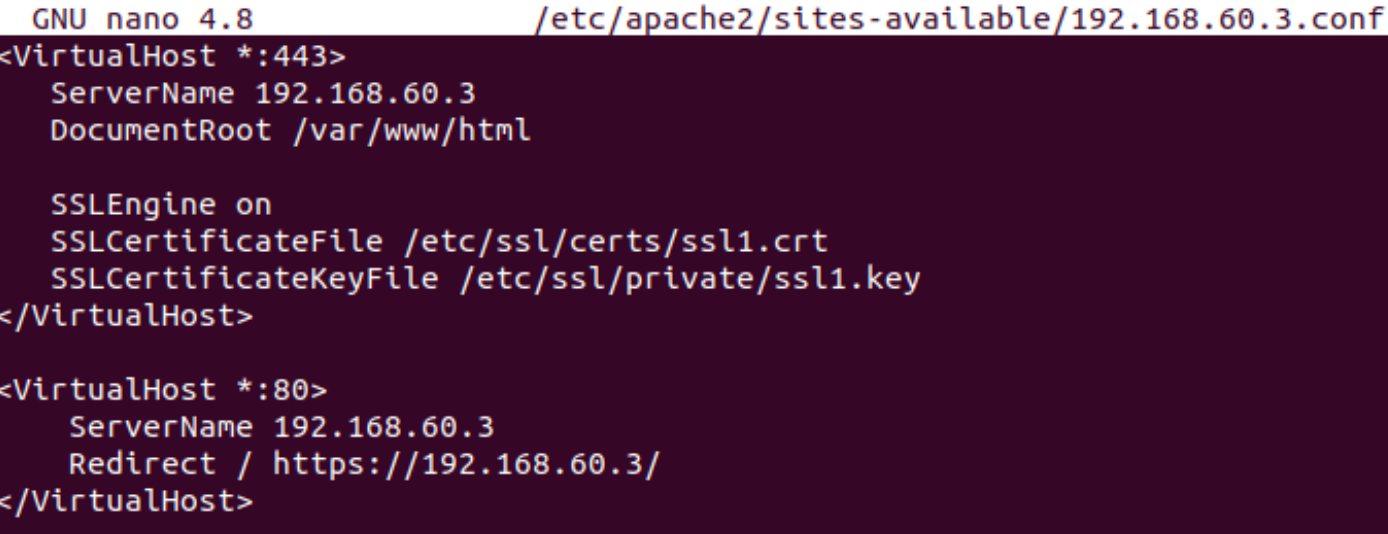
Enter following into your conf file
<VirtualHost *:443>
   ServerName your_domain_or_ip
   DocumentRoot /var/www/your_domain_or_ip

   SSLEngine on
   SSLCertificateFile /etc/ssl/certs/ssl1.crt
   SSLCertificateKeyFile /etc/ssl/private/ssl1.key
</VirtualHost>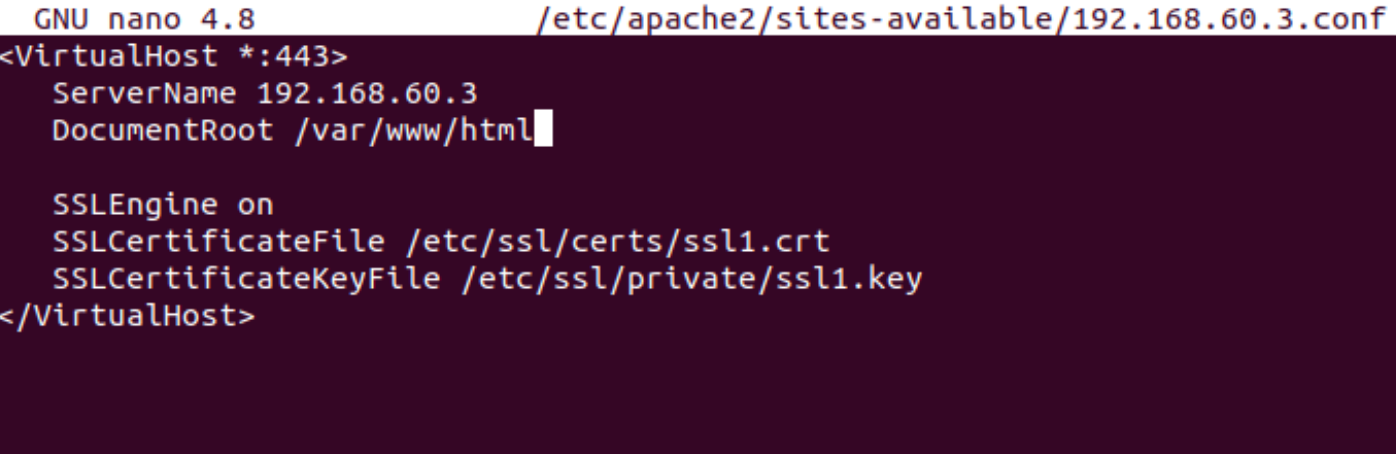
As you can see from the screenshot, under server name I also specified 192.168.60.3 since I also generated cert with 192.168.60.3.
Under document root, you will enter location of your website files. For this tutorial I used /var/www/html which has in it default apache2 webpage.
We will now enable our configuration by entering
sudo a2ensite your_domain_or_ip.confThen we will test it by entering
sudo apache2ctl configtestYou can see the results of the success in the screenshot below. AH00558 message is ok, you can ignore it. Output Syntax OK is signal that we need.
We also need to reboot our apache2 webserver
sudo systemctl reload apache2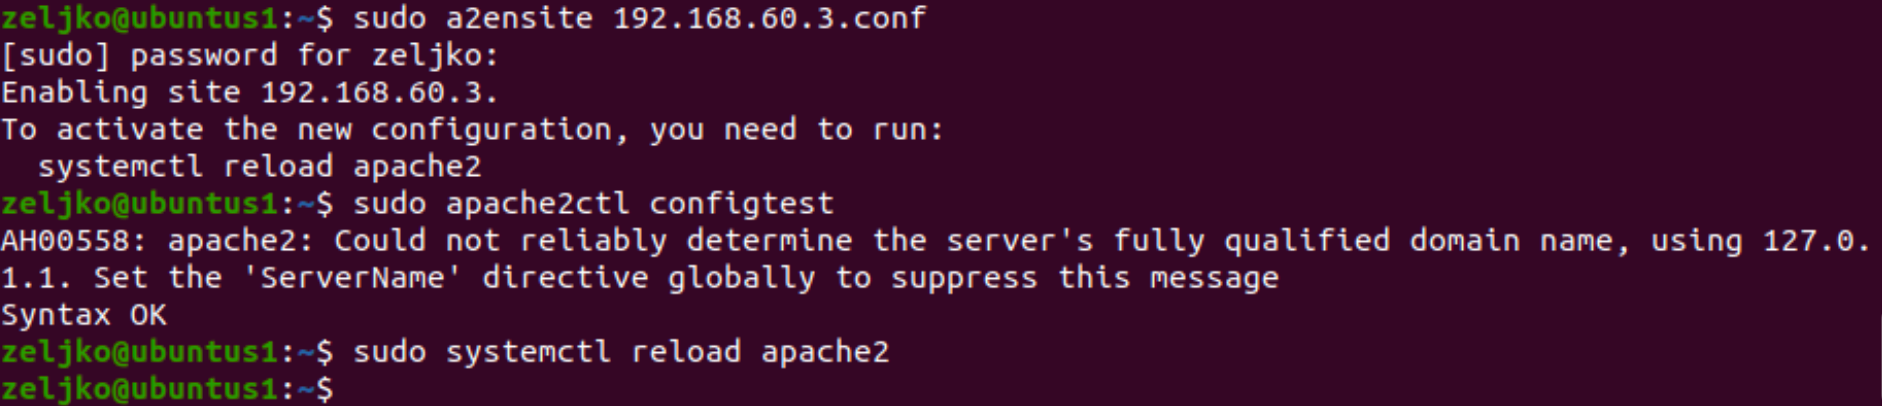
We will now test our website again by entering
https://192.168.60.3
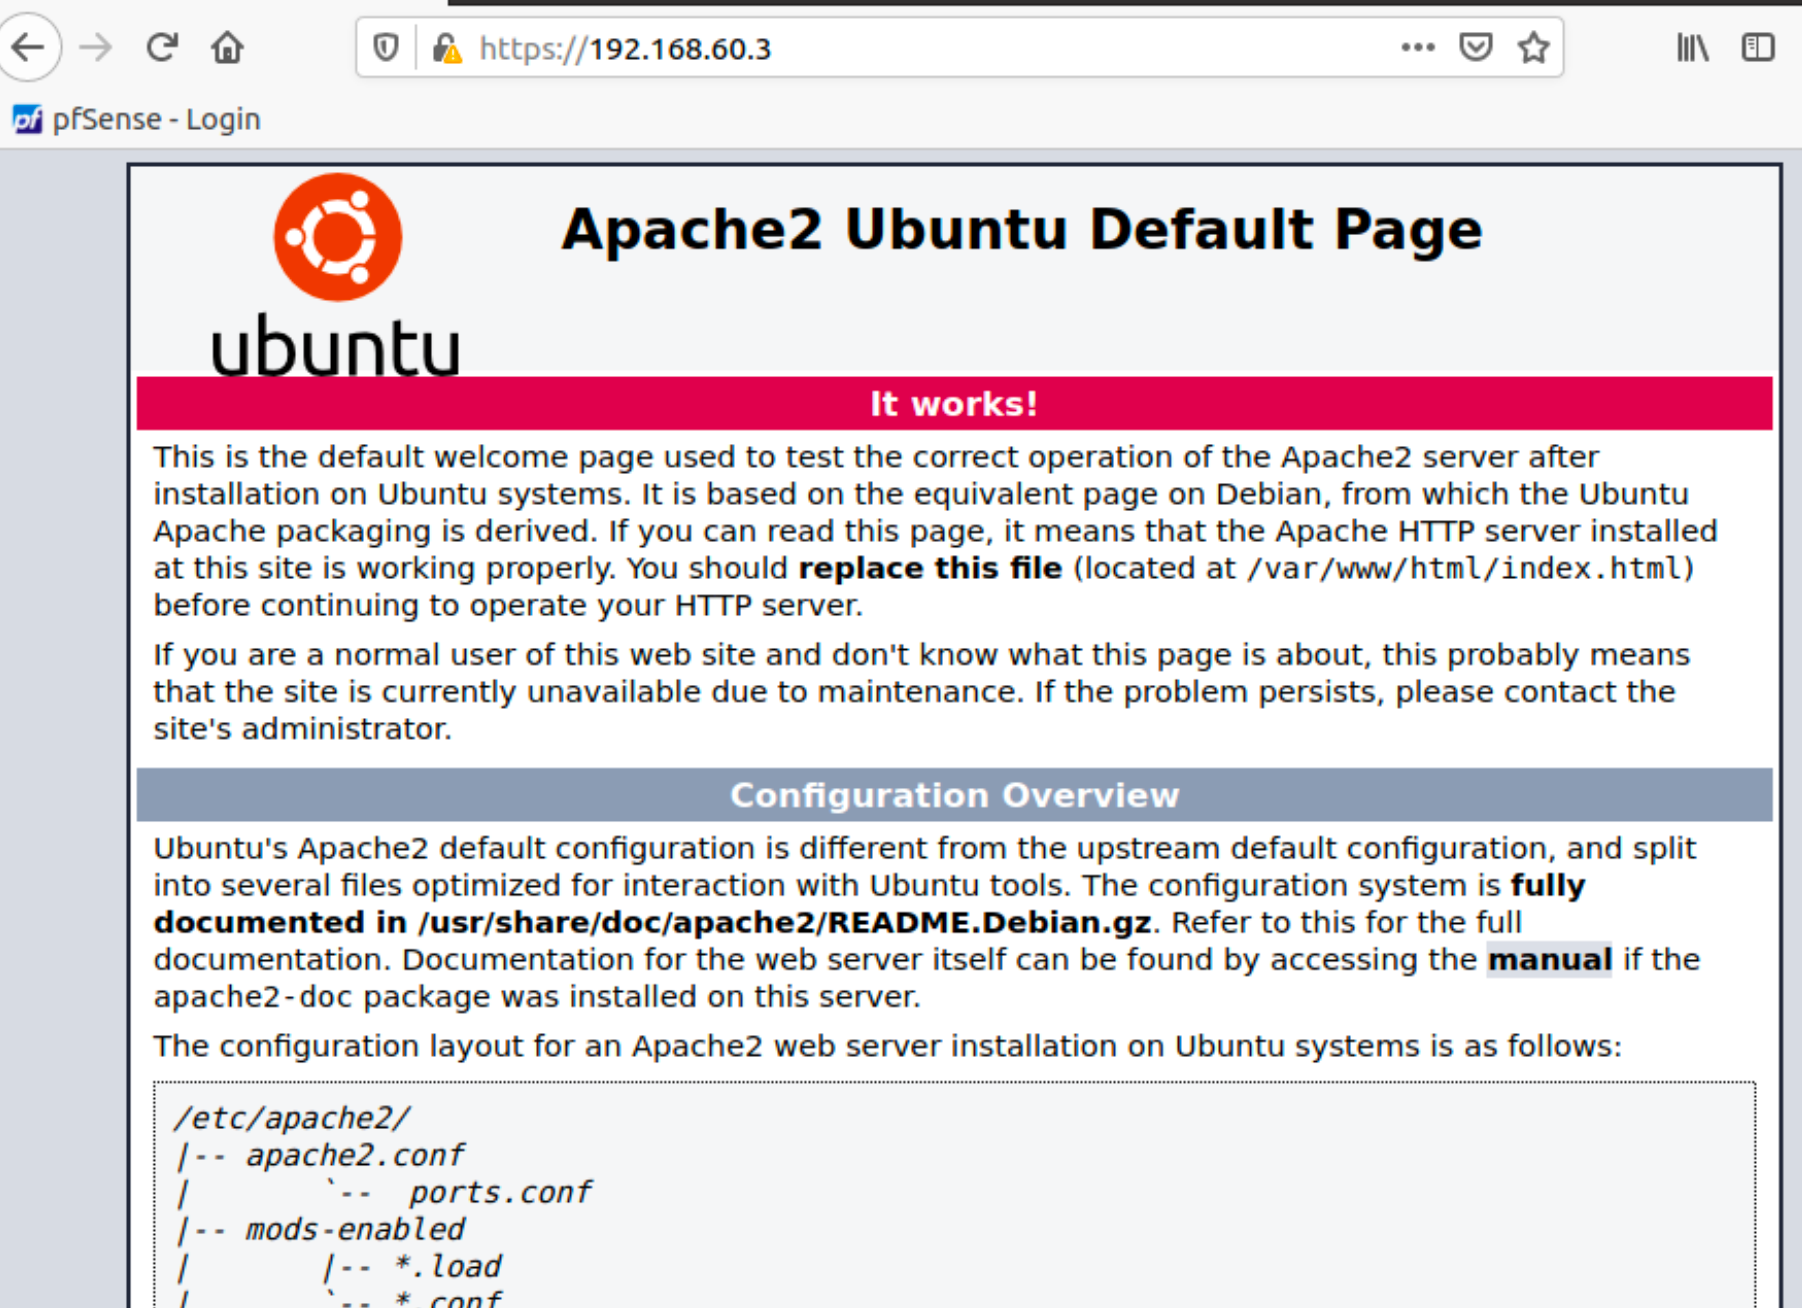
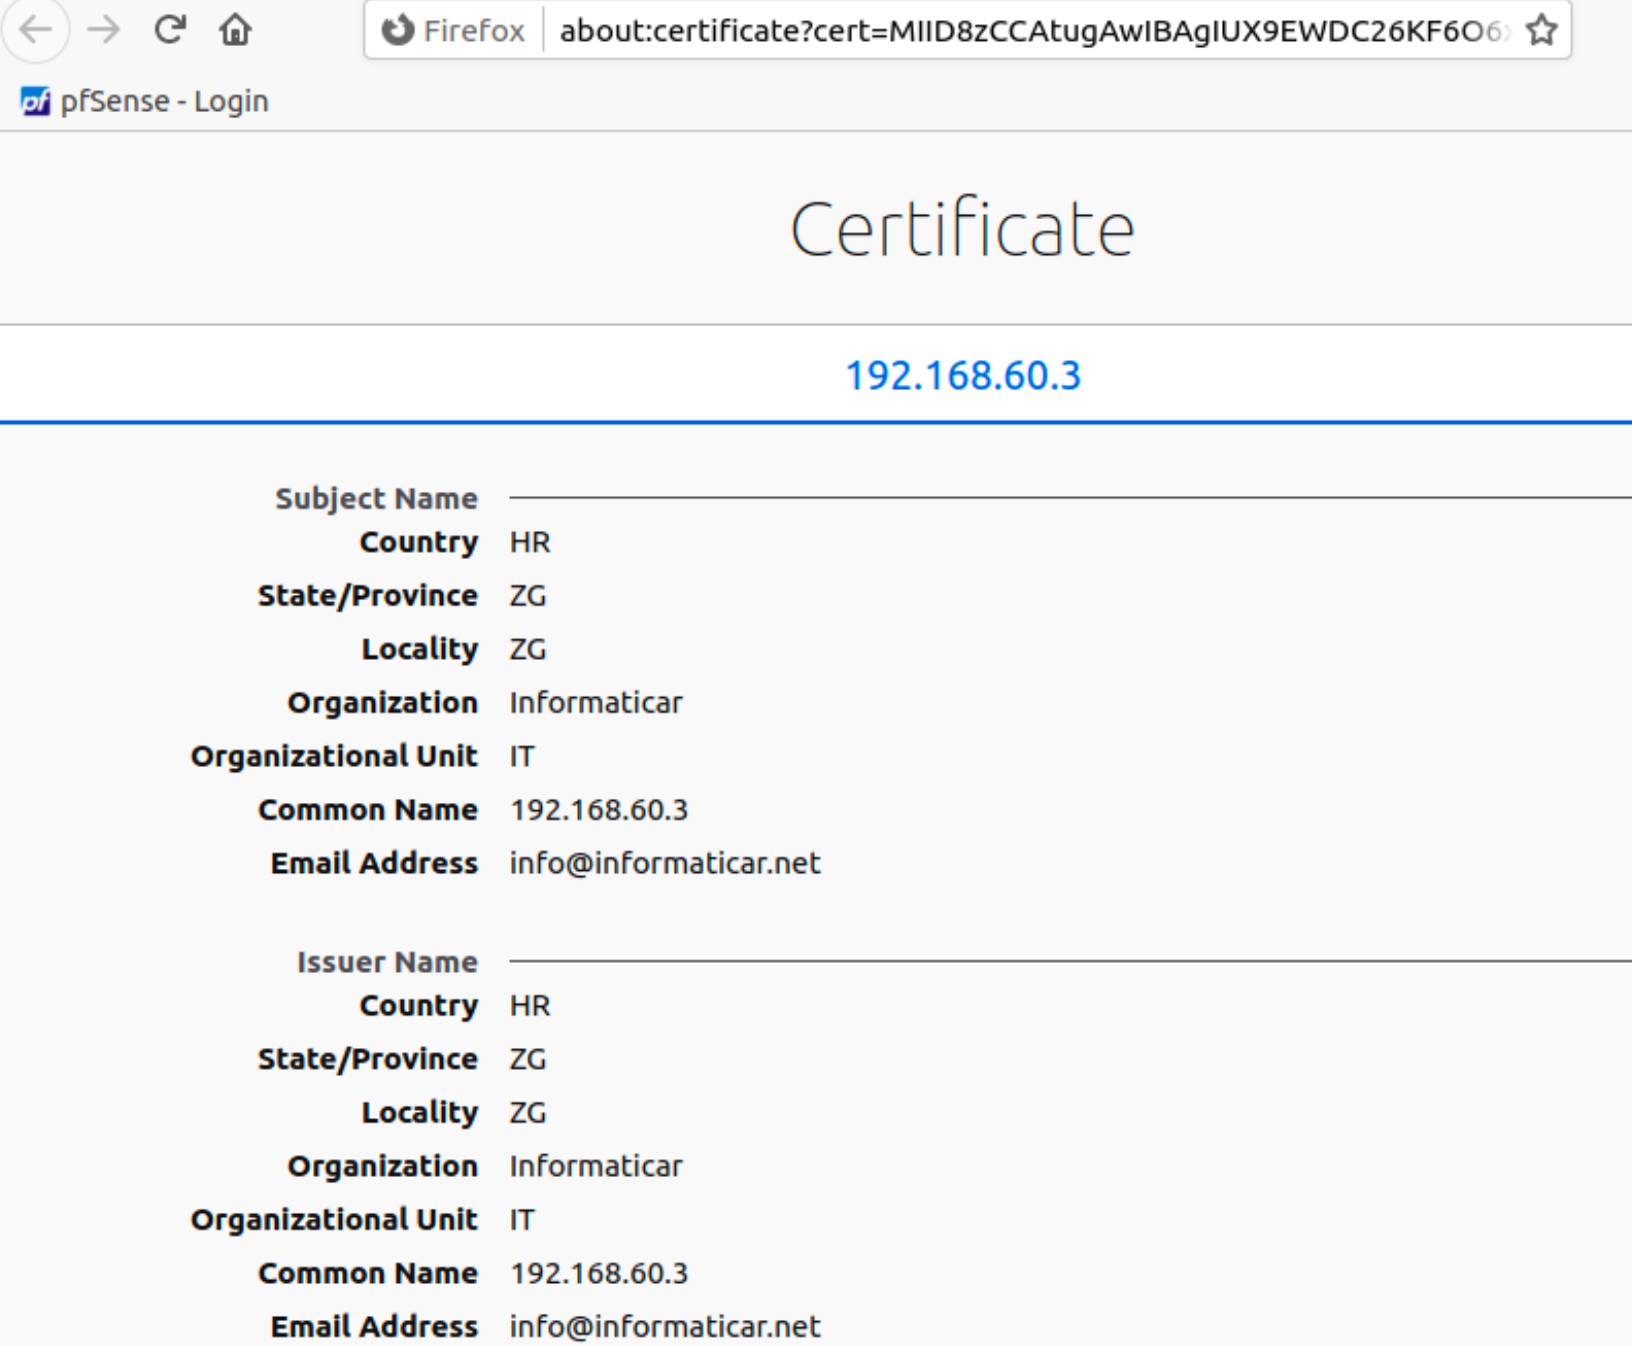
We can also see certificate details. Website uses cert we created earlier.
HTTP to HTTPS redirection
As a bonus step, we will redirect HTTP traffic to HTTPS.
We will edit 192.168.60.3.conf file we created above in this guide.
sudo nano /etc/apache2/sites-available/your_domain_or_ip.conf
At the bottom of the file we will create another block with following
<VirtualHost *:80>
    ServerName your_domain_or_ip
    Redirect / https://your_domain_or_ip/
</VirtualHost>
This is how my config file looks like:
We will again test our config and reboot apache2
sudo apachectl configtest
sudo systemctl reload apache2
After I entered http://192.168.60.3 I was automagically transfered to https://192.168.60.3
That is it, we now secured our web server with HTTPS.