Workflows are at the heart of M-Files – Workflows enable us to standardize and automate processes within company, and manage various approvals.
Again, we need to understand Metadata and Users/Groups inside M-Files before we can create Workflows.
I already wrote about those topics, so check them out before diving into Workflows.
Since Workflows are also specific to the M-Files, we will go step by step, with practical examples to understand better how workflows work.
1 Create Approver and Reviewers property
Before we dive into Workflows we need to create Approver and Reviewers property. Go to my “M-Files how to configure Metadata” article if you are not sure how to create property inside M-Files Metadata.
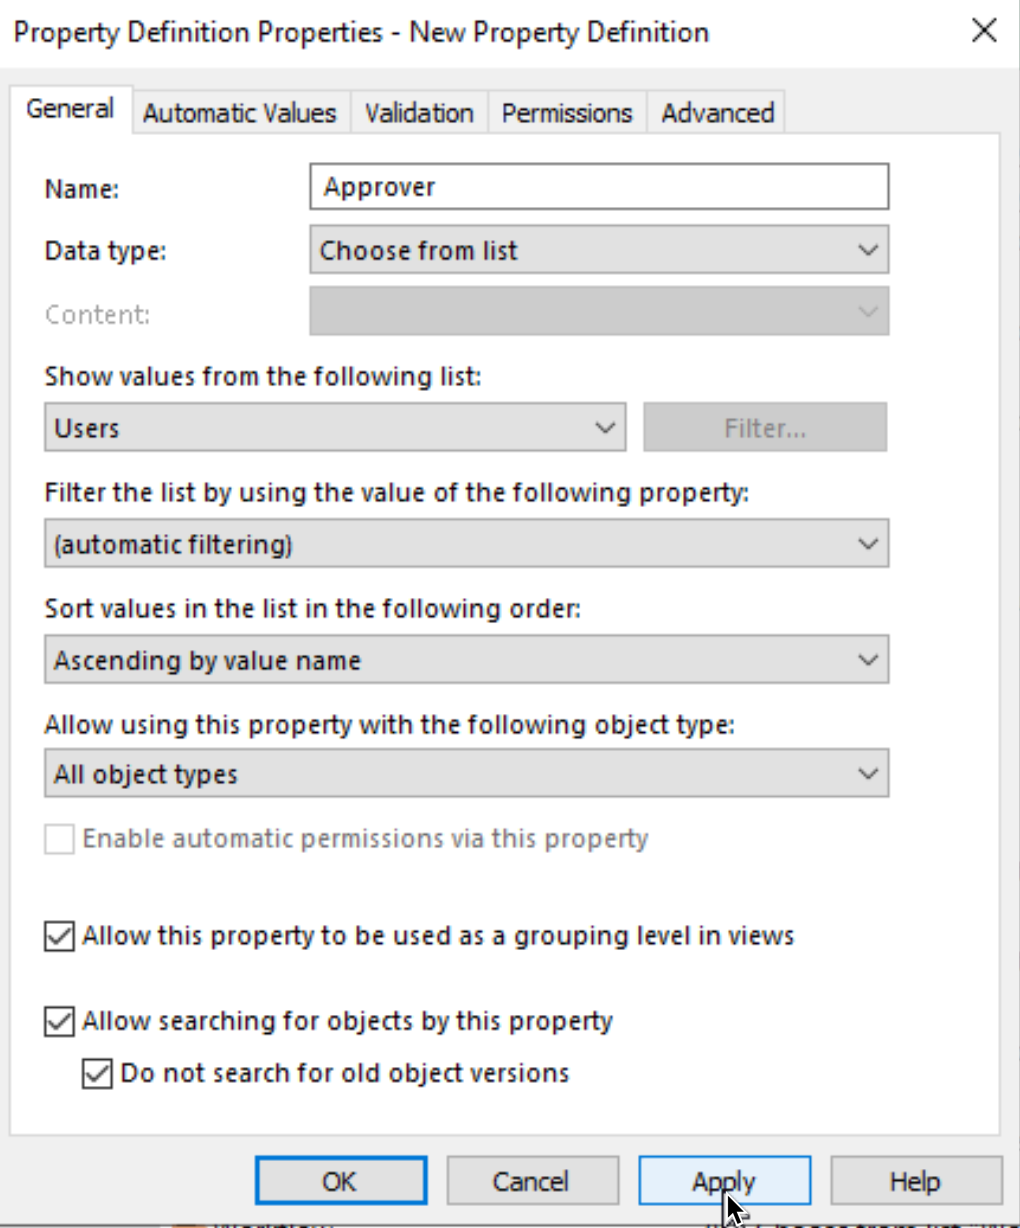
I will here only screenshot two property definitions I created – Approver and Reviewers
Approver
M-Files Reviewers
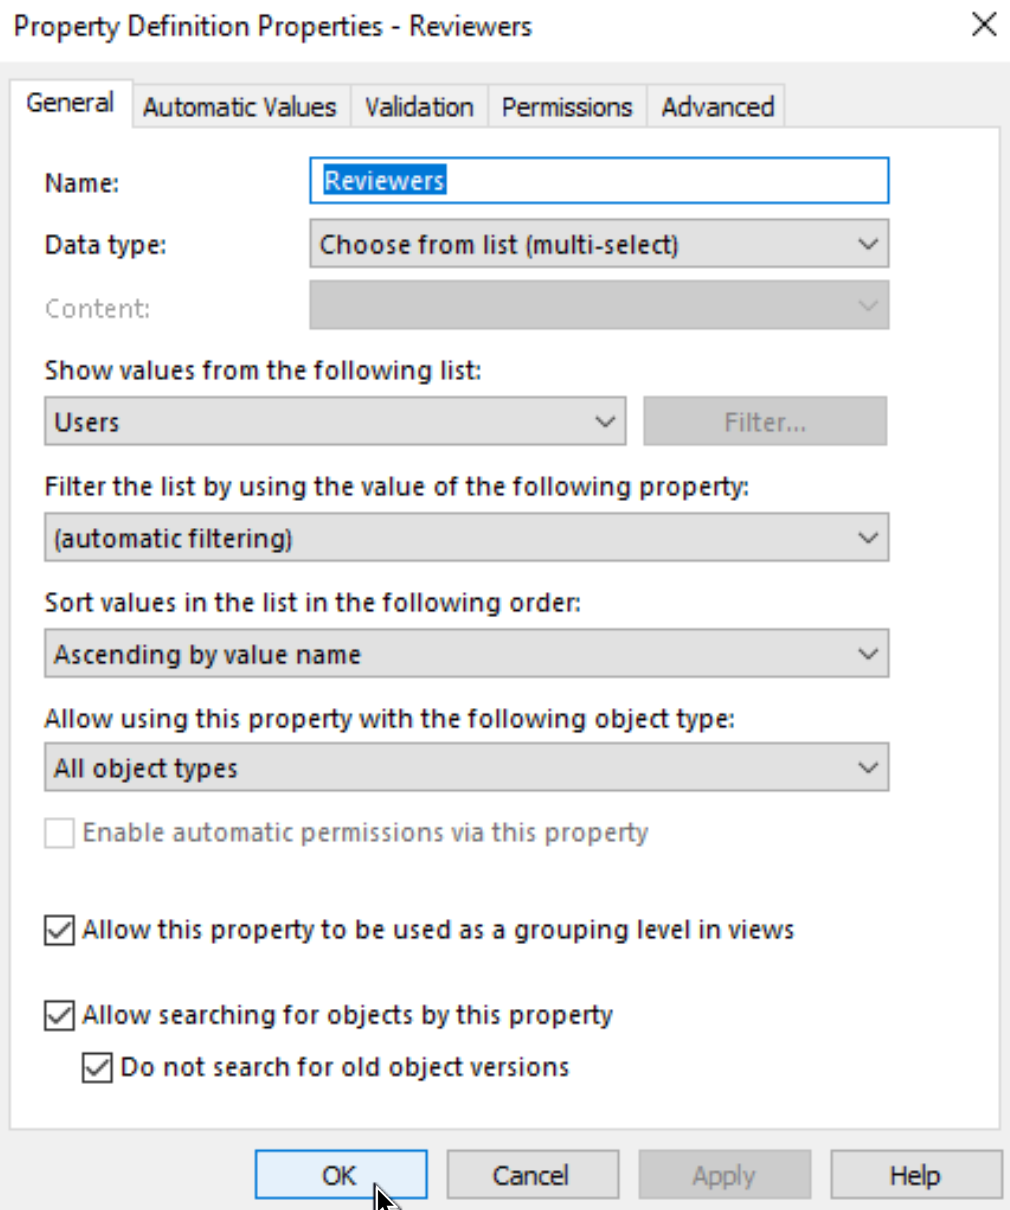
Ok, that is it for the property definitions. We will need these two – Approver allows us to select one user that will approve our document in workflow scenario, while Reviewers will allow us to select multiple users to approve our document.
2. Simple Workflow Scenario
Ok, let’s create our first Workflow to get a feeling how these things work.
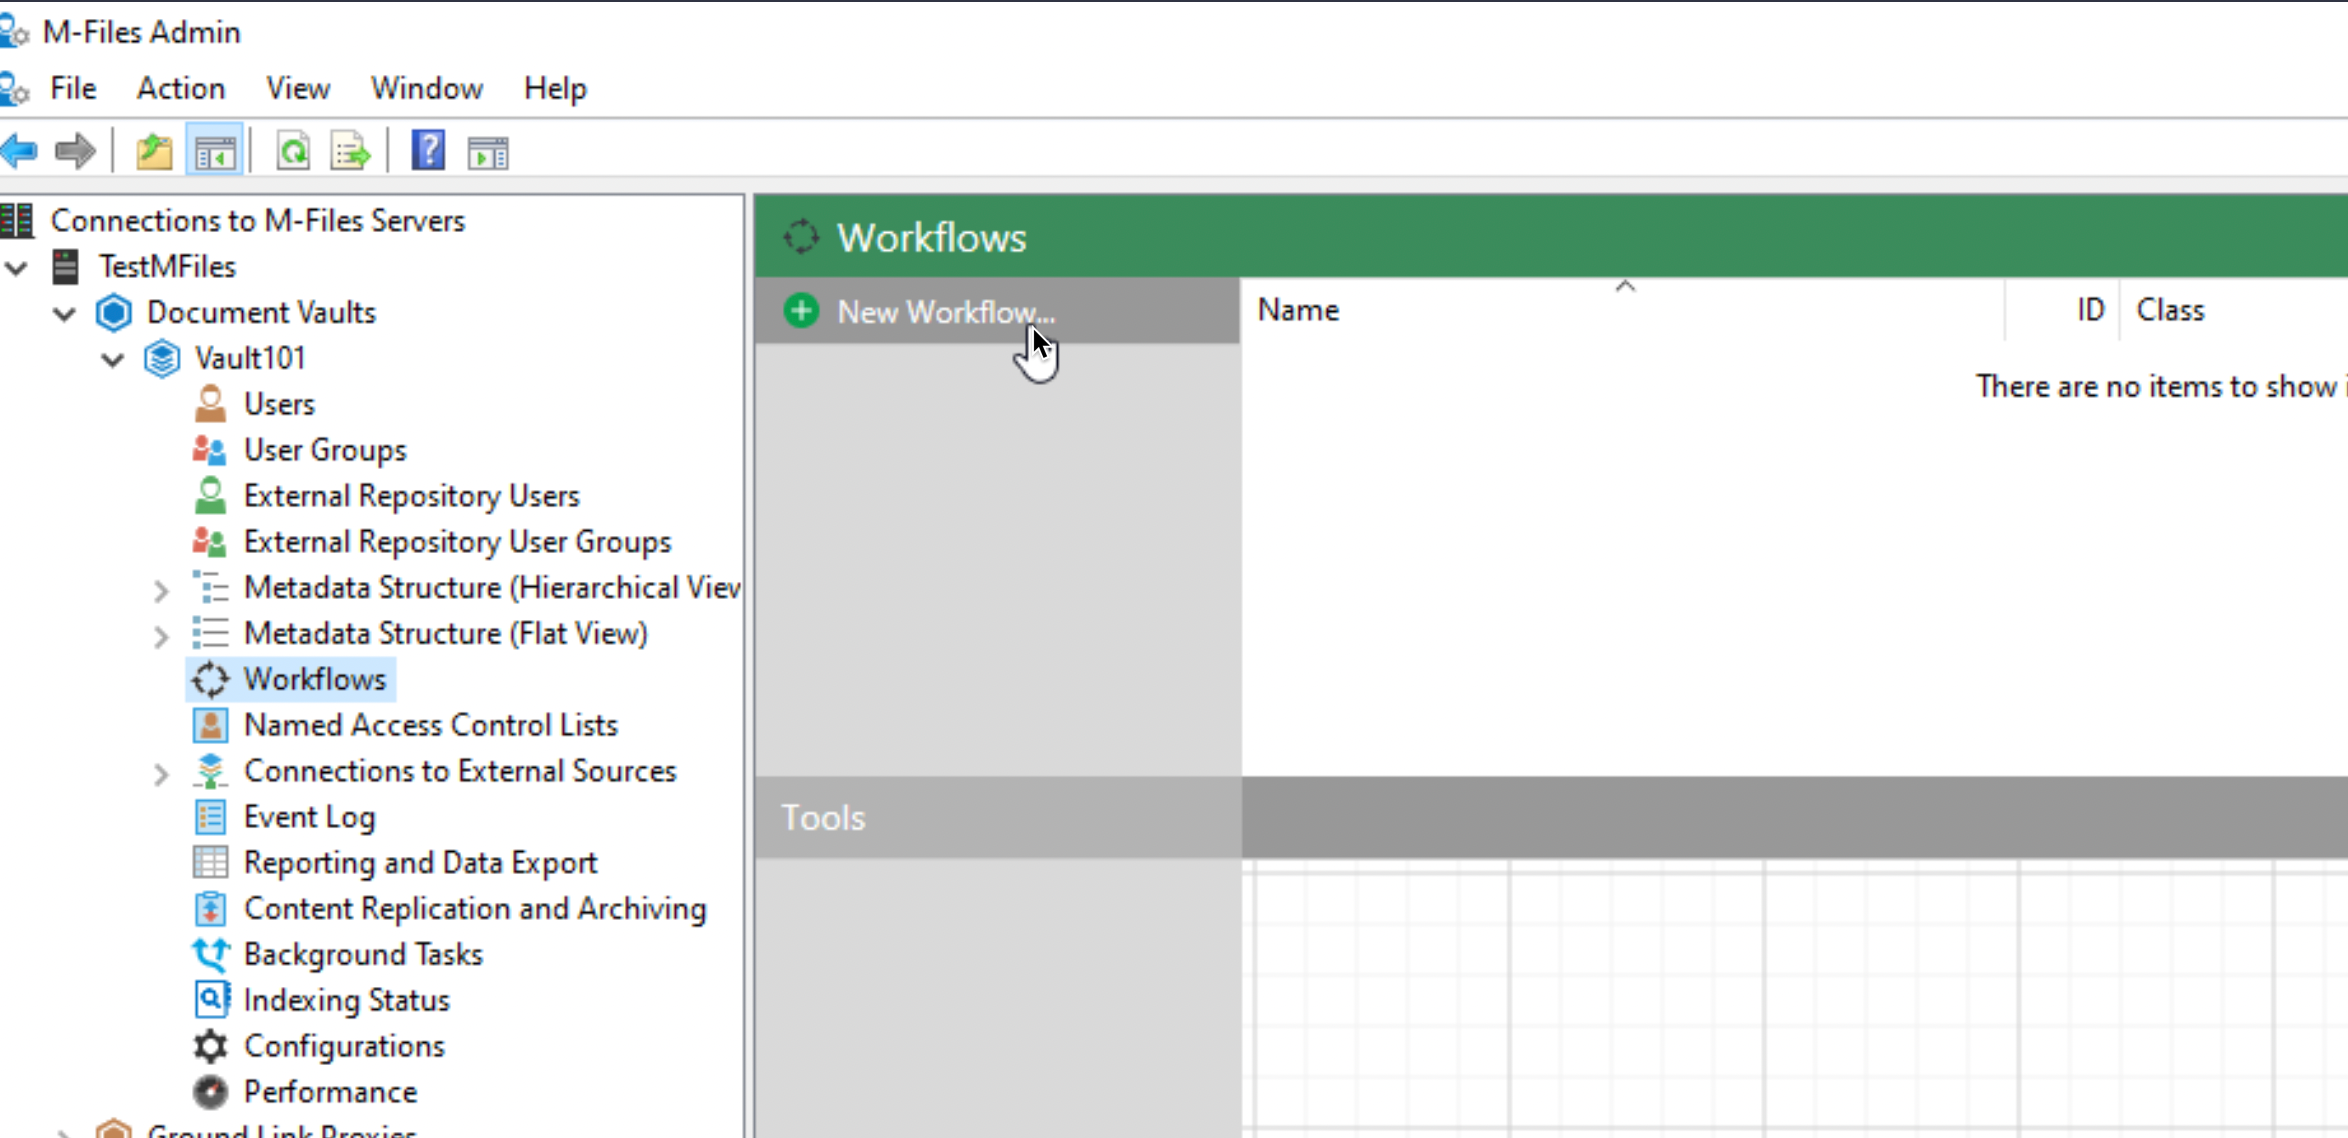
Open M-Files Admin interface – select your server and then Vault inside which you plan to deploy Workflow (Vault101 in my case). Select Workflows from the menu – click on New Workflow…
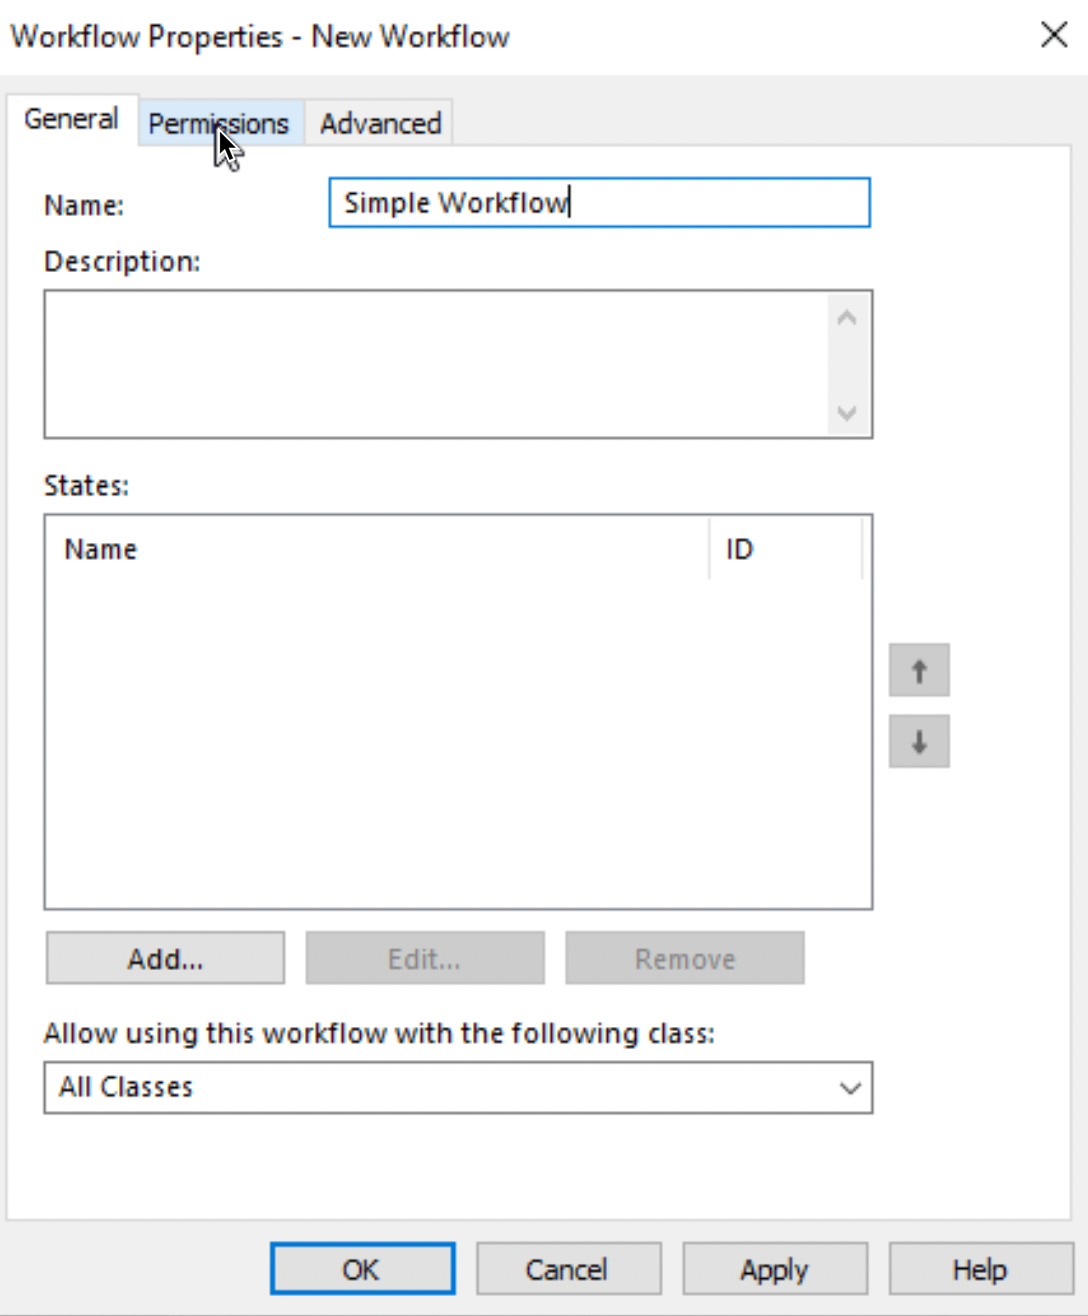
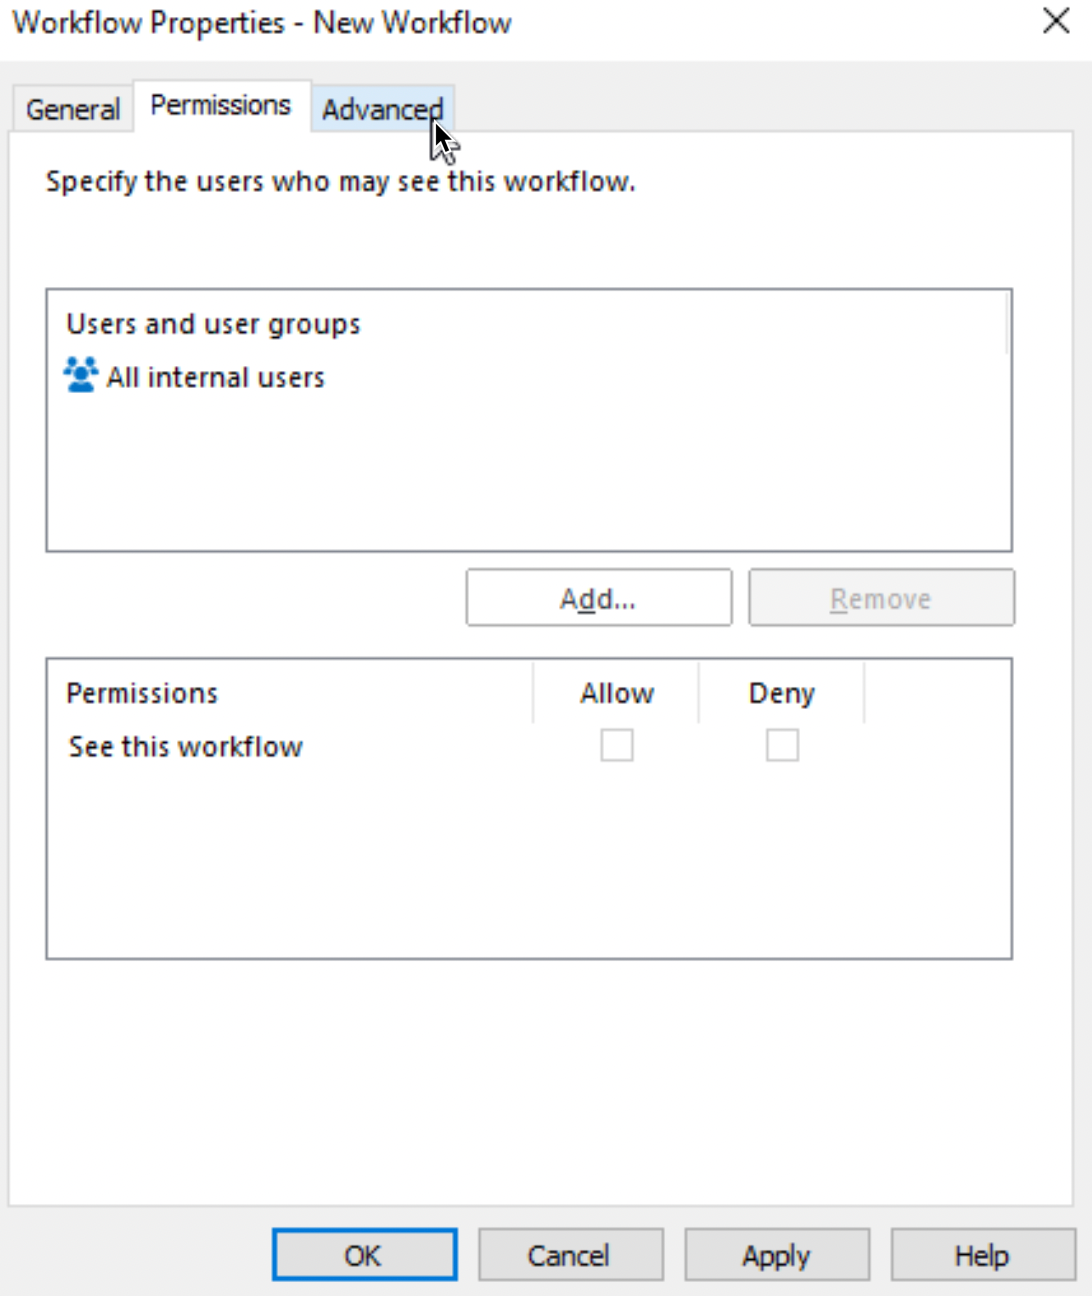
I entered the name for my first Workflow – Simple Workflow. After that I could also define states for this Workflow, but this time we won’t do it here, we will do it separately, so we can get a better overview what fits where. Let’s check out Permissions folder while we are at it.
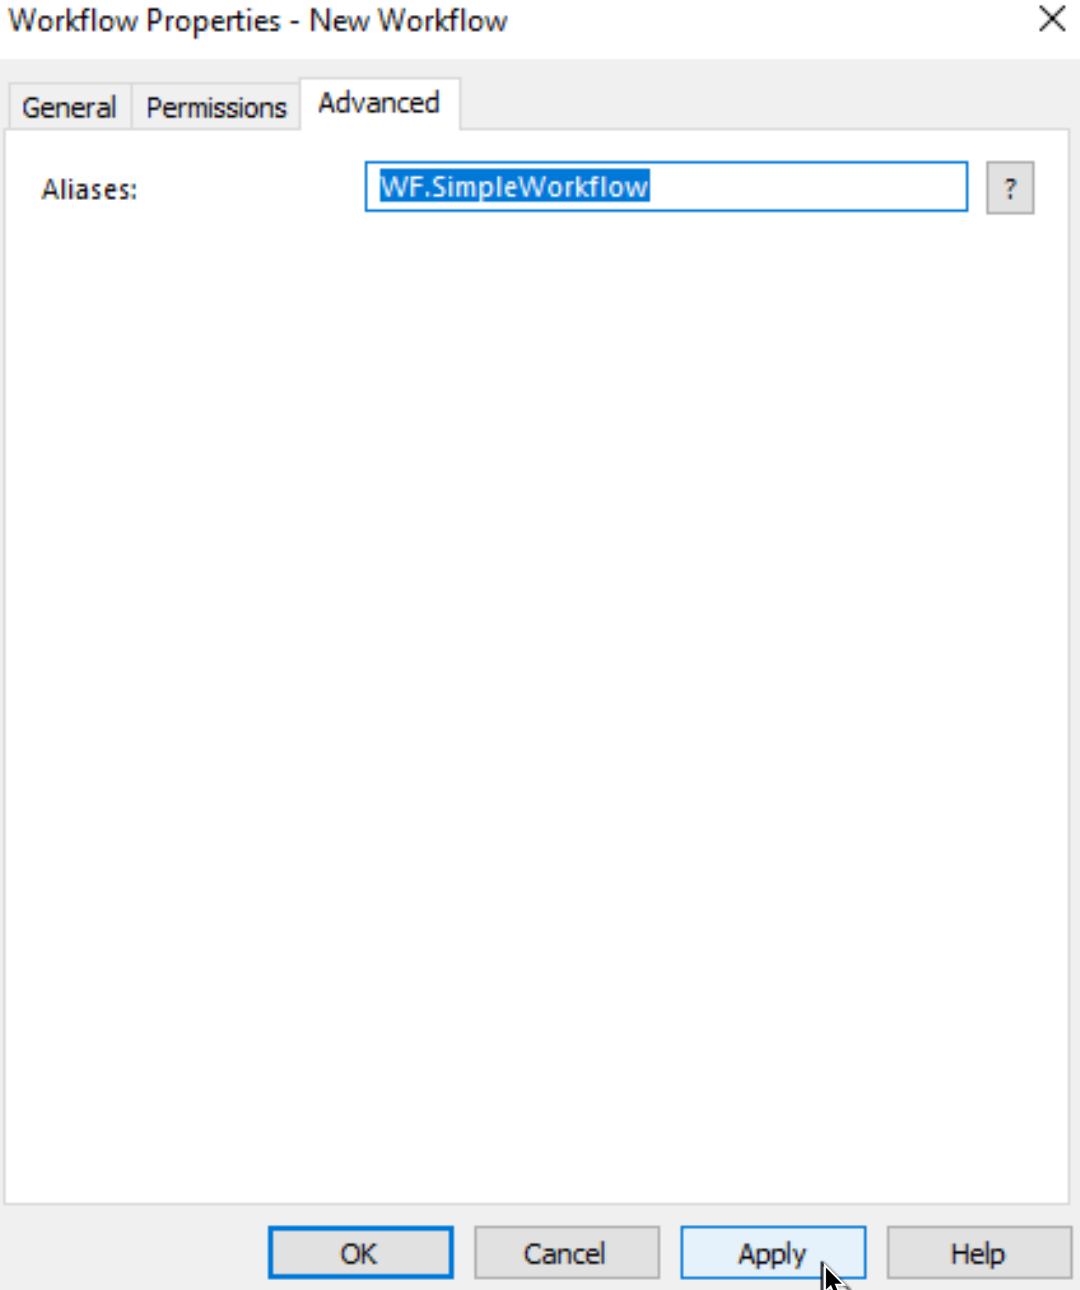
All Users can currently see this Workflow, and let’s leave it at that. In production, you will use your users or group lists to define who gets to see what. For the last, we will check Advanced tab.
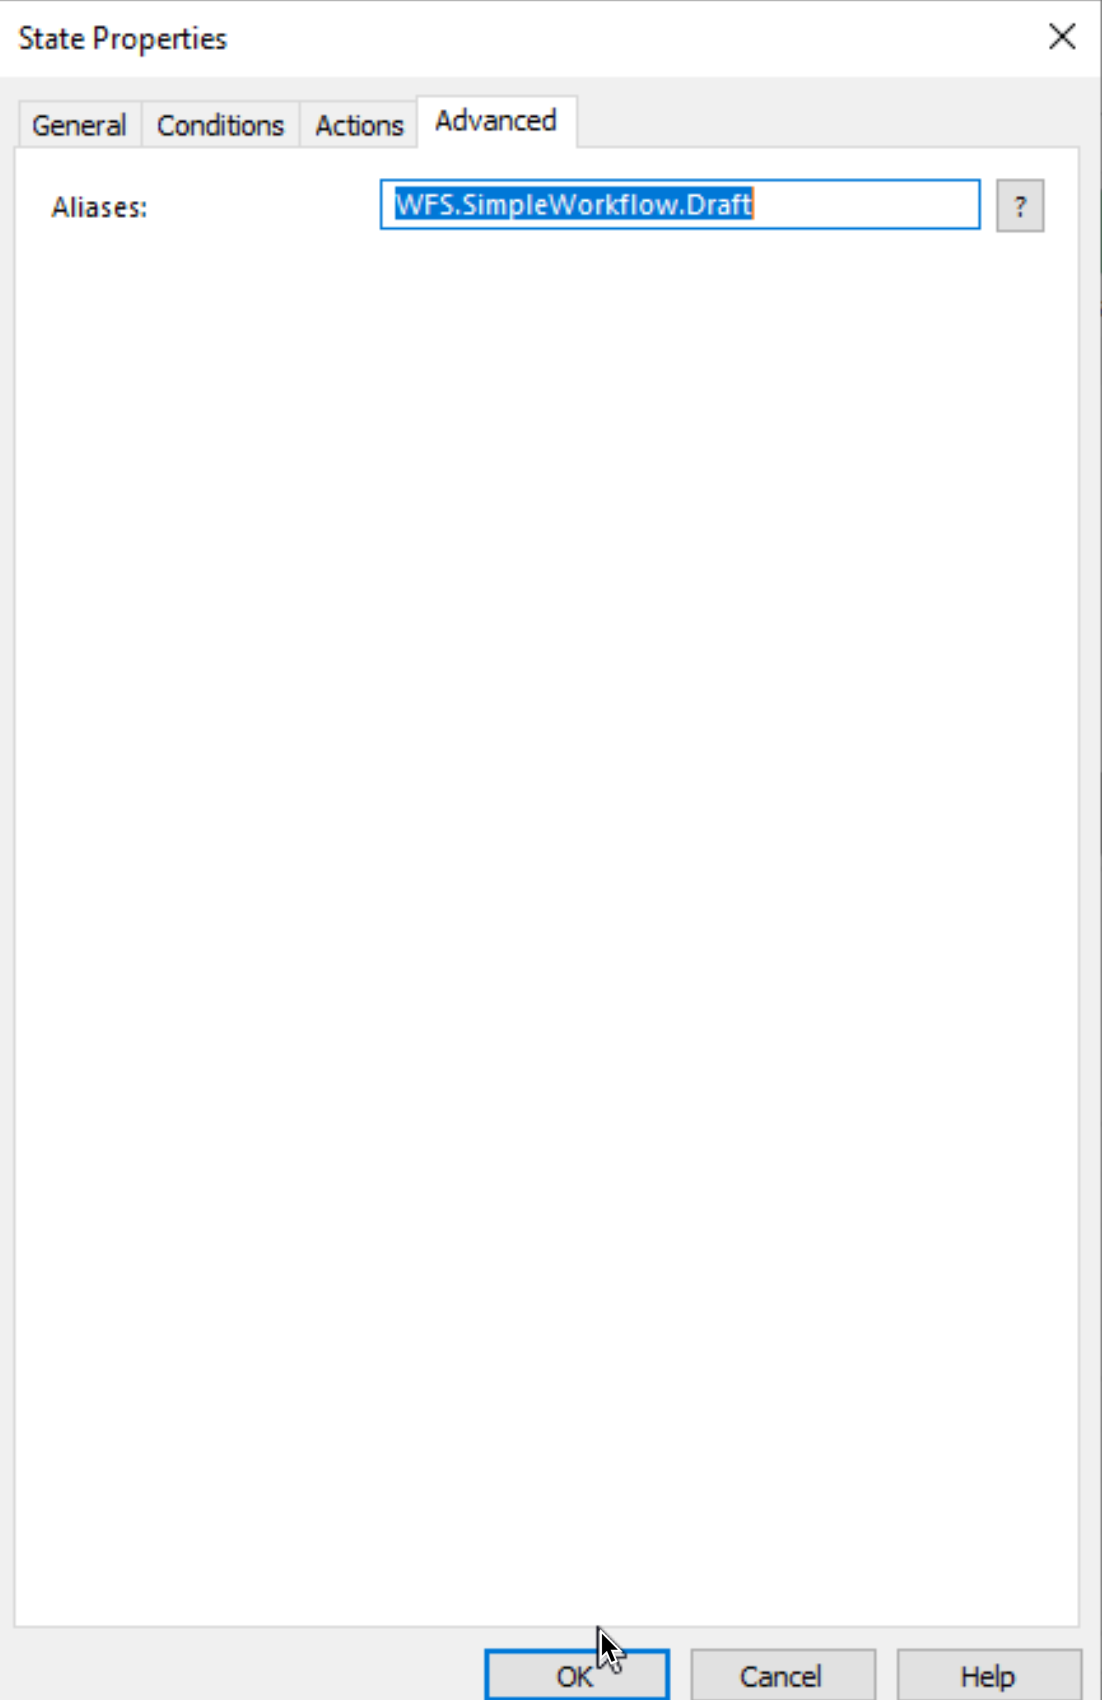
Aliases are shown in Advanced. Apply – OK
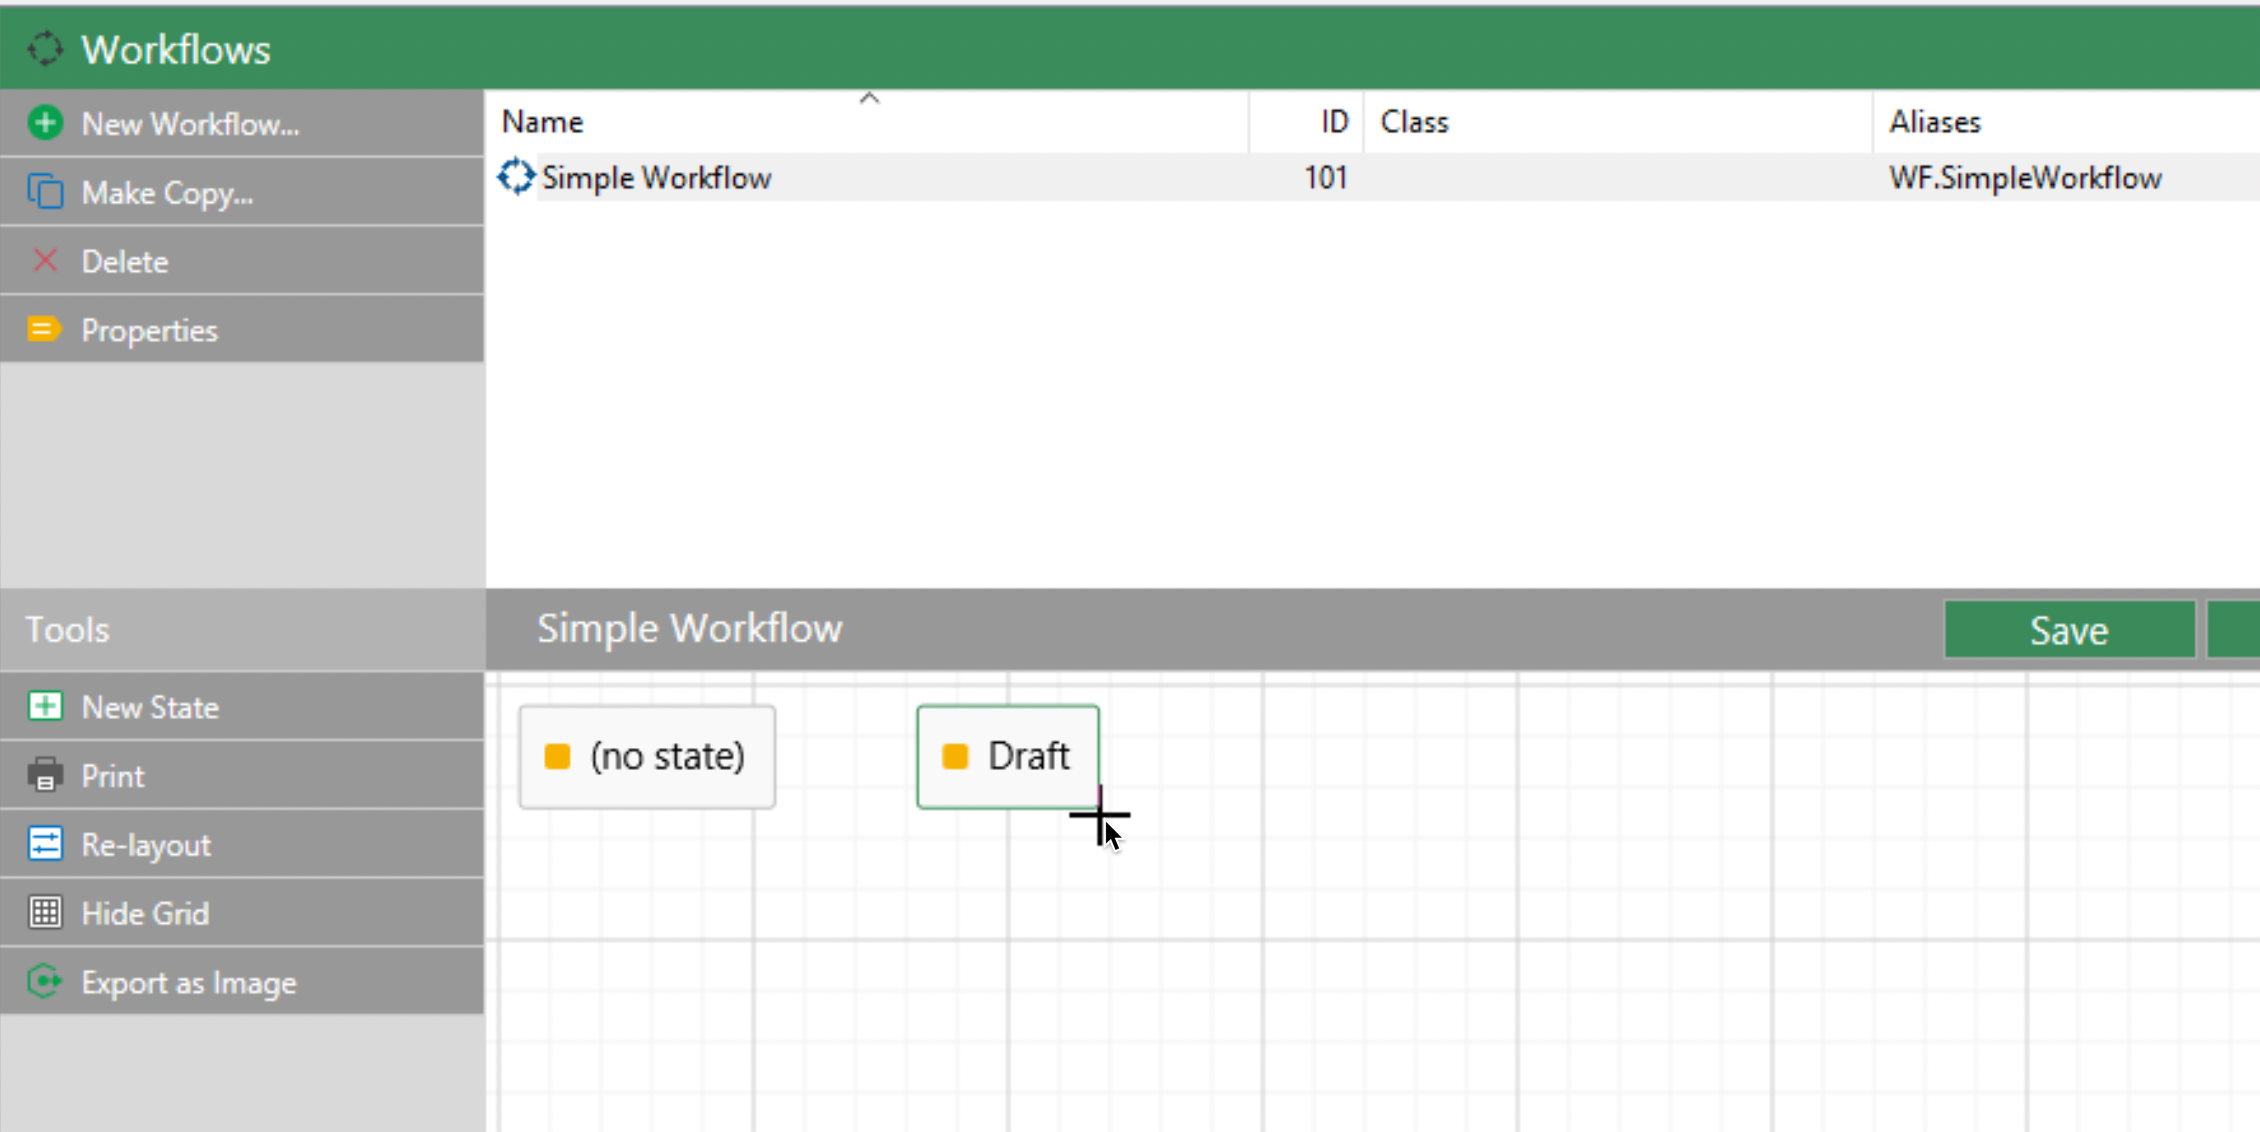
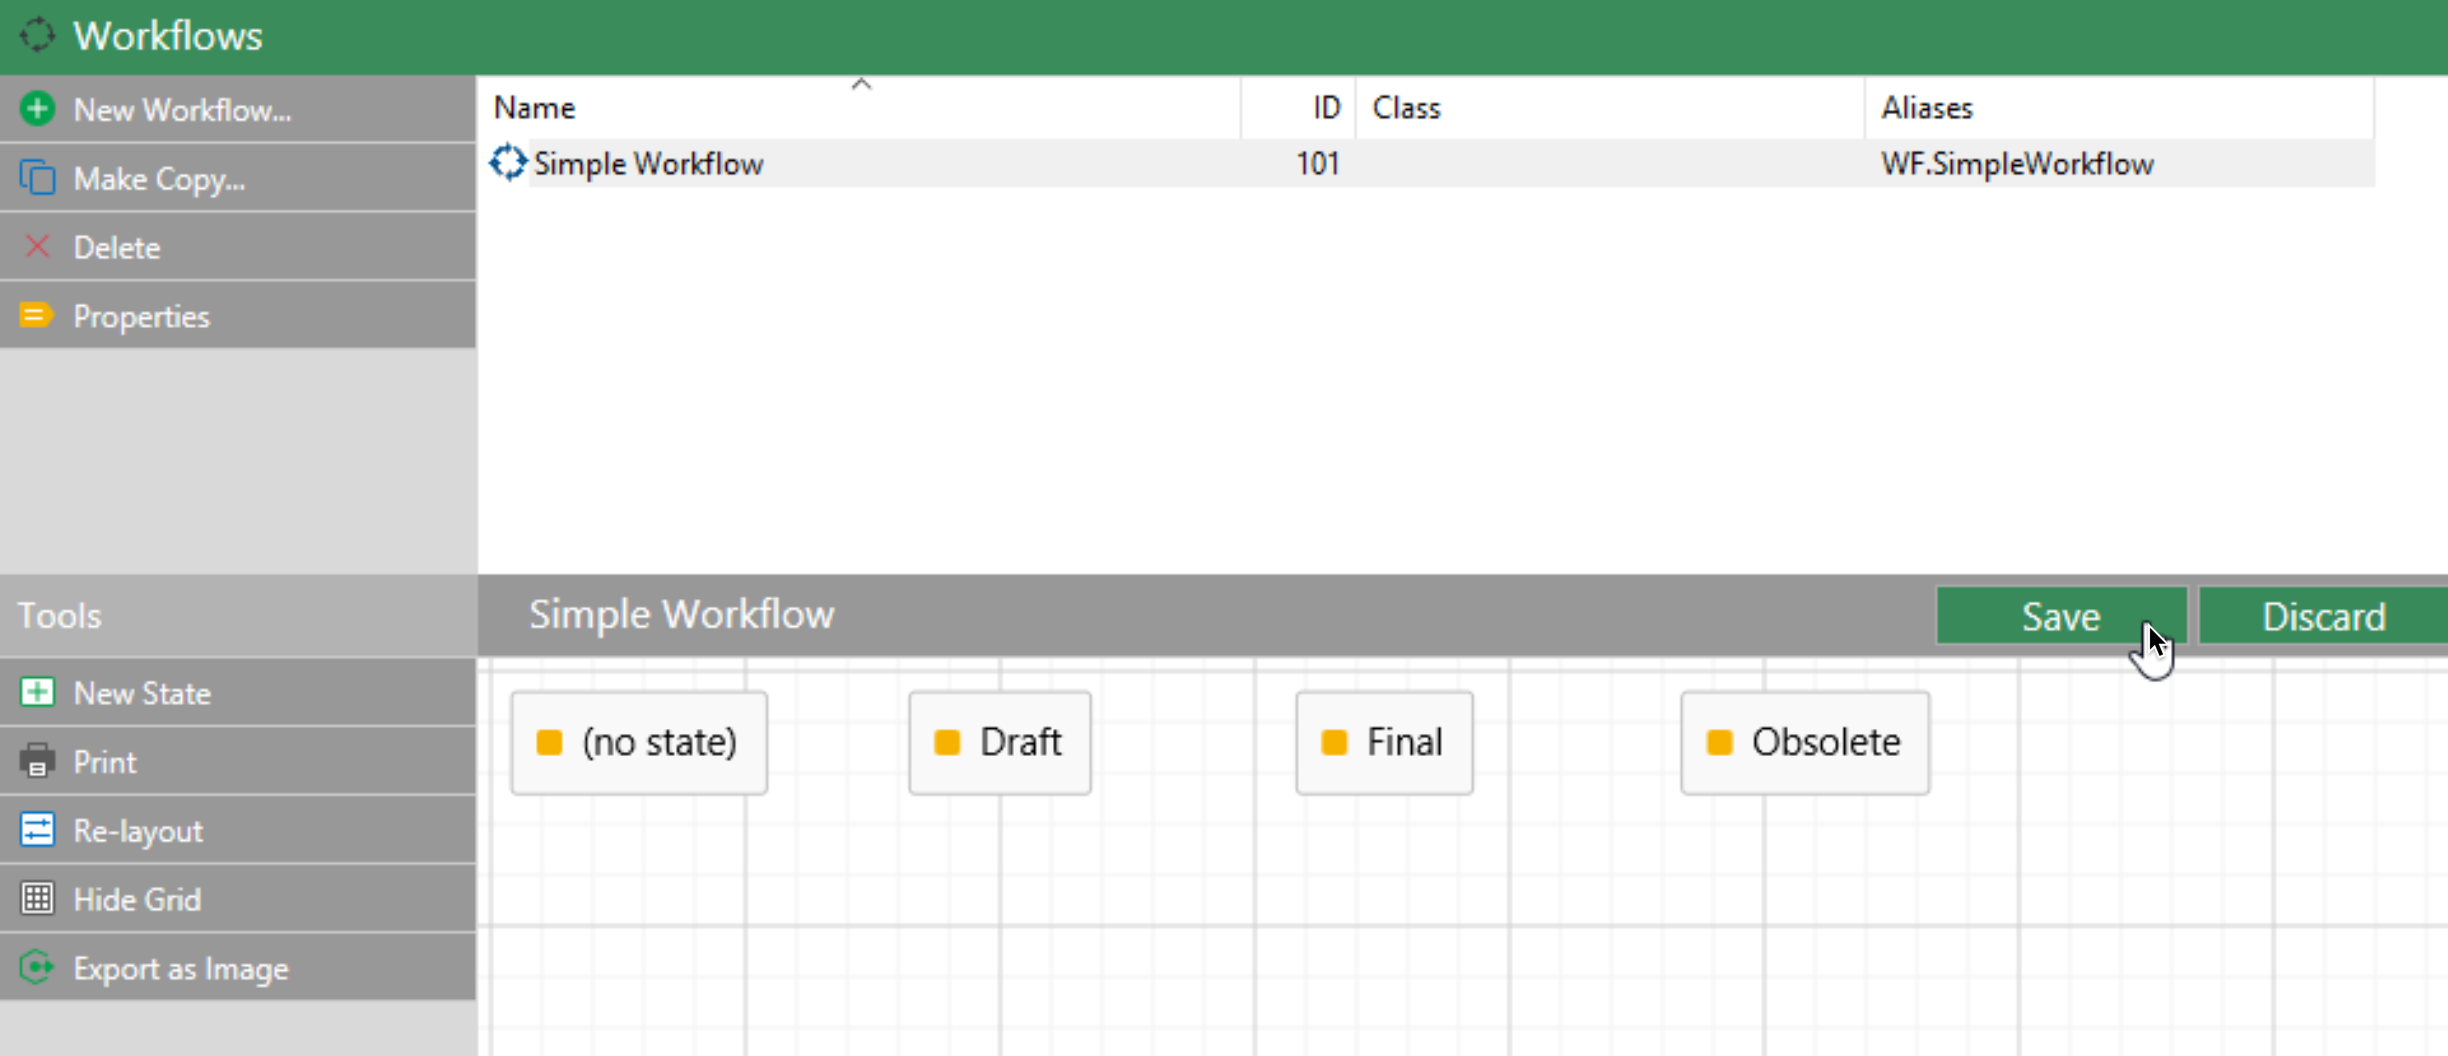
We created our first Workflow! Now, under Tools section we will define states for the Workflow. Click on New State
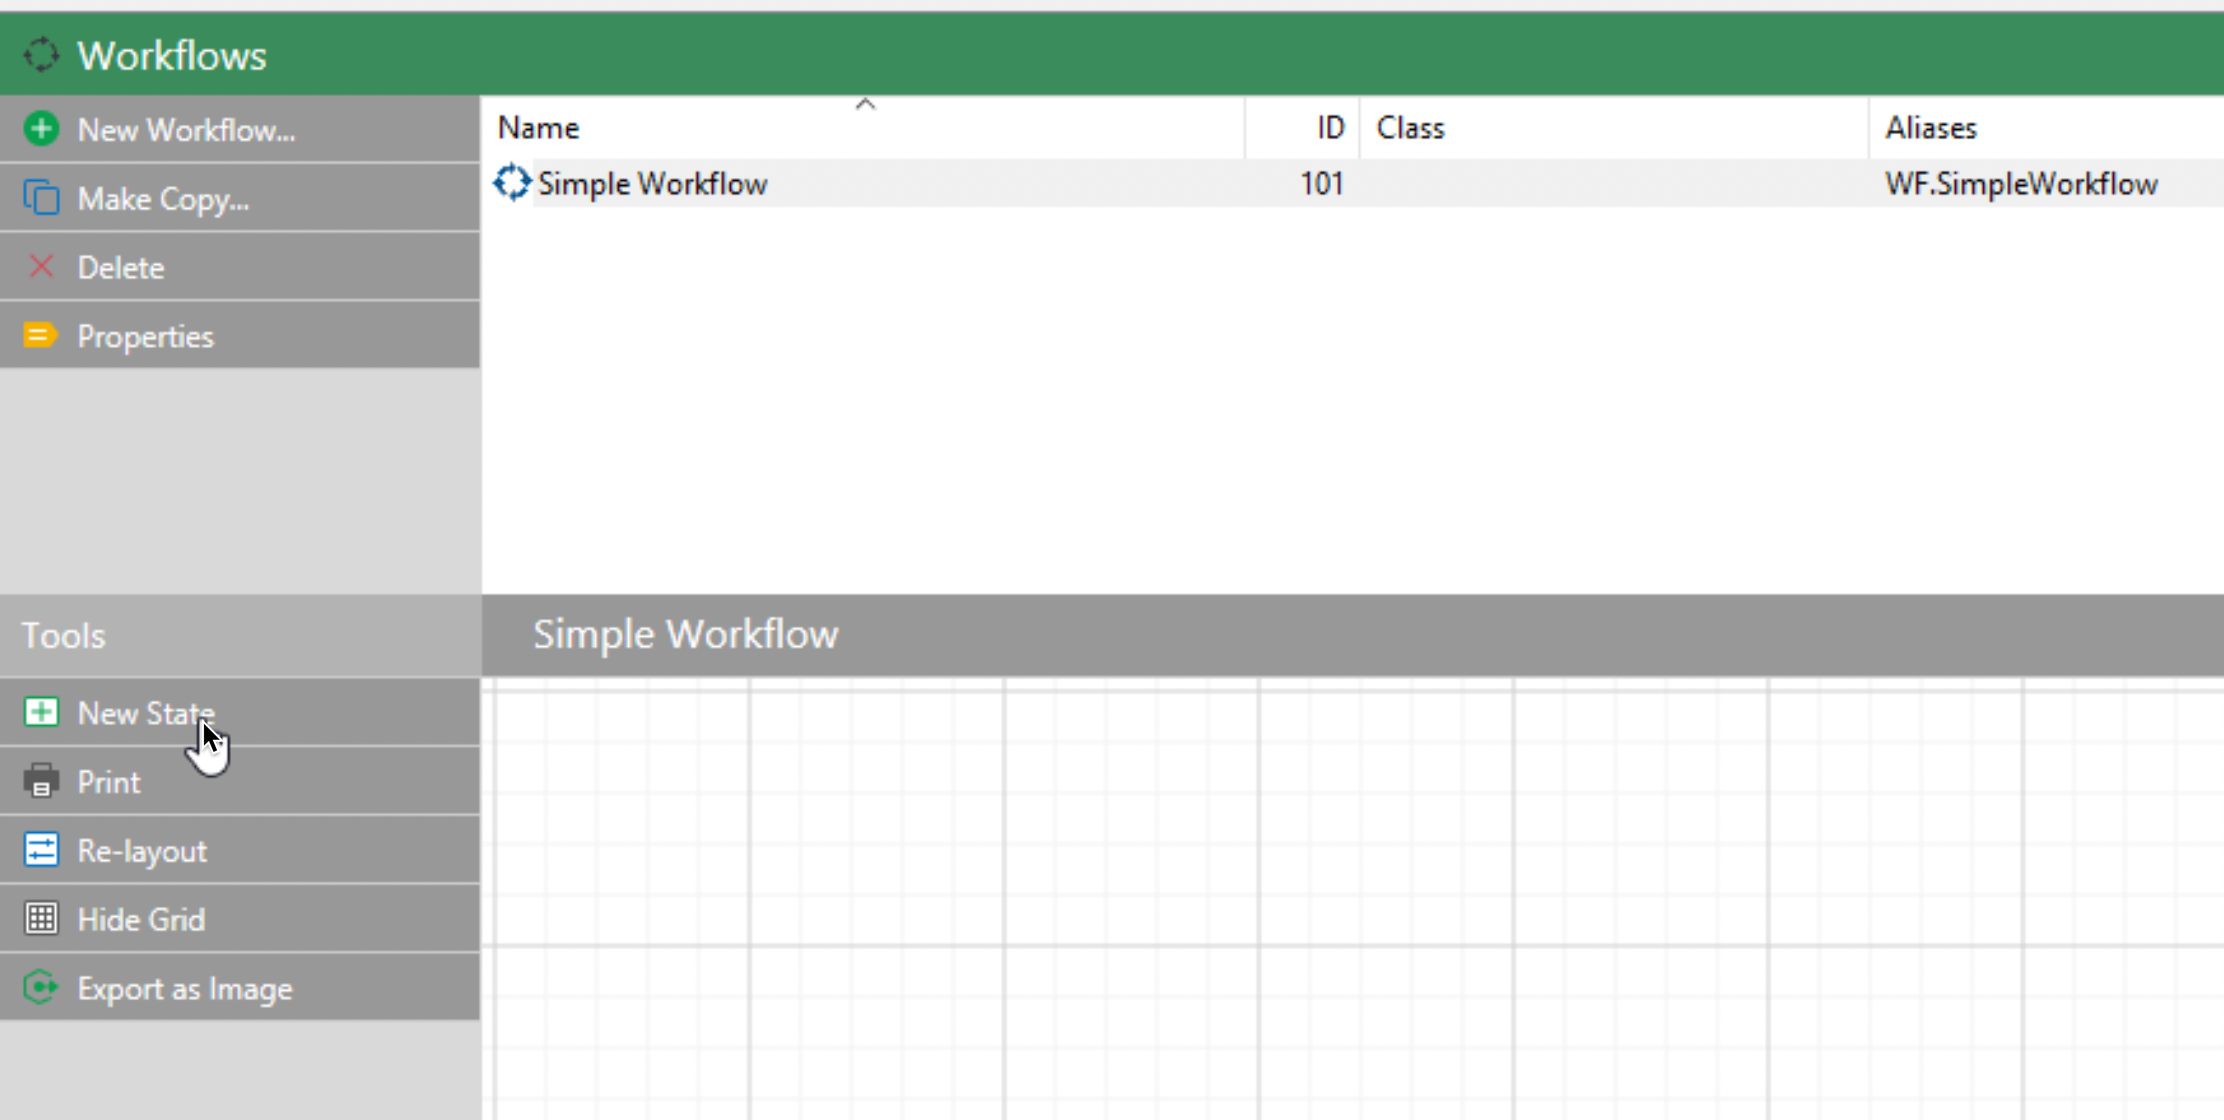
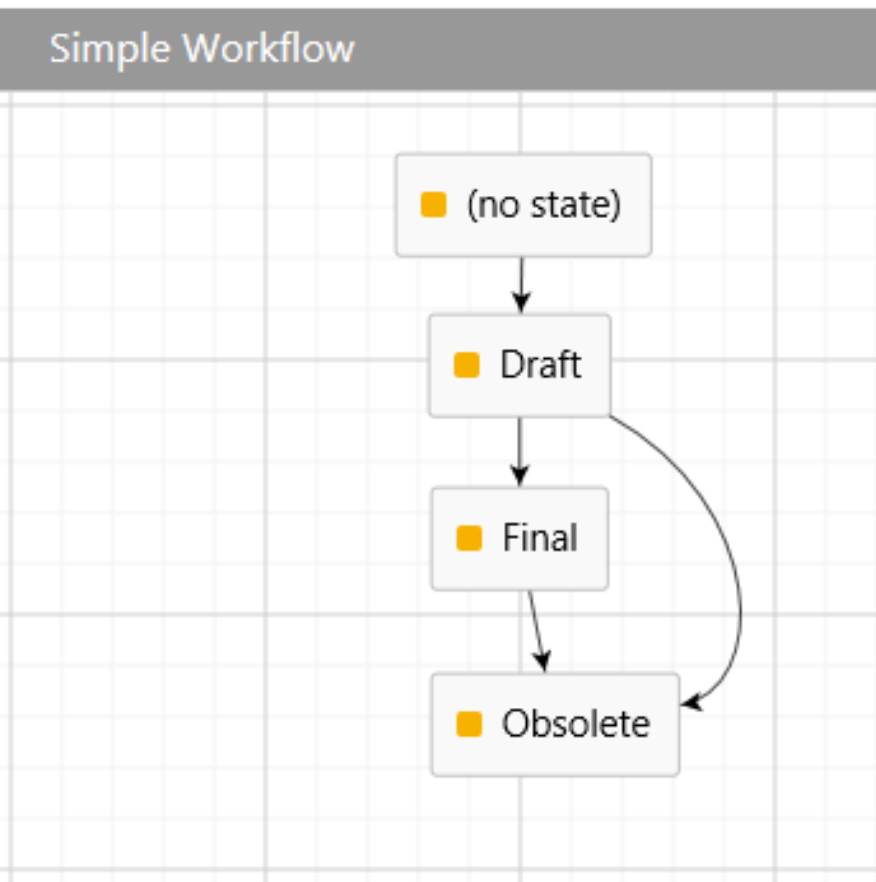
We will create three states – Draft, Final and Obsolete.
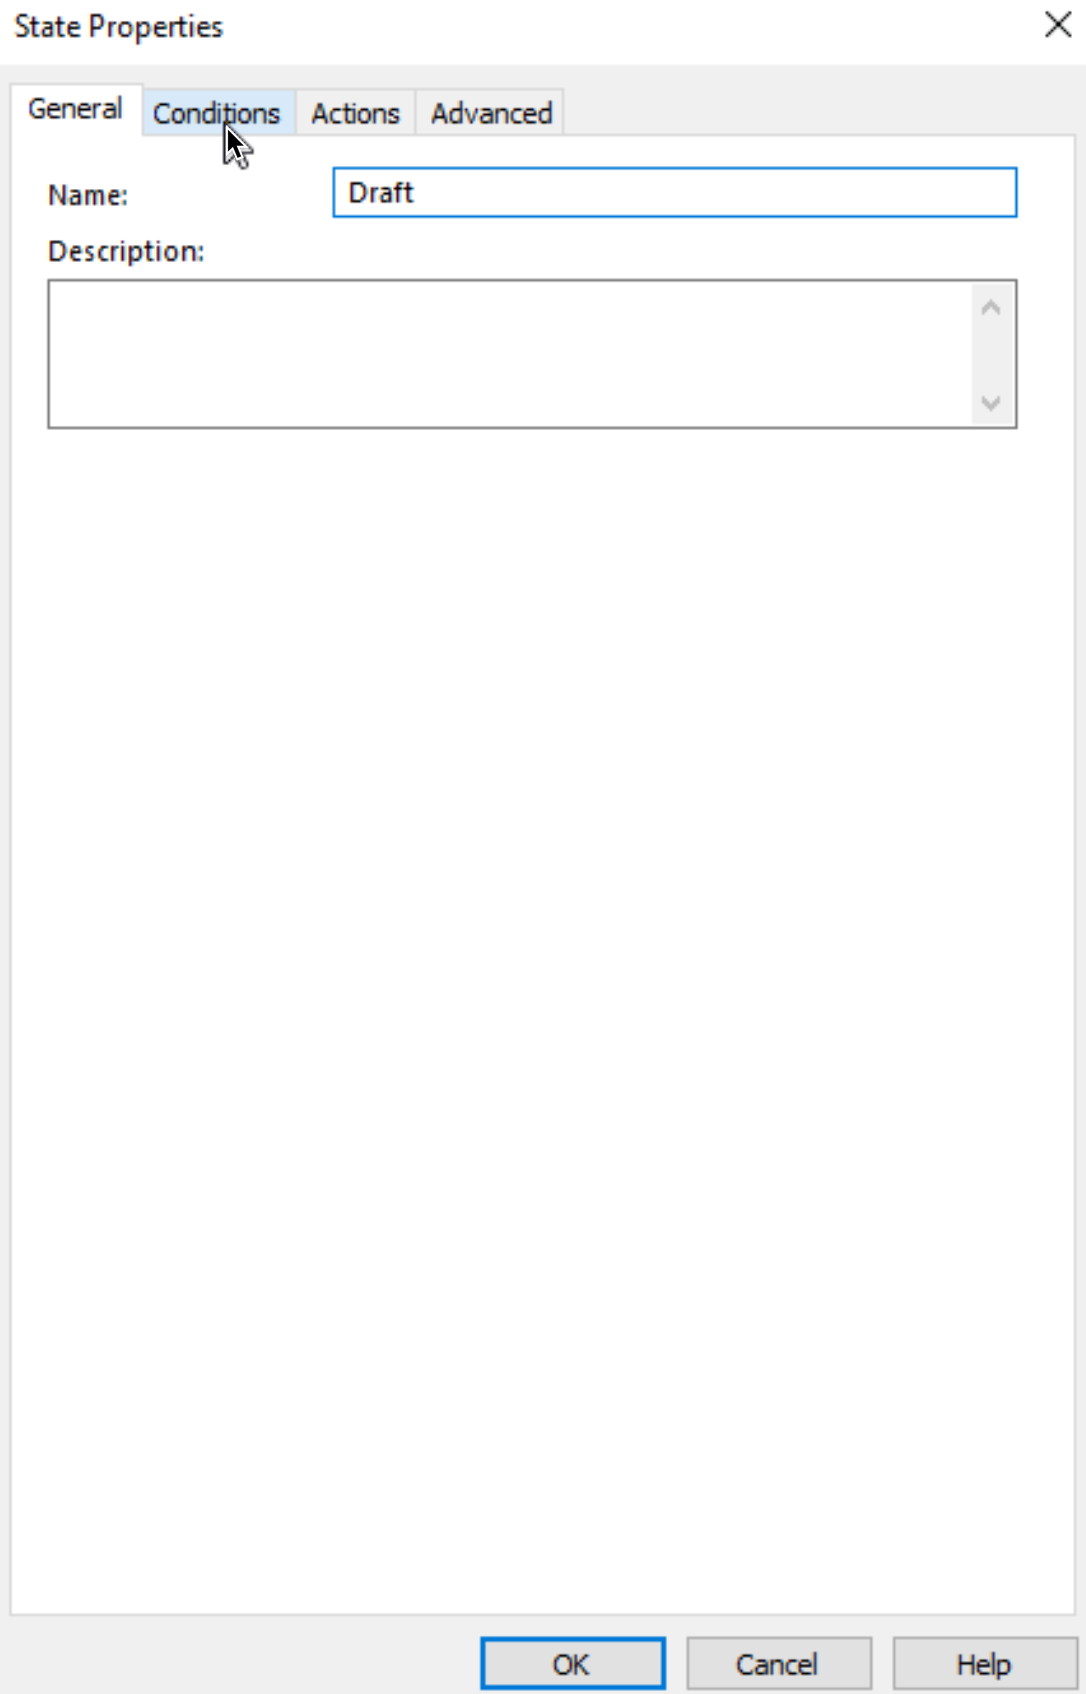
Together we will create Draft, for other two states, procedure is same.
In General we entered Name for our state – Let’s move to Conditions
On conditions screen we can define rules (conditions) that need to be met before our Workflow can change state.
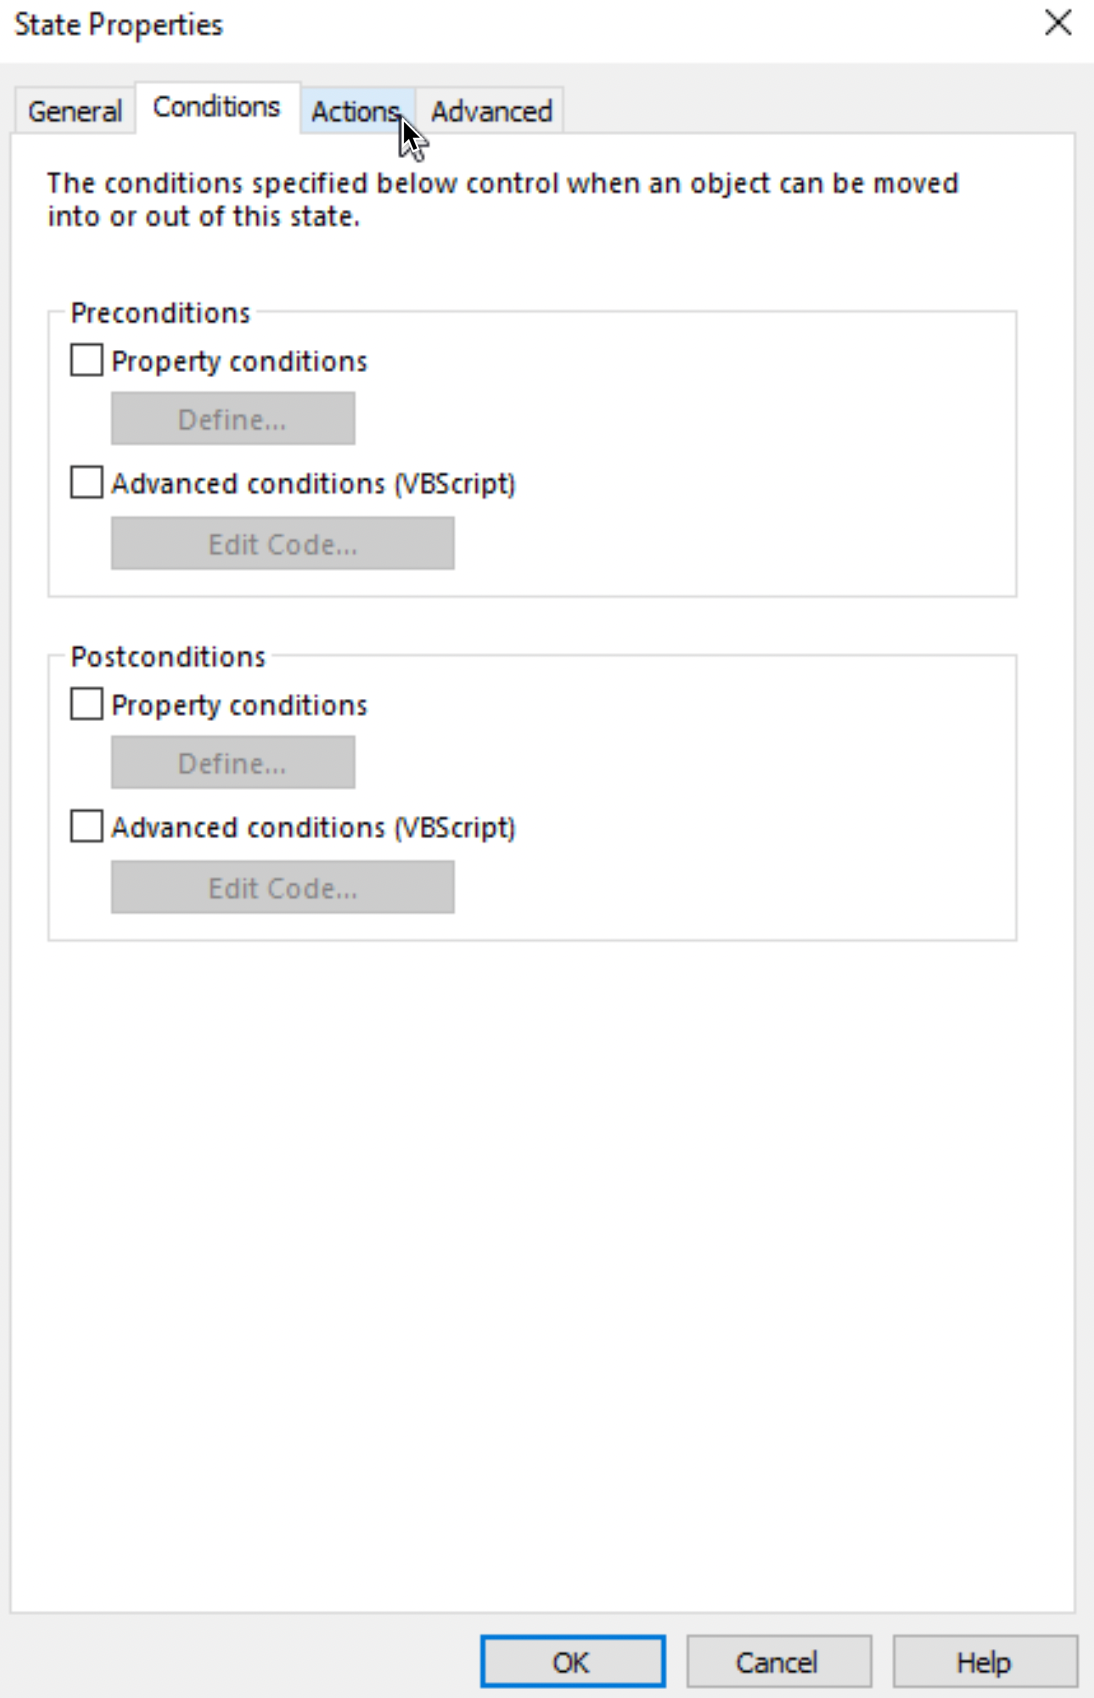
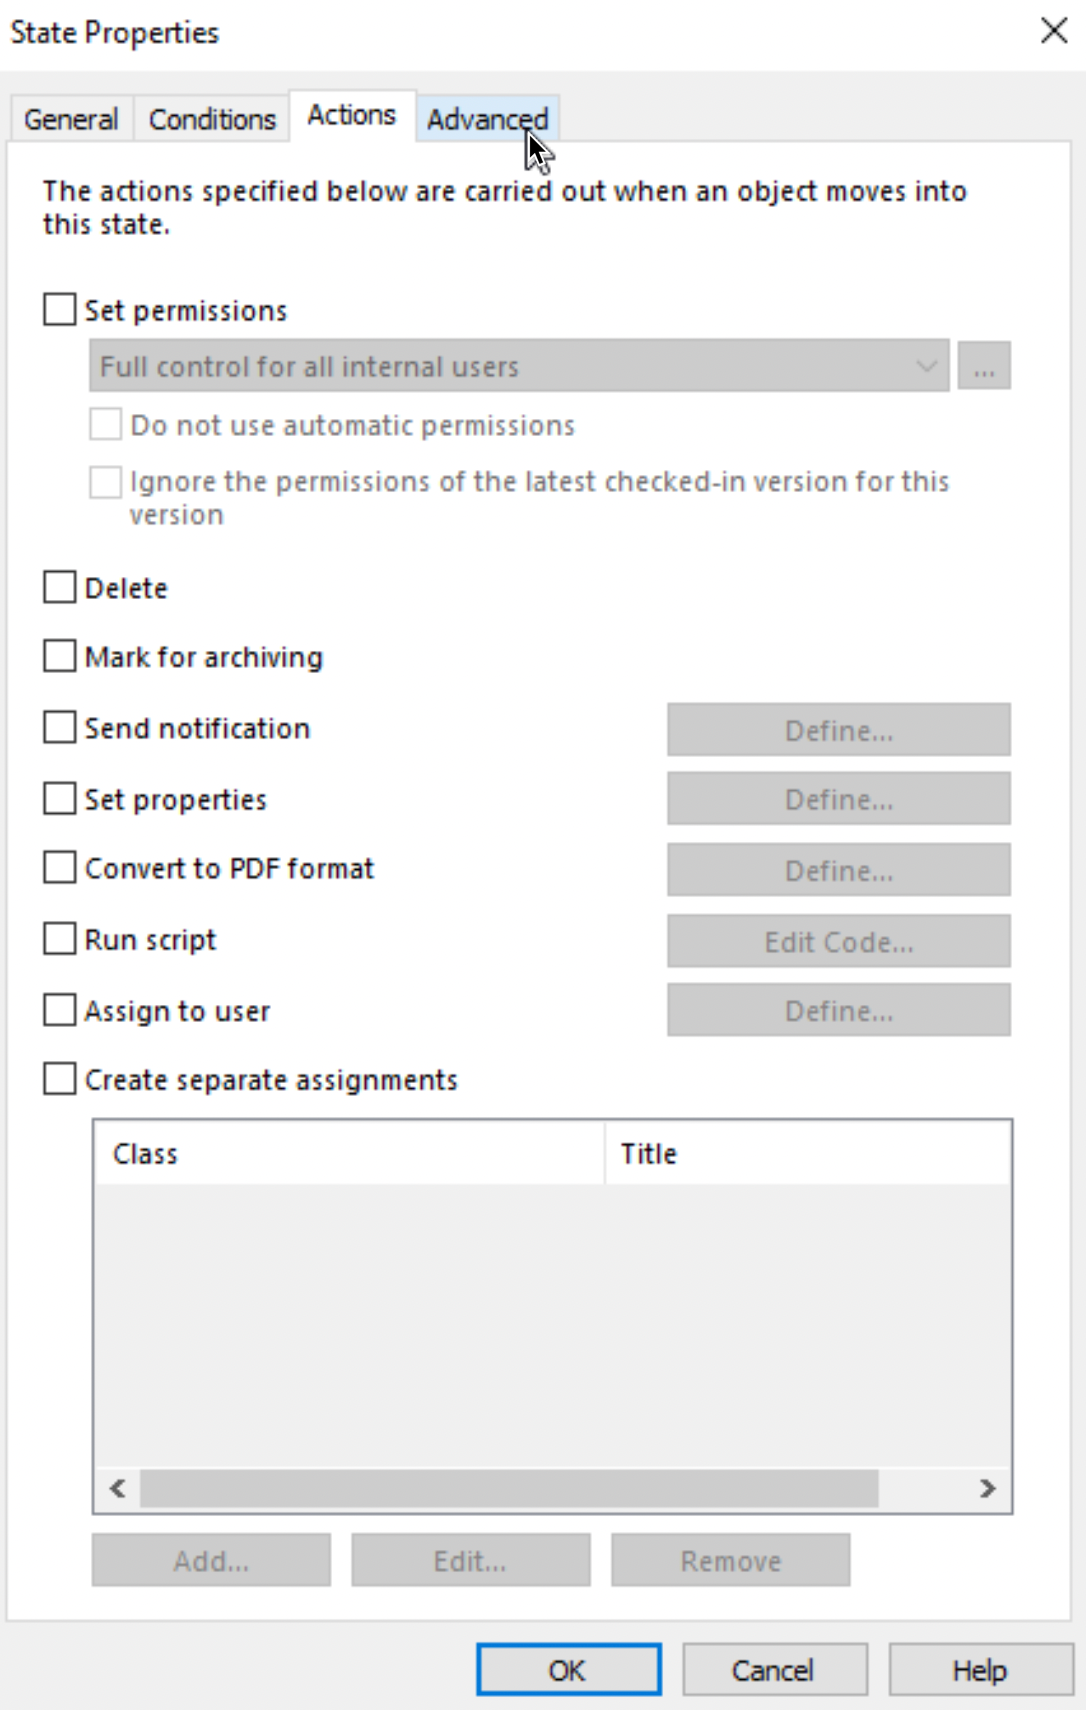
Actions – here is where we can define additional properties of the state, assign user to the state (one by selecting Assign to user) or many by selecting Create separate assignments
Finally, on Advanced tab – Aliases – confirm with ok.
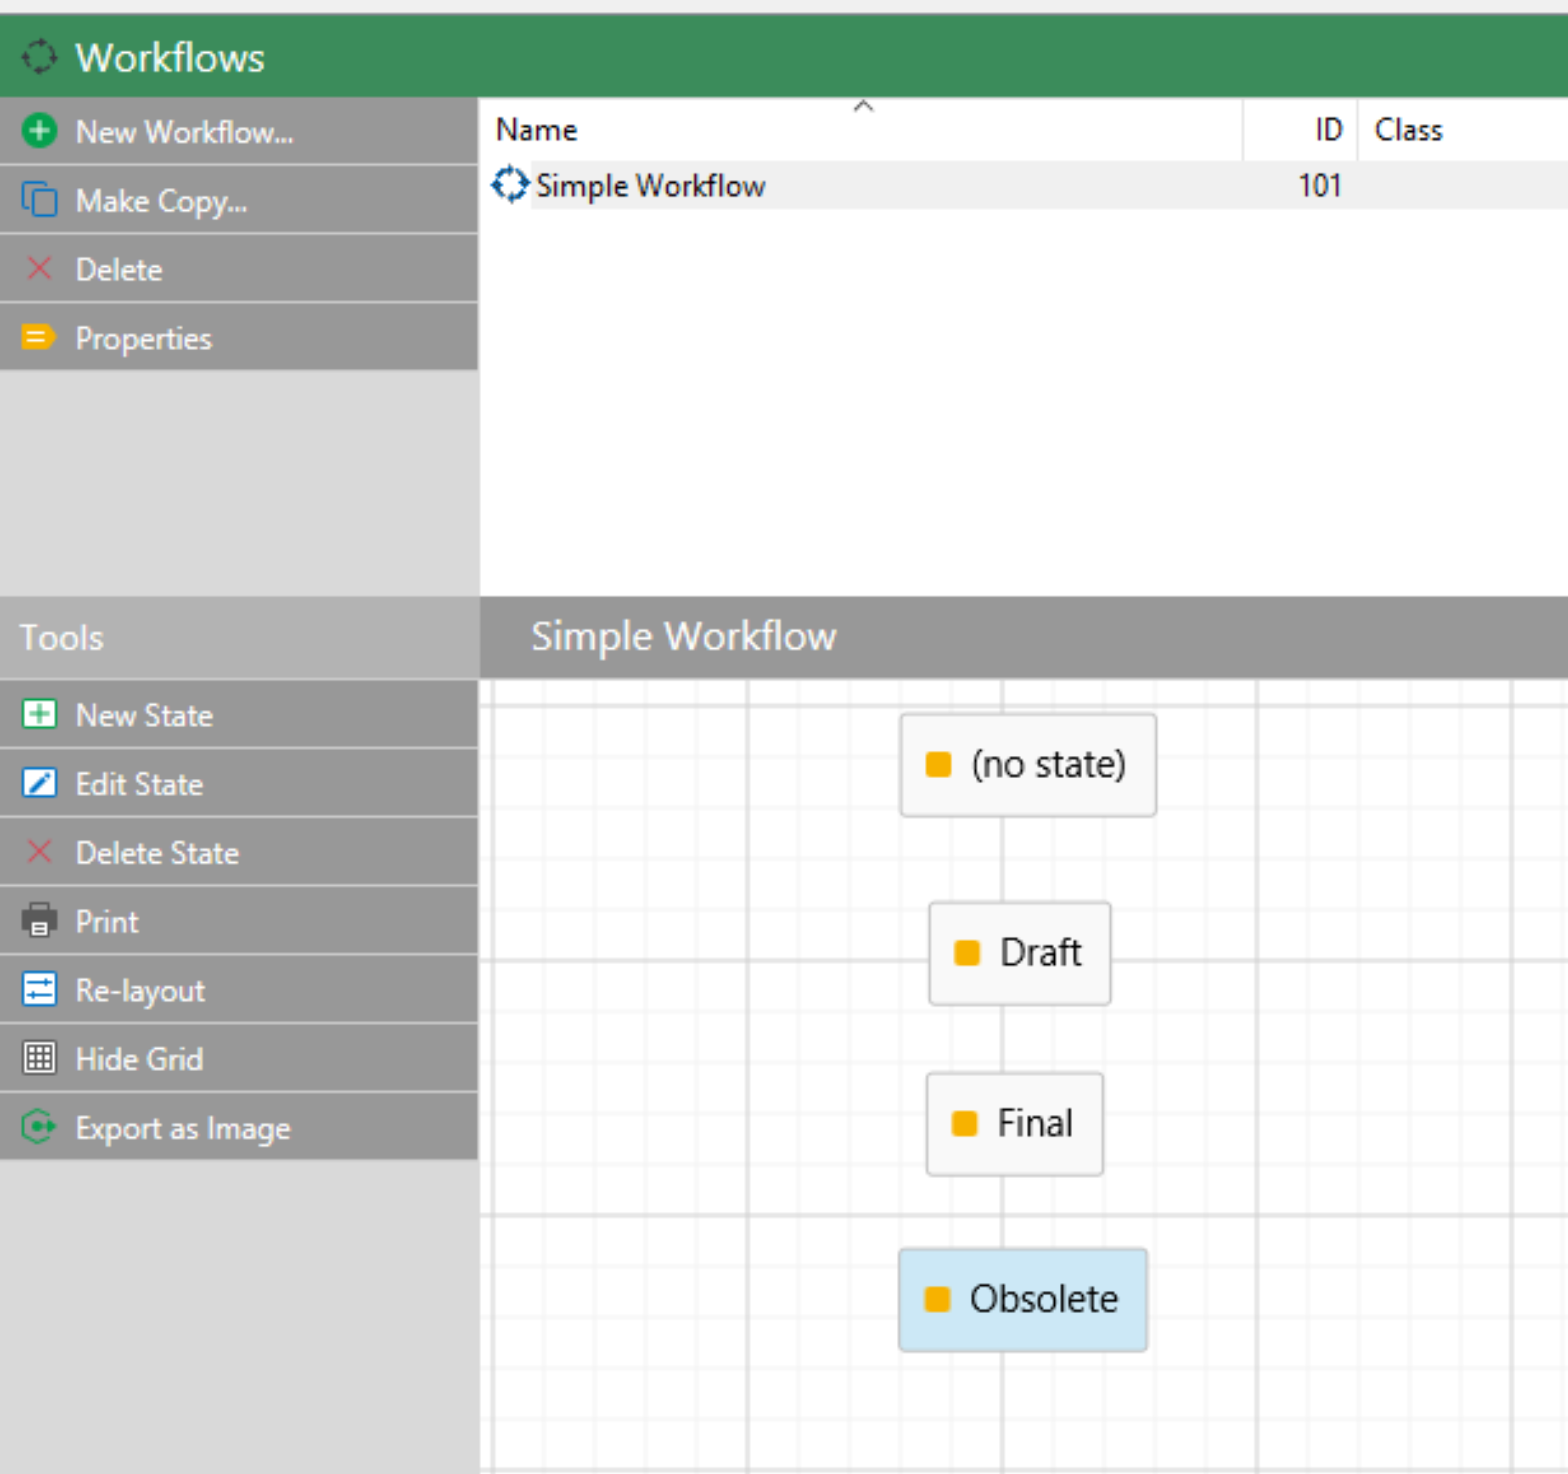
We have our first state created
After I added all states I will save my Simple Workflow States
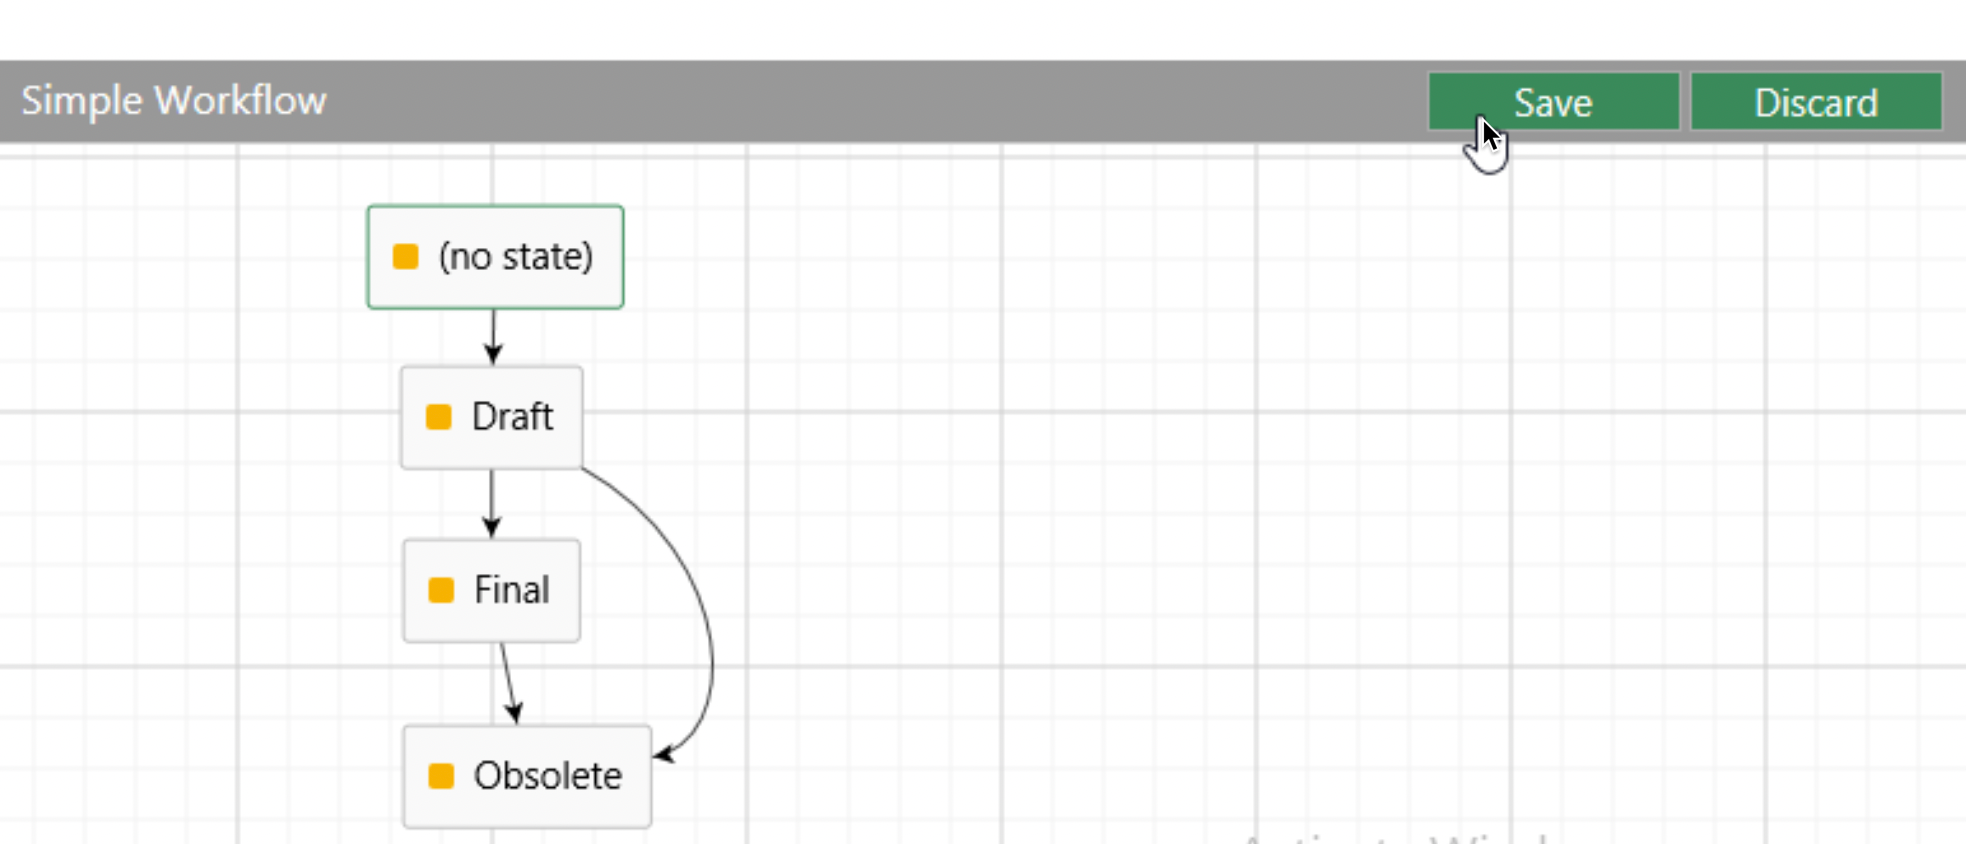
Now, in designer mode (that is place where we see our states) we can rearrange our states, to be more visible and logical to us.
This is how I arranged mine – in logical path, how process progresses usually.
Now, we need to draw transition lines between states. This is done by simply hovering with mouse button over a state, and then pressing left mouse button and holding it while drawing a line towards another state
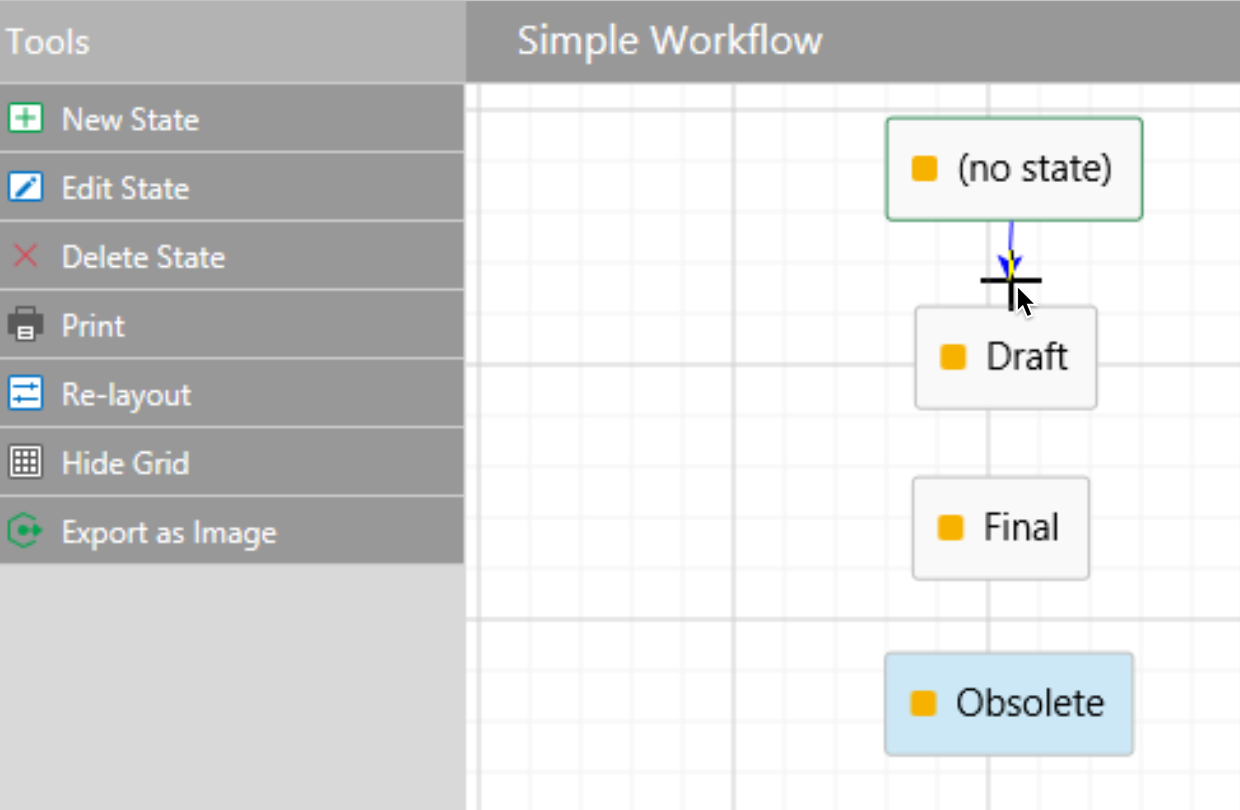
We can also modify lines as needed
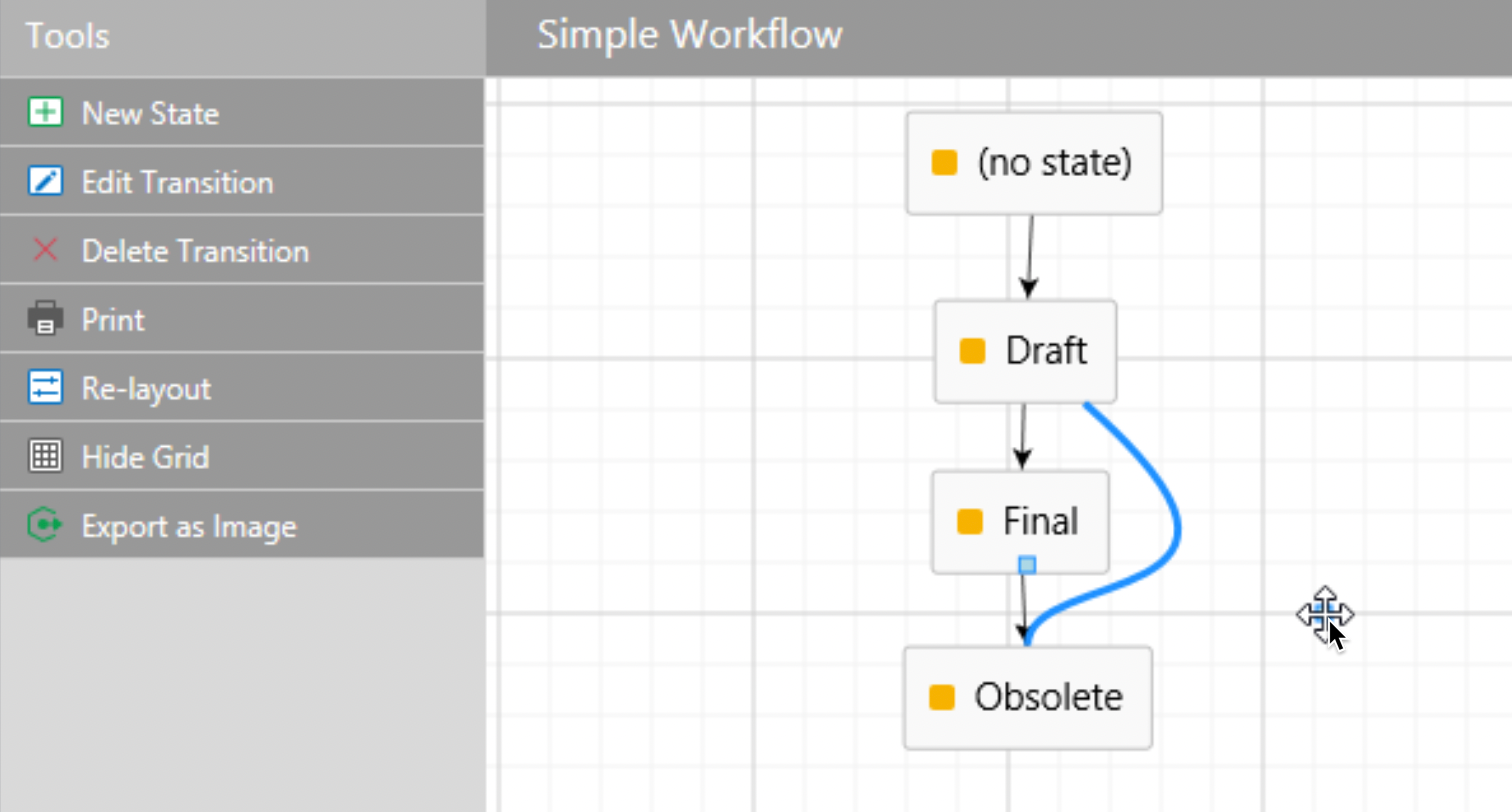
Here is my finished Workflow
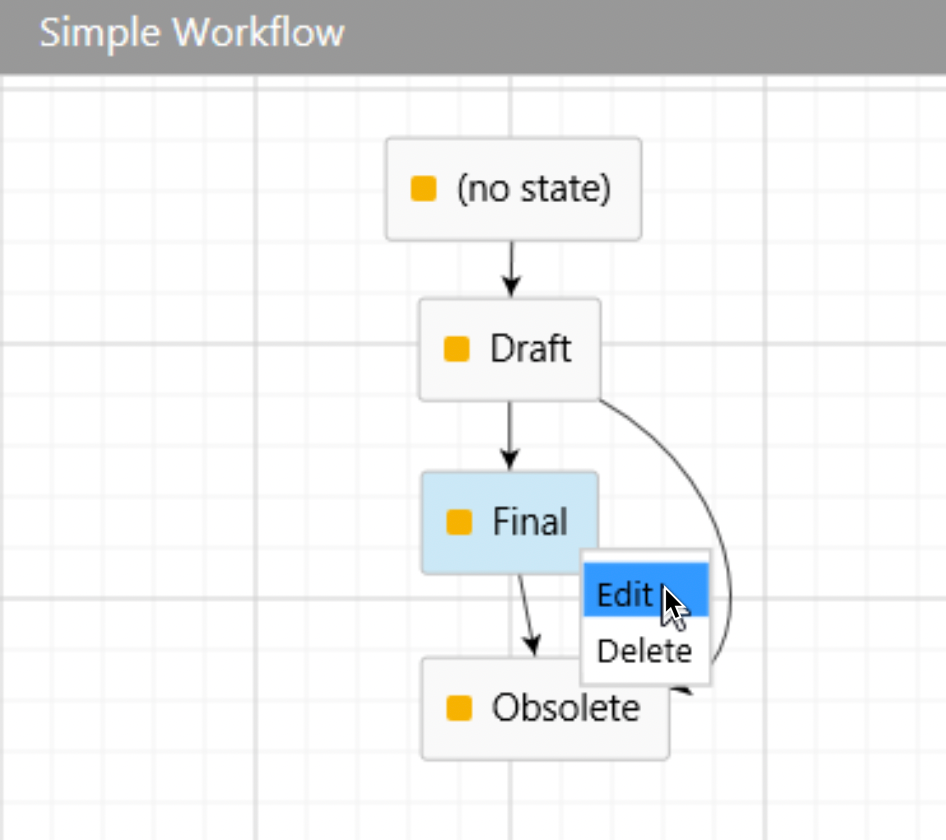
Now, before we test our Workflow, we will modify actions of Final and Obsolete state.
Right click on Final state and select Edit
Go to Actions tab – select Set properties – click on Define…
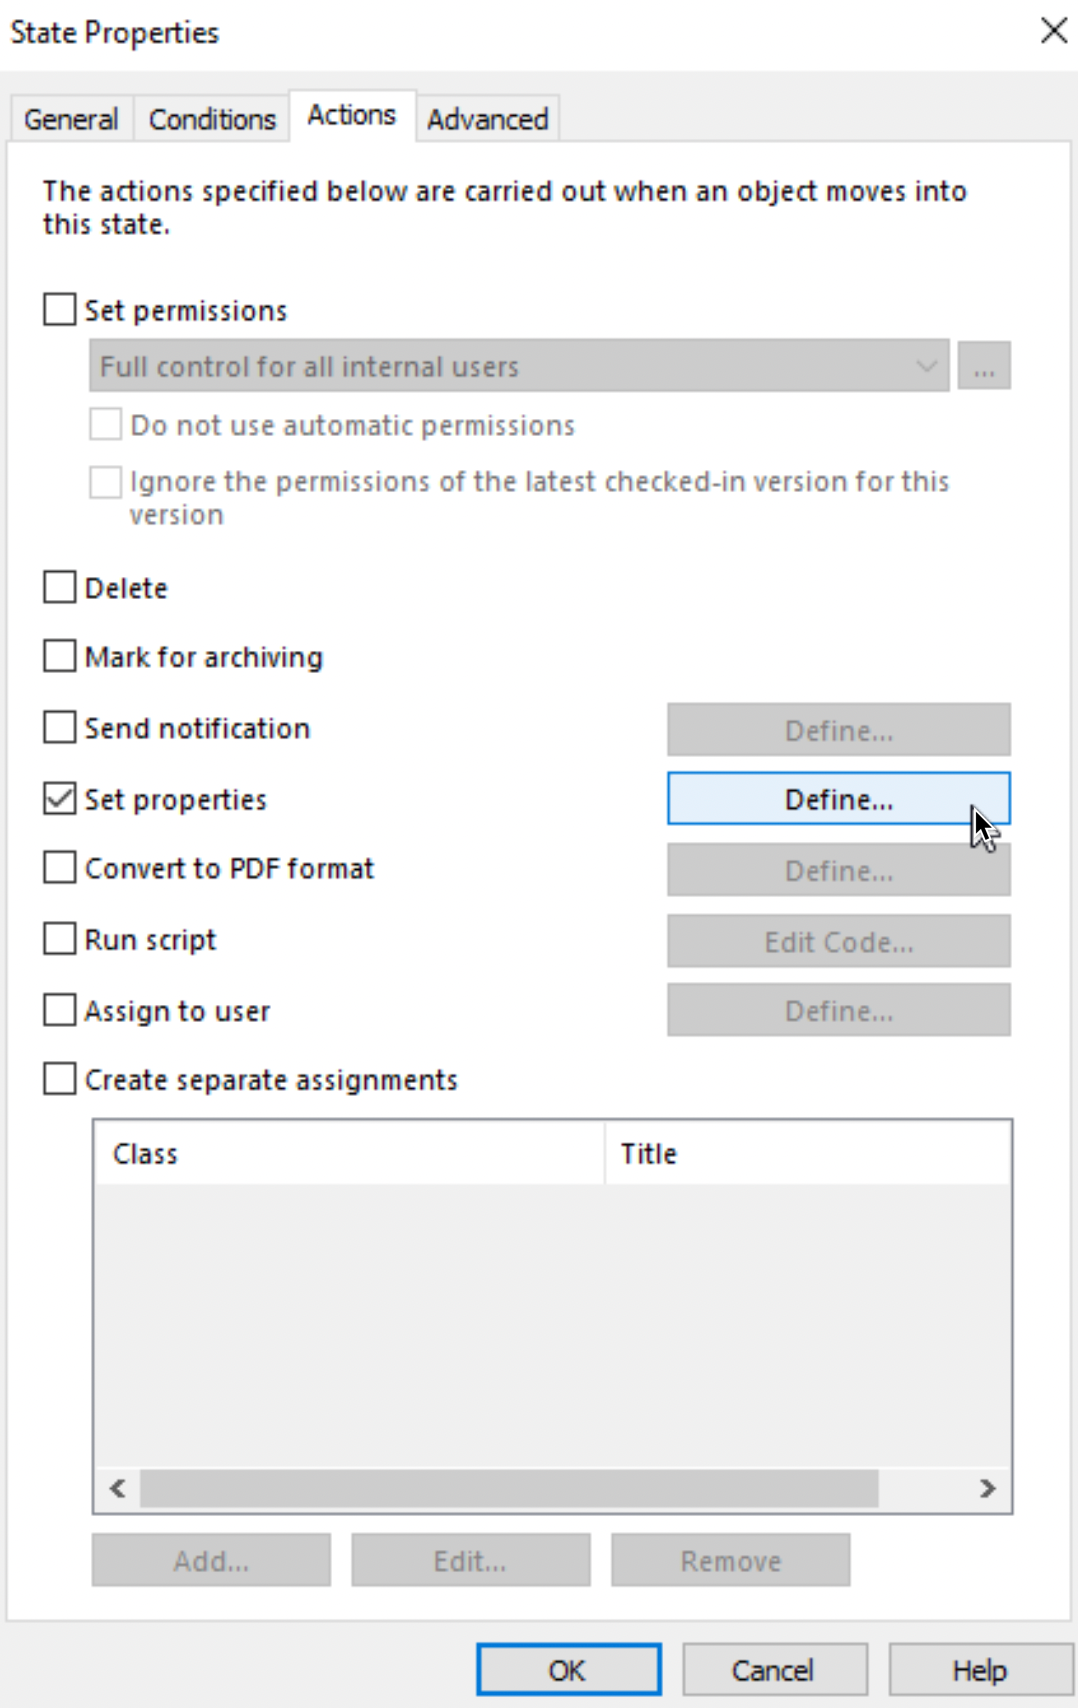
Select Add…
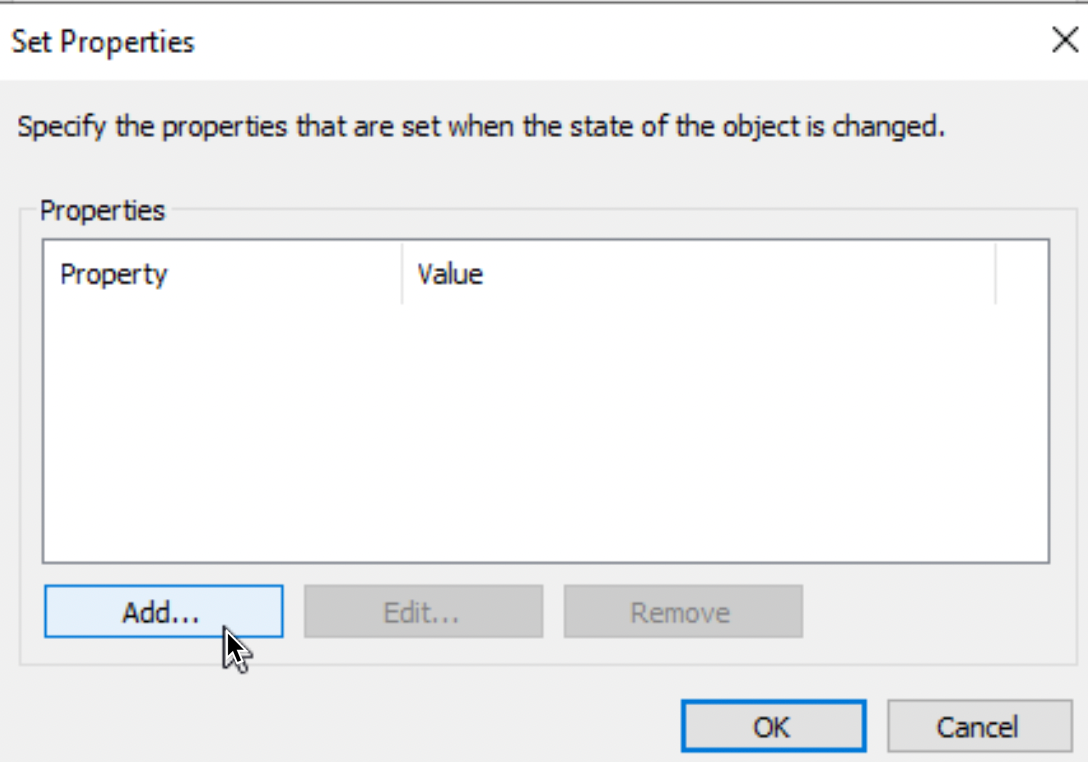
Select Description from Property list
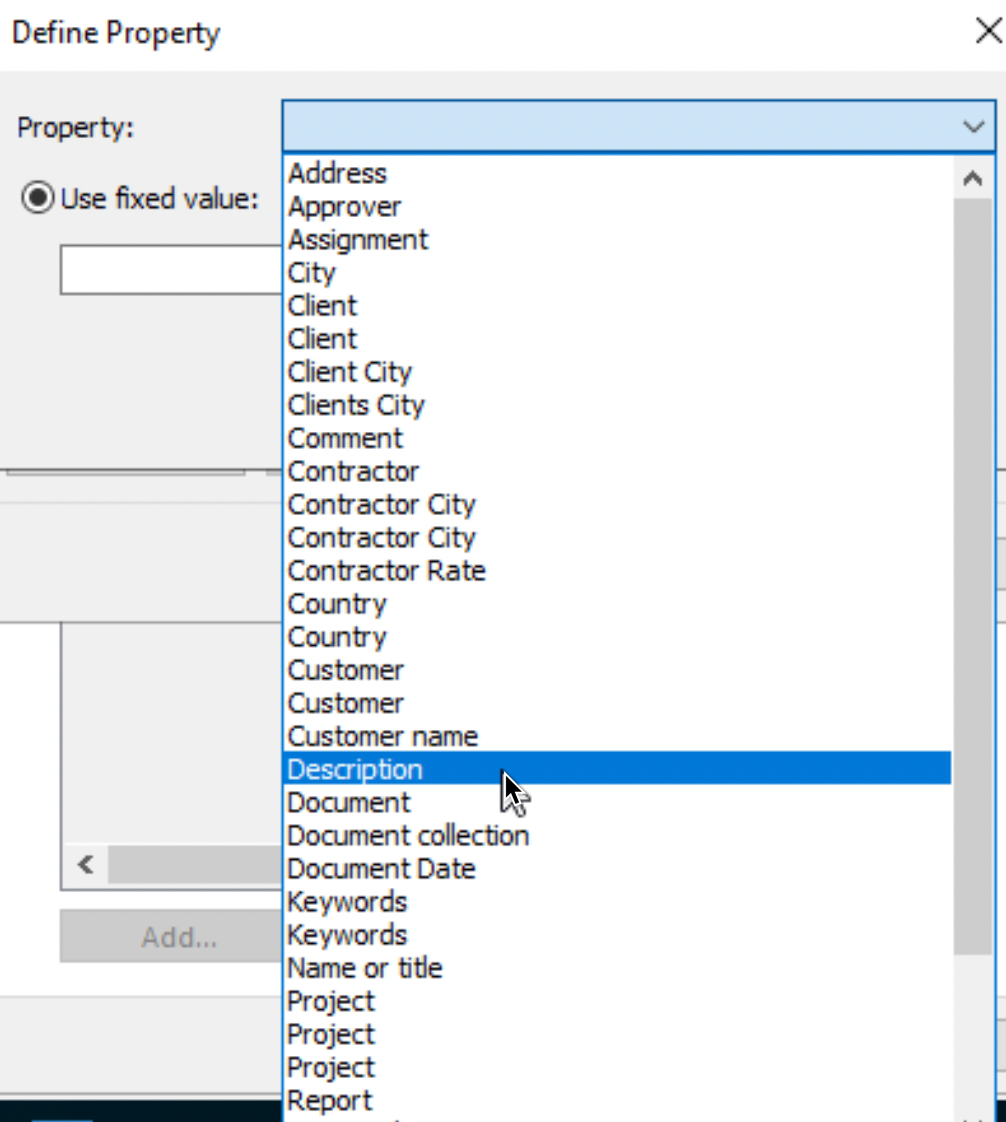
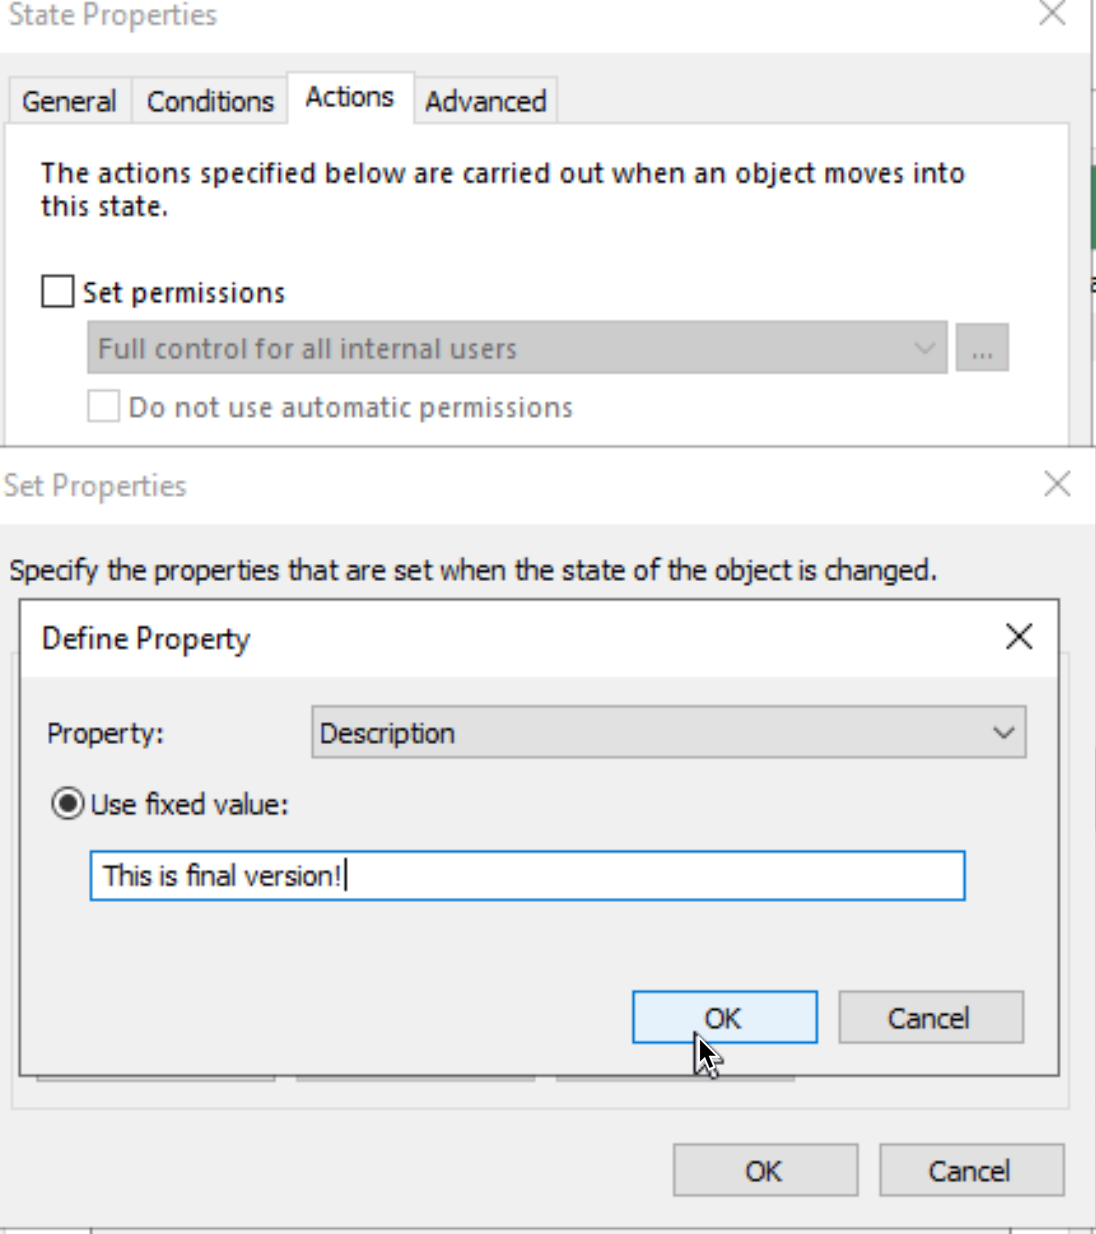
After Description is selected, write something. I wrote – this is final version – close everything with ok.
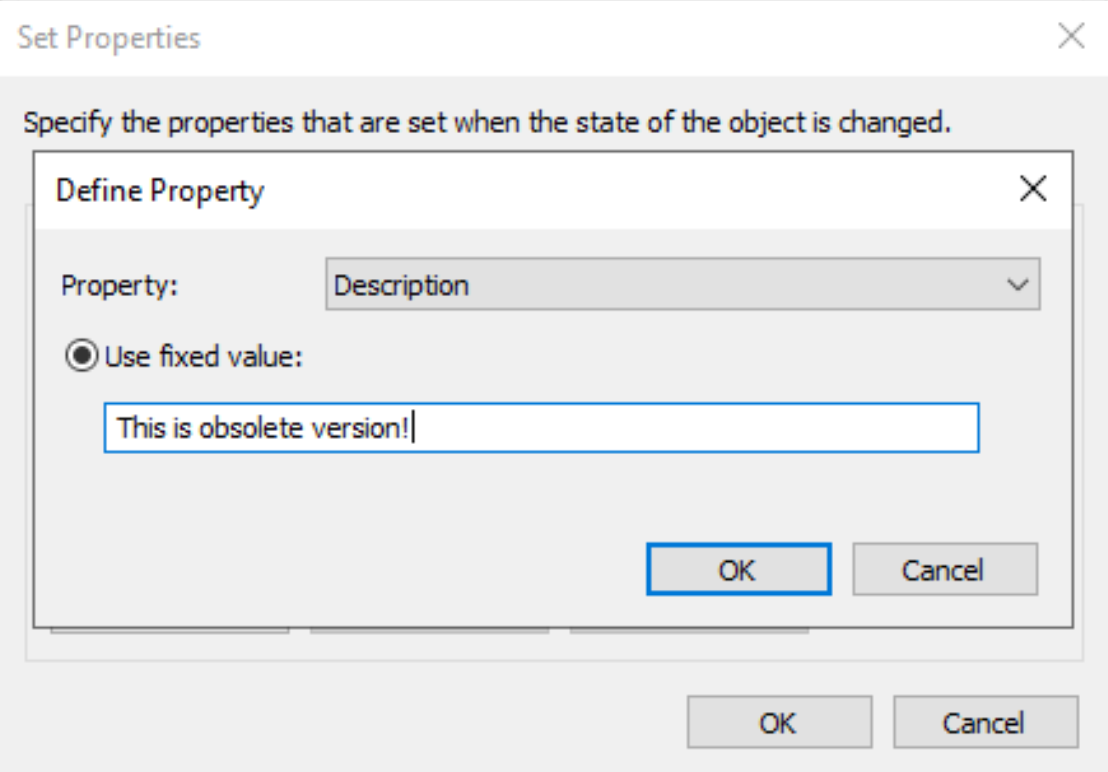
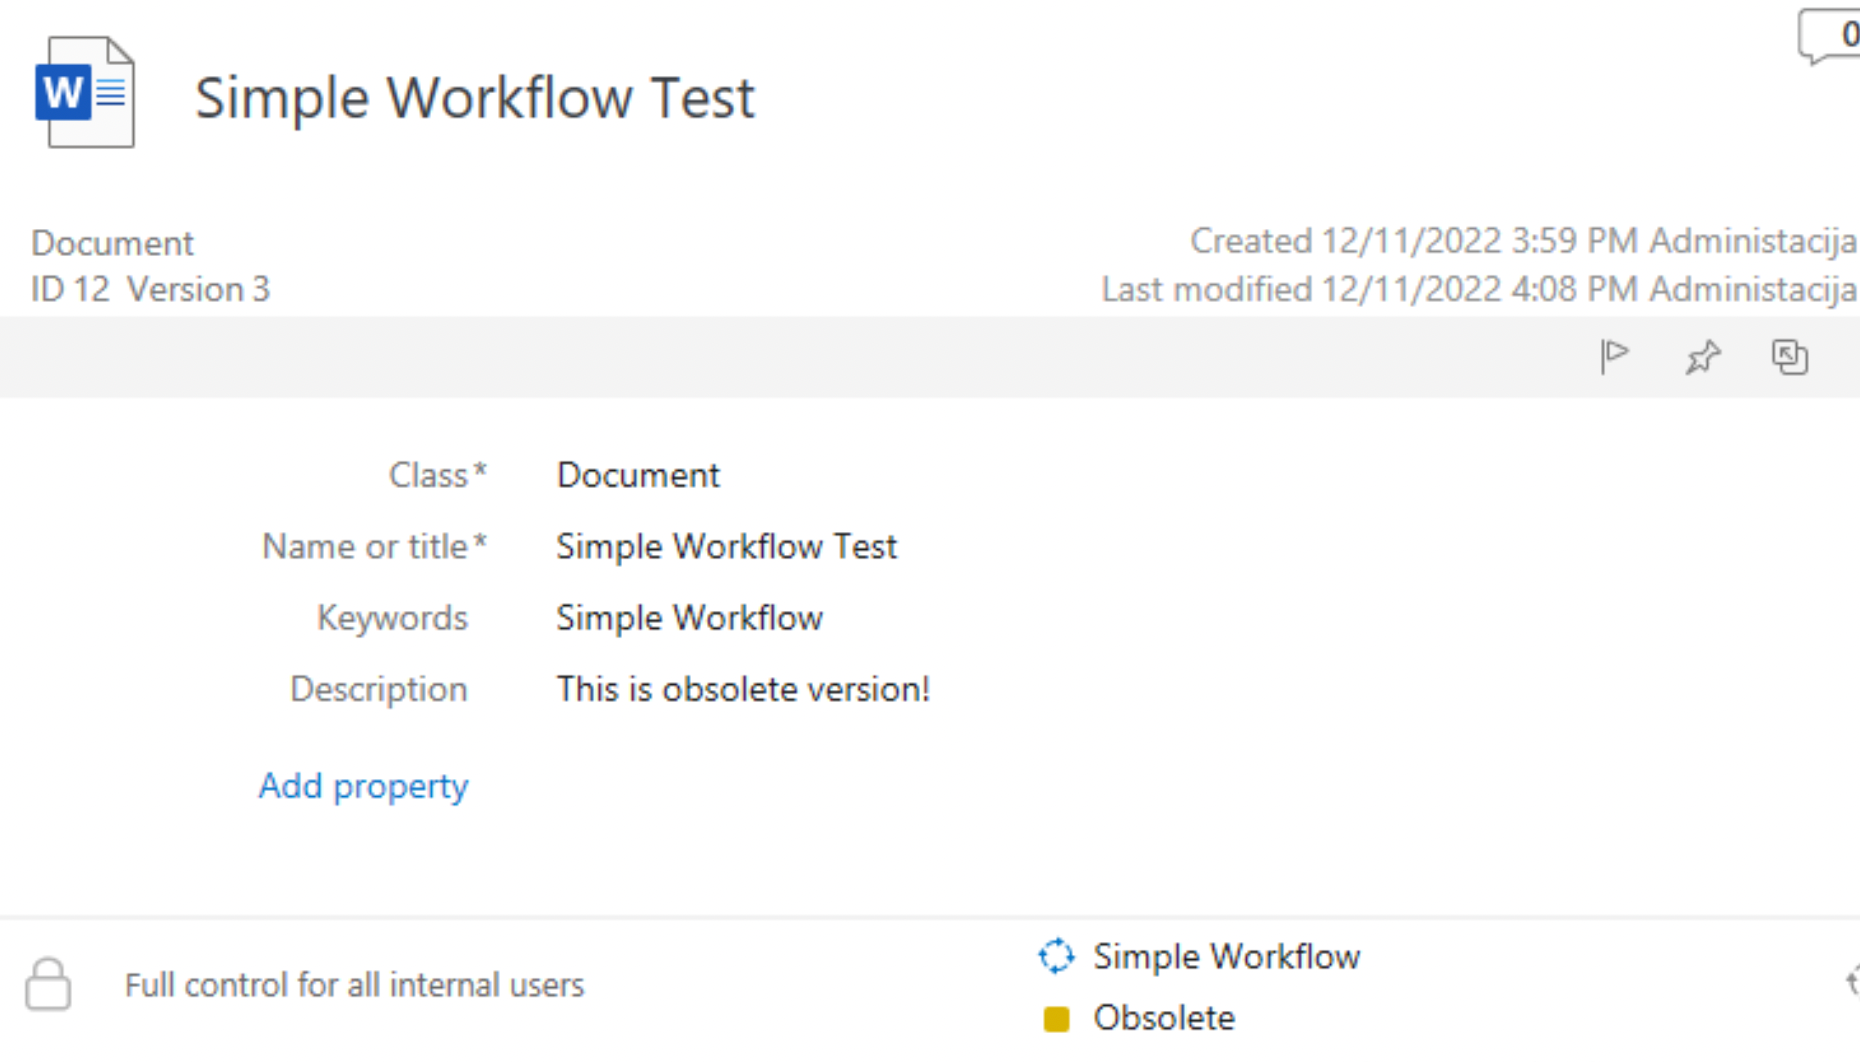
Repeat the process for Obsolete state – just change text to something else – I changed it to “This is obsolete version!
Don’t forget to save the state of your Workflow!
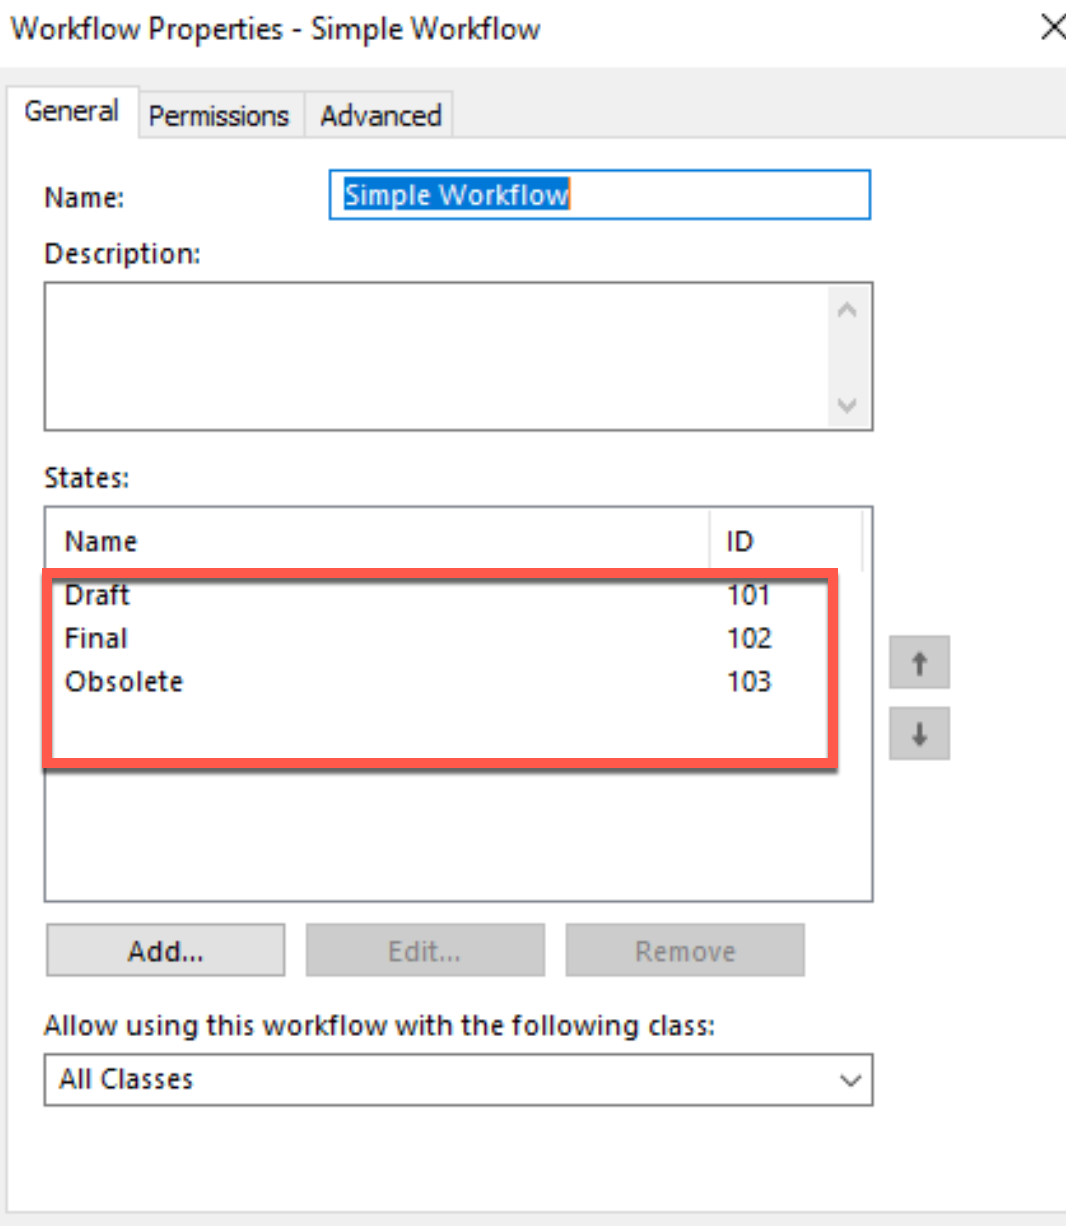
Before we wrap up this – select your Workflow from Workflows screen – right click on it and make sure that states are listed in correct order – Draft 101, Final 102, Obsolete 103 – this is what you should check in every workflow you have. Otherwise, sometimes when starting or going through workflow, you won’t automatically get into first state of workflow…
Now, let’s test our Workflow.
to do that we need to go to our M-Files Desktop.
Testing
I will create new Document Object – and select Word document
I entered Name and some Keywords… Now – from the bottom right part of the screen select first three lines —
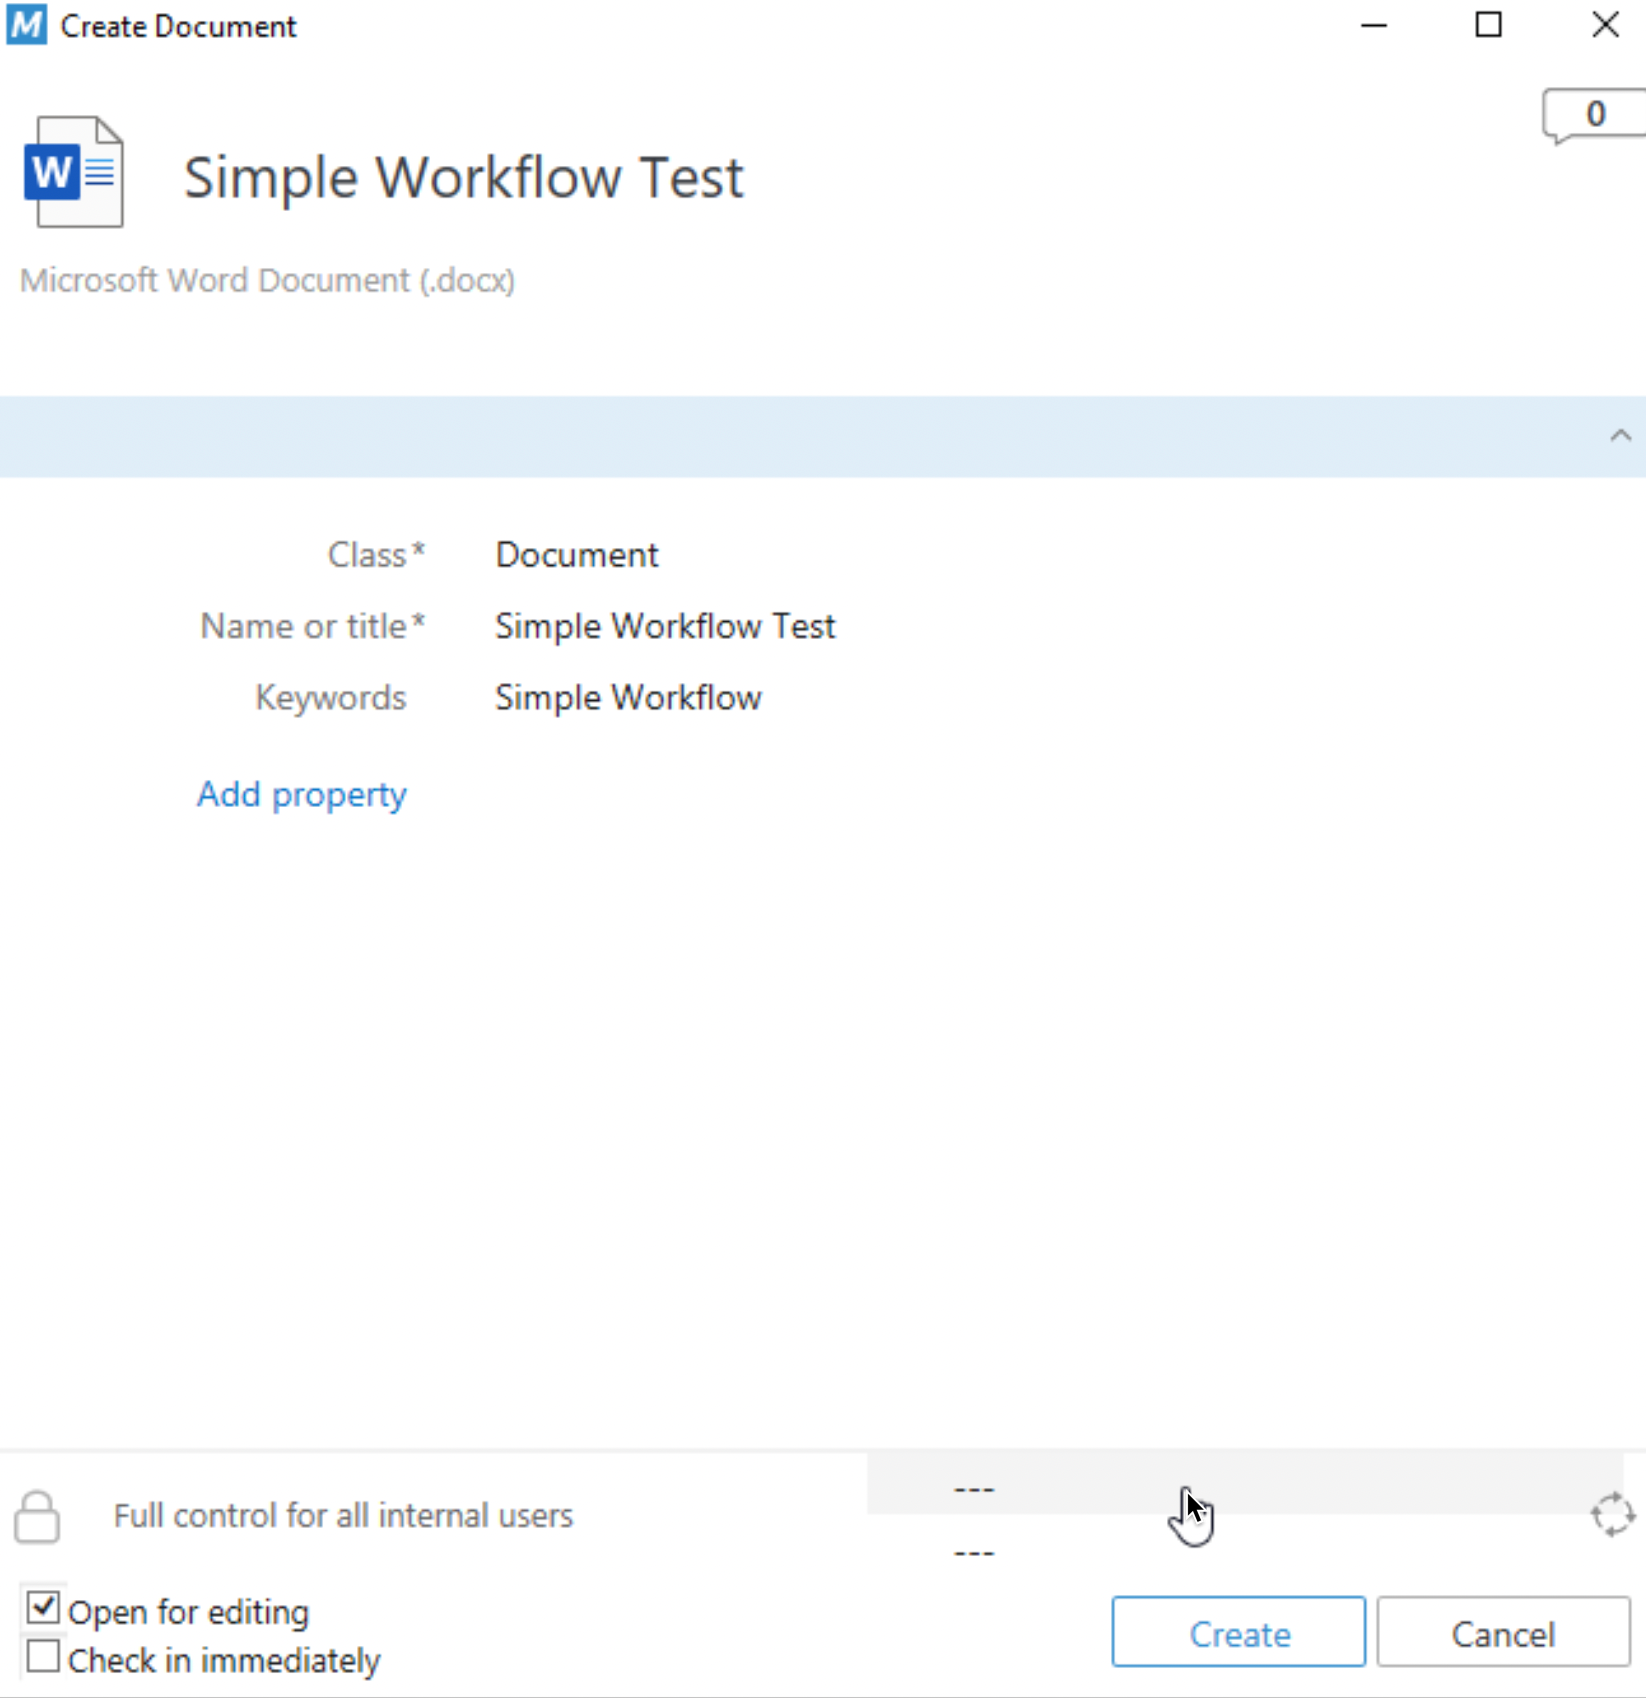
This is where we select Workflow for our document – we have only one – so we will select it.

Next, Draft state should be automatically selected – if not, click on the next three lines just below the one we clicked now, and select Draft state. Click on Create
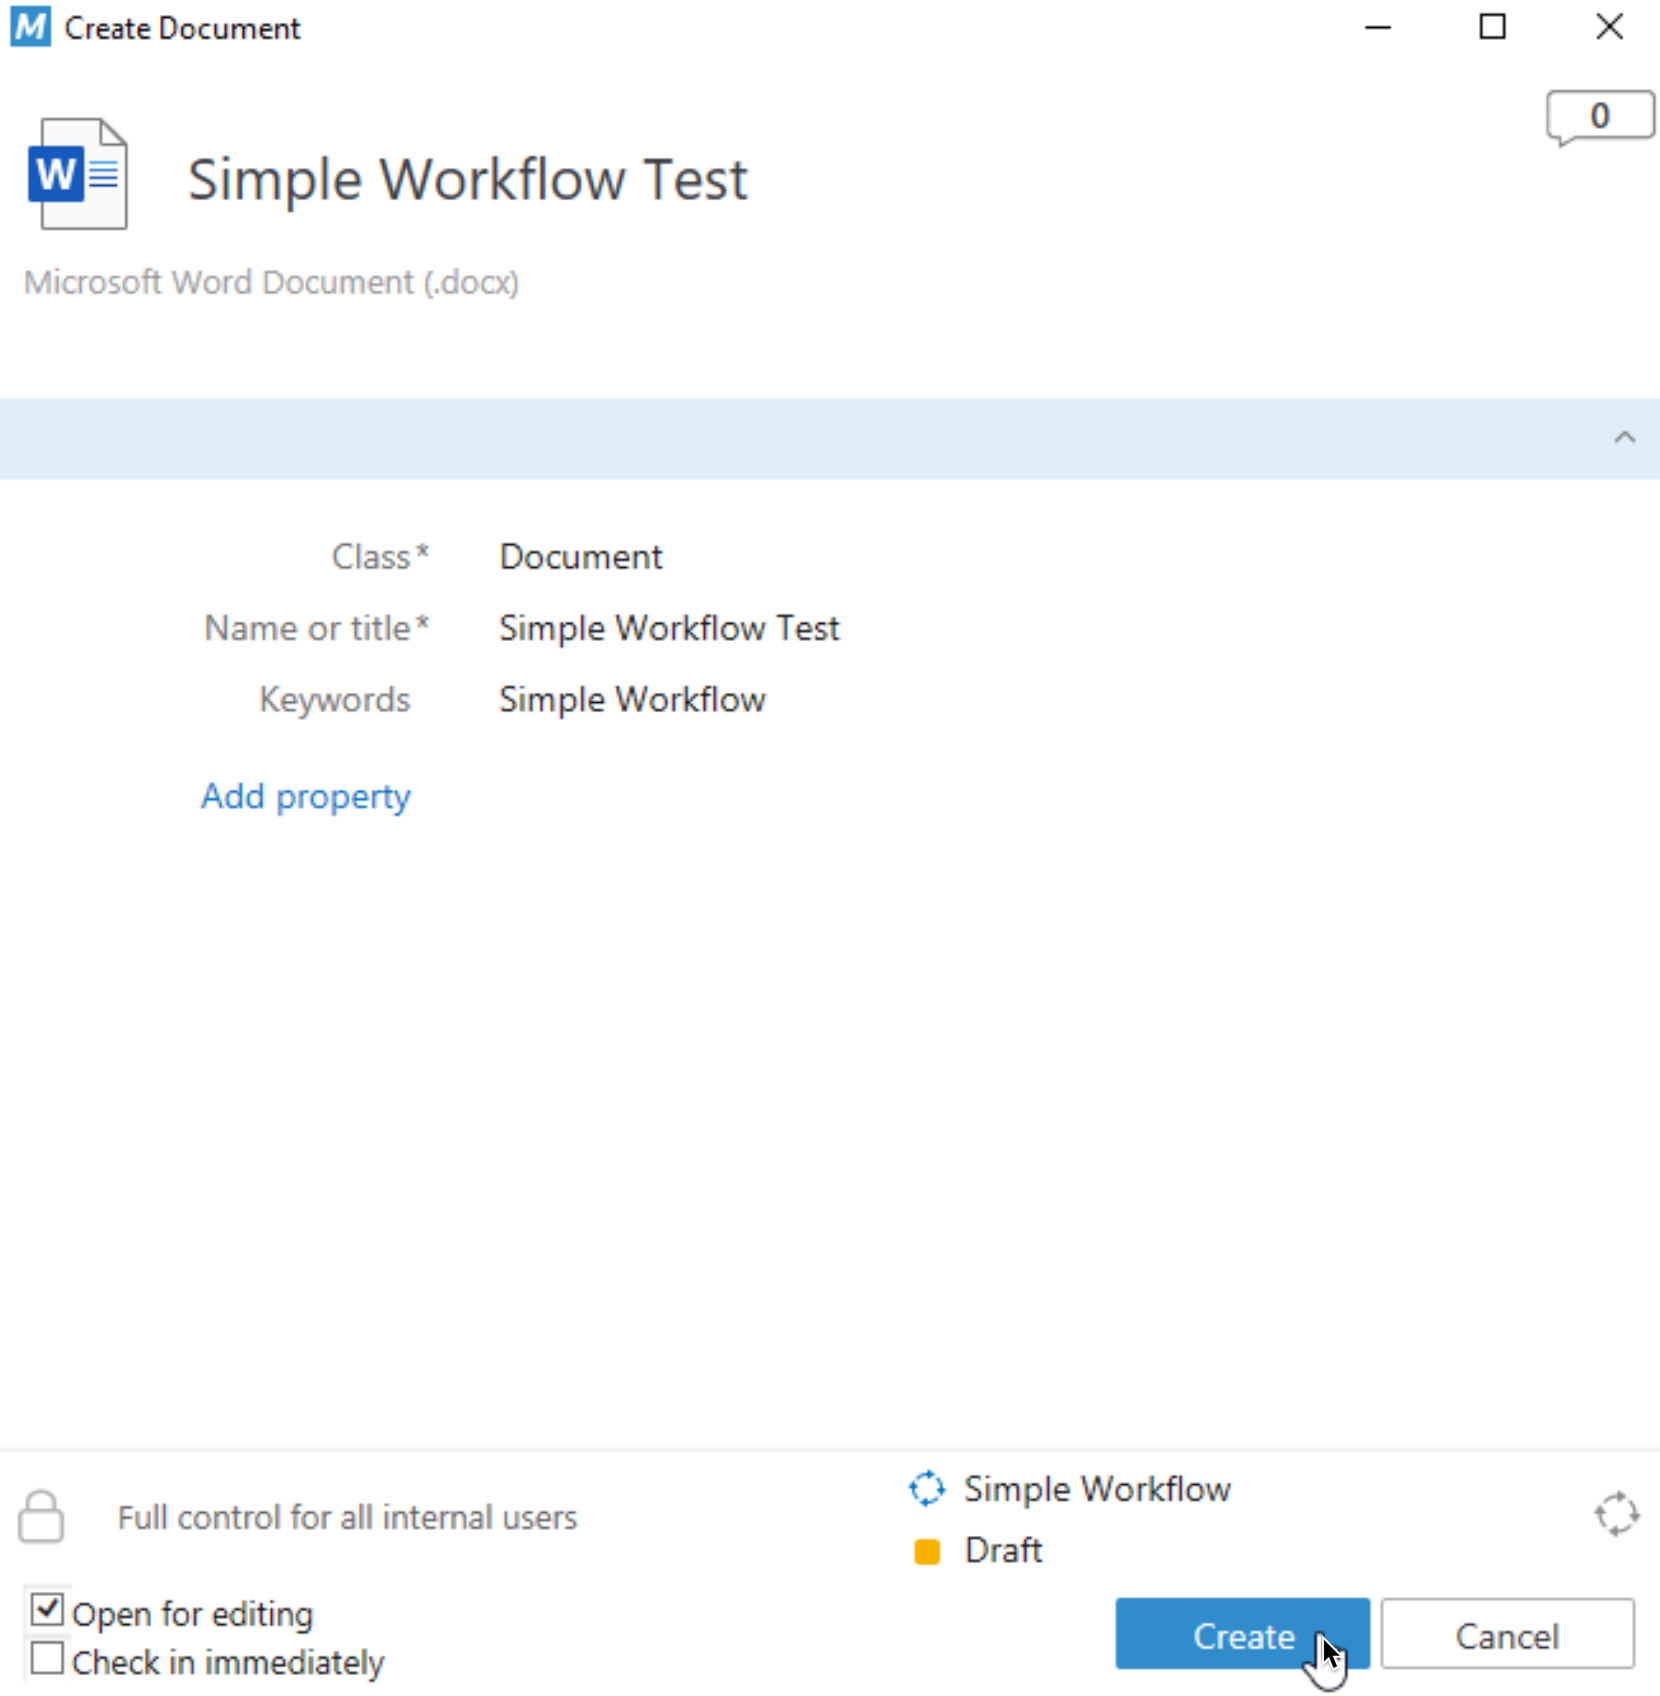
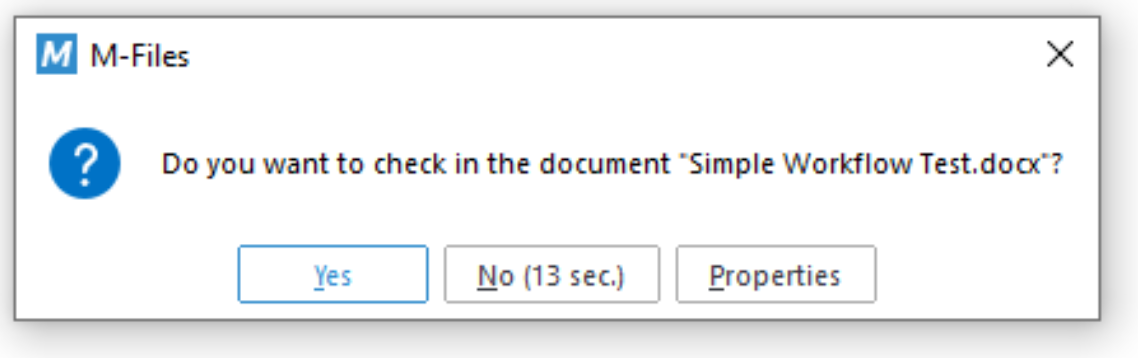
After we click on create – new Word file will open – just close it, confirm all the dialogs and close it (it doesn’t matter that file is empty, we are testing workflow.) We could also uncheck Open for editing on screen above, before we confirmed with Create, and check the box beside – Check in immediately, but this is also fine, to feel the process.
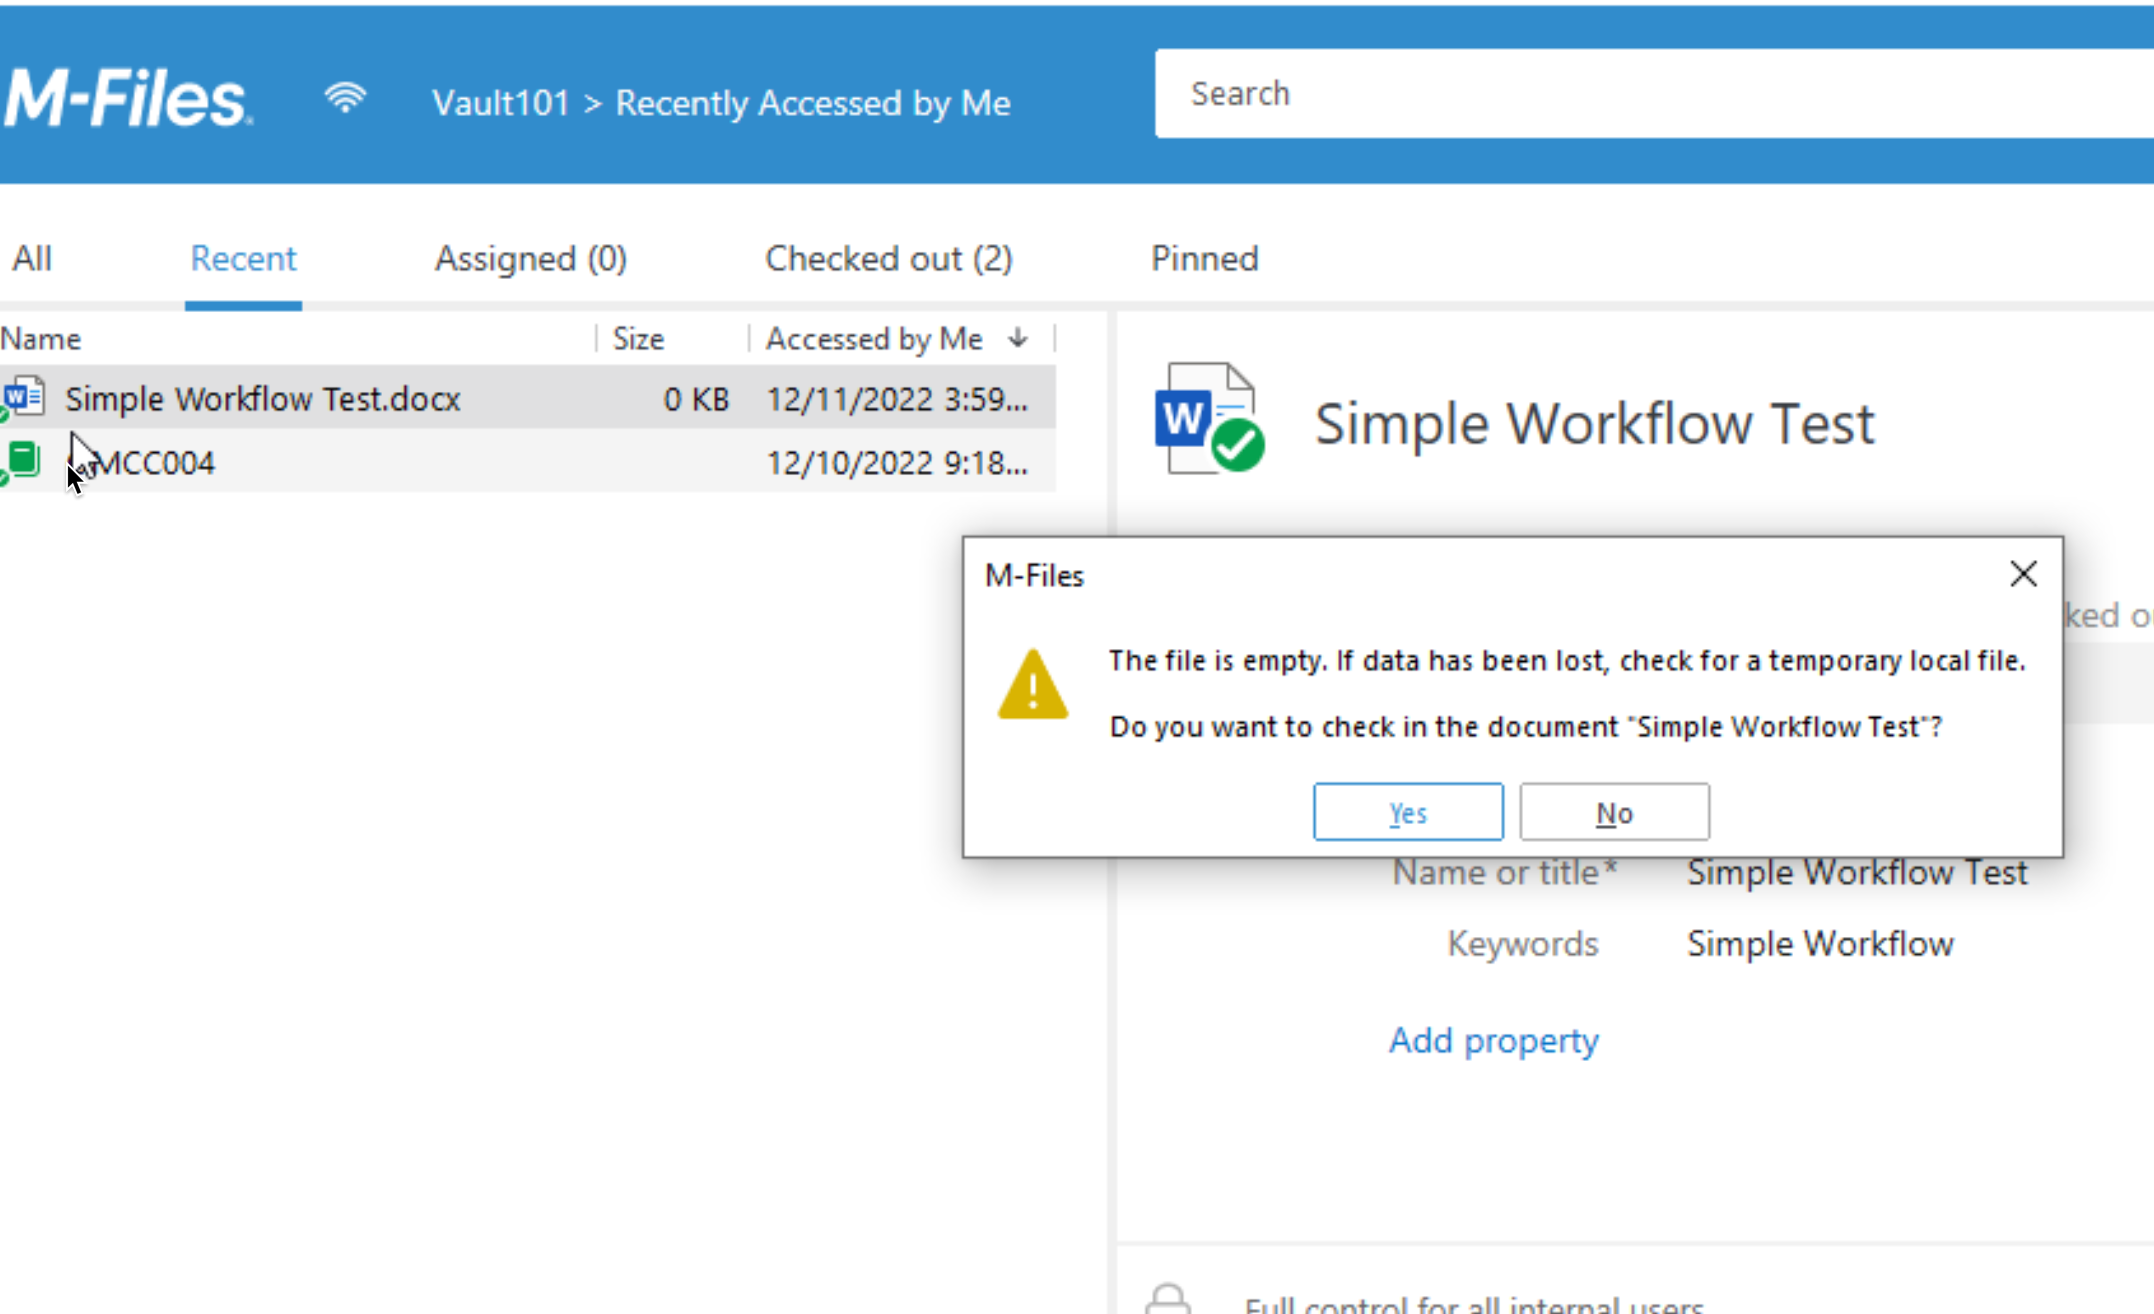
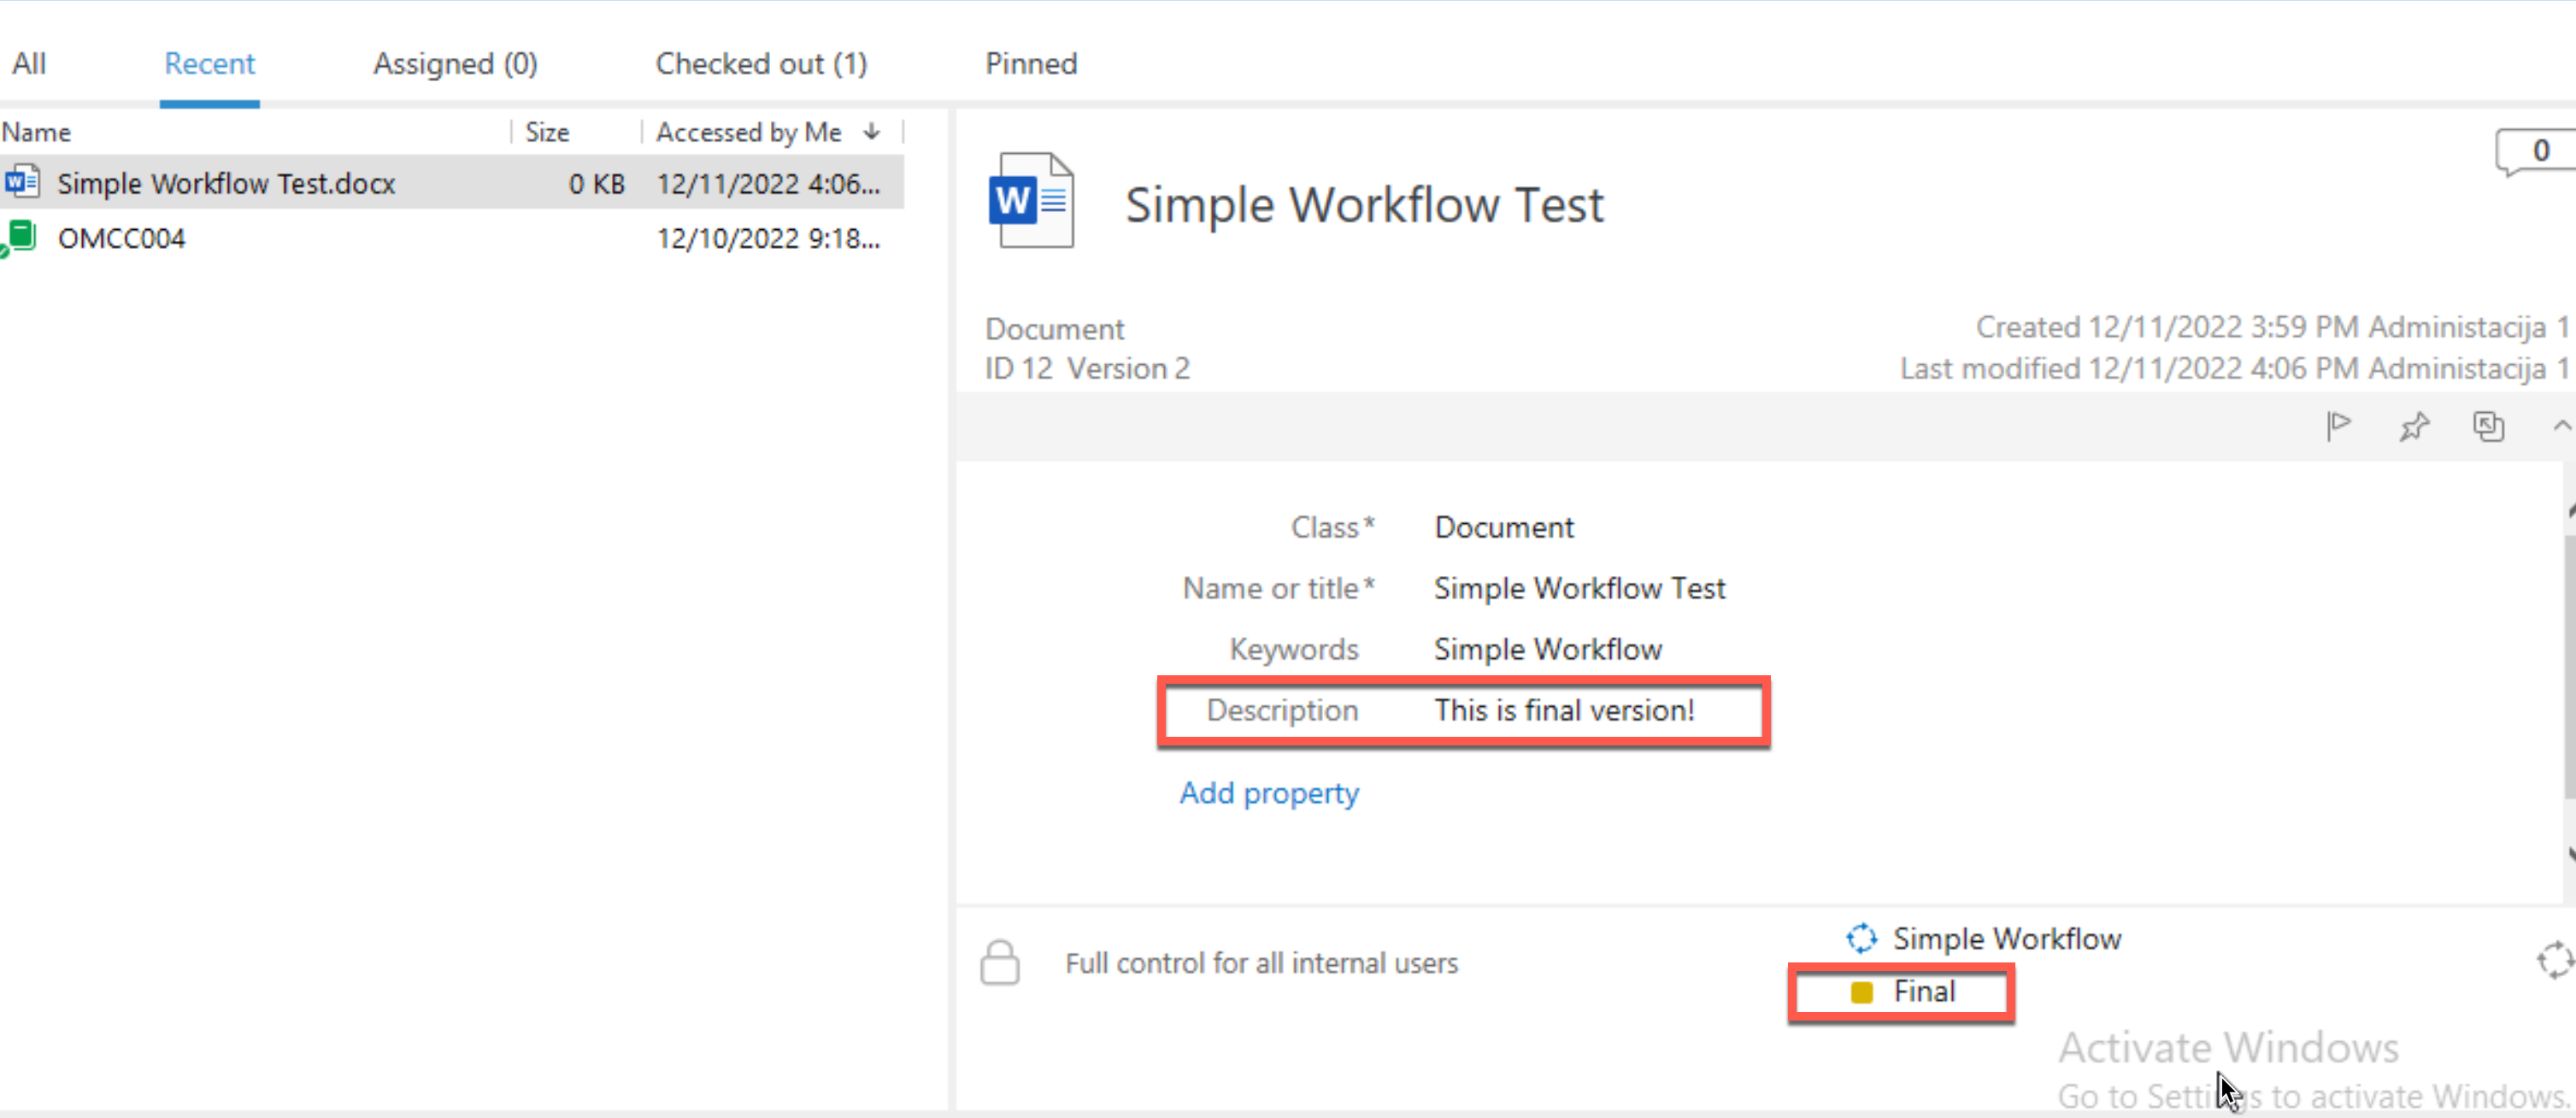
Ok, we are in Recent tab in our M-Files Desktop, where we can see Simple Work Test.docx file. Let’s check our states in the bottom right window
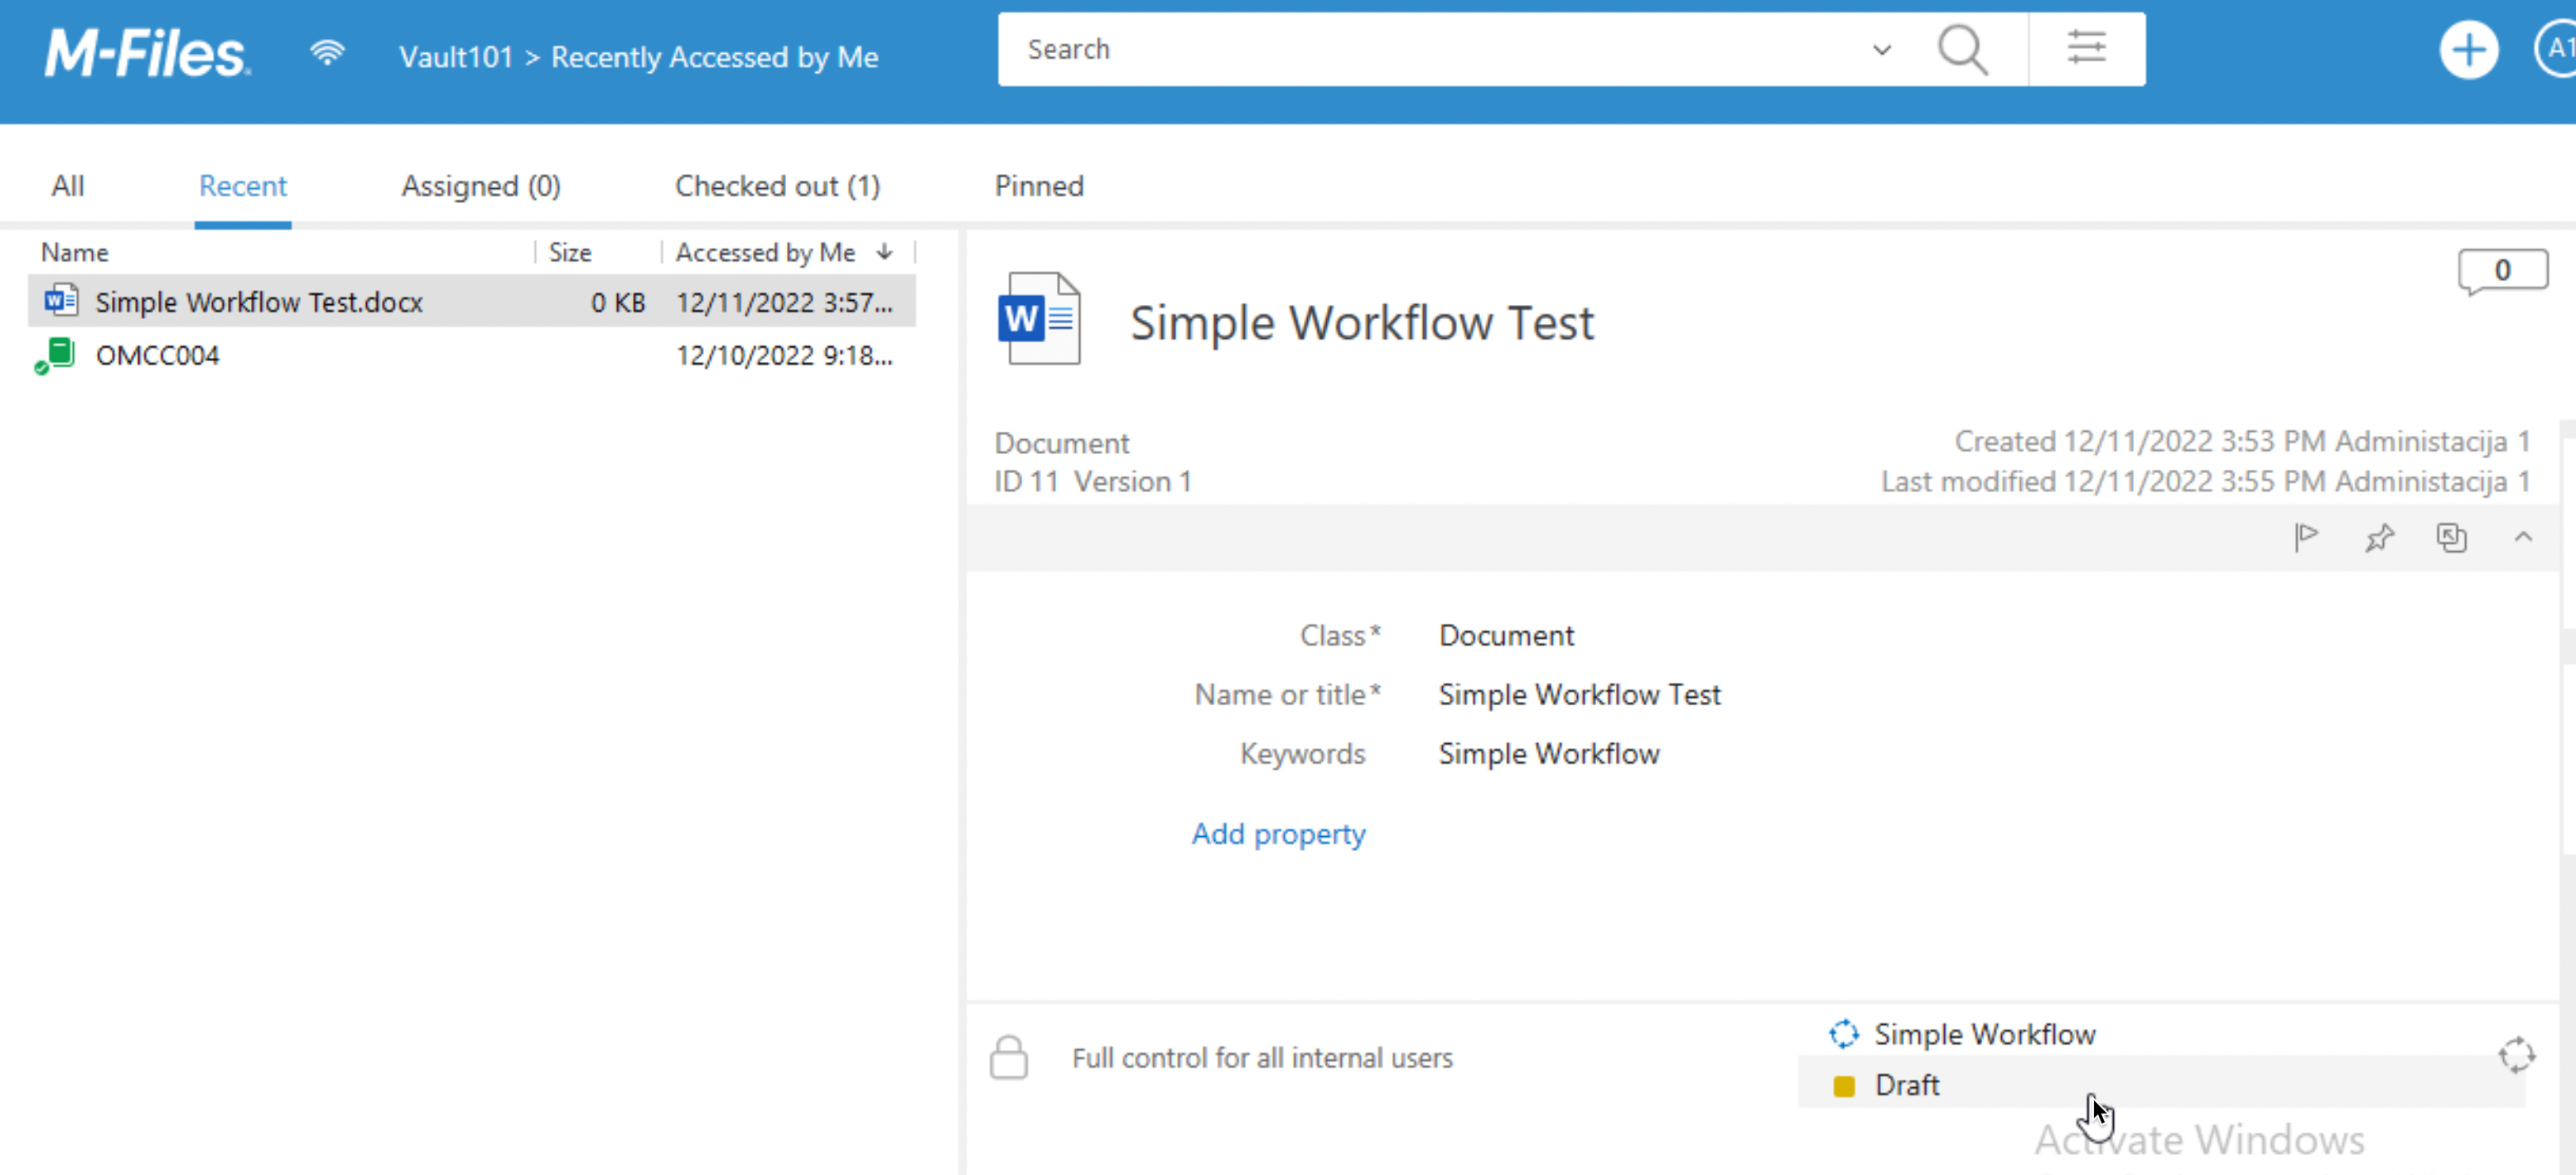
We can transition this document to two states – Final and Obsolete.
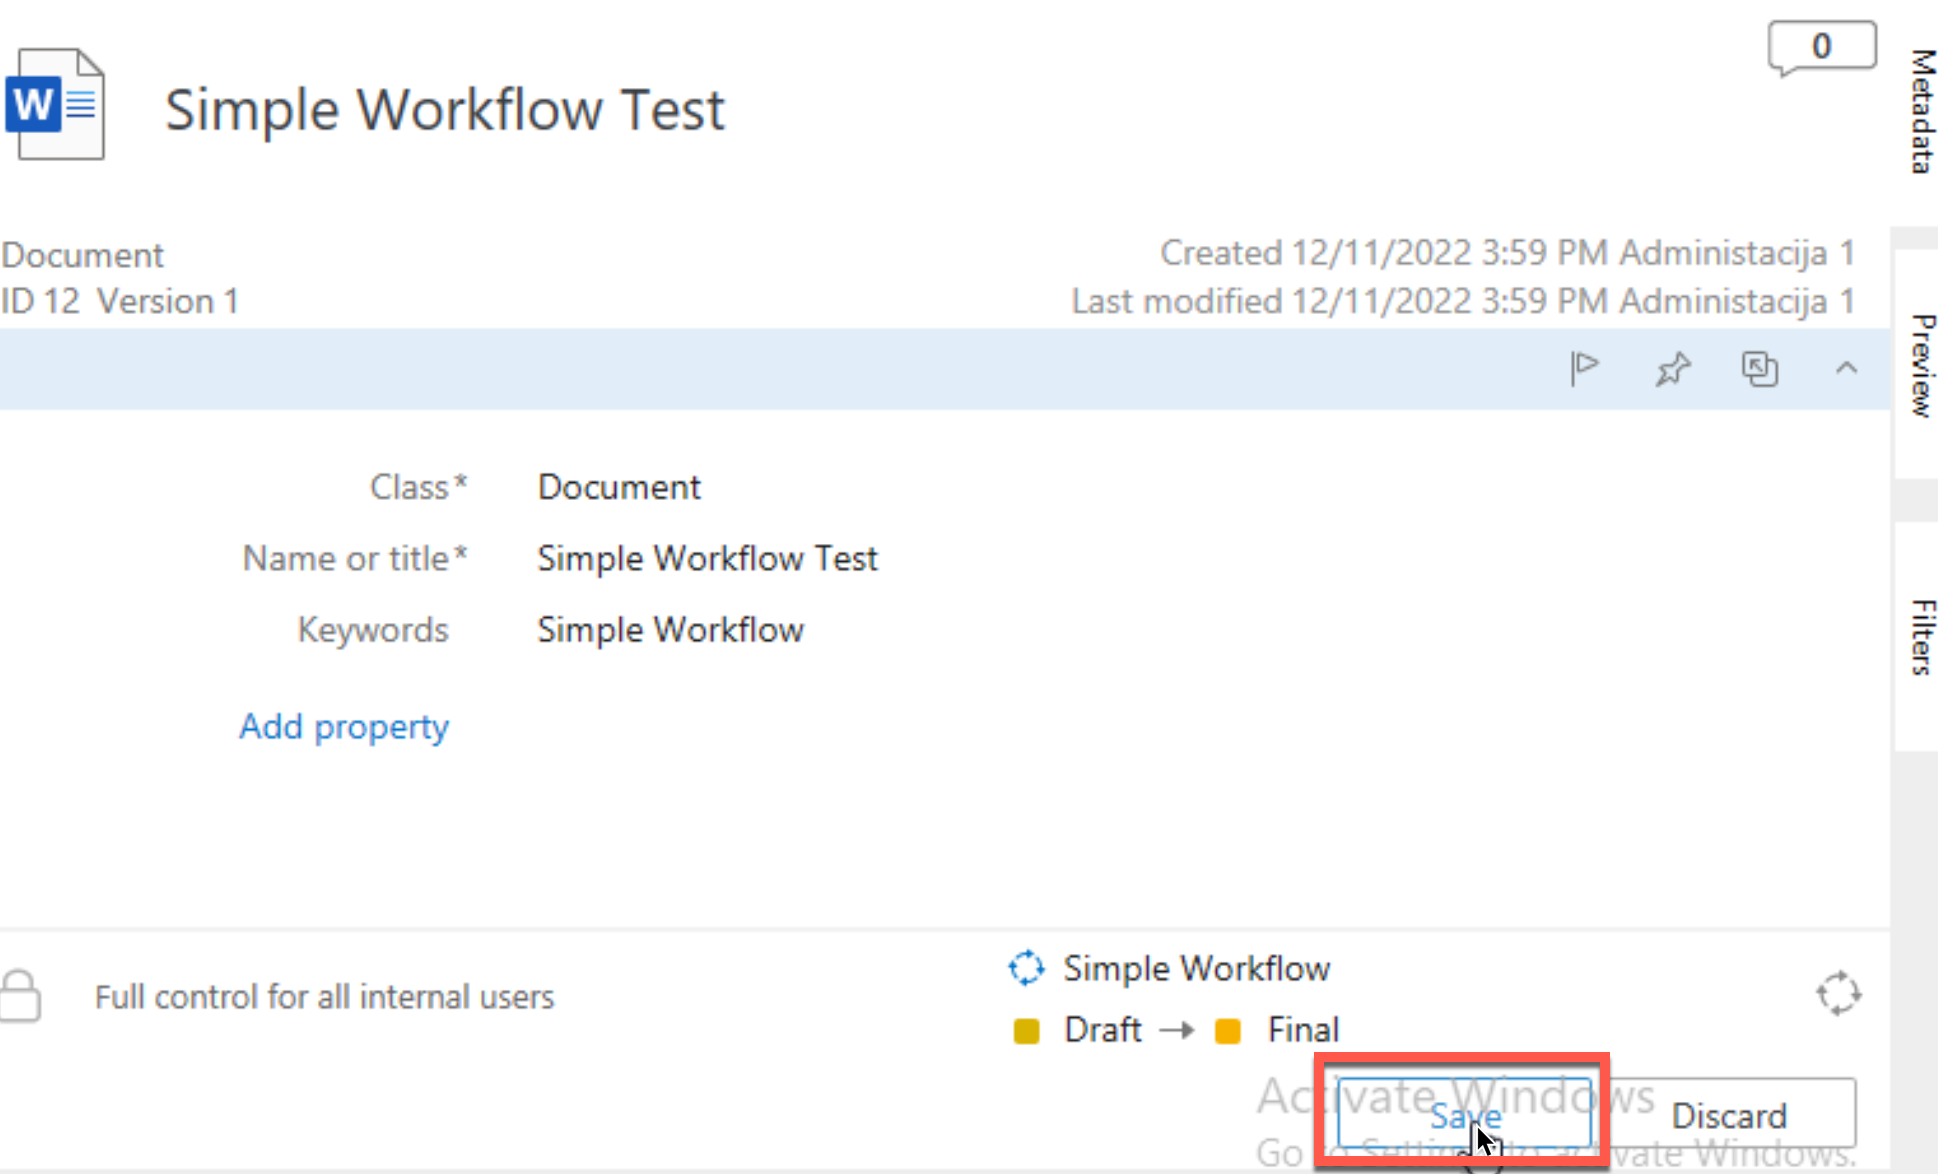
Let’s first transition to Final
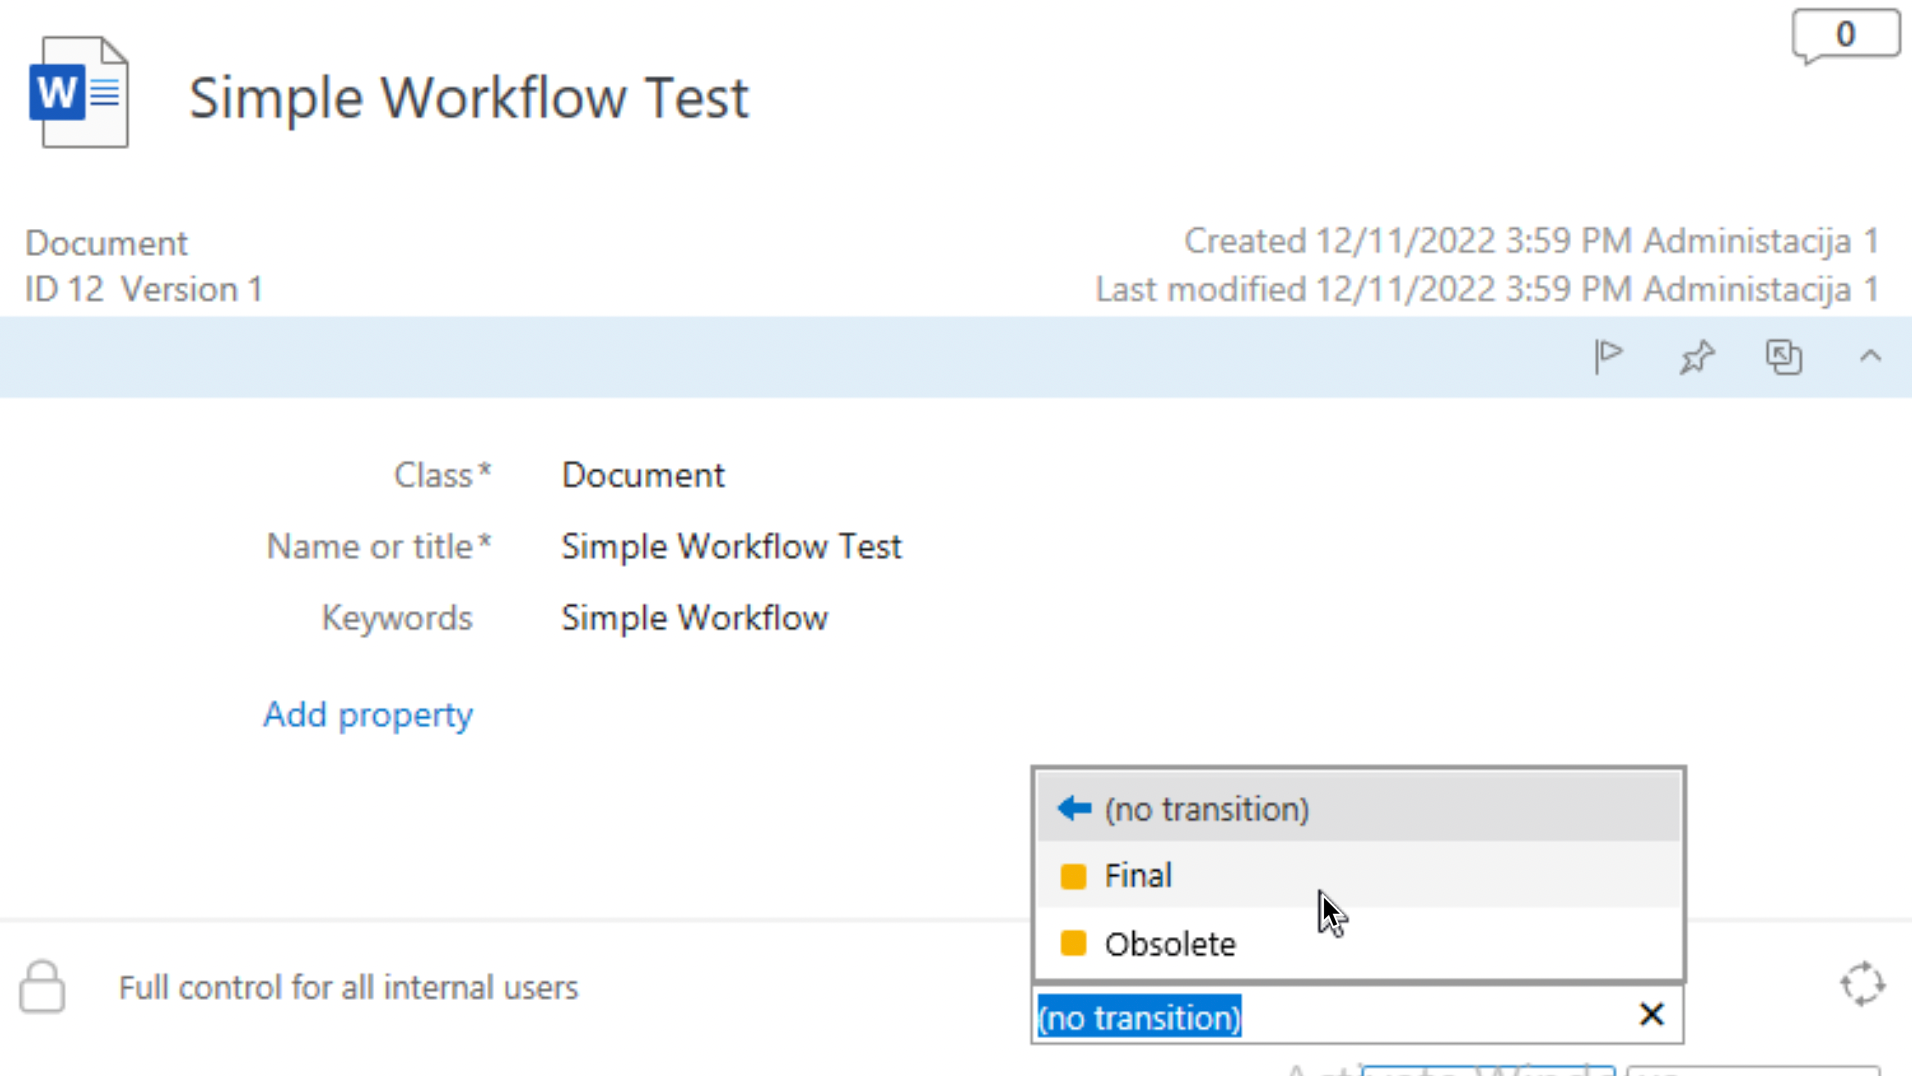
Pop-up will appear after we select Final.. Comment will appear in Metadata area of the workflow.
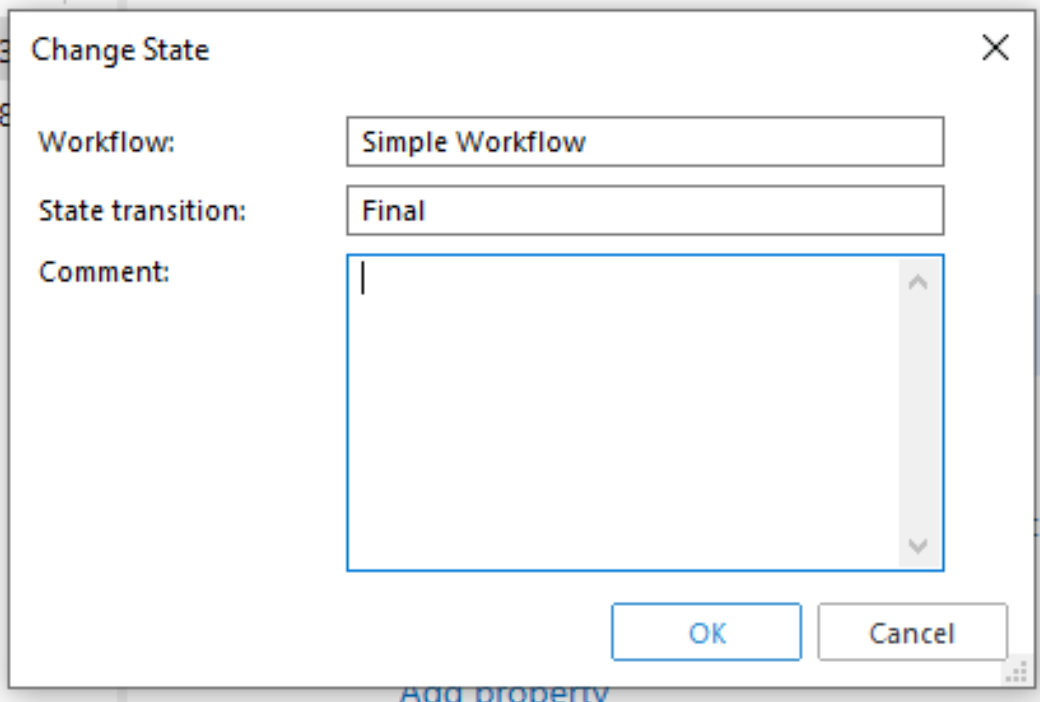
Final step is to Save the state
Great success! Our document is in final state, and it has Description we attached to it.
If we repeat the process with obsolete state, we will get this
So, that is it, we created our first workflow with three states and two custom properties.
My series of articles about M-Files
Server
M-Files how to configure Metadata
M-Files – users and user groups
M-Files – Create and manage simple workflow
M-Files – Create Workflow with assignments
M-Files – Create Workflow with Approvals
M-Files – Manage permissions for Workflows
M-Files – how to create and use document templates
How to backup and restore M-Files Vault
M-Files – How to enable access to M-Files through website
M-Files how to secure connection between server and clients (HTTPS)
M-Files Migrate from Firebird DB to Microsoft SQL DB
Desktop
Understanding M-Files logic + Overview of M-Files desktop
M-Files Creating Views for M-Files Desktop
M-Files how to save or modify documents?
M-Files How to share documents? How to save eMails to M-Files?