After we done simple one server installation, and prepared our environment, let’s start with configuration of the server and client side.
Basic Server Setup
First, we will do server side.
To get going, we will start M-Files Admin shortcut which should be on your desktop (see M-Files installation tutorial)
This is main screen, and this is where all the things will happen with M-Files
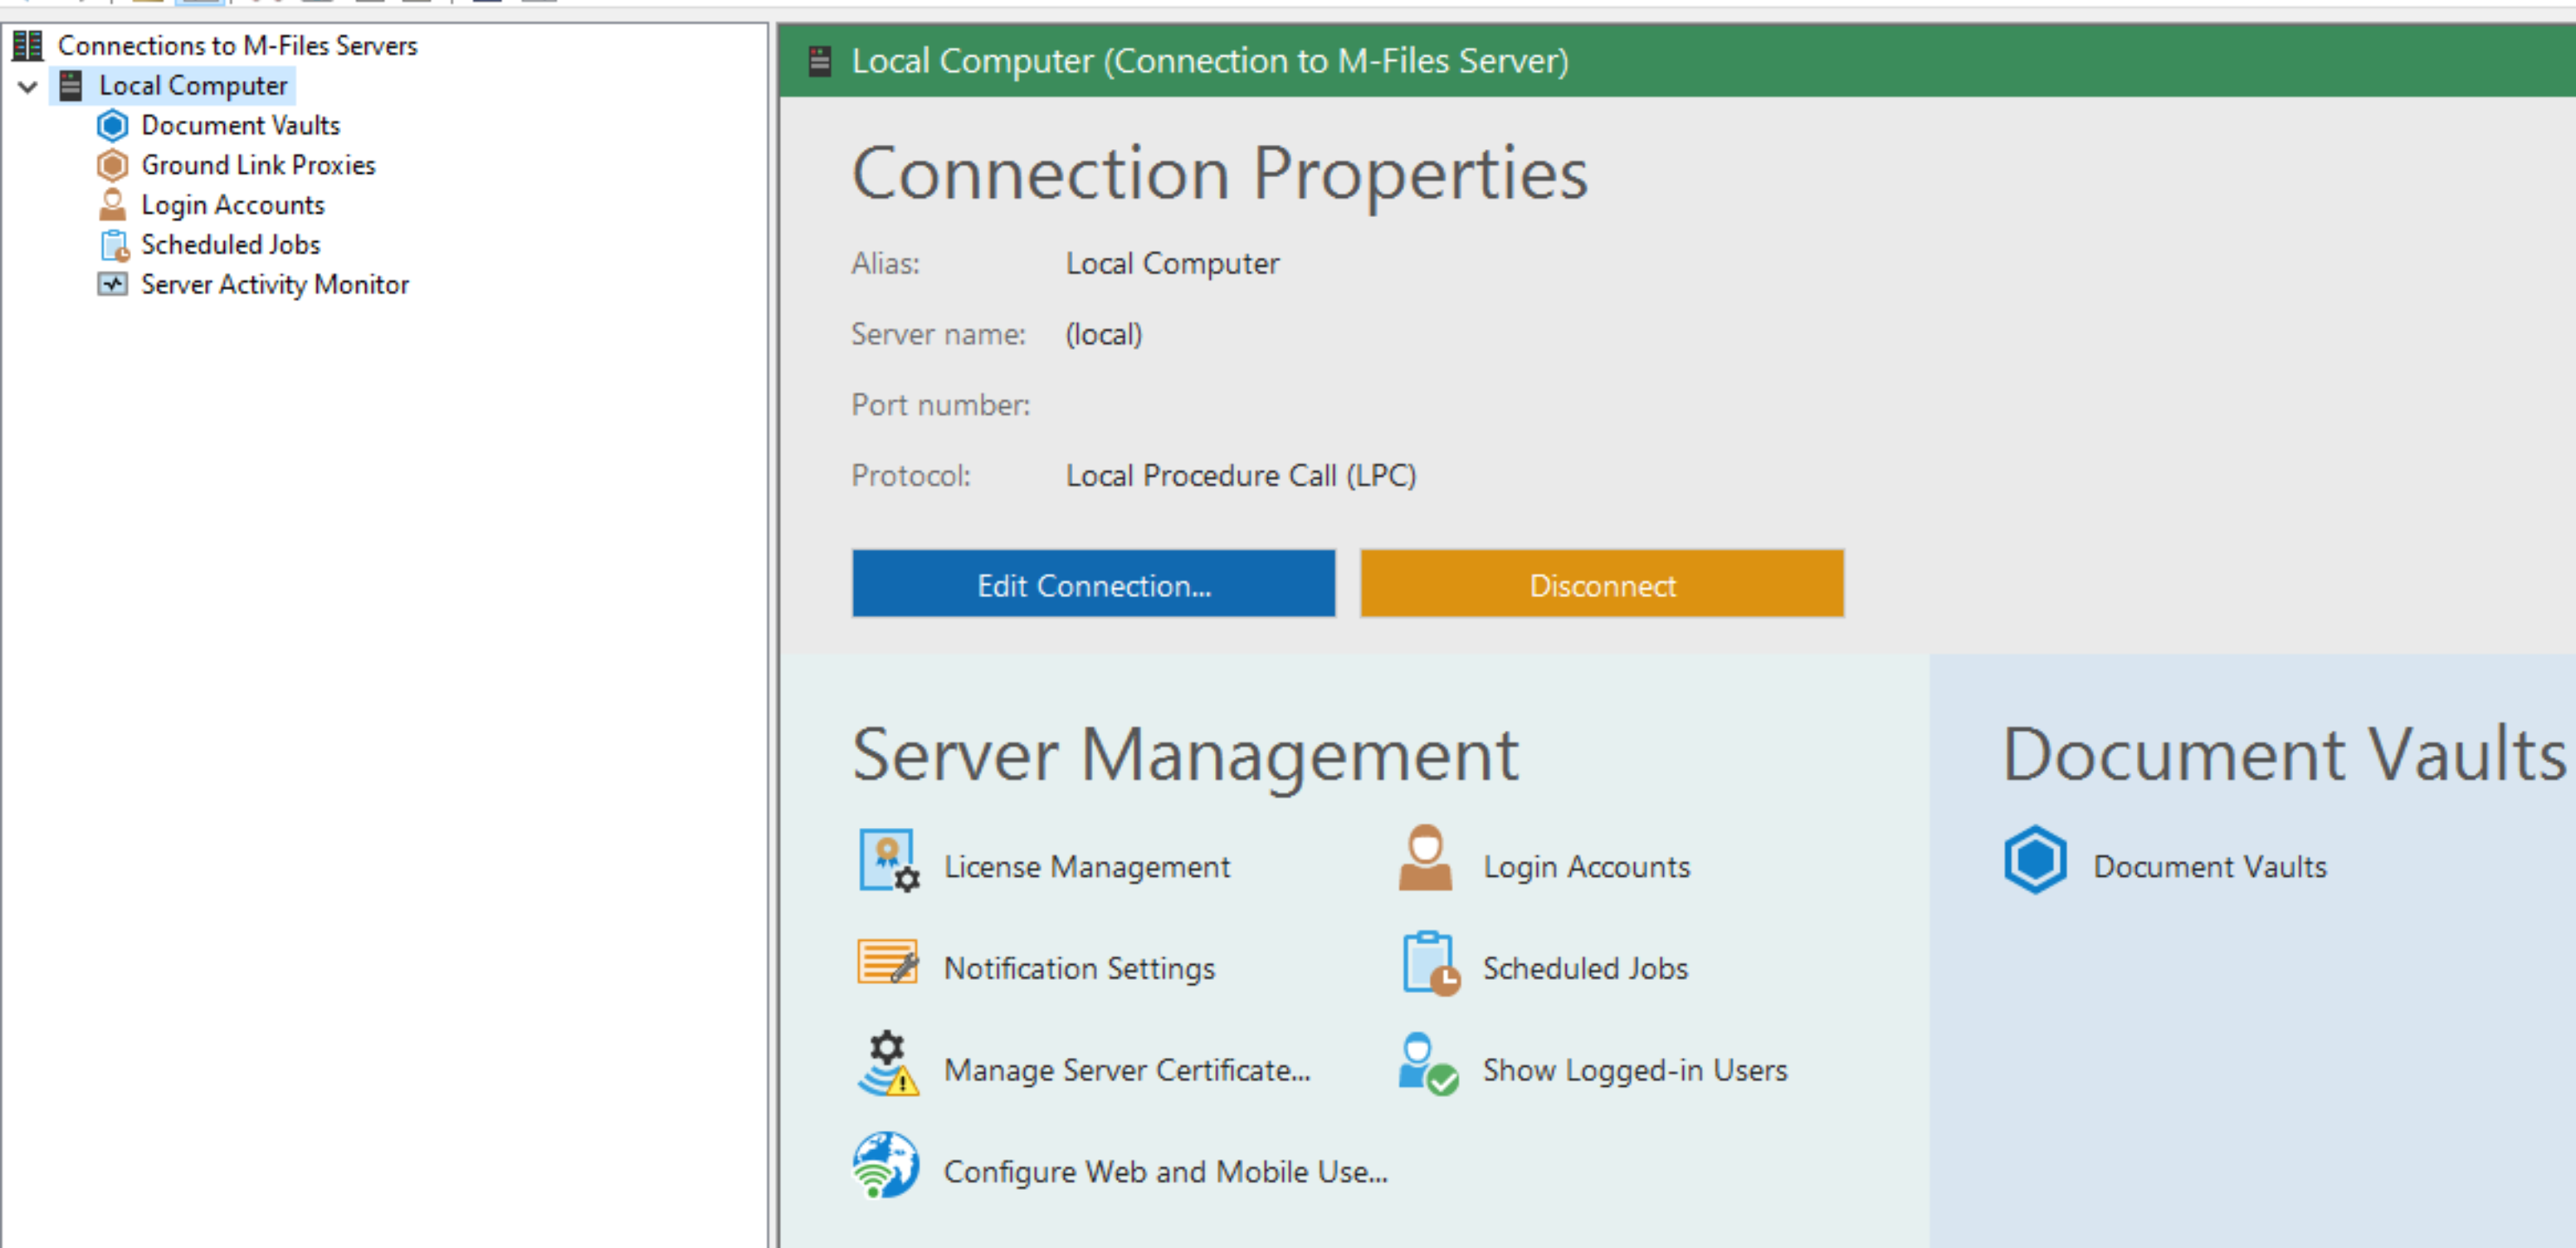
Connection setup
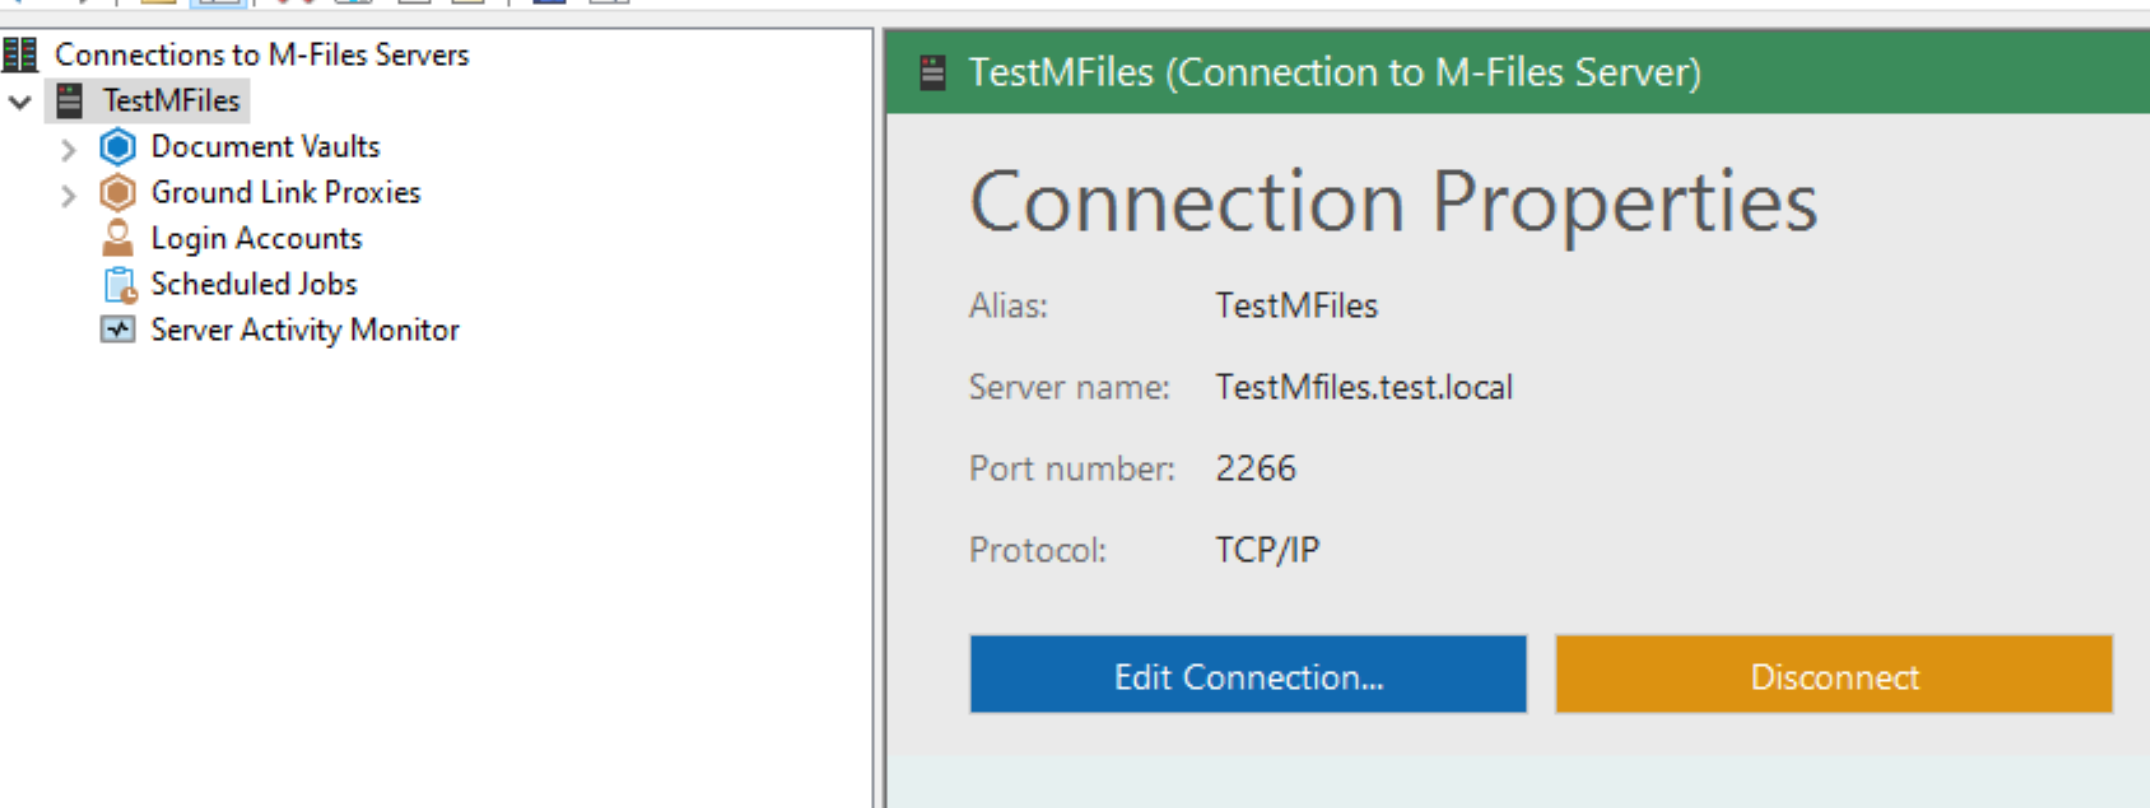
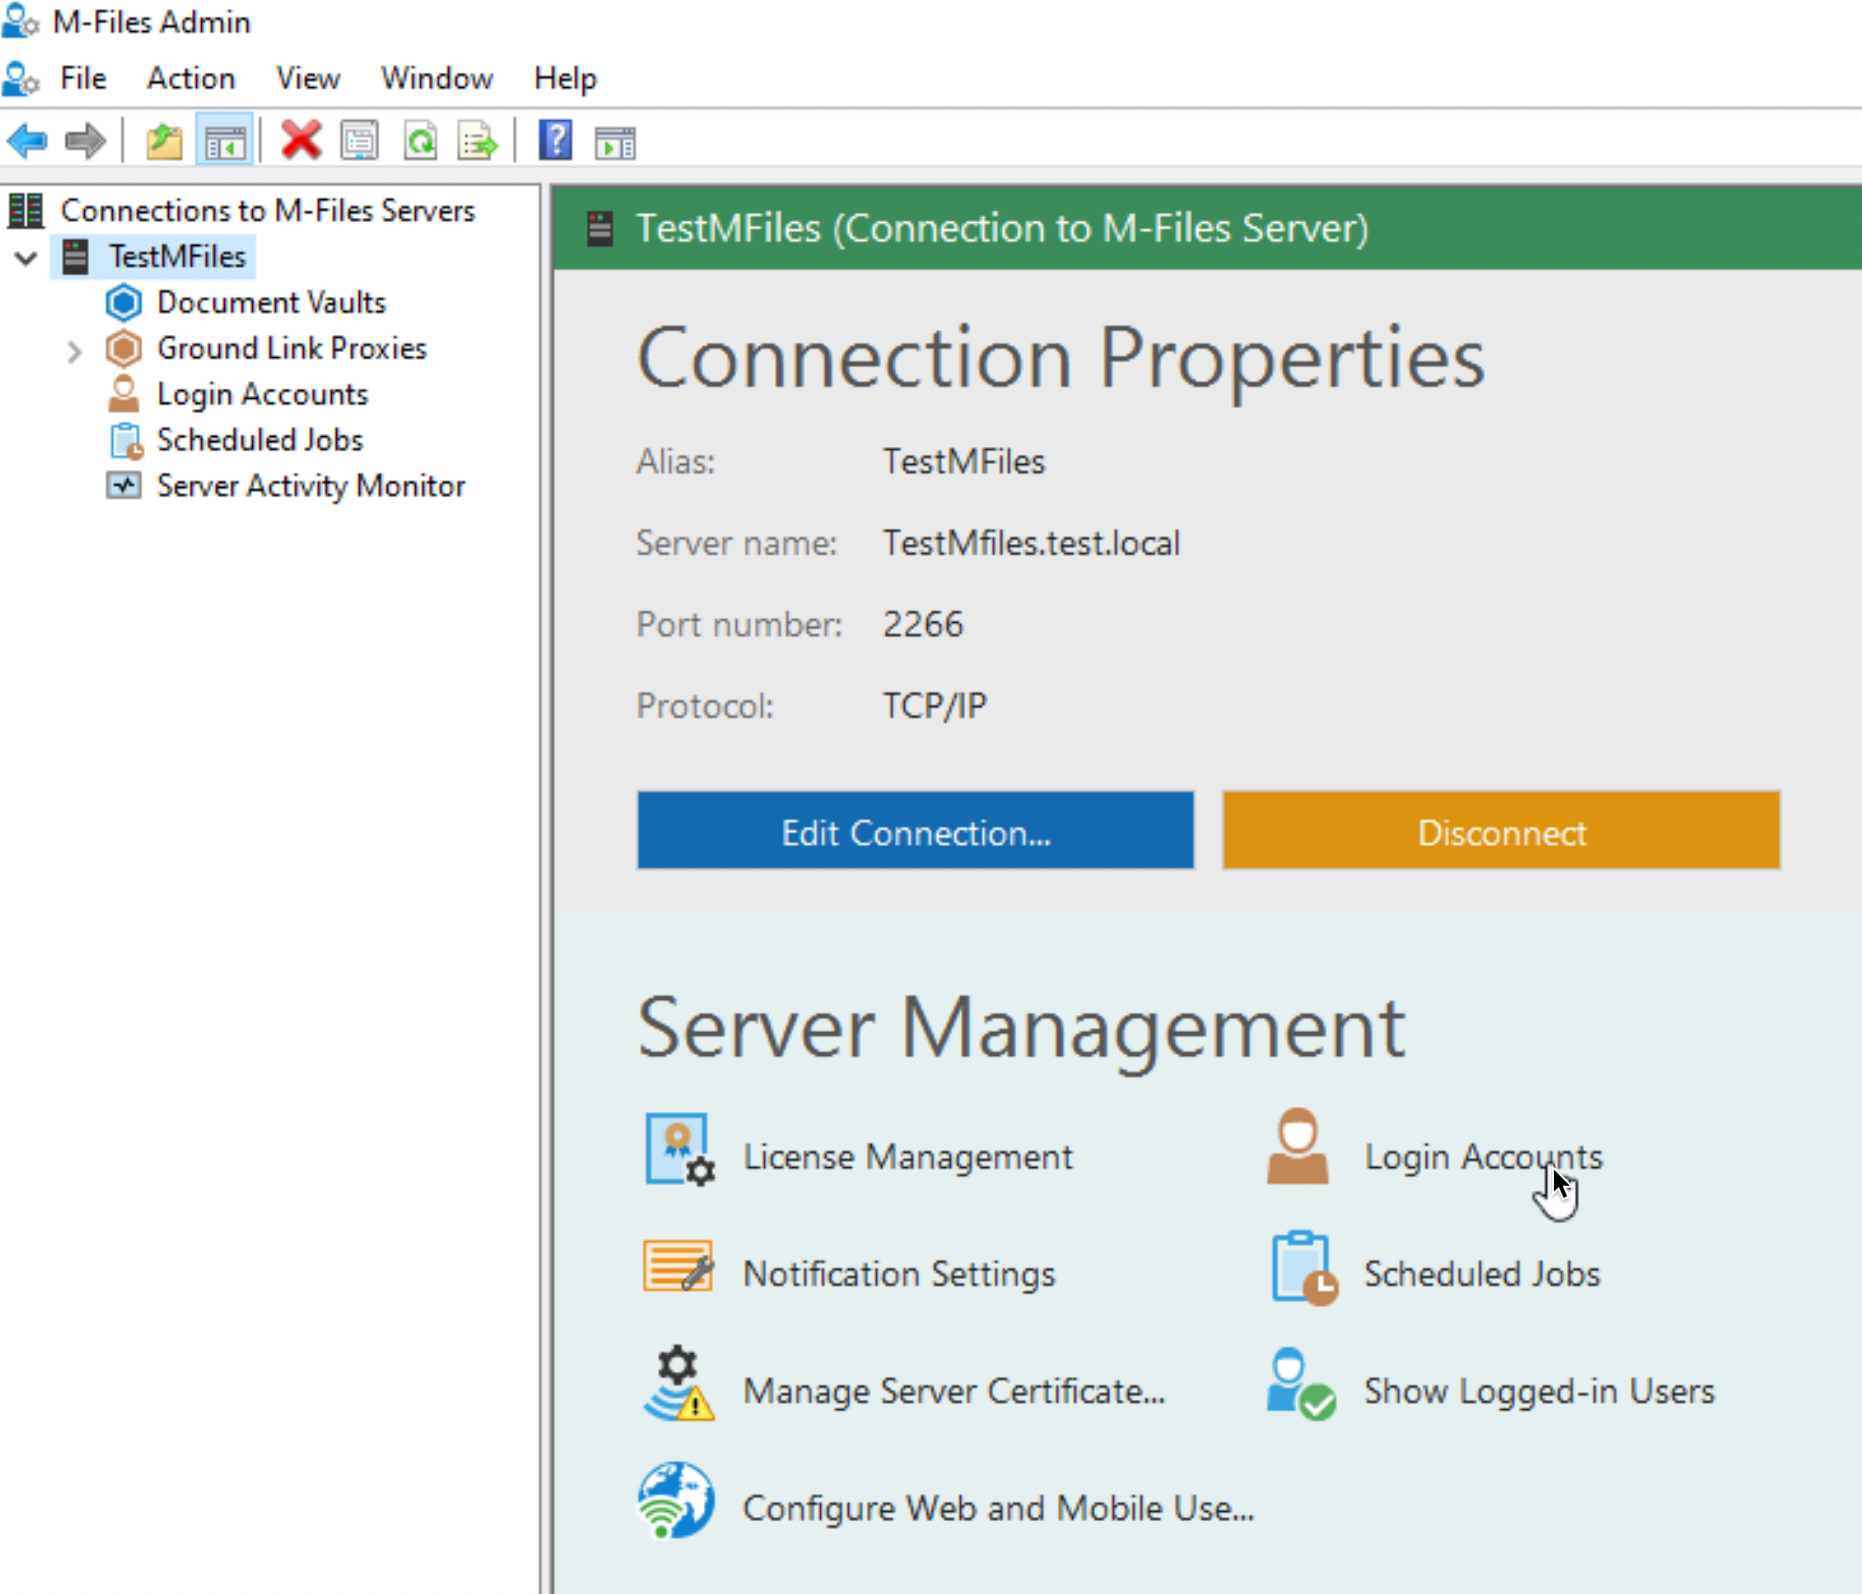
We will first select Local Computer and from the right screen (as seen above) under Connection Properties select Edit Connection
Currently LPC is selected
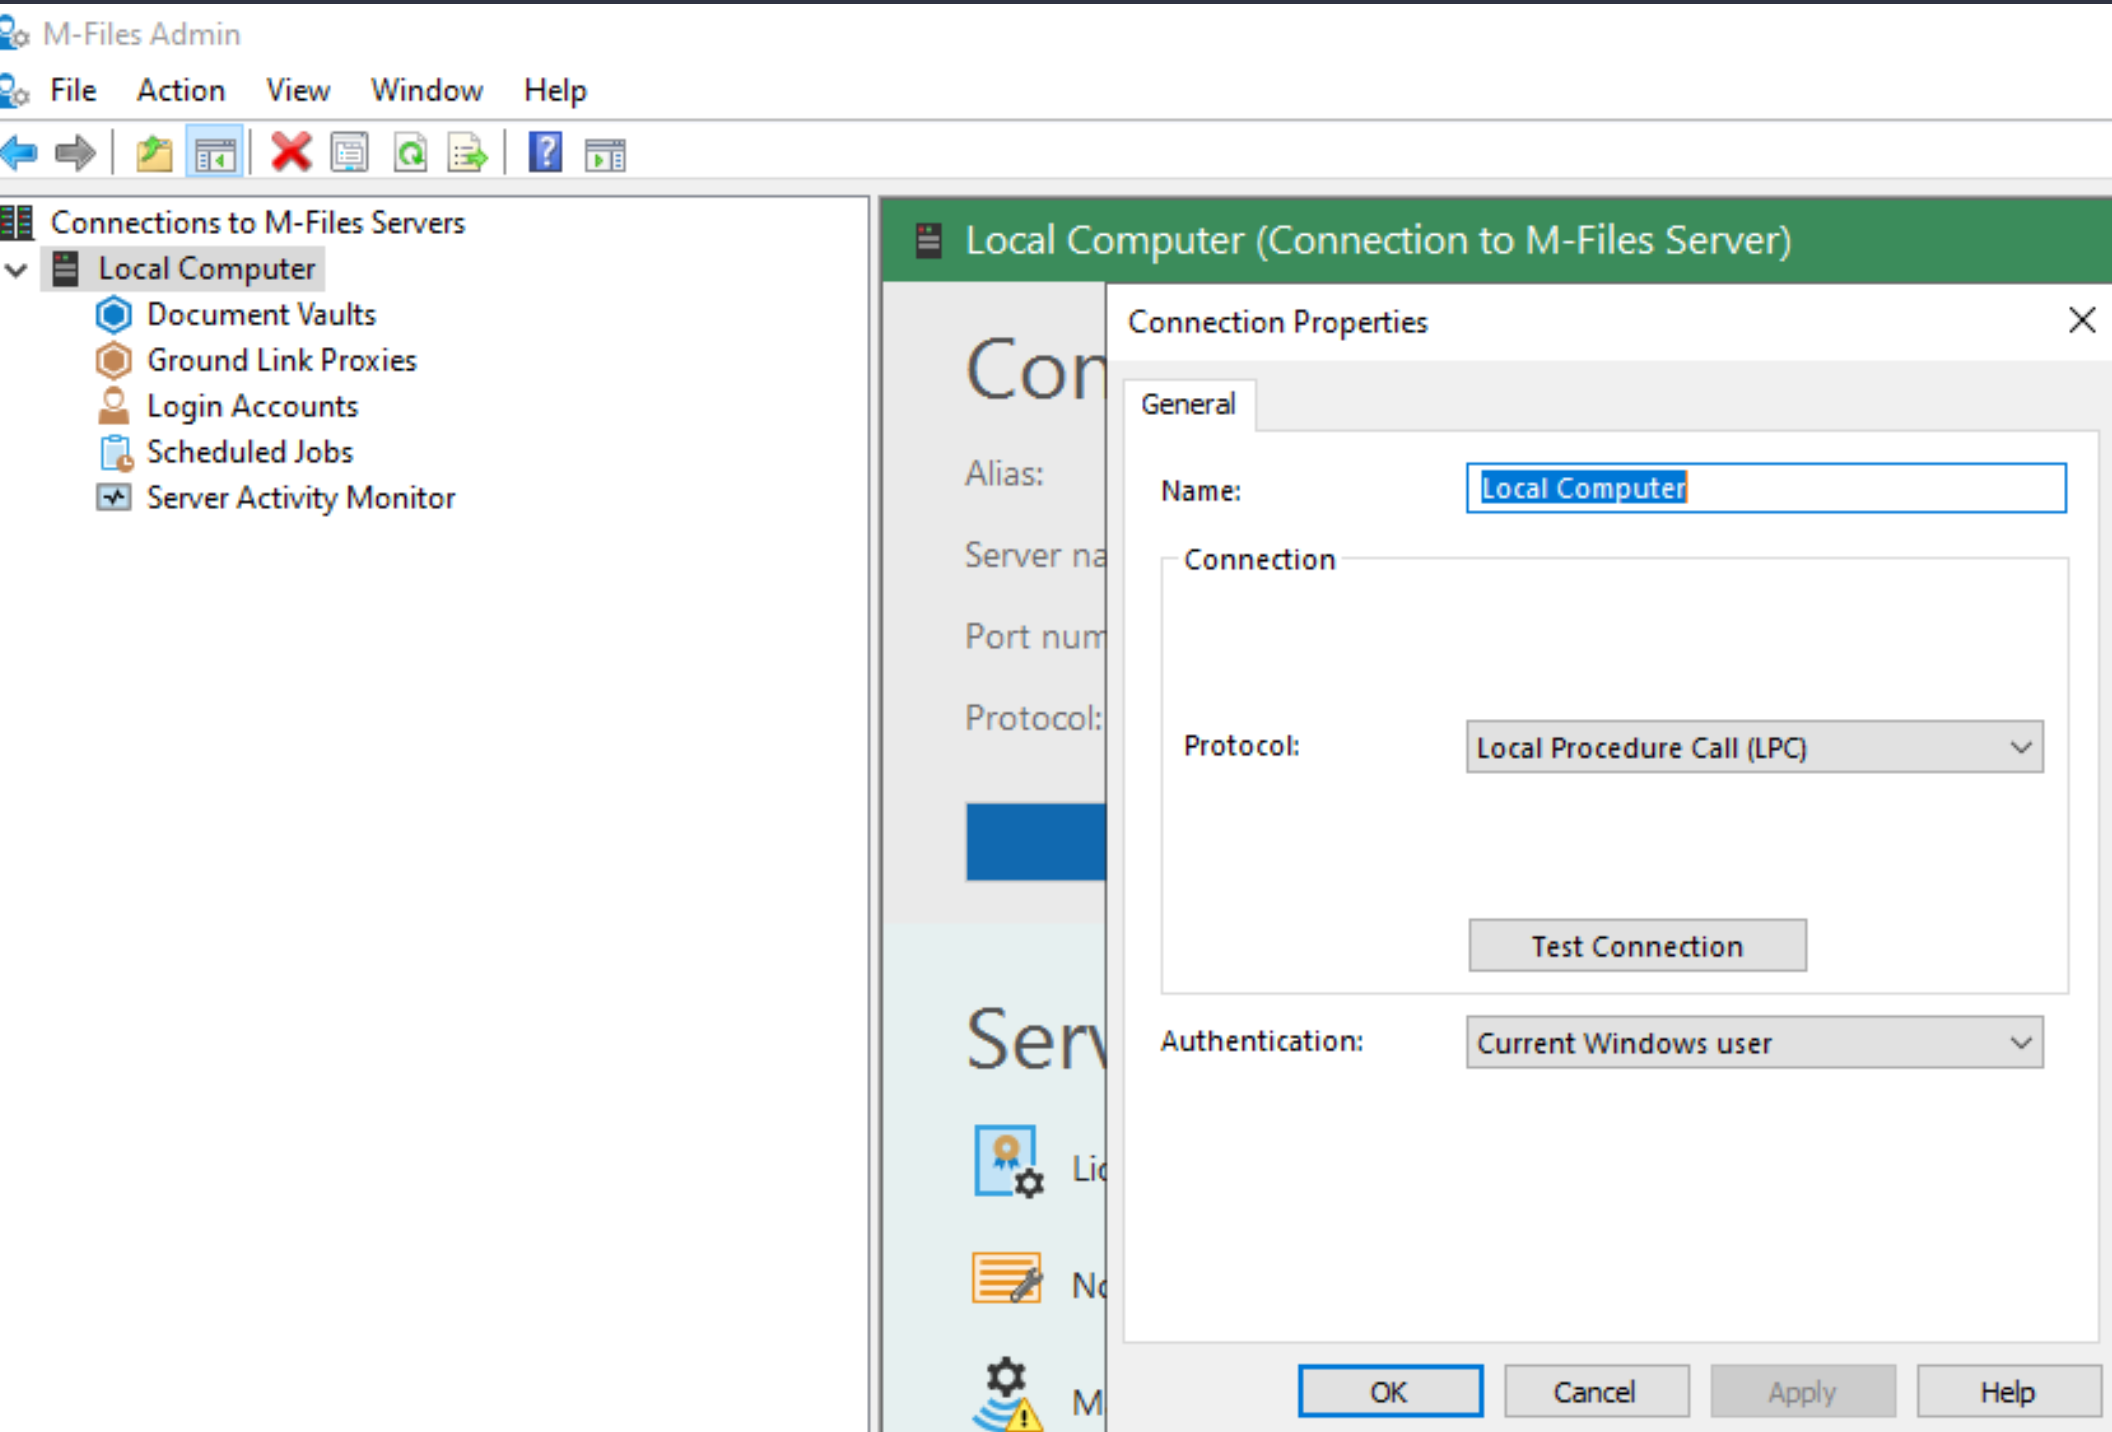
we need to change that.
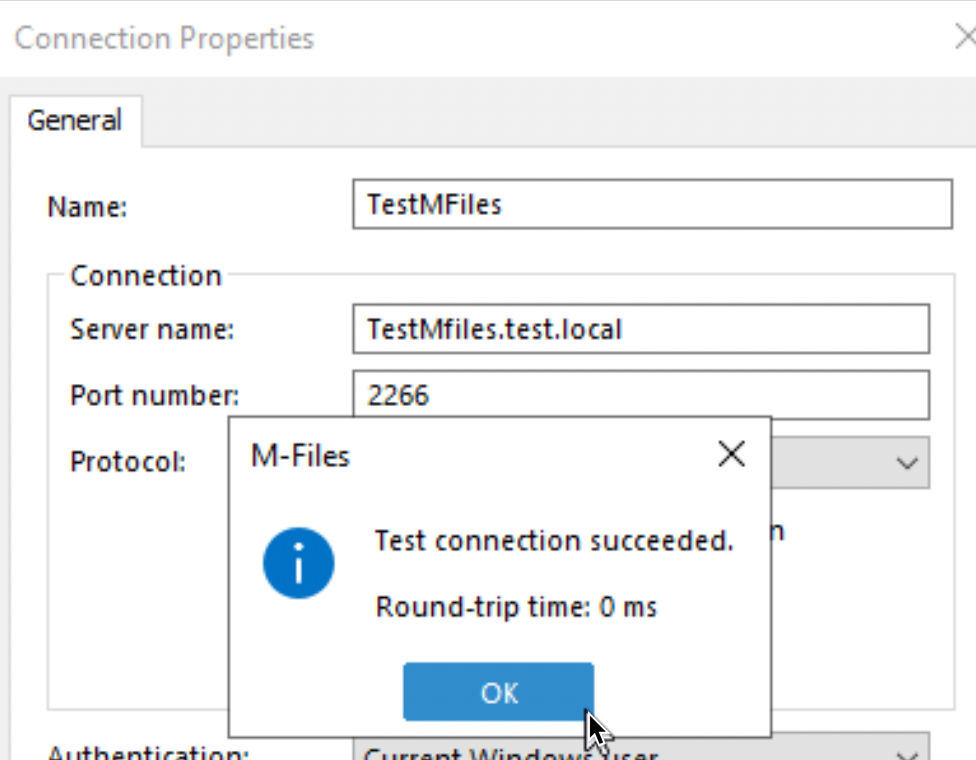
I will rename connection to – TestMFiles. Under server name I will enter my FQDN of my computer – TestMFiles.test.local. Port number will remain 2266, and protocol (there are many to select) I will select TCP/IP . Click on Test Connection
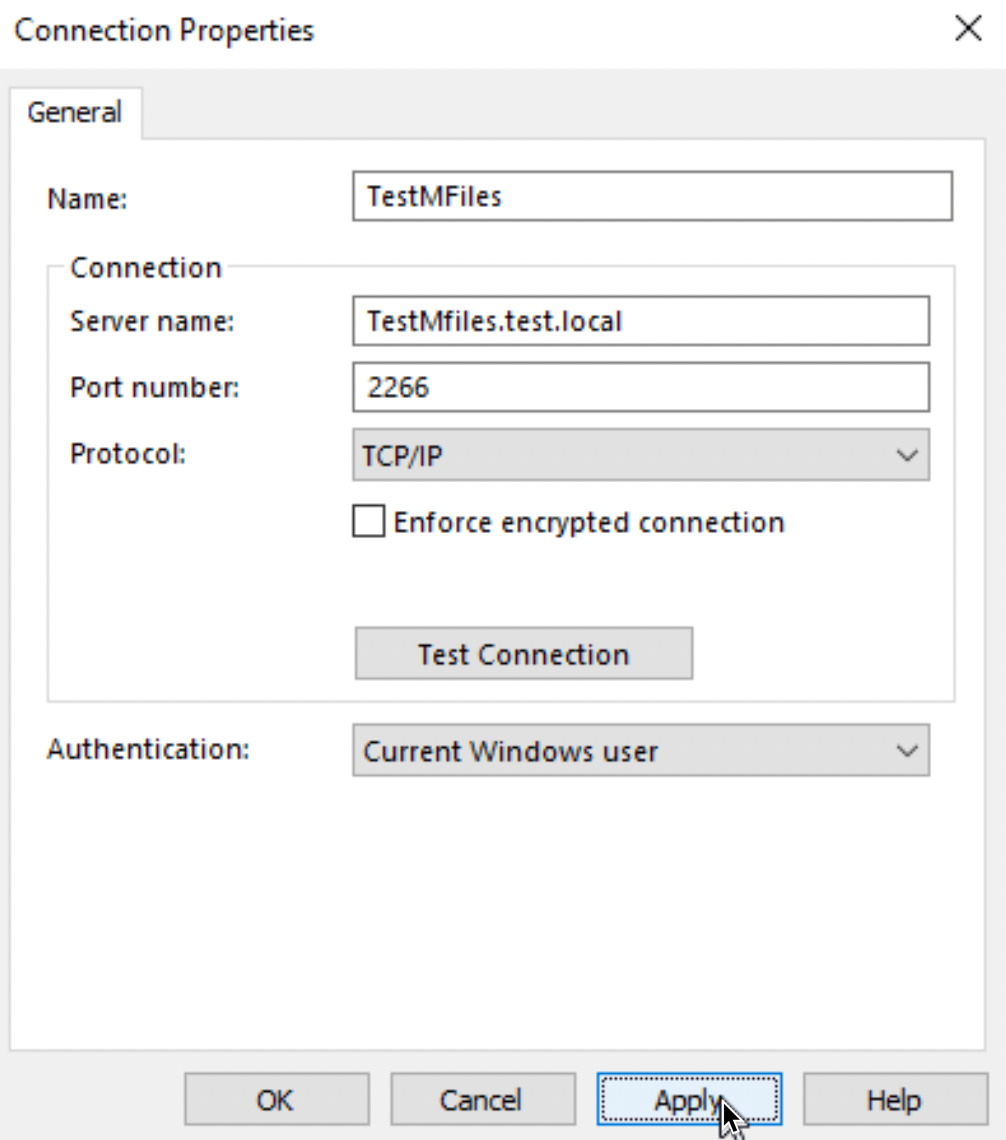
Connection works in my case. We can click on OK, then on Apply and OK on Connection Properties window to close the dialog.
Now, on the main screen of M-Files Admin Connection Properties are changed
Things to consider – I already mentioned in M-Files installation part. Connection we set above is not encrypted! I would not recommend running this scenario in production. I covered this in my article – “M-Files how to secure connection between server and clients (HTTPS)” you can find link at the bottom of this article.
Additional steps are needed to enable encryption, I will try to get to this topic once we are familiar with basics of M-Files. For now, here are useful links to the topic
https://www.m-files.com/user-guide/latest/eng/rpc_over_http.html
Ok, let’s continue further on the M-Files Admin main screen.
Licensing
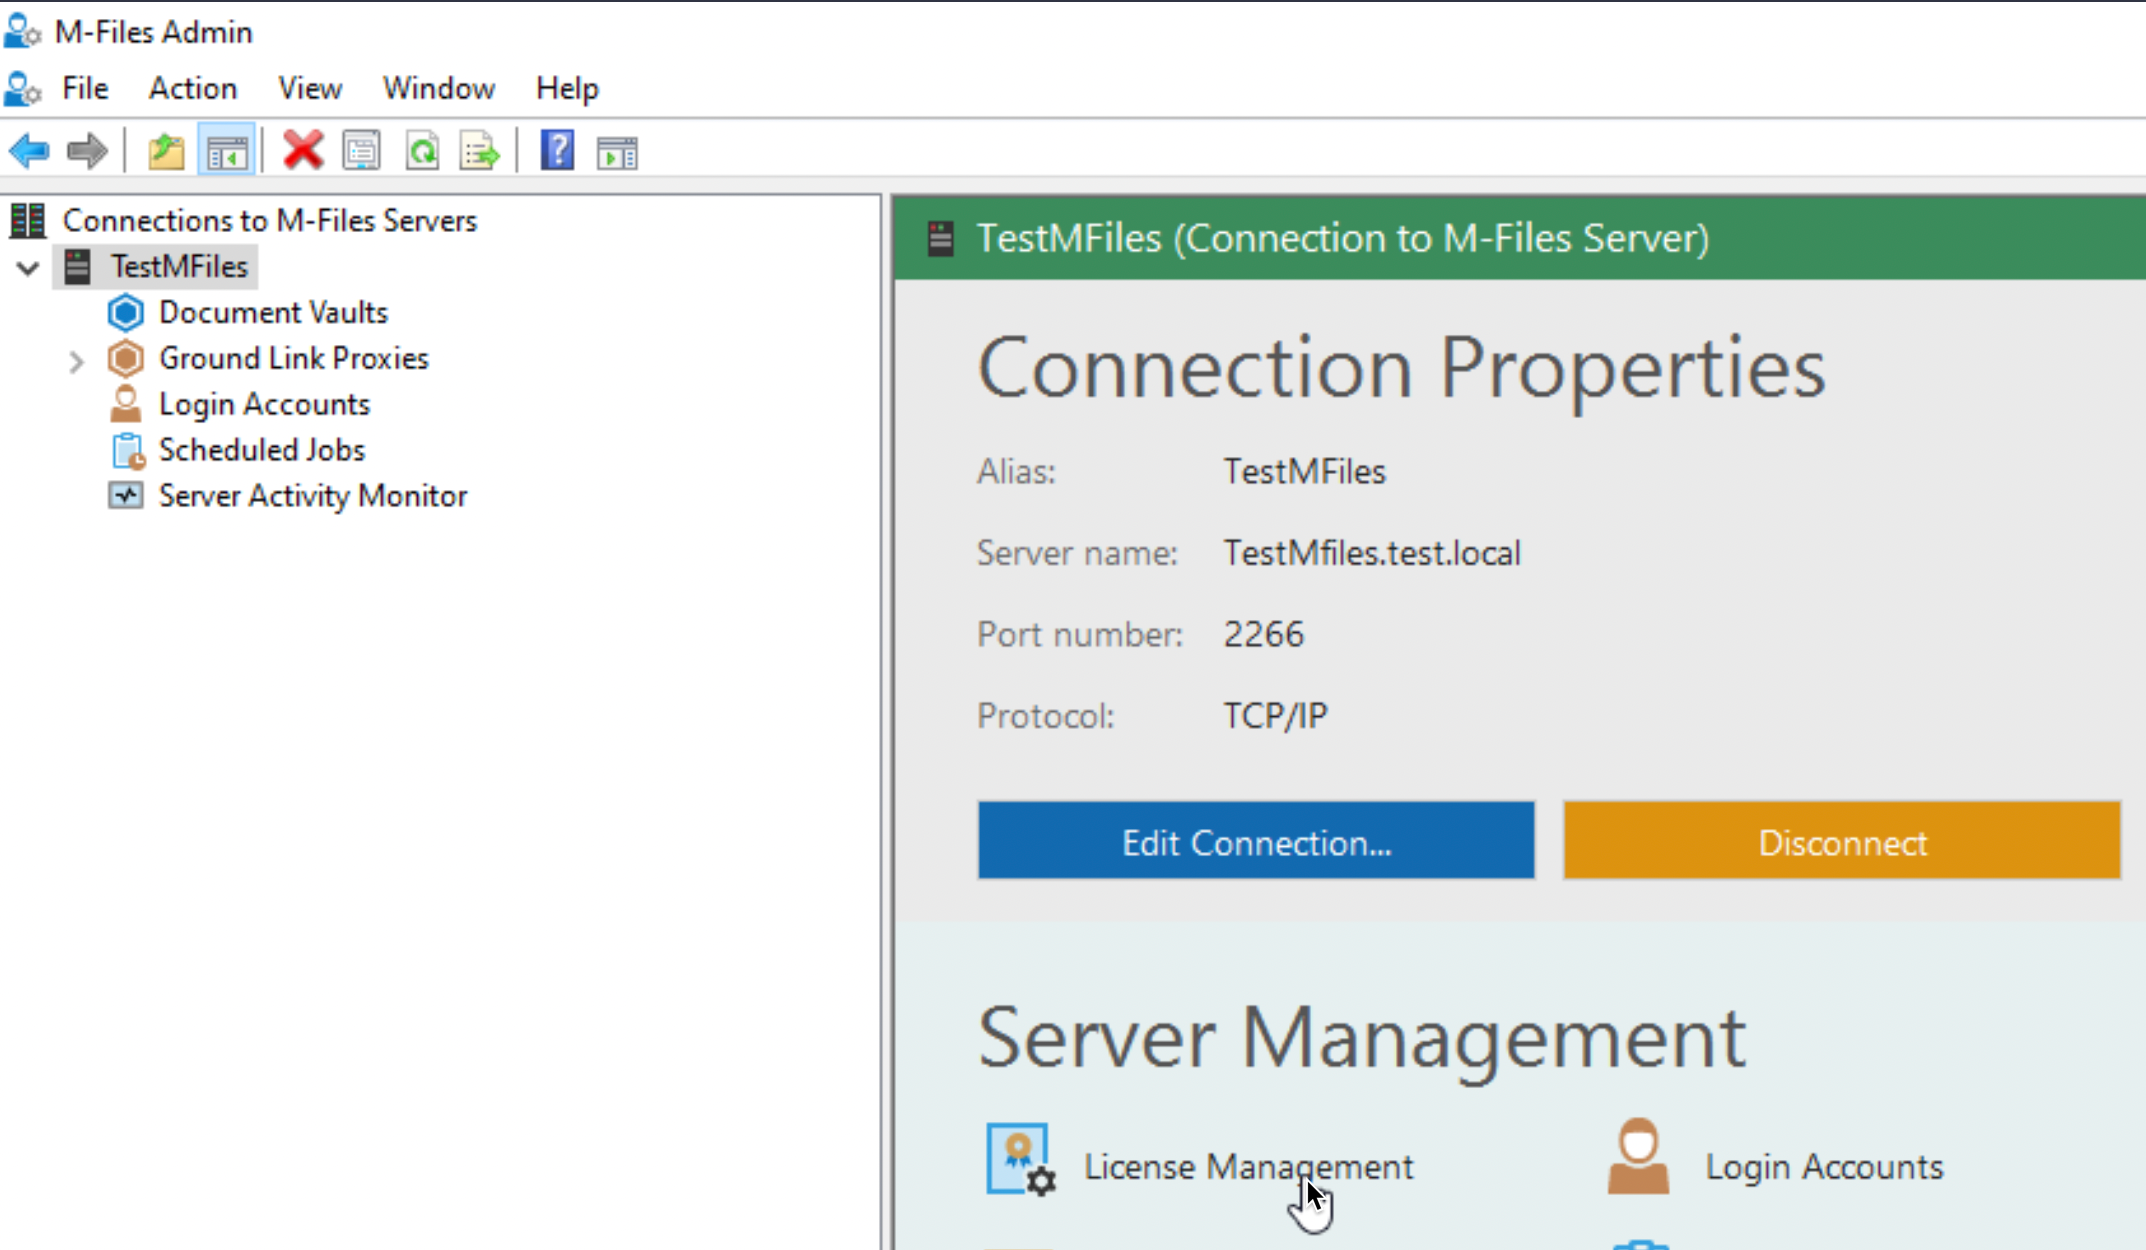
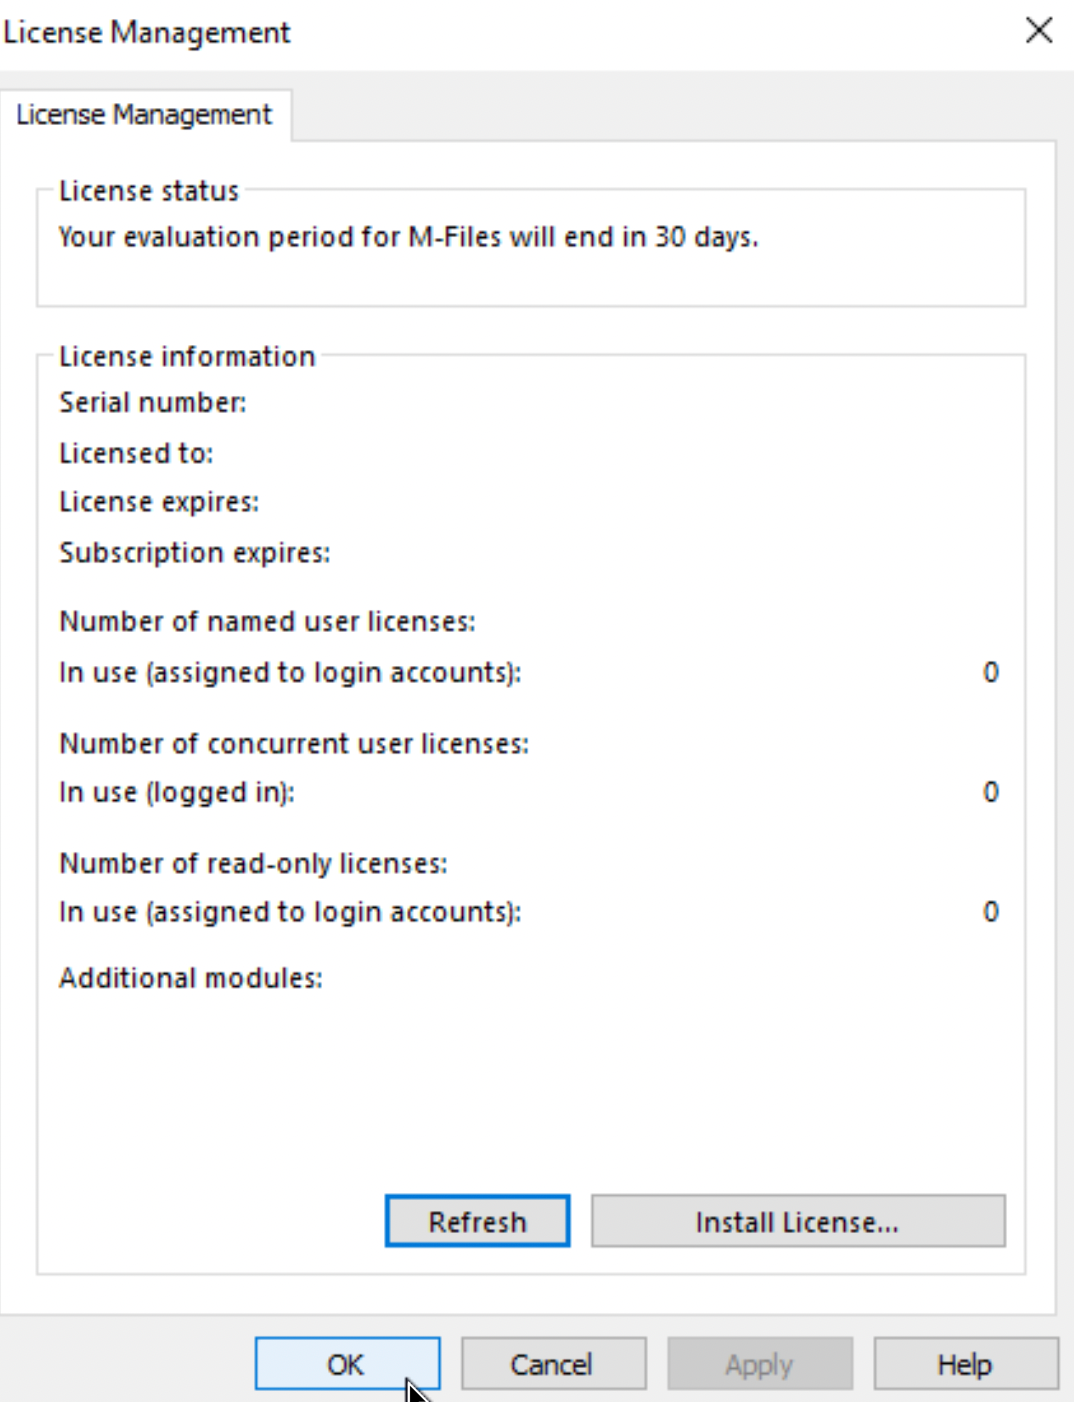
Can be checked on main screen on the right side under Server Management under License Management
We are currently in trial mode, so that is all we need. There are three types of licences – Named – assigned to user, Concurrent – can be used by multiple users, but only one can be logged at the time, and Read-only which as the name says – can only read, they have no power to edit or create anything.
Notifications
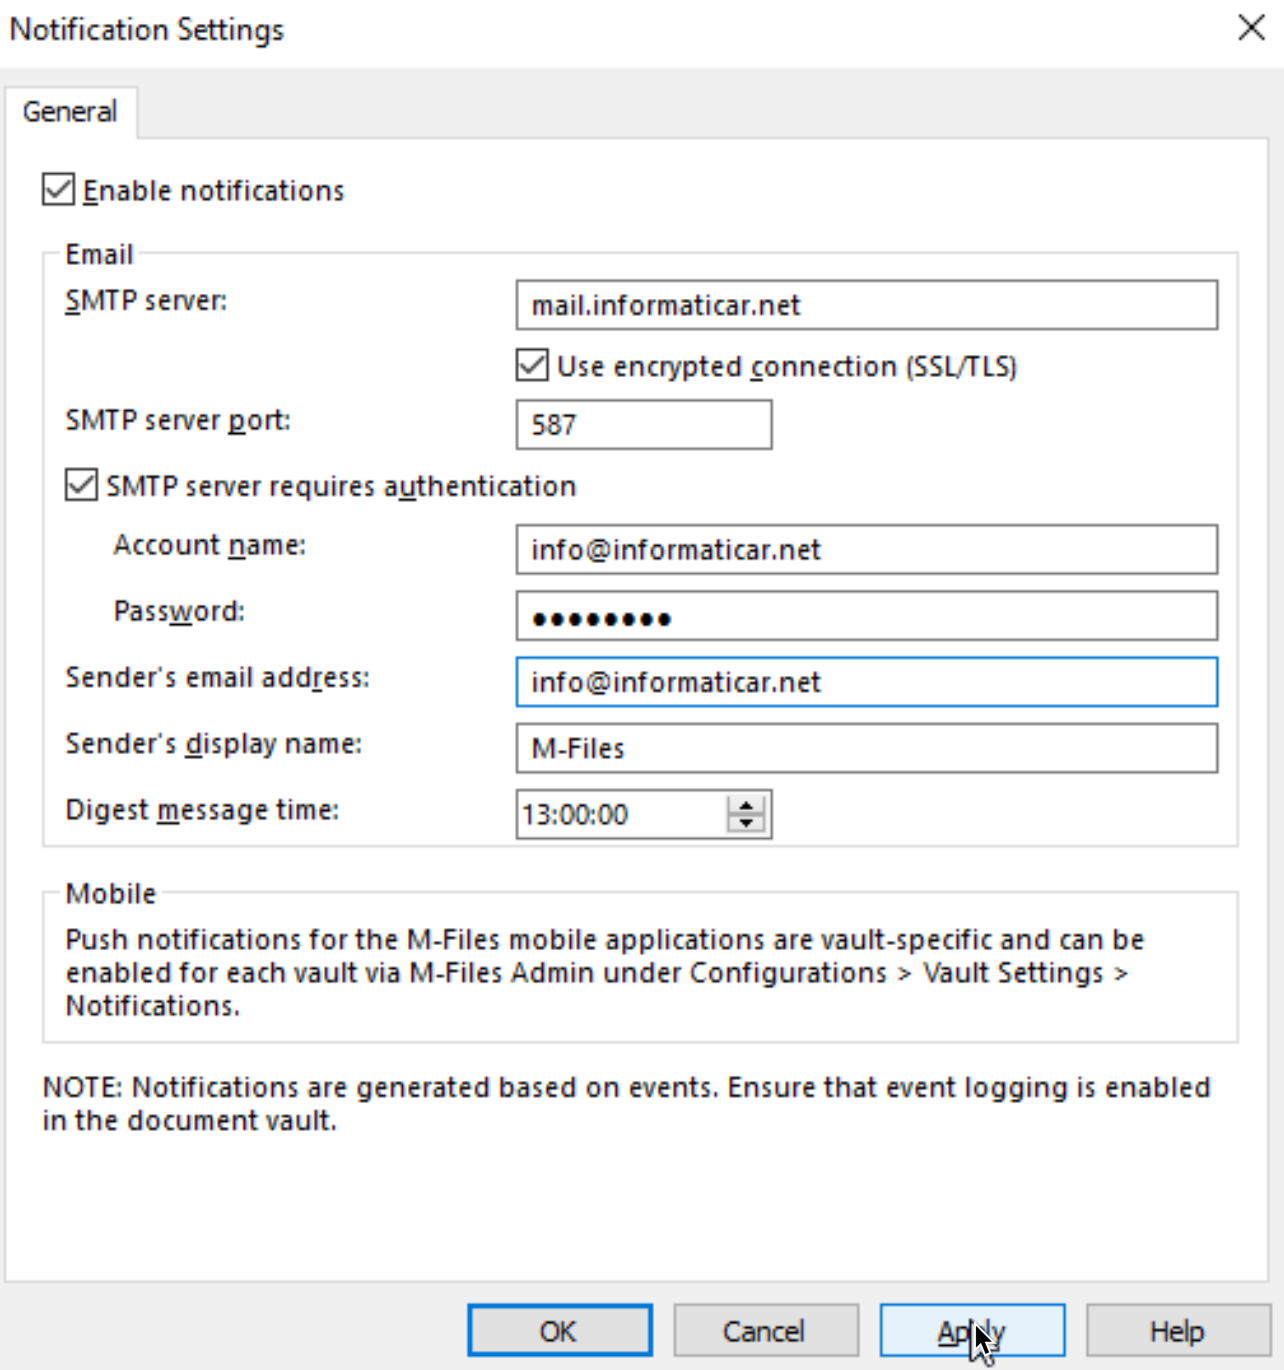
We want to get info and alerts from critical apps – M-Files will be one of them. So, under License Management there are Notification Settings. Below is my setup – yours will differ.
Manage Server Certificate
Next up, is server certificate. For this scenario I will use self-signed certificate. Problem with self-signed certs is that clients will not trust it, so you will need to import all the properties of the certificate also to the clients, otherwise let’s say – HTTPS connection through M-Files Desktop won’t work. Best way to deal with this in your network is to implement certificate authority yourself, or use worldwide certificate authorities (but then, your domain will have to correspond to the publicly available domains)
On the same server your M-Files server is installed, start Powershell as admin and type in following
Get-PSDrive | Format-Table -AutoSize -Wrap After that, type following command to issue certificate (change DNSName to your server name!!)
New-SelfSignedCertificate `
-DnsName "TestMFiles.test.local" `
-KeyAlgorithm RSA `
-KeyLength 2048 `
-CertStoreLocation "Cert:\LocalMachine\My" `
-NotAfter (Get-Date).AddYears(10) 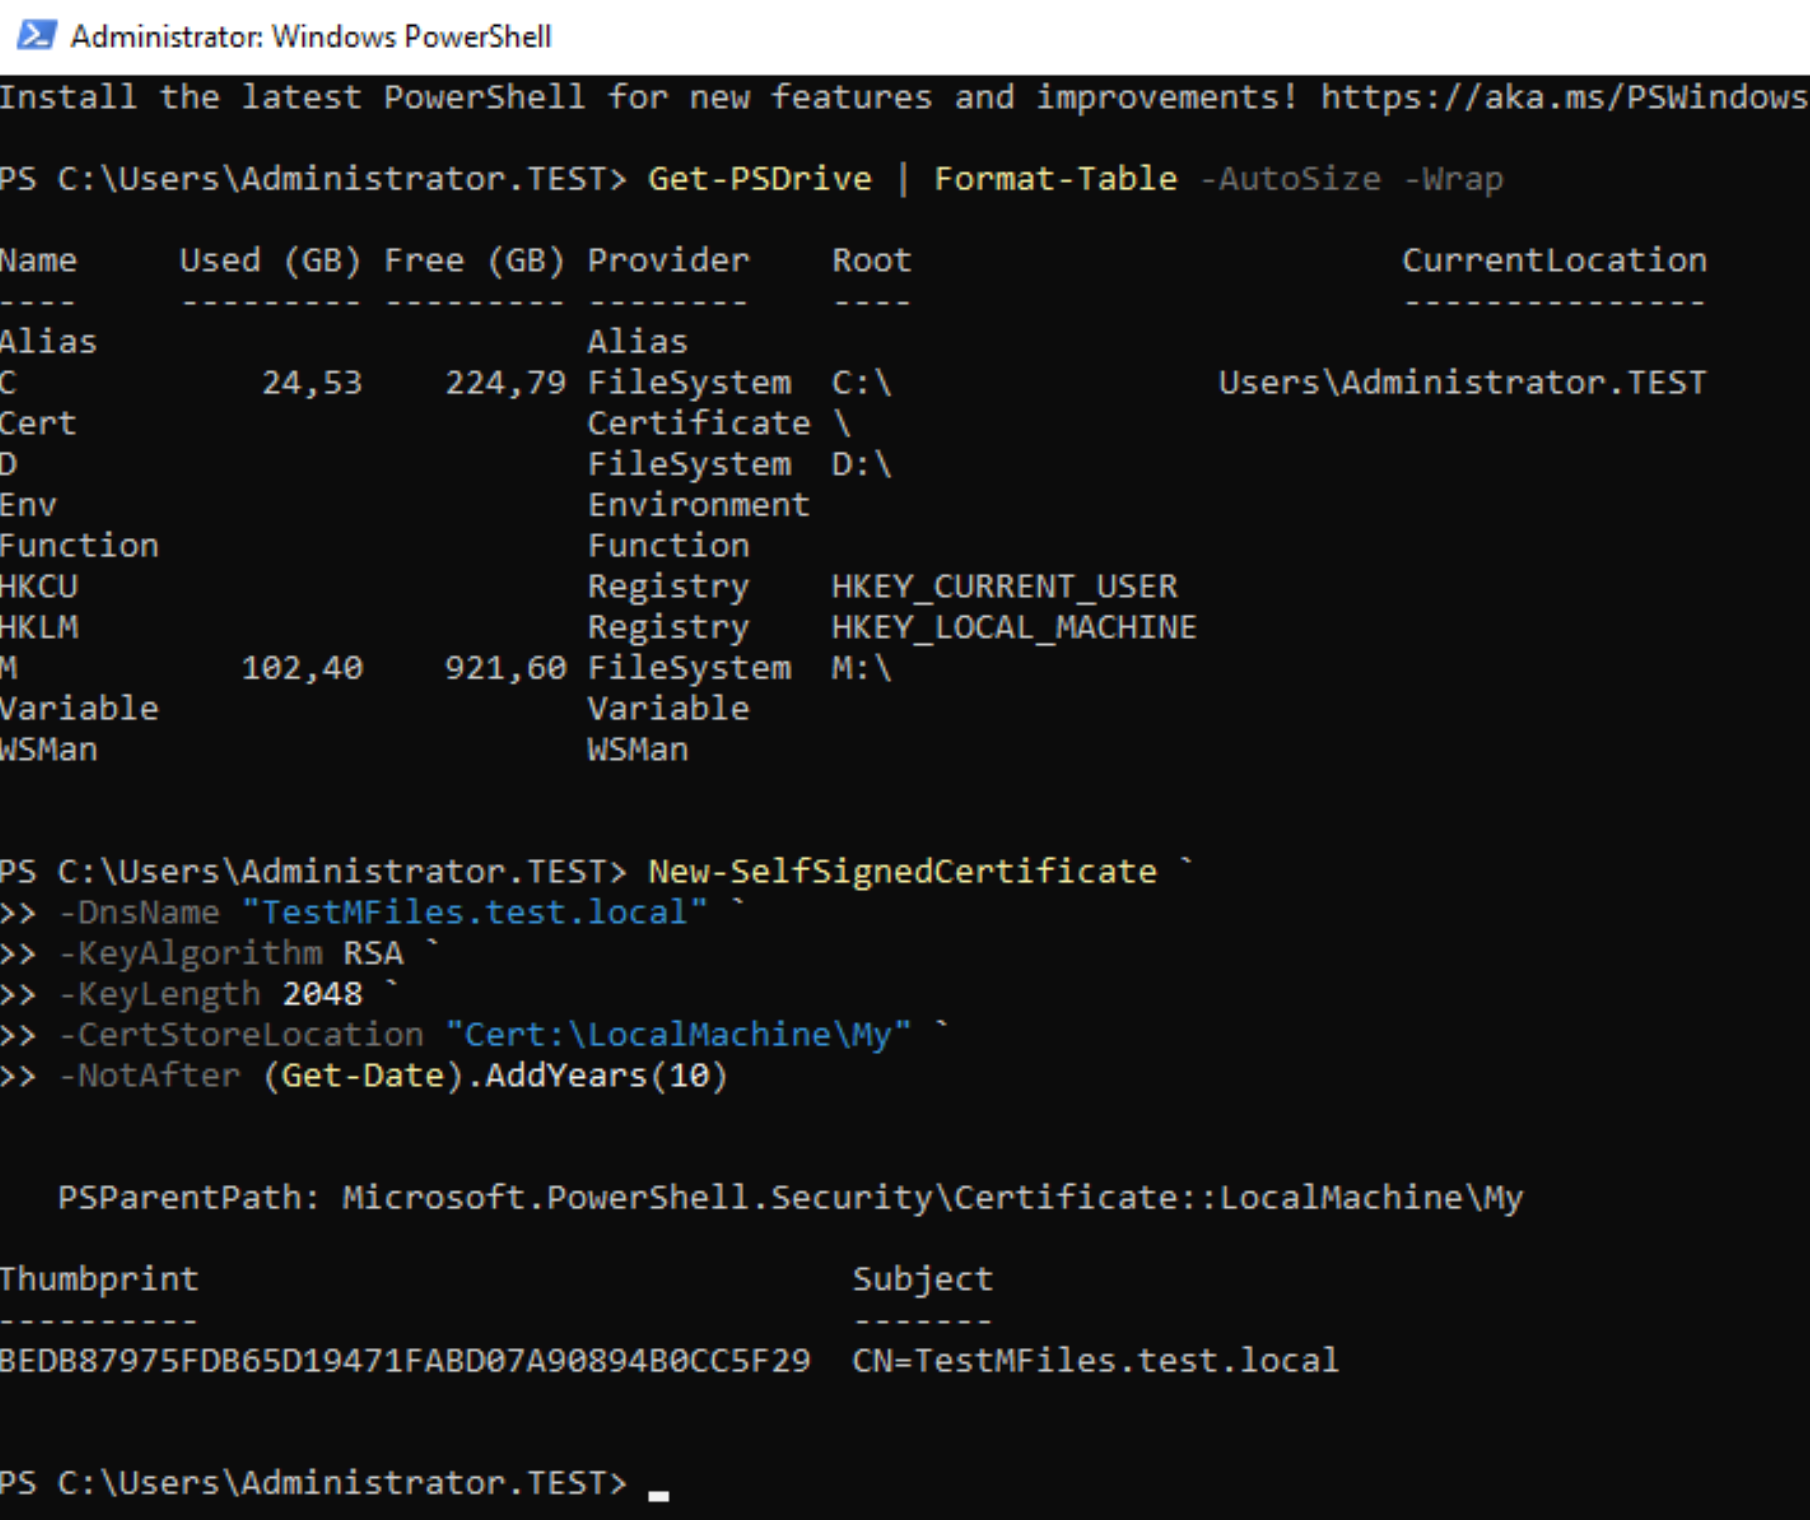
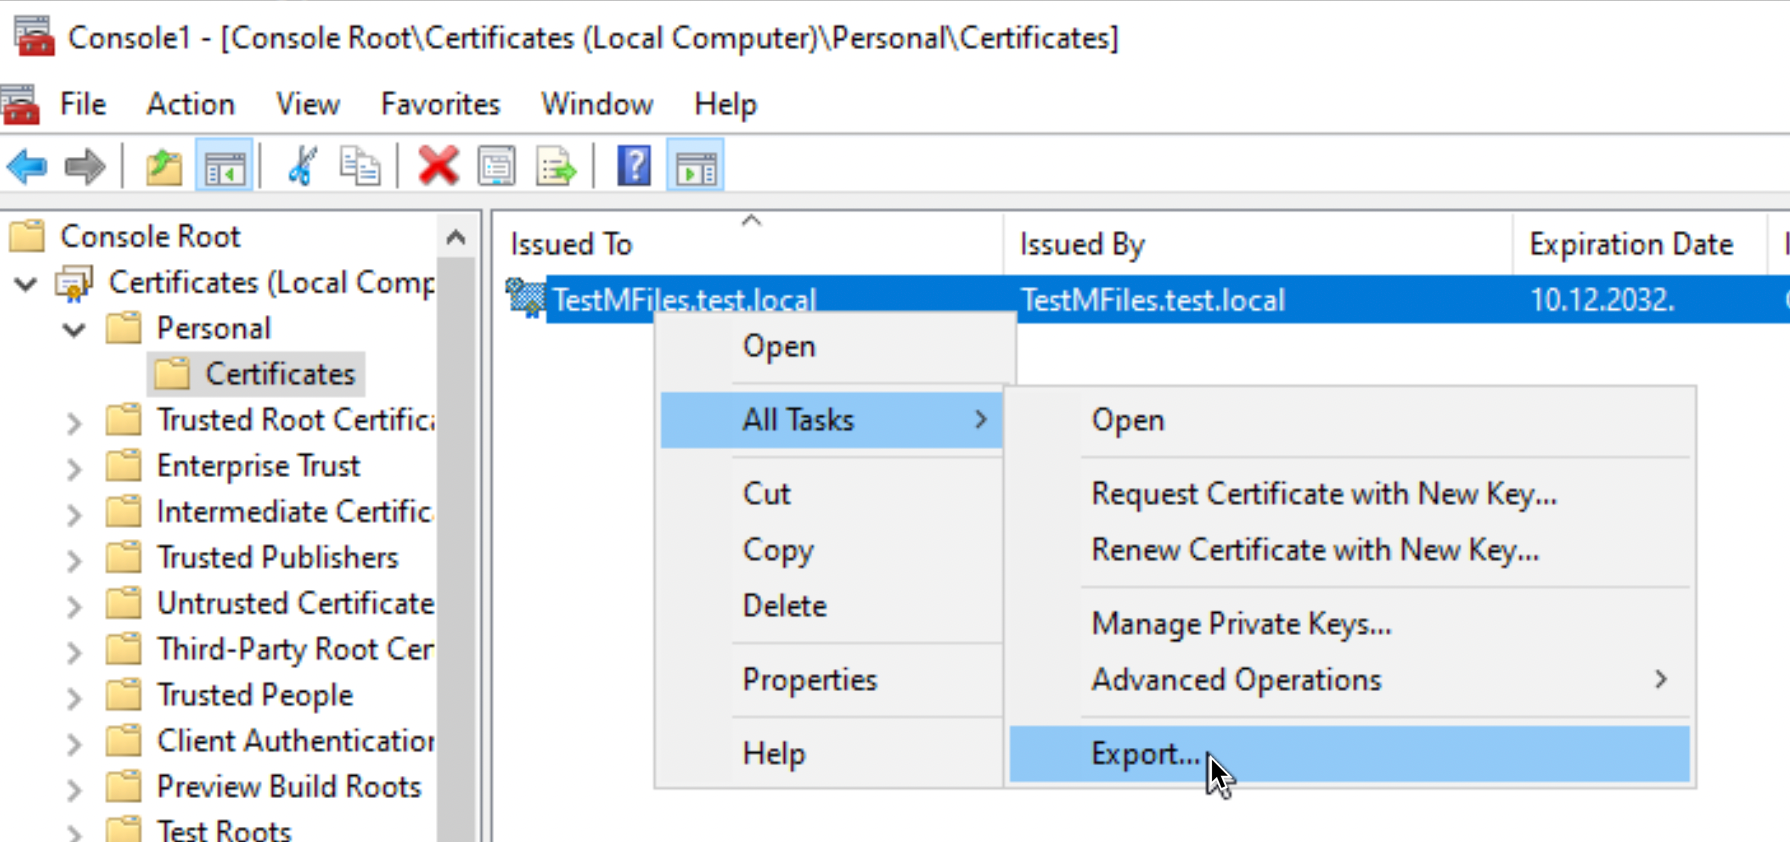
Now, in search console of windows server type in – mmc – MMC will be opened, select File – Add/Remove snap-ins, select Certificates – click on Add – new window will pop-up, select Computer account – Local Computer – confirm with OK twice
You will get screen below, on which you will select – Personal – Certificates – select certificate we just generated, right click on it, select All Tasks – Export
Yes, export Private Key
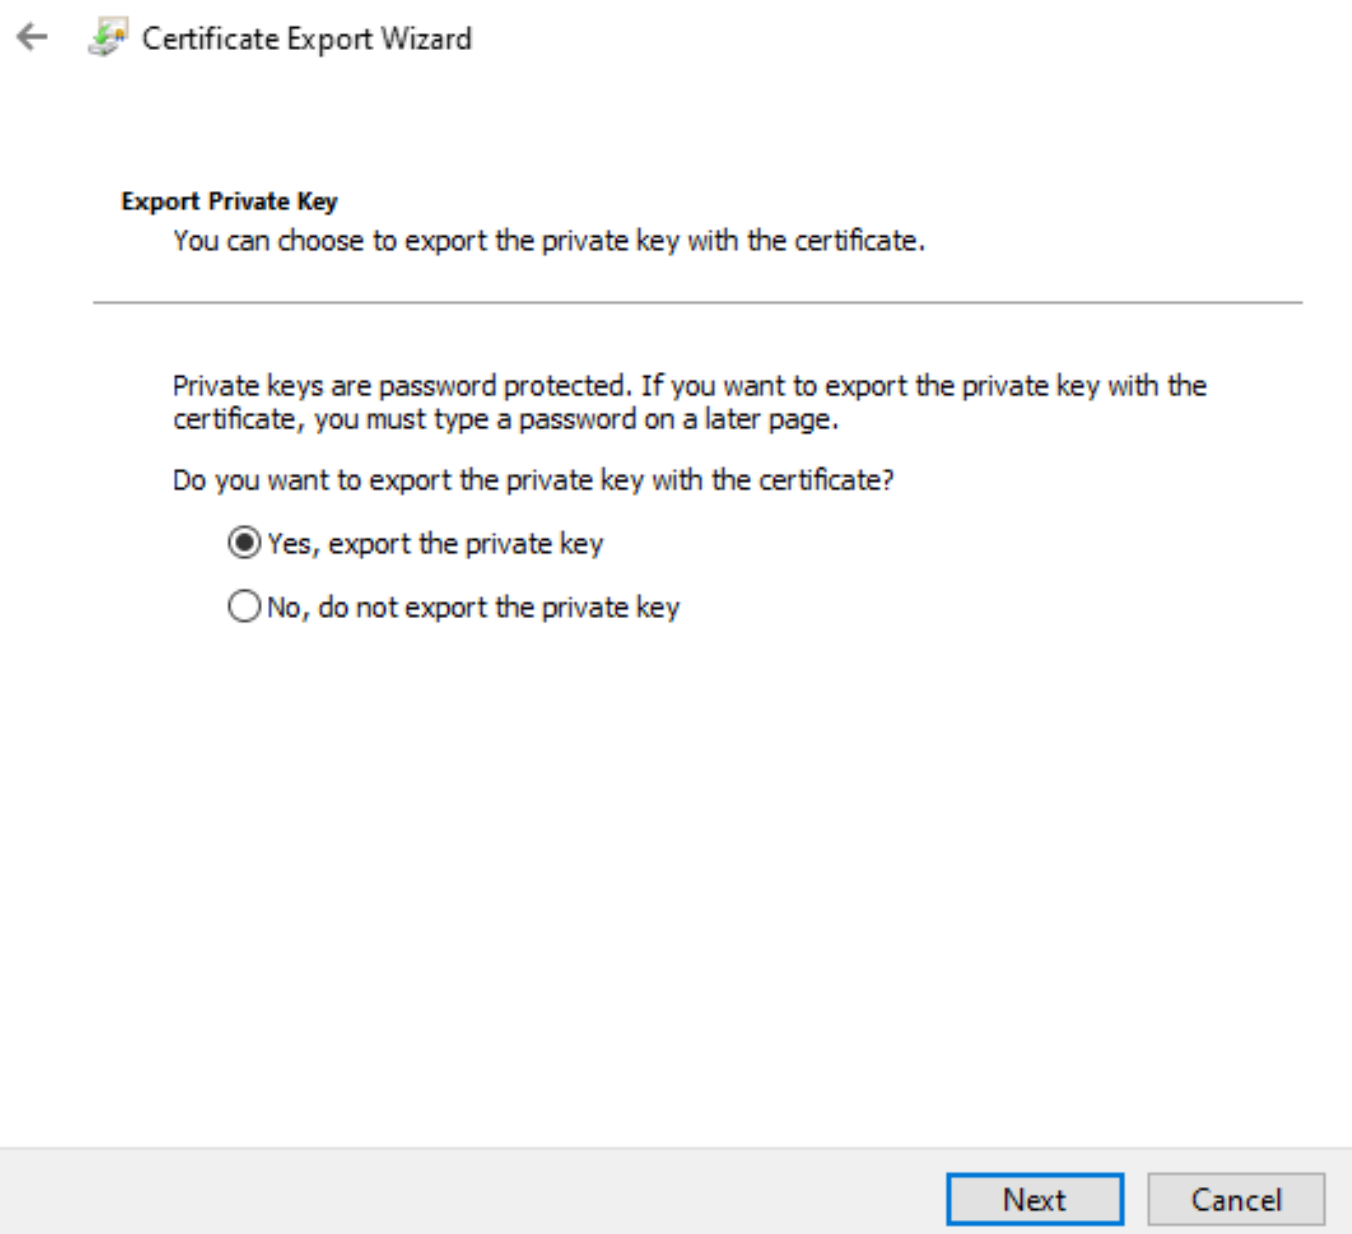
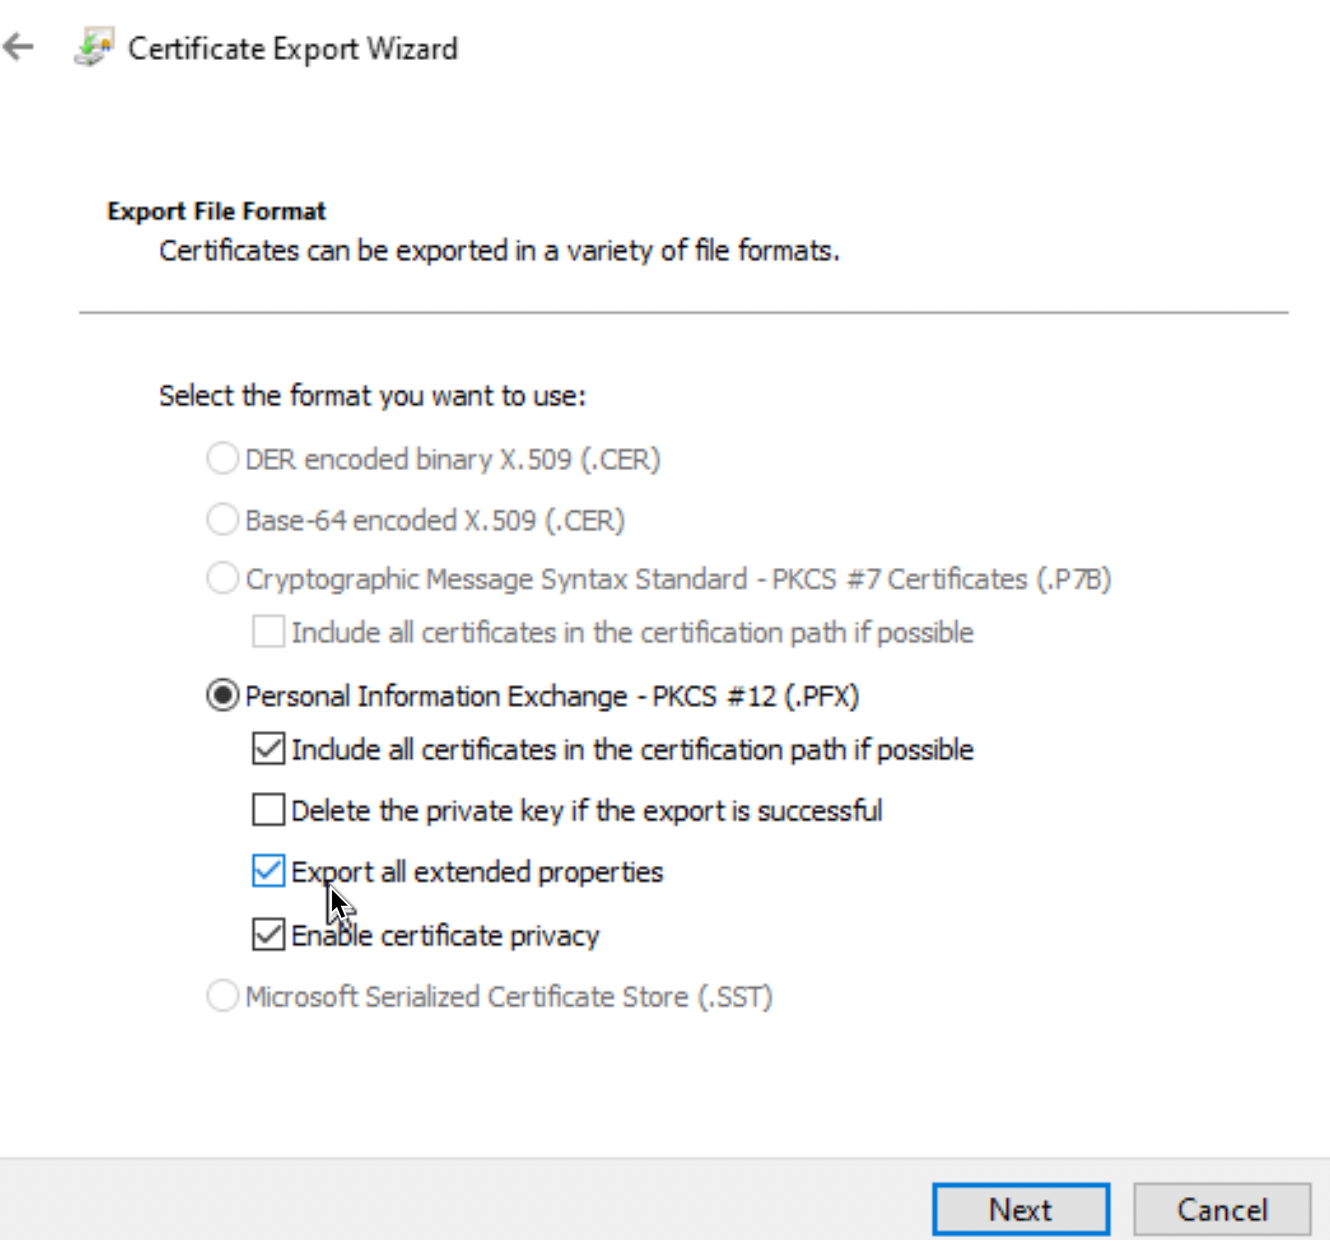
Select also, Export all extended properties – set location and password for cert (remember the pass) and finish export
Close MMC console.
Ok, I exported my cert into C:\temp folder, and cert is named MFilesCertNovi.pfx
Now, we will need to convert pfx to .pem (private/public) or .key (private) and .crt (public) format. If you have .pfx file, you will need to do this conversion, .pfx does not work in M-Files.
I described process of converting .pfx to .key and .crt in my other article (Convert .pfx certificate to .key and .crt)
Now, my .key and .crt files are in C:\temp and I will simply select .key part and press Change under Private Key in Server Certificate Management to import it. I will repeat process for public part (under certificate) to import .crt.
Press OK when you are done
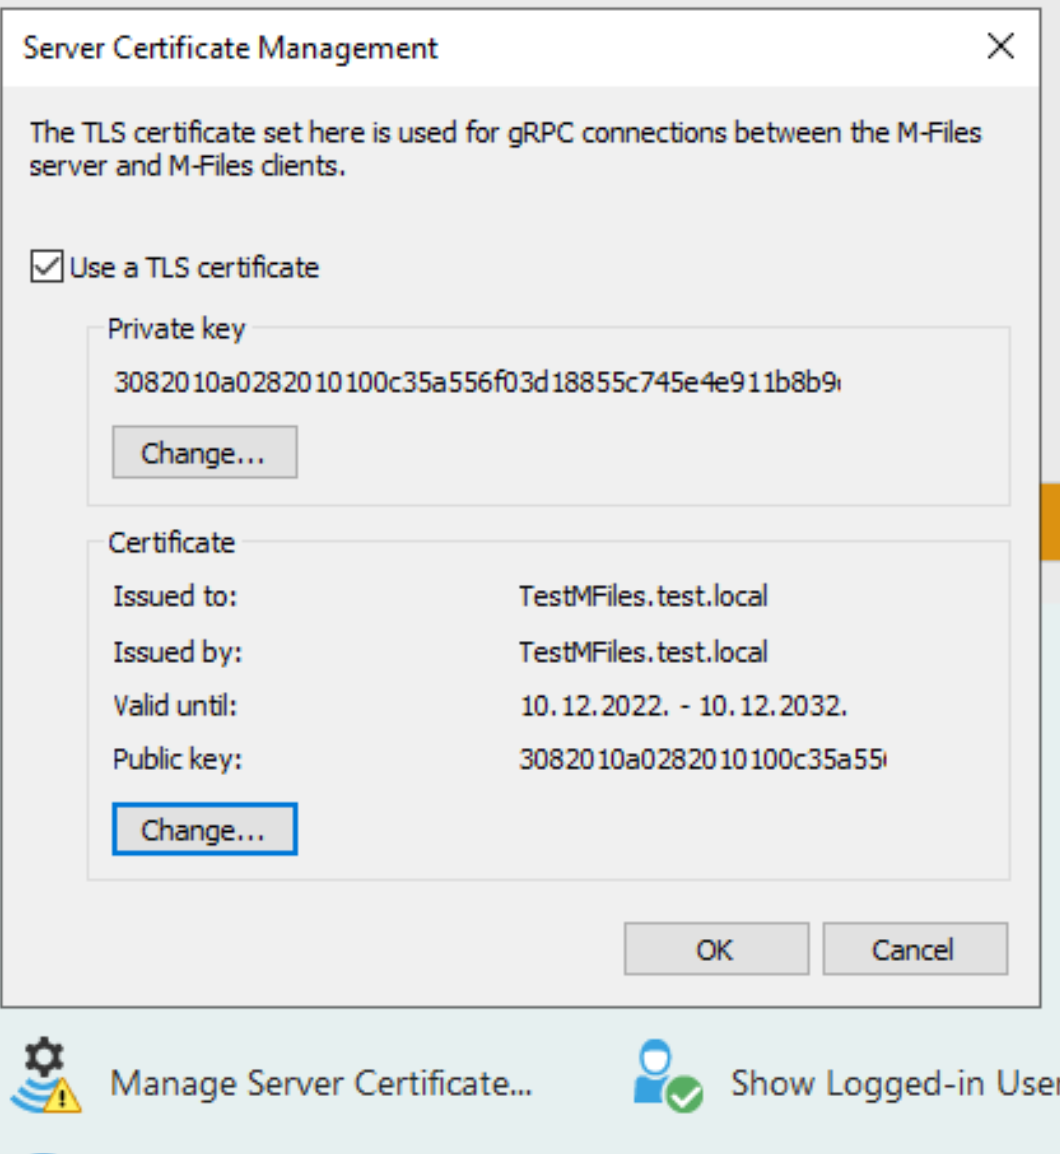
Be sure that cert is valid, and clients will work with it. Yes
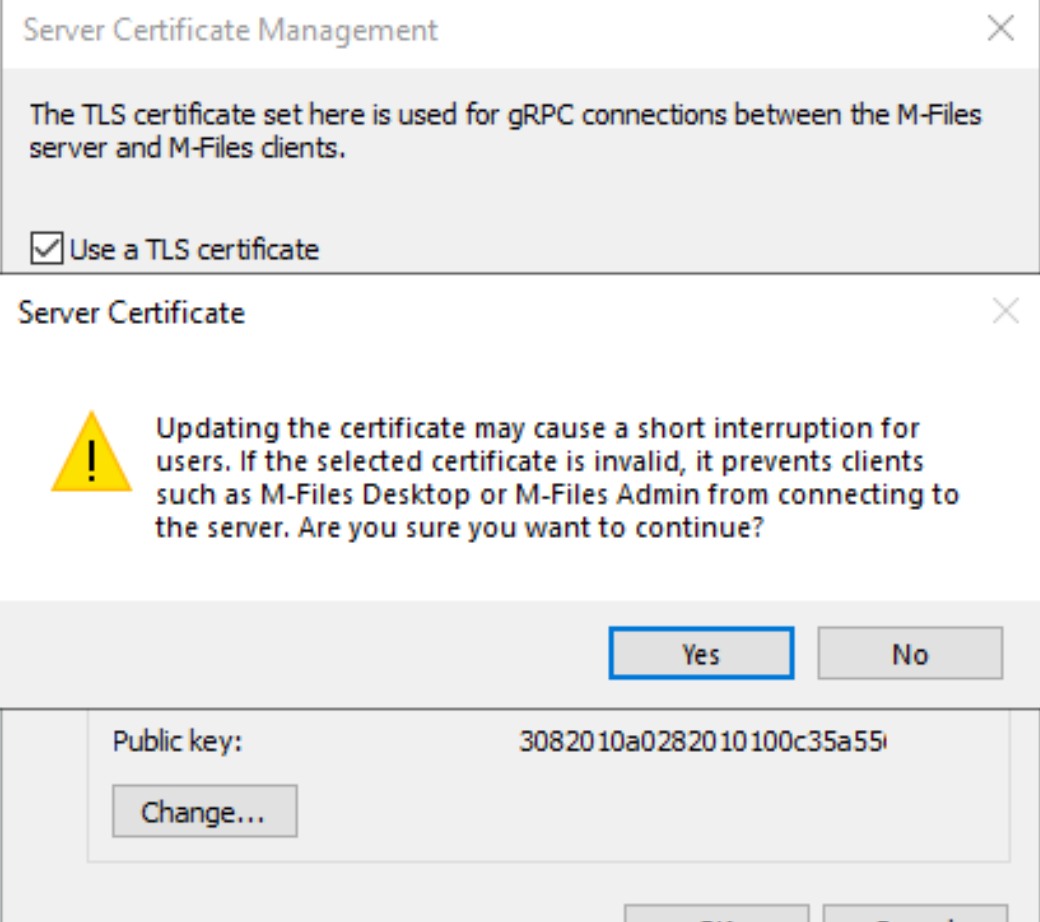
We are done with certificates.
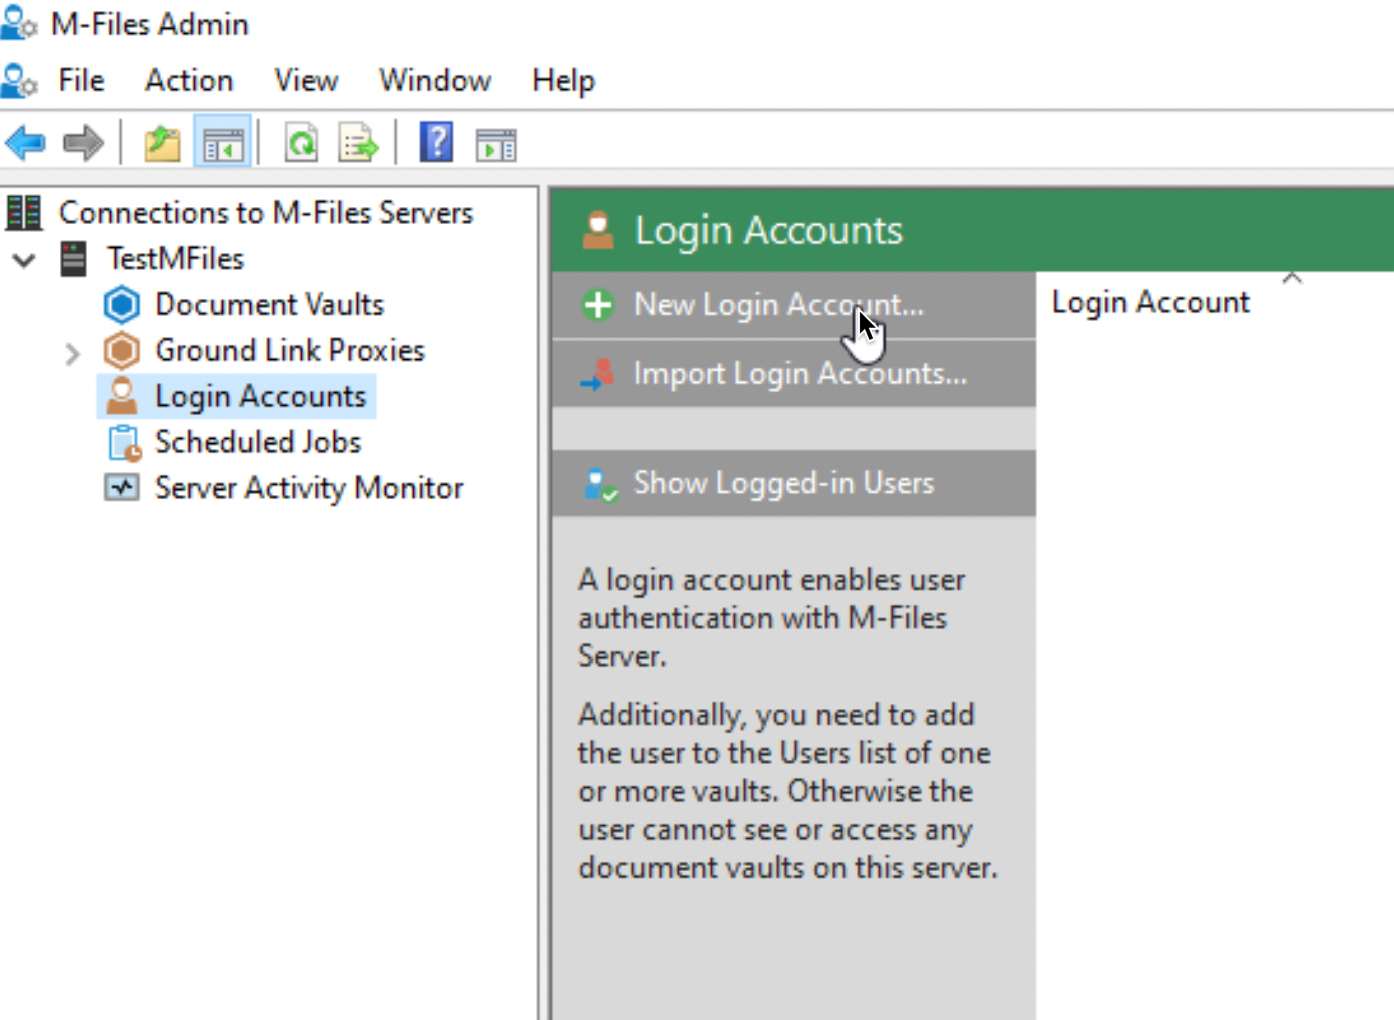
Login Accounts
I will skip to configure web access for our users, we will to that in the future (check the link at the bottom of the article – M-Files – How to enable access to M-Files through web site) next important part is Login accounts
Login accounts are important because they authenticate users to M-File server. We will additionally add users to Vaults – this is separate part. First you need to add user to Login Account, then when we have Vaults, we will also need to add users to that Vault. I will use my AD for adding accounts
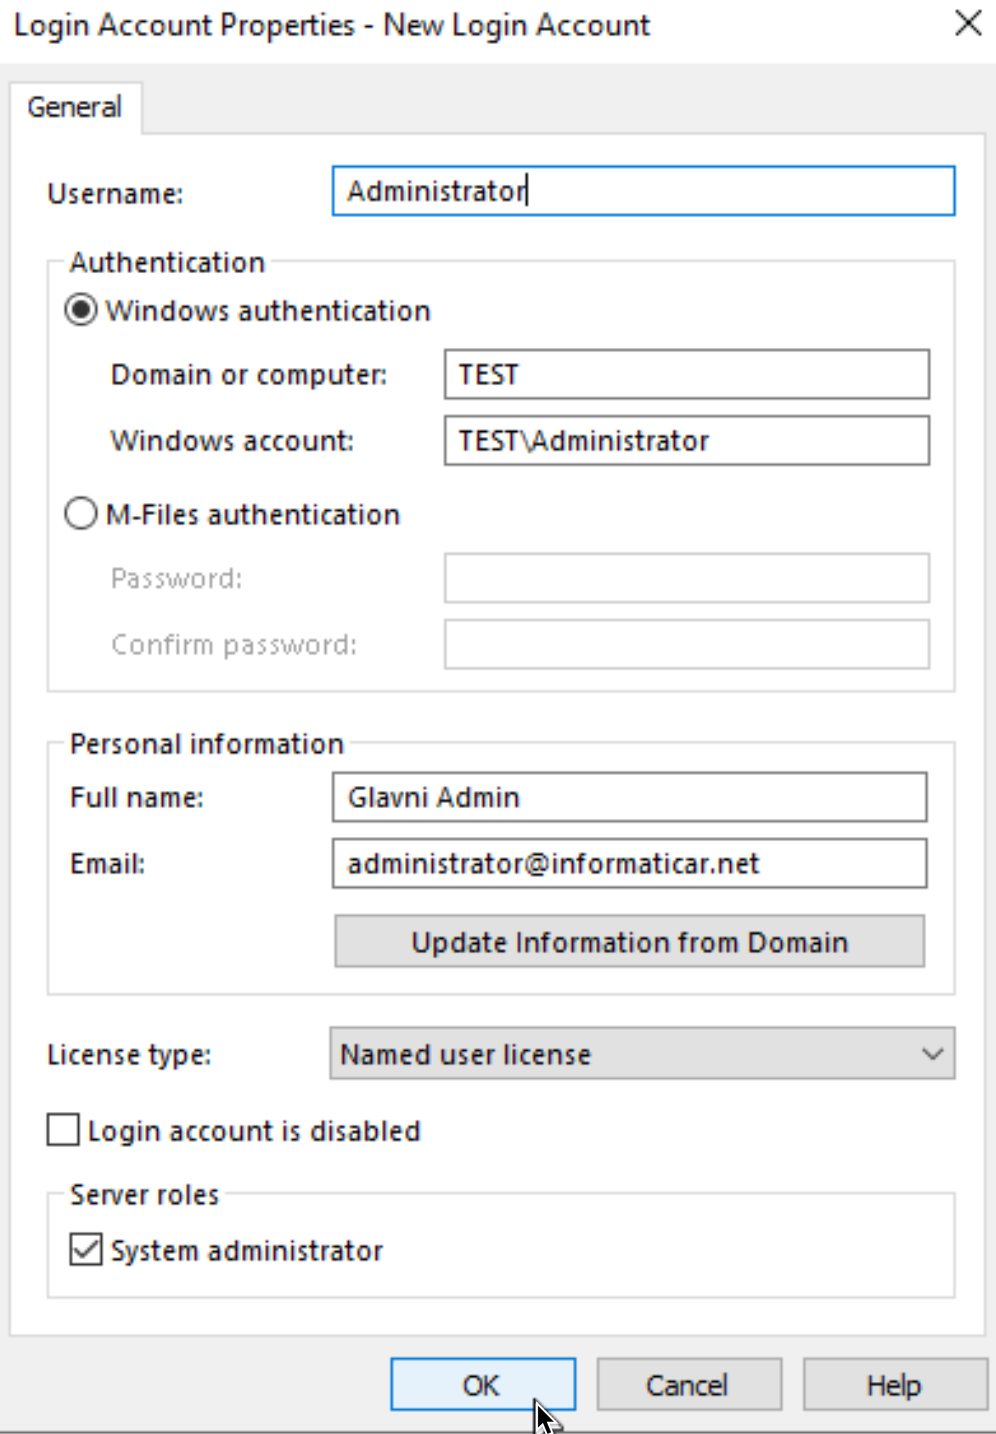
New Login Account
For a start I will add Administrator, You can enter Full name and email for user (email is important so user can get notified of new tasks inside app) . License type is set to Named, (I described licensing in installation part) here you will select license that you bought. I will also assign user right to be system administrator.
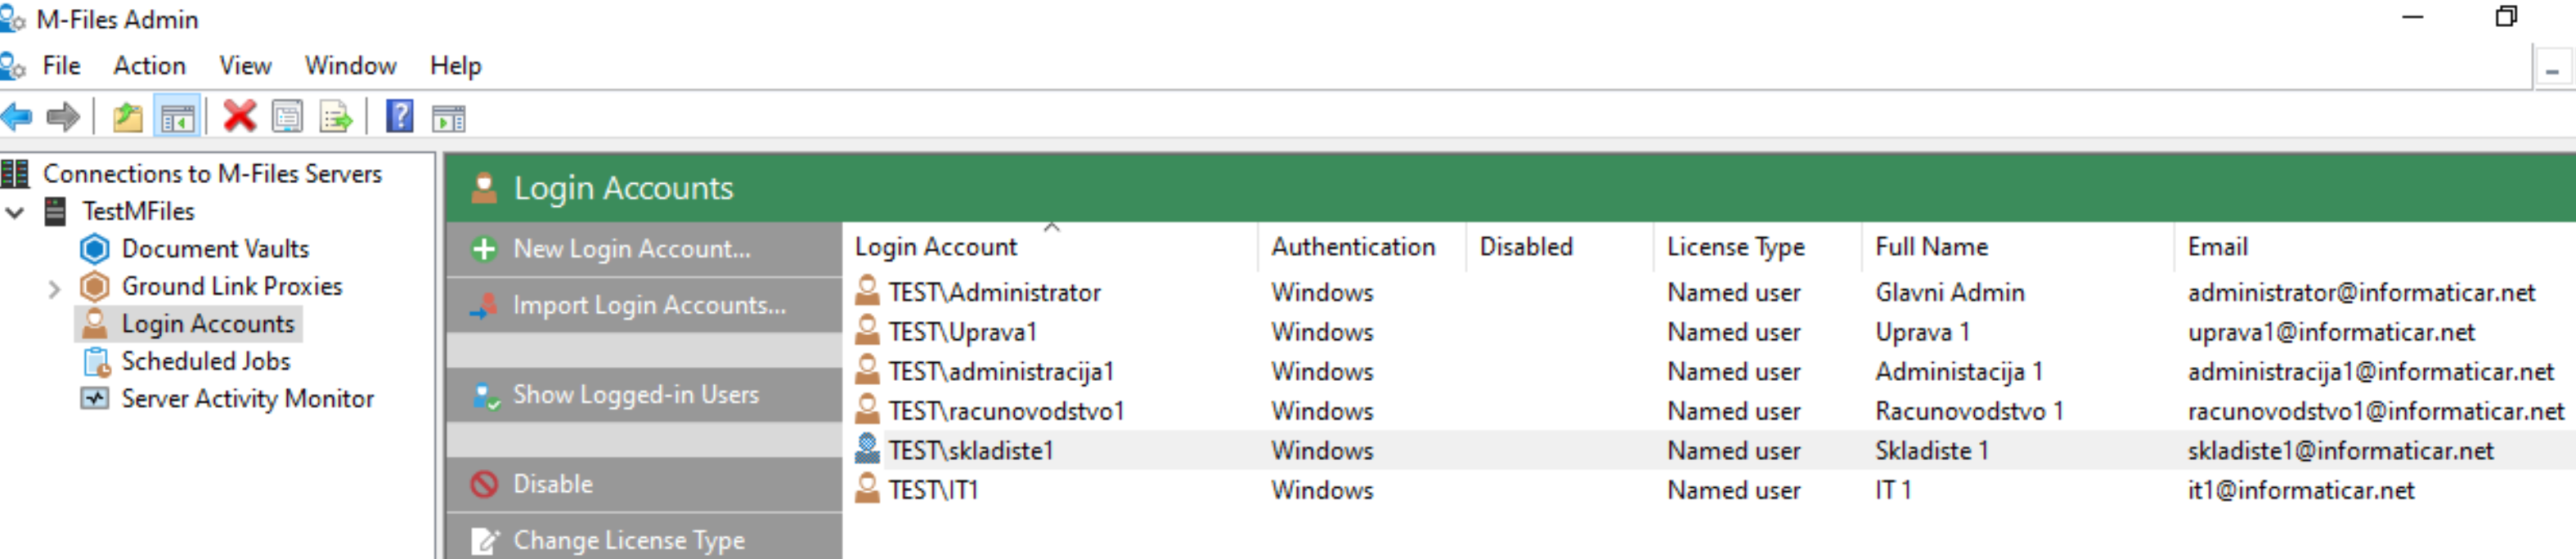
Next, I will add all my users, but without them being System Admins, here is example for one user

Here are few users after I created them
Documents Vault
And finally the crown of all the things we are doing in M-Files – Document Vault is place where all the documents and data is stored in M-Files. After we create Vault, most of our work will be inside it.
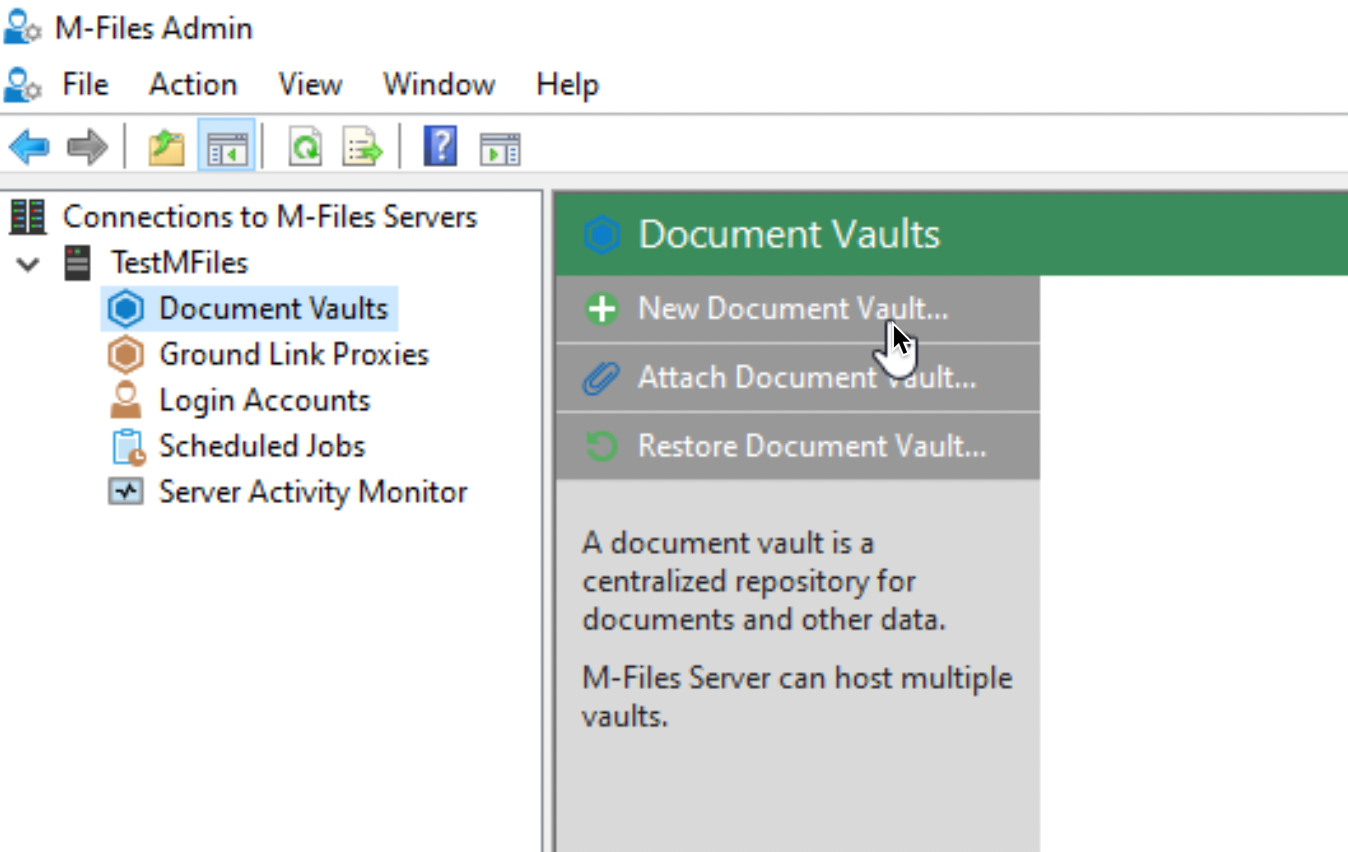
Select you M-Files server from M-FIles Admin, and click on Document Vaults – in the right part of the screen select New Document Vault…
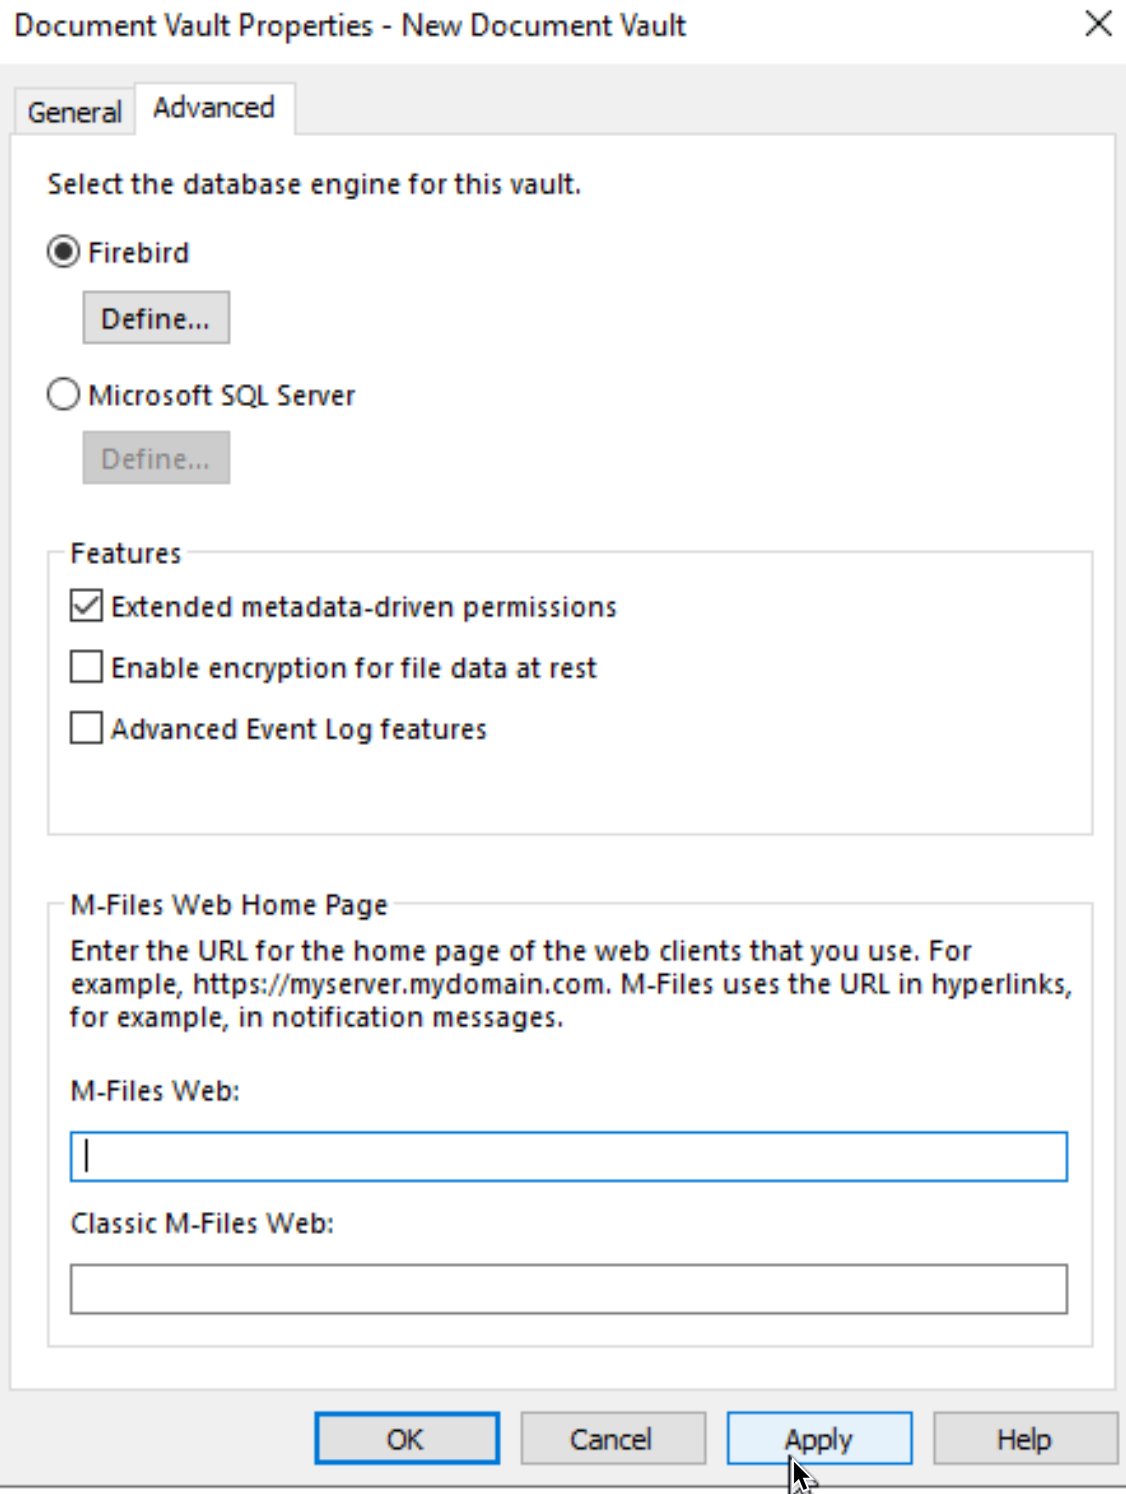
In General tab I will enter Name (Vault101) and leave everything as is. You can change language or icon of the Vault.
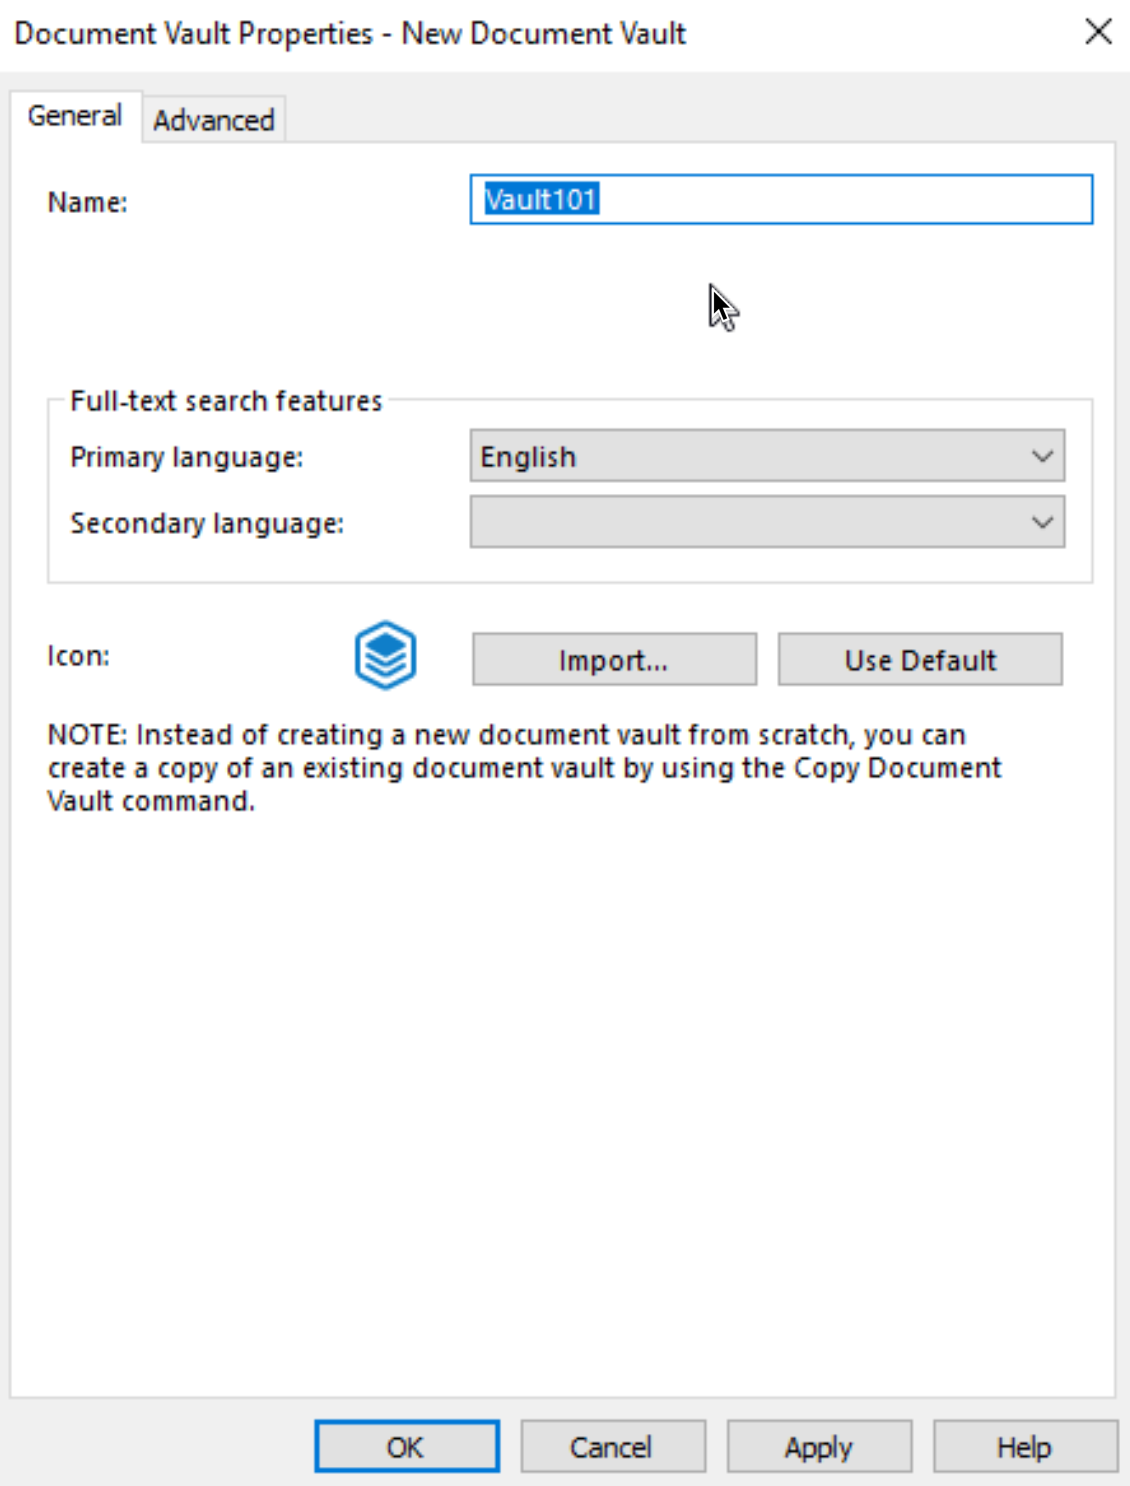
On Advanced tab we will just have a look at things. We will leave all settings as they are – FireBird DB, no website defined. It is good to know where to define those things when we will need them. Apply | OK
We now have our first Vault!!! – Vault101
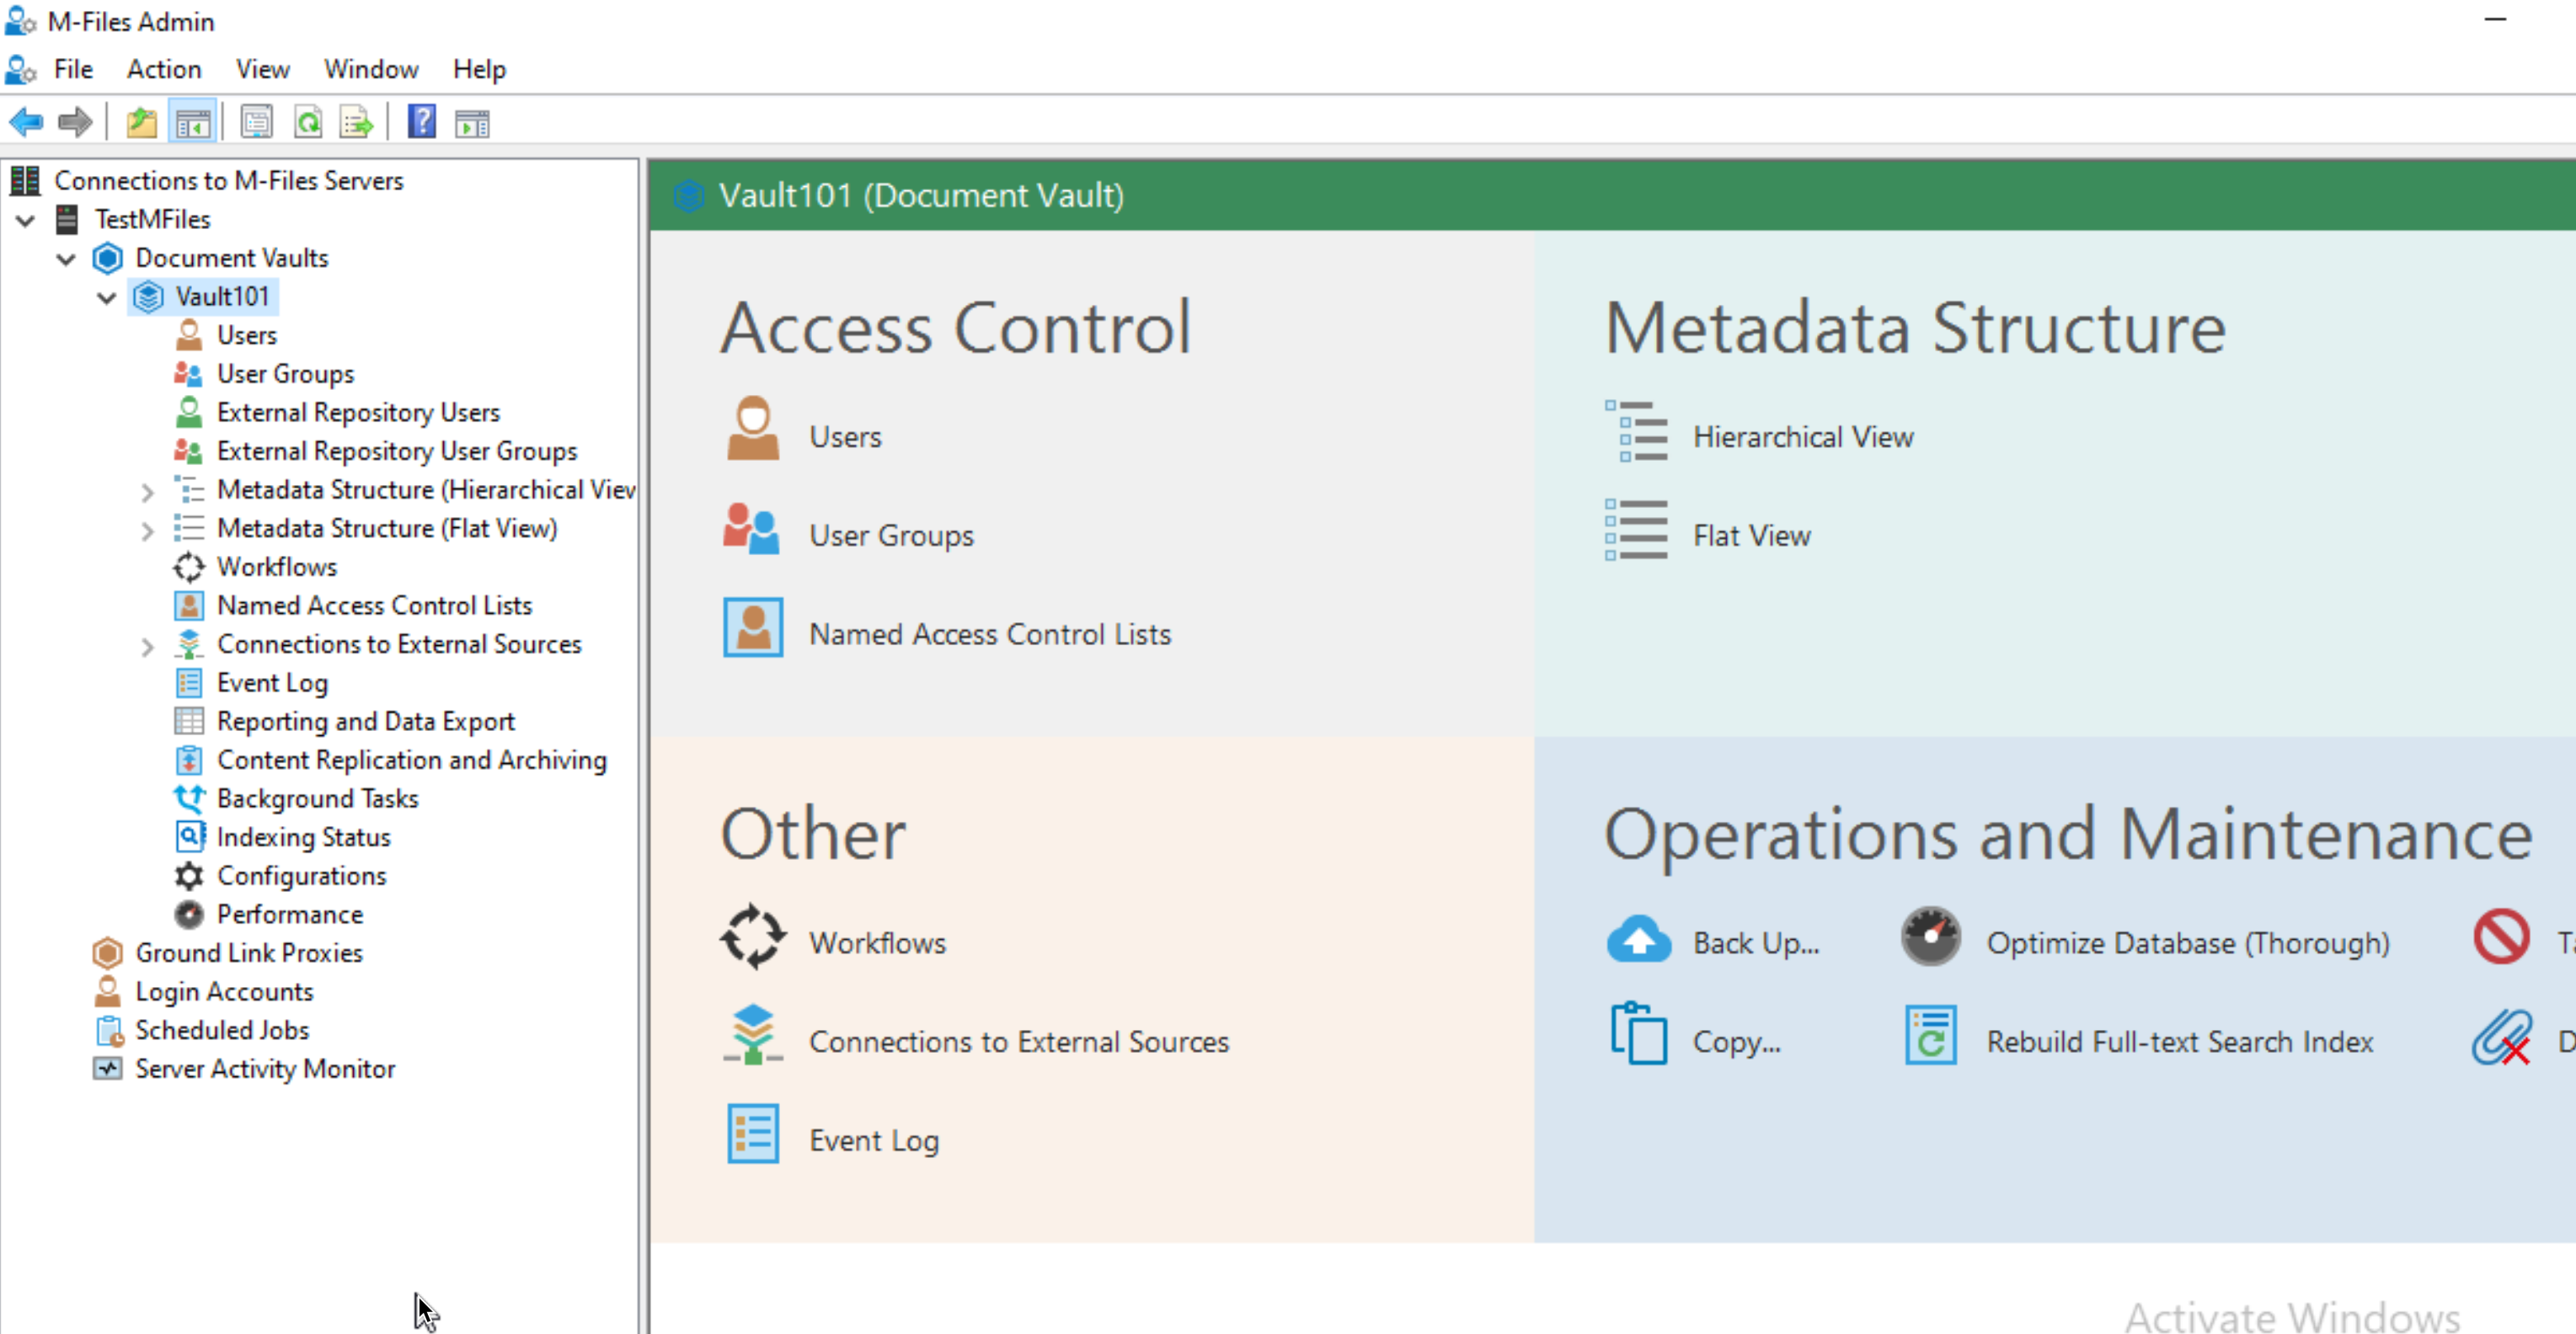
We will go through Document Vault in detail, because this is the place where everything happens. But, in this article we will just do one more thing before we wrap up server part – create Users in Vault
Create user accounts in Vault
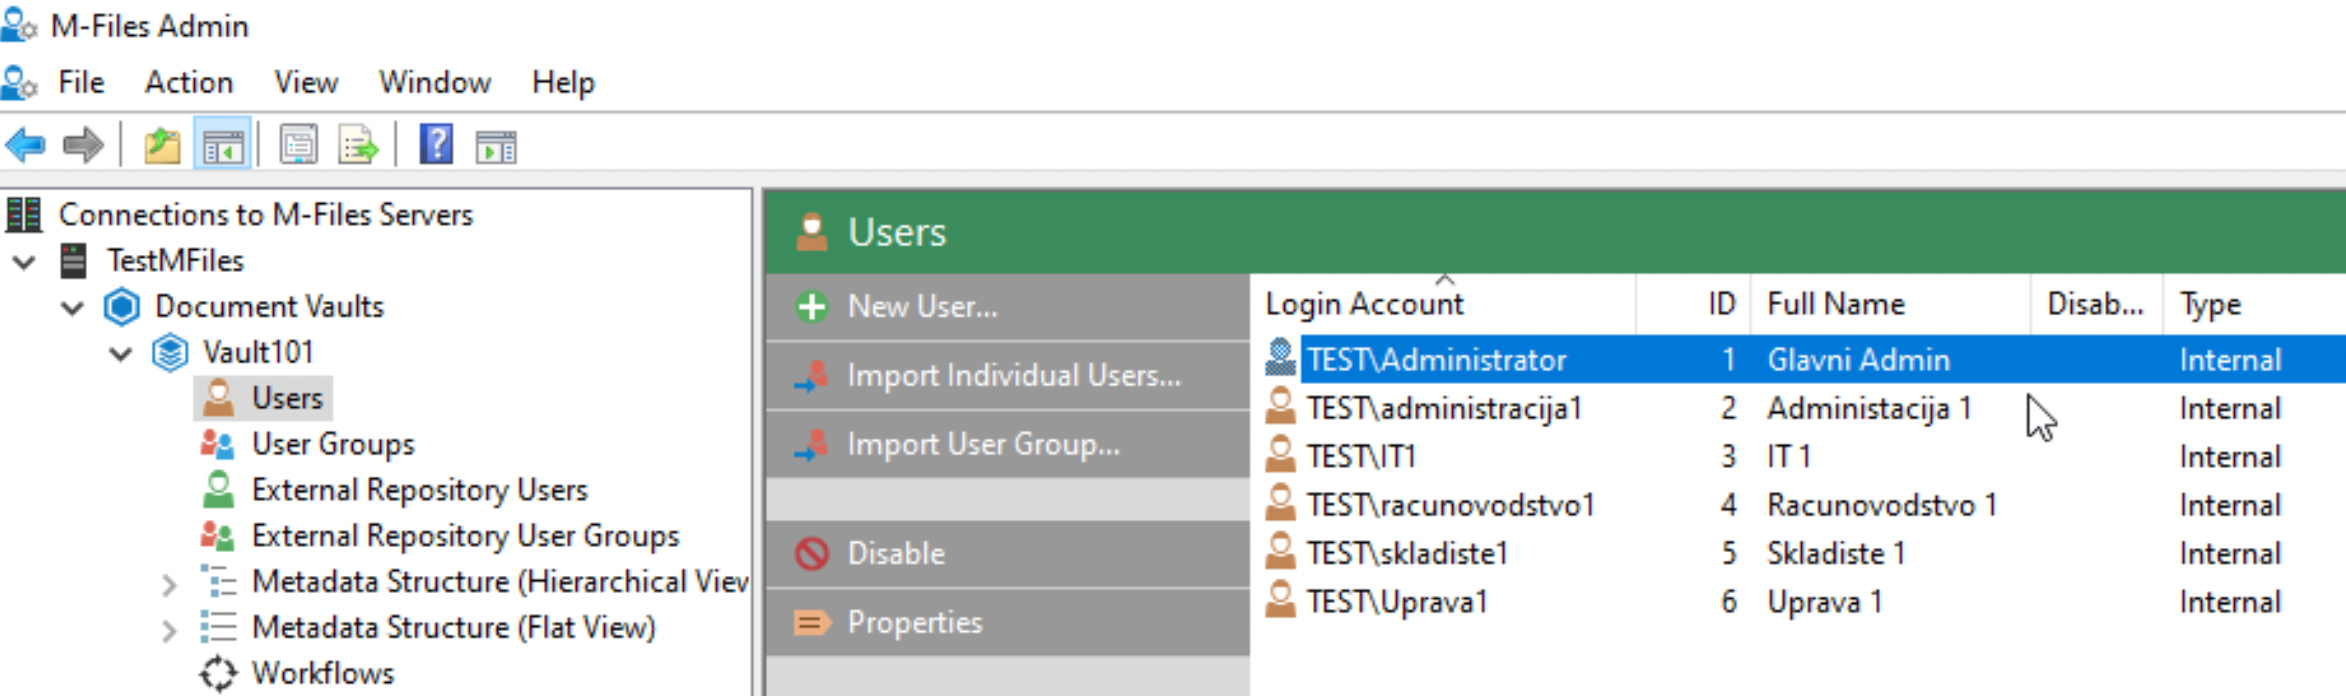
Expand your Vault (Vault101 in my case) select Users – New User
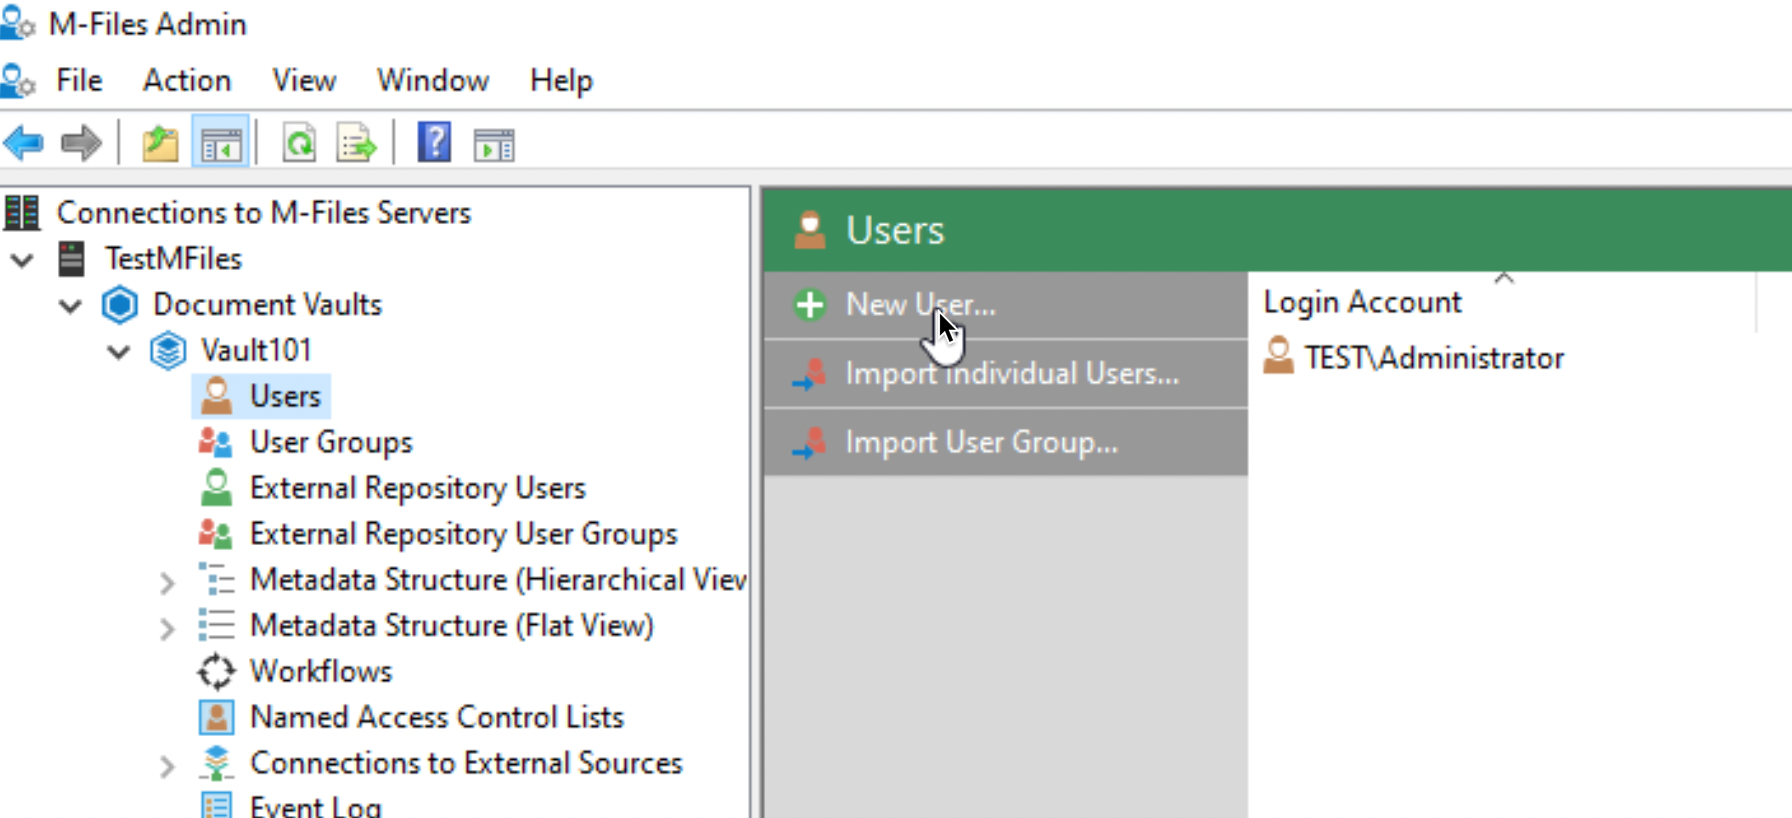
As I already mentioned – login accounts are prerequisite for this step. I will now select one account and leave everything else as is. We will not change anything now

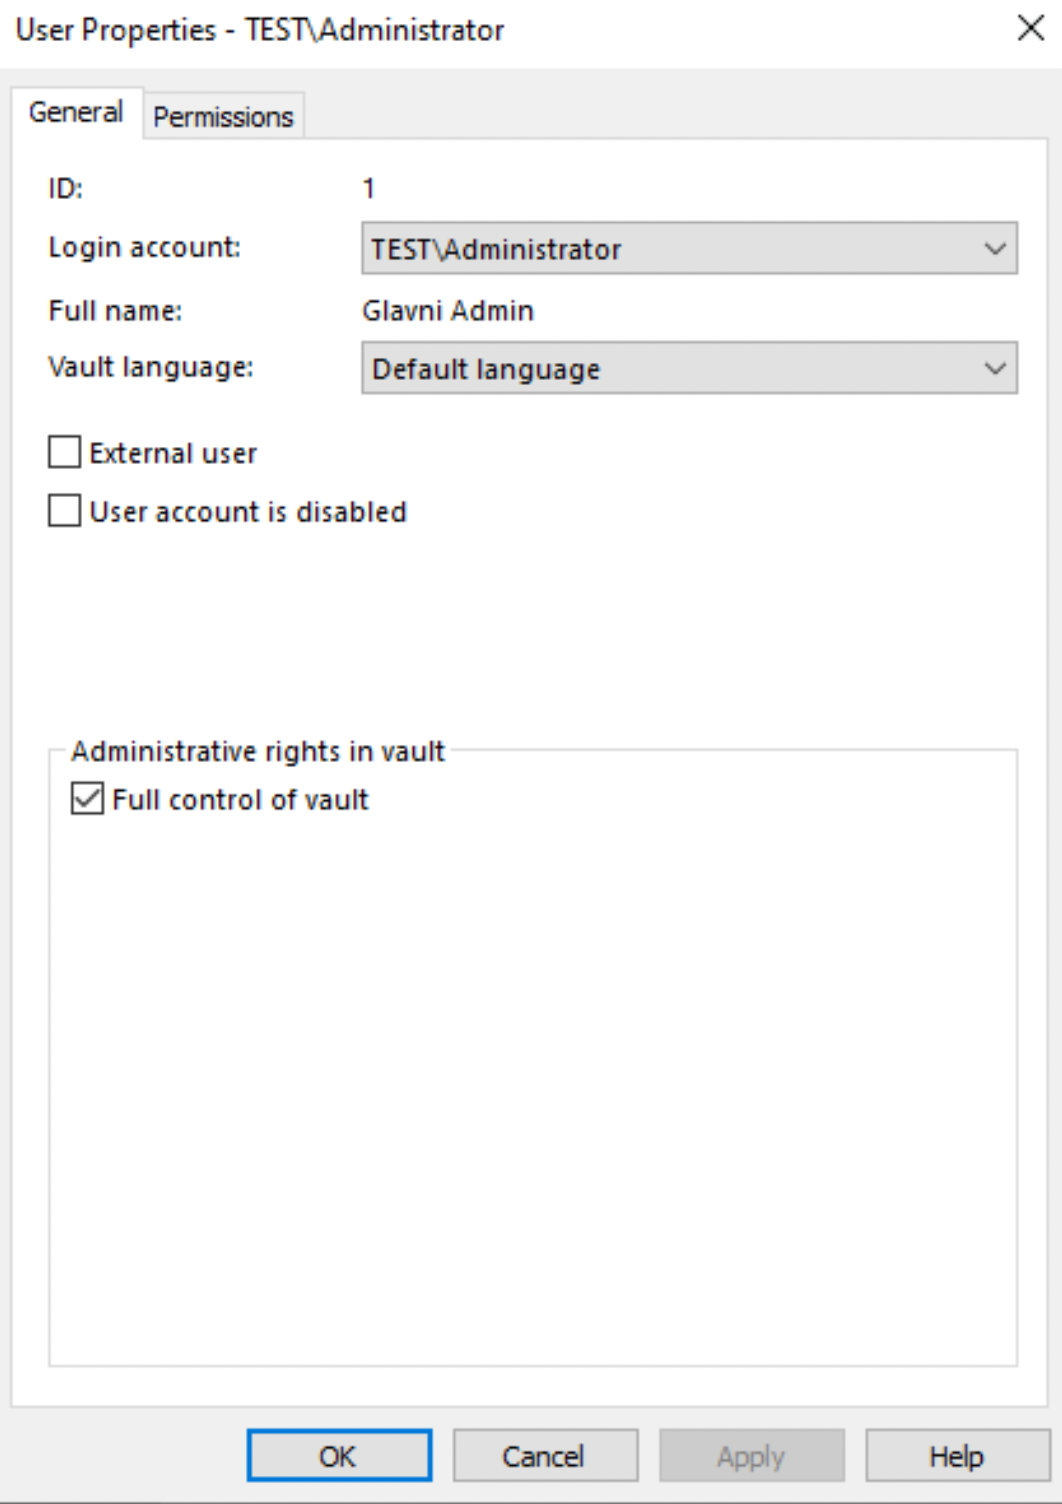
Administrator account of the vault
We already have Administrator user in Vault, and this is how User Properties tab looks for it
I added all my users to this vault. You will add users you will need for the vault you create. Add users to vault only if it makes sense / they have some role inside vault or need access to some data.
Ok, basic parts are done, let’s quickly do few more things
M-Files Updates
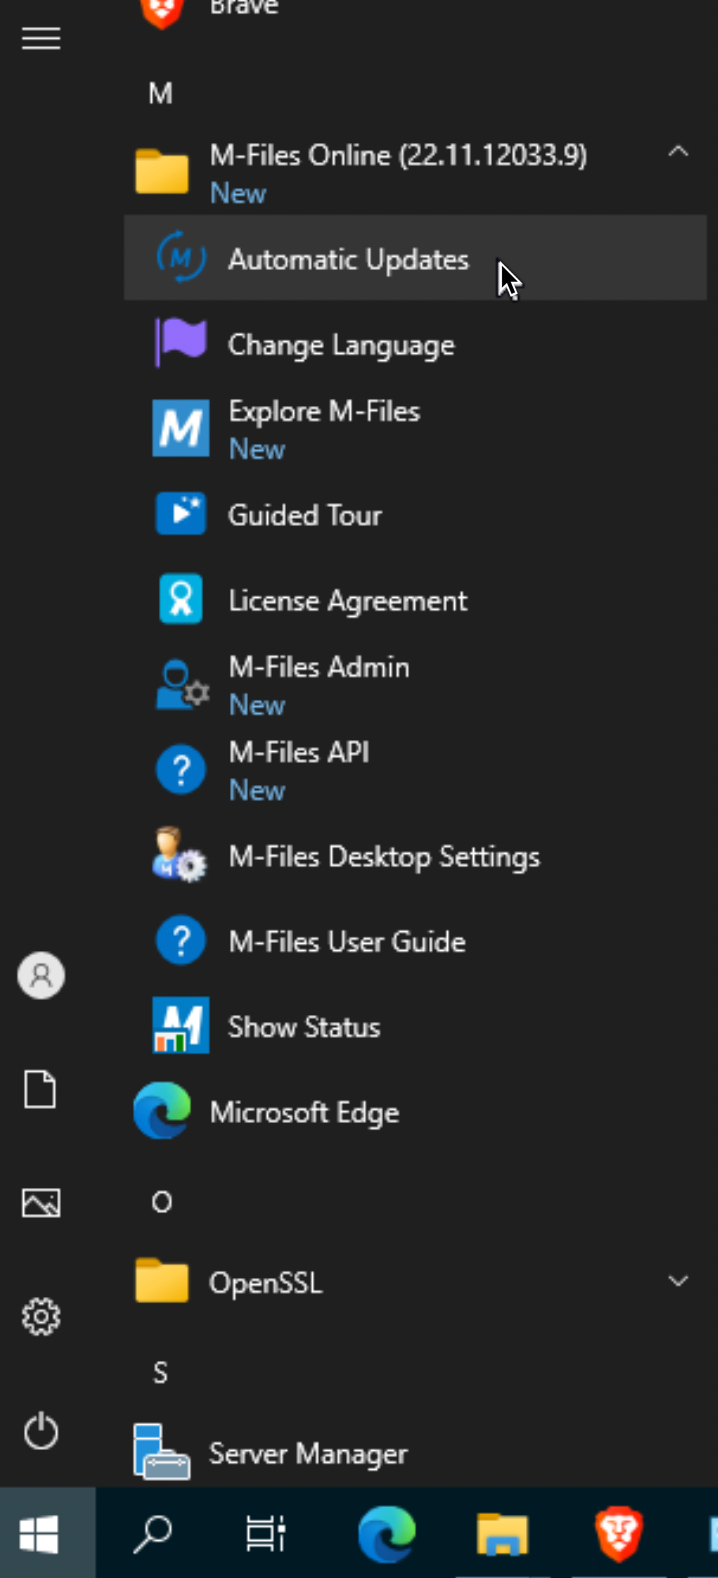
M-Files Updates are done automatically. M-Files downloads and installs automatically new versions. You can however manage automatic updates on your server following way. Click on Start – M-Files – Automatic Updates
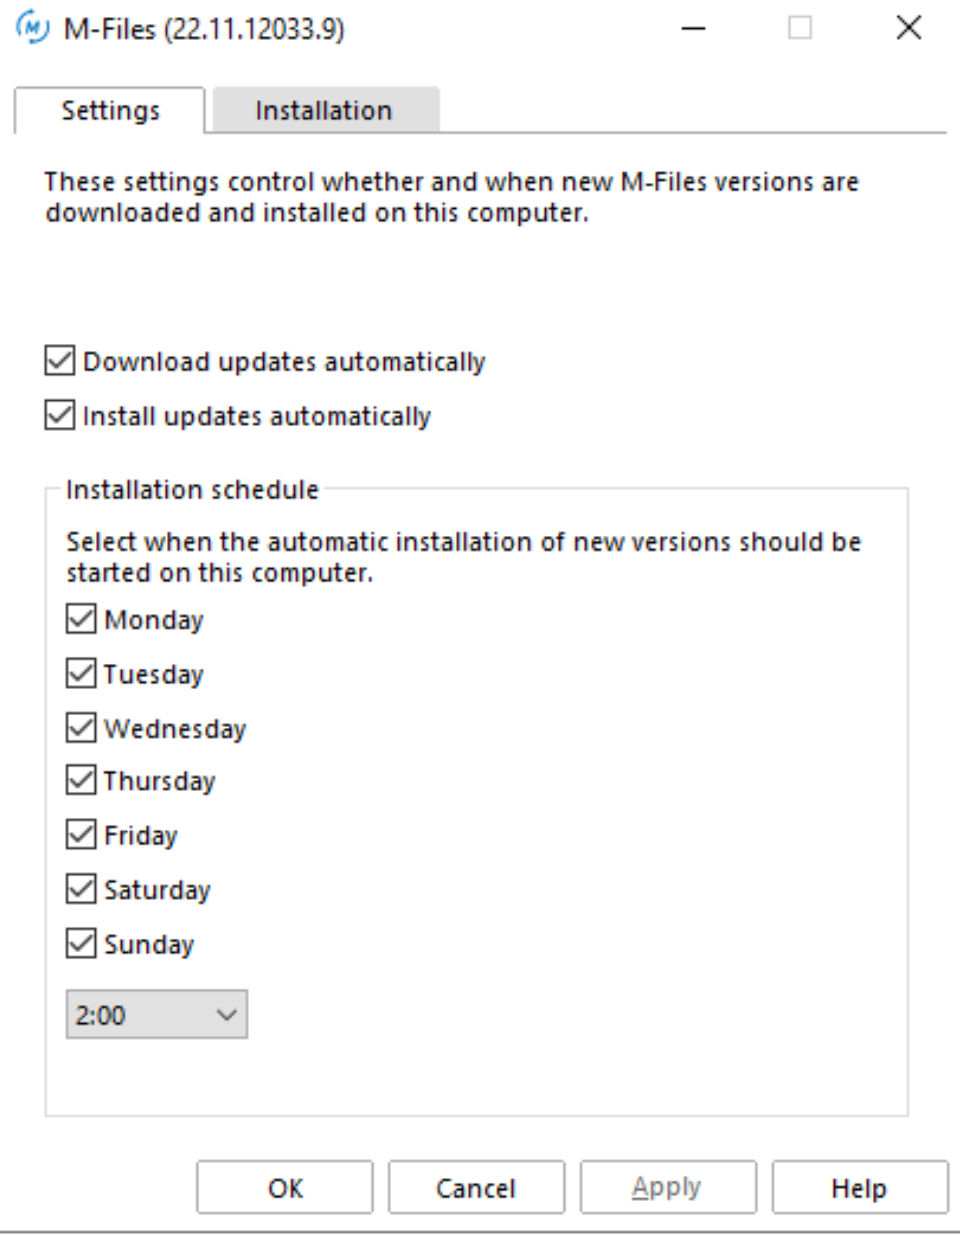
You can select if you want updates to be downloaded and installed automatically, and also define schedule for installation.
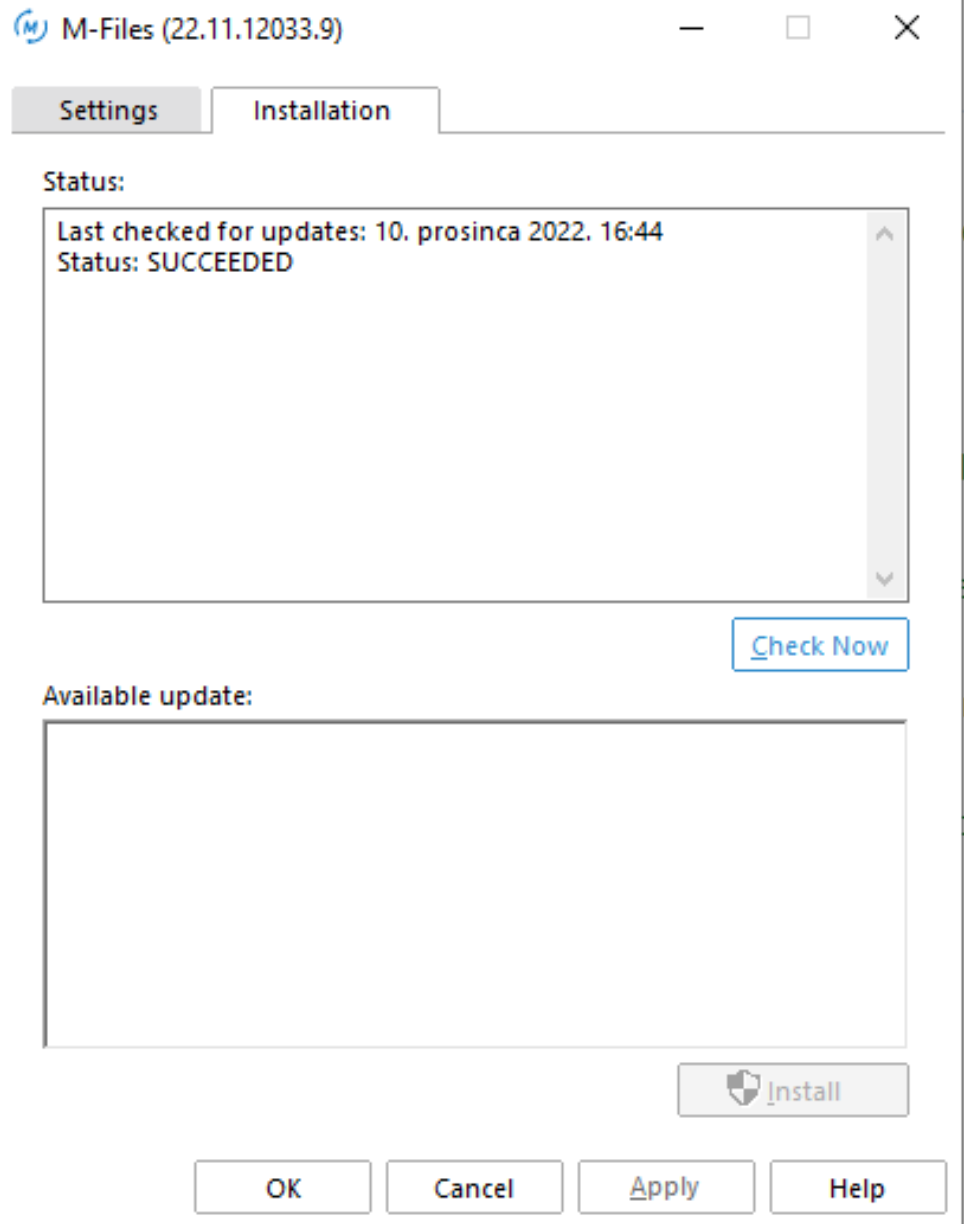
Installation tab, offers you a view into update status or available updates.
There is also and option to define automatic updates for server and clients through registry.
Define Backup Jobs
For this tutorial, we will define backup job on the same disk and on the same machine. Just to feel the process. In production – define external backup, and for good measure backup your M-Files to other server.
In M-Files Admin under Scheduled Jobs select New Scheduled Backup Job…
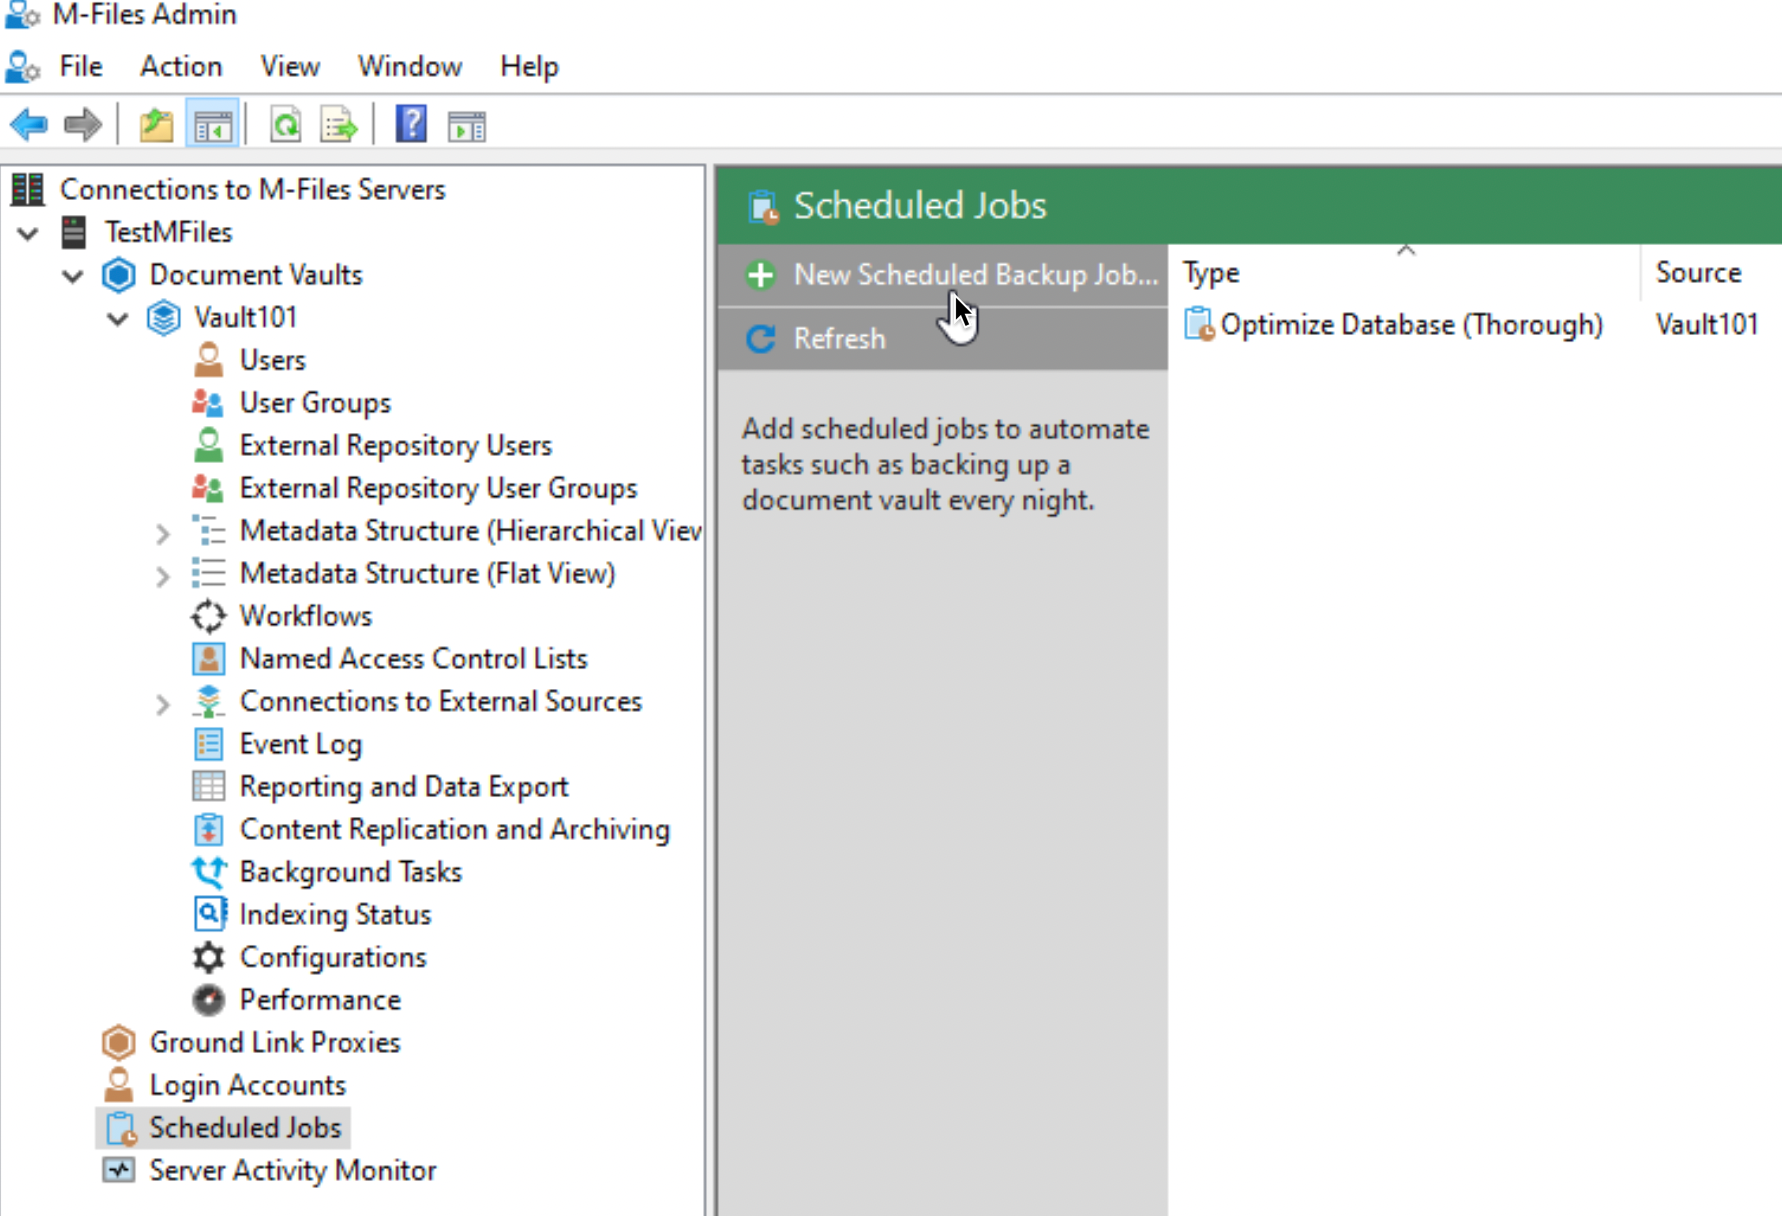
We will create two jobs – one for Master database and another one for Vault101
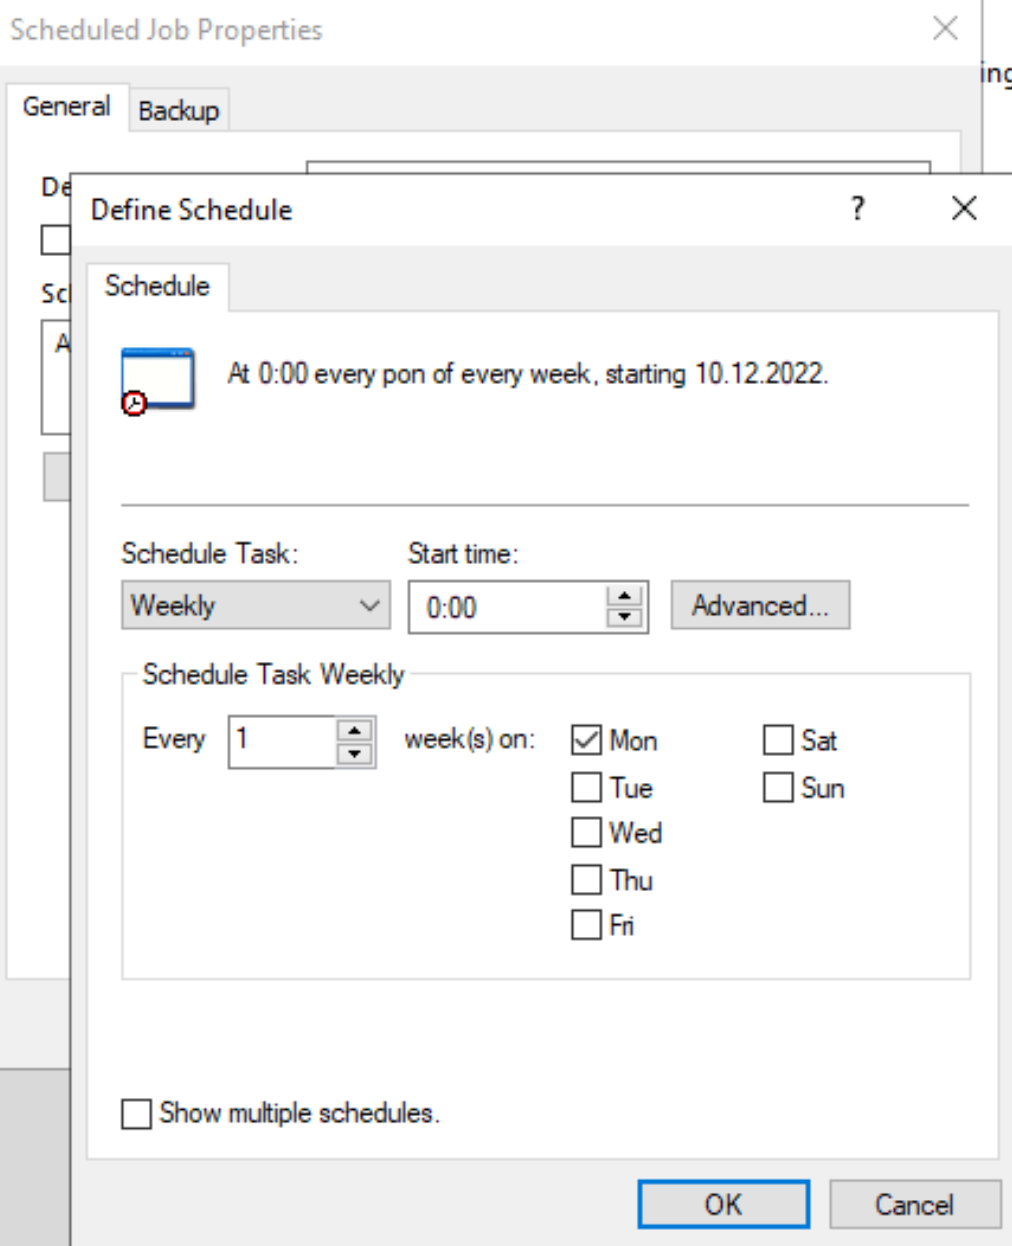
On General tab – enter description to your liking. After that click on Schedule
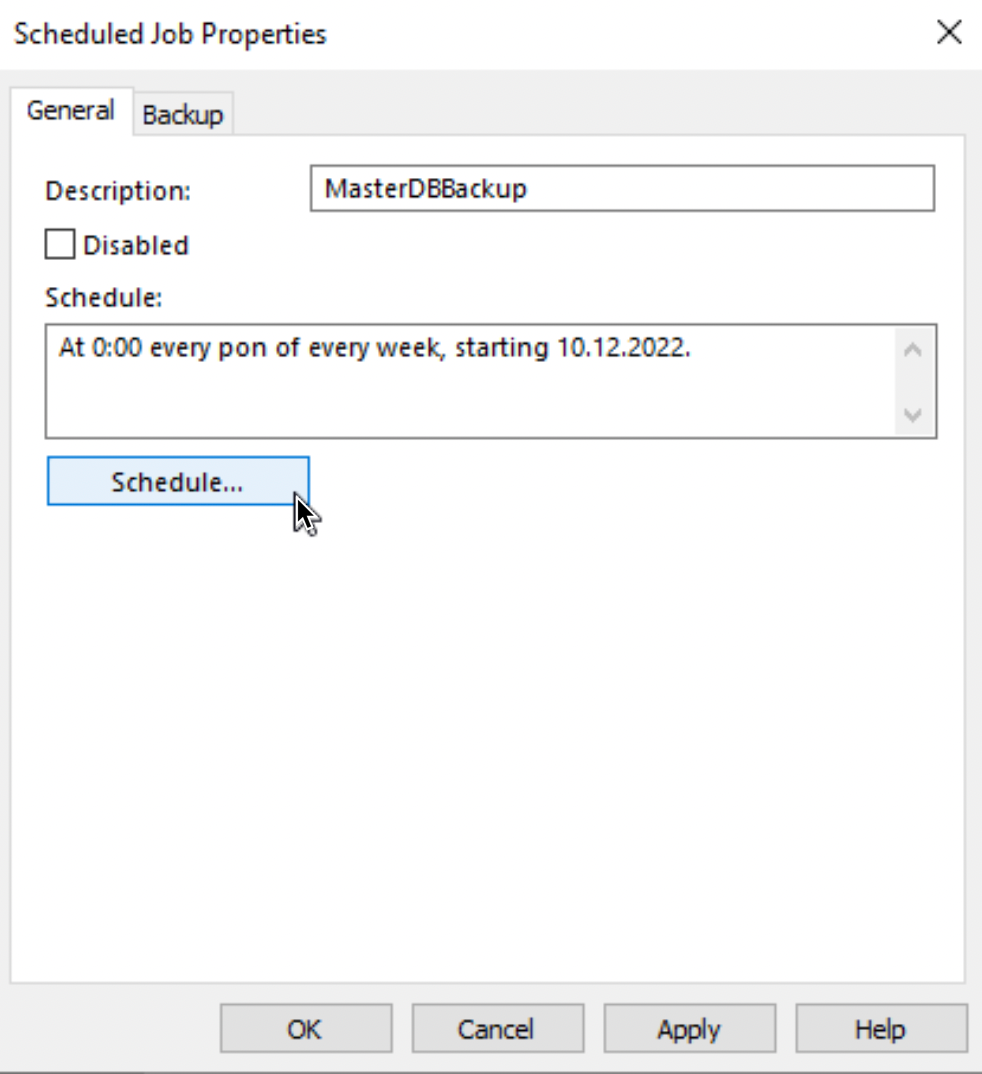
For a test, I will leave it as it is – although options for scheduling are very rich.
Next, to the Backup tab. I will select Master database, define backup location (again, in real life, this should be some other place and server) After that I defined account that has rights to location of the backup (when you backup to some other place, you will need to enter login data that has rights to the share you are backing to). Apply – OK
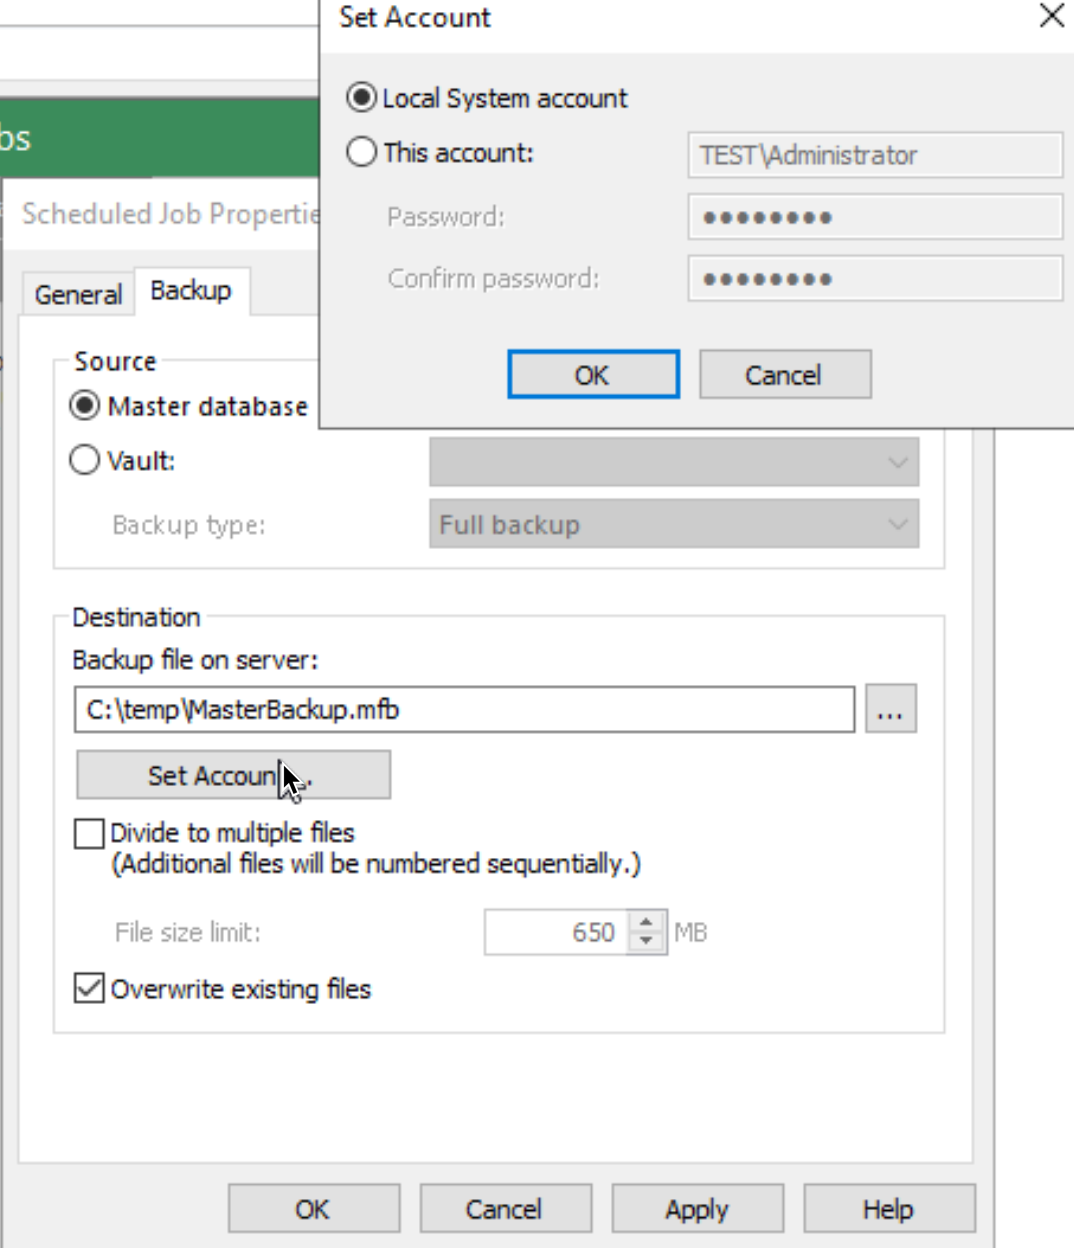
Job defined above will create one file and then overwrite it. If you wish to create multiple backup versions for MasterDB, best plan would be to define multiple schedules (one for every day) and define different file names for each day, so you have multiple backup files for multiple days.
Vault backup job offers full and differential options, so there is a room to play. Differential backup requires full backup.

To test backup job, I will right click on created backup job and select Start Job. Backup is success!
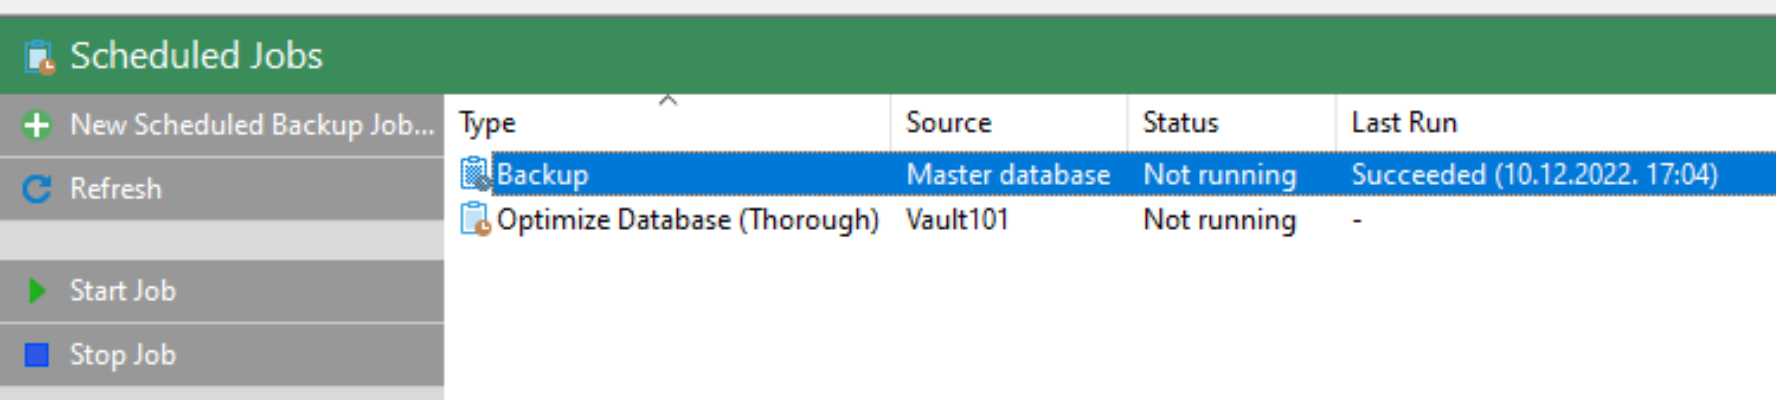
And we have a backup file created.

Same way we can also define backup for our vault.
That is it for now, for Server part, let’s attach our vault to client.
Basic Client Configuration
On our client machine, we now need to connect to the document vault we created.
To be able to successfully do this part, all the this I did in installation and this basic configuration part are necessary.
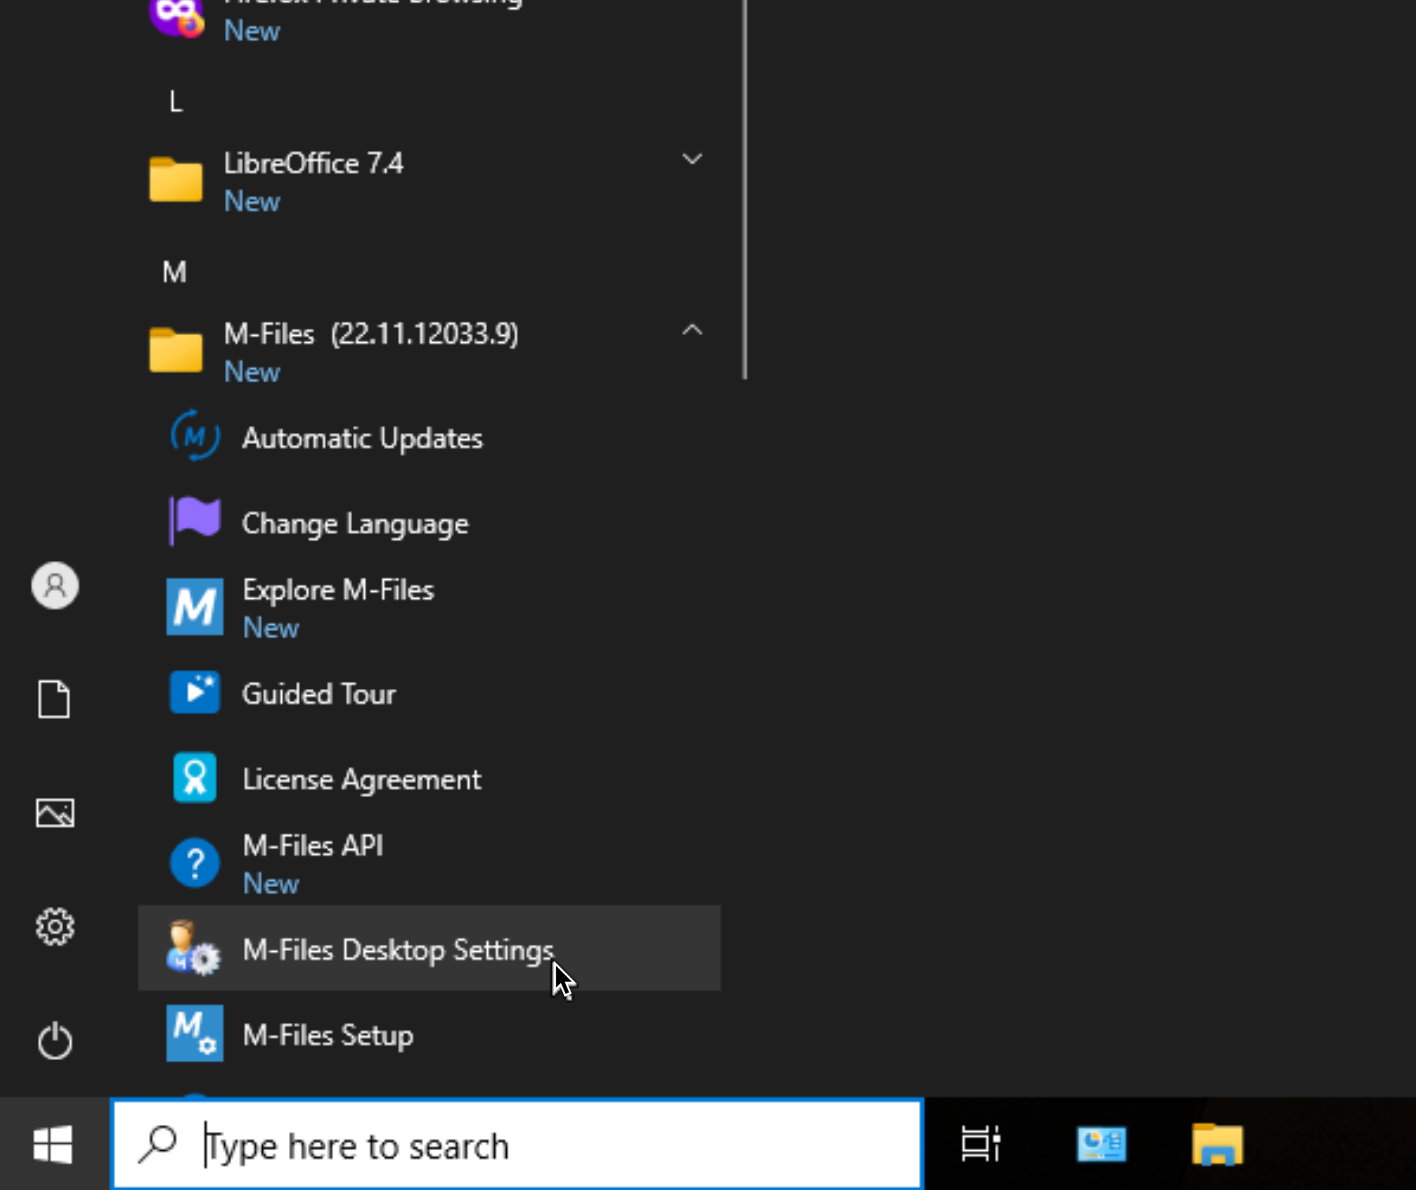
Go to you client machine (I will do this at MFilesClient1) click on Start – Expand M-Files directory and select M-Files Desktop Settings
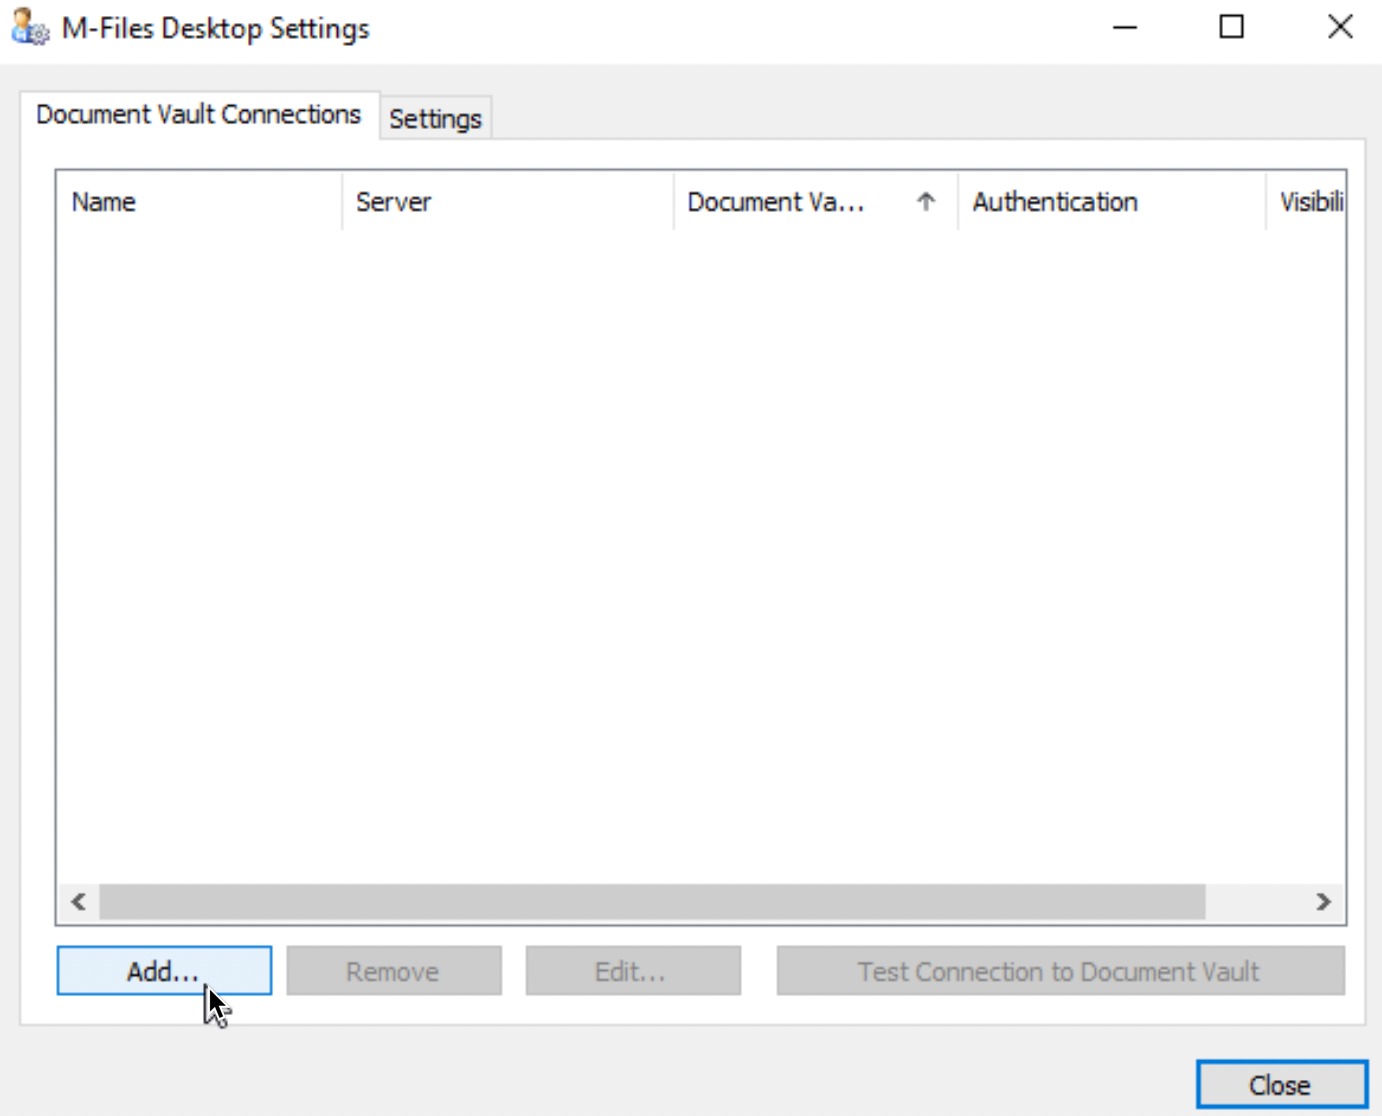
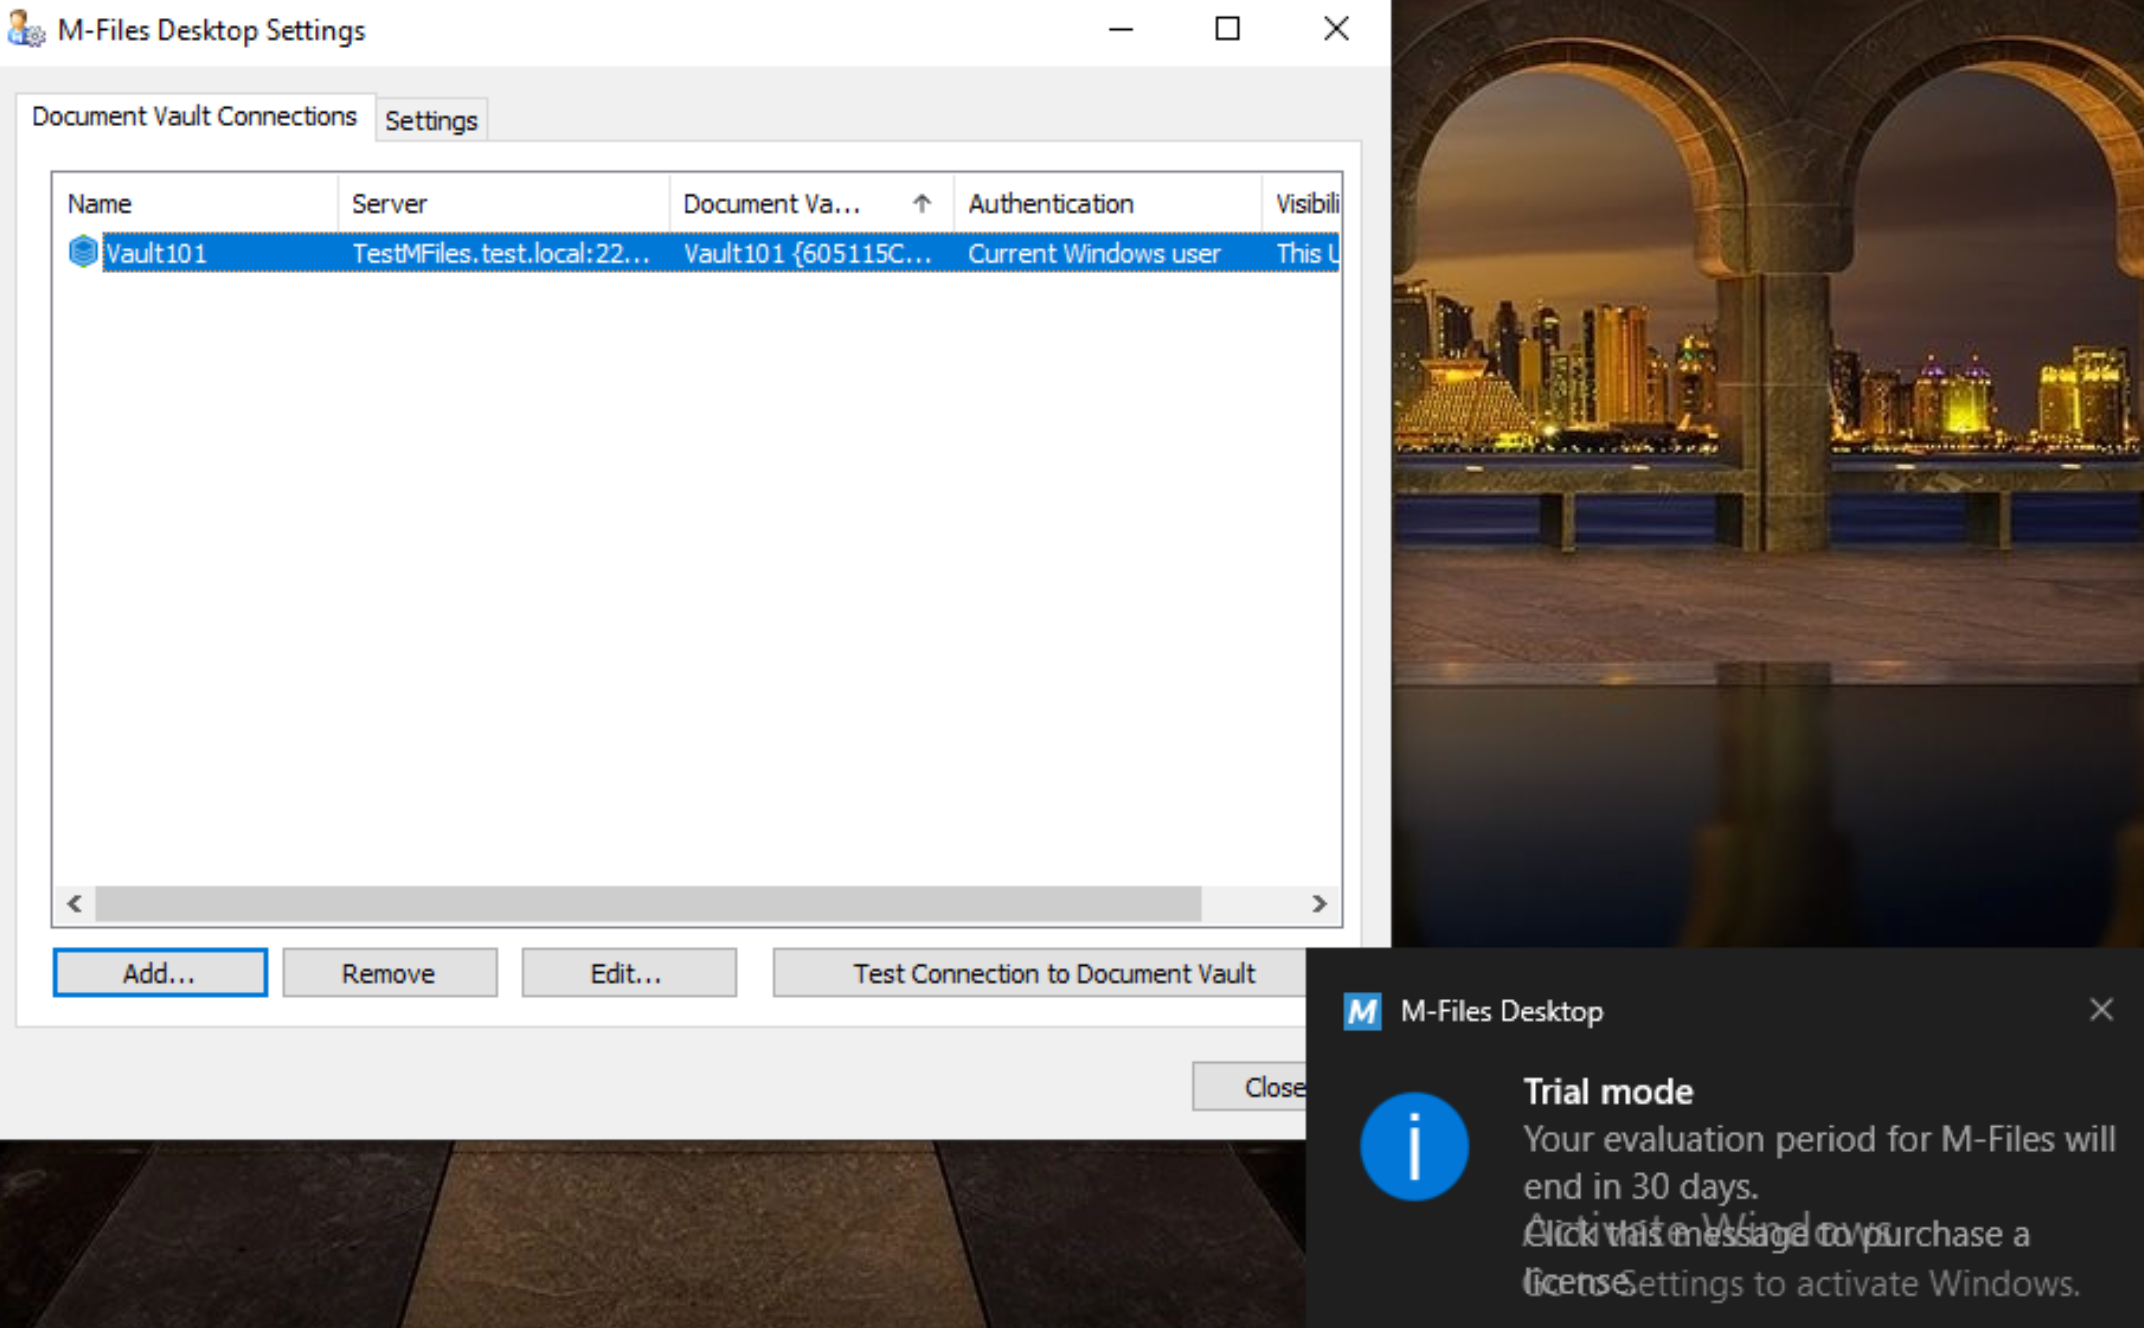
On Document Vault Connections select Add…
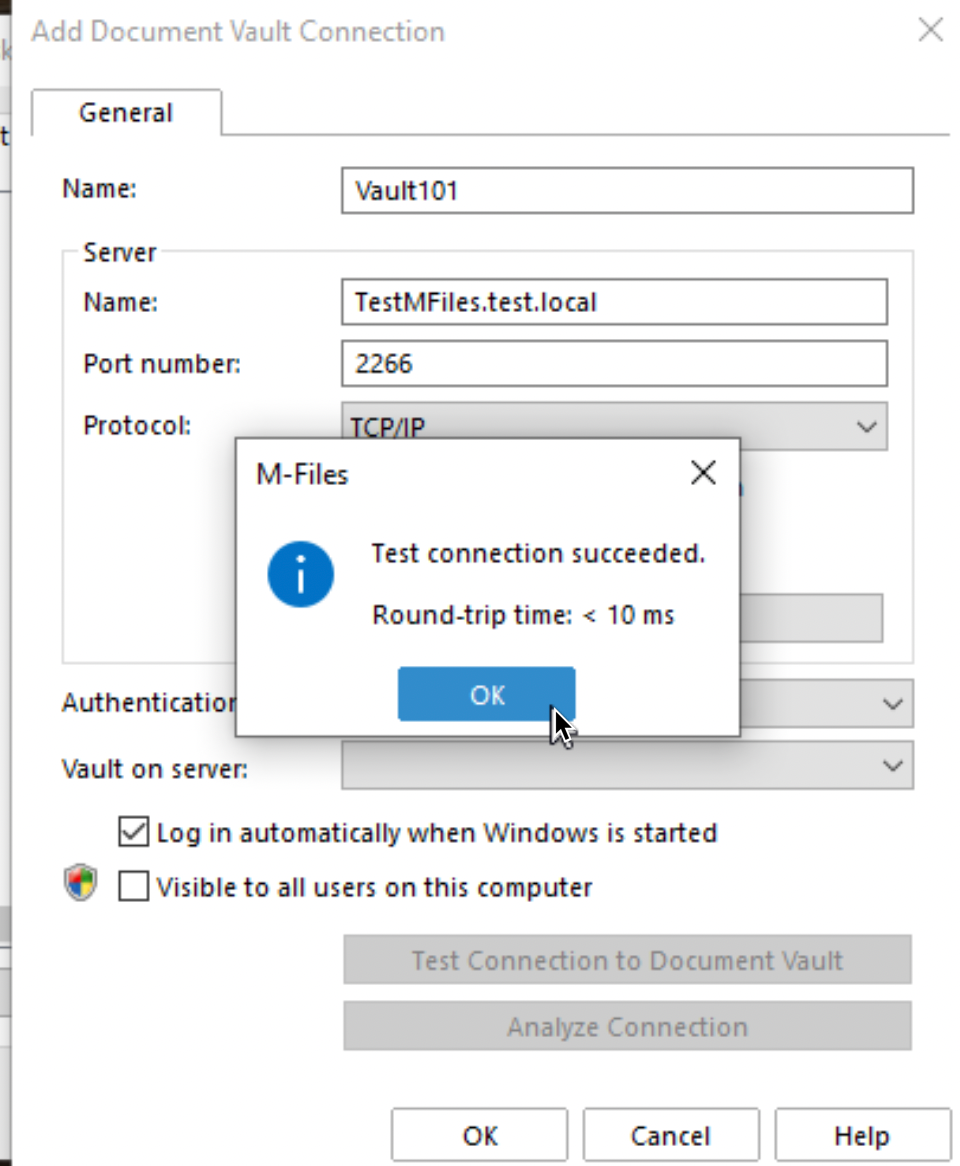
We will use settings from the server connection properties (configured at the beginning). Your server should have port 2266 opened (You were asked to open it in installation part). Your DNS should also work properly so you are able to resolve server name by – name. I entered my Vault settings as depicted below. I will now test connection
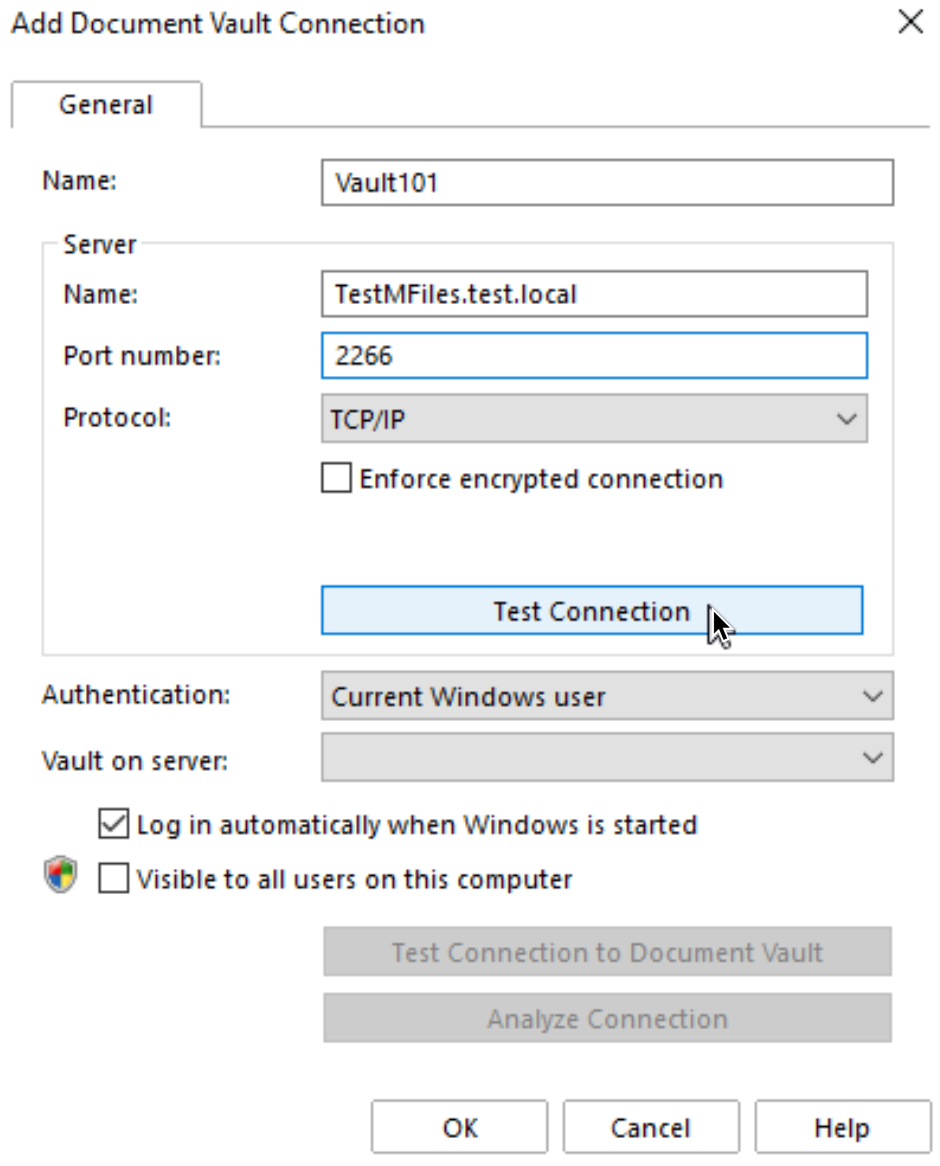
Works good
Before we wrap up, we need to select Vault
I will select only one vault I have created so far – Vault101. Confirm everything with OK.
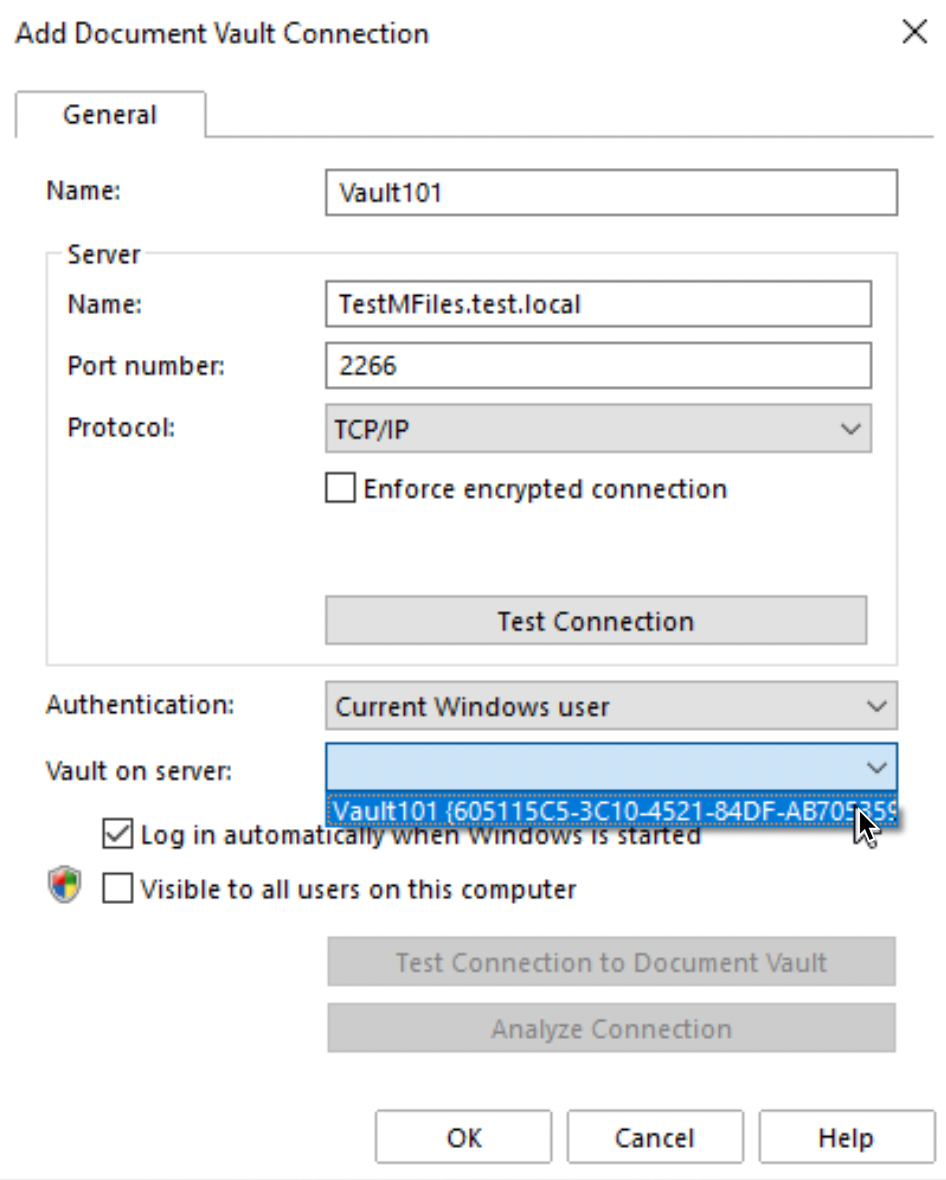
Success, we attached our client to the server
If we now click on M-Files icon on desktop, we will be greeted with main screen of M-Files app.
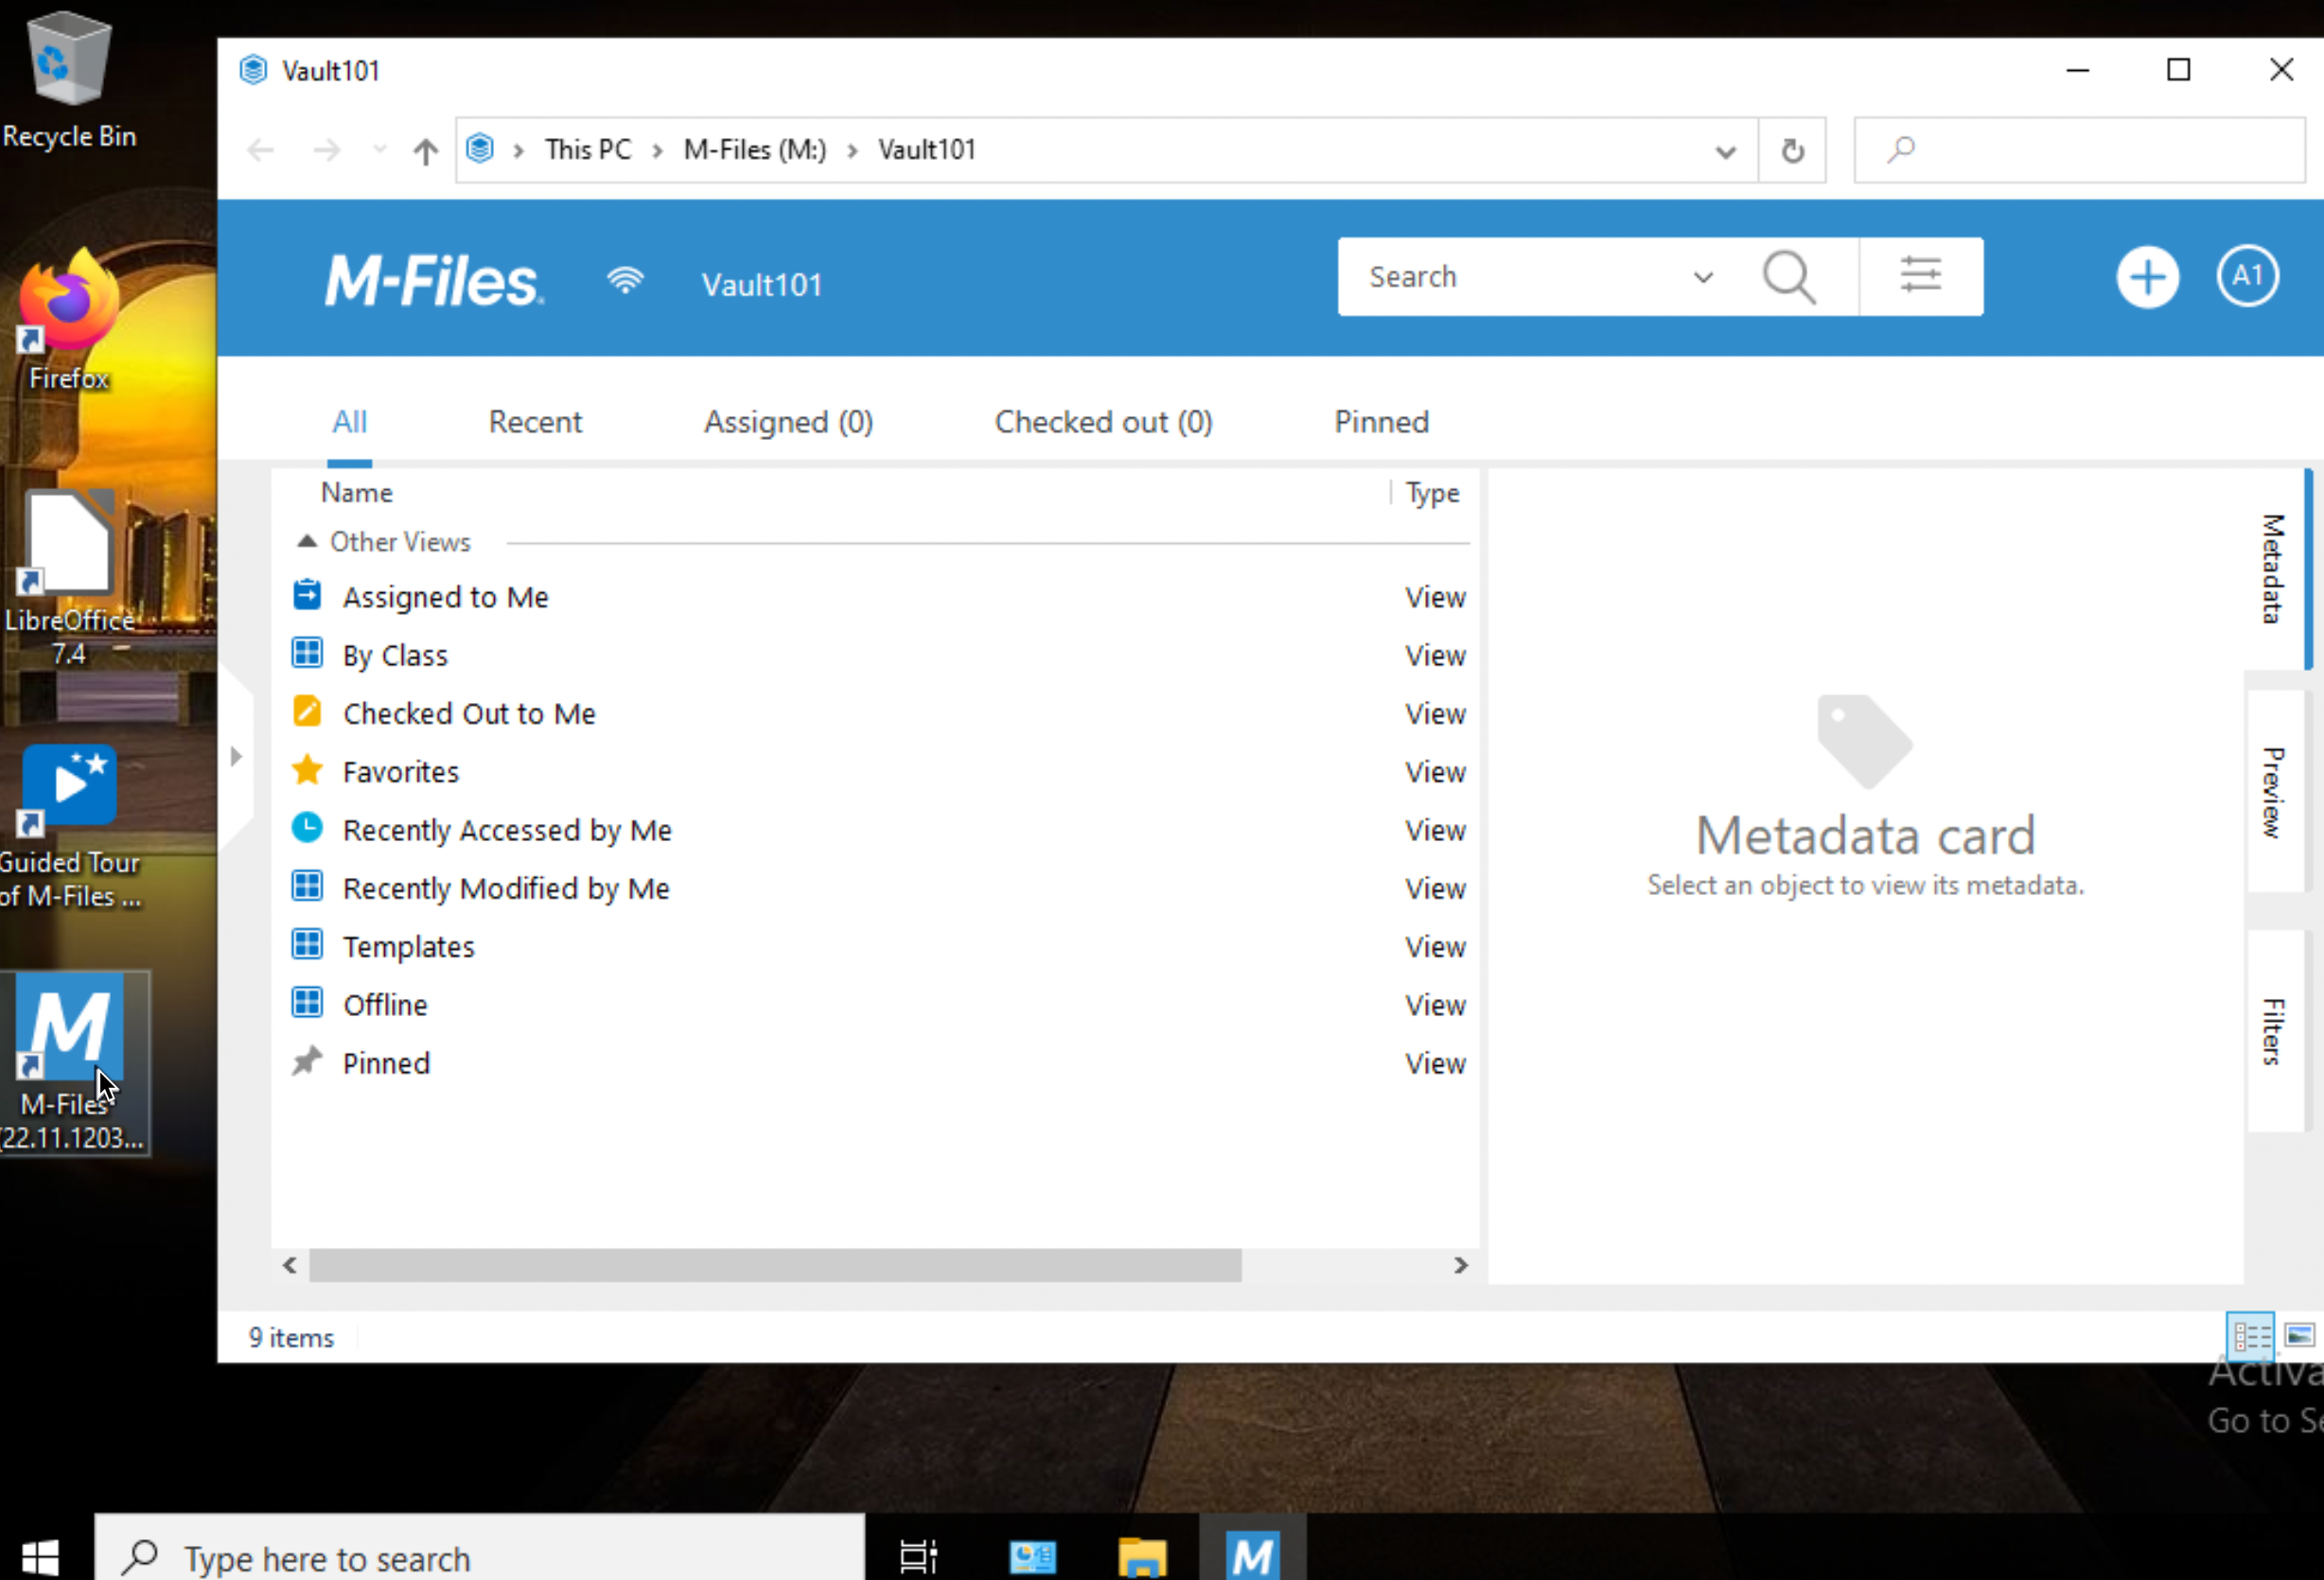
This step wraps up basic M-Files setup. We done basic server and client setup, and we can now start to mess with metadata and workflows.
My series of articles about M-Files
Server
M-Files how to configure Metadata
M-Files – users and user groups
M-Files – Create and manage simple workflow
M-Files – Create Workflow with assignments
M-Files – Create Workflow with Approvals
M-Files – Manage permissions for Workflows
M-Files – how to create and use document templates
How to backup and restore M-Files Vault
M-Files – How to enable access to M-Files through website
M-Files how to secure connection between server and clients (HTTPS)
M-Files Migrate from Firebird DB to Microsoft SQL DB
Desktop
Understanding M-Files logic + Overview of M-Files desktop
M-Files Creating Views for M-Files Desktop
M-Files how to save or modify documents?
M-Files How to share documents? How to save eMails to M-Files?