We done a lot with M-Files, and concluded it may be a valuable tool in our company. That brings another problem – if we use M-Files with valuable info, all the measures we take to protect our data won’t make sense if documentation travels unencrypted through the network. Let’t take a look at our options and how to configure them.
There are two ways we can make our M-Files secure, one is through RPC and other one with HTTPS.
Here are resources you may want to look at
Enabling RPC over HTTPS Connections to M-Files Server
Protecting Data in Transit with Encryption in M-Files
RPC
RPC over TCP/IP is easier to configure, but applies only to communication between M-Files Server and M-Files Desktop solution. It is not applicable for Web or Mobile solution.
So, use this solution if you only plan to use M-Files Desktop.
configuration is simple.
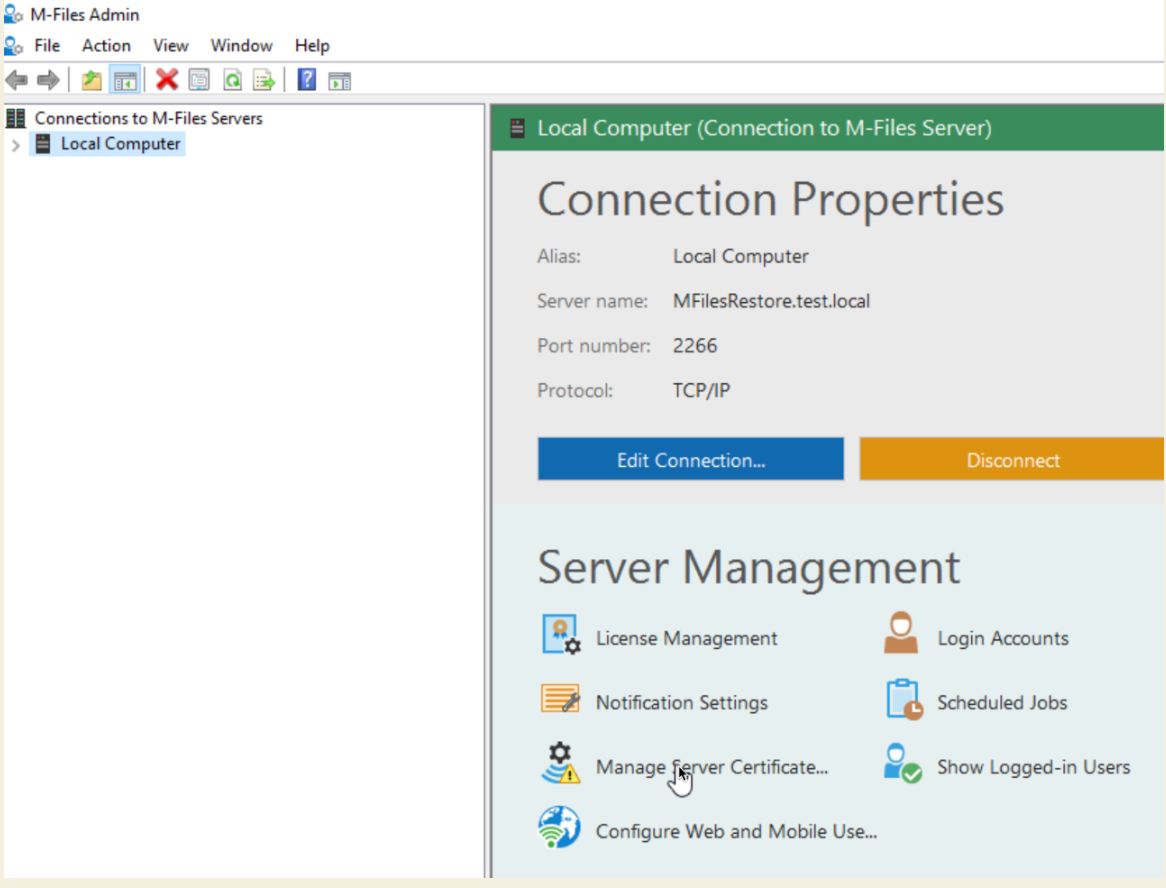
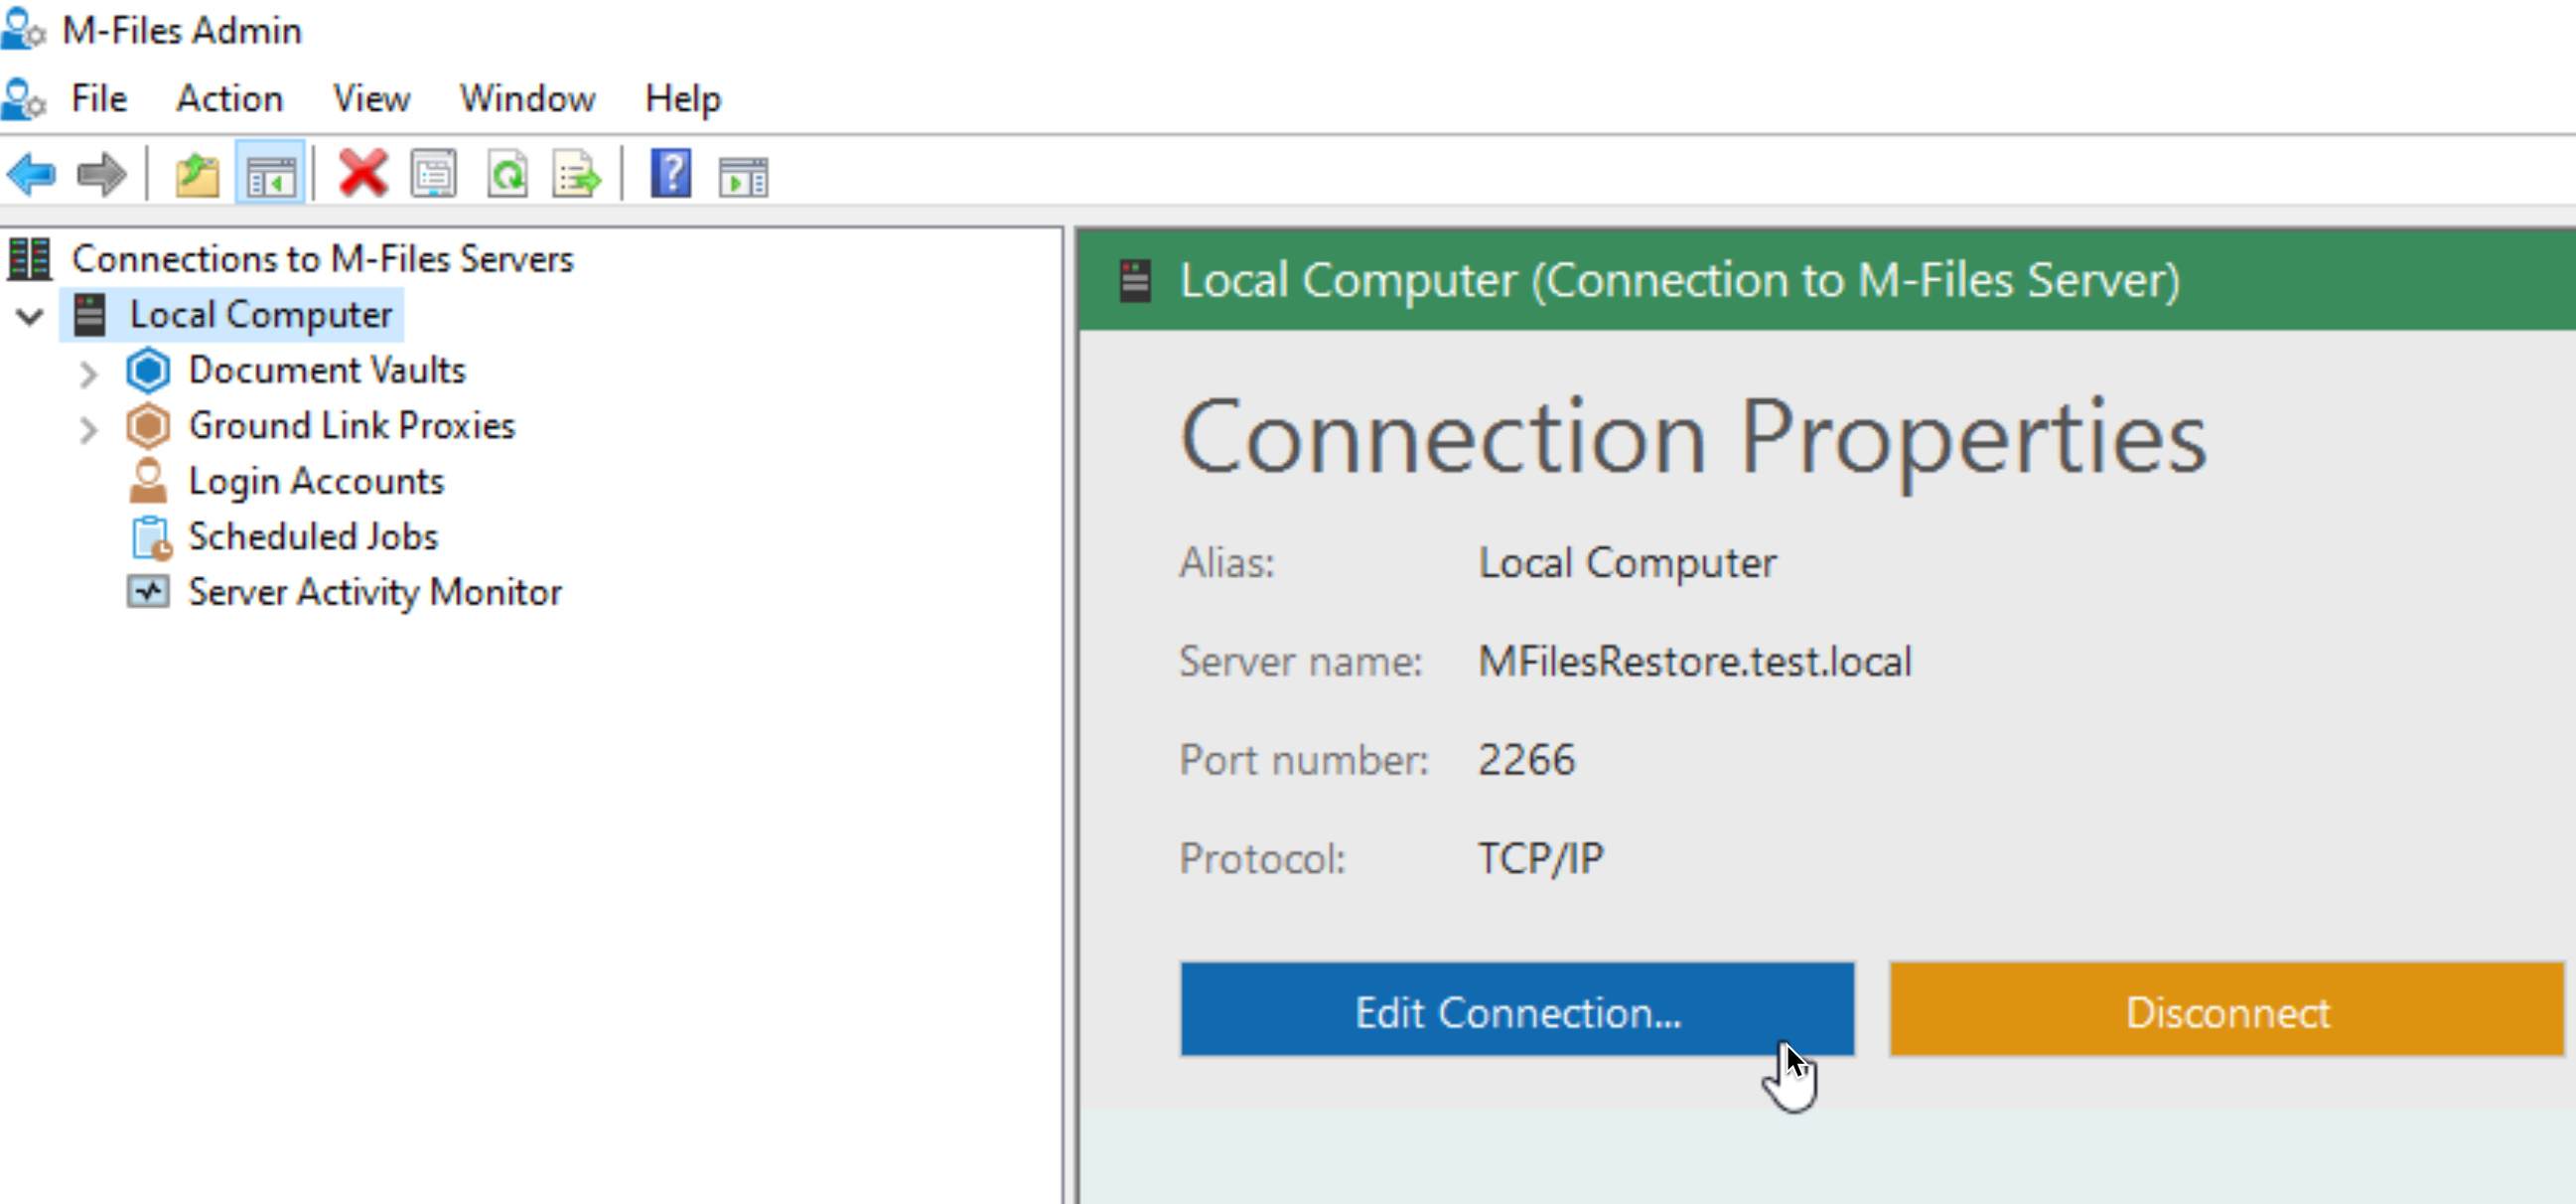
On your server – open M-Files Admin – select your server – and in right part of screen under Connection Properties select – Edit Connection
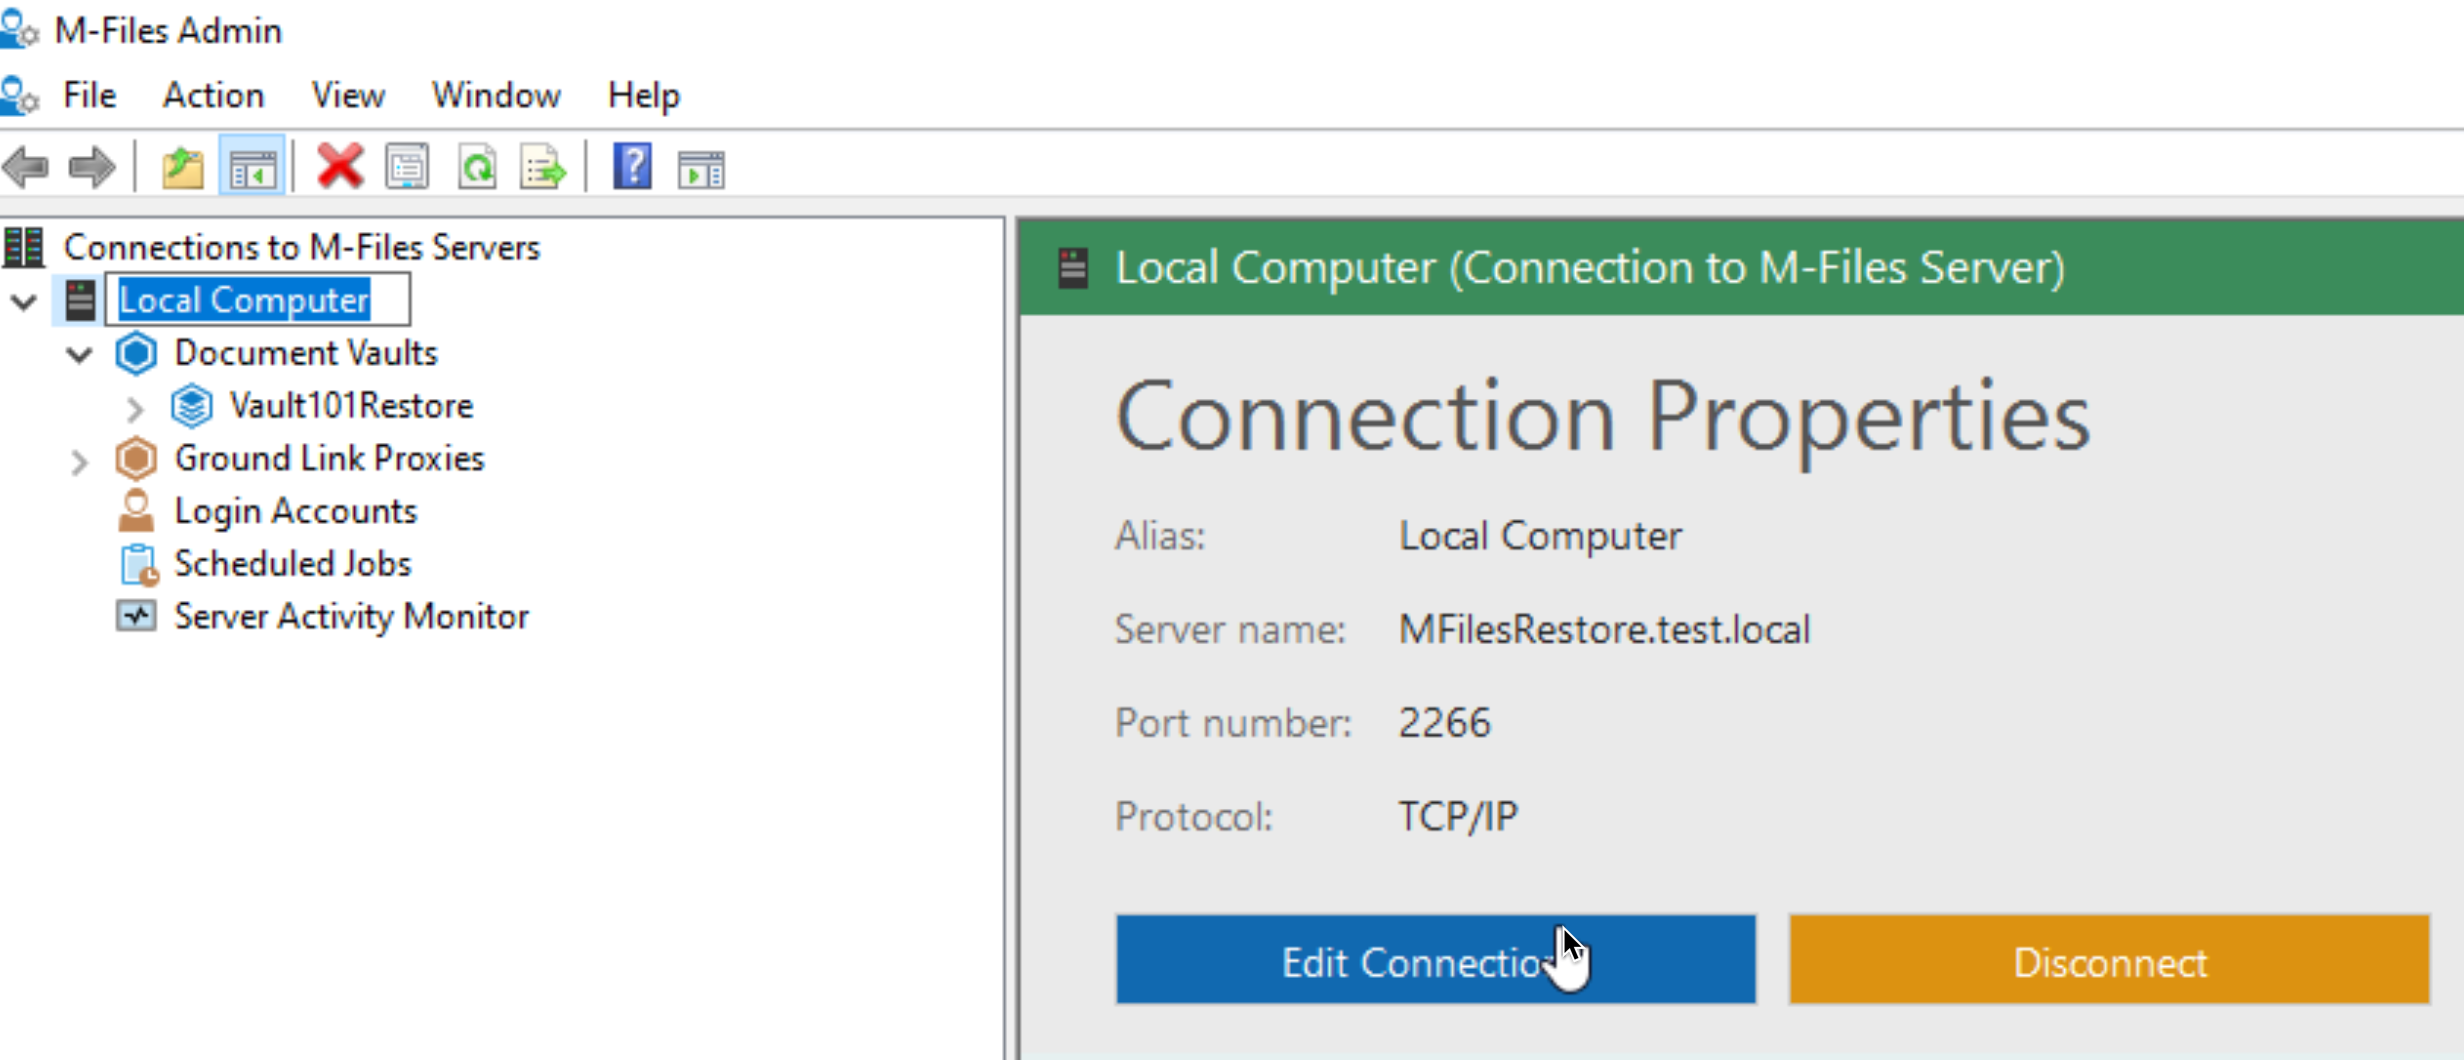
Enforce encrypted connection should be marked.
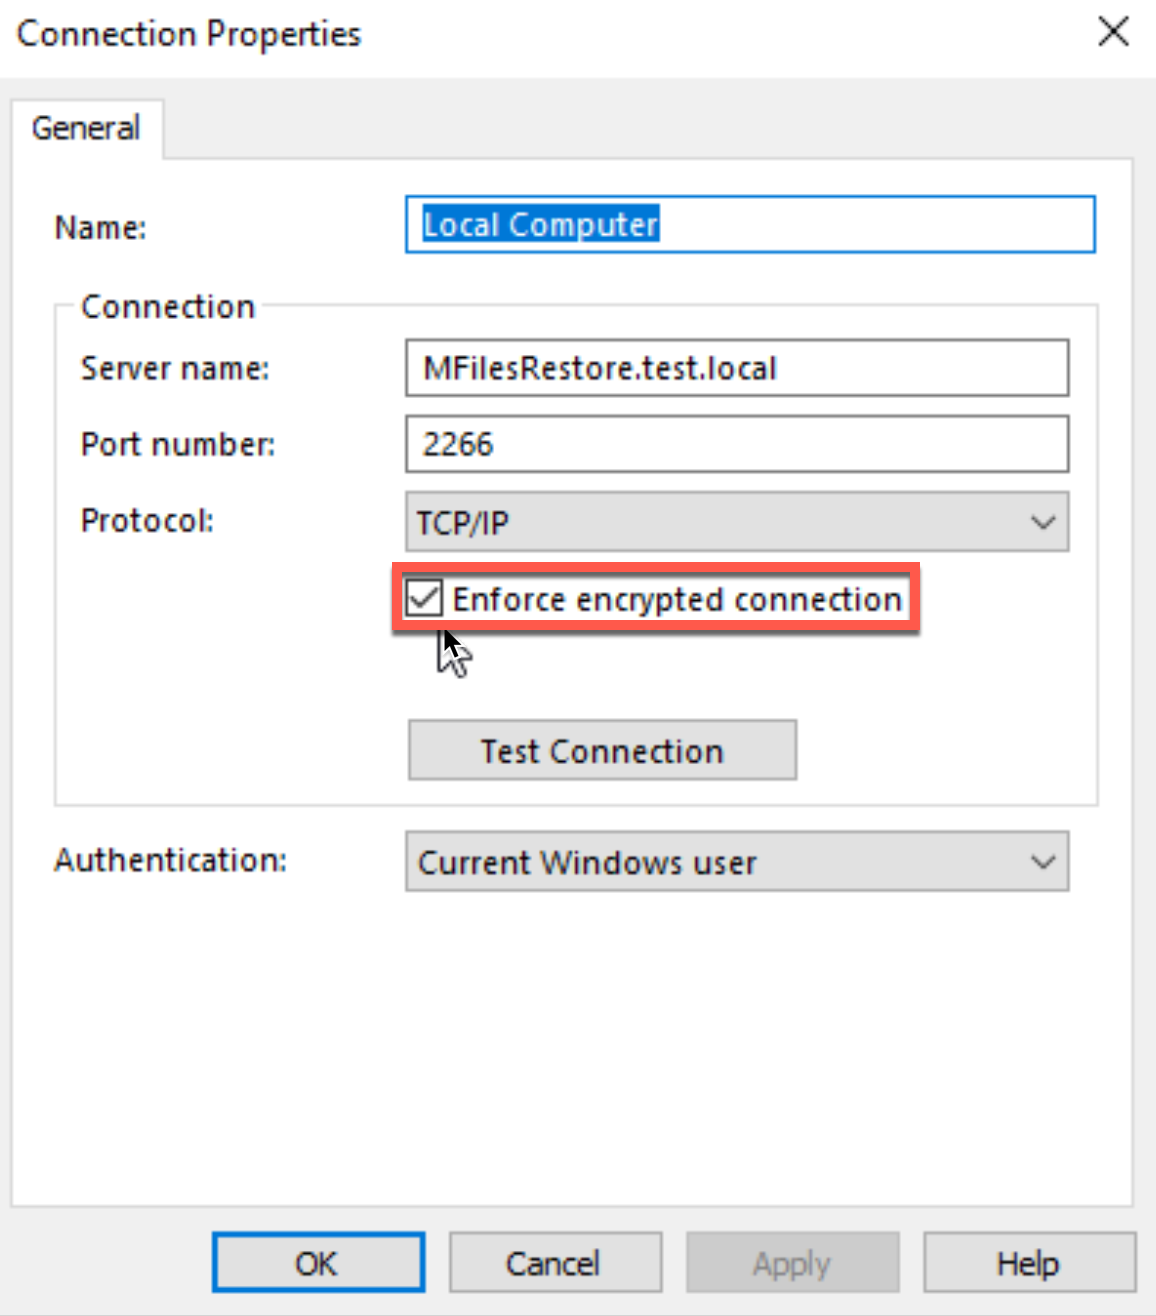
That is it for Server part.
On client open M-Files Desktop Settings. If you have existing Vault like I have, you will select it and click Edit. If it is new one, you will add it, we will end up on same screen.
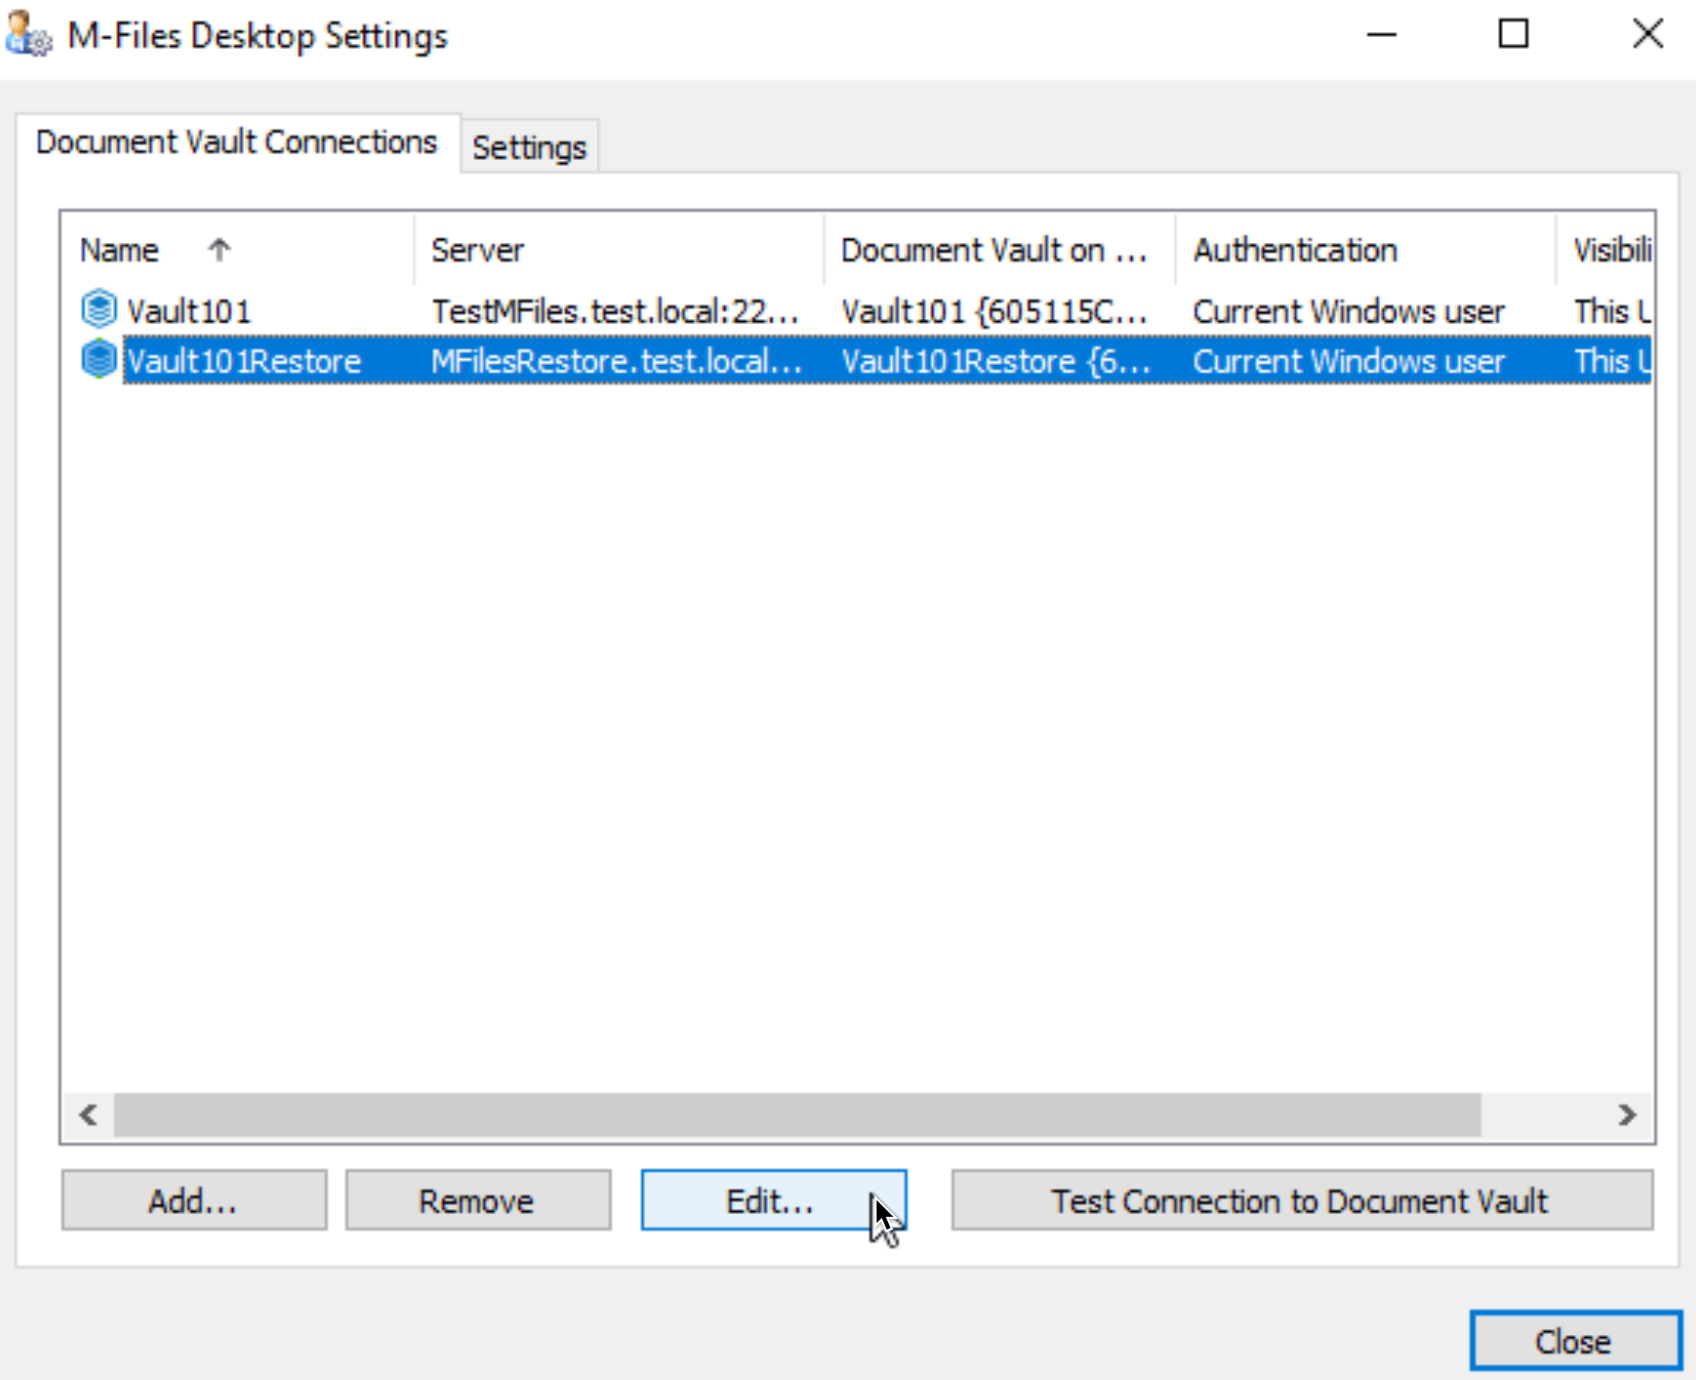
again, mark Enforce encrypted connection.
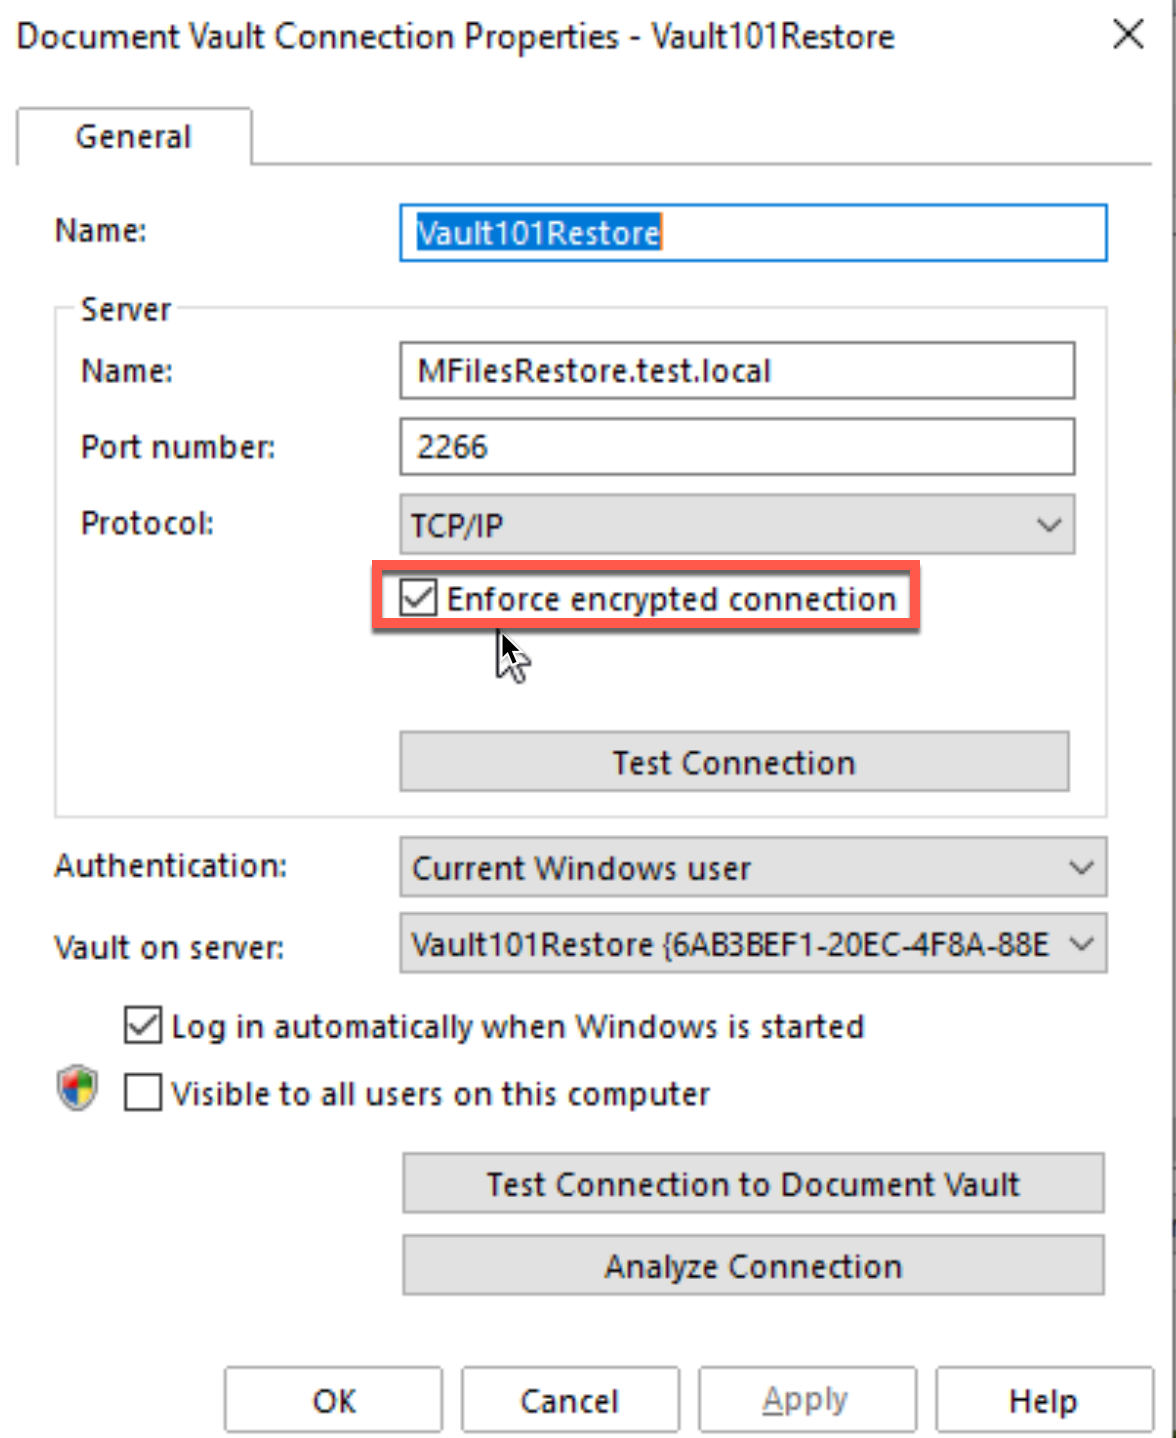
Test connection after you select the option.
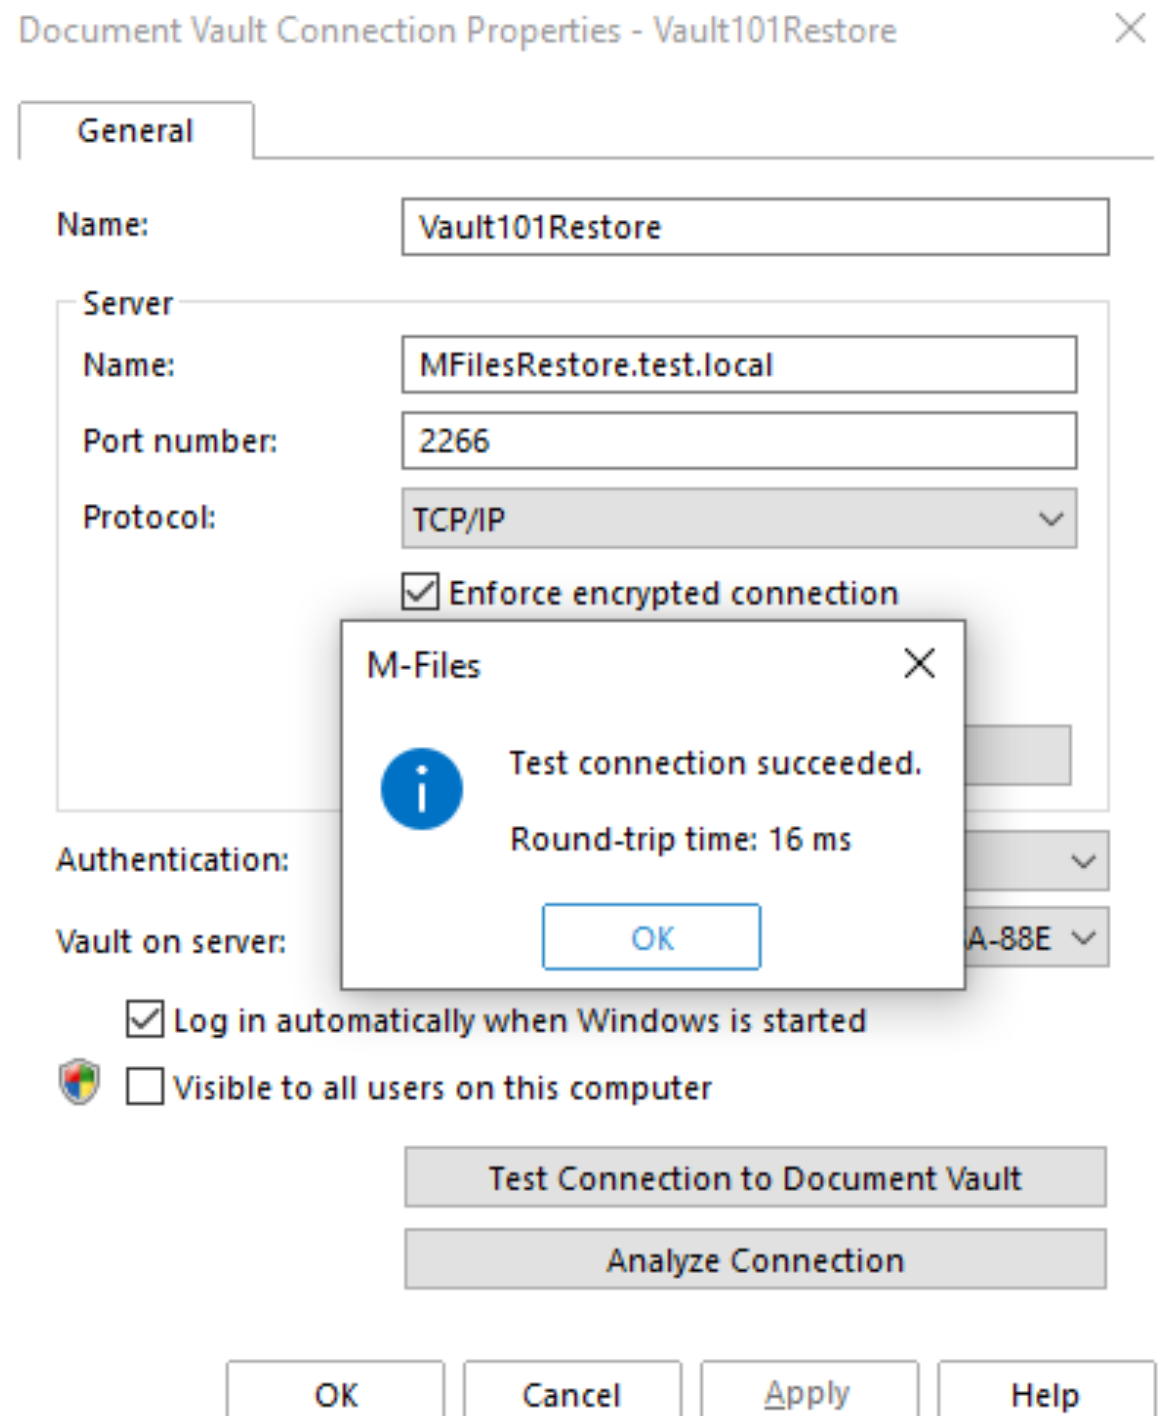
That is it for RPC option.
HTTPS
RPC scenario was easy to implement, but HTTPS is a bit more complicated – at the beginning – document at the top is your source of information.
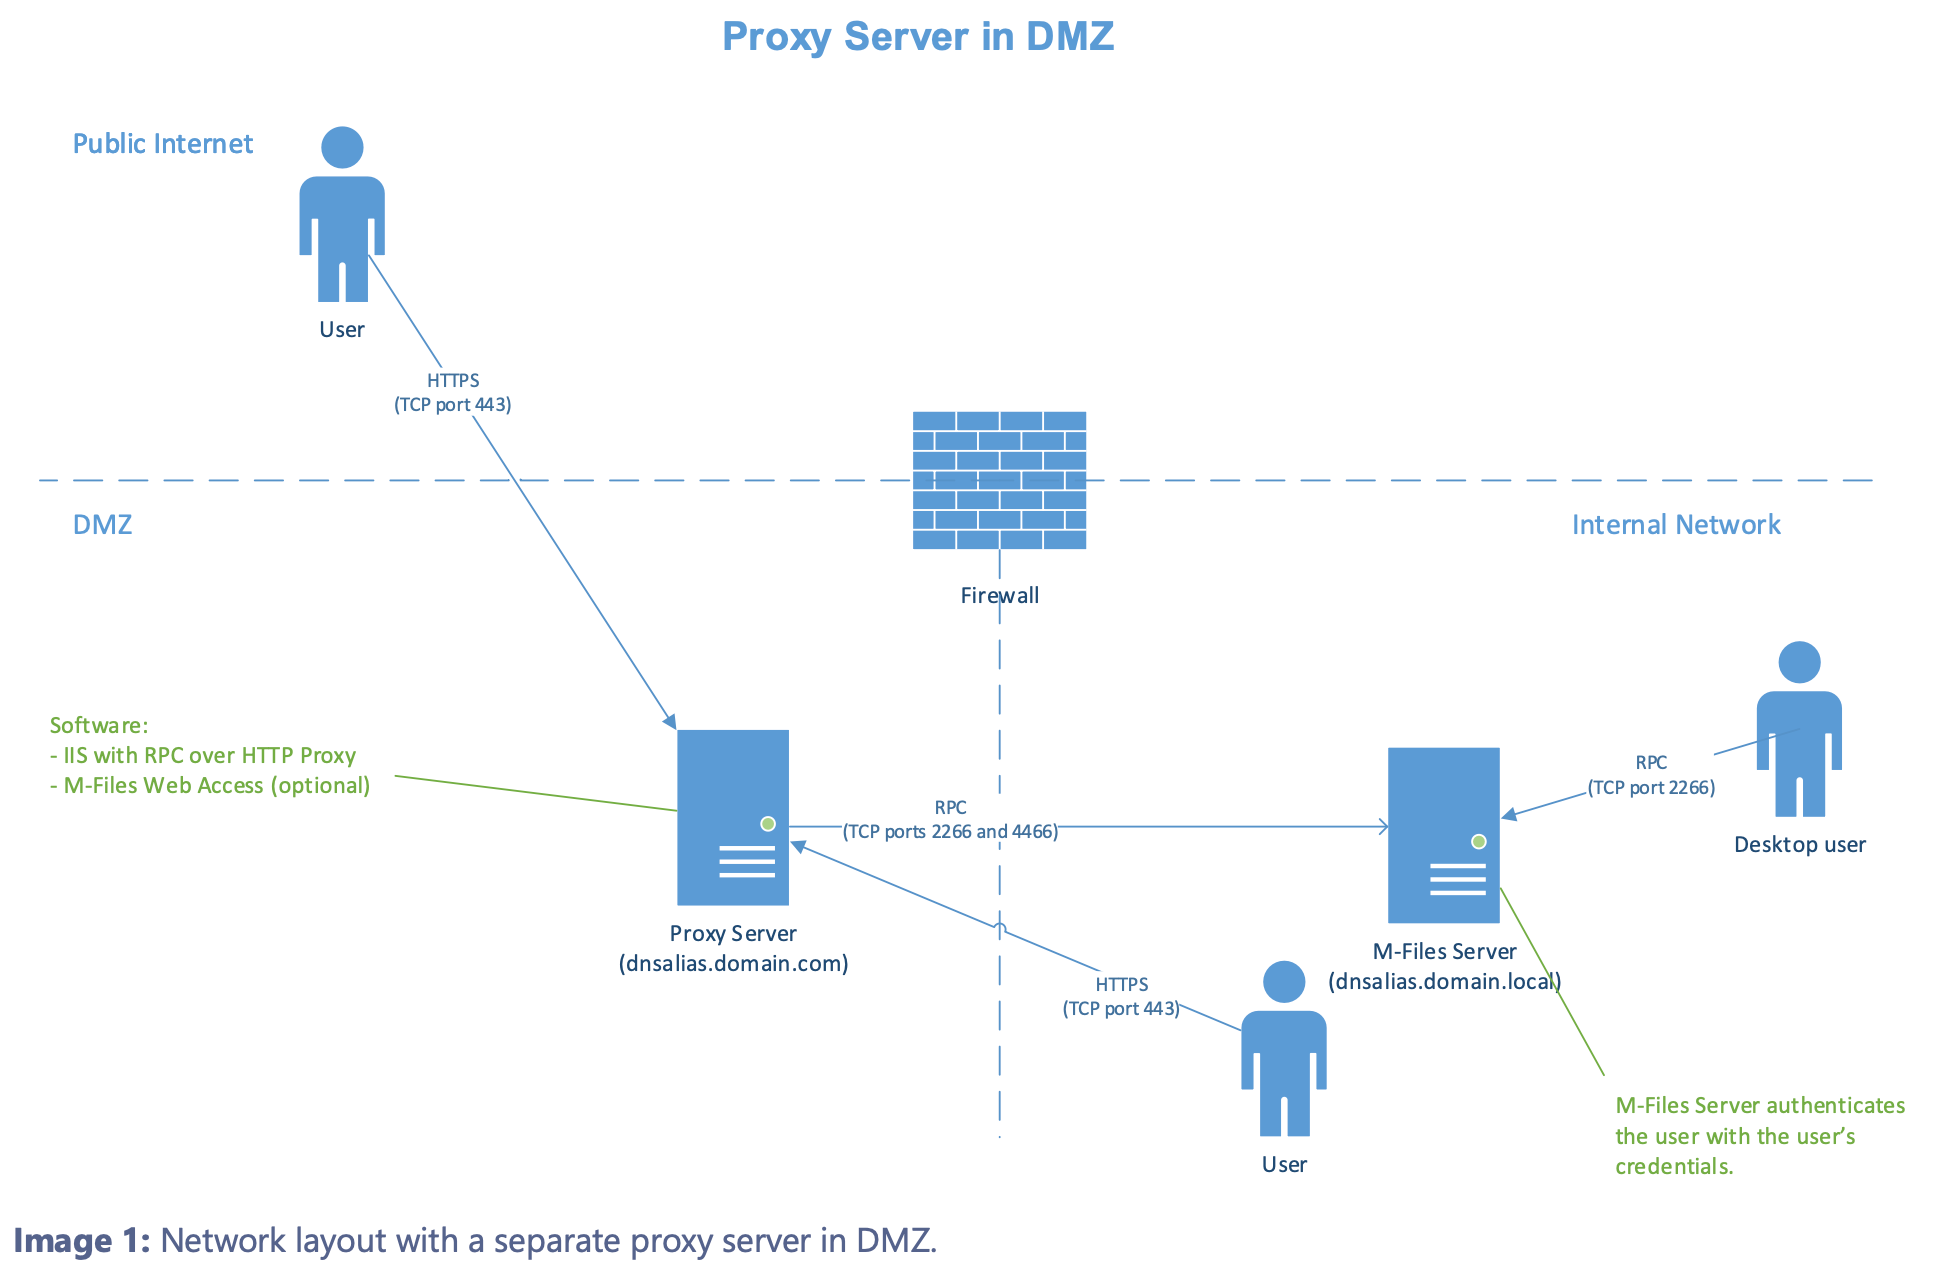
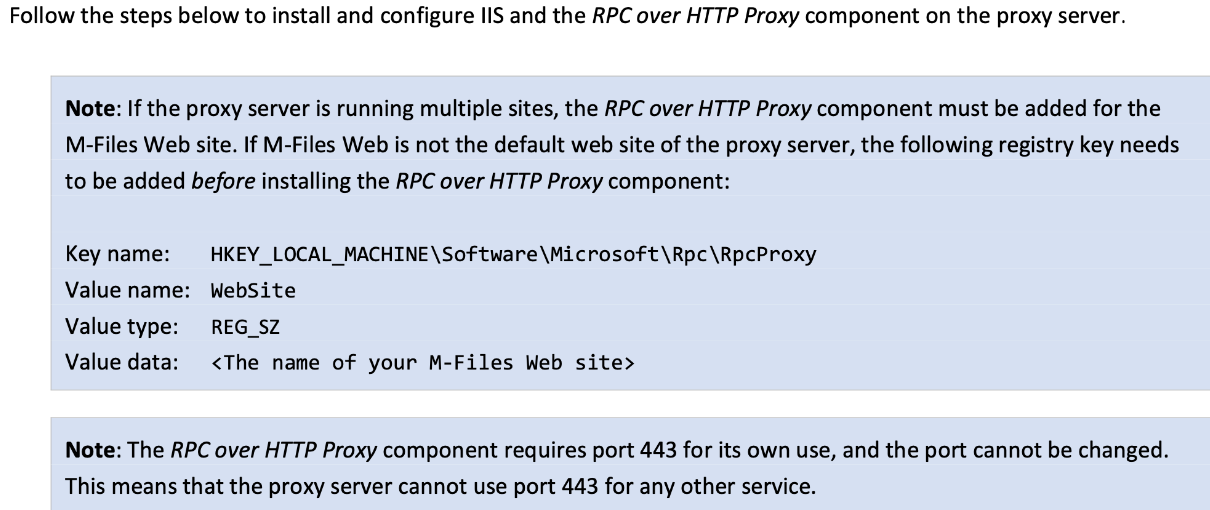
For HTTPS scenario we will need proxy server with HTTPS. We need SSL certificate, IIS server, and RPC over HTTP proxy component for IIS.
This scenario can be done in two ways, first way (and the best way) if you are going to expose M-Files towards public internet is to bring up second server and publish HTTPS on that server. That server would ideally be in DMZ
Pictures are taken from M-Files documentation I listed above.
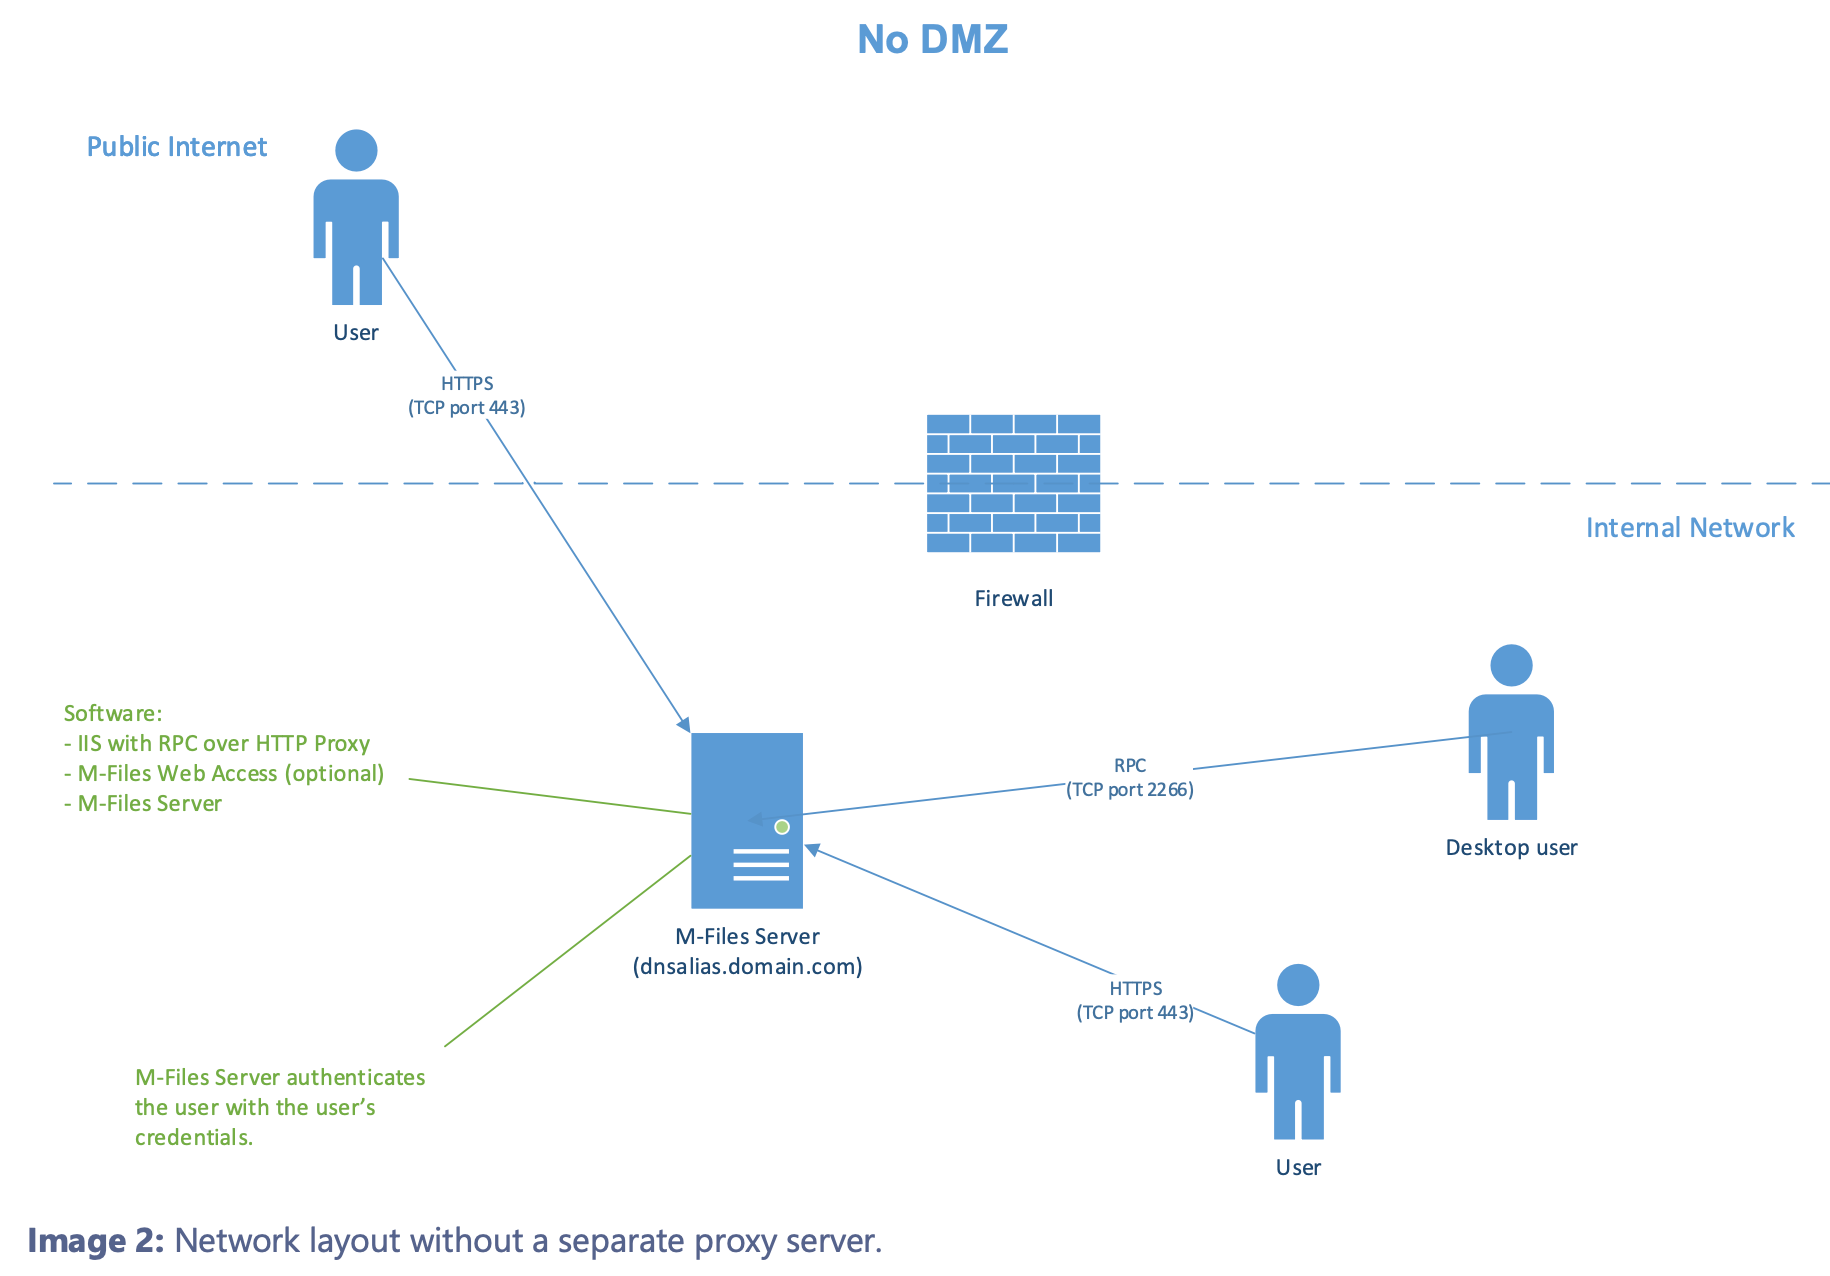
In my case, I won’t expose my M-Files towards internet. I just want to have more secure inner environment with Web browser and Web app enabled. So, I’m going to use single server scenario, which is also supported in M-Files documentation.
Let’s get to work.
Installing prerequisites/setup
As I mentioned, I’m going to deploy single server scenario, since my M-Files server is not exposed to public.
I’m going to use my environment which you can find in my M-Files DMS – installation article.
Windows domain, with latest (as of 2022) Windows Server 2022 release.
On top of that, we are going to prepare prerequisites stated in the document I linked at the start of this article (Enabling RPC over HTTPS Connections to M-Files Server)
Installing M-Files Web
Since we are using everything on same server – M-Files recommend we first configure M-Files web, so we will do that. This configuration has all the ingredients we need for HTTPS setup.
I already have article on the topic here – M-Files – How to enable access to M-Files through web site
But since is a bit complicated guide, I will also paste everything here, so this is in one place.
Certficate
For HTTPS communication we are going to need certificate – if you are going public with your M-Files – you are going to need certificate from some certificate authority (CA), if you are going to use M-Files exclusively inside your internal domain, then internal certificate authority (domain) would be ideal.
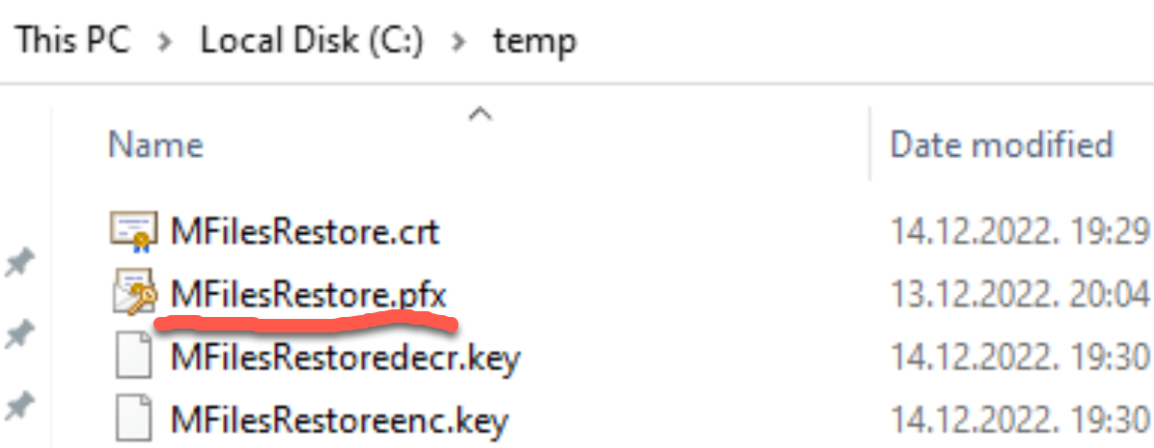
I don’t have any of these in my lab, so I’m going to create self-signed certificate (I described process in M-Files basic configuration article) from my server.
Downside of the self-signed certificate is that nobody will trust it. So, to avoid annoying certificate warnings and errors, you will have to import that certificate on every client that you use it on.
You will need .pfx for IIS and .key as private part of certificate for M-Files Admin, and .crt as public part of the certificate for M-Files Admin.
IIS instalation
Before we enable web on the M-Files, we will need to install IIS and few other details for it.
If you just install IIS and start process of enabling Web on M-Files, you will be greeted with following messages:
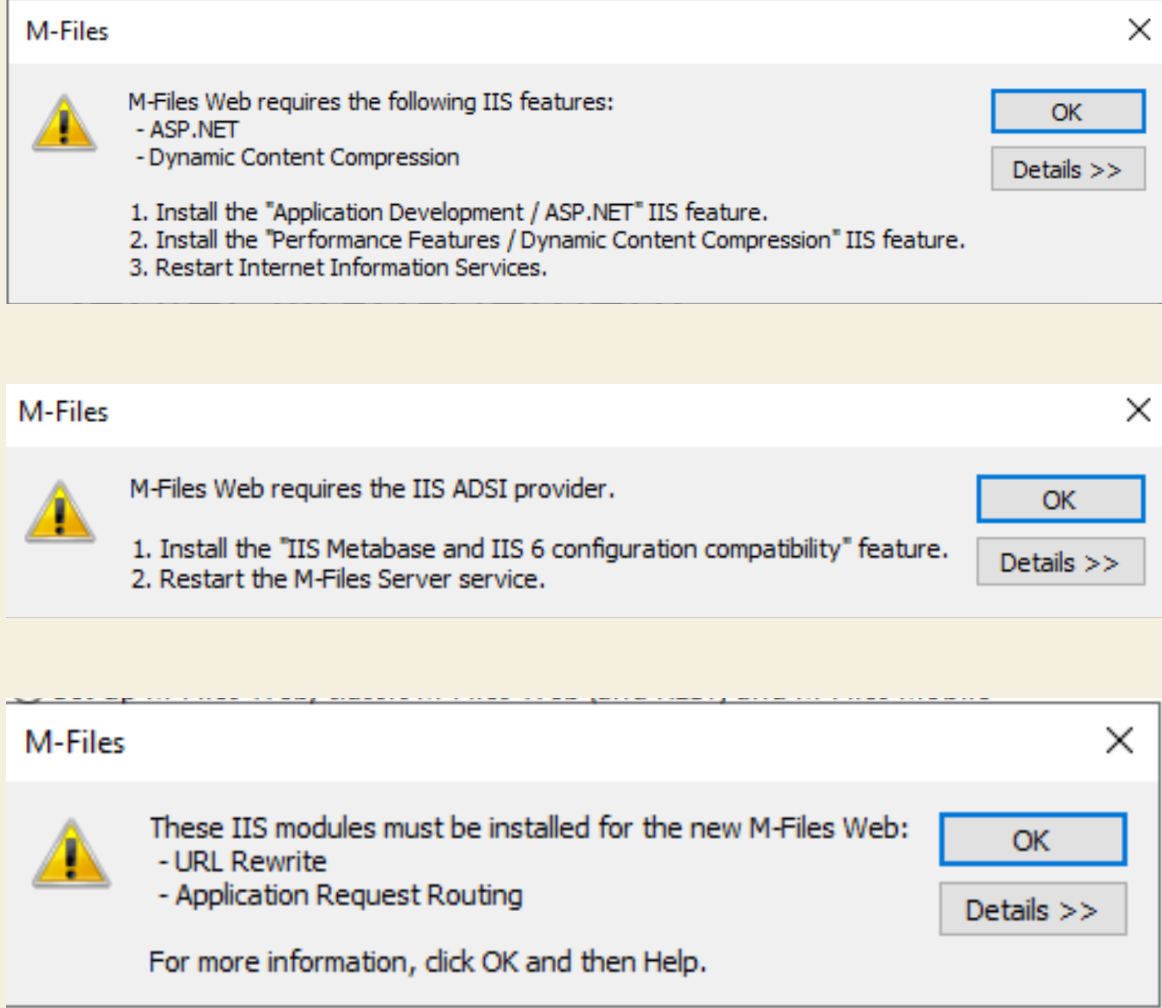
So, couple of things need to be enabled when you start IIS deployment.
I will not go through whole IIS installation process, only important parts (I assume you know your way around Windows Server)
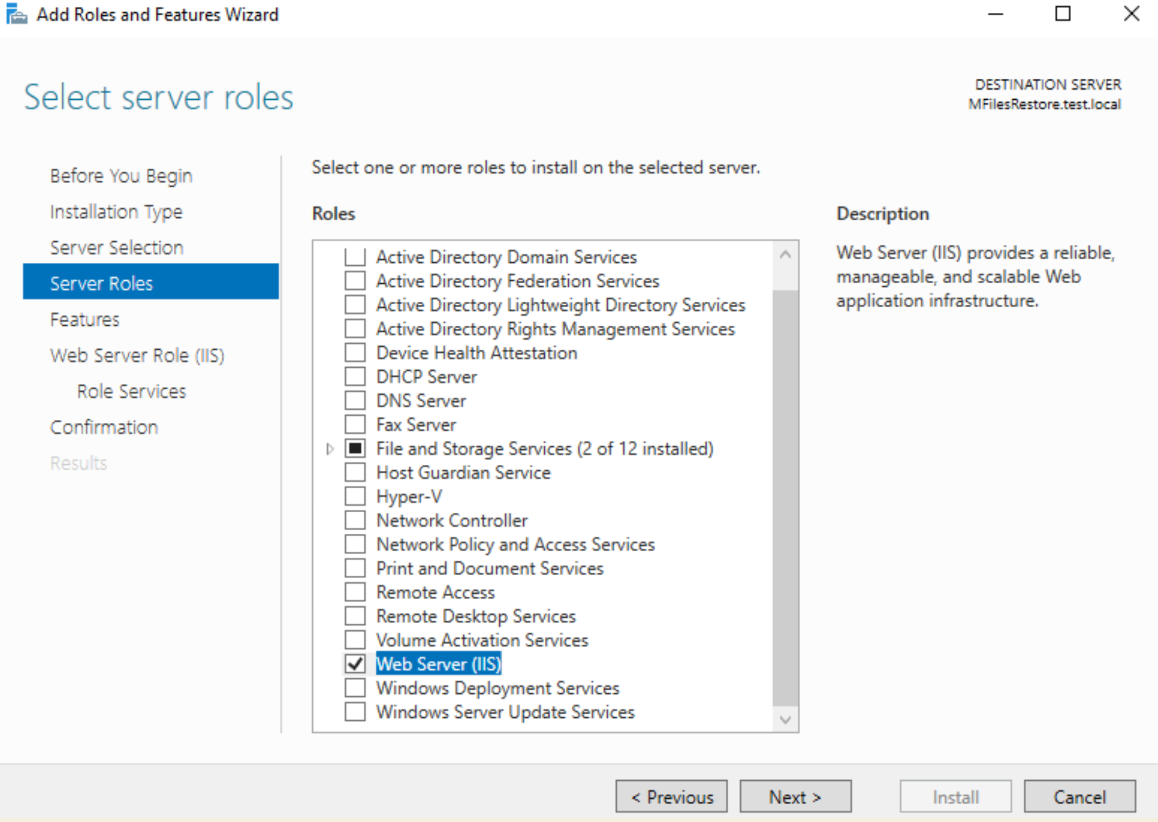
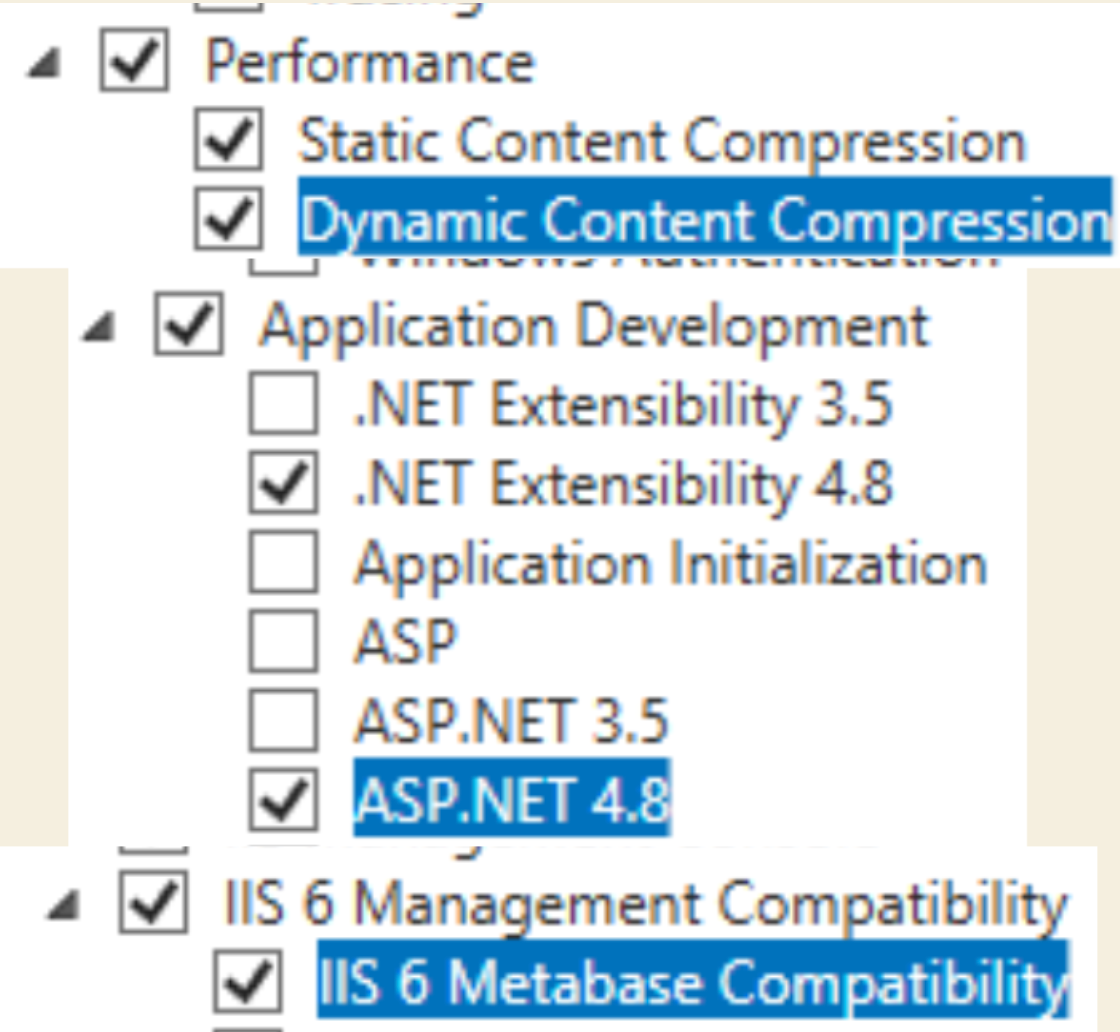
We will be doing standard IIS installation with few additions from screenshots above
Performance – Dynamic Content Compression
Application Development – ASP.NET 4.8
IIS 6 Management Compatibility – IIS 6 Metabase Compatibility
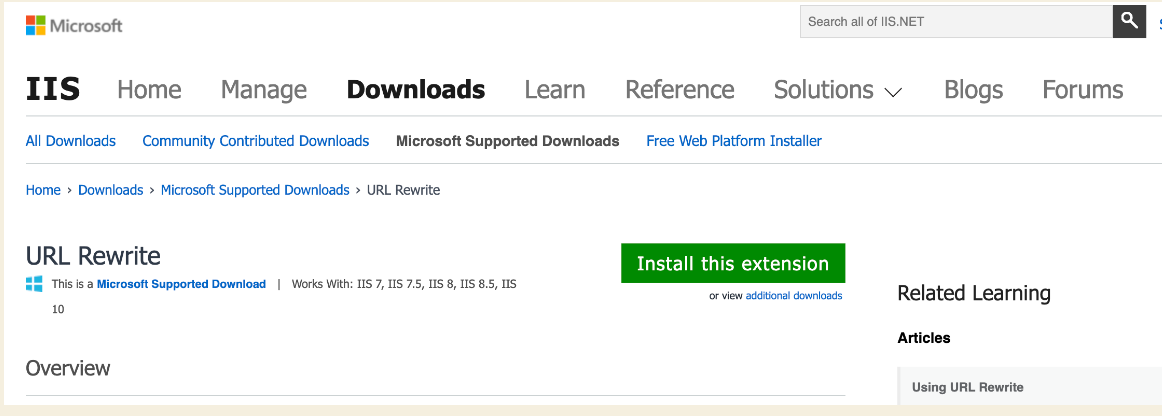
After you are done with IIS installation, we will need to install two more things for IIS
IIS Addons
I won’t either be going through installation of this, it is just simple Next-Next without any configuration needed.
URL Rewrite – https://www.iis.net/downloads/microsoft/url-rewrite
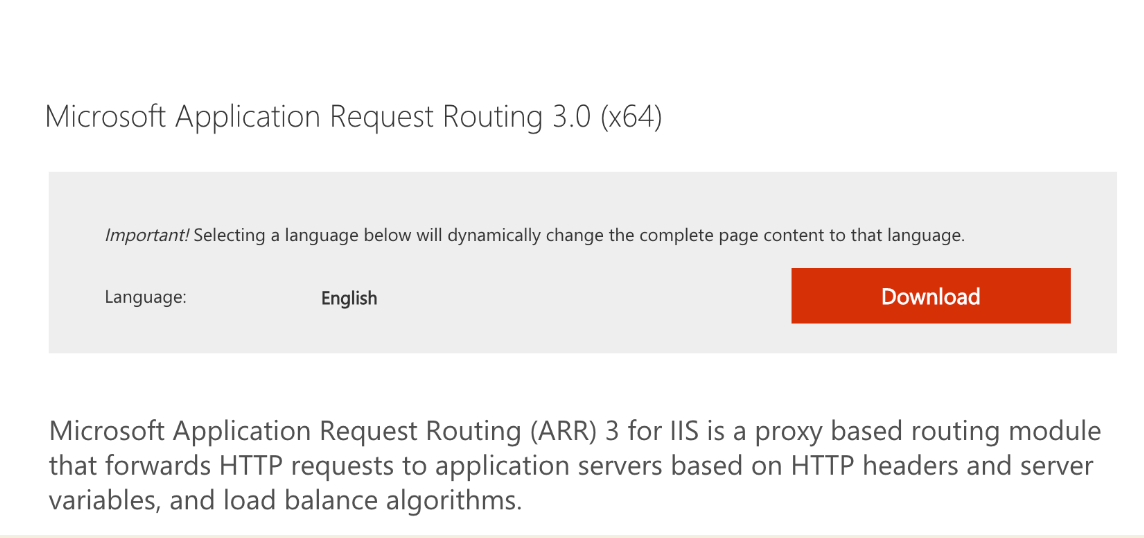
Microsoft ARR – https://www.microsoft.com/en-us/download/details.aspx?id=47333
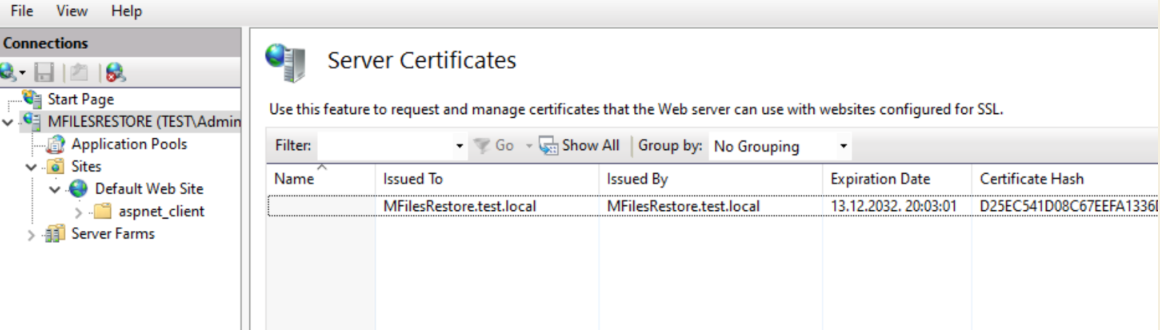
After all these are installed – go to IIS Manager – click on your IIS server and select Certificates. Import .pfx you generated to that IIS.
Next step…
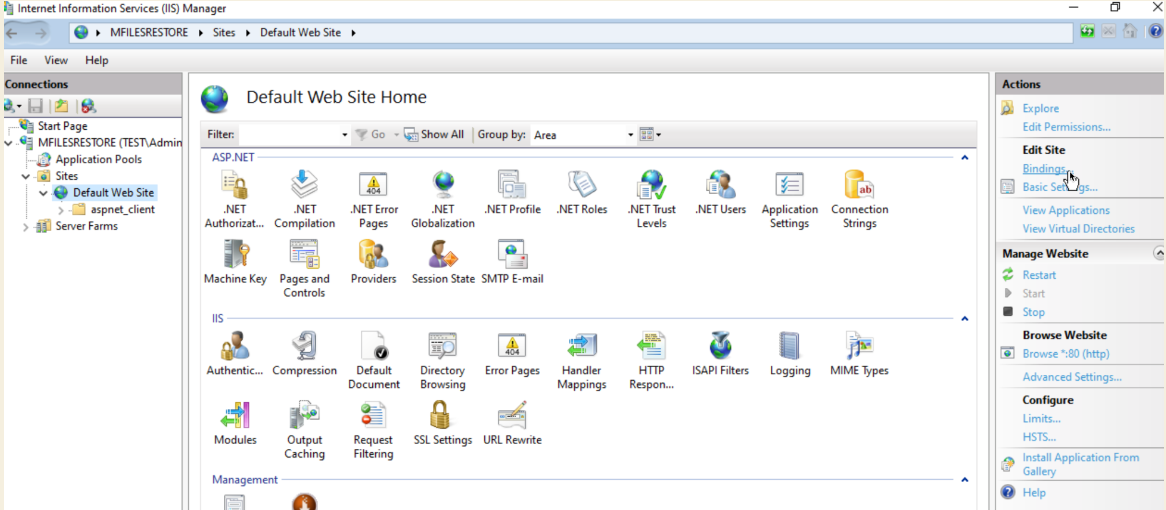
IIS Manager – expand Default Web Site – select Bindings
Add https, port 443 with certificate you just imported
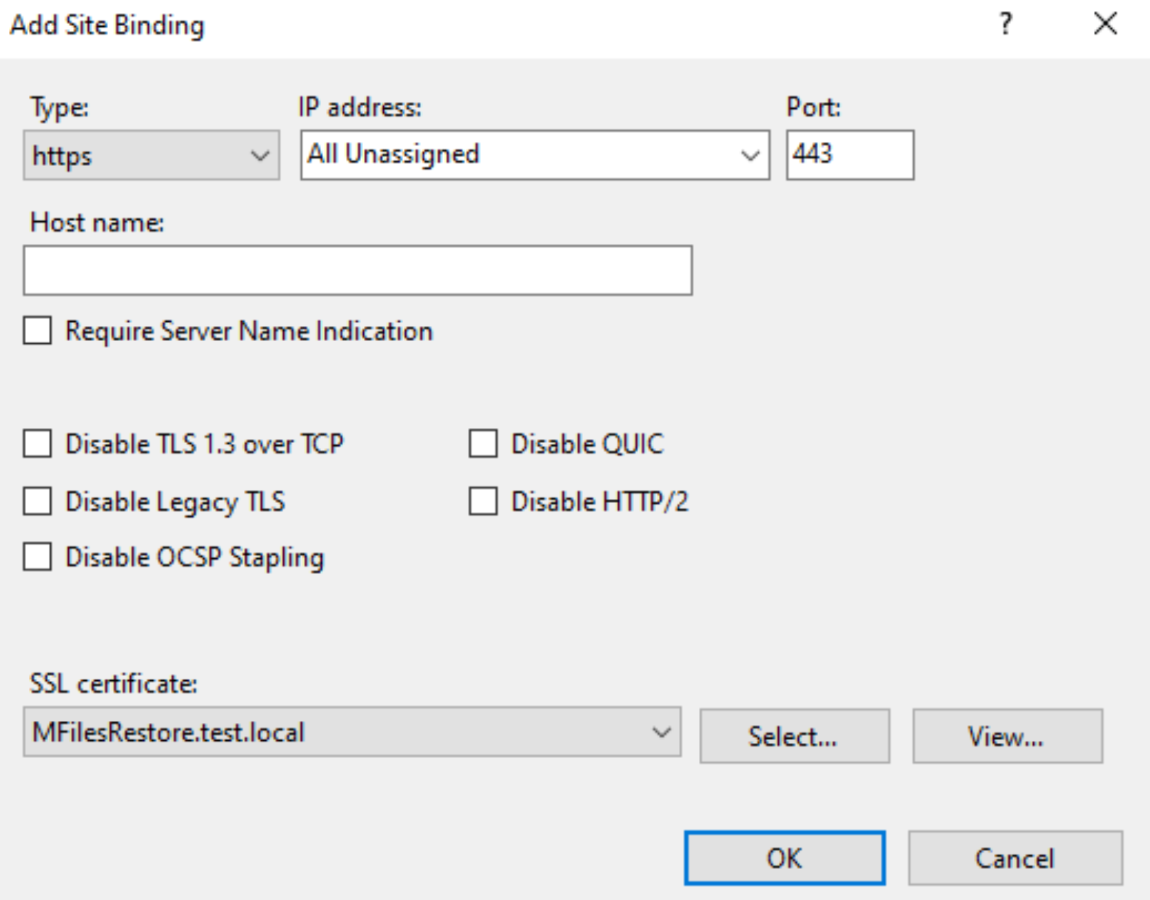
Now, you should have both port 80 and 443 enabled
After all that is done, I will reboot my M-Files server for a good measure.
Enable M-Files Web
After IIS prerequisites are done, we can finally open M-Files admin on the server
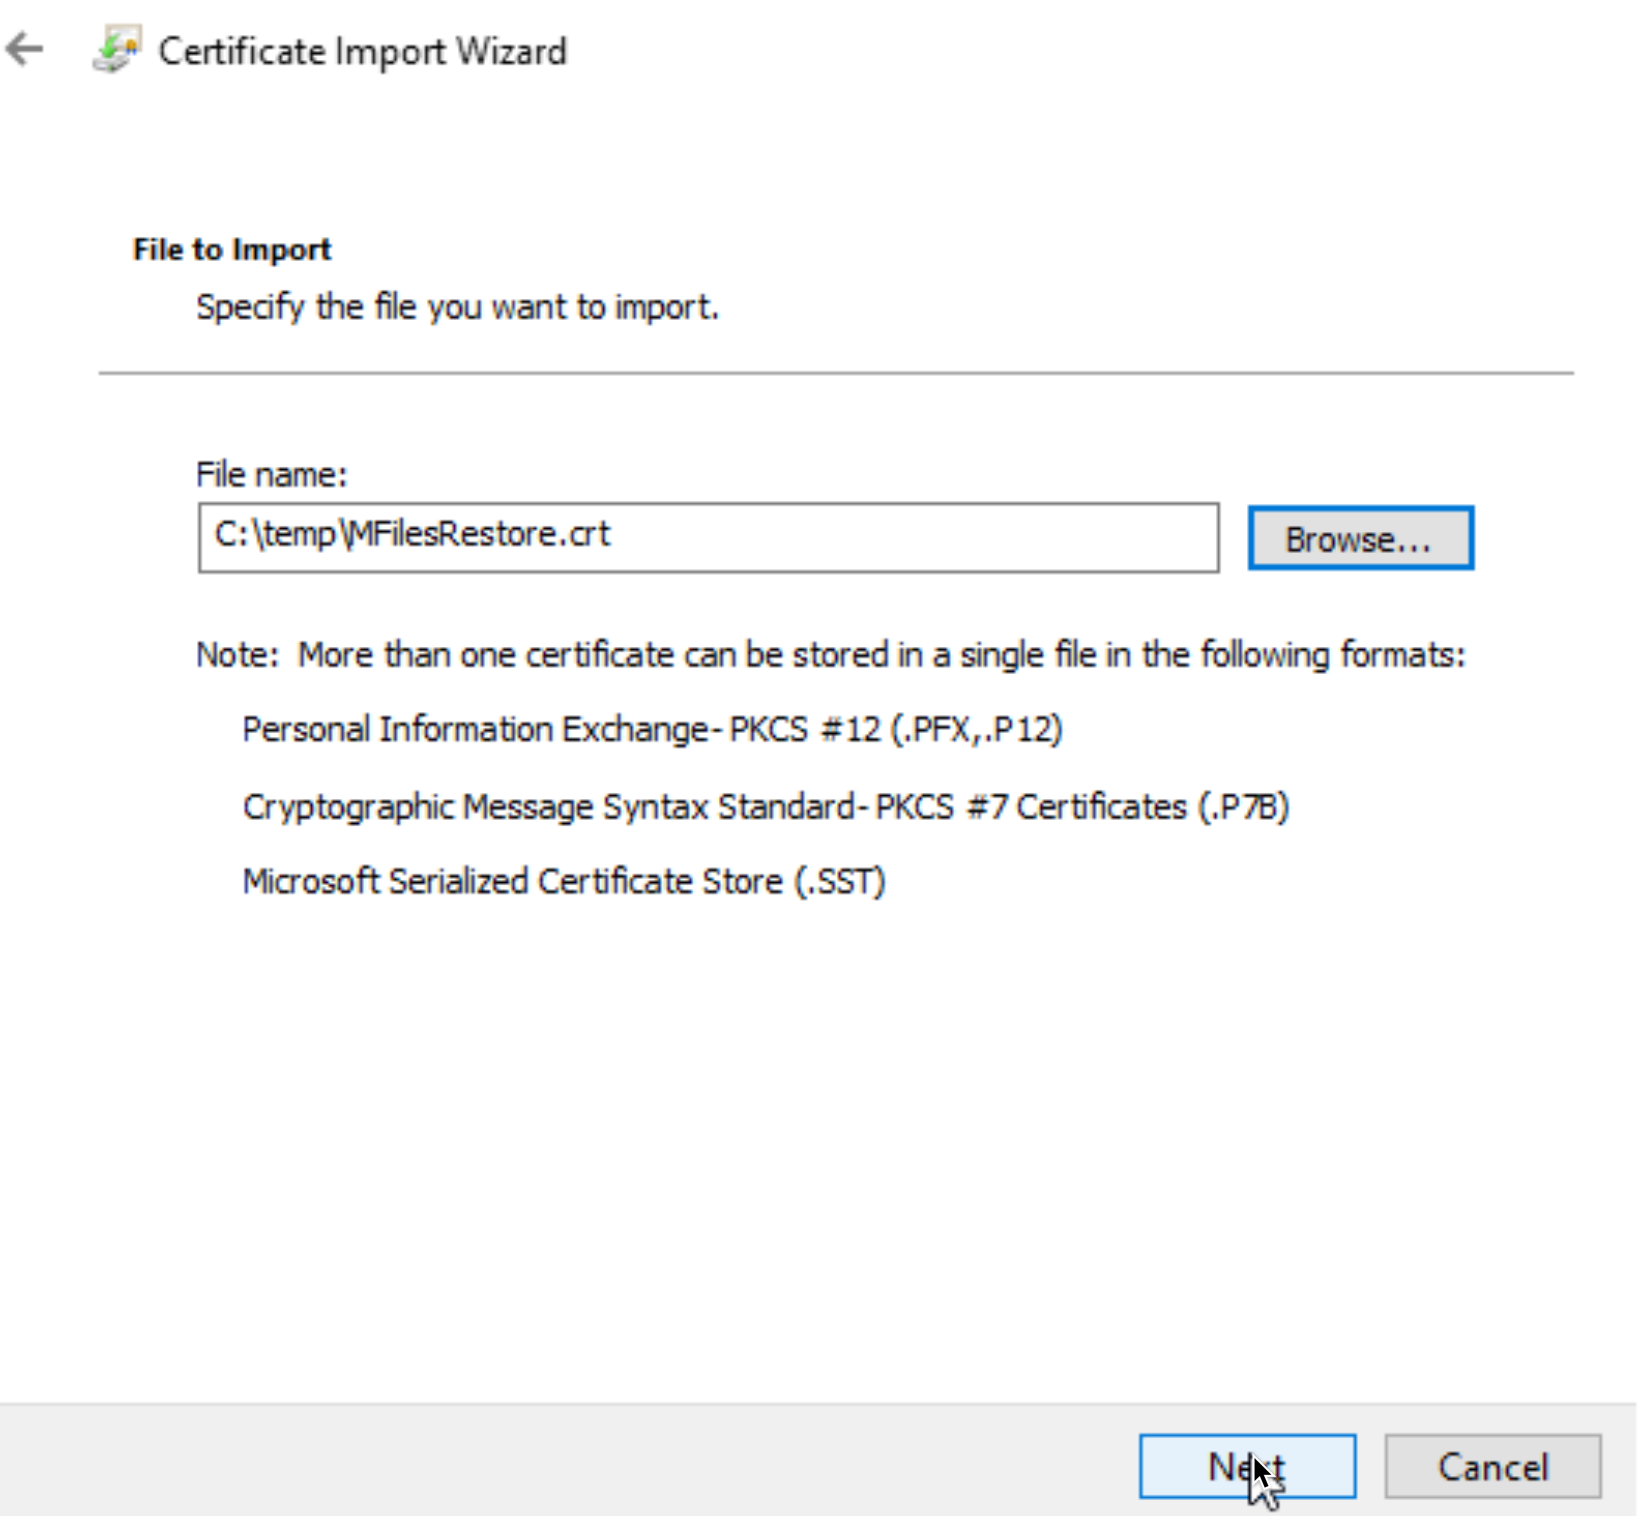
First step will be importing our certificate (.key and .crt) to the M-Files Admin server
Mark “Use a TLS certificate and import .key under Private key section (key file should be decrypted, without password) and .crt under Certificate section.
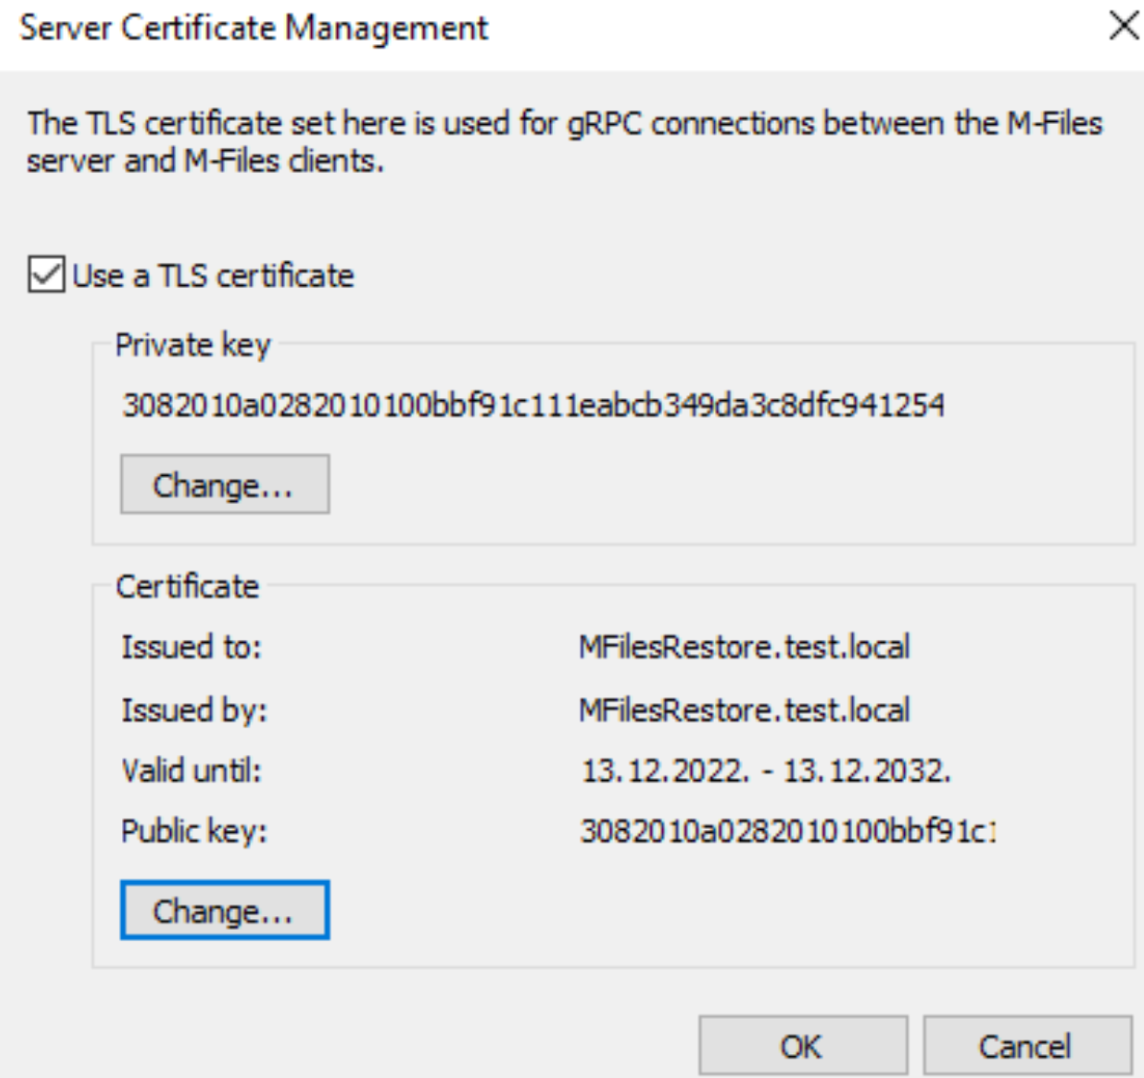
Confirm with ok to close. Confirm with yes on closing
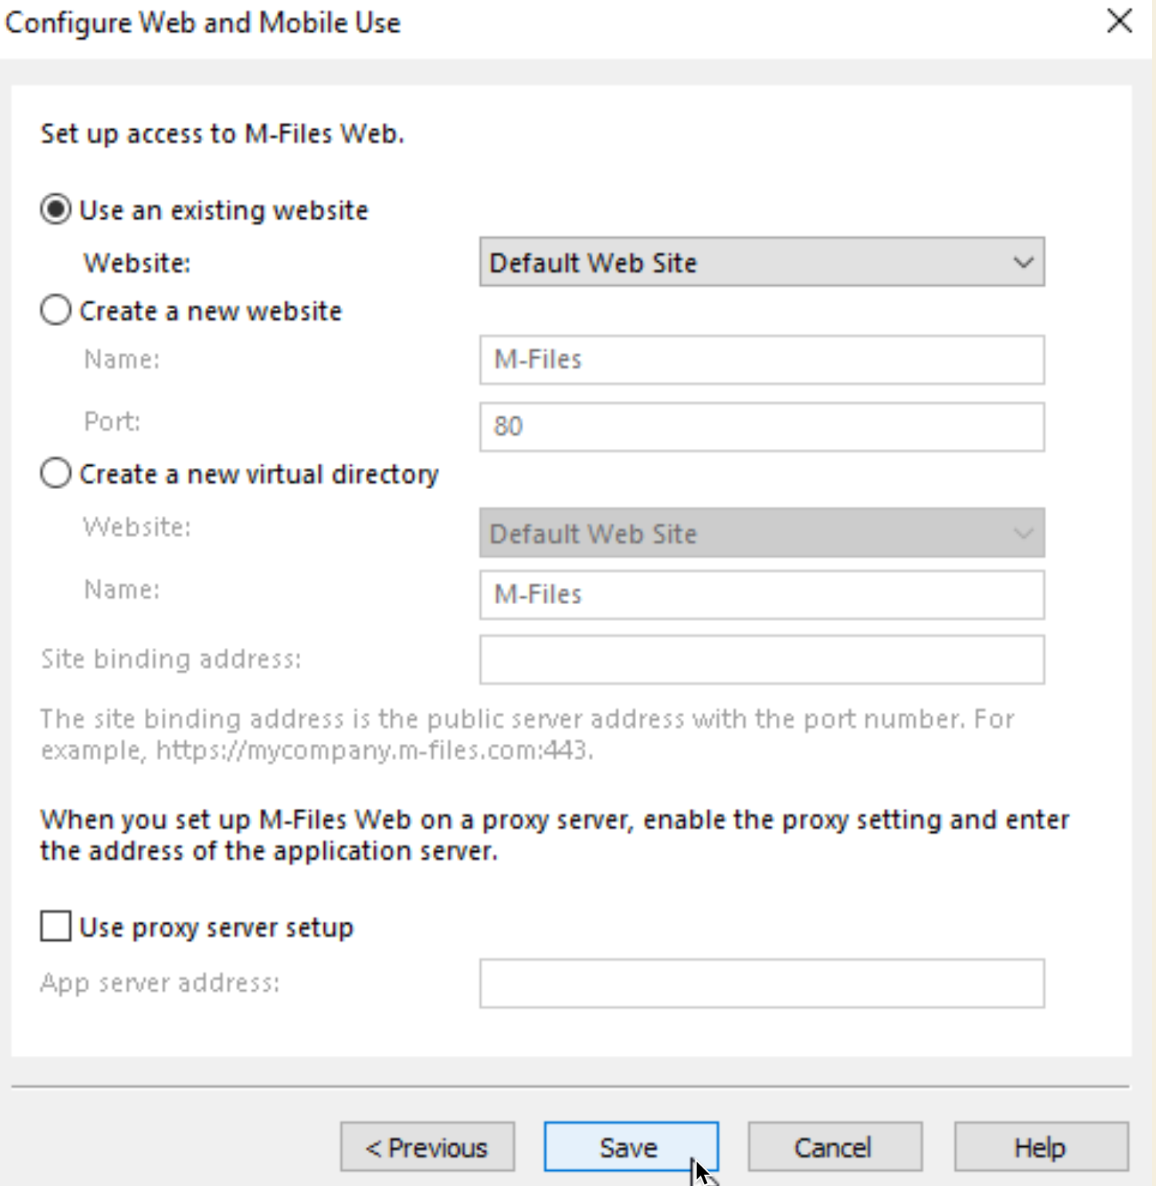
Final stop in M-Files Admin – “Configure Web and Mobile Use…”
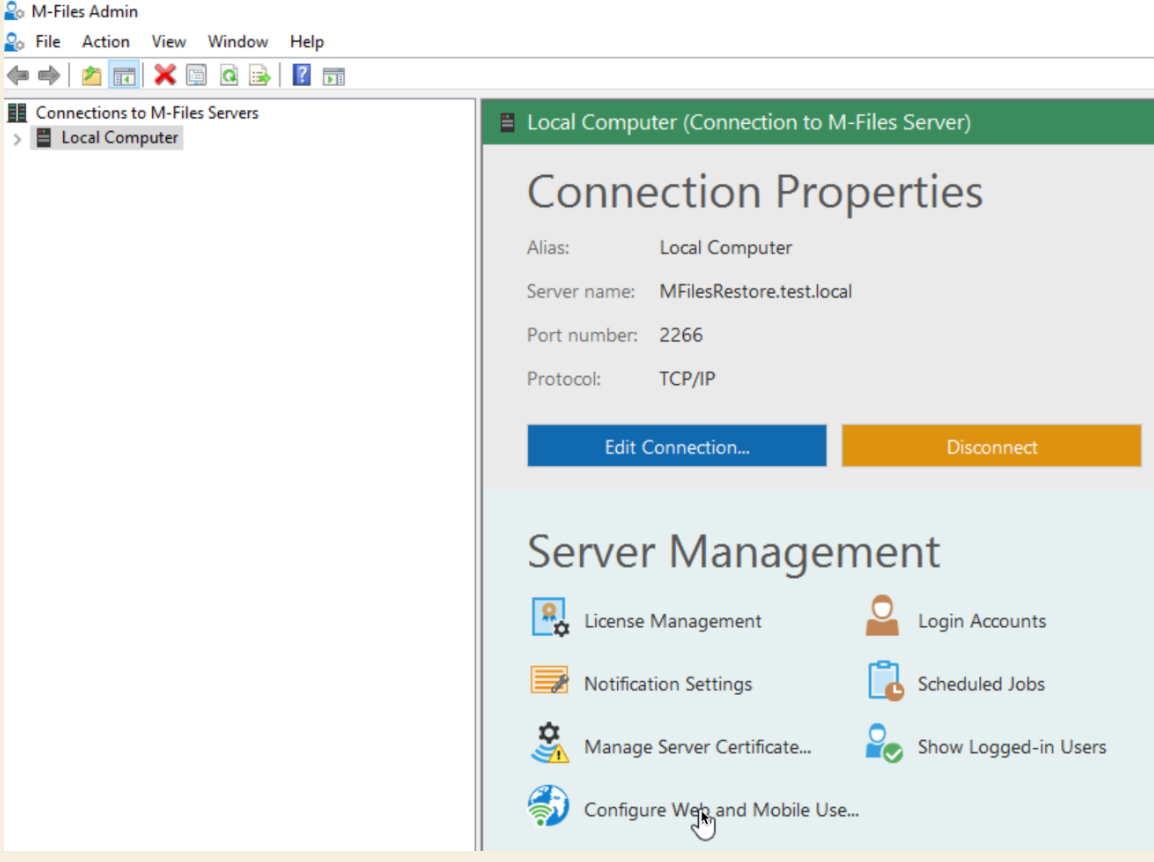
I will only configure M-Files web – so I’ll select “Set up M-Files Web”
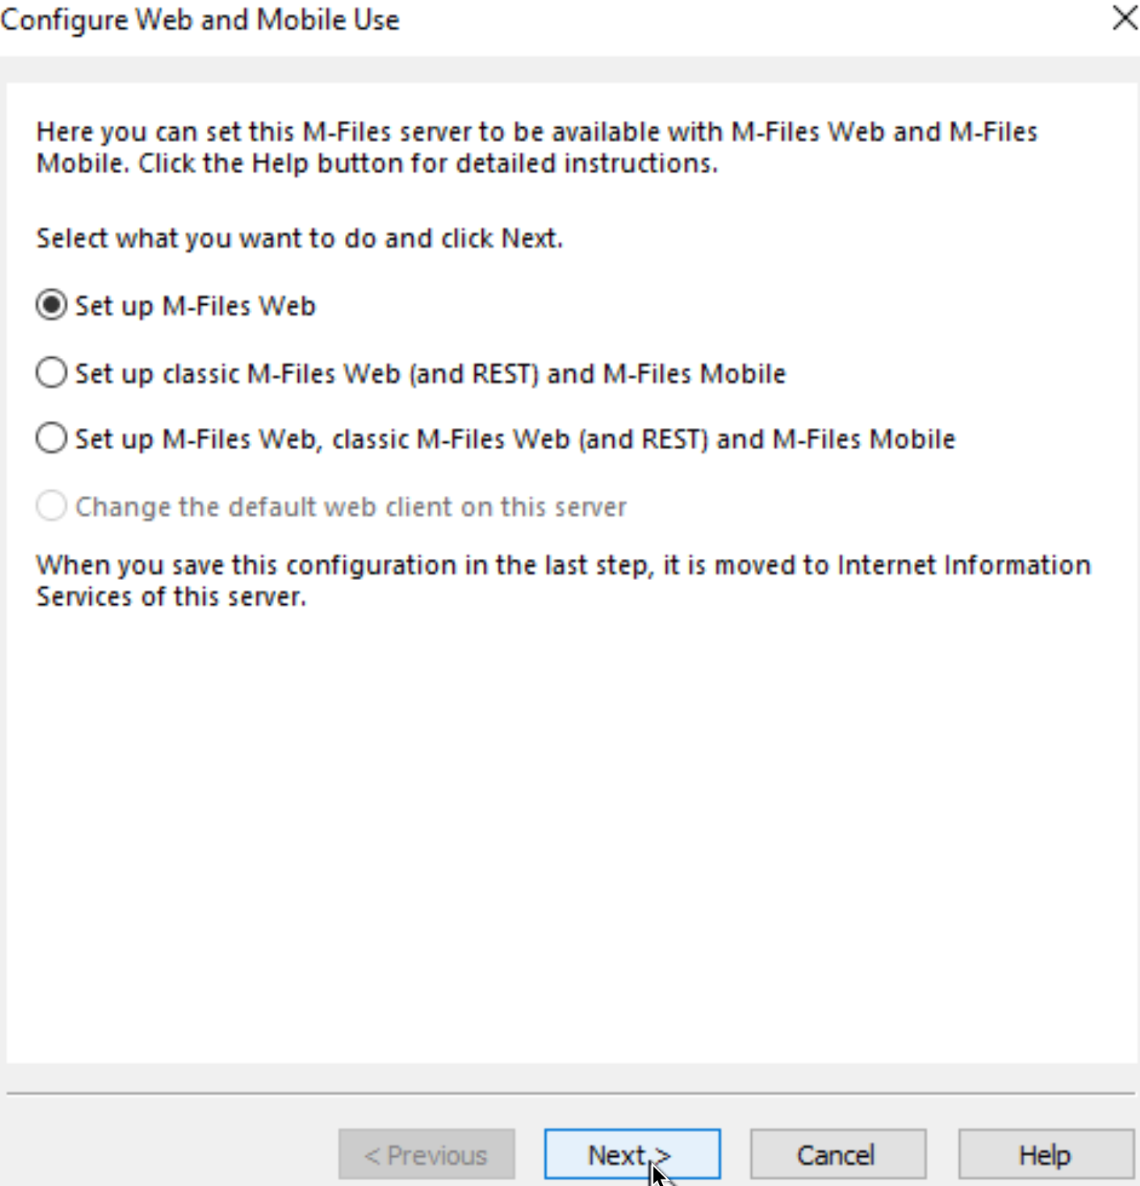
I also want it to go to Default Web Site, because I will need that for later RPC proxy config. Save
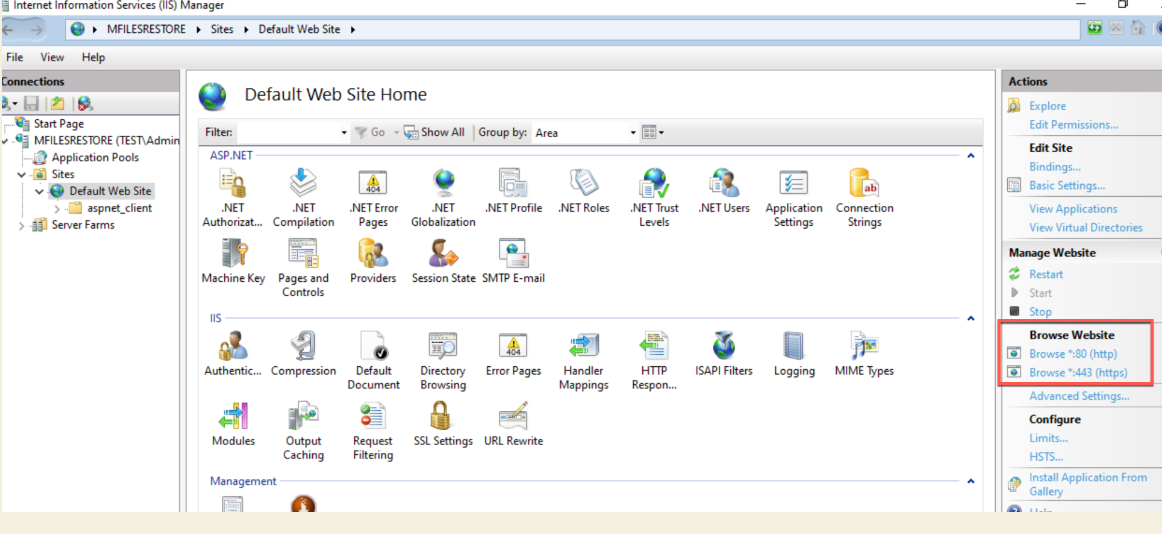
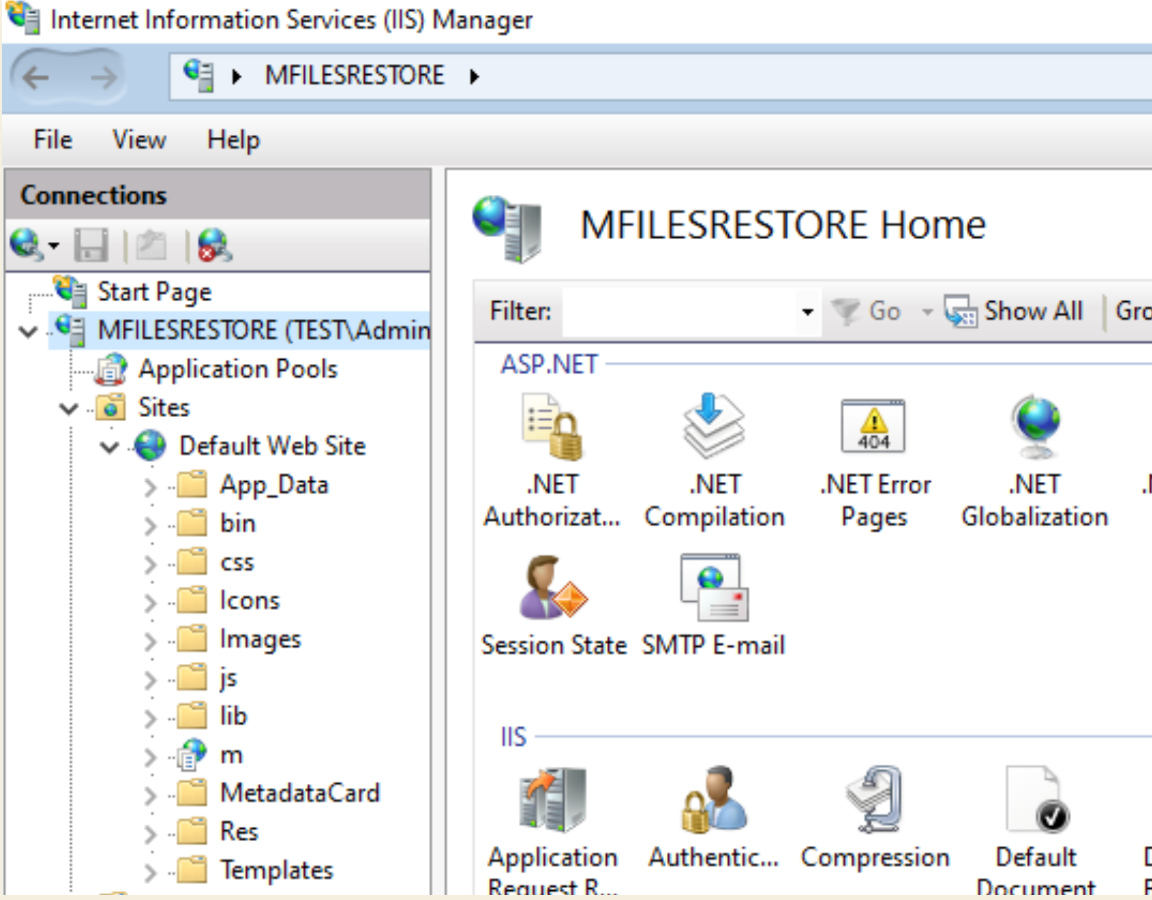
Now, if we go under IIS Manager, we can see that under Default Web Site something is deployed now.
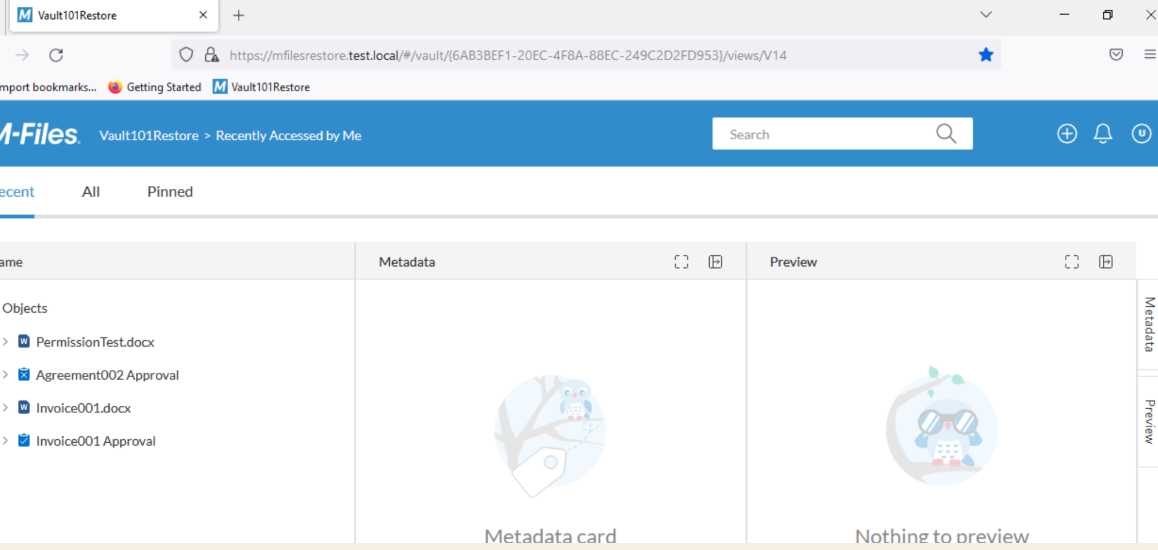
Ok, that is that. Quick test from client shows that this works
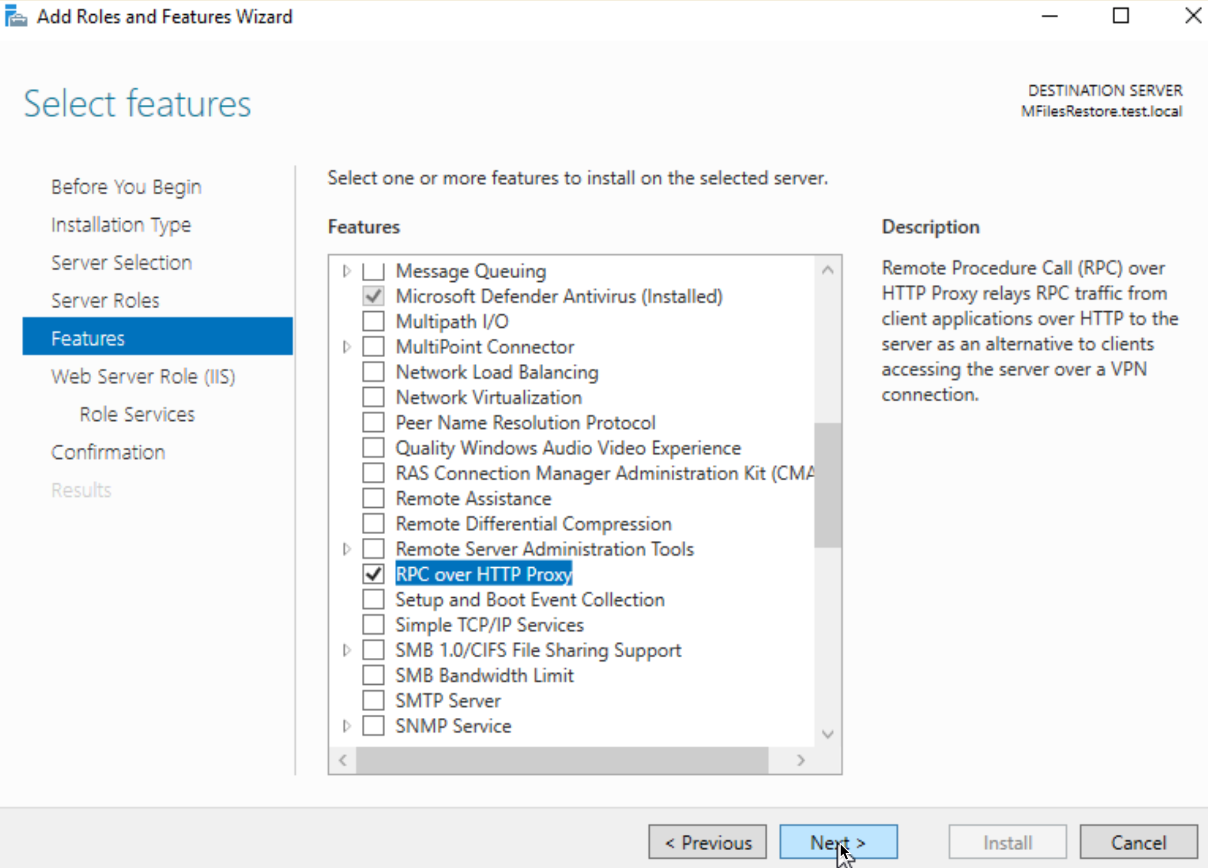
Installing RPC over HTTP Proxy feature
We have IIS installed, now we will add RPC over HTTP Proxy Feature.
Adding Registry settings for proxy (if needed – I don’t need it in this scenario)
I will just copy/paste from M-Files documentation. My proxy will be exclusive for M-Files and installed under default website, so I won’t need this option below.
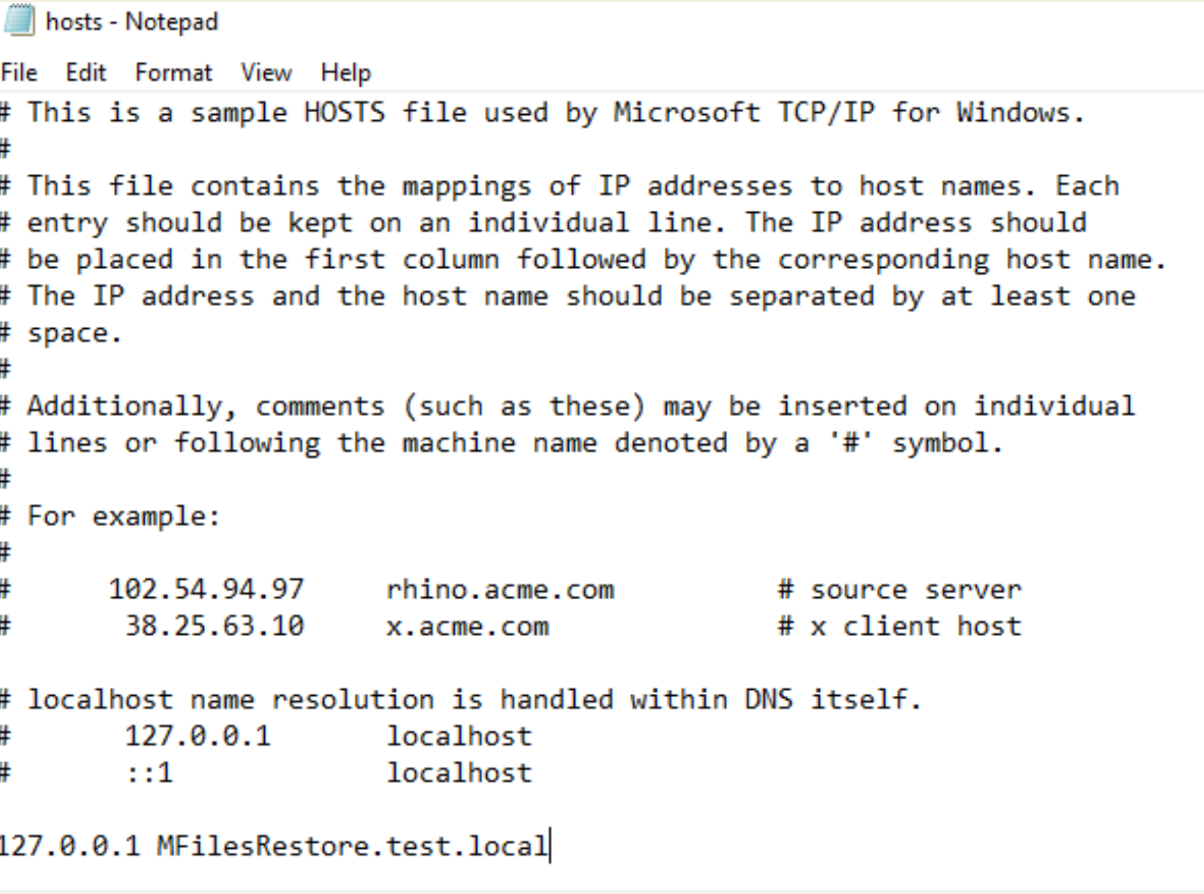
DNS / Hosts file
Since my scenario is inside domain, I can resolve names – for example, I can reach my M-Files server named MFilesRestore from anywhere inside my local network by name.
Anyway, I’m going to add following to my hosts file on MFilesRestore server (M-Files and proxy both are on this server)
Edit hosts file on M-Files/Proxy server:
C:\Windows\System32\drivers\etc
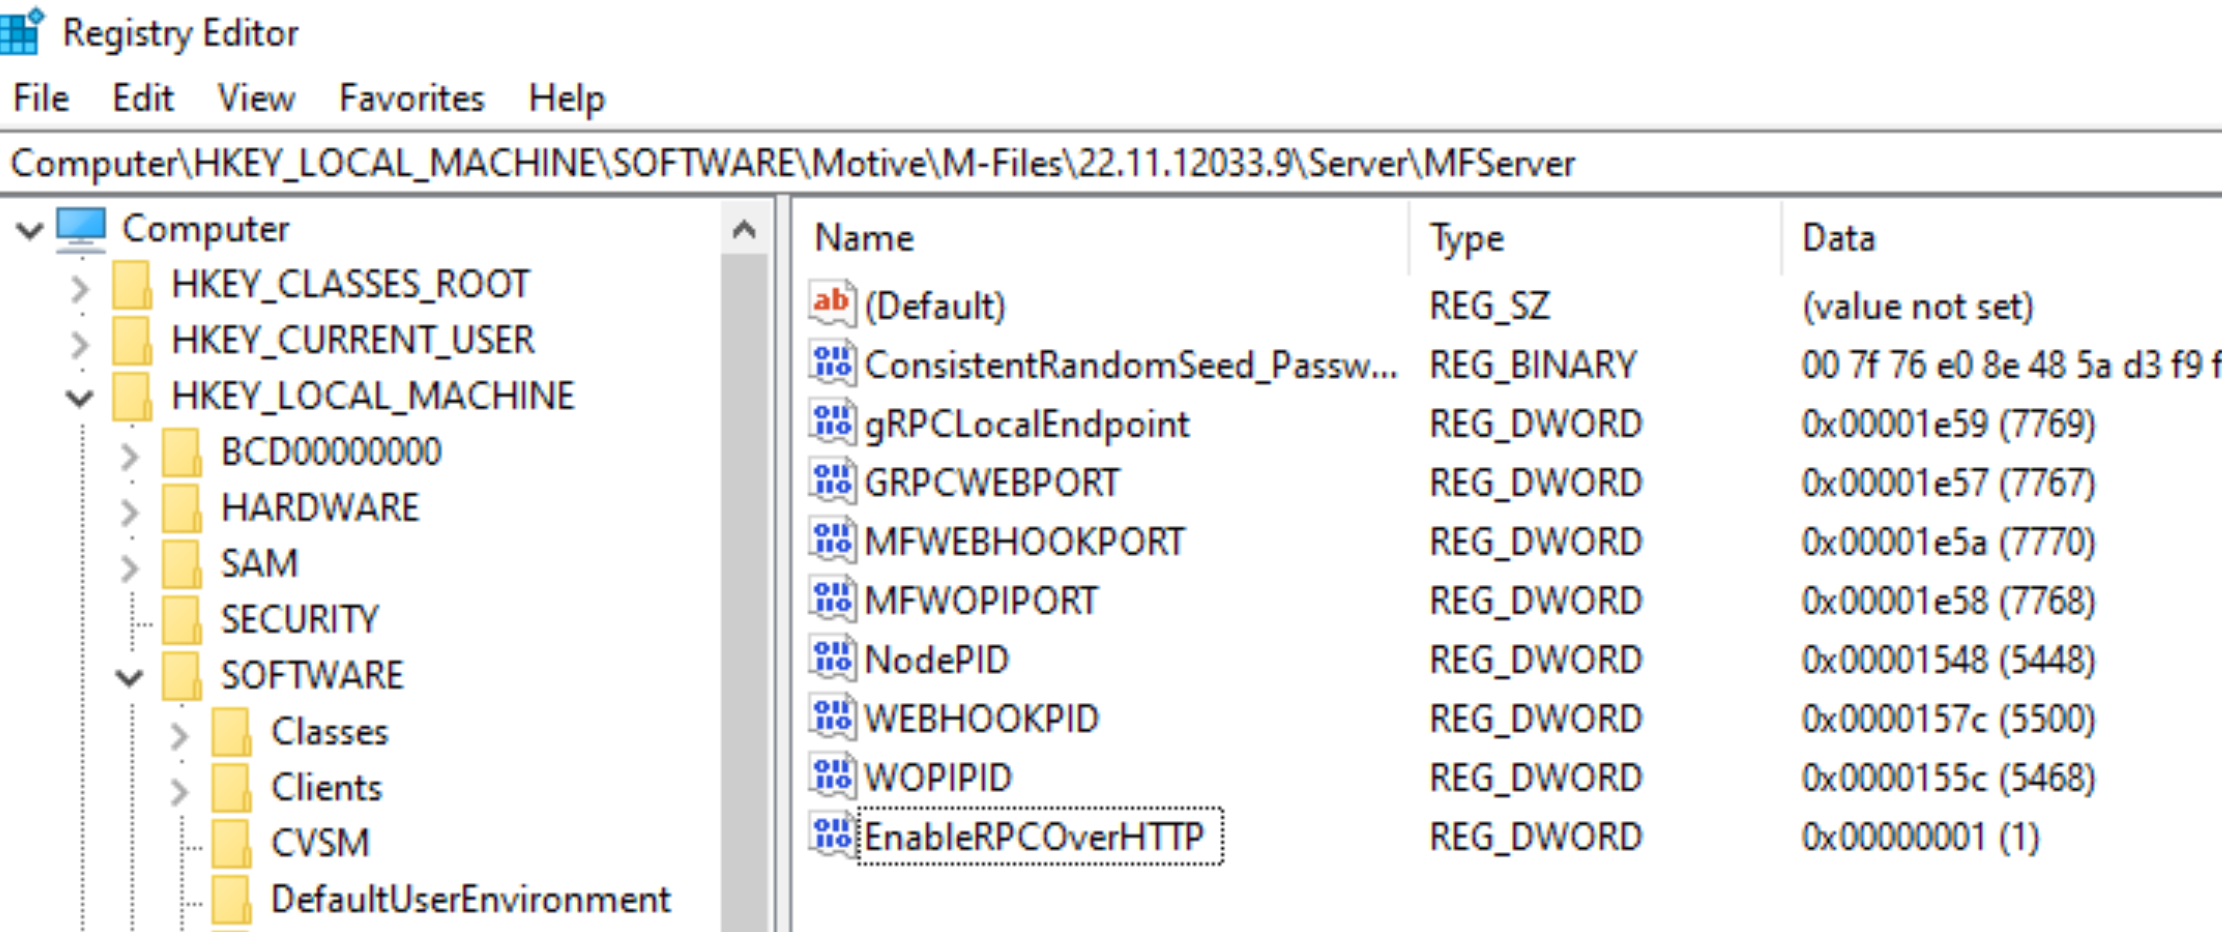
Edit Registry
Again, I’m going to just screenshot from M-Files document in the link above
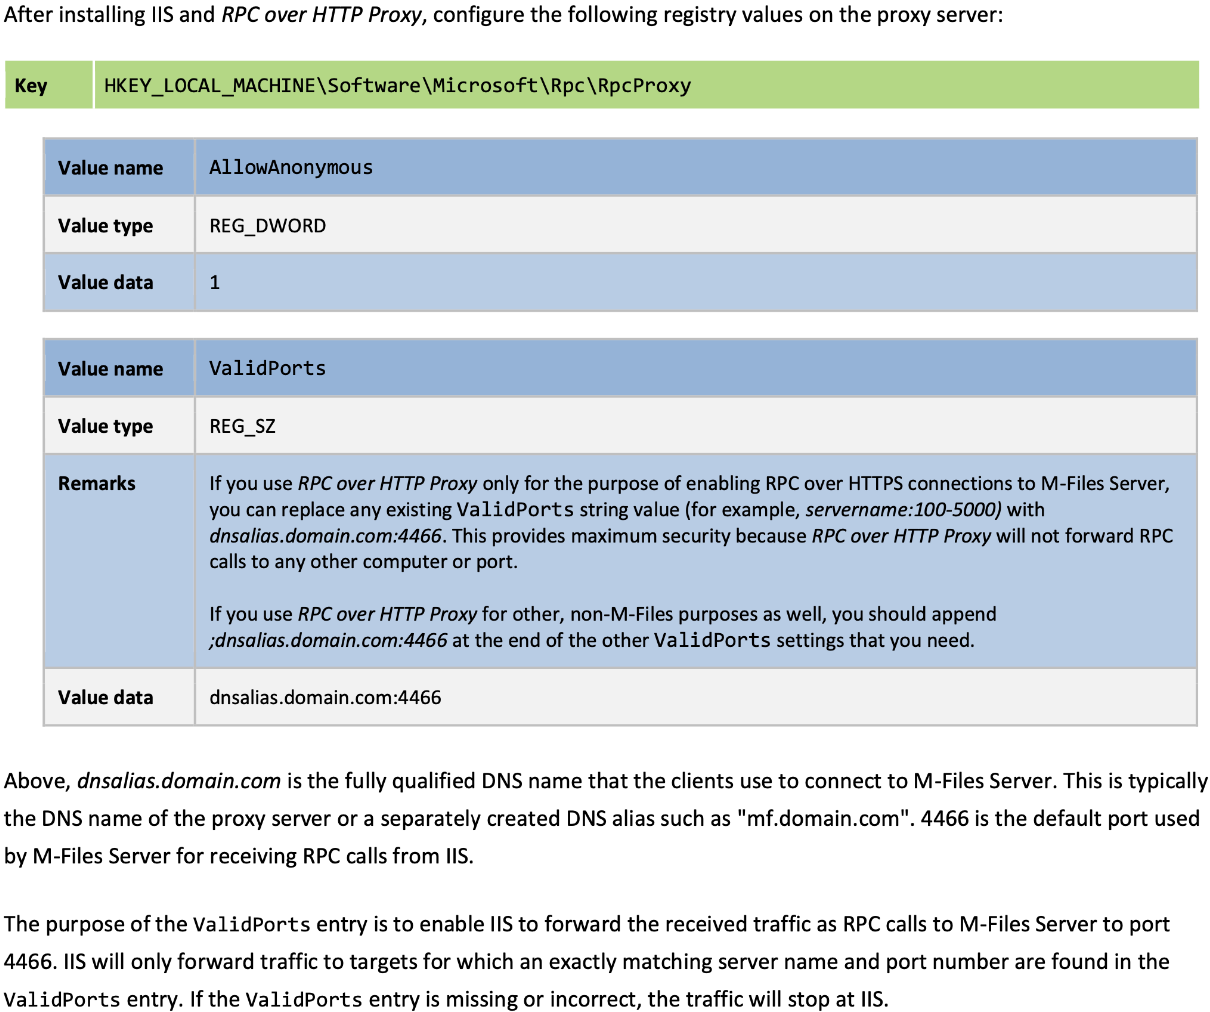
If you are using this proxy for more than one site, be careful with this setting, do not delete values that are there.!!!
Make sure you spell everything correct
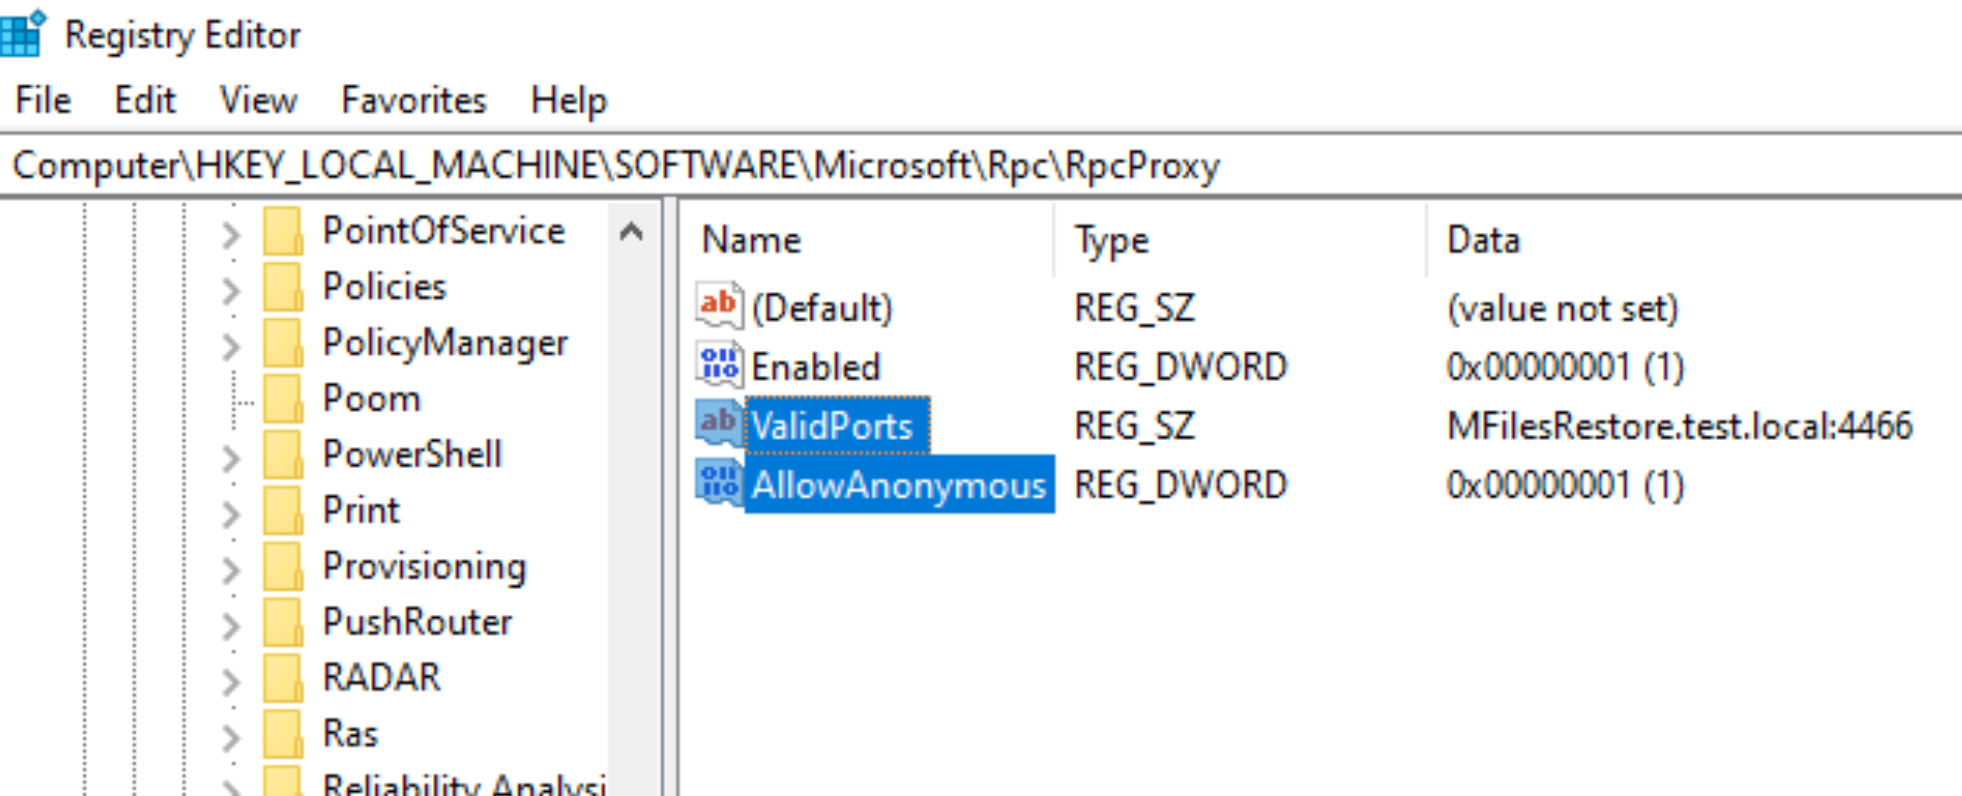
Next thing in registry…
I have that
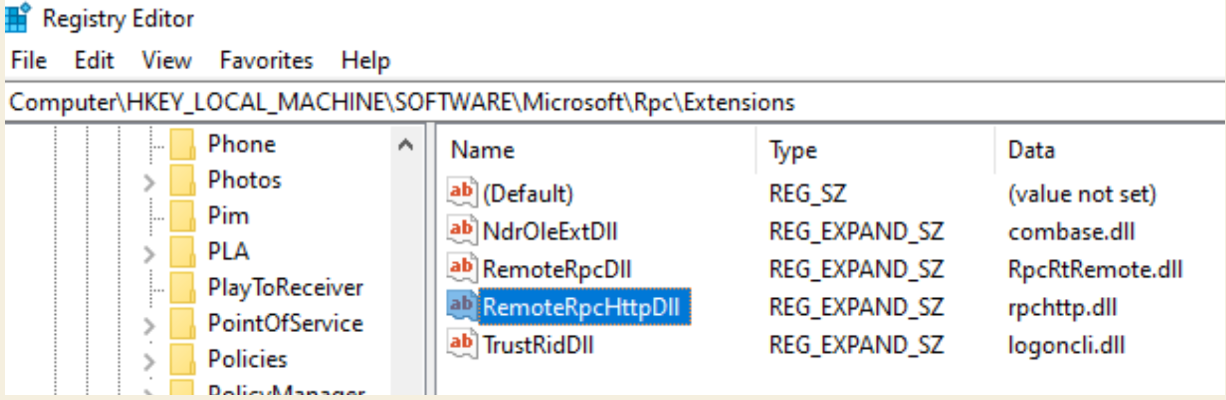
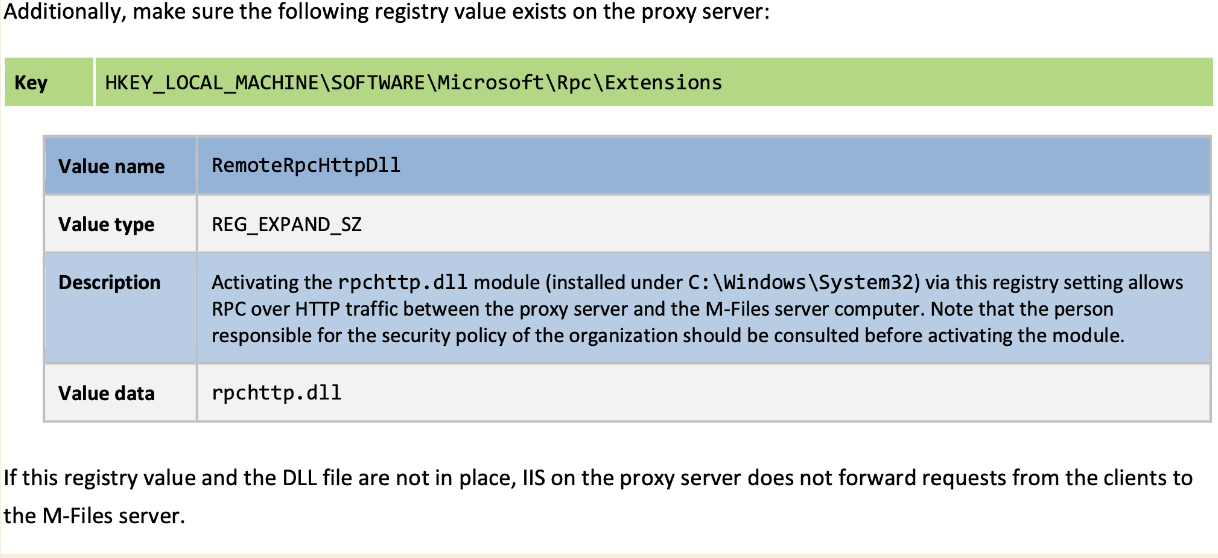
Now, for the M-Files part of registry…
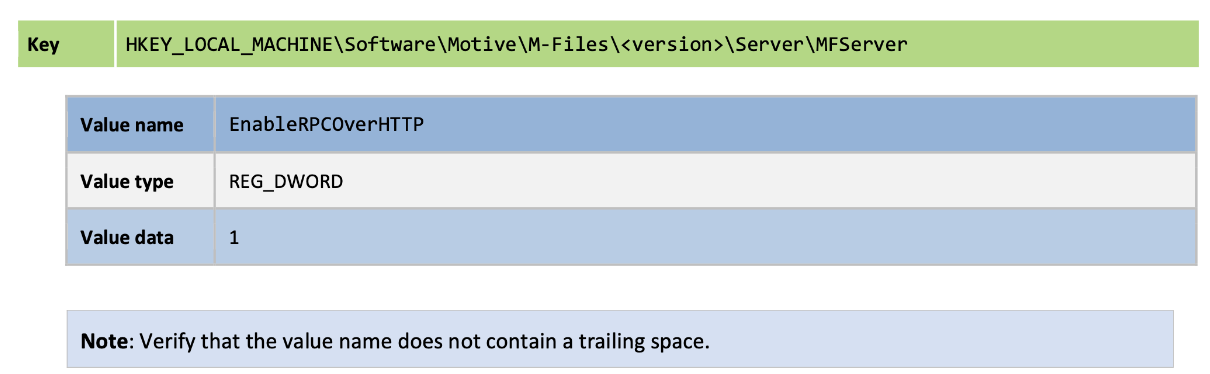
Make sure you spell everything correct
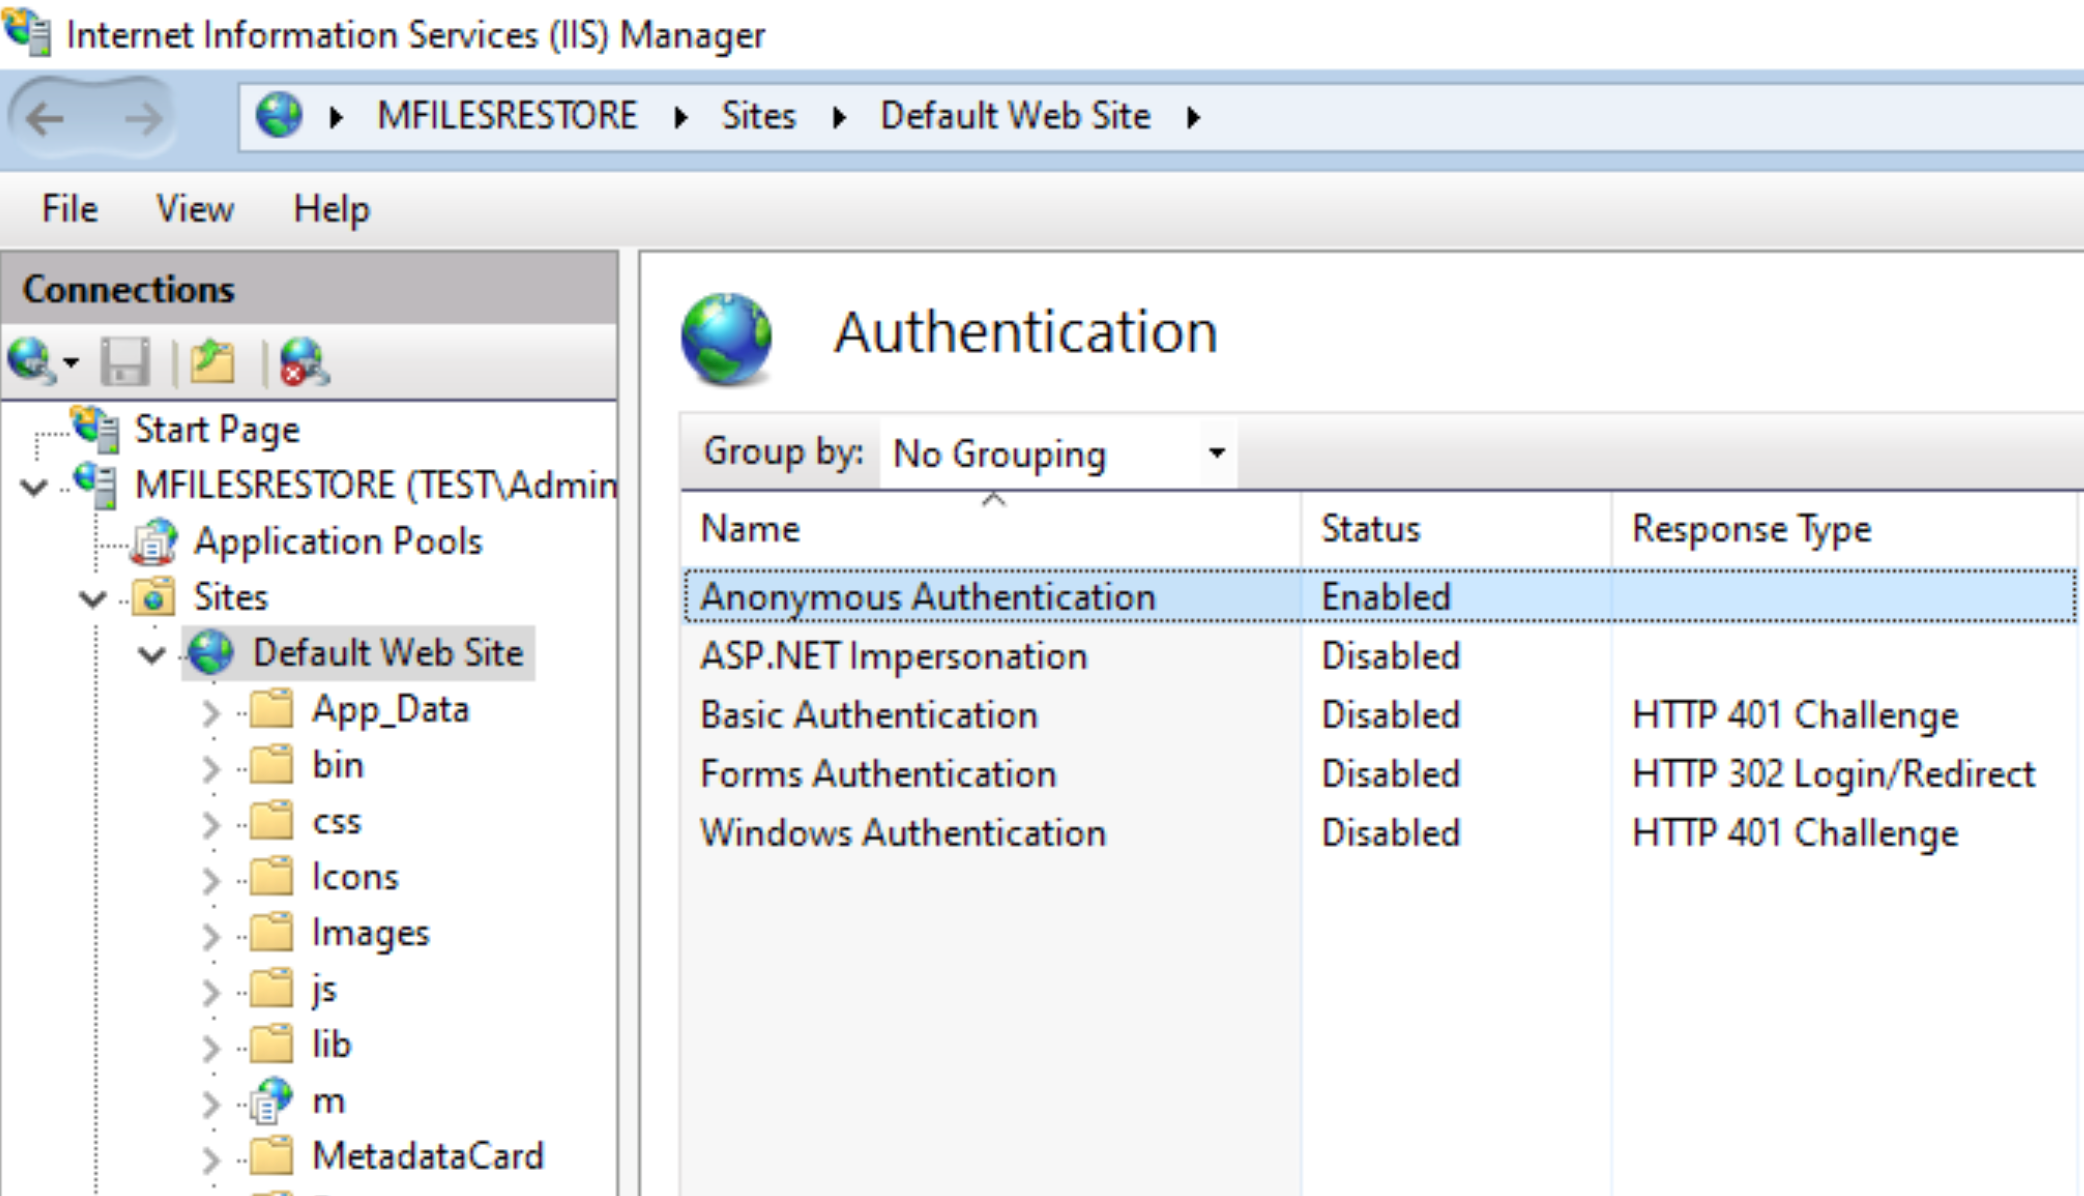
IIS
In IIS, navigate to Rpc, and in Authentication enable Anonymous
Authentication and Basic Authentication
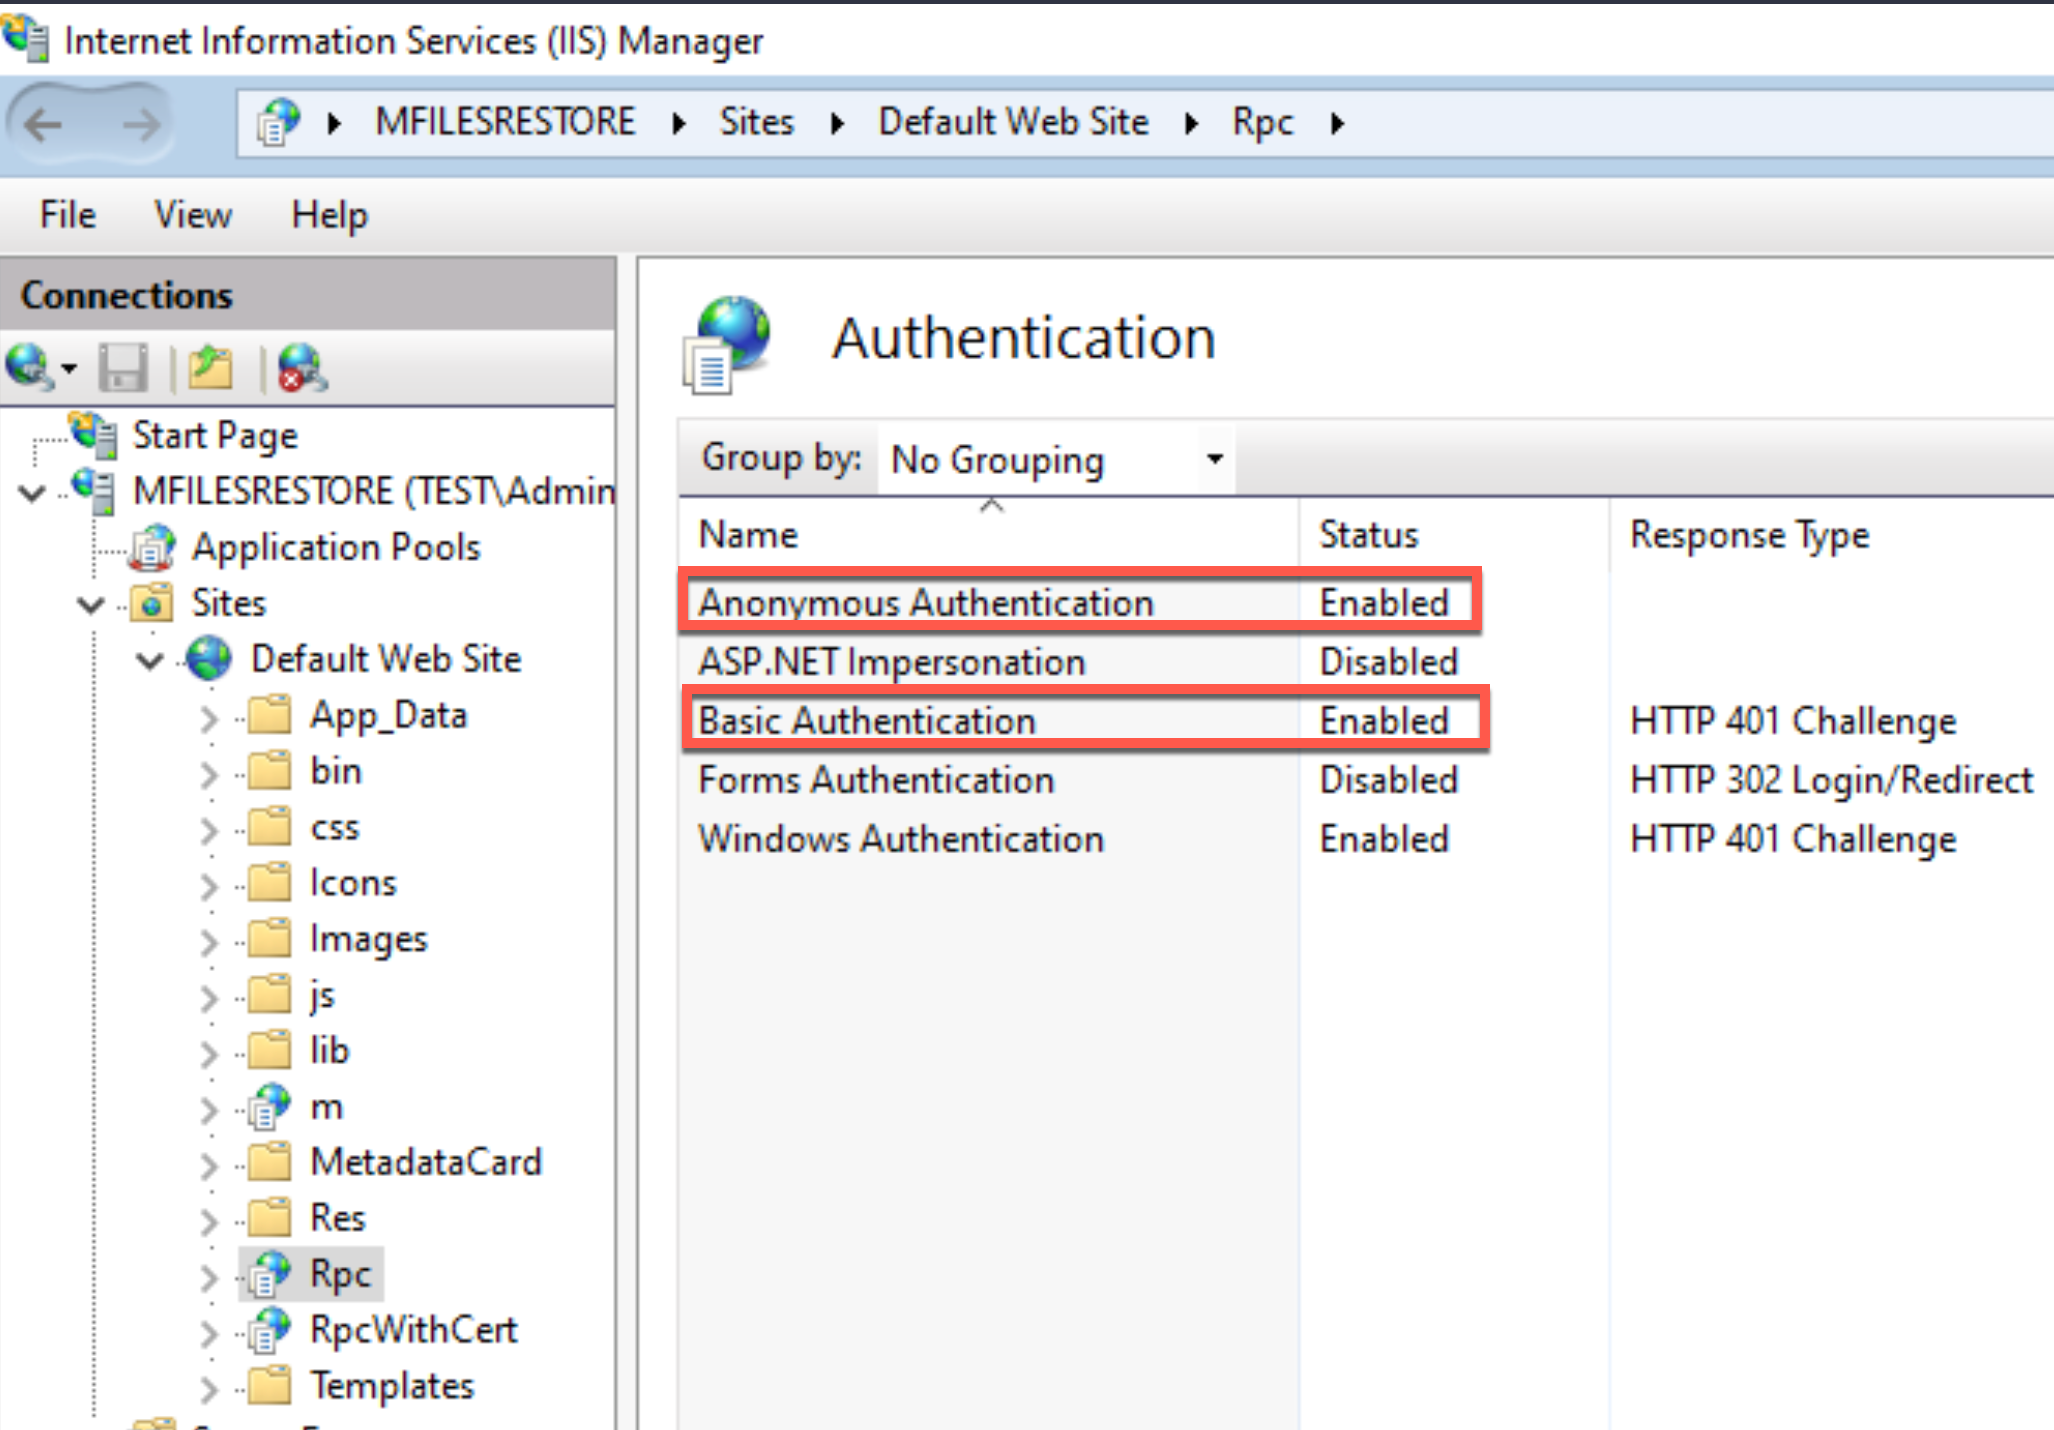
Anonymous Authentication should be enabled also under Default Web Site
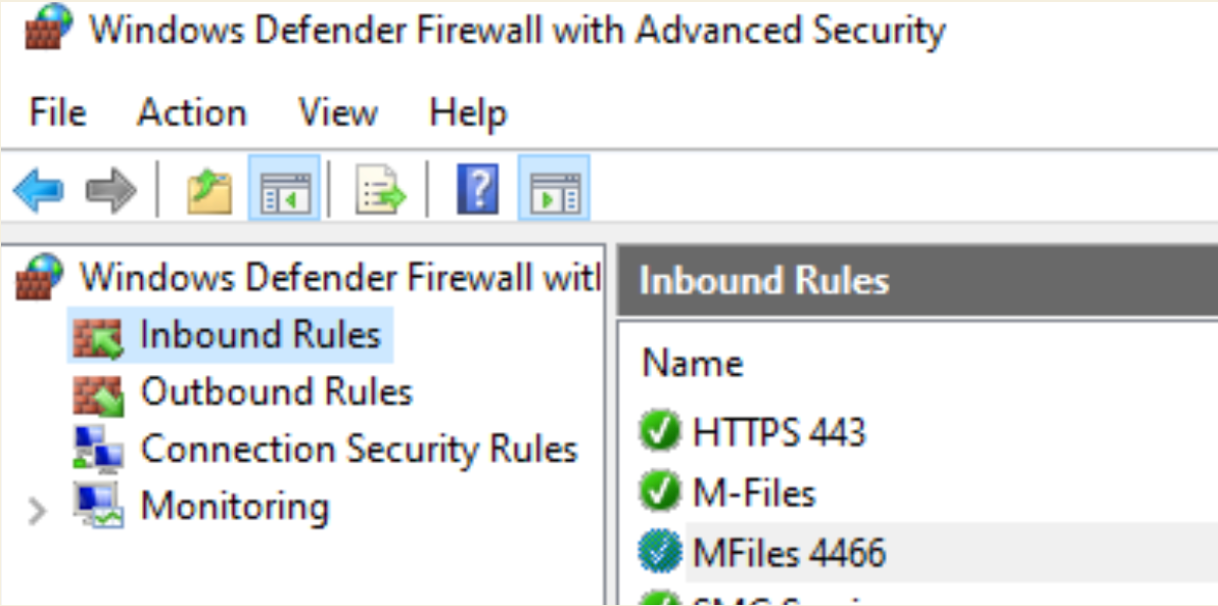
Firewall
Enable port TCP 443 and 4466 through firewall – both inbound and outbound rule I did.
REBOOT THE SERVER
Now, with all this changes done, we should reboot, before we go further.
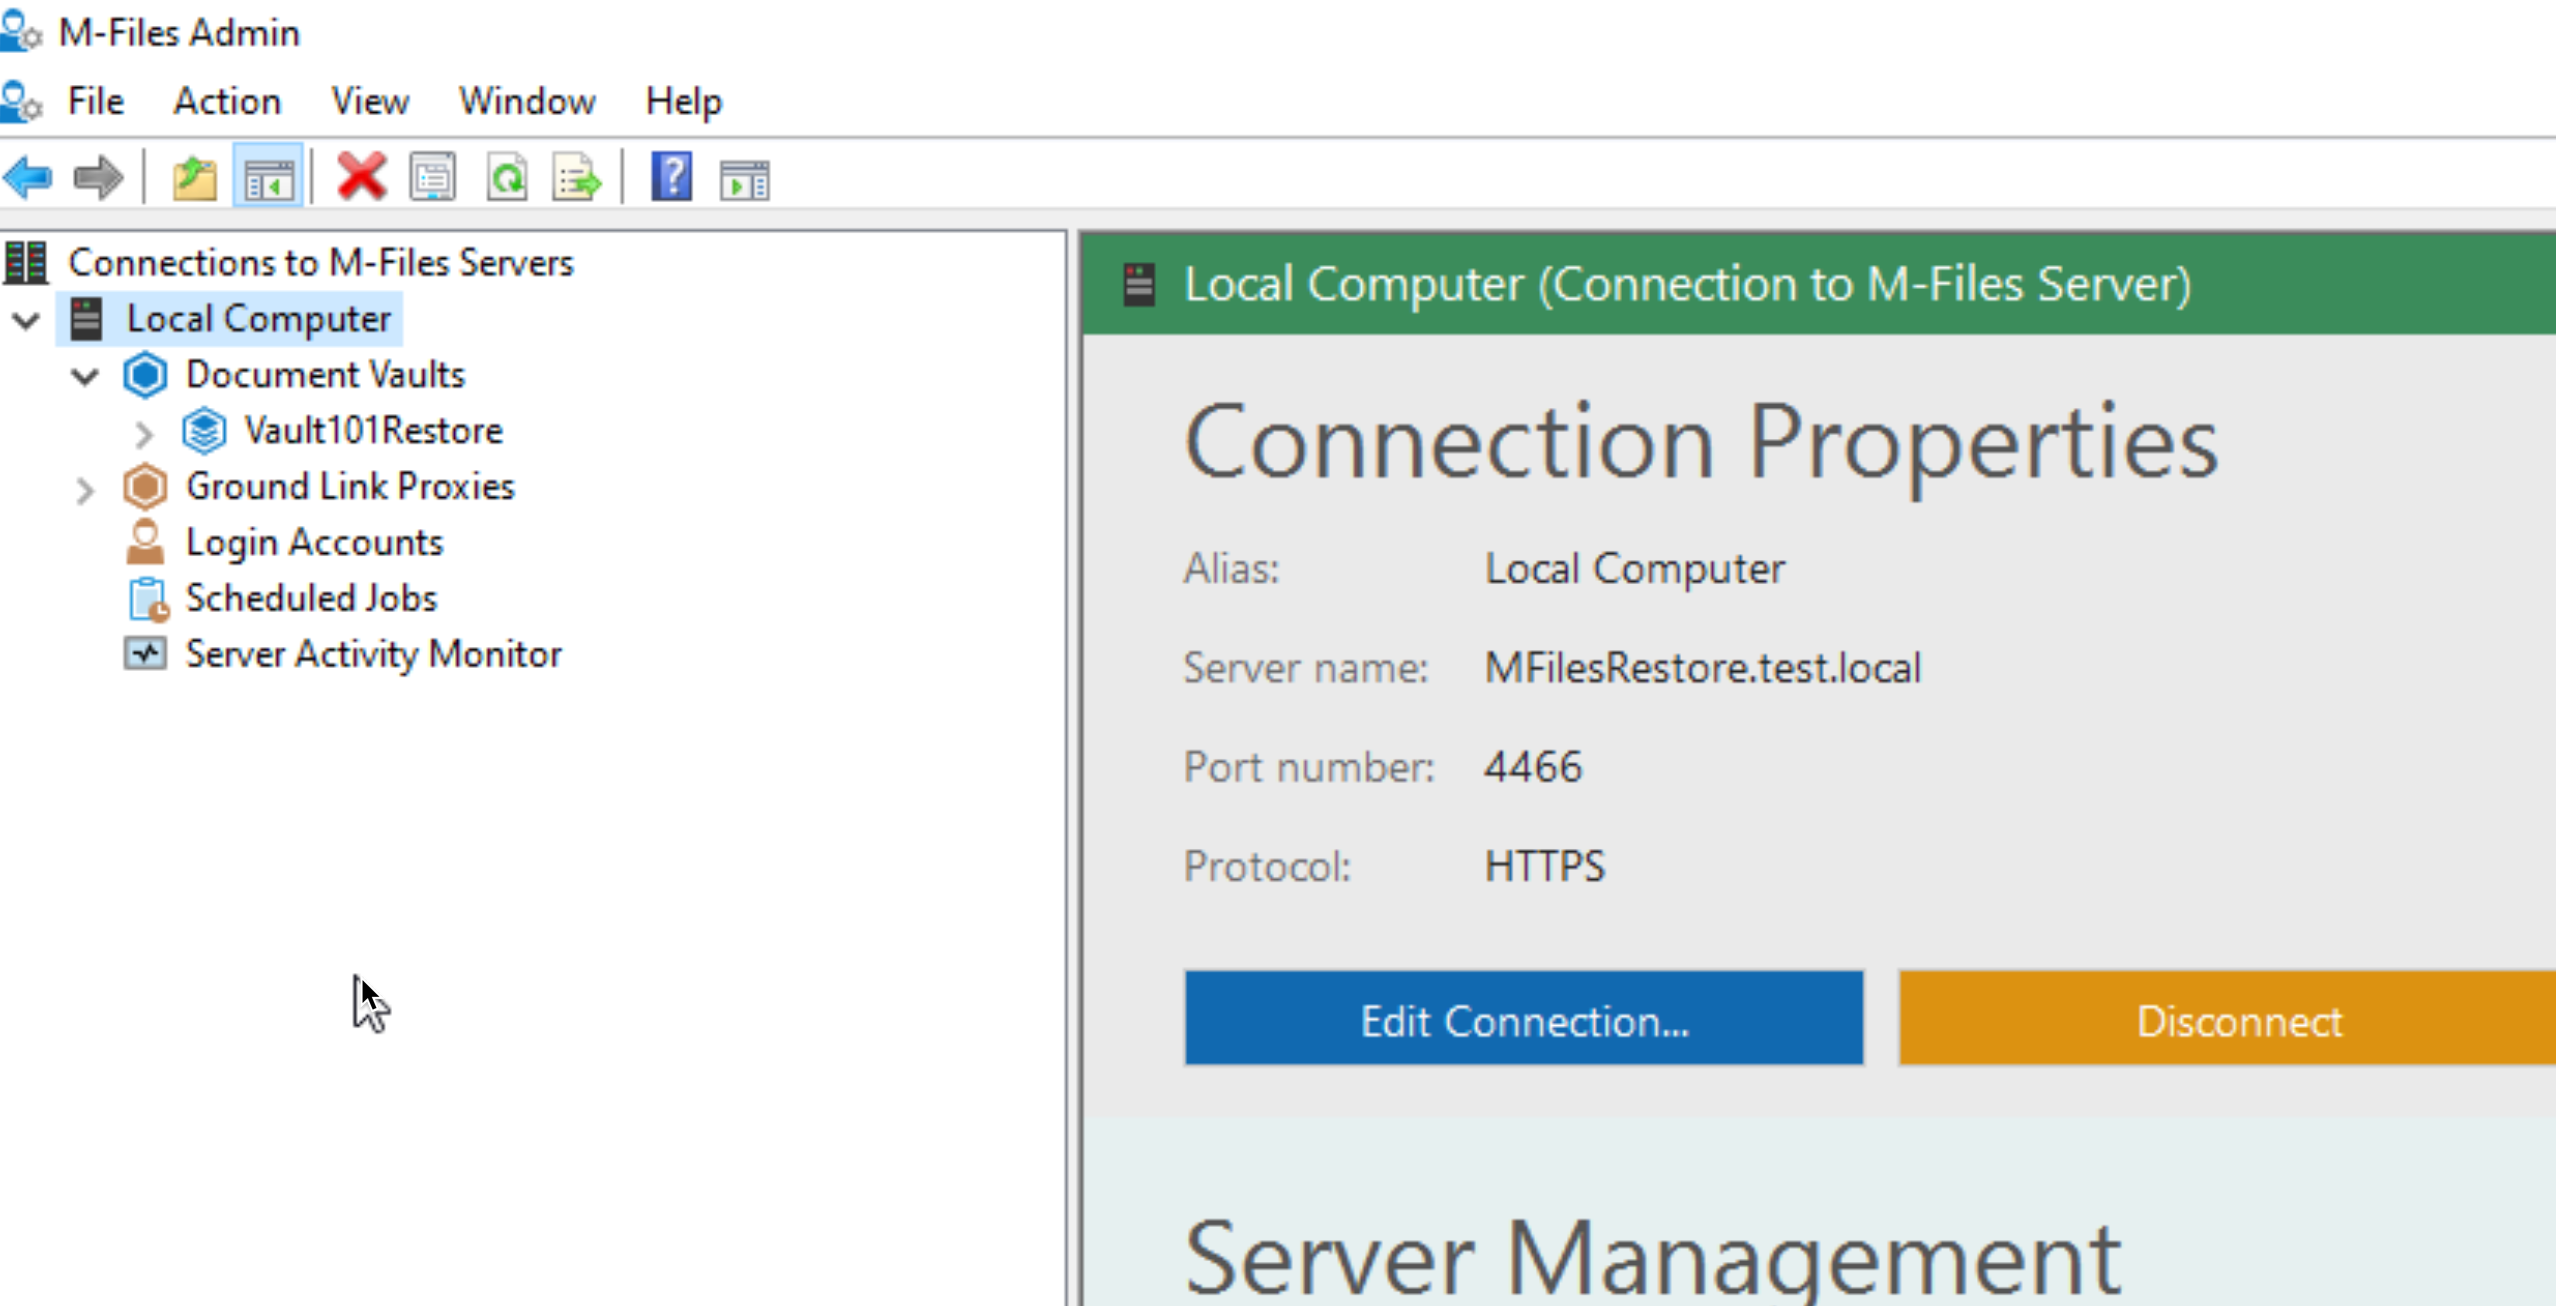
Ok, after reboot, on M-Files server start M-Files Admin
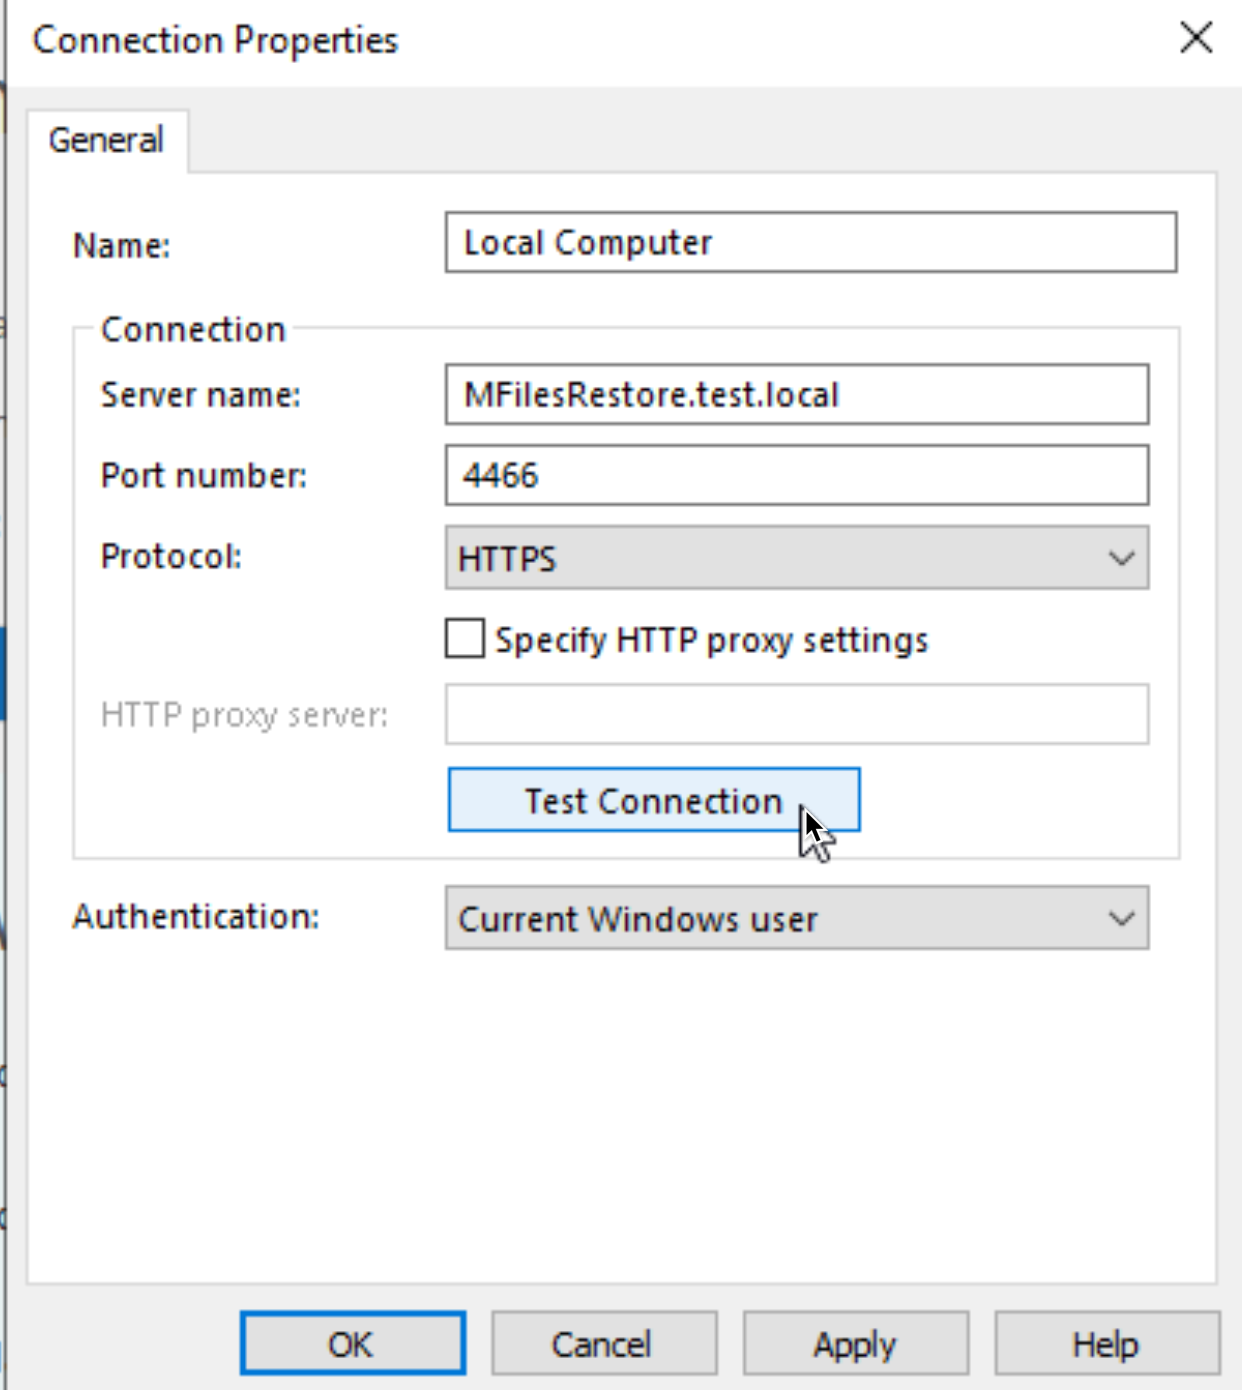
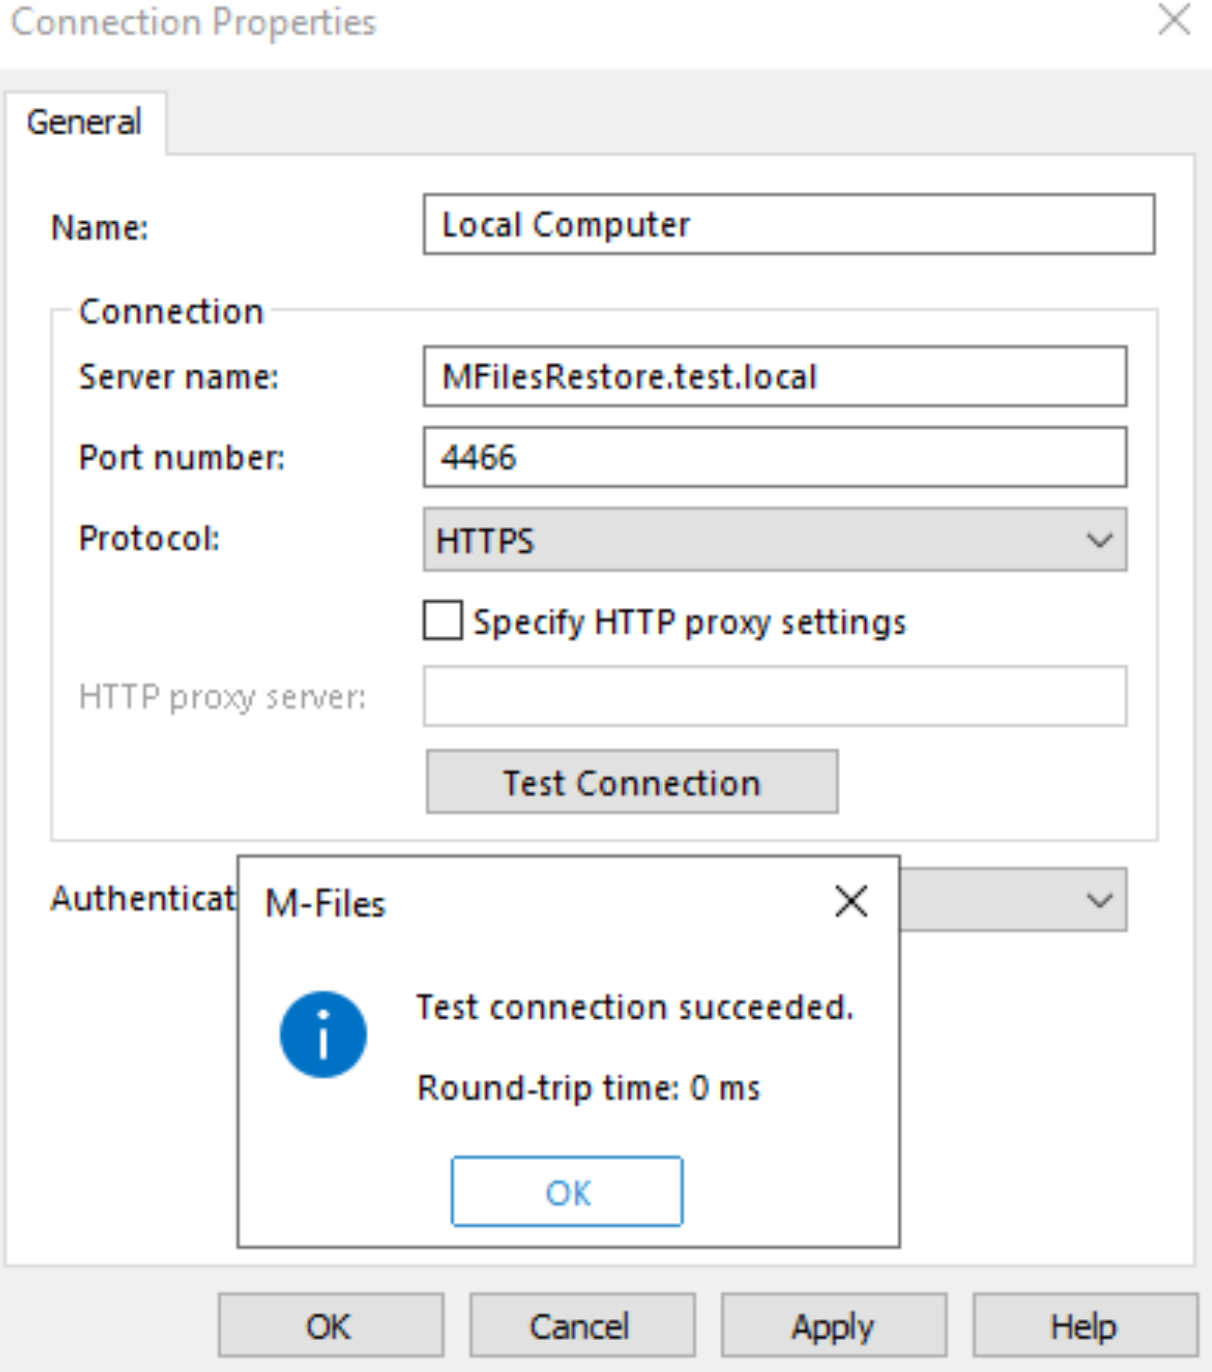
Click on Connection Properties – Edit Connection…
We will now try to change our connection to HTTPS, port 4466
Make the changes on click on Test Connection
No luck… I’m getting “Network problems are preventing M-Files from communicating with the server. The RPC is unavailable.
Ok, in the document I specified above at the beginning from M-Files about RPC configuration, at the bottom of the document there is great troubleshooting section which can help.
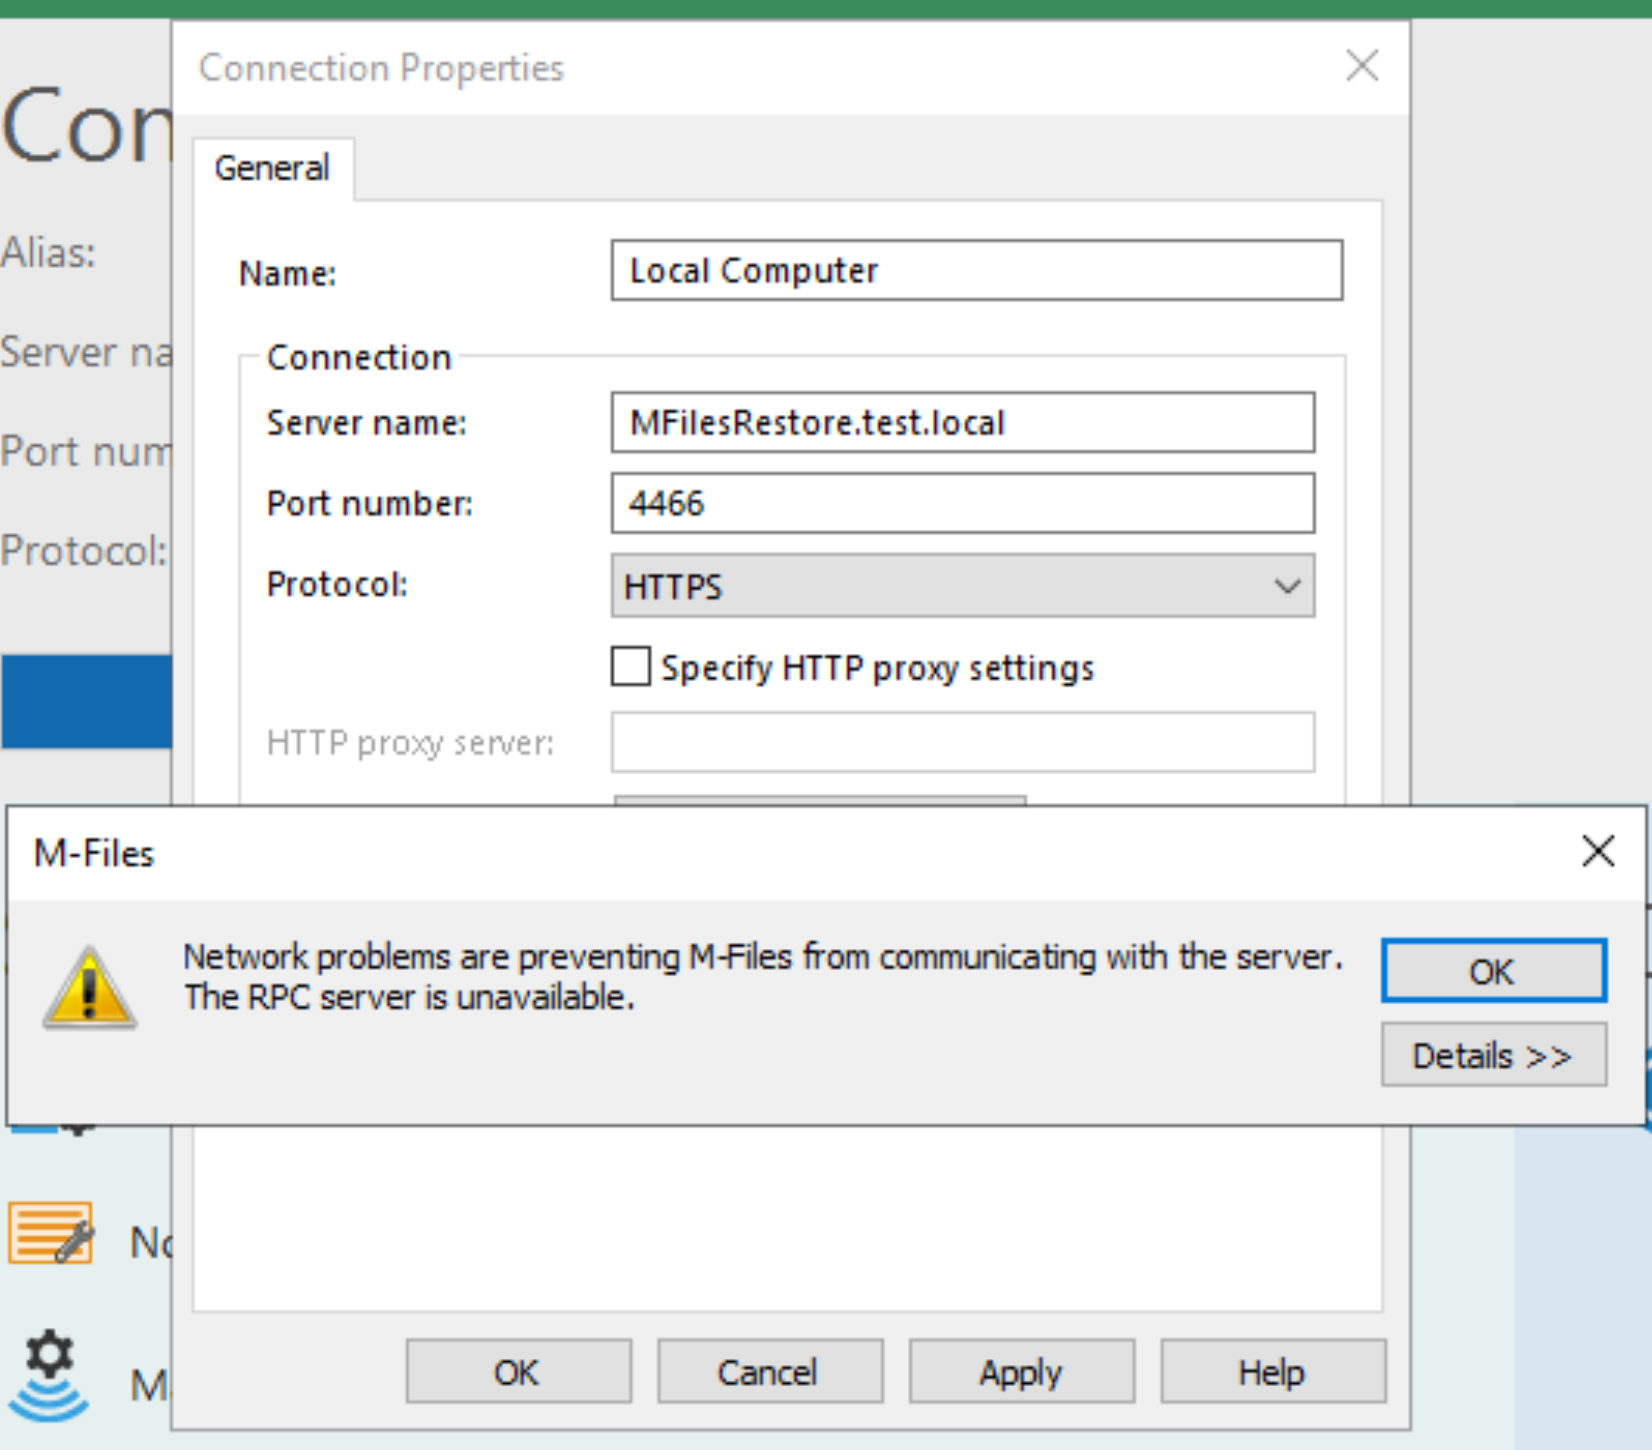
I assume what is the problem in my case – self signed certificate.
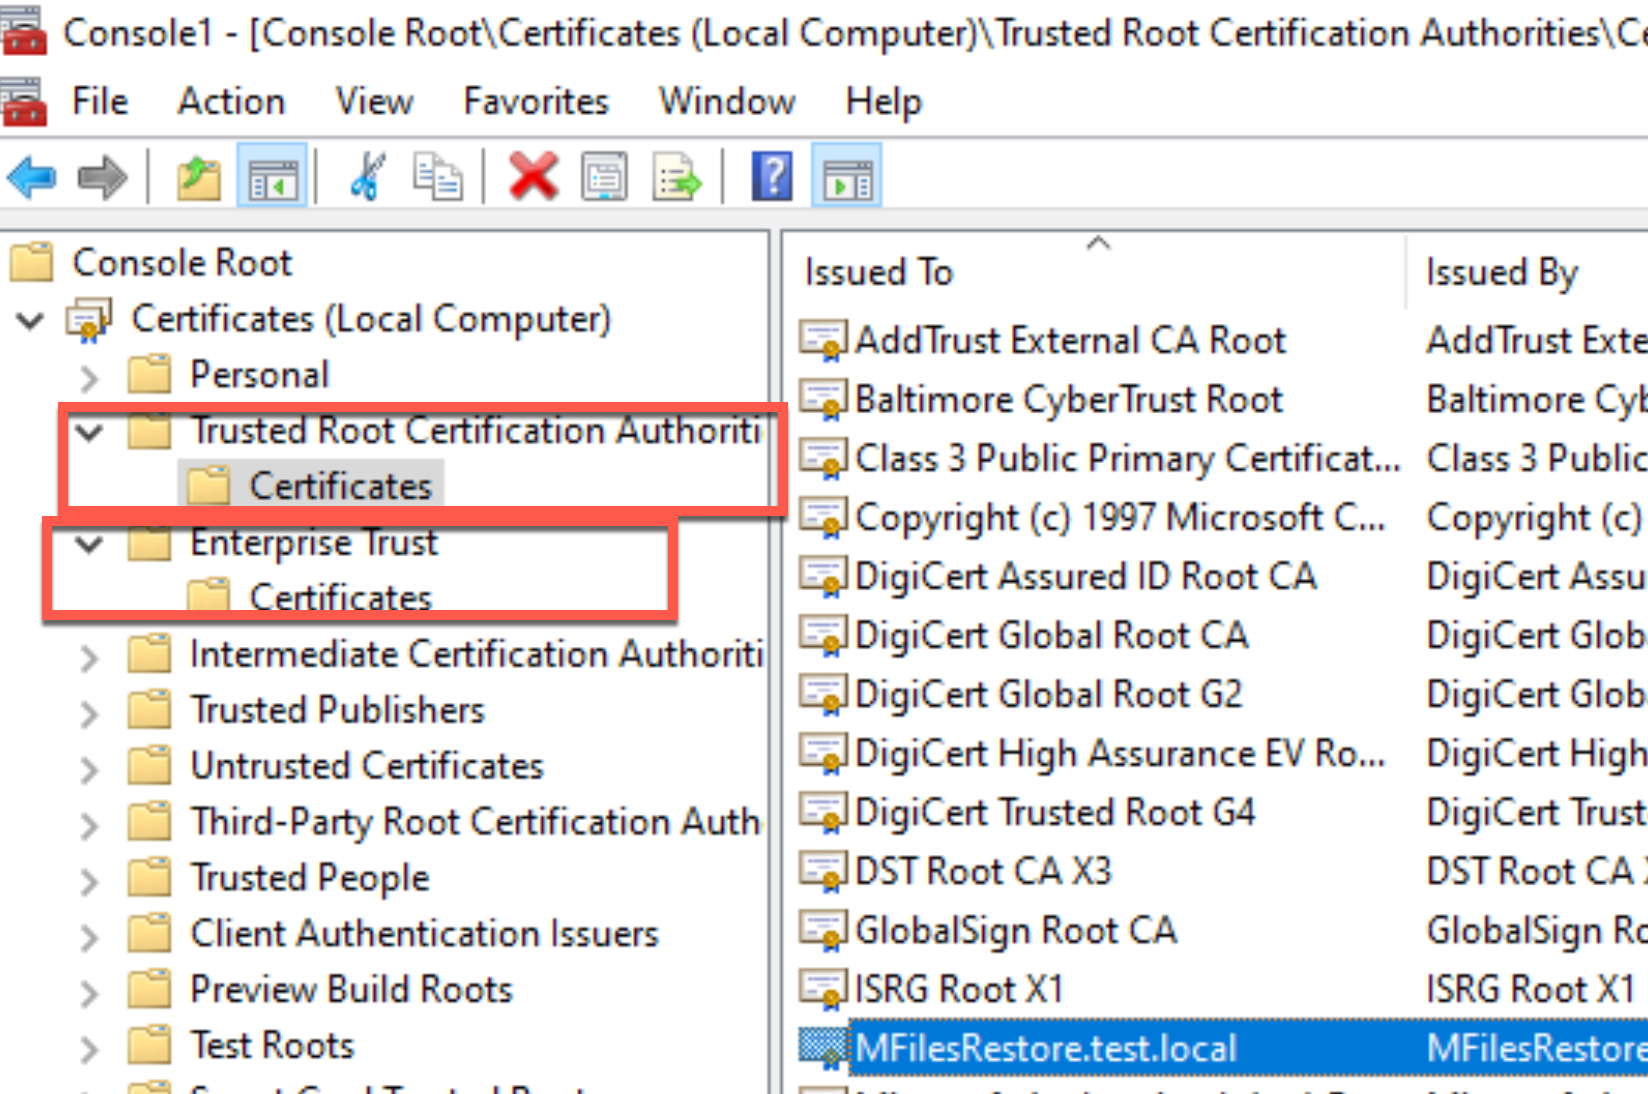
So, in MMC, and new snap-in with certificates from local computer and import your crt into Trusted Root Certification Authority and Enterprise Trust
Let’s retry after that…
Success!!!
We are now accessing M-Files admin through HTTPS
Now, let’s try client side.
On client side, you should also import .crt into Trusted Root Certification Authority and Enterprise Trust store.
Connection from Desktop works
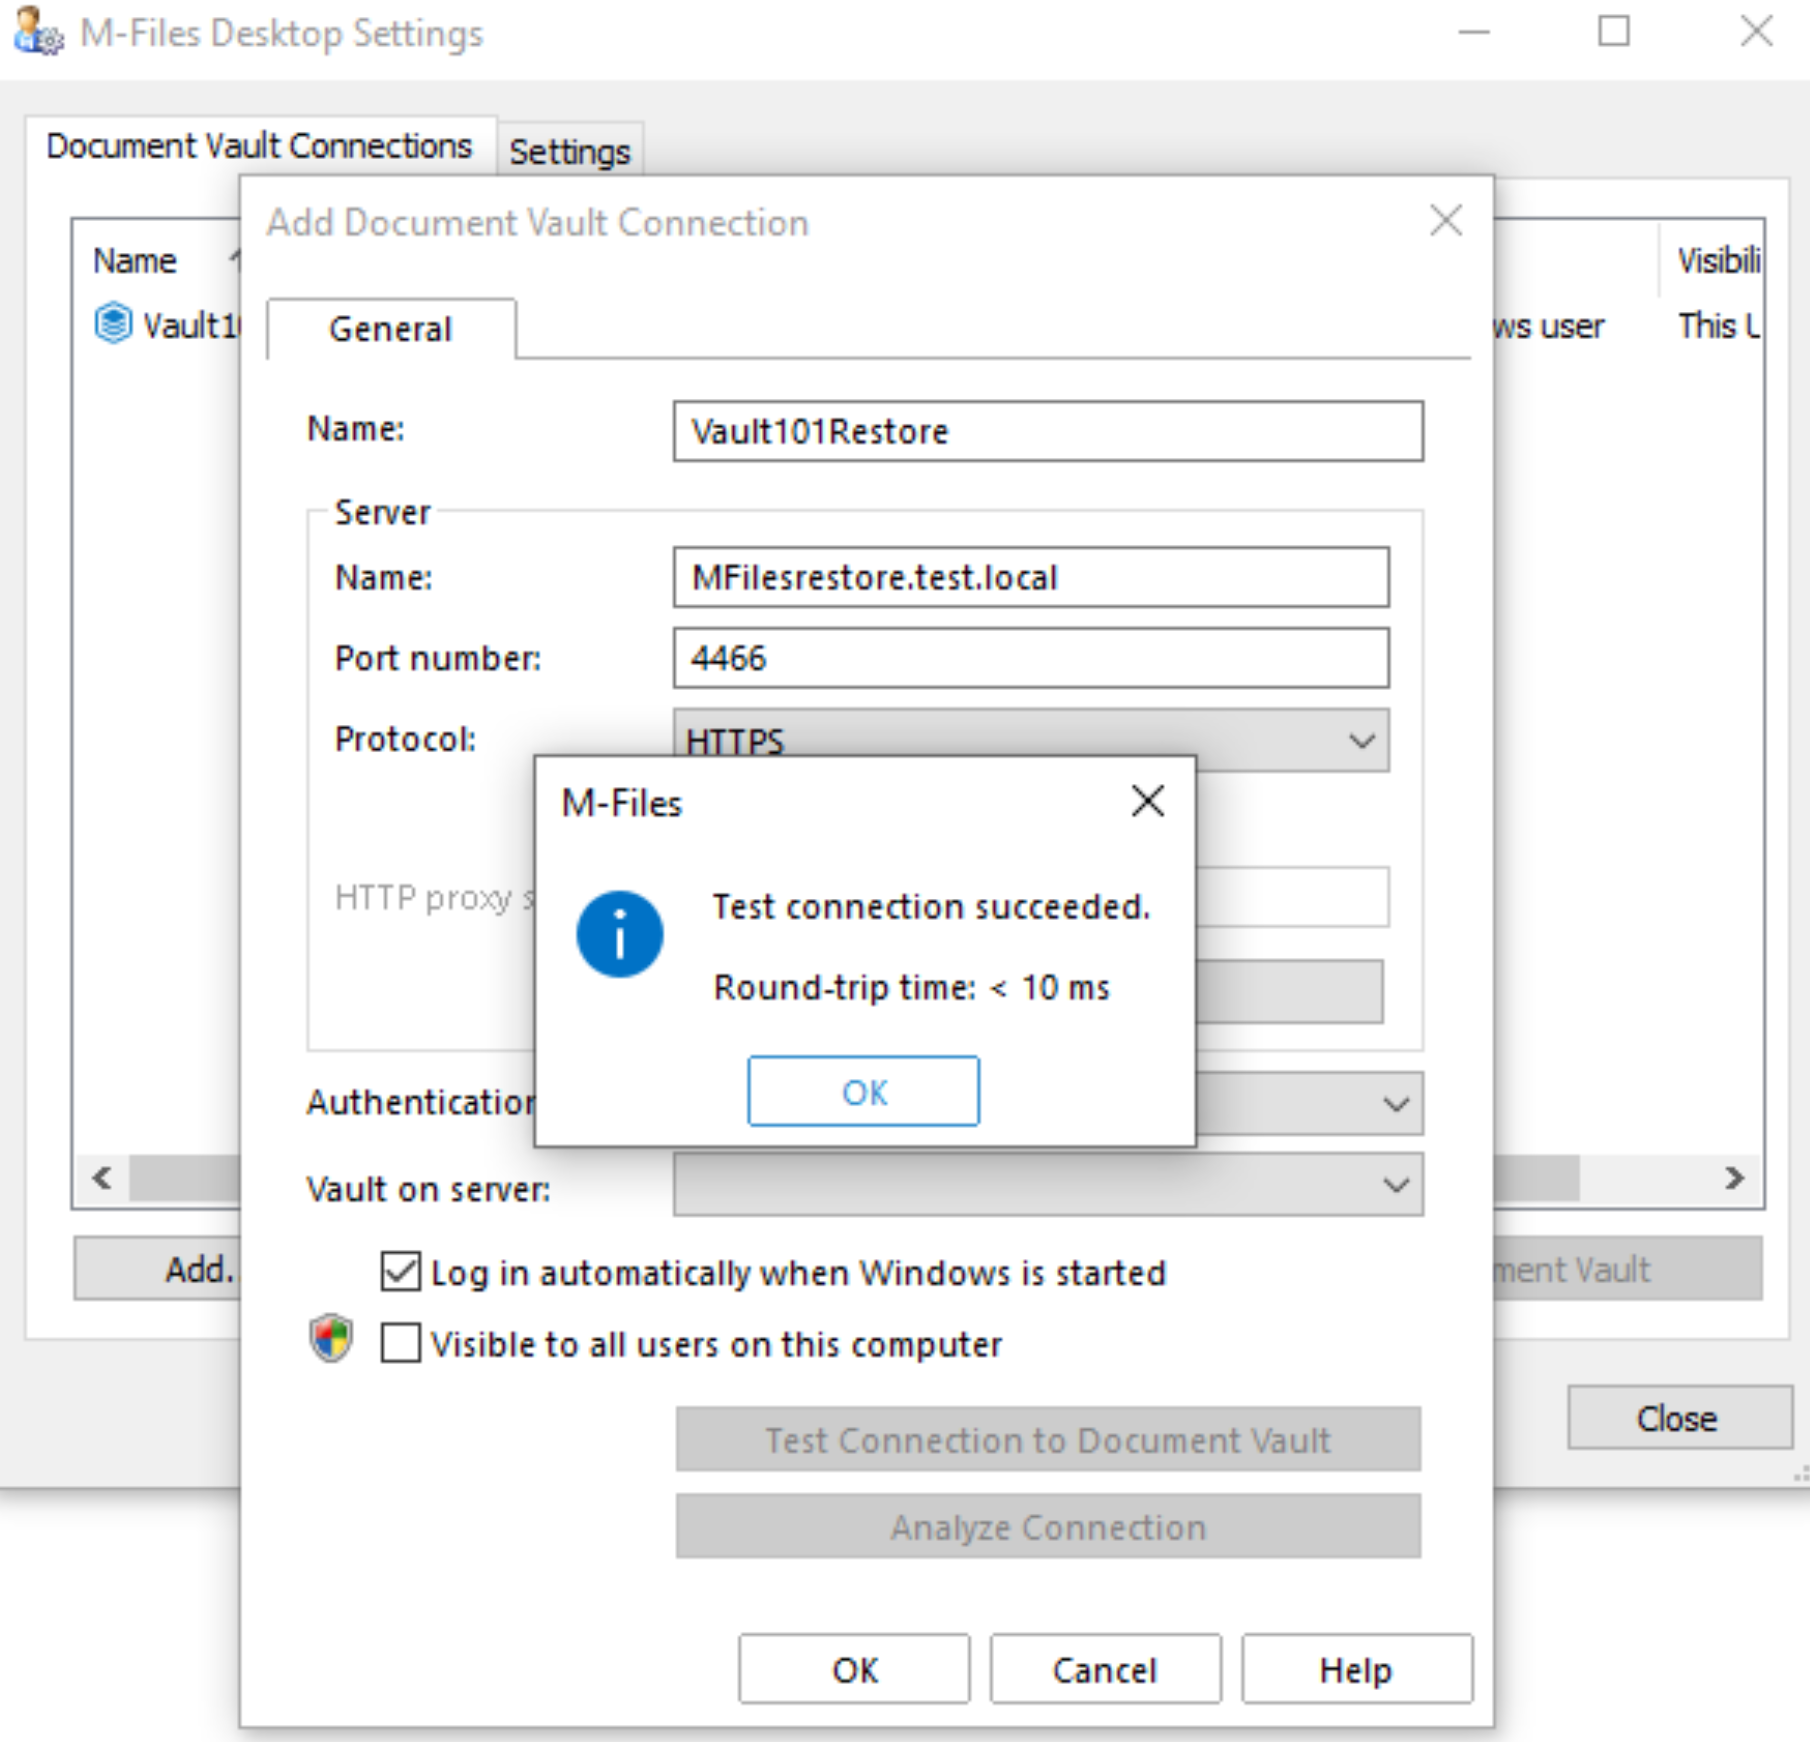
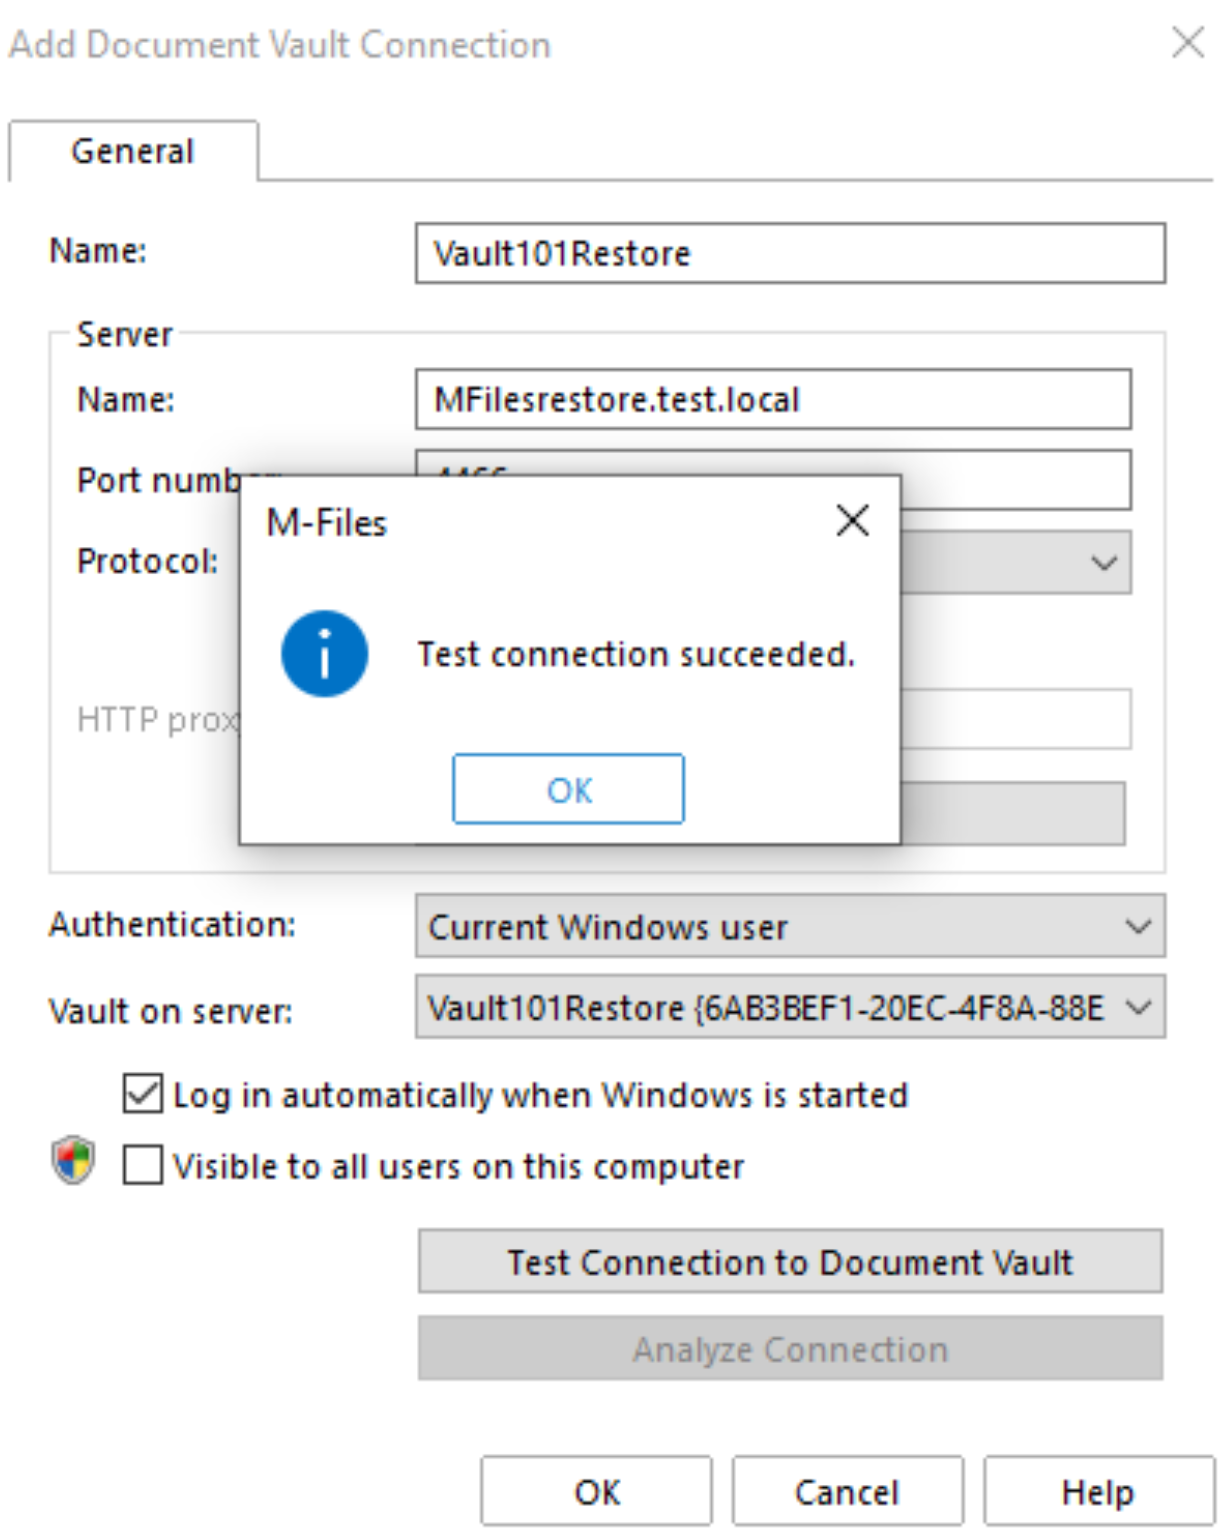
Let’s now try to select Vault and test connection to it
Again, success. Great!! Press ok to finish
I hoped too early… Logging in to the vault xy failed. Access is denied.
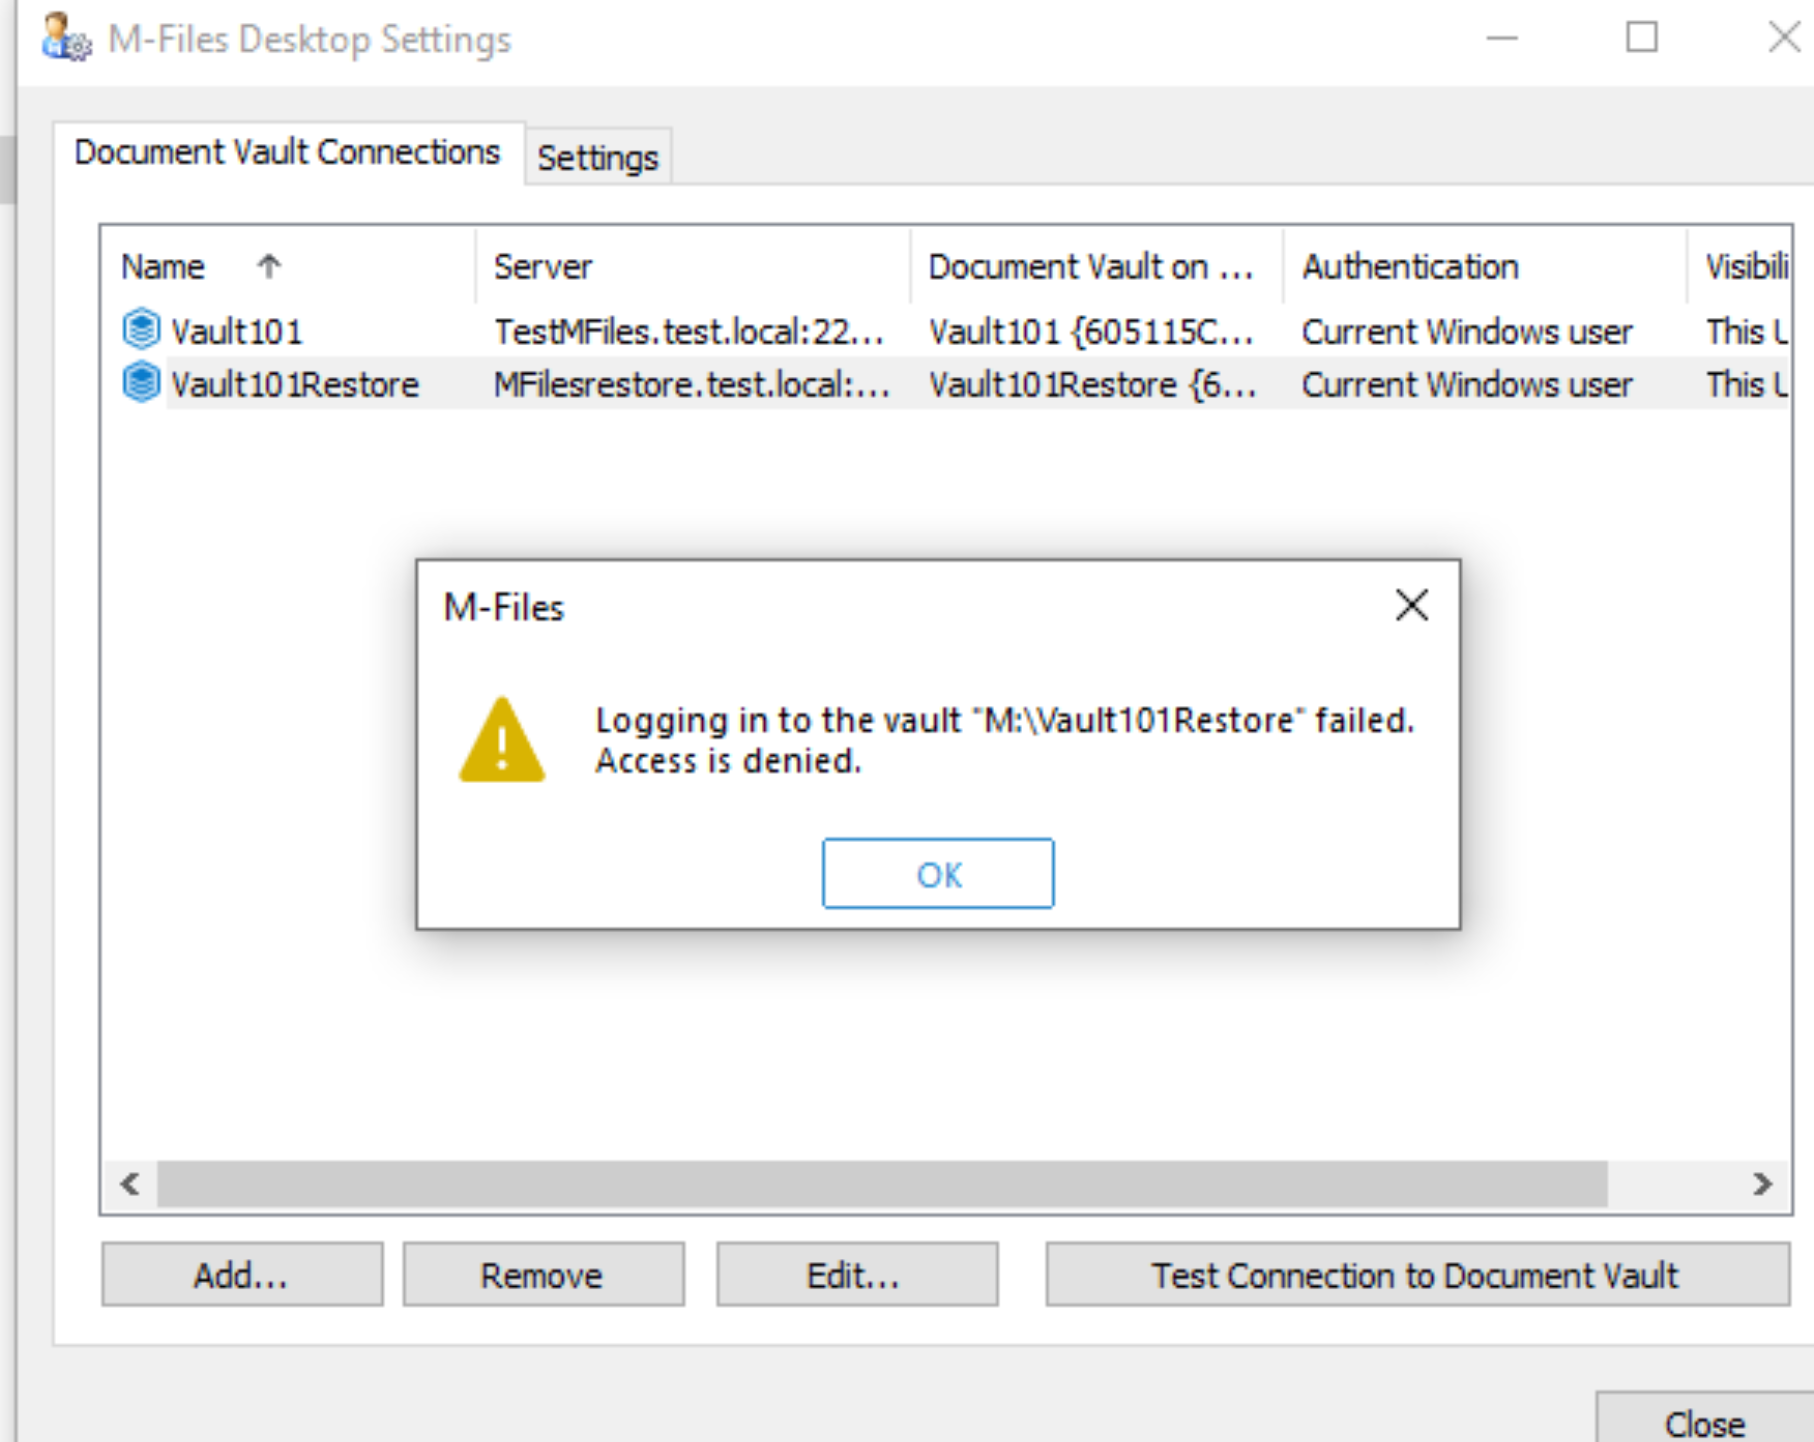
So, access from server works, but from clients not…
In my lab I have Windows Server 2022 Ent v 21H2 with latest patches and also Windows 10 Enterprise v 21H2 with latest patches.
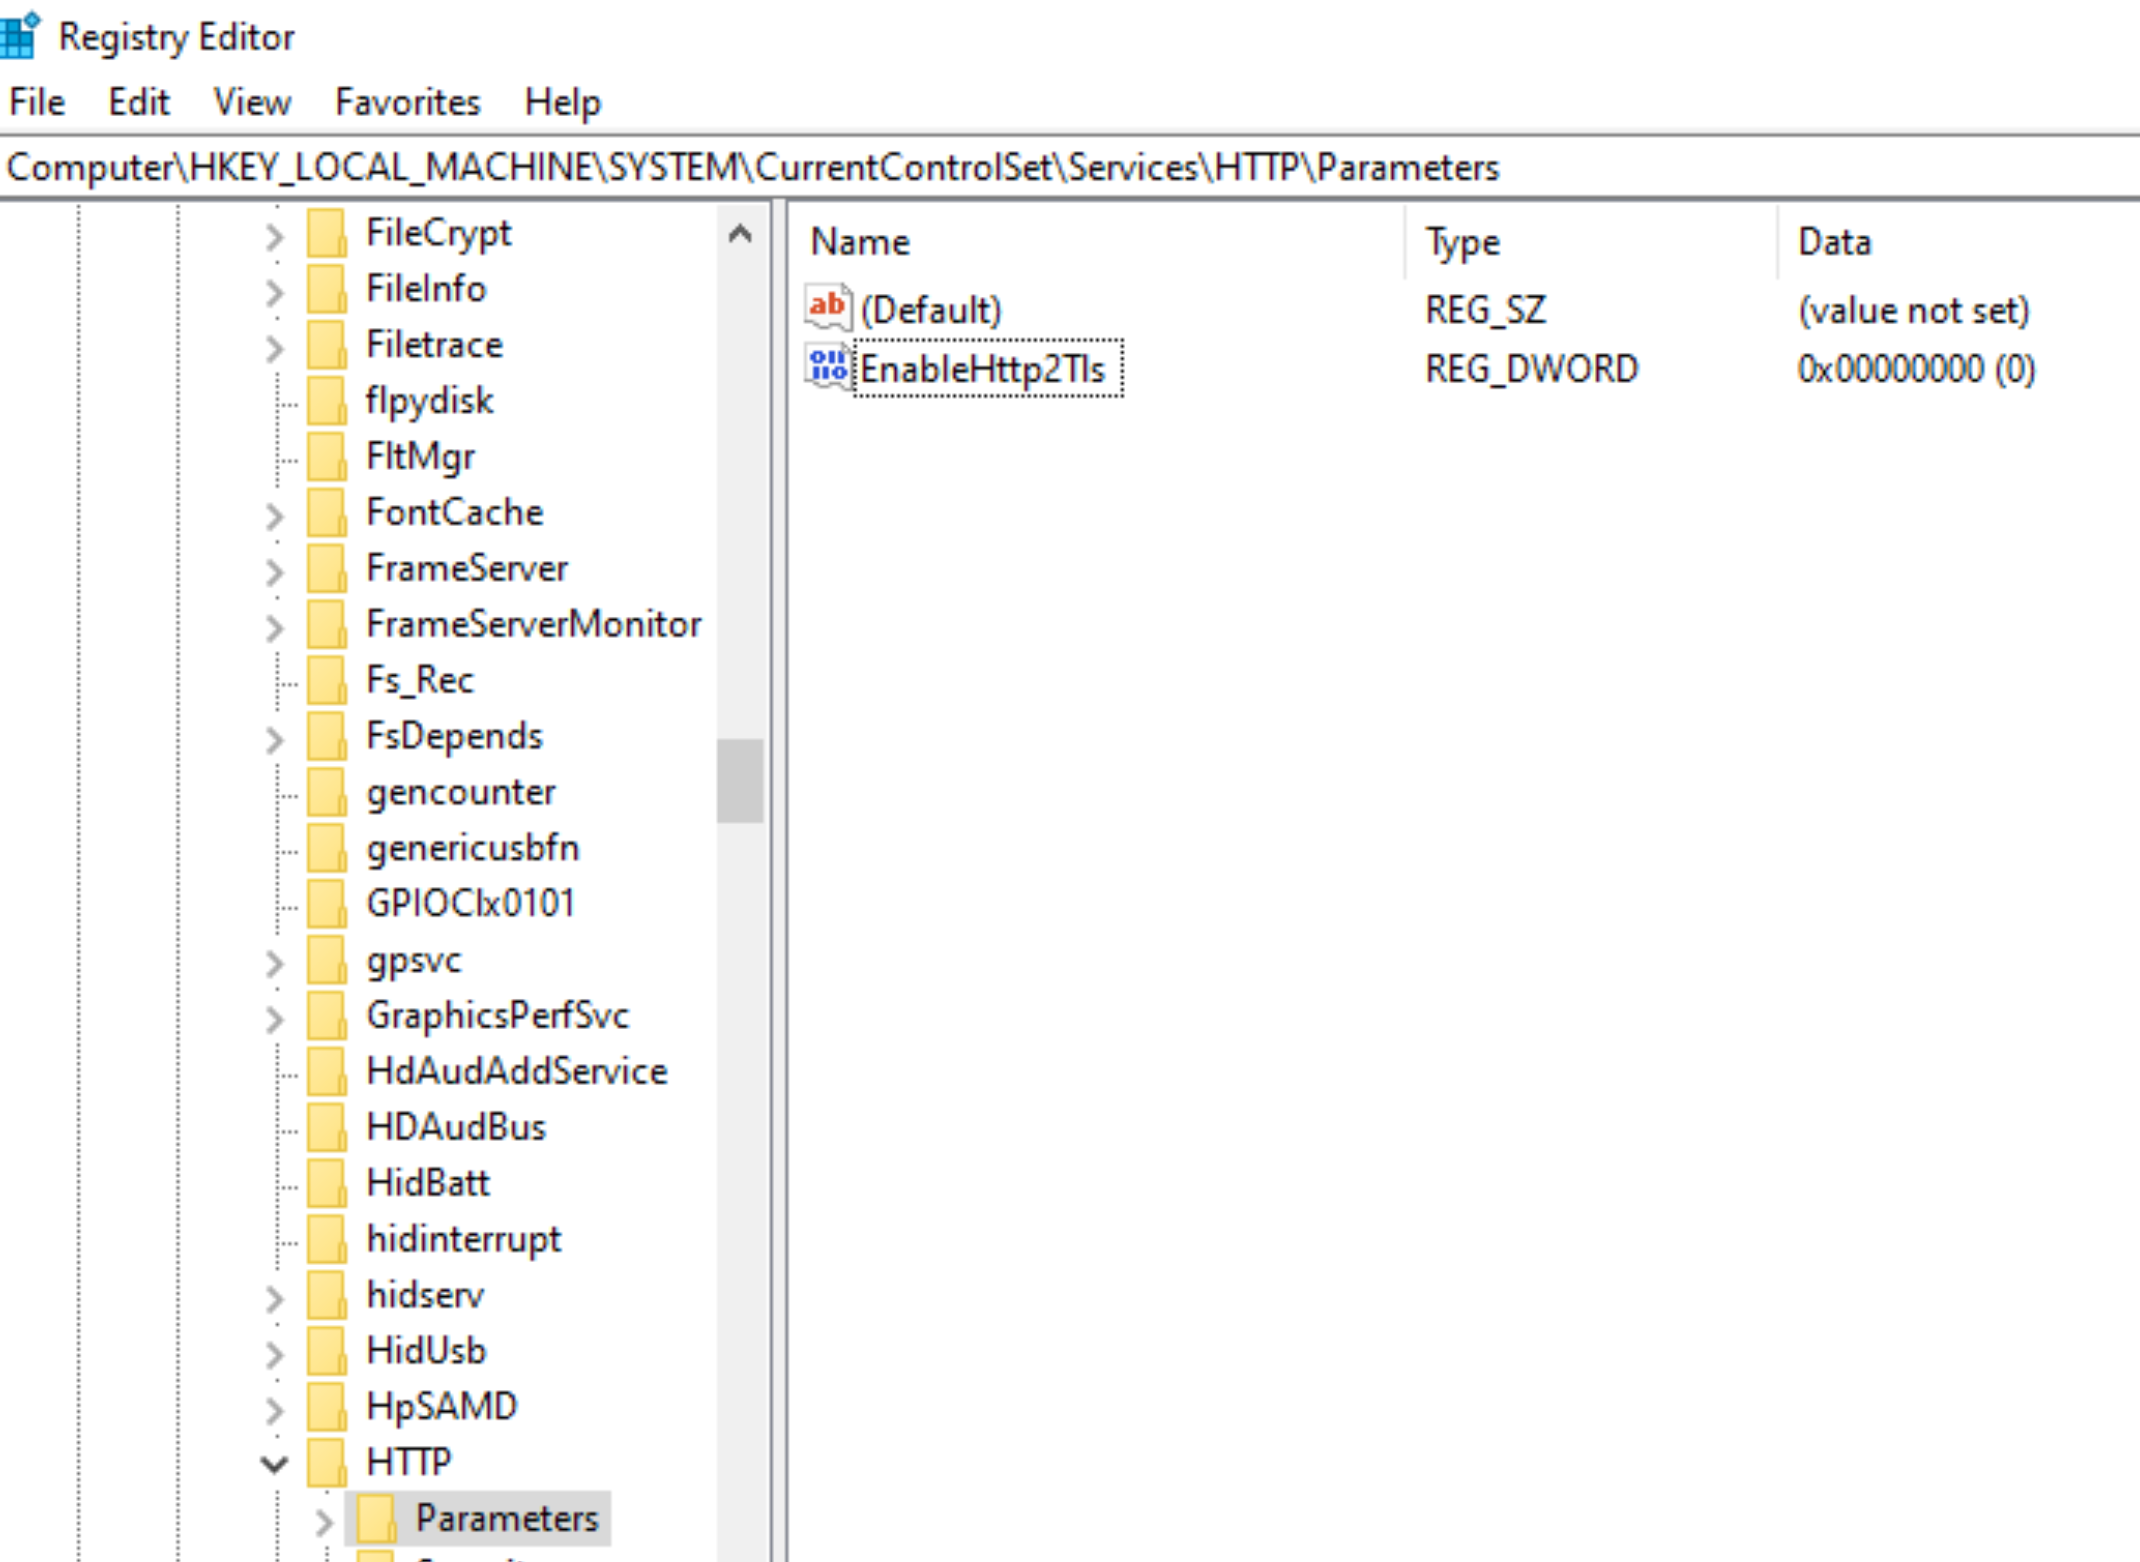
Here is the solution for the problem above
According to the link above – I’m going to implement workaround on my M-Files server – it is dedicated M-Files server, so I don’t have fear that something else will break.
Fix does not need to be applied both to the server, and client side, so I’m going to do it just on server side – it is easier.
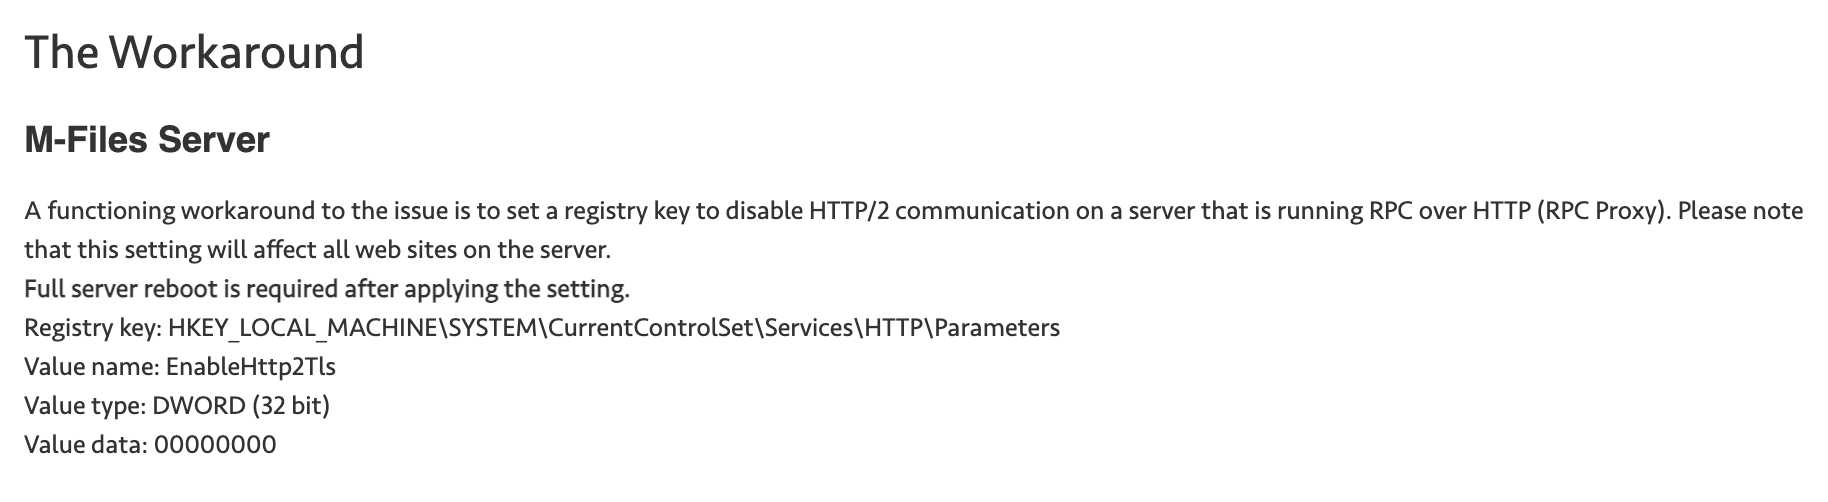
again, watch for spelling.
Reboot the M-Files server and try on client once more!
It works, no more access is denied error!!
Ok, that is it, we now have M-Files with HTTPS inside our local network.
My series of articles about M-Files
Server
M-Files how to configure Metadata
M-Files – users and user groups
M-Files – Create and manage simple workflow
M-Files – Create Workflow with assignments
M-Files – Create Workflow with Approvals
M-Files – Manage permissions for Workflows
M-Files – how to create and use document templates
How to backup and restore M-Files Vault
M-Files – How to enable access to M-Files through website
M-Files how to secure connection between server and clients (HTTPS)
M-Files Migrate from Firebird DB to Microsoft SQL DB
Desktop
Understanding M-Files logic + Overview of M-Files desktop
M-Files Creating Views for M-Files Desktop
M-Files how to save or modify documents?
M-Files How to share documents? How to save eMails to M-Files?