We have already done pFSense installation, you can check it here – https://www.informaticar.net/how-to-install-pfsense-on-hyper-v/ , now it is time for the simple configuration of the firewall.
I`ll be testing with the following: Hyper-V hypervisor, Windows Server 2016 STD Evaluation, pFSense 2.3.4
Windows Server 2016 has only internal network (for communication with other VMs on LAN) – 10.20.20.2/16
pFSense has two network interfaces – LAN (for communication with VMs within local network) 10.20.20.1/16
WAN (for intrnet connection) – that will be my fixed public IP address.
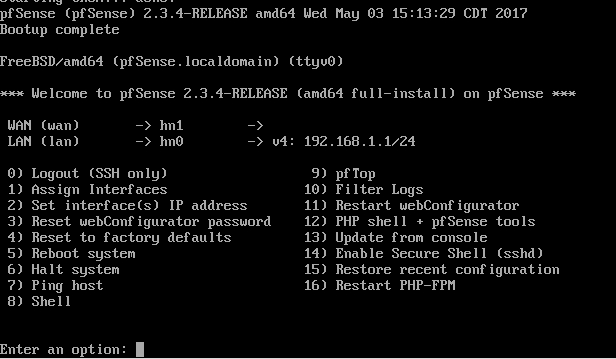
Let us start with the pFSense – after installation I`m greeted with following screen
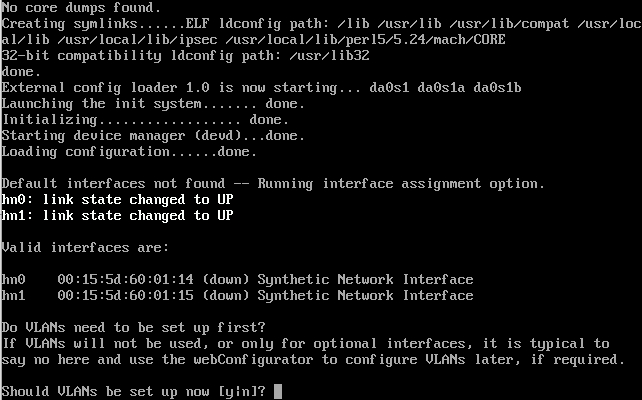
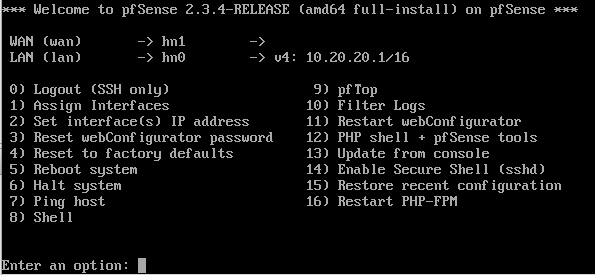
We have two network interfaces hn0 and hn1, but which one is LAN, and which is WAN?
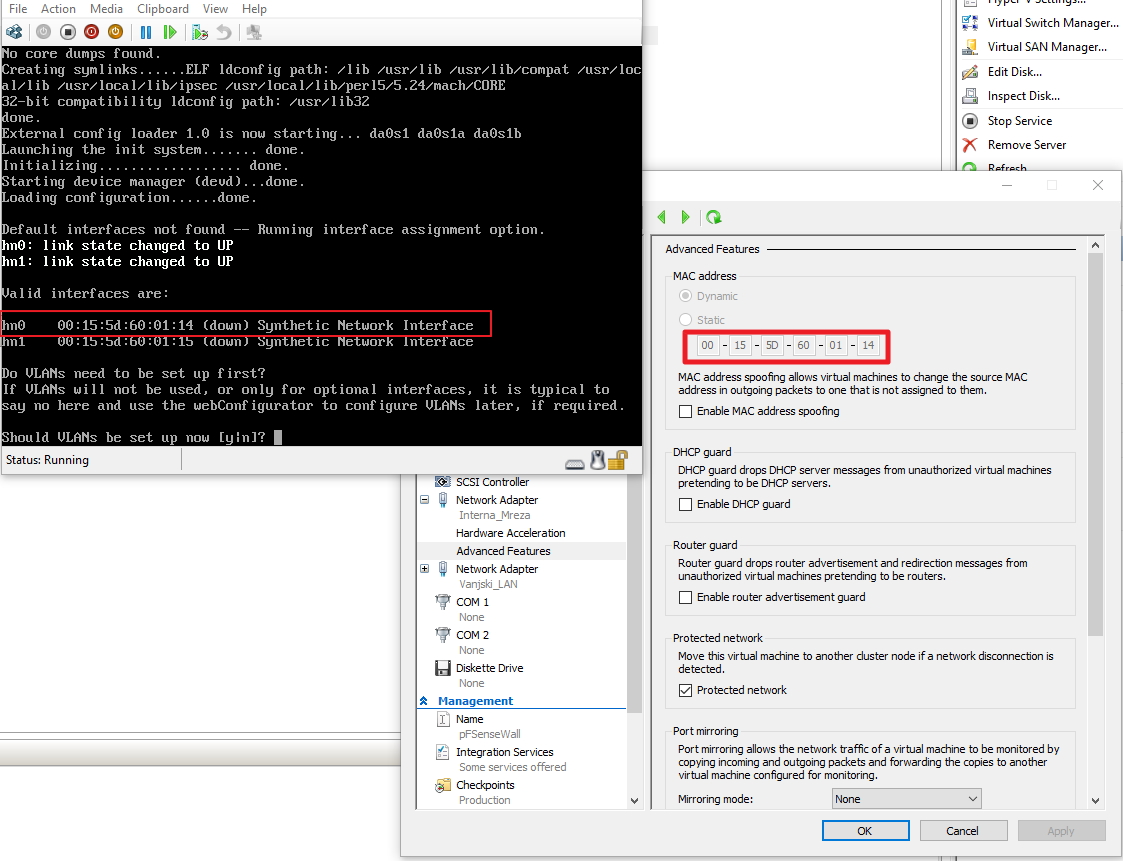
Head on to the Settings of the pFSense VM |Hardware |Select Network Adapter and expand + sign | Select Advanced Features | You should see MAC address of the network adapter. It seams like hn0 is my LAN adapter, and hn1 is WAN adapter.
Let’s begin with the setup
We will not be using VLANs in this LAB. This is simple LAB, with just firewall config.
“Should VLANs be set up now [y:n]? N

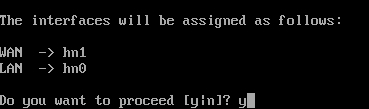
Next step is WAN link selection (public/internet NIC) – since we were smart enough we know that hn1 is our WAN interface.
I don`t need auto detection, I`ll enter hn1 – confirm with ENTER

Next we are asked for LAN interface – that will be hn0 in this case – confirm with ENTER

Just leave blank and press enter
![]()
If you are sure you assigned right interfaces – enter Y
…
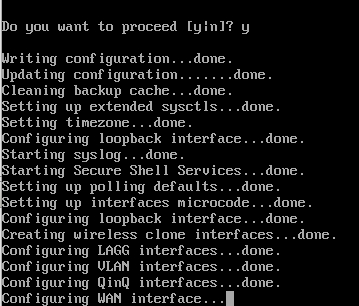
After some time…
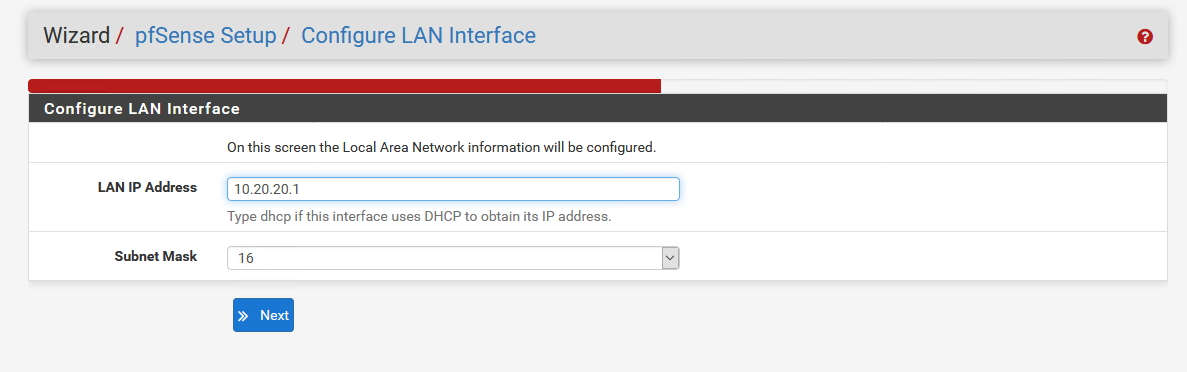
I want to setup another LAN address for LAN interface. So I`ll start another wizard.
Enter 2 “Set Interface(s) IP address
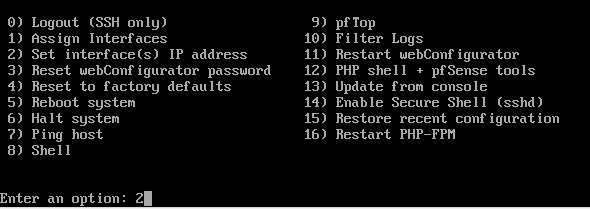
We want to change LAN ip address so we`ll choose 2 – LAN
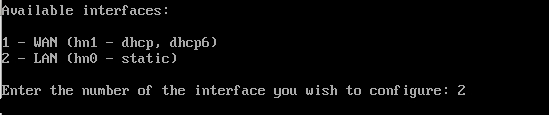
I`m entering new IP address – in this LAB – 10.20.20.1
![]()
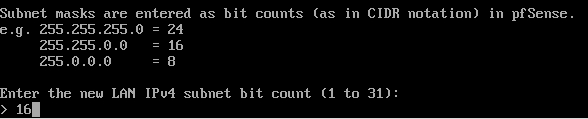
Subnet mask in this case is 16bit
Just press enter and leave blank

We`ll also won`t be needing IPv6 IP so I`ll leave that blank and confirm with Enter
![]()
I don`t want DHCP server running on pFSense so I`ll choose N. You have an option for pFSense to be your DHCP server for LAN. pFSense in general has many great network options.
![]()
For now we want http protocol for our web configurator – Y
![]()
… Press Enter
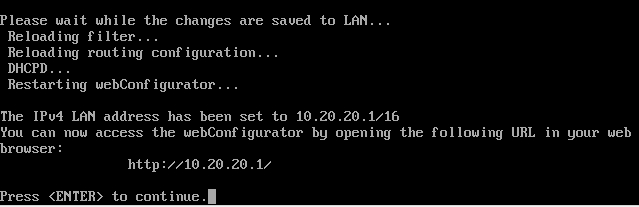
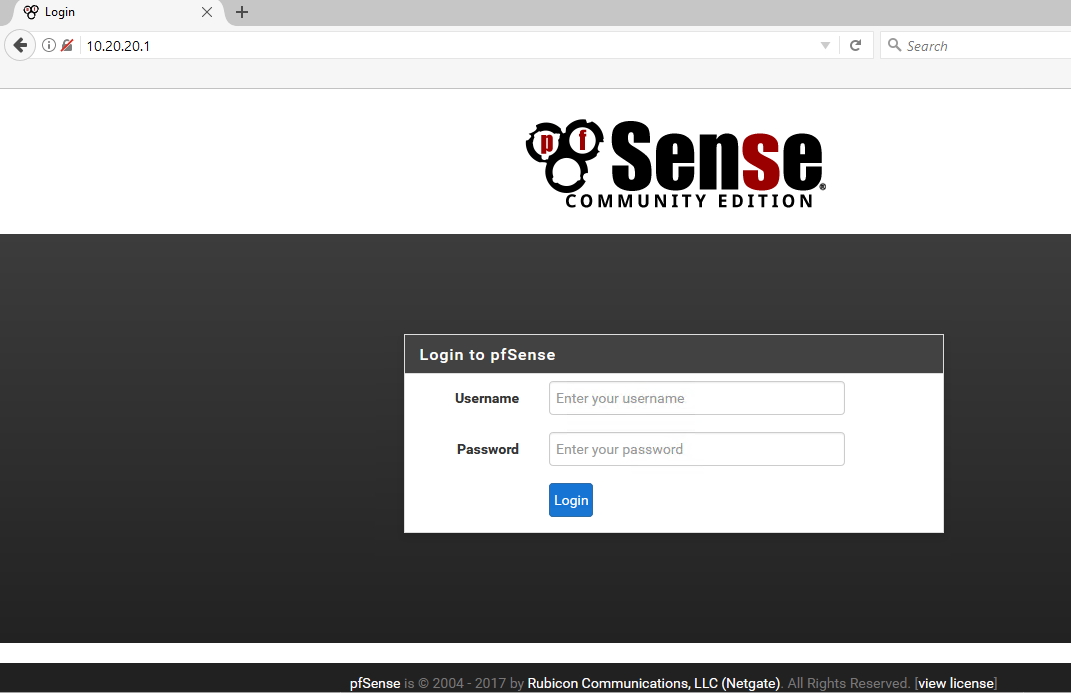
We are back on the login screen, but now with different LAN IP address
Now, that is it for now for the pFSense virtual machine. Let’s head to Windows Server 2016 VM that is configured with only LAN access on IP 10.20.20.2 – IP is static – 10.20.20.1 is configured as Gateway and 8.8.8.8 as DNS
Virtual machine should be able to reach internet after we complete pFSense configuration.
In Windows Server VM we`ll head to following address – http://10.20.20.1 (LAN address we assigned to the pfSense)
I`m greeted with login screen – that is good signal, we done everything right so far.
Default username and password for pFSense are as follows
Default username: admin password: pfsense
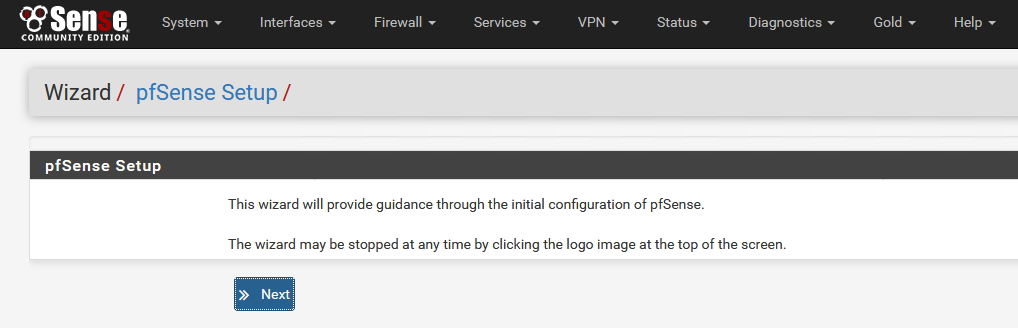
After login – another wizard screen
Let us configure a bit more
Next
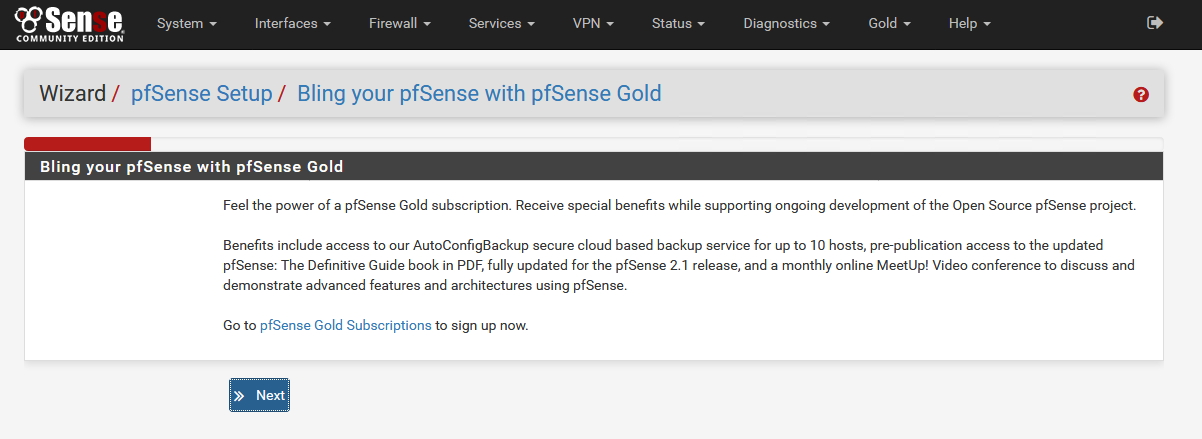
You`ll be asked for pFSense Gold subscription. pFSense is free product, but if you use it heavily I recommend supporting developers of this great product.
Next
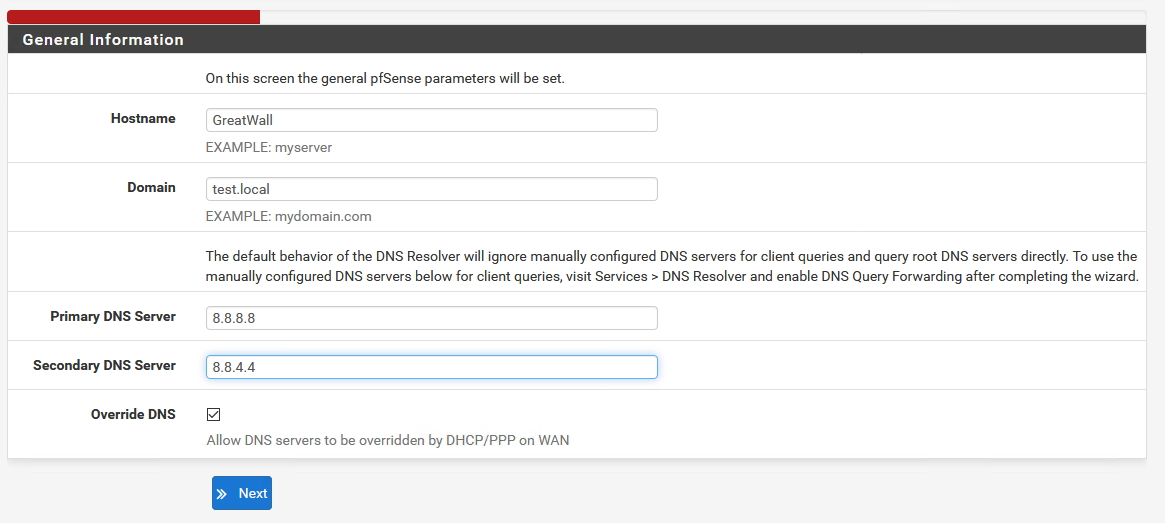
Enter name for your firewall installation and Domain if you have one, and DNS servers – I entered Google DNS servers, you can enter DNS servers from your provider or whatever works for you.
Next
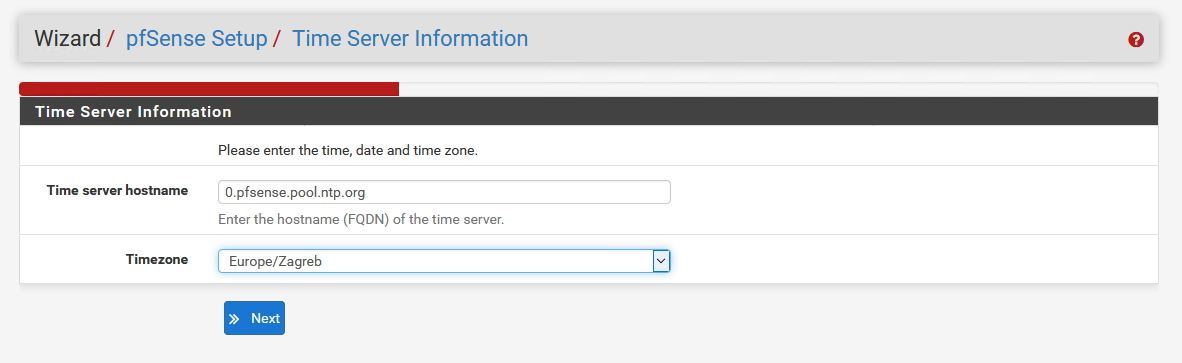
I also left Default NTP server (if you have domain or ISP NTP you can enter it here) and selected my city for Timezone |Next
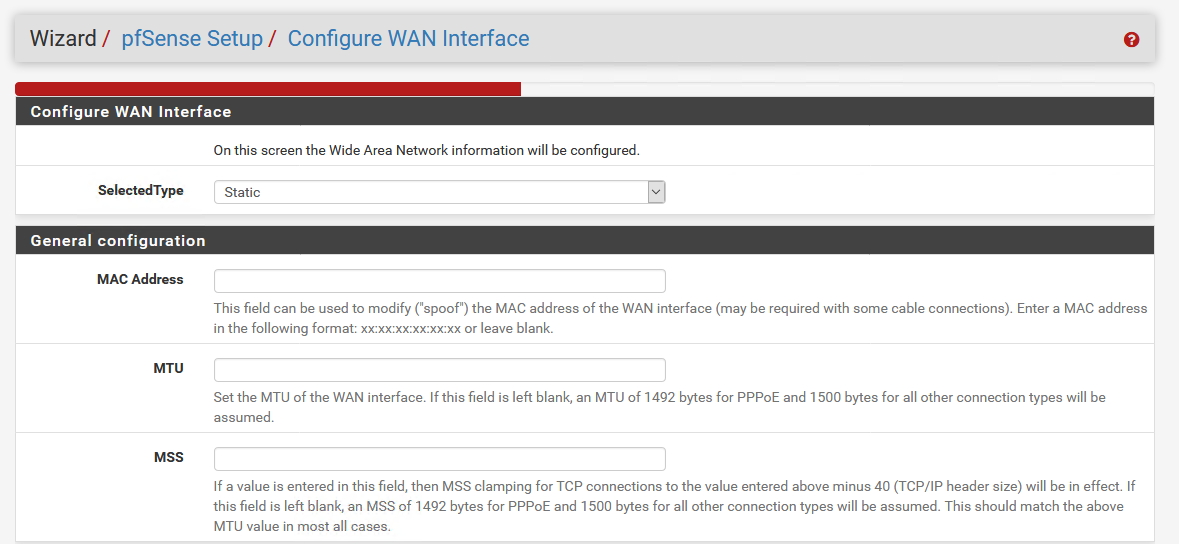
Now to the important step – WAN interface configuration
I have static IP so I`ll be choosing Static under SelectedType. You can also configure DHCP, PPoE or PPTP connections here.
Other options on this screenshot are in my case blank
Under Static IP configuration you`ll enter IP address and Subnet Mask your provider gave you, and you`ll also enter Upstream Gateway(IP Address of ISPs router)
I masked my IP address partially.
DHCP client configuration and PPoE configuration are blank for me.
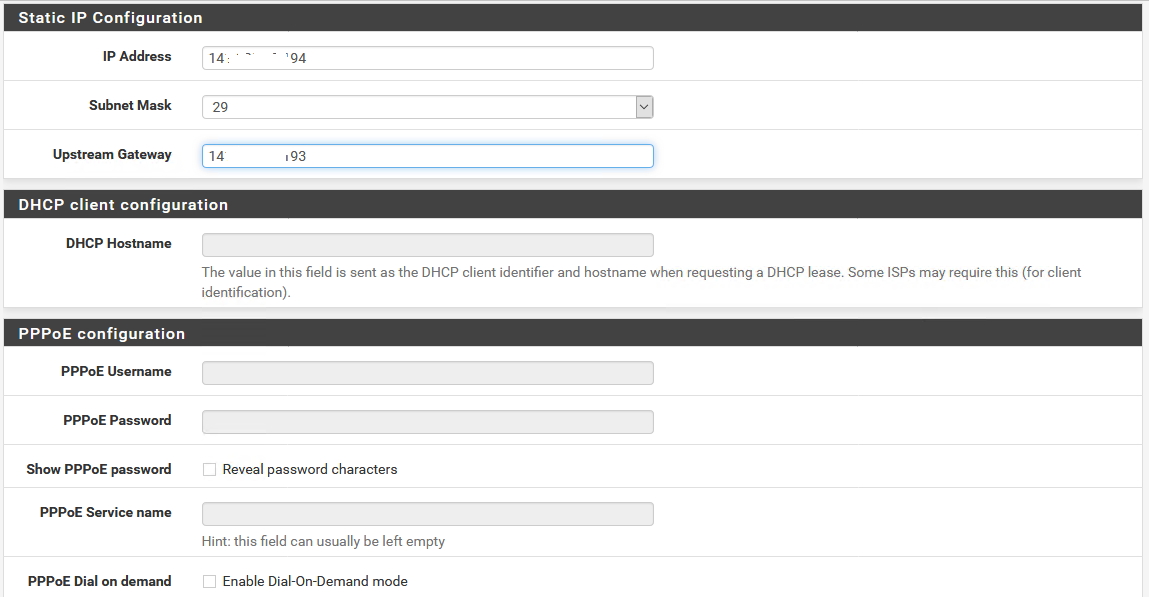
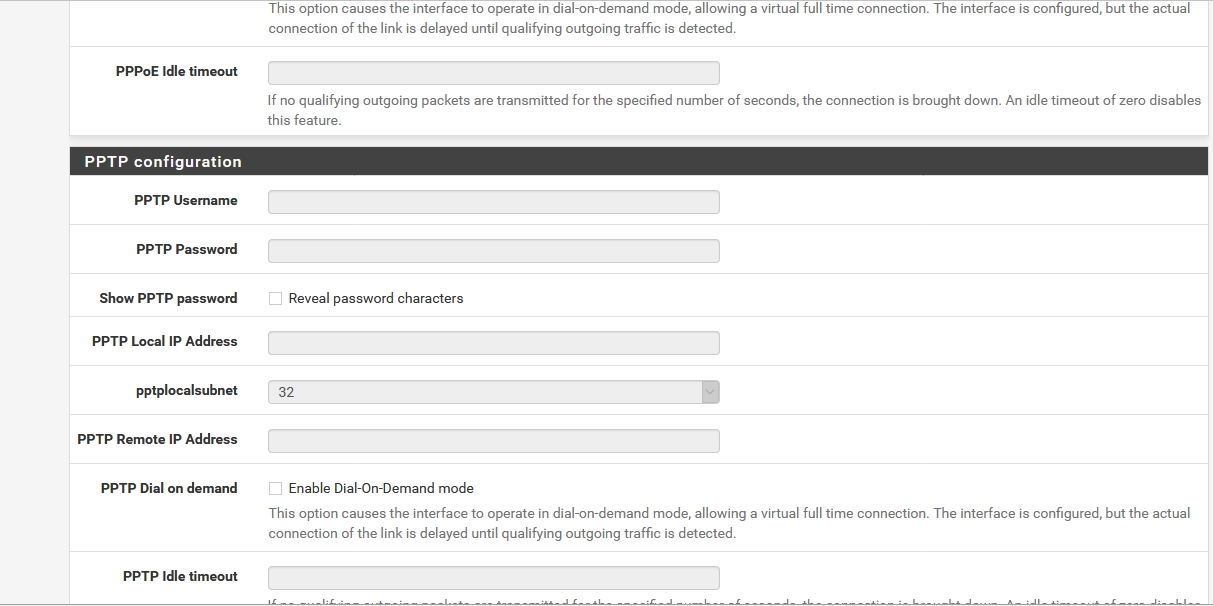
PPTP configuration also blank in my case
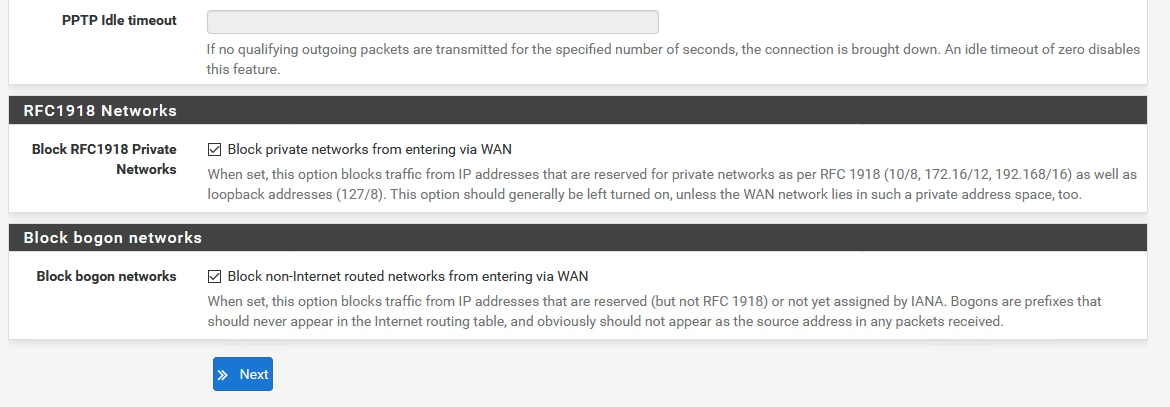
Under RFC1918 Networks and Block bogon networks I selected both marks |Next
We already configured LAN so I`ll just select Next
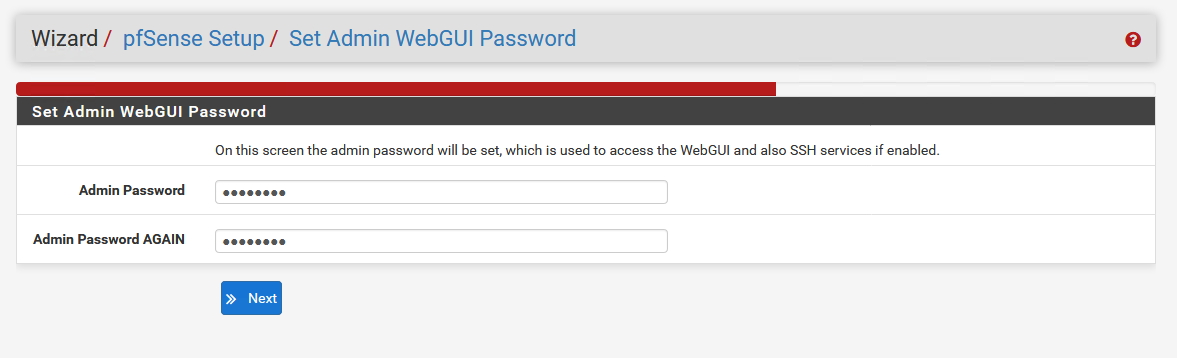
It is recommended for you to change default password – do not enter default or simple password, you need strong password for your firewall configuration |Next
Reload
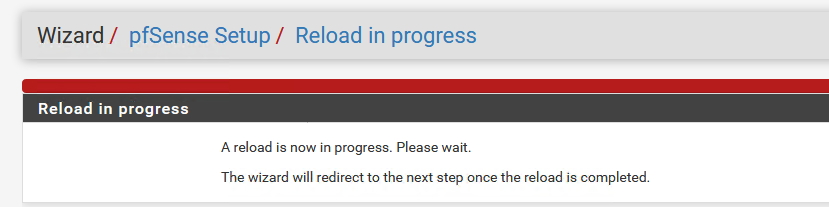
Wizard completed

Let’s try and visit something on the web – success
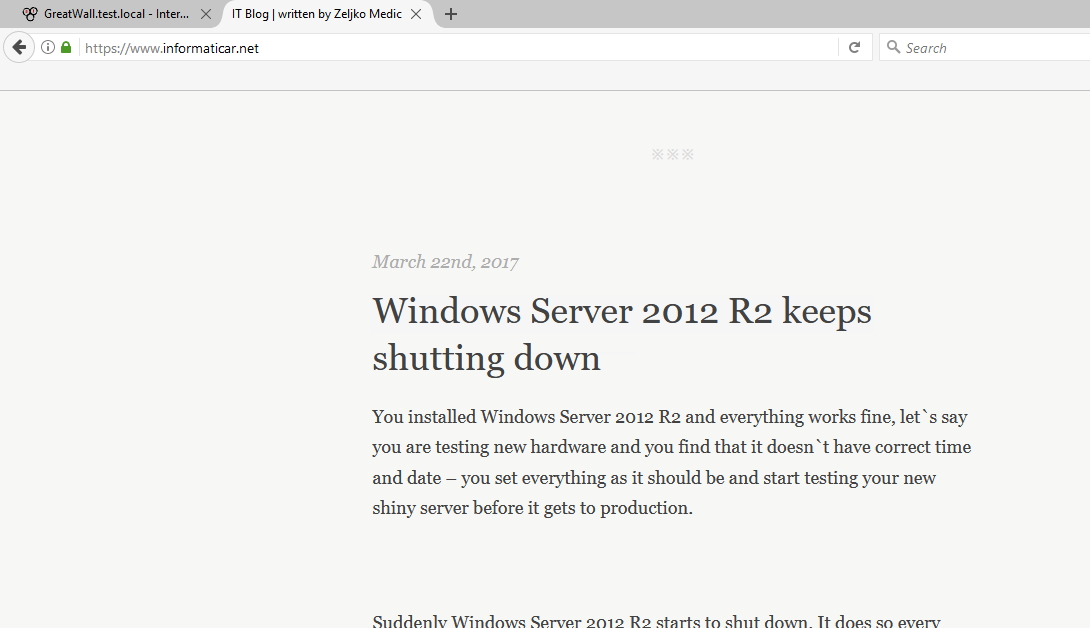
That is it, you now have basic functional and free firewall for your network.
I`ll be covering a few more themes regarding pFSense
Creating simple LAN rule, creating simple WAN rule and VPN configuration.
Generally, I`m very pleased with pFSense, and I highly recommend it as you home or SMB solution.
pFSense article series:
How to install pFSense on Hyper-V – https://www.informaticar.net/how-to-install-pfsense-on-hyper-v/
How to configure pFSense – https://www.informaticar.net/how-to-configure-pfsense/
How to define firewall rules on pFSense – https://www.informaticar.net/how-to-define-firewall-rules-on-pfsense/
How to create port forwarding on pFSense – https://www.informaticar.net/create-port-forwarding-on-pfsense/
How to setup OpenVPN on pFSense – https://www.informaticar.net/how-to-setup-openvpn-on-pfsense/
How to setup OpenVPN on client (pFSense) – https://www.informaticar.net/how-to-setup-openvpn-pfsense-version-on-client-pc/
OpenVPN on pFSense: Enable access to the LAN resources – https://www.informaticar.net/openvpn-on-pfsense-enable-access-to-the-lan-resources/
How to revocate user certificate on pFSense – https://www.informaticar.net/how-to-revocate-user-certificate-on-pfsense-openvpn/
How to import PFX certificate to pFSense – https://www.informaticar.net/how-to-import-pfx-certificate-to-pfsense/