Since pFSense is my preferred choice when it comes to firewall solutions, it is logical that I would setup VPN solution on it. In this LAB we`ll be creating OpenVPN SSL Peer to Peer connection.
My goal is to setup OpenVPN without additional payed services. So that means issuing own certificates, managing own CA and revocation list.
As usually, I read a lot of documentation but still wasn`t able to get working configuration, since I often have different approach, and want to achieve working solution with minimal investments. Especially for my private needs and testing labs.
Here is my cookbook for OpenVPN on pfSense – Peer to Peer SSL edition.
Settings:
Inside pFSense network
Host: Windows Server 2016 STD Eval – 10.20.20.2/16
Firewall/VPN: pFSense 2.3.4 – LAN Interface: 10.20.20.1/16
WAN Interface: Static IP
OpenVPN Interface for clients: 192.168.1.0/28
Machine that will be connecting to the OpenVPN is Windows Server 2012 R2 STD Eval – Random local IP
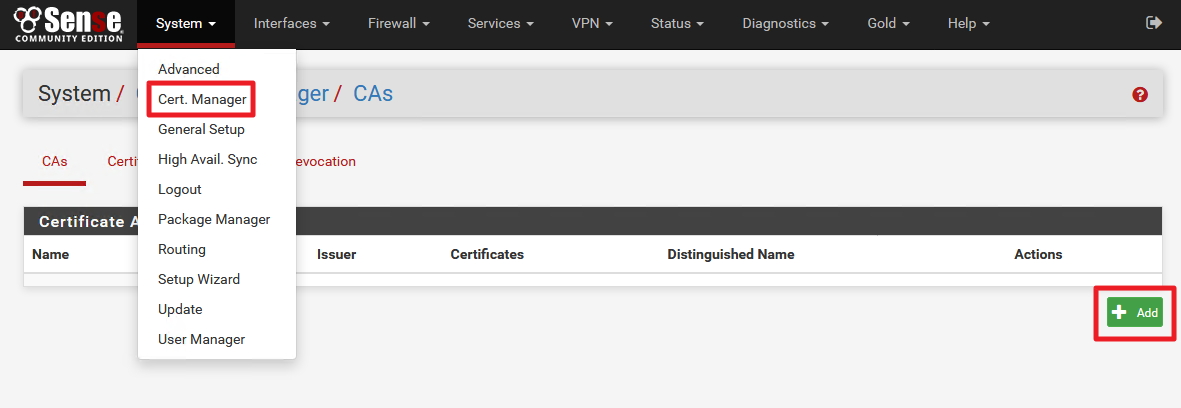
First step – we need local Certificate Authority on pFSense
System | Cert.Manager | CAs | Add
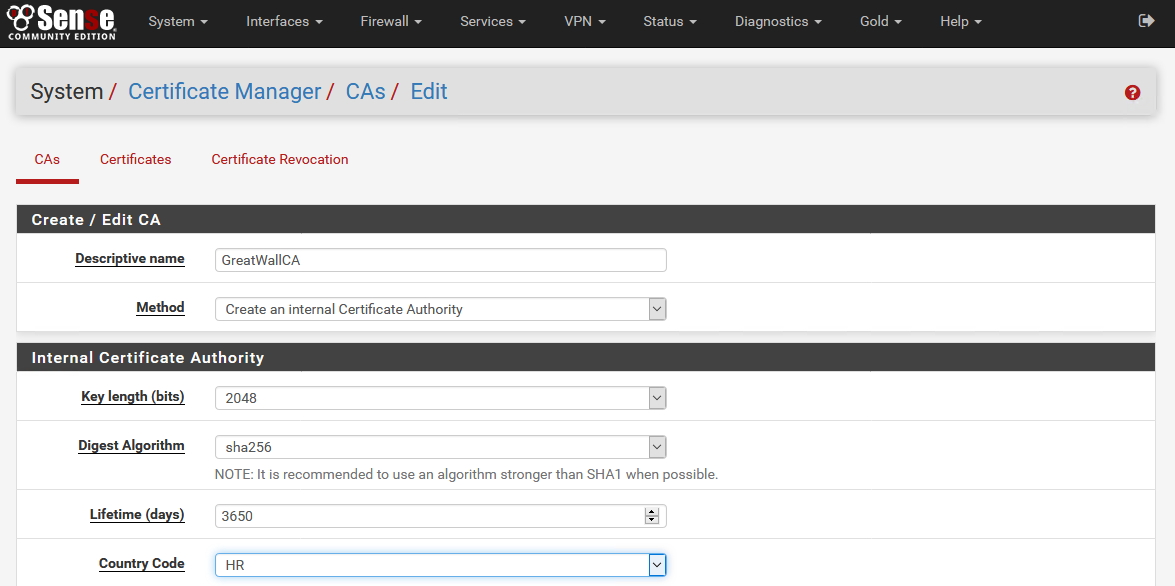
Descriptive name: Enter a name for the CA | Method: Create an Internal Certificate Authority | Key Length: 2048 (you can always use stronger) | Digest Algorithm: sha256 | Lifetime (days): 3650 (you can select shorter, or longer period) | Country Code: HR (select your country)
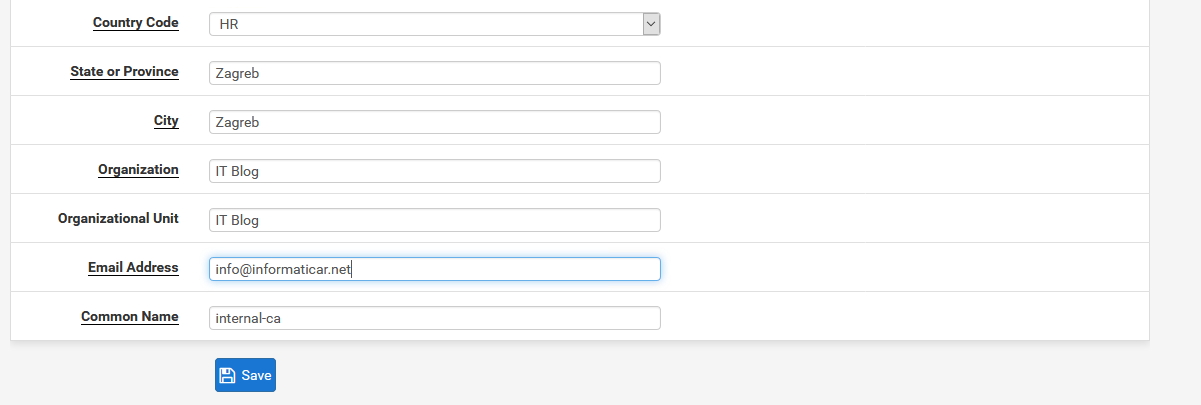
Enter your personal or company data |Common name leave as is |Save
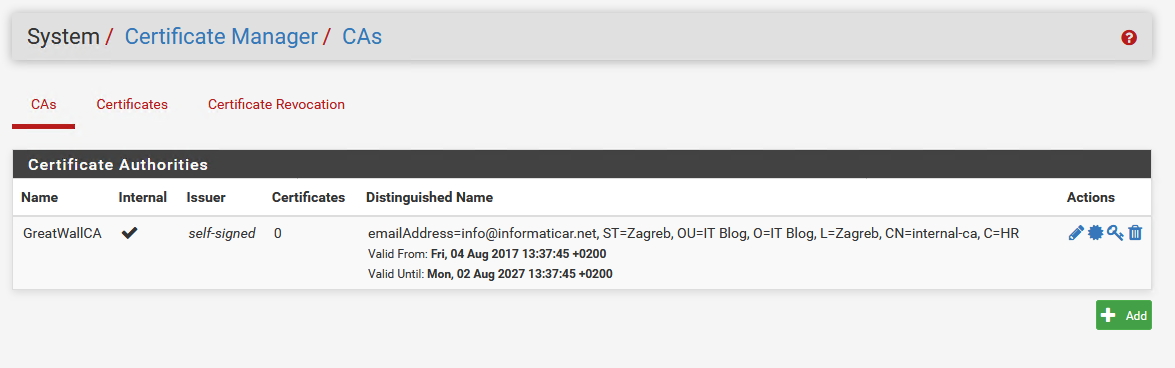
Created
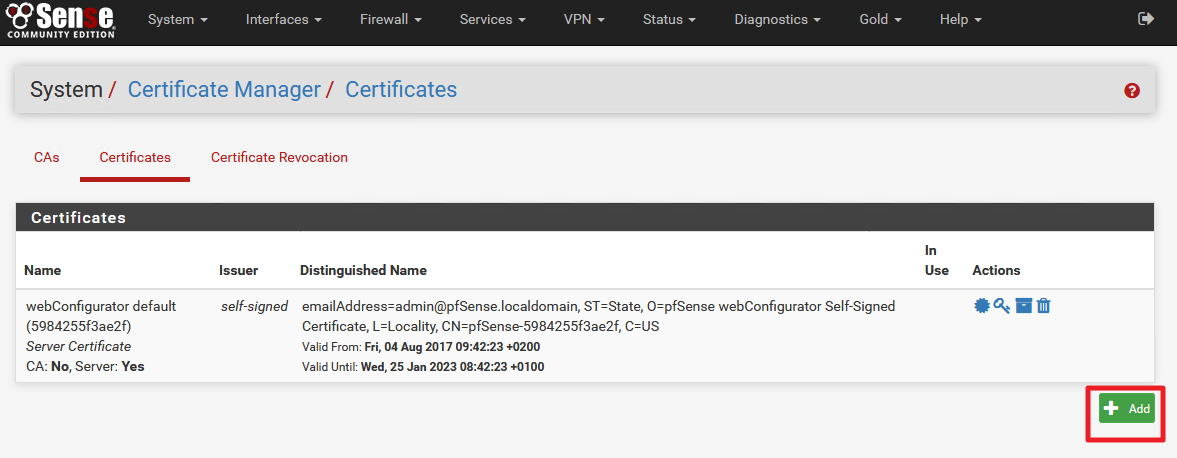
Next step should be adding server and client certificates
First, we`ll create Server Certificate
System | Cert.Manager | Certificates | Add
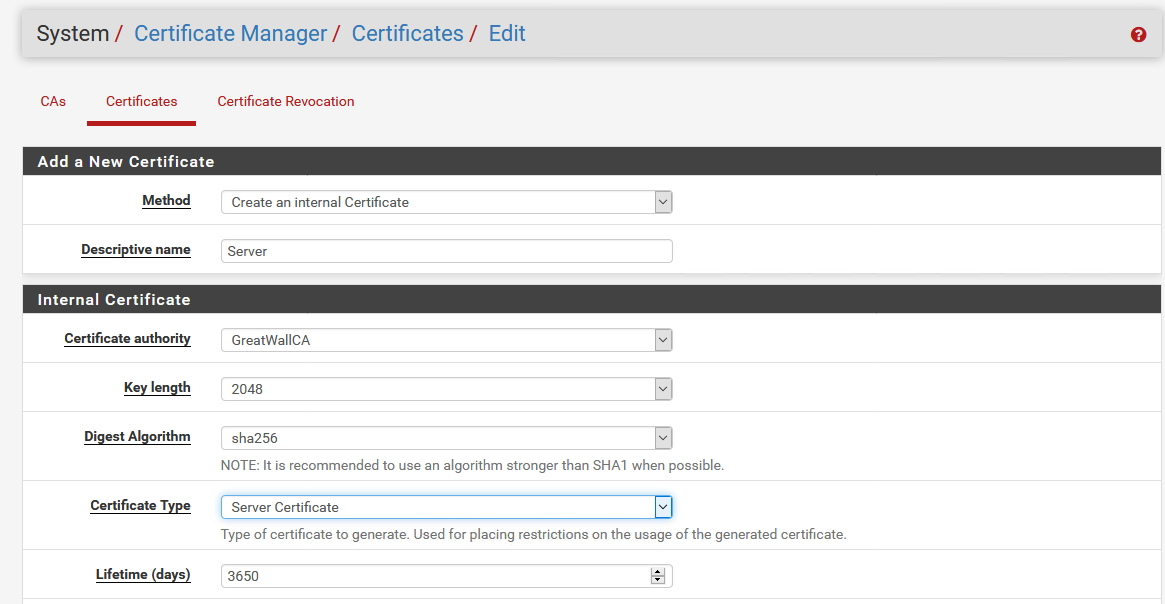
Method: Create an Internal Certificate | Descriptive name: enter something you`ll recognize) | Certificate Authority: (should be server we just created) | Key length and Digest Algorithm should be the same as for CA. (2048 and sha256 in my case) | Certificate Type: Server Certificate | Lifetime (select length, for me is 10 years)
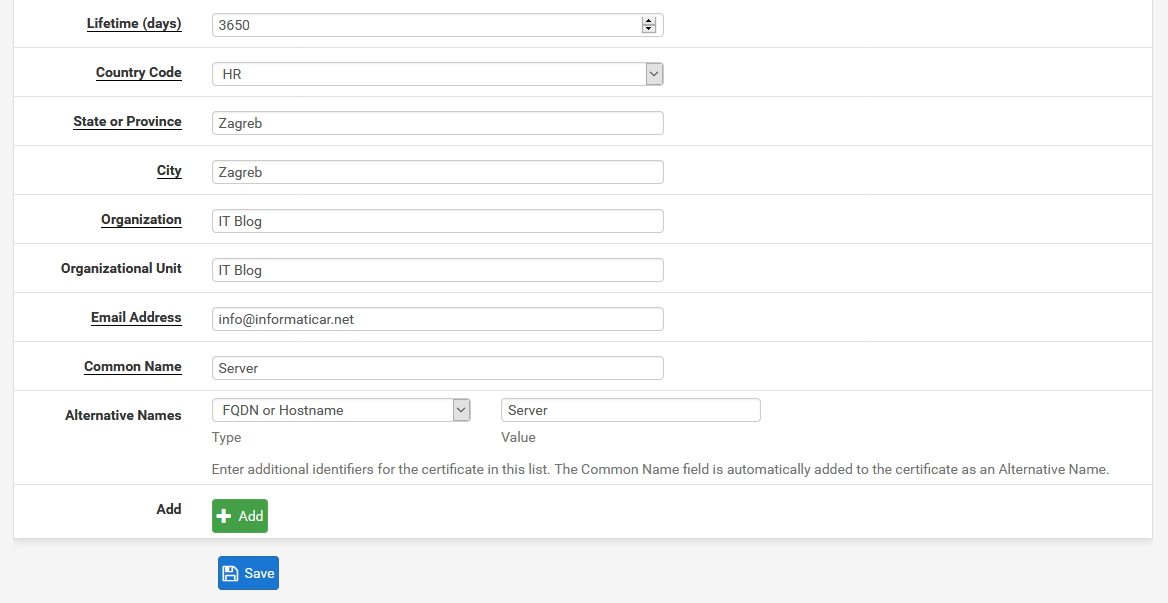
City, Organization, email will be entered from CA data |Common name: enter something for the server | Alternative names: again, enter something |Save
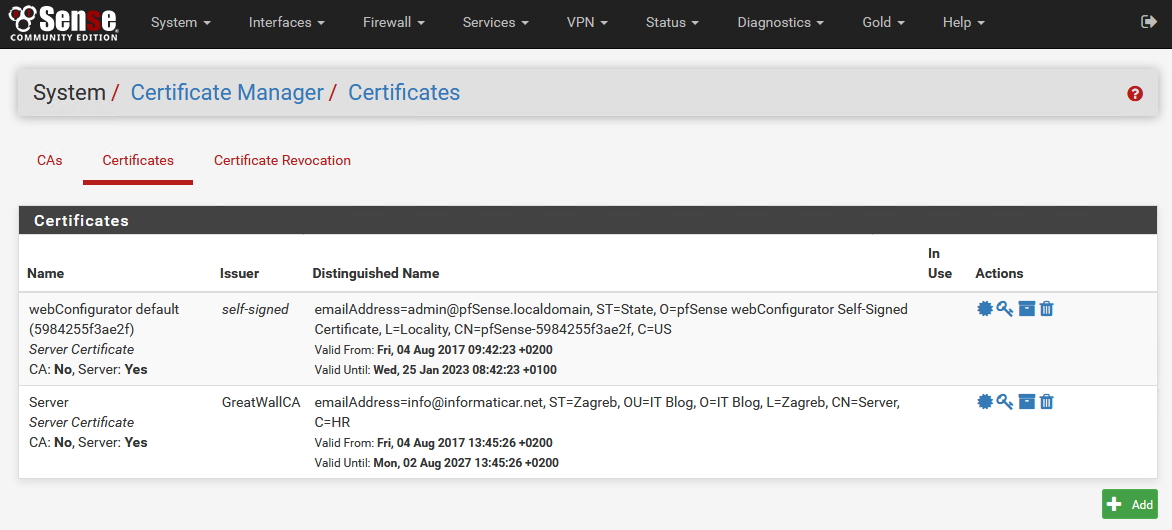
pFSense now has Server Certificate created
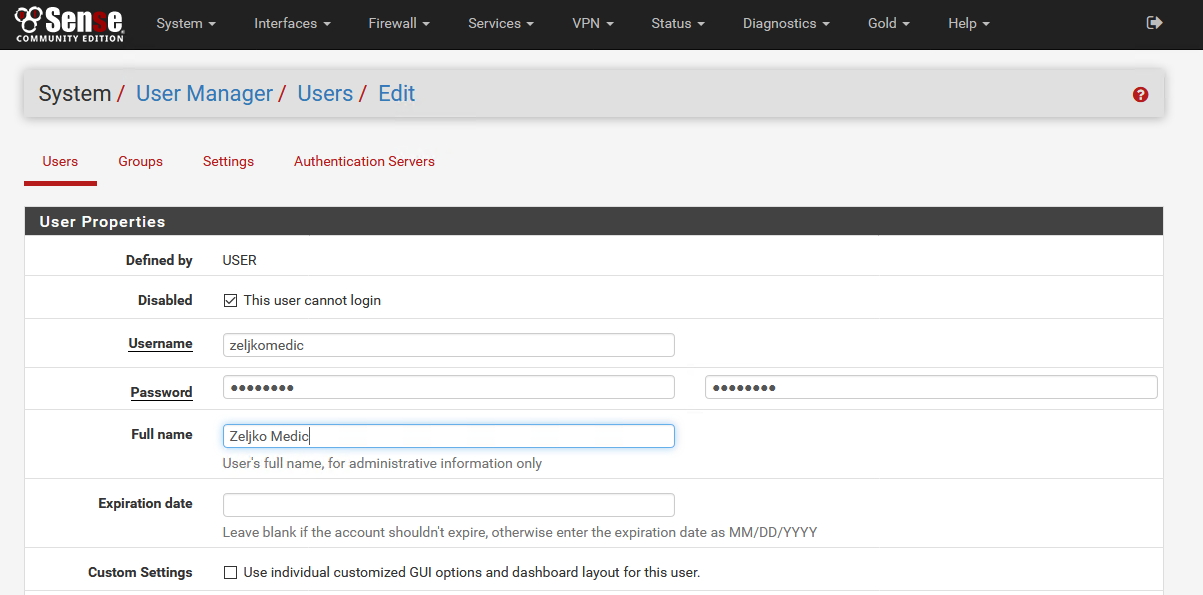
Next step: Creating new user + user/client certificate
System | User Manager | Add

Disabled This user cannot login should be checked – that way VPN user won`t be able to login to your firewall appliance | Enter username | password |description | expiration date (enter if you like to renew user certificates)
Group membership – users should not be members of admin group | Check – Click to create a user certificate option | Enter Descriptive name (as you like) | Certificate authority select the one that we created (should be selected by default) |Key length should be the same as in CA | Lifetime (choose how you like, for this lab in my case everything will be 10 years, but user certs should not be enabled that long)
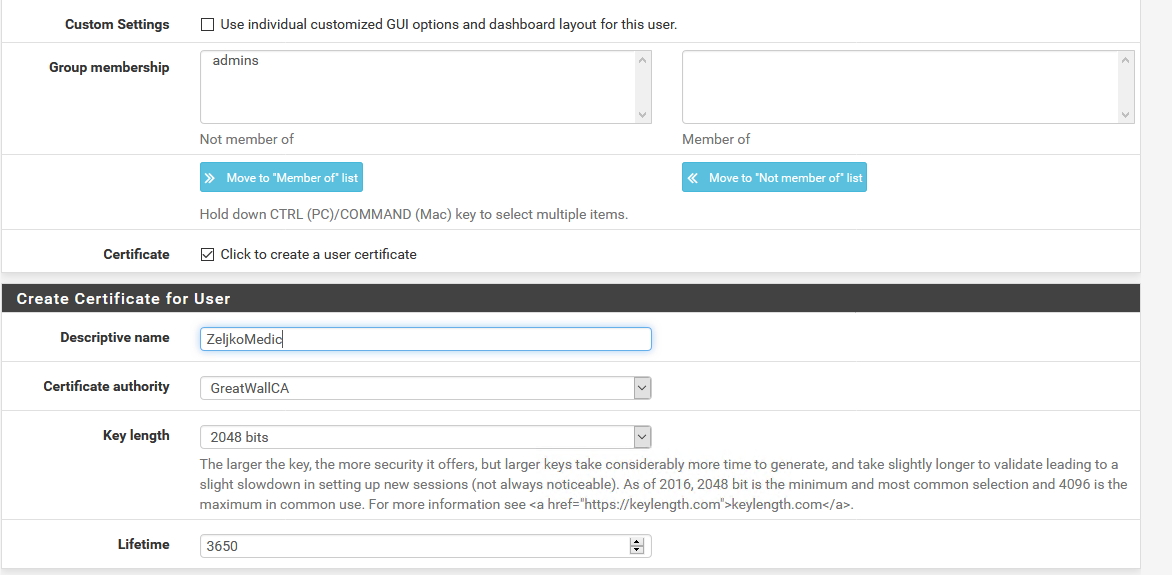
Save
User is created
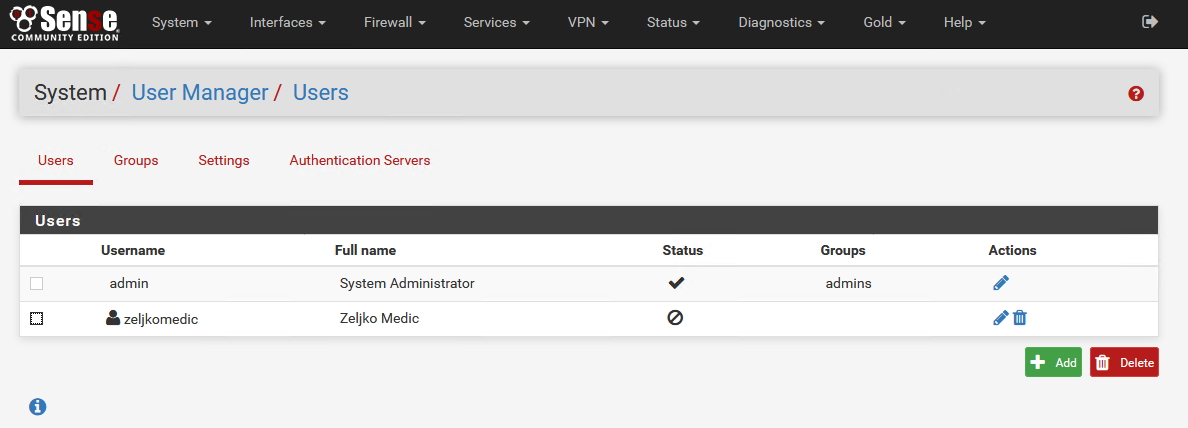
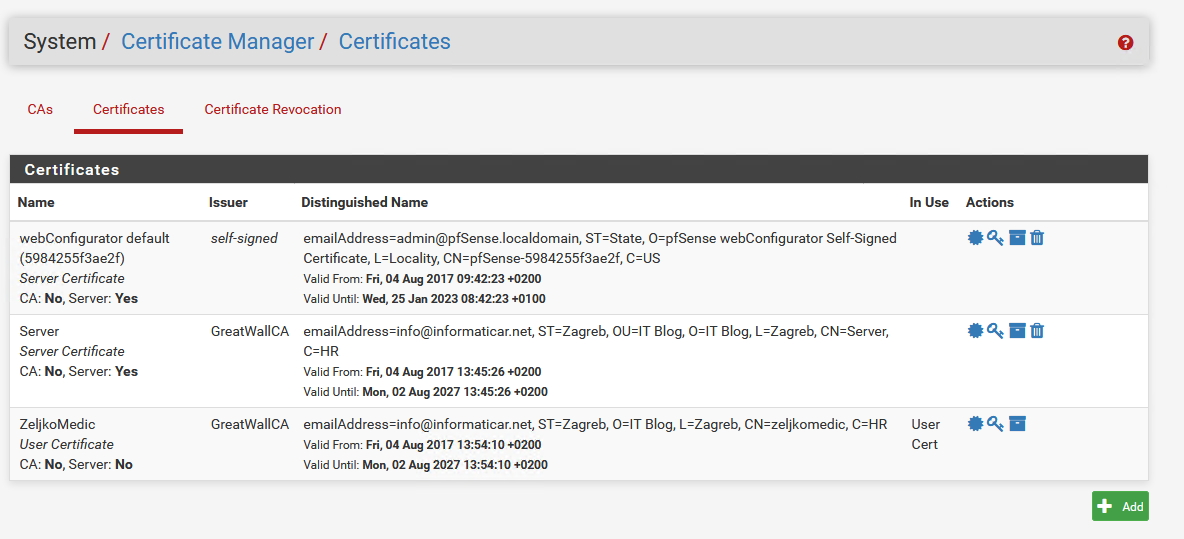
If we head back to System | Cert.Manager | Certificates |User Cert for ZeljkoMedic should be seen along with created Server certificate.
______________________________________________
“Not a “must do” part of the LAB”
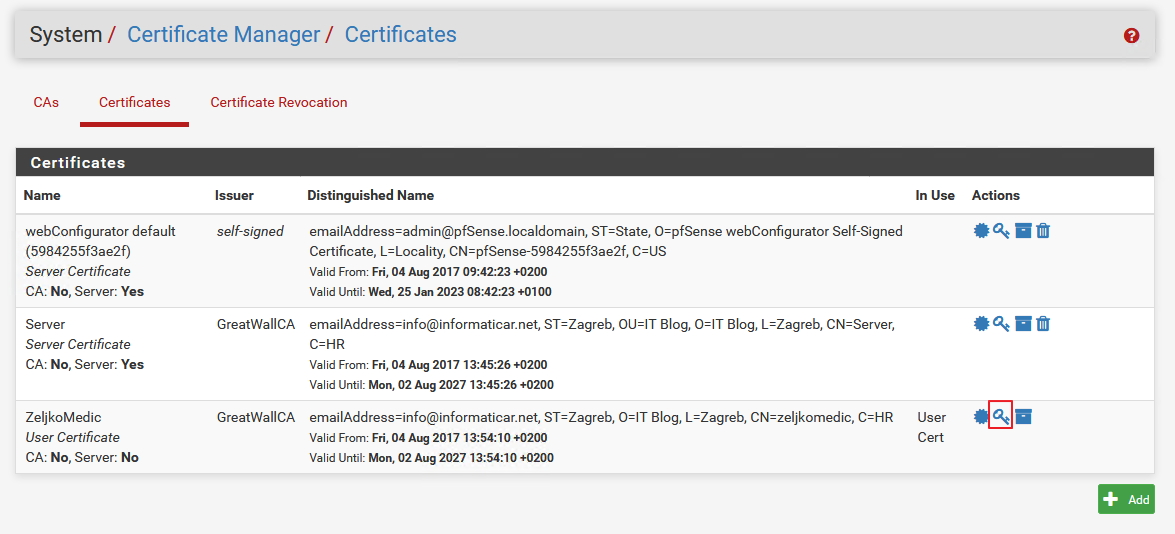
It would be good idea to export created certificates for backup – you can do it by using Export option on CAs and Certificates tab and export all the certificates just in case something goes wrong.
“End of not a must do part of the LAB”
__________________________________________
Next step
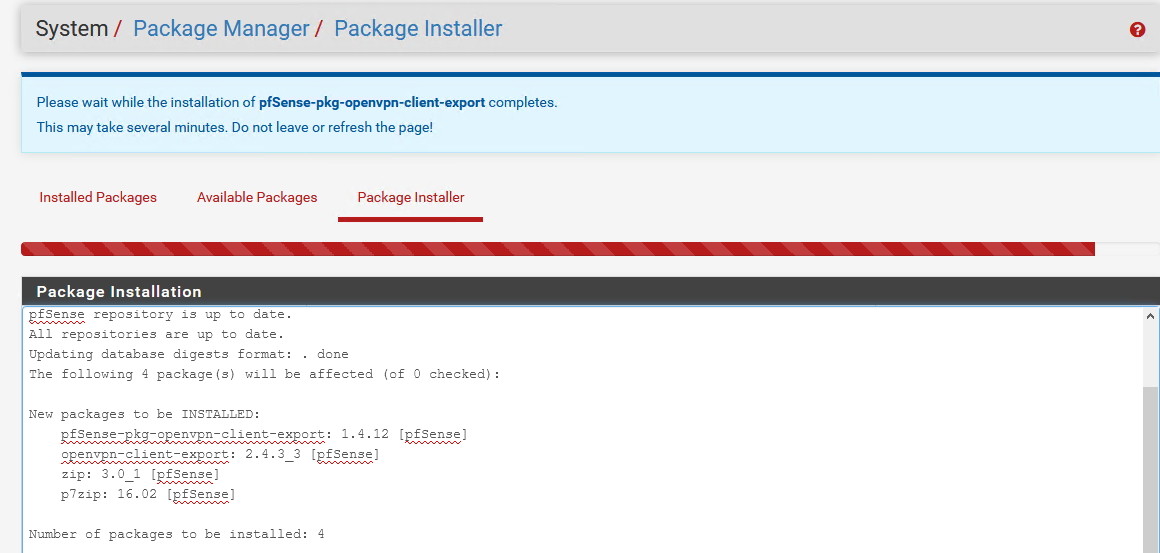
System |Package Manager | Available Packages
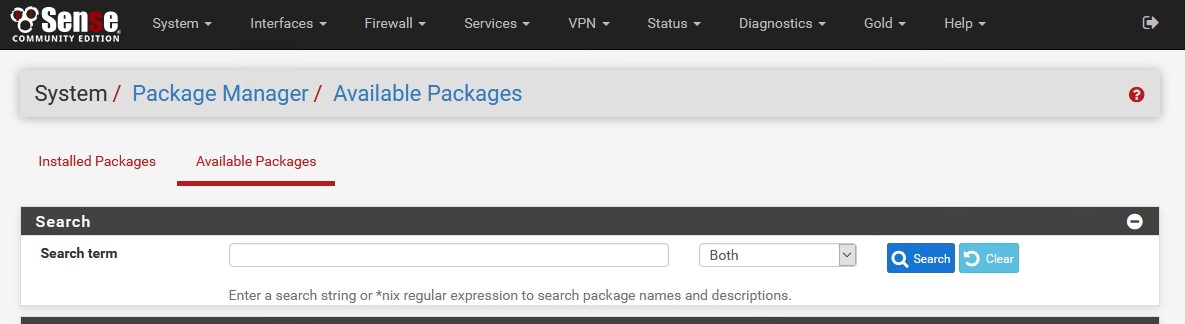
Find openvpn-client-export and select Install

Confirm

…
Success
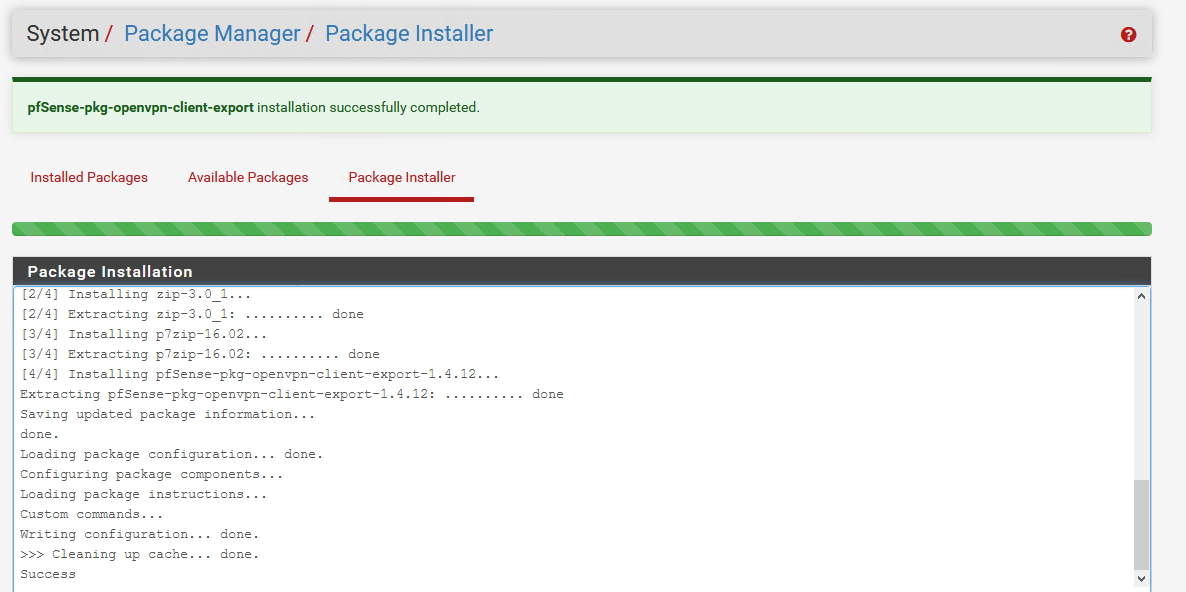
It is located now in the Installed Packages section

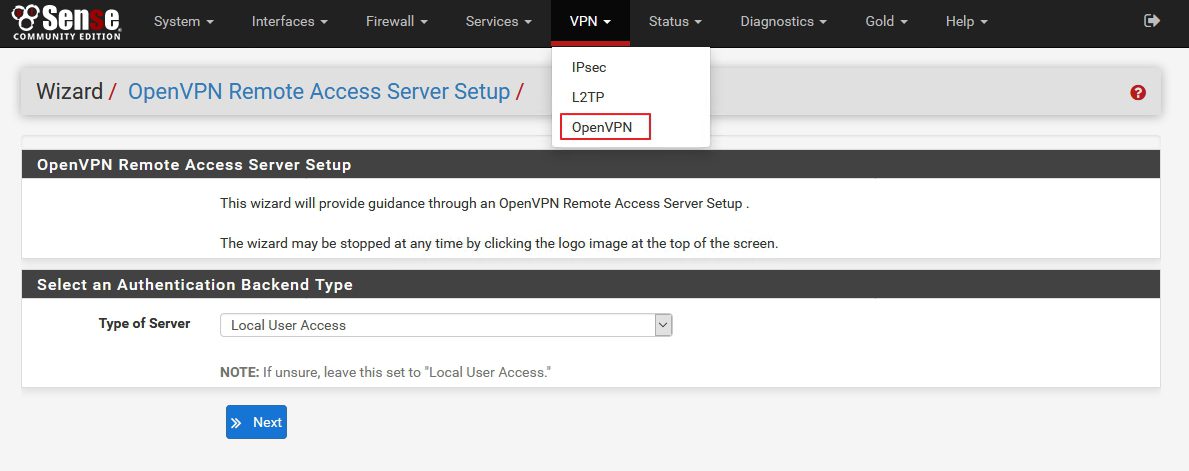
VPN |OpenVPN | Wizards

VPN |OpenVPN | Wizards |Type of Server: Local User Access | Next
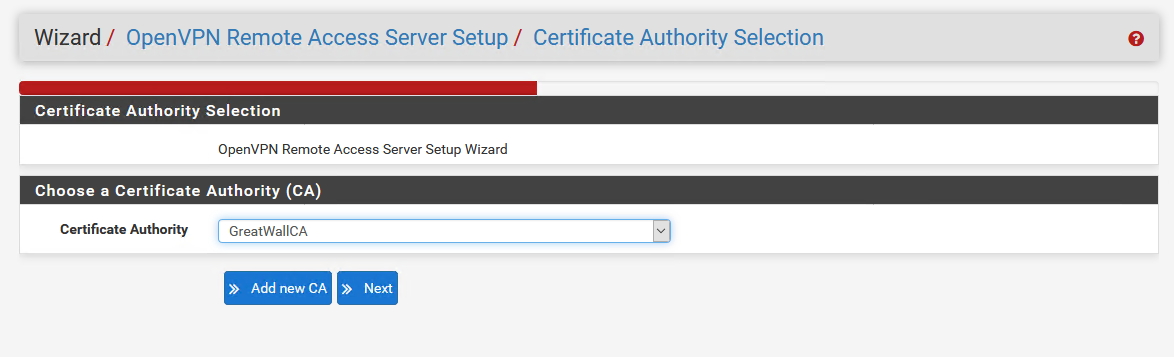
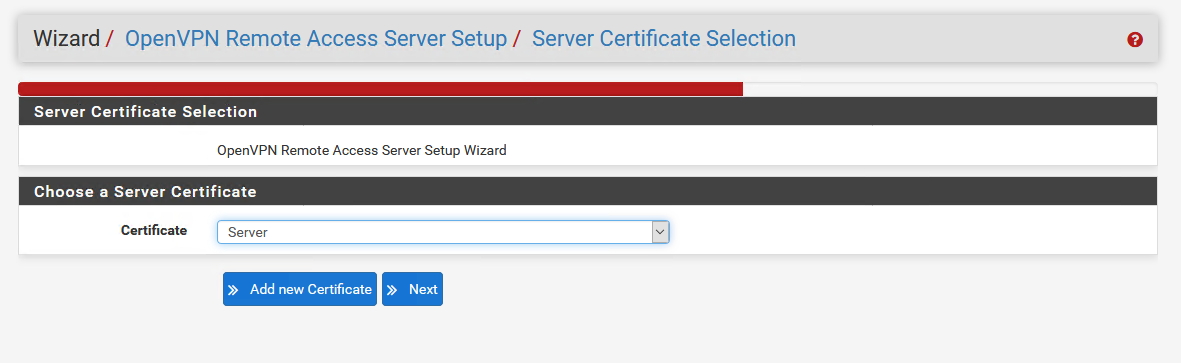
In next step we`ll have to select CA – we already created one and it should be selected | Next
Server certificate is also already created, make sure it is selected |Next
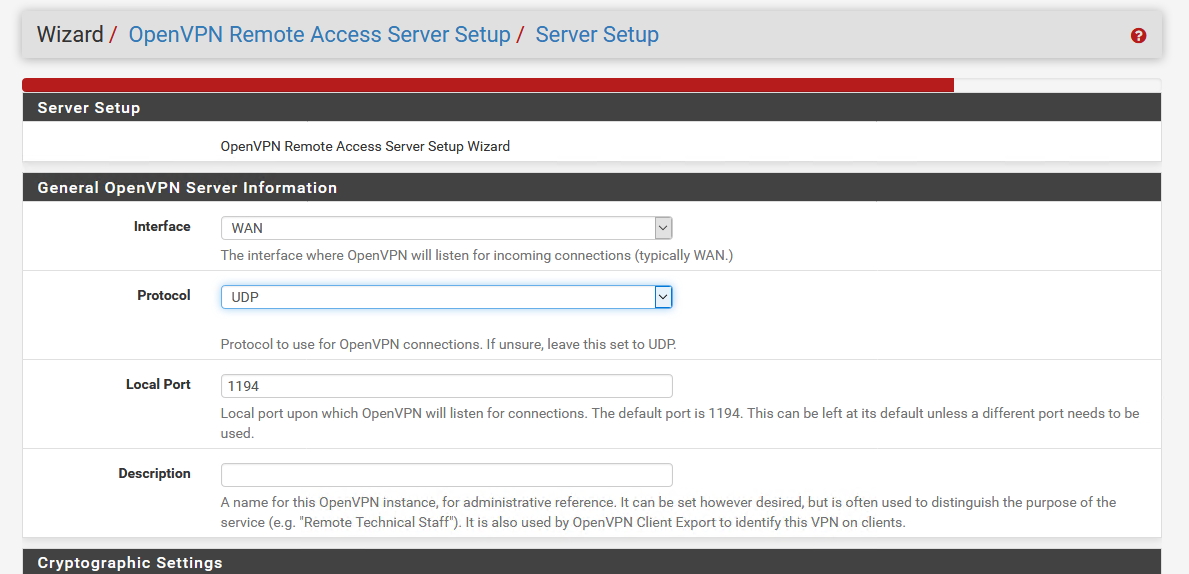
Server Setup | Interface: WAN | Protocol UDP | Local Port 1194 | Description (enter something)
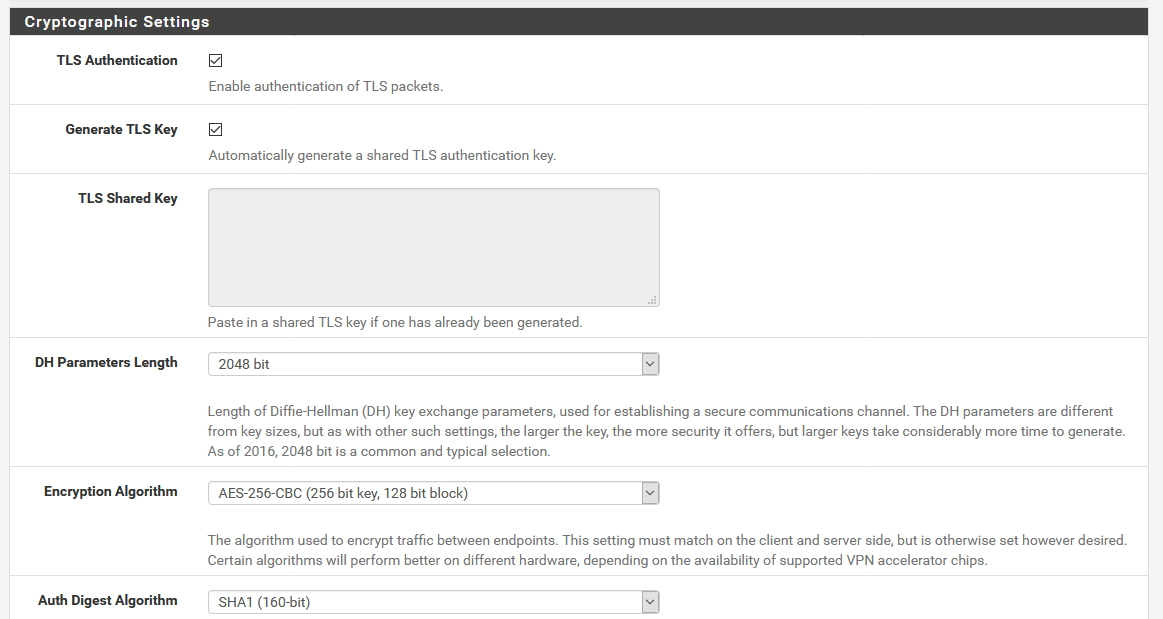
Cryptographic Settings |Mark as pictured if you followed all the settings from the beginning – if you entered crypto settings for CA certificate differently – make sure they are the same here.
Tunnel Settings | Tunnel Network – clients will be getting IP address when they connect to the network – you define range here (range should be different from your production network) | Leave everything else as pictured (expect concurrent connections – enter number you need)

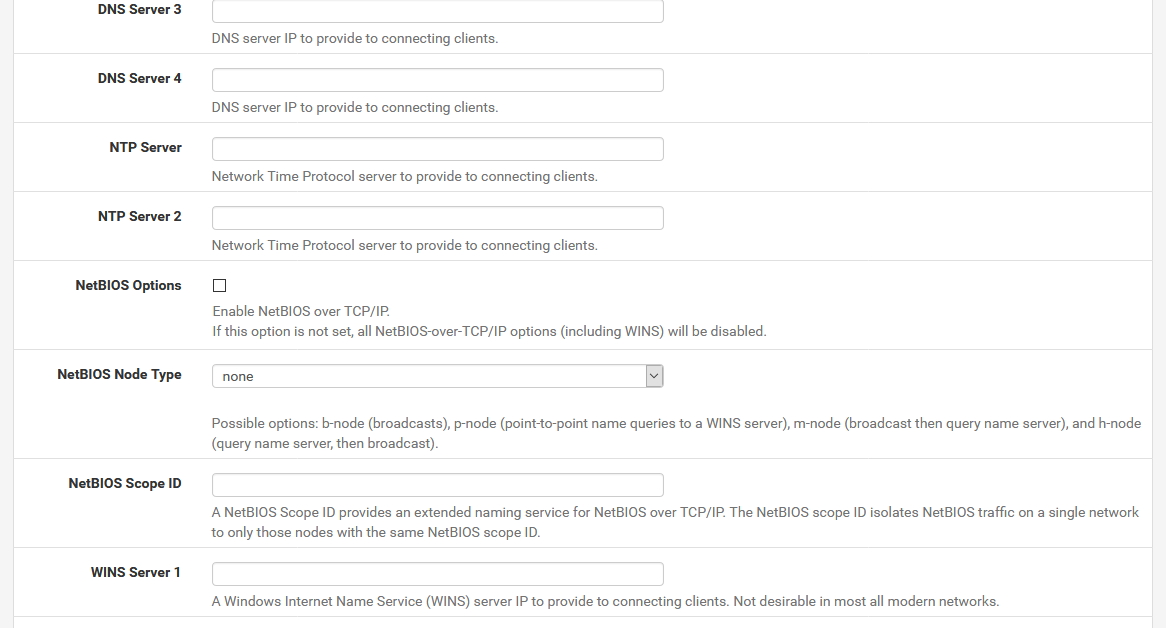
Define DNS servers that you have (your own, ISP, Google…) everything else should be as pictured
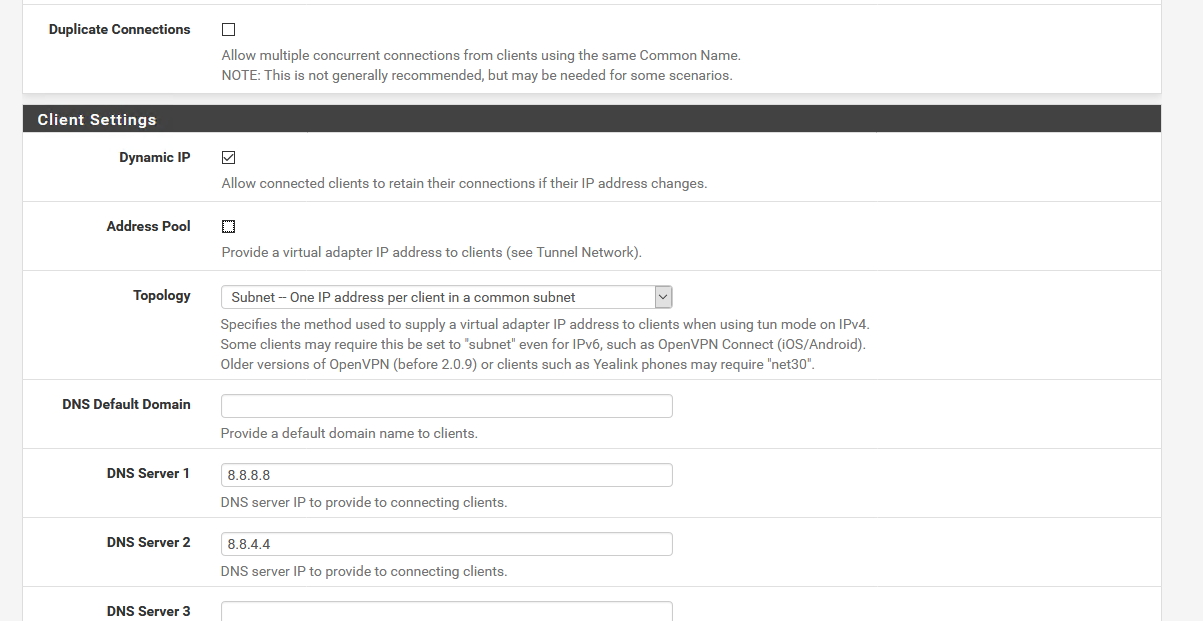
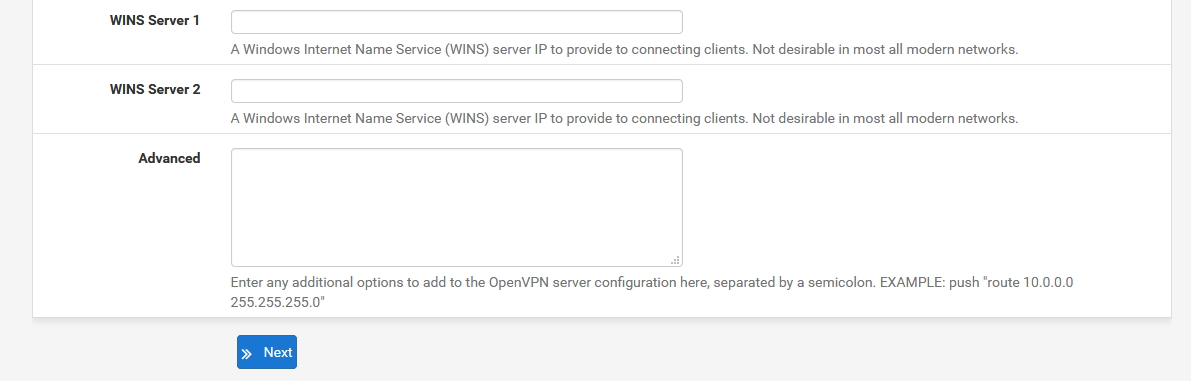
If you have a need to setup NTP, NetBIOS or WINS here is the place to do
Next
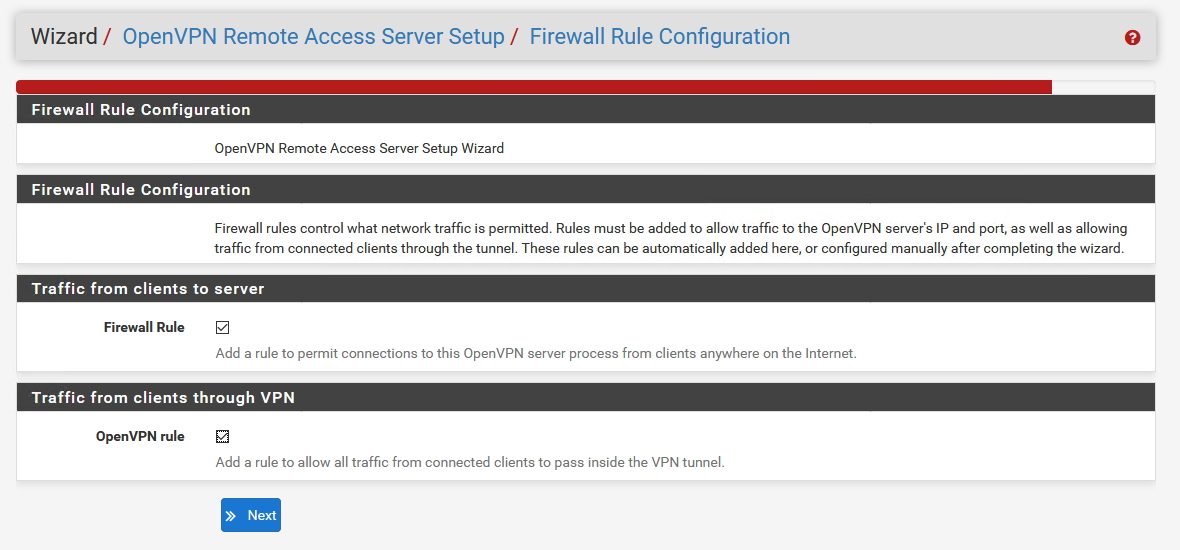
Select both to be configured automatically – Firewall and OpenVPN rule |Next
!!!Just a little note here – if you have custom LAN Firewall rules that will not affect your VPN connectivity – you don`t have to do anything on the LAN Firewall interface for the VPN to work
Finish
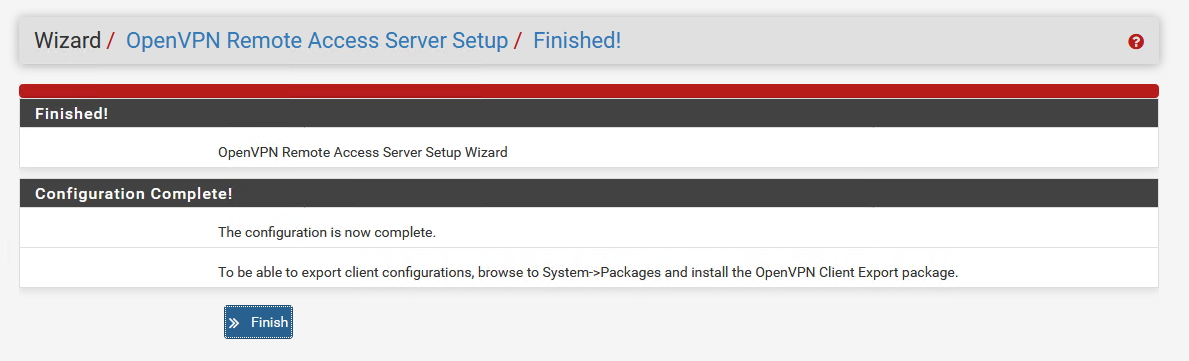
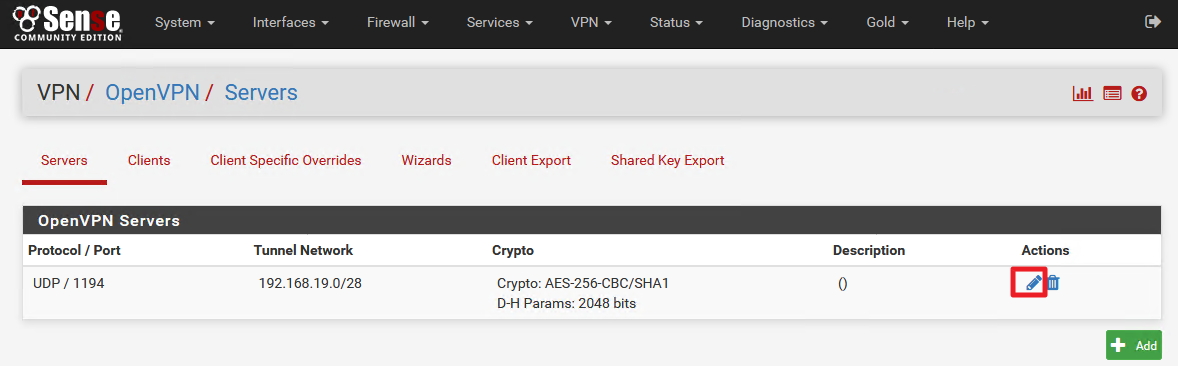
Created |Now click on Edit | We need to take a second look and change a few things | We will be back here once more again, so remember this place.
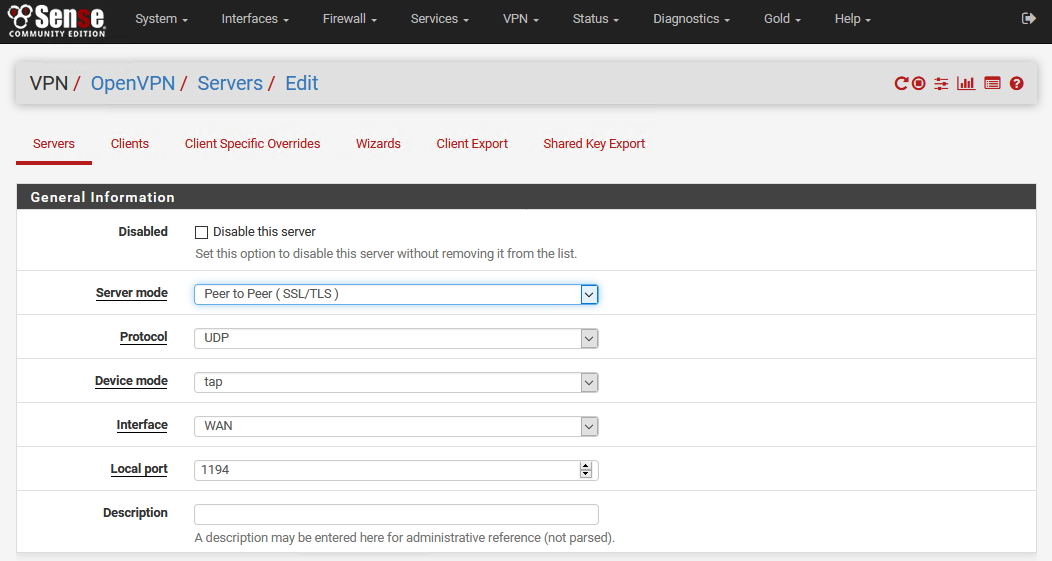
This is the OpenVPN Server configuration that works for me |Server mode: Peer to Peer (SSL/TLS) – we will change this option when we want to export client settings and then set it back to Peer to Peer | Protocol UDP | Device mode tap | Interface WAN | Local port 1194 | Description – choose what you like
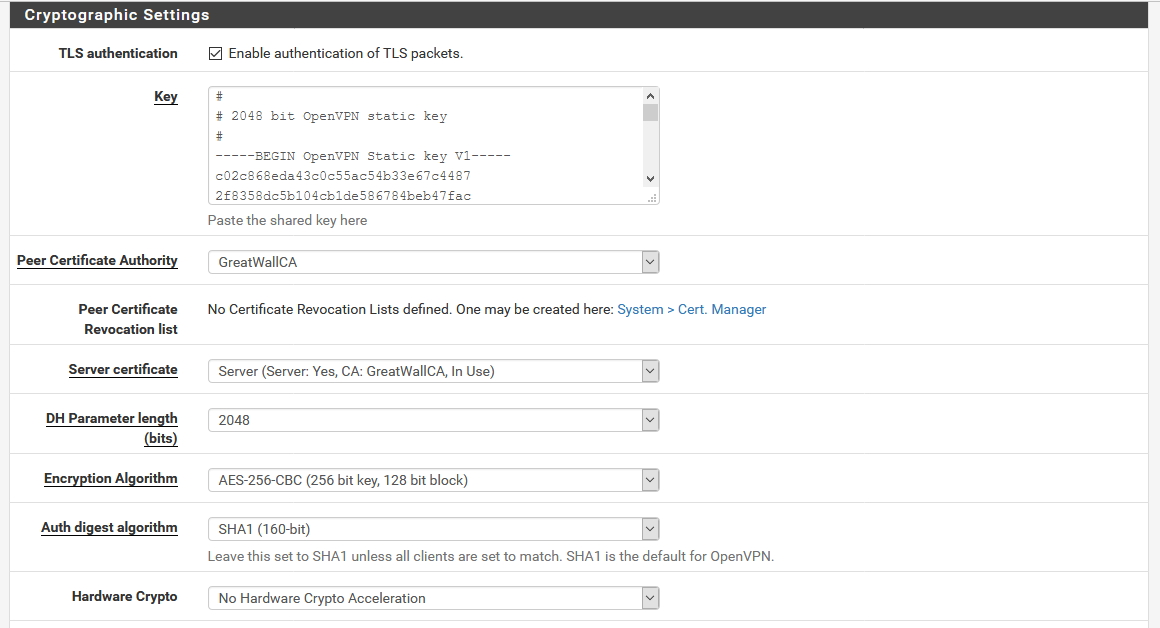
Cryptographic Settings |Generally you want settings to be the same for the Certificate Authority (CA), Server certificate, Client certificate and here under OpenVPN settings
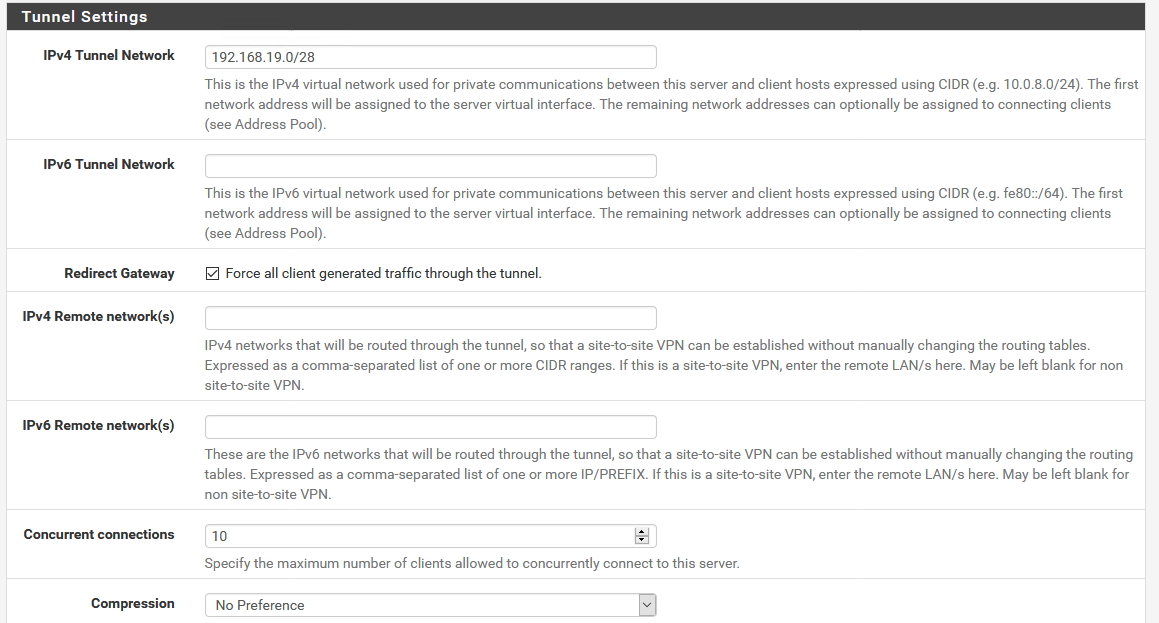
Tunnel Settings – defined in OpenVPN Wizard setup
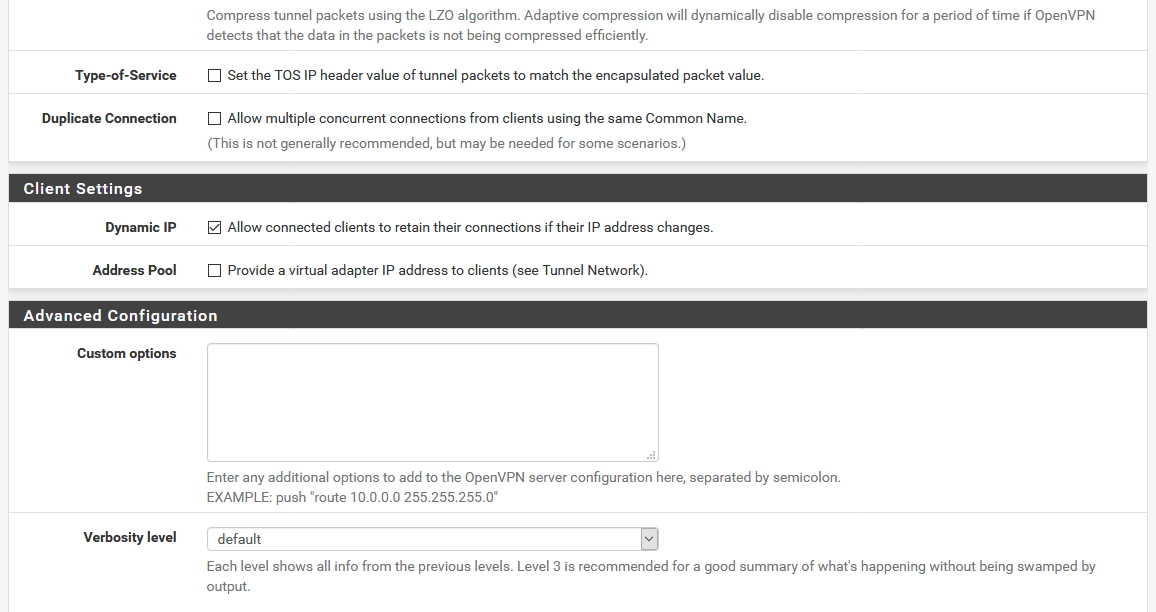
!!!! Advanced configuration is interesting part and we`ll be definitely needing it in the future – to be precise we will need “Custom options” field.
For some reason if I enter commands in the “Custom options” field while setting up VPN I`ll get errors after setting up and trying to connect to VPN
TLS Error: TLS key negotiation failed to occur within 60 seconds (check your network connectivity)
TLS Error: TLS handshake failed
So we`ll leave “Custom options” field empty for now – until the end of this LAB. But, we definitely need custom commands in Custom options field in order to successfully access LAN resources over VPN connection
You will be successfully connected to the VPN at the end of this tutorial but to be able to access LAN resources over VPN after finishing this tutorial follow this link – UBACI LINK to finish that part.
Setup as pictured
Save
In next step, we are going to enable OpenVPN interface
Interfaces | (assign) | Interface Assignments
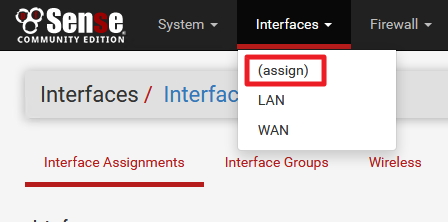
Under Interface Assignments there should be a network ports available under Available network ports: | Click on Add

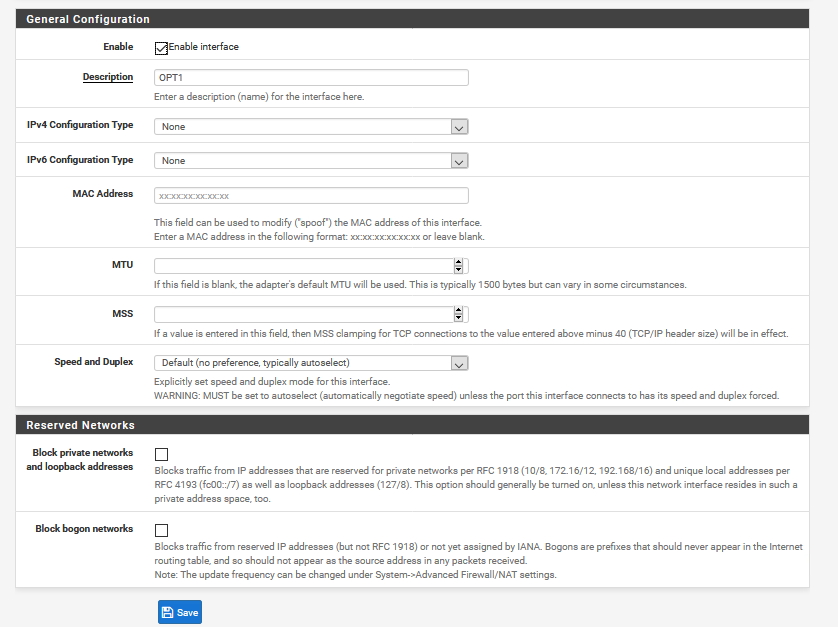
Interface has been added and now click on OPT1 that is created
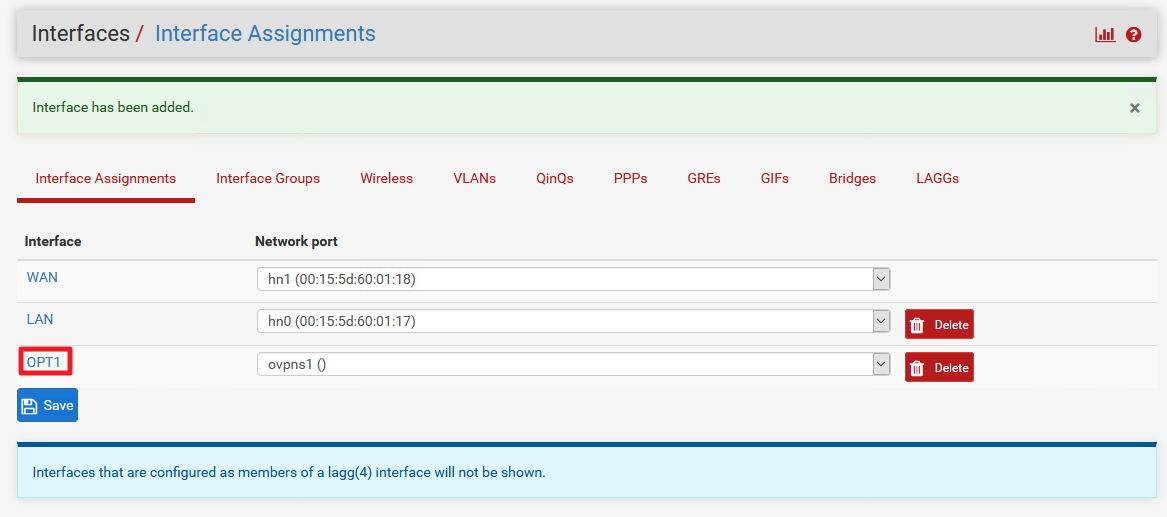
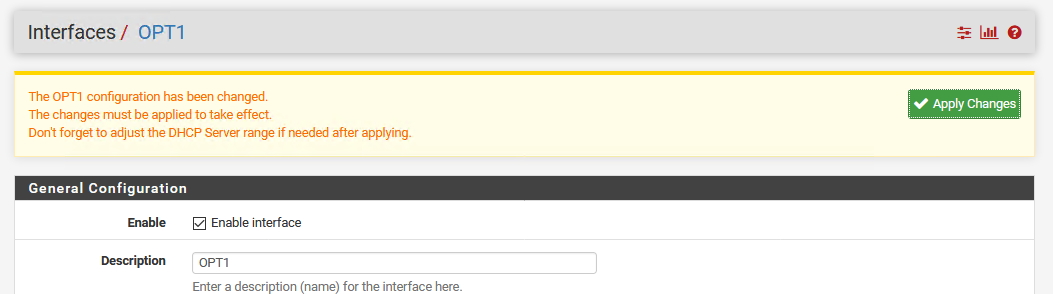
Click on Enable interface |Save
Apply Changes
Now, let’s check if this setup is working – we are going to export our configuration and hopefully import it into client and then connect to VPN
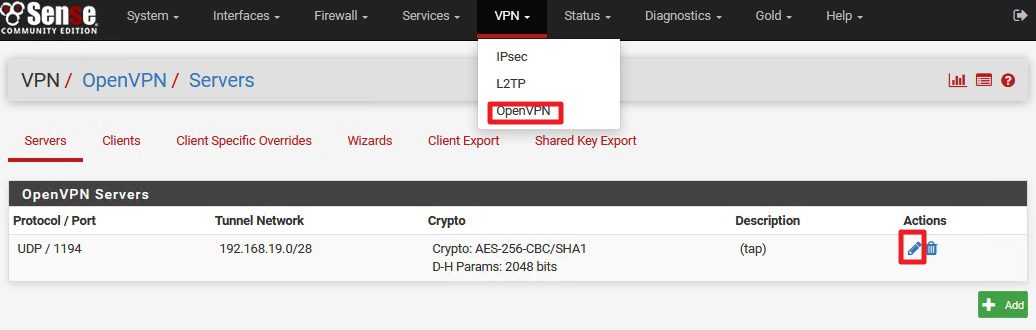
Go to VPN | OpenVPN | Client Export

Now, with default settings (or changed) this just doesn`t work for me. So if somebody has an idea what am doing wrong – I`ll be grateful if you let me know. So far I have a little workaround that works – but I will love to know where my mistake is.
At the bottom of the screen there should be packages that you can save – but instead of download links I get error
“If a client is missing from the list it is likely due to a CA mismatch between the OpenVPN server instance and the client certificate, or the client certificate does not exist on this firewall.
OpenVPN 2.4 requires Windows Vista or later
The “win6” Windows installers include a new tap-windows6 driver that works only on Windows Vista and later.
The “XP” Windows installers work on Windows XP and later versions.”
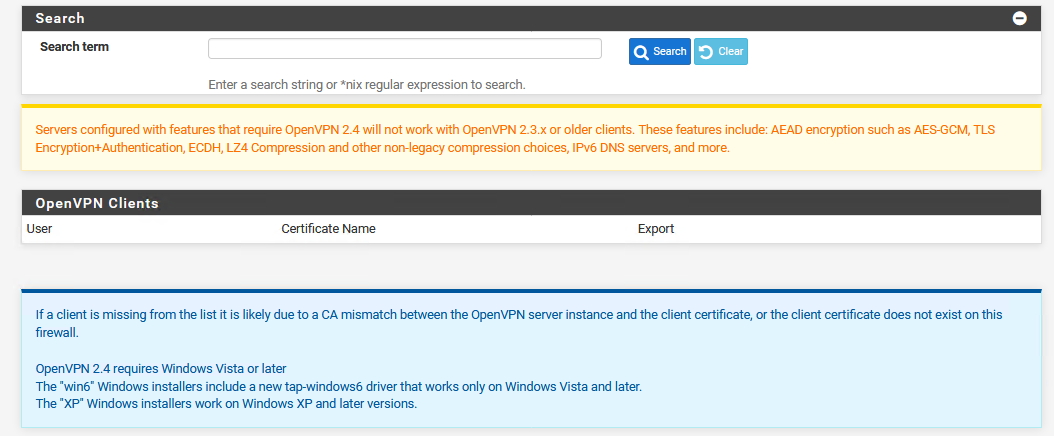
Error doesn`t discourage me.
In order to successfully export your configuration we will do few steps
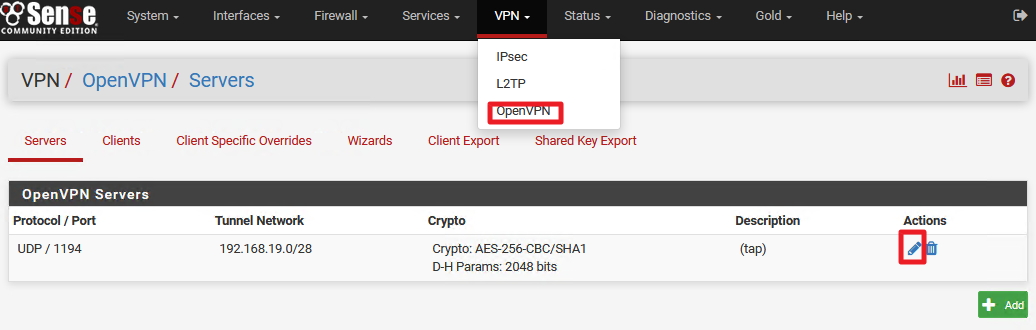
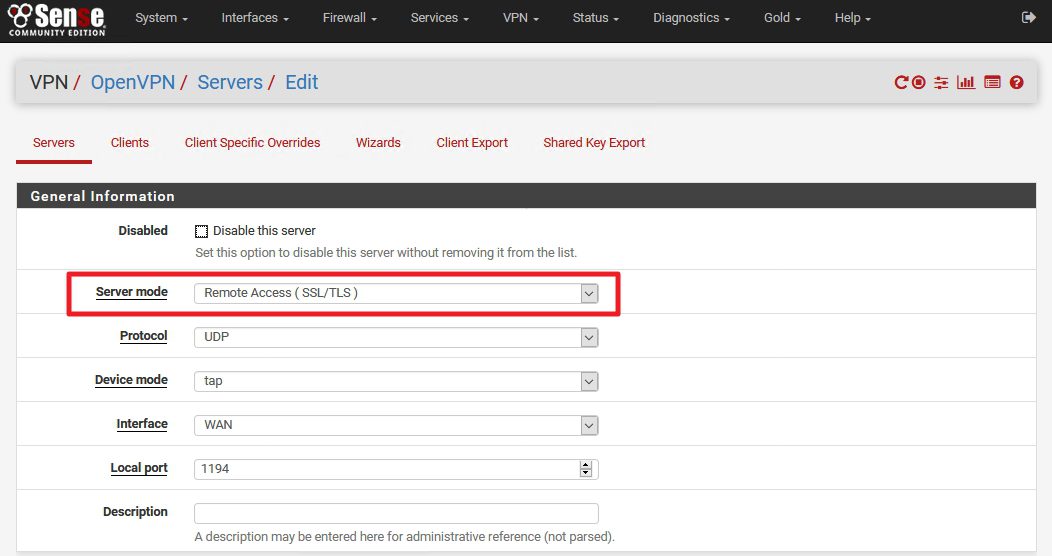
VPN |OpenVPN | Servers |Click on Edit on VPN connection we created
Now – change Server mode from “Peer to Peer” to “Remote Access (SSL/TLS)” |DO NOT CHANGE ANYTHING ELSE |Save
Go back to VPN | OpenVPN | Client Export – scroll to the bottom of the window

Now, instead of error we have package export choice
I`ll choose Standard Configurations | Archive

Now, look into your browser download folder – you should have zip file with all config files you need

Copy that zip file to the stick and take it with you to the client PC for which you want to enable VPN connection.
IMPORTANT STEP!!!
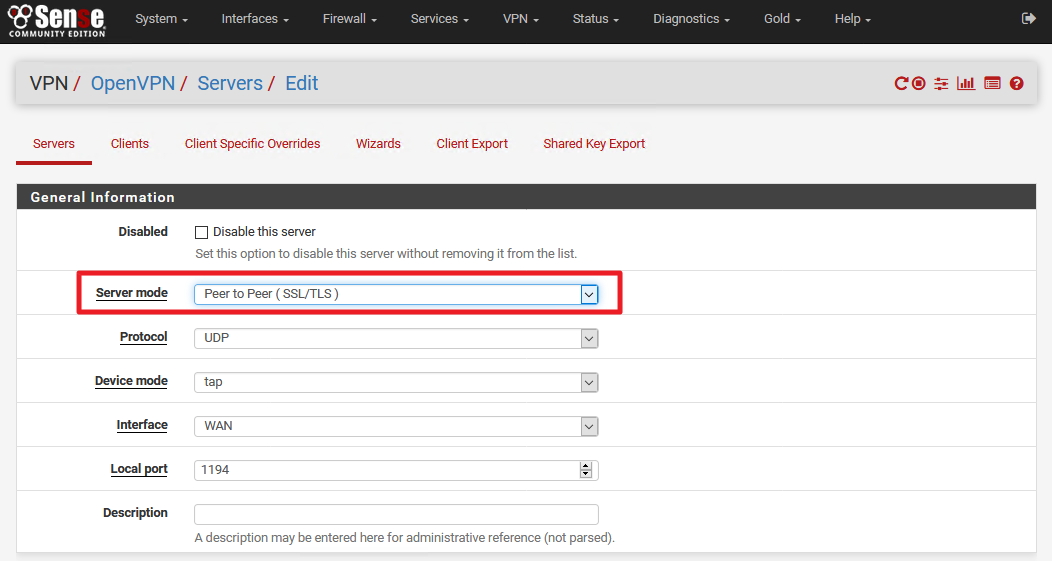
Before we wrap up server part go back to the
VPN |OpenVPN | Servers |Click on Edit on VPN connection we created
Change back Server mode | Peer to Peer (SSL/TLS) |DO NOT TOUCH ANY OTHER SETTINGS | Save
That is it for the server side.
We have a functional OpenVPN on pFSense. If you have better solutions for some of the workarounds in this document, please feel free to contact me.
Next step will be configuring client side for the OpenVPN, you can read more about it here – https://www.informaticar.net/how-to-setup-openvpn-pfsense-version-on-client-pc/
pFSense article series:
How to install pFSense on Hyper-V – https://www.informaticar.net/how-to-install-pfsense-on-hyper-v/
How to configure pFSense – https://www.informaticar.net/how-to-configure-pfsense/
How to define firewall rules on pFSense – https://www.informaticar.net/how-to-define-firewall-rules-on-pfsense/
How to create port forwarding on pFSense – https://www.informaticar.net/create-port-forwarding-on-pfsense/
How to setup OpenVPN on pFSense – https://www.informaticar.net/how-to-setup-openvpn-on-pfsense/
How to setup OpenVPN on client (pFSense) – https://www.informaticar.net/how-to-setup-openvpn-pfsense-version-on-client-pc/
OpenVPN on pFSense: Enable access to the LAN resources – https://www.informaticar.net/openvpn-on-pfsense-enable-access-to-the-lan-resources/
How to revocate user certificate on pFSense – https://www.informaticar.net/how-to-revocate-user-certificate-on-pfsense-openvpn/
How to import PFX certificate to pFSense – https://www.informaticar.net/how-to-import-pfx-certificate-to-pfsense/