We already went through installation of Azure Stack (ASDK) here, but that was only the first step, we need to do some preparation before we can use our Azure Stack installation. I will cover scenario where you selected Azure as Identity Provider.
These steps assume you have internet connection. Also, I ran all these commands logged in as Azurestack\AzureStackAdmin account on ASDK host.
Some of the scripts for post installation steps can change, so be sure you have the latest scripts. Latest scripts should be available here https://docs.microsoft.com/en-gb/azure-stack/asdk/asdk-post-deploy?view=azs-1908
As of January 2020, this tutorial is 100% valid.
Registering PSGallery
First, we will register PSGallery repository by running following command:
Set-PSRepository -Name "PSGallery" -InstallationPolicy Trusted
Installing Azure Stack PowerShell module
Then we will be installing latest Azure Stack PowerShell module using following script: (internet connection is required)
This part I always like to do in PowerShell ISE (with elevated privileges), but you select best way to execute your commands.
Get-Module -Name Azs.* -ListAvailable | Uninstall-Module -Force -Verbose
Get-Module -Name Azure* -ListAvailable | Uninstall-Module -Force -Verbose

# Install the AzureRM.BootStrapper module. Select Yes when prompted to install NuGet
Install-Module -Name AzureRM.BootStrapper

# Install and import the API Version Profile required by Azure Stack into the current PowerShell session.
Use-AzureRmProfile -Profile 2019-03-01-hybrid -Force
Install-Module -Name AzureStack -RequiredVersion 1.8.0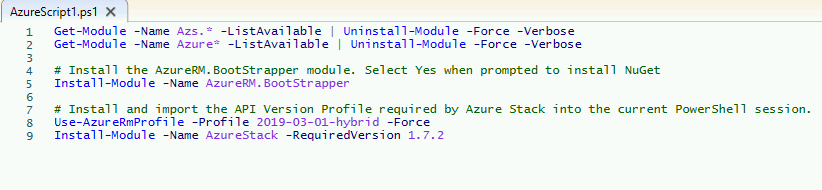
Download Azure Stack Tools
Next we will execute script which will download AzureStack-Tools from Github repo.
This part I also like to execute in Powershell ISE (with elevated privileges)
Here is the script:
# Change directory to the root directory.
cd \

# Enforce usage of TLSv1.2 to download the Azure Stack tools archive from GitHub
[Net.ServicePointManager]::SecurityProtocol = [Net.SecurityProtocolType]::Tls12
Invoke-WebRequest `
  -Uri https://github.com/Azure/AzureStack-Tools/archive/master.zip `
  -OutFile master.zip

# Expand the downloaded files.
Expand-Archive -Path master.zip -DestinationPath . -Force

# Change to the tools directory.
cd AzureStack-Tools-master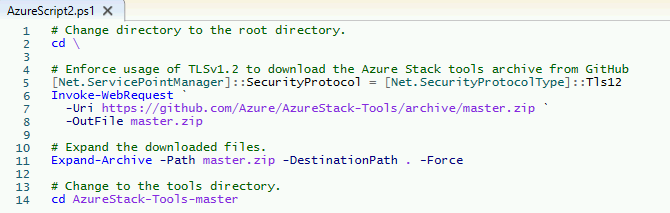
Validate ASDK installation
Last step would be to validate ASDK installation.
Before we go any further, we need to make sure that ASDK deployment was successful. We will test it by following these steps.
If you are not by now, log in as AzureStack\AzureStackAdmin on ASDK host.
Run powershell as admin
Enter following command:
Enter-PSSession -ComputerName AzS-ERCS01 -ConfigurationName PrivilegedEndpoint
Immediately after that command run following:
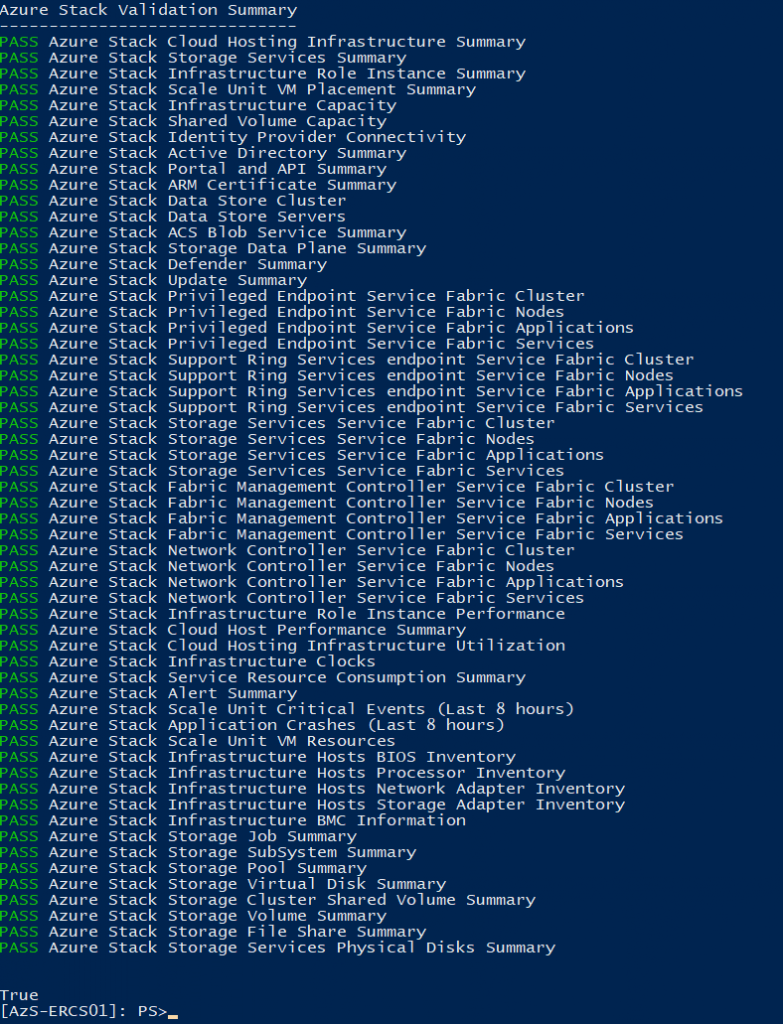
Test-AzureStack
Result should be complete pass. If it was a failure, you will need to troubleshoot more.
That is it for the post install steps.
Next steps after post instalation would be:
2. Register your Azure Stack with (online) Azure – https://www.informaticar.net/register-your-azure-stack-asdk-with-azure-ad/
3. Integrate Azure Stack into your local network – Remove NAT https://www.informaticar.net/integrate-azure-stack-to-your-lan-remove-nat/