One of the things that were problematic for me with Azure Stack is that it acts as an independent “bubble” inside your local network. Besides accessing Azure Stack host via RDP on installing Azure Stack VPN on Windows Client, there is no other way to access the Azure Stack on your LAN.
Public IP range that Azure Stack assigns (192.168.102.xx) is not available from my local network, so a lot of things I wanted to test, were not available to me as I would like. But there is something you can do about it, read further to find out.
This is actual method for removing NAT on Azure Stack installations (1.1908, 1.1910)
Azure Stack host configuration
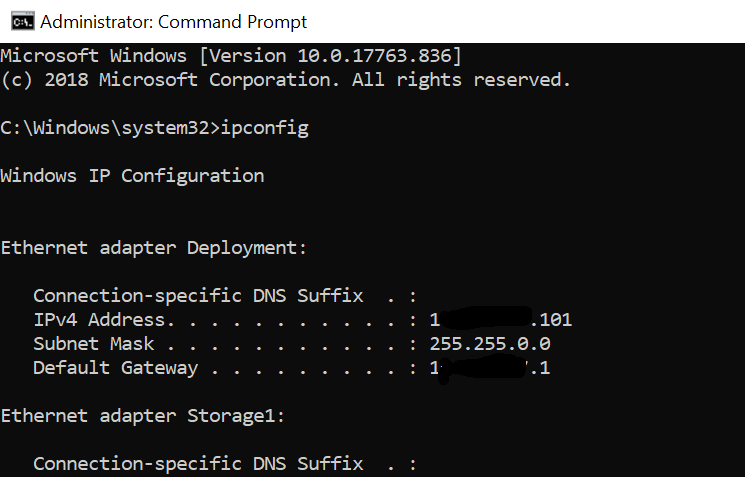
Start CMD as Administrator and type in command
ipconfigWrite down IP address, subnet, gateway of your host NIC and alias of ethernet adapter (Mine is Deployment)
Start PowerShell as admin and type in following command
Get-NetNat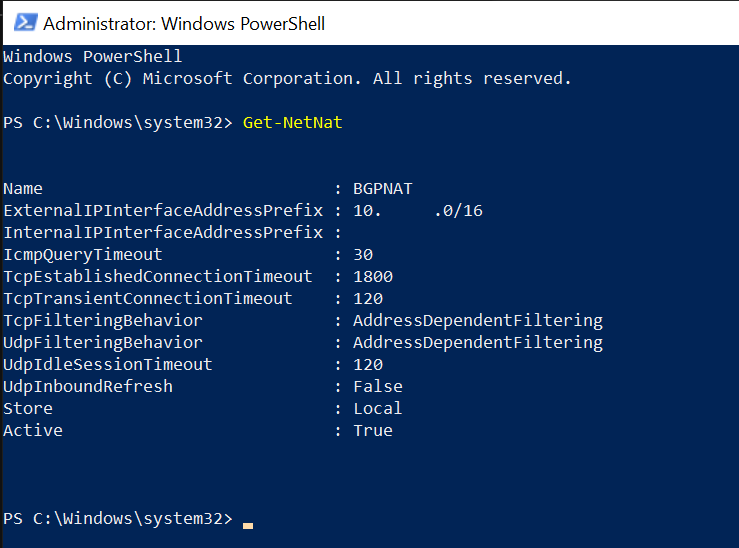
Then execute command for removing NAT
Remove-NetNatIf you are using DHCP for addressing, you will now have to enter ipconfig /renew, so you can renew your IP address.
f you have static IP you will have to enter following (in Powershell)
New-NetIPAddress -IPAddress ‘<your external Azure Stack host IP>’ -AddressFamily IPv4 -Type Unicast -PrefixLength <your subnet in prefix format> -InterfaceAlias ‘<interfaceName>’ -DefaultGateway <your gatewayon Azure Stack Host>Here is an example. Let’s say you Azure Stack host has fixed IP (you defined on the one LAN adapter you are allowed to have on your ASDK install)
IP: 12.12.12.3
Subnet mask: 255.255.0.0 (16bit)
Gateway: 12.12.12.1
That translates into this command as follows
New-NetIPAddress -IPAddress 12.12.12.3 -AddressFamily IPv4 -Type Unicast -PrefixLength 16 -InterfaceAlias Deployment -DefaultGateway 12.12.12.1
In case your command failed like in my case you will need to use additional Remove-NetRoute commands. If everything went ok for you with the command above, proceed further, you don’t need this.
Change myAdapter value with alias of your LAN adapter.
# Remove the static ip
Remove-NetIPAddress -InterfaceAlias myAdapter

# Remove the default gateway
Remove-NetRoute -InterfaceAlias myAdapter
In my case only one command was needed, but there are occasions where I needed both, and also in your case, maybe one of these will clear your errors, or maybe youll need both of these commands.

Then I will again run command New-NetIPAddress again
New-NetIPAddress -IPAddress 12.12.12.3 -AddressFamily IPv4 -Type Unicast -PrefixLength 16 -InterfaceAlias Deployment -DefaultGateway 12.12.12.1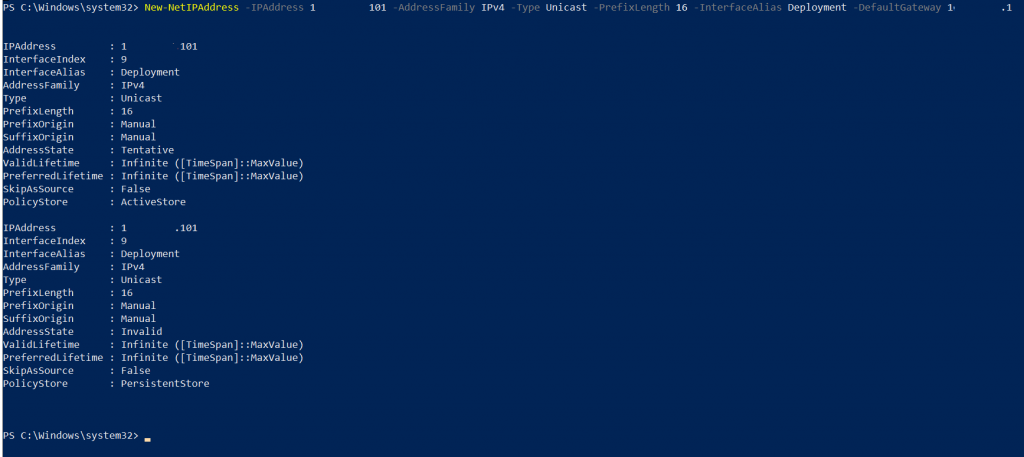
Now it works, and that’s it for the host router on the Azure Stack.
Local Area Network Configuration
Now, we need to make sure that clients from your local network outside of Azure Stack can route in to the network.
You will have to put forwarders to be sure that you can reach 192.168.200.0/24 and 192.168.102.0/24 Azure Stack ranges.
You will have to add routes to your switch (if you have layer 3 switch) or router (if you can configure routes on it). In case all of the above is not available to you, you still can configure static routes on your Windows clients that will access Azure stack. Default Azure Stack Networks you need to route are listed below.
Scenario for adding routes to Windows clients
Enter following commands into command prompt (as Administrator)
Change 12.12.12.3 for your Azure Stack host IP address.
route add 192.168.200.0 mask 255.255.255.0 12.12.12.3
route add 192.168.100.0 mask 255.255.255.192 12.12.12.3
route add 192.168.102.0 mask 255.255.255.0 12.12.12.3
route add 192.168.105.0 mask 255.255.255.0. 12.12.12.3
These are all of the subnets I found, if something is missing, feel free to let me know.
It would be best if you could do this on your router, since you will loose internet connection for your Azure Stack in case you cannot add routes to it on your router (at least that was in my case).
Adding Azure Stack Certificate to your Windows clients
If you are going to use Azure Stack services on your Windows Clients (azure client portal, admin portal…) You will also need to export certificates from Azure Stack host.
How to get to the Certificate Store on Azure Stack Host?
Type mmc.msc into Windows search on Azure Stack | Click on File in top left corner of mmc | Add/Remove Snap/in | select Certificates | click on Add | Computer Account | Local Computer
From Trusted Root Certification Authorities | Certificates you will need two certificates
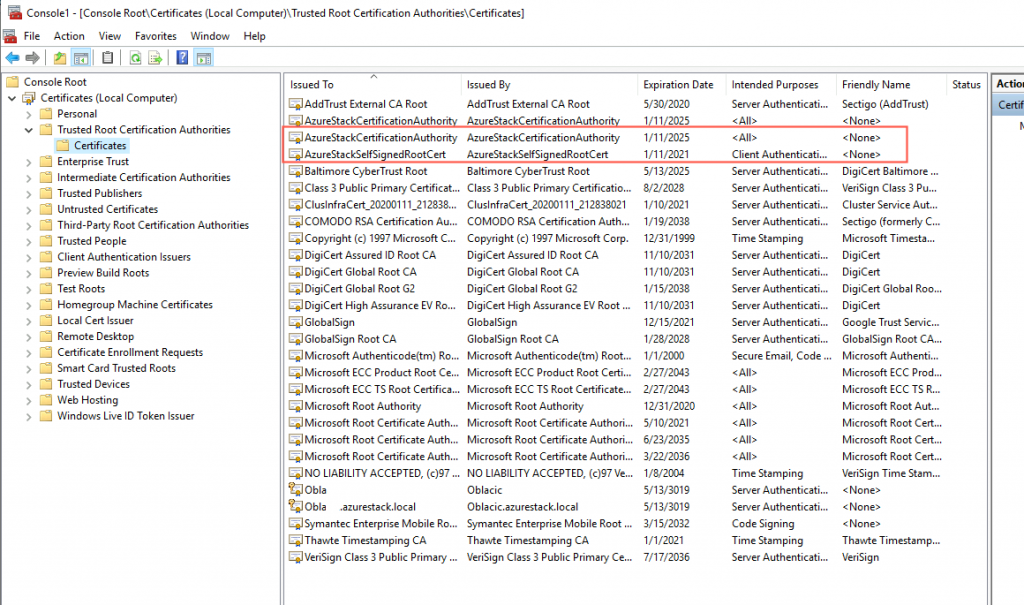
Export AzureStackCertificationAuthority and AzureStackSelfSignedRootCert and import them into your Windows Client into Trusted Root Certification Authorities store.
You will need these certs if you wish to run portal on your client PCs.
You will also need to set DNS names, you can make conditional forwarders for following domains:
Azurestack.local, internal.azurestack.local, local.azurestack.external.
On the version of Azure Stack I’m currently running (1.1910.0.58) DNS is on IP address 192.168.200.69.
That changes from version to version, so be sure to check out your settings.
After all these steps I can now run Azure Stack services from my local homelab network. What I needed most is 192.168.102.xx network, that is a pool of public IPs Azure Stack has assigned, and I wasn’t able to access them from my network. With steps above done, I can now access many of the resources from Azure Stack.
If you are still interested in just connecting your Windows Client to Azure Stack, without removing NAT – https://www.informaticar.net/?p=4112