In this guide we will try to setup email server with Postfix (MTA), Dovecot (MDA) and Roundcube as webmail server.
As someone who is coming from years on working with Microsoft Exchange, it was hard for me to find a good replacement for Exchange on Linux. I went through a lot of different combinations on Linux, and this one I’m going to write about today is one of them that I think is worth trying.
Before we begin
This is only basic tutorial to get your email server up and running, so please have that in mind. Be also sure to properly secure and configure in detail your email server afterwards.
I will not go through all the details needed for a complete email server environment with this tutorial. I have a plan for the future to explain all the little details you need to put up a web service, here I will just be describing email server setup procedure.
What I have for this tutorial:
Ubuntu 20.04 installation with fixed public IP. (you can get those through VPS server).
Wildcard certificate for your domain you wish to use for email. I would strongly advise you get yourself proper wildcard certificate for your domain – don’t use self-signed. Self-signed certificate will not work well in email communication.
Let’s encrypt certificates should also be fine (I will not describe them here).
For this guide I will use informaticar.net domain as an example, although in screenshot there will be depicted other domain which I will (try to) cover, because I don’t want to disclose the domain I’m configuring.
Ok, let’s start.
Configuring hostname and DNS records
On my Ubuntu 20.04 installation I’m going to run following command to change its name. Hostname is pretty important and good practice is to name your email server same as your MX DNS record for email. In my case it will be mail.informaticar.net
sudo hostnamectl set-hostname mail.informaticar.net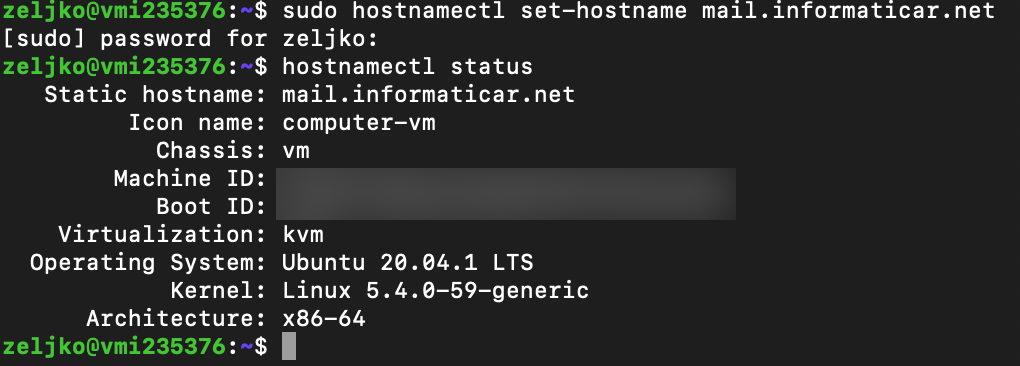
In your DNS console you will need to add two DNS records. Let’s say that the VM which will host our email server has public IP of 0.111.222.333 (this is obviously not real IP)
First, we will need to define A record.
A record will be named – mail – and have ip 0.111.222.333
Next record would be MX
MX record would be – mail.informaticar.net and have weight of 10.
Also in order for your email server to work properly, you will need reverse PTR record. Usually if you are doing mail server on your VPS or hosted service, there is a section inside control panel that allows you to add one. If you have public IP and you are testing this on-premise, probably your ISP would have to add one for you.
Reverse PTR is simple IP address and your MX name
0.111.222.333 mail.informaticar.net
is how a record would look like in my case.
That would be it for a start. Use mxtoolbox.com to check you DNS and mail configuration.
Open Firewall ports
sudo ufw allow 25
sudo ufw allow 80
sudo ufw allow 443
sudo ufw allow 587
sudo ufw allow 465
sudo ufw allow 143
sudo ufw allow 993
In case you are using POP3 you will also need
sudo ufw allow 110,995Certificate Story…
You can have many issues if you don’t configure certificates well. You can go with Let’s Encrypt certificates or you can buy them. I bought mine (wildcard certficate) from Sectigo and I need setup specified below. You will always need public and private part of the certificate for your domain, but sometimes you will also need additional part and that is certificate chain from you CA (company you got your certificates from).
Every certificate has private and public part. Public part has extension .crt and private part of the key has extension .key.
Also both public and private parts can have .pem extension. All extensions mentioned will work with Postfix and Dovecot as long as you have valid certificates.
Besides private and public parts of the certificate you got, you will maybe need chain certficate of your CA (Certificate Authority) to complete the “chain”. Sectigo (from whom I bought certificate) has bundle of the certificates you can download from their site, just google sectigo chain cert or intermediate cert.
Postfix certificates
So, for Postfix (in my case) I need three certificates:
Private certificate for my domain – /etc/ssl/private/ssl1private.pem
(This one could also be in .key format and it will work. So if it is named ssl1pivate.key – it works for Postfix)
Public part of my certificate – etc/ssl/certs/ssl1public.pem
(That could also be named ssl1public.crt, that will also work)
and my CA certificate chain – /etc/ssl/certs/SectigoBundle.pem
Later in configuration there is a Postfix config file in which I will need to configure these paths and you need to import/copy your certificates to those directories.
Dovecot certificates
For Dovecot, in my case all three files will be needed. However, while in Postfix you can specify public, private and your CA key separately, in Dovecot you cannot.
So, in Dovecot you will specify private key ssl1private.pem (or ssl1private.key, both extensions work).
You will have to merge ssl1public.pem and SectigoBundle.pem into one file and specify it as a public certificate file for Dovecot. This would be “chain” certificate which would in itself have public part of your personal certificate and all the certs from your CA.
To merge these two files, execute following command
cat /etc/ssl/certs/ssl1public.pem /etc/ssl/certs/SectigoBundle.pem > /etc/ssl/certs/chain.pemThen in Dovecot configuration you will specify following:
Private key – /etc/ssl/private/ssl1private.pem
Public key – /etc/ssl/certs/chain.pem
This way your authentication and mail service will work flawlessly. Also, maybe your CA has already all of this integrated into public part of your certificate, so you don’t have to have all this trouble of defining and merging certs. It all depends from which vendor you get your certs.
Installing Apache, MariaDB and PHP 7.4
Next step would be to install components mentioned above. We need them in order for Roundcube to work.
sudo apt-get update -y
sudo apt-get upgrade -y
sudo apt install apache2 apache2-utils mariadb-server mariadb-client php7.4 libapache2-mod-php7.4 php7.4-mysql php-net-ldap2 php-net-ldap3 php-imagick php7.4-common php7.4-gd php7.4-imap php7.4-json php7.4-curl php7.4-zip php7.4-xml php7.4-mbstring php7.4-bz2 php7.4-intl php7.4-gmp php-net-smtp php-mail-mime php-net-idna2 mailutils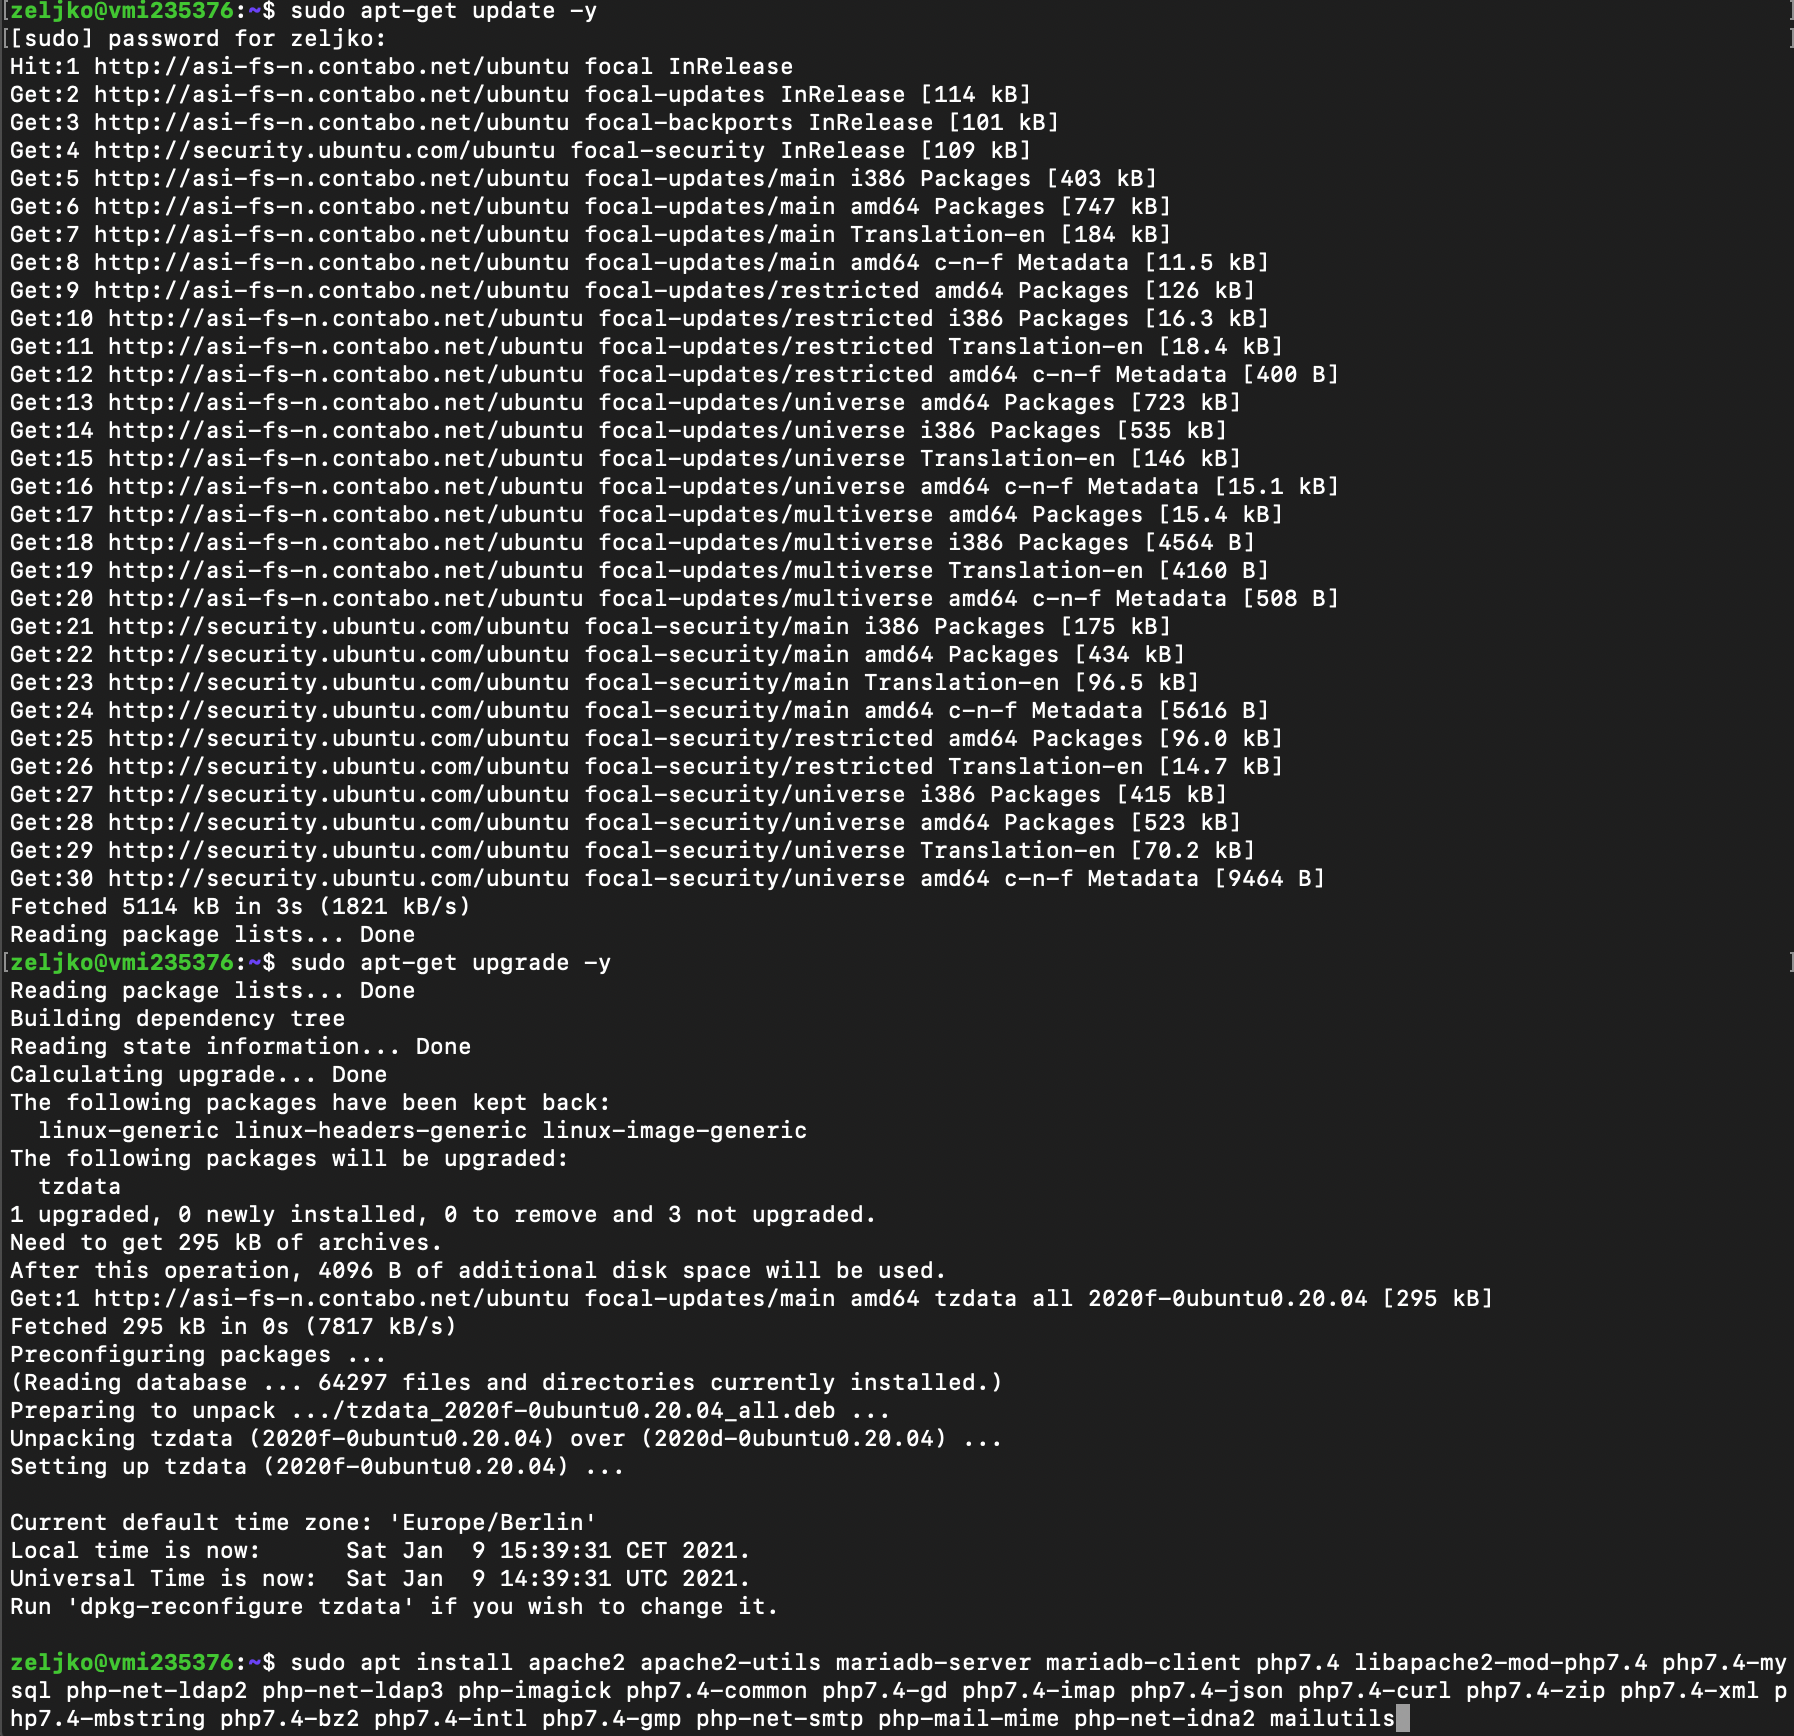
Last commant “mailutils” should also trigger installation of the Postfix, which is the next step.
Installing Postfix
Postfix is MTA (Mail Transfer Agent) and is essential part of every Linux email setup. Postfix transfer messages from mail client to remote SMTP servers you send your email to.
Command to install Postfix is (if the above command haven’t started install)
sudo apt-get install postfixSelect Internet Site
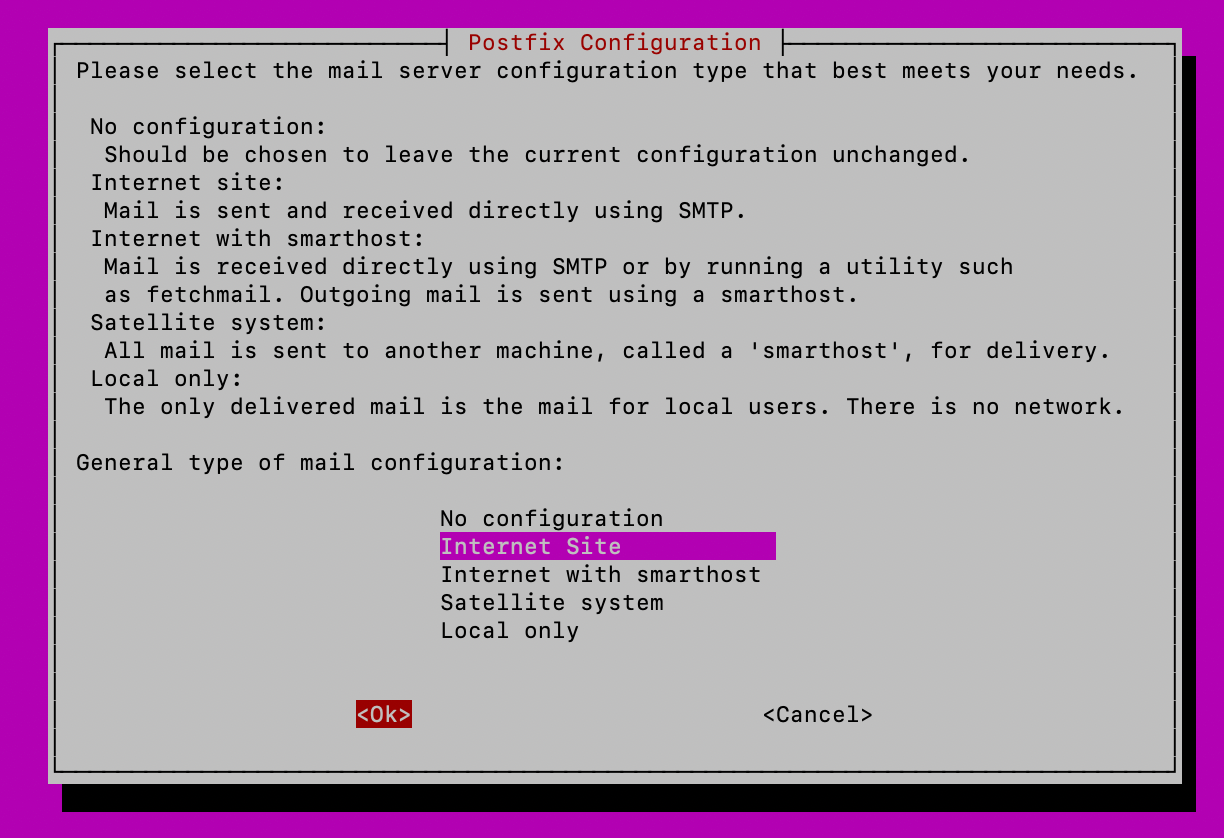
Enter your FQDN, in my case that would be informaticar.net
OK

After you press ok installation will continue because there is a lot to install in the command we issued earlier.
This is how the end looks like
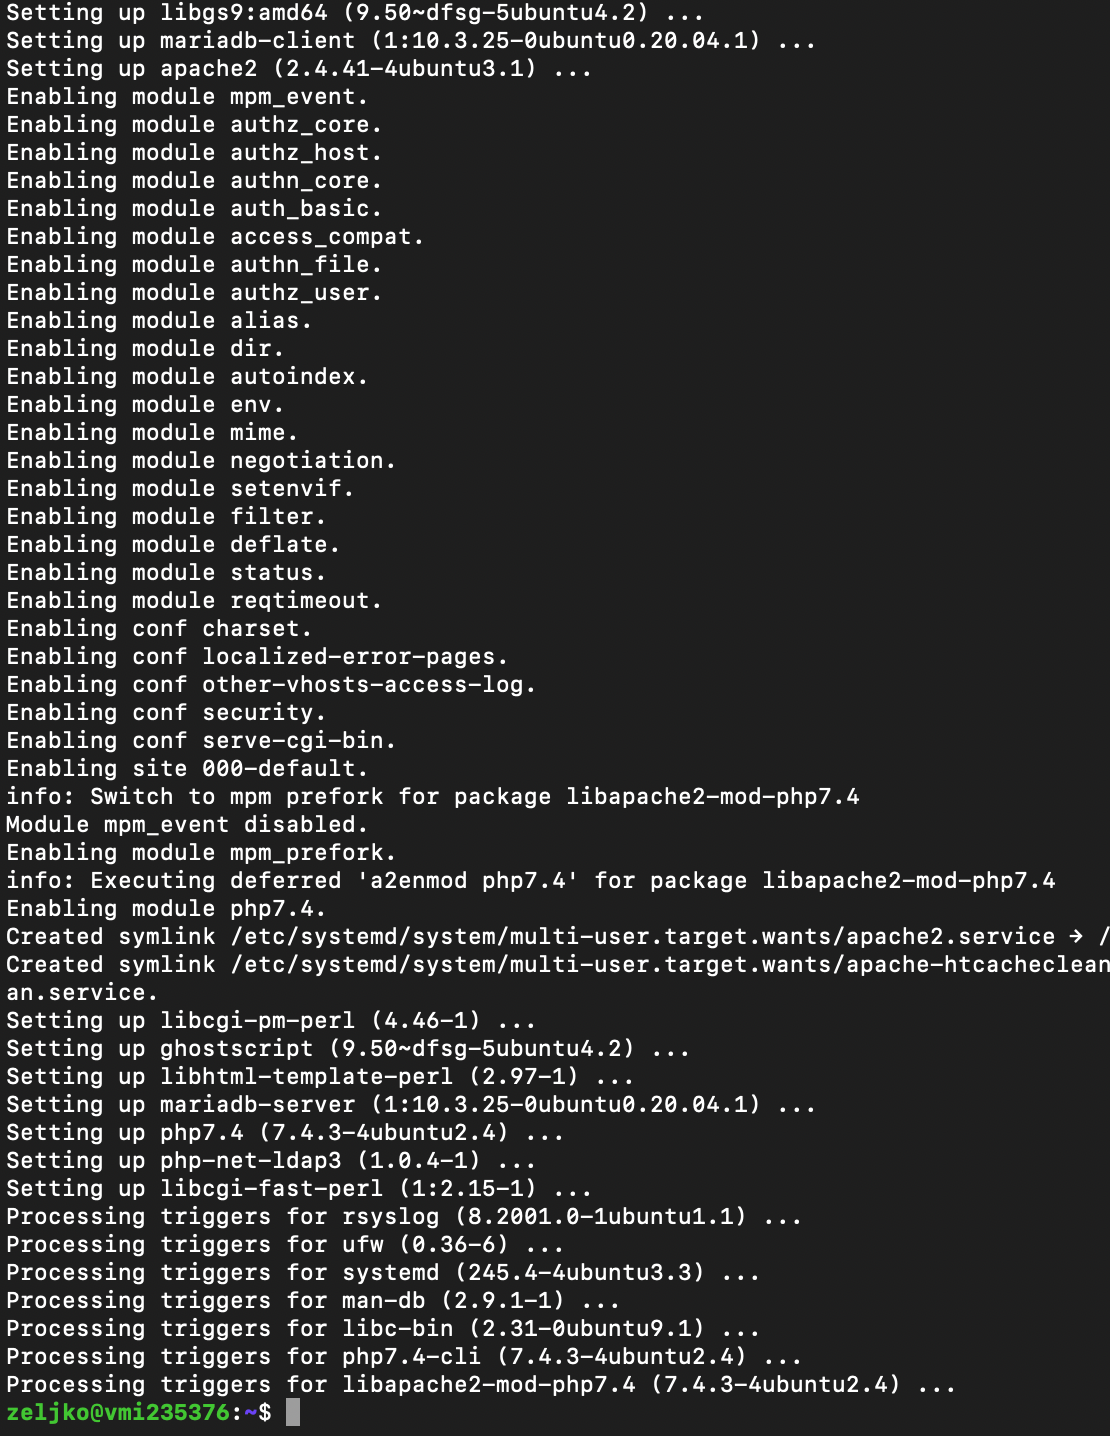
Postfix should also be installed and it should have created /etc/postfix/main.cf file. We will now verify installed Postfix version and check if the service works.
postconf mail_version
sudo systemctl status postfix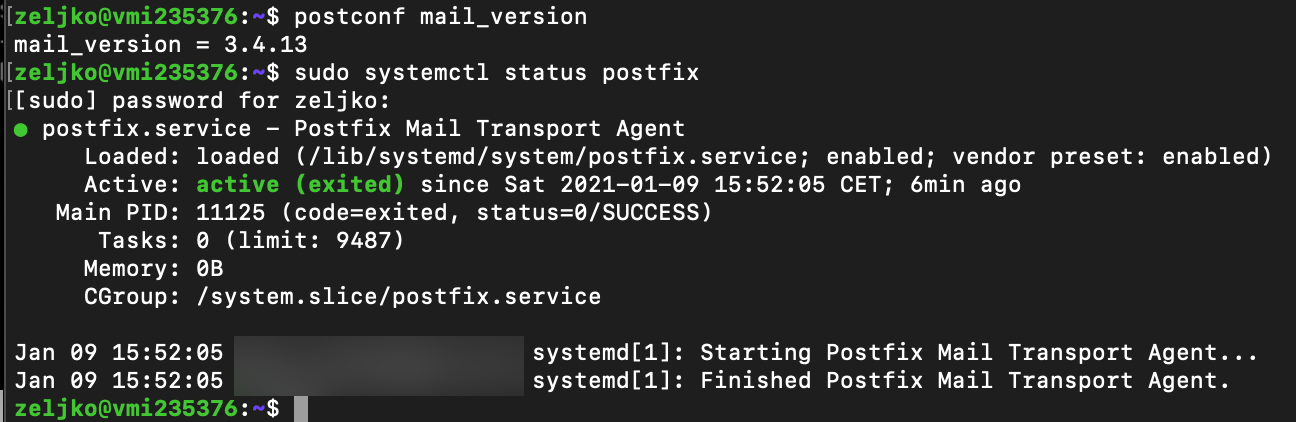
Let’s also check installed binaries
dpkg -L postfix | grep /usr/sbin/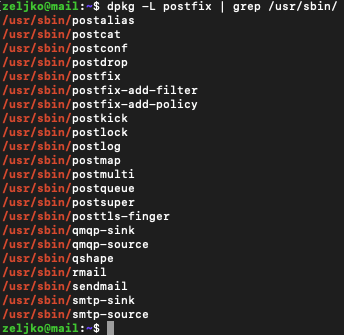
All ok so far, let’s head on to next step
Test Postfix Mail Server
We will try to connect to port 25 by typing in following
telnet gmail-smtp-in.l.google.com 25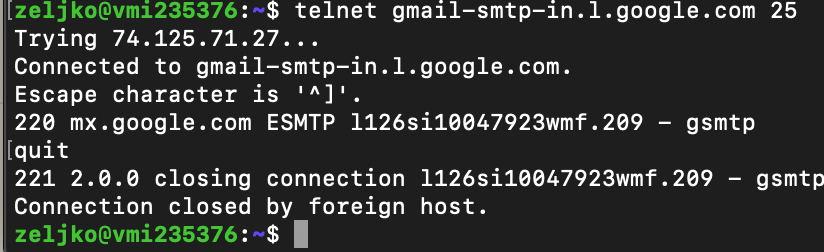
We made successful connection. Type quit to close connection.
We can also test email sending by using mail command
If you don’t have mail installed, install it by typing in
sudo apt install mailutilsSend mail to the email address that works by typing in
mail username@somedomain.comAfter you enter subject and some text into body of email,confirm sending by pressing Ctrl+D
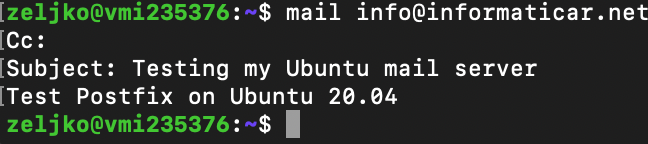
I received mail I sent. Don’t let email address I sent mail to confuse you. I’m using informaticar.net just as an example in commands here, in reality I’m setting Postfix to another domain, and my informaticar.net domain is already fully functional.
Advanced Postfix Configuration
for this part you will need certificates. You can look up Let’s Encrypt tutorials or buy yourself certificate for your domain.
I have bought certificate for my domain, since that is really the easiest and most practical way for me, and certificates are not that expensive.
I have certificates for my domain and they are located in following directories:
Public part: /etc/ssl/certs/ssl1public.pem
Private part: /etc/ssl/private/ssl1private.pem
We will now enable submission service for our Postfix
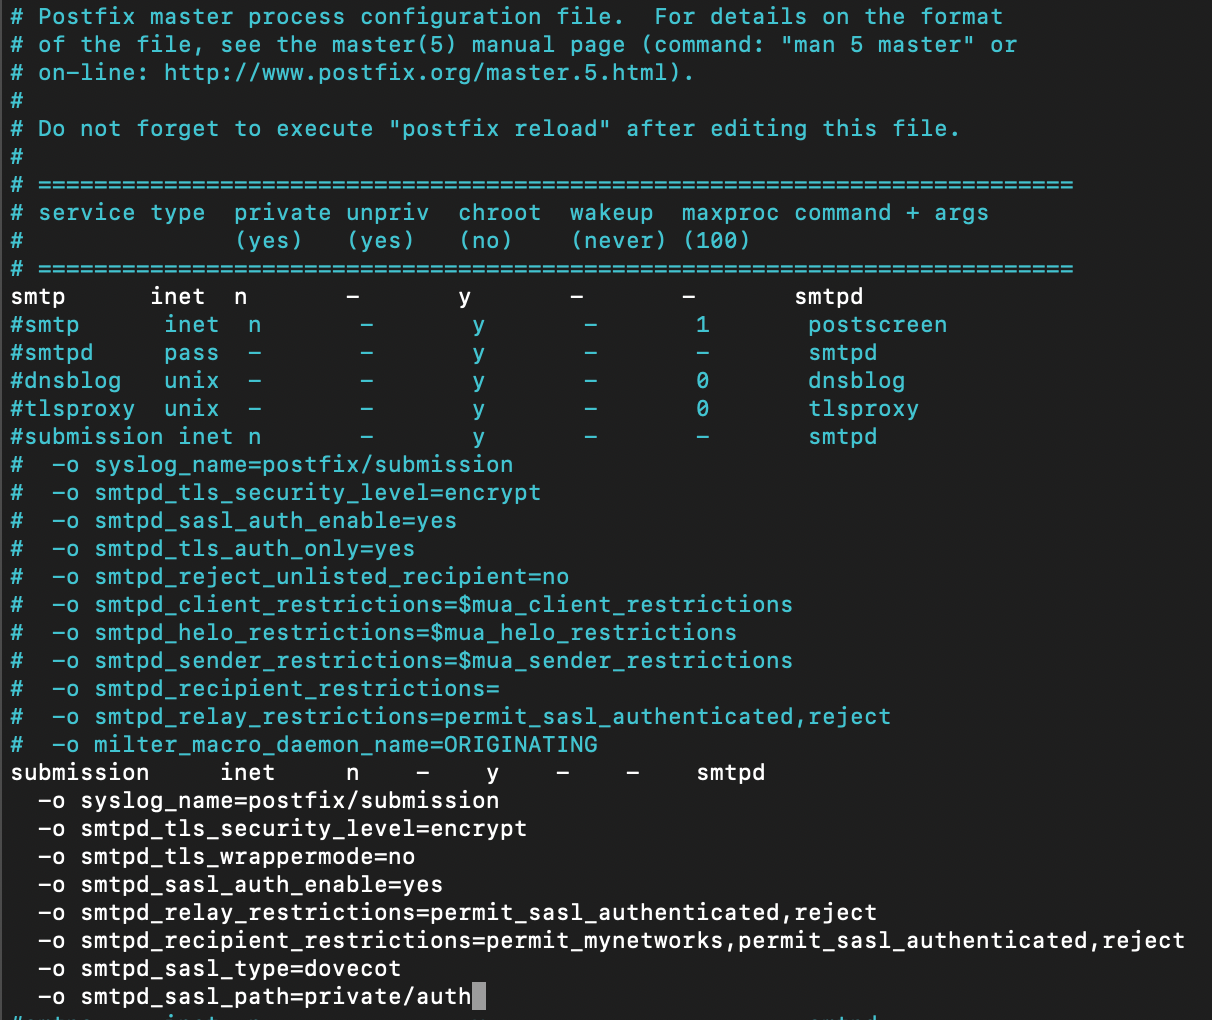
The changes we will enter into master.cf file will enable TLS encryption and submission daemon. Submission service is needed so that desktop client can, wait for it, submit emails to Postfix.
Submission daemon uses port 587 and also startssl is used for communication between client and submission daemon.
sudo nano /etc/postfix/master.cfEnter following. use one blank space before you start typing -o
submission     inet     n    -    y    -    -    smtpd
  -o syslog_name=postfix/submission
  -o smtpd_tls_security_level=encrypt
  -o smtpd_tls_wrappermode=no
  -o smtpd_sasl_auth_enable=yes
  -o smtpd_relay_restrictions=permit_sasl_authenticated,reject
  -o smtpd_recipient_restrictions=permit_mynetworks,permit_sasl_authenticated,reject
  -o smtpd_sasl_type=dovecot
  -o smtpd_sasl_path=private/auth
I chosen not to un-comment existing lines, I simply c/p lines specified above to the lines below commented section in the file.
If you by any chance are going to use Microsoft Outlook, it needs port 465. You will then need to add following lines:
smtps     inet  n       -       y       -       -       smtpd
  -o syslog_name=postfix/smtps
  -o smtpd_tls_wrappermode=yes
  -o smtpd_sasl_auth_enable=yes
  -o smtpd_relay_restrictions=permit_sasl_authenticated,reject
  -o smtpd_recipient_restrictions=permit_mynetworks,permit_sasl_authenticated,reject
  -o smtpd_sasl_type=dovecot
  -o smtpd_sasl_path=private/auth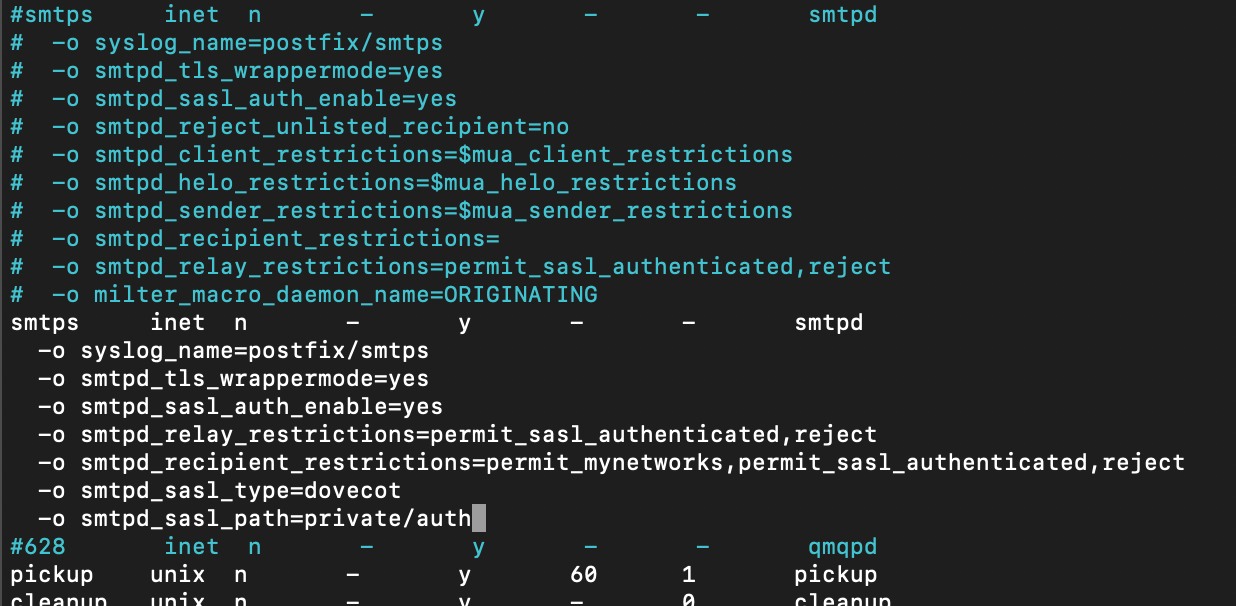
Next, we need to specify certificate location for our Postfix install
sudo nano /etc/postfix/main.cfIn the following two lines specify location of your private and public part of certificate.
Replace ssl1public.pem and ssl1private.pem with your certificate names and location. (smtpd_tls_CAfile is optional part you may have to define, I explained in the certificate story at the beginning of this guide)
#TLS parameters
smtpd_tls_cert_file=/etc/ssl/certs/ssl1public.pem
smtpd_tls_key_file=/etc/ssl/private/ssl1private.pem
smtpd_tls_CAfile = /etc/ssl/certs/SectigoBundle.pem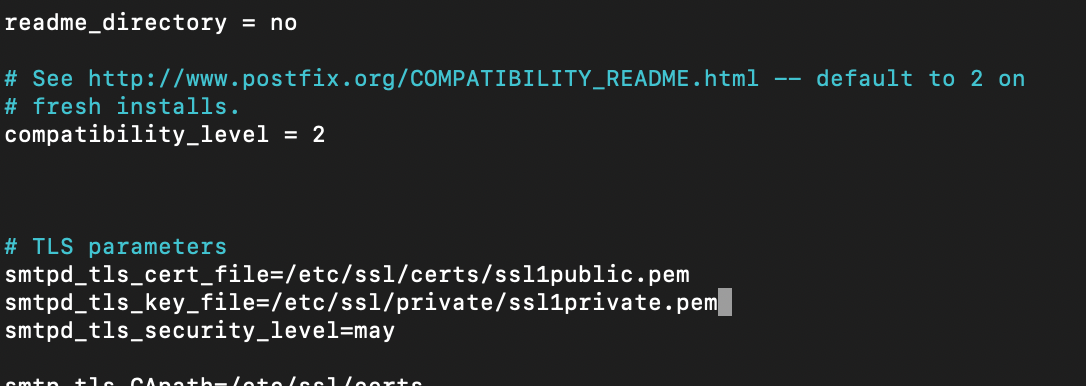
Also enter following lines:
smtpd_tls_security_level=may
smtpd_tls_loglevel = 1
smtpd_tls_session_cache_database = btree:${data_directory}/smtpd_scache

#Enable TLS Encryption when Postfix sends outgoing emails
smtp_tls_security_level = may
smtp_tls_loglevel = 1
smtp_tls_session_cache_database = btree:${data_directory}/smtp_scache

#Enforce TLSv1.3 or TLSv1.2
smtpd_tls_mandatory_protocols = !SSLv2, !SSLv3, !TLSv1, !TLSv1.1
smtpd_tls_protocols = !SSLv2, !SSLv3, !TLSv1, !TLSv1.1
smtp_tls_mandatory_protocols = !SSLv2, !SSLv3, !TLSv1, !TLSv1.1
smtp_tls_protocols = !SSLv2, !SSLv3, !TLSv1, !TLSv1.1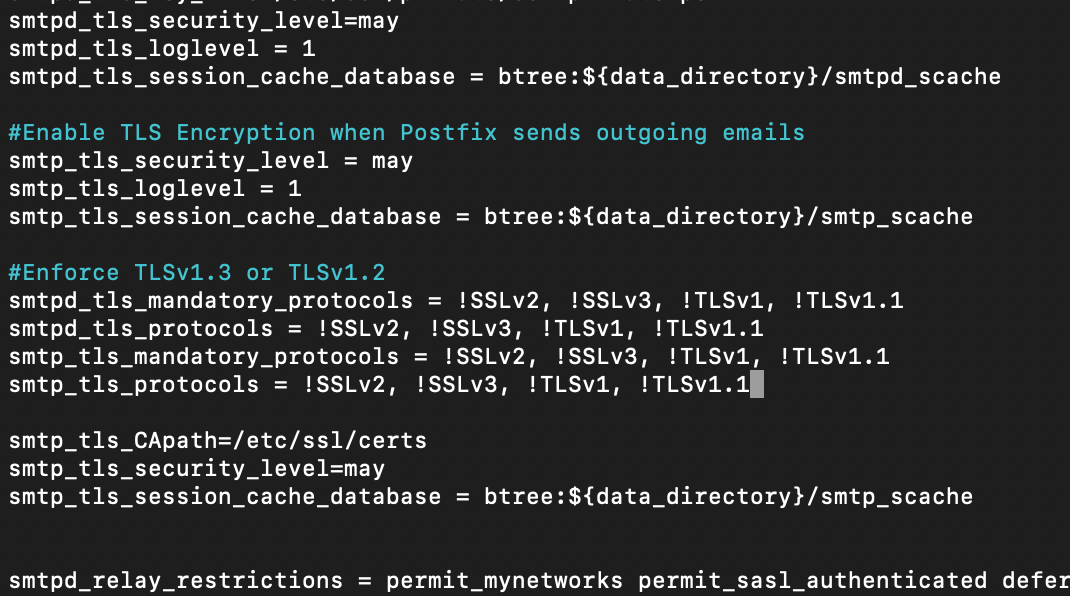
Save and close file.
We will now reboot Postfix
sudo systemctl restart postfixand check what ports are active now (by default only port 25 is active)
sudo ss -lnpt | grep master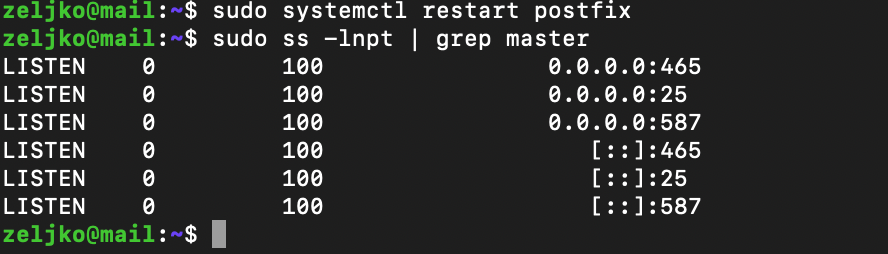
Creating email alias
In the later stages of this guide there will be some back and forth between Postfix and Dovecot. Postfix has aliases file, and it is in /etc/aliases file. By default there is only one entry postmaster: root
So, in the practical terms, mail from postmaster@informaticar.net are going to be delivered to the root@informaticar.net.
I don’t want to use root, and neither do you.
So, lets add another line
sudo nano /etc/aliasesI specified my name as follows. I specified my username – zeljko. You should specify username that you use on your Ubuntu installation. So, change zeljko with your Ubuntu user.
root: zeljko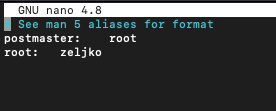
After you save and close file, we need to rebuild aliases database.
sudo newaliasesFew cosmetic changes…
Message Size Limit
By default attachment limit should be 10MB. We can check the attachment limit by typing in:
postconf | grep message_size_limitOne thing you need to have in mind is that, if you wish to change message_size_limit, your message_size_limit cannot be larger than mailbox_size_limit. To check the mailbox size limit, type in following
postconf | grep mailbox_size_limitBy default, mailbox size limit in Ubuntu is zero – so that is good news, since we have “unlimited” mailbox space – that is until the disk is filled up.
Ok, lets change message_size_limit to 45MB. All values are in bytes, so that would be cca 50331648 bytes
sudo postconf -e message_size_limit=50331648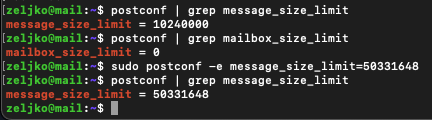
Postfix hostname
It should be same as the system name. In case you wish to change system name, check what is your Postfix hostname. It should be in format mail.yourdomain.net
In my case that is mail.informaticar.net
sudo nano /etc/postfix/main.cfFind following line and change the name (mail.yourdomain.net should be your domain name, in my case that is mail.informaticar.net).
myhostname = mail.yourdomain.netIn my case, myhostname is ok, so no need for change.
If you did these changes it would be good idea to restart Postfix
sudo systemctl restart postfixDisable IPv6
You can check what protocols Postfix is using by typing in
postconf inet_protocolsBy default Postfix uses both IPv4 and IPv6. If you don’t use IPv6 type in following to disable it
sudo postconf -e "inet_protocols = ipv4"Reboot Postfix
sudo systemctl restart postfix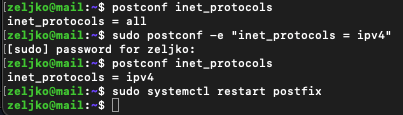
Now we are done with Postfix.
Installing Dovecot IMAP/POP
Dovecot is MDA (Mail Delivery Agent) and it will deliver email from/to the mail server.
To install it, run following
I won’t be using POP3 protocol, only IMAP, but for this tutorial I’m going to install both. (you can left out dovecot-pop3d part if you won’t be using pop3).
sudo apt-get install dovecot-core dovecot-imapd dovecot-pop3d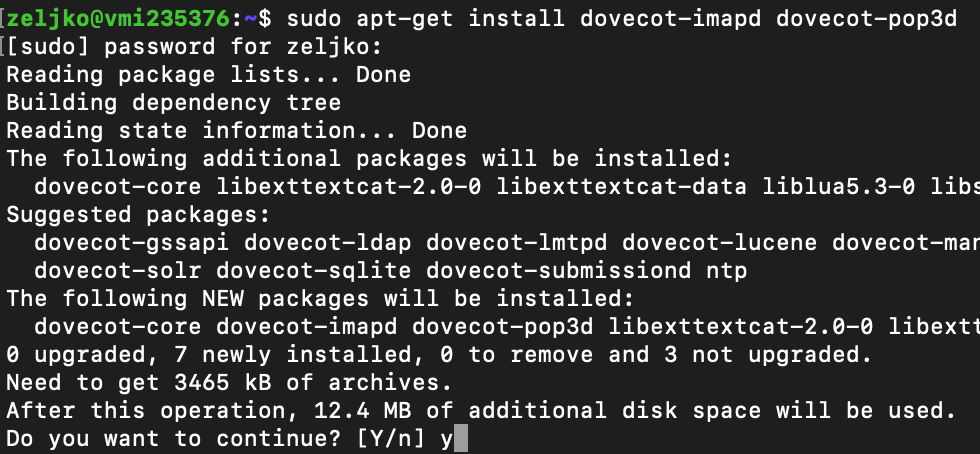
After installation restart service and check status
sudo systemctl restart dovecot
sudo systemctl status dovecot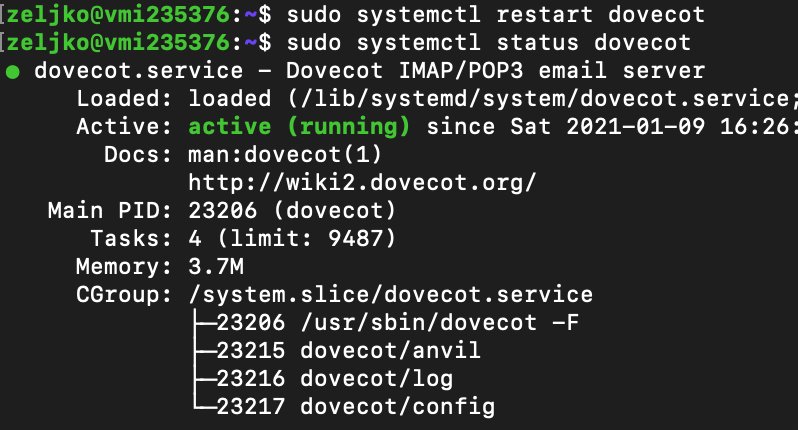
We will now enable IMAP protocol
We need to edit dovecot.conf file
sudo nano /etc/dovecot/dovecot.confUnder # Enable installed protocols add following line, right below that line.
protocols = imap
If you wish to enable pop3 also, enter following
protocols = imap pop3Save the file and exit.
Configure mailbox location
By default Postfix and Dovecot use mbox as email store. We want to use maildir because it is newer, modern, scalable and better in terms of data integrity than mbox.
Ok, lets check where the email spool dir is
postconf mail_spool_directory/var/mail should be response of the command, and in my case – it is.

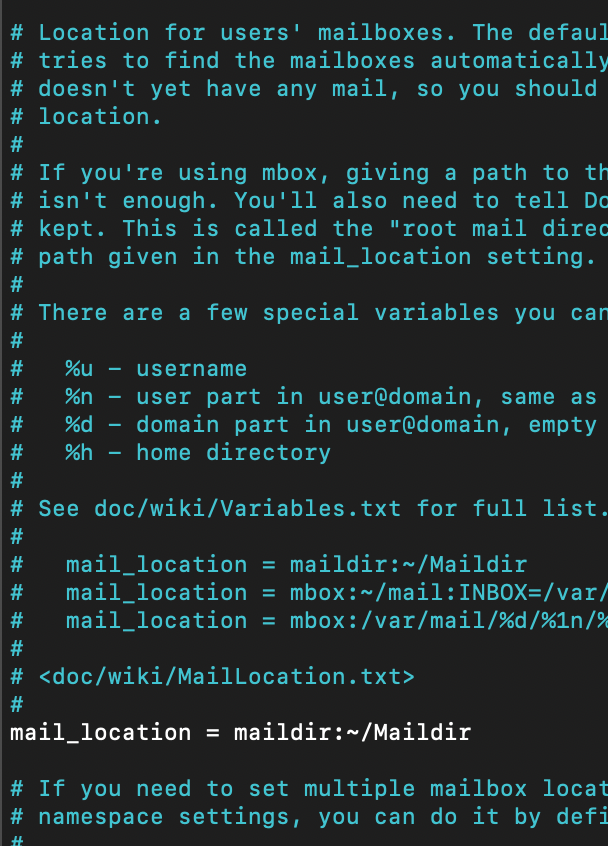
Let’s now change to maildir. We need to edit 10-mail.conf file inside dovecot.
sudo nano /etc/dovecot/conf.d/10-mail.confMail location looks like this by default
mail_location = mbox:~/mail:INBOX=/var/mail/%uWe need to change it to
mail_location = maildir:~/MaildirWith that change, emails will be stored inside Maildir in home folder of every user.
One other line needs to be added at this file if you are using Ubuntu older than 18.04 or 20.04. This line i already inside Ubuntu 20.04 on which I’m working.
mail_privileged_group = mailSave and exit file.
We also need to add user Dovecot to mail group so that it can read inbox.
sudo adduser dovecot mailConfigure authentication
We need to edit following file
sudo nano /etc/dovecot/conf.d/10-auth.confUncomment following line
disable_plaintext_auth = yes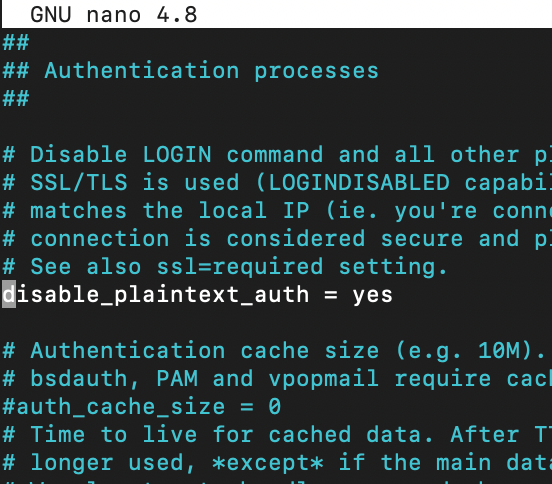
If you want user to login without full email address, add following. I set my username format like the line below and I still can login with my email address of just username.
auth_username_format = %n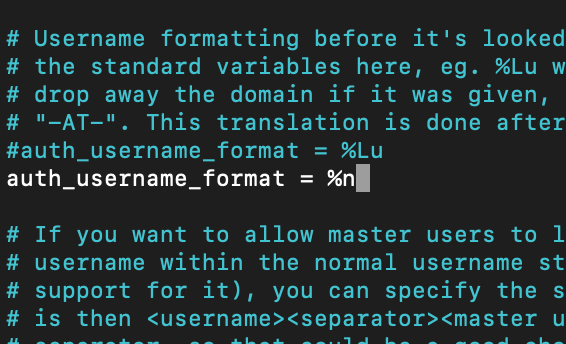
Next, we need to find following line
auth_mechanisms = plainand add to it login, so that older email clients could be used
auth_mechanisms = plain login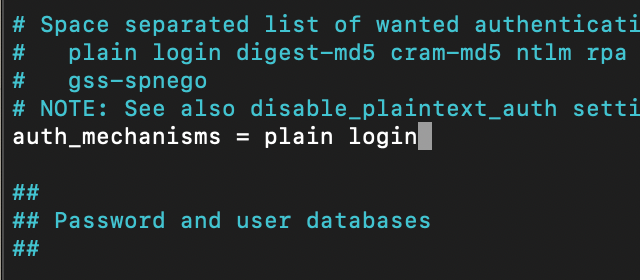
ave and close file.
Configure SSL/TLS
We will again use our certificates.
We need to edit following file
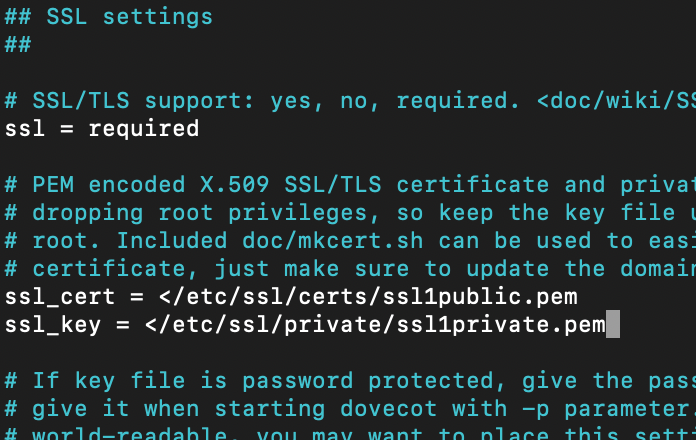
sudo nano /etc/dovecot/conf.d/10-ssl.confChange ssl = yes to the value below
ssl = requiredWe also need to change following lines to go to look at our certificates. ssl_cert is public part of the certificate, and you may need to merge you public cert with intermediate certs provided by your CA (see certificate story at the beggining of the guide for more details).
ssl_cert =
ssl_key =
Change to match your ssl certificate locations for public and private key
My keys are in /etc/ssl… as I already mentioned above.
We need to find ssl_prefer_server_ciphers line and change it from no to yes
ssl_prefer_server_ciphers = yesAlso for Ubuntu 20.04 and Dovecot v.2.3+ you should find and uncomment and add following
ssl_min_protocol = TLSv1.2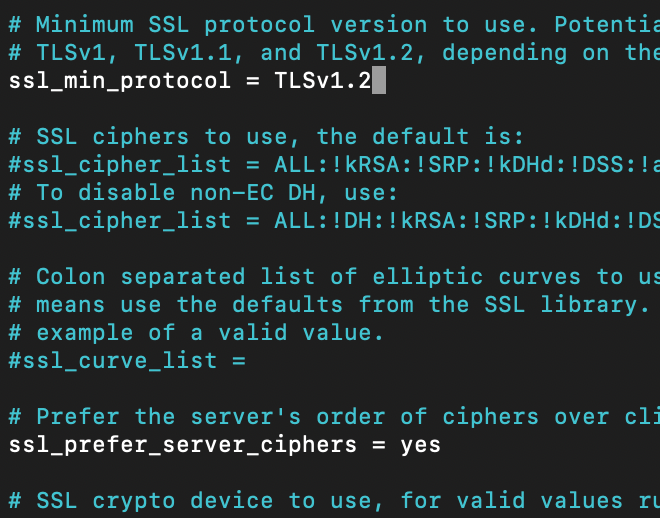
Save and exit file.
Configure SASL Auth
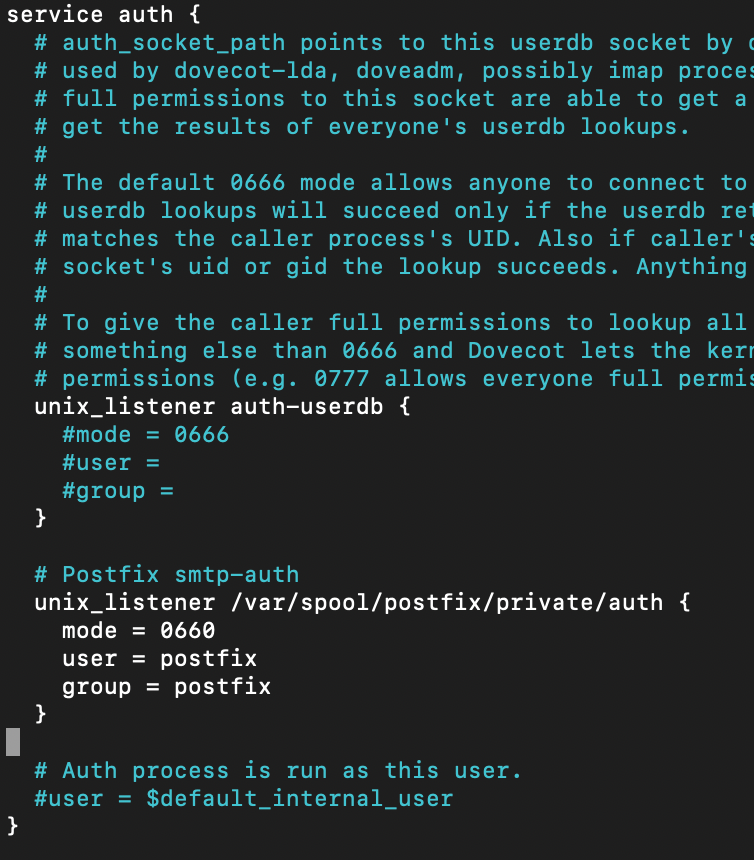
sudo nano /etc/dovecot/conf.d/10-master.confInto the “service auth {” part we need to add following. Please be careful with syntax and make sure you don’t move/delete {} brackets and make sure opening bracket has also closing one.
# Postfix smtp-auth
unix_listener /var/spool/postfix/private/auth {
      mode = 0660
      user = postfix
      group = postfix
    }
This is how it should look like
Save and close file.
Auto create Sent and Trash folder
Edit following file
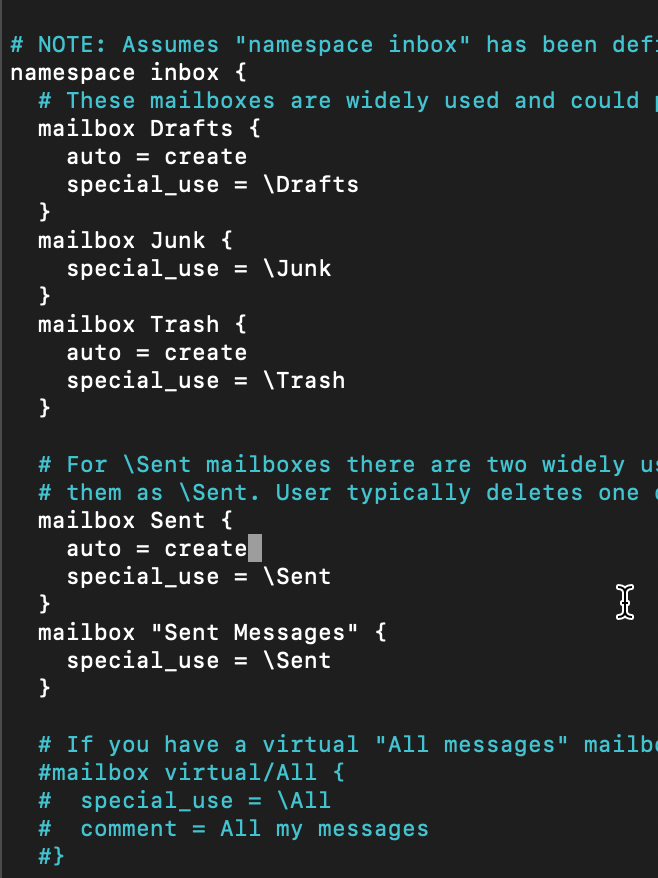
sudo nano /etc/dovecot/conf.d/15-mailboxes.confIn order to create automatically some folder for a user we need to add following line.
and you need to add that line under specific folder you wish to be created. For example, we want folder Drafts to be created automatically
auto = createmailbox Drafts {
auto = create
special_use = \Drafts
}
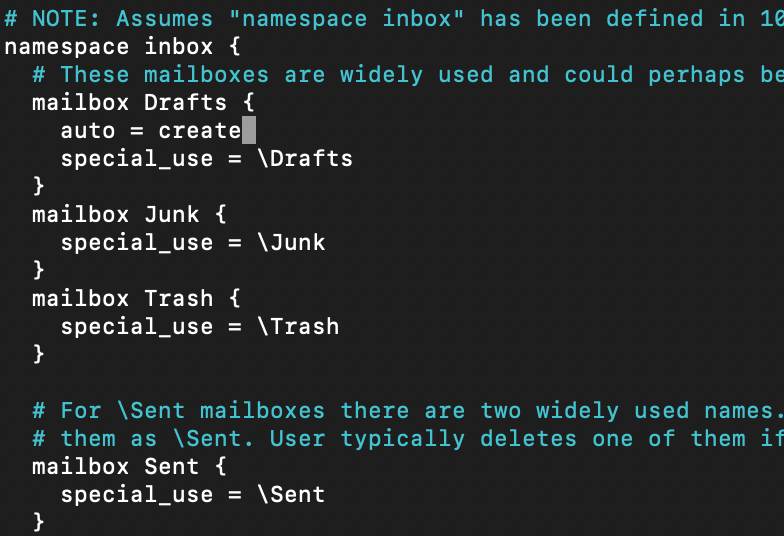
I hope it is clear now. I will add this line to the Trash and Sent folders.
Save and close
We will now restart dovecot
sudo systemctl restart dovecot
systemctl status dovecot
It is always good to check the status of the service, if it failed to restart, service will not be running.

Lets see now on what ports is dovecot listening
sudo ss -lnpt | grep dovecot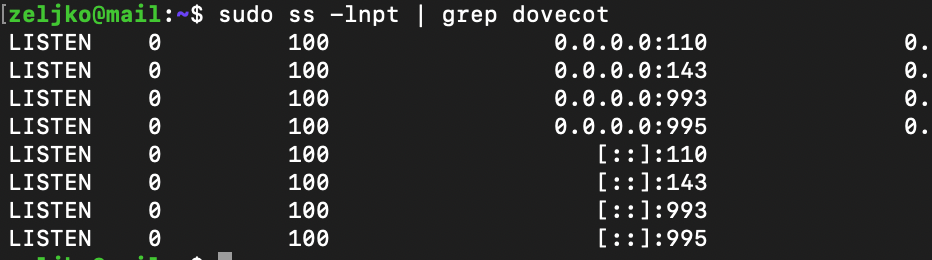
Ok, so on ports 110(pop3) and 143(imap) and also on the secure versions of these protocols on ports 993, 995
We will also reboot Postfix
sudo systemctl restart postfix
sudo systemctl status postfix
Using Dovecot to deliver emails to Message Store
By default Postfix delivers emails to appropriate folders (inbox, sent…) by using local delivery agent (LDA). We can configure Dovecot to do it via LMPT protocol which is simplified SMTP. LMTP is scalable and reliable system.
Lets do it. Install Dovecot LMTP
sudo apt install dovecot-lmtpdEdit dovecot configuration file
sudo nano /etc/dovecot/dovecot.confAdd lmtp under protocols
protocols = imap lmtp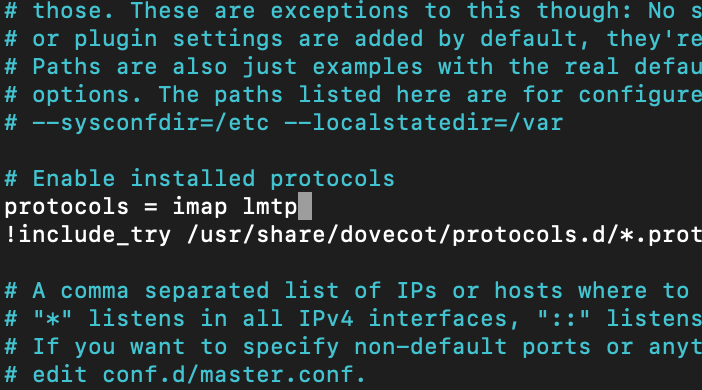
Save and exit.
Now we need to edit 10-master.conf file.
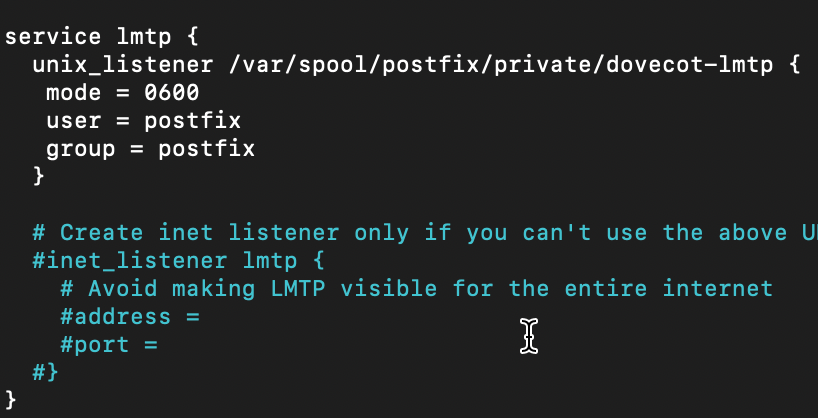
sudo nano /etc/dovecot/conf.d/10-master.confService lmpt part should look like this
service lmtp {
 unix_listener /var/spool/postfix/private/dovecot-lmtp {
   mode = 0600
   user = postfix
   group = postfix
  }
In picture, so you can see for yourself
Save and exit
Let’s edit one more file while we are at it
sudo nano /etc/postfix/main.cfAdd following lines to the end of the file.First one test Postfix to deliver via lmtp adn second disables smtputf8 in Postfix.
mailbox_transport = lmtp:unix:private/dovecot-lmtp
smtputf8_enable = no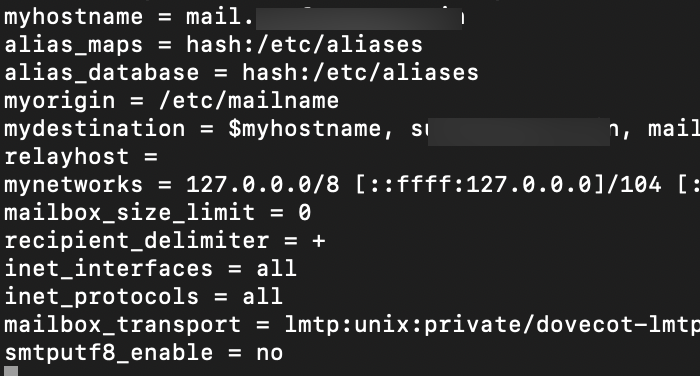
Save and close file.
Restart both Dovecot and Postfix
sudo systemctl restart dovecot
sudo systemctl restart postfix
That should be it for Dovecot.
Email Testing
At this point we have a functioning server.
We will add testuser1 to our system. By simply adding user to our Ubuntu installation we will also be able to just add email account for him.
sudo adduser testuser1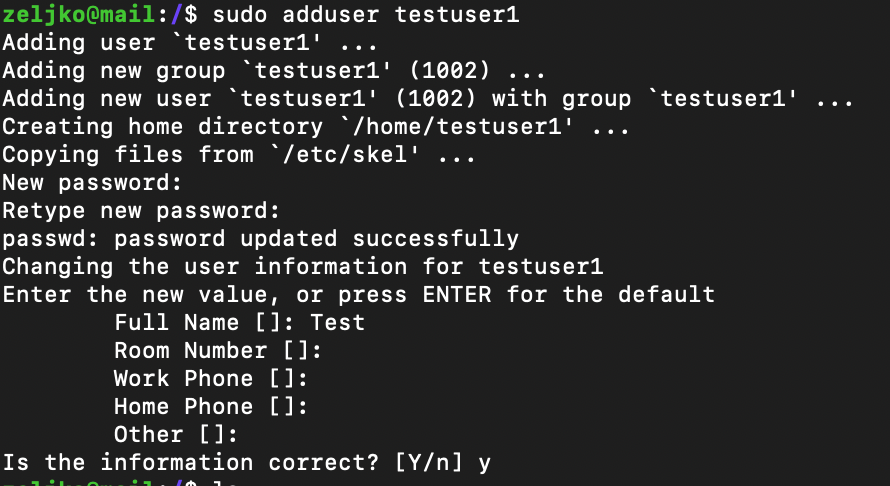
Depicted below are the settings for email account for our user testuser1.
IMAP on port 143 with STARTTLS and normal password
SMTP on port 587 with STARTTLS and normal password
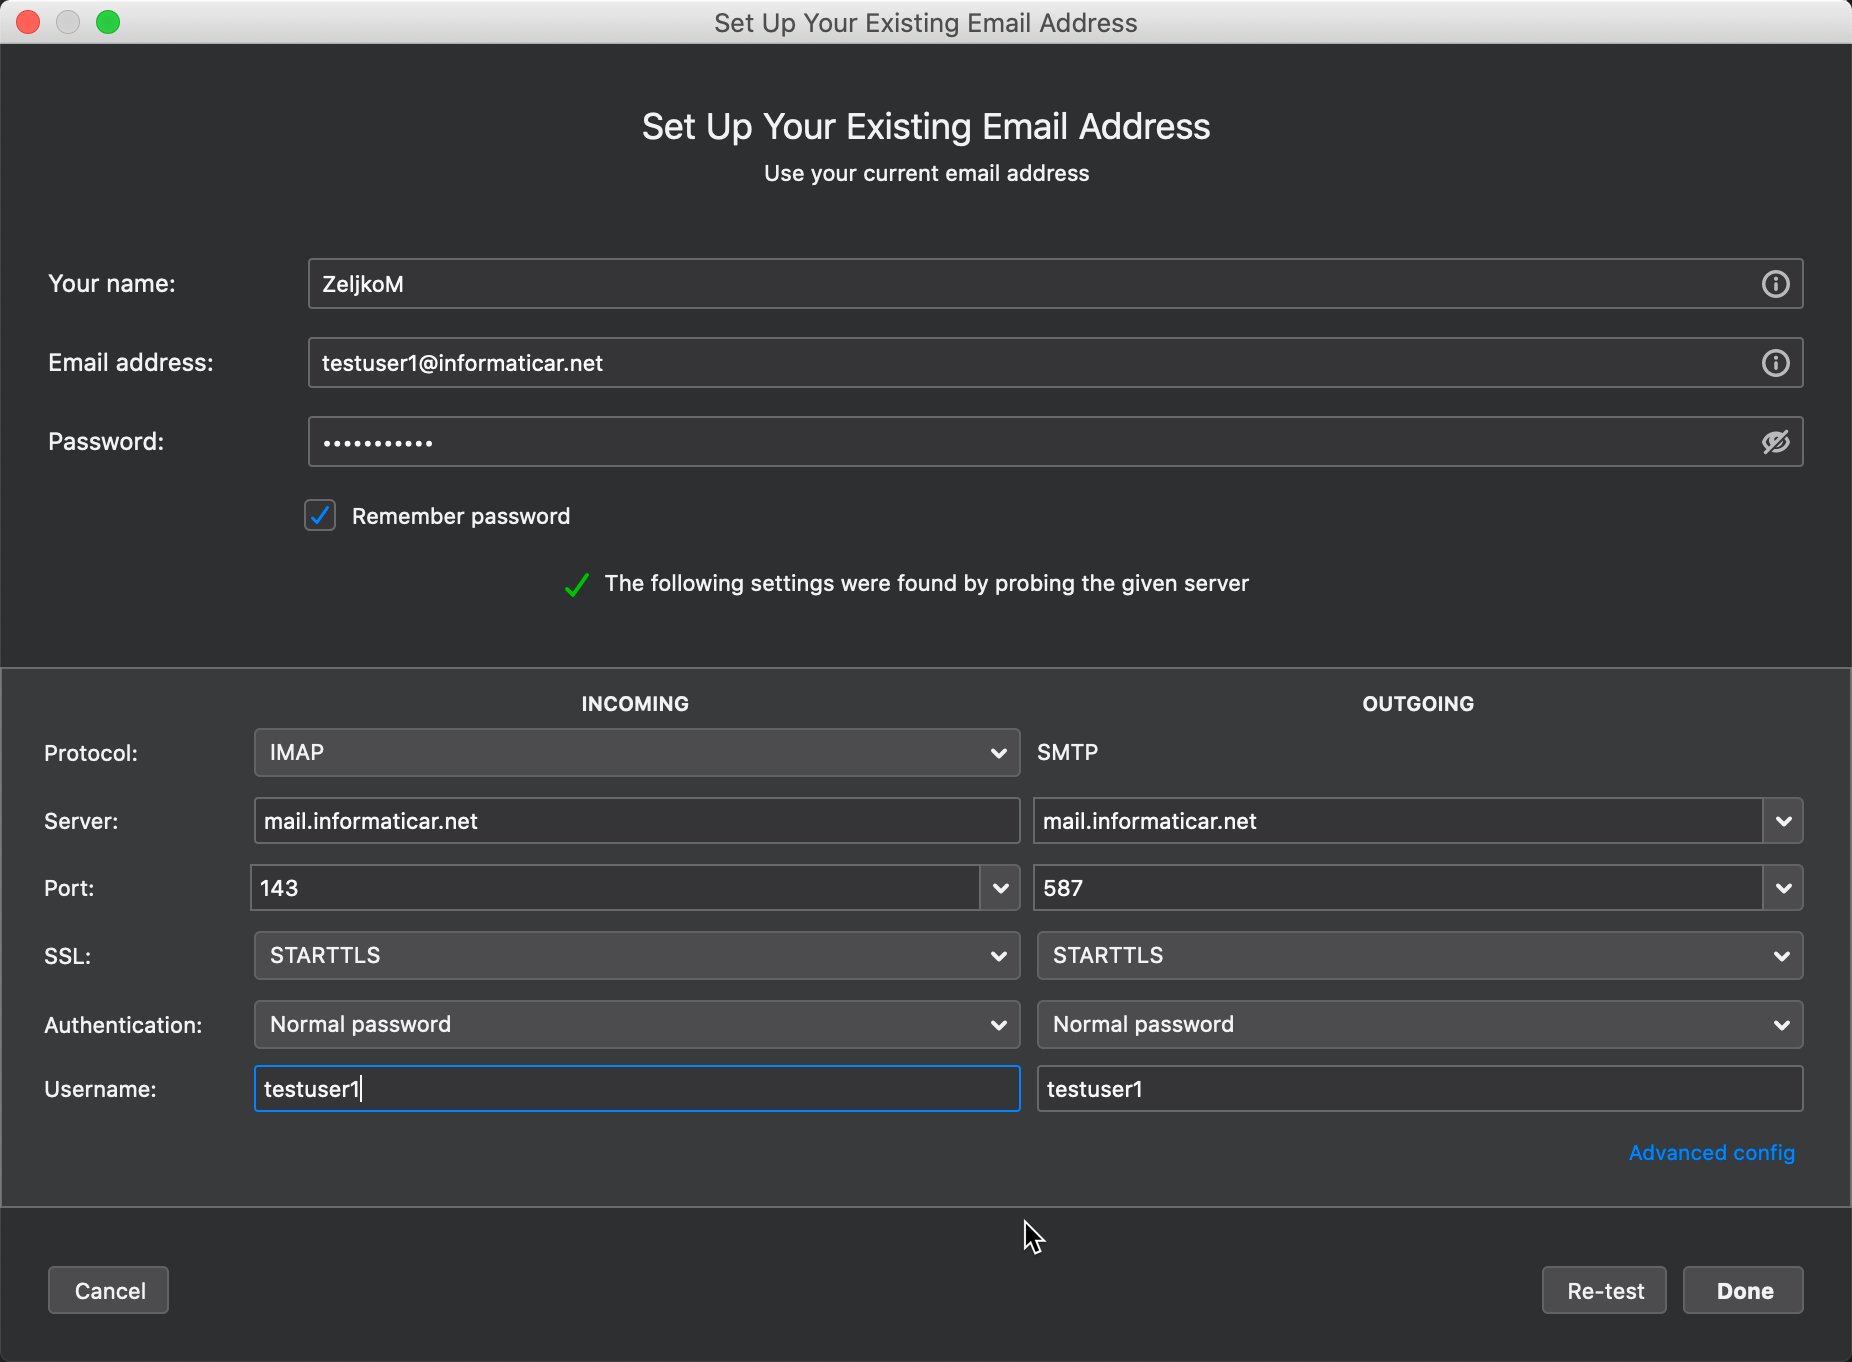
If you select SSL/TLS encryption for IMAP you can use port 993 ans SSL/TLS for SMTP you can use port 465.
With the settings above I’m able to send and receive emails!! This would be it for a core functionality, we now have functioning mail server.
Next step will be to install Roundcube
Roundcube installation
Roundcube is a webmail server, it is graphical interface through which we will manage our mailbox…
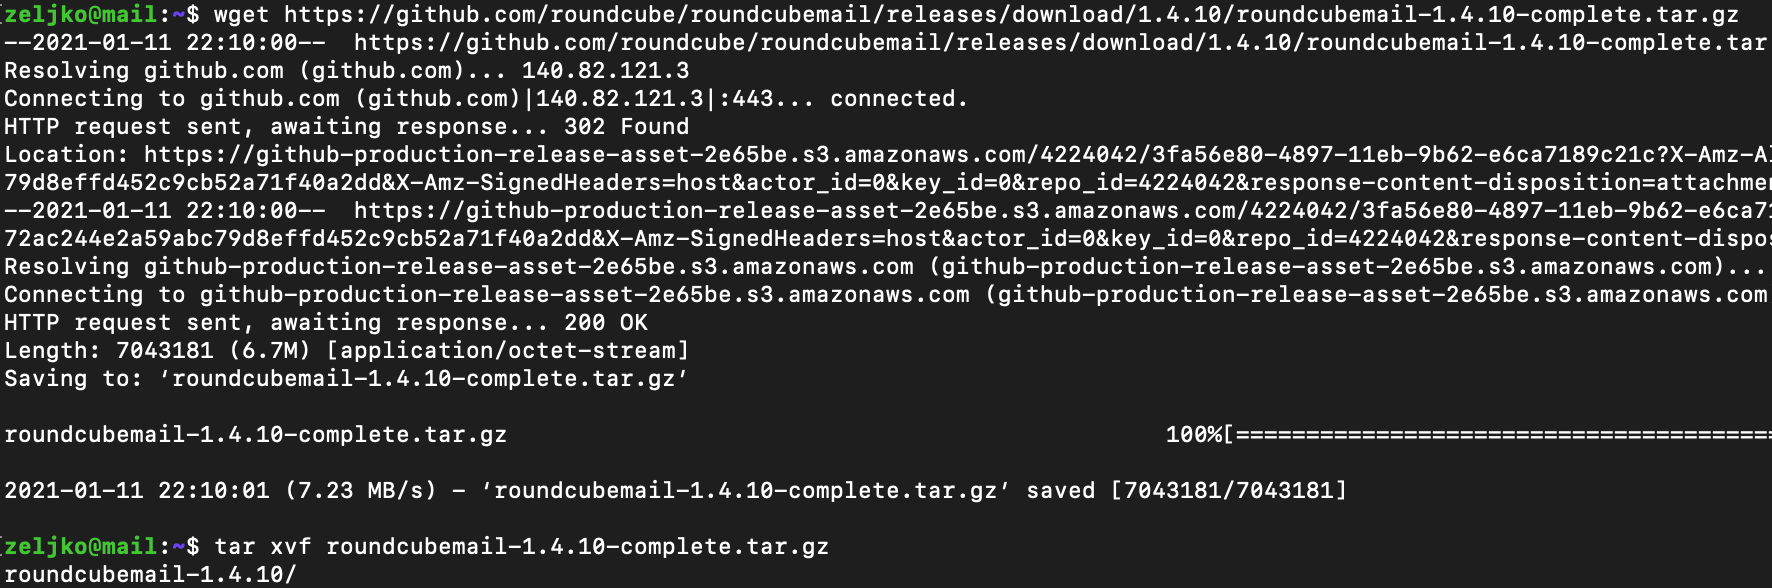
wget https://github.com/roundcube/roundcubemail/releases/download/1.4.10/roundcubemail-1.4.10-complete.tar.gz

tar -xvf roundcubemail-1.4.10-complete.tar.gz

sudo mv roundcubemail-1.4.10 /var/www/roundcube

sudo chown -R www-data:www-data /var/www/roundcube/

sudo chmod 755 -R /var/www/roundcube/

sudo chown www-data:www-data temp/ logs/ -R
There are scenarios in which people are selecting to skip first chown and chmod command, and are executing only last chown command.

Next, we will need dependency manager for PHP.
sudo apt install composerNow, we need to change to the roundcube directory
cd /var/www/roundcubeand use composer to install dependencies
composer install --no-dev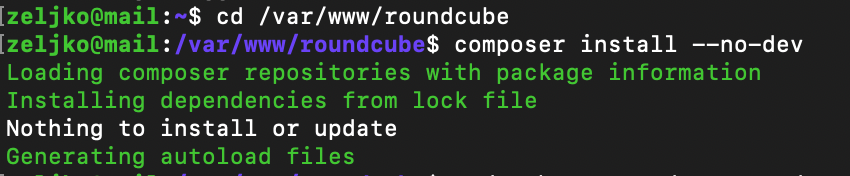
If you get nothing to install or update – you are good to go.
Next, we will need to create database for Roundcube
If this is a fresh install for you like in my case, I would recommend you run – sudo mysql_secure_installation to secure your MariaDB install before proceeding.
Now, we will create new database named roundcube and define user named rcubeuser. Change password to a strong pass.
sudo mysql -u rootCREATE DATABASE roundcube DEFAULT CHARACTER SET utf8 COLLATE utf8_general_ci;
CREATE USER rcubeuser@localhost IDENTIFIED BY 'password';
GRANT ALL PRIVILEGES ON roundcube.* TO rcubeuser@localhost;
flush privileges;
quit;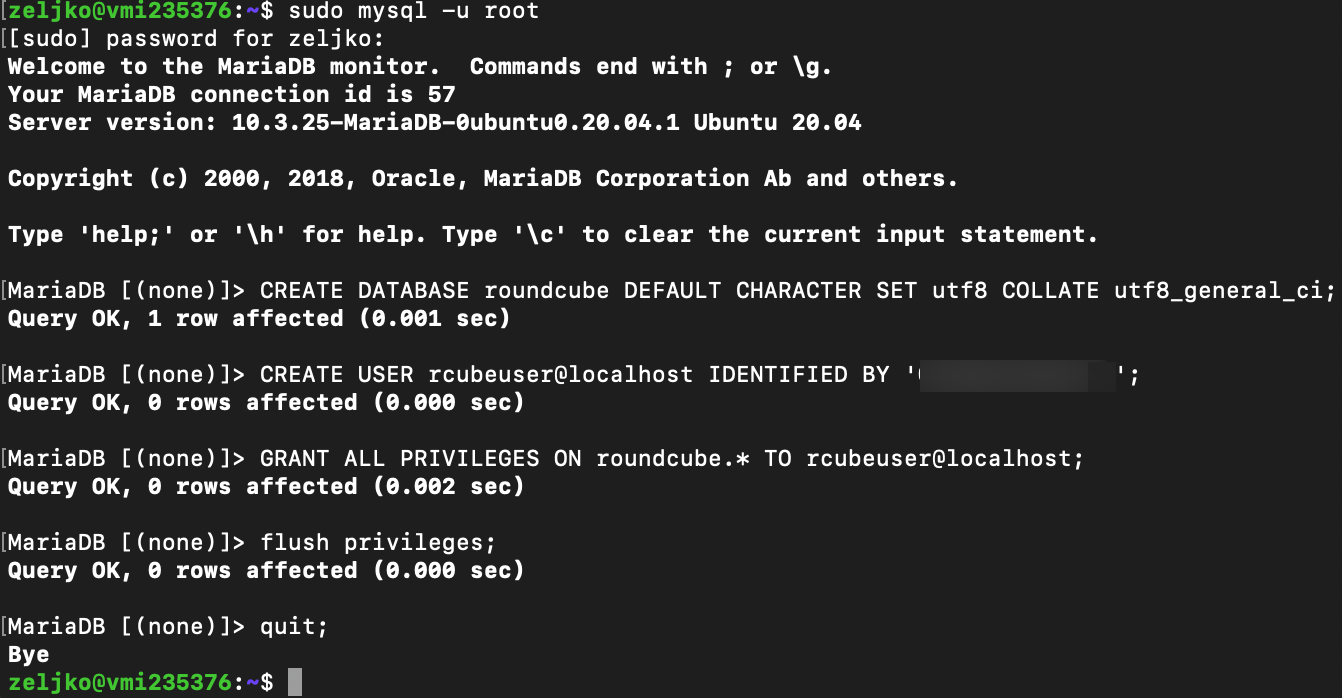
Next, we will import initial tables into roundcube database
sudo mysql roundcube < /var/www/roundcube/SQL/mysql.initial.sql
Create Virtual Host for Roundcube webmail
We will create virtual hosts file for our Roundcube webmail. Before doing this, we will enable https and import our domain ssl certificates. You can follow my tutorial here that will show you how to enable ssl and configure it. Skip the part on creation self-signed certificate, you will need to have a valid certificate for your domain from internet acknowledged ssl certificate provider. Make sure you import certificates in the right place, like described in the tutorial I linked.
To reiterate once again – you need to enable ssl before going further. Check the link just above this text.
sudo nano /etc/apache2/sites-available/roundcube.confEnter following into file. Under ServerName I will enter mail.informaticar.net, you need to enter your mail server name.
<VirtualHost *:443>
   ServerName your_domain_or_ip
   DocumentRoot /var/www/roundcube/

<Directory />
    Options FollowSymLinks
    AllowOverride All
  </Directory>

  <Directory /var/www/roundcube/>
    Options FollowSymLinks MultiViews
    AllowOverride All
    Order allow,deny
    allow from all
  </Directory>

   SSLEngine on
   SSLCertificateFile /etc/ssl/certs/ssl1.crt
   SSLCertificateKeyFile /etc/ssl/private/ssl1.key
</VirtualHost>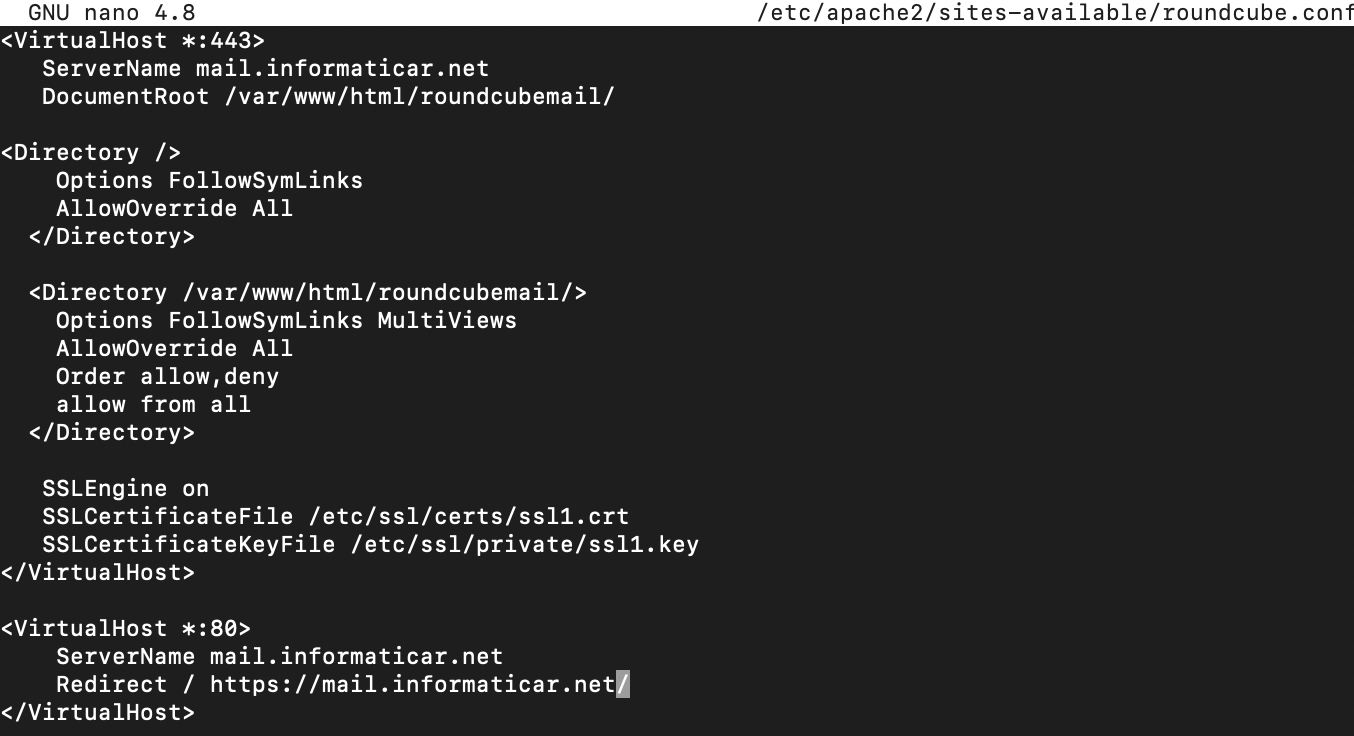
We will now enable our virtual host file
sudo a2ensite roundcube.confWe will next test our configuration
sudo apache2ctl configtestAnd in the end, we will restart apache service
sudo systemctl reload apache2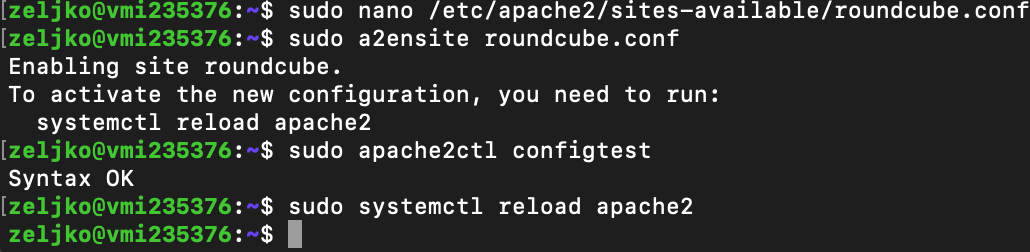
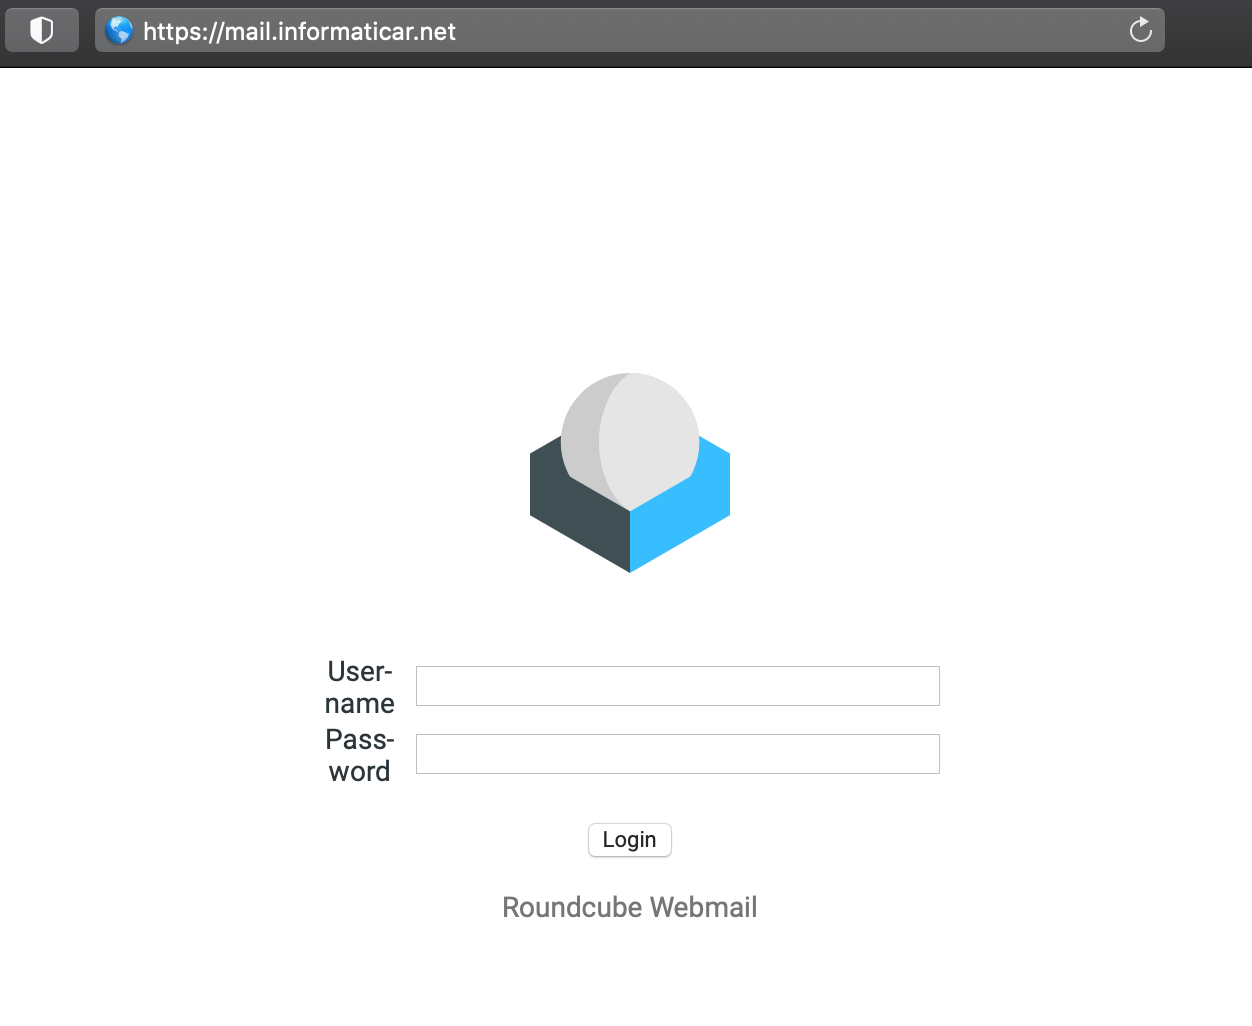
And now if I enter into my browser following link (change informaticar.net ffor your domain)
https://mail.informaticar.net/installer/
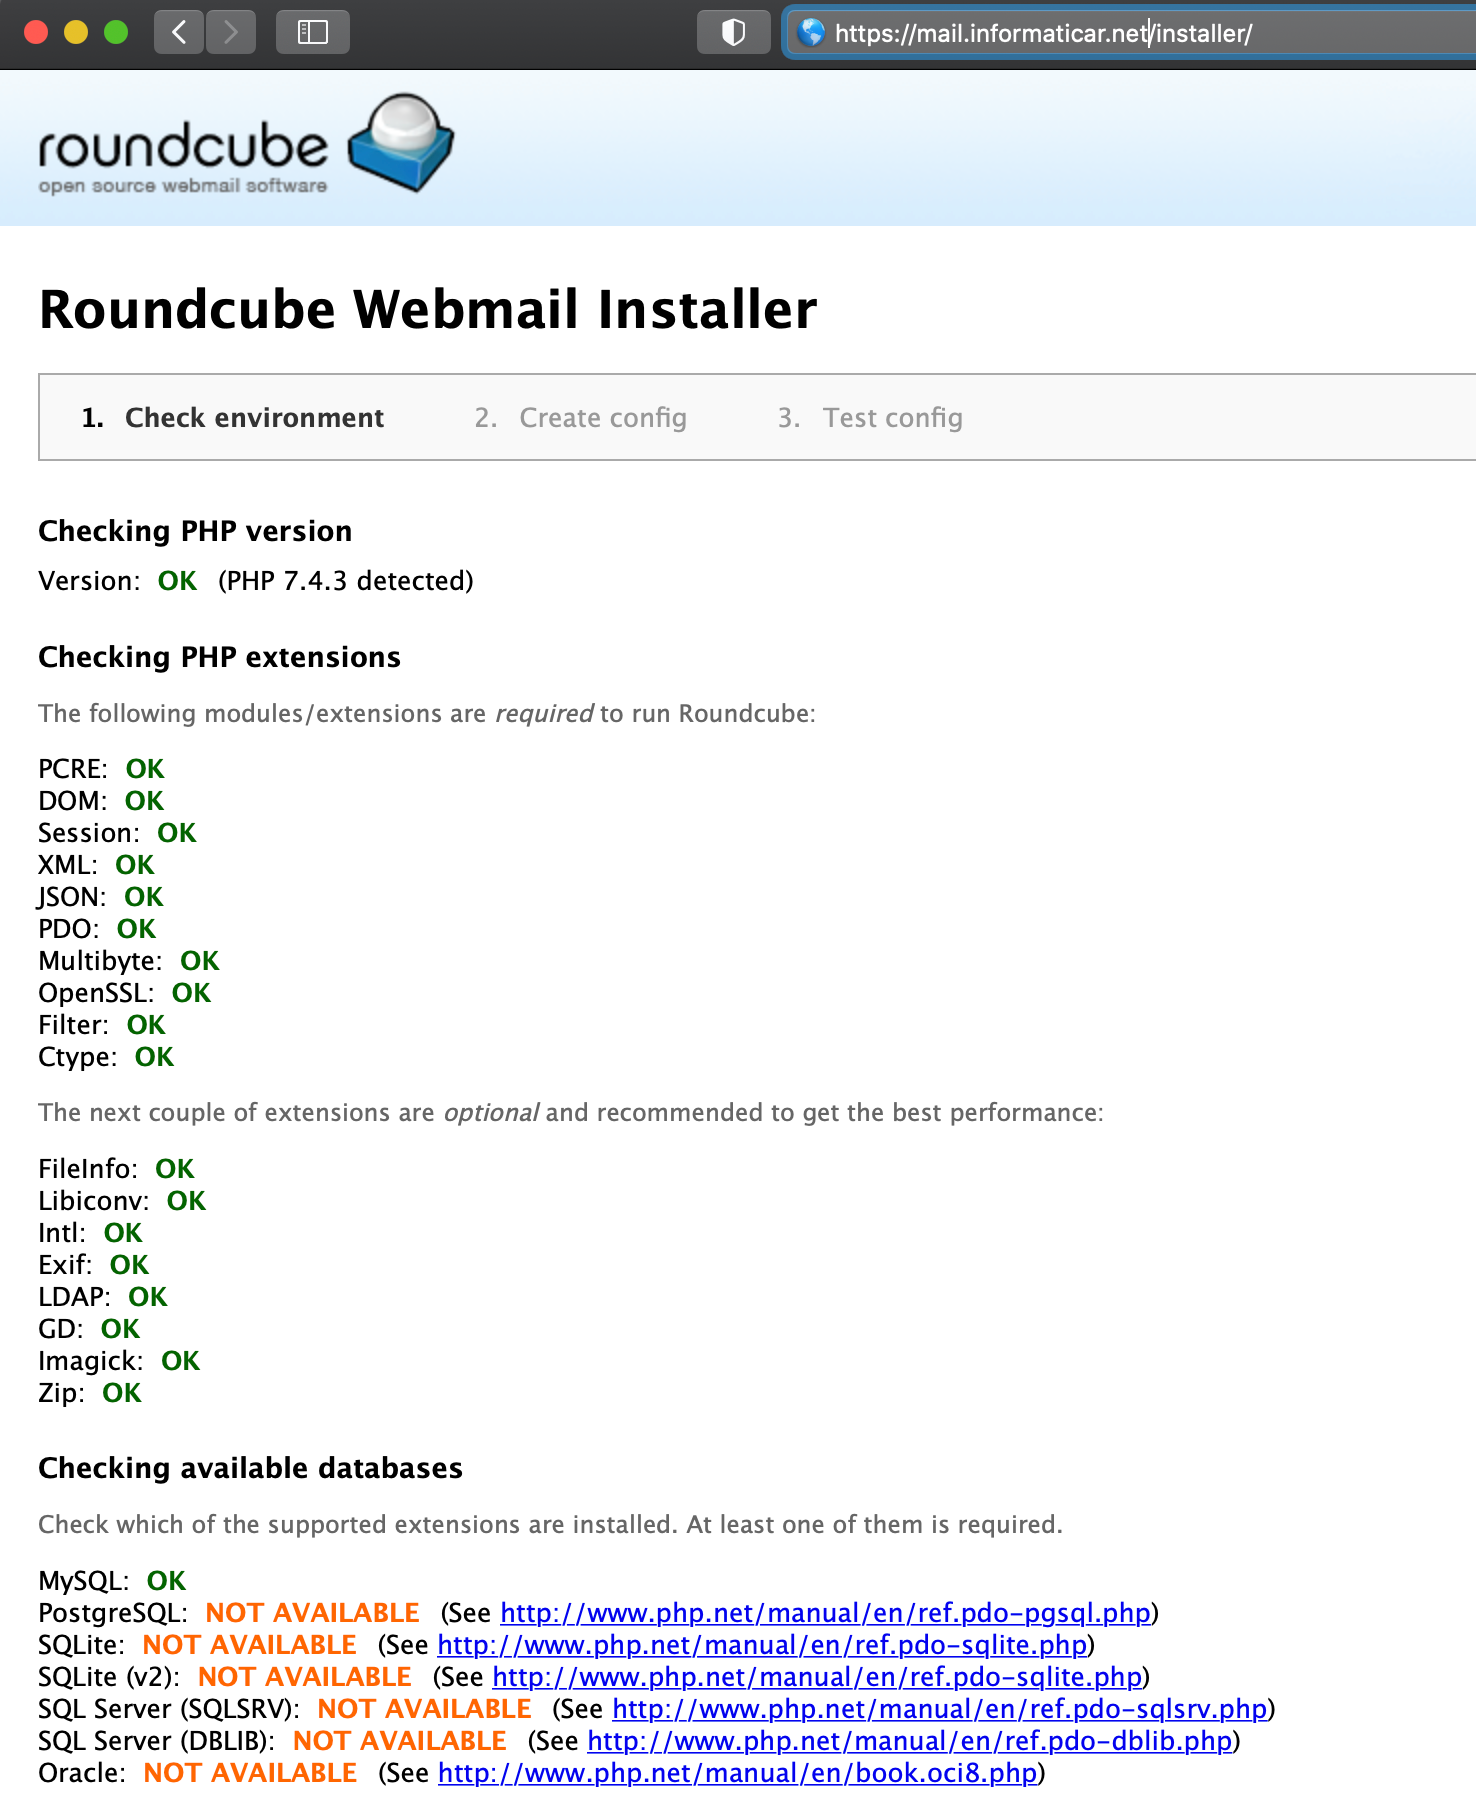
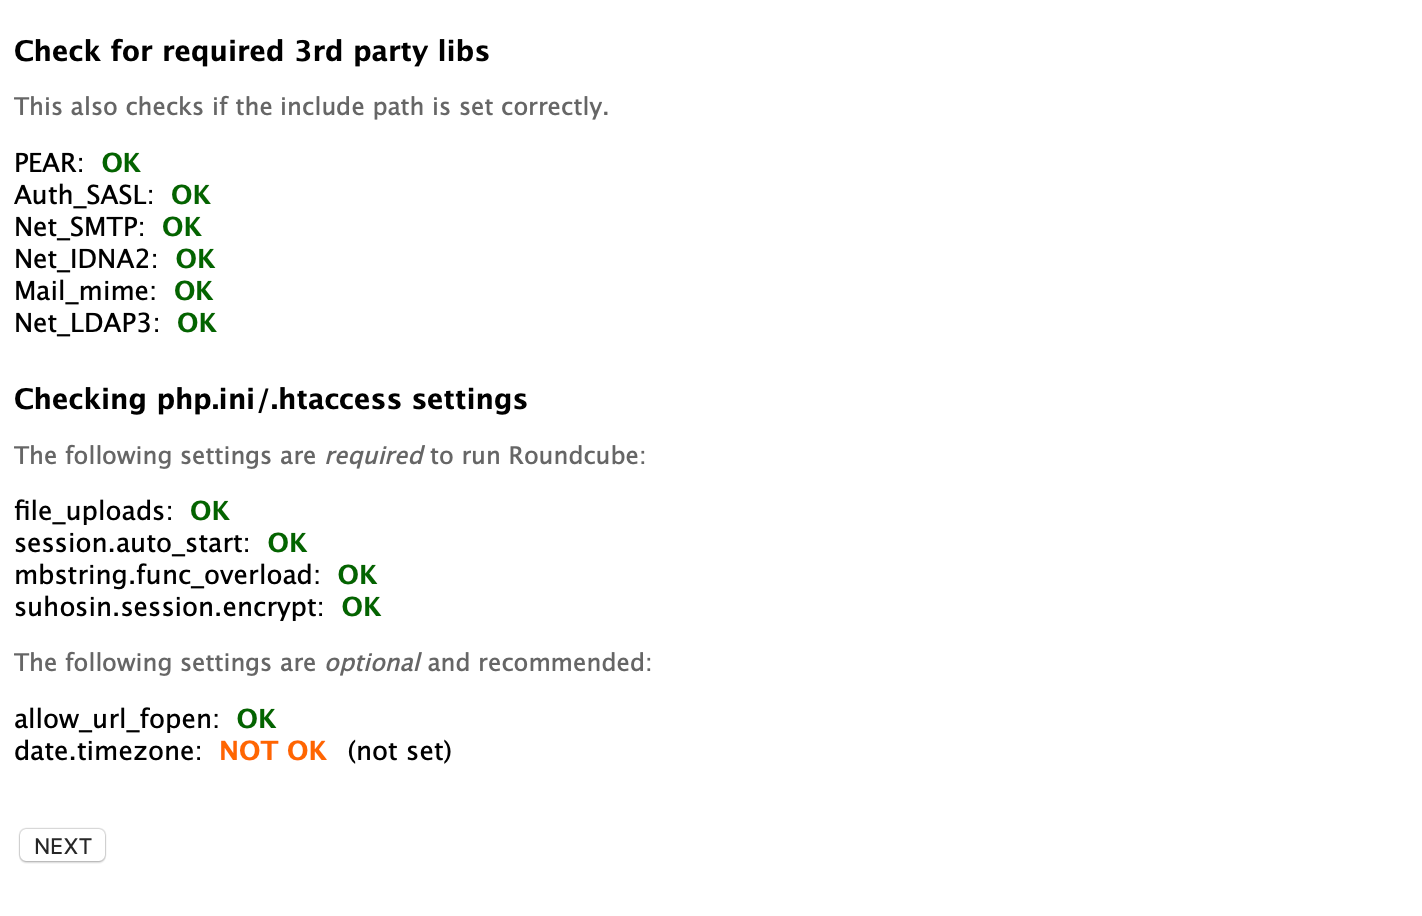
Click on Next at the bottom of the page
(for date.timezone to be ok, you would have to set timezone in php.ini file).
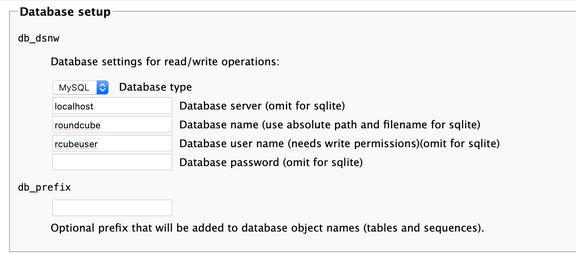
On the next page go to the database section
for the database name enter: roundcube since that is a database we defined, also enter rcubeuser as user and the password you defined for the rcubeuser
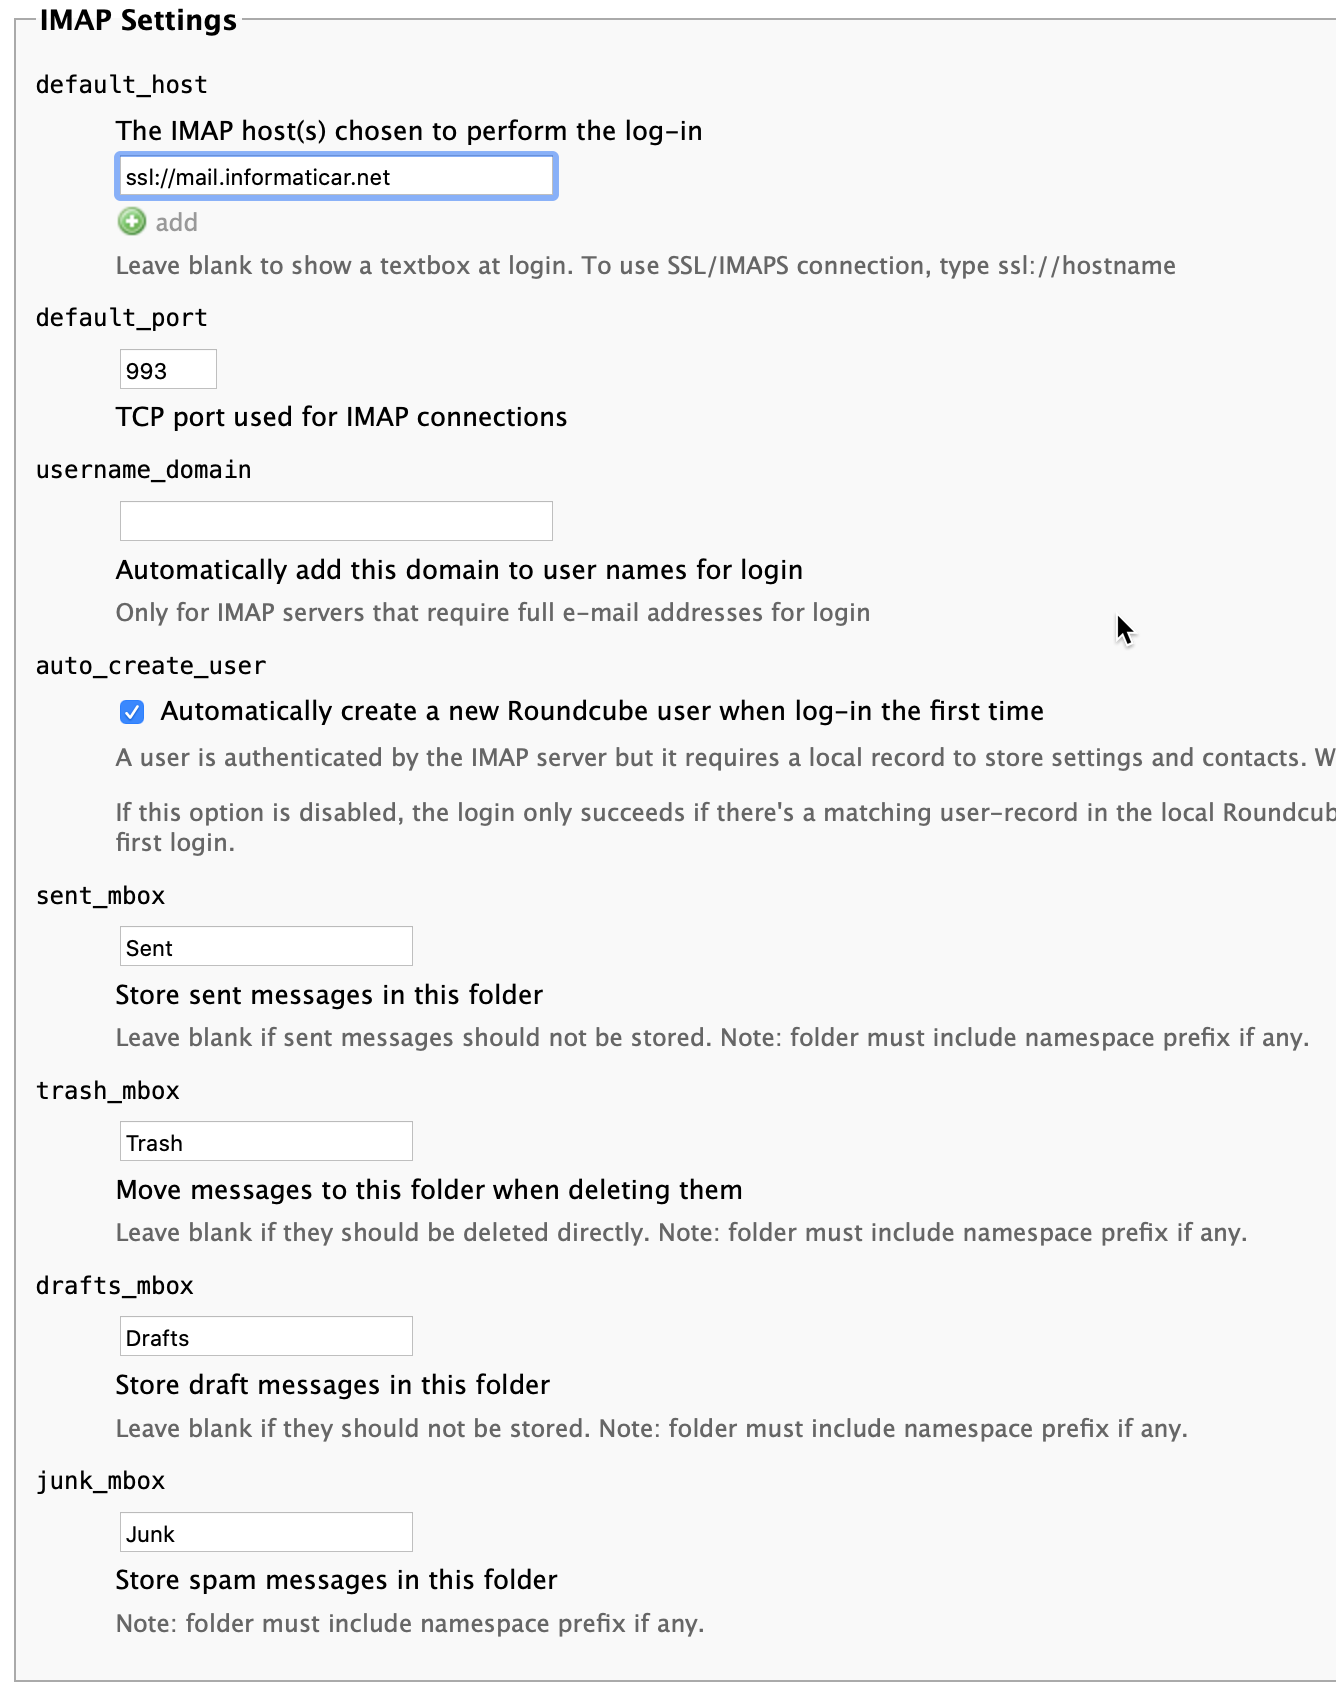
In the IMAP Settngs part, I specified ssl://mail.informaticar.net and port 993.
It is extremely important that you sorted your certificates well, because this won’t work if the certs in Postfix and Dovecot are not properly defined (see Certificate story at the beginning of the guide).
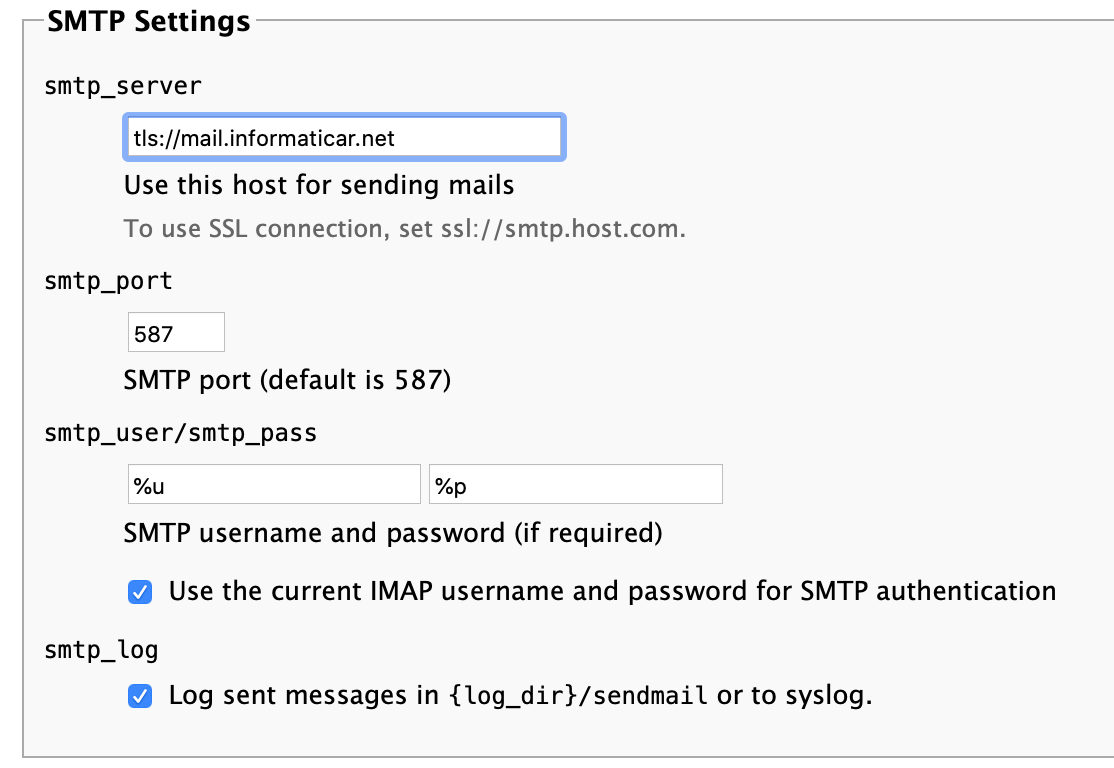
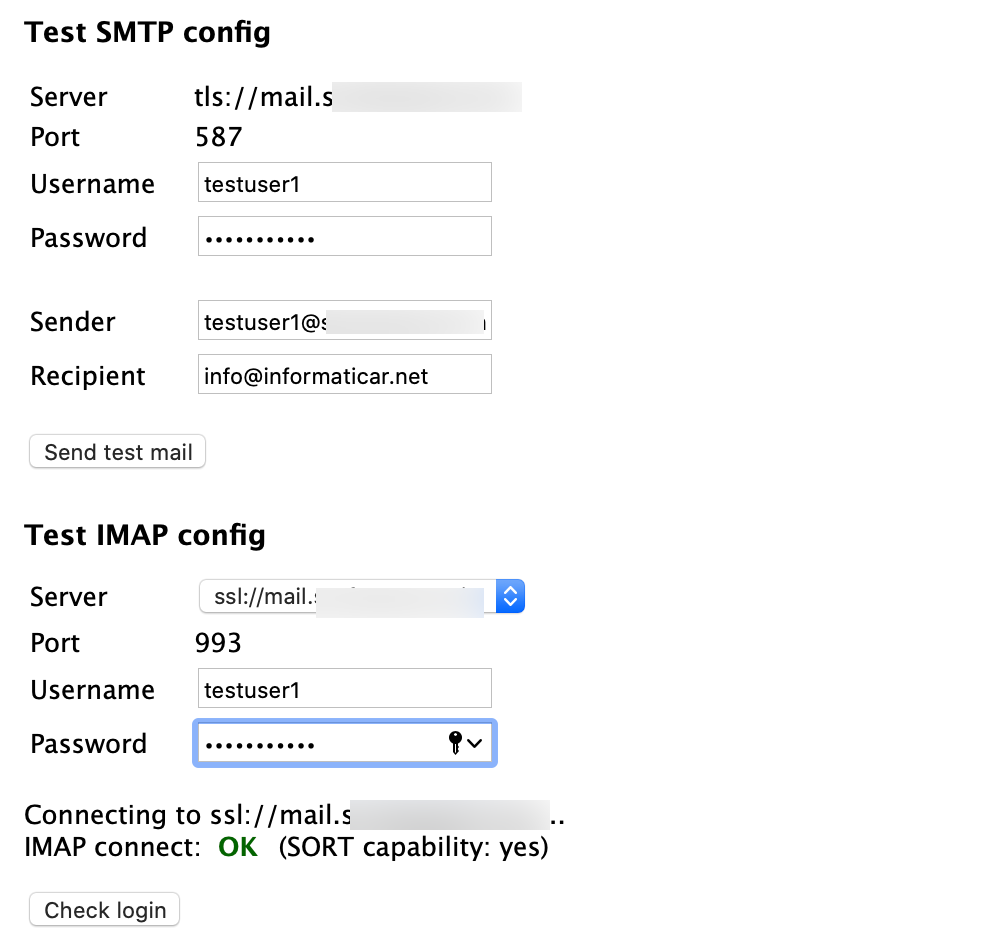
SMTP Settings
smtp server is defined as tls://mail.informaticar.net with port 587, I left everything else as it is.
Again, it is extremely important that you sorted certificates for Postfix and Dovecot in good order, or this won.t work.
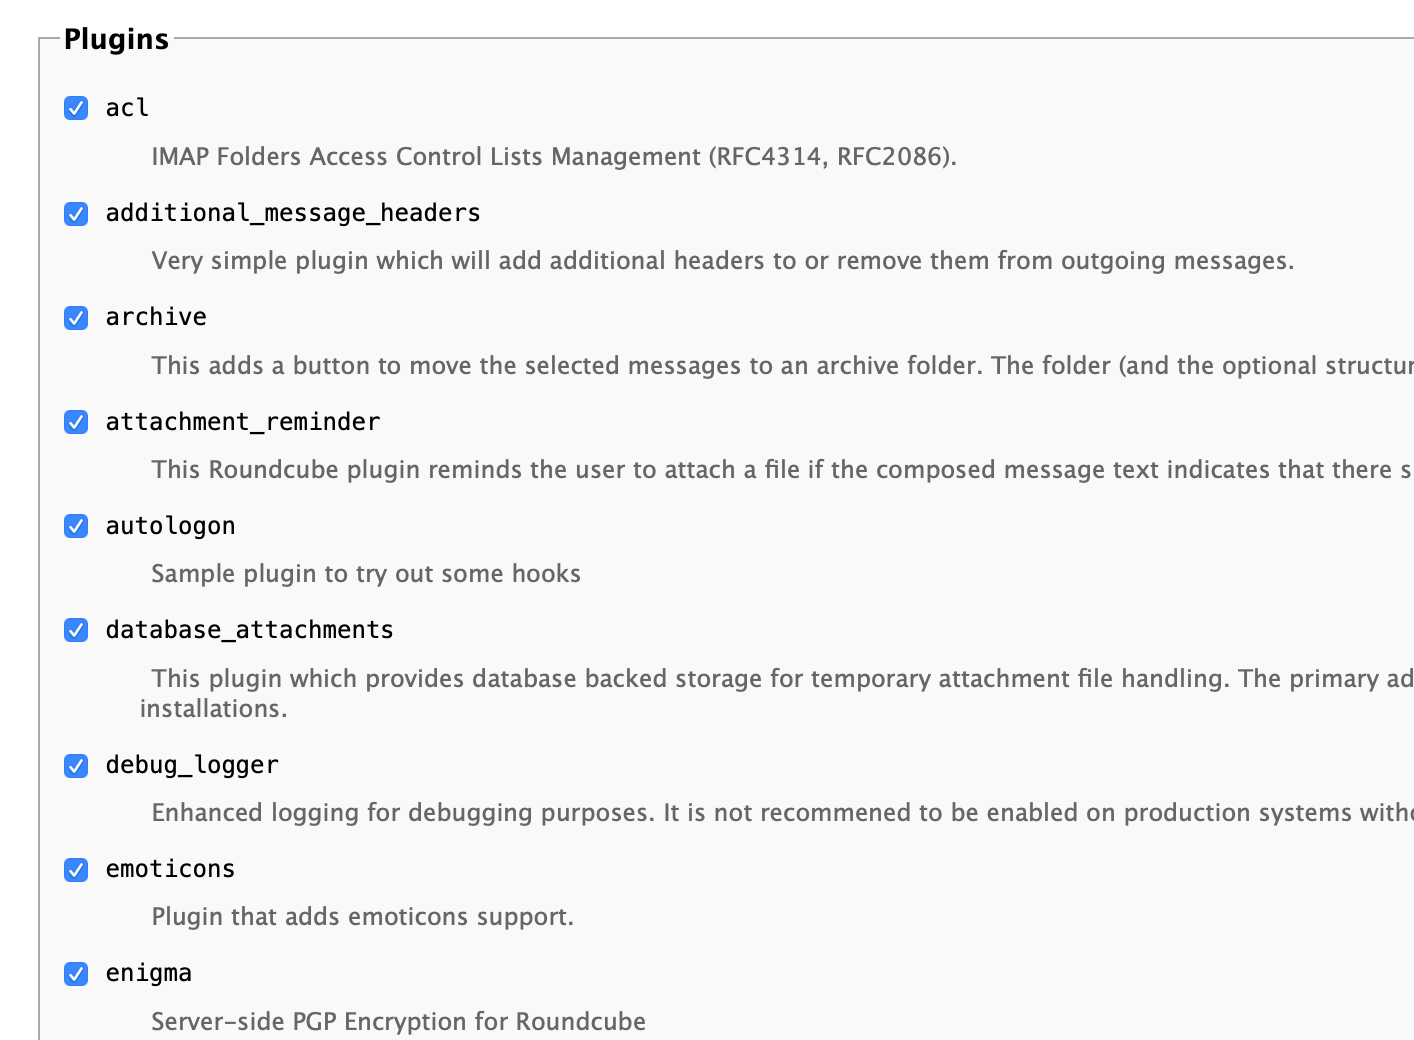
Plugins
I selected all. If you want to disable something later, go to /var/www/html/roundcube/config and edit config.inc.php
Ok, almost done
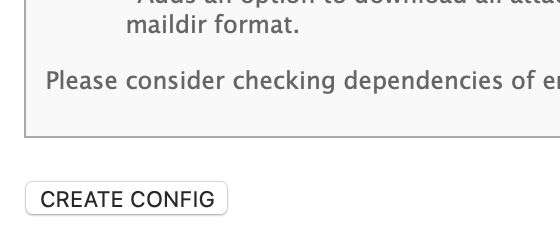
Scroll to the bottom and click on Create Config when you are done.
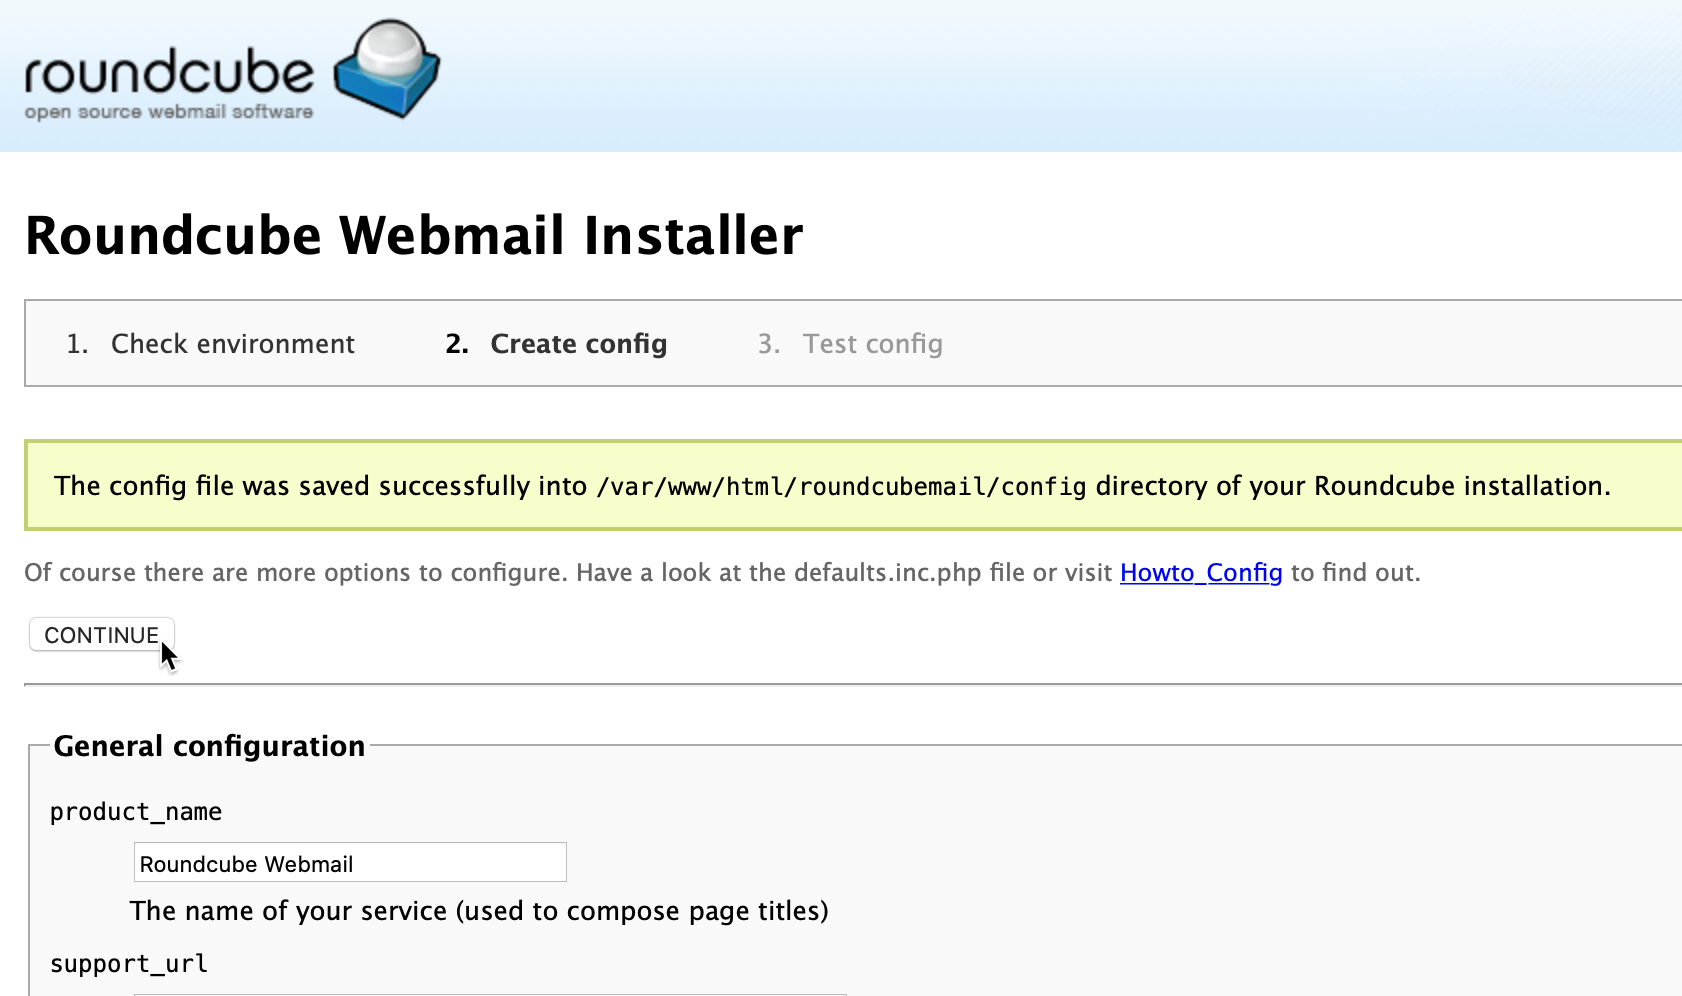
You will be brought back to the top of the page and config file is created. Click on Continu
On this screen if you went on with “alternative permissions” setting in which you skipped first chown and chmod command, you will get pop/up to download your config.php.inc file. Then you would have to copy that file to the /var/www/roundcube/config dir.
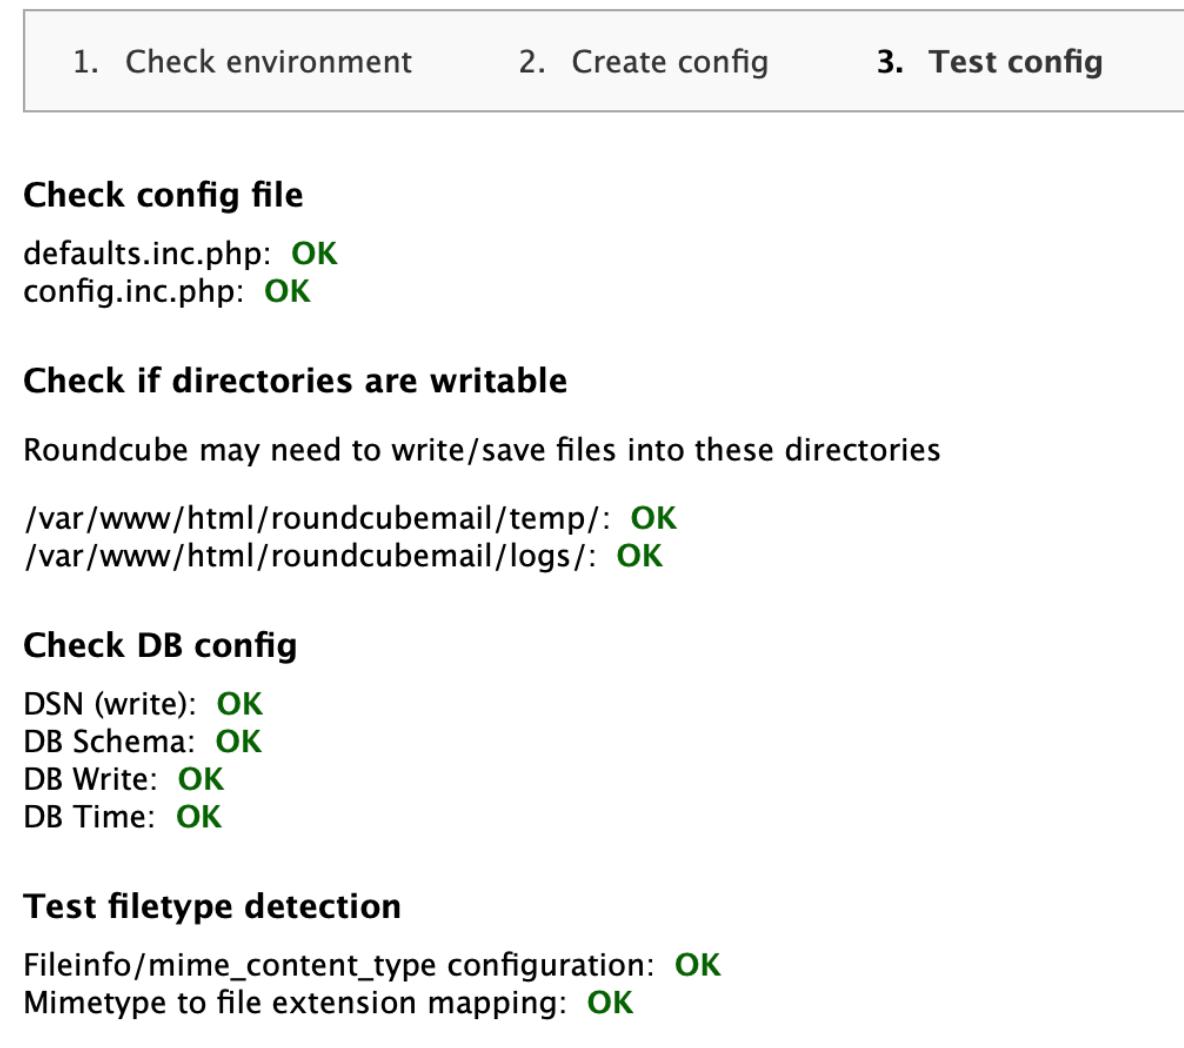
I executed all permissions for Roundcube, and the screen below is what I got. Select Continue.
Everything is ok, we will quickly be testing smtp and user login now.
You should get Green OK in both tests. If you haven’t got green OK, check your configuration, logs and especially certificates configuration.
If you haven’t get ok for both tests, just click on step.2 Create config at the top of the page, to change/reconfigure what is needed.
There is also a warning at the bottom of the page

Let’s remove installer
sudo rm /var/www/roundcube/installer/ -rWe also need to check one line in our config.inc.php file.
sudo nano /var/www/roundcube/config/config.inc.phpThere is no line $config [‘enable_installer’] = true; or false inside my config.inc.php so that is ok. If there is enable_installer line in your config.inc.php then change in to false.
Create email user
We are almost at the end…
I already did this in a Dovecot part, but in case you missed it.
I will create new user named testuser1
sudo useradd testuser1We will also create password for our testuser1
sudo passwd testuser1Let’s now go to our webmail address
https://mail.informaticar.net
I logged in with testuser1@informaticar.net and password for the user.
We are in
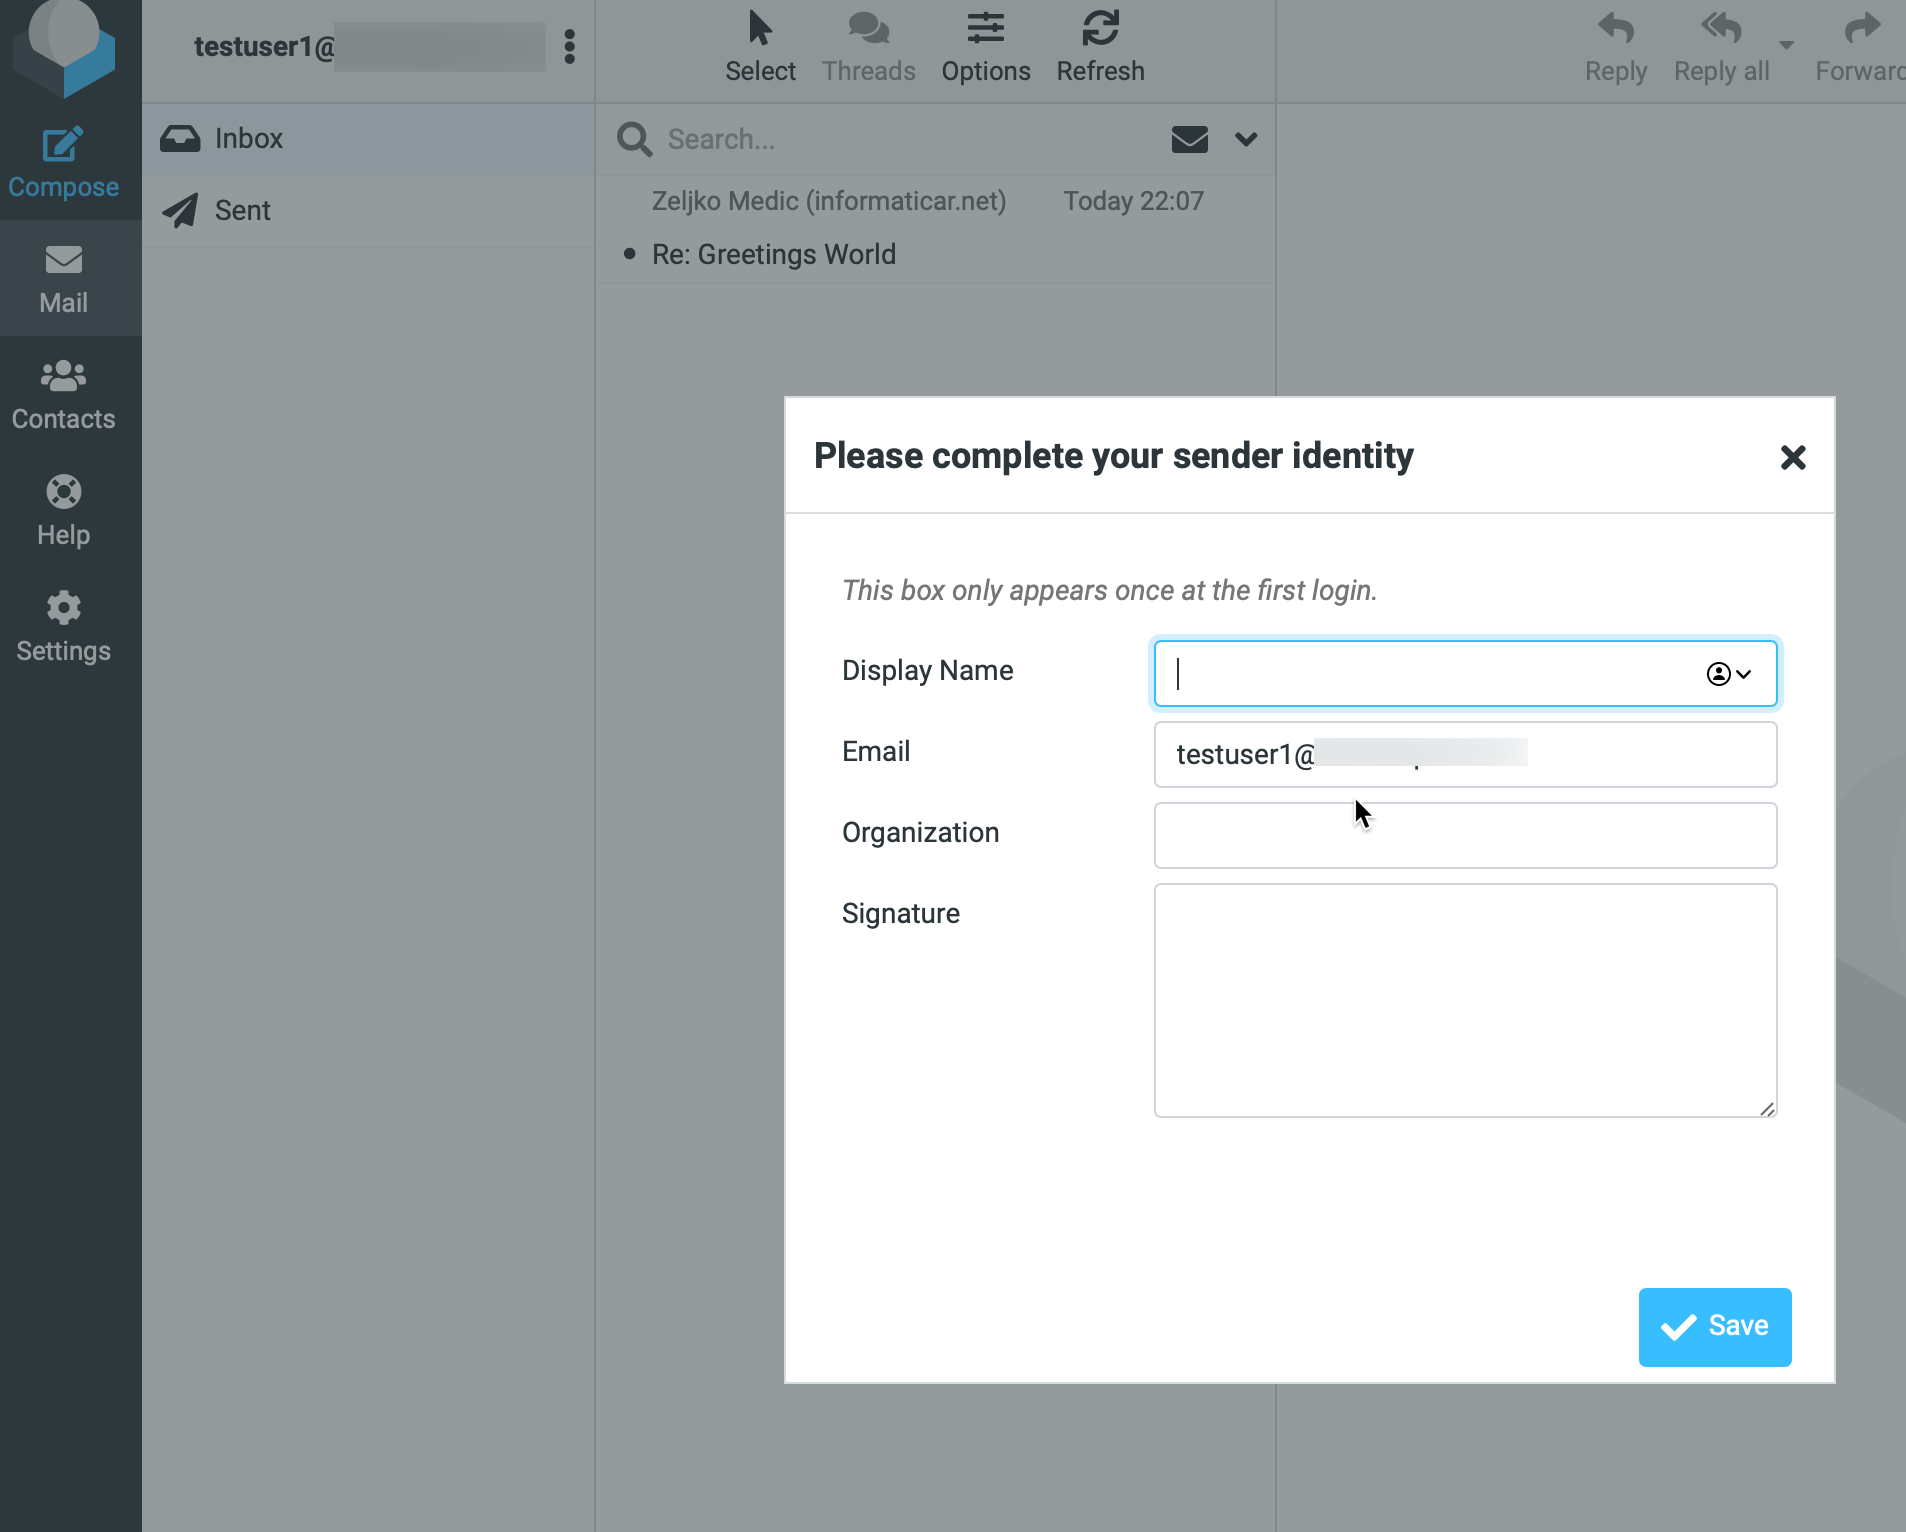
If you done everything correctly by now, you should be able to send and receive email messages also through Roundcube now.
If you have any email messages in your account, these messages should also be visible now in Roundcube.
Officially we now have working email server in Ubuntu.
But, before you go, let’s go through couple more useful things for Roundcube.
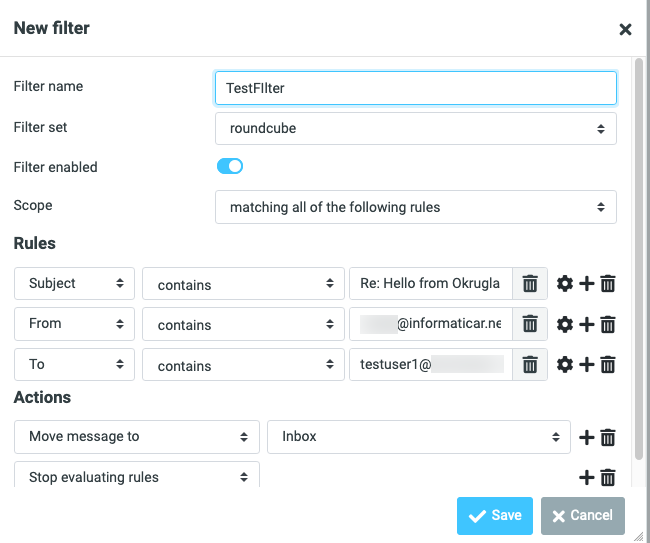
Sieve Message Filter
Sieve enables you to create folders and filter incoming messages to created folders.
We will install Sieve with following command
sudo apt install dovecot-sieve dovecot-managesieved
For this to function properly, you will also need Dovecot LMTP, we already did it in Dovecot part of the guide, so if you haven’t done it yet, be sure to check it out.
After install, we now need to edit dovecot.conf file
sudo nano /etc/dovecot/dovecot.confAdd sieve to the list of protocols
protocols = imap lmtp sieve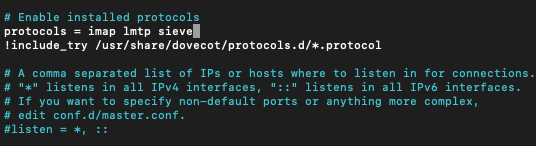
Next, we need to edit 15-lda.conf file.
sudo nano /etc/dovecot/conf.d/15-lda.confAt the bottom there should be protol lda line. Uncomment mail_plugins and under $mail_plugins you should add sieve
protocol lda...
...
mail plugins = $mail_plugins sieve
It should look like this.

Save and close file…
Also, if you have 20-lmtp.conf file in /etc/dovecot/conf.d you should edit it
sudo nano /etc/dovecot/conf.d/20-lmtp.confUncomment mail plugins line under protocol lmtp and add following
protocol lmtp...
...
mail plugins = quota sieve
If you have PostfixAdmin installed and you use virtual users that don’t have home directories (under which sieve saves stores scripts) you will also have to edit
sudo nano /etc/dovecot/conf.d/10-mail.confAdd somewhere in the file following line (I did it at the bottom of Mailbox locations and namespaces section)
mail_home = /var/vmail/%d/%n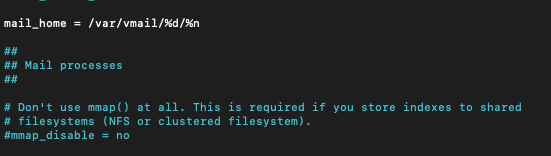
Save and close file.
We now need to reboot Postfix and Dovecot
sudo systemctl restart dovecot
sudo systemctl restart postfix
Now, if you open email in your inbox, click on more… and select create filters the wizard will pop-up which will enable you to create filters
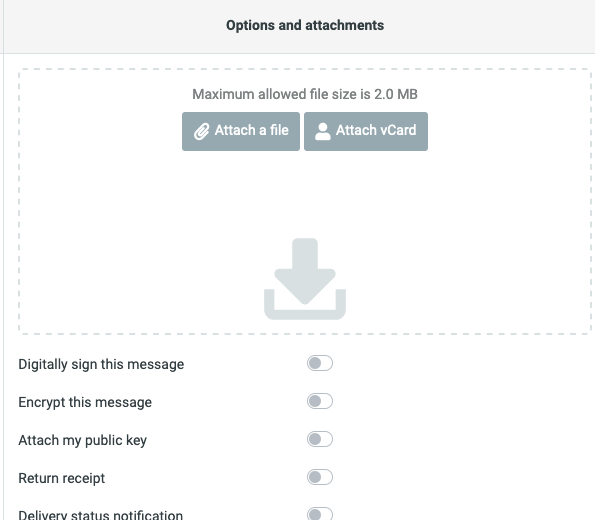
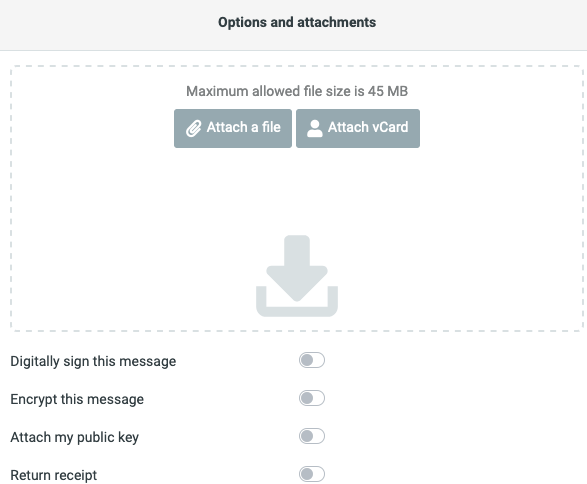
Increase File Upload Limit
By default there is a 2MB upload limit inside Roundcube
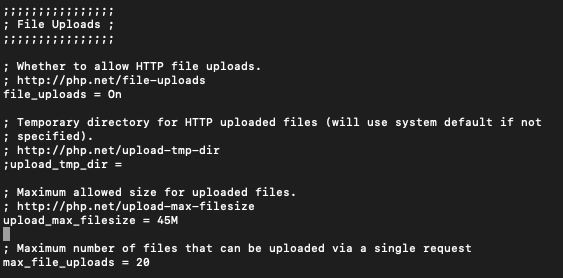
We need to edit this in php.ini file
sudo nano /etc/php/7.4/apache2/php.iniFind following line
upload_max_filesize = 2MI will change value to 45M
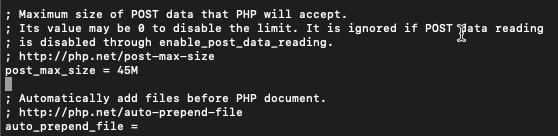
We also need to fine post_max_size line
post_max_size = 8MI will change my value again to 45M
Save and close file.
We need to restart apache2
sudo systemctl restart apache2Reload Roundcube webmail in browser
At last, we need to remove database attachments plugin from config.inc.php file, because it can be error prone.
sudo nano /var/www/roundcube/config/config.inc.phpFind line
'database_attachments'and remove it.
Before

After

That would be it.
We are done with the simple email server setup.
Conclusion
We now have functional mail server on Ubuntu 20.04. A lot of steps to do, but in the end, effort was well worth it. I will eventually be going through PostfixAdmin setup which will enable us to host multiple domains on one mail server.
Also, before getting this in production be sure to check security best practices and enable antispam and antivirus. I will also be talking about these topics in the future.