In this guide, we will be going through local installation of Bitwarden, that means this password manager is within your local network, and not in the cloud. This guide also won’t cover any type of connecting your password manager to the internet – have that in mind.
Ok, let’s start with basic stuff – all of the data I’m going to talk about here can be found – https://bitwarden.com/help/install-on-premise-linux/
This is going to be completely local installation without internet access – however, I will be using public certificate I have for a specially bought domain only for my internal network and I will use PiHole as local DNS server.
(HUGE) DOWNSIDE OF THIS APPROACH – if you have Bitwarden only in local network, it won’t be available to you always. It will work on your mobile devices, but in write mode (adding, modifying items in vault) only when your are connected to local network. When you are outside in the world, you will only be able to read your Bitwarden entries, there will be no option to edit current or add new items to your vault.
So, continue only if something like this is acceptable for your use case.
Also, have in mind – you are responsible for your installation and Bitwarden – I would suggest that the machine on which Bitwarden is installed is encrypted and well maintained – completely offline if not used.
I also cannot be responsible for any kind of damage that is done by following this guide – loss of data, health, or any other issues possible.
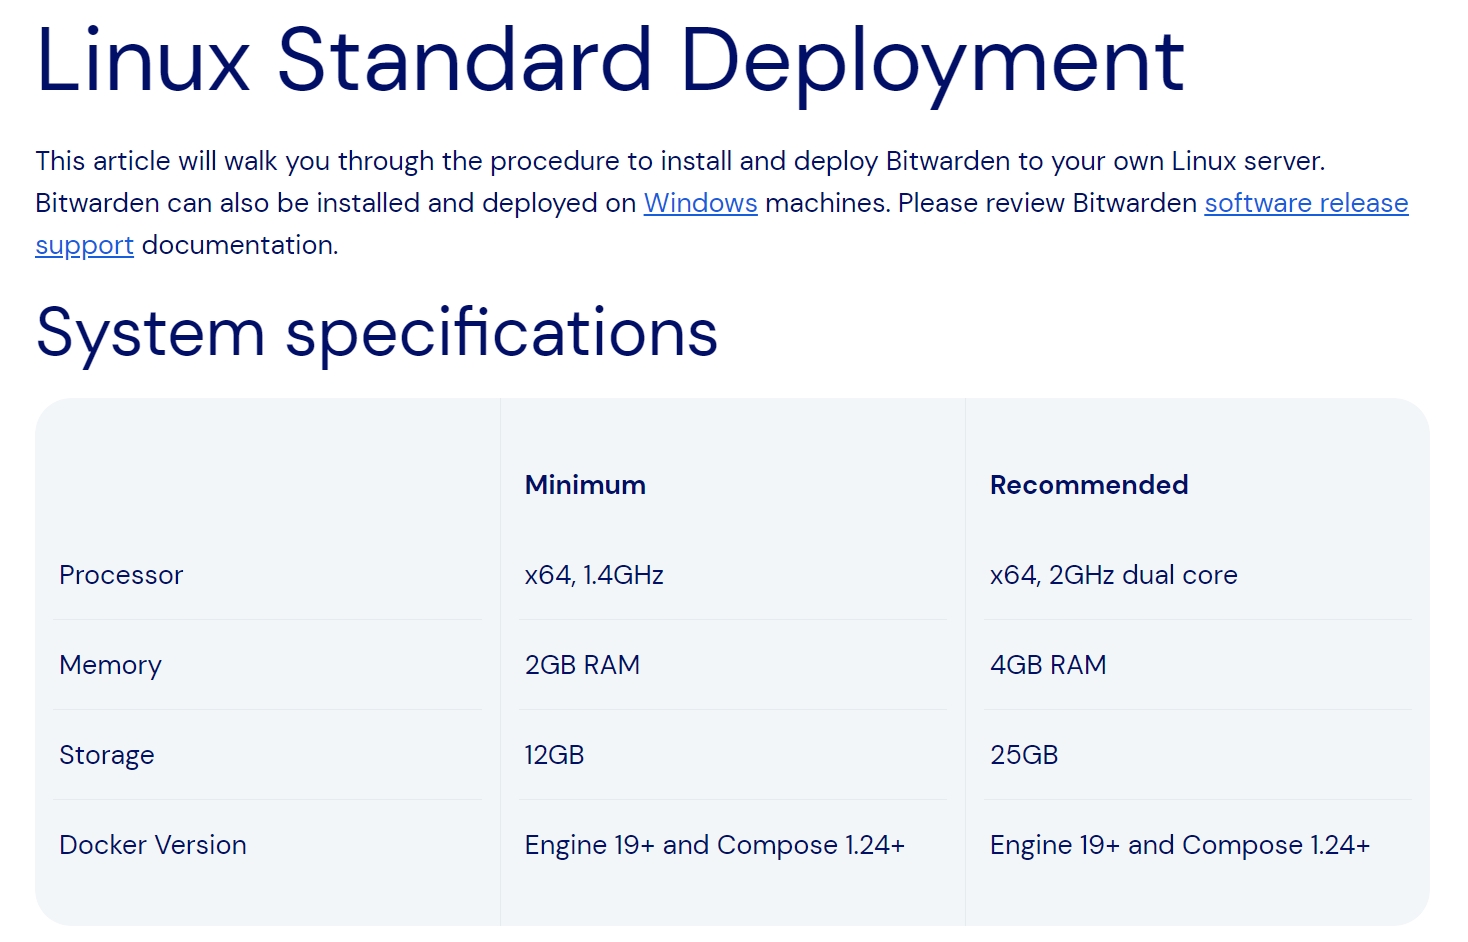
Minimum requirements for this installation are x64 1.4Ghz CPU, 2GB of RAM, 12GB of disk space…
Preparing Ubuntu
I will be using Ubuntu Server 22.04.3 LTS for this guide.
First, during setup of the VM or host on which you will host Bitwarden containers, extremely smart would be that the machine is encrypted. So, during setup – encrypt your drive.
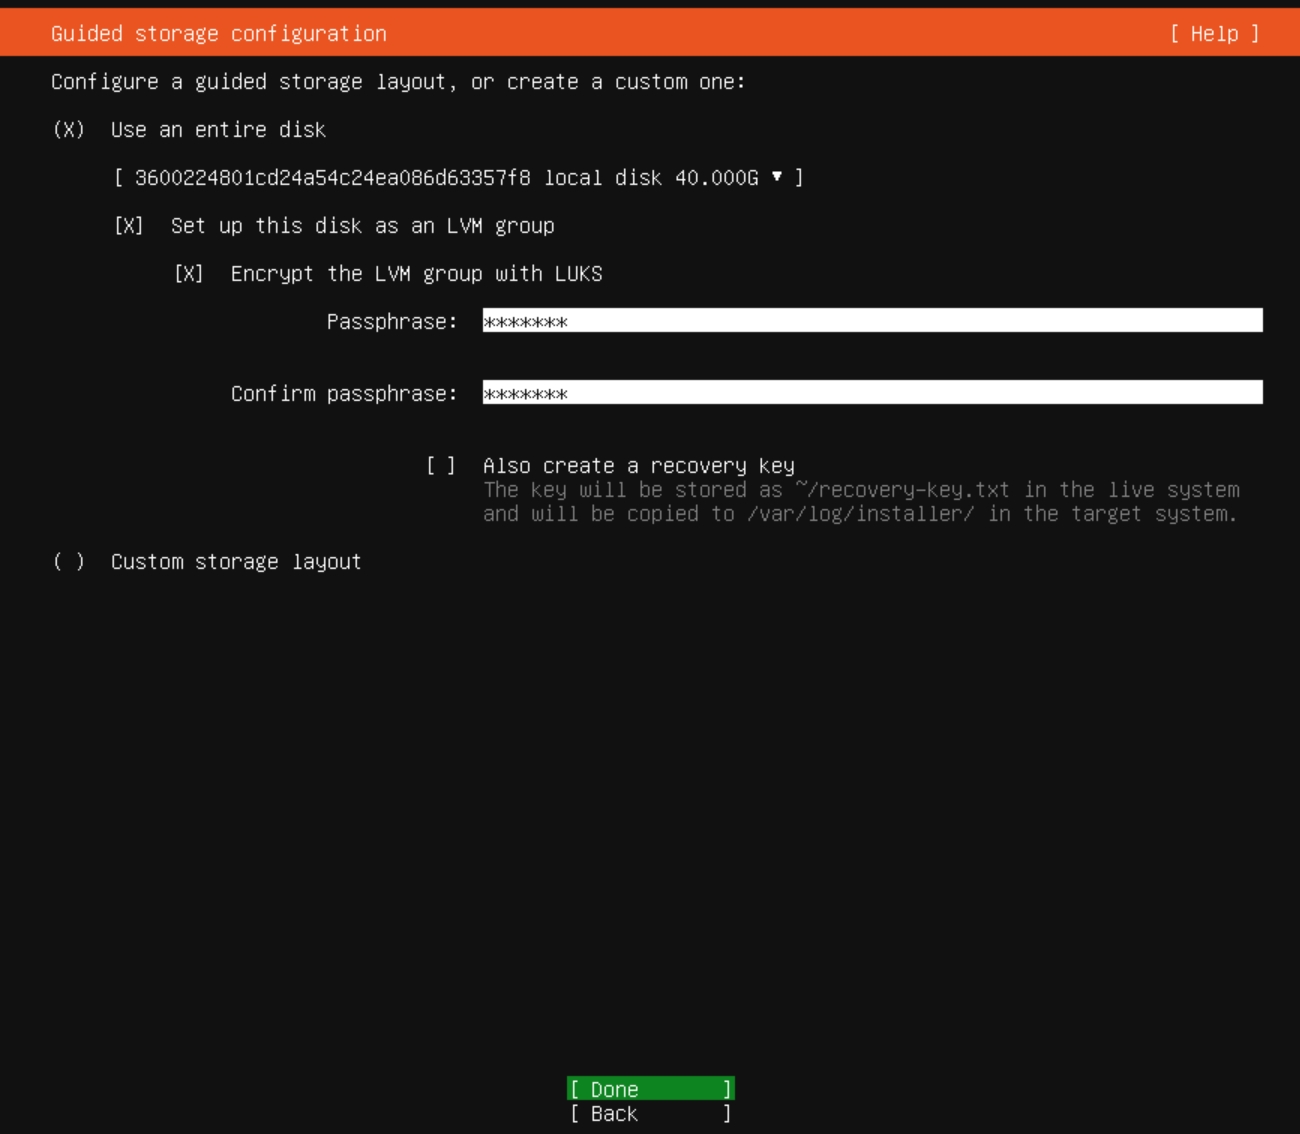
I’m doing this on Hyper-V, so be aware that maybe in some cases this machine won’t boot automatically – you will need to enter decryption password on boot.

Updates
First step would be to do
sudo apt update
sudo apt upgrade
Firewall
When everything is up to date, we will add two rules to our firewall (if you plan to access machine via SSH three rules). For SSH hardening please have a look here – https://www.informaticar.net/security-hardening-ubuntu-20-04/
You should also allow port 25 or 587 depending on what port your email is.
sudo ufw allow 80
sudo ufw allow 443
sudo ufw allow 22
sudo ufw allow 25
sudo ufw enable
Set fixed IP for your Bitwarden machine
Please change below values to your local network.
Addresses – 192.168.44.202 is address of our Linux machine which will host Bitwarden
Gateway – 192.168.44.1 – gateway for my local network
DNS – 192.168.44.10 – address of my local DNS server.
sudo nano /etc/netplan/01-network-manager-all.yaml

network:
  version: 2
  renderer: networkd
  ethernets:
    ens18:
      dhcp4: no
      addresses: [192.168.44.202/24]
      gateway4: 192.168.44.1
      nameservers:
        addresses: [192.168.44.10]
Reboot server after these changes.
Set hostname for your Bitwarden VM
Check you machine hostname by typing in:
hostnamesudo hostnamectl set-hostname machinename.your.domain
It would be nice to reboot the machine after all the changes
sudo rebootIn my case machinename.your.domain is bitwardentest1.informaticar.net
Other components needed
Certificate – for this guide I will be using my informaticar.net public certificate. What I found working best is to buy completely new domain and use it only for your local network. That way, you won’t have to mess with local PKI infrastructure which can be complex for a one man band and local network with home services. Also, self-signed certificates are the option, but if you wish to use Bitwarden on your mobile devices, this can be the issue. It will work, but I find this very hard. You can go with Let’s encrypt, and if you use your own certificate, make sure it is wildcard one!
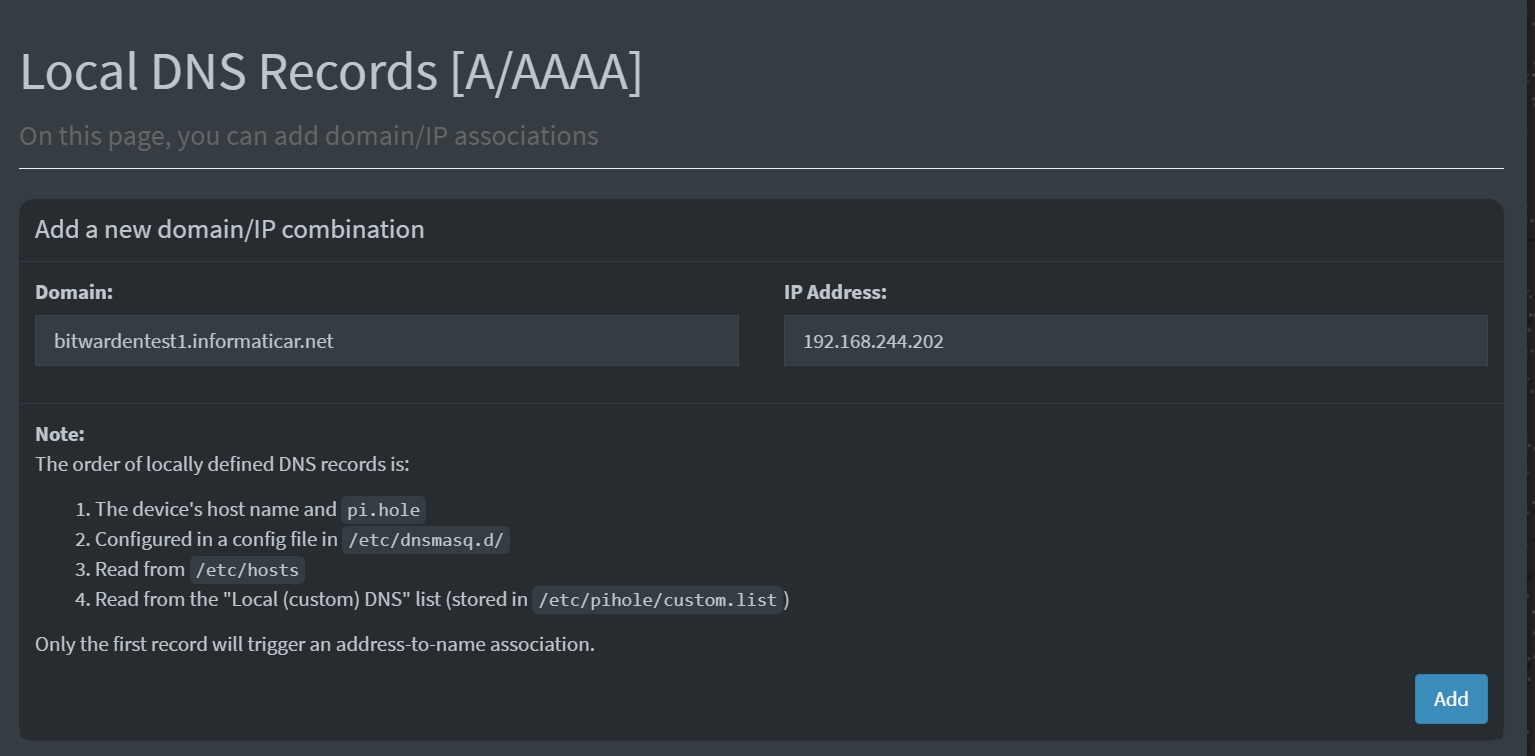
I’ll be using following – bitwardentest1.informaticar.net – again, buy separate domain, and use it only locally, within your home network.
bitwarden.yourdomain.localLocal DNS – for your home network you’ll need local DNS. I’m long overdue on writing on PiHole, and I will make that soon right. We will need local DNS, to point IP address to the bitwarden by name – that way our certificate will work the way it should and we’ll get no errors.
So, in my case, address 192.168.244.202 will be pointed to bitwardentest1.informaticar.net
Email for sending notifications – You can use gmail or some other mail provider, in recent years I use more and more transactional services like Brevo or Postmark for generic emails. It all depends or how critical or confidential service is. Bitwarden won’t work correctly without ability to send emails.
I will be using Postmark for this guide. It has 100 emails per month in free tier, which is more than enough for what I need here.
Install Docker Engine & Compose
First we need to install Docker Engine & Compose. First we will go through Docker Engine.
You can always find actual Docker Install procedure for Ubuntu here – https://docs.docker.com/engine/install/ubuntu/
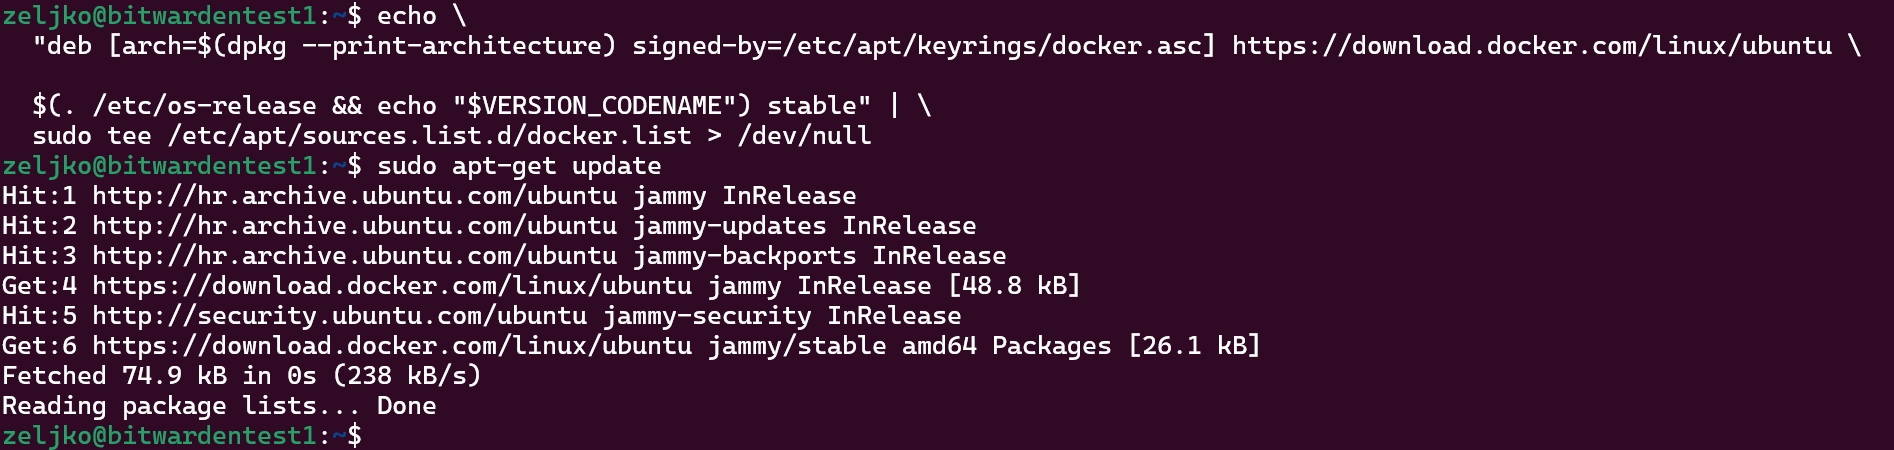
First we need to add Docker repo to apt
First we will resolve GPG part
sudo apt-get update
sudo apt-get install ca-certificates curl
sudo install -m 0755 -d /etc/apt/keyrings
sudo curl -fsSL https://download.docker.com/linux/ubuntu/gpg -o /etc/apt/keyrings/docker.asc
sudo chmod a+r /etc/apt/keyrings/docker.asc
Then apt part
echo \
  "deb [arch=$(dpkg --print-architecture) signed-by=/etc/apt/keyrings/docker.asc] https://download.docker.com/linux/ubuntu \
  $(. /etc/os-release && echo "$VERSION_CODENAME") stable" | \
  sudo tee /etc/apt/sources.list.d/docker.list > /dev/null
sudo apt-get update
Don’t be alarmed by extra space in command, just copy it and execute
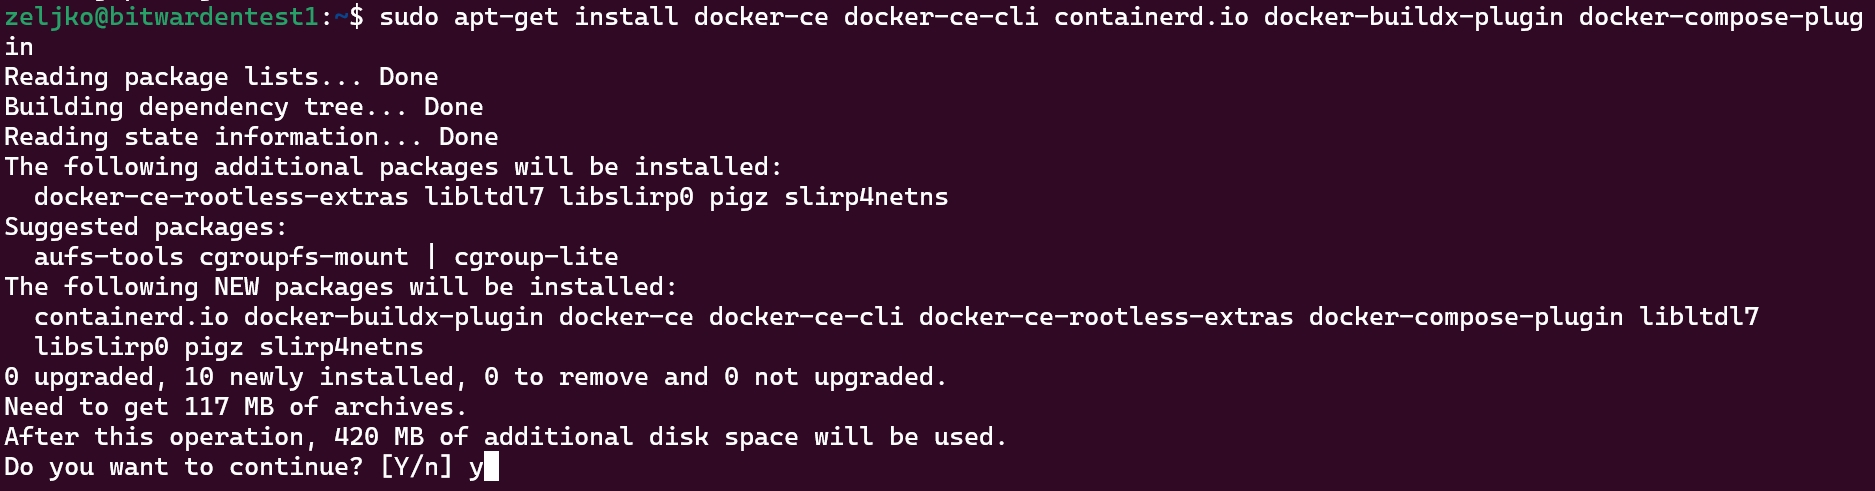
Let’s now install Docker. This command will install Docker Engine and Compose
sudo apt-get install docker-ce docker-ce-cli containerd.io docker-buildx-plugin docker-compose-plugin
We will test it by running
sudo docker run hello-world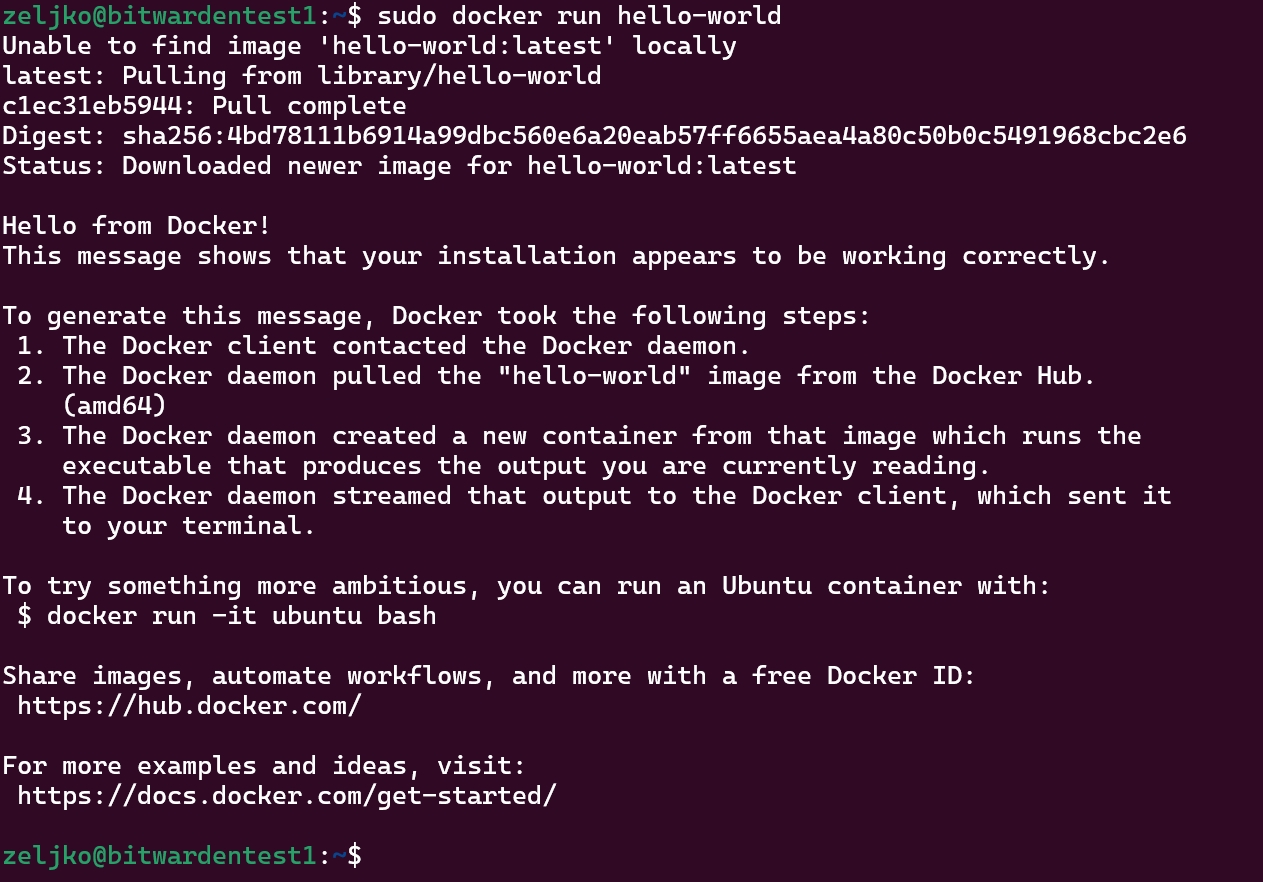
Docker generated message and then made an exit. We are done.
To check installed version run
docker version
docker compose version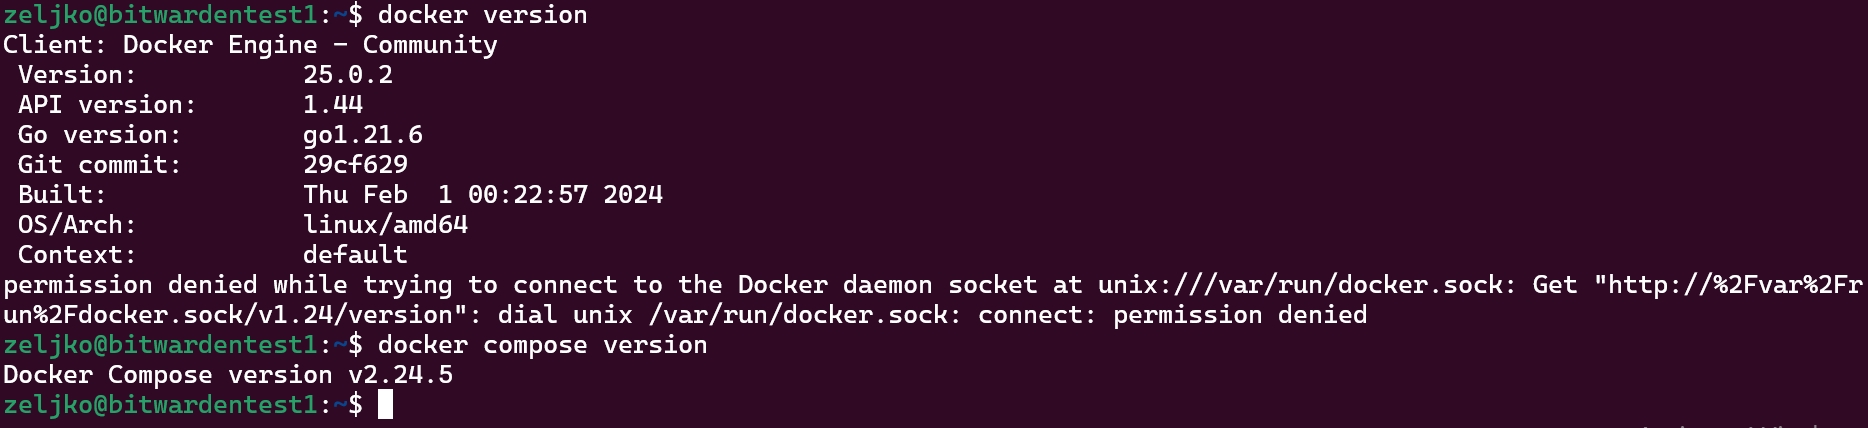
Add Bitwarden user, directory and make Docker run without root privileges
We will now add bitwarden user to system
sudo adduser bitwarden
Add extra long and hard password for that user, although first command will already make you add password for the user
sudo passwd bitwarden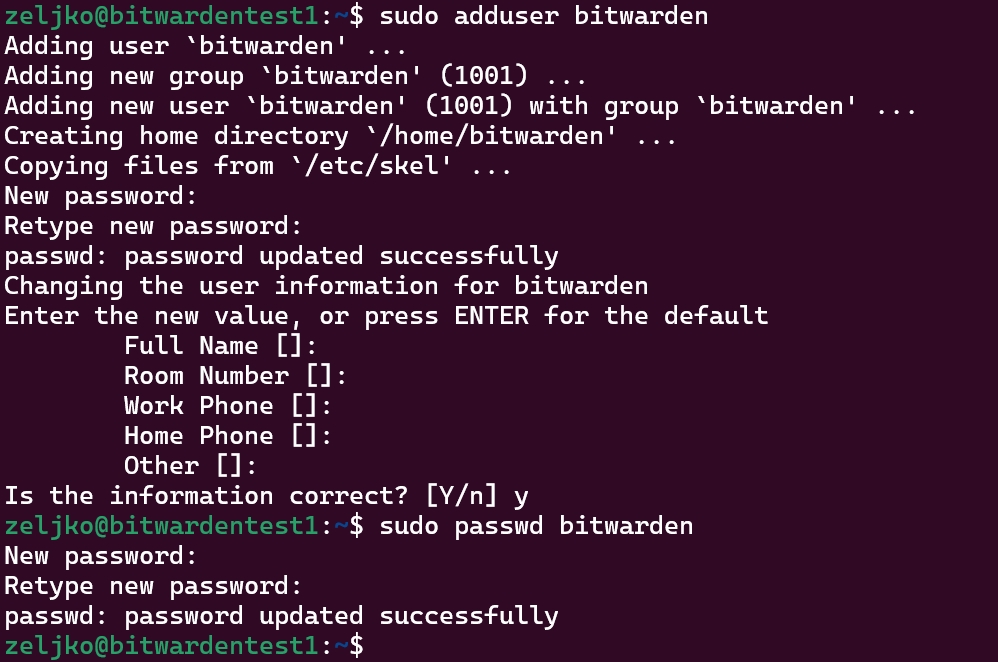
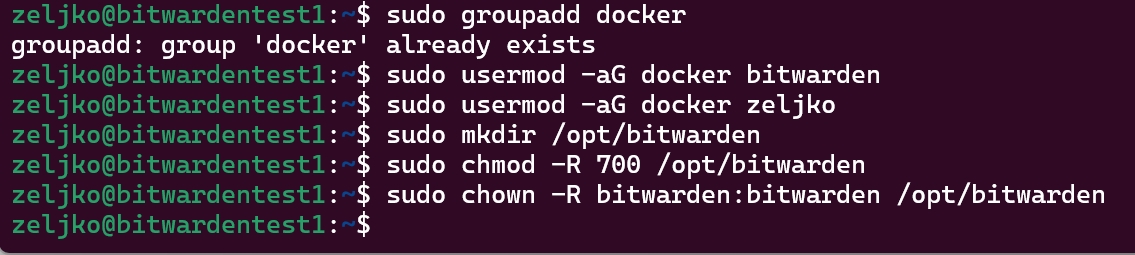
We will now create Docker group, add bitwarden user to it, and create bitwarden directories and permissions on it. I will also add my user (zeljko) to docker group (sudo usermod -aG docker zeljko)
sudo groupadd docker
sudo usermod -aG docker bitwarden
sudo mkdir /opt/bitwarden
sudo chmod -R 700 /opt/bitwarden
sudo chown -R bitwarden:bitwarden /opt/bitwarden
Reboot server
Now, since I also added my local user (zeljko) into Docker group, in theory if I run now Docker without sudo, it should work.
docker run hello-world
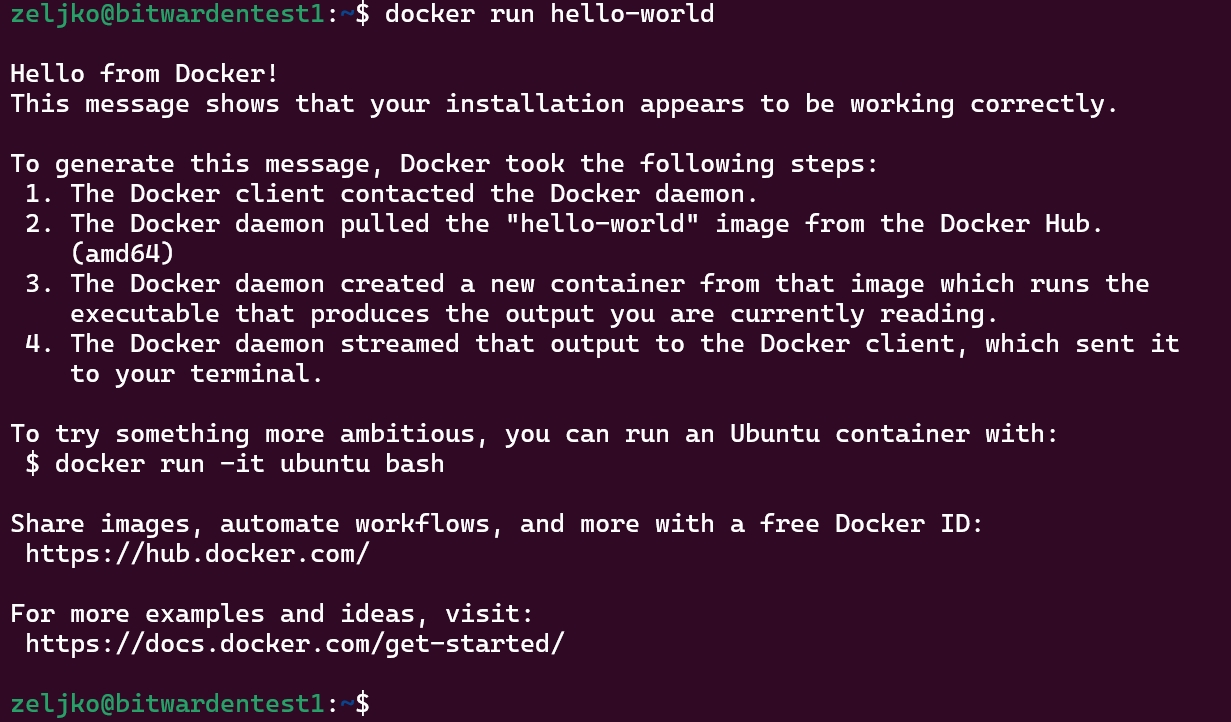
It works! Great, we can go to the next step.
Install Bitwarden
We already set DNS record for our Bitwarden,
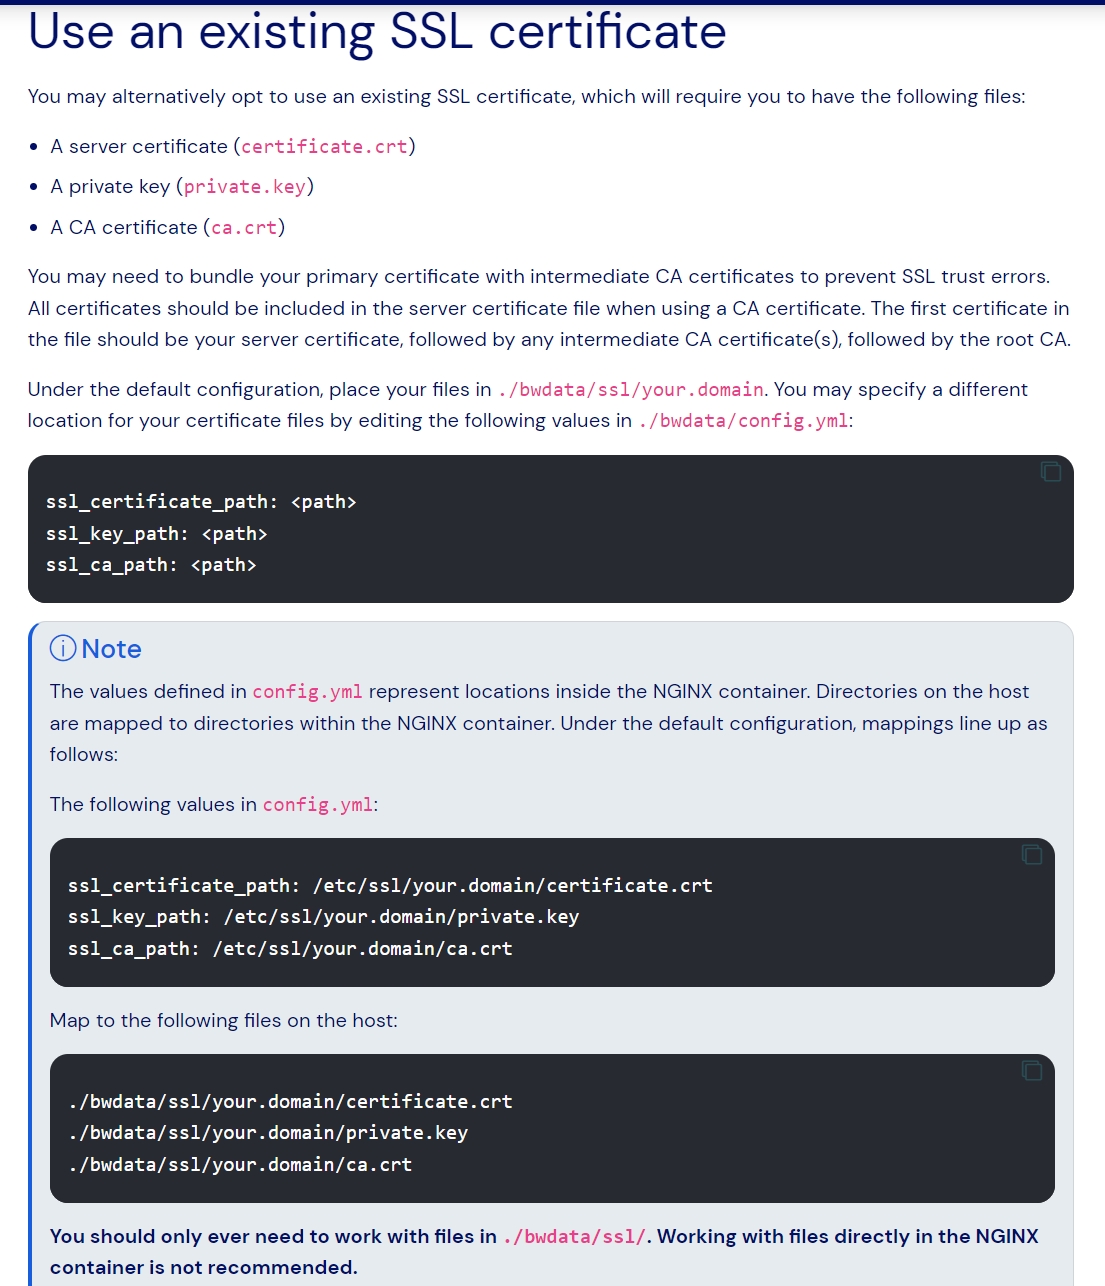
I already have SSL certificate at hand, and you should have it also ready. You can find more on certificates on Bitwarden here – you can go with some other option – https://bitwarden.com/help/certificates/
For our use case, we have create certificate with three parts, private key (.key), public key (.crt) and CA key from certificate authority (.crt). I usually buy certs from Sectigo, and they send you CA bundle. It is important that certificates are ok, otherwise you will get errors. Below you can read more about this scenario. Private key should be without password.
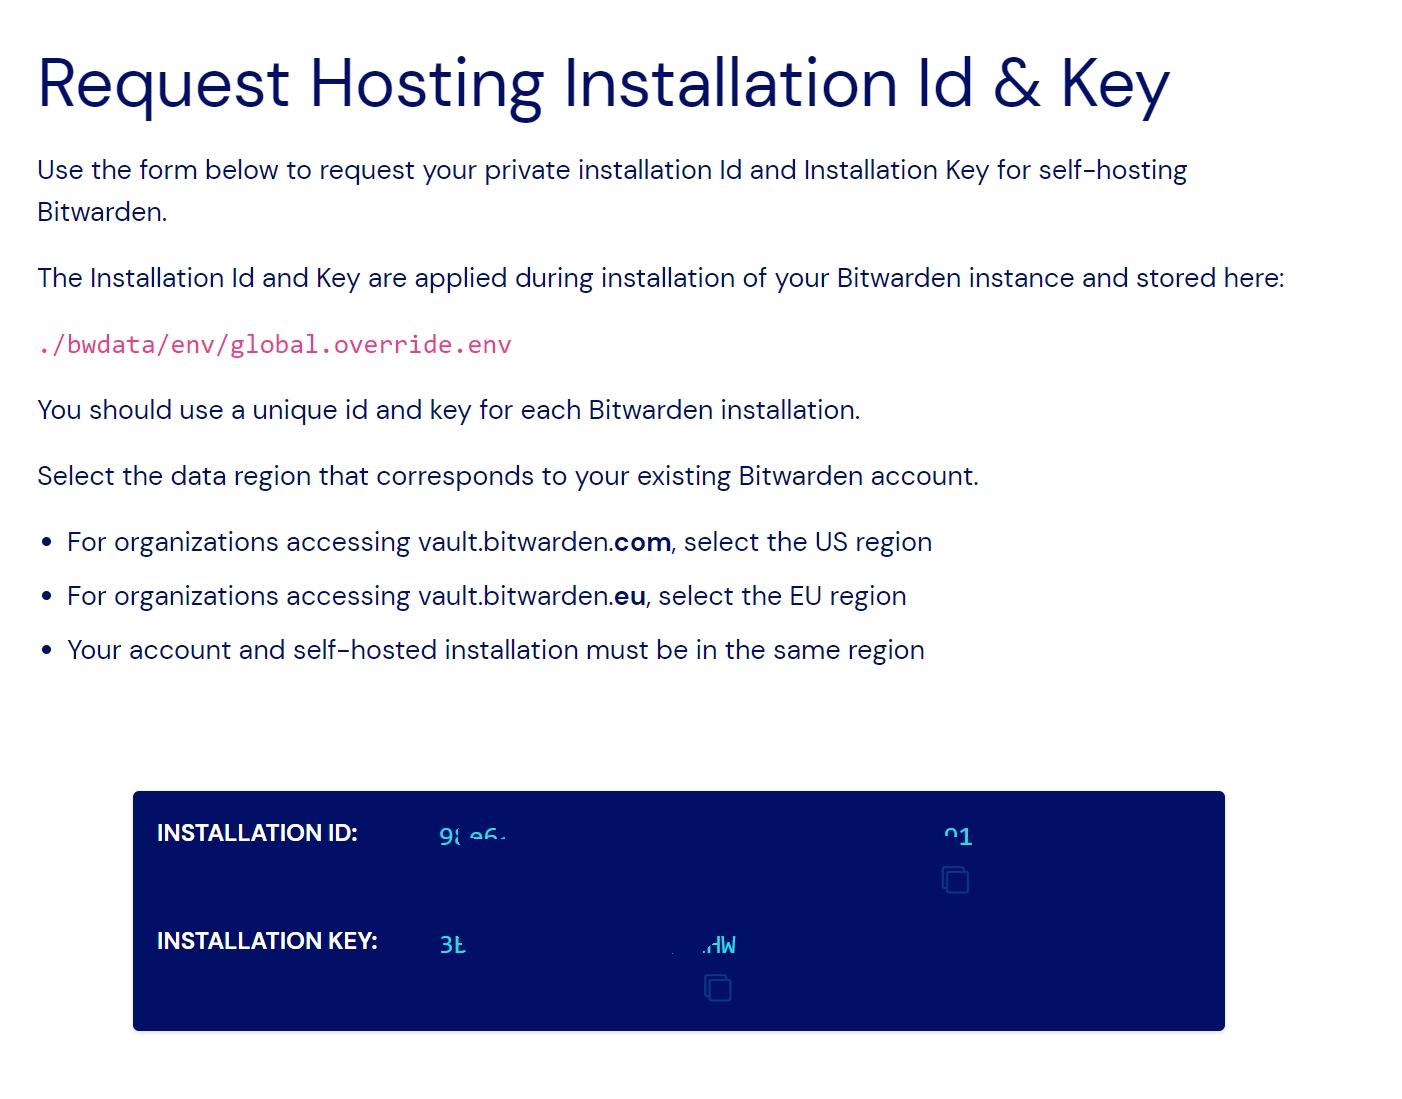
But, we need to do one more thing – request installation ID using valid email. We will do it here – https://bitwarden.com/host/
Enter email, select your region and press Submit
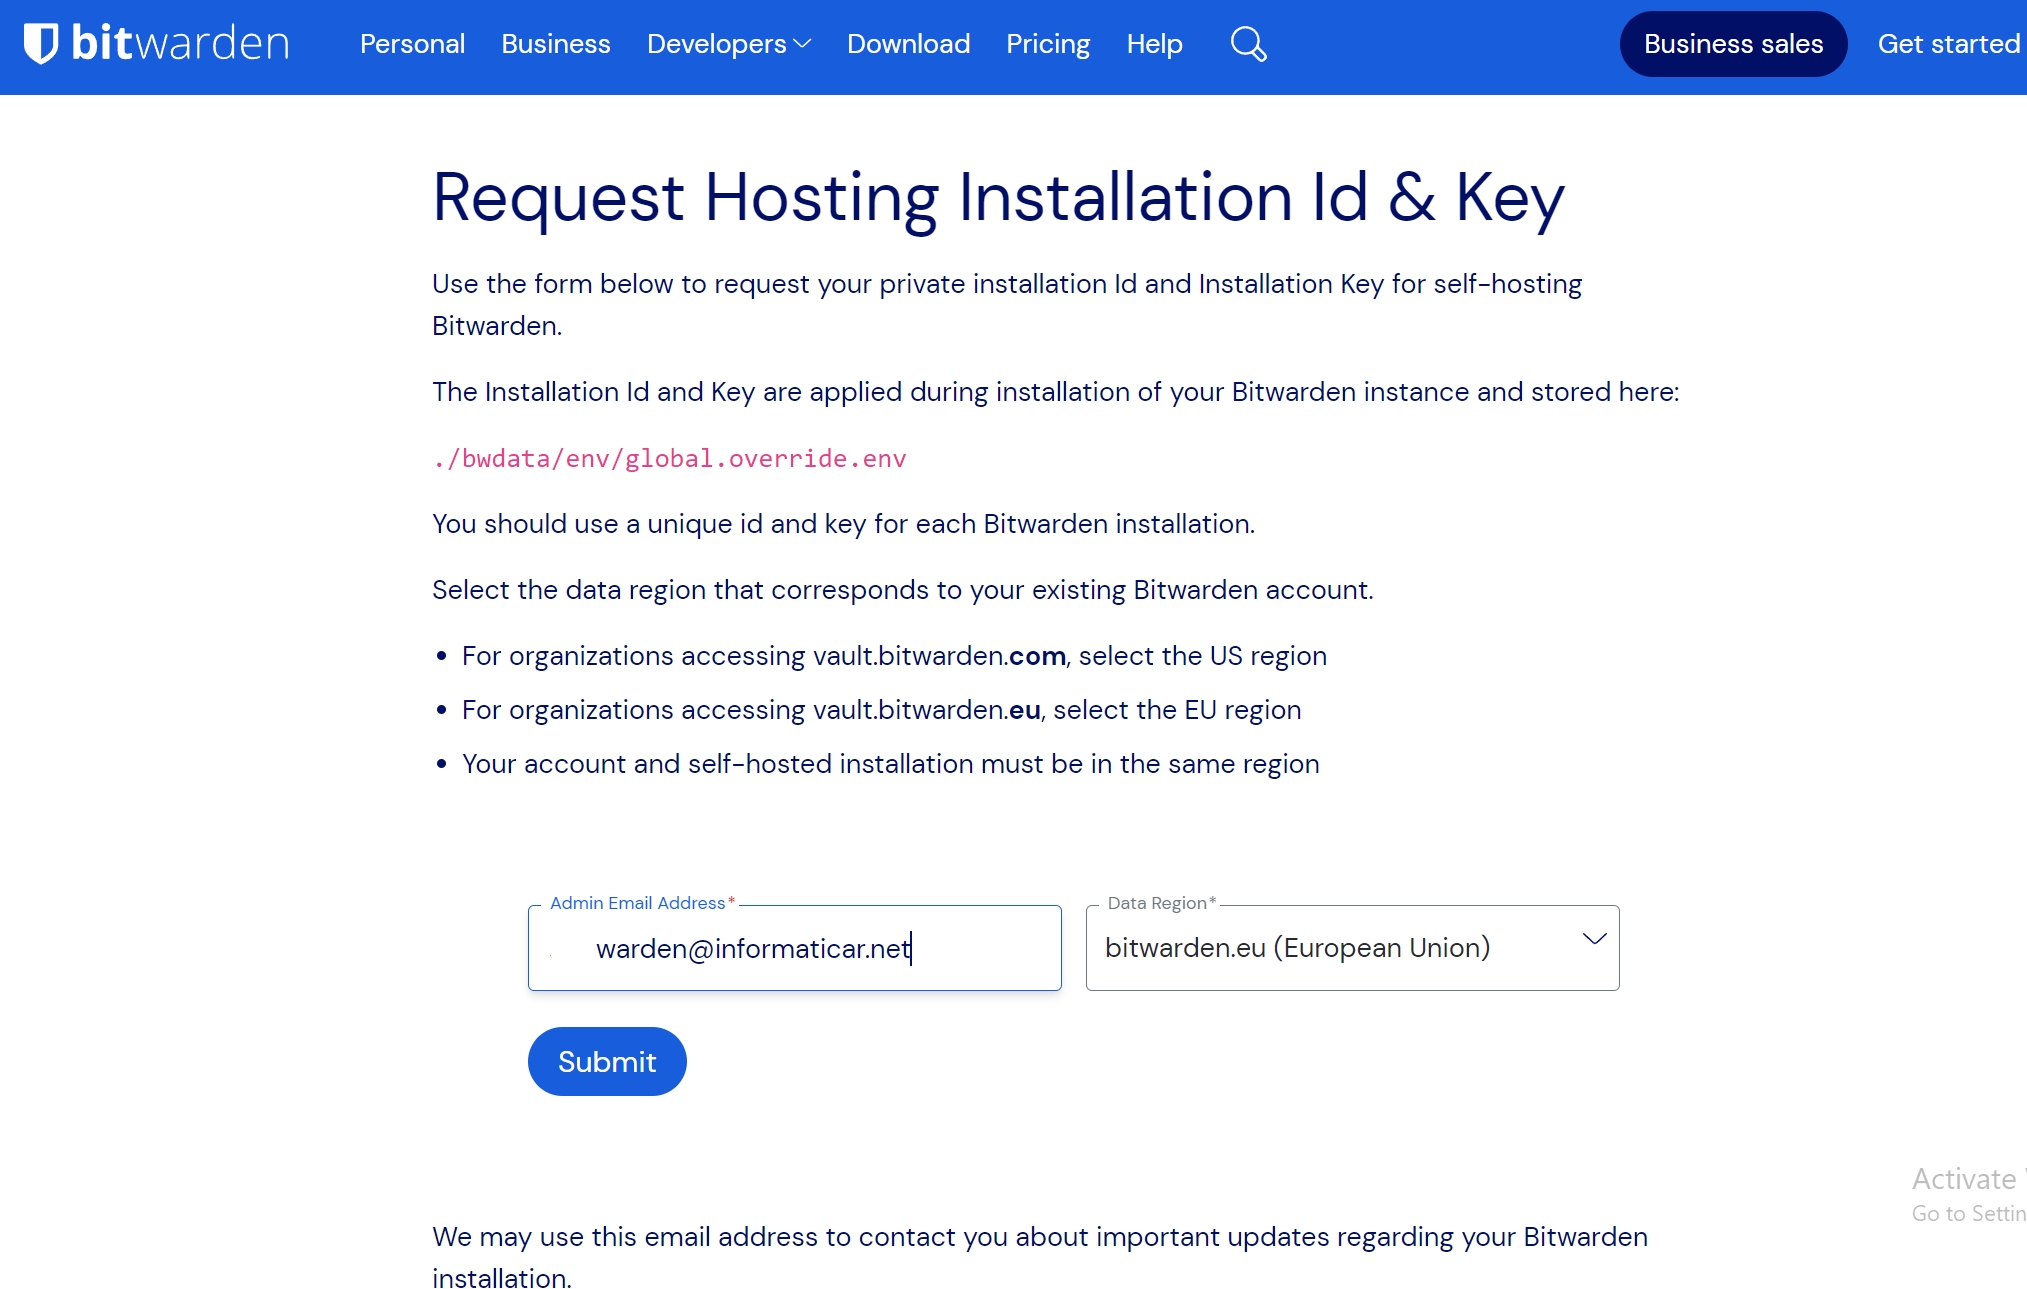
Copy you installation ID and Key to safe place
Ok, let’s start – we will now download installer script.
curl -Lso bitwarden.sh "https://func.bitwarden.com/api/dl/?app=self-host&platform=linux" && chmod 700 bitwarden.sh

And we will start the installer by running
./bitwarden.sh install
You will be asked for domain name for your instance, I will use bitwarden1.informaticar.net I defined at the beginning.
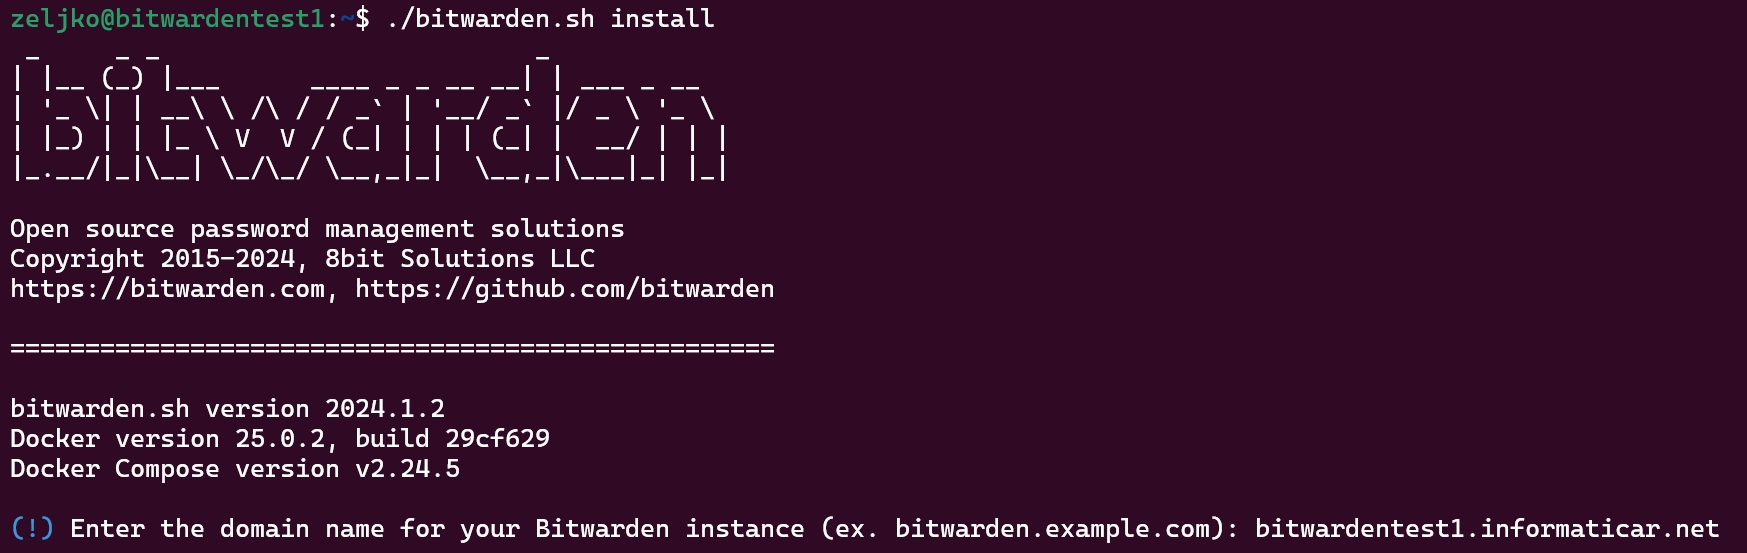
I don’t want Let’s Encrypt certificates, but you can go with that if you wish. I will enter database name as WardenVault
After some containers are pulled, you’ll have to enter Installation ID and Installation Key taht we got earlier from BitWarden site. And then Enter your region.
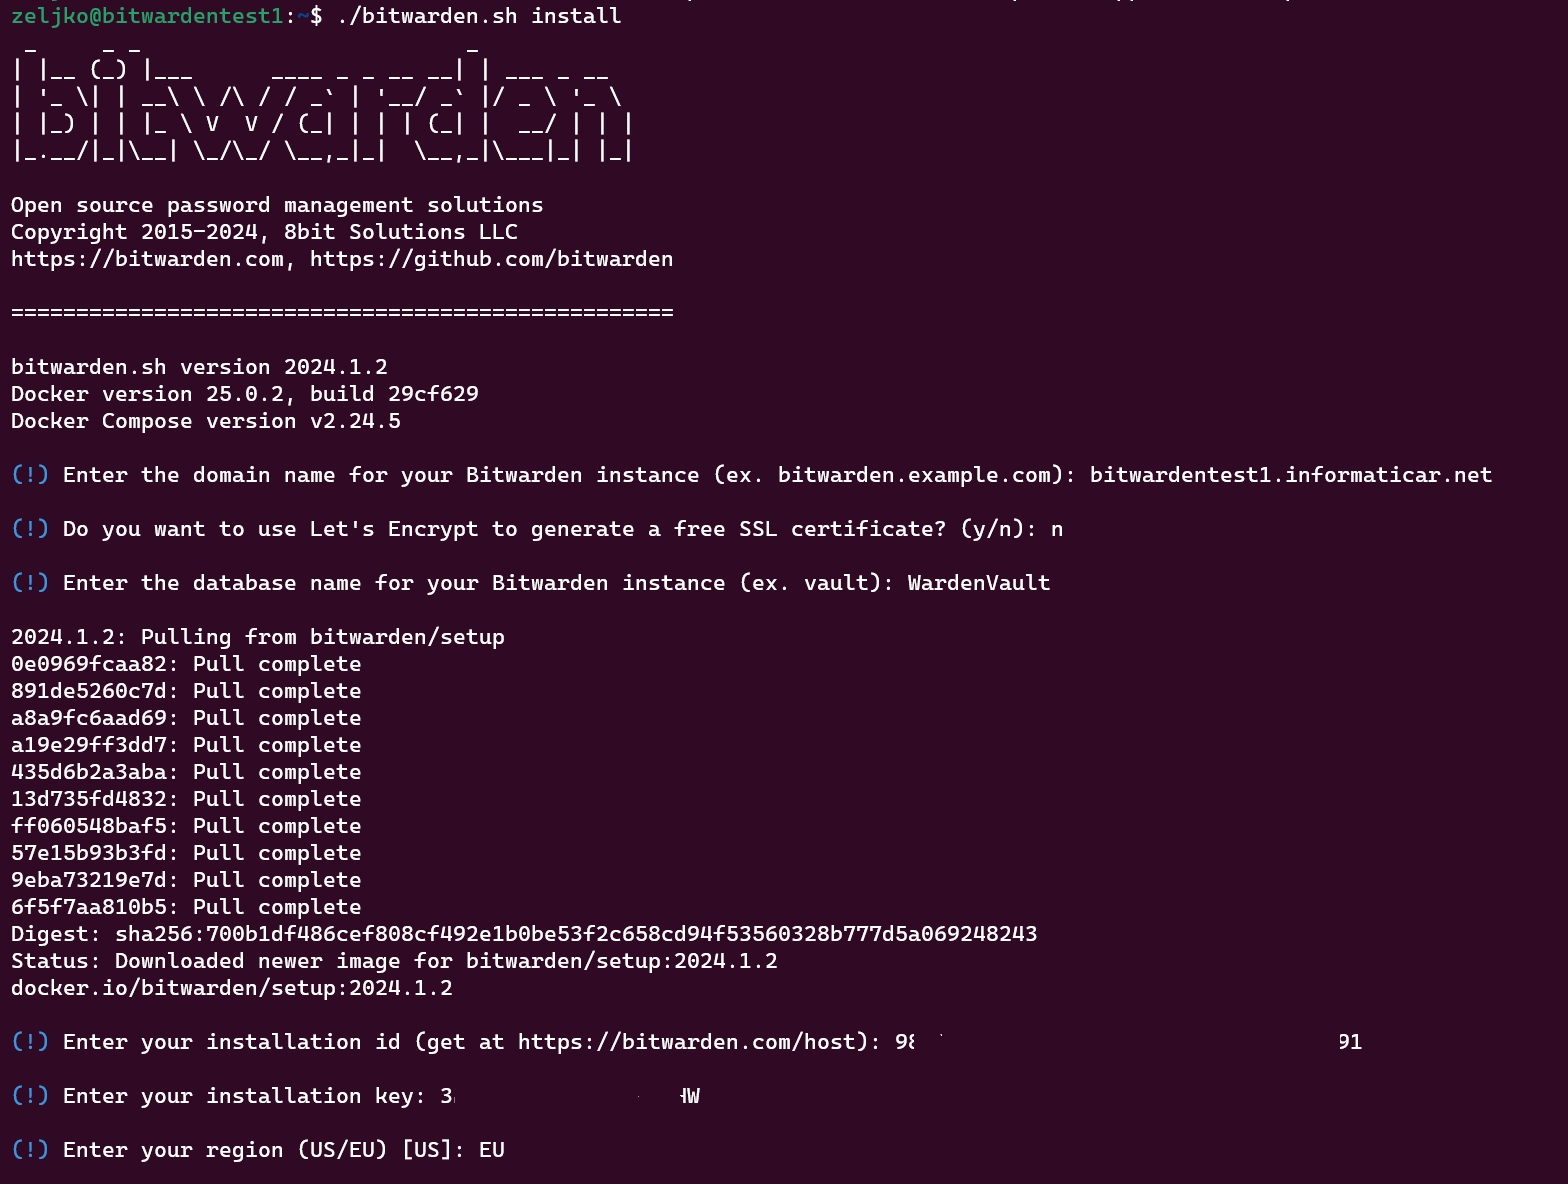
In the end, I will confirm with Y that I have a certificate to use, and that it is trusted SSL certificate, which means I need ca.crt also. Now, we WON’T START BITWARDEN UNTIL WE IMPORT CERTIFICATES!!

Certificates
You .key certificate should be named private.key . Public part should be named certificate.crt and CA key from your certificate authority should be named ca.crt. So make sure you rename your certificates
private.key
certificate.crt
ca.crt

Now, all three certificates should be copied to ./bwdata/ssl/yourdomainname
In my case I will copy all to ./bwdata/ssl/bitwardentest1.informaticar.net


SMTP settings
We won’t start our installation just yet, we will also define email settings, that will be needed
sudo nano ./bwdata/env/global.override.envUnfortunately, there is no universal setup here, so check settings of your email provider and enter them here. Save when you are done.

Start
We will finally run start command
./bitwarden.sh start
It will take some time…
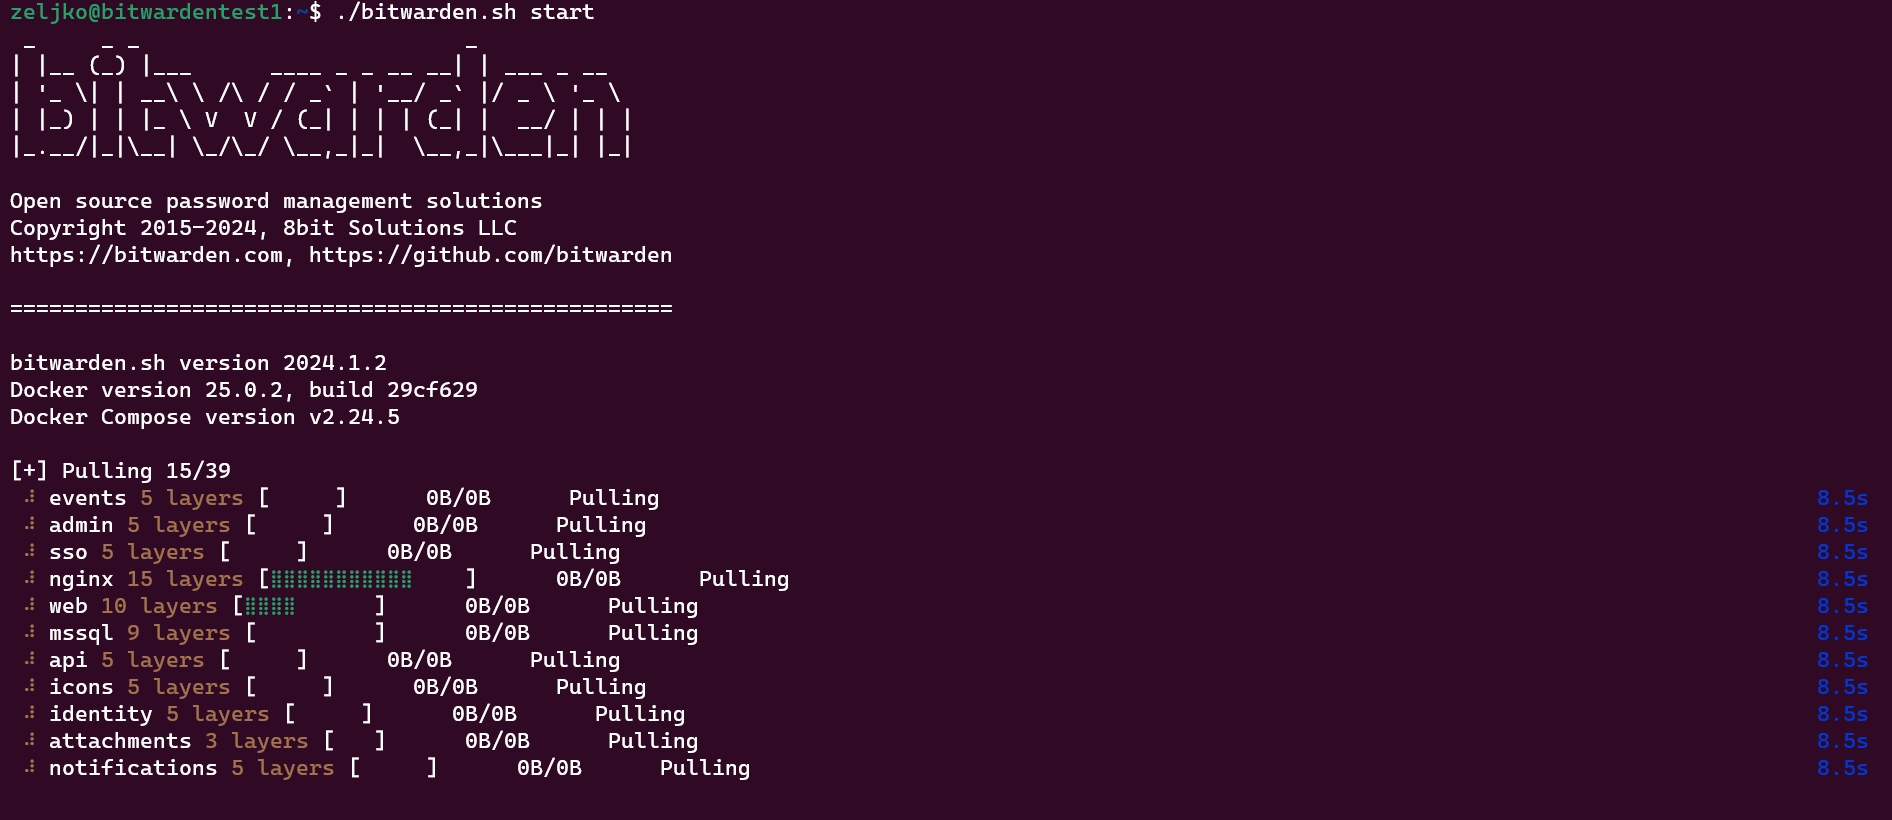
After some time you will get following if everything is ok
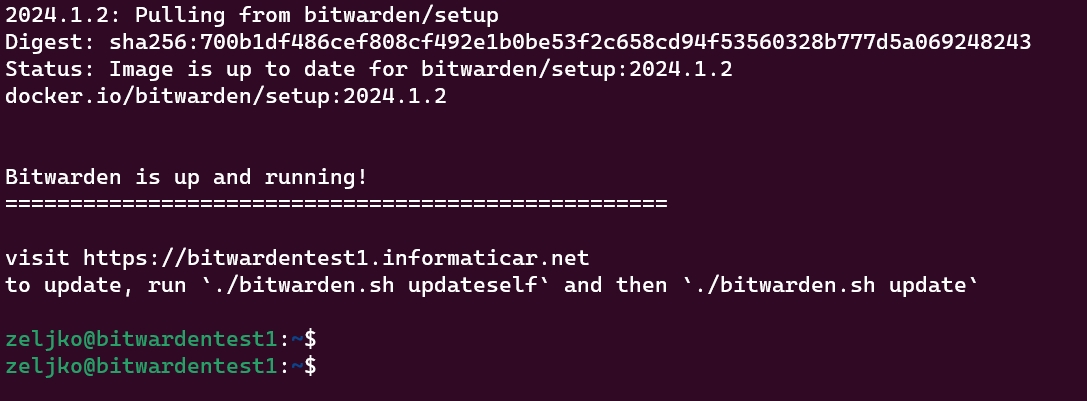
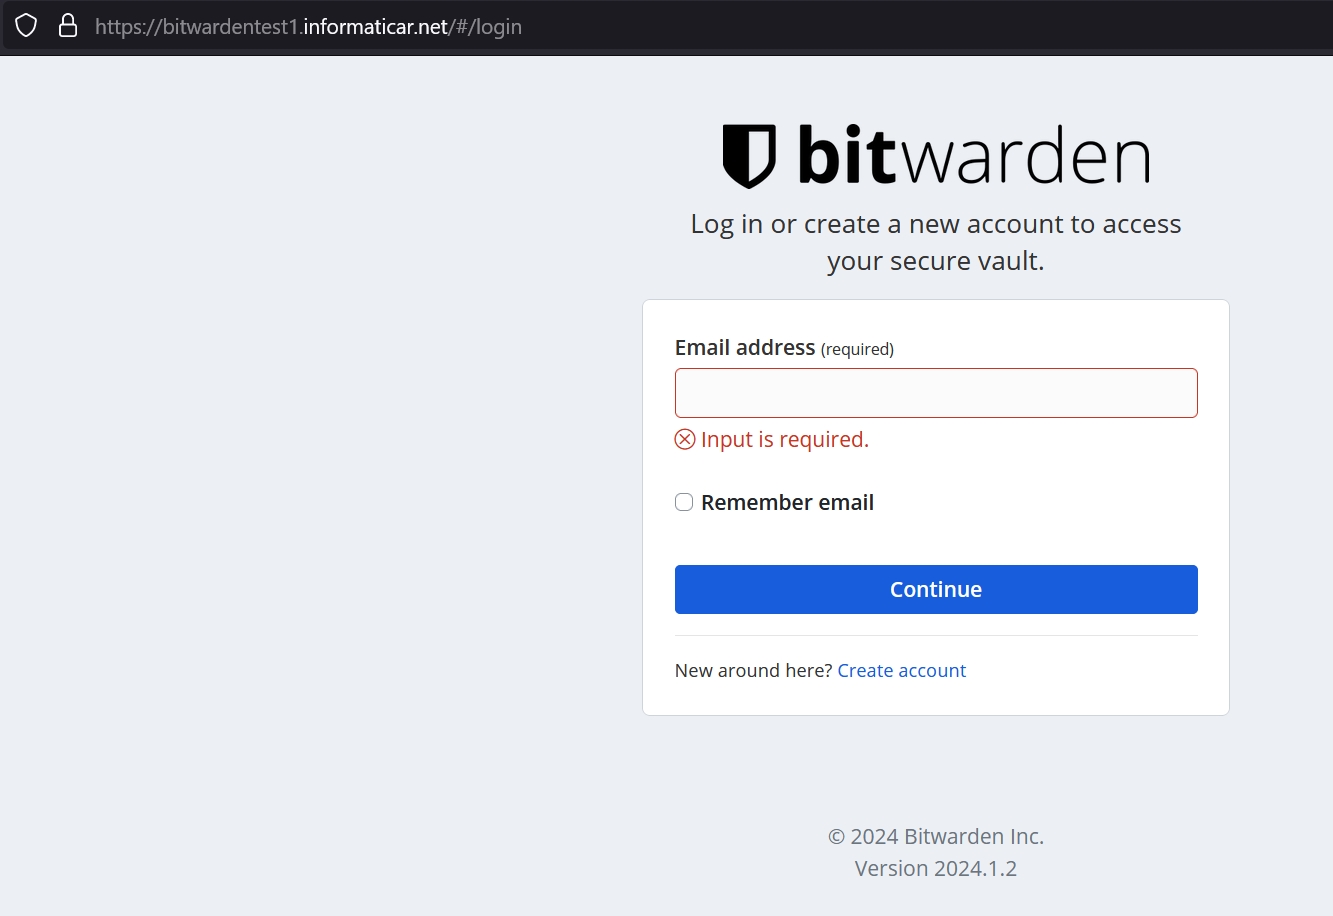
And if I run https://bitwardentest1.informaticar.net in web browser…
Success!! And without error
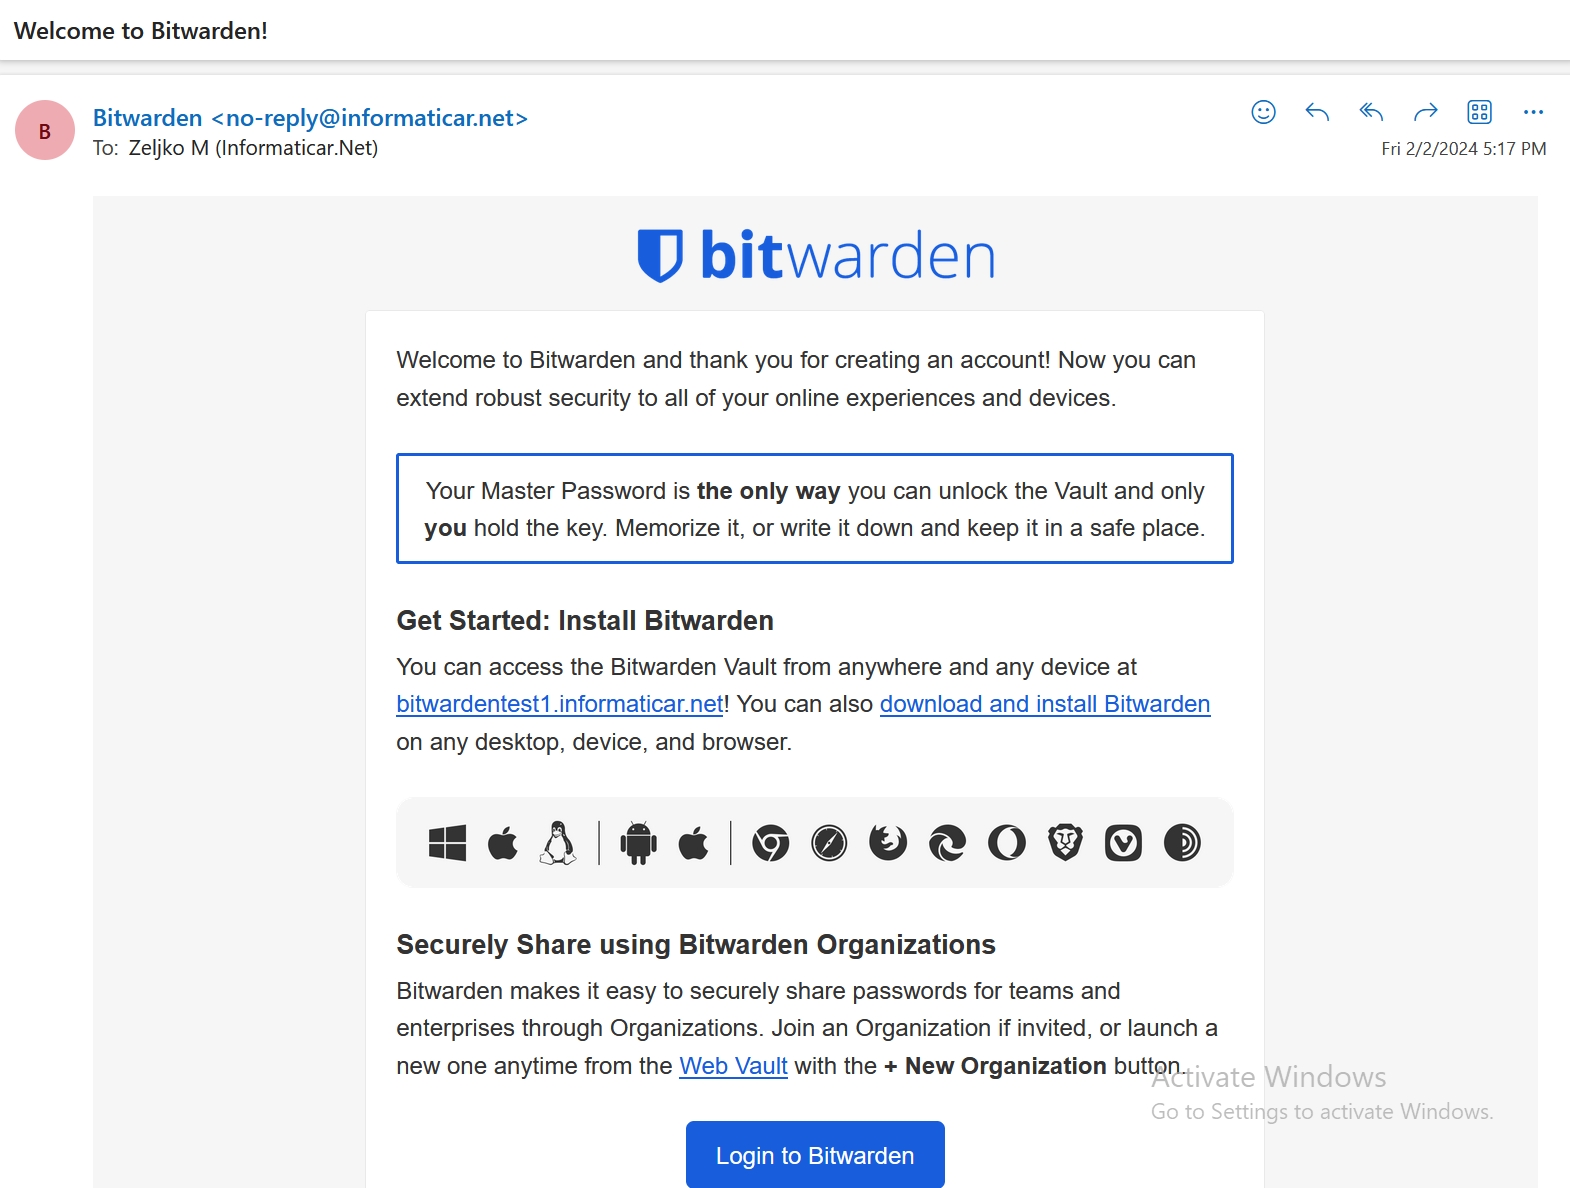
I will immediately also test account registration and SMTP by clicking on Create account
I got registration email!!!
I was able to login
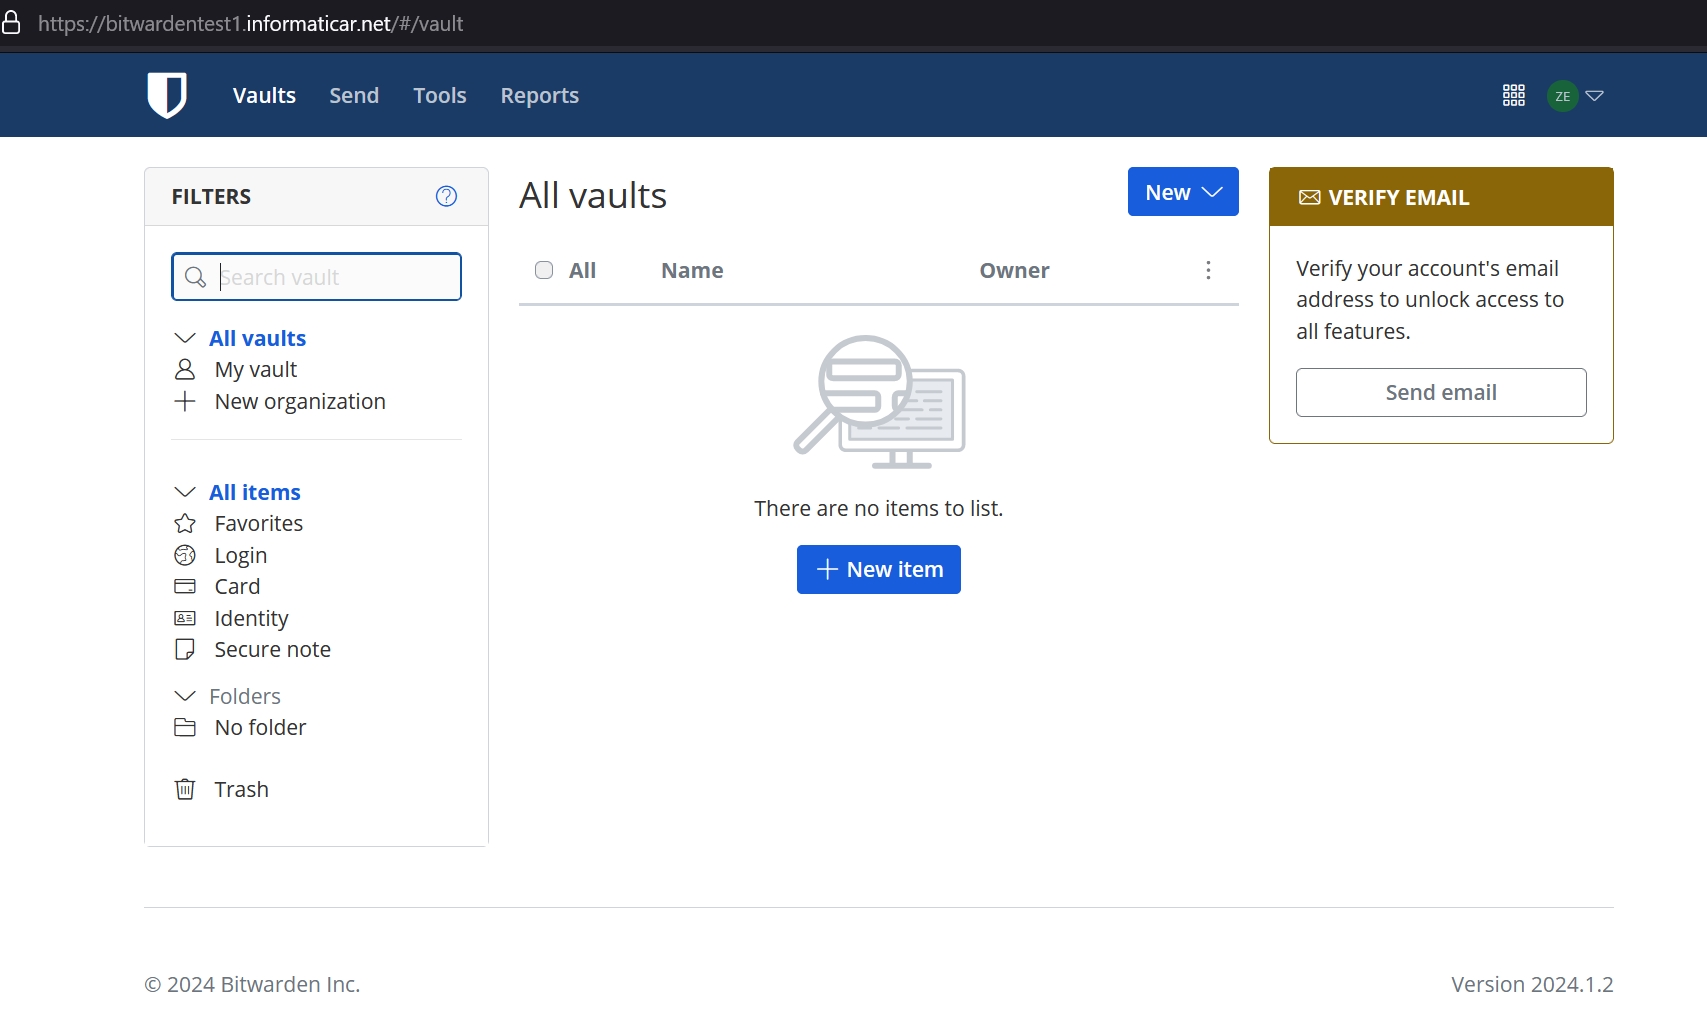
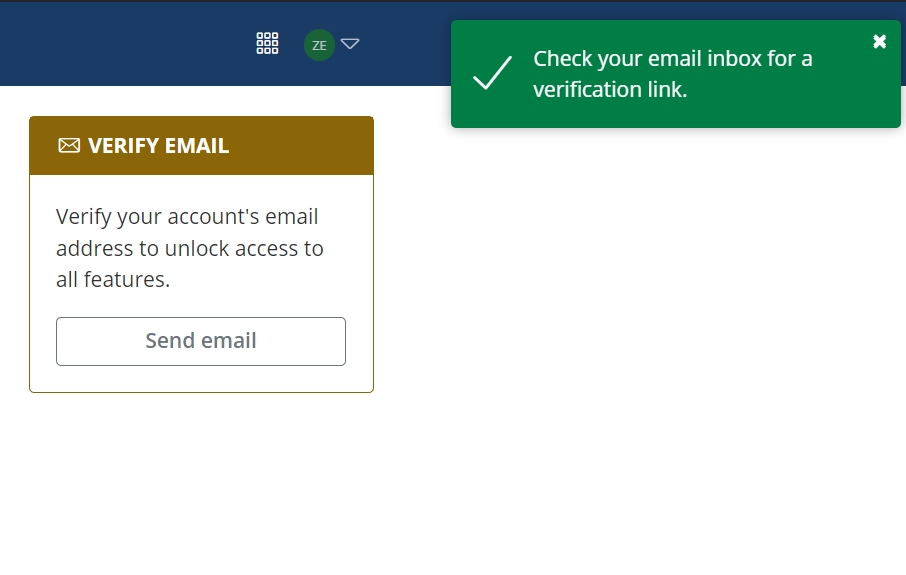
I had to verify email, and that also worked perfectly
I was also able to log in to Bitwarden app on mobile device and connect to the vault and create new item. Important thing is that this will only work when you are in local network.
How to update your Bitwarden install?
It is already mentioned above in the screenshot, run in order listed below
./bitwarden.sh updateself
./bitwarden.sh update
Conclusion
This is already too long, we now learned to install and make simple configuration of Bitwarden. If there is enough interest, I will make a few more guides on the topic.