Fortigate installation on Azure (Stack) should be a piece of cake according to documentation and internet, but for me – it isn’t. I had a problem that VMs that I assigned to my Fortigate installation could not access internet.
I saw a lot of posts around the internet with similar problems, but none of them with solution. As usual I went through a lot of documentation, done everything by the book – but no luck for me.
Here is a Fortigate Cookbook for Azure – https://docs.fortinet.com/vm/azure/fortigate/6.2/azure-cookbook/6.2.0/609353/network-interfaces-and-routes
But for me – no go.
This is my story on Azure Stack (v 1.1910.0.58)
Installation of Fortigate VM would go great, my Fortigate installation is accessible from the internet and it can ping internet. VM I add to the Fortigate can ping and access Fortigate installation, can see other VMs in same network, but cannot access internet or ping anything outside local network.
The problem wasn’t in firewall rules.
Here is my tutorial for Fortigate installation in Azure Stack.
Prerequisites
For this tutorial I will be using following
Azure Stack v.1.1910.0.58
Fortigate Single VM Deployment BYOL (from Azure Marketplace) v 6.0.3 (download it from Marketplace)
Windows Server 2016 Dtcntr trial for testing purposes. (Use Marketplace version or your own image)
You will also need a license for Fortigate (trial can be requested for Fortinet, or you already bought one)
Fortigate Network configuration:
Whole virtual network is in range 172.16.0.0/22
Outside Subnet 172.16.0.0/24
Inside Subnet 172.16.2.0/24
Azure Stack is using default network configuration and everything it adds is standard for Azure Stack – public IP in range 192.168.102.xx DNS server for VMs on address 168.63.129.16
Fortigate Installation
I will highlight most important parts, not every detail of the installation. This tutorial assumes you have basic knowledge of Azure infrastructure.
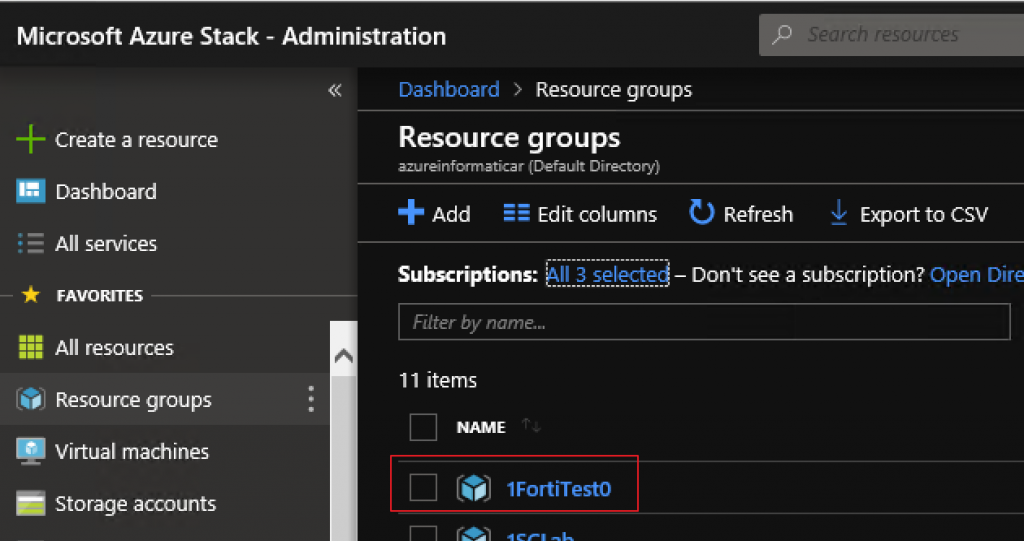
Resource Group
You will need empty resource group to deploy your Fortigate installation to. I created resource group named “1FortiTest0”. Not the prettiest name in the world, but it will server purpose.
Next go to the Virtual machines | +Add | Networking
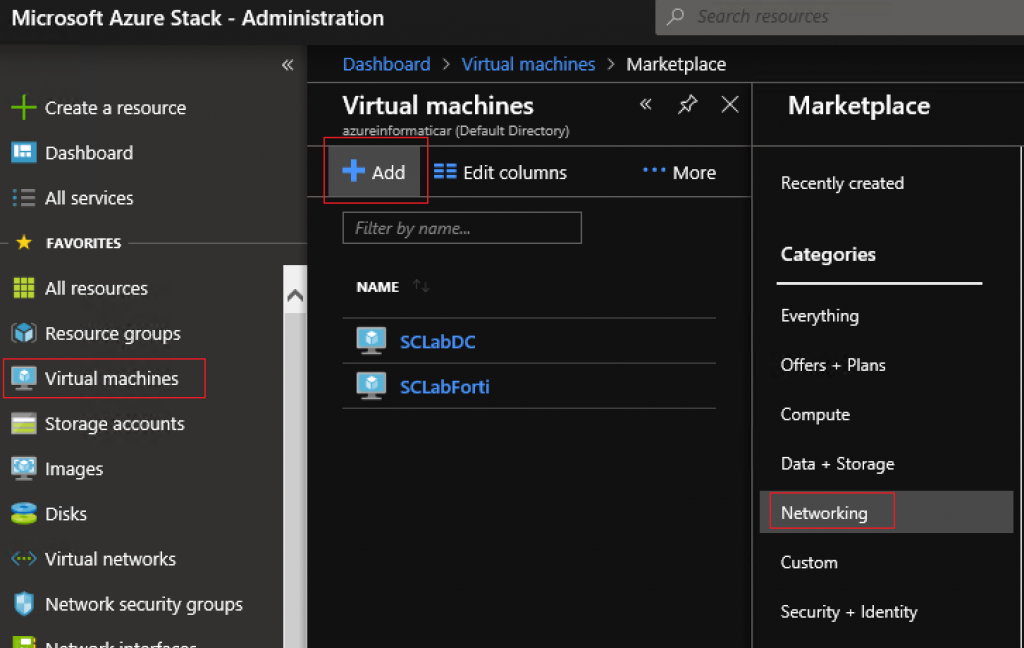
Browse until you find Fortigate NGFW – Single VM Deployment (BYOL)
(of course, you will need to download Fortigate VM if you haven’t yet)
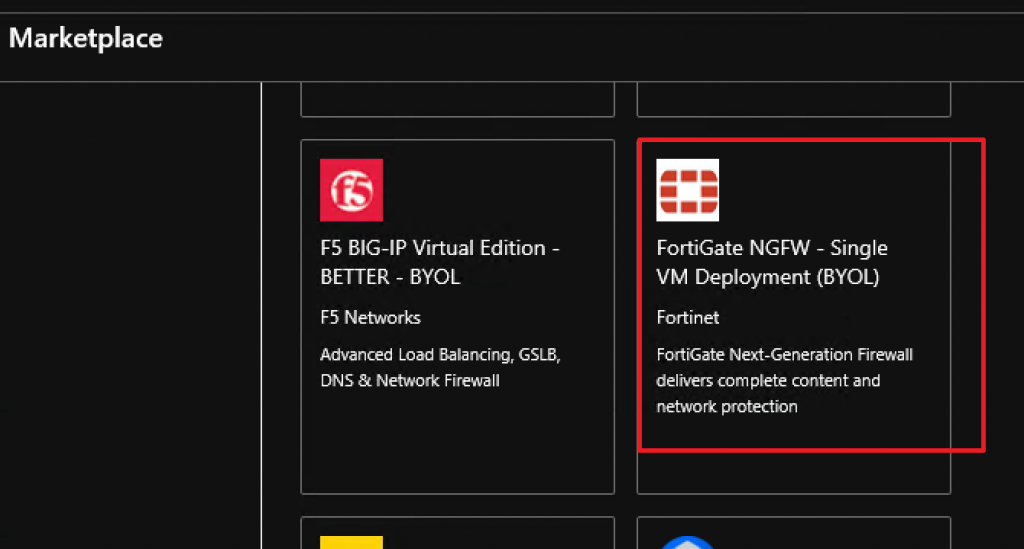
Click on it and select Create
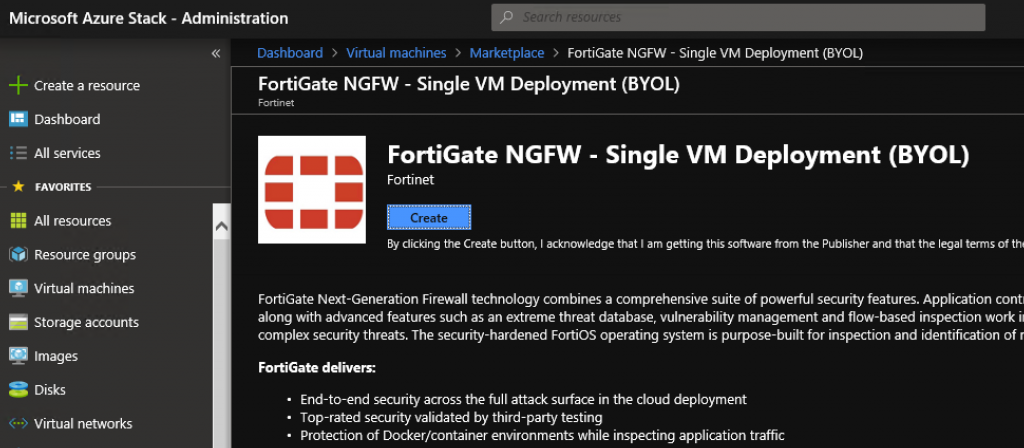
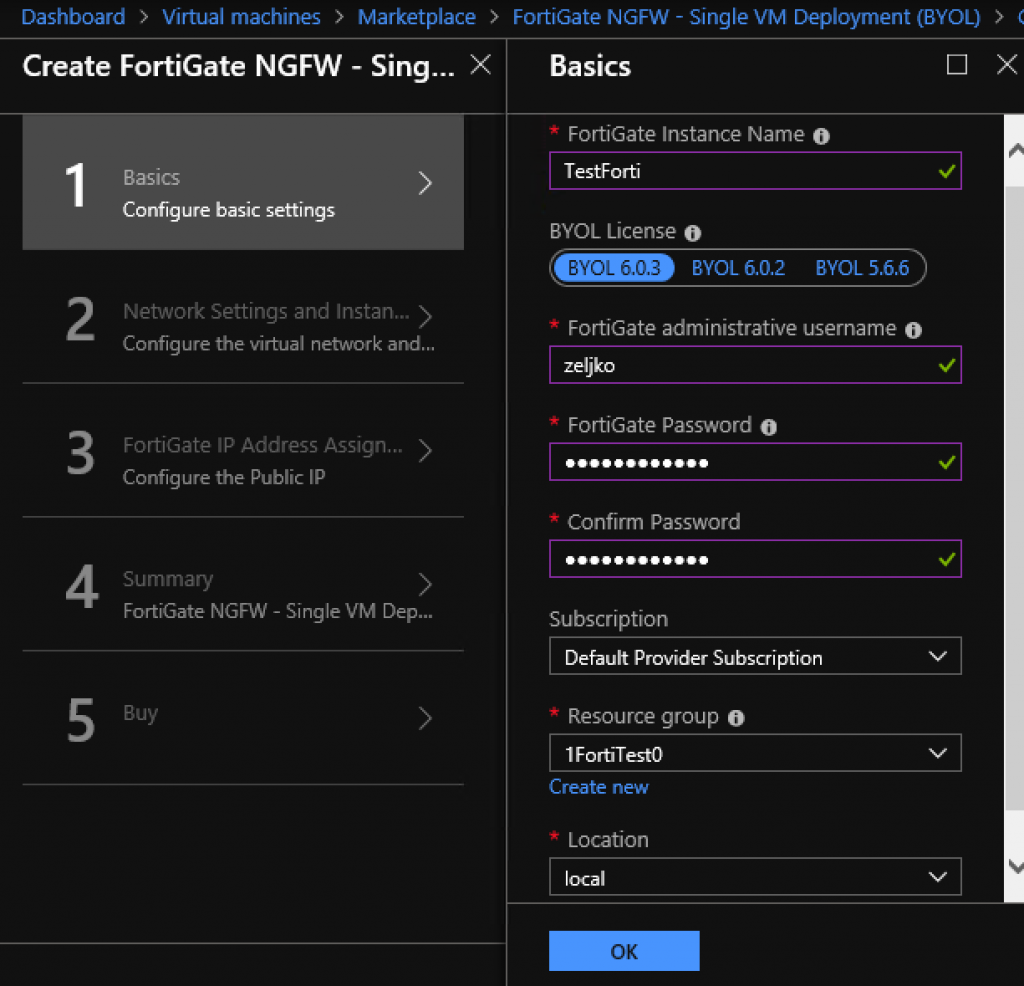
On a first screen you will select a name for your Fortigate install, user, pass… I will select Resource group I earlier created and I selected BYOL 6.0.3 for the Fortigate version | OK
Ok, now most important part – networking.
My virtual network has a range of 172.16.0.0/22 and I have two subnets within that network – public subnet on 172.16.0.0/24 and private subnet on 172.16.2.0/24
Here are the screens
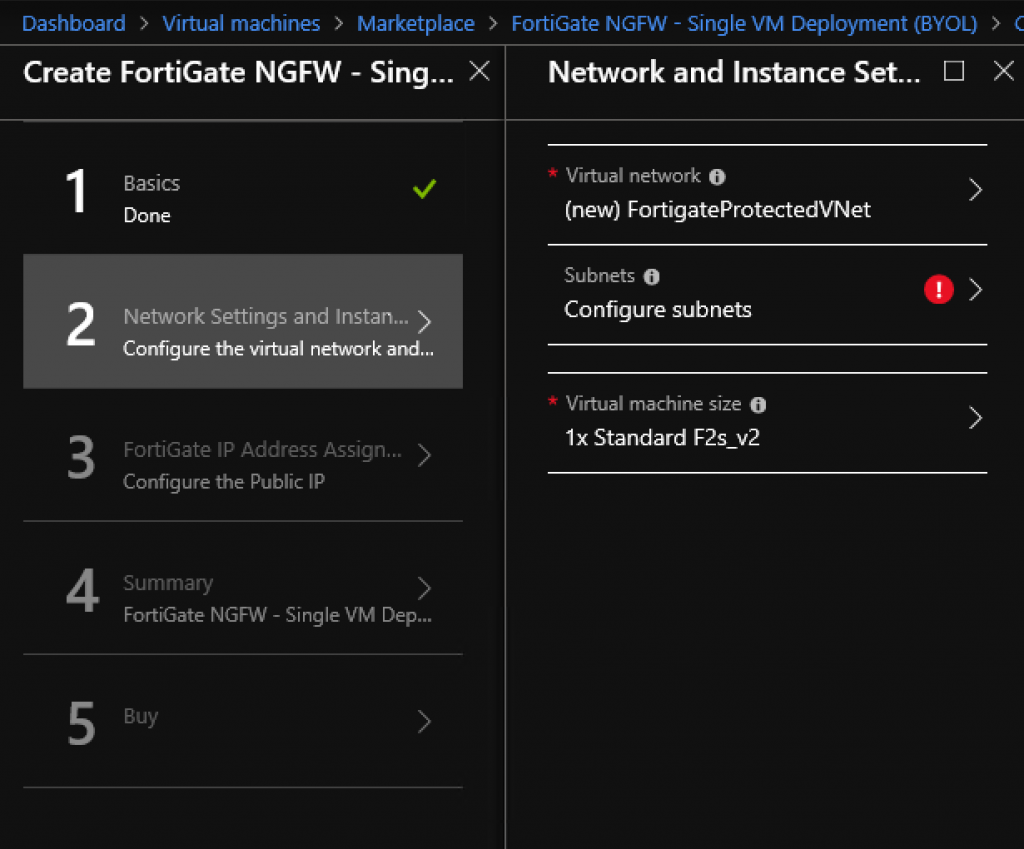
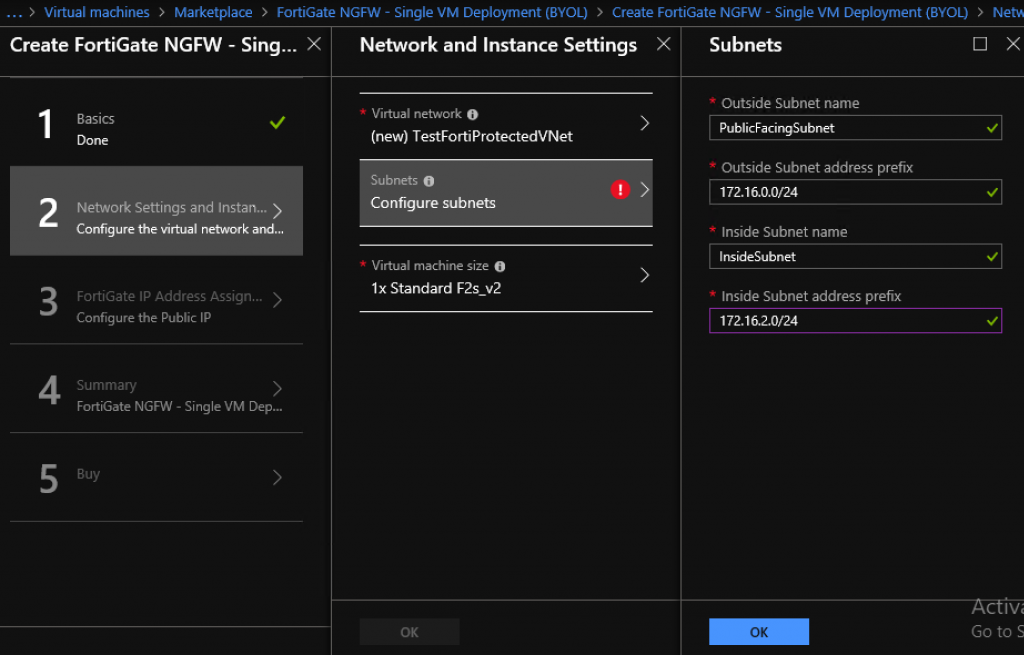
Virtual network (172.16.0.0/24) setup

Outside (public) subnet on 172.16.0.0/24 and private subnet on 172.16.2.0/24
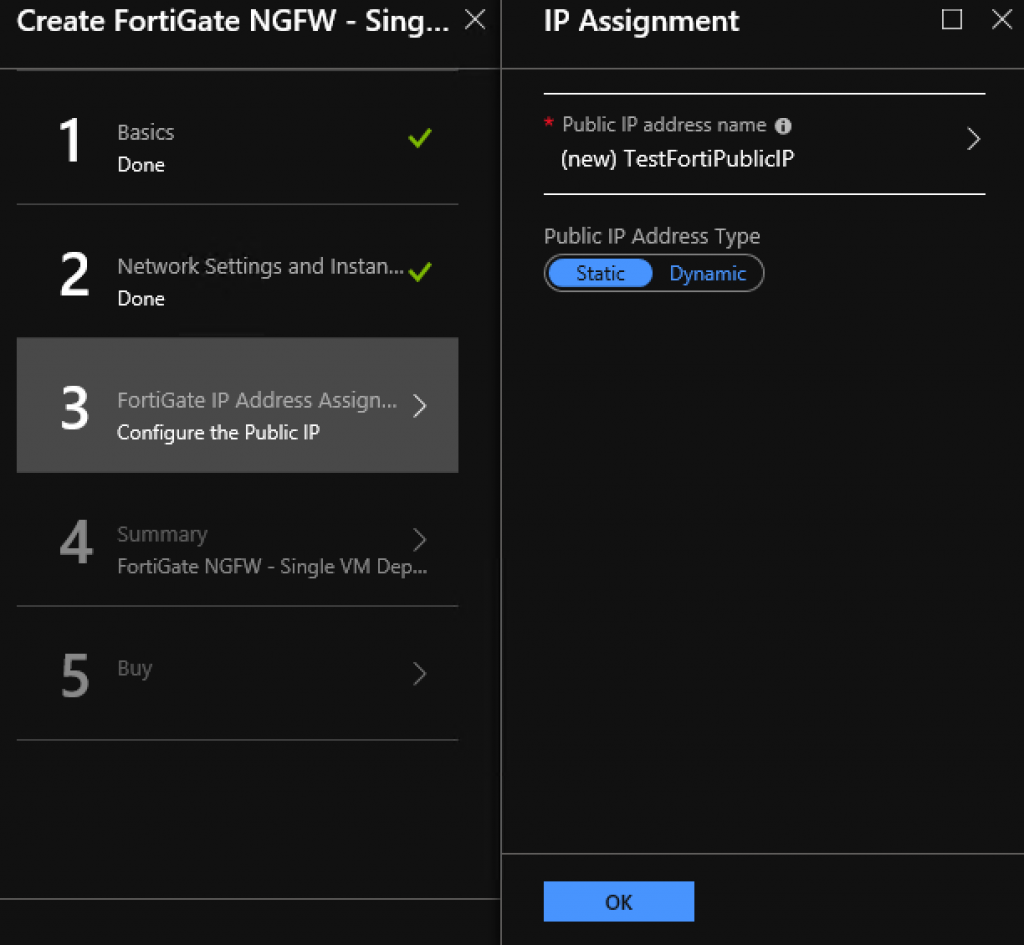
On next step, you will select public ip. I will select static and name it TestFortiPublicIP
Here is my summary
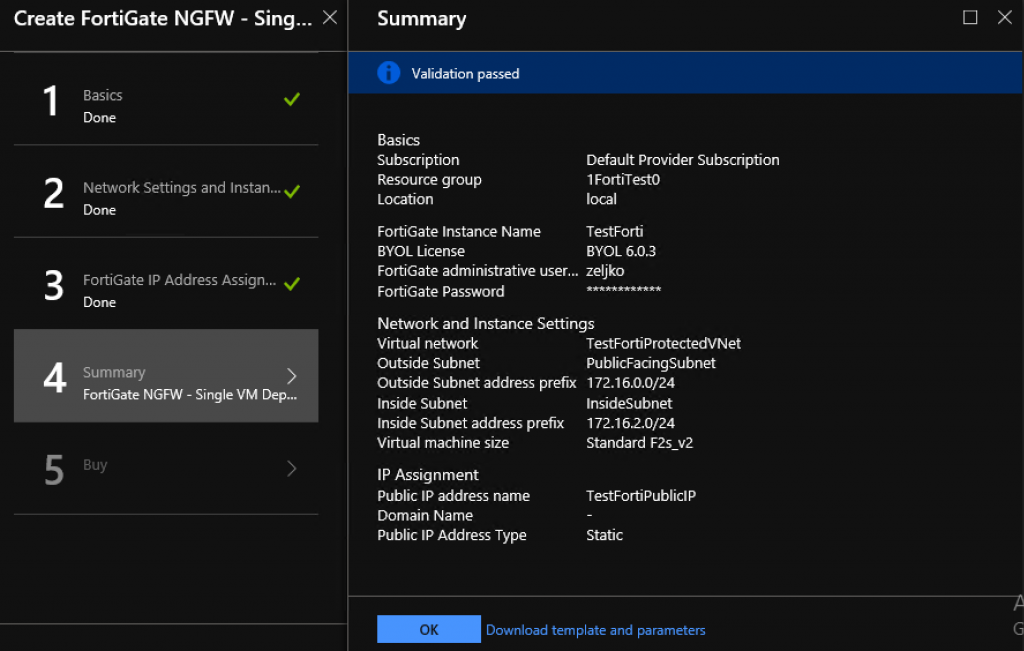
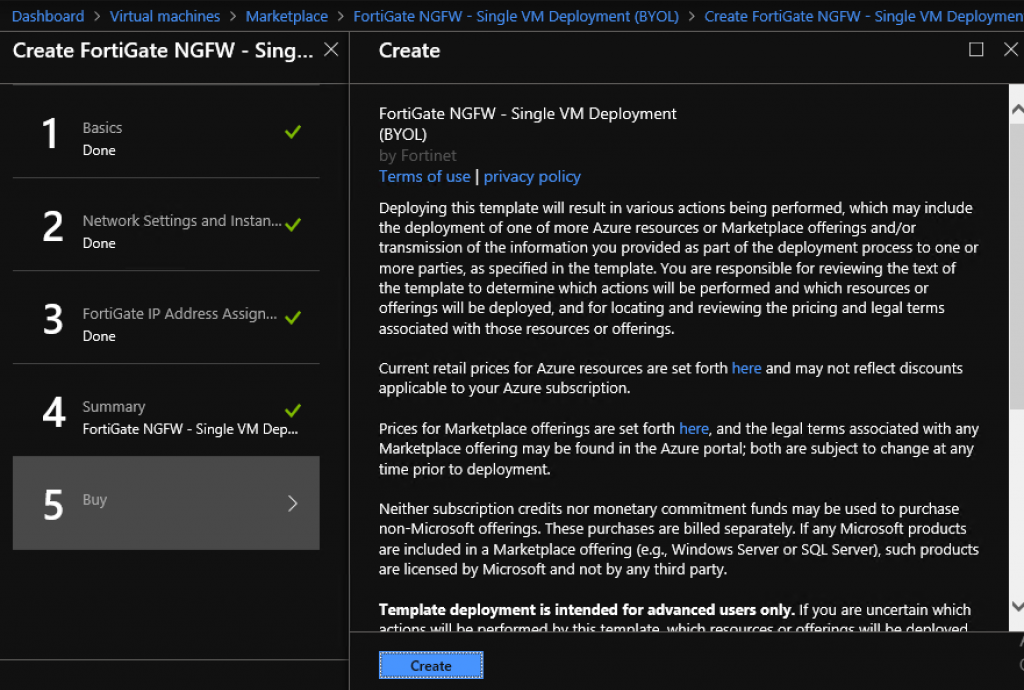
And in the end I will vreate the VM
Ok, I put emphasis on networking for the installation part, because it is most important, you get to select other parts like VM size (depends on license you have) names, users and passwords.
Now, during deployment, Fortigate will create and configure virtual network and subnets we defined, put together routing and deploy the VM.
On top of that we will add virtual machine.
Virtual machine installation
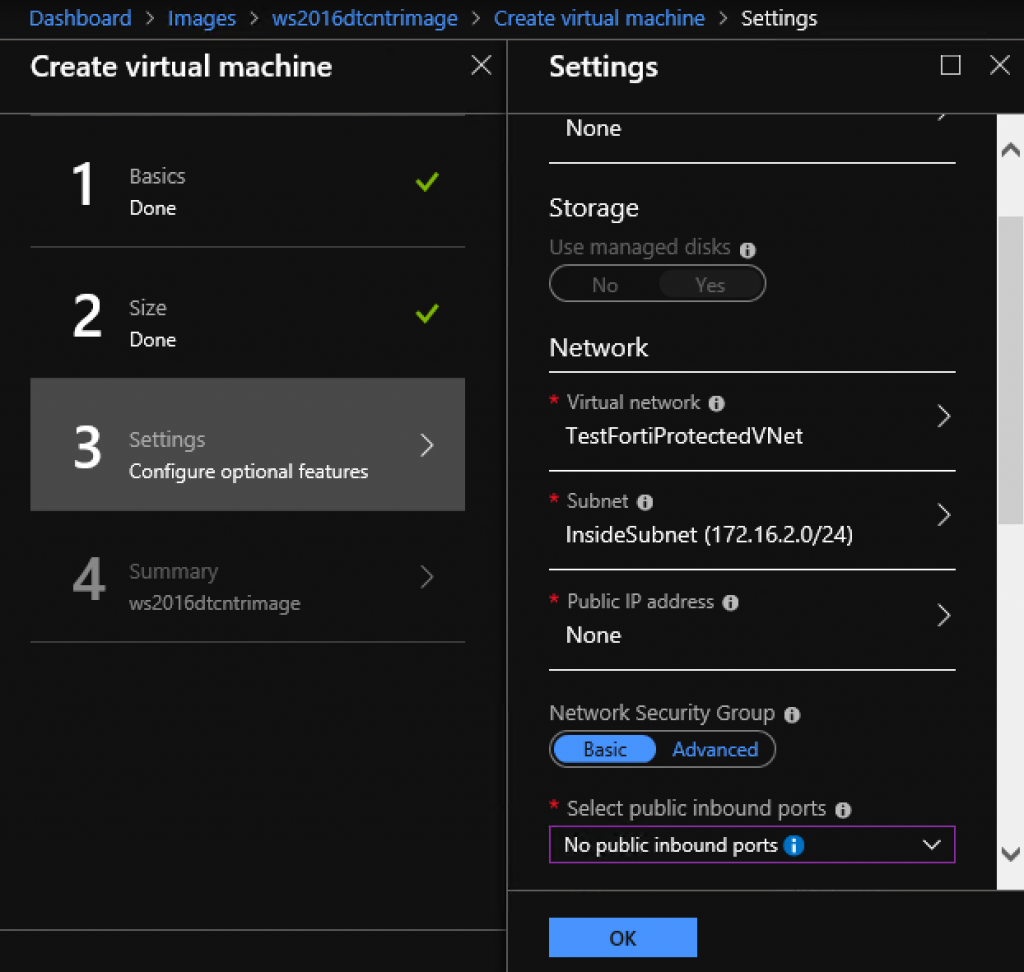
I won’t go through the whole process, I will just cover networking part. I selected virtual network that Fortigate created, I also put the machine into inside subnet. There are no public IPs for the VM (Fortigate should handle that) and also I removed security groups from the VM (Fortigate should also handle that). Only thing that you need is a bare network adapter that has (local) connection to the Fortigate VM.
Fortigate configuration
According to documentation, Fortigate VM should deploy networking, routing and you should just configure firewall and few more details and it should be done.
As always – not in my case.
My fortigate installation got IP 192.168.102.34
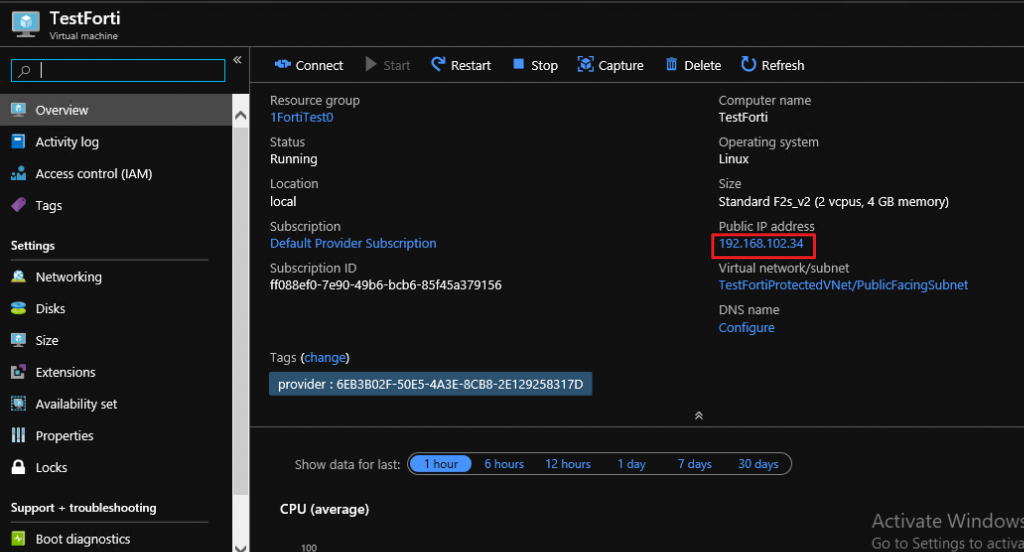
I can access it through my network
After first login you will be asked for license. Now it is time to upload your license or trial license.
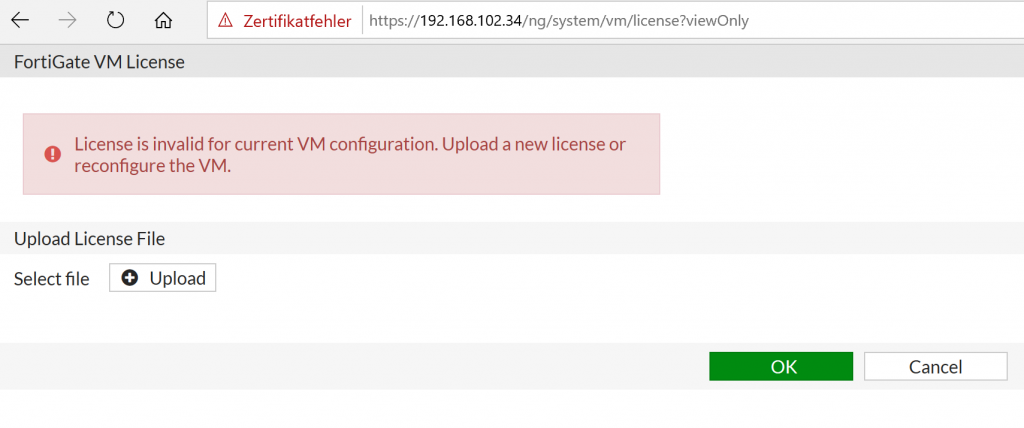
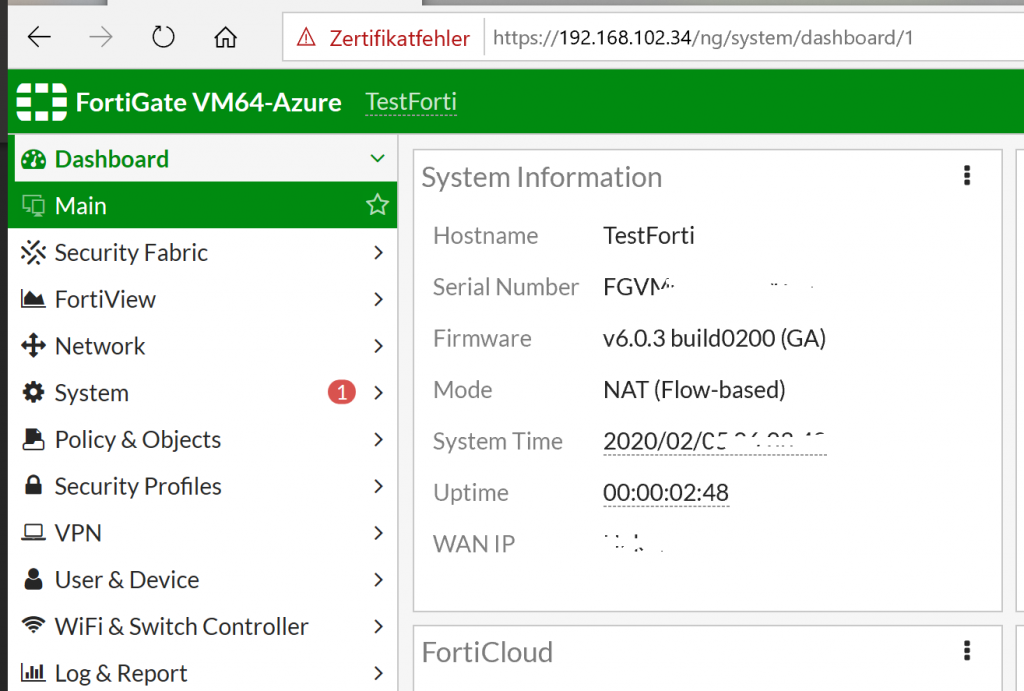
Machine will reboot and you should be able to login and see Fortigate interface if everything is ok.
I will just quickly go to the Windows Server VM I installed into Fortigate network. I will also cheat a bit and access it through HyperV console on Azure Stack host since I do not have RDP or anz other access to it at the moment.
This is just to demonstrate connectivity.
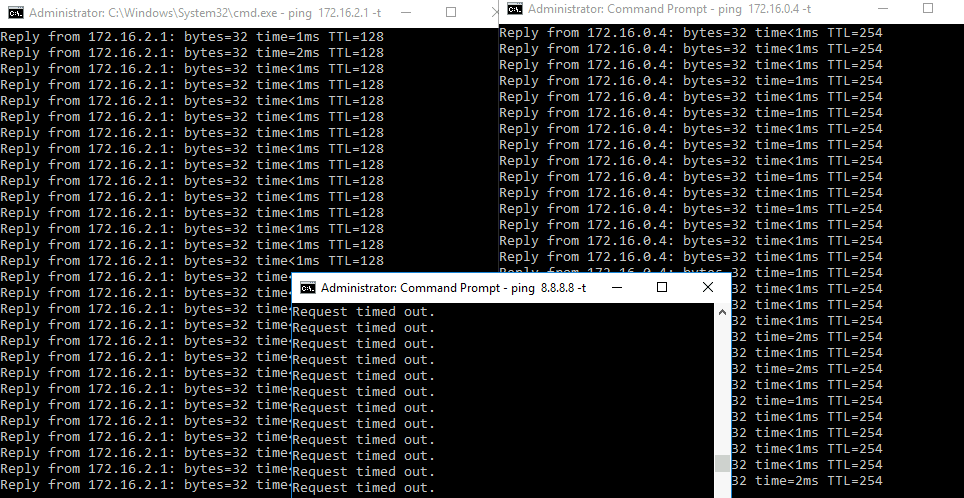
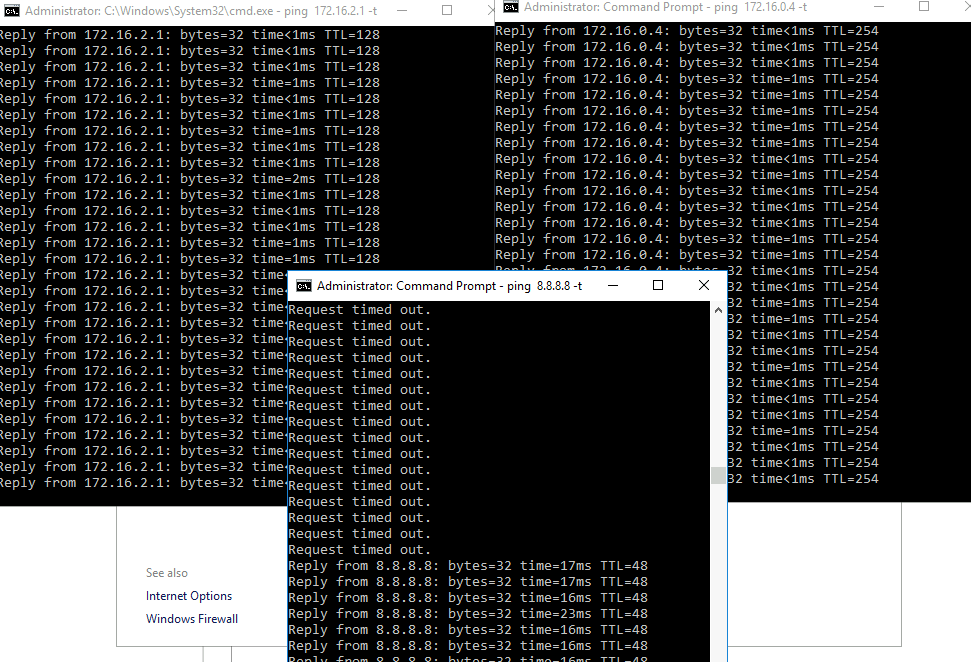
Here are network settings of the VM I deployed.
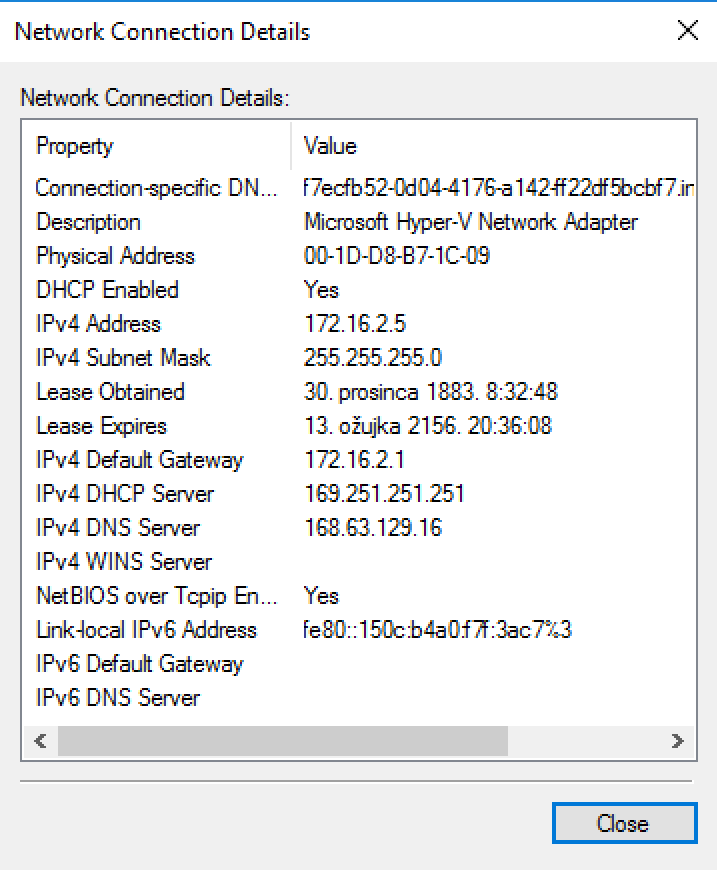
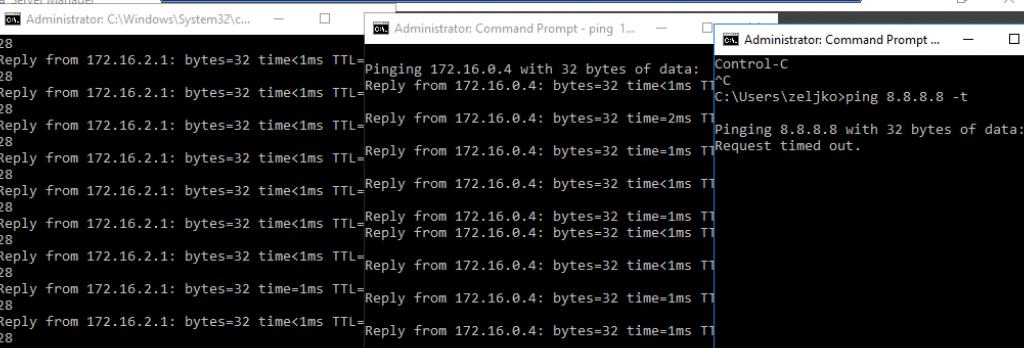
Here is a ping toward inside interface (172.16.2.1) outside interface (172.16.0.4) and internet (8.8.8.8). Yes, no ping towards internet, everything else works.
Let’s try 8.8.8.8 from Fortigate
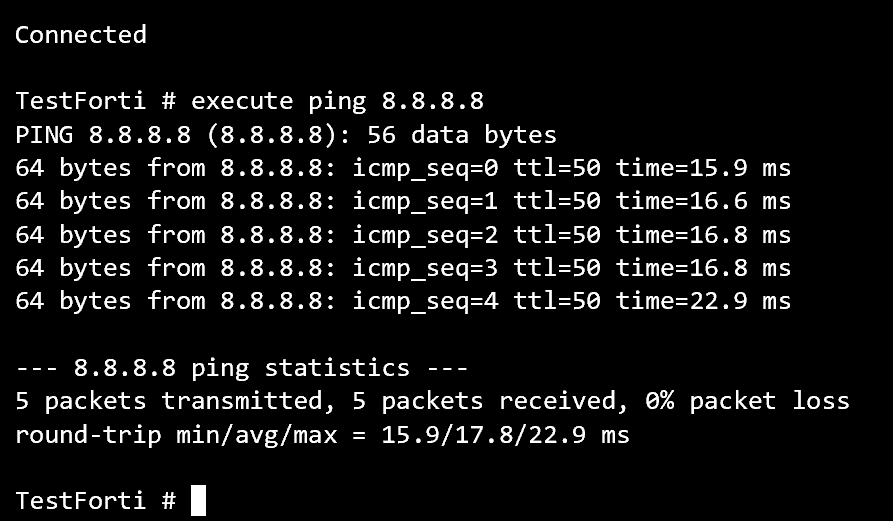
Works.
Yes, you will now say, wait a minute Zeljko, there are no firewall rules in place, of course you cannot communicate with internet from internal network. We will get to that in a moment.
We will continue with Fortinet. First stop, network interfaces.
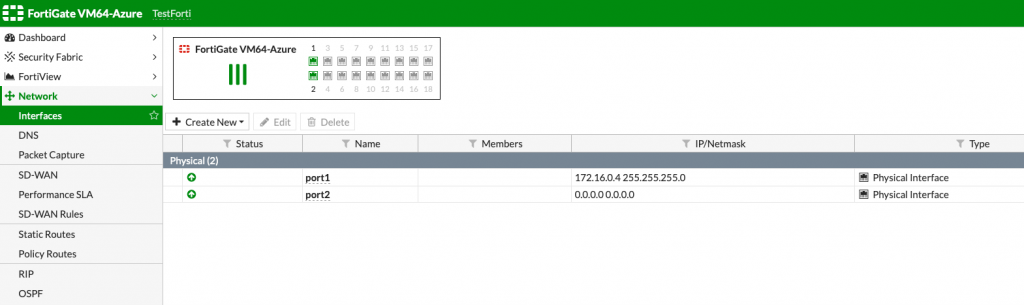
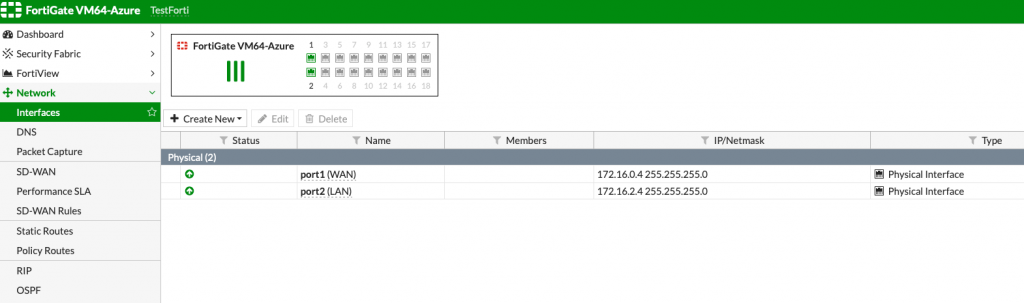
From the menu on the left, select Network and then Interfaces. You can see in the main screen that there are two interfaces – port 1 and port 2. Port 1 is Outside (WAN) network, while port 2 should be internal (LAN) network.
LAN network currently has no IP.
That is the first problem. It happens to me only on Azure Stack install. I tried a few times from scratch, even after complete Azure Stack reinstall, but the problem remains.
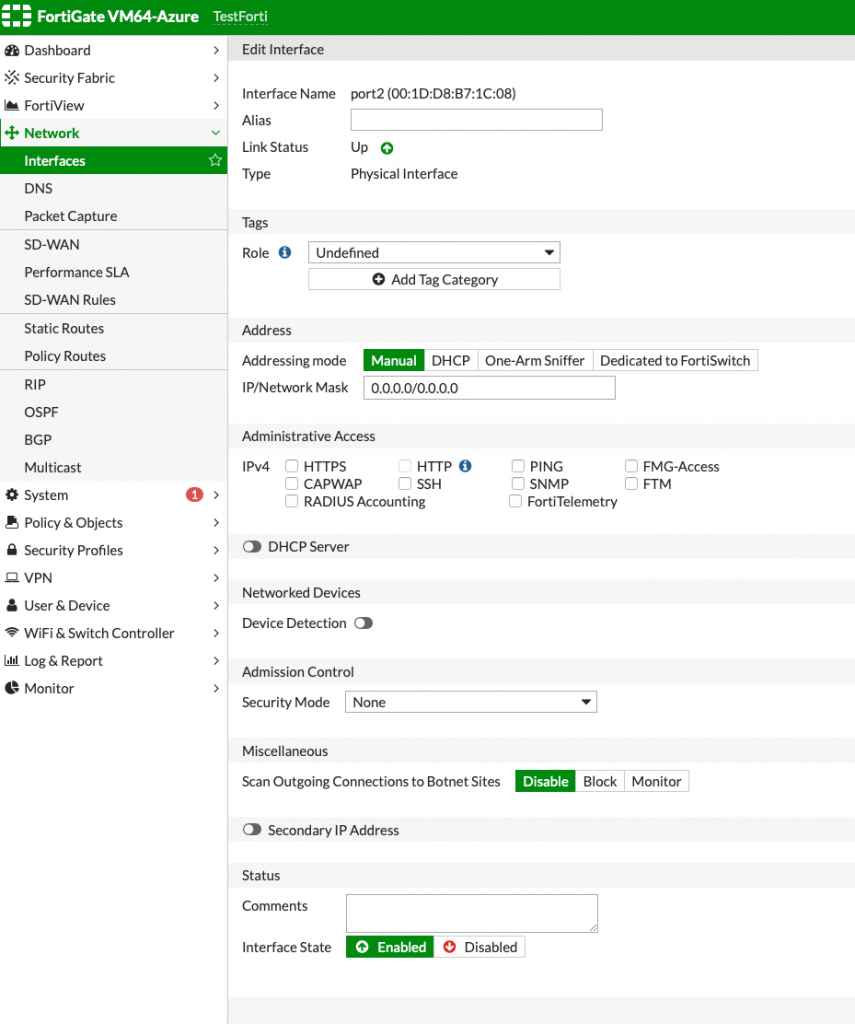
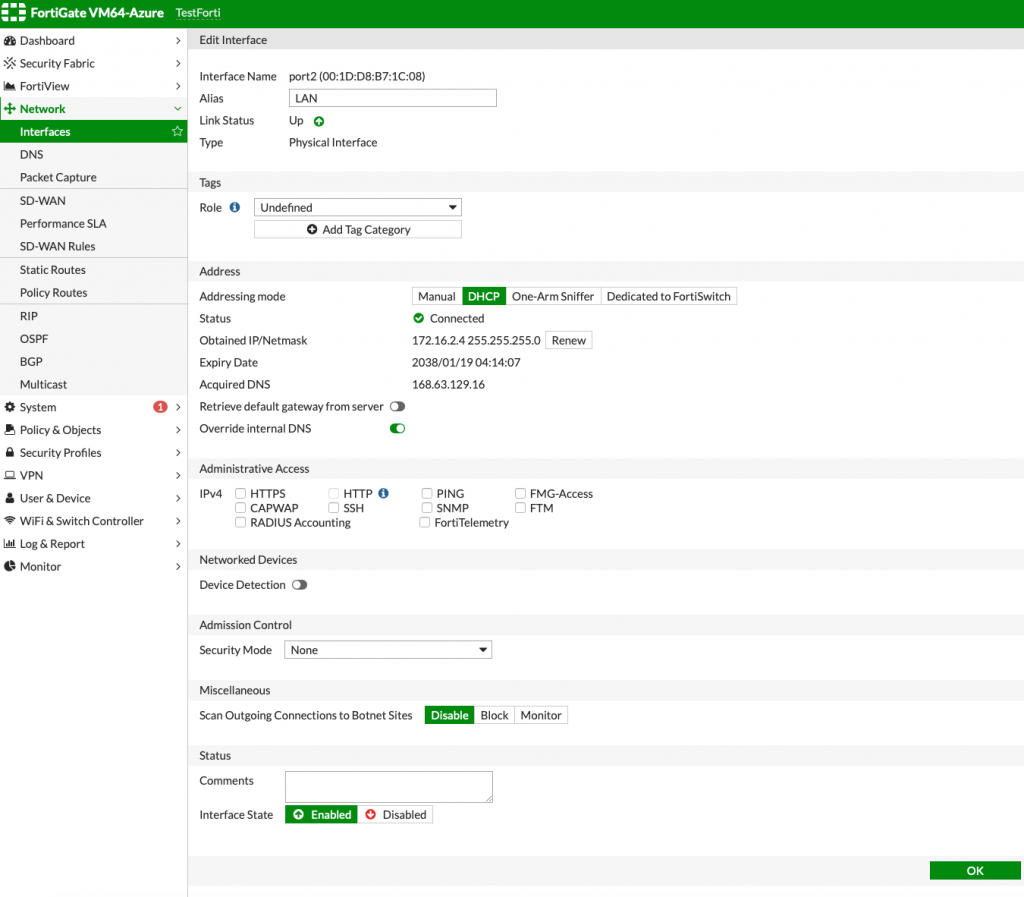
Double click on the port 2 and a new screen should appear, and this is how it looks like.
Addressing mode is on Manual, but it should be on DHCP.
I changed to DHCP, turned off option Retrieve default gateway from server and pressed ok. Then I again clicked on port 2, and opened once again the same interface screen.
Ok, this is fine now.
This is how my interfaces screen looks in the end. I also marked both ports so it is clear which one is internal (LAN), and which one is external (WAN).
We will now configure simple firewall rule.
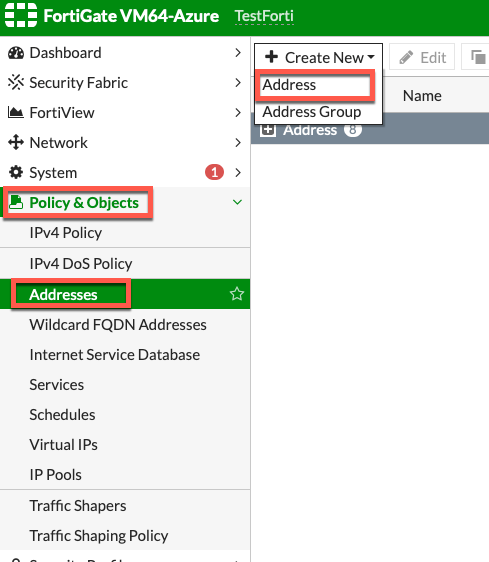
First step | Policy & Objects menu | Addresses | Create New | Address
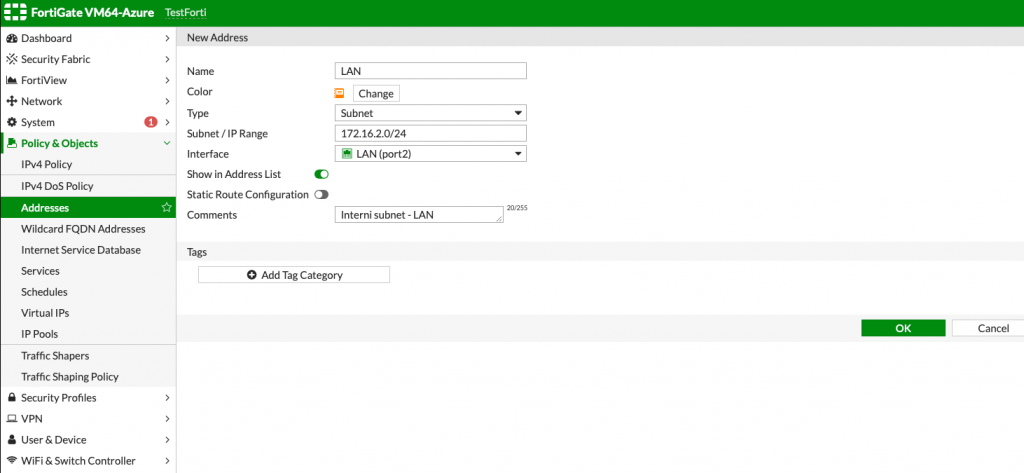
I will name it LAN, select type Subnet, subnet range would be in my case 172.16.2.0/24 and interface would be port 2 (LAN) | OK
Now, when we defined our LAN as an address, we can easily add it to various places and in rules on our Fortigate.
Next step would be to create simple IPv4 Policy (firewall rule). I will create rule that will allow HTTP and HTTPS (websites), DNS and PING from the internet to our local network.
Policy & Objects | IPv4 Policy | +Create New
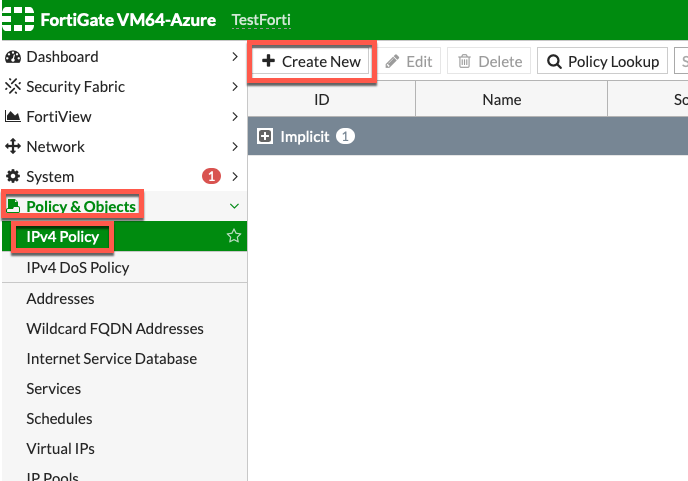
I will name my rule WWW (select the name you like and will recognize). Incoming interface will be port2 (LAN) and outgoing port1 (WAN). Source will be LAN (we defined it in addresses menu) and destination “all”, it will be allowed always and services I want let through are DNS, HTTP, HTTPS and PING. Action should be ACCEPT if you want to allow traffic. I also enabled NAT | OK
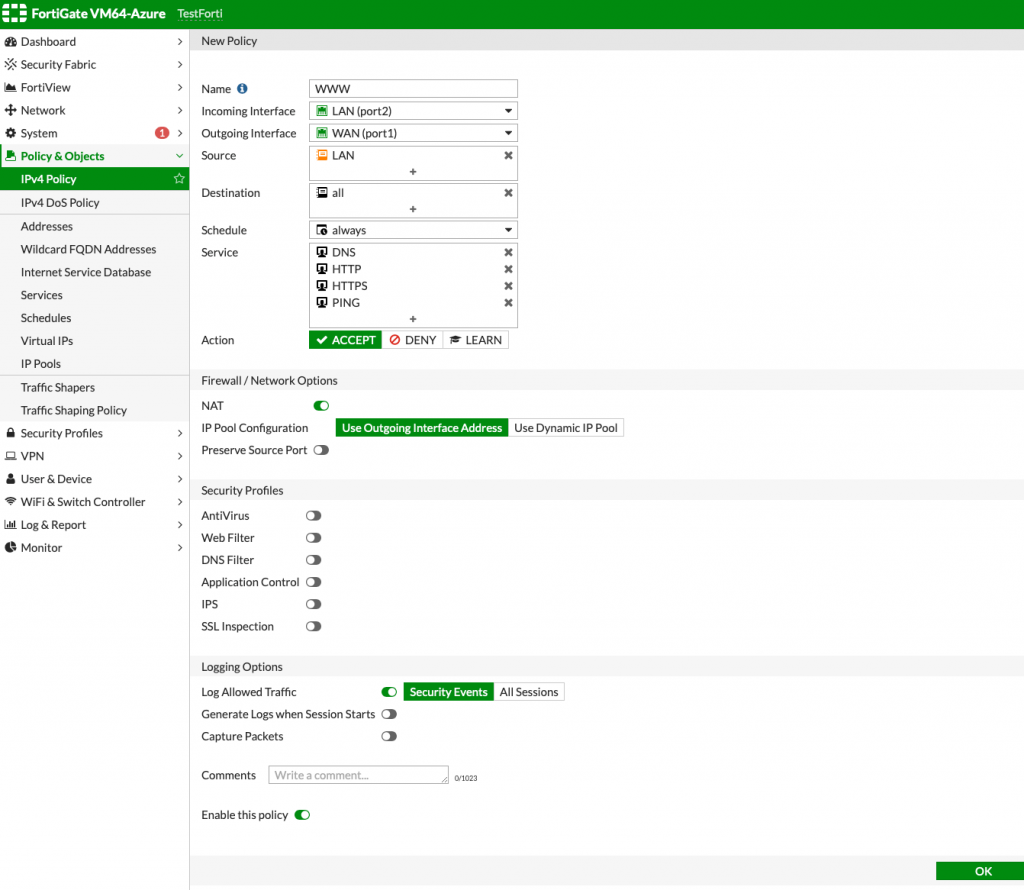
So, this is how now my IPv4 Policy looks like
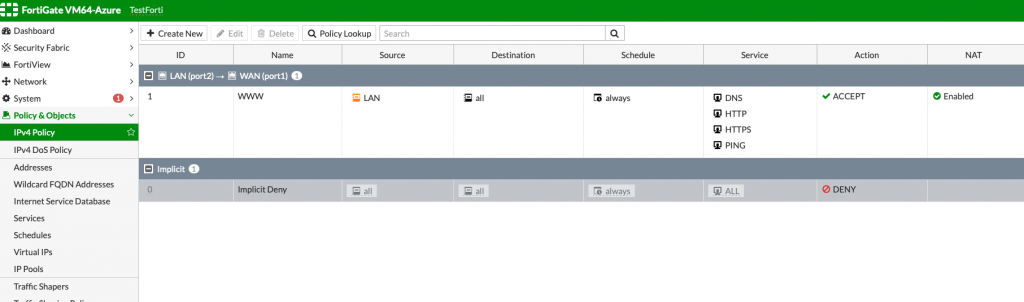
Now I should have internet access? Well, not yet : )
Back to Network menu | Static Routes | + Create New
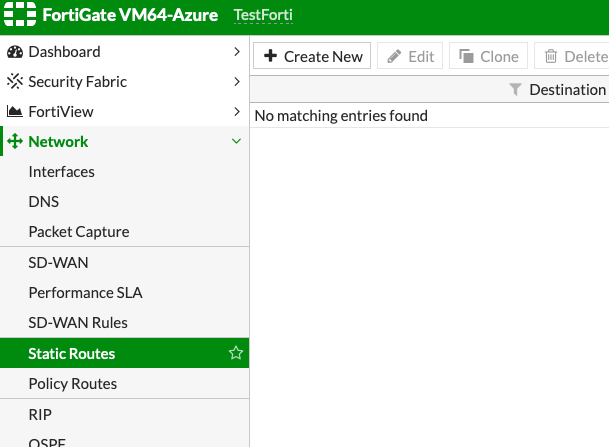
Ok, this part can be a little confusing since there is lot going on between Azure and Fortigate. LAN interface on Fortigate is (in my case) on port2 and it has IP address 172.16.2.4.
My Windows Server 2016 has gateway address 172.16.2.1. Both Fortigate and WS2016 WM can reach gateway 172.16.2.1
At the same time, WAN interface (Outside network) is on port1 on Fortigate and has IP address 172.16.0.4. Next hop for Fortigate 172.16.0.4 is gateway on address 172.16.0.1
There is also DNS server Azure Stack assigns to VMs and one of the addresses is 168.63.129.16.
This can all be a bit confusing, I didn’t manage to find good quality info on complete network topology on Azure Stack, so if any of you has detailed info or can point me in a right direction, please contact me. All I found out about Azure Stack networking is through my testing and exploration so far.
Ok, back on topic.
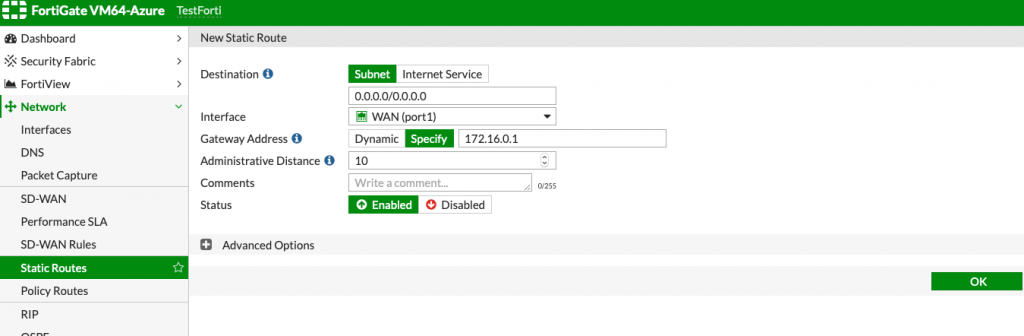
We need two static routes. First one will be
0.0.0.0/0 through gateway 172.16.0.1 (on port 1)
And second one will be
168.63.129.16/32 through gateway 172.16.2.1 (on port 2)
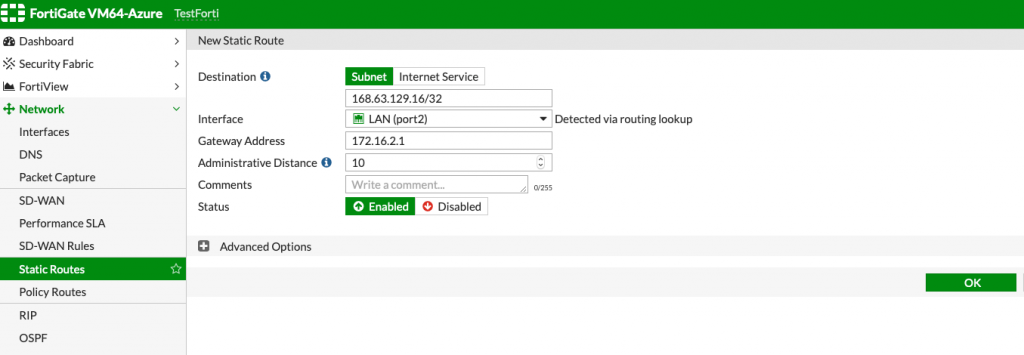
Here is how static routes look in my lab

Can my VM now have internet? Still no.
My VM should now have outside connectivity, but it still has not.
My whole setup from Azure Stack to Fortigate and VM is pretty much by the book with no custom changes.
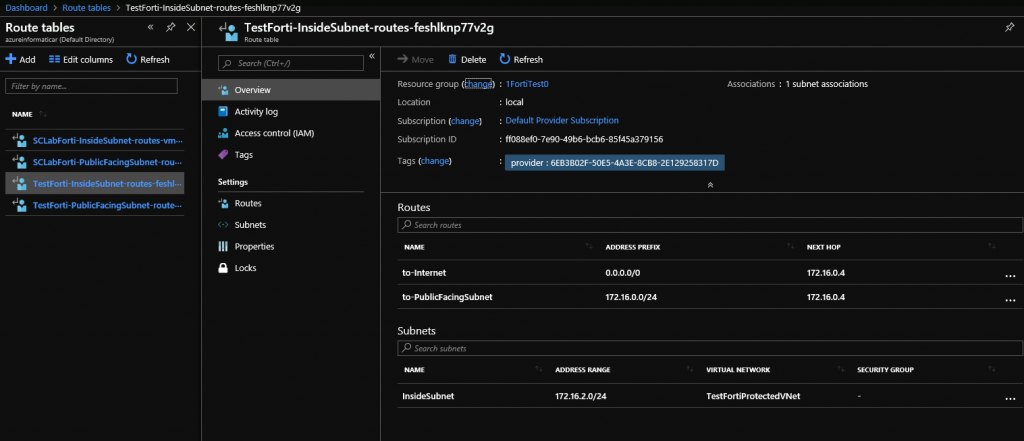
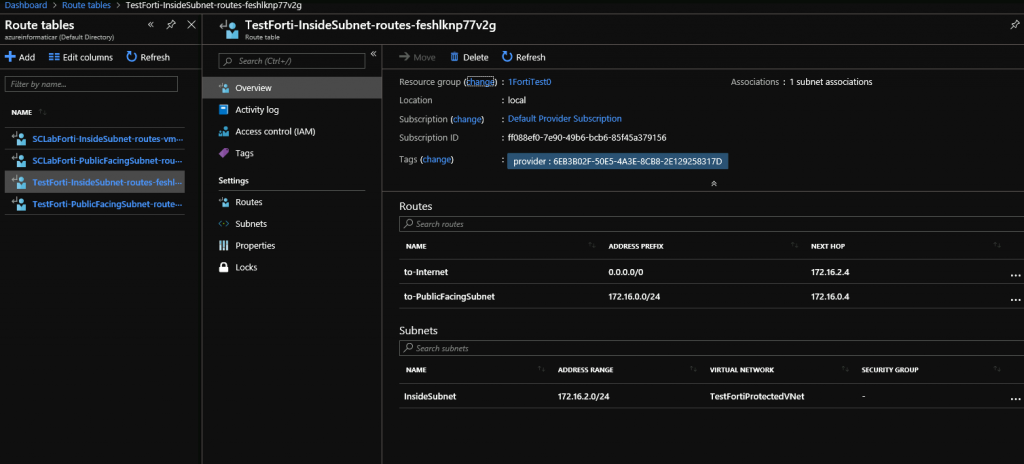
There is also one more thing that Fortigate sets while installing – Routes on Azure Stack.
And here is how my routing tables look like
Inside subnet (LAN)
Public facing subnet (WAN)

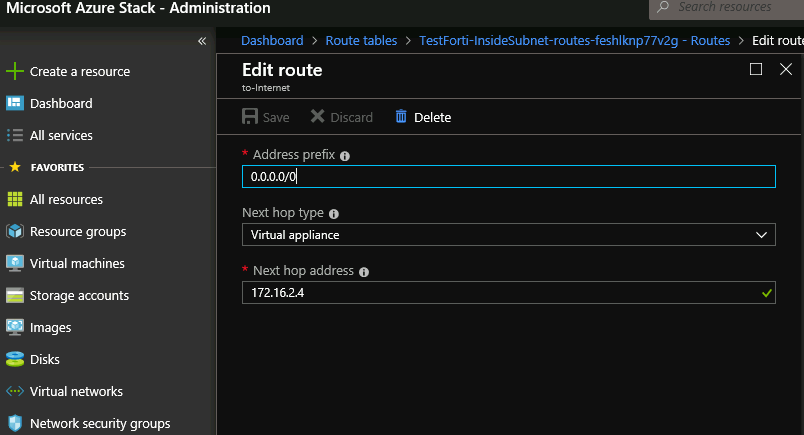
Ok, now, on the inside subnet go to Routes, select “to Internet” and change Next hop address from 172.16.0.4 to 172.16.2.4 as pictured below. Click on Save
Your internal routes should now look like this
And at the same time at my VM – ping finally went through and my VM can reach internet.
That is it, this scenario works for me and it allowed my VMs to reach internet finally.
You may be lucky so that everything works out of the box for you after Fortigate installation, maybe my tutorial can help, and perhaps you will need to adjust a bit more for your lab. But in the end, you ask, yeah – but what now? You cheated in this lab and accessed your VM through Azure Stack host and local Hyper-V, that is not the point of Azure Stack. I need remote access to my Azure Stack lab from my LAN – how do I configure Fortigate to access my VM through RDP (or SSH)? – well, it can be easily done – https://www.informaticar.net/how-to-access-vms-behind-fortigate-in-azure-stack/