This quick tutorial will show you how to install WordPress on CentOS 8 / RHEL 8. We will be installing all prerequisites (LAMP stack) + WordPress.
First, we will update our CentOS installation, so we have everything up to date. Run all the commands with root priviledges.
su
yum update
Next step would be installation of prerequisites (mysql, webserver, php…)
dnf install php-mysqlnd php-fpm mysql-server httpd tar curl php-json
Now, we will let HTTP and HTTPS ports through our firewall (on permanent, zone, and add values there are two minuses before them)
firewall-cmd --permanent --zone=public --add-service=http
firewall-cmd --permanent --zone=public --add-service=https
firewall-cmd --reload

With next commands we will first start Apache webserver and MySQL
systemctl start mysqld
systemctl start httpd
After start commands we will now enable Apache and MySQL to start after reboot
systemctl enable mysqld
systemctl enable httpd
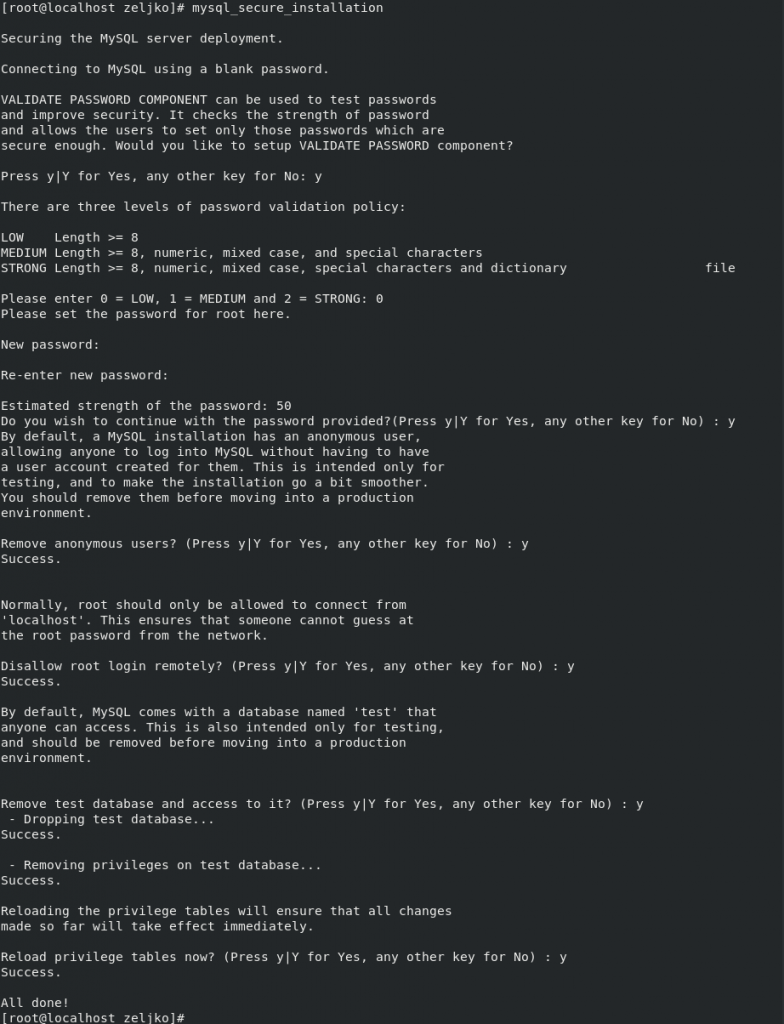
We will also go quickly through securing our MySQL installation
mysql_secure_installation!!Disregard my LOW password strength, you should always use strong passwords in production environment.
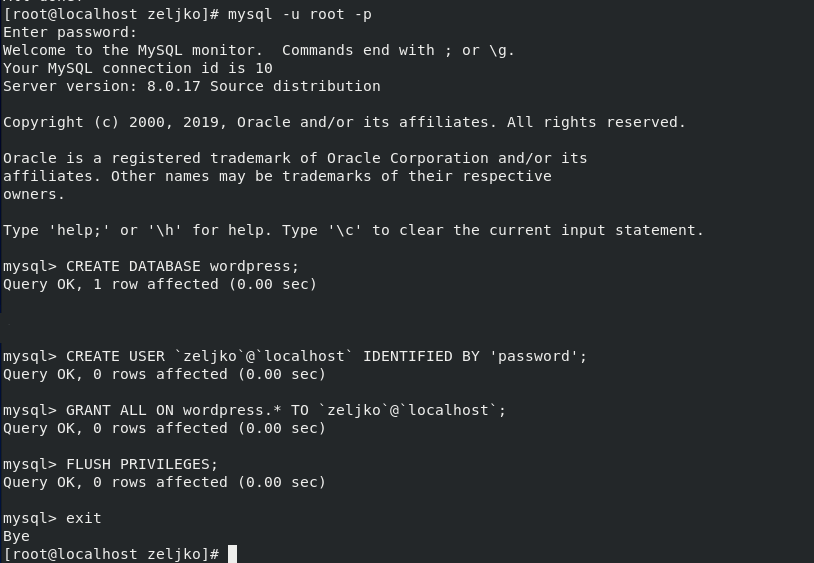
Next step will be creation of wordpress database in MySQL and user that will have all the privileges to the DB.
In my case DB name is “wordpress” and user will be “zeljko” – change both to what fits you.
mysql -u root -p
mysql> CREATE DATABASE wordpress;
mysql> CREATE USER `admin`@`localhost` IDENTIFIED BY 'pass';
mysql> GRANT ALL ON wordpress.* TO `admin`@`localhost`;
mysql> FLUSH PRIVILEGES;
mysql> exit
We are done with installing and configuring prerequisites, now we will download and extract WordPress
curl https://wordpress.org/latest.tar.gz --output wordpress.tar.gz
tar xf wordpress.tar.gz
Next step would be to copy wordpress to /var/www/html directory
cp -r wordpress /var/www/html
Last step before installation will be to change permissions and change SELinux security context:
setsebool is extremely important – your WordPress install won’t be able to connect to internet and check for updates if you don’t execute this.
chown -R apache:apache /var/www/html/wordpress
chcon -t httpd_sys_rw_content_t /var/www/html/wordpress -R
sudo setsebool -P httpd_can_network_connect true
Now into browser enter http://localhost/wordpress if you are starting install on local machine on which WordPress is installed or IP address if you are accessing it somewhere from LAN.
My install is on
http://10.20.10.6/wordpress
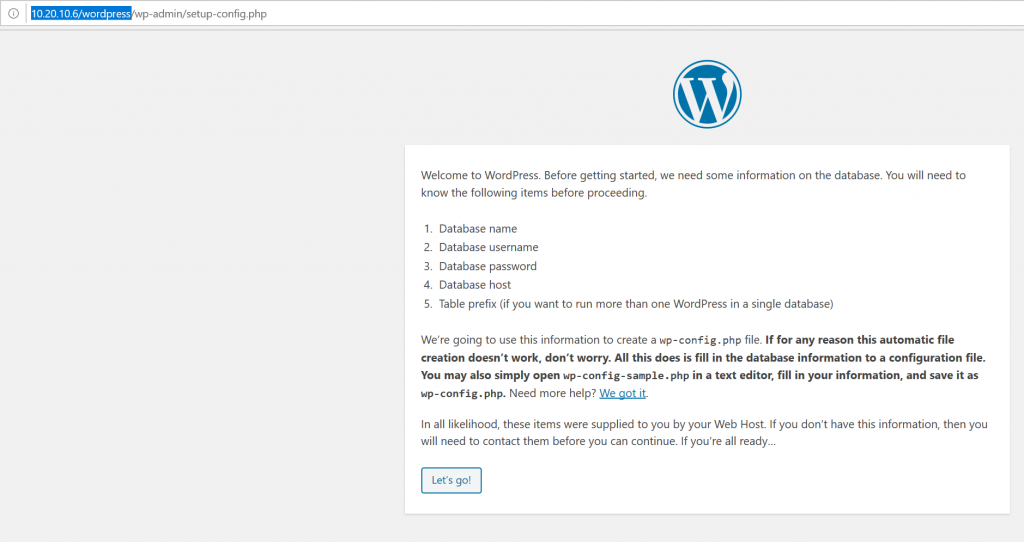
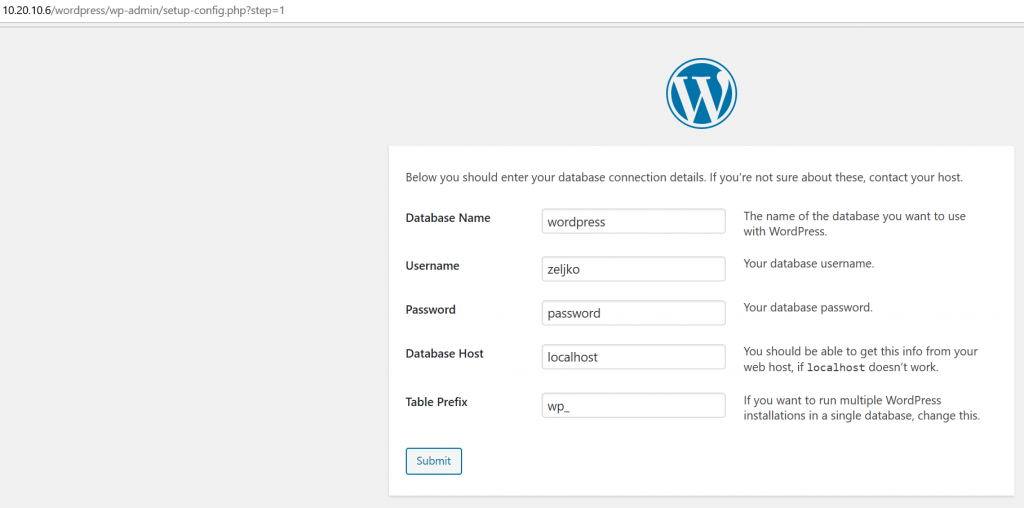
After you click on Let’s go, you will be greeted with next screen on which you have to enter data we set earlier – wordpress DB name, DB user, DB password
Database Host and Table Prefix can stay with default settings.
Submit
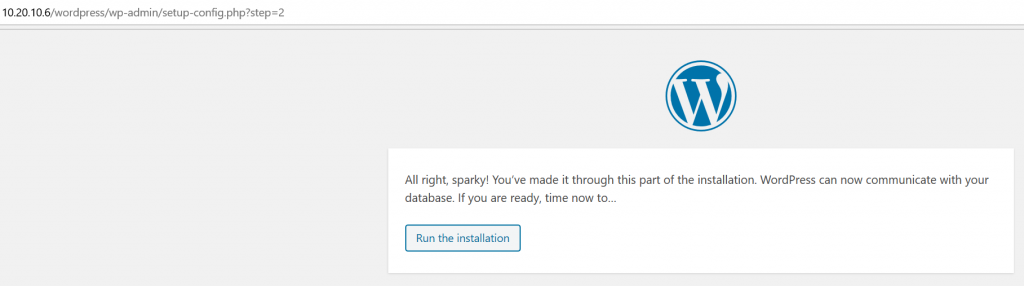
If you done everything ok, you’ll be greeted with next screen.
Click on Run the installation
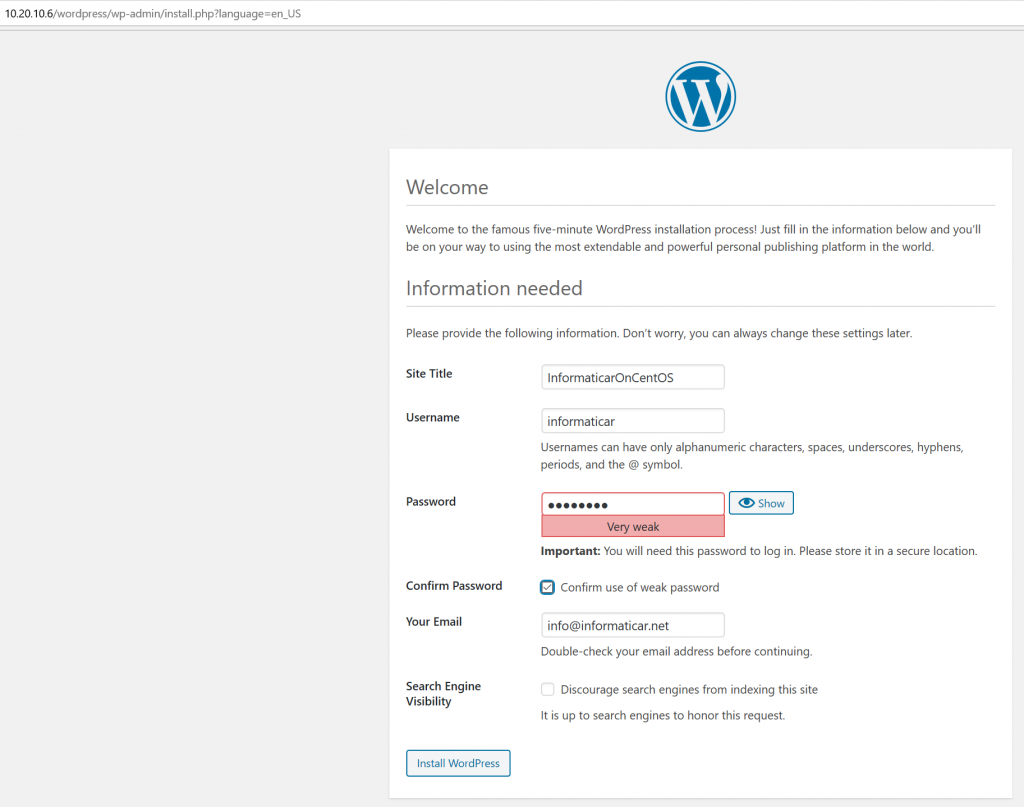
Enter Name for your website, username and password for your WordPress administrator, email on which you can be notified and click on Install WordPress
!! Again, very important, use strong passwords. I’m using weak passwords only in my LABs, so I don’t waste time on entering them, in production, only use 12+ signs complex passwords.
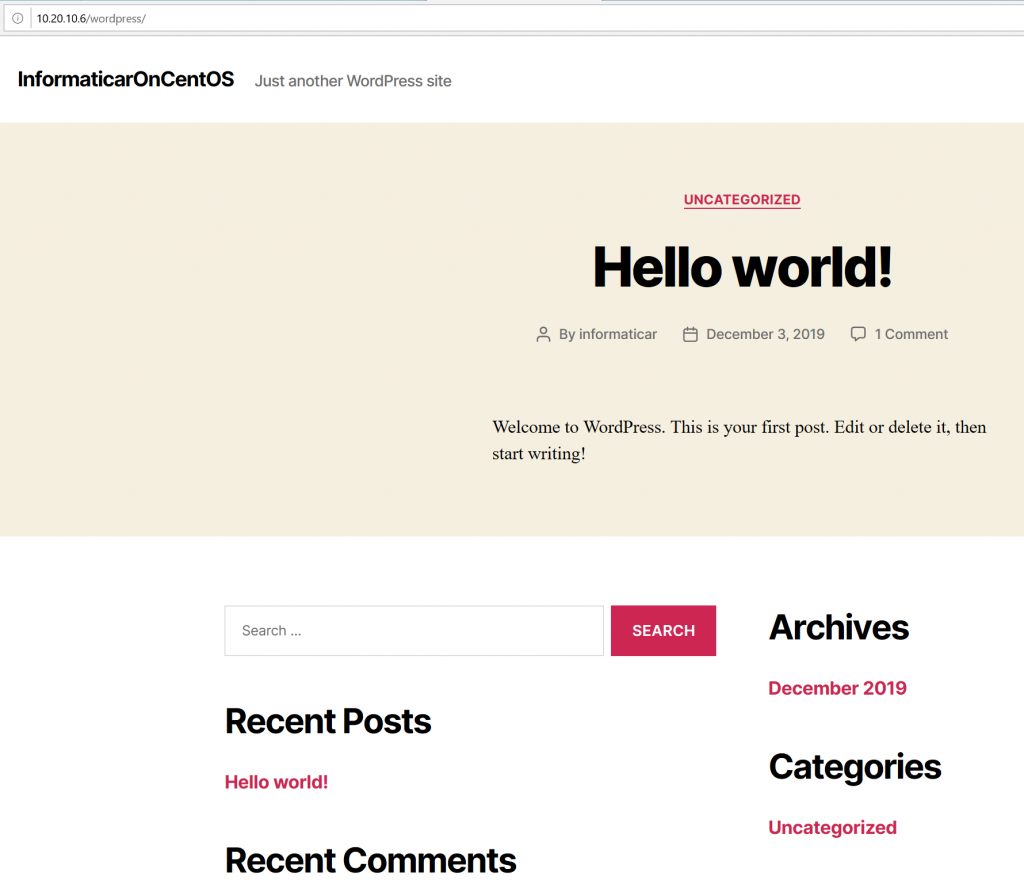
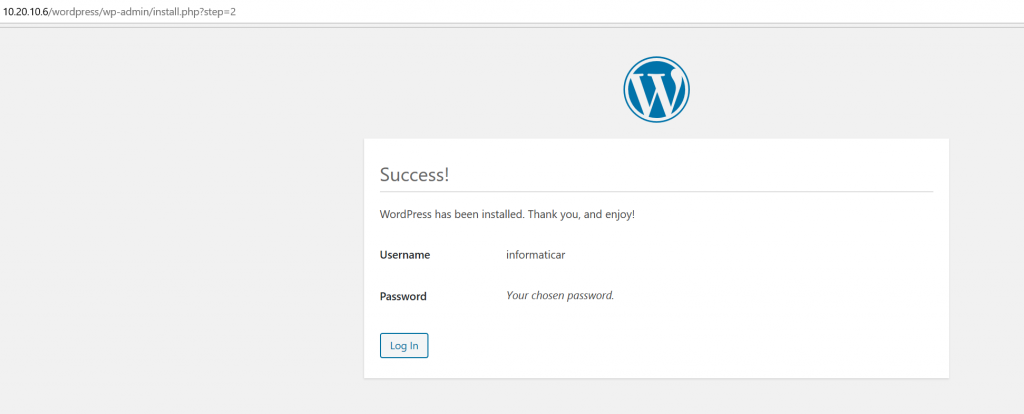
WordPress is installed, success!
Now on http://10.20.10.6/wordpress we can see our wordpress page