Although cloud services are widespread today, file share is something every environment still needs. In this article I will cover creating highly available file share (DFS)
Before we begin
I already covered DFS in single server scenario, in my Server Basics series, you can find article here
More or less every company needs some kind of network file share. In time, that part of network will get to be more important. To have highly available and redundant file server is a must, in every serious environment.
It will also make your life easier, since you will publish your network file shares via Namespaces under one name and one IP address. So, if one of the servers fails behind that namespace, your users will still be able to access file share.
I will not be covering every detail of other processes (like cluster feature install for example) besides details of DFS cluster creation. I will point you to other articles on my blog which cover some things you may be missing.
There are also some important things to consider before you deploy DFS – go to the bottom of the article to check that out.
Prerequisites
Domain
All of this is done in domain – i have setup domain named informatiker.local
Environment has two domain controllers named DC1 and DC2.
I created one group named IT, which we will assign to the shared folders for access.
ISCSI Target server
For this scenario we will also need disk that is network attached – ISCSI will be perfect. You can bring up ISCSI target on Windows Server – I already wrote about that here
It doesn’t make sense to make file server redundant while leaving ISCSI Target server as a single point of failure.
On my blog I also written – “Create ISCSI Target cluster on Windows Server 2019”
Beneath that ISCSI Target cluster is Storage Spaces Direct cluster. You can check out on my blog article named “Create two node Storage Spaces Direct (S2D) inside VMs. On top of that you can build ISCSI Target cluster.
My environment has two VMs in ISCSI Target cluster named Storage1 and Storage2. Both machines are part of the domain.
I created
I created one shared disk which is 10GB in size and I will attach that drive to DFS1 and DFS2 machine. This drive will serve as Namespace cluster disk which has to be shared between cluster nodes.
File Share servers (DFS)
Ok, main part of this article are two VMs that will hold file shares (DFS)
I named these two machines DFS1 and DFS2. Both machines are part of the domain.
Networking
Both machines have two NICS
DFS1 – 10.0.0.66 , heartbeat 191.168.0.66
DFS2 – 10.0.0.67, heartbeat 192.168.0.67
“Heartbeat” network will serve only for cluster purposes, and besides IP address and subnet mask, no other details are entered.
Besides that, make sure you uncheck “Register this connection’s addresses in DNS” and “Disable NetBIOS over TCP/IP” in properties on Heartbeat network adapter (only on NIC that will serve as Heartbeat network). Check out my article “Create Failover Cluster in Windows Server 2019” if you need more details on that.
We will need two additional names and IPs which we will use during cluster .
First name and IP are for DFS cluster
DFSCluster – 10.0.0.68
And IP and name for our fileshare namespace
Fileserver – 10.0.0.69
ISCSI
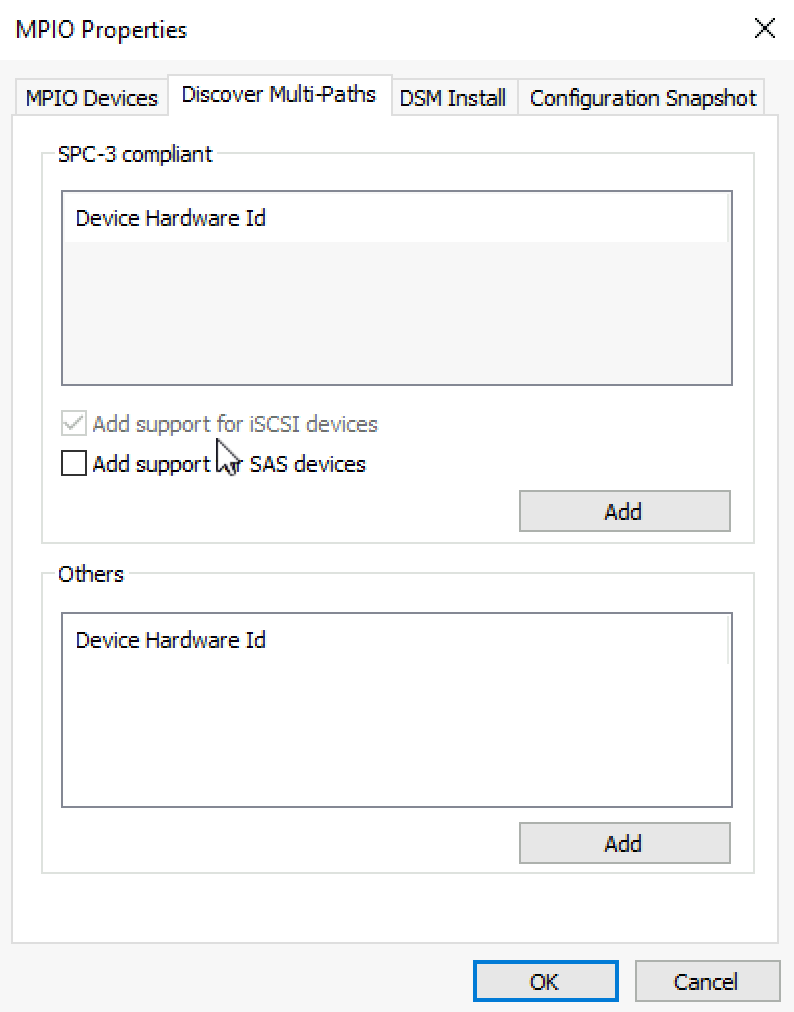
On both DFS1 and DFS2 machines enable ISCSI initiator and install MPIO
Add support for ISCSI devices on MPIO
Connect ISCSI Target you created earlier to both DFS1 nd DFS2 ISCSI Initiators. Make sure you enable multi-path!!! Do this on both nodes.
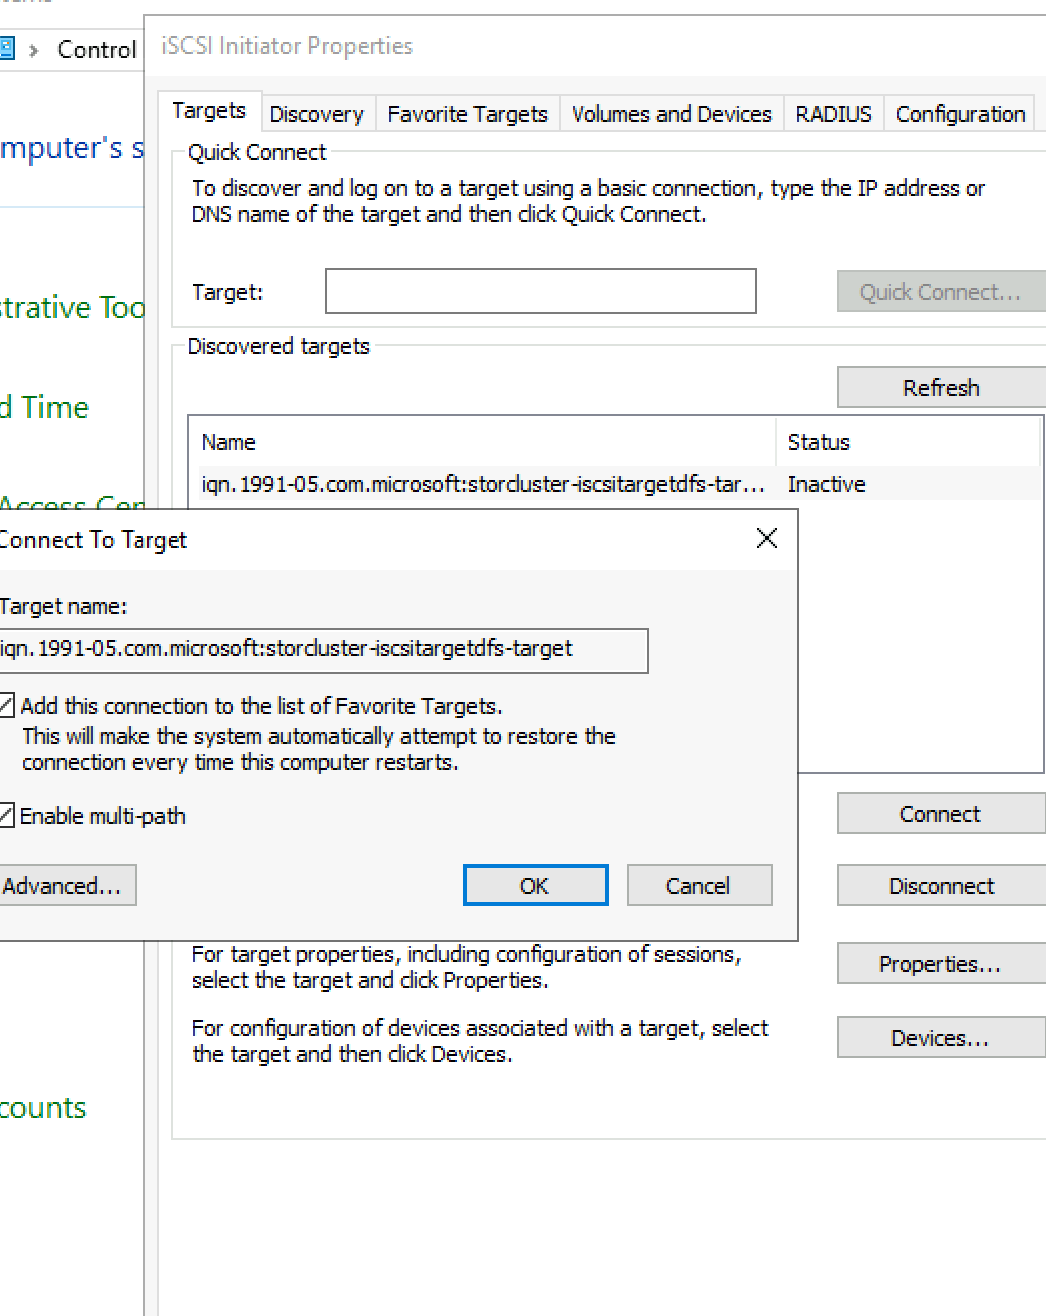
After I was connected to the ISCSI drive I immediately formatted it and gave it name. It is currently attached to DFS2 machine. So, this is done on only one node.
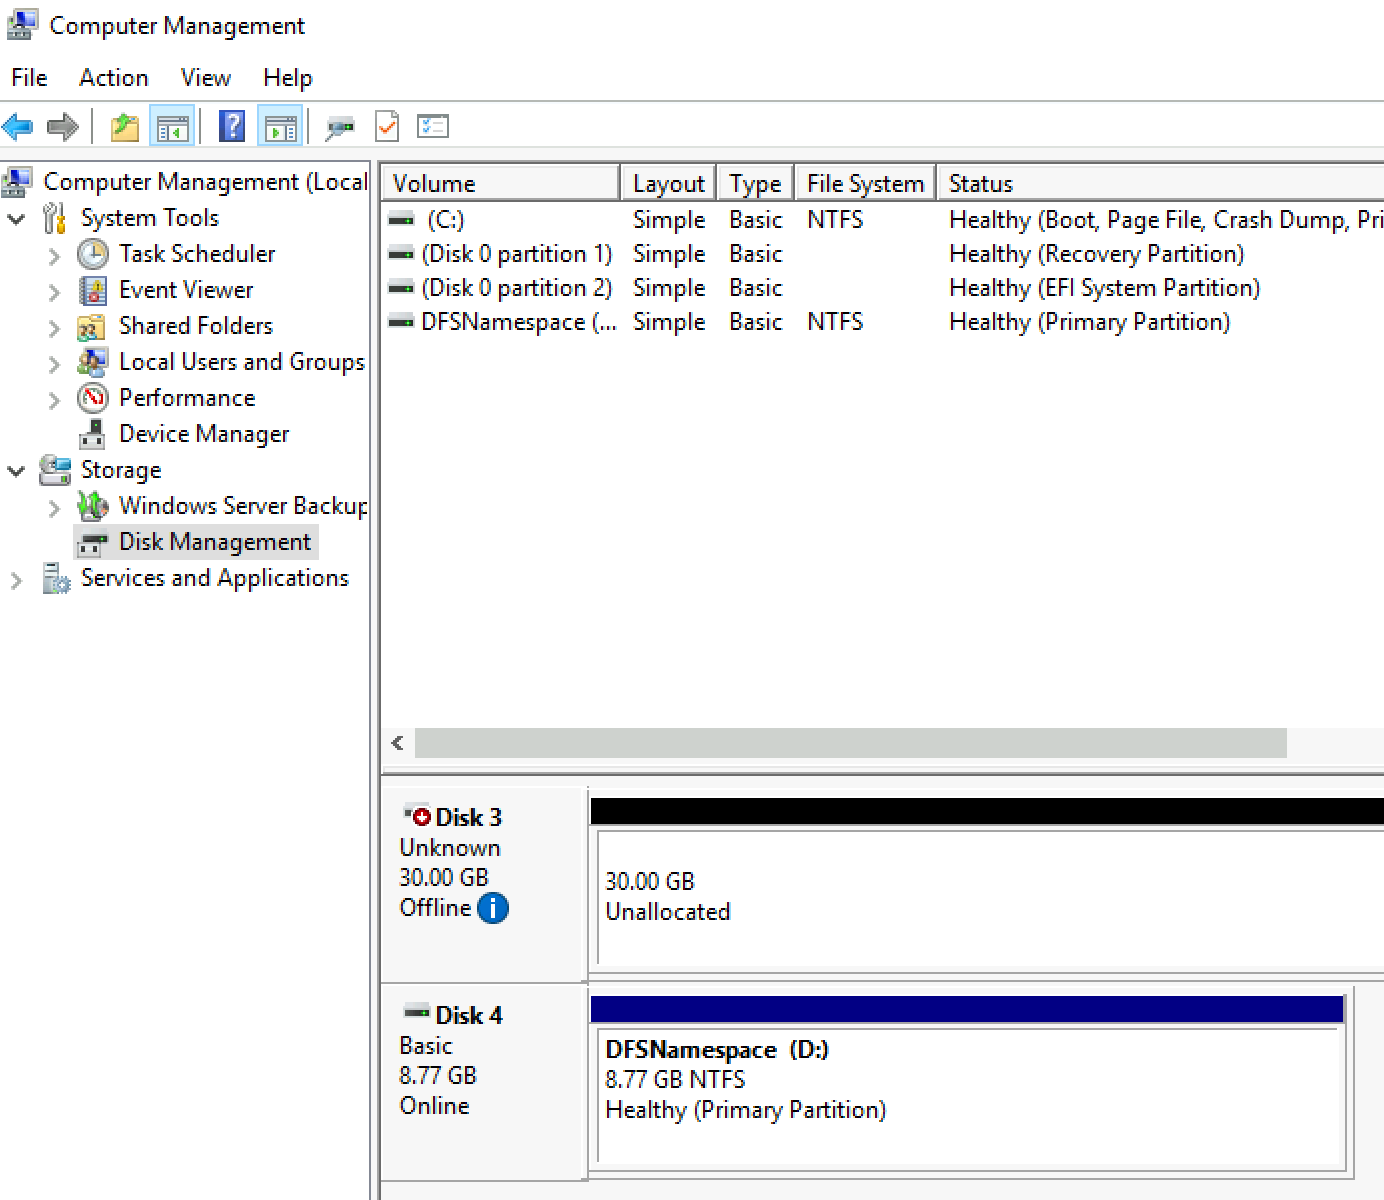
Disks
I will also add local drives to both DFS1 and DFS2 machines. I will add one disk with drive letter E and both disks are 30GB in size. It is important that drives on both nodes (DFS1 and DFS2) are in same size.
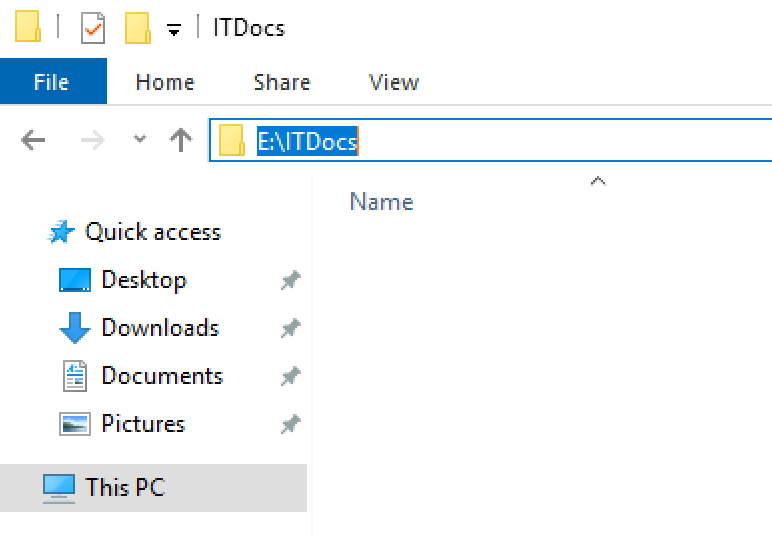
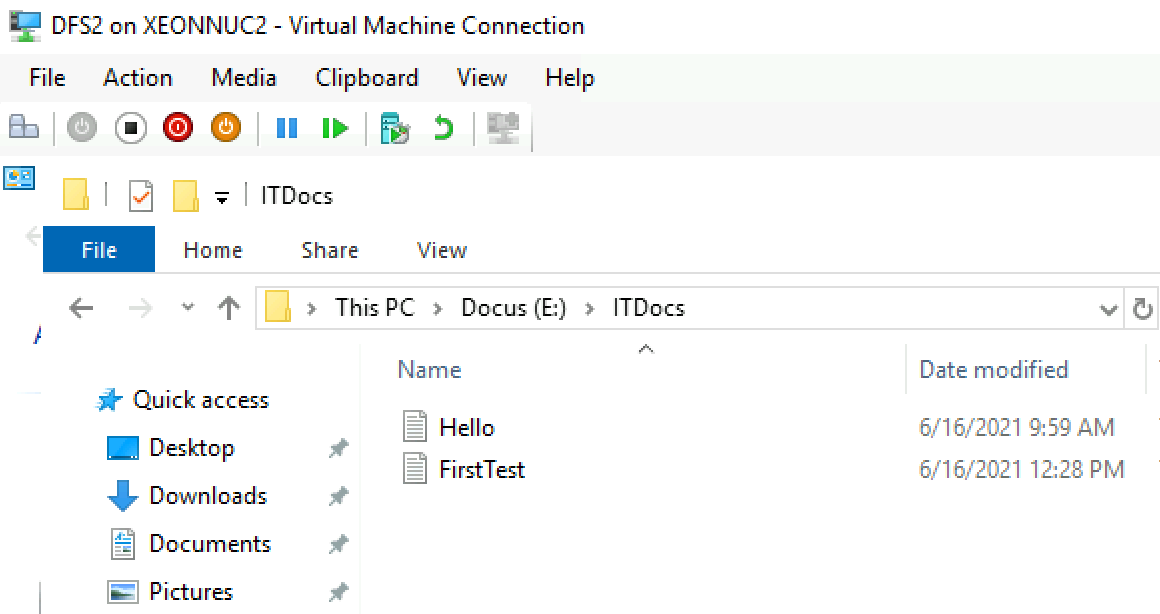
I also created folder named ITDocs in root of the E drive – E:\ITDocs on bot nodes.
Folder and disk mapping has to be exact on both nodes.
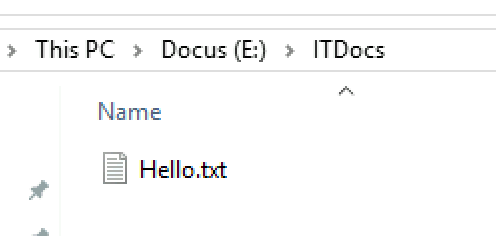
Additionally, ONLY on DFS1 node, inside ITDocs folder I created one file named Hello.txt.
That way we will see if that file replicates to DFS2 after we are done with DFS cluster.
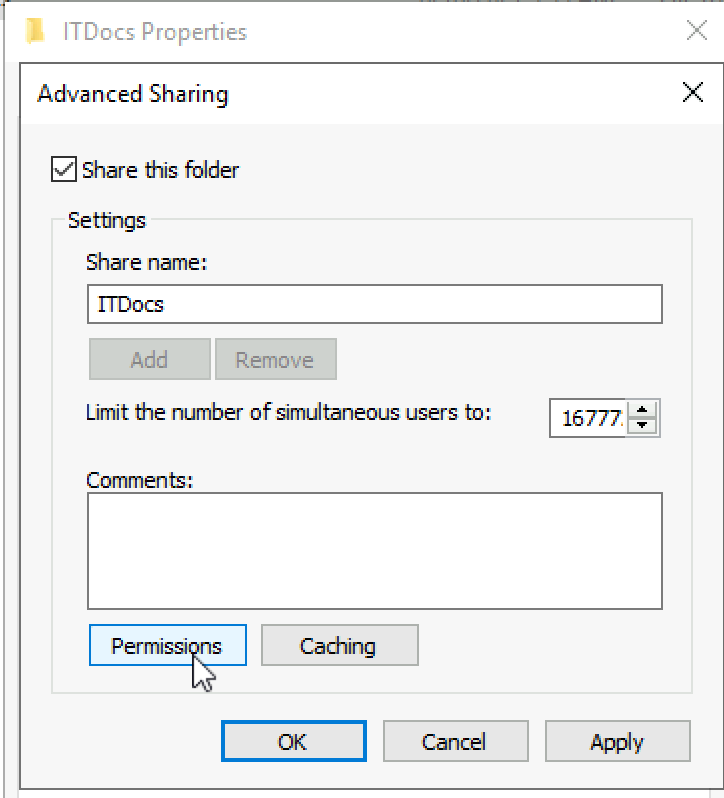
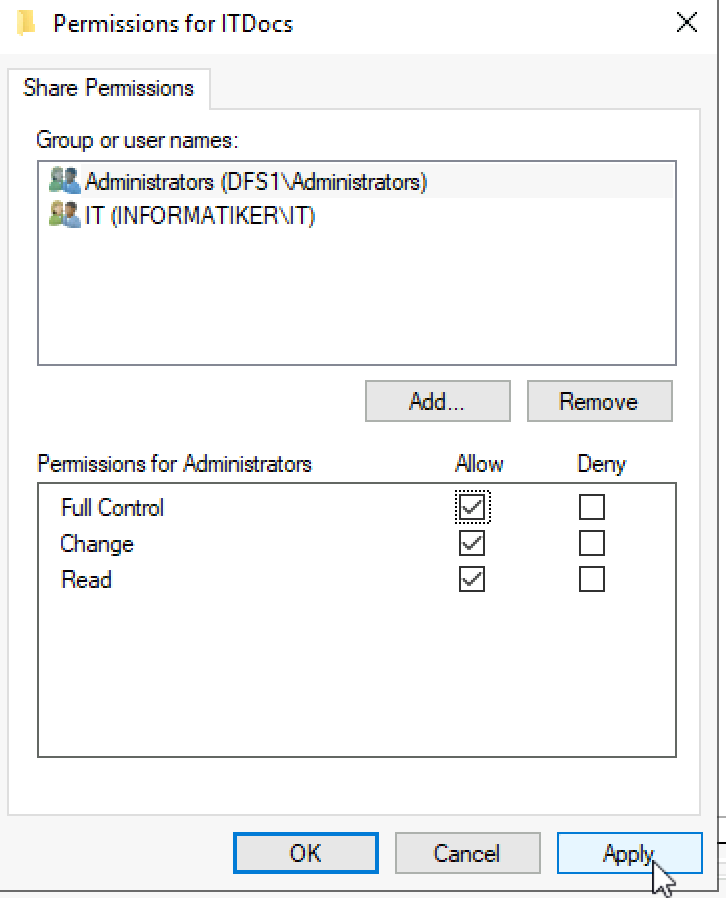
I will also make ITDocs folder on both DFS1 and DFS2 Shared.
!!!Only for a test drive, you can select Everyone – DO NOT LEAVE THIS IN PRODUCTION, MAP YOUR SHARES to GROUPS OR USERS FROM AD. You can use Everyone only in this test scenario just to see if everything works.
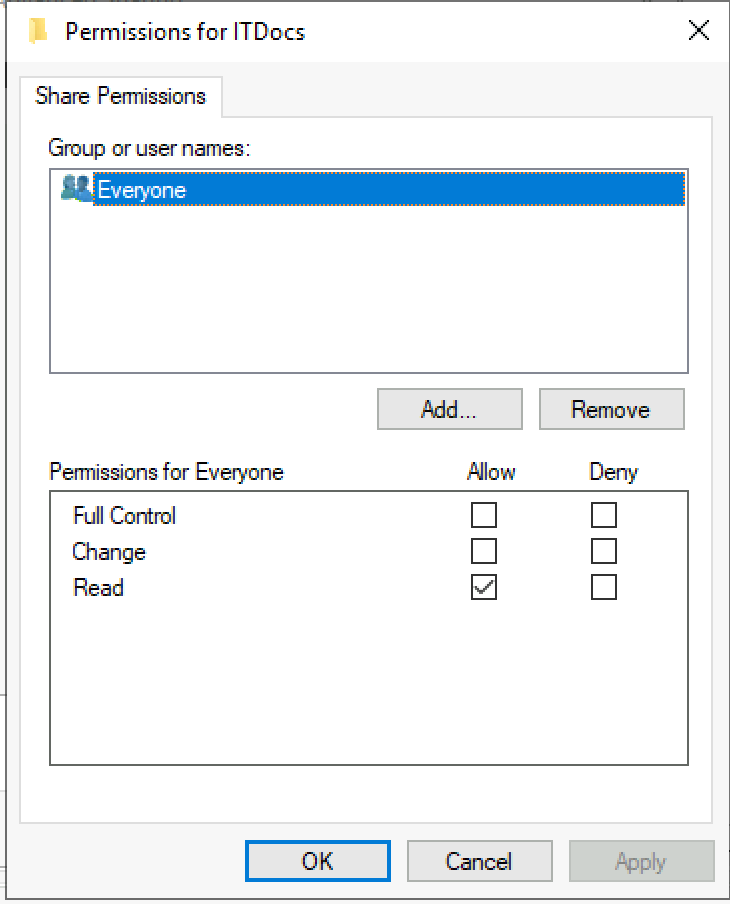
I will give permissions to the share as follows – to Administrators group from local computer (DFS1 and DFS2) and IT group which I created and which will have rights to this folder.
You can manage permissions better when you get more comfortable with DFS – only thing to remember now is to add local administrators group to file share, of DFS Namespaces will not be able to see the share. This can be resolved by modifying permissions on DFS Namespace and fine tuning them to your needs, but for a start this will do.
Roles and Features
On both DFS1 and DFS2 we need to install Failover Clustering feature and DFS Namespaces and DFS Repication Roles.
First I will be installing Failover Clustering feature on both servers.
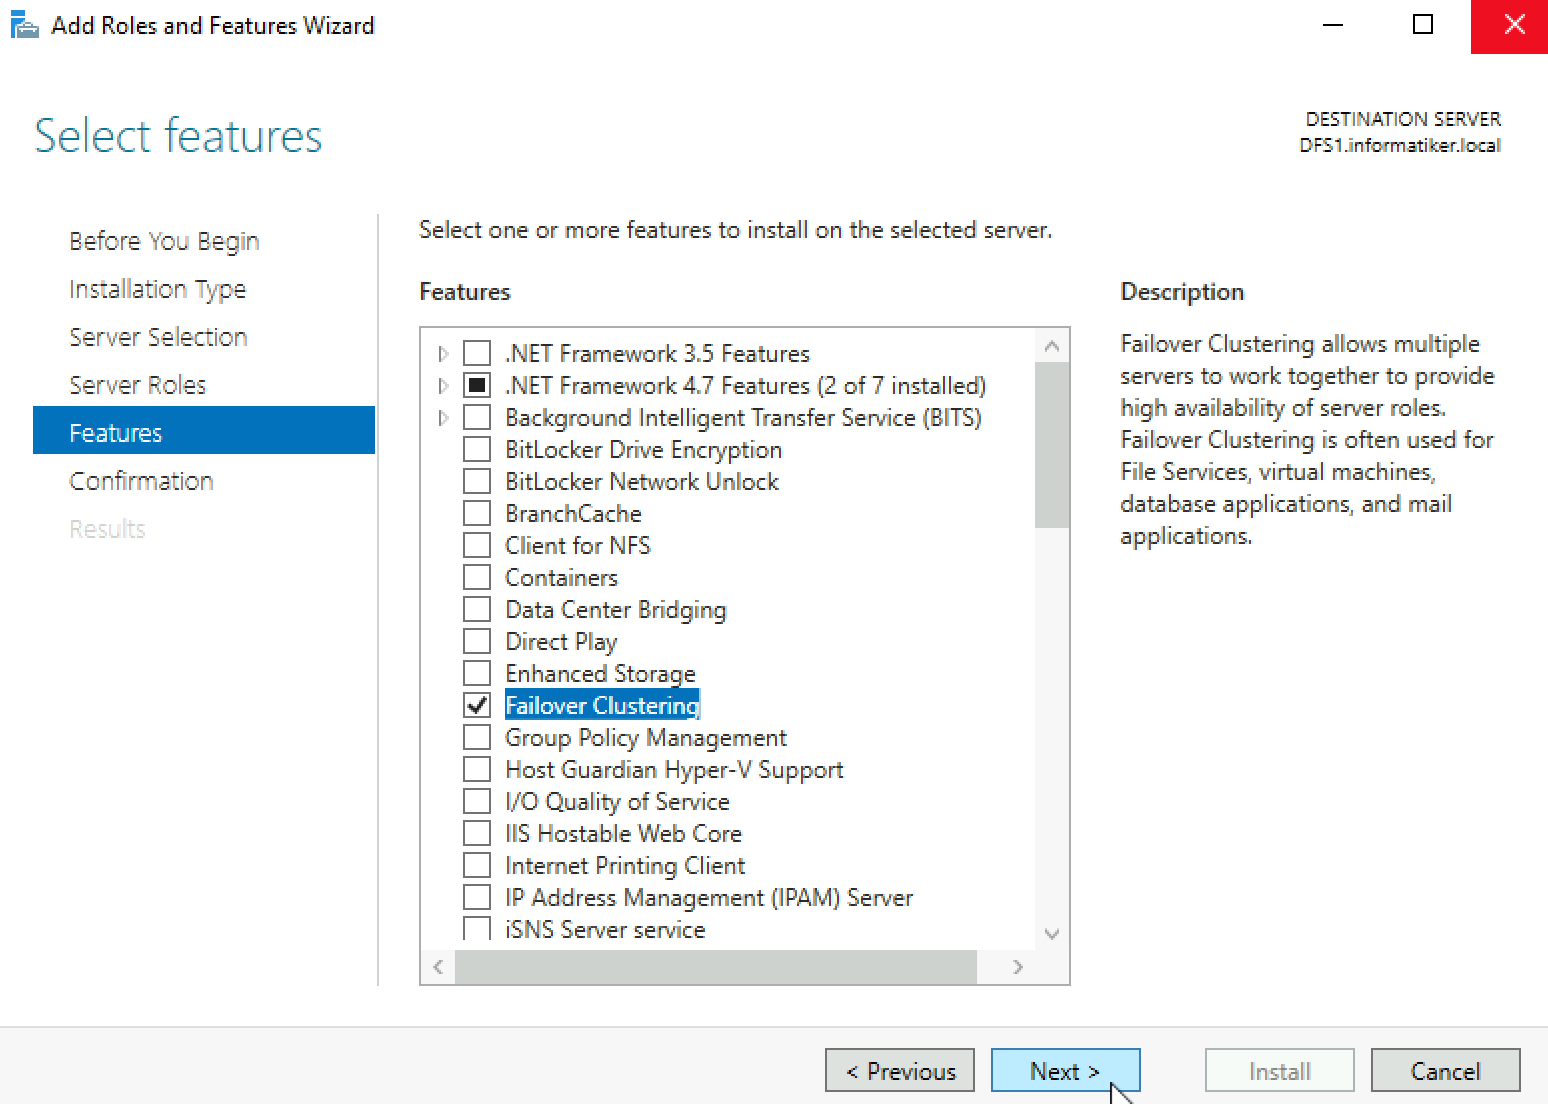
Reboot after Failover Clustering Feature install.
After that I will be installing DFS Namespaces and DFS Repication Roles on both servers.
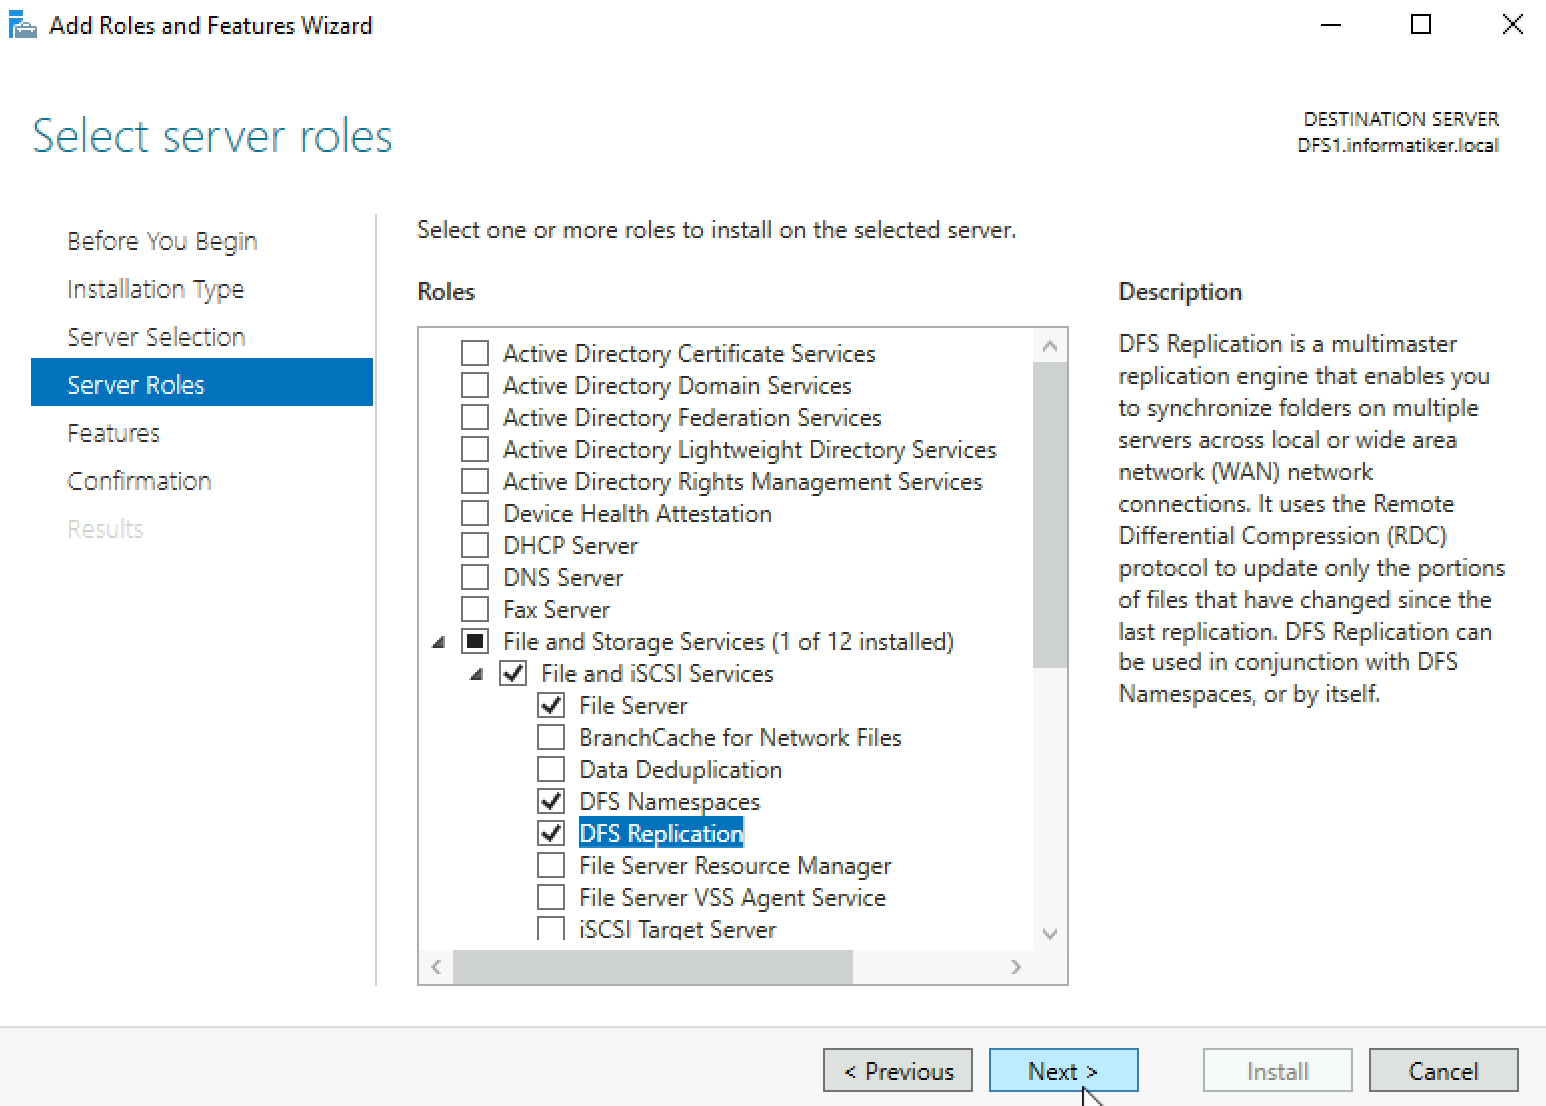
I also rebooted after installing these roles.
Ok, now we have all the prerequisites met for these machines. Let’s get to work.
Creating DFS Cluster
First step will be creating cluster between DFS1 and DFS2 machines. As I already mentioned, I will not be going step by step through this process, if you are not familiar with the procedure follow my article named – “Create Failover Cluster in Windows Server 2019”
I will highlight only some details here.
I will start process from Failover Cluster Manager on DFS1
I will first Validate Configuration. It is ok to have a few warnings.
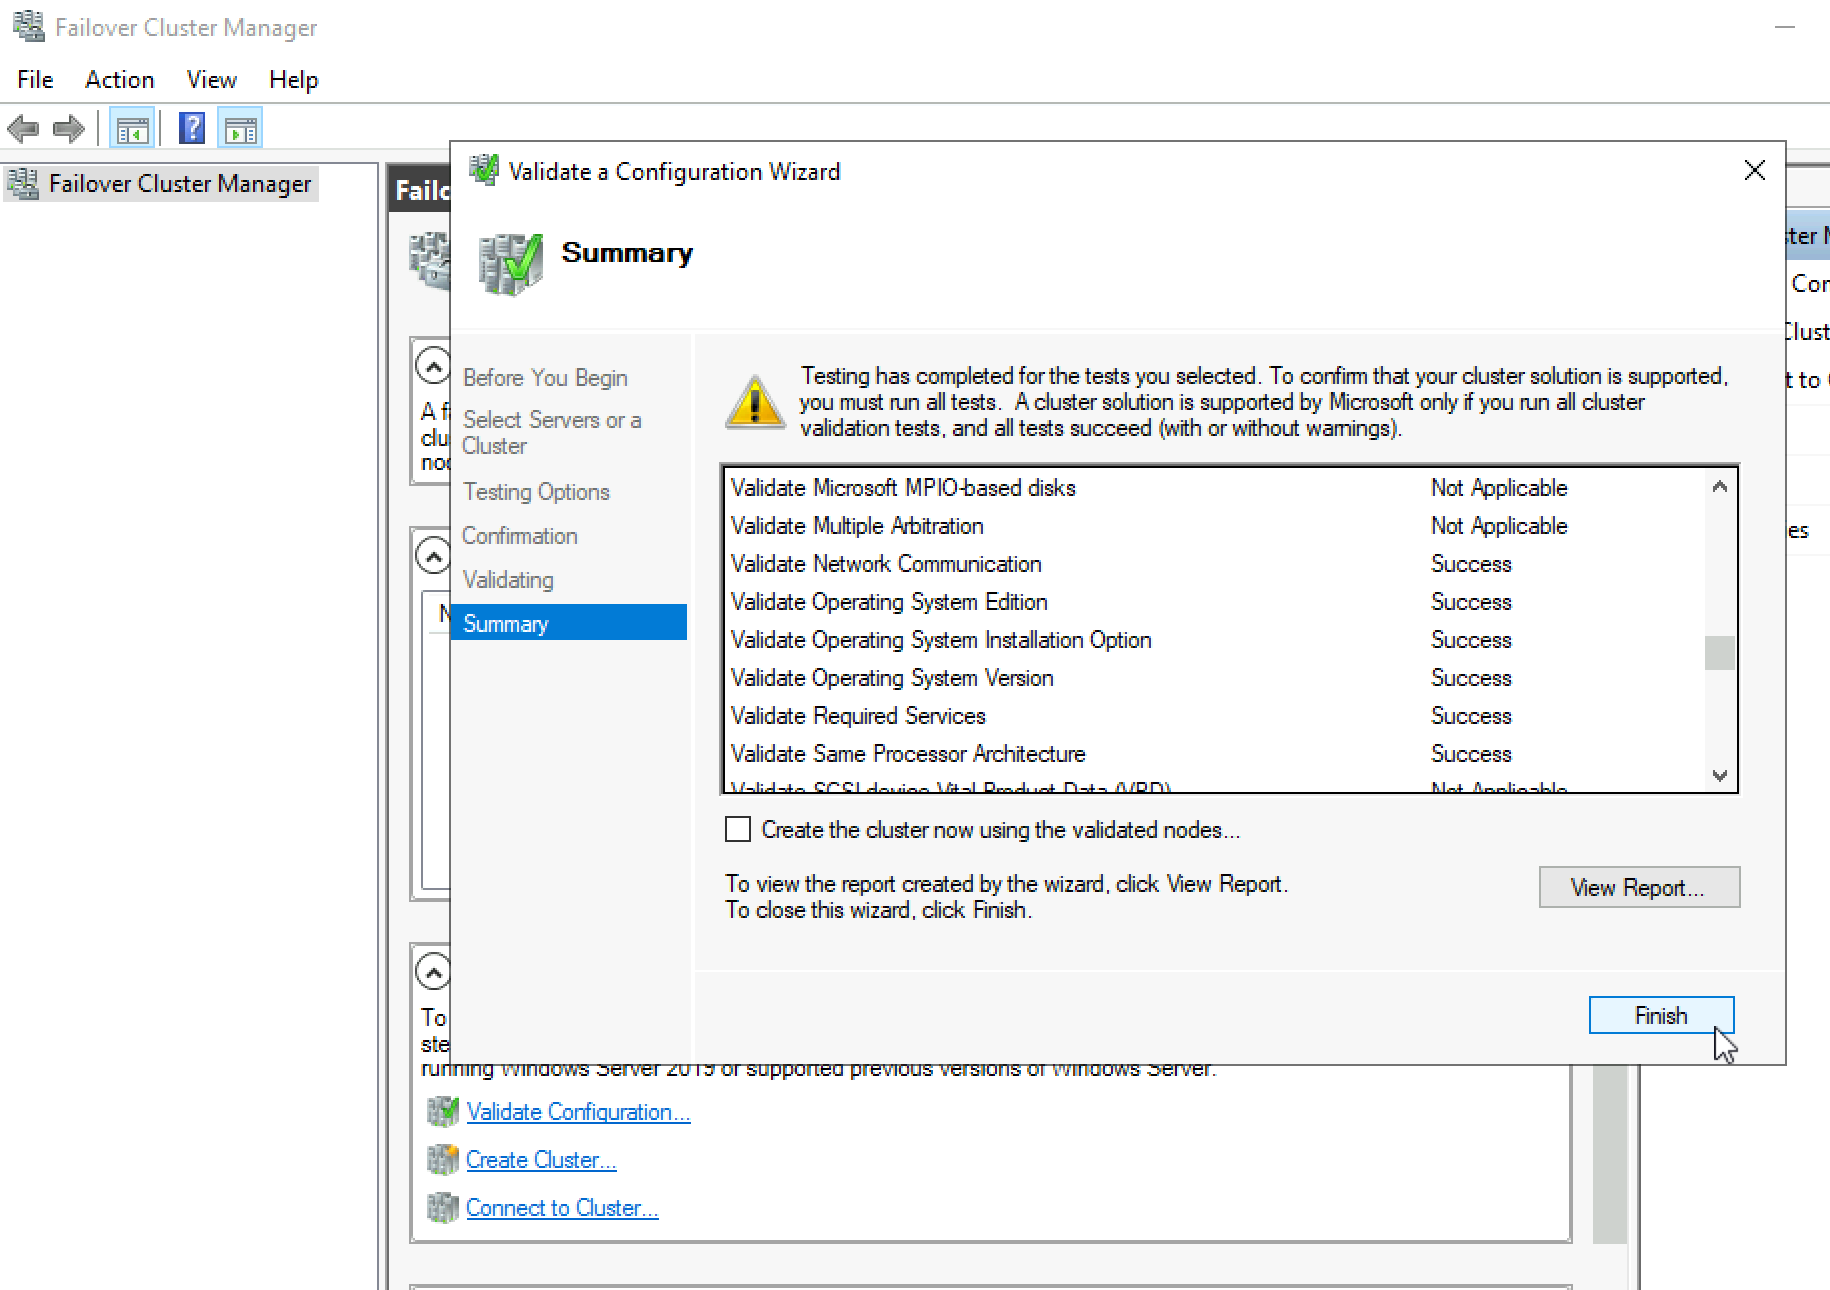
After that I will start a process of creating cluster.
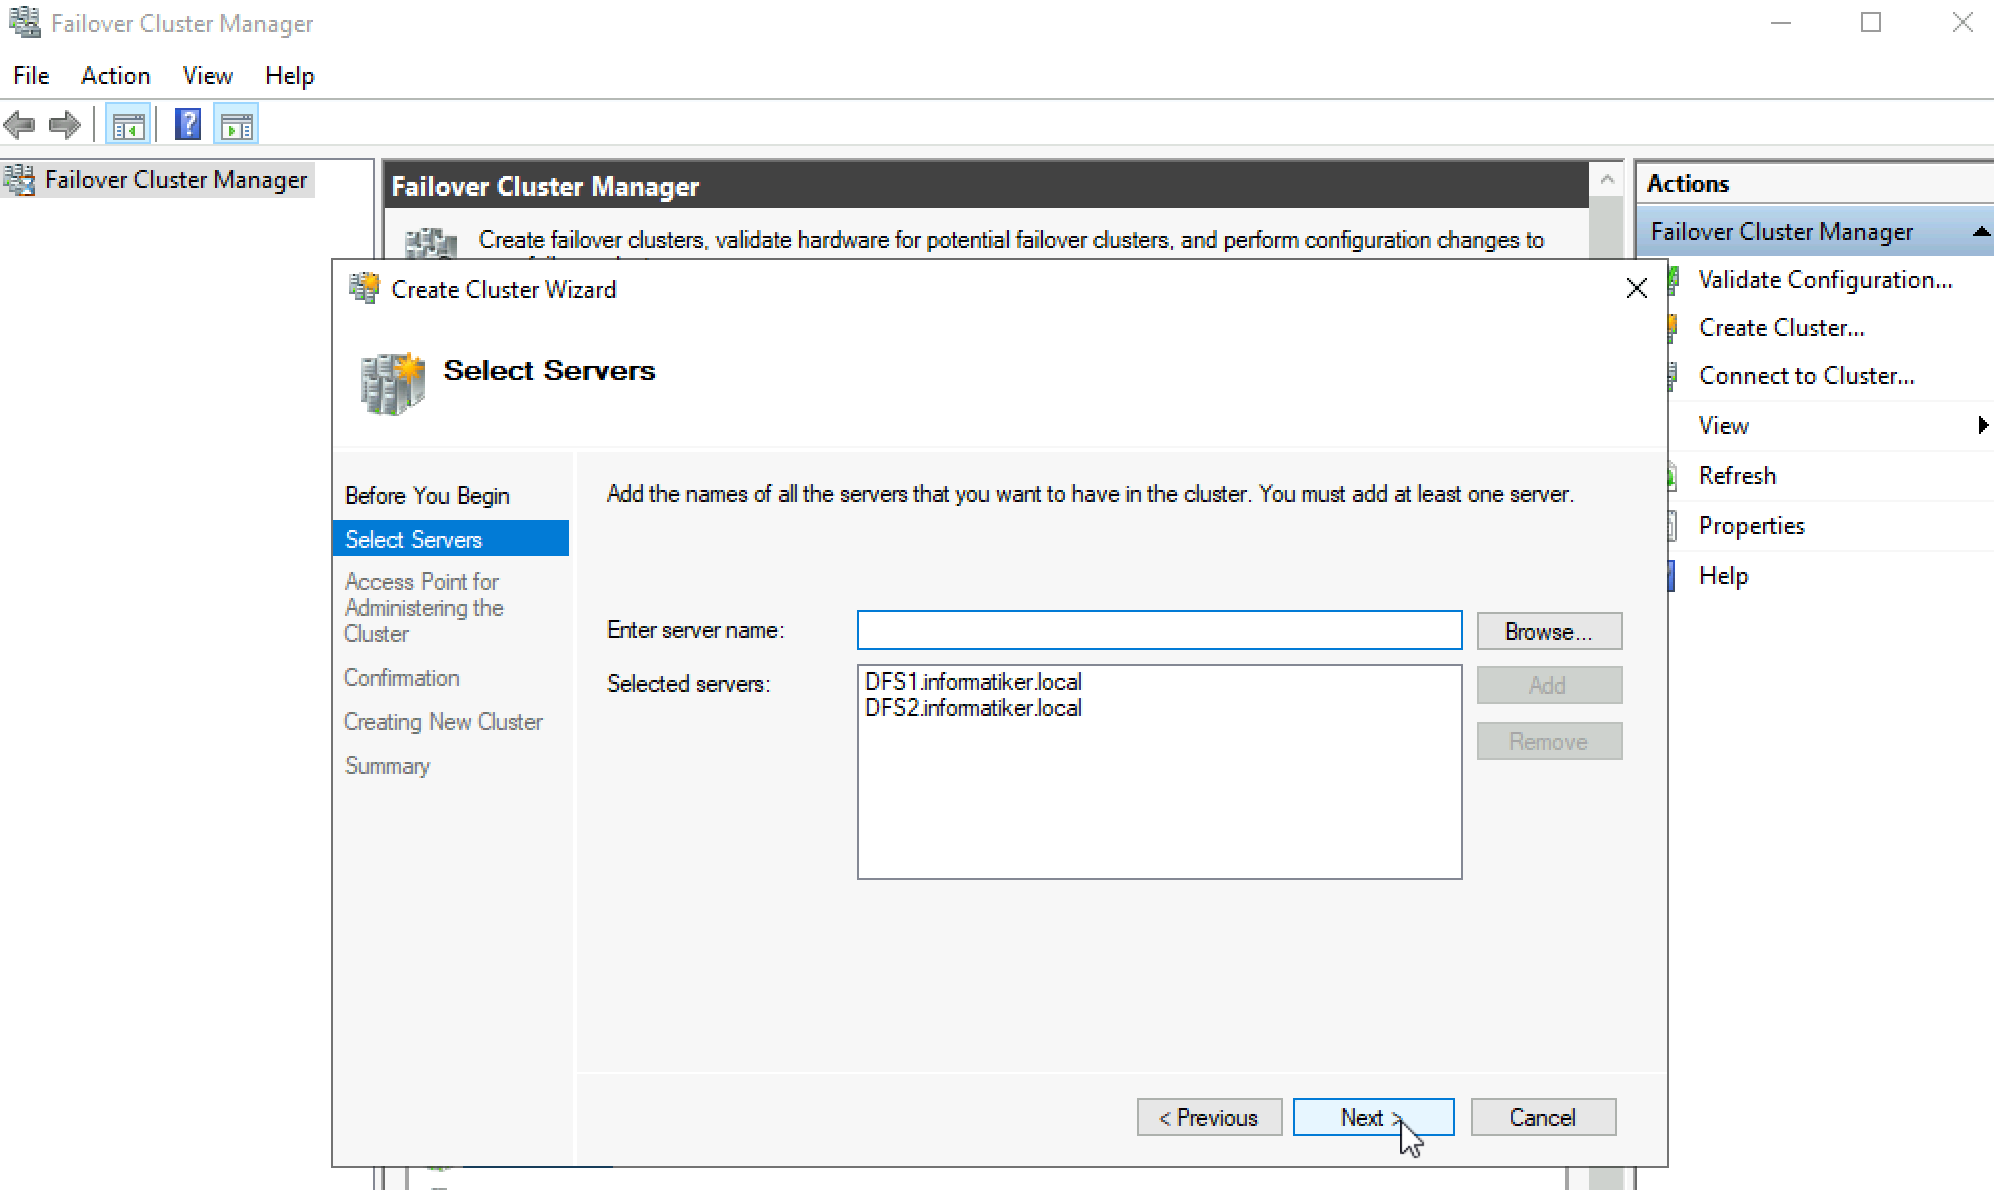
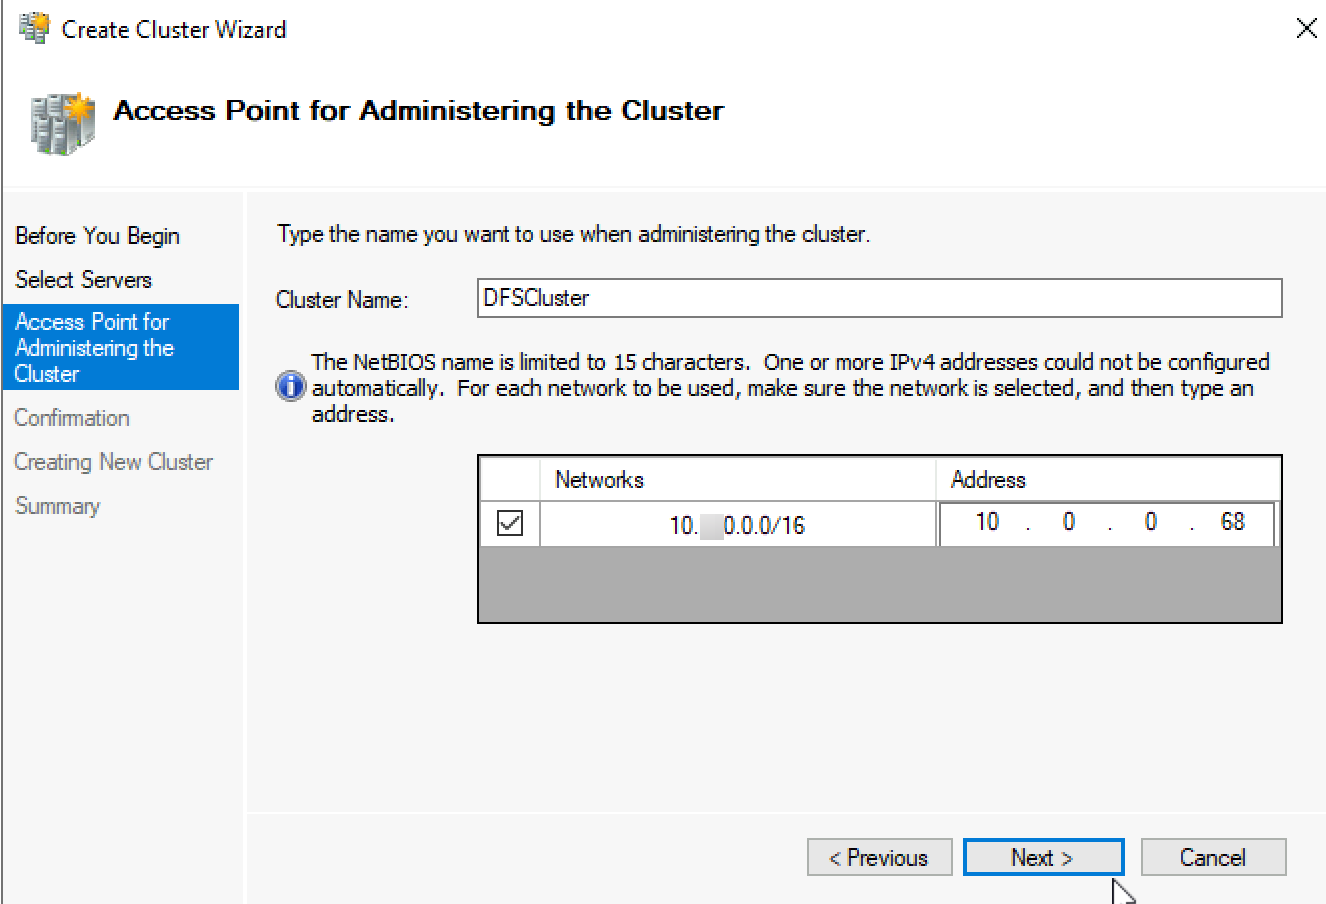
In next step we will define cluster name and IP. I will name my cluster DFSCluster and give it IP 10.0.0.68
In the next step I will also select to “Add all eligible storage to the cluster”
In the end we created cluster
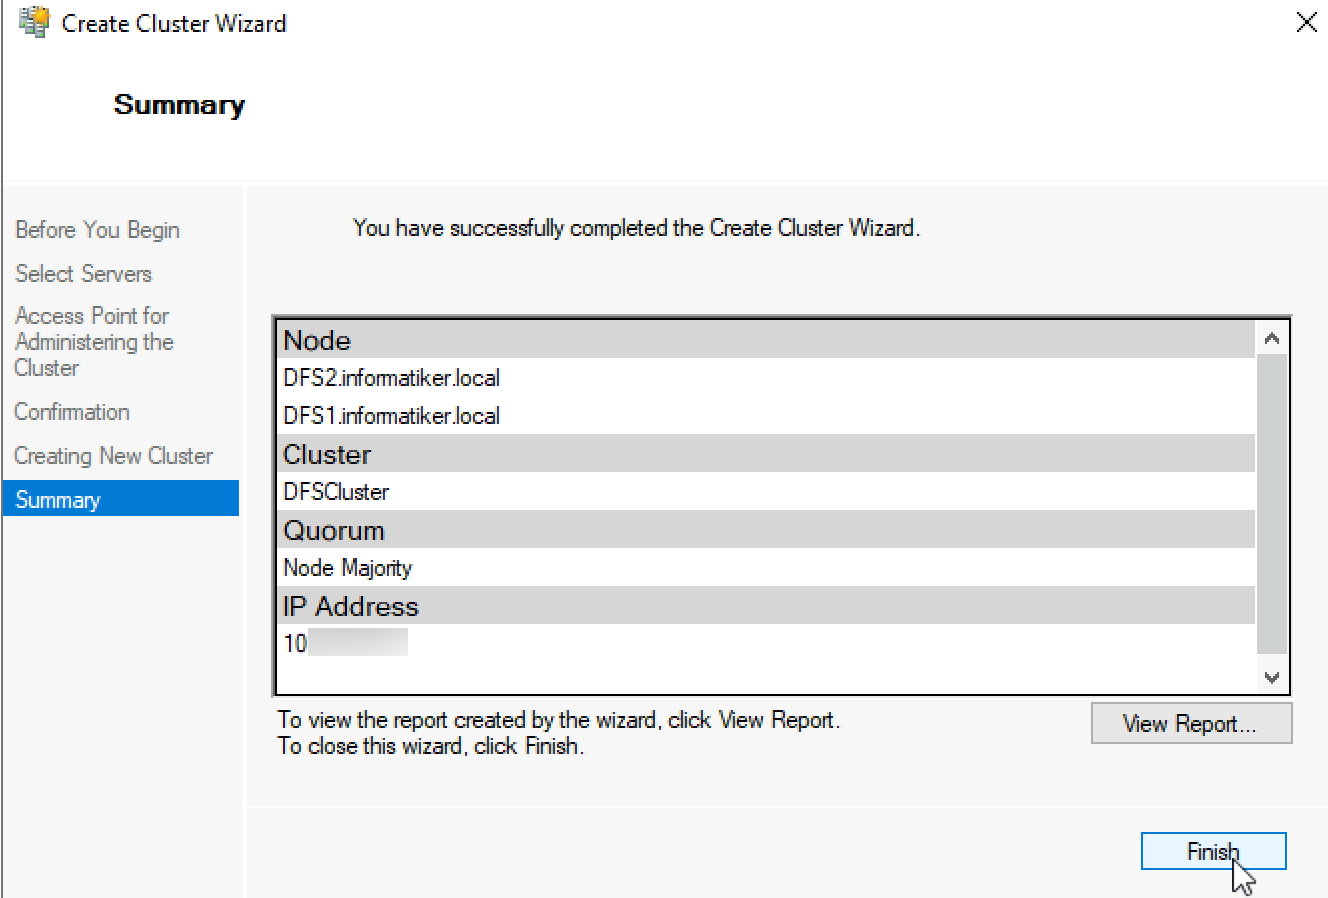
Now let’s check Cluster Manager to see how it went.
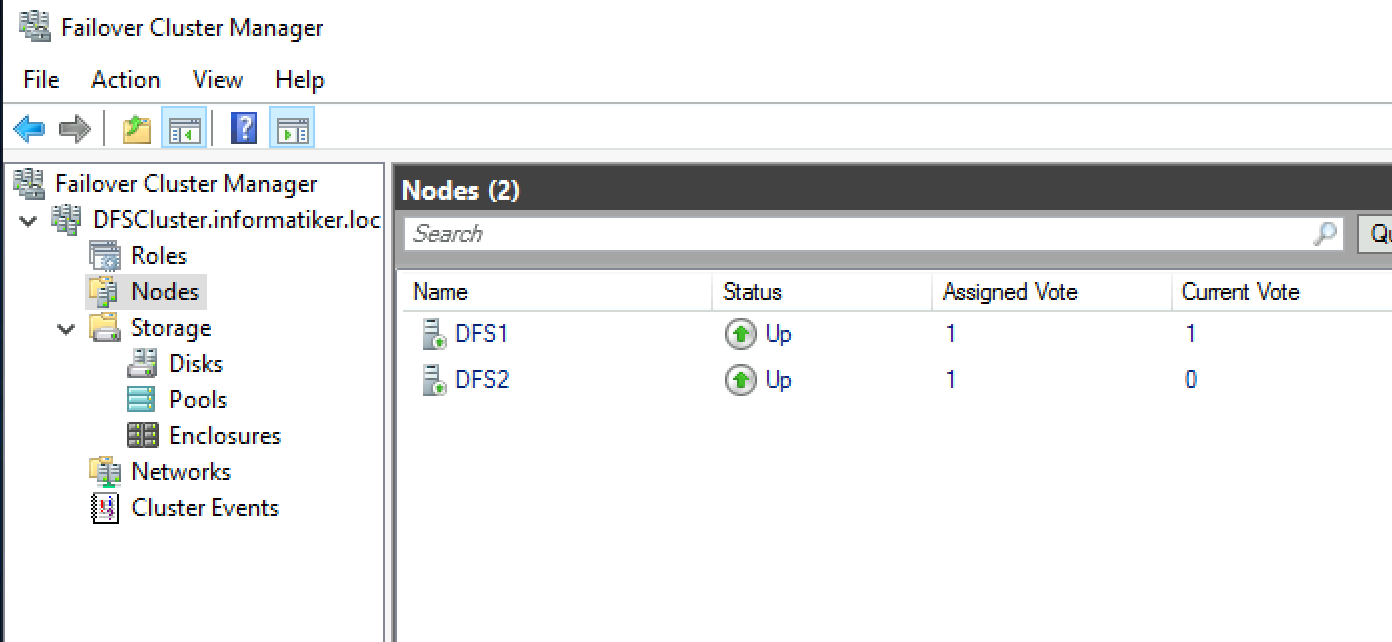
Couple of things to check – Nodes. Ok, both servers are up and listed
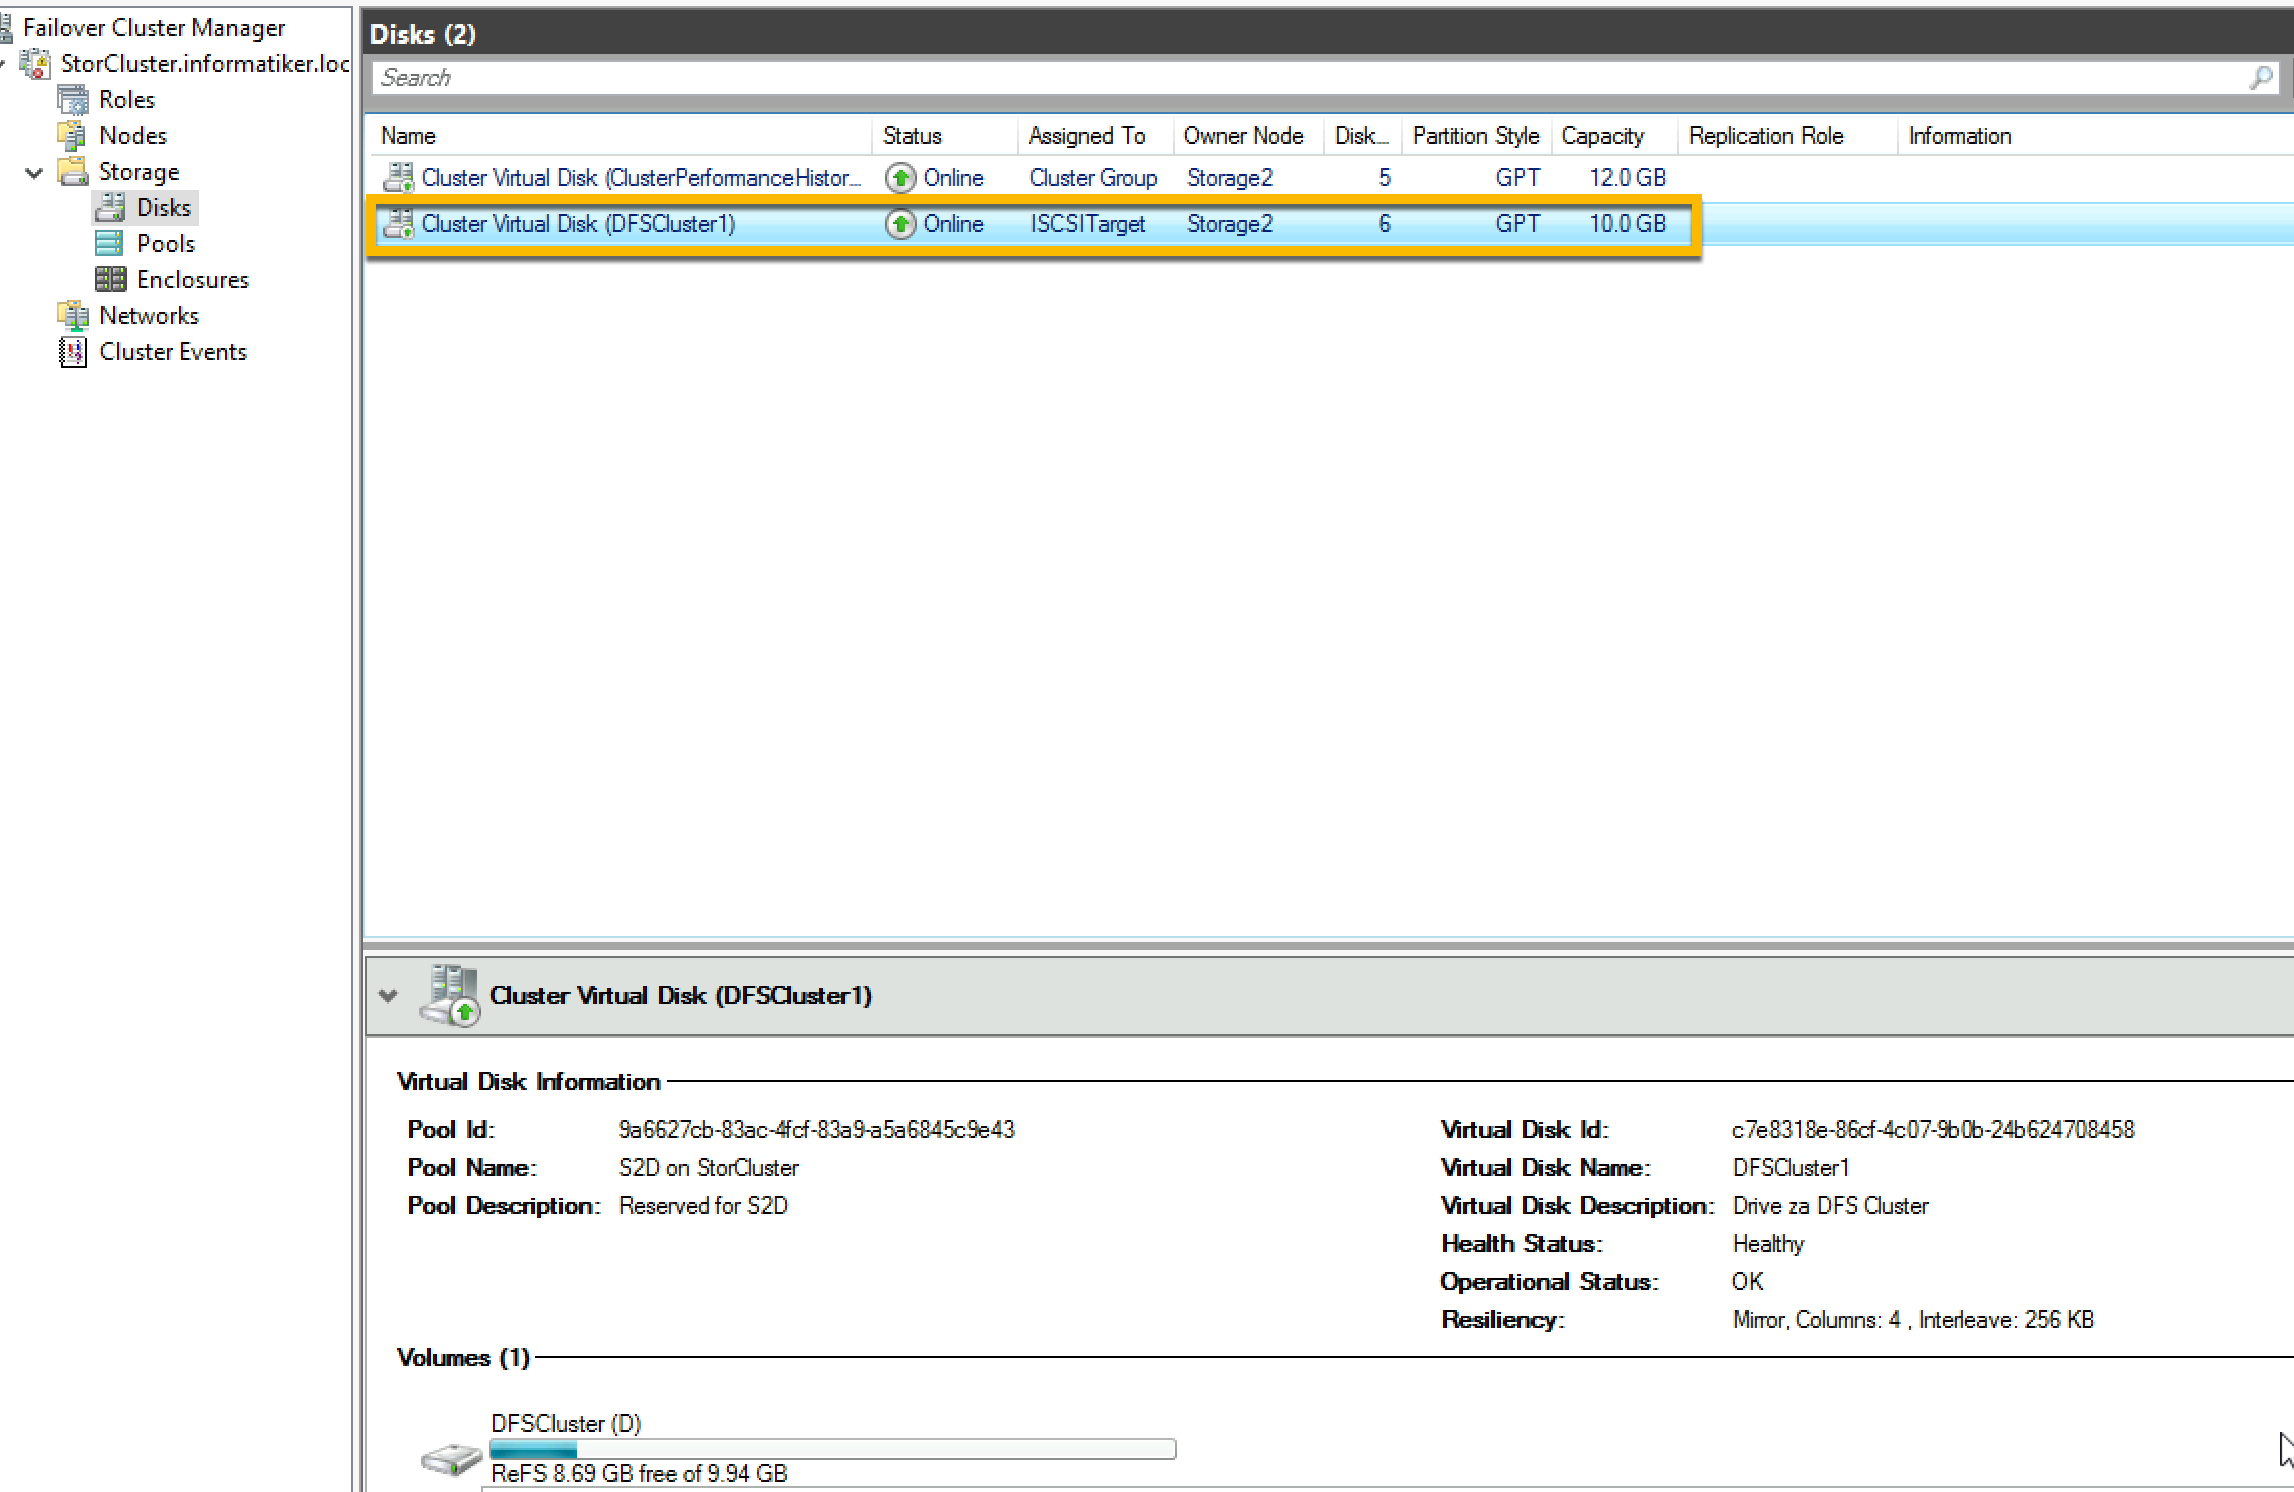
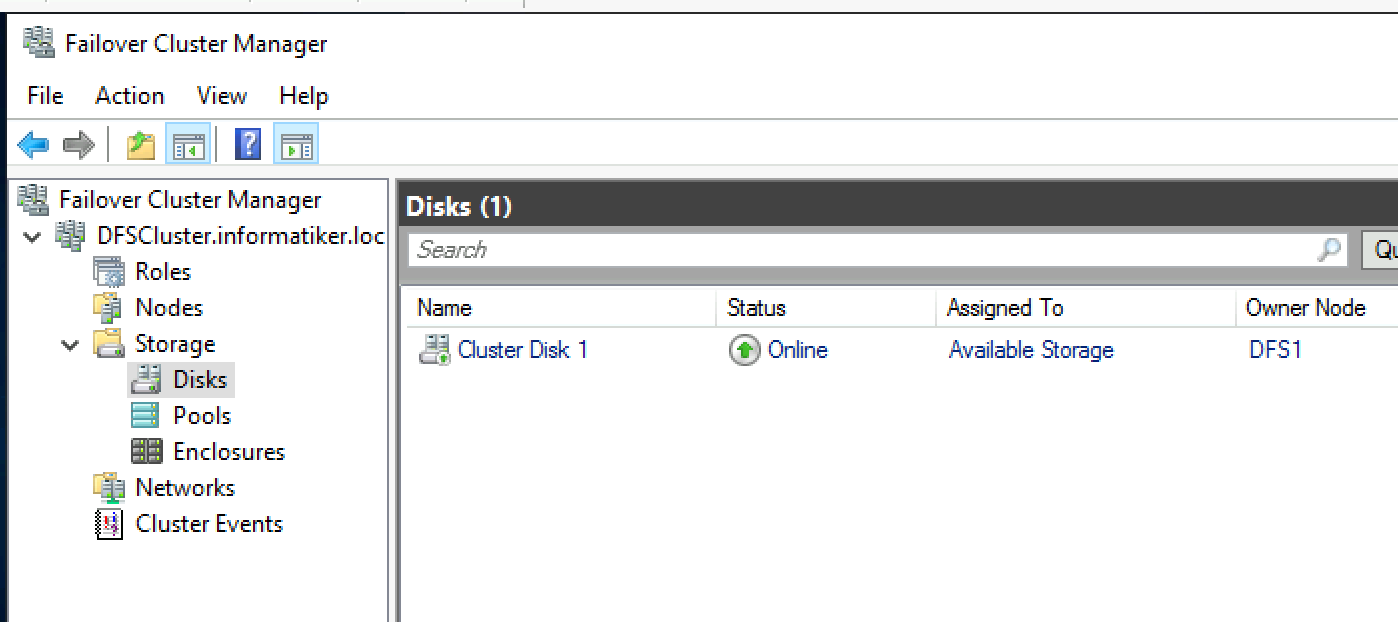
Storage | Disks
Our ISCSI disk is added
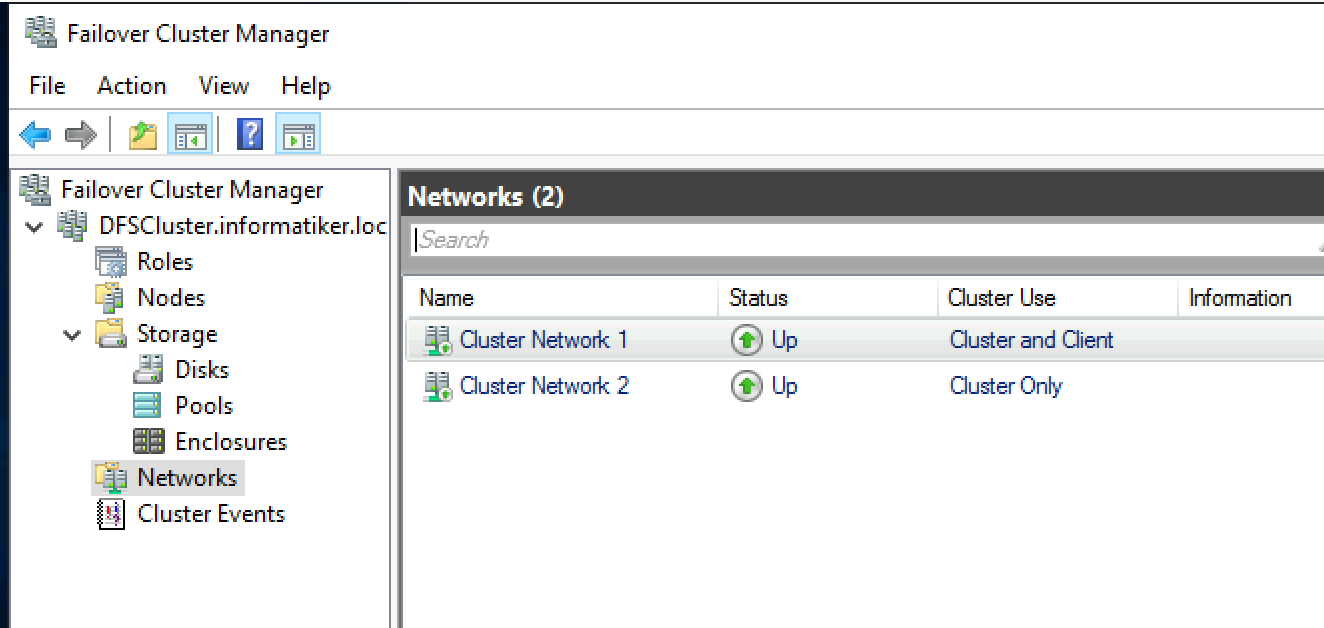
Networks – both disks are up and running
Ok, so our cluster is nicely prepared.
Adding DFS Namespace Server cluster role
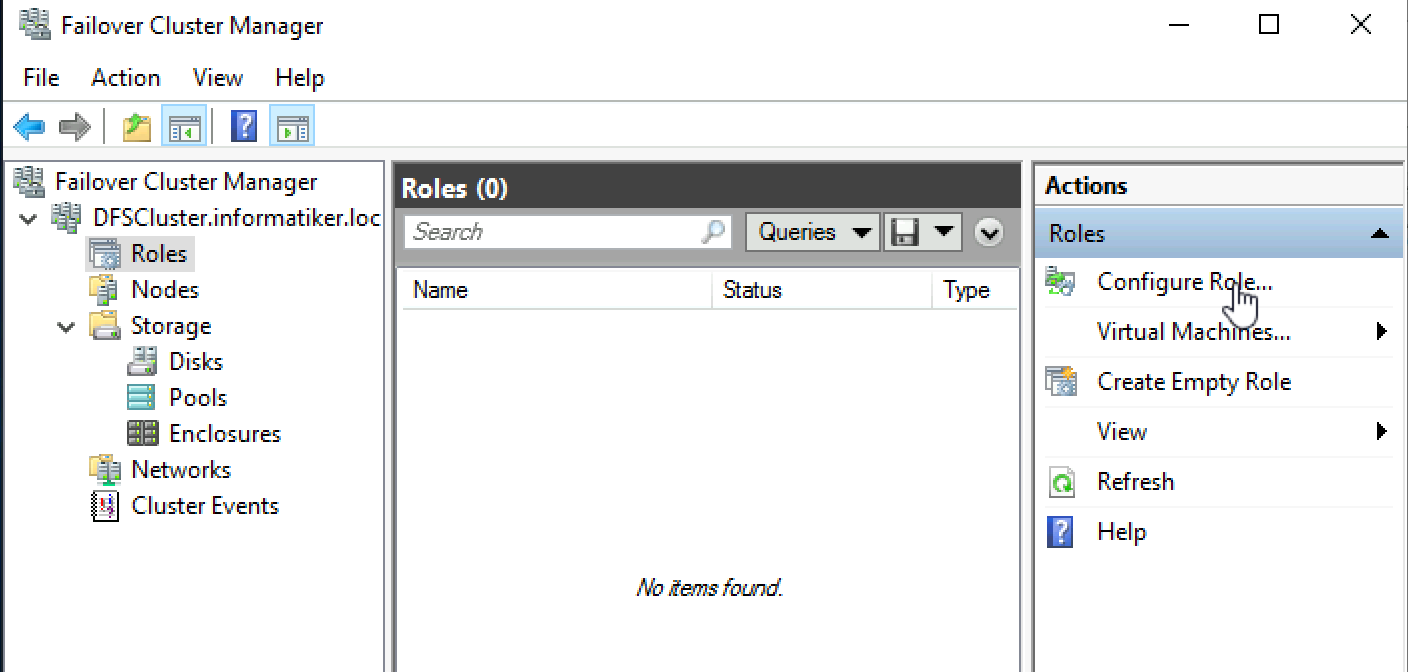
This one we will go step by step,because now in our Failover Cluster Manager we will add DFS Namespace Server Role.
I will do this from DFS1.
Configure Role
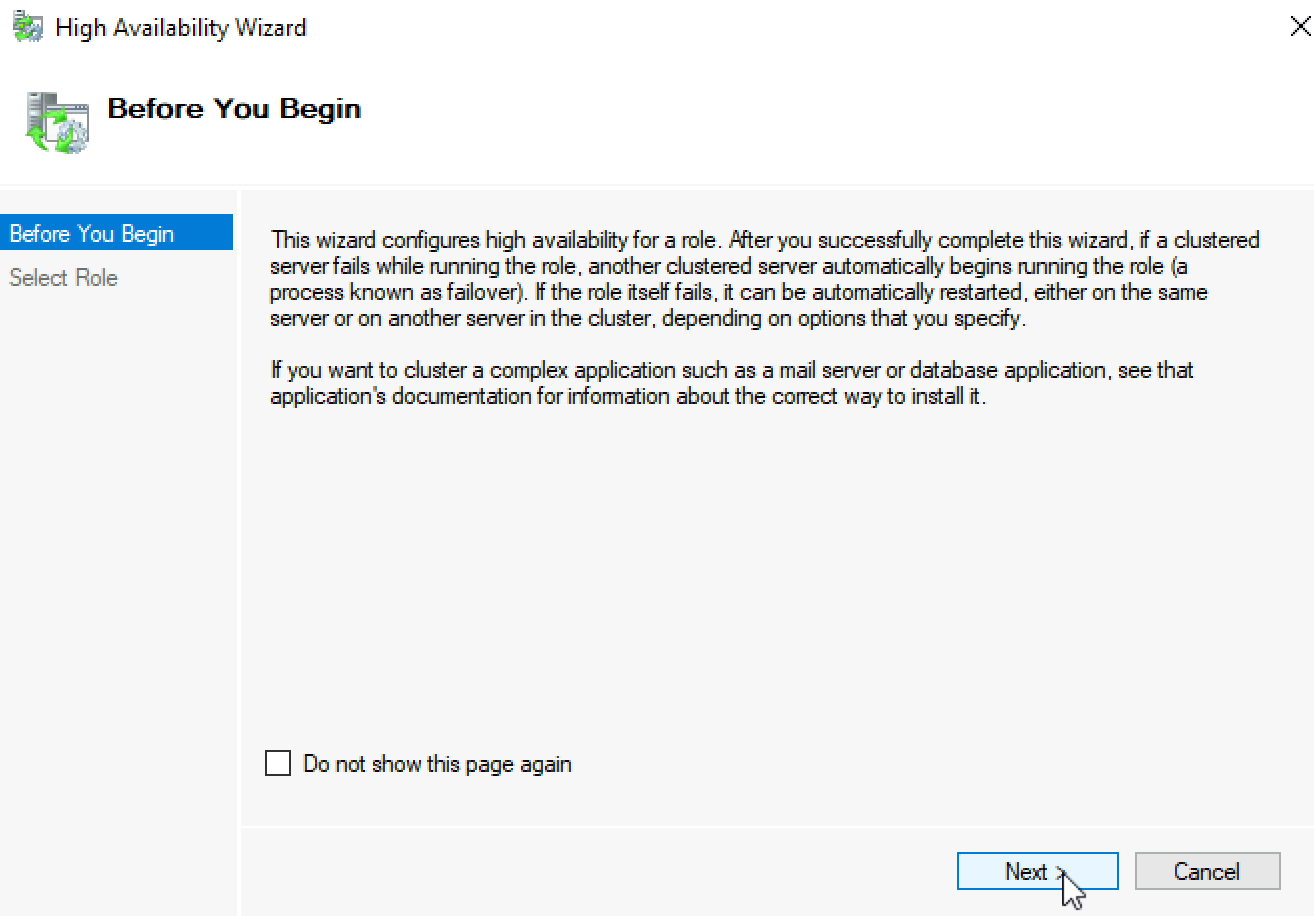
Next
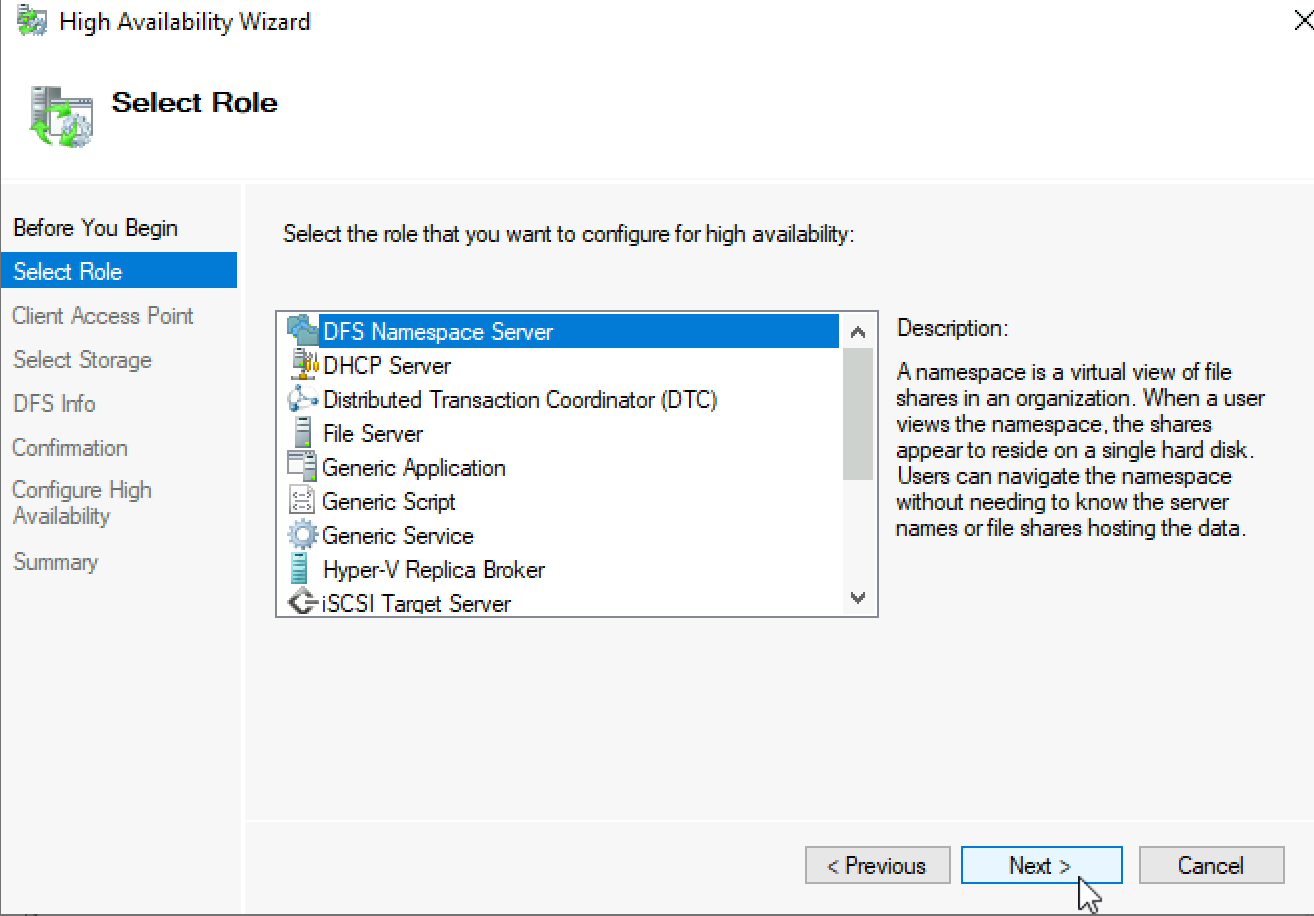
Select DFS Namespace Server | Next
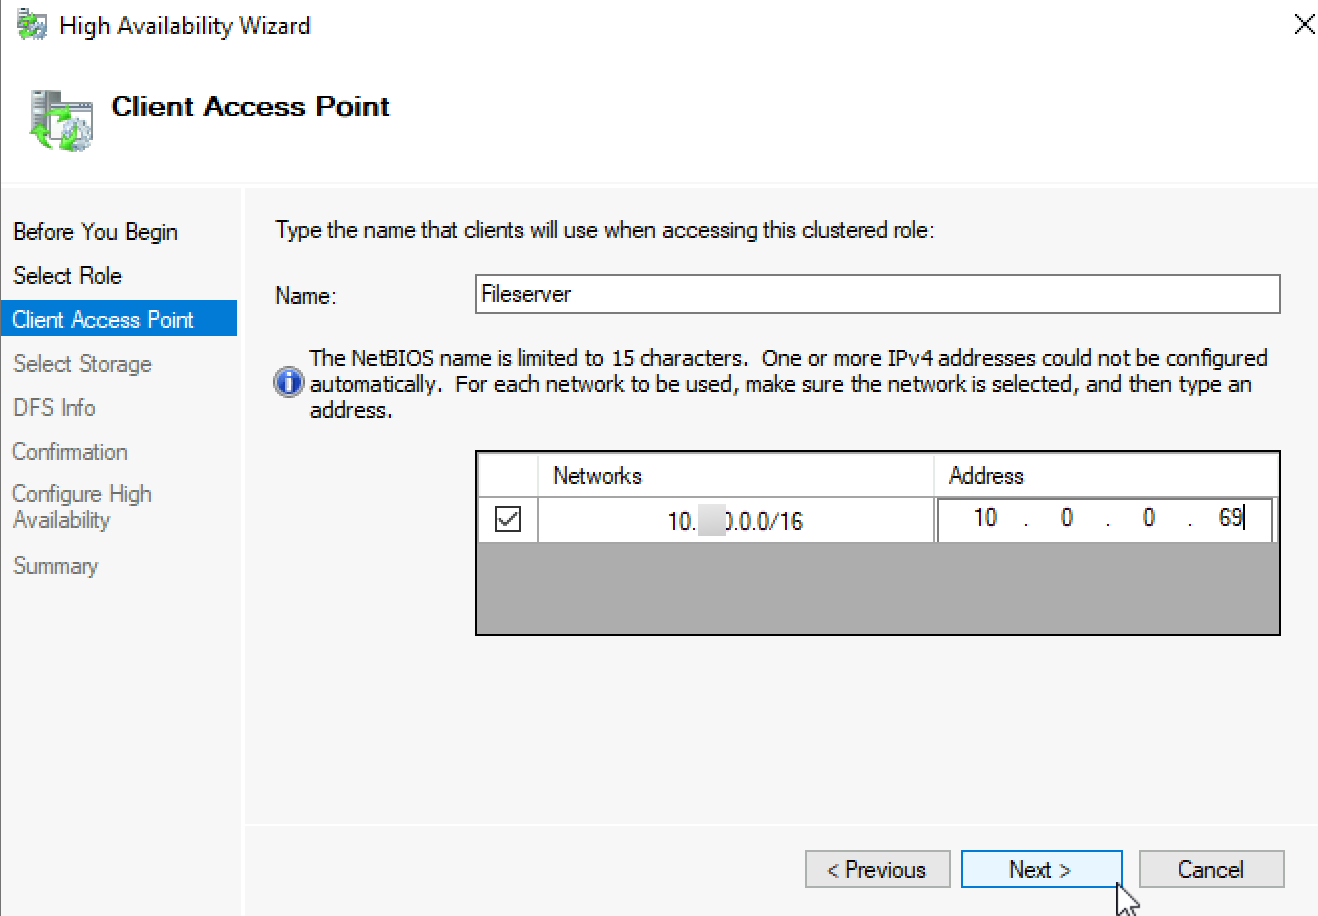
I will give it name Fileserver and IP 10.0.0.69
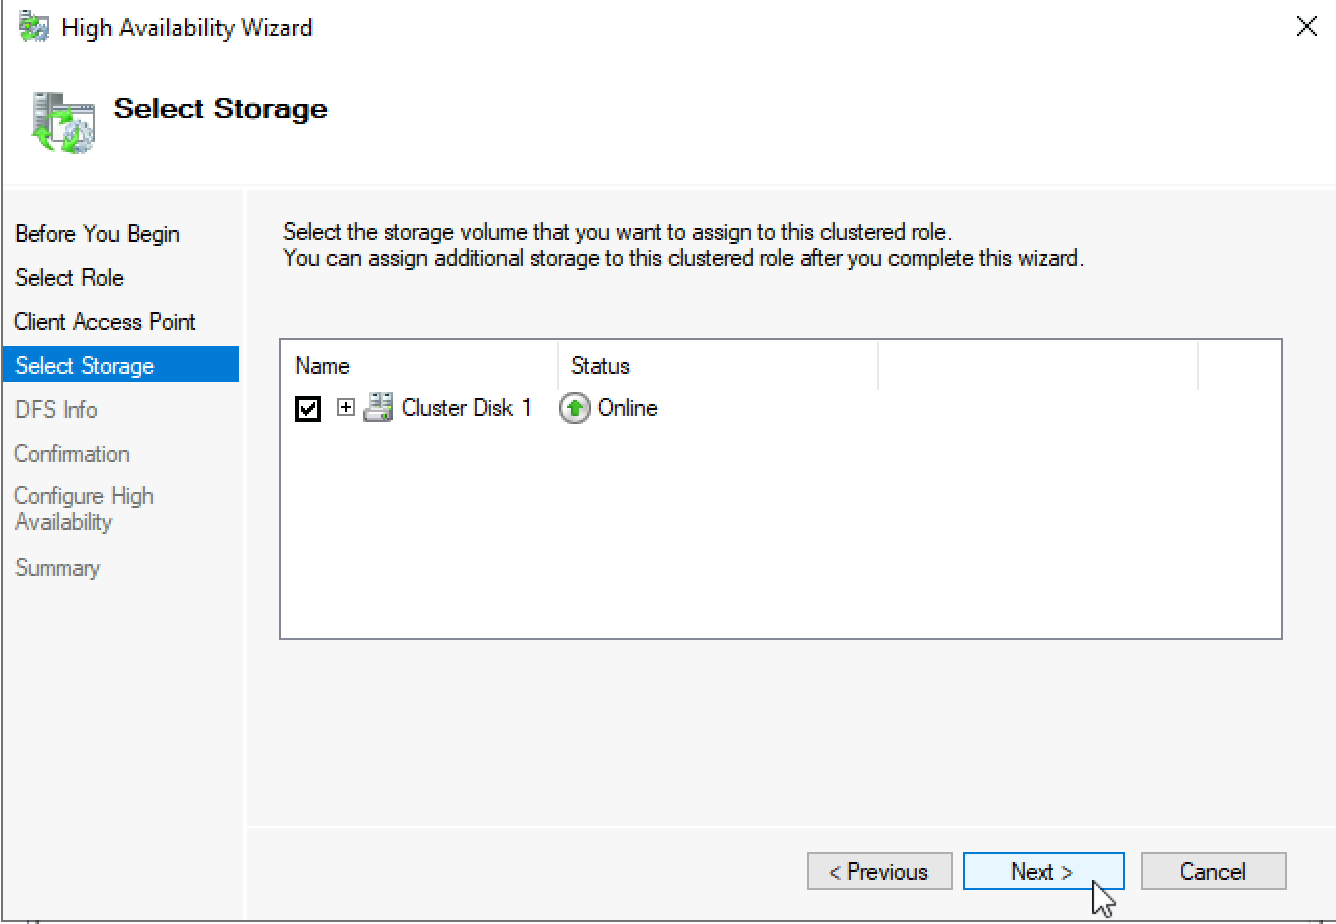
For storage I will add available ISCSI disk | Next
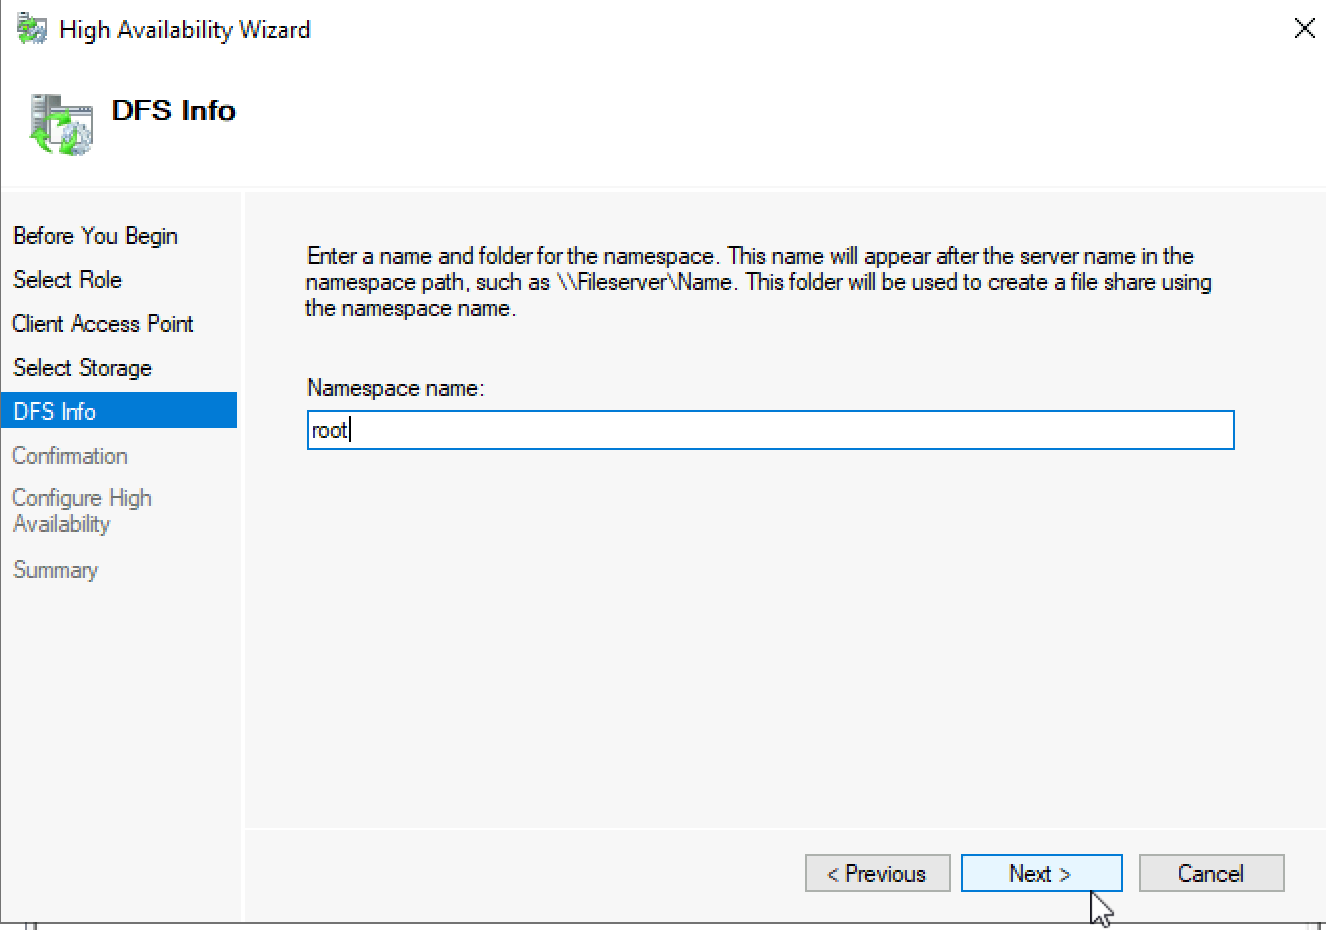
I will name Namespace – root | Next
Review all the info | Next
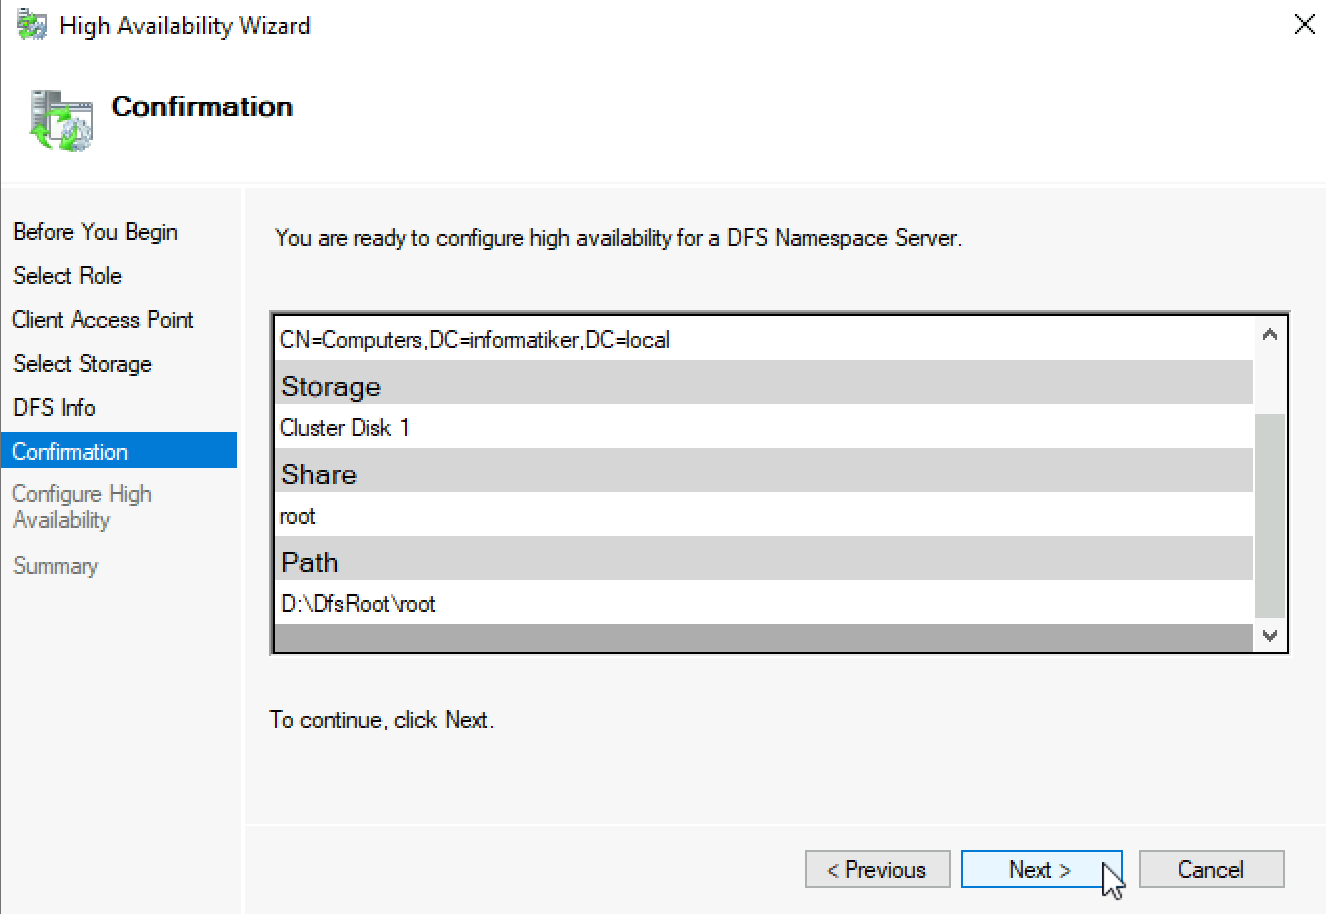
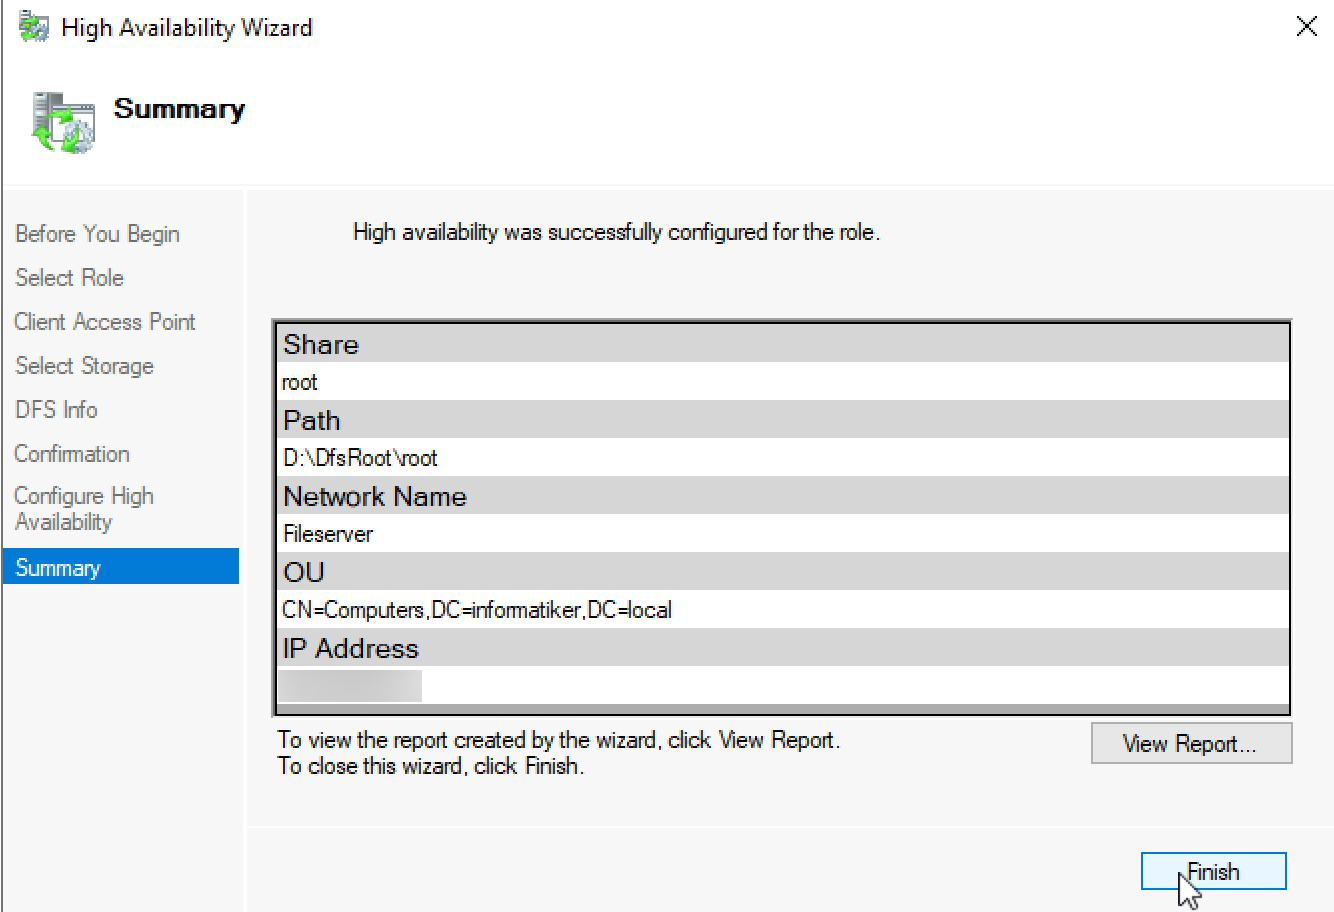
Configure High Availability screen run by fast, we finished at the summary screen | Finish
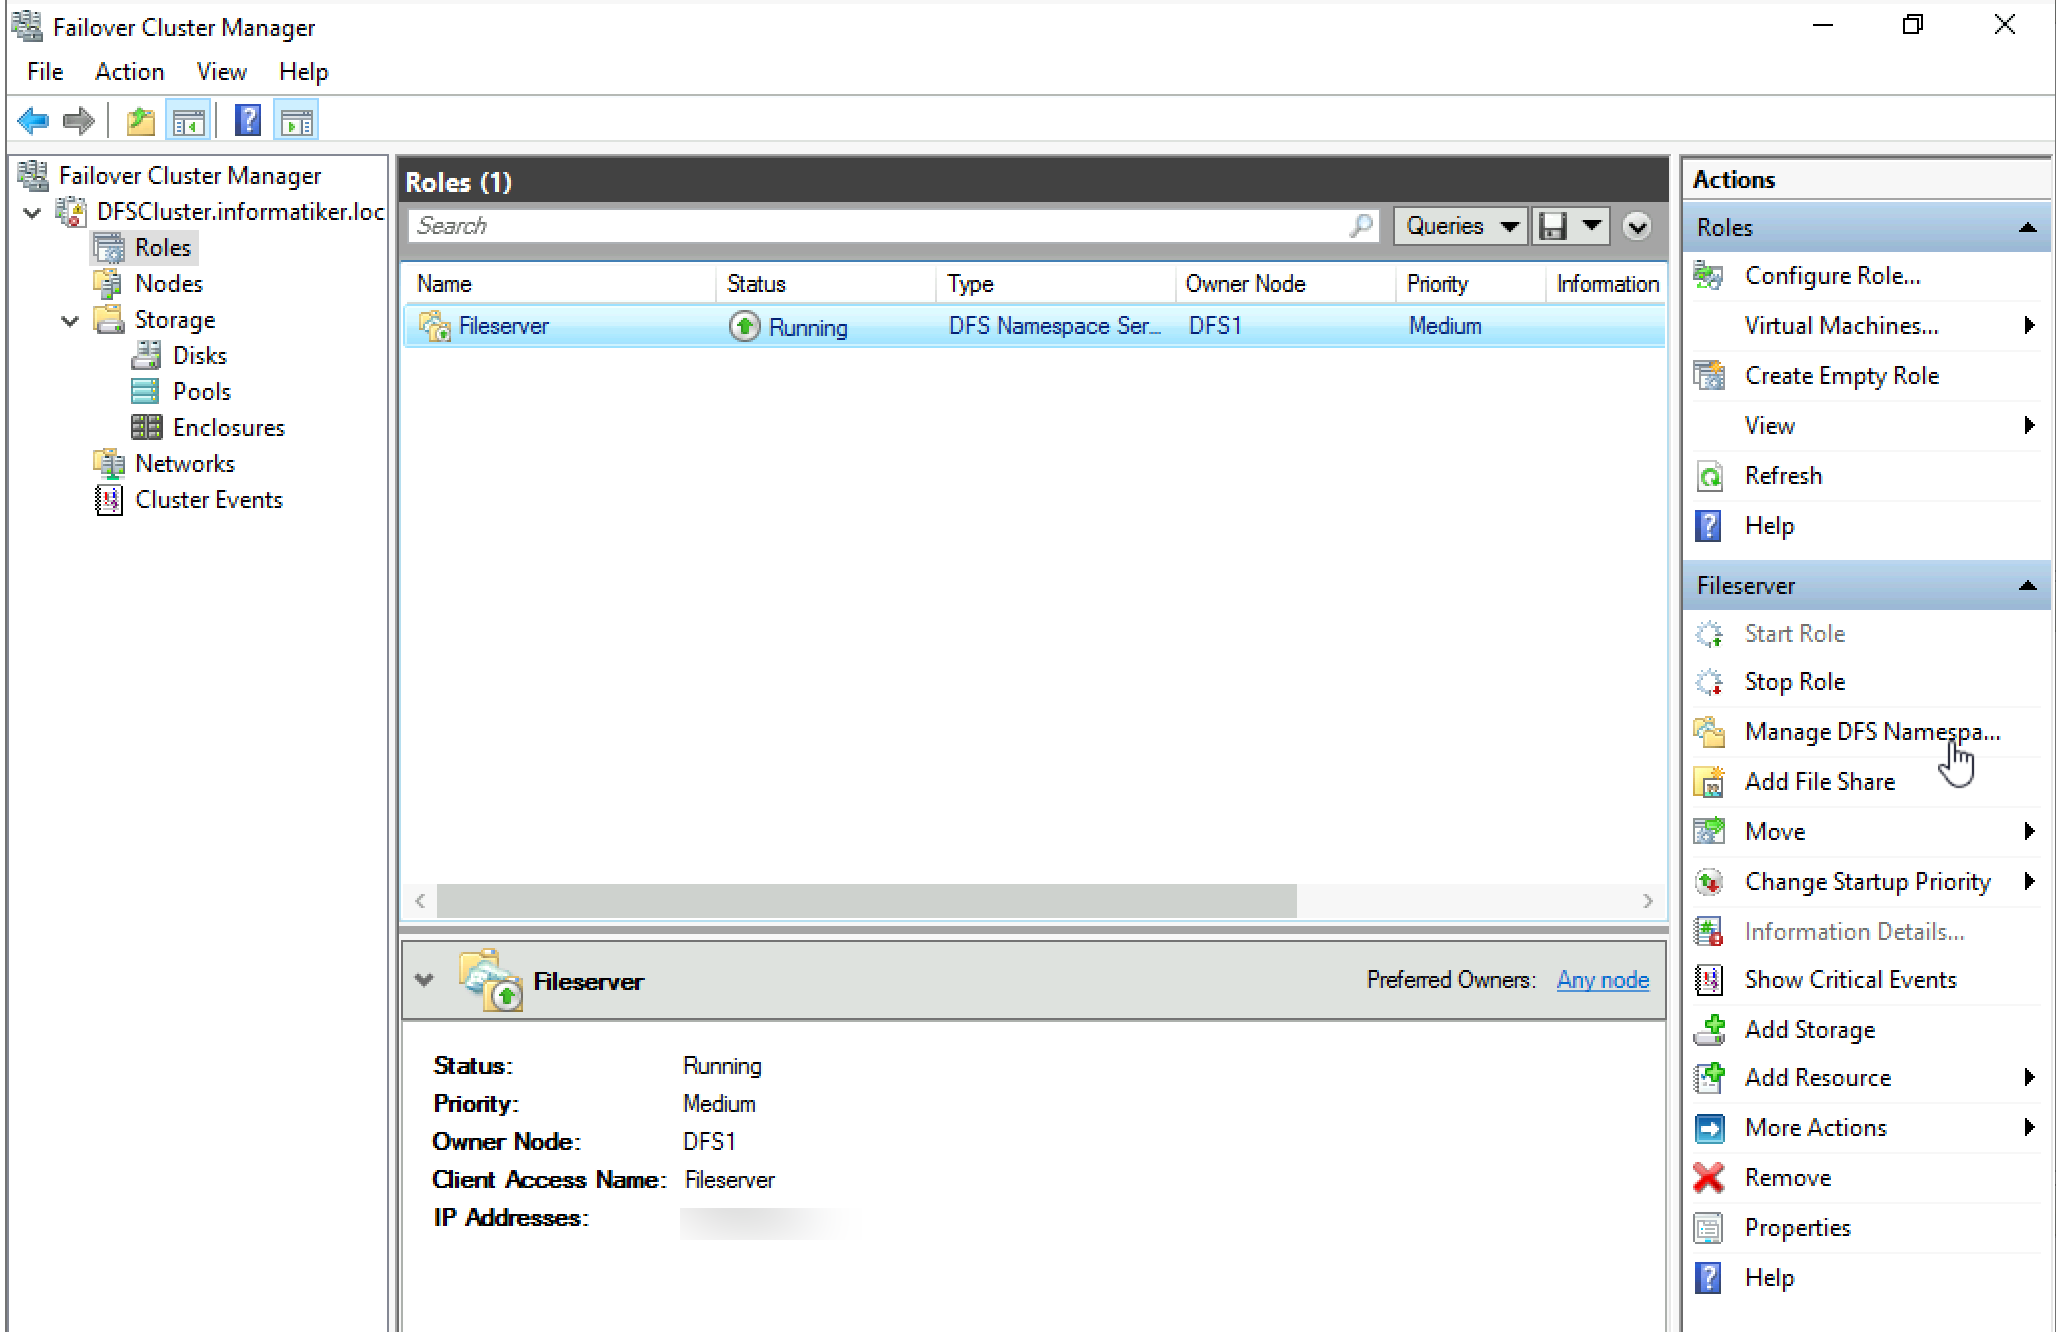
We will now click on Manage DFS Namespace after we selected our newly created role in Failover Cluster Manager
DFS Management / Adding Folder / Creating Replication
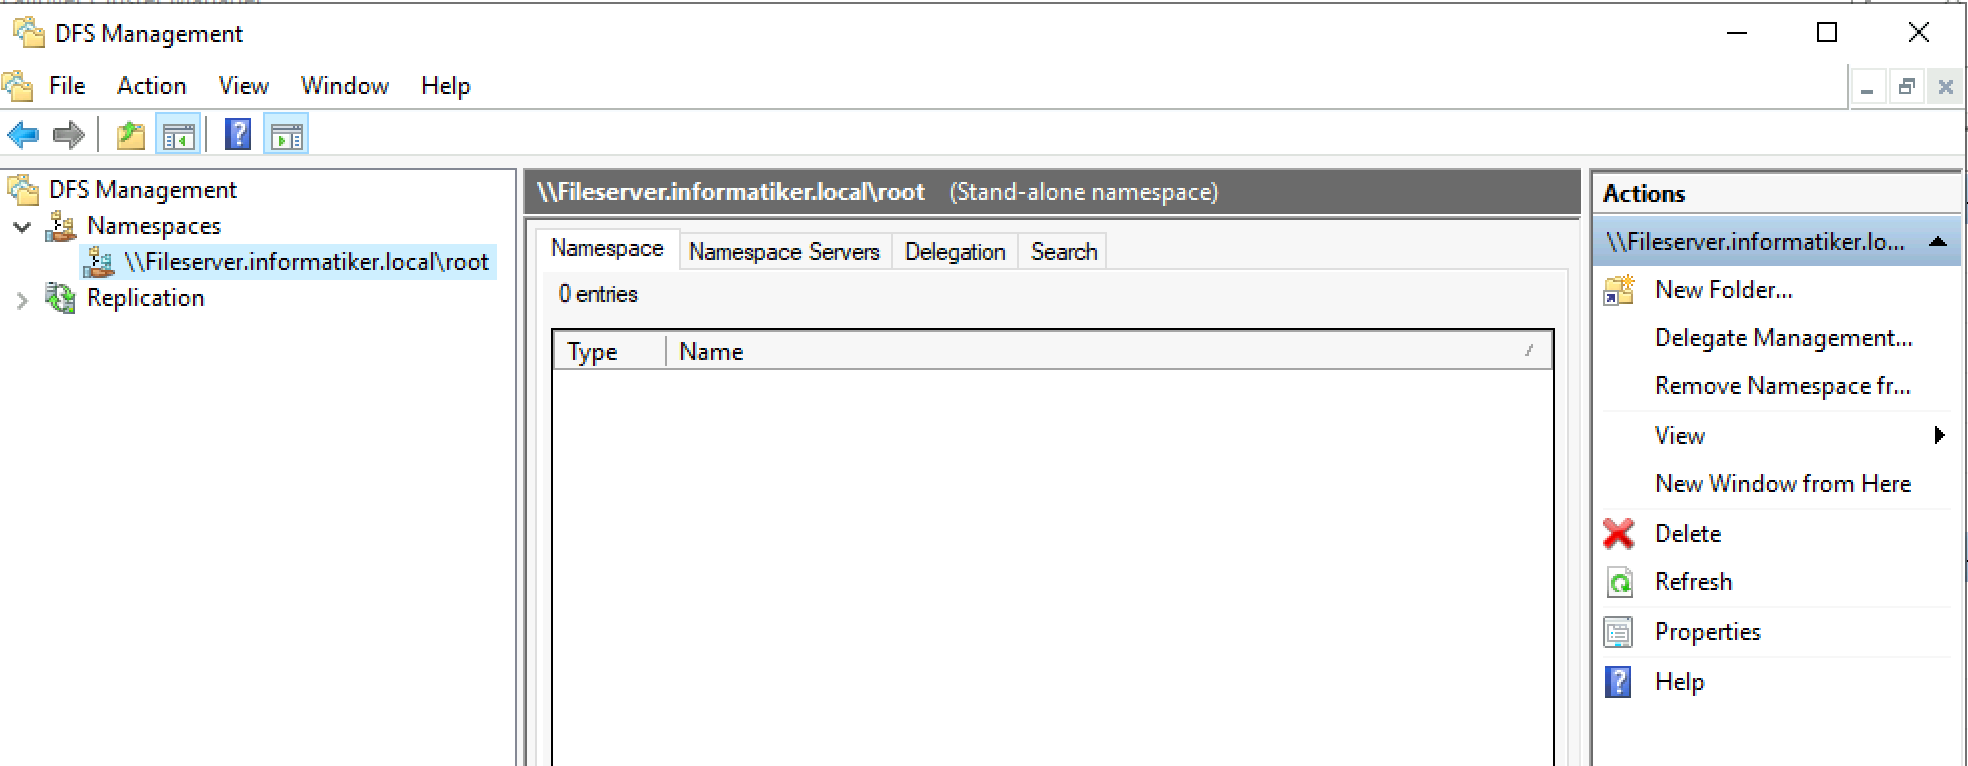
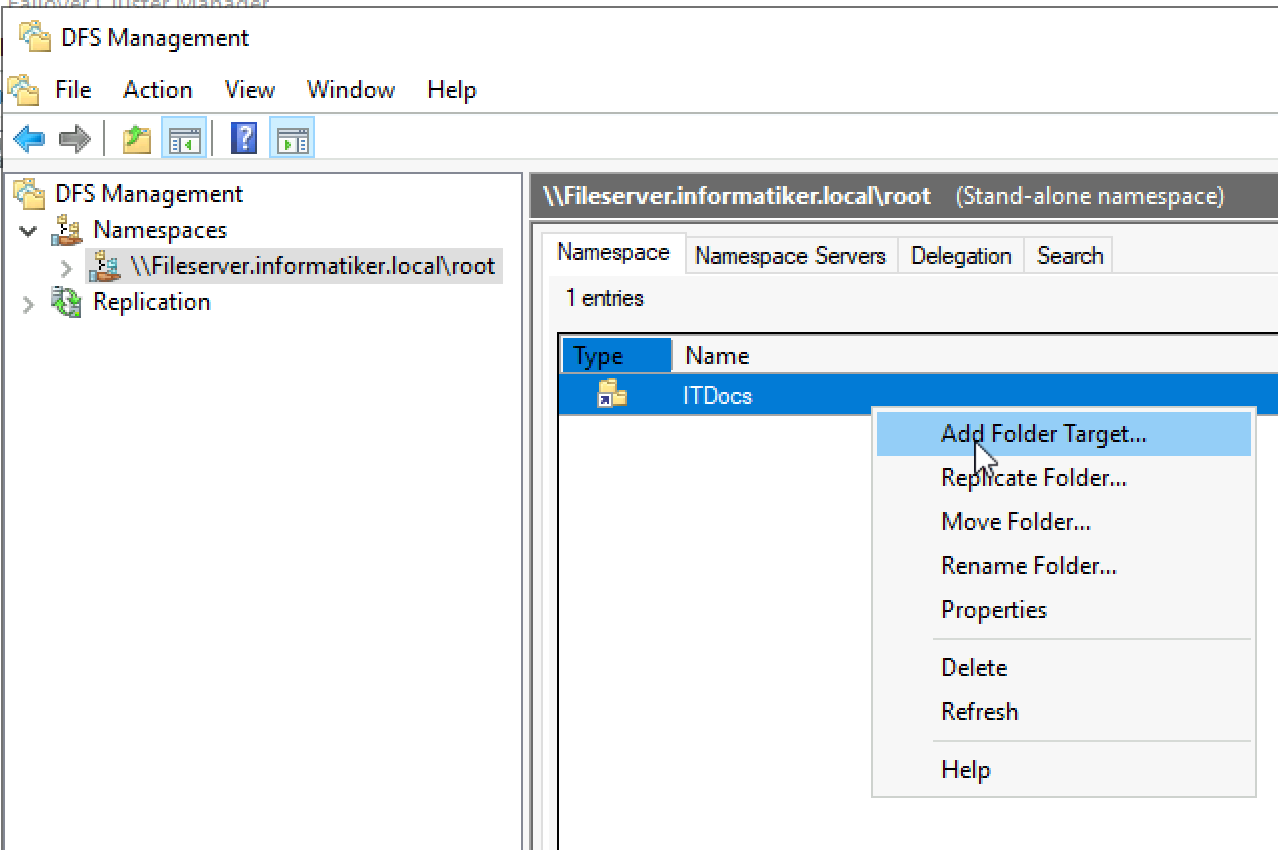
New window will open – DFS Management – in which we can see Namespaces and Replication sections in the far left part of the screen. If we expand Namespaces we can see that there is a Namespace named – \\fileserver.informatiker.local\root
That is also a file path for future file server. We will now add folder ITDocs from local E drive on DFS1 server to this namespace. Then we will tell it to replicate to DFS1 and that same folder. Remember, folder ITDocs on DFS2 is empty, and same folder on DFS1 holds one file. Let’s go one step at the time.
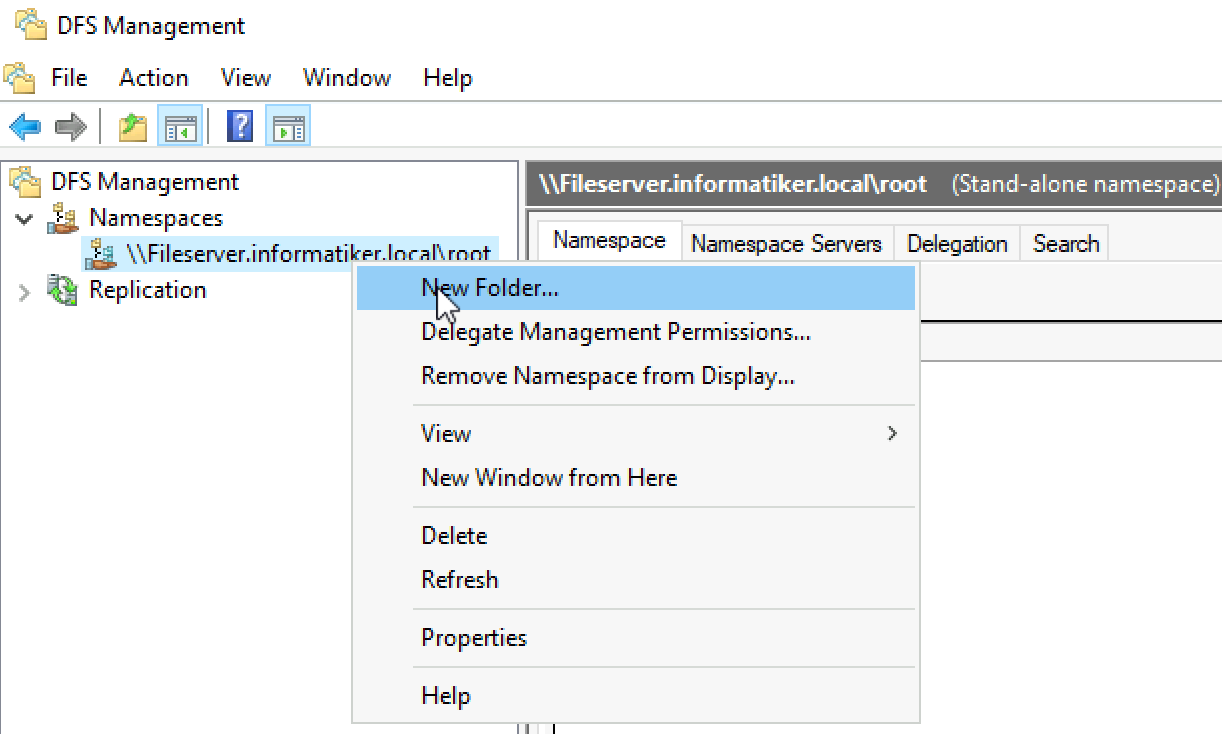
Right click on created Namespace and select New Folder
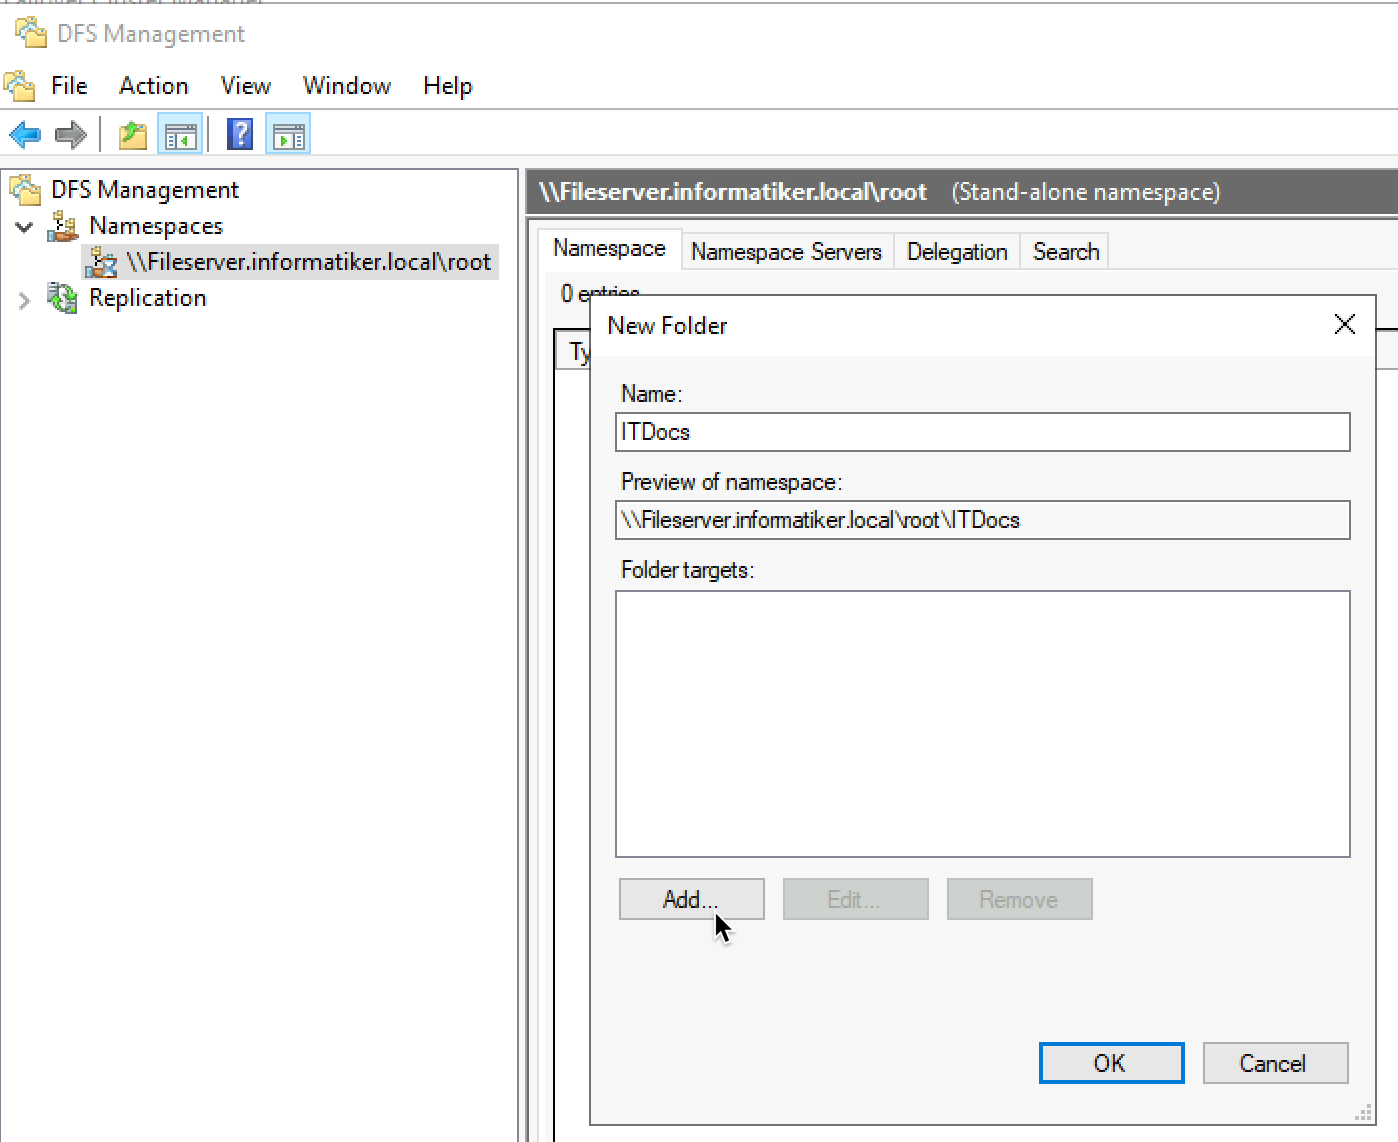
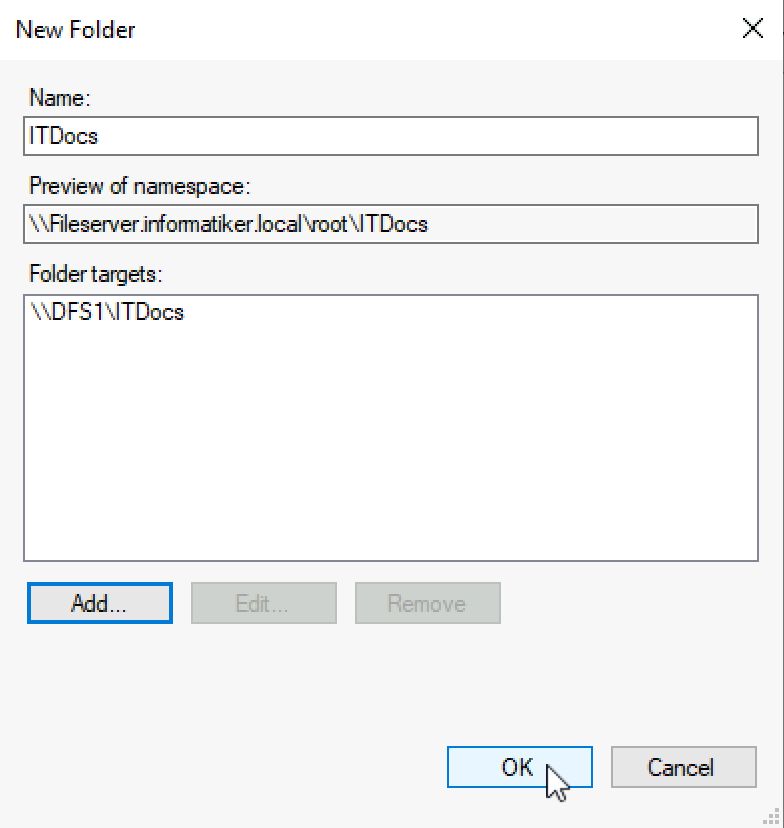
New window will be opened. I’ll name the New Folder – ITDocs and click on Add button.
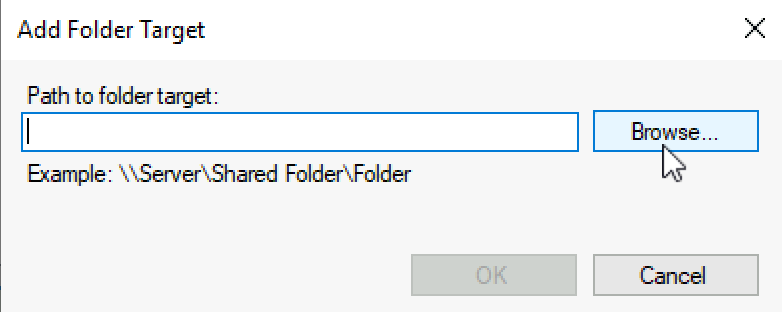
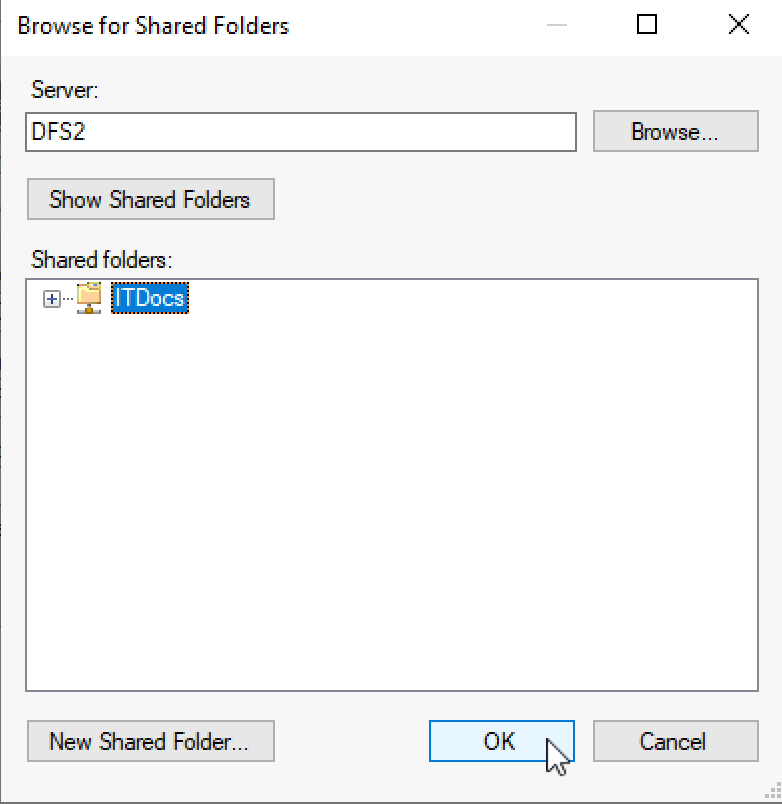
Click on Browse
Our ITDocs Fileshare on DFS1 server is visible (remember local administrators group for file share to see it here. Use everyone only for a test). OK
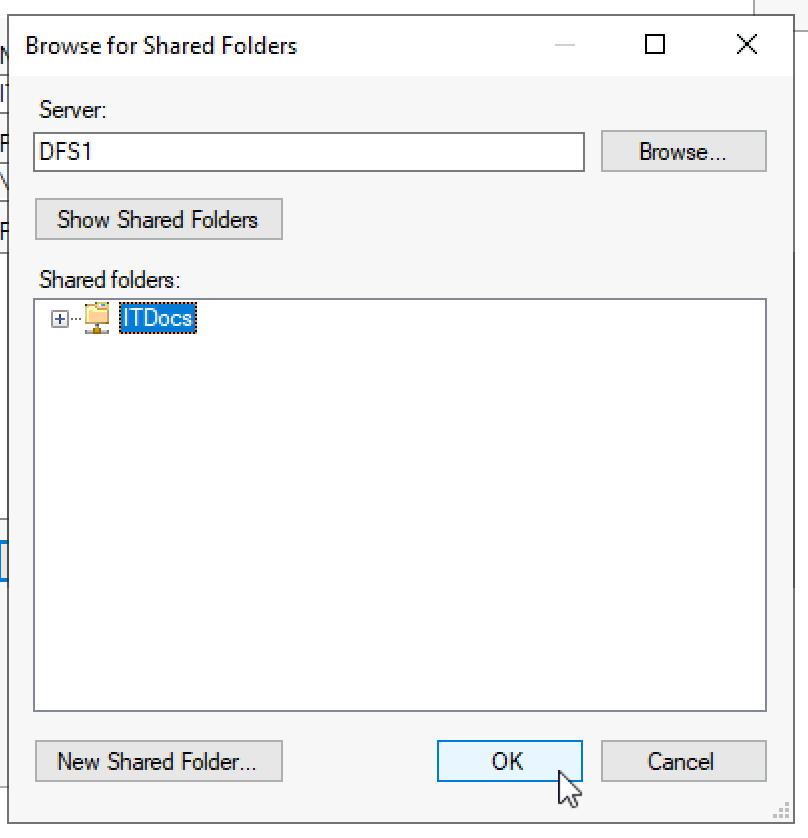
OK
Ok, we are done with adding new folder
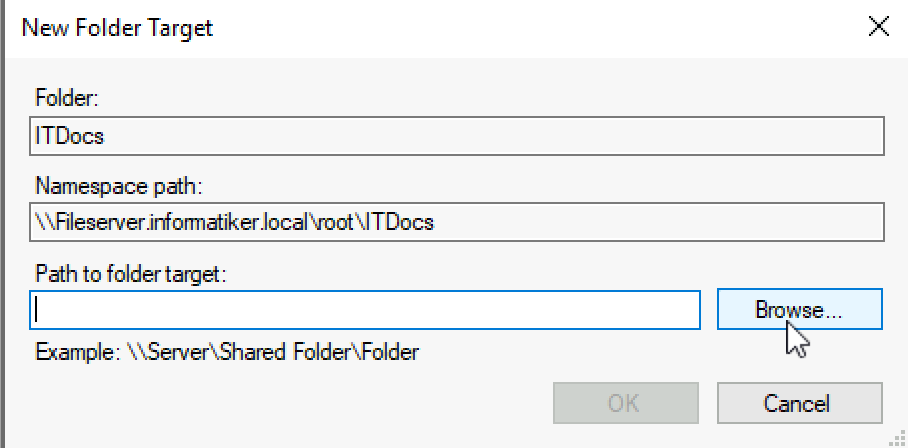
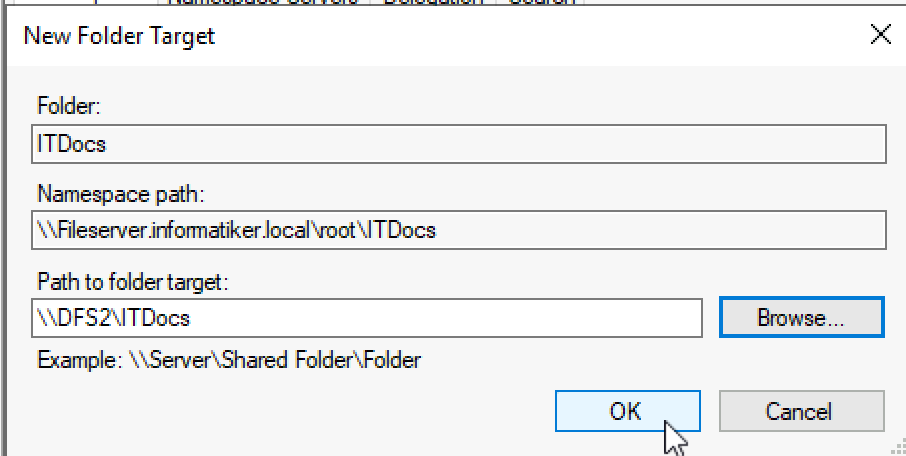
Now we can see new folder under our namespace – we will right click on created folder and select “Add Folder Target…”
Browse
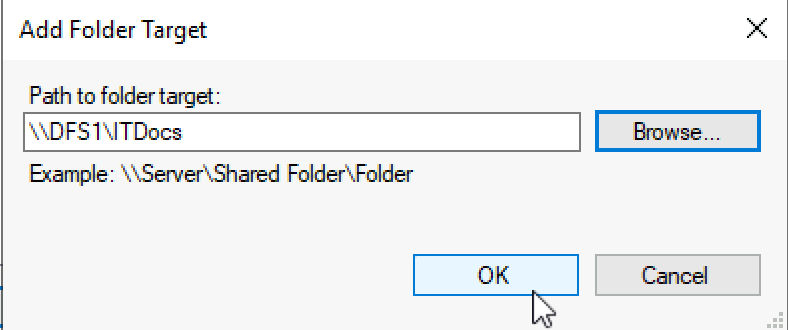
We will now select DFS2 server and same folder
Ok
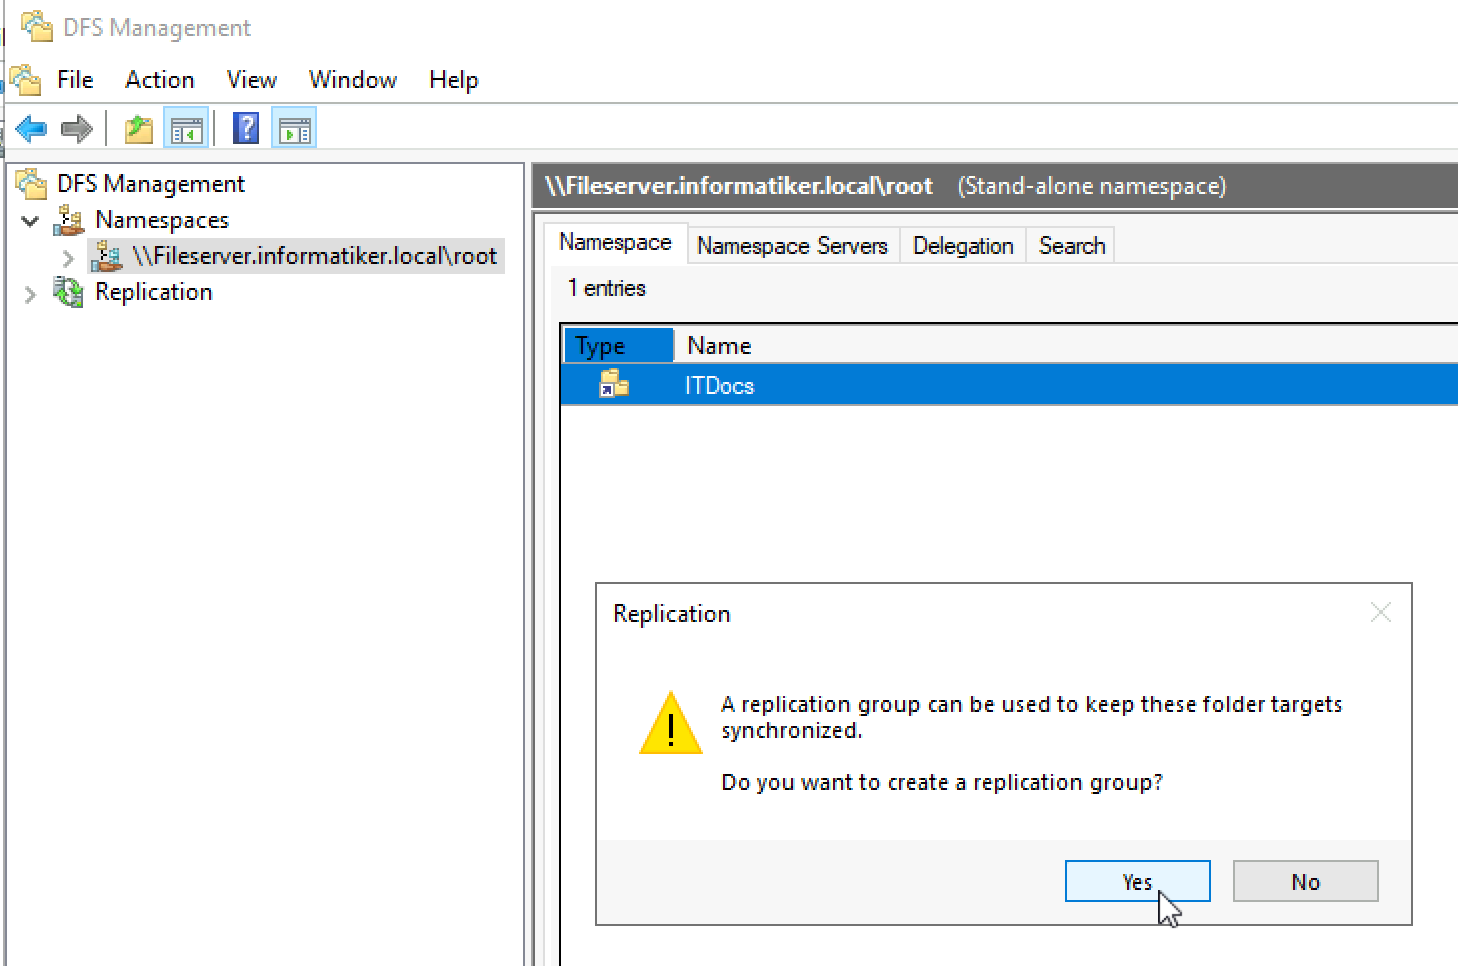
You will then be asked to create Replication group – select Yes
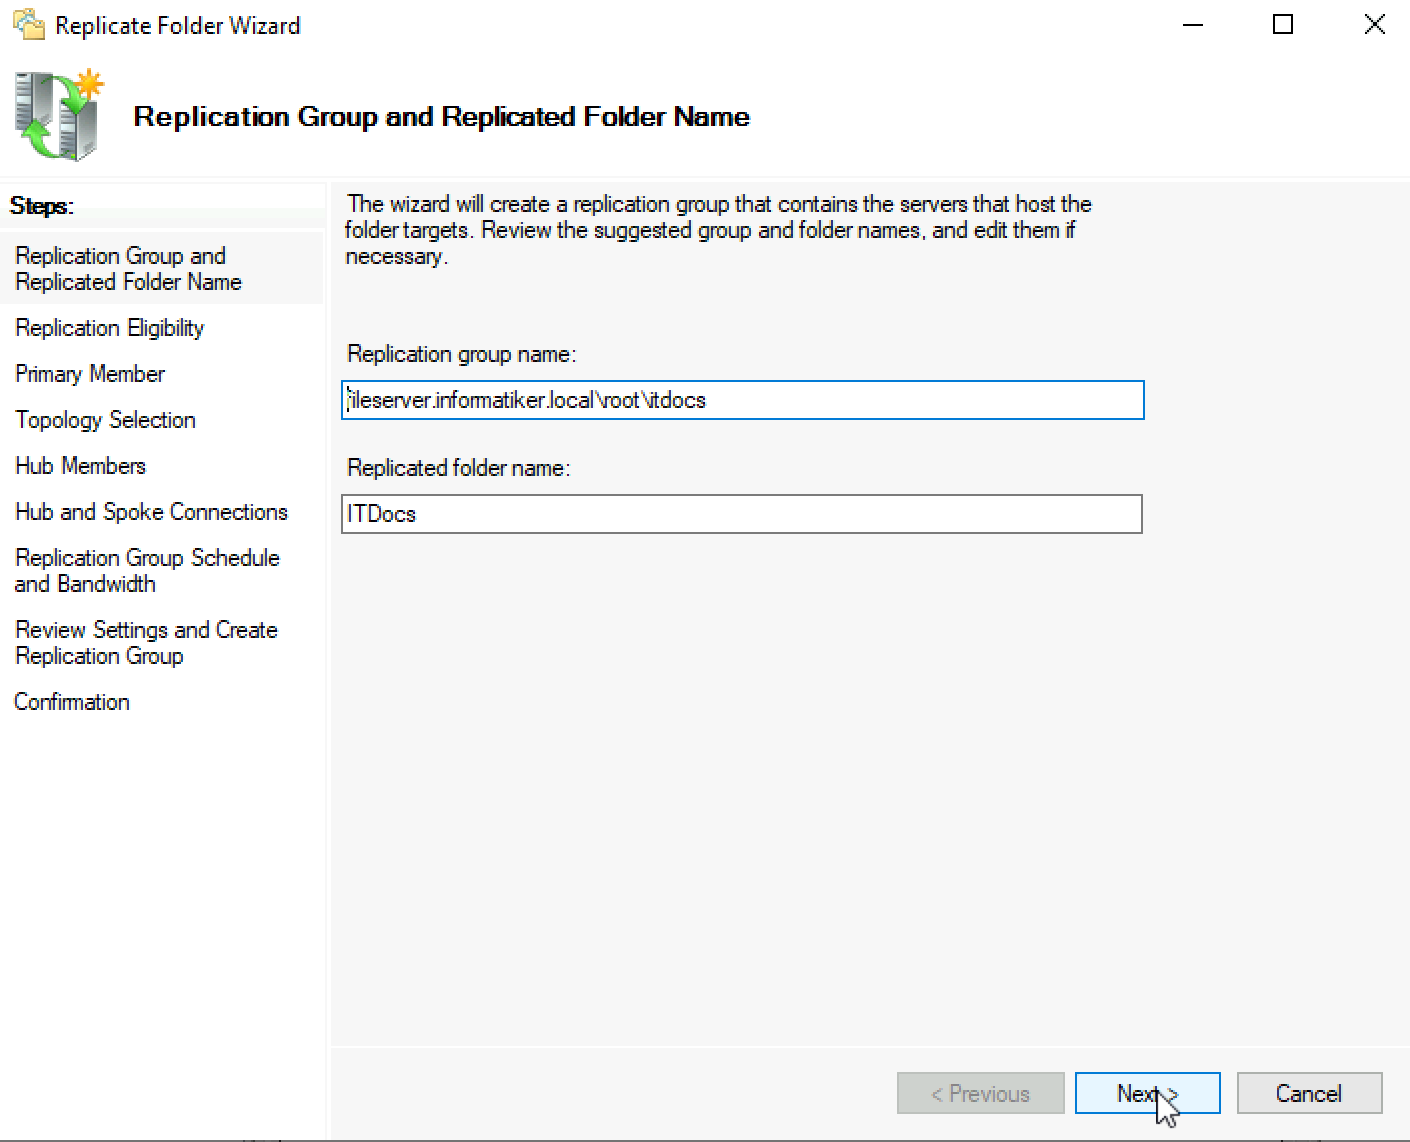
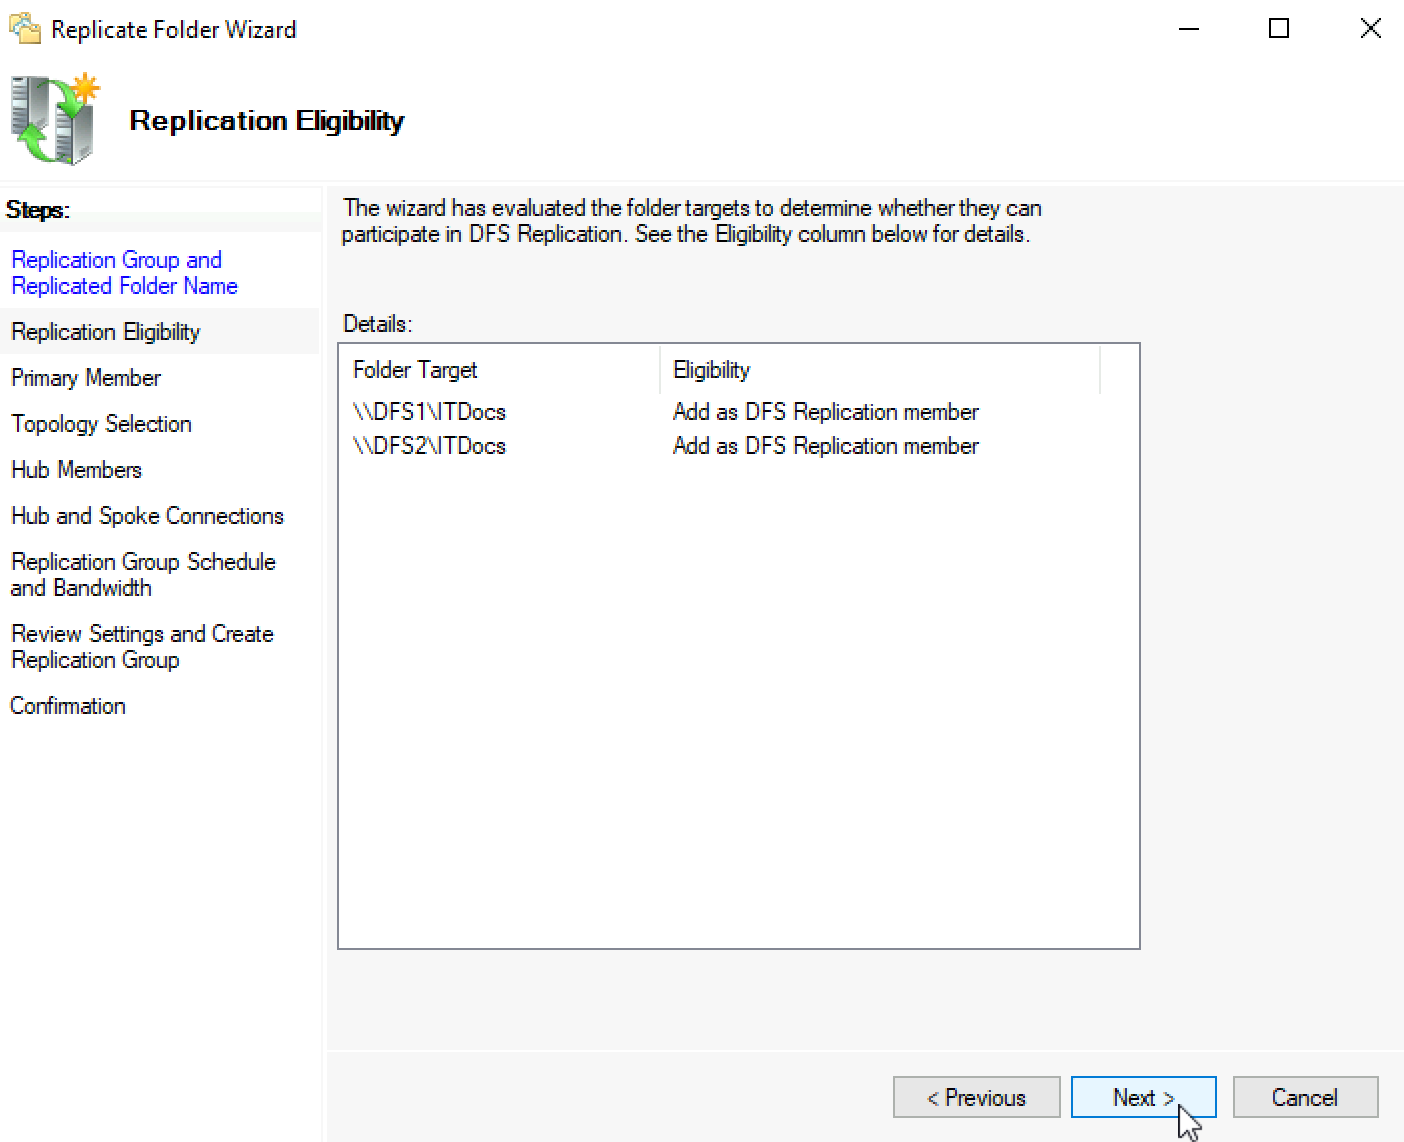
New wizard will appear – on first screen I left everything as is – Next
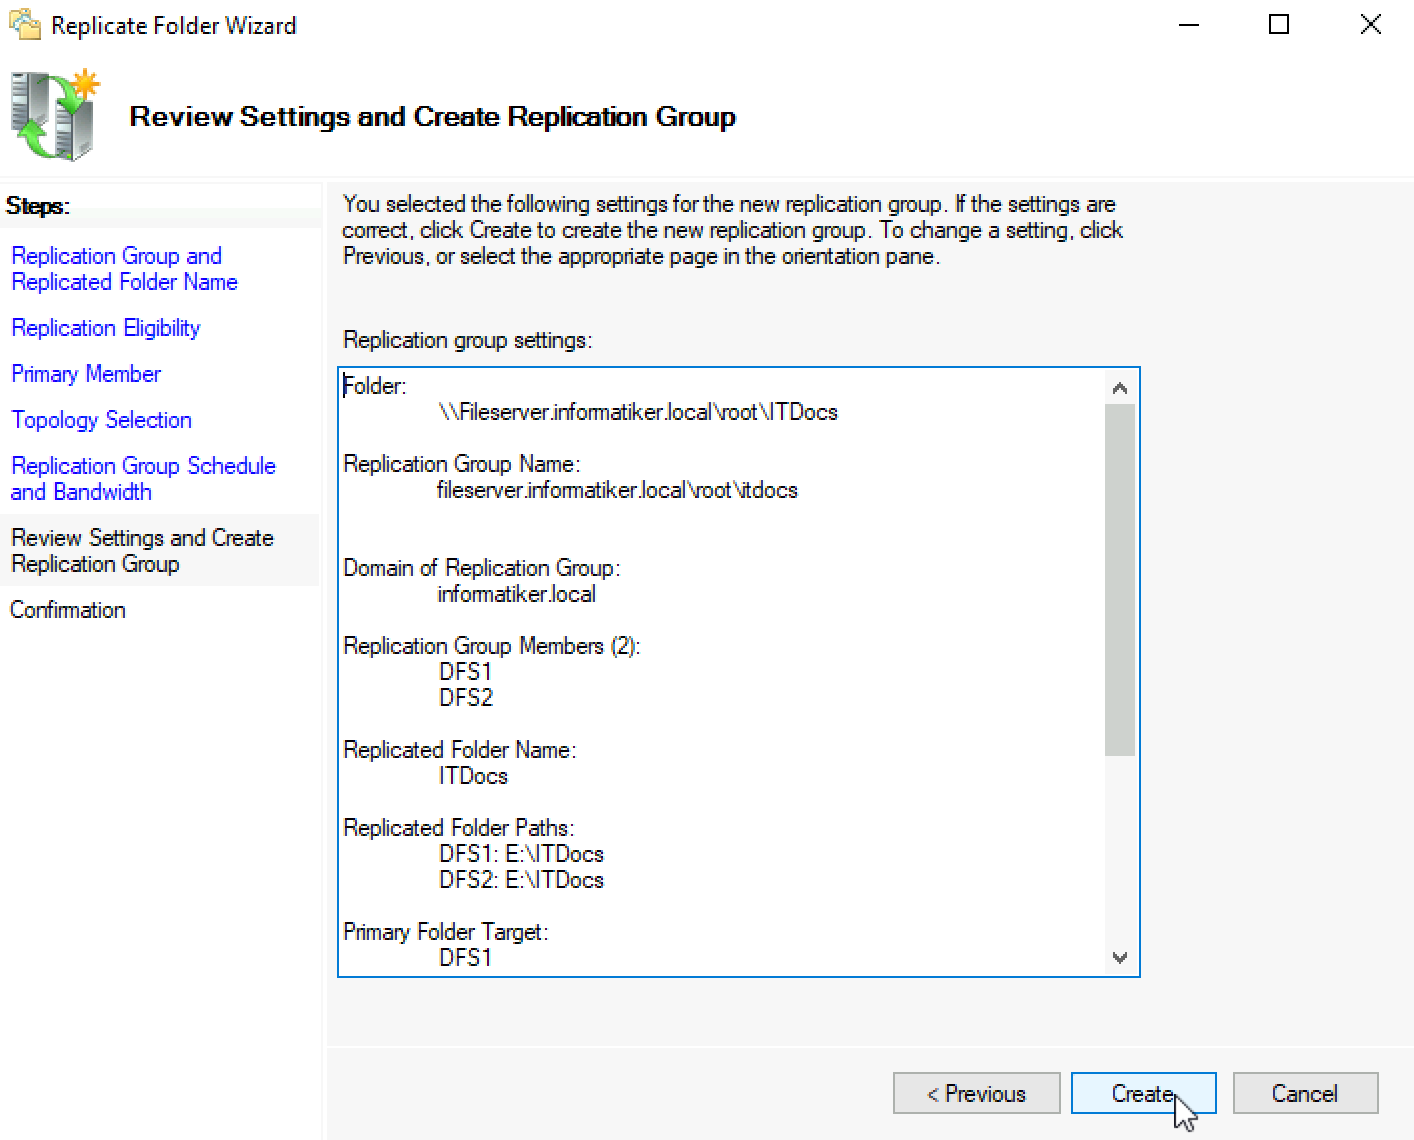
Everything is correct, I want these two folders to replicate (ITDocs on DFS1 and DFS2)
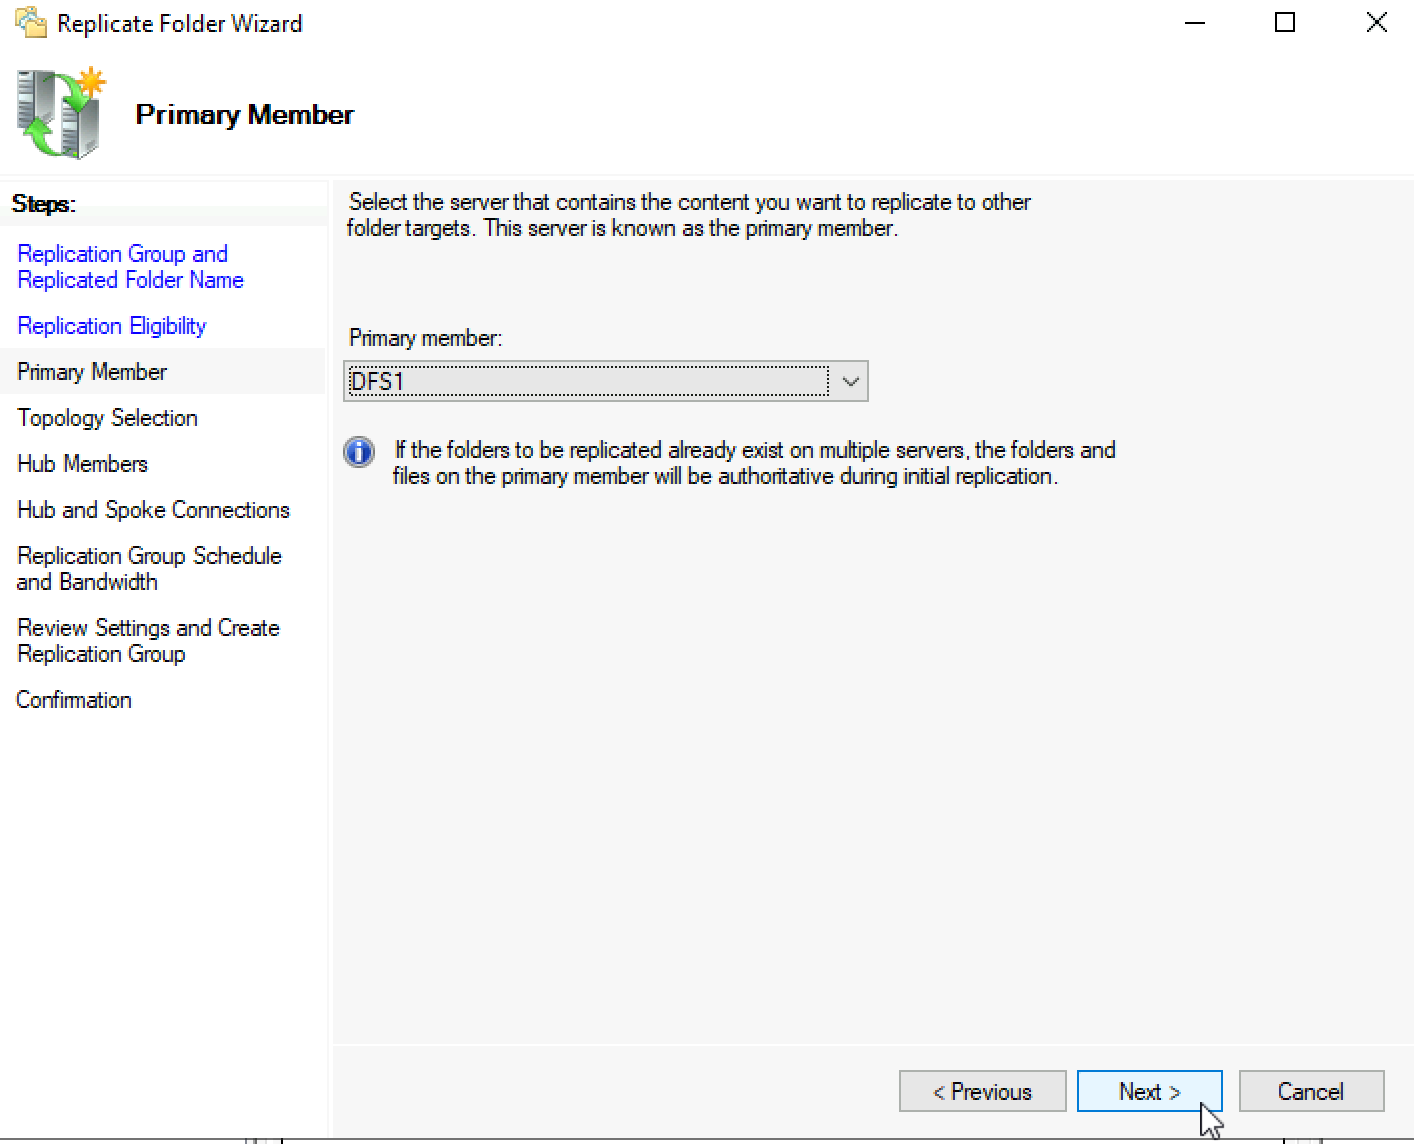
I don’t have preference for primary member, so I will select DFS1 | Next
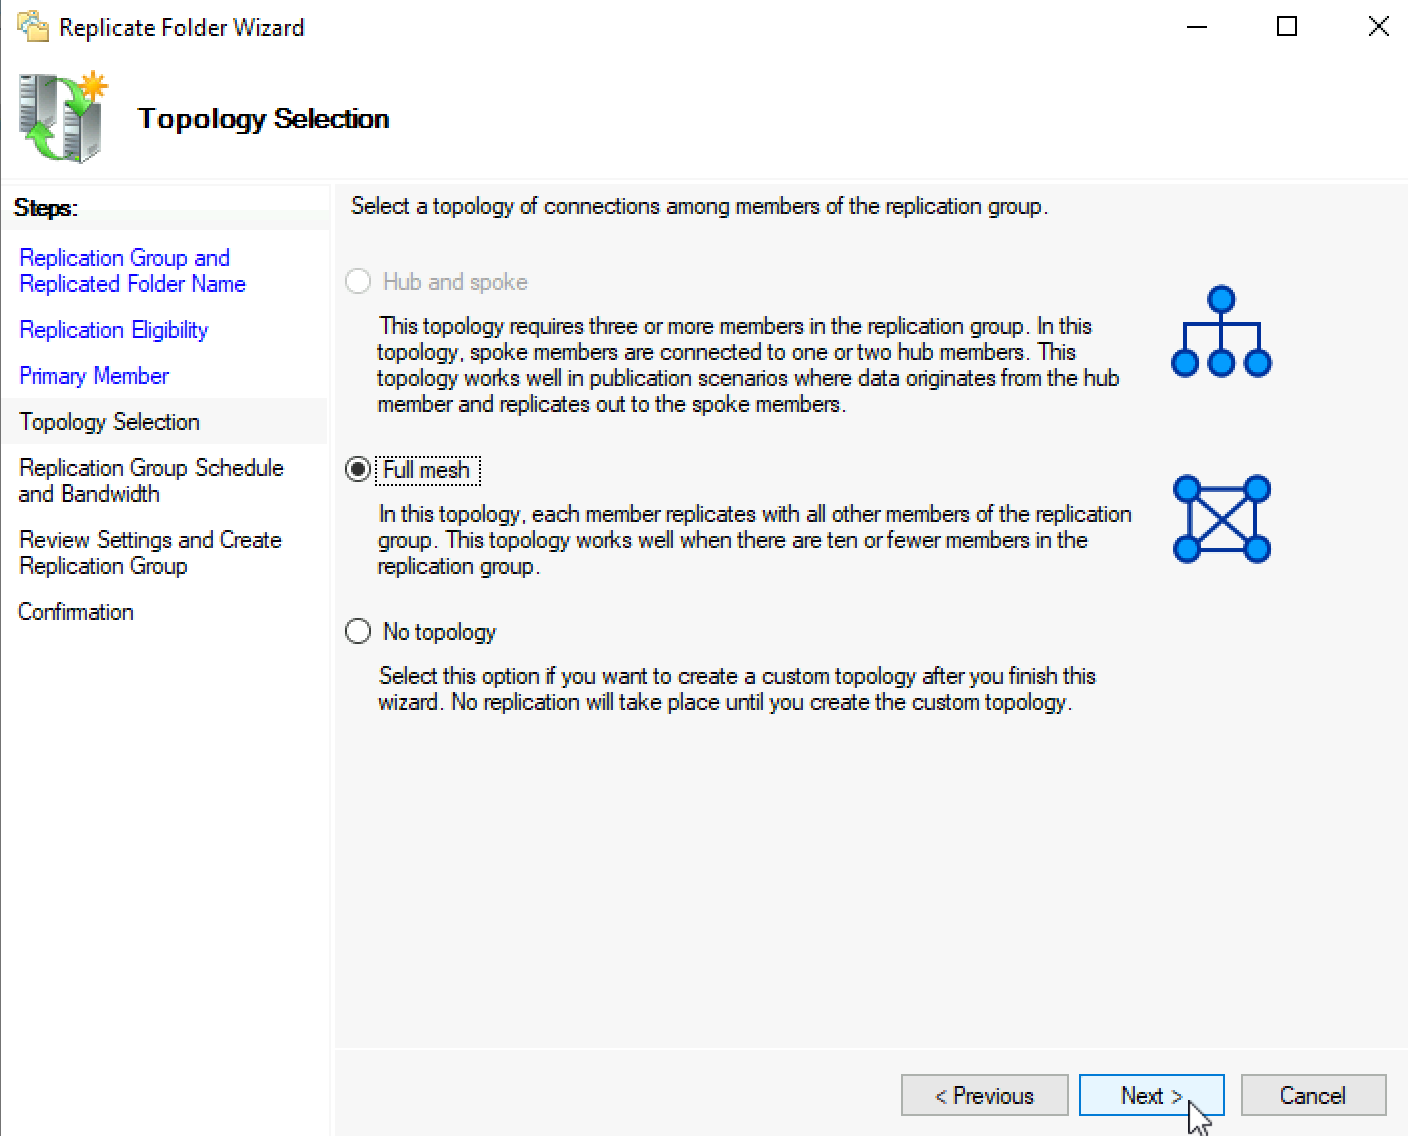
Not a lot to select from – Full Mesh
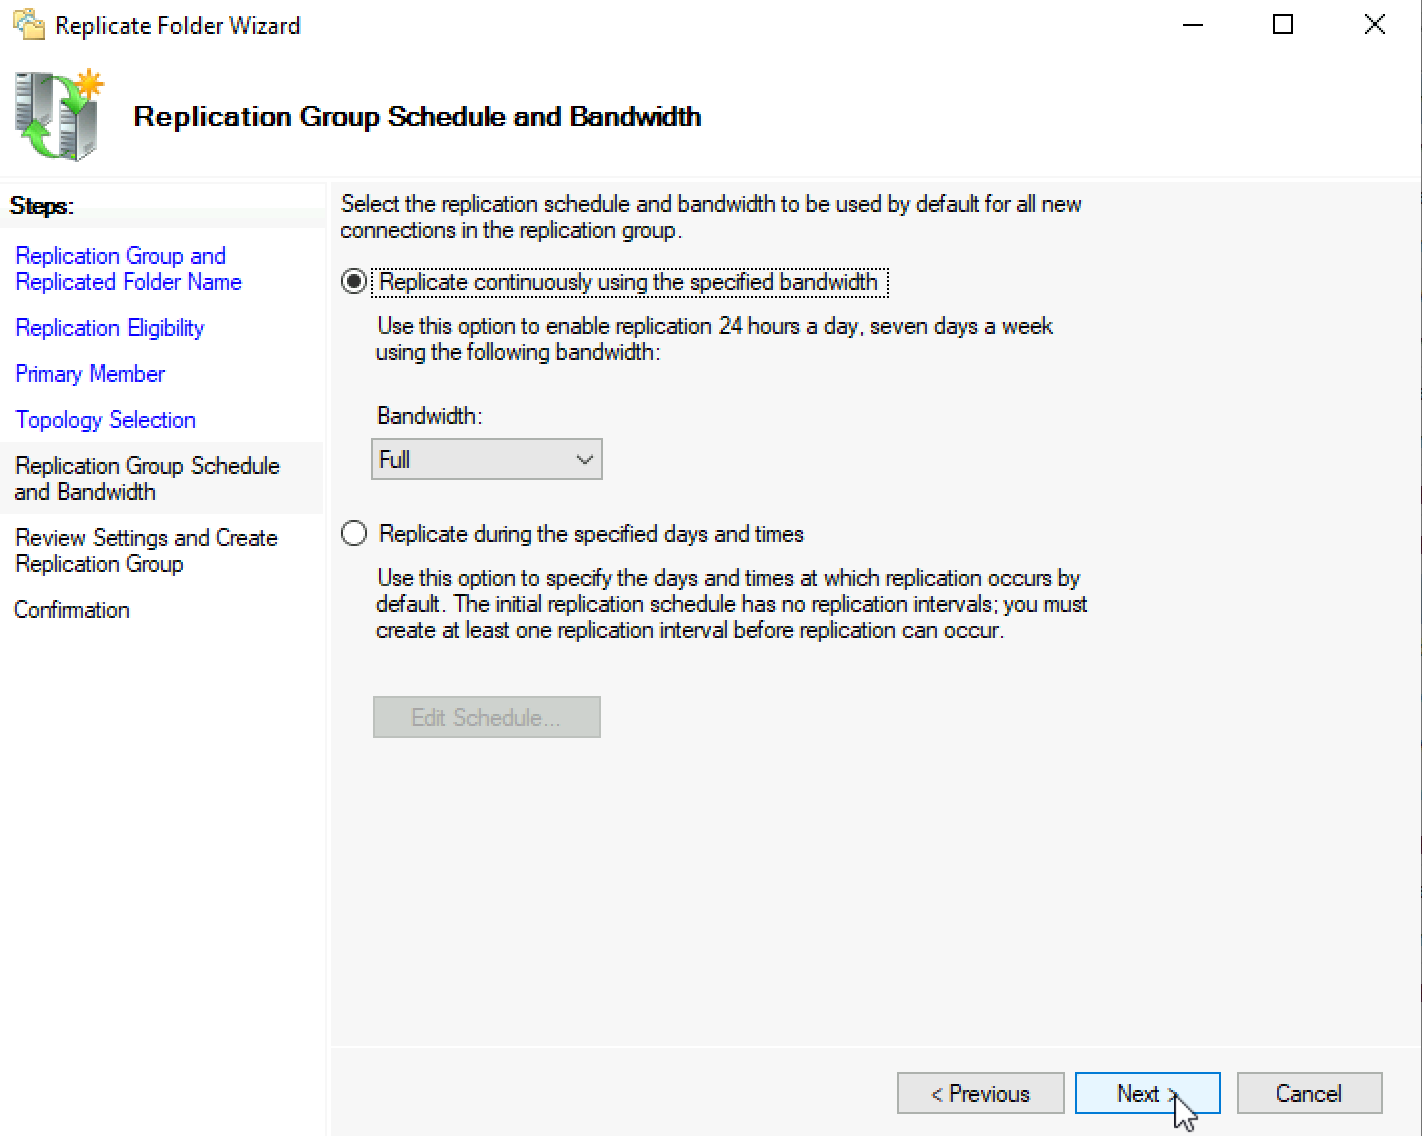
If bandwidth is an issue, you can configure that here | Next
Create
Huge success
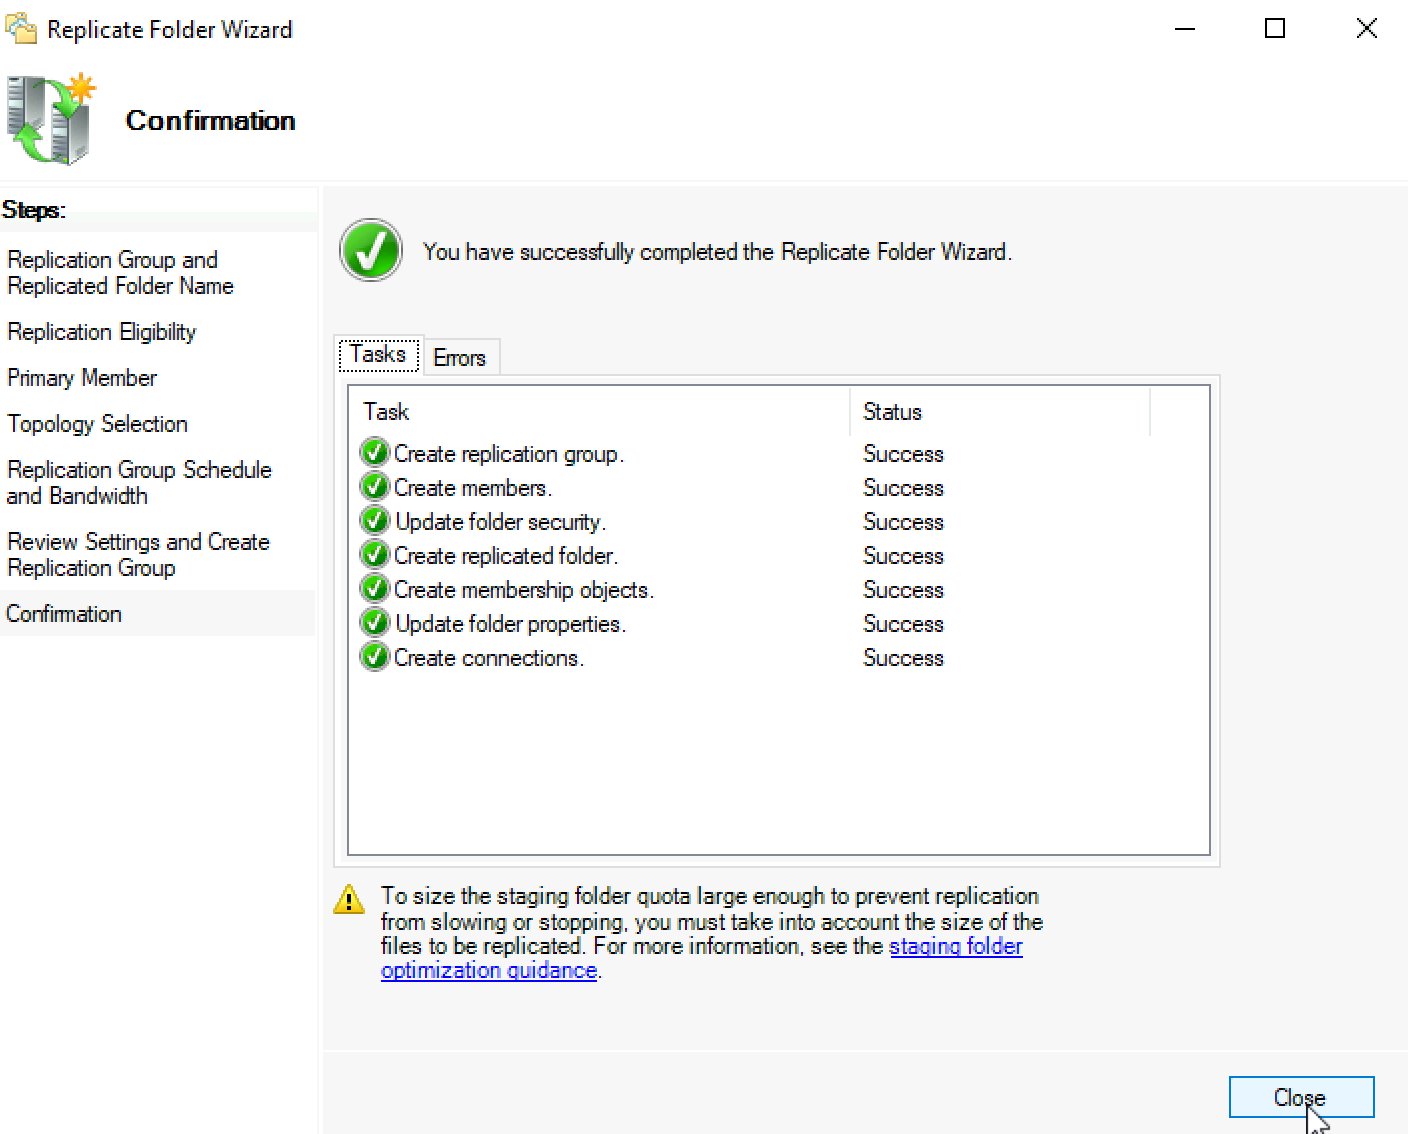
OK

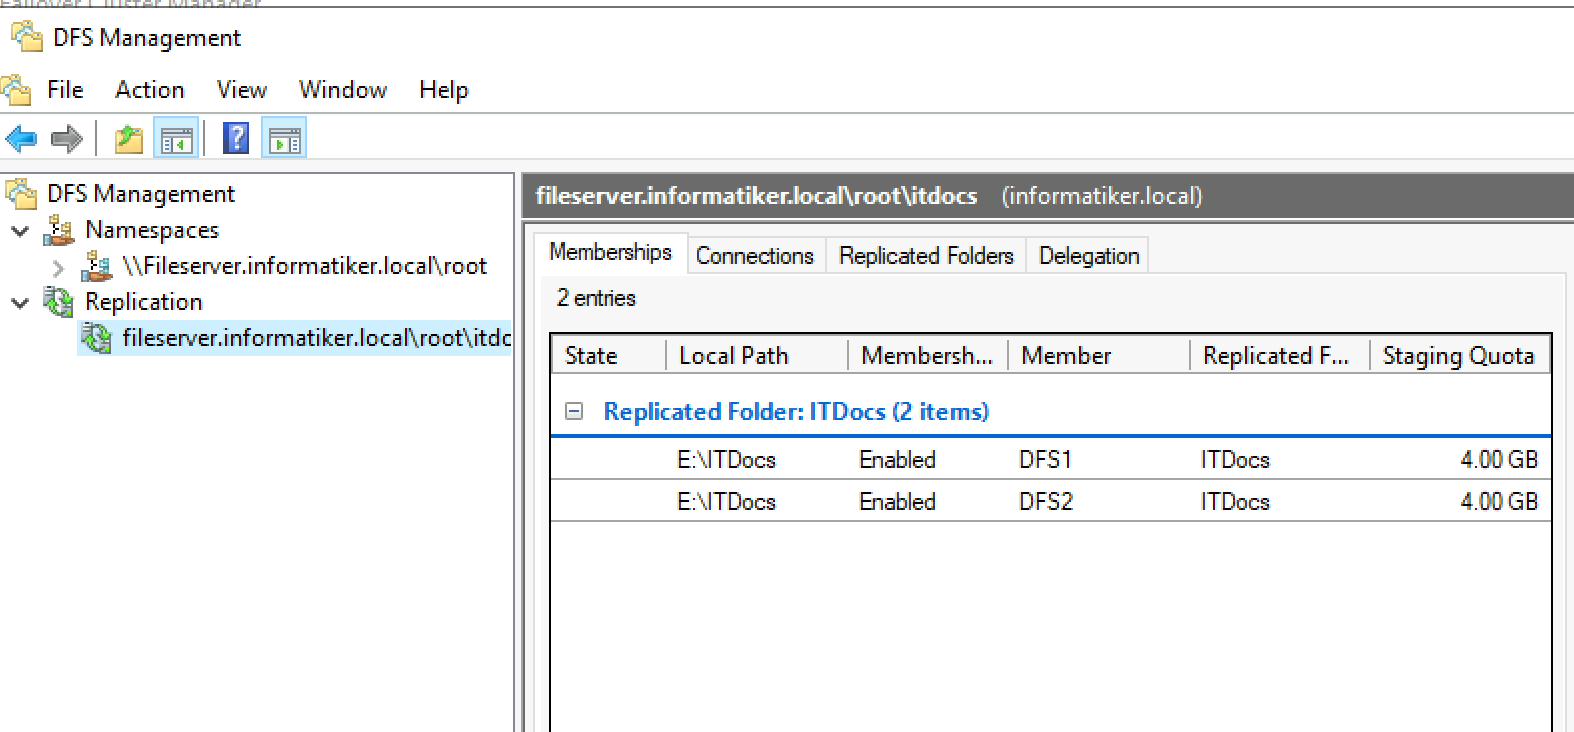
Now, we have a replication configured also
Remember I created Hello.txt inside ITDocs folder on DFS1 only. ITDocs folder on DFS2 is empty.
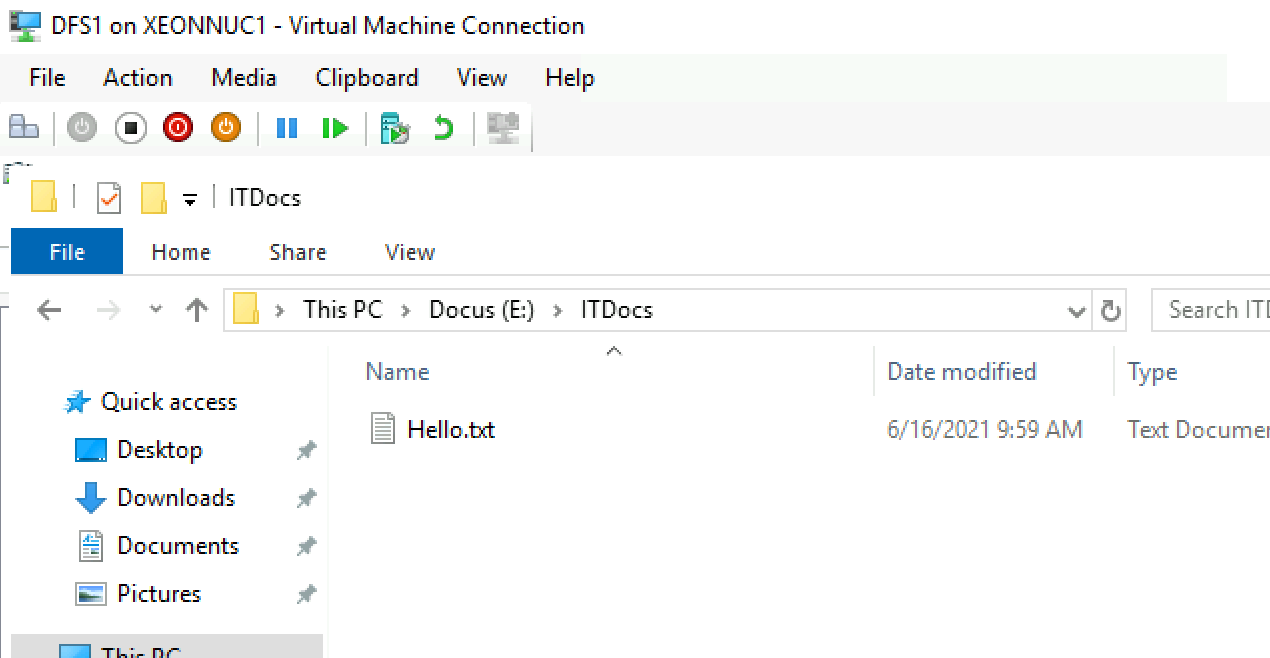
It also created everything on DFS2. On DFS2 I created FirstTest file, which was immediately replicated to DFS1
Ok, so we done a little bit of testing at the end of the configuration.
That is more or less it, we now have a working file replication.
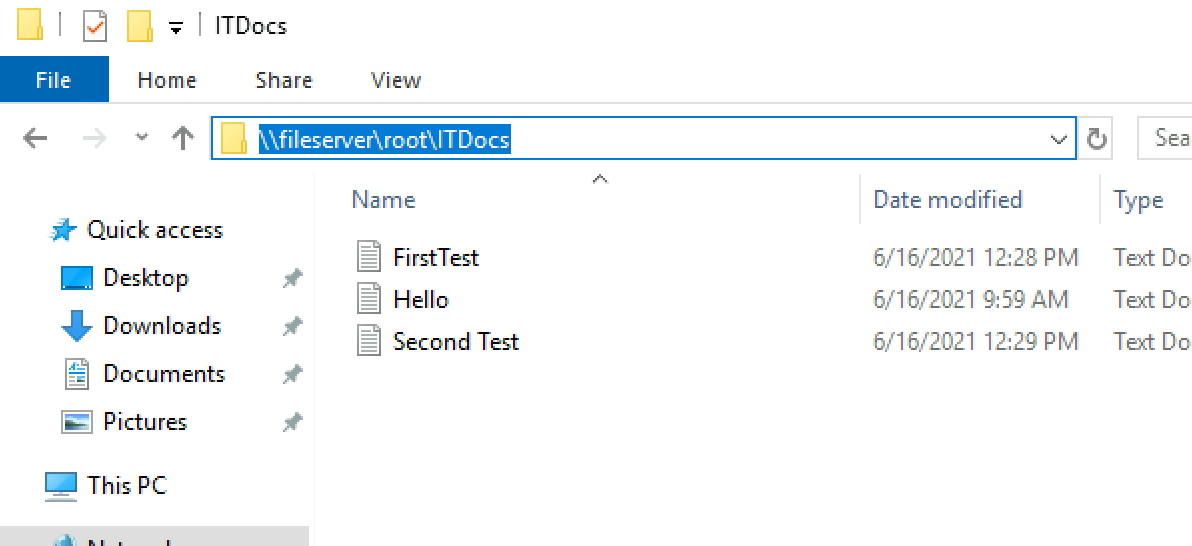
If we visit from client computer, we will access now file share from \\fileserver\root\ITDocs
So, no \\DFS1 or \\DFS2 but Fileserver – that way if DFS1 or DFS2 is down, your users will always be able to access file share, as long as one node behind fileserver namespace is up.
I also created file named Second Test on my client machine – it replicated to both DFS1 and DFS2
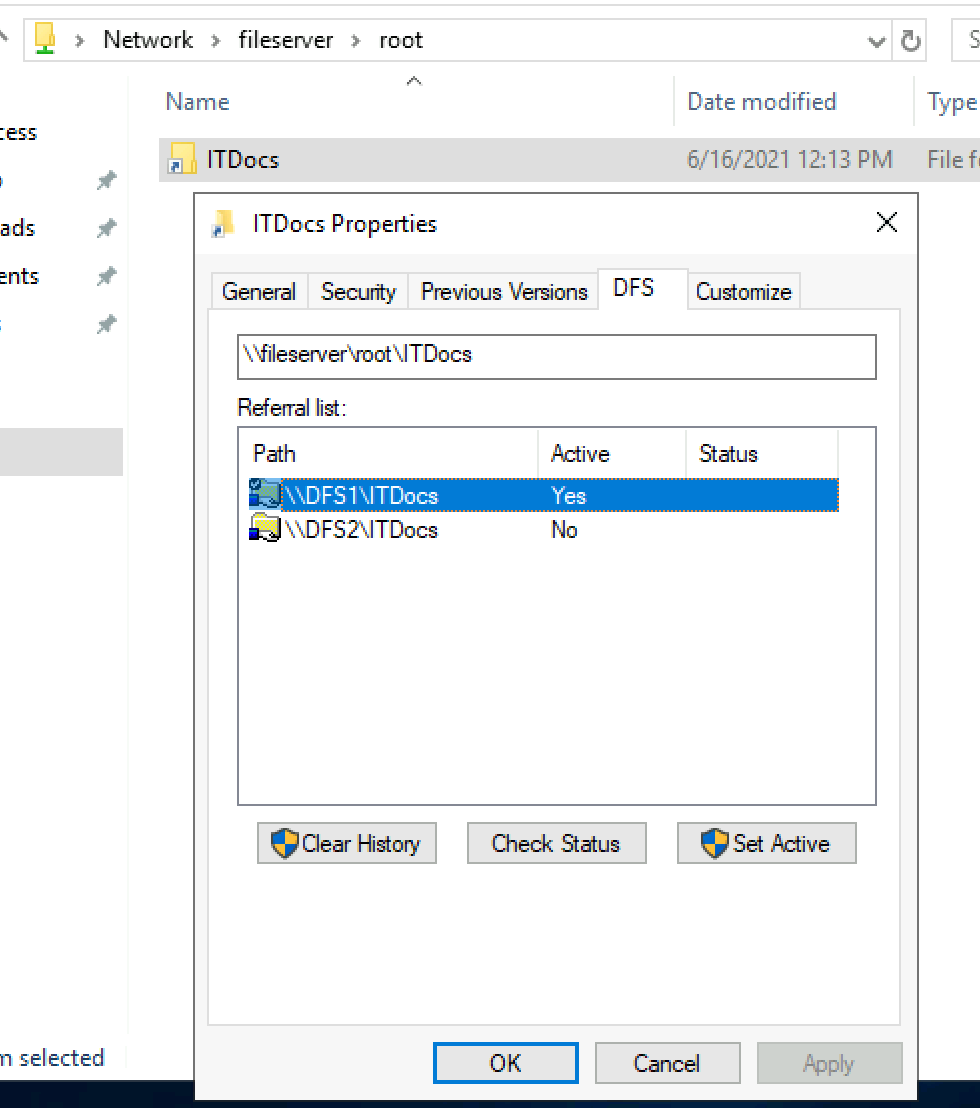
I would also like to know to which DFS server is my client connected for files, to DFS1 o DFS2.
On client machine go to \\fileserver\root and right click on ITDocs folder
Select DFS tab – I’m currently connected to DFS1 server.
Ok, our setup and testing is done – everything works!
Things to consider / Conclusion
Few important things/limitations to consider before you put this into production
Large number of files
If you have large file share – a tens or hundreds of GBs – most important is that you start from one node and initially replicate to other ones. Don’t try to do initial Replications with files/folders scattered on multiple servers – consolidate all on one server, and then replicate that to other (empty folders). Otherwise you are risking DFS malfunction at the start.
Again, if you have large file shares with enormous file changes everyday – maybe DFS is not solution for you – depending on your environment, it may be too slow for your needs and not replicate everything in time and in the end you finish with conflicts.
File conflicts
This one can be fatal if you have multiple people working on same files at the same time.
Why?
From example above – you can see that my Client is connected to DFS1 node and working on files on DFS1
If I have another user, he/she may be connected to DFS2. Both of them will then be able to open same file (without read-only lock if we are talking word, excel) and edit same file at the same time.
The last one who closes and saves will overwrite changes from the other one. So, work will be lost if two people have same file opened, but system selected to connect them to different node of the DFS.
This is huge issue
It also won’t respond well if you start some changes (on same set of files/folders) on one node, and then impatiently apply some more changes on the second node to the same set of files/folders. Things will mess up.
Special characters/ Long folder and file names
Can also be issue, I had extreme cases where files would not be replicated because special characters or because of a book written in name of the file.
DFS is not a backup – file deleted or edited on one node – will be deleted edited on second/third node… I hope that is clear enough.
Permissions
Be specific with your permissions and add them according to the needs, do not just let everyone read/write/edit everyhing.
These are some of the issues you need to be cautious about with DFS, it can be fiddly, but it also can be useful if you know how to utilize it. Huge plus is that you are able to propagate your file shares through the network under universal name, and not dependent on the single server. That way if something happens to one node of the DFS, people will be able to work without noticing downtime.