We went through installation and configuration of SpamTitan for our Exchange server, now we are going to go step further and create clustered configuration. Cluster is always great idea for redundancy/high availability.
Before we begin
We are going to do this with two installations of SpamTitan. One is on 192.168.50.4 and another one 192.168.50.5.
Both SpamTitan installations are same versions. Your installations doesn’t have to be in same network, but you have to be able to communicate between them, of course.
I named my SpamTitan installations:
mail.informaticar.net – 192.168.50.4
mail1.informaticar.net – 192.168.50.5
I created A records for mail and mail1 for domain informaticar.net
I also created two MX records
mail.informaticar.net with weight 10
mail1.informaticar.net with weight 30
Both mail and mail1 have separate public IP!!
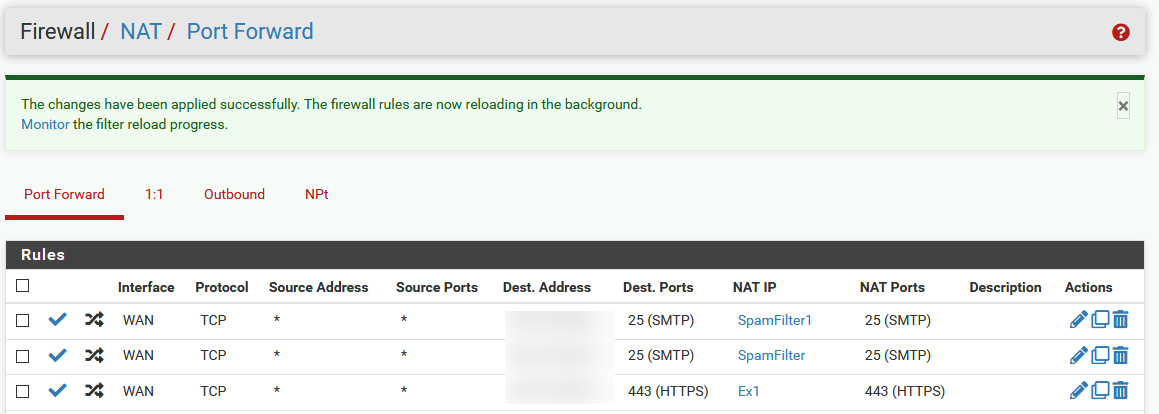
I also added NAT to my firewall for port 25 to both of these machines (firewall rule on WAN interface is automatically created on pFSense).
All of the details on which I talk about here can be found on SpamTitan Admin guide – https://docs.titanhq.com/en/9589-setting-up-a-cluster.html
Cluster setup
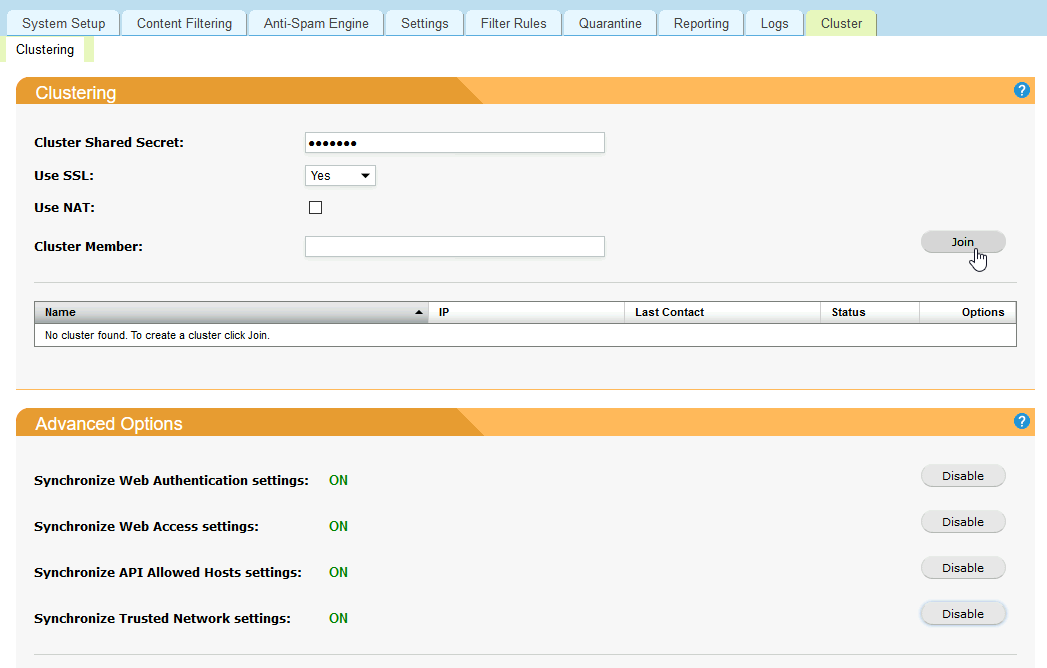
I’m going to login to 192.168.50.4 since that will be first of my two node cluster members
Under Cluster menu, I’m going to enter shared secret (be sure to remember this password and make it strong!) I’m going to use SSL since I have SSL cert (you may choose not to use SSL). I don’t need NAT, so I’m not going to check that.
Since this is first node in the cluster, and cluster does not exist yet, Cluster Member will be left empty. Under Advanced Options I’m going to turn everything on.
Select Join
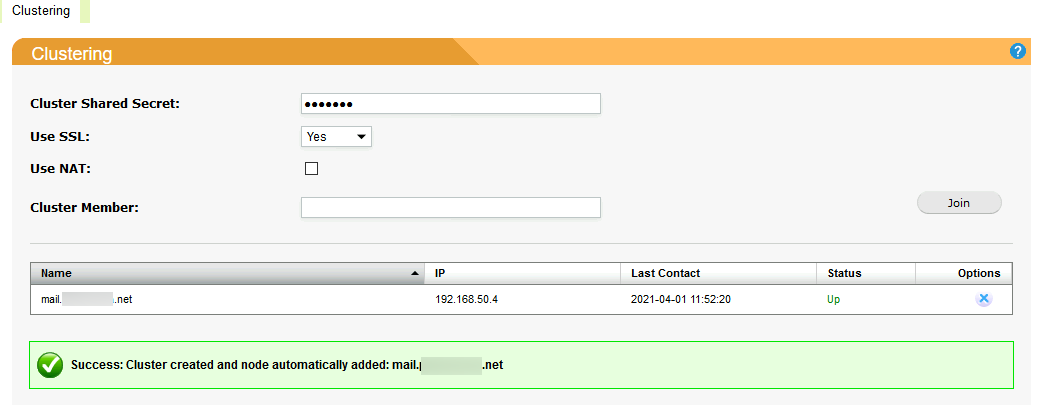
Operation was success.
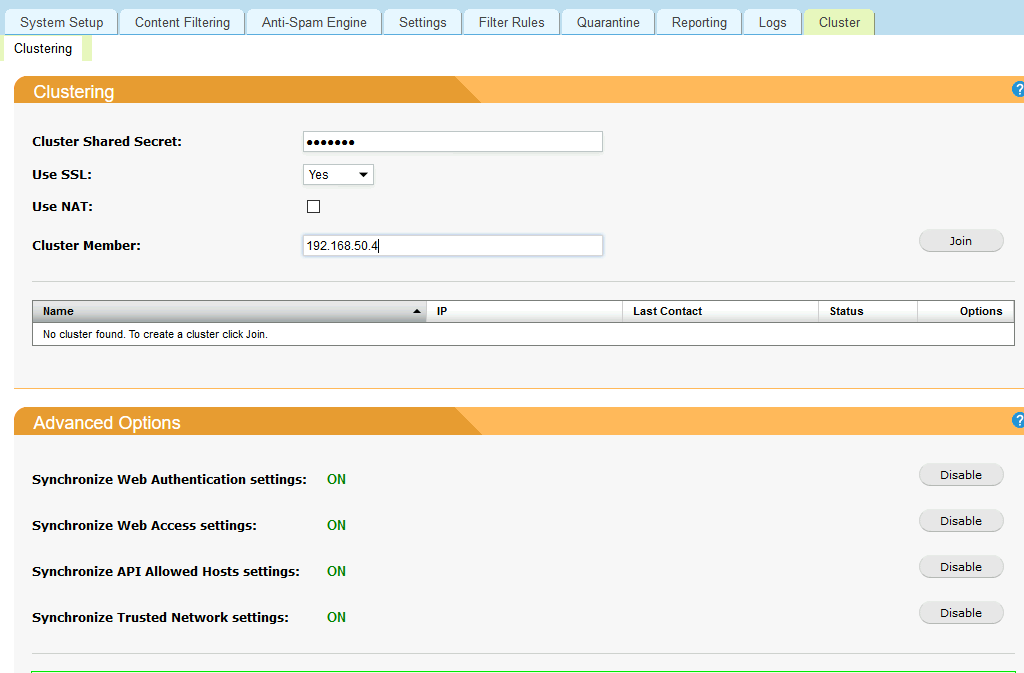
Now, I’m going to repeat procedure for SpamTitan on the 192.168.50.5
I will do everything same way as on the first node, except this time in Cluster Member Field I will enter 192.168.50.4
Join
Again – success
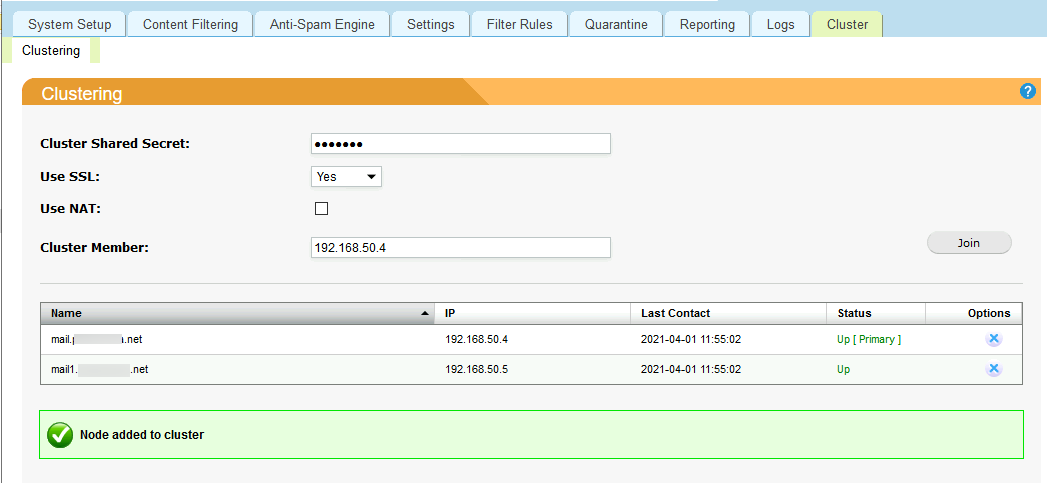
Now we have created cluster.
Testing
I will do simple test, my mailflow has to work with both SpamTitan nodes up, or with each of them (mail or mail1) down.
Let’s test it.
Both nodes up – I will send email to the domain I’m testing from external domain

Email received
Let’s now shut down node1 (mail, 192.168.50.4)
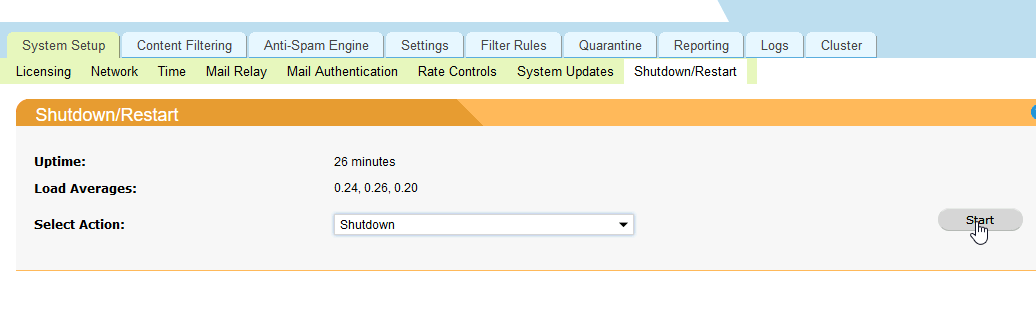

I will now repeat sending email from external domain
Email received, everything works!
Ok, and the last test, we are going to bring down 192.168.50.5 (mail1)

It works!
Everything works, ofcourse this to function correctly, your firewall/router/NAT should be configured correctly. I have two public IPs – each one mapped to one SpamTitan installation and one mapped to mail and second to mail1.informaticar.net
That way, my setup worked flawlessly.
Conclusion
This was fast and simple and it is highly useful scenario, since it enables you to update your nodes and have antispam and mailflow intact.