We already did SpamTitan installation, now we are going to do basic configuration of the software. Nothing too fancy, just simple steps. SpamTitan also has great support (at least in my experience) so they can help you with tinkering your antispam protection.
Let’s start
Before we begin
There is no enough time for me to do deep in-depth walkthrough, because there is so many scenarios you can cover, here is the in depth admin guide for SpamTitan – of course you can also ask support for help. https://docs.titanhq.com/en/8792-spamtitan-gateway-admin-guide.html
On this link – https://www.spamtitan.com/spamtitan-gateway-sign-up-confirmation/ you can find videos that will guide you for installation and configuration of the product.
Configuration
Where we left of in installation manual is login screen to our SpamTitan installation http://192.168.50.5
Default SpamTitan login is: admin
Default SpamTitan pass is: hiadmin

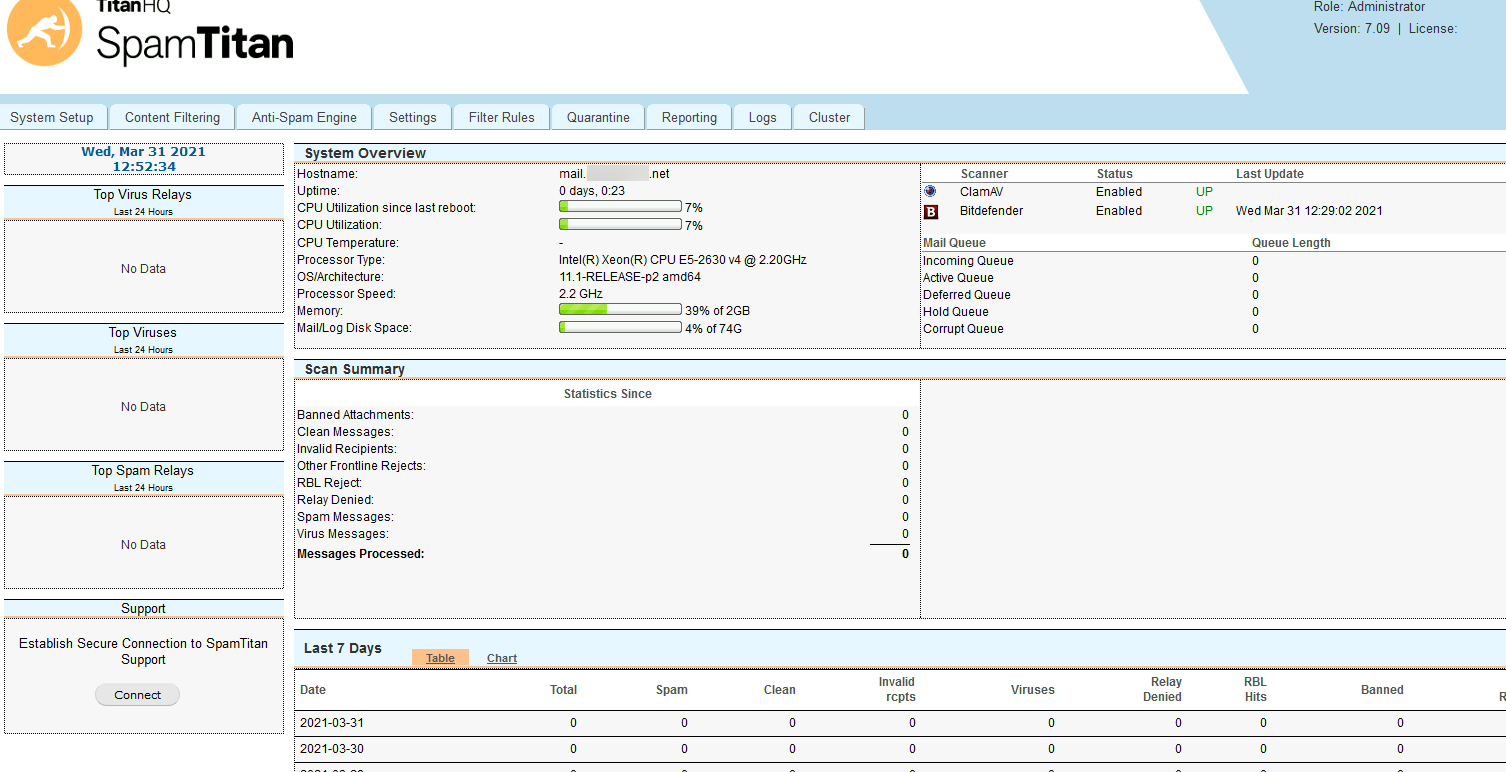
You will be greeted by Dashboard screen. Even from login screen in the bottom left box you can select connect to support for the product
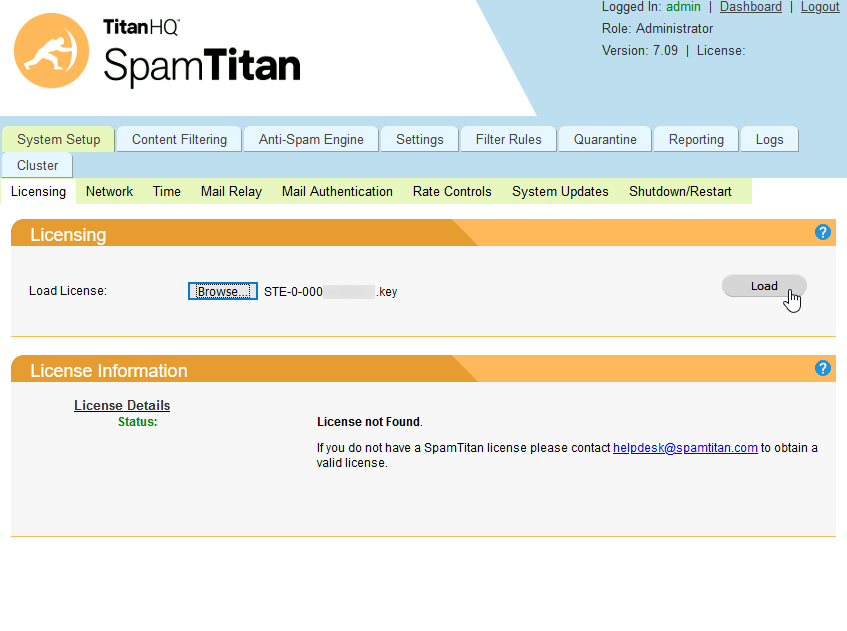
System Setup
Next step is going to be System Setup menu and Licensing tab under it. On the Licensing screen browse to the location where your SpamTitan license is, selet the key and load it.
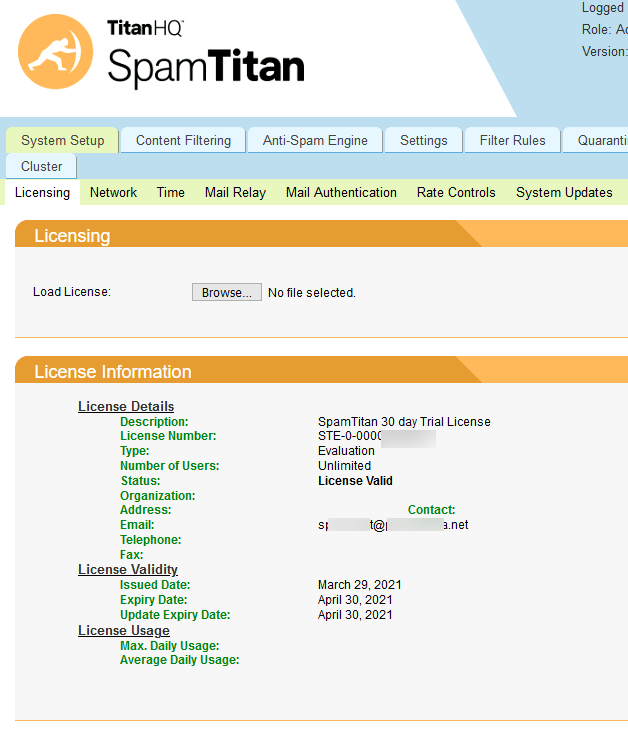
You should have your license loaded
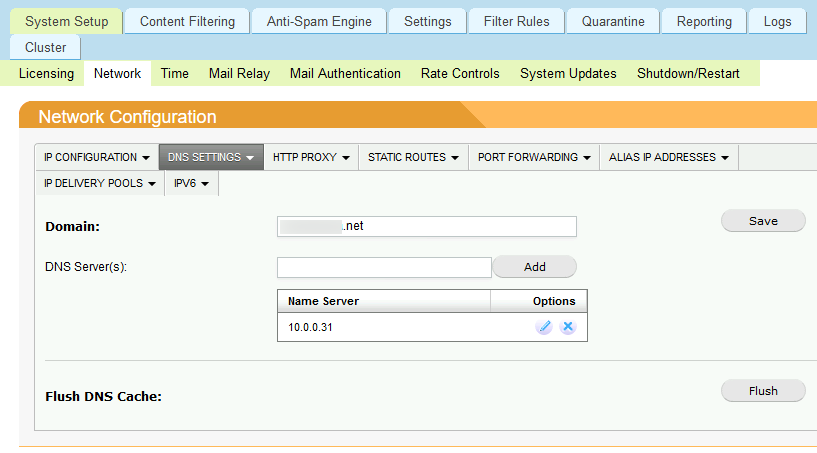
We are staying on System Setup menu and selecting Network tab. Two important settings there. IP config and DNS config. I assume you did these correctly during installation phase, but here is where you can modify something if you wish.
IP Configuration
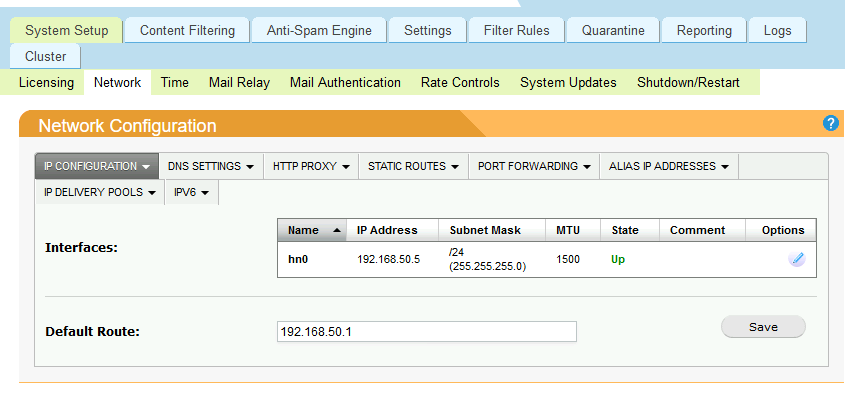
DNS Settings
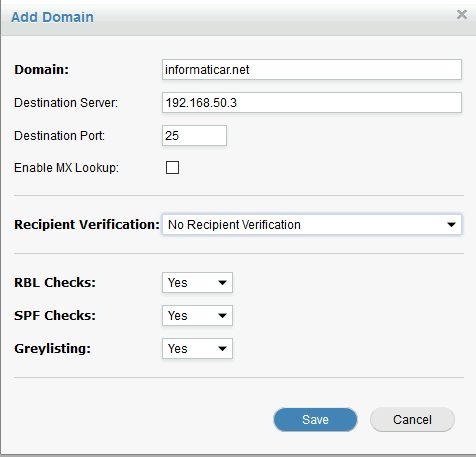
We are still on System Setup, next tab is going to be Mail Relay
Under Domains tab I’m going to add my domain – informaticar.net and local IP of the exchange edge role – 192.168.50.3
Under Recipient Verification you can specify Dynamic Recipient Verification, but then you also need to specify server that is doing it. When you are done, click on Save
Dynamic Recipient Verification is very good practice (not used here) because with Dynamic Recipient Verification SpamTitan will check incoming mail and see if the user exists. If the user exists it will let mail pass (in case it is not spam) and if the user does no exist, mail will be rejected (I specified mailbox server role IP 10.0.0.36). Also be very careful with this, if not setup correctly, your emails will be rejected (I personally experienced it and was wandering what is wrong with my email).
This is how your domain tab should look like after you save your settings.
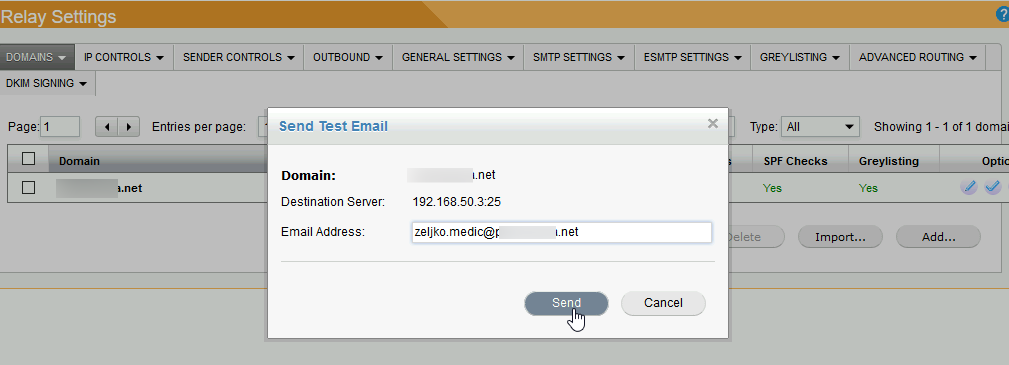
Good idea is to click on test button under domain options while we are still at this screen, to check if this is working.

Enter email address which is active on the Exchange you are trying to protect with SpamTitan. Click on Send
Success with sending from SpamTitan
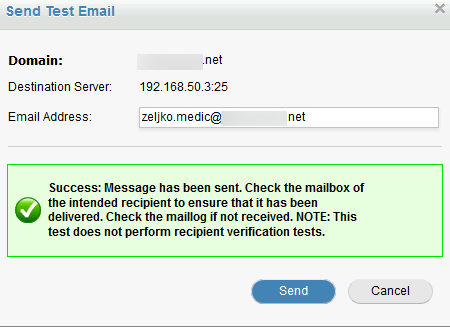
And it is in my inbox
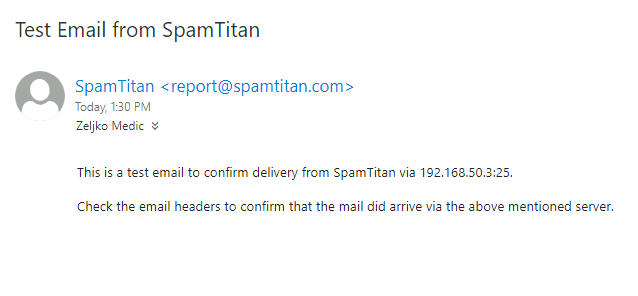
So, all is good, SpamTitan is communicating with Exchange.
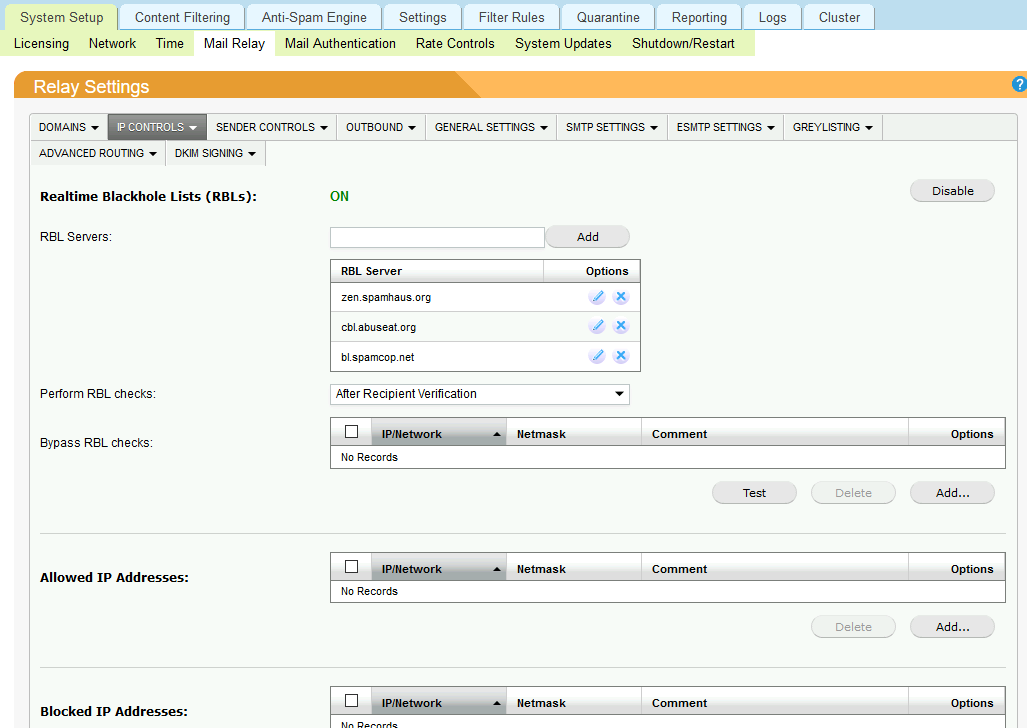
Next up, still on the System Setup under Mail Relay tab is IP Controls
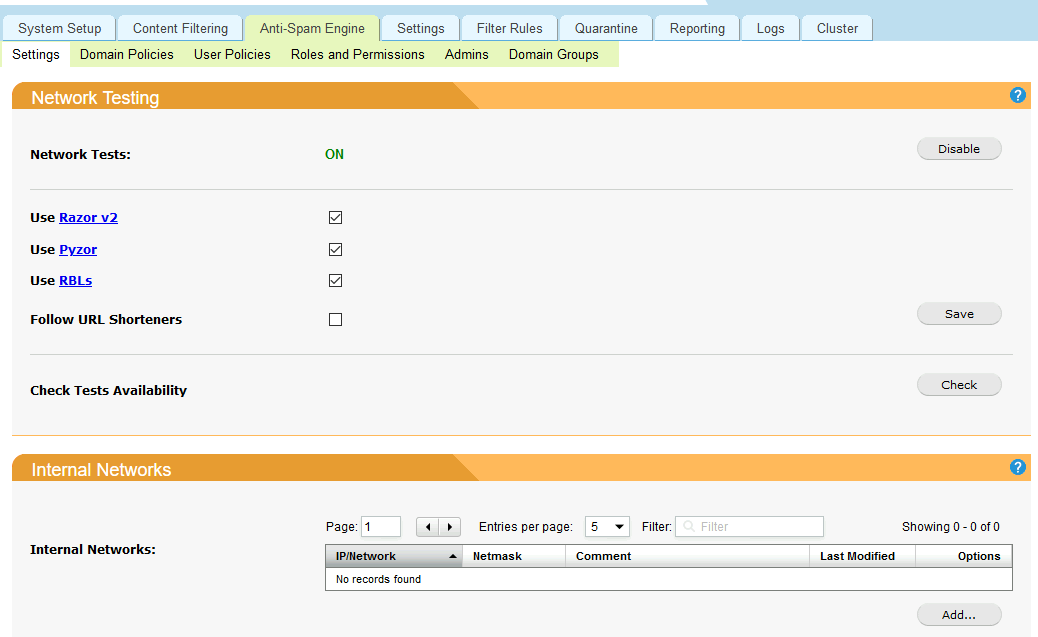
You can white or blacklist IPs you wish, and also do something I highly recommend – turn ON Realtime Blackhole Lists (RBLs).
zen.spamhaus.org, cbl.abuseat.org and bl.spamcop.net are some of the lists I would recommend. Use only highly reputable list here, because not all RBLs are good RBLs.
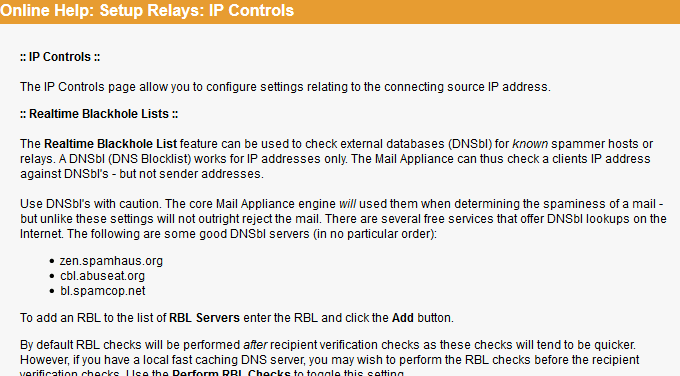
If you click on the little blue question mark in the top right corner, you will see that SpamTitan also recommends these lists
Things worth mentioning on the Mail Relay tab are Sender Controls and Outbound which you can define.
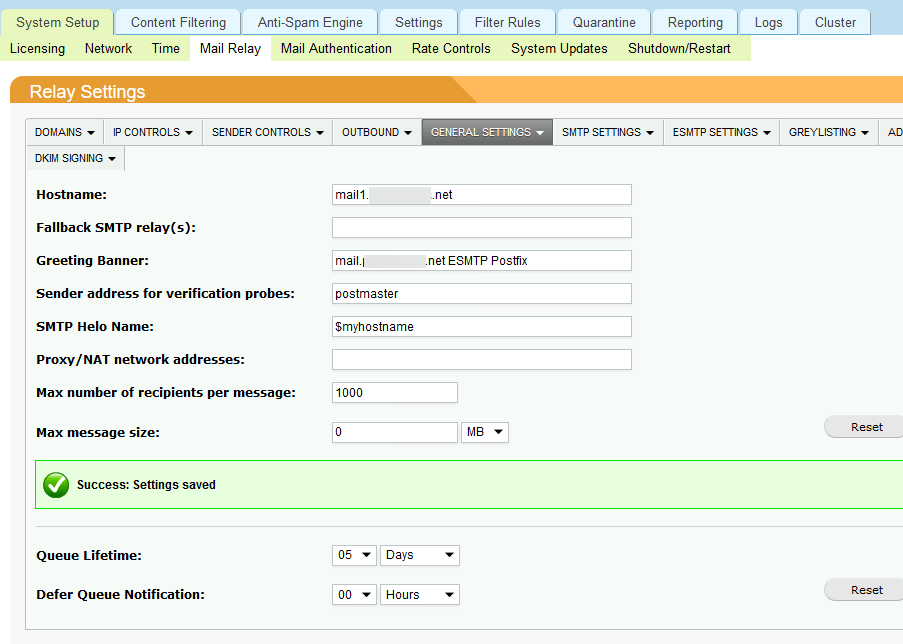
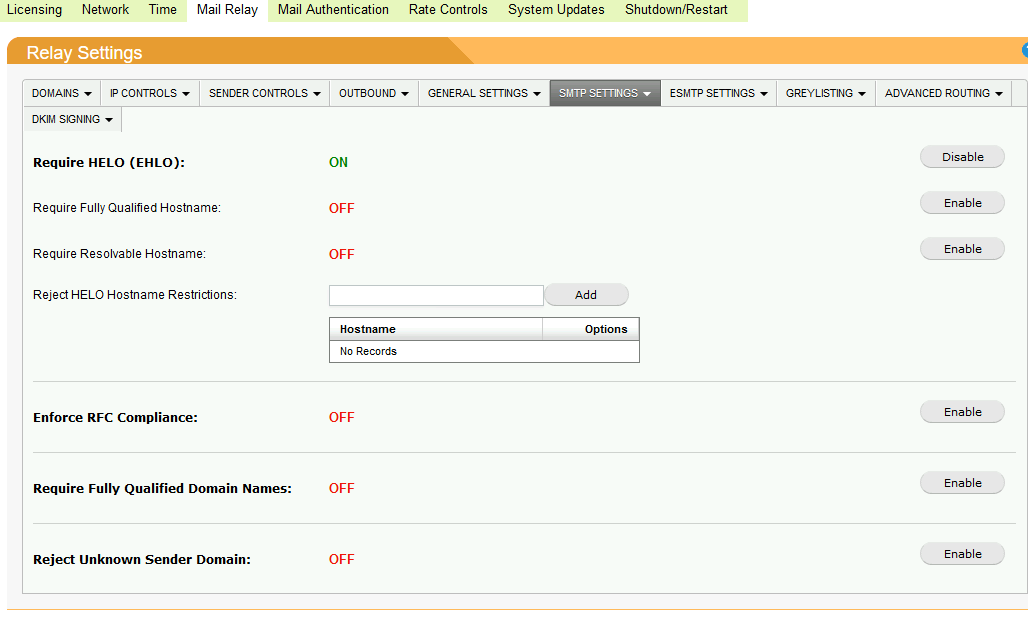
Under General Settings in Mail Relay tab it is worth mentioning that you can change hostname, greetings banner and other things for you appliance, HELO message…
Also under SMTP Settings in ail Relay Tab you can define what you will require for mailflow. This really is up to you, to tweak and test according to your needs.
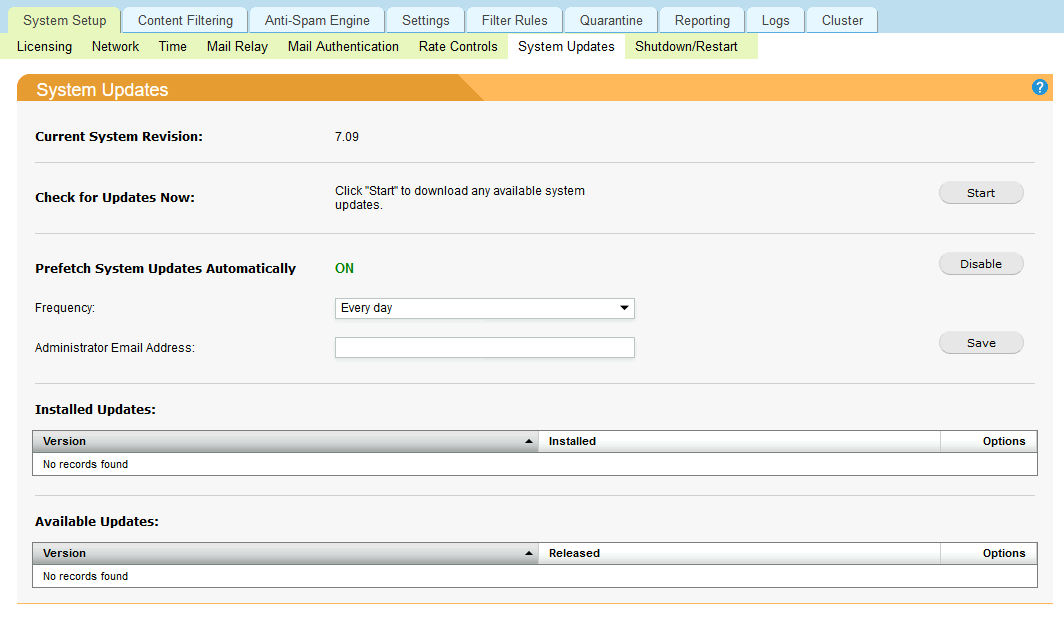
Next under System Setup menu is System Updates tab. Be sure to keep you SpamTitan up to date.
You can enter your email so you get notified of updates – good practice.
Content Filtering
Moving on to Content Filtering menu.
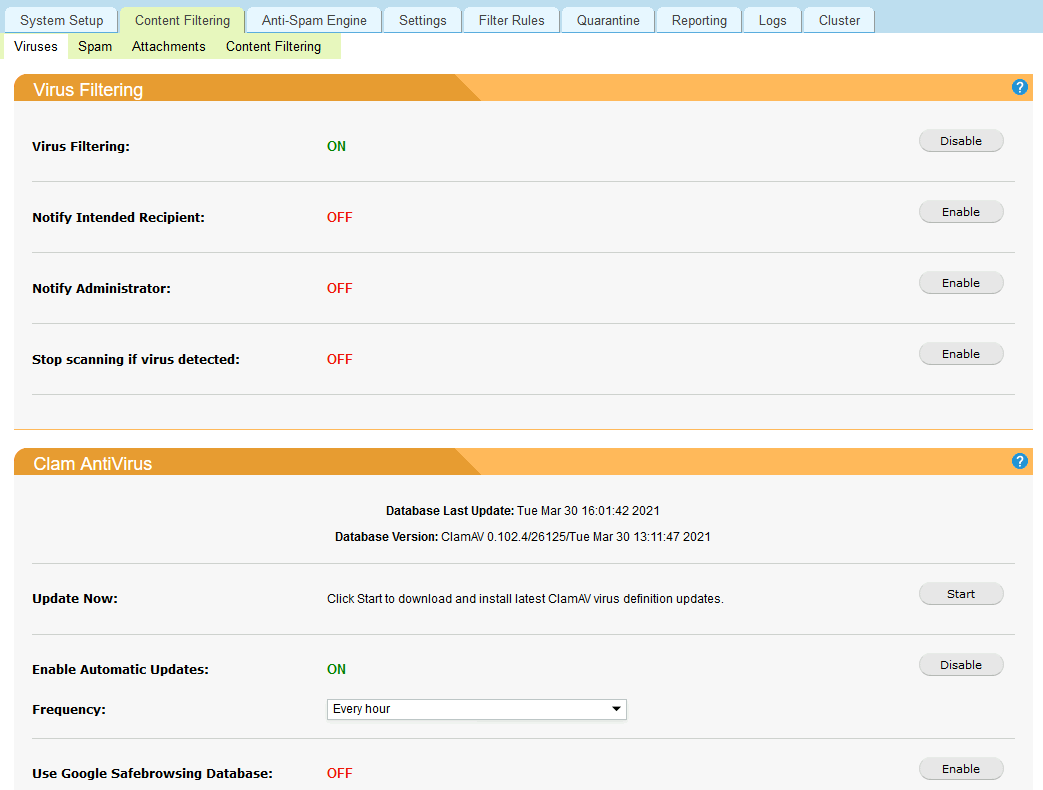
Viruses Tab – again, set at your preference. Currently SpamTitan is using ClamAV and Bitdefender as AV engines and both should be on.
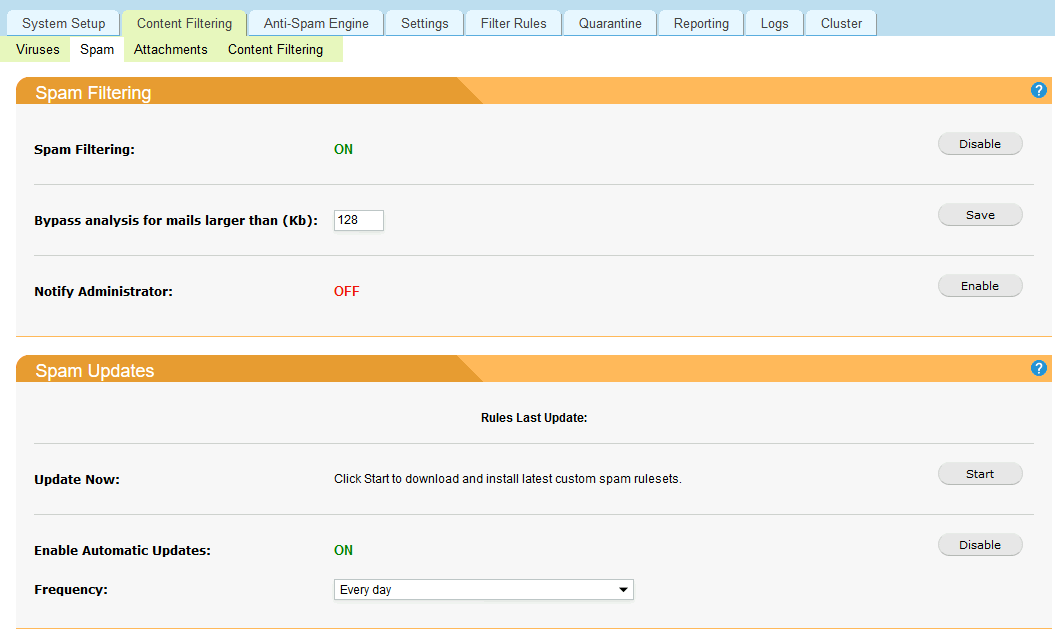
Spam tab – should be on with automatic updates. Check if “Bypass analysis for emails larger than” fits your needs.
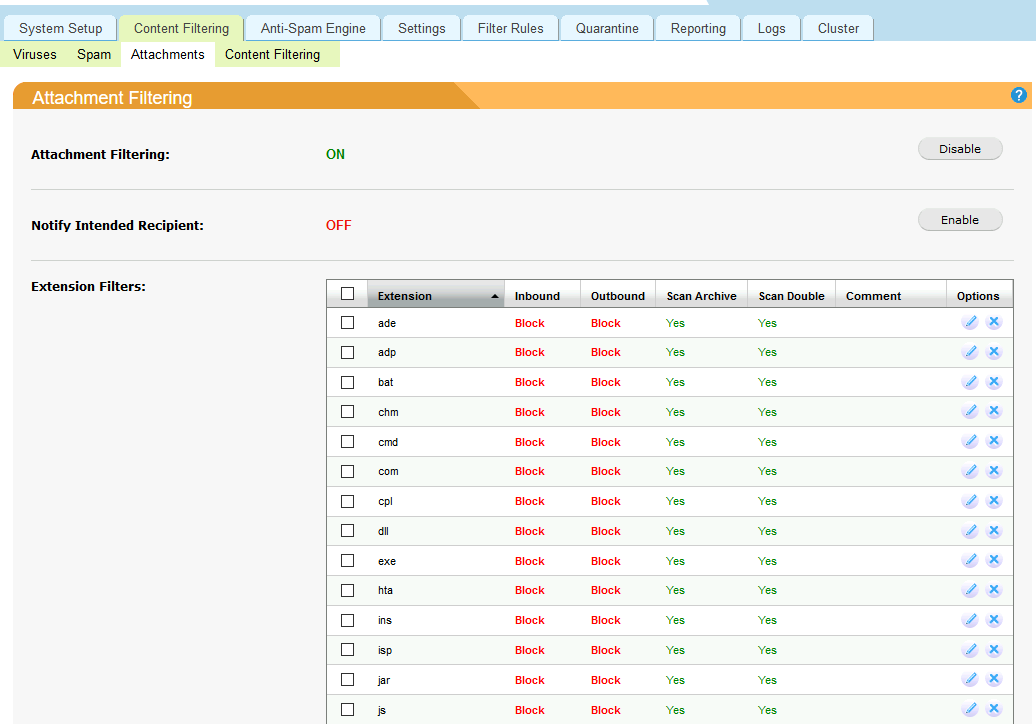
Attachment filtering is also On (and it should stay on). You can modify further and block or allow extensions.
Content Filtering is another tab, you can specify here content you wish your filter to catch is something is region specific or passed by antispam.
Anti-Spam Engine
Also something you should leave on in settings tab.
Also make sure to use Botnet Detection, Penpals Score and Passive OS fingerprinting. Other settings more or less adjust to your preference, need.
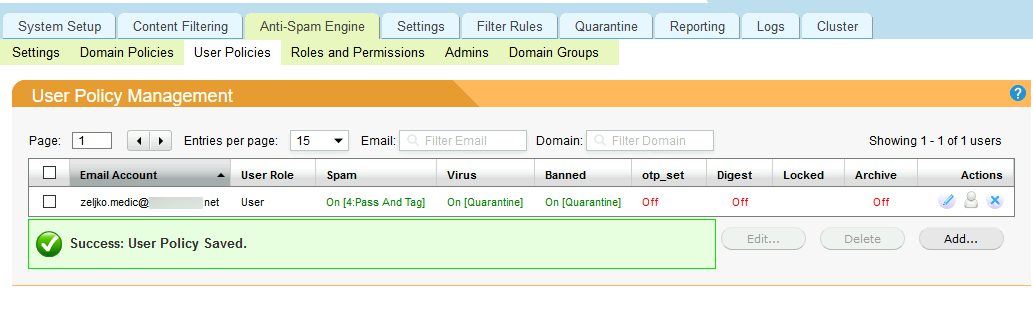
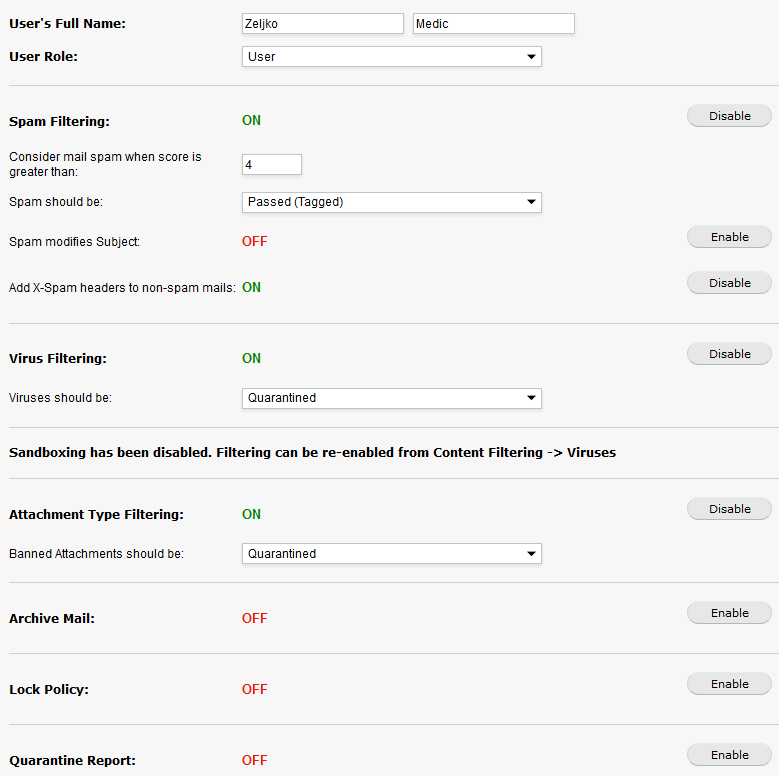
Domain Policies tab is interesting one.You can specify here how spam is handled, do you want to reject it, quarantine it…
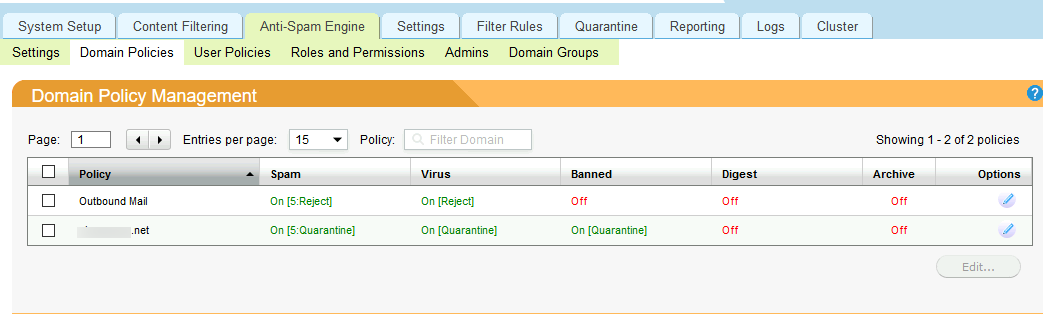
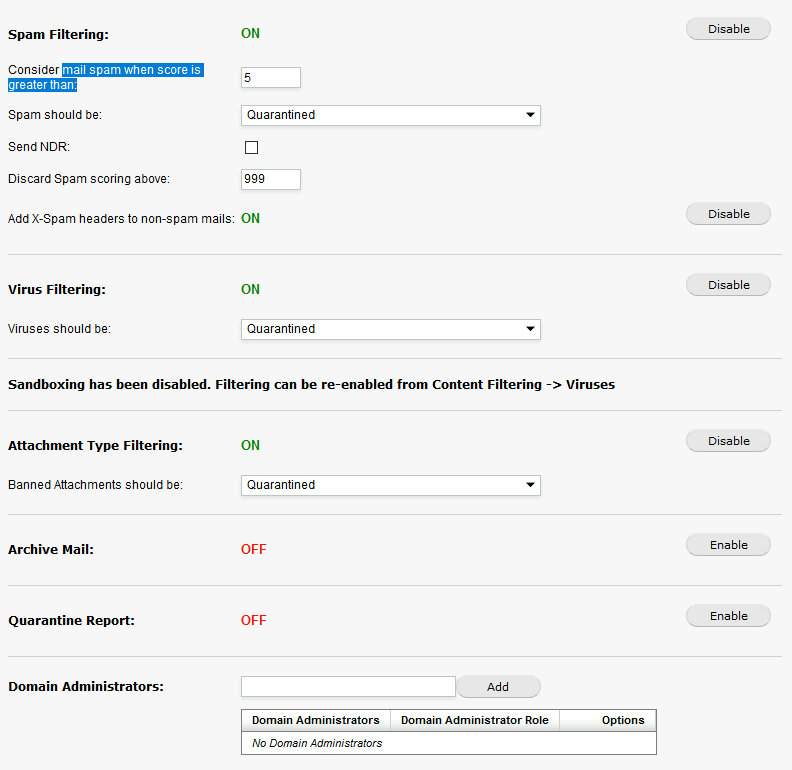
I think Quarantine is good approach, because sometimes there will be false positives. Also I set score of 5 for considering mail a spam.
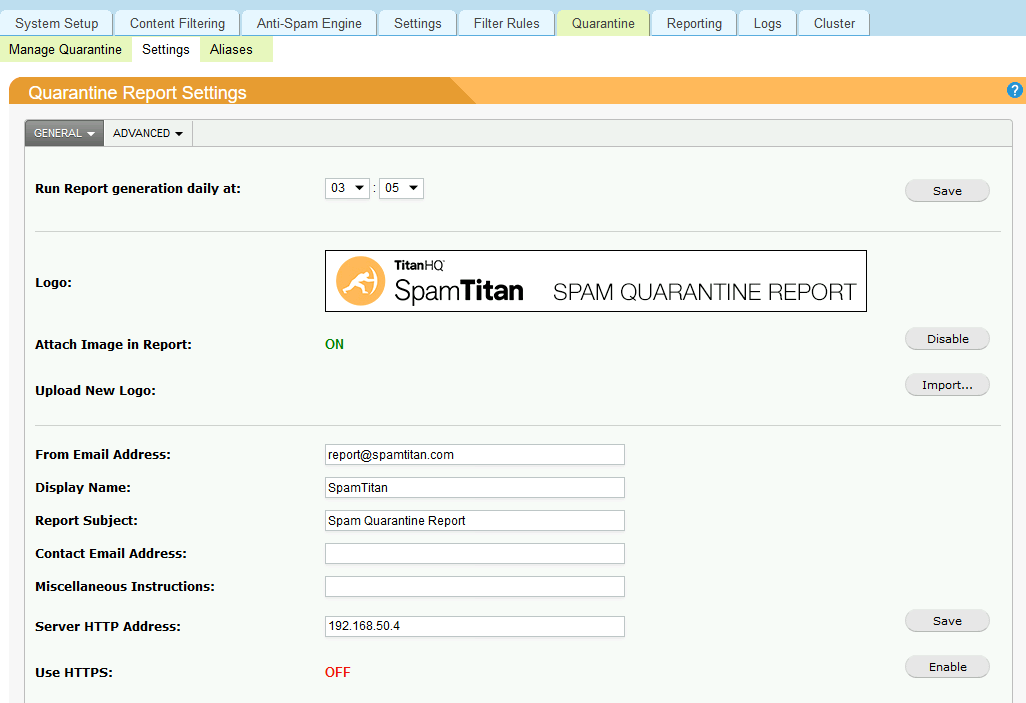
You can also have quarantine report if you wish.
This is also place where you can specify domain administrators – these people can manage some settings for the domain (like black or whitelist email addresses, domains and also release email from quarantine.)
User Policies enables you to fine grain settings depending on user. So, if some users are heavily hit with spam, you can lower spam threshold or change quarantine rule to pass spam but tag it, or just reject email… You can also set quarantine reports for users and they can receive it…
Under Anti-Spam engine you can also assign roles to users, set admins and so on.
Settings
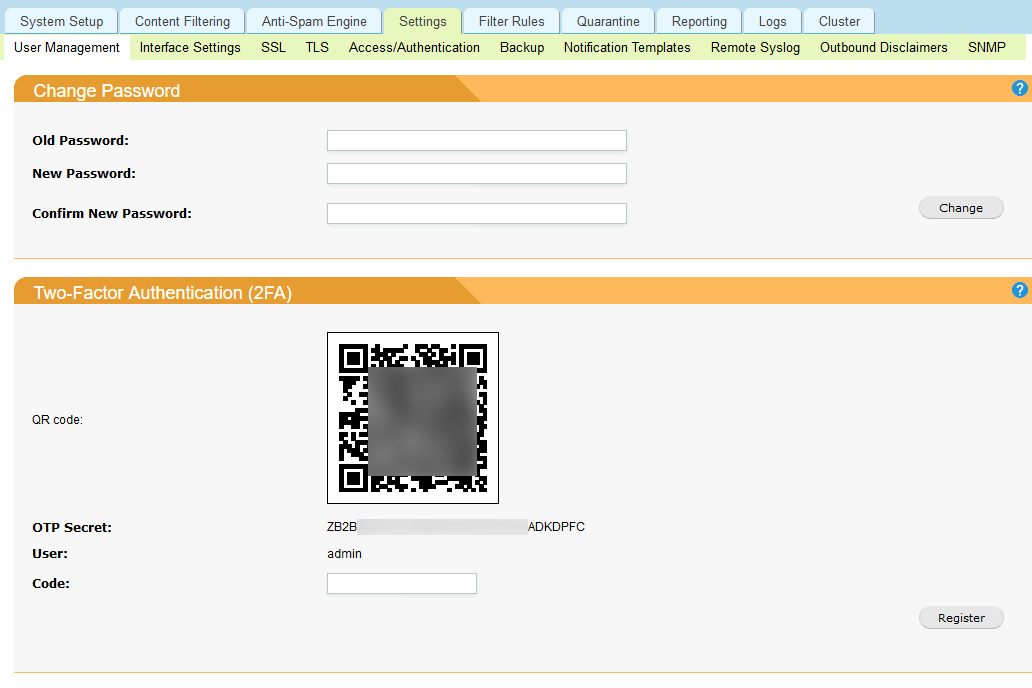
Under User Management I would recommend settings strong password and enabling 2FA authentication
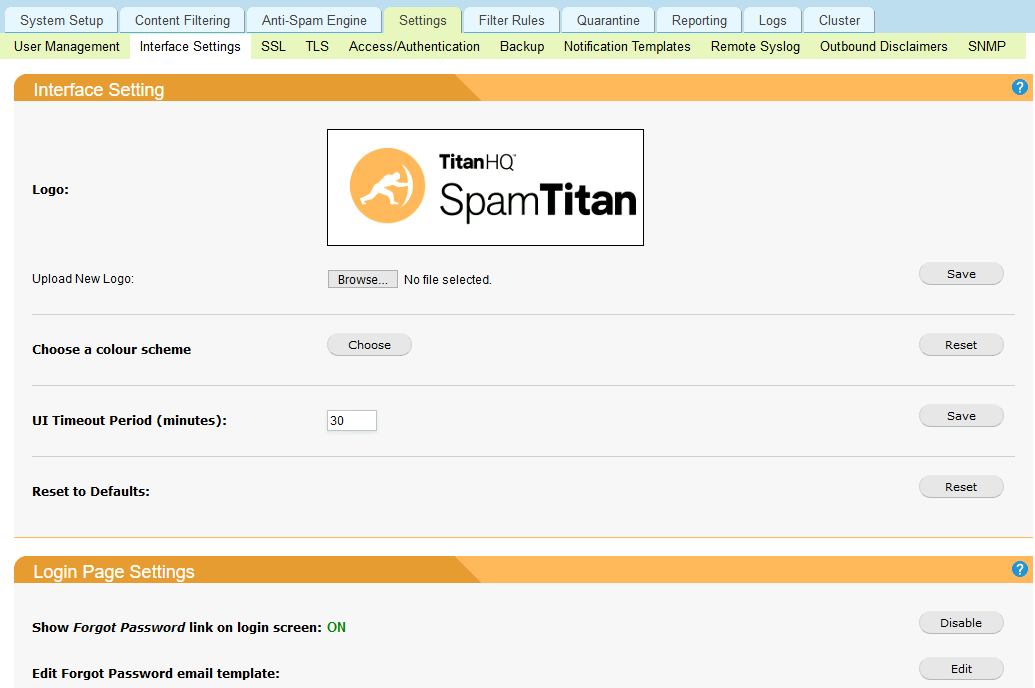
You can also customize look on Interface Settings tab
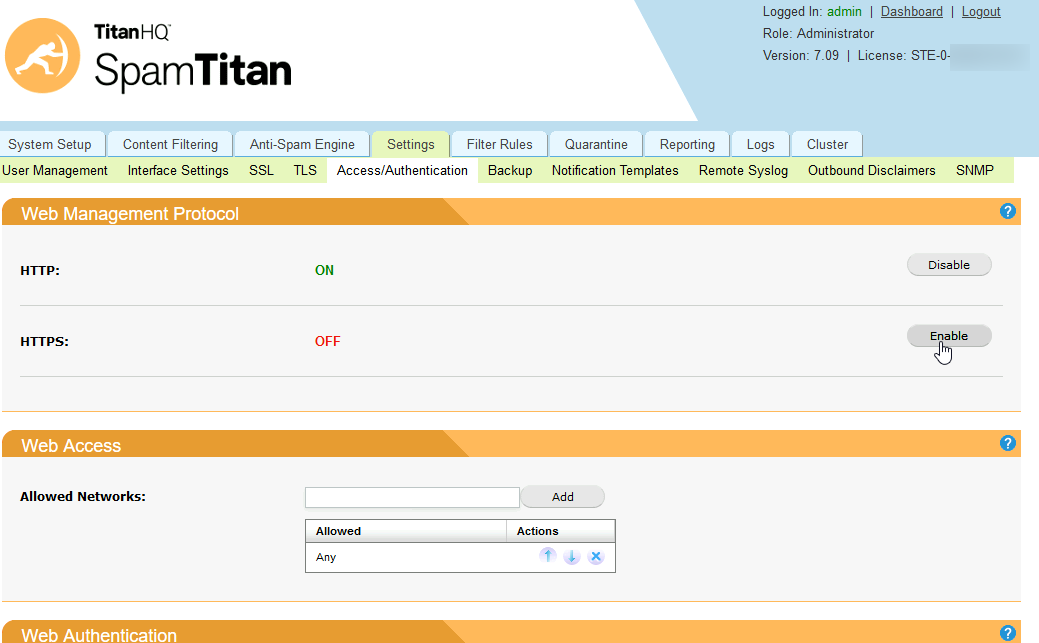
I would recommend setting SSL certificate and TLS if you need it.
If you import ssl certificate, in needs to be in pem format.
If you are doing this in Windows and have pfx certificate you will need to convert it to pem. To do so, you will need OpenSSL for Windows.

After you set you SSL certificate you should go to the Access/Authentication tab and set HTTPS on for Web Management
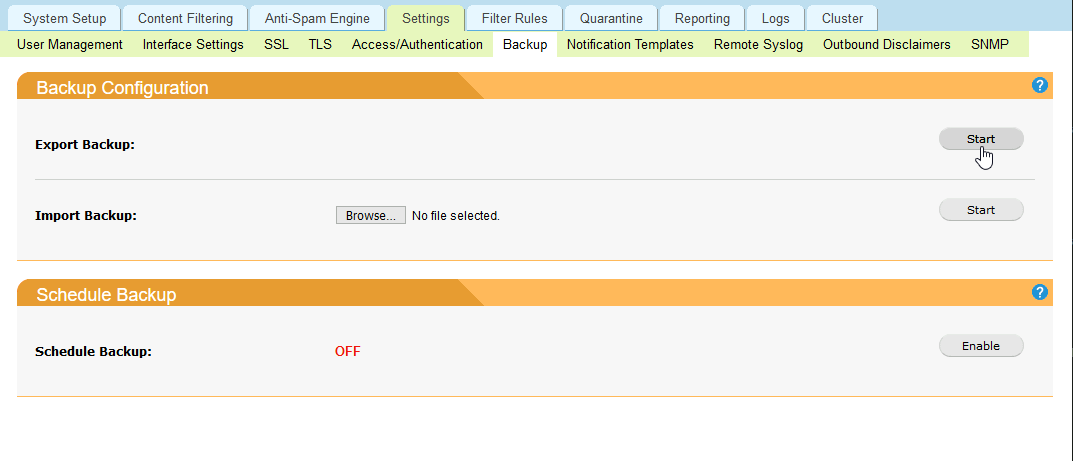
You should also regularly export your settings or schedule backup of your setup.
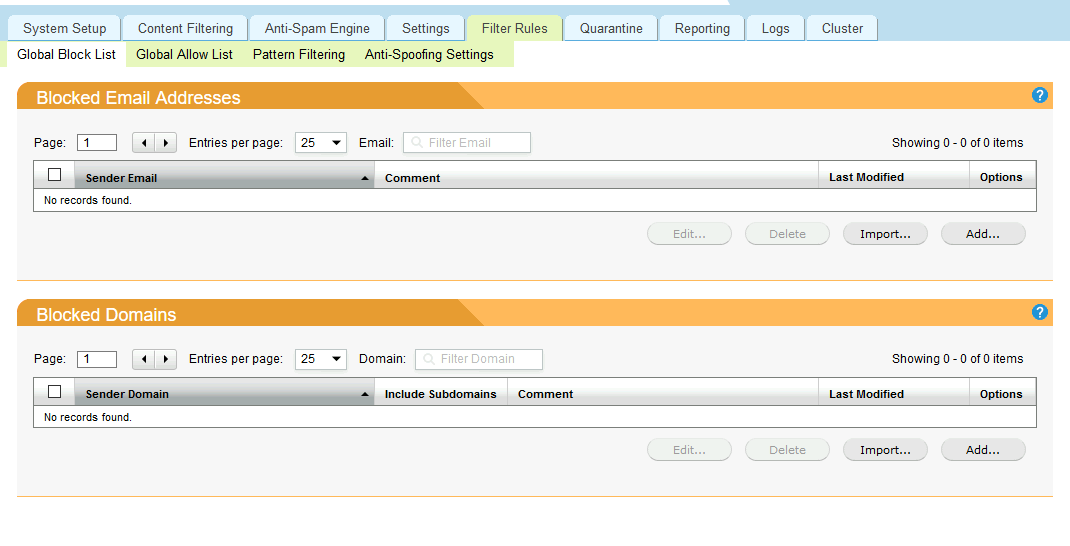
Filter Rules
Here you can white or blacklist domain or email address, set pattern filtering and Anti-Spoofing…
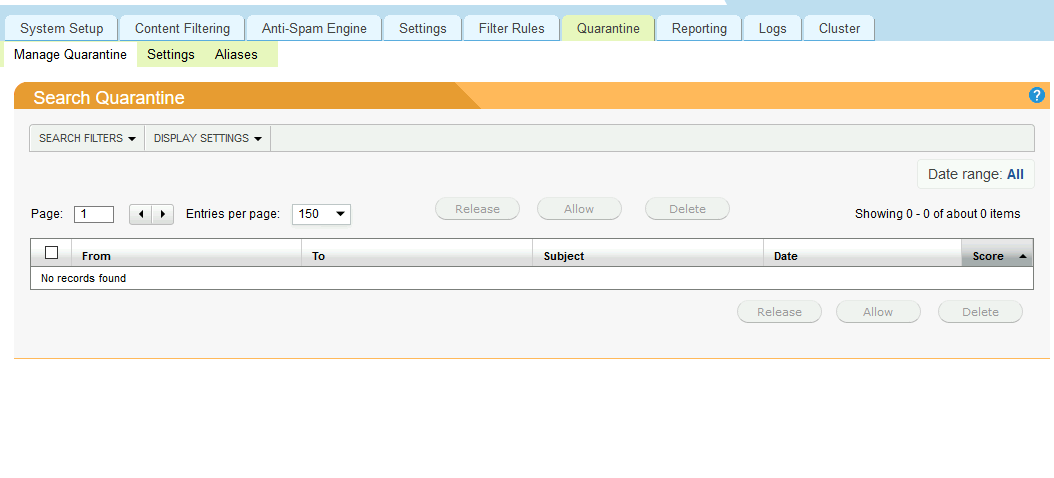
Quarantine
Under Quarantine you can manage your Quarantine, Release email, whitelist…
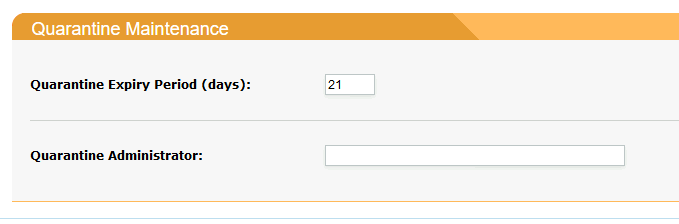
Settings tab – you can set reports here and set quarantine expiry period
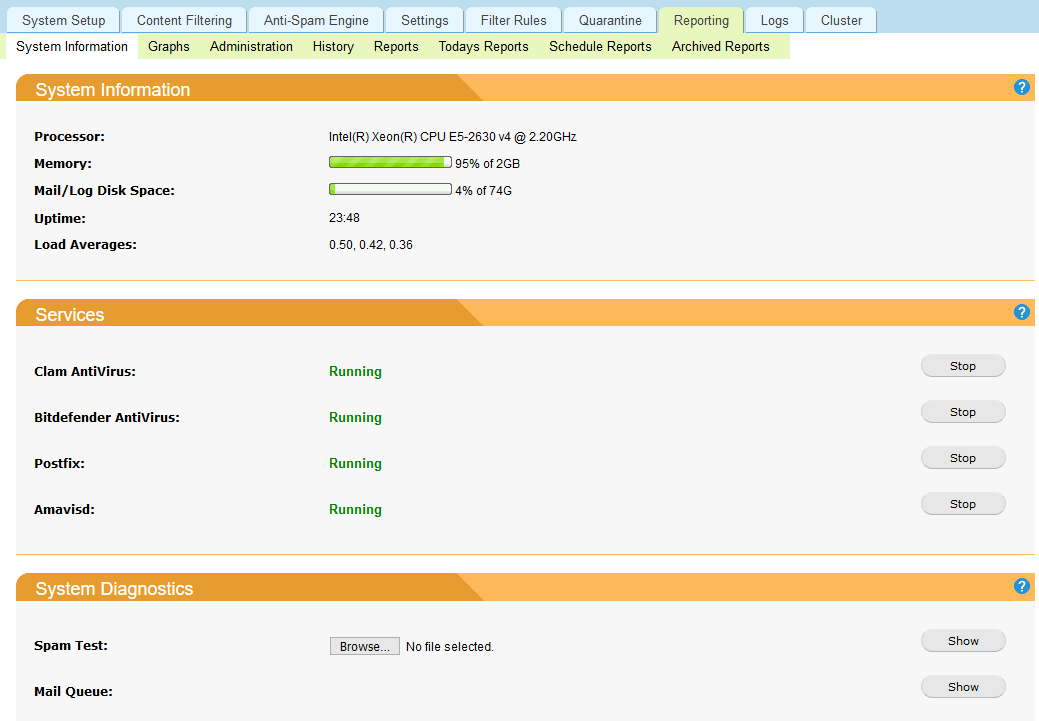
Reporting
All kind of reports and diagnostics here, I will not go through details of reporting, it is useful, and you will see how these reports and diagnostics fits you best if you go through them.
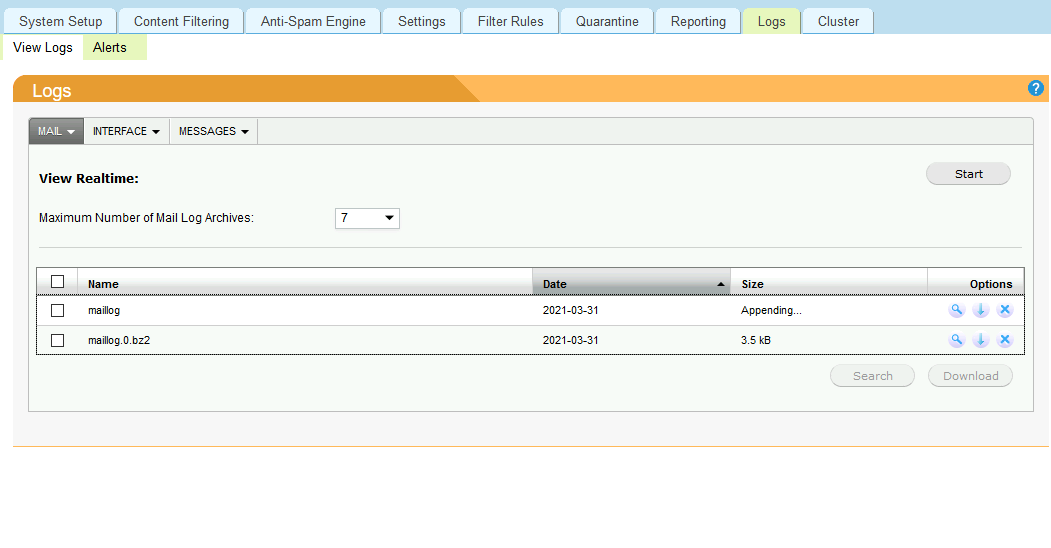
Logs
If you are interested in the details of mailflow, you can find details here.
Cluster
This is menu for separate guide I’m hoping to cover, SpamTitan in cluster would be nice to have, and we’ll see that one through also.
After you are done with setup
You need to now set you SpamTitan to handle your mailflow
DNS/MX setup
Do this step after you configured SpamTitan to handle your SPAM, not after installation immediately!
If you have hosted DNS look at the bottom of this page for MX record setup – https://www.spamtitan.com/spamtitan-gateway-sign-up-confirmation/
I host my own DNS/MX records for this lab,so I’m not going to change anything in my setup. I’m just going to create simple NAT rule so that incoming/outgoing mail on port 25 is going through SpamTitan and that SpamTitan handles mail traffic before it reaches Exchange.
This is my NAT rule for mail (SpamFilter alias for IP 192.168.50.5, that is IP address of my SpamTitan install)
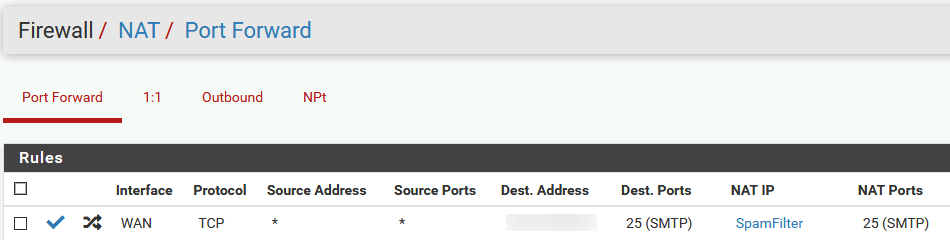
MX records and A records remain the same – mail.informaticar.net, we are just going to push all our incoming and outgoing email through SpamTitan.
SpamTitan is (in theory) filtering everything before it reaches Exchange. So, after you receive email from outside, it will pass through SpamTitan and then go to your Exchange edge or mailbox role, depending on your setup.
How to check if your SpamTitan is handling email from outside towards your Exchange?
After you have set you DNS (if needed) NATing, or whatever you need to switch your mailflow to SpamTitan, check if now SpamTitan is handling your external email. Simple way to check this is to send emil from outside to your domain which is protected by SpamTitan.
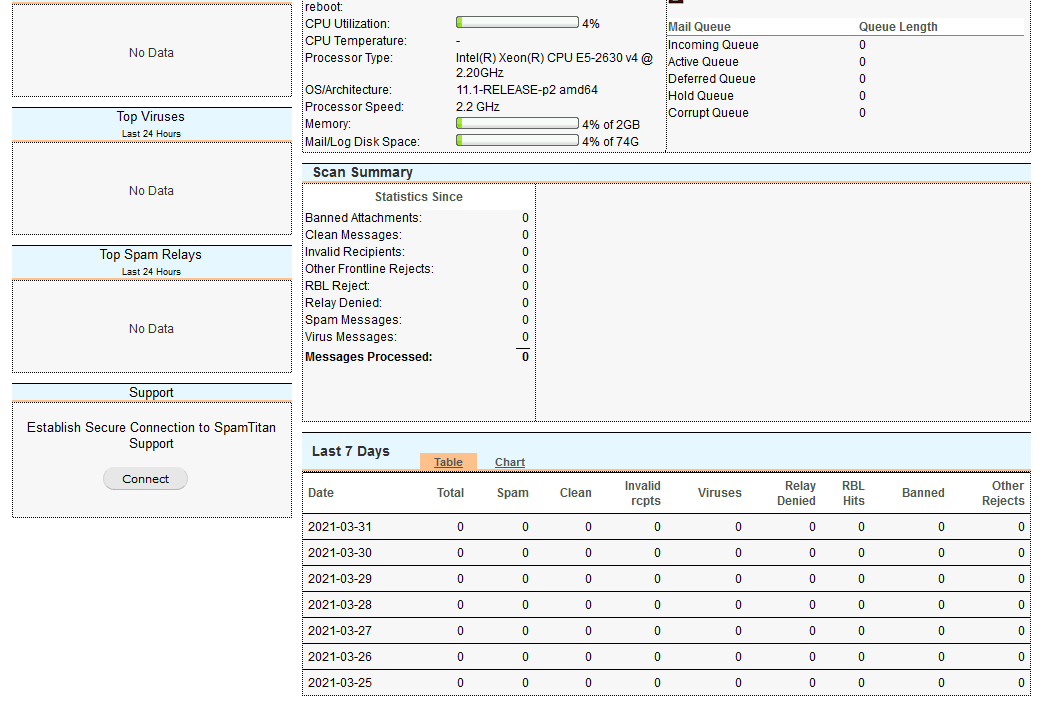
If on your SpamTitan dashboard under Scan Summary there is Zero on Messages Processed and all zeros under Last 7 Days report, you are doing something wrong.
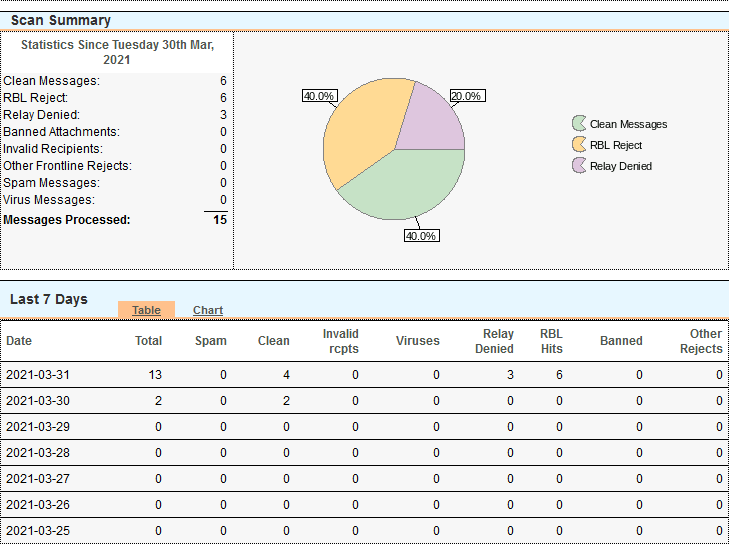
If you got report like this on your SpamTitan Dashboard, congrats, your SpamTitan is now handling your traffic.
It is hard for me to give you exact guide on how to set this part, because there are a lot of different setups for mailflow and DNS.
But at least I can point you to right direction if you are stuck.
Conclusion
This is only basic setup for SpamTitan, there is a lot to do, and each setup is individual, so you can tweak this to your needs. Also, I put links to SpamTitan Admin guide and support reference, so if you are stuck, you can go there.
Remember, you have to find sweet spot for your system so there are no too many false positives or you are not getting hit hard by spam. Also remember to bring up people awareness in your organization, because there is no 100% accurate solution to spam, people should be aware of this and on the risks that email communication is.