We already created two node DFS cluster – but what if we wanted to add another node to that cluster? Of course you can expand your cluster environment, let’s just go through steps on how to do it
Before we begin
You should go through articles on my blog named “How to create File Share cluster (DFS) on Windows Server“, and “Add a New Node to Windows Server Cluster”.
Prerequsites
I won’t be going through details on entire setup, I will just say that I have DFS setup with two nodes – DFS1 and DFS2 – every detail about that setup can be found in “How to create File Share cluster (DFS) on Windows Server” guide.
I want to add DFS3 to the mix. You need to set DFS3 VM as in Prerequisites section of “How to create File Share cluster (DFS) on Windows Server” guide.
Which means two NICs, domain member, MPIO, ISCSI Initiator, installing failover clustering DFS roles/features, creating E drive with same size as on DFS1 and DFS2 and making empty shared ITDocs folder on it…
Before we continue, you will have to add DFS3 to the Windows Server Cluster we created with DFS1 and DFS2 – cluster is named – DFSCluster
You can follow that procedure in my guide named – “Add a new node to Windows Server Cluster”.
When you prepared machine that way – we can continue.
Adding DFS3 to Namespace
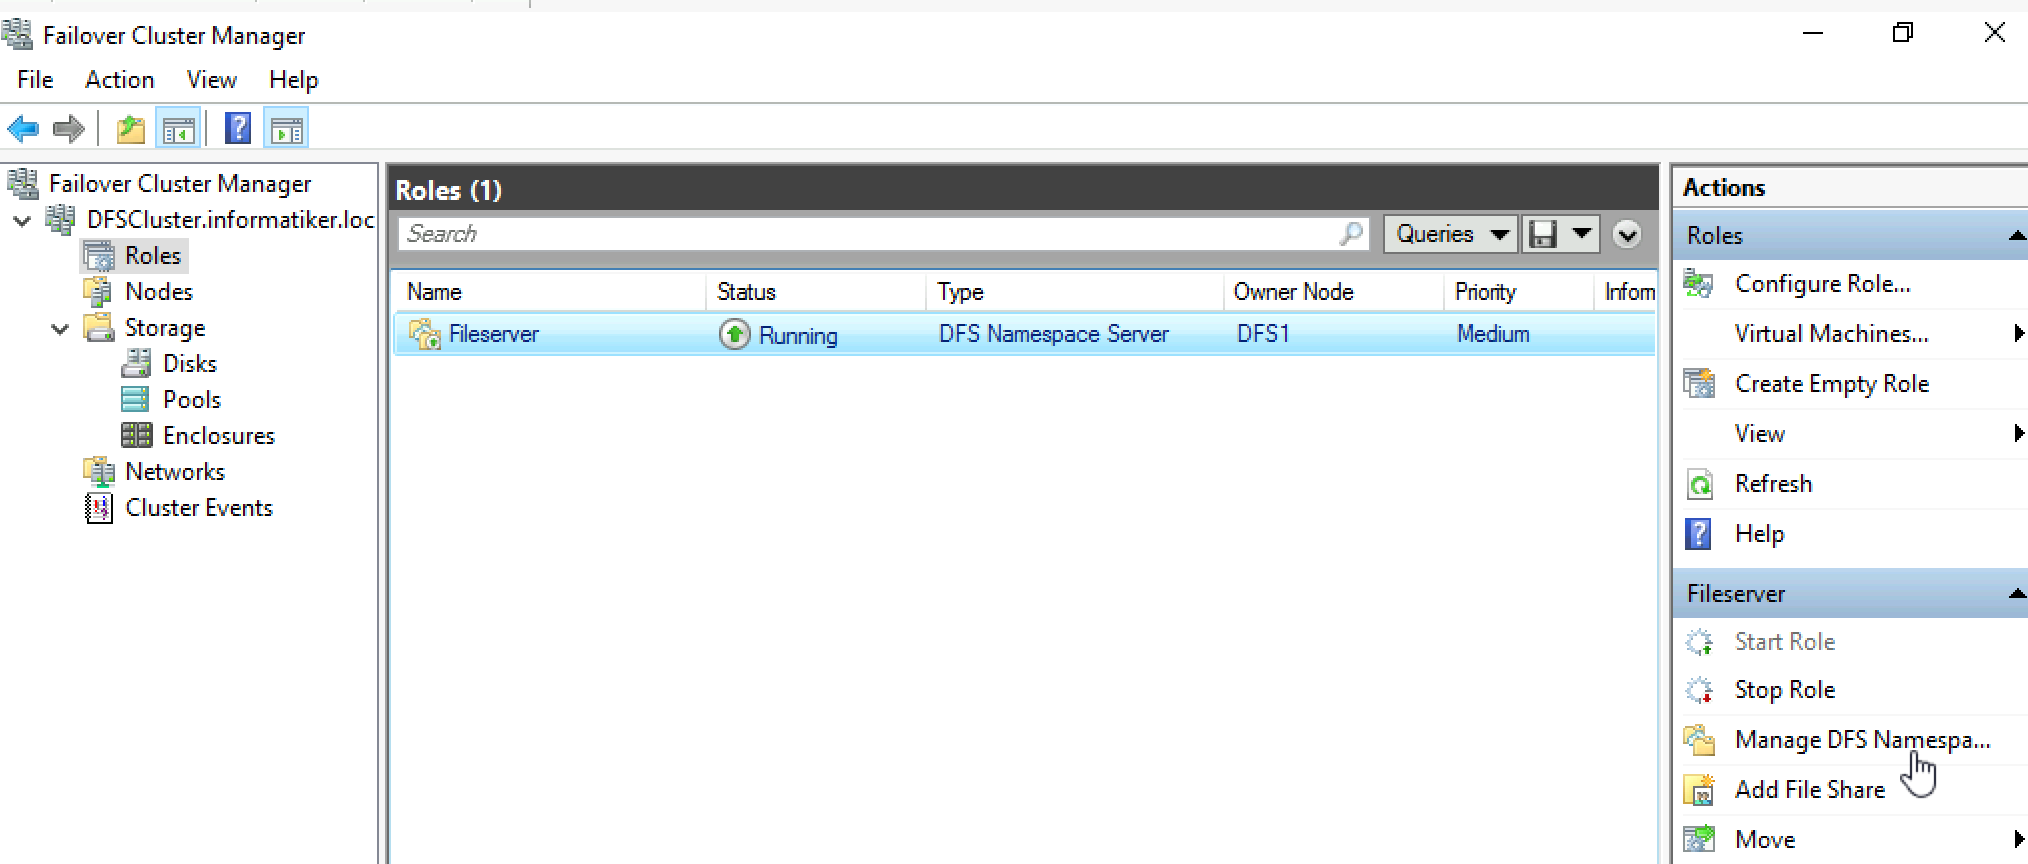
I will be doing this from DFS1 which is already part of Namespace.
Open Failover Cluster Manager and select DFS Namespace Server role | Click on Manage DFS Namespace
Currently, we can see under Namespaces and ITDocs that we have two Folder Targets – DFS1\ITDocs and DFS2\ITDocs
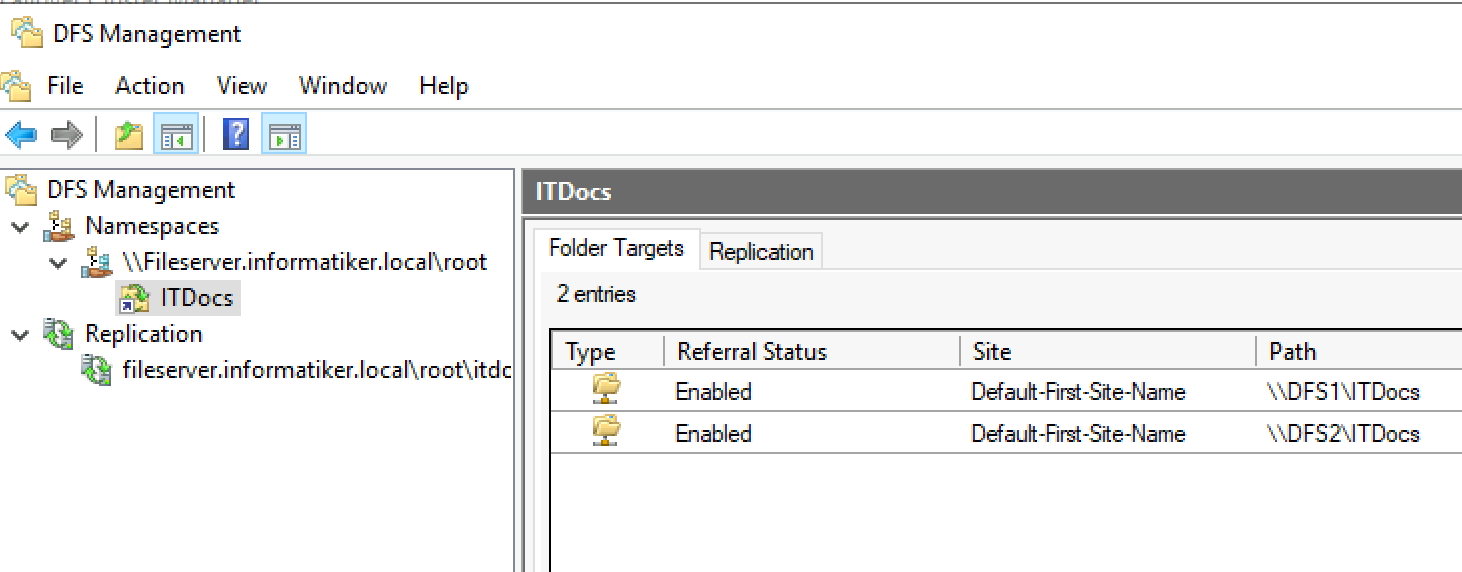
Under Replication section in Connections tab we can see that we have DFS1 and DFS2 both are sending members.

Ok, now that we know the state of the services, we will add DFS3 to the configuration.
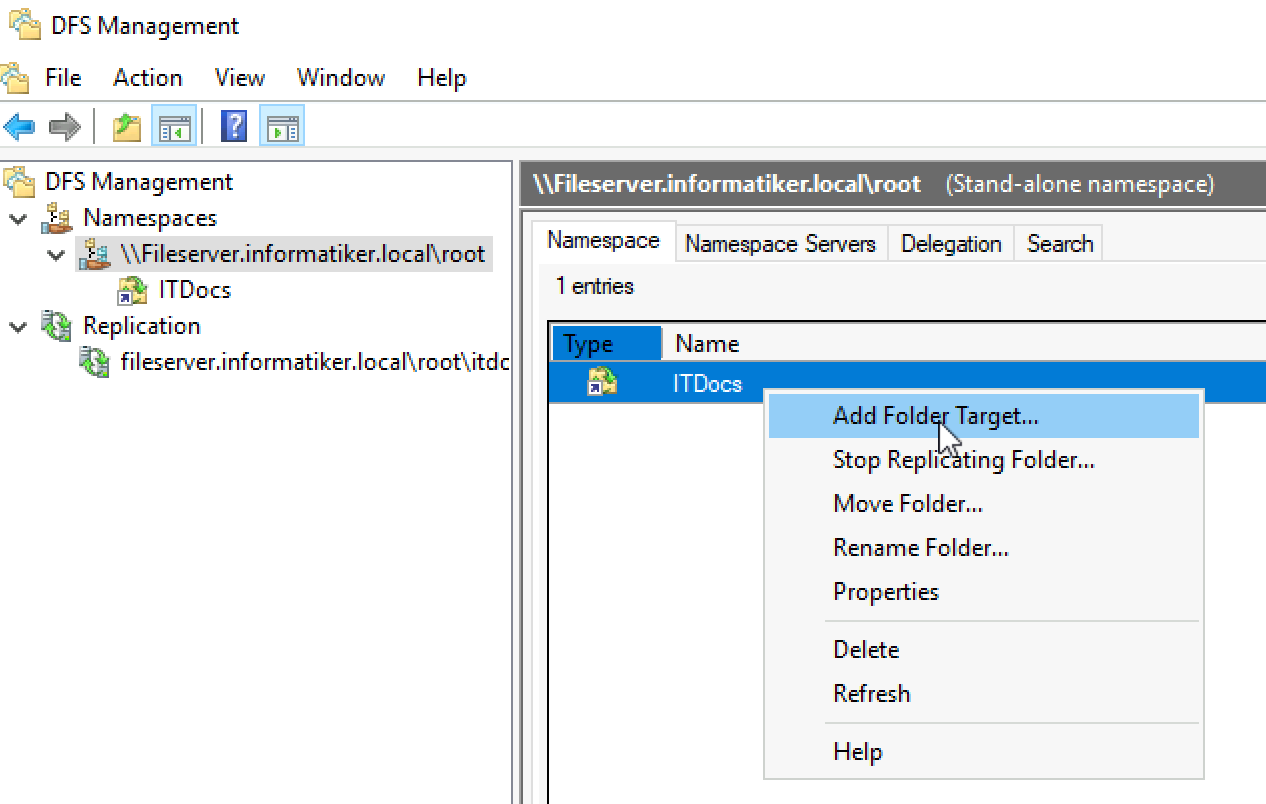
We will click on Namespaces and select namespace name (Fileserver.informatiker.local\root…) In central part of the window, under Namespaces tab, our ITDocs folder will appear. Right click on it – select Add Folder Target…
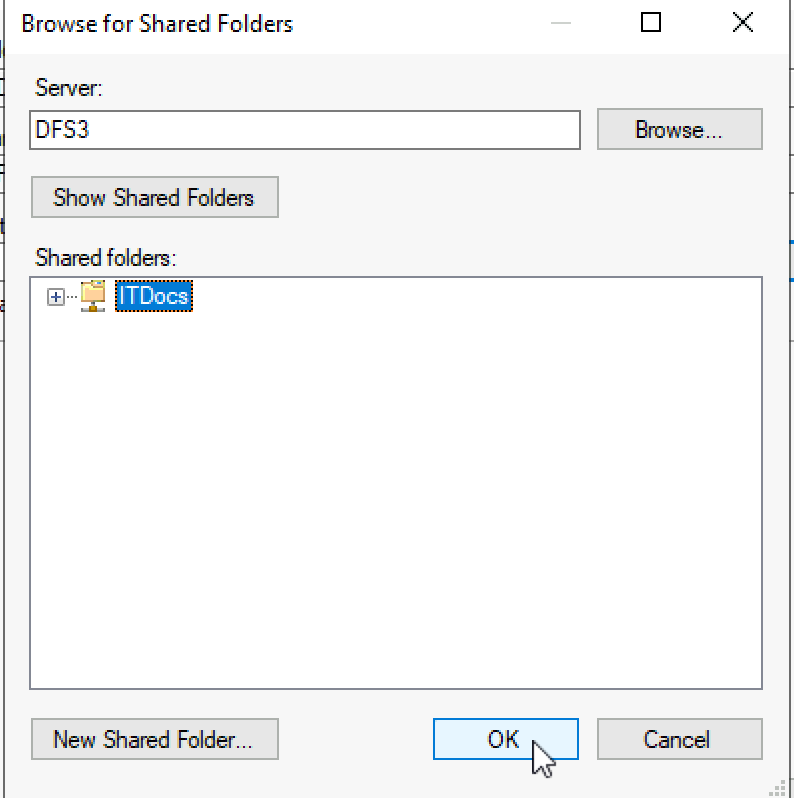
Click on Browse
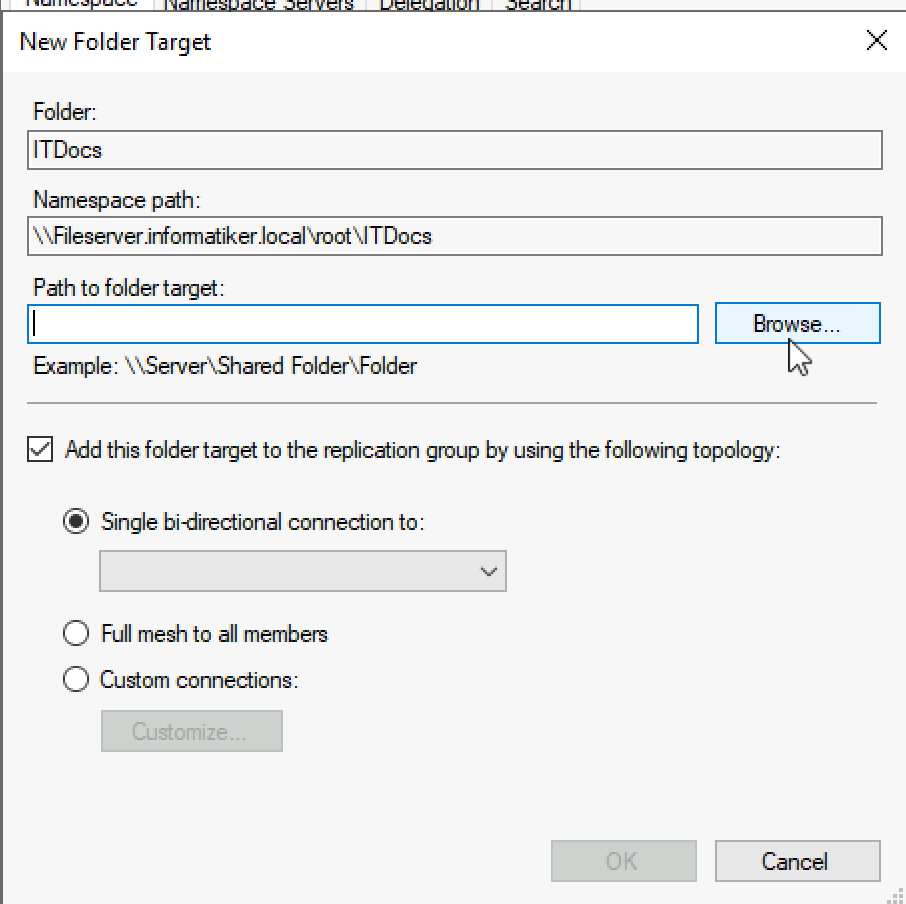
Select DFS3 and shared ITDocs folder. Ok
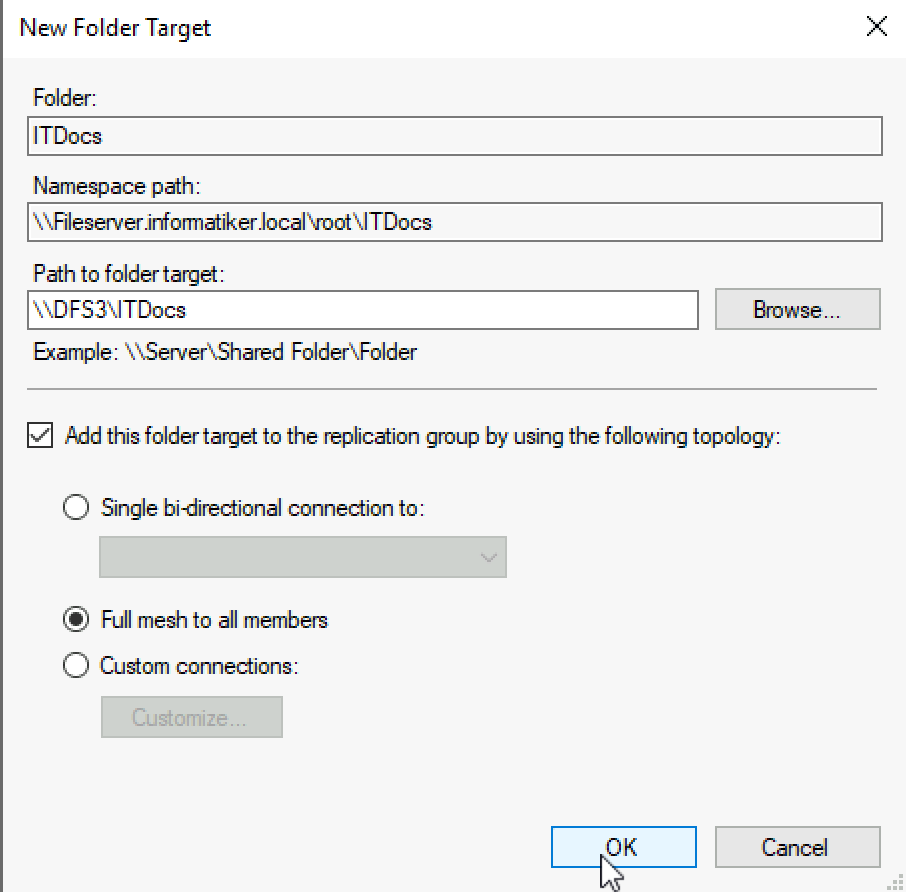
Before we close this dialog. Make sure you have checked “Add this folder target to the replication group by…”
Also select replication type – Now, that we have three nodes we can select Single bi-directional connection. I will stick with Full mesh to all members. Ok.
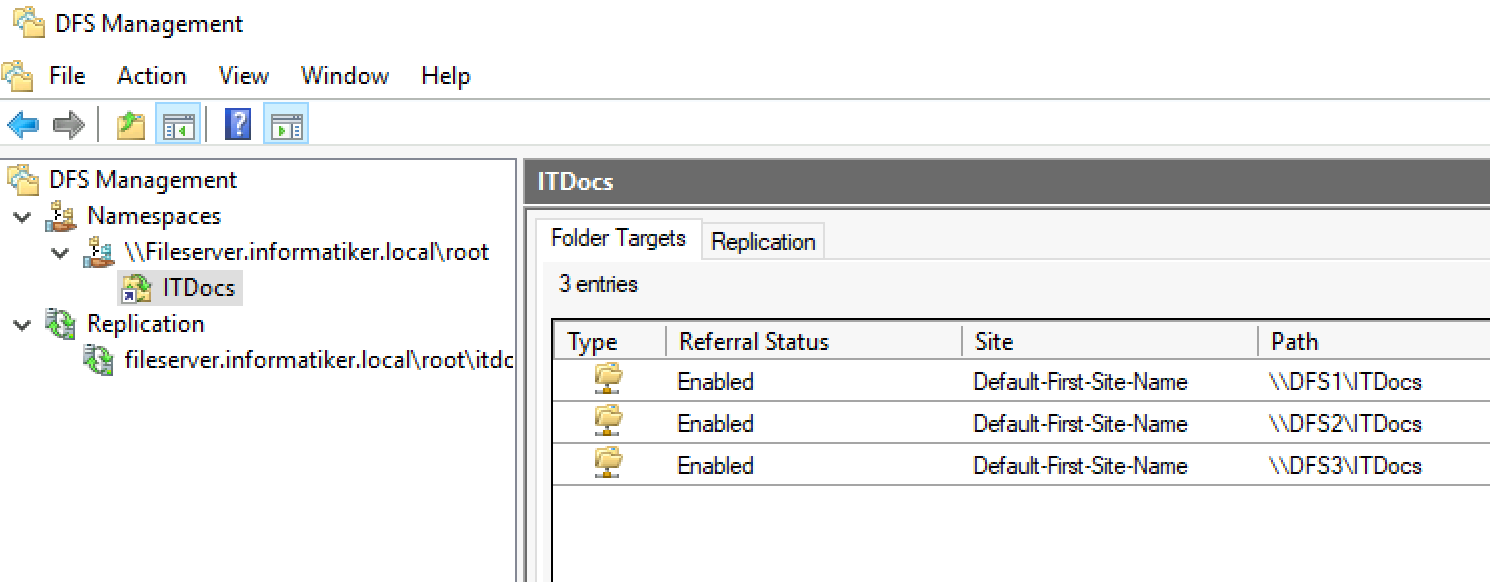
Now, let’s check our folder targets – DFS3 is added
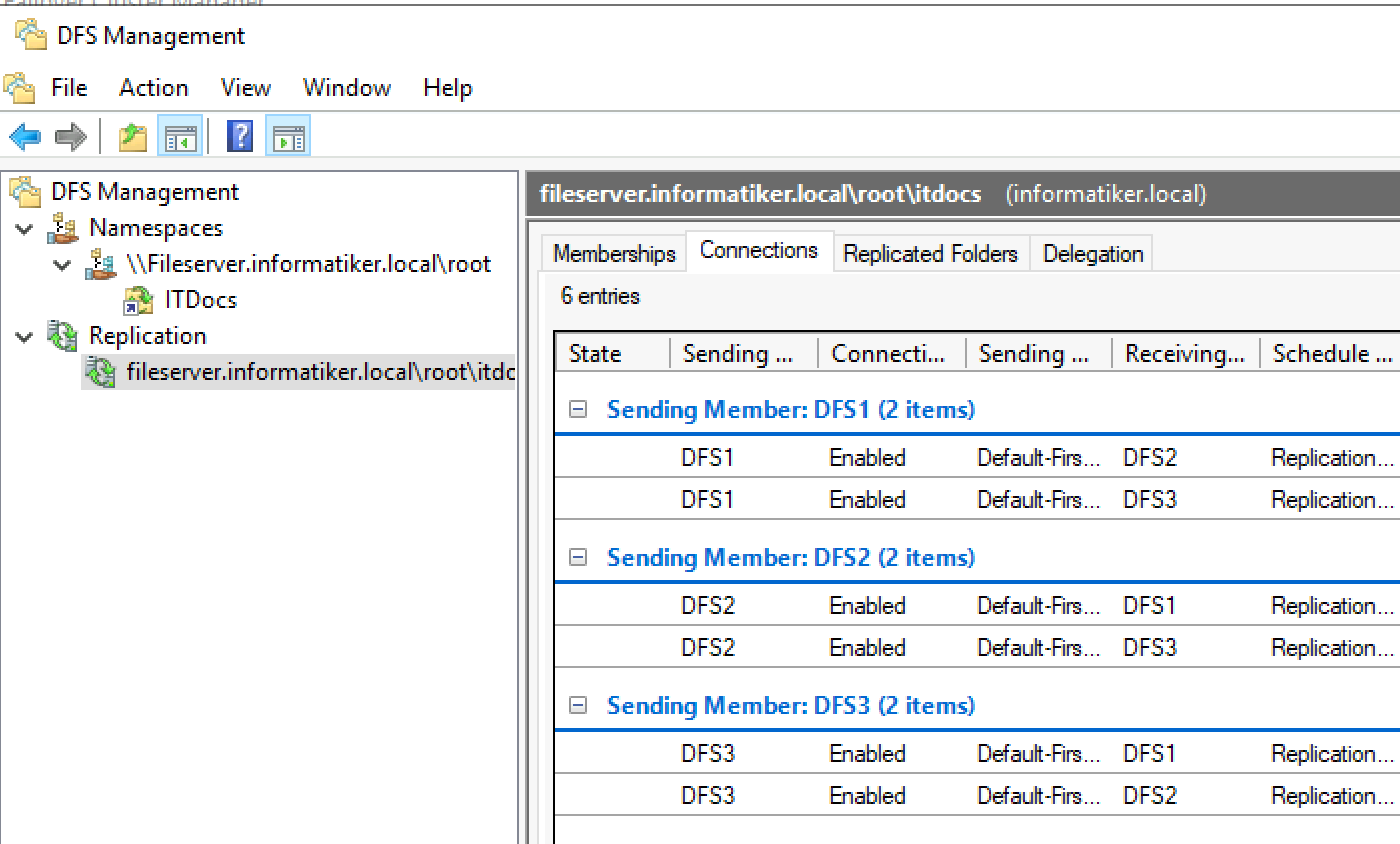
Let’s check Replication section – DFS3 is added as Sending member.
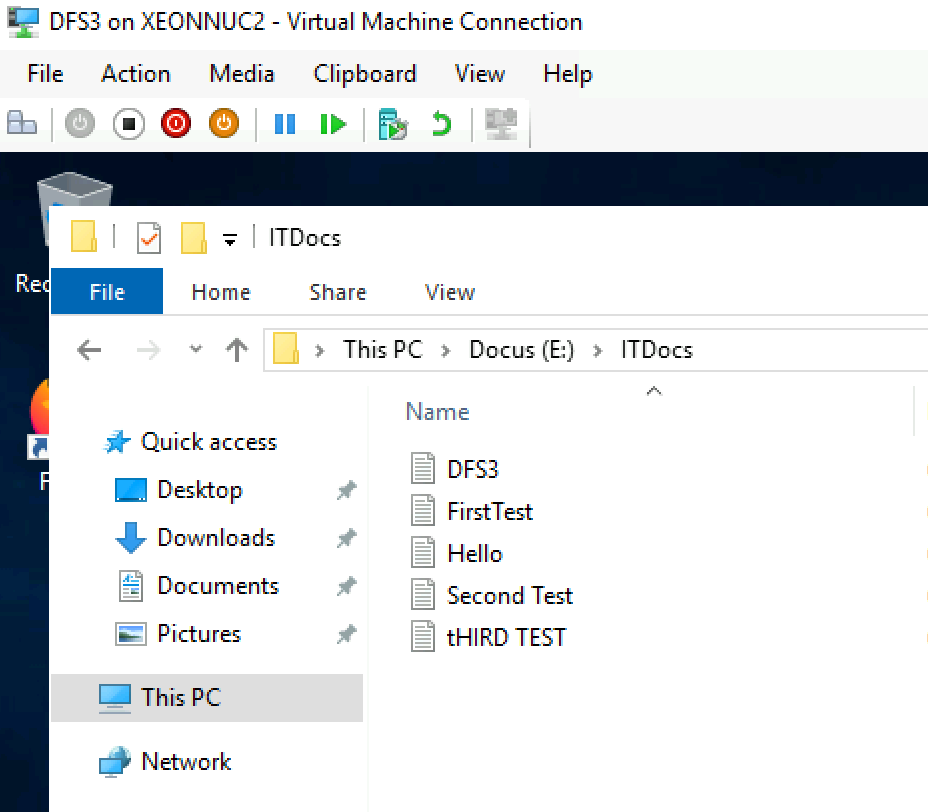
After few minutes files are also replicated to the DFS3, and also after I created DFS3 file, it is replicated to other two nodes without issues.
I also tested by taking each of three nodes down, one at the time. All functioned well – I was able to create files, delete them, and all would replicate across the nodes and to the node that was down, once it came back up.