I have some scenarios where I would like failover cluster but don’t need domain since I just need clustered service and nothing else. Prior to the Windows Server 2016 that was not possible. Windows Server 2016 allows us to create clusters without active directory, but there are few things that you have to take care of before embarking on cluster creating journey in a workgroup.
So, we are going to create Workgroup cluster. This article is for the people that are already familiar with cluster, networking and DNS terms.
Here are some things to know and prerequisites to take care before creating workgroup cluster.
Supported clustering scenarios:
SQL server is supported and is recommended to use integrated SQL authentication.
File server is supported but Microsoft does not recommend it. In this scenario Kerberos authentication for SMB is not supported.
Hyper-V is also supported but not recommended since live migration is not supported and only quick migration is available.
LAB Setup
Windows Server 2016 Standard Trial
Members of cluster: WS2016CL1, WS2016CL2
Networking:
LAN: 10.30.30.10/24 WS2016CL1
LAN: 10.30.30.20/24 WS2016CL2
Private Cluster Network: 192.168.30.10/24 WS2016CL1
Private Cluster Network: 192.168.30.20/24 WS2016CL2
Prerequisites:
All members of the cluster have to be Windows Server 2016.
User accounts:
All members of the cluster need to have same username and password.
Account must be member of Administrators group.
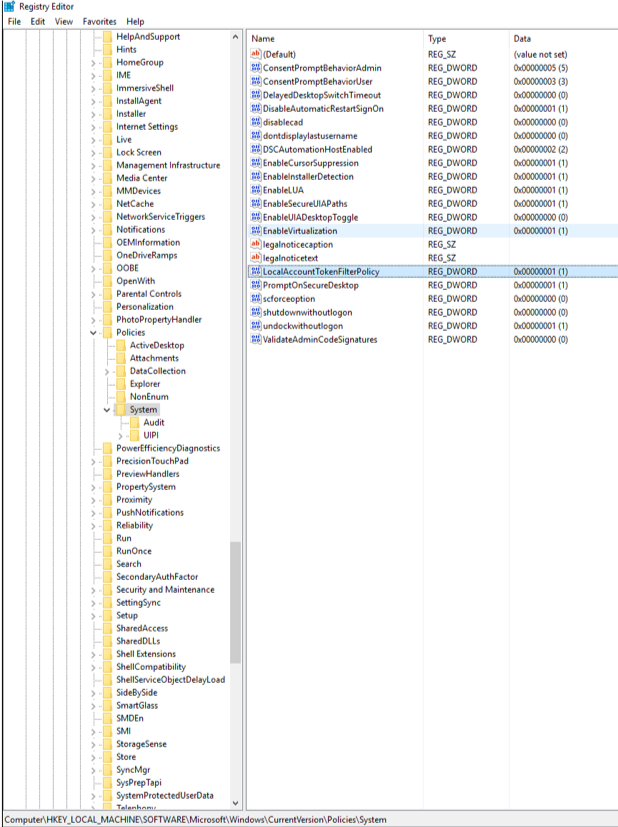
If you are going to use account other that default Administrator, then everything above applies to it, and also you have to enter LocalAccountTokenFilterPolicyin registry
LocalAccountTokenFilterPolicy needs to be set to 1.
Here is the powershell command for entering it into registry
New-ItemProperty -Path HKLM:\SOFTWARE\Microsoft\Windows\CurrentVersion\Policies\System -Name LocalAccountTokenFilterPolicy -Value 1 And here is the picture where you can see the path and look of the key, for all of you that like to do things via GUI.
In this LAB I’m going to use default Administrator account.
Network:
On each of the network members you’ll need two network interfaces. One for the LAN connection and the other one for the private heartbeat connection between cluster nodes.
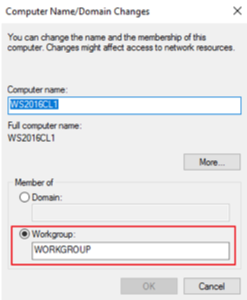
Workgroup name:
I will also leave “WORKGROUP” as a workgroup name
While you are at the same screen click on the More… button
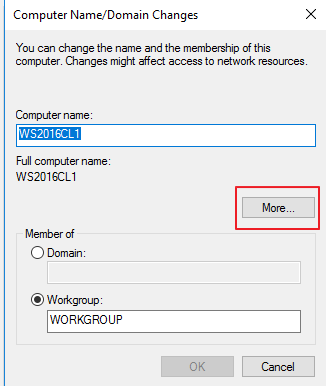
Enter primary DNS suffix for this computer. I will enter workgroup. You can enter whatever you want that will represent your DNS suffix
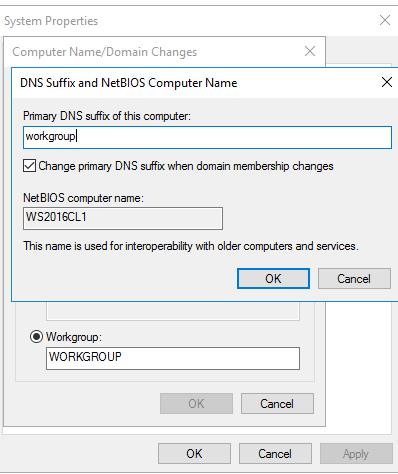
You will need to restart your server after this change.
This is how Full computer name field looks like after restart.

Only If you have multiple domainsyou will enter DNS suffixes for all the domains in the window pictured below, after you select “Append these DNS suffixes (in order):”
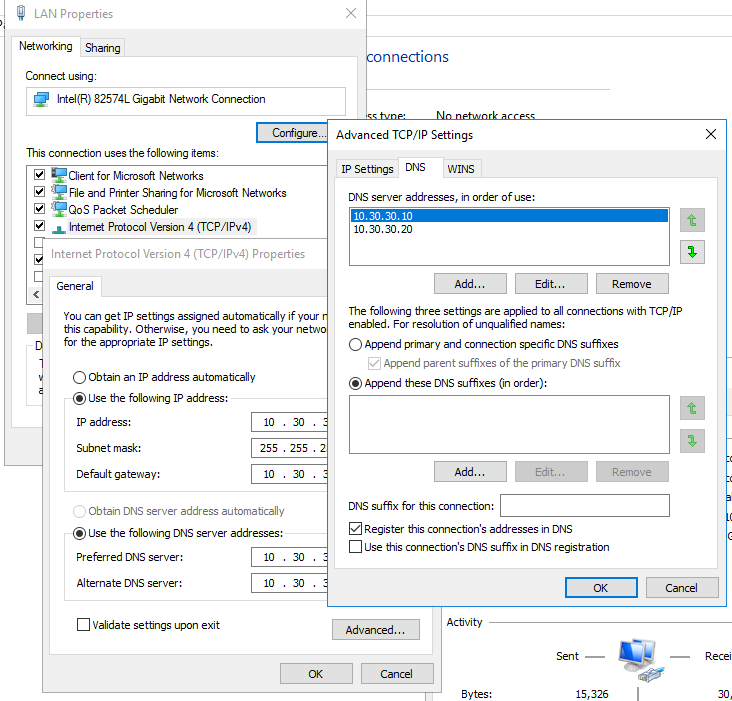
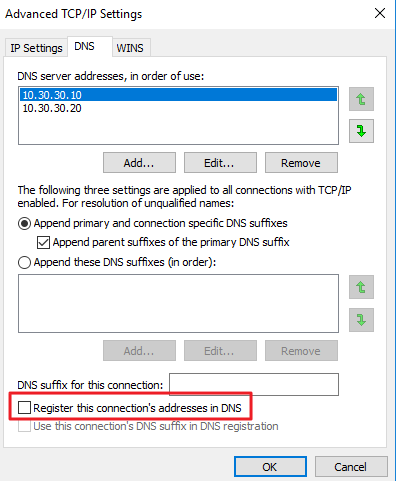
You also should uncheck “Register this connections addresses in DNS” under Advanced TCP/IP Settings.
For this LAB I will also install DNS role on both of the cluster members. DNS service should be available for this cluster, you will choose how to implement it.
Be sure that DNS will not be single point of failure. You only need Host A records for the every workgroup cluster node entered into DNS.
This part of the DNS configuration is completely optional. Feel free to configure DNS as you like. You only need Host A records for the every workgroup cluster node entered into DNS.
/Optional part starts
I installed DNS role on both cluster nodes and set them up as primary forward lookup zones, named workgroup.
Also I added Host A record for both cluster nodes on both DNS server so the end result is this
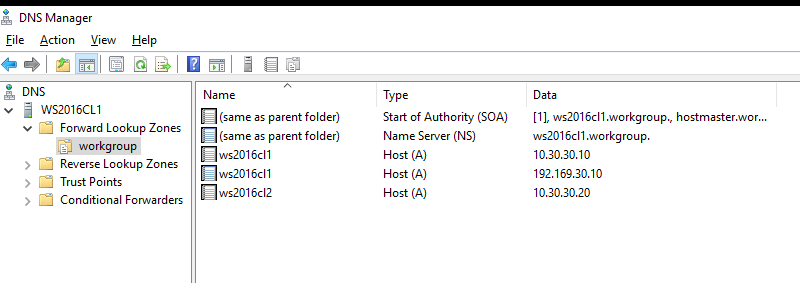
10.30.30.x addresses are important in my case since they are addresses that should be accessible through the LAN.
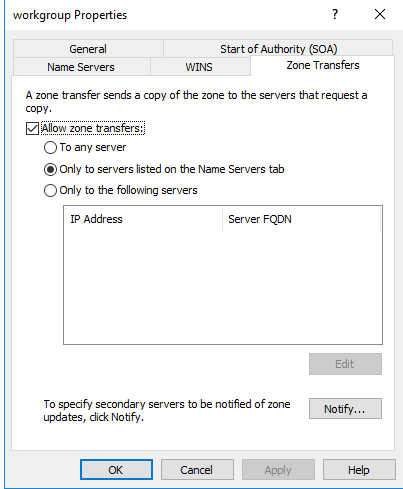
I also added both servers to the Name Servers list in DNS. This has to be done on both nodes of the DNS.
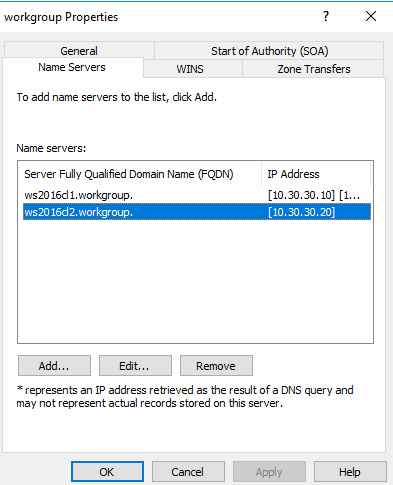
I also setup zone transfer this way, since I already done Name Servers part on both nodes.
Optional part ends/
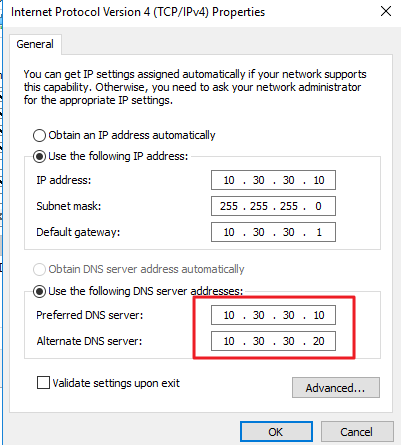
Enter your DNS server addresses into “Use the following DNS server addresses:” field.
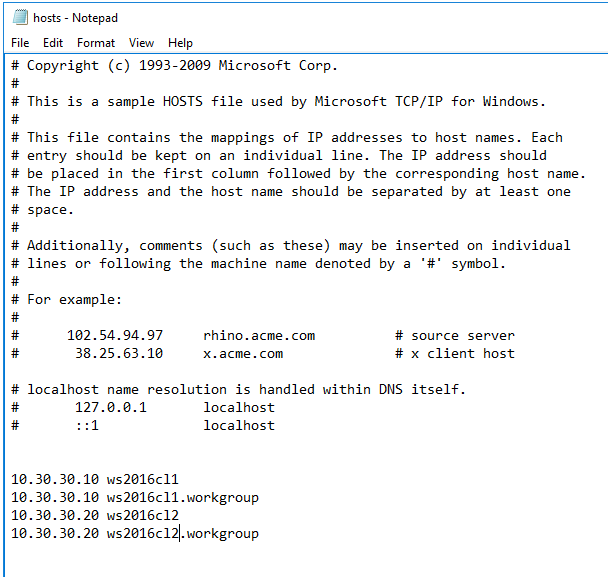
I also edited hosts file on both nodes of the cluster, and entered names and IP addresses of both nodes into hosts files. It needs to be done on all nodes.
Hosts file can be found here – C:\Windows\System32\drivers\etc\hosts
This is how my looks like:
With this step all the prerequisites should be covered and we should be able to install cluster feature on both cluster nodes in workgroup.
I will not describe clustering installation procedure here, I already covered that topic in this article, so follow the steps here https://www.informaticar.net/windows-server-2012-r2-failover-clustering-dhcp/until the part where DHCP role installation starts.
However, here is the result of the Cluster Validation for my workgroup cluster. I selected all tests.

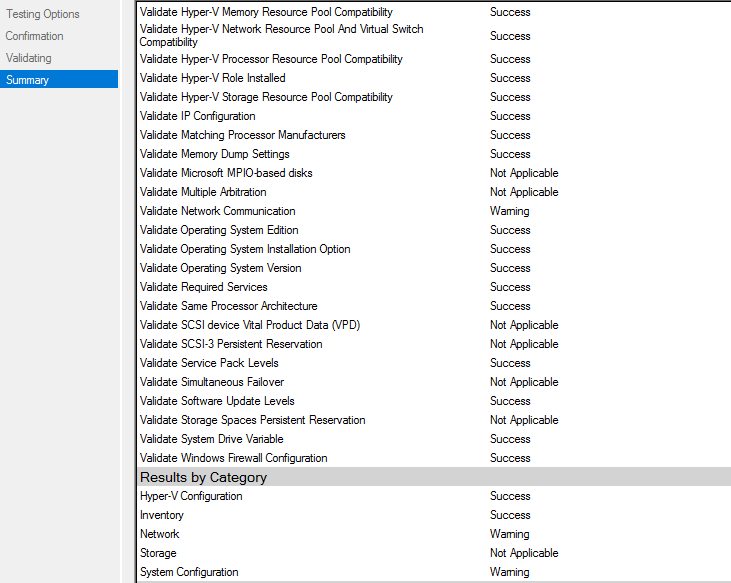
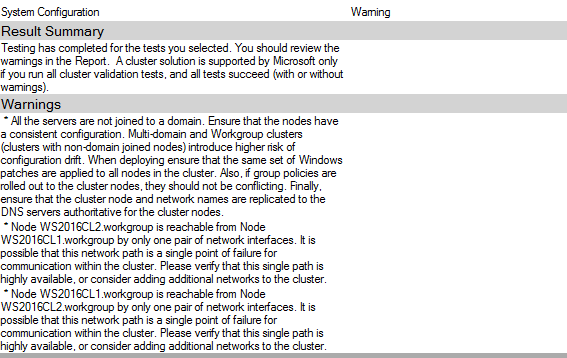
I was able to create cluster after validation.
Obviously everything went ok, although we are warned in the end that nodes are not in domain.