After we are done with compute installation we will continue onto network installation for our OpenStack installation – Train release.
Install and configure controller node
This part is done on the controller node.
More details on this topic can be found here – https://docs.openstack.org/neutron/train/install/install-rdo.html
Prerequisites
First, we will create DB
mysql -u root -pCREATE DATABASE neutron;GRANT ALL PRIVILEGES ON neutron.* TO 'neutron'@'localhost' \
IDENTIFIED BY 'NEUTRON_DBPASS';
GRANT ALL PRIVILEGES ON neutron.* TO 'neutron'@'%' \
IDENTIFIED BY 'NEUTRON_DBPASS';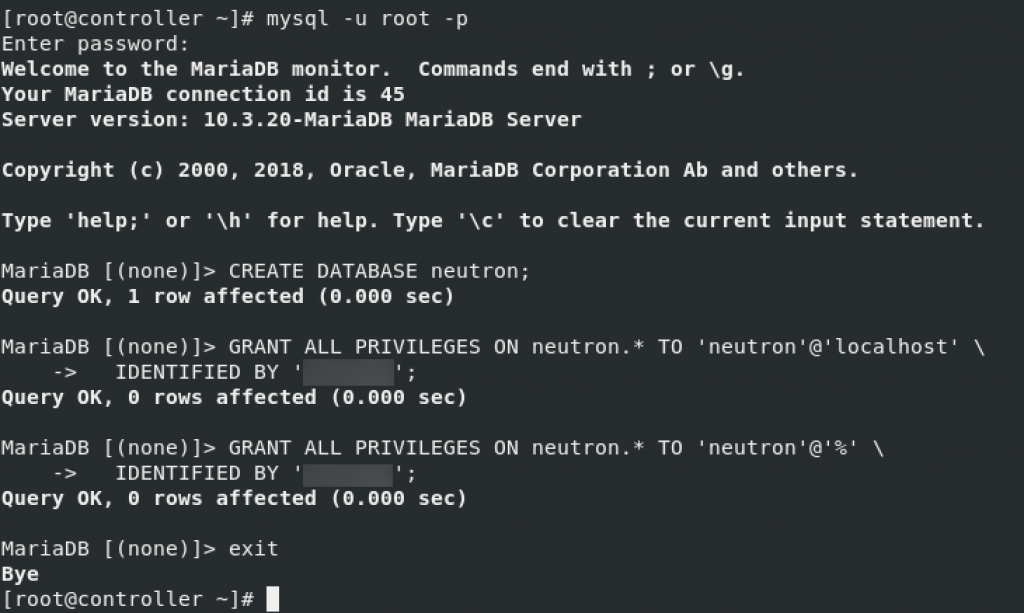
Next, source admin to gain access to admin only cli commands
. admin-openrc
or if you done previos parts with my tutorials
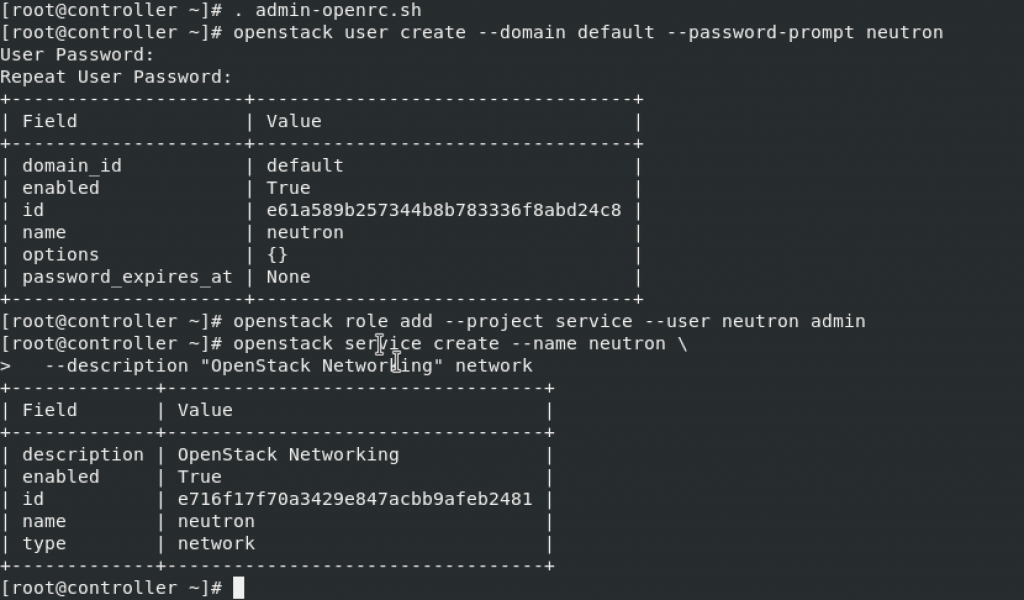
. admin-openrc.shCreate neutron user
openstack user create --domain default --password-prompt neutronAdd admin role to neutron user
openstack role add --project service --user neutron adminCreate neutron service entity
penstack service create --name neutron \
  --description "OpenStack Networking" network
Create Networking API service endpoints
openstack endpoint create --region RegionOne \
  network public http://controller:9696
openstack endpoint create --region RegionOne \
network internal http://controller:9696openstack endpoint create --region RegionOne \
network admin http://controller:9696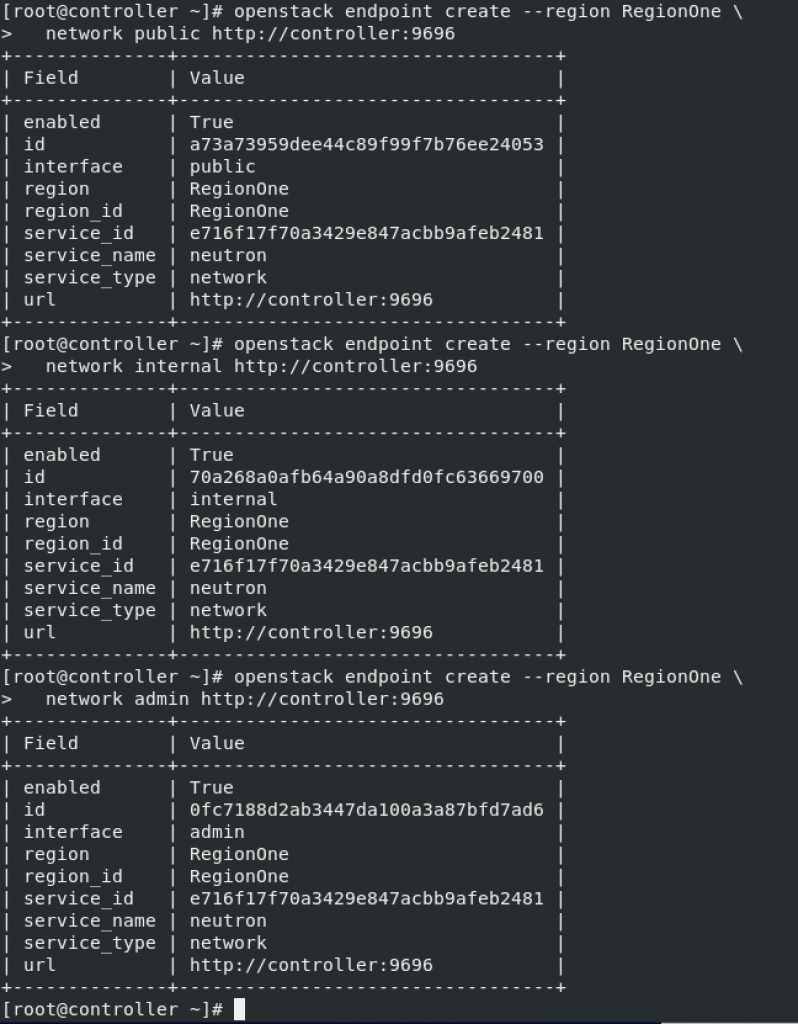
Configure networking options
Here I will just c/p explanation from OpenStack on the link above
You can deploy the Networking service using one of two architectures represented by options 1 and 2.
Option 1 deploys the simplest possible architecture that only supports attaching instances to provider (external) networks. No self-service (private) networks, routers, or floating IP addresses. Only the admin or other privileged user can manage provider networks.
Option 2 augments option 1 with layer-3 services that support attaching instances to self-service networks. The demo or other unprivileged user can manage self-service networks including routers that provide connectivity between self-service and provider networks. Additionally, floating IP addresses provide connectivity to instances using self-service networks from external networks such as the Internet.
Self-service networks typically use overlay networks. Overlay network protocols such as VXLAN include additional headers that increase overhead and decrease space available for the payload or user data. Without knowledge of the virtual network infrastructure, instances attempt to send packets using the default Ethernet maximum transmission unit (MTU) of 1500 bytes. The Networking service automatically provides the correct MTU value to instances via DHCP. However, some cloud images do not use DHCP or ignore the DHCP MTU option and require configuration using metadata or a script.
Choose one of the following networking options to configure services specific to it. Afterwards, return here and proceed to Configure the metadata agent.
I will use option 2 (Self-service networks) and describe it here. Links to both methods on OpenStack documentation are here
Option 2 – Self-service networks
Installation is done on the controller node
sudo yum install openstack-neutron openstack-neutron-ml2 \
  openstack-neutron-linuxbridge ebtables
Edit /etc/neutron/neutron.conf
sudo vi /etc/neutron/neutron.confdatabase section. Replace NEUTRON_DBPASS with neutron db pass you set earlier.
[database]
# ...
connection = mysql+pymysql://neutron:NEUTRON_DBPASS@controller/neutron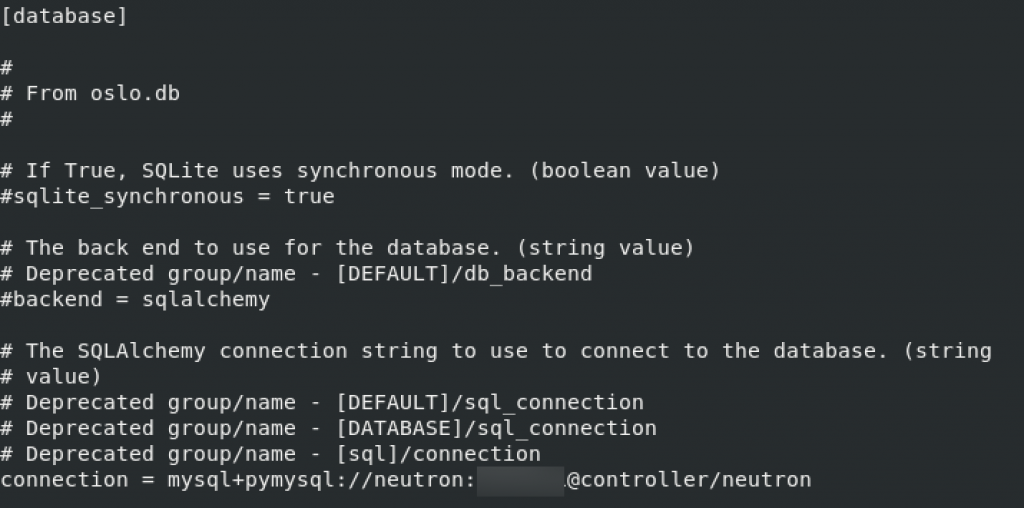
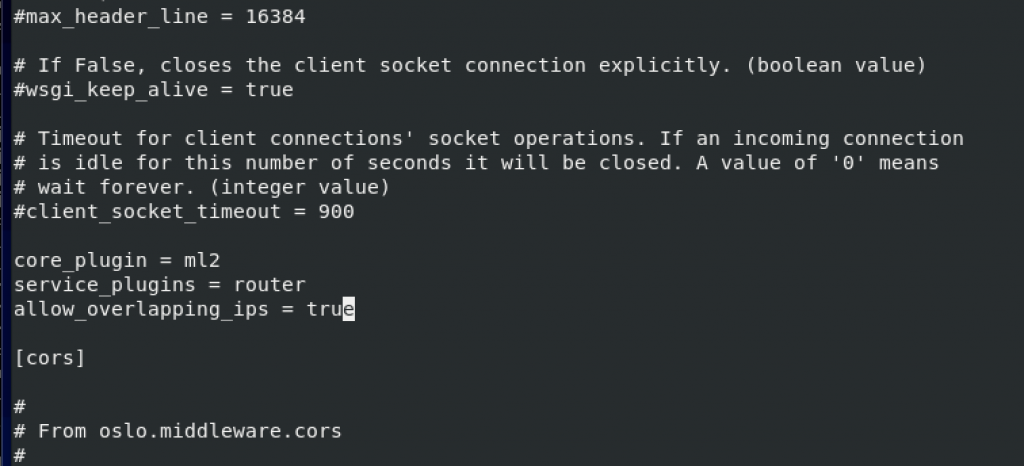
In the default section, enable the Modular Layer 2 (ML2) plug-in, router service, and overlapping IP addresses
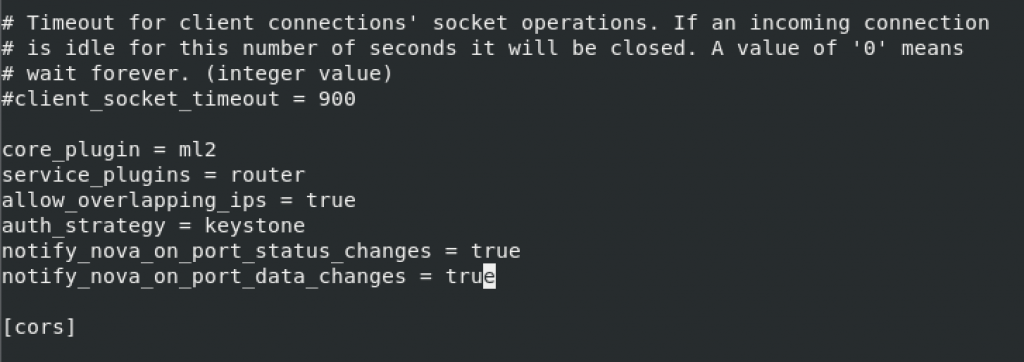
[DEFAULT]
# ...
core_plugin = ml2
service_plugins = router
allow_overlapping_ips = true
I haven’t found any of these, so I just added them to the bottom of the [DEFAULT] section.
Default RabbitMQ. Replace RABBIT_PASS with your pass
[DEFAULT]
# ...
transport_url = rabbit://openstack:RABBIT_PASS@controller

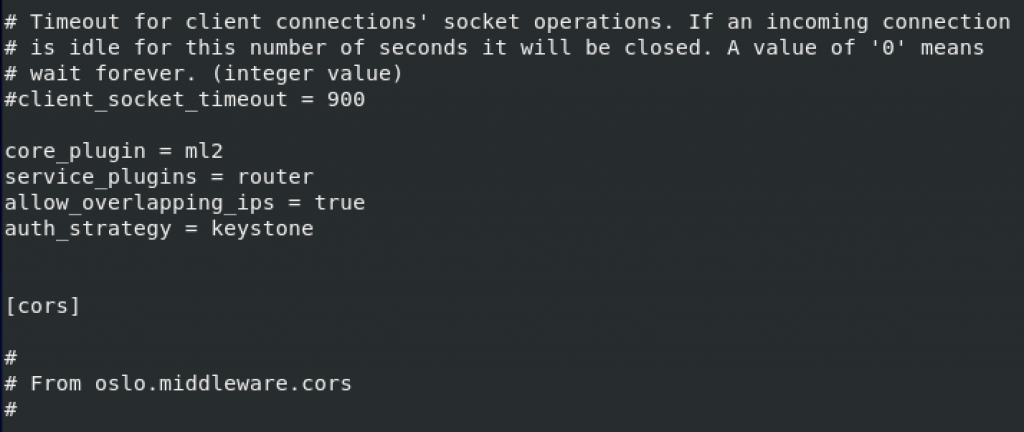
default and keystone_authtoken. Replace NEUTRON_PASS with neutron system user pass.
[DEFAULT]
# ...
auth_strategy = keystone
[keystone_authtoken]
# ...
www_authenticate_uri = http://controller:5000
auth_url = http://controller:5000
memcached_servers = controller:11211
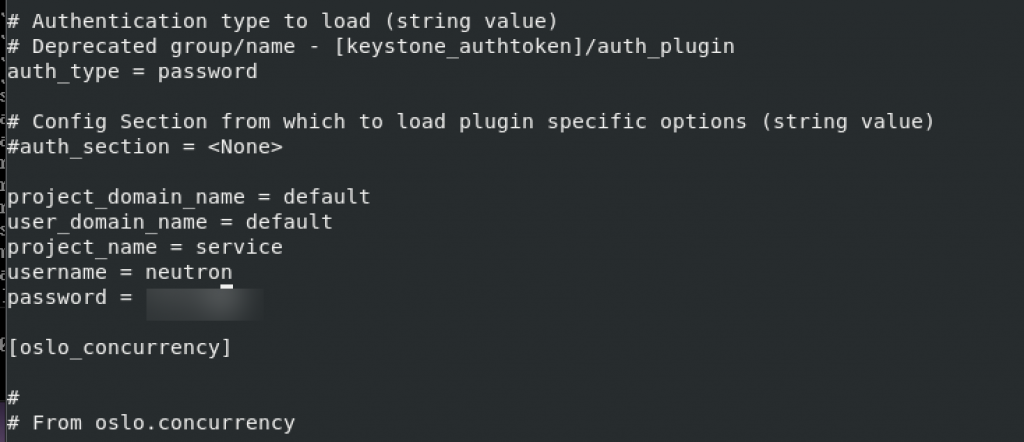
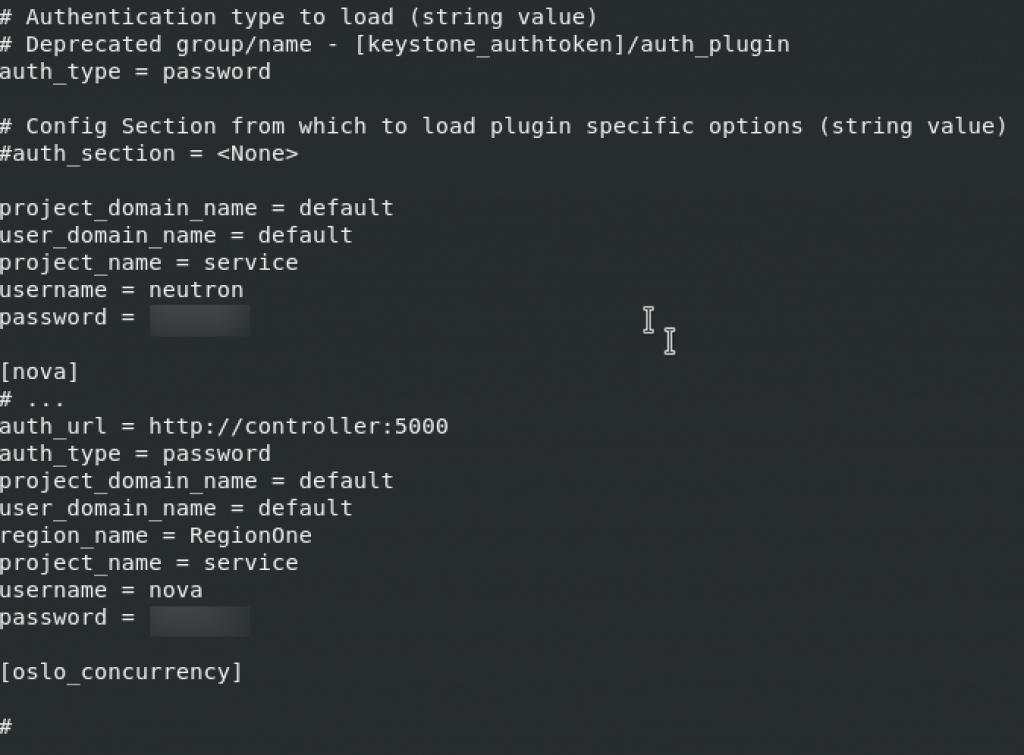
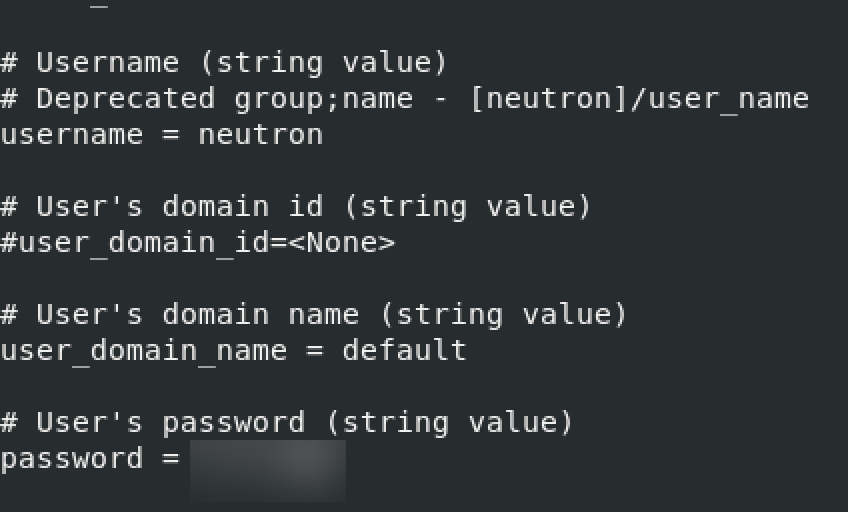
auth_type = password
project_domain_name = default
user_domain_name = default
project_name = service
username = neutron
password = NEUTRON_PASS
For, default section, I haven’t found auth_strategy vaule, so I just added one to the bottom of [DEFAULT] section.
!!! Change auth_uri which is in the file by default, to auth_url
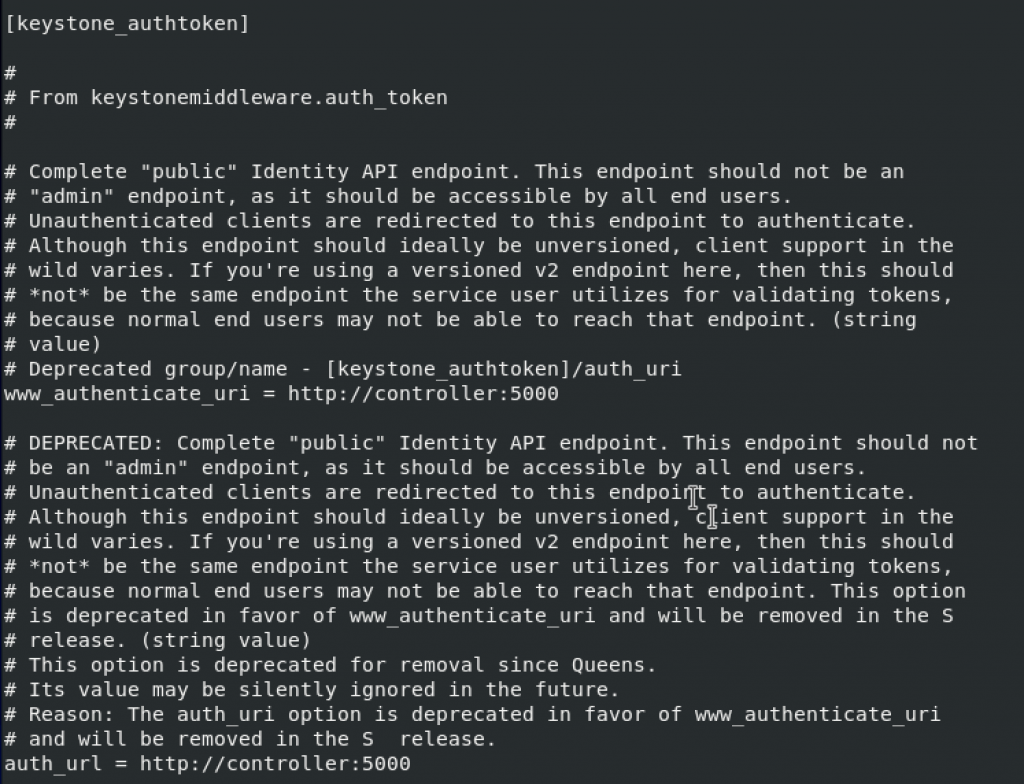

change auth_type and add rest of the values to the bottom of the keystone_authtoken section
default and nova. Replace NOVA_PASS with neutron system user pass.
[DEFAULT]
# ...
notify_nova_on_port_status_changes = true
notify_nova_on_port_data_changes = true

[nova]
# ...
auth_url = http://controller:5000
auth_type = password
project_domain_name = default
user_domain_name = default
region_name = RegionOne
project_name = service
username = nova
password = NOVA_PASS
Add notifiy_nova… lines again to the bottom of the [DEFAULT] section.
Nova section is completely missing so I will add it in the file on the place where it comes in alphabet order, under m, just behind keystone_authtoken and above oslo_concurrency setting.
oslo_concurrency
[oslo_concurrency]
# ...
lock_path = /var/lib/neutron/tmp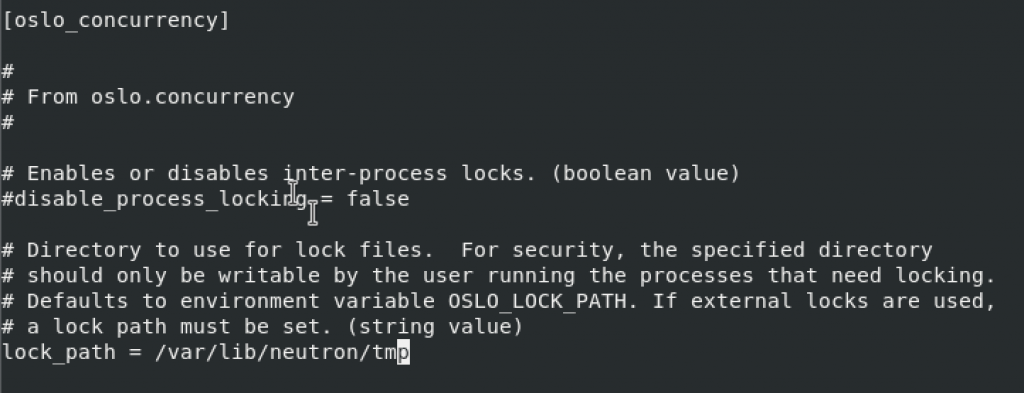
Configure the Modular Layer 2 (ML2) plug-in
We will edit /etc/neutron/plugins/ml2/ml2_conf.ini
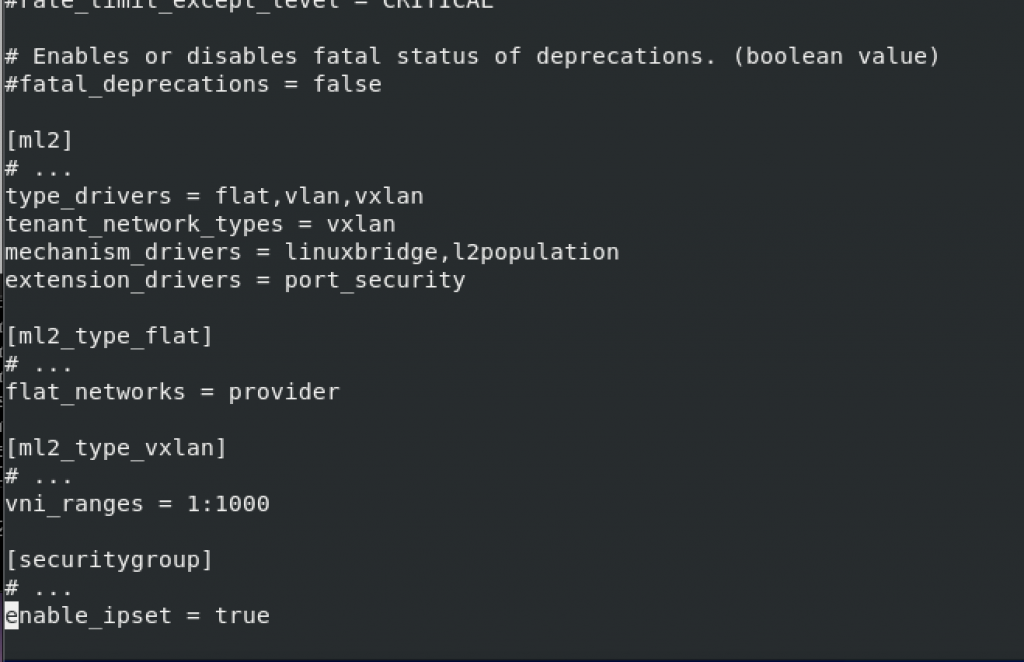
ml2 – enable flat, VLAN, and VXLAN networks:
[ml2]
# ...
type_drivers = flat,vlan,vxlan
ml2 – enable VXLAN self-service networks
[ml2]
# ...
tenant_network_types = vxlan
ml2 – enable the Linux bridge and layer-2 population mechanisms
[ml2]
# ...
mechanism_drivers = linuxbridge,l2population
!!After you configure the ML2 plug-in, removing values in the type_drivers option can lead to database inconsistency.
ml2 – enable the port security extension driver
[ml2]
# ...
extension_drivers = port_security
ml2_type_flat
[ml2_type_flat]
# ...
flat_networks = provider
ml2_type_vxlan
[ml2_type_vxlan]
# ...
vni_ranges = 1:1000
securitygroup
[securitygroup]
# ...
enable_ipset = true
None of these values exist in the file, so I added new sections and values in them, as depicted below. I added these values at the bottom of the file.
Configure linux bridge agent
Edit /etc/neutron/plugins/ml2/linuxbridge_agent.ini
sudo vi /etc/neutron/plugins/ml2/linuxbridge_agent.ini linux bridge section – map the provider virtual network to the provider physical network interface. Ok, installation documentation is not clear on this one, but from what I grasped, under PROVIDER_INTERFACE_NAME you need to enter name of your provider interface NIC. My management network resides on interface ens33, while provider interface is on ens34 (you can check your network names by typing in ifconfig). Also, here is how network looks in OpenStack installation documentation.
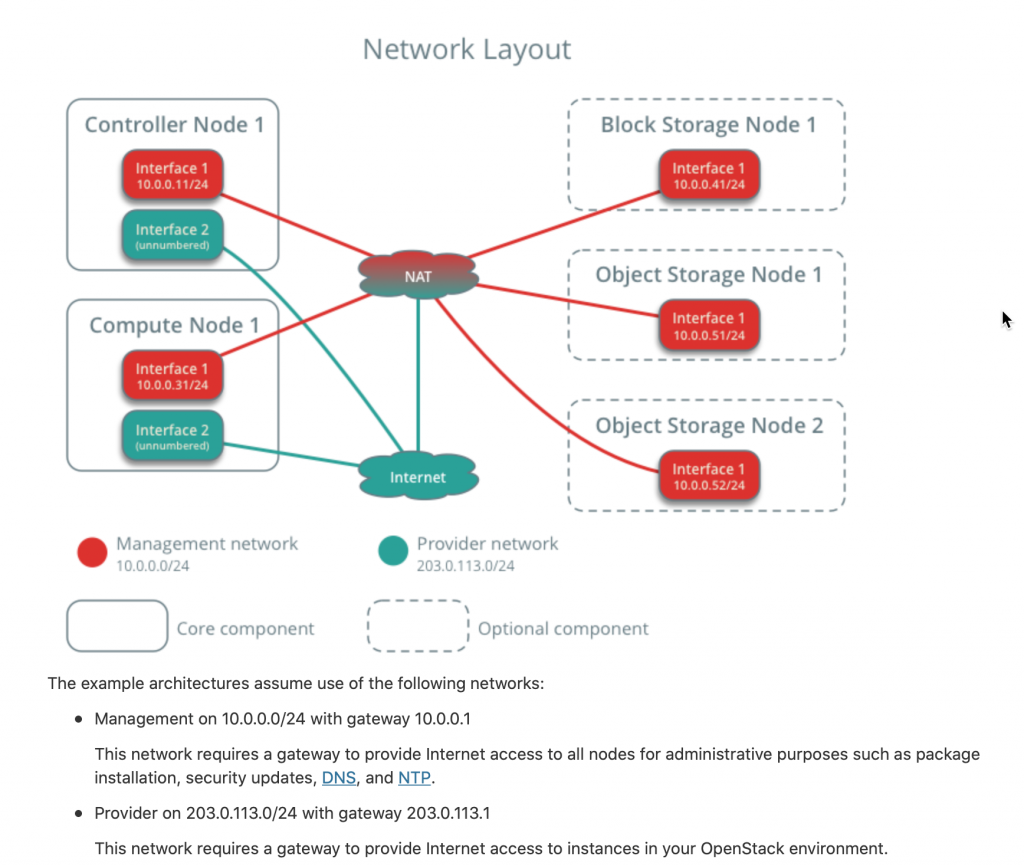
I will try with my ens34 interface which has 203.0.113.0 network on it.
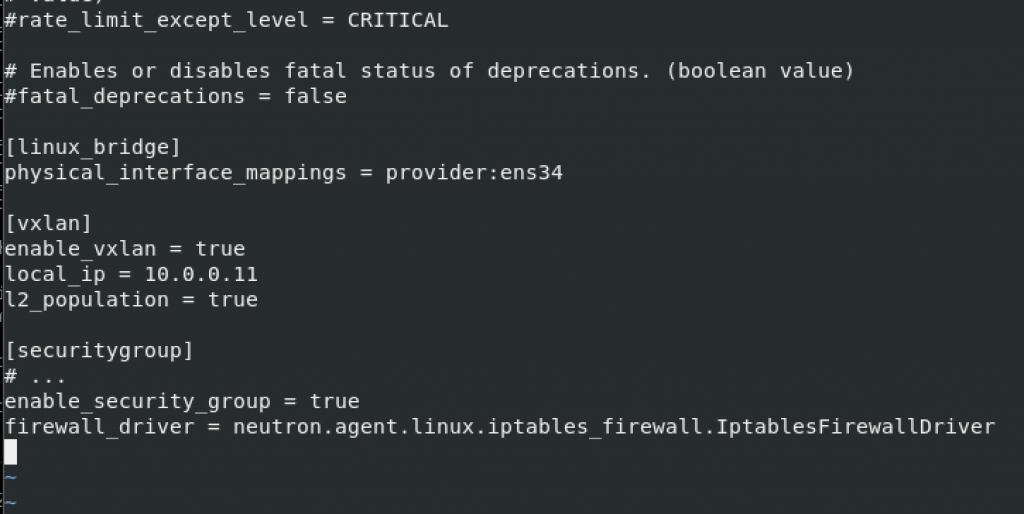
[linux_bridge]
physical_interface_mappings = provider:PROVIDER_INTERFACE_NAME
vxlan section – enable VXLAN overlay networks, configure the IP address of the physical network interface that handles overlay networks, and enable layer-2 population. OVERLAY_INTERFACE_IP_ADDRESS is the IP address of the controller node, so in my case – 10.0.0.11
[vxlan]
enable_vxlan = true
local_ip = OVERLAY_INTERFACE_IP_ADDRESS
l2_population = true
securitygroup – enable security groups and configure the Linux bridge iptables firewall driver
[securitygroup]
# ...
enable_security_group = true
firewall_driver = neutron.agent.linux.iptables_firewall.IptablesFirewallDriver
Story is again same, you need to create new sections with values in the file.Mine looks like this.
Verify that OS supports network bridge filters.
Execute following
modprobe br_netfilter
sysctl -p
Execute commands bellow and confirm that the values are set to 1. My ipv6 interface is disabled and will not be used, so it will return error.
sysctl net.bridge.bridge-nf-call-iptables
sysctl net.bridge.bridge-nf-call-ip6tables
Configure layer-3 agent
edit /etc/neutron/l3_agent.ini file
sudo vi /etc/neutron/l3_agent.iniIn the default section configure linux bridge interface driver
[DEFAULT]
# ...
interface_driver = linuxbridge
Again, value does not exist so I added it at the bottom of the [DEFAULT] section.

Configure the DHCP agent
Edit /etc/neutron/dhcp_agent.ini file
sudo vi /etc/neutron/dhcp_agent.iniDefault section – configure linux bridge driver, dhcp driver, enable isolated metadata
[DEFAULT]
# ...
interface_driver = linuxbridge
dhcp_driver = neutron.agent.linux.dhcp.Dnsmasq
enable_isolated_metadata = true
Again, none of the values exist, so add them to the bottom of the default section.
Back to the Networking controller node configuration
Configure metadata agent
Edit
sudo vi /etc/neutron/metadata_agent.ini Default section – Replace METADATA_SECRET with a suitable secret fot the metadata proxy
[DEFAULT]
# ...
nova_metadata_host = controller
metadata_proxy_shared_secret = METADATA_SECRET
Add values to the bottom of the file, since values are not predefined.

Configure the Compute service to use the Networking service
Edit
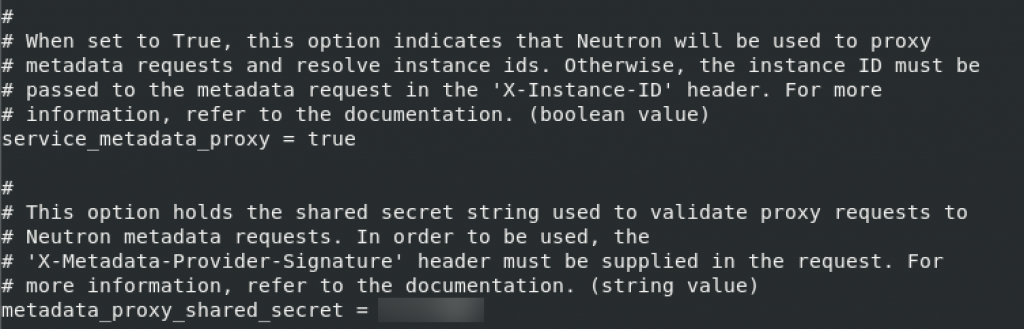
sudo vi /etc/nova/nova.confneutron section – NEUTRON_PASS – pass for neutron service account, and METADATA_SECRET – enter secret you defined in the step before this.
[neutron]
# ...
auth_url = http://controller:5000
auth_type = password
project_domain_name = default
user_domain_name = default
region_name = RegionOne
project_name = service
username = neutron
password = NEUTRON_PASS
service_metadata_proxy = true
metadata_proxy_shared_secret = METADATA_SECRET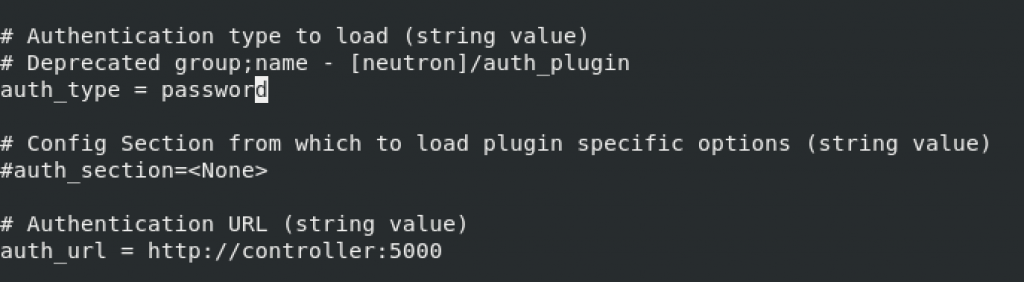


Finalize install
Create symbolic links
ln -s /etc/neutron/plugins/ml2/ml2_conf.ini /etc/neutron/plugin.iniPopulate database
su -s /bin/sh -c "neutron-db-manage --config-file /etc/neutron/neutron.conf \
  --config-file /etc/neutron/plugins/ml2/ml2_conf.ini upgrade head" neutron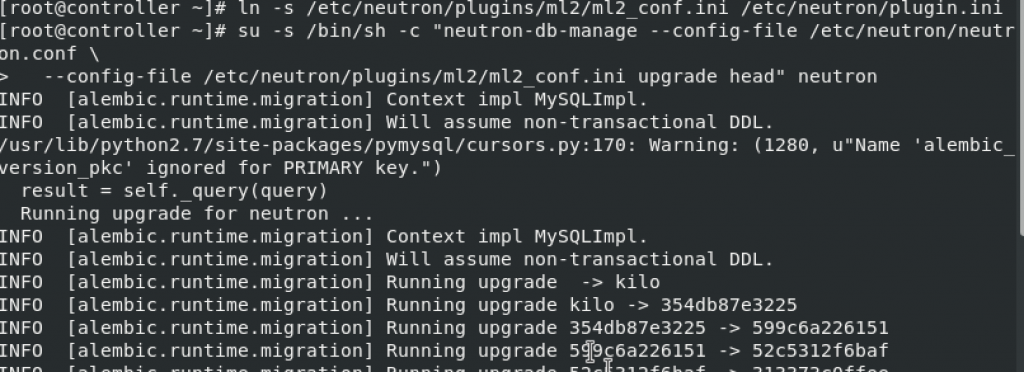

Restart Compute API service
systemctl restart openstack-nova-api.serviceStart and enable services
sudo systemctl enable neutron-server.service \
  neutron-linuxbridge-agent.service neutron-dhcp-agent.service \
  neutron-metadata-agent.service
sudo systemctl start neutron-server.service \
  neutron-linuxbridge-agent.service neutron-dhcp-agent.service \
  neutron-metadata-agent.service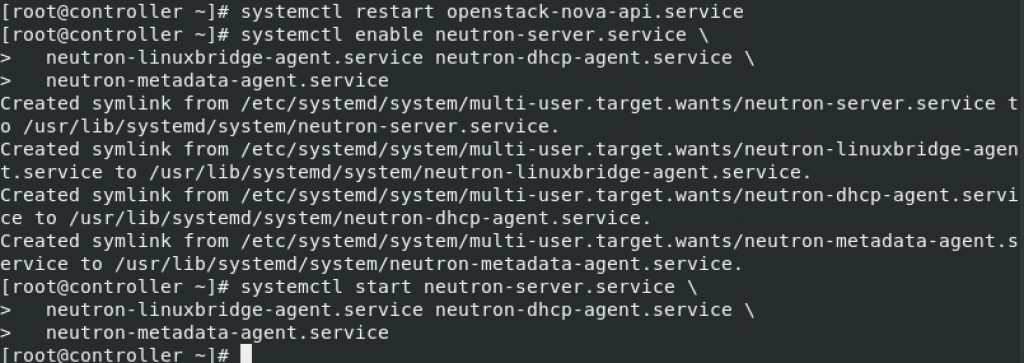
If you have networking option 2 (this tutorial has) we additionally need these
sudo systemctl enable neutron-l3-agent.service
sudo systemctl start neutron-l3-agent.service
Install and configure Compute node
This part will be done on compute node
Install components
sudo yum install openstack-neutron-linuxbridge ebtables ipsetEdit
sudo vi /etc/neutron/neutron.confDefault section – change RABBIT_PASS for your RabbitMQ password
[DEFAULT]
# ...
transport_url = rabbit://openstack:RABBIT_PASS@controller
default and keystone_authtoken sections – change NEUTRON_PASS to your pass.
Add auth_strategy value to the bottom of [DEFAULT] section.
!!! Change auth_uri to aut_url under keystone_authtoken section.
Some values are also not predefined in keystone_authtoken, so enter them at he bottom of keystone_authtoken section. Story is the same as in aaaallll previous keystone_authtoken sections.
[DEFAULT]
# ...
auth_strategy = keystone

[keystone_authtoken]
# ...
www_authenticate_uri = http://controller:5000
auth_url = http://controller:5000
memcached_servers = controller:11211
auth_type = password
project_domain_name = default
user_domain_name = default
project_name = service
username = neutron
password = NEUTRON_PASS
oslo_concurrency
[oslo_concurrency]
# ...
lock_path = /var/lib/neutron/tmp
Again, as in the controller network section we will need to define networking option. Since we already defined option 2, we need to do the same on compute node.
Configure networking option 2 – Compute node
We are doing this on a compute node.
Here is the link to the OpenStack documentation – https://docs.openstack.org/neutron/train/install/compute-install-option2-rdo.html
Edit
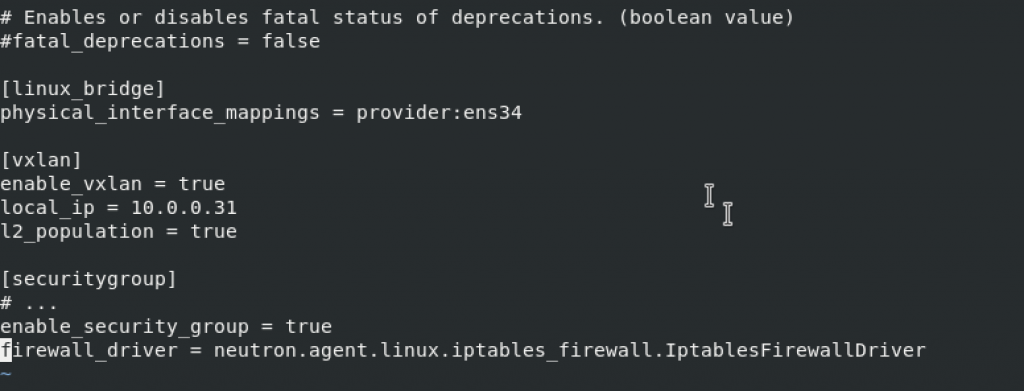
sudo vi /etc/neutron/plugins/ml2/linuxbridge_agent.inilinuxbridge – again like in this part above, I will enter ens34 in the PROVIDER_INTERFACE_NAME. See configuration above if you need more details.
[linux_bridge]
physical_interface_mappings = provider:PROVIDER_INTERFACE_NAME
vxlan – OVERLAY_INTERFACE_IP_ADDRESS will be 10.0.0.31 – management ip of the compute node.
[vxlan]
enable_vxlan = true
local_ip = OVERLAY_INTERFACE_IP_ADDRESS
l2_population = true
securitygroup
[securitygroup]
# ...
enable_security_group = true
firewall_driver = neutron.agent.linux.iptables_firewall.IptablesFirewallDriver
None of the values is predefined, so I added them all to the bottom of the file.
Execute following
modprobe br_netfilter
sysctl -p
Execute commands bellow and confirm that the values are set to 1.
sysctl net.bridge.bridge-nf-call-iptables
sysctl net.bridge.bridge-nf-call-ip6tables
Back to the Networking compute node configuration
Configure the Compute service to use the Networking service
Again, all is done on compute node
Edit
sudo vi /etc/nova/nova.confneutron section – Change NEUTRON_PASS to the pneutron system user pass.
[neutron]
# ...
auth_url = http://controller:5000
auth_type = password
project_domain_name = default
user_domain_name = default
region_name = RegionOne
project_name = service
username = neutron
password = NEUTRON_PASS
Restart the compute service
systemctl restart openstack-nova-compute.serviceEnable and start linux bridge agent
sudo systemctl enable neutron-linuxbridge-agent.service
sudo systemctl start neutron-linuxbridge-agent.service
Verify operation
This part will be done on controller node
Start
. admin-openrc

#or if you followed my previous tutorials you will enter

.admin-openrc.sh
Run following
openstack extension list --network
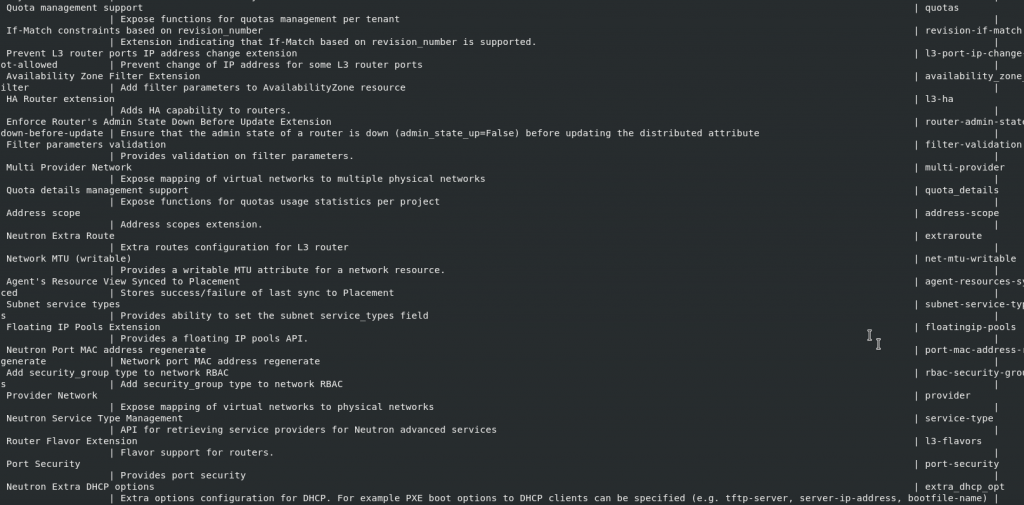
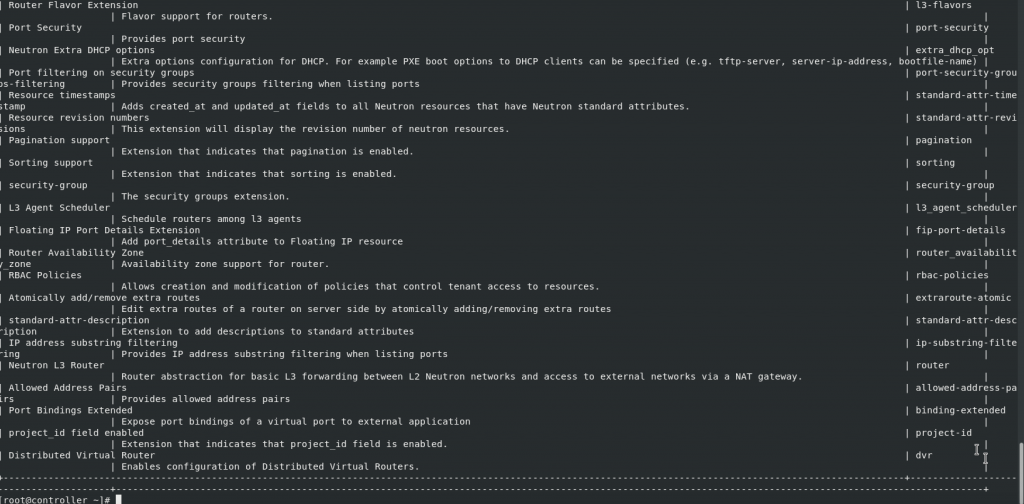
Since I used networking option 2, I will execute command to check that also
openstack network agent list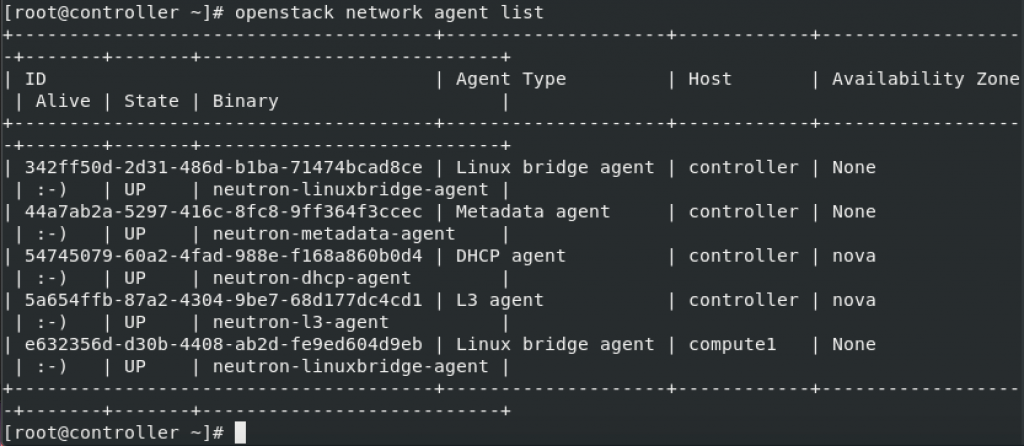
Details and more tests are available here – https://docs.openstack.org/neutron/train/install/verify.html
That is it for the Minimal OpenStack installation. I will be adding Dashboard – Horizon, so we can manage this install.