In Ubuntu 22.04 there are some news regarding Ubuntu and Microsoft Active Directory. Canonical added something called ADsys (available in Ubuntu Pro) which you can read more about here – https://ubuntu.com/blog/new-active-directory-integration-features-in-ubuntu-22-04-part-1
We still need SSSD and PAM for authentication – Adsys compliments them with adding GPO support, privilege managment and so on…
Let[s join again Ubuntu to Windows domain, this time with Windows Server 2022.
Prerequisites:
Domain is on Windows Server 2022 Datacenter Trial.
Domain controller:
Domain name is test.local
Domain Controller name is: TEST-DC1
IP of domain controller is: 192.168.44.10
Inside Active Directory Users and Computers I created new OU named DomainUSers and inside that OU, I created user named – linuser1@test.local
We will use that user for our Linux machine as domain user.
Linux machine:
Ubuntu client we are going to join to domain is Ubuntu 22.04.3 LTS
Machine name is: Lin-Client1
Machine IP is 192.168.44.201
Machine has Gnome 3 desktop environment installed.
Preparing Ubuntu client:
Sudo apt update
Sudo apt upgrade
After that we need a few components installed:
sudo apt -y install realmd sssd sssd-tools libnss-sss libpam-sss adcli samba-common-bin oddjob oddjob-mkhomedir packagekit

After this step we need to set DNS server for our Linux machine, I will also make IP address fixed
First with ip a command we will check current IP address and name of network adapter
ip a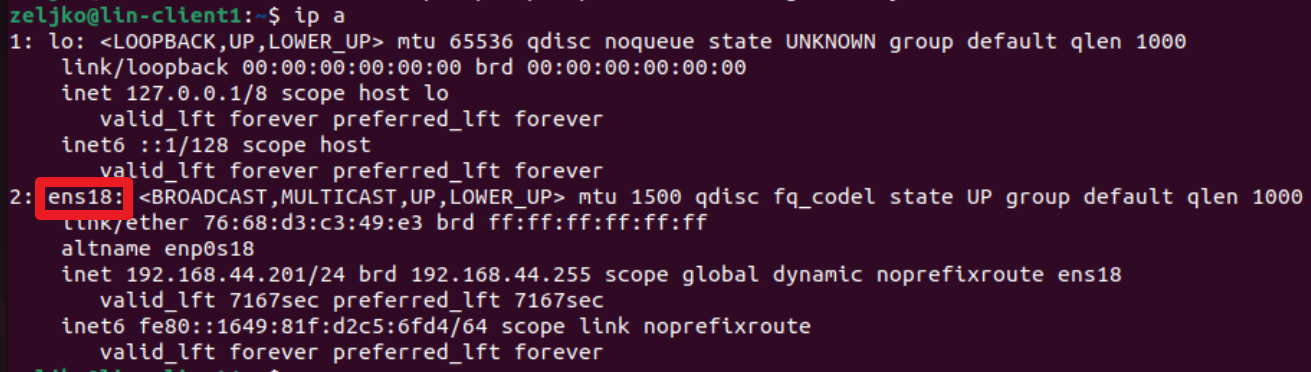
We can see that in my case, I have adapter named ens18
Next, we have to edit out networking file to add DNS server of our domain controller as DNS for our Linux machine.
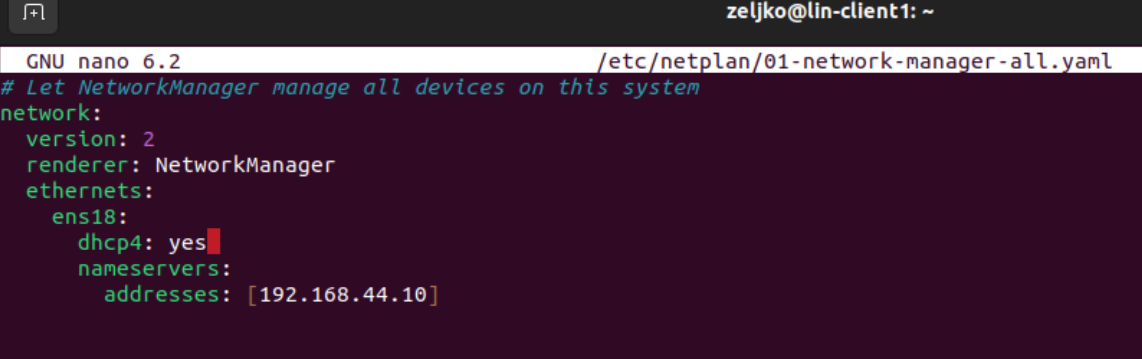
sudo nano /etc/netplan/01-network-manager-all.yamlAnd then enter following line (REMEMBER TO CHANGE IP ADDRESS TO YOUR IP!!!). You will change ens18 to your adapter name as we saw above, also I have dhcp enabled so I don’t have fixed IP in this scenario. Nameservers part is important. Under nameservers, in addresses enter IP of domain controller. Save everything.
network:
  version: 2
  renderer: networkd
  ethernets:
    ens18:
      dhcp4: yes

      nameservers:
        addresses: [192.168.44.10]
After you saved everything run:
sudo netplan apply
In case you want fixed IP your netplan file would look like this
network:
  version: 2
  renderer: networkd
  ethernets:
    ens18:
      dhcp4: no
      addresses: [192.168.44.202/24]
      gateway4: 192.168.44.1
      nameservers:
        addresses: [192.168.44.10]
Before we finally start joining the domain, let’s check our Ubuntu machine hostname, and if necessary change it.
hostnameIn case you wish to change hostname of the machine, change SETNEWNAME… for the name you wish.
sudo hostnamectl set-hostname SETNEWNAMEFORYOURMACHINEOk, now we can finally start joining our Ubuntu PC to domain… Let’s first check if we can see the domain.
realm discover test.local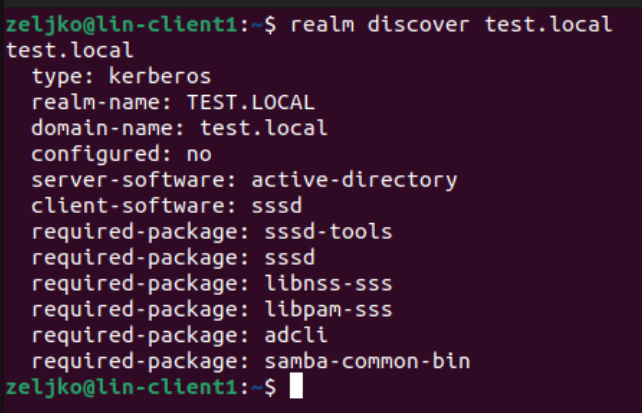
In case you are getting “no such realm found” error try following:
___________________________________________________________________________
ONLY DO THIS PART IF YOU GET “NO SUCH REALM FOUND” ERROR!!
sudo nano /etc/systemd/resolved.conf

uncomment DNS and Domains line. In DNS enter IP of your domain DNS, and in Domains enter name of your local domain.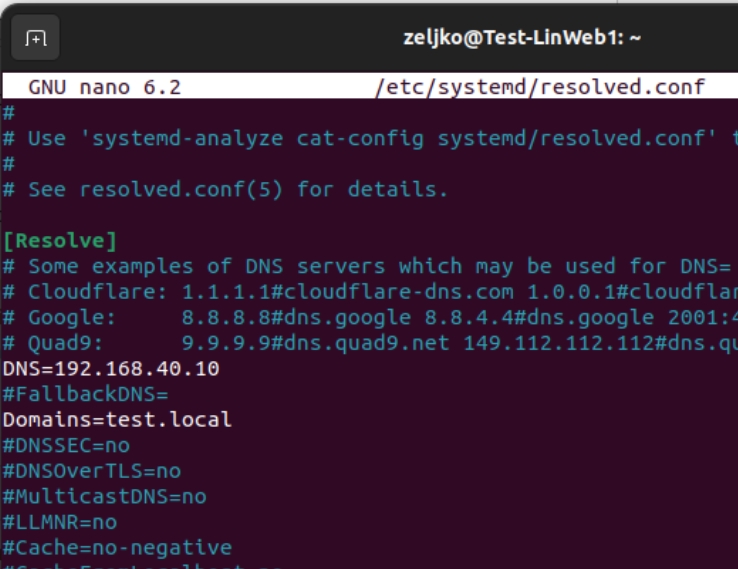
Now, we will switch this to version provided by system
sudo ln -sf /run/systemd/resolve/resolv.conf /etc/resolv.confWe will now restart resolved service
sudo systemctl stop systemd-resolved
sudo systemctl start systemd-resolved
Finally realm discover should now work
END of OPTIONAL PART resolving “NO SUCH REALM FOUND” ERROR!!
_________________________________________________________________________________________________
Now, finally we will join our machine to Windows domain (chabge test.local for your domain name)
realm join test.local
We will also check if we can now verify our domain user we will use
id linuser1@test.local
We will now edit common-session file to automatically create home folder for new user.
sudo nano /etc/pam.d/common-session
In line session optinal add following
pam_mkhomedir.so skel=/etc/skel umask=077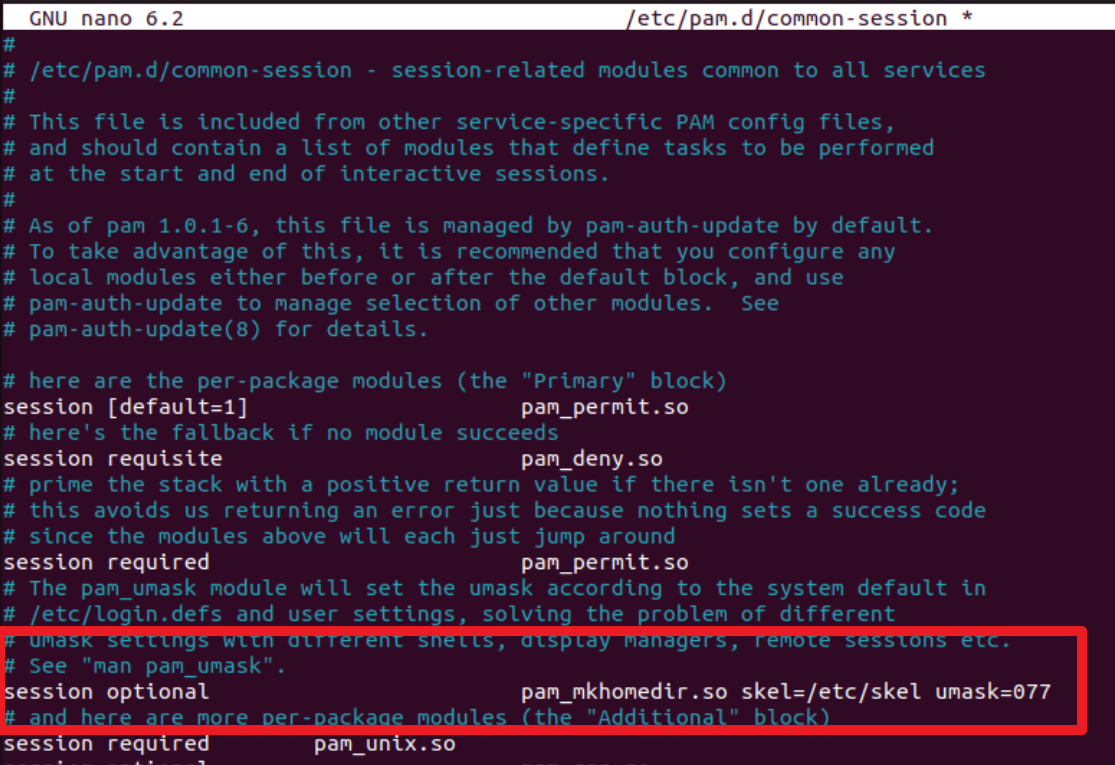
Save the modified file and exit.
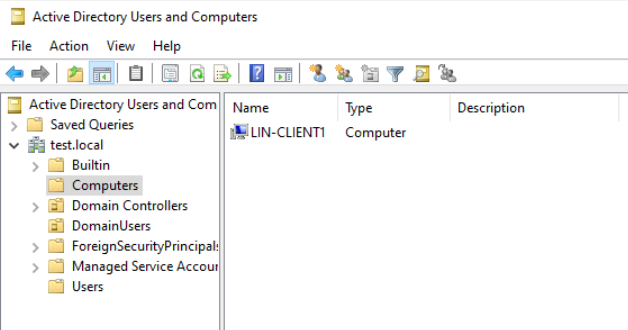
Ok, before we try to login as domain user to our Ubuntu machine, let’s check our domain controller and Computer section in Active Directory users and computers to see if our lin-client1 machine is added.
It is!
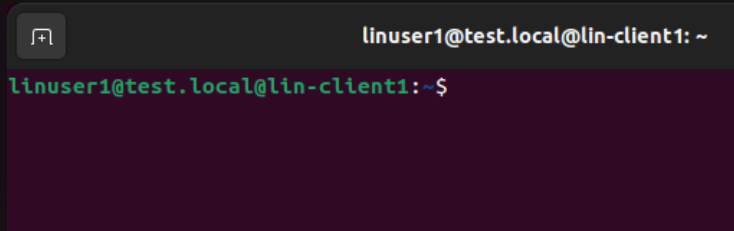
Ok, back to our Ubuntu Machine to see if we can login as domain user named linuser1@test.local
If you work only in shell without gui, you will type exit to logout of session and then login with linuser1@test.local and then type password.
I have GUI, so I selected logout, and selected not listed on lock screen and after that typed username and domain password.
It works! Also, home directory is created
One more tip before we wrap up. If you want to omit domain name part for the username – go to
sudo nano
/etc/sssd/sssd.conf

use_fully_qualified_names = False

Save the file and reboot sssd

sudo systemctl restart sssd