I wrote a lot about Azure Stack Development Kit (further in article Azure Stack or ASDK) on my blog already, and I still use the platform. However, there is a slight problem with the concept – I use it in my test environment, and usually like to experiment with lots of other technologies – so I would like to run Azure inside VM. It is possible – read on and find out how to do it.
I planned to publish this earlier, but due to lot of work, this became Christmas special :)
DISCLAIMER – this is something I recently started to play with – I’m not sure if the future updates for ASDK will work on VM, or if there are problems with the services on ASDK – I will update this article if I find something significant.
This scenario is also not supported by Microsoft. I searched for the info if running Azure Stack inside VM could be in some way illegal – but couldn’t find any info on that (as of writing in July 2022).
PREREQUISITES
I wrote a lot about Azure Stack (ASDK) on my blog already – in this article I will focus only on details that are important for running Azure Stack in the VMs – I will NOT go through all the details, I did it in my older article here – https://www.informaticar.net/how-to-install-asdk-azure-on-premises/ That article covers everything for top to bottom on how to start with Azure Stack – refer to it, if you are missing some steps here.
Principle is the same as you would install Azure Stack on Bare Metal – difference is that you need to prepare your VM to be able to execute Hyper-V and modify few files from Azure Stack installer so we can make Azure installer think that it is starting on a hardware, not inside the VM.
VM specs
I will create my VM with following specs – CPU – 22 cores (minimum 16 cores), 356GB of RAM (minimum 192GB), 1 SSD with 250GB of disk space for OS (200GB minimum) and 4 SSDs with 410GB of disk space for Azure Stack (4 disks with 400GB size is minimum).
This is a lot of resources – there is a way to modify and “cheat” Azure Stack installer and set minimum resources to much less. I will mention how to get installer started with let’s say 100GB of RAM, 8 cores and 100GB disk size. In reality I would not recommend this if you plan to use Azure Stack extensively – it will just be slow and unusable.
Choosing hypervisor/CPU/DISK config
Most important thing is that your hypervisor and CPU supports nested virtualisation. I’m using Intel Xeon and Proxmox for this. In the past when I last tried AMD CPUs (Epyc) there were some issues with enabling nested virtualisation (I tried it with Windows Server and ASDK, and it was some matter of Microsoft supporting AMD CPUs…) – I haven’t tried it since 2019, so I’m not sure what is current state of the matter – check if you have AMD Epyc/Ryzen CPU before you start.
I will use Proxmox (v 7.0-11) as my virtualisation platform and Intel Xeon 5218R as CPU. As far as I know VMware and VirtualBox also support nested virtualisation.
If you are interested in Proxmox, I wrote a lot about it, here is the start – https://www.informaticar.net/how-to-install-proxmox/
Second most important thing is drives that you’ll be using for this. I will use one 1.92TB drive and make four 410GB “virtual disks” from it.
Important thing with drives is that the disk, or disks that you’ll be using are not in any kind of RAID configuration. I’m just using disk attached to the server – not in RAID configuration.
I created LVM Thin Pool in Proxmox with one 1.92TB drive (drive is not in RAID!!).

Creating VM for ASDK
Two important moments – selecting CPU type (Host) and disk drives as SATA.
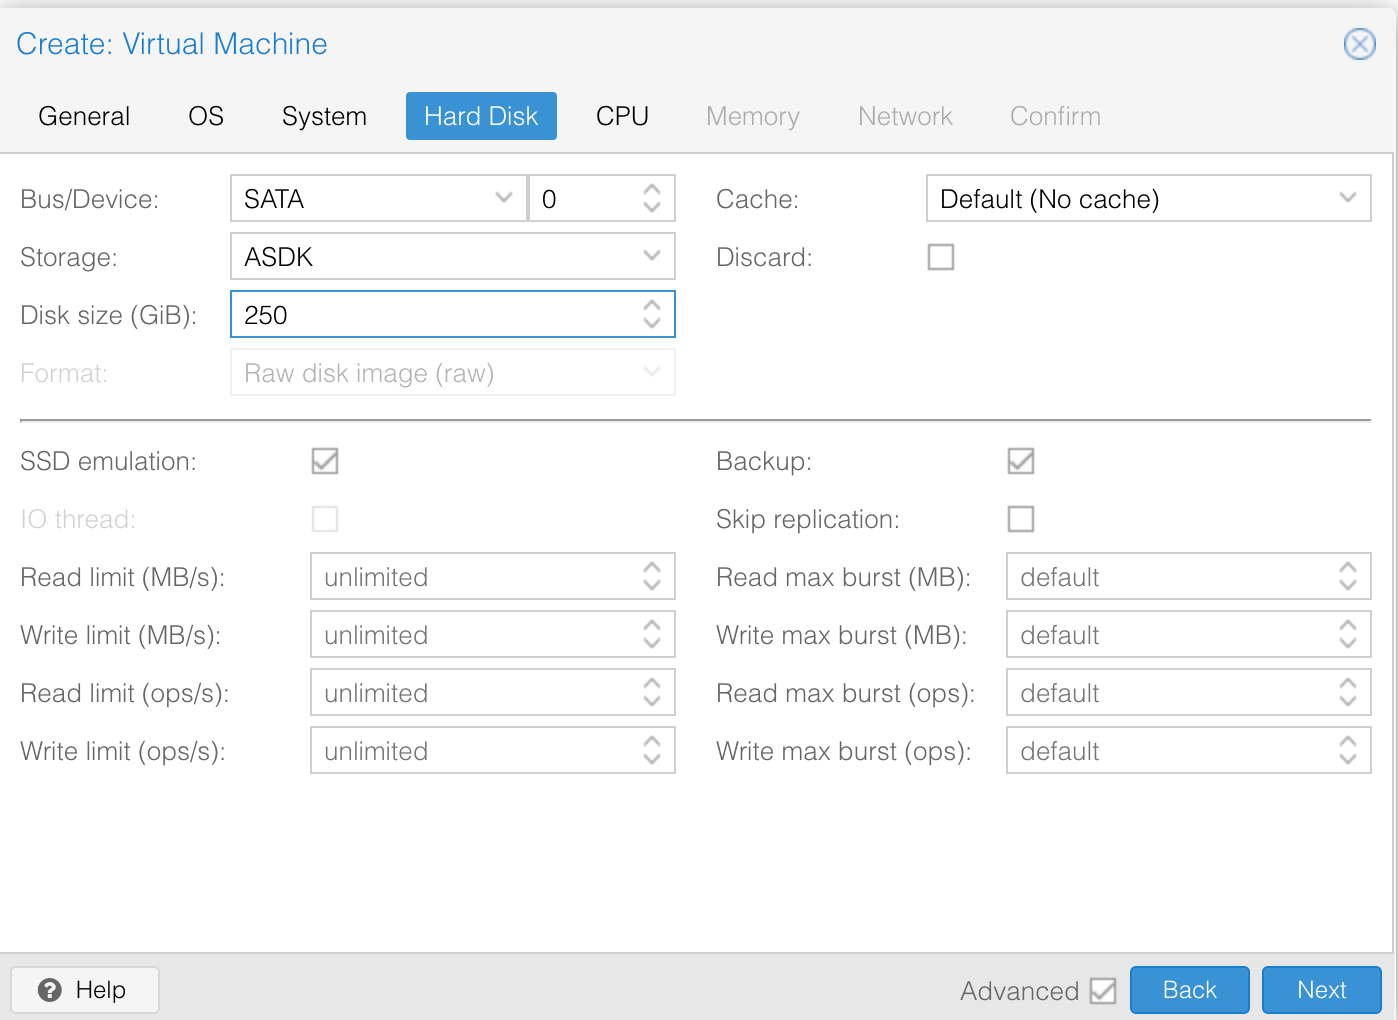
Disk
This is how your disk setup needs to look like – Storage type is SATA, and disk size is 250GB (for OS) – I also selected SSD emulation. I will repeat process with exact same config for four more disks of 410GB in size. (I used VIRTIO SCSI as controller – it can be seen on the summary of VM below)
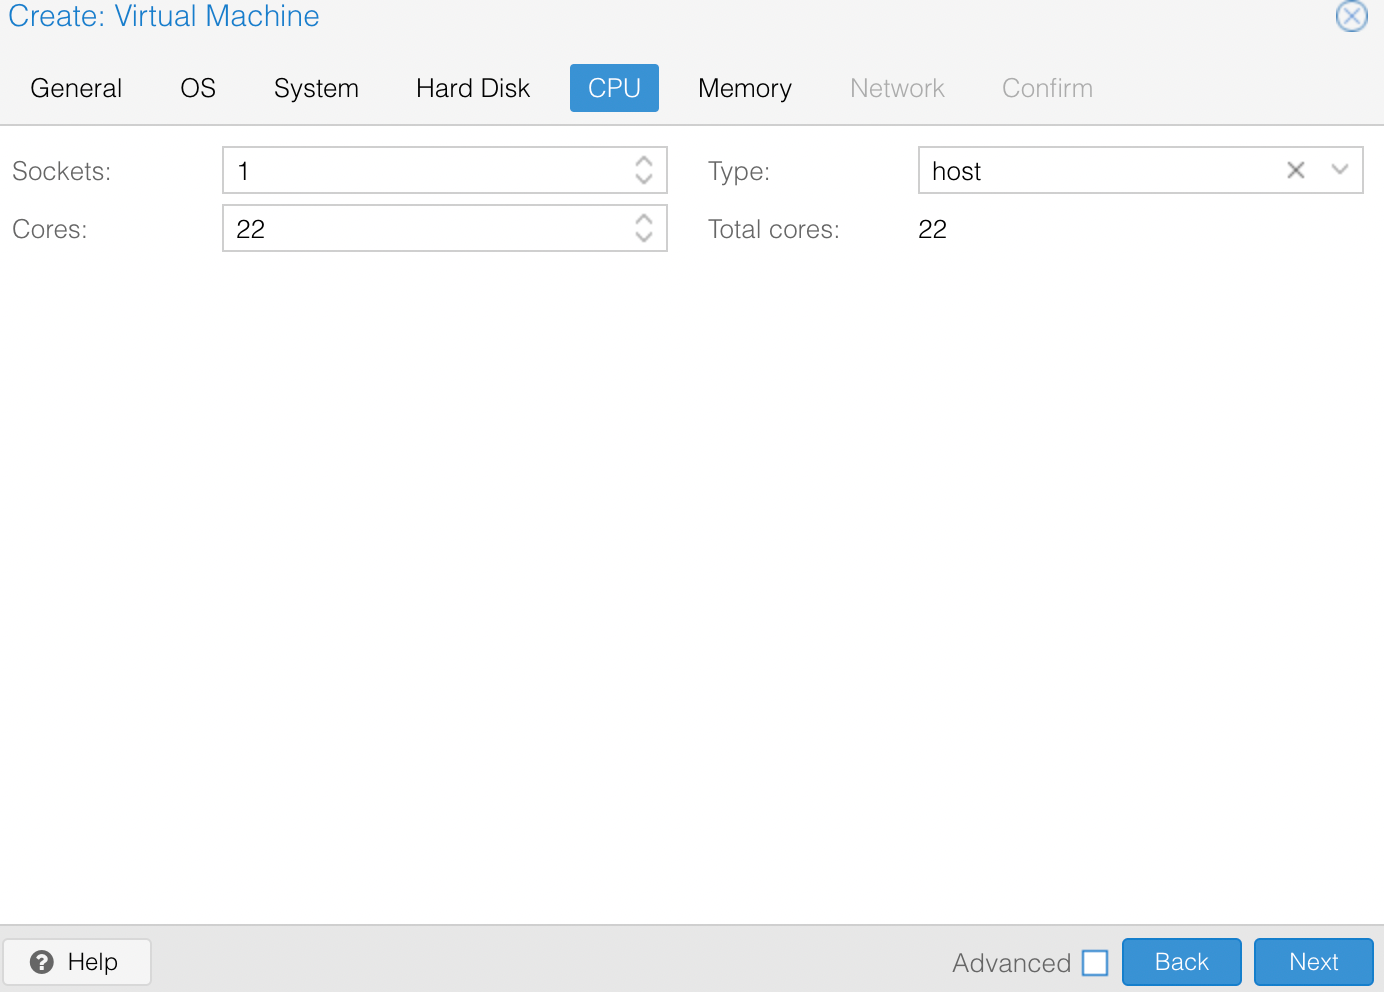
CPU
I will select 22 cores. Type needs to be set to – host !!
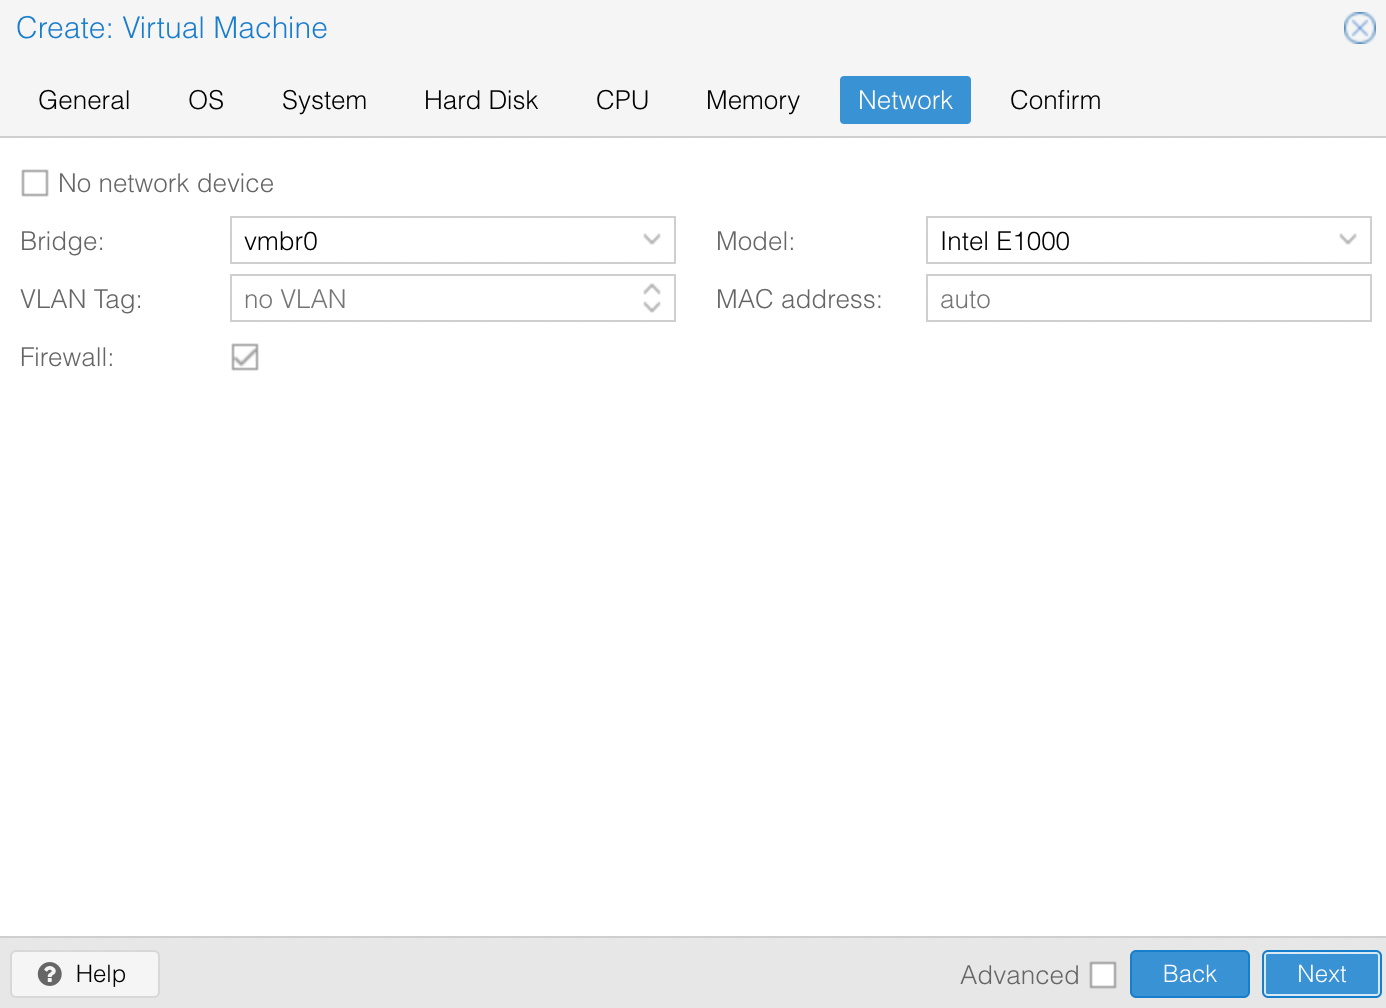
Network
Azure Stack allows only one network card – so here is what I set
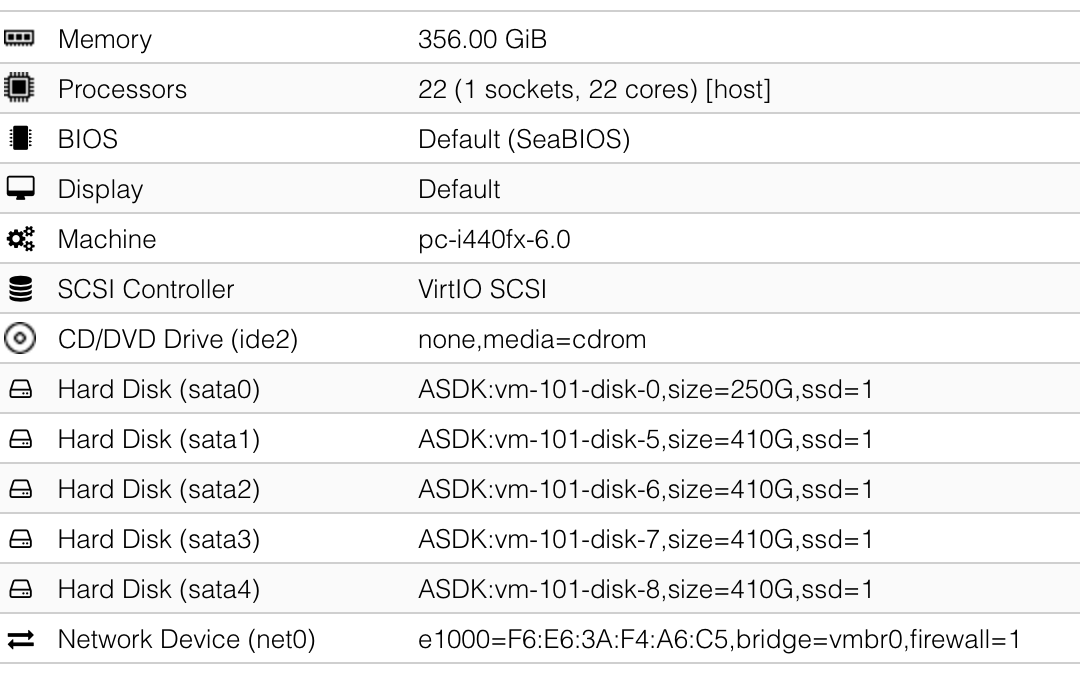
In the end – this is how my VM looks like
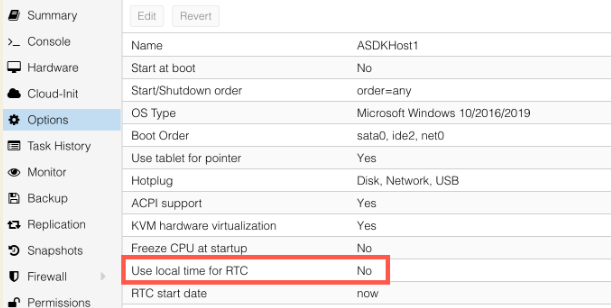
Time!!
Under Options section for the VM, I also set Use local time for RTC to NO. Usually VM will pick up time from host to your VM, and that can be confusing for ASDK.
We can now proceed and install Windows Server 2019 and after that download Azure Stack Development Kit.
ASDK Download Link – https://azure.microsoft.com/en-us/overview/azure-stack/development-kit-thank-you/
Make sure you have fixed IP address on your Windows Server 2019 installation and that you do not touch four disks that you attached to the VM!
Preparing ASDK-Installer.ps1 / Editing Cloudbuilder.vhdx
ASDK-installer.ps1 script
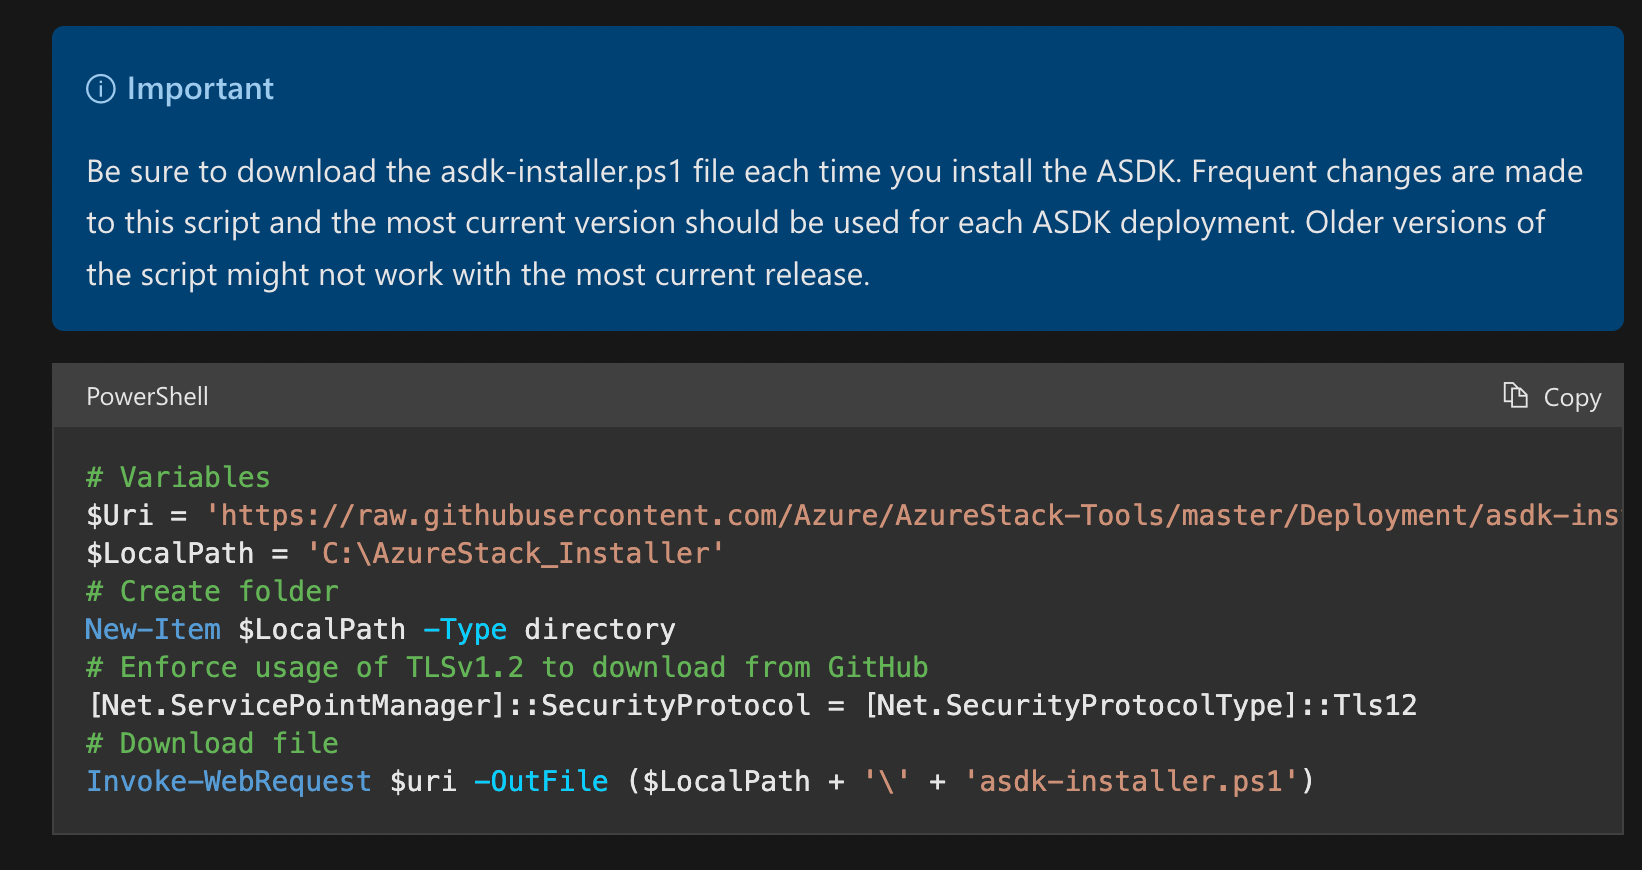
While the Azure Stack Development Kit is downloading (it is about 30GB in size) we will prepare our ASDK-Installer.ps1 script. We need ASDK-installer.ps1 to mount Cloudbuilder.vhdx and start Azure Stack install.
We can get code that will generate ASDK-Installer.ps1 script here – https://docs.microsoft.com/en-us/azure-stack/asdk/asdk-prepare-host?view=azs-1908
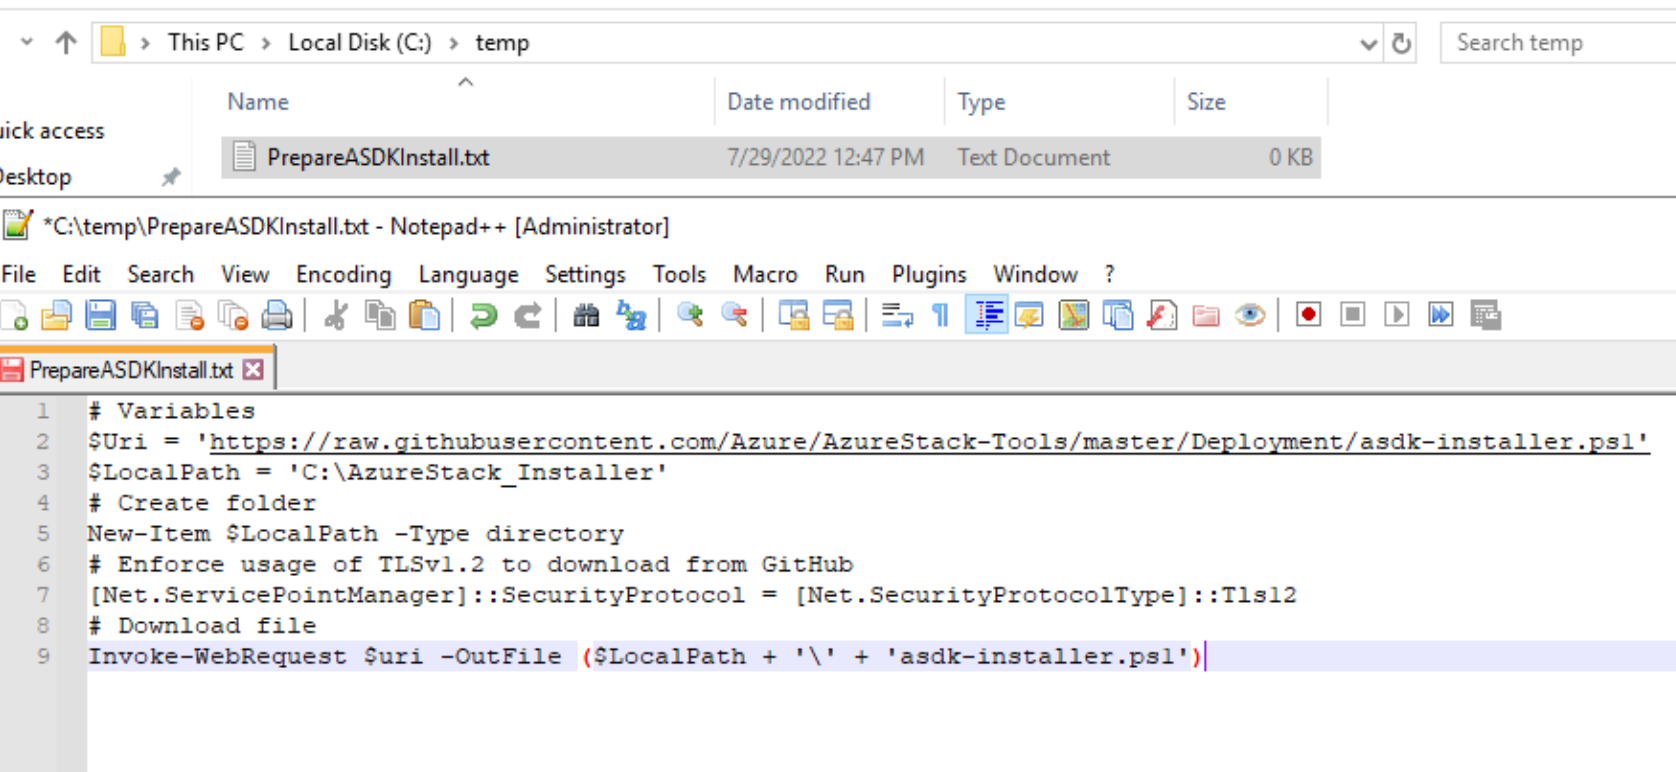
Copy part that is in Powershell window (depicted below) to new txt document. I called file with the code below – PrepareASDKInstall.txt
I’m usually opening txt files with Notepad++. Here is how my file looks like. After you copied the code – rename PrepareASDKInstall.txt to ps1 (PrepareASDKInstall.ps1)
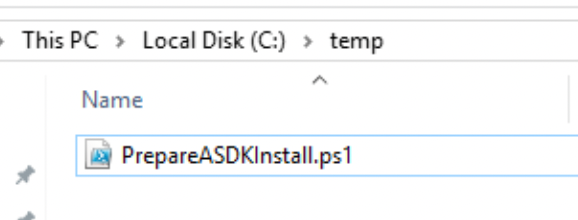
This code will create ASDK-installer.ps1 in new directory C:\AzureStack_Installer that it will create. It will pull latest ASDK-installer.ps1 from Github.
Start Powershell – first type in
Set-ExecutionPolicy UnrestrictedThen navigate to the folder where you created PrepareASDKInstall.ps1 (In my case C:\temp – and execute script)
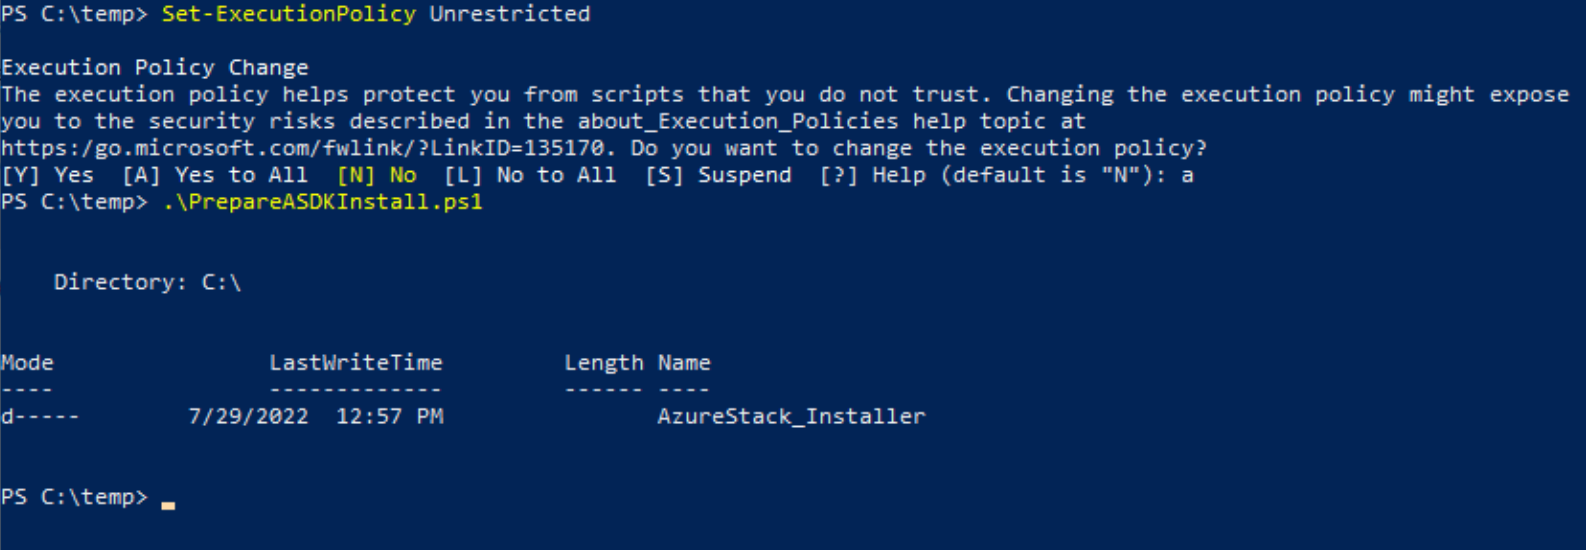
After we created ASDK-installer.ps1 will will proceed to edit the file.
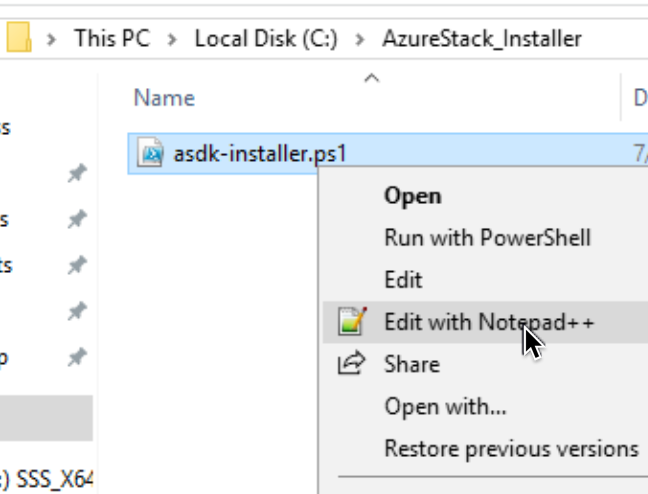
Code we downloaded and executed with PrepareASDKInstall.ps1 generated following – C:\AzureStack_Installer folder and inside created ASDK-installer.ps1 script – I will open it with Notepad++
Look around line 1927 – that line goes something like this in original
# Booted from vhdx, but not CloudBuilder.vhdx
    elseif ((get-disk | Where-Object {$_.isboot -eq $true}).Model -match 'Virtual Disk') {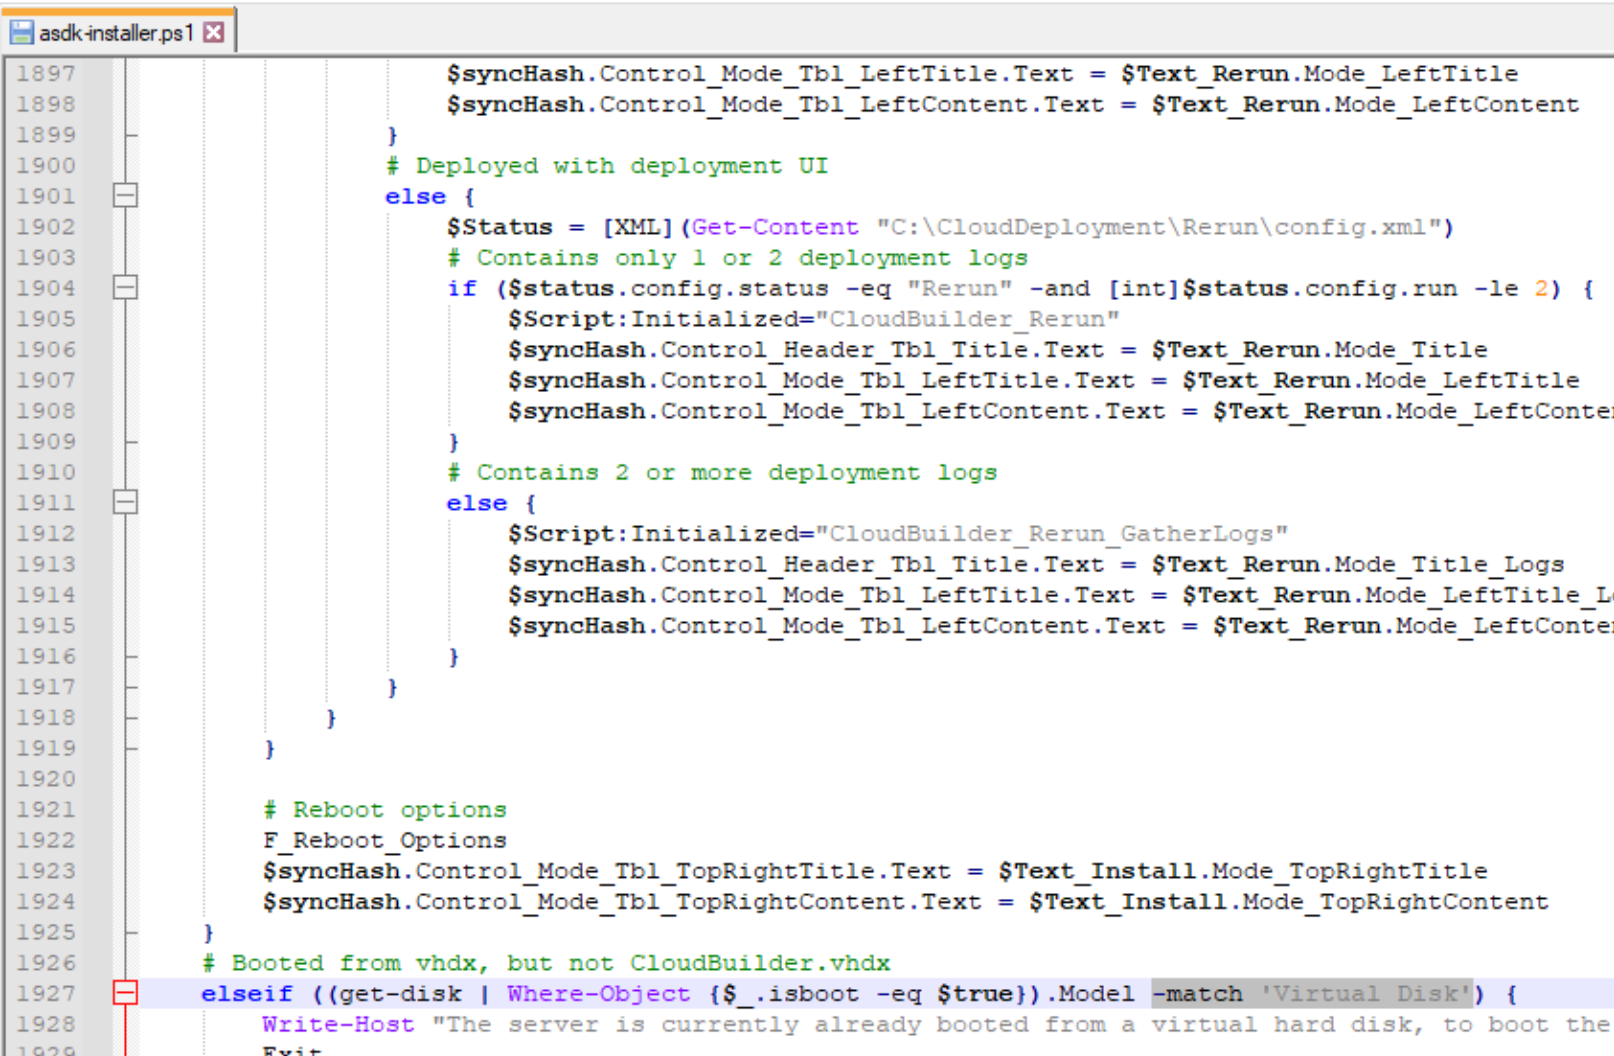
WE NEED TO CHANGE ‘Virtual Disk’ to ‘not Disk’
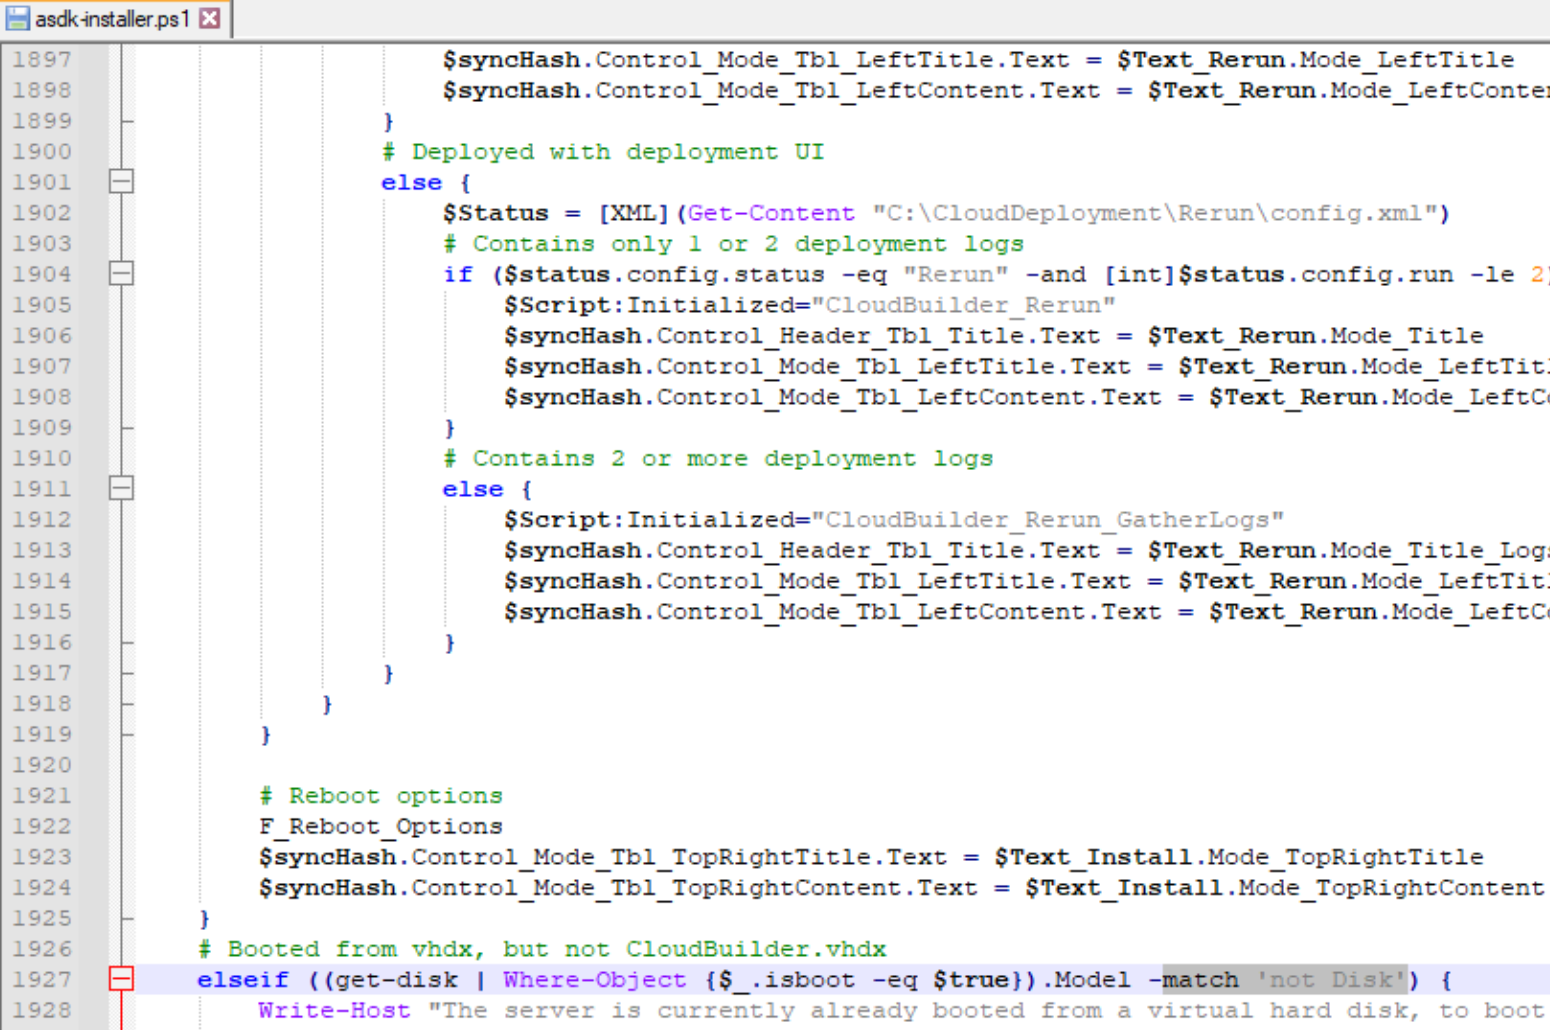
Save file and exit.
Next stop will be Cloudbuilder.vhdx
Cloudbuilder.vhdx
After you downloaded Azure Stack Development Kit (see article I linked at the top of this post for more details) we need to extract Cloudbuilder.vhdx to the root of the C drive.
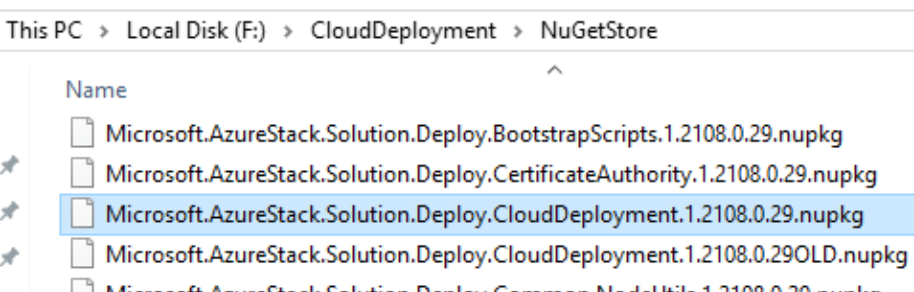
I’m doing this with version Azure Stack Development Kit version 1.2108.0.29
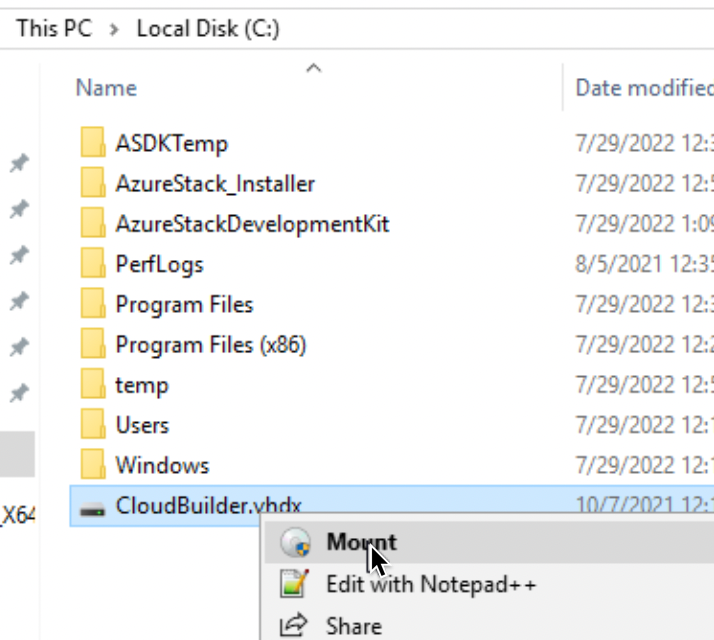
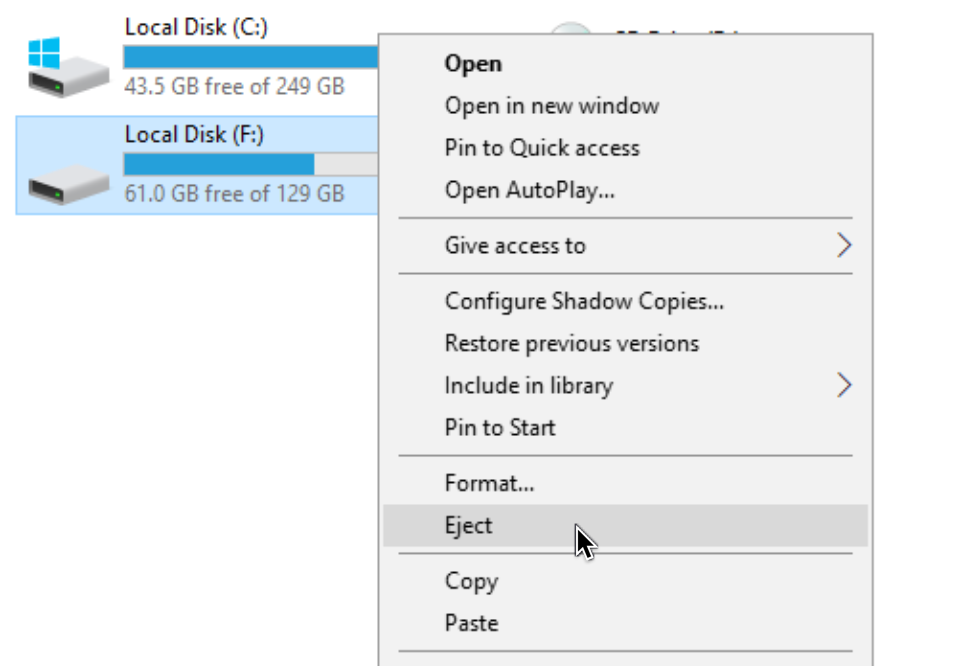
We need to mount Cloudbuilder.vhdx – you will do that be right clicking on it and then select Mount (make sure you dismounted/ejected Windows Server installation iso before mounting CloudBuilder)
Click on mounted Cloudbuilder drive (in my case it mounted on F: drive) and navigate to following file -CloudDeployment/NuGetStore/Microsoft.AzureStack.Solution.Deploy.CloudDeployment.1.2108.0.29.nupkg
(number in file name will differ if you do this somewhere after 2022, because versions often change)
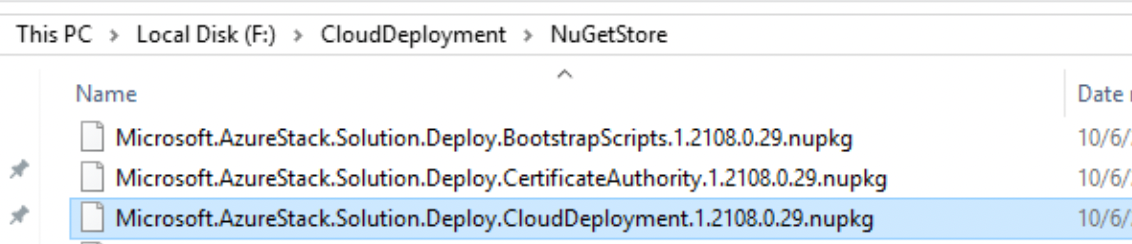
Copy file Microsoft.AzureStack.Solution.Deploy.CloudDeployment.1.2108.0.29.nupkg to somewhere else – I made a copy in C:\temp

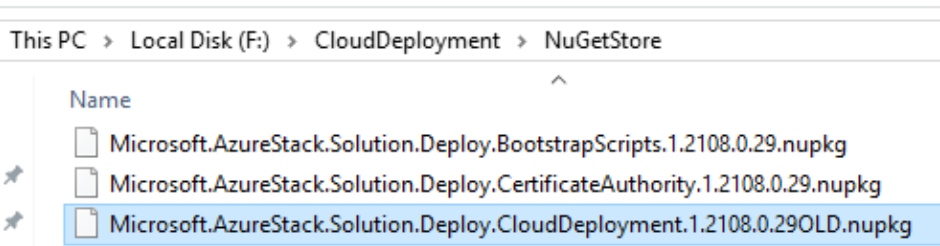
Original file should stay where it is – just add OLD after the version number – so that is looks something like this – Microsoft.AzureStack.Solution.Deploy.CloudDeployment.1.2108.0.29OLD.nupkg
We need that file in case we mess something up.
On file we copied to C:\temp, we will now change extension from .nupkg to .zip

We can now open that file and from it we need to edit two files
/content/Roles/PhysicalMachines/Tests/BareMetal.Tests.ps1
and
/content/Configuration/Roles/Infrastructure/BareMetal/OneNodeRole.xml
BareMetal.Tests.ps1 is very important – it will enable us to cheat checks of the Azure Stack installer and go through with the installation inside VM. We will make it think that it is on physical hardware.
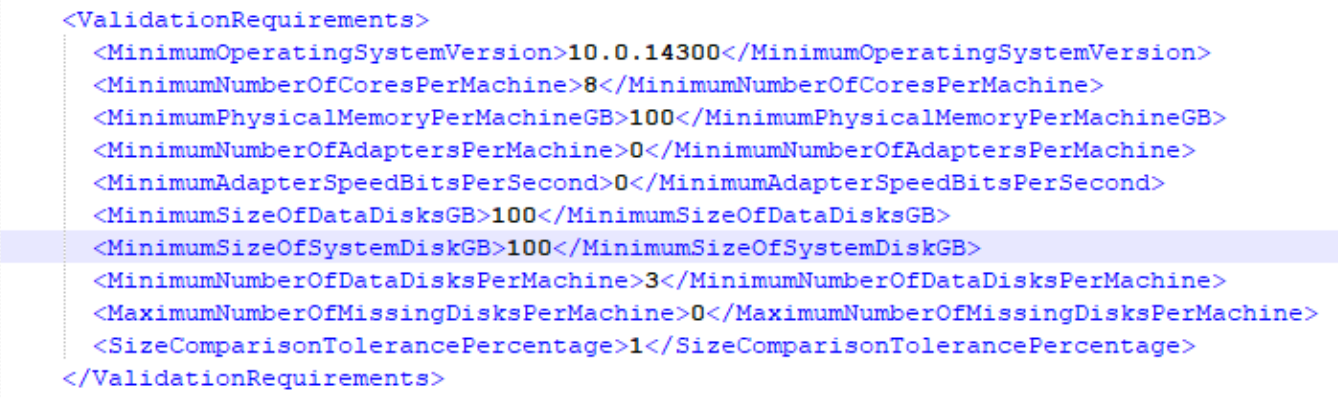
OneNodeRole.xml will check if the machine satisfies minimum requirements – I will just show you configuration – I don’t have experience with it since I don’t have need to lower requirements for ASDK install.
BareMetal.Tests.ps1
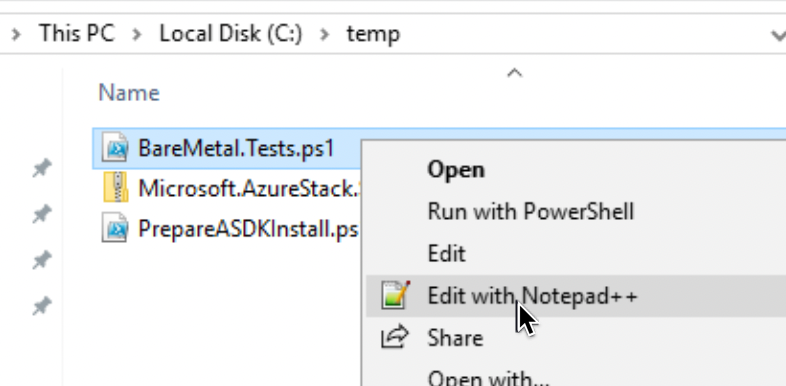
I copied BareMetal.Tests.ps1 from zip to C:\temp folder. I will return it to zip and overwrite current file after I edited it.
What we need to do is following – find all values that look like this
"if (-not$isVirtualizedDeployment)"and change them to this
"if ($isVirtualizedDeployment)"so we need to remove -not if it is before word isVirtualizedDeployment
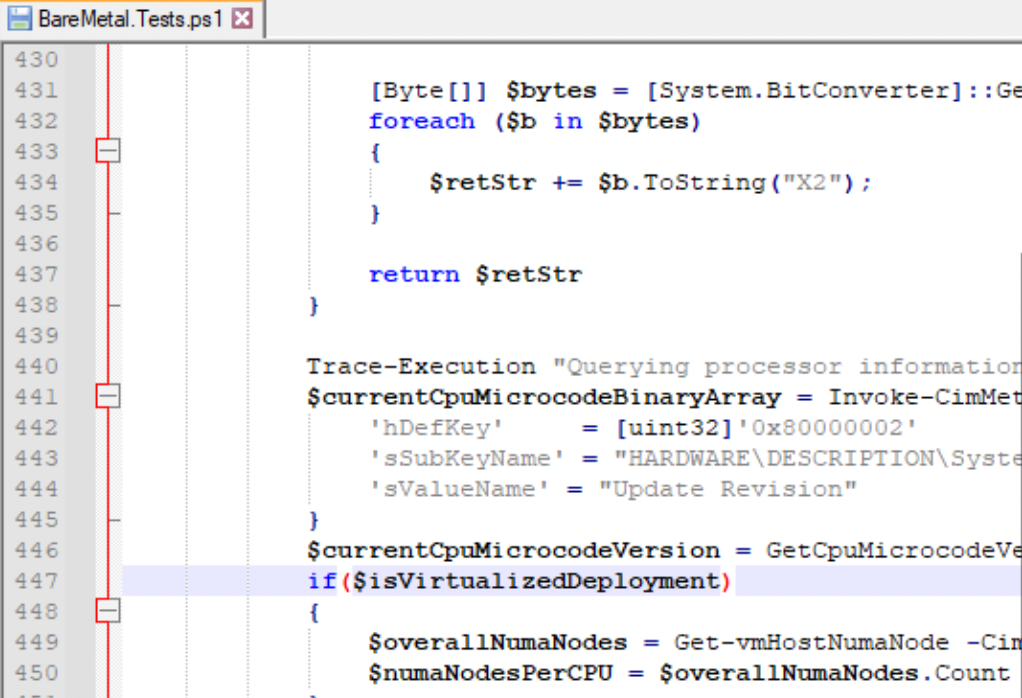
I used Notepad++ and searched for “isVirtualizedDeployment”. I found my first value that has -not in front of isVirtualizedDeployment.

I removed -not and this is how it looks like
If you are using Notepad++ click on Find Next to go through entire file.
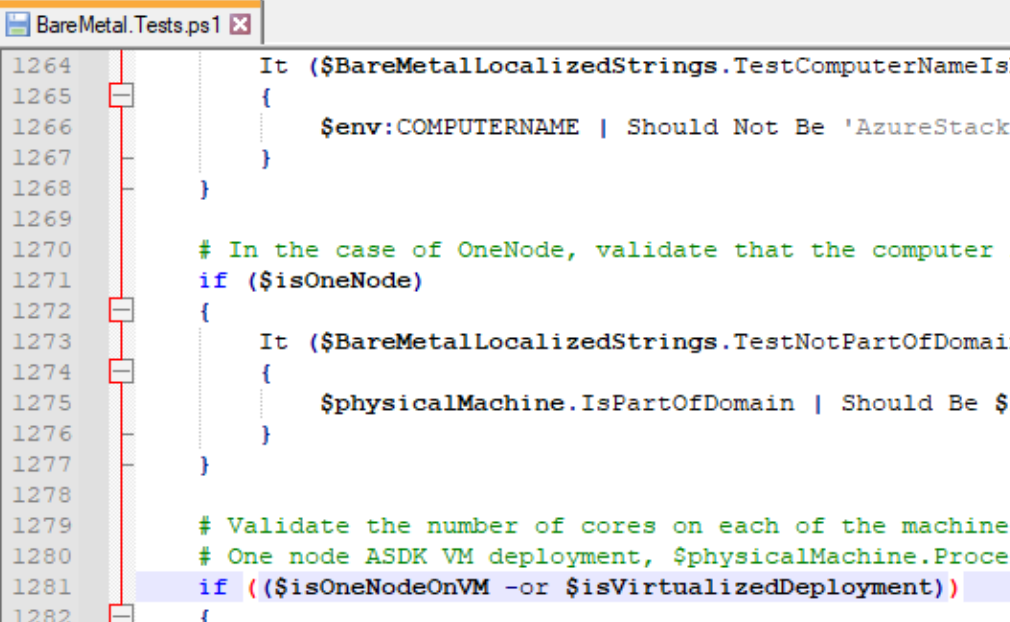
NEXT one was tricky – but yes, you need to remove -not also here
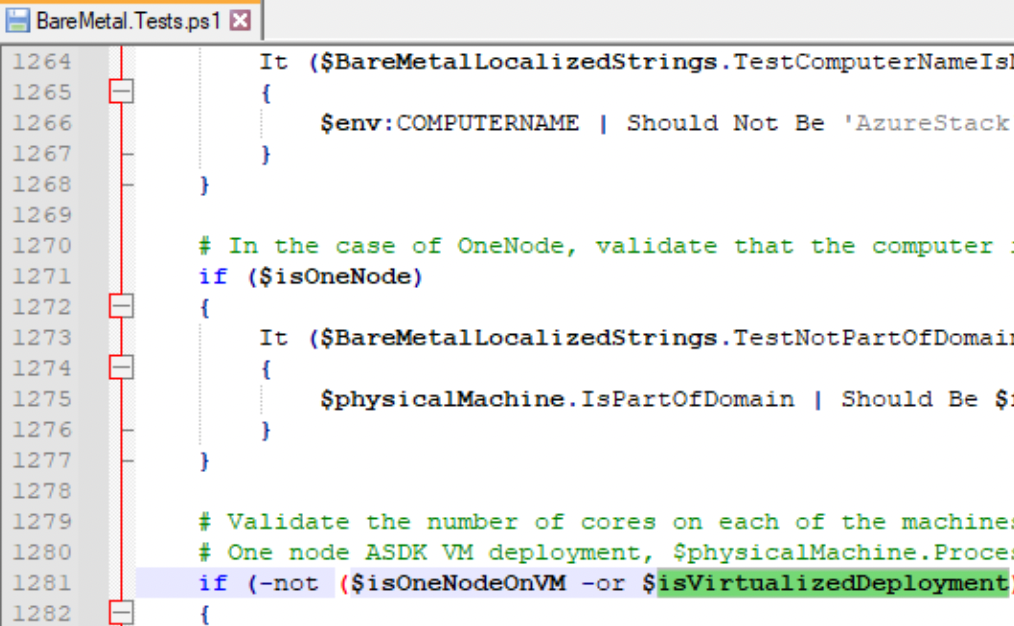
So it looks like this
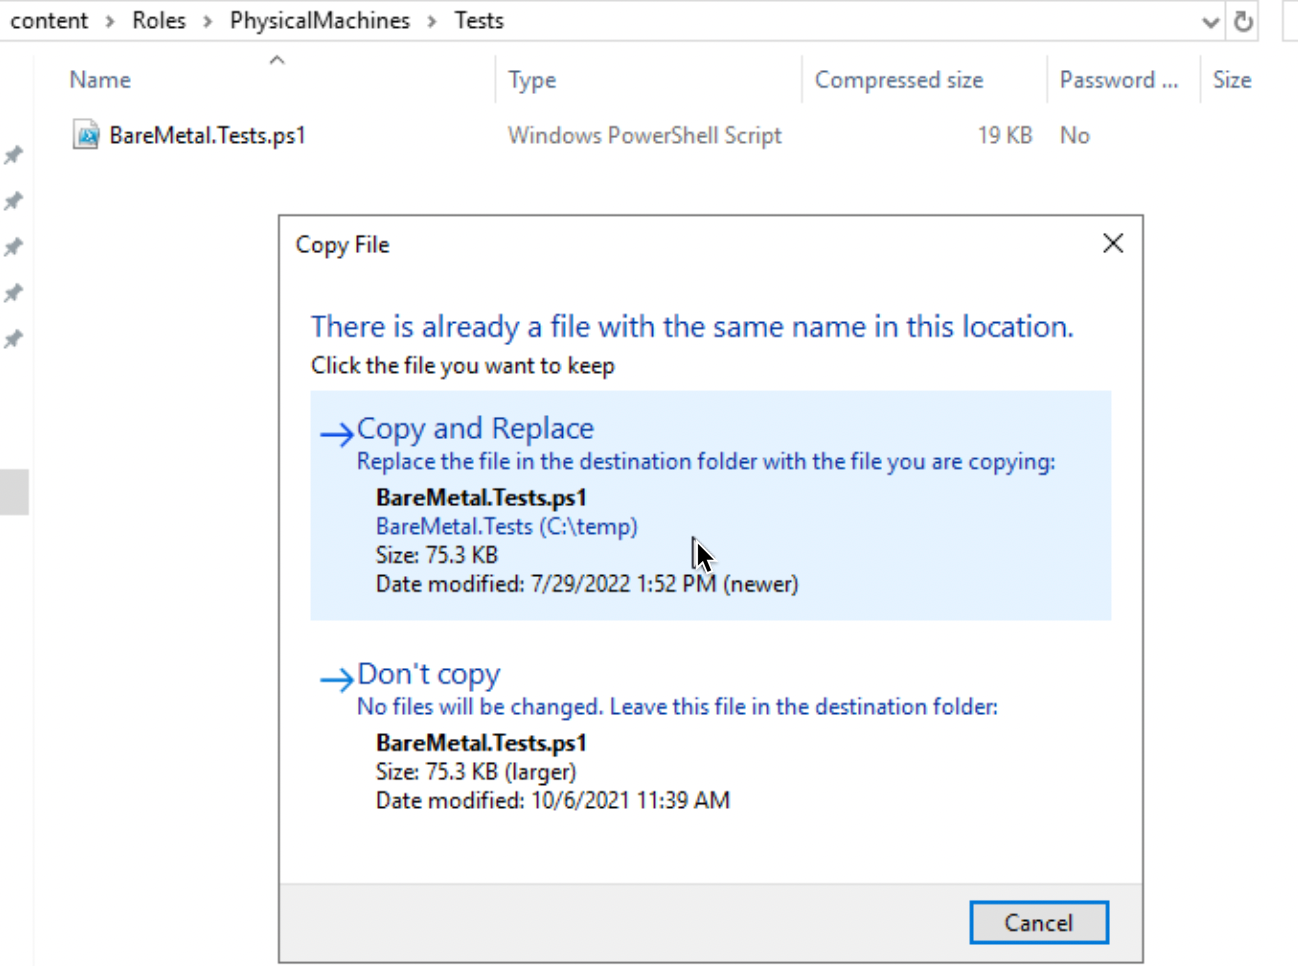
After you are done, save file and copy it back to – /content/Roles/PhysicalMachines/Tests/BareMetal.Tests.ps1
Select copy and replace
That is it for BareMetal.Tests.ps1
Now, onto OneNodeRole.xml
OneNodeRole.xml
Search for ValidationRequirements section and see my example below – set according to your hardware capabilities.
Once again – I haven’t tested OneNodeRole.xml in my case, since I have enough resources and I work with Azure.
You need to change CPU, Memory and disk minimums – this is how I done it.
After you edited and saved file, overwrite original as with BareMetal.Tests.ps1 example.
Rename .zip back to .nupkg.
In C:\temp after you edited and copied back BareMetal.Tests and OneNodeRole files to Microsoft.AzureStack.Solution.Deploy.CloudDeployment.1.2108.0.29.zip – rename it back to .nupkg extension and copy it to the original location in CloudDeployment/NuGetStore/Microsoft.AzureStack.Solution.Deploy.CloudDeployment.1.2108.0.29.nupkg
I deleted OLD file I renamed at the start.
Dismount Cloudbuilder
Run ASDK-installer.ps1
We prepared everything – time to start install process.
We will now run ASDK-installer.ps1 script
Open Powershell as admin, first run
Set-ExecutionPolicy Unrestrictedand then execute ASDK-installer.ps1 from C:\AzureStack_Installer

Prepare Environment
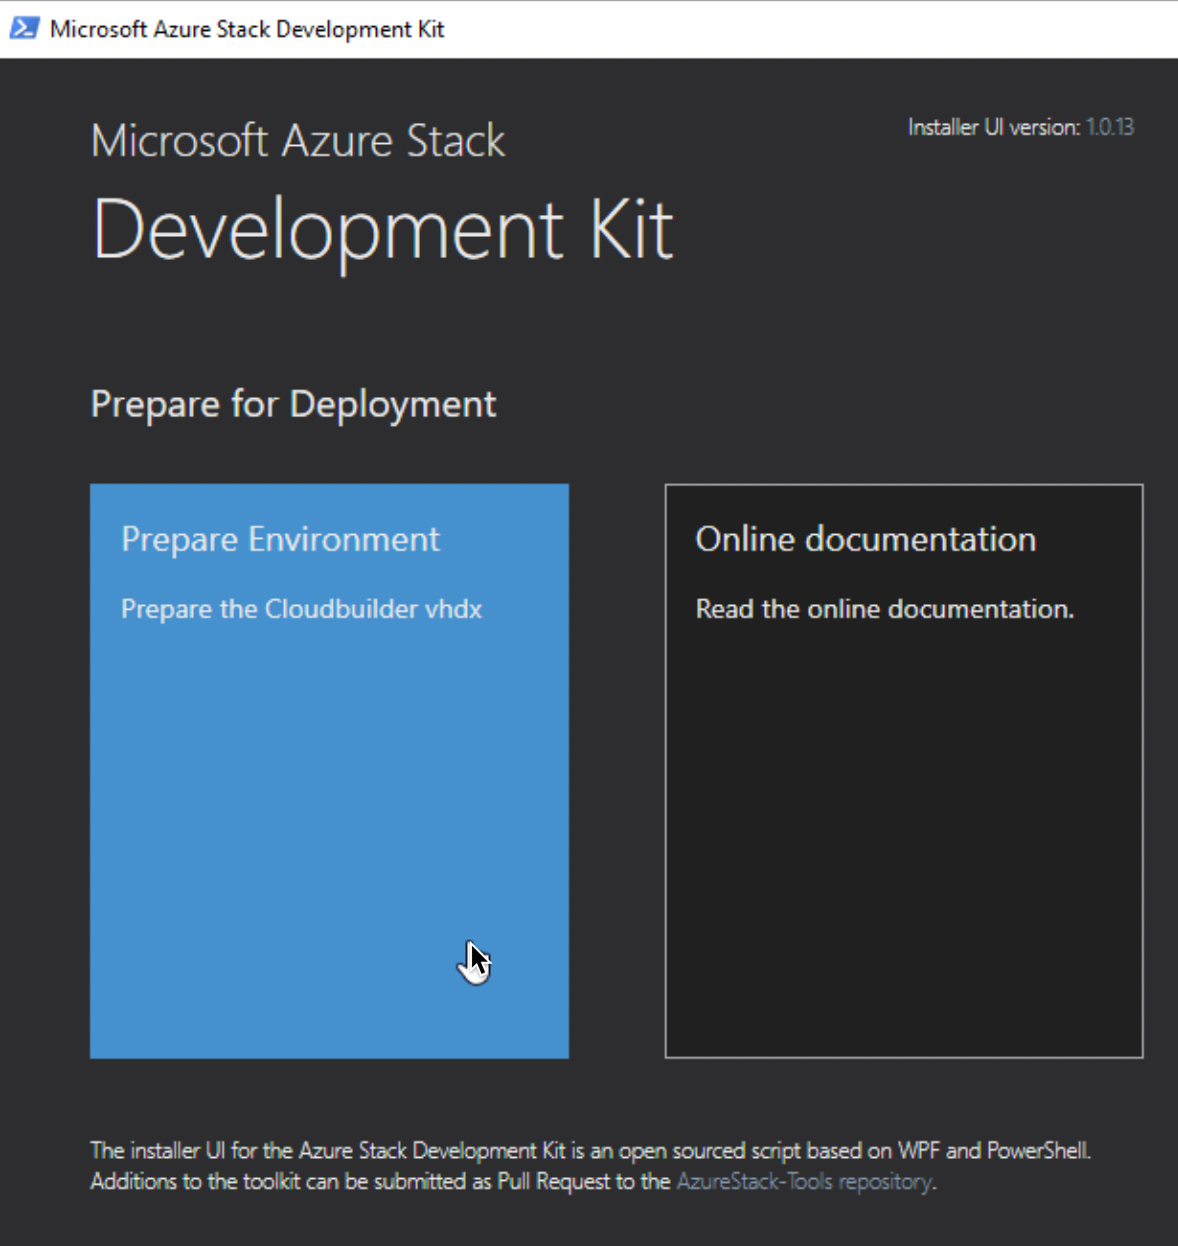
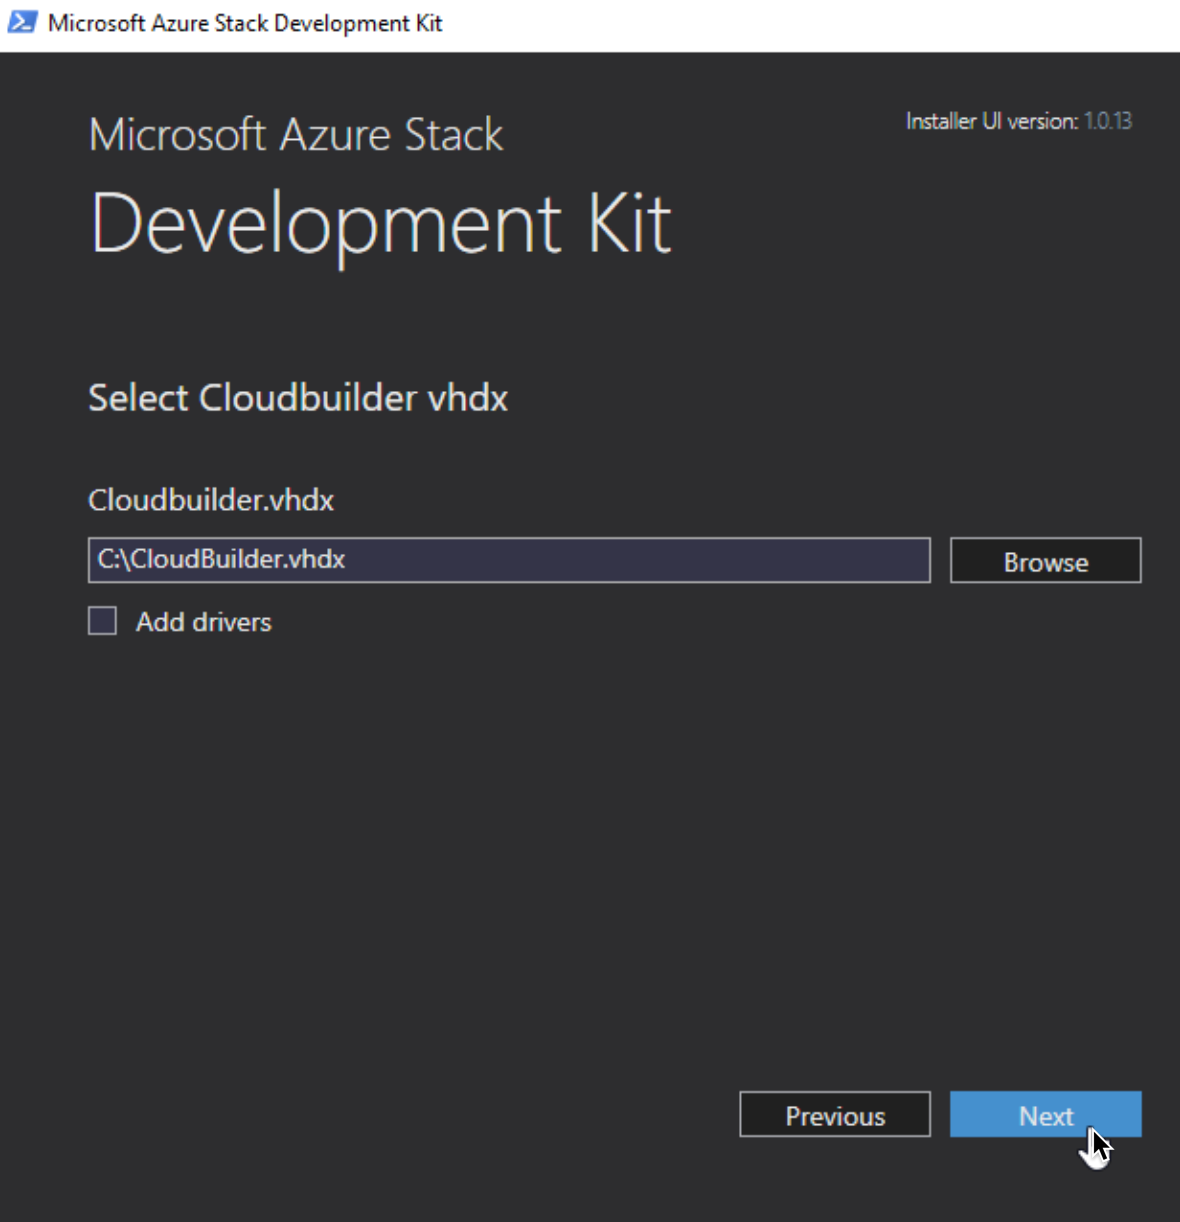
Find CloudBuilder image in root of your C drive
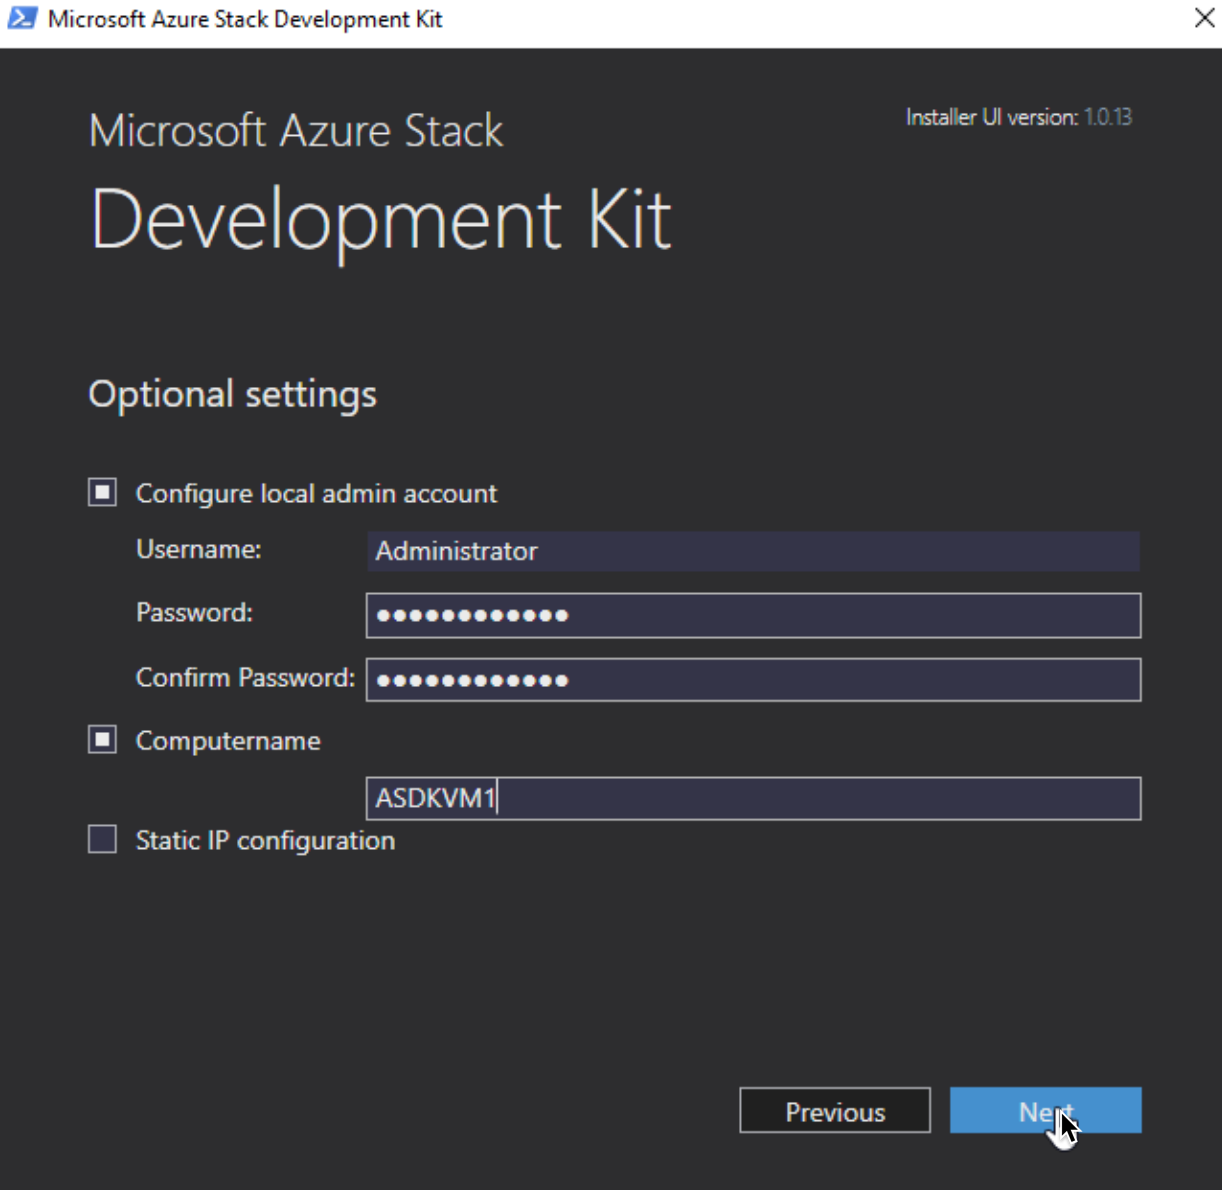
Here we will define name of the machine which Installer will boot, pass need to be complex with more than 8 characters. Be smarter than me and define static IP settings at this step.
Next
We will now try to reboot
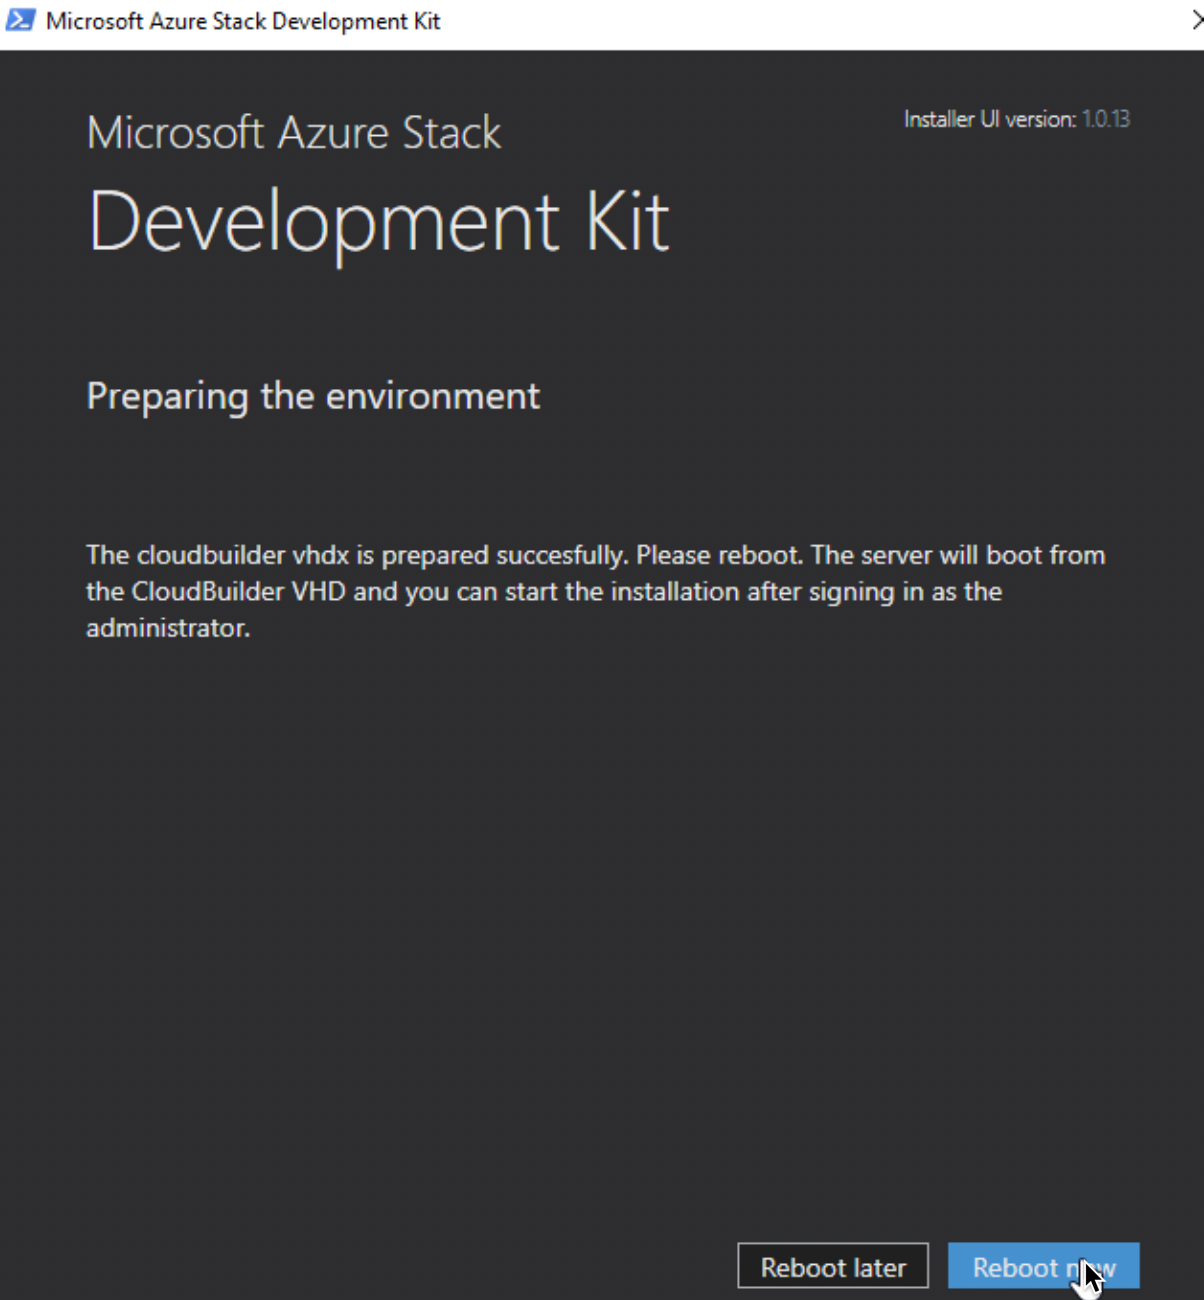
We have new entry on boot – we will boot to Azure Stack.

After you boot to Cloudbuilder.vhdx it will be completely new installation of Windows Server from which we will start Azure deployment.
Make you IP address fixed in case you missed it in Preparation step like I did – and update your Windows installation (if the system allows) so you don’t get bothered by updates while installing.
We will now again start ASDK-installer.ps1 but this time it is on D:\AzureStack_Installer

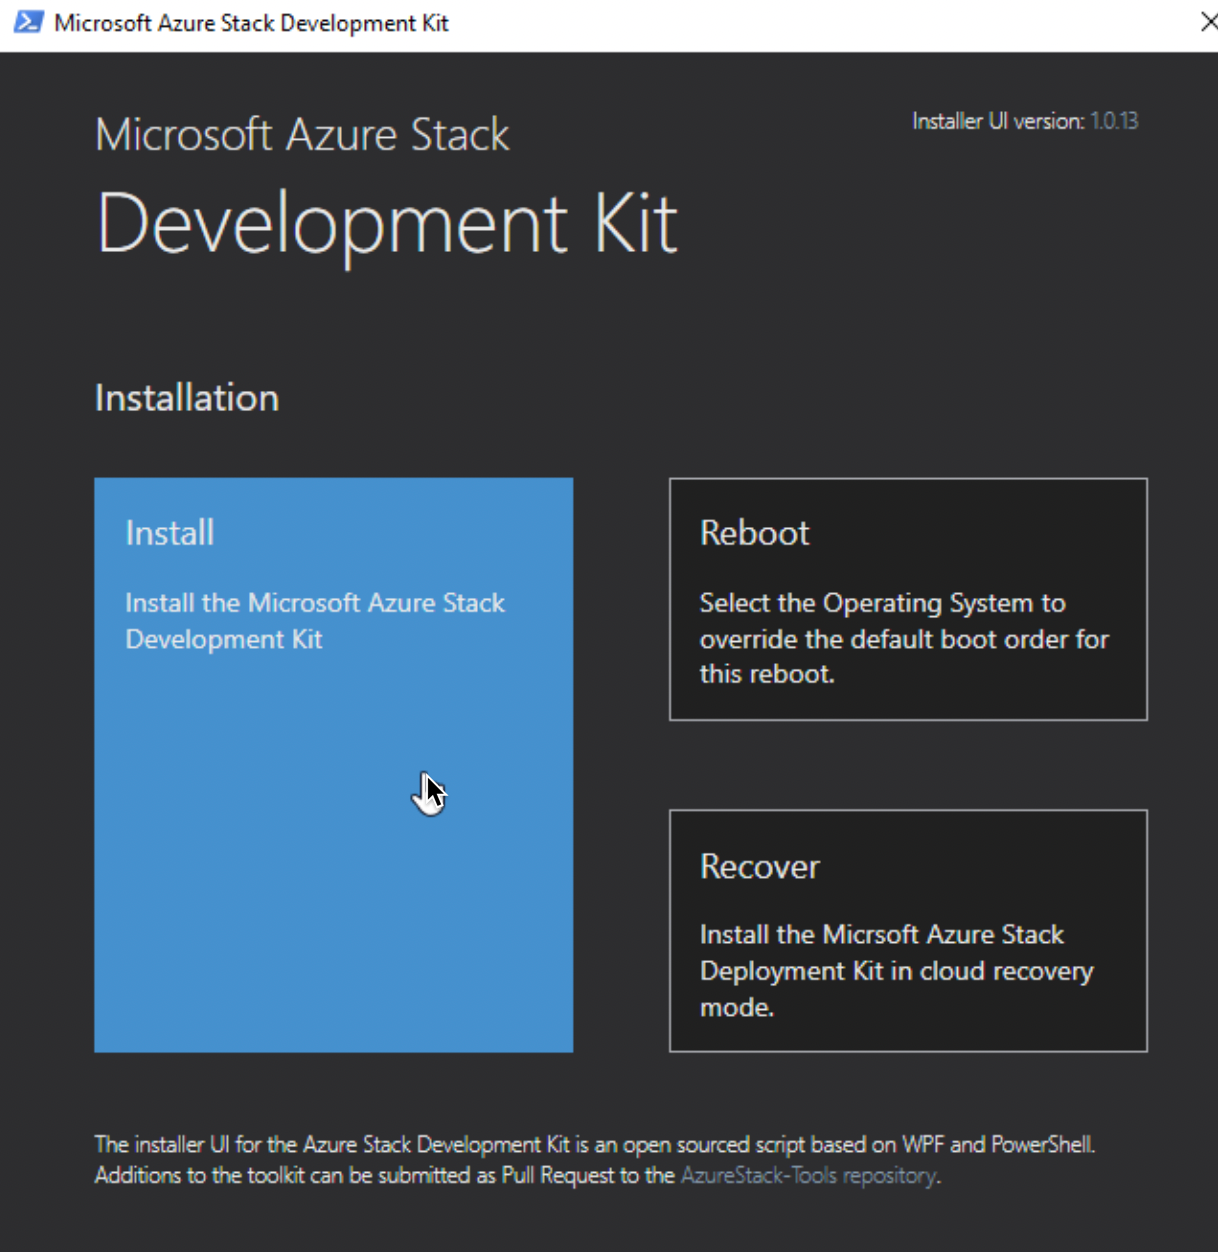
Install
Go through all the steps (I covered them in initial Azure Stack installer tutorial) and make sure you do not close Powershell window from which you started asdk-installer.ps1 script.
I will just put here last step – Deploy
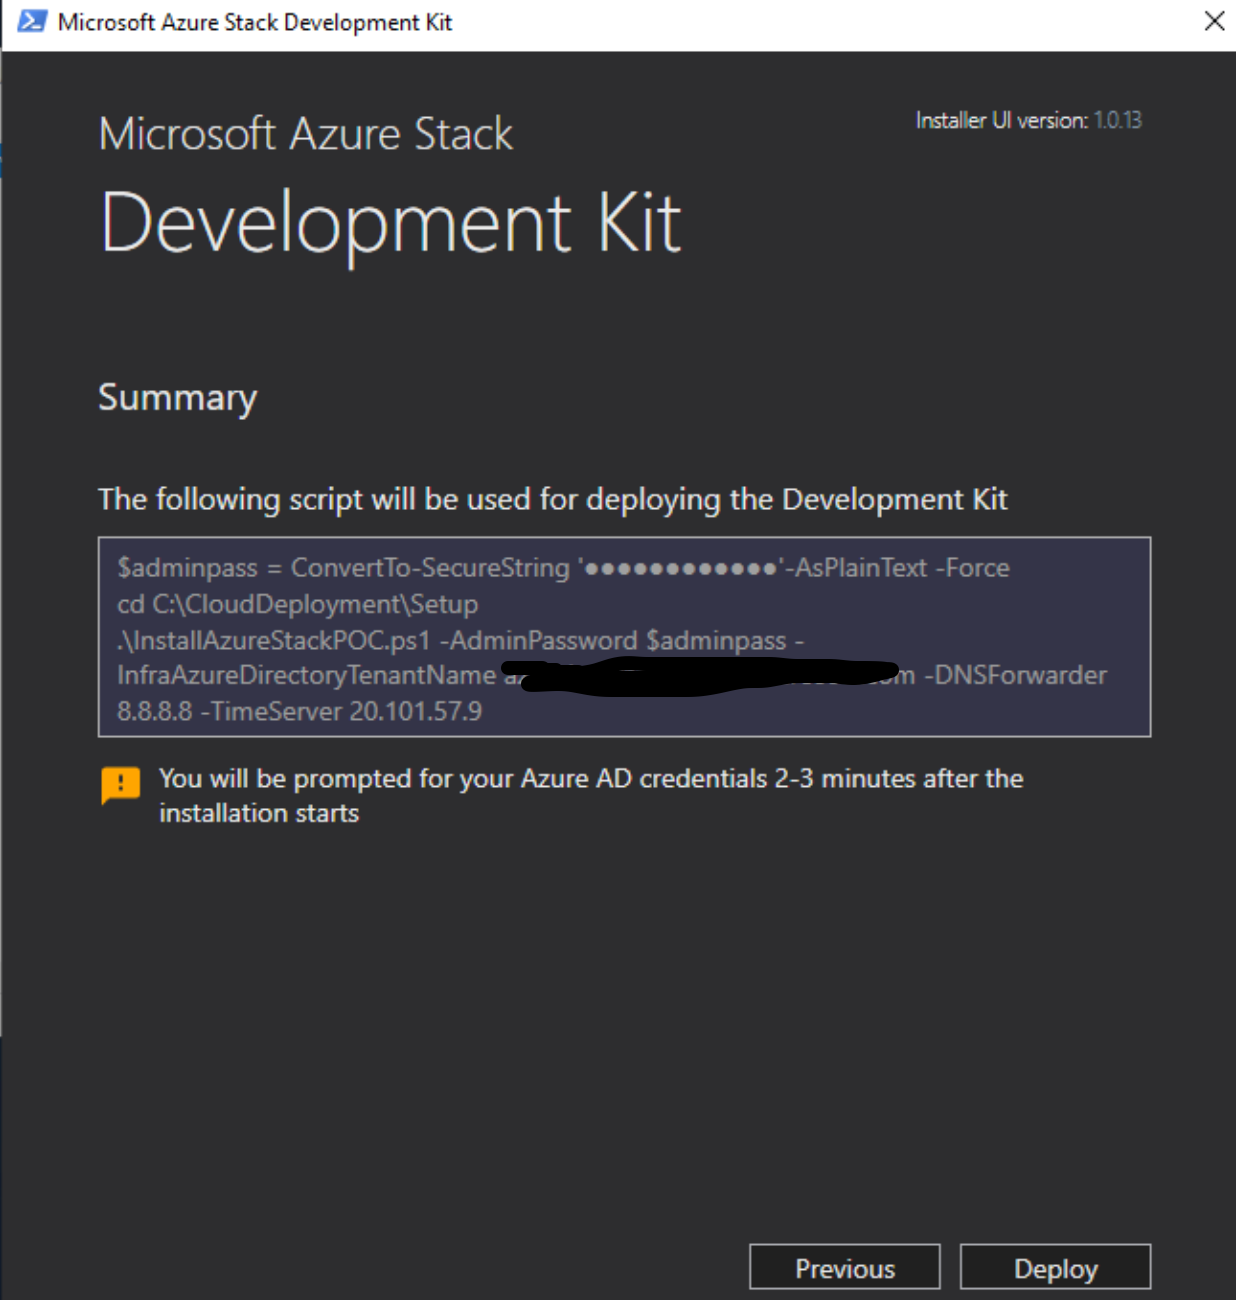
In my case – Deployment wouldn’t start. I would just be back in Powershell and that would be it.

We will run deployment manually through Powershell
From C:\CloudDeployment\setup run InstallAzureStackPOC.ps1 script.

It will then start
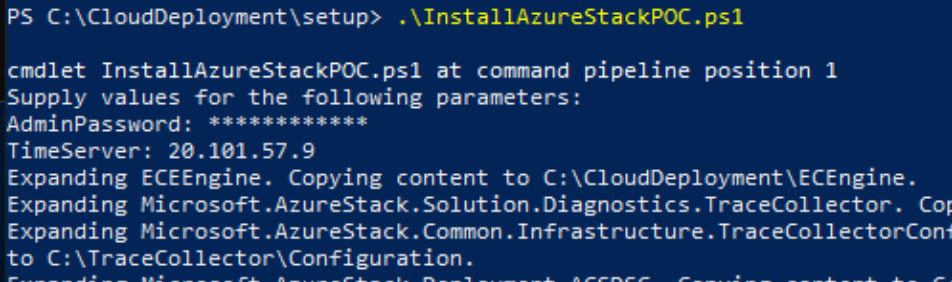
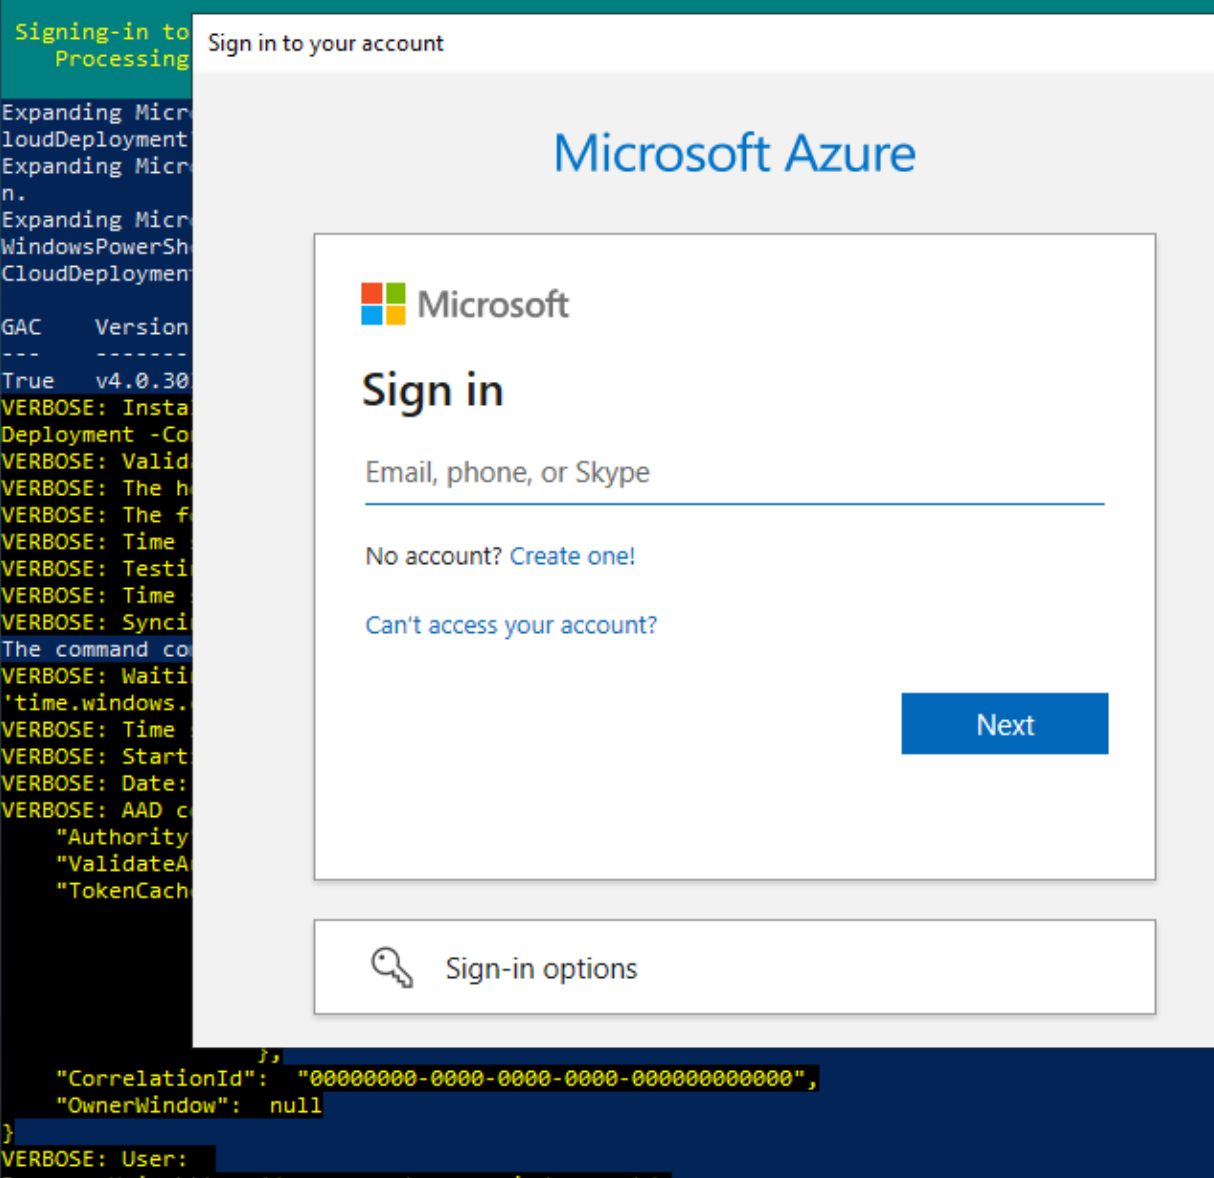
Wait a few minutes if you selected Azure AD as authentication – you will need to log in.
Now we wait – if you get error – especially if you went with hardware below recommendation – tinker with your settings
If setup fails at some point, for some reason – you can always rerun it with following command
.\InstallAzureStackPOC.ps1 -RerunI see that people who try ASDK installs have some problems during install – so my advice would be that you try and satisfy minimum requirements – especially RAM and disk.
Rest of the details are in my other article on topic of Azure installation.
Deployment is underway…
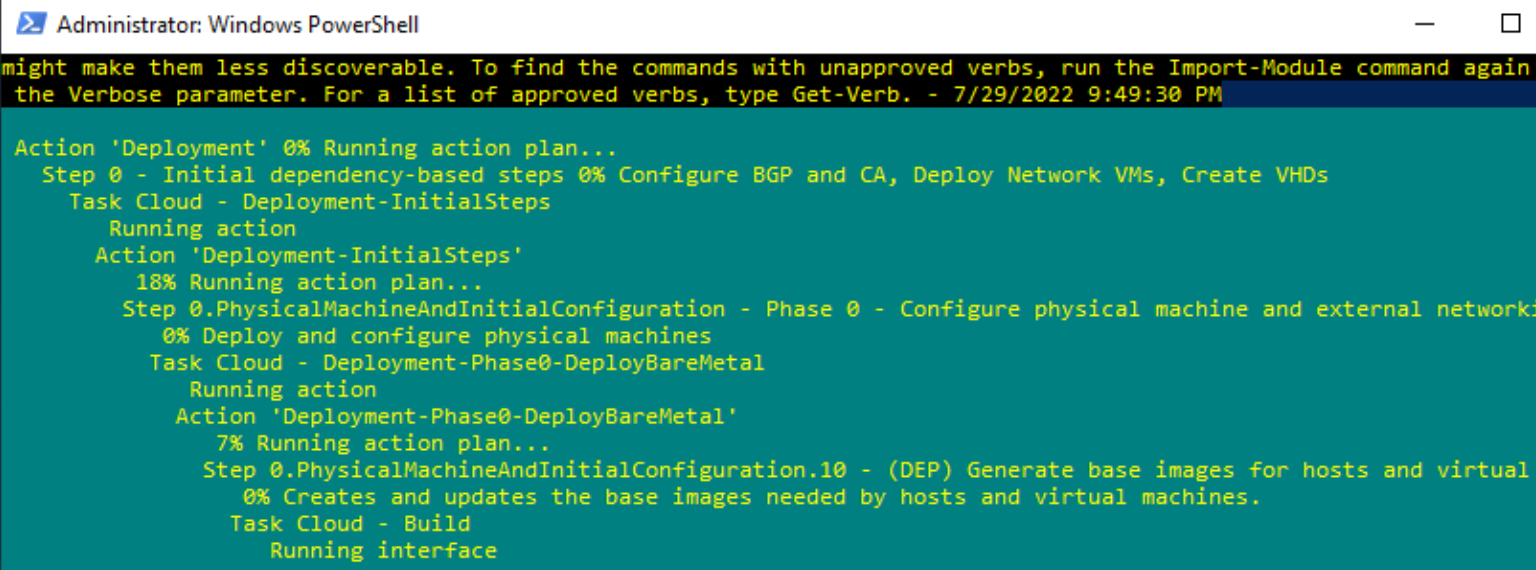
This will be interesting

It went past that point without problem and couple hours later I was at step 60.
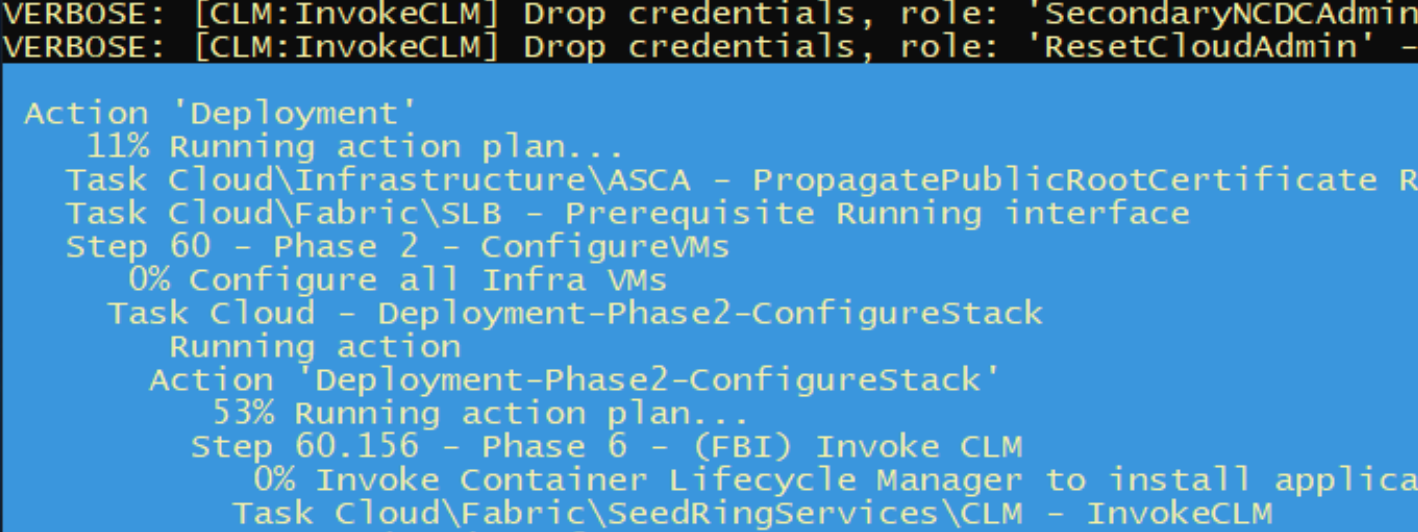
I did this installation three times. Two times it went flawless – without hiccups – one time it was failing, and it was failing at the early stage when it was creating DC at the first step. That one time install was failing it was due to that that I forgot to attach additional four drives to the VM.
As I mentioned – I see that people have problems with the deployment, mostly if you try with lot less RAM and disk space.
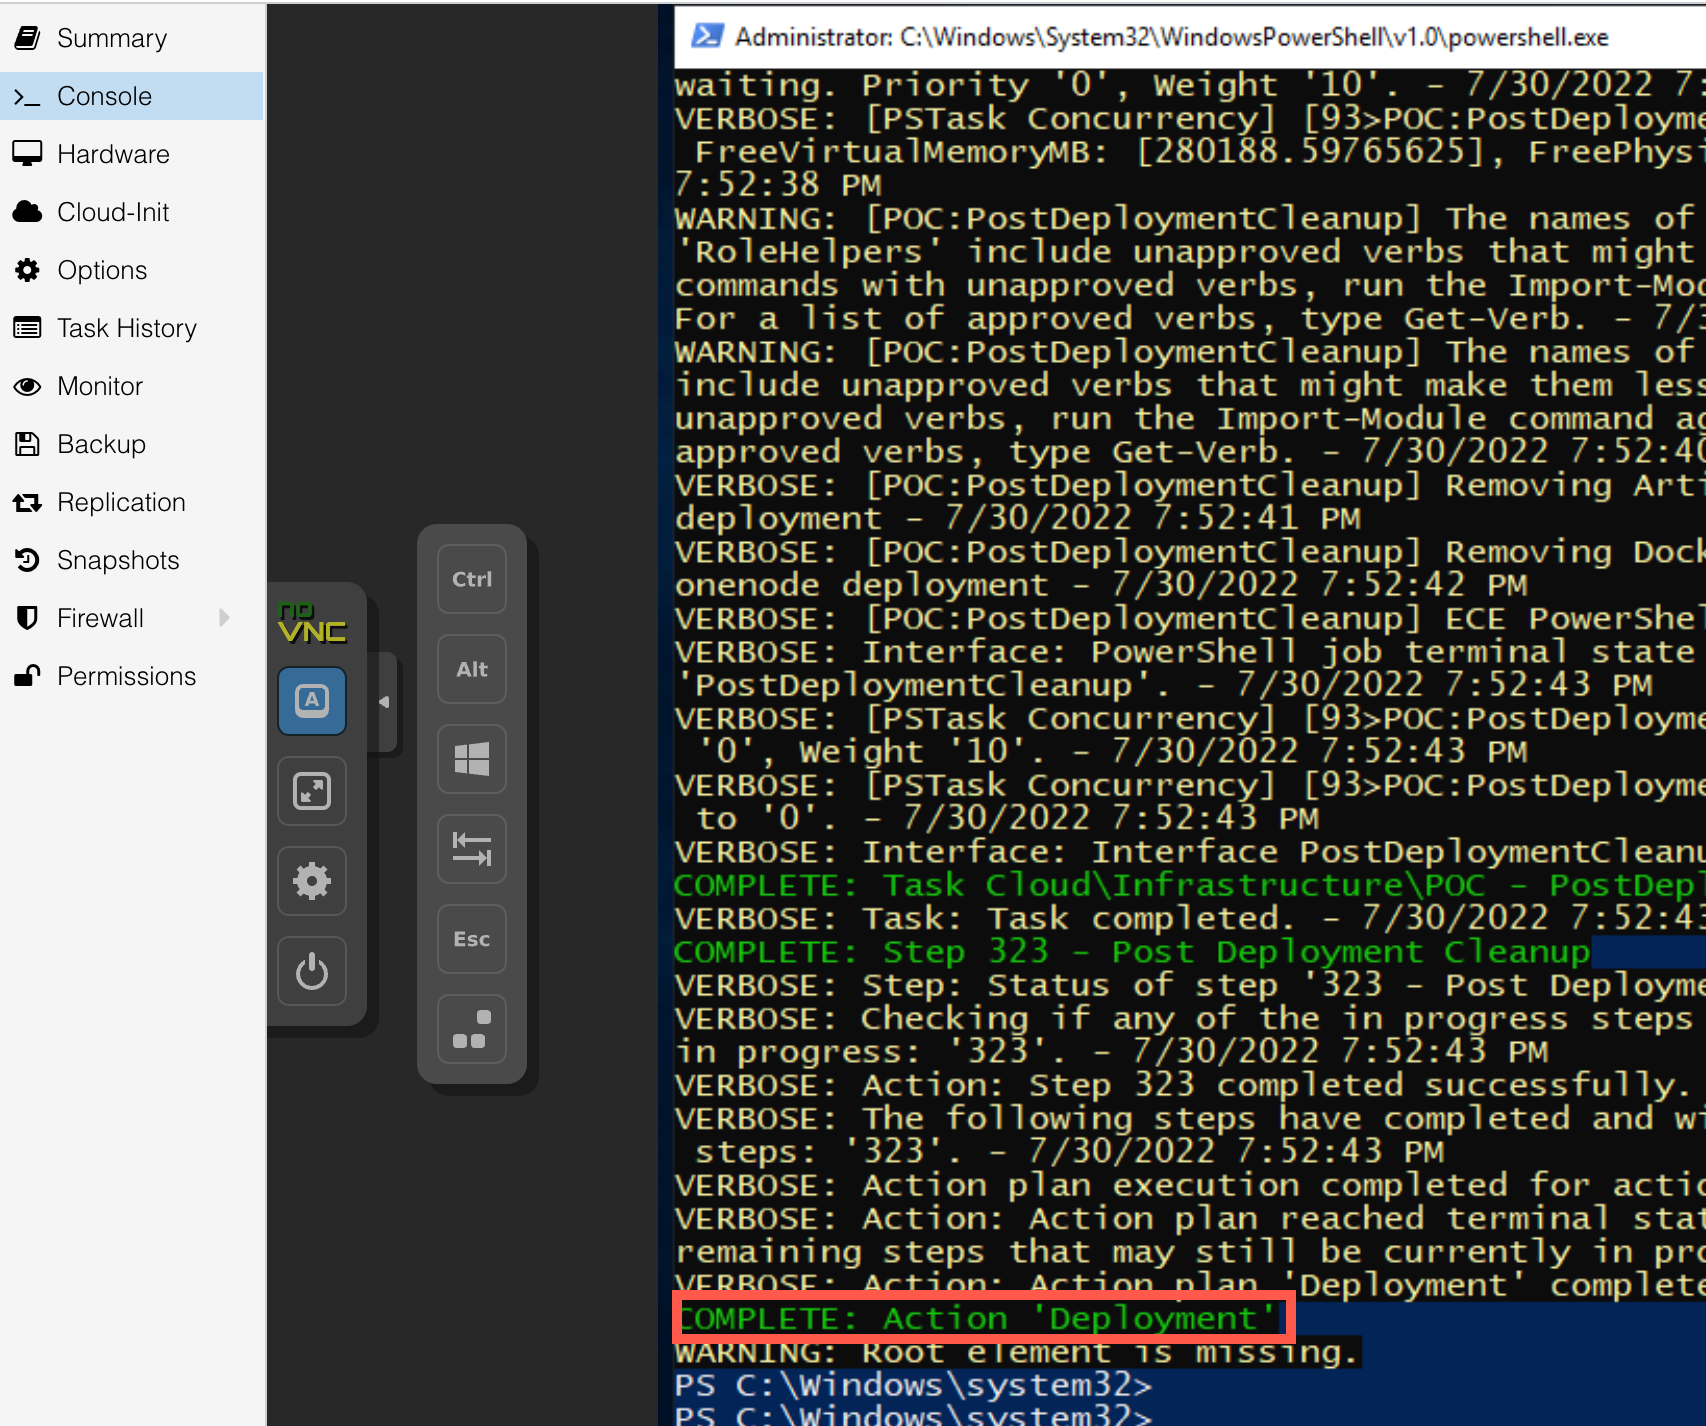
After almost 9 hours of deployment – Done – when you see COMPLETE: Action ‘Deployment’ – task is over, you now have Azure Stack installed.
Ok, let’s see if this works – open web browser on your ASDK machine and type in following address – https://adminportal.local.azurestack.external
You should be greeted by login to your Azure account and after that if everything is ok, you should see this
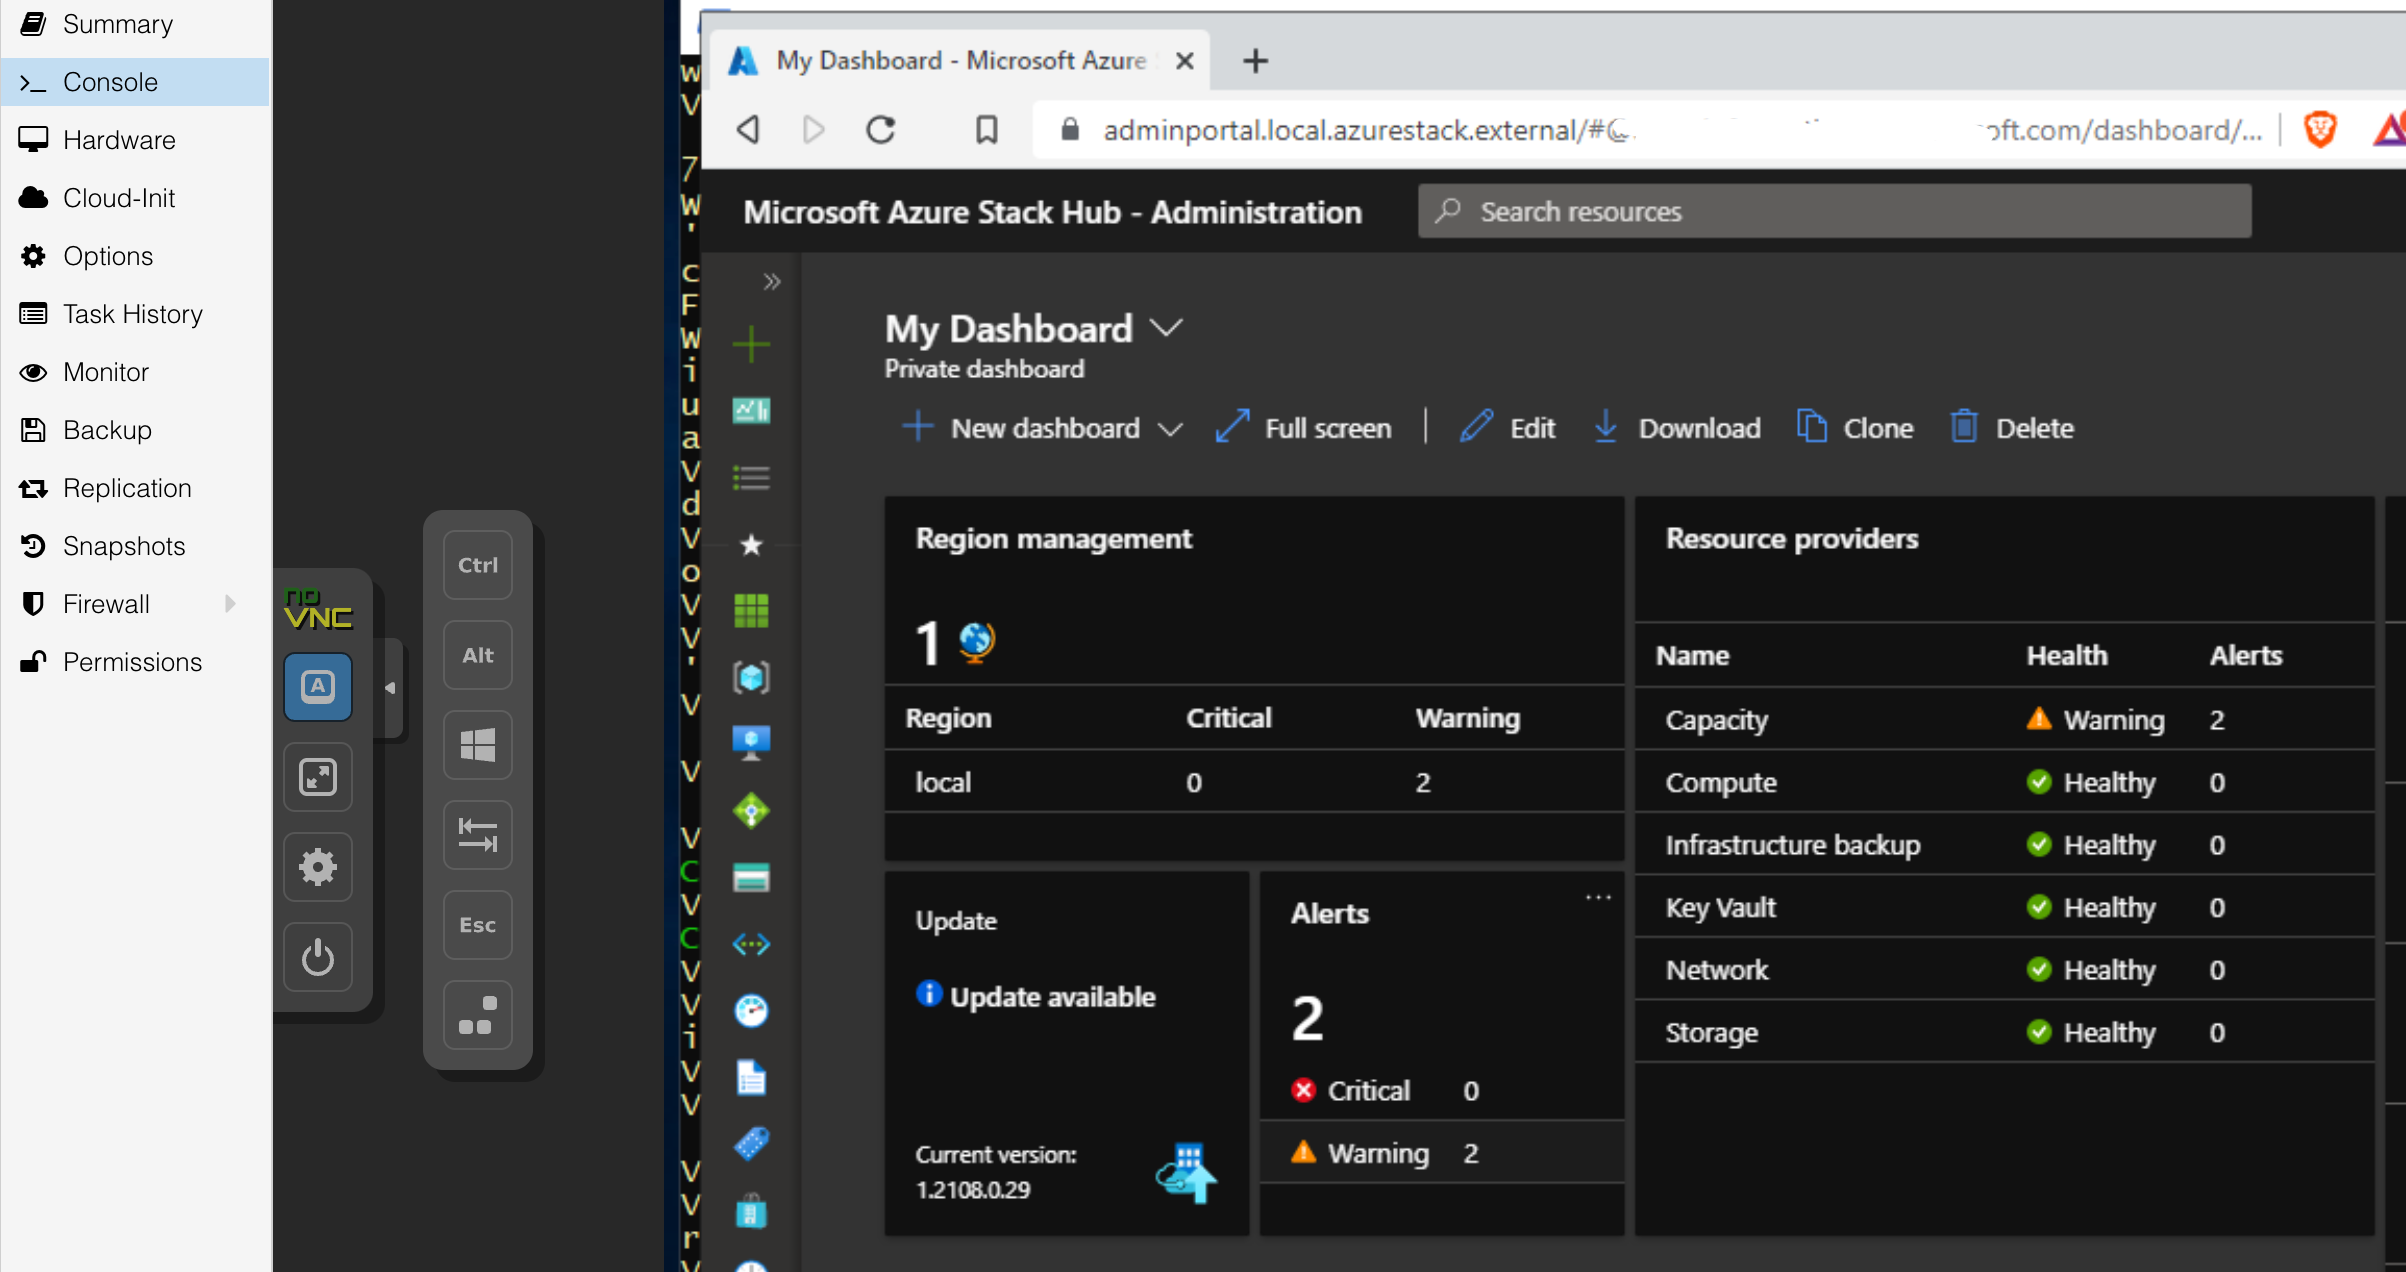
We did it, Azure works inside VM!!
This is already long post, so if you are interested further in Azure on your machine/VM, this is start point on my blog – https://www.informaticar.net/how-to-install-asdk-azure-on-premises/
In the end of that article there are links on how to proceed and what to do with Azure on your hardware/VM.
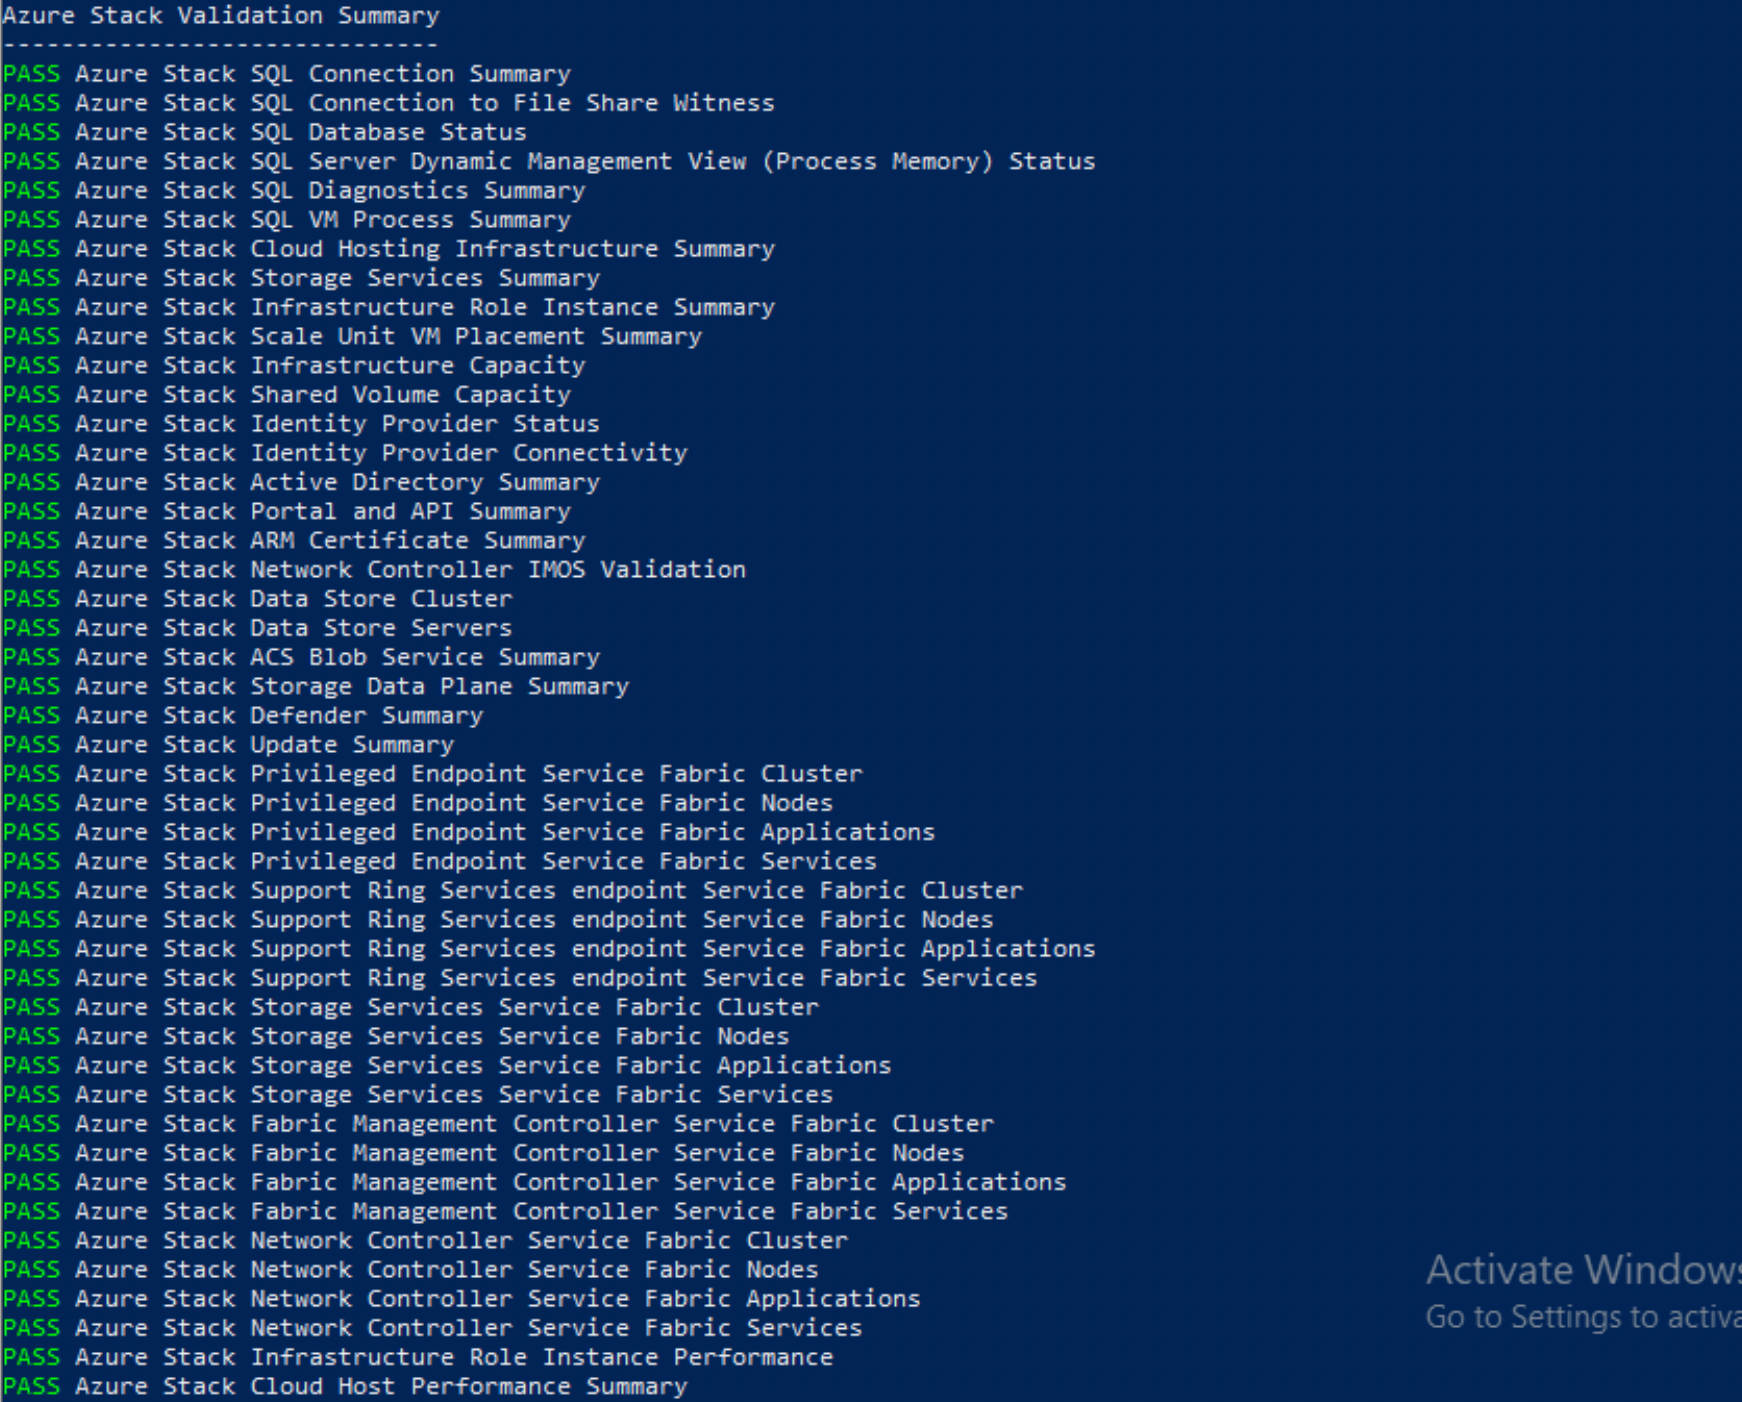
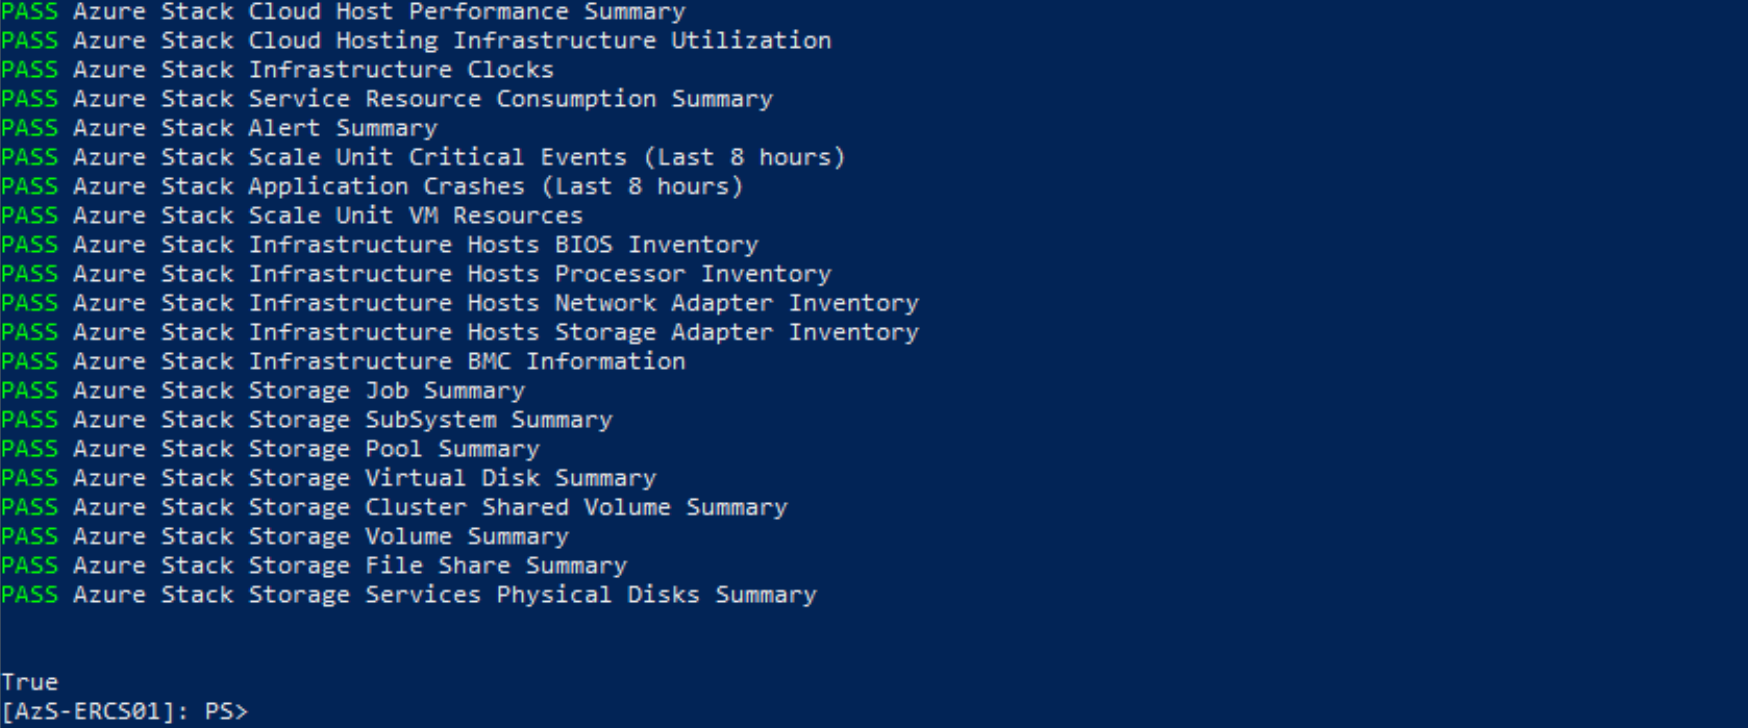
Before end, just one small addition – in my article Azure Stack Post Installation steps I described how to test you Azure Stack install. Here are results of test from the deployment inside VM – everything is ok!
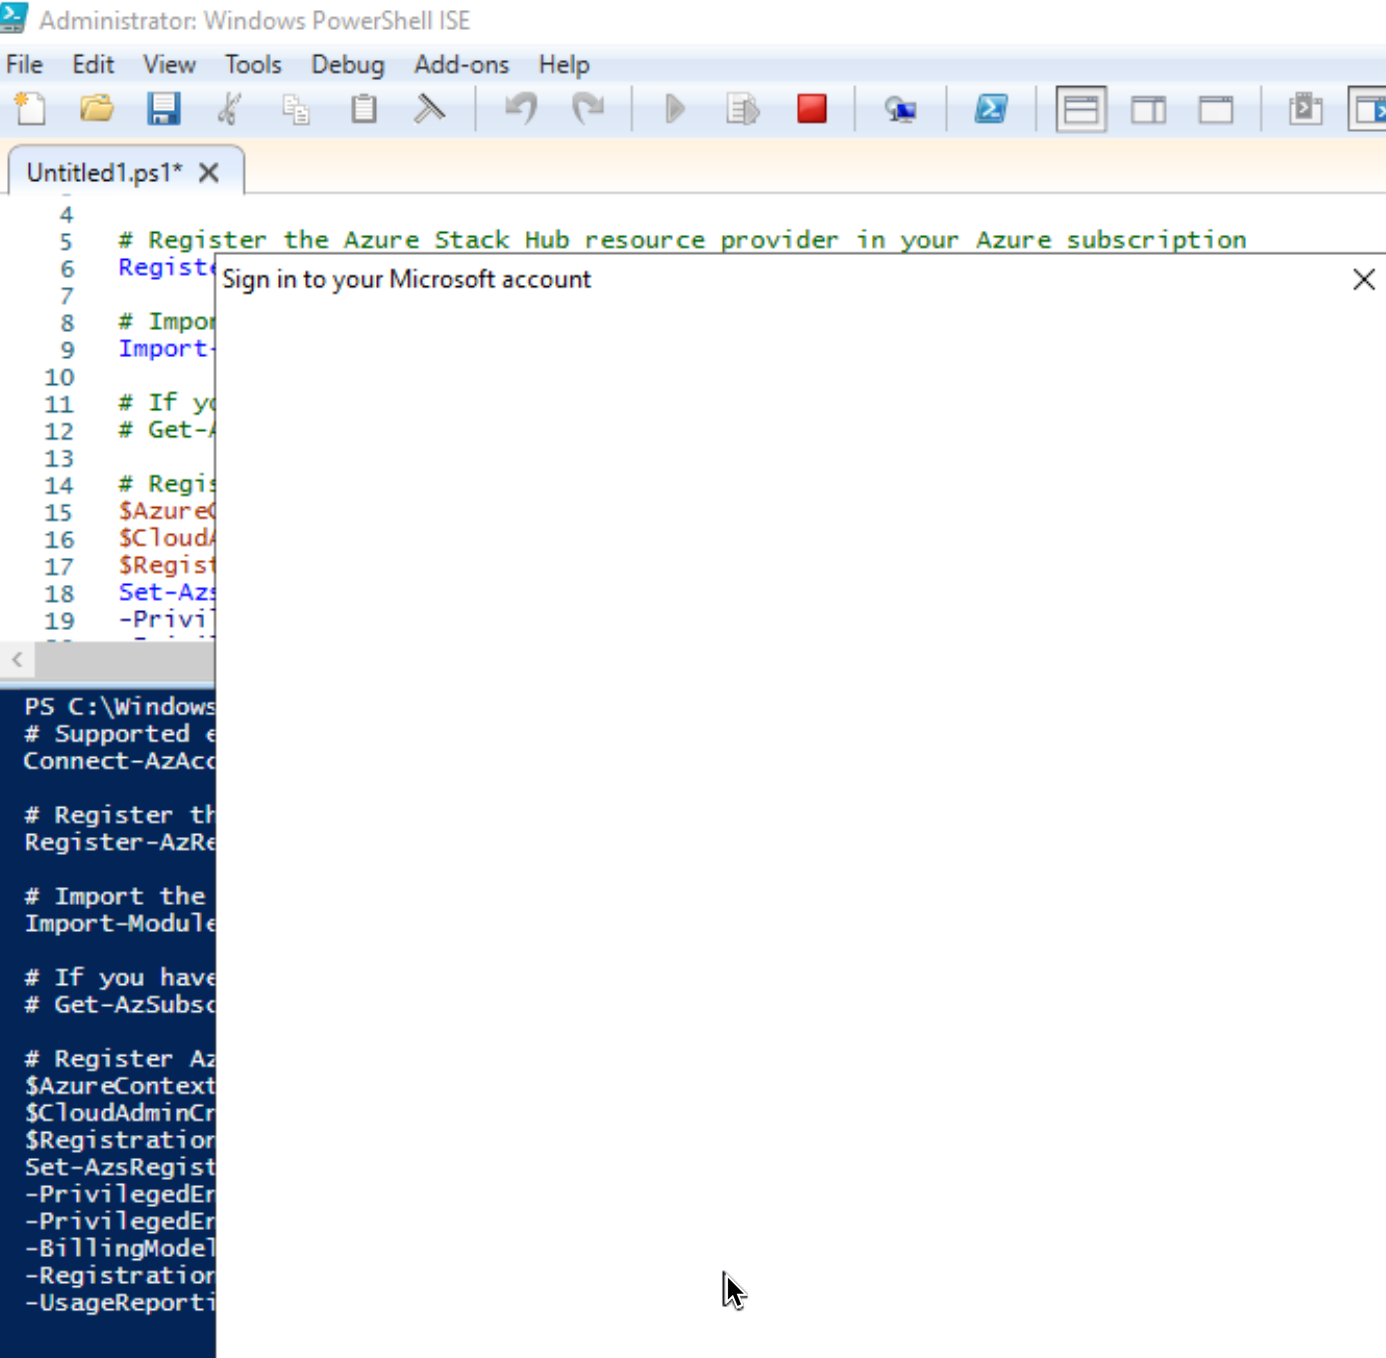
Before we end – I lost a two or three hours of trying to figure out why when I get to the activation part of the Azure Stack – I described it here – I would only get blank login screen
I’m using Az Modules, not AzureRM modules, but still this error.
When starting registration script it would start Connect-AzAccount, I would get “Sign in to your Microsoft account” pop-up – I could enter my account and then password screen would be blank, like depicted below.
tried updating Powershell modules
I tried changing default browser/lowering IE security settings/cleaning browser cache
Rebooting my Azure Stack
Nothing worked. In the end – I edited script for registration – https://docs.microsoft.com/en-us/azure-stack/asdk/asdk-register?view=azs-1910&tabs=az1%2Caz2%2Caz3%2Caz4%2Caz5%2Caz6%2Caz7
To this part
# Add the Azure cloud subscription environment name.
# Supported environment names are AzureCloud, AzureChinaCloud, or AzureUSGovernment depending which Azure subscription you're using.
Connect-AzAccount -EnvironmentName "<environment name>"
I added
Connect-AzAccount -EnvironmentName "<environment name>" -UseDeviceAuthenticationSo, the script looks like this
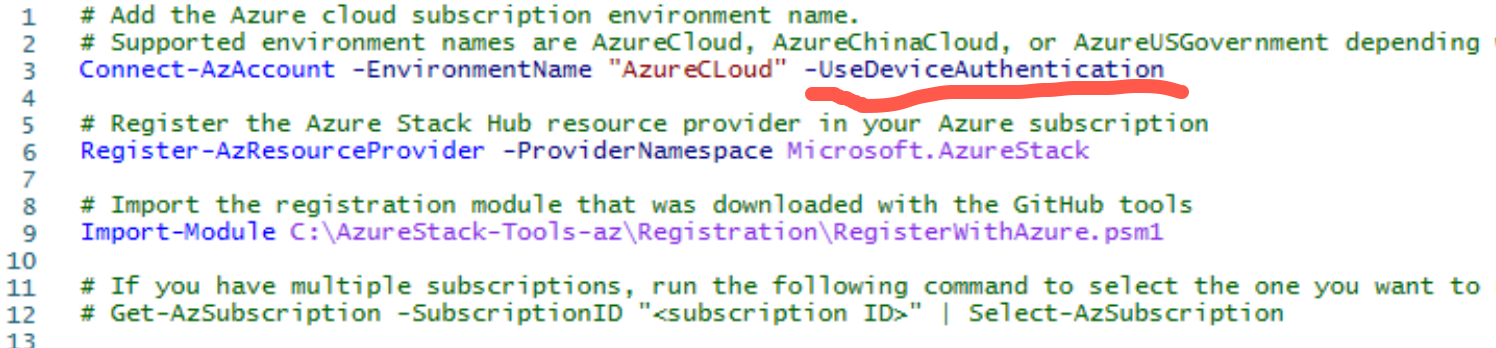
This way, script won’t give you pop-up for login, but instead give you code you need to enter in your browser on the link that is on the screen (microsoft.com/devicelogin). This way you will get pass through that authentication window, and be able to register your Azure Stack.
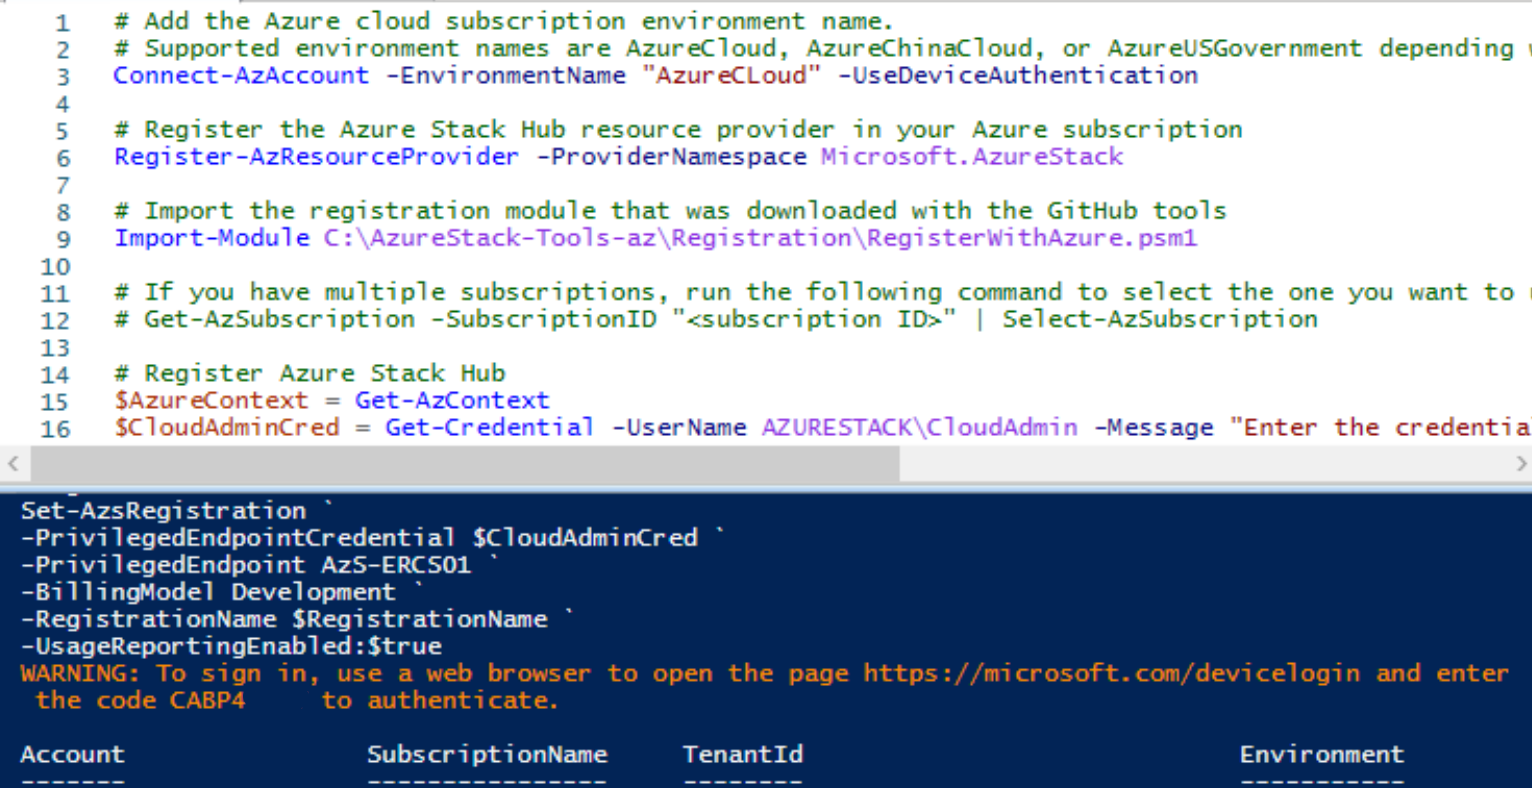
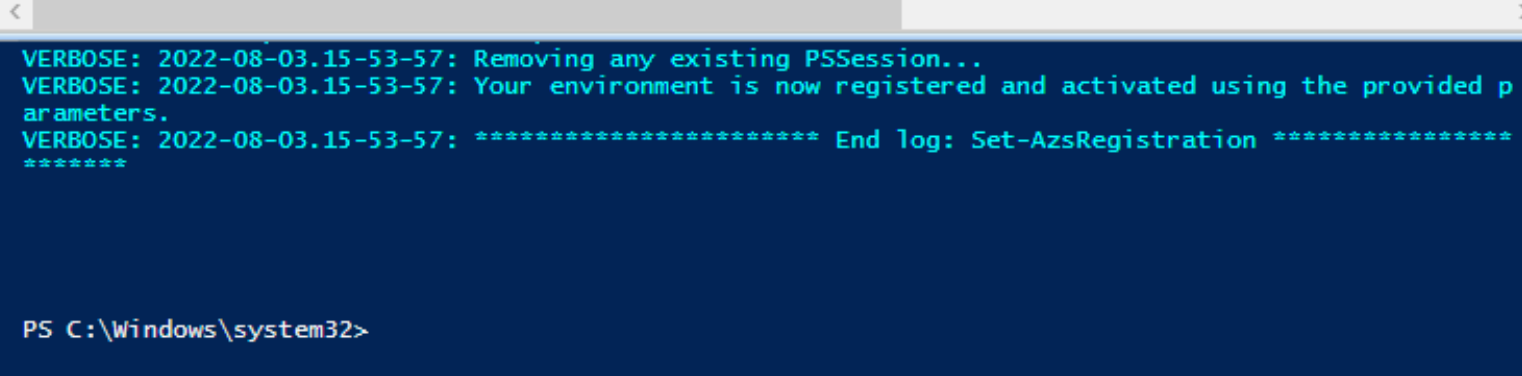
After that everything was fine and I was able to register my Azure Stack in VM!
That is it, we now have working Azure Stack inside VM.