Apache enables you to host more than one website on your server. It can be done via virtual hosts, and here is how to do it.
Prerequisites
You need to have domain name, already preinstalled Apache.
Also, this tutorial assumes you are sudo user on your system.
I will be doing it in my home lab. I will configure all needed on CentOS 8 with already installed Apache and test it in Windows 10.
I gave my CentOS fixed IP of 192.168.1.23 and then in Windows host file (/windows/system32/drivers/etc/hosts) I entered three domains on 192.168.1.23 IP address.
primjer.com
primjer1.com
primjer2.com
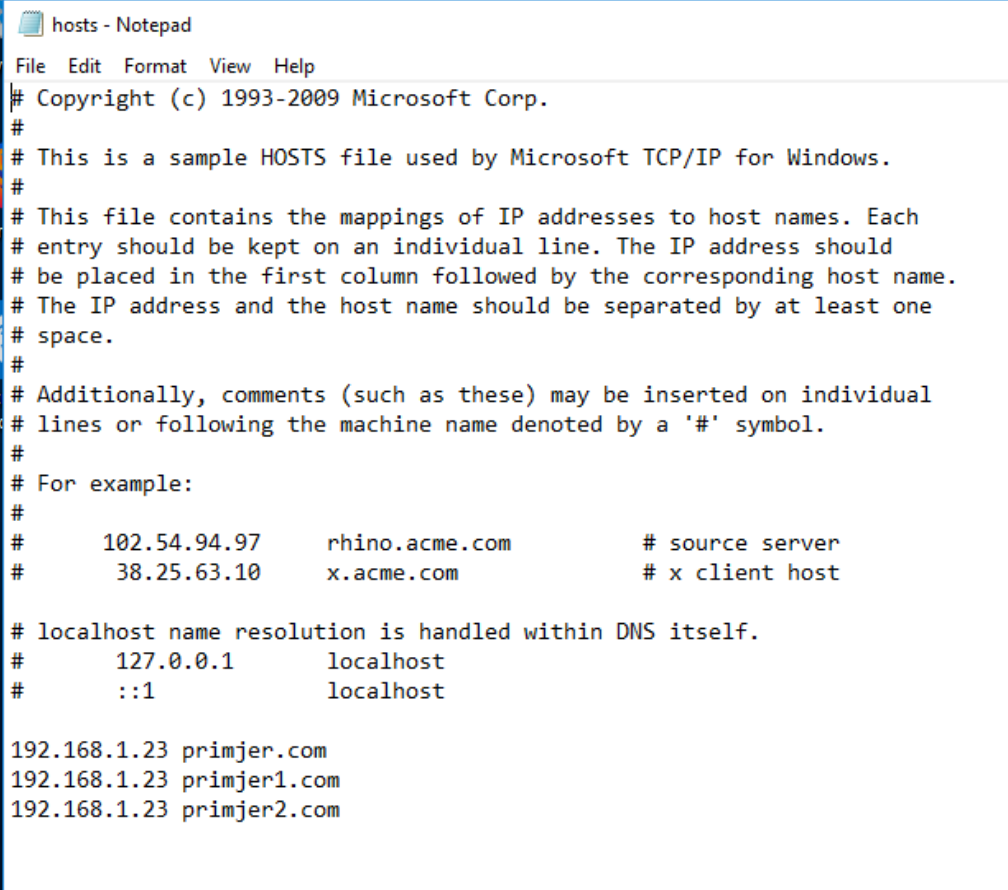
This way we will be able to test if our settings work without the need to add external domain to our lab.
Creating Directories
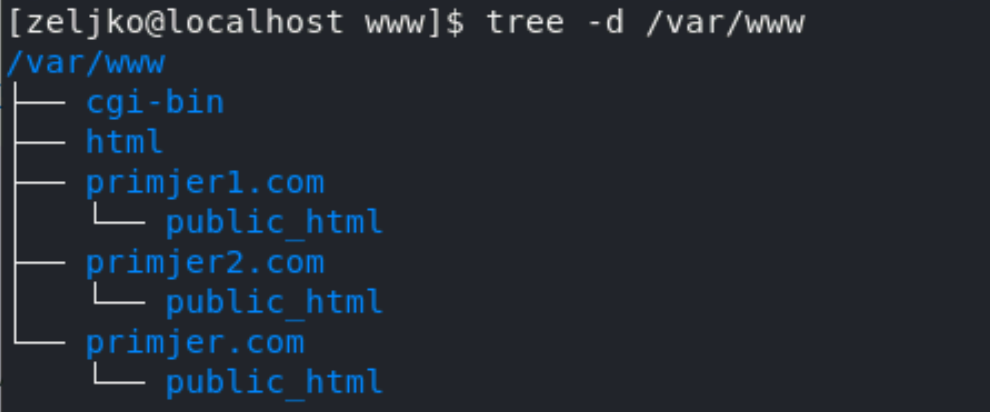
We will first create directory structure for our webistes. It will look like this:
Main directory will be /var/www, inside it it will be subdirectories for each domain /var/www/primjer.com, /var/www/primjer1.com and /var/www/primjer2.com
Inside primjer.com, primjer1.com and primjer2.com directories we will create public_html directories that will host our webiste files for each website.
So, our directory structure will look like this
/var/www/primjer.com/public_html/
/var/www/primjer1.com/public_html/
/var/www/primjer2.com/public_html/
For visual types here is our directory structure in bash
We will create this folder structure by entering following commands:
sudo mkdir -p /var/www/primjer.com/public_html/
sudo mkdir -p /var/www/primjer1.com/public_html/
sudo mkdir -p /var/www/primjer2.com/public_html/
Now, inside every public_html directory for every of three websites we created we will add index.html file inside.
sudo vi /var/www/primjer.com/public_html/index.html
Enter following into file
<!DOCTYPE html>
<html lang="en" dir="ltr">
  <head>
    <meta charset="utf-8">
    <title>Welcome to primjer.com</title>
  </head>
  <body>
    <h1>Success! primjer.com home page!</h1>
  </body>
</html>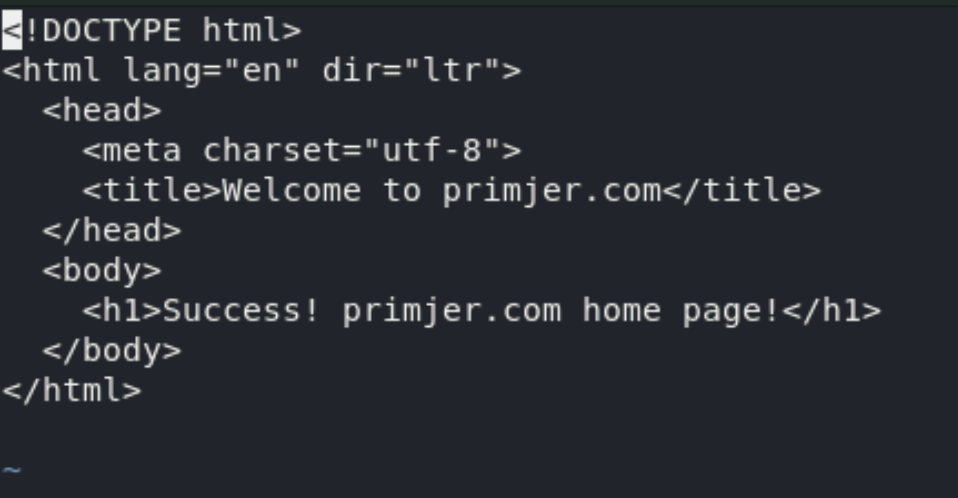
Save file and repeat procedure for other two websites. Make sure you edit text so it reflects website you are accessing (add primjer1.com and primjer2.com into text).
Before we proceed to creating virtual hosts we will also make sure we have right permissions on our folders.
sudo chown -R apache:apache /var/www/primjer.com
sudo chown -R apache:apache /var/www/primjer1.com
sudo chown -R apache:apache /var/www/primjer2.com
Creating Virtual Hosts file
Virtual host files can be done in a couple of ways, I will show one, which should be practical to maintain.
Apache loads .conf files from /etc/httpd/conf.d directory. We will put our virtual hosts files in this folder.
sudo vi /etc/httpd/conf.d/primjer.com.confEnter following into new file, change domain names (for every of the domain) and save it.
<VirtualHost *:80>
    ServerName primjer.com
    ServerAlias www.primjer.com
    ServerAdmin webmaster@primjer.com
    DocumentRoot /var/www/primjer.com/public_html

    <Directory /var/www/primjer.com/public_html>
        Options -Indexes +FollowSymLinks
        AllowOverride All
    </Directory>

    ErrorLog /var/log/httpd/primjer.com-error.log
    CustomLog /var/log/httpd/primjer.com-access.log combined
</VirtualHost>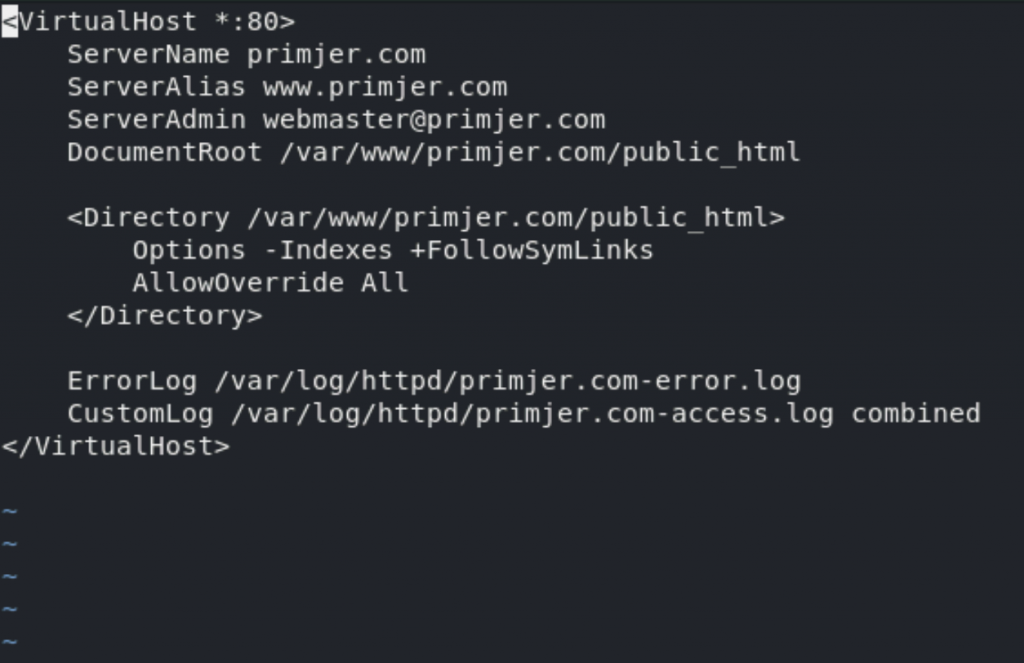
You should repeat this procedure for the remaining two webistes.
A quick explanation of the items in this file.
ServerName – name of the domain for which this virtual file is.
ServerAlias – subdomains and all other domains name will be used for.
DocumentRoot – directory where website files reside.
Options:
Indexes – prevents director listing
FollowSymlinks – tells webserver to follow symbolic links
____________________
Optionally – Setup for HTTPS
If you would like to setup HTTPS, this is an example of how it would look like
<VirtualHost *:443>
  ServerName primjer.com
  DocumentRoot /var/www/primjer.com/public_html

  CustomLog /var/log/httpd/primjer.com-access.log combined
  ErrorLog /var/log/httpd/primjer.com-error.log

  # Example SSL configuration
  SSLEngine on
  SSLProtocol all -SSLv2
  SSLCipherSuite HIGH:MEDIUM:!aNULL:!MD5
  SSLCertificateFile "/var/www/primjer.com/ssl/server.crt"
  SSLCertificateKeyFile "/var/www/primjer.com/ssl/server.key"
</VirtualHost>
You will need SSL certificates for HTTPS to work, you can put them where you find it practical, it does not have to be /var/www dir.
__________________
Now, back to our initial tutorial.
After you are done with creating .conf files, run following command to check if configuration is ok
sudo apachectl configtestYou should get Syntax OK. I got error above because I’m using localhost machine without any configuration, so don’t let that bother you.

After you are done with the test, and if everything is ok, we need to restart Apache for changes to take effect.
sudo systemctl restart httpdFinally, lets test if our virtual host files work. I will enter into my client machine all three domain names I created to check if they work.
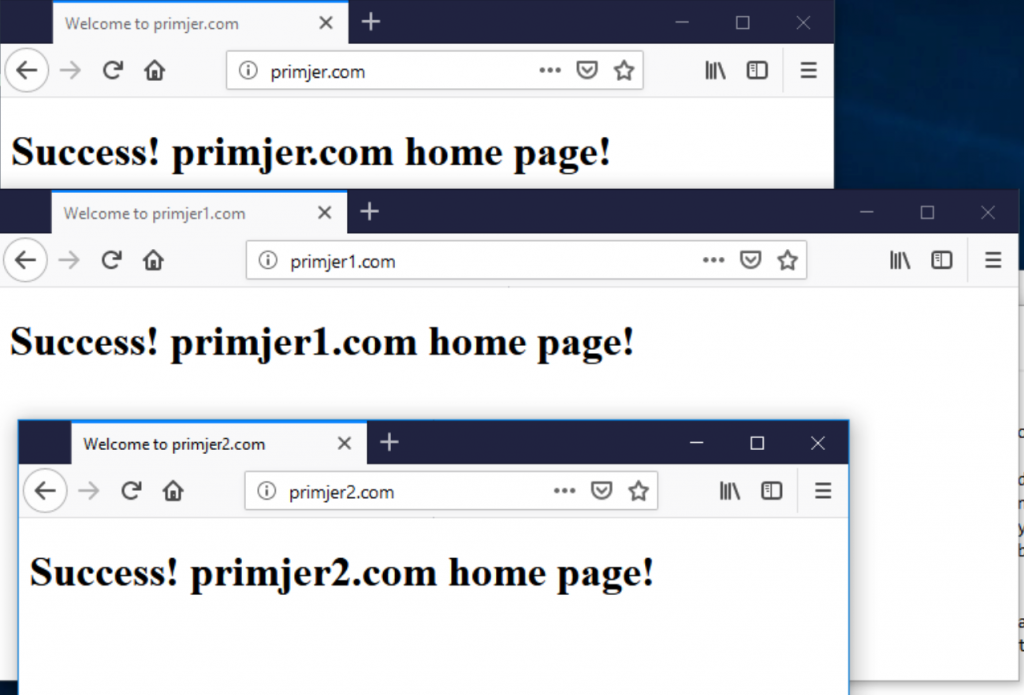
All is good, we are done.