We already done four node setup, and you can find all the details on my blog. This is more or less same setup, but this time only with two nodes. I will not go into so much details in this guide, it is more or less the same setup as in the guide I wrote before. Two node setup will only grant you Mirroring option, which is more than fine for some scenarios.
Before we begin
You will usually read that Storage Spaces Direct is run on hardware, but it can also be run inside virtual machines.
It is recommended to run Storage Spaces direct on hardware for production environments, but for myself I find it doable for some non-critical (and light) workloads even in virtualization mode.
Before you begin with Storage Spaces Direct, if you are not sure what it is all about, make sure you start here – https://docs.microsoft.com/en-us/windows-server/storage/storage-spaces/storage-spaces-direct-overview and make yourself comfortable with technology.
This is also a great read – https://docs.microsoft.com/en-us/windows-server/storage/storage-spaces/deploy-storage-spaces-direct
Prerequisites
This will be tutorial for two Hyper-V nodes with two virtual machines. You can also simulate this on one Hyper-V host if you have enough resources (I did this guide on one machine).
Here you can read about hardware requirements (can also be good guide line for virtual environment) https://docs.microsoft.com/en-us/windows-server/storage/storage-spaces/storage-spaces-direct-hardware-requirements
Hyper-V host
On Hyper-V host I created two virtual switches – one is “External” type through which machines communicate with the clients and rest of the network. I unchecked “Allow management operating system to share this network adapter” since I have dedicated network adapter for Hyper-V. In case you have only one network adapter on you Hyper-V host, you should leave that checked, otherwise your host won’t have network connection.
Second one is private (I named it VMsOnly) and it is only for communication between VMs.
VMs
I have one VM which serves as domain controller. I named it DC and it has IP address of 10.0.0.31. Domain name is informatiker.local. VM has only one network adapter connected to External network switch.
I created twoVMs with 4cores, 8GB of RAM, and five disks in total. One for system, and four drives for Storage Spaces Direct (30GB in size, each). Do not initialize or create volumes on four drives for Storage Spaces Direct! You can also attach physical disks directly to your VMs, but in this guide I will use standard vhdx.
Each VM also two network adapters – one network adapter connected to External network switch and another one to private switch (for cluster heartbeat).
I named VMs as follows:
Node1 – External IP 10.0.0.123 Private IP 192.168.5.2
Node2 – External IP 10.0.0.124 Private IP 192.168.5.3
All of the machines should be added to your domain.
We need to enable nested virtualization on each Hyper-V host on which Storage Spaces Direct will be installed
In my case it is only one host
Set-VMProcessor -VMName Node1 -ExposeVirtualizationExtensions $TrueYou need to run this command for each VM you created.
You will also need to enable MacAddressSpoofing for each of the created VMs.
Get-VMNetworkAdapter -VMName Node1 | Set-VMNetworkAdapter -MacAddressSpoofing OnYou can also do this by opening Settings of the VM inside Hyper-V Manager, and going to Network Adapter and extend its properties | Select Advanced Features and click on Enable MAC address spoofing.
Virtual machines
I already written about specs for our two nodes.
We need to install Windows Server 2019 Datacenter on all of the nodes.
Also, we will join these machines to our domain.
Install required Roles/Features on the Storage Spaces Direct nodes
On each of the nodes we will install following roles
Hyper-V, Failover-Clustering, File Server, Data Center Bridging, RSAT Clustering and Hyper-V Powershell.
I also managed to get by with Failover Clustering and File Services installed. You can do this also through Server Manager if you have GUI installed.
Install-WindowsFeature -Name "Hyper-V", "Failover-Clustering", "Data-Center-Bridging", "RSAT-Clustering-PowerShell", "Hyper-V-PowerShell", "FS-FileServer"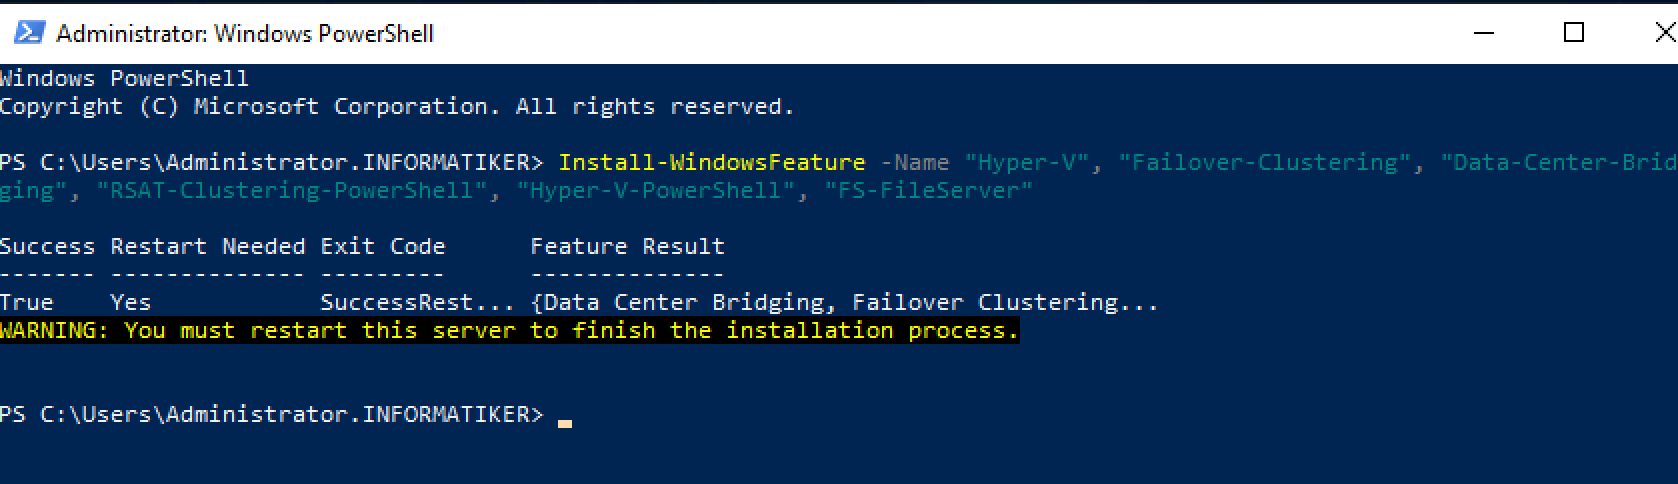
Repeat this install on all nodes and reboot them.
We will now test if our nodes are prepared for clustering. I will run this test on Node1 in Powershell as admin.
Test-Cluster –Node Node1,Node2 –Include "Storage Spaces Direct", "Inventory", "Network", "System Configuration"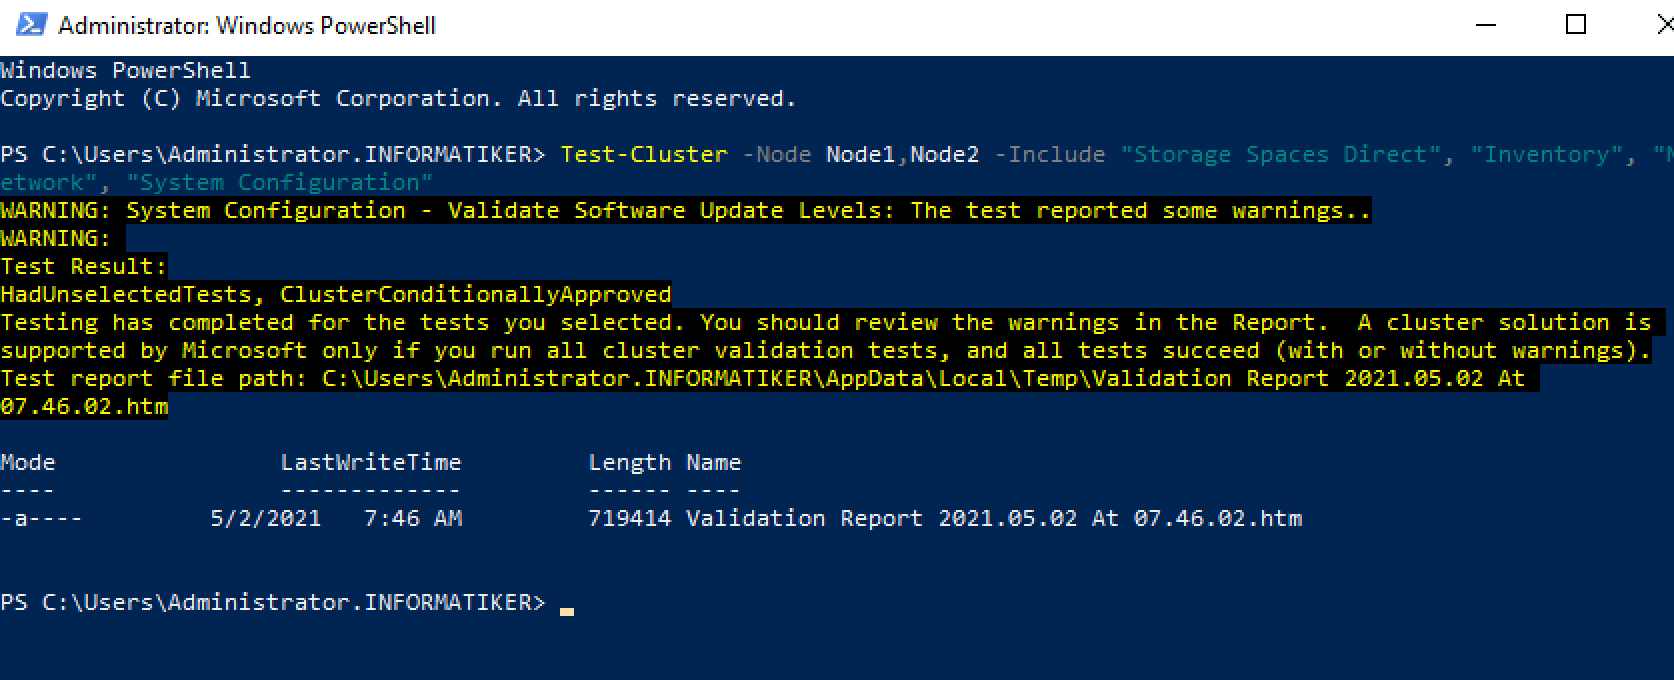
You can also check your results in C:\Users\YourUserName\AppData\Local\Temp\Validation report XY….
If you installed Windows Server with GUI, you may also want to have Failover Cluster Manager installed. To install it, type into powershell
Install-WindowsFeature RSAT-Clustering-MGMT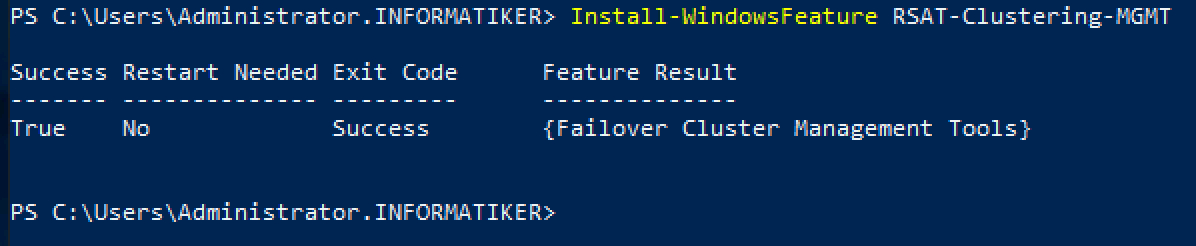
In case there are no errors, you can proceed. I got a warning inside System Configuration, but nothing special…
Create Storage Spaces Direct Cluster
Ok, if you cleared your cluster test ok, we can go forward. We will now create cluster. I will name my cluster StorCluster, and include all nodes into it. Also, NoStorage switch is important since this cluster will be used as Storage Spaces Direct cluster. I will also assign IP address to this cluster – 10.0.0.127
I will run this command from Node1.
New-Cluster –Name StorCluster –Node Node1,Node2 –NoStorage -StaticAddress 10.0.0.127
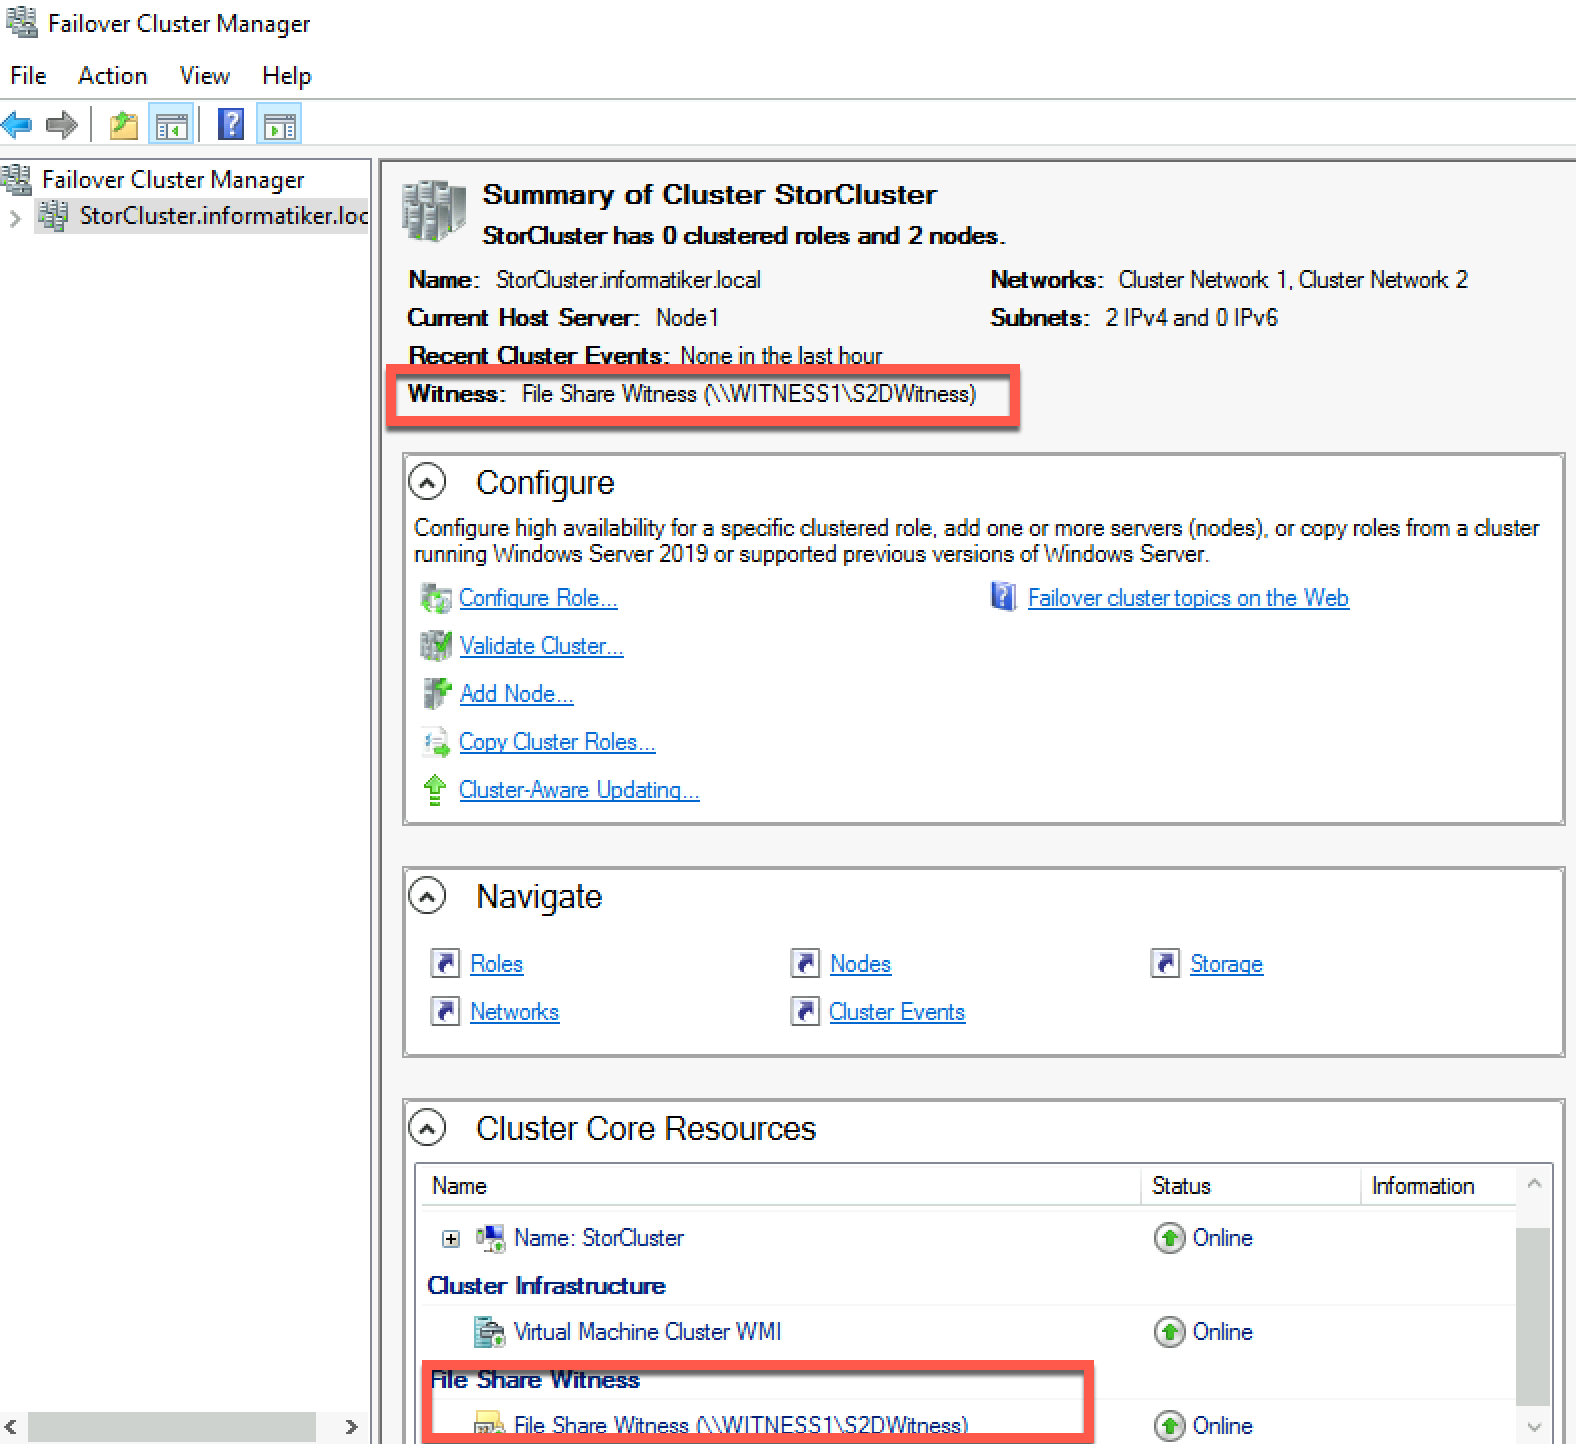
If you wish to use this in production, cluster witness may be a good idea. You can look it up here in step 3.4. Deploying cluster witness can help you withstand loosing two nodes for example in our scenario with four nodes. I would highly recommend this, especially in two node scenario.You can look this up also on my blog, I went through failover cluster setup and quorum is explained there.
I enabled it for this scenario.
Here is the script from this link under Section 3.1. It is c/p below. Change Node1, Node2… to the name of your nodes and save it as .ps1 script.
This script will remove all the data from all the disks except OS drive, so be careful when executing it! Make sure your nodes are clean and don’t have any valuable data before you execute this!
# Fill in these variables with your values
$ServerList = "Node1", "Node2"

Invoke-Command ($ServerList) {
    Update-StorageProviderCache
    Get-StoragePool | ? IsPrimordial -eq $false | Set-StoragePool -IsReadOnly:$false -ErrorAction SilentlyContinue
    Get-StoragePool | ? IsPrimordial -eq $false | Get-VirtualDisk | Remove-VirtualDisk -Confirm:$false -ErrorAction SilentlyContinue
    Get-StoragePool | ? IsPrimordial -eq $false | Remove-StoragePool -Confirm:$false -ErrorAction SilentlyContinue
    Get-PhysicalDisk | Reset-PhysicalDisk -ErrorAction SilentlyContinue
    Get-Disk | ? Number -ne $null | ? IsBoot -ne $true | ? IsSystem -ne $true | ? PartitionStyle -ne RAW | % {
        $_ | Set-Disk -isoffline:$false
        $_ | Set-Disk -isreadonly:$false
        $_ | Clear-Disk -RemoveData -RemoveOEM -Confirm:$false
        $_ | Set-Disk -isreadonly:$true
        $_ | Set-Disk -isoffline:$true
    }
    Get-Disk | Where Number -Ne $Null | Where IsBoot -Ne $True | Where IsSystem -Ne $True | Where PartitionStyle -Eq RAW | Group -NoElement -Property FriendlyName
} | Sort -Property PsComputerName, Count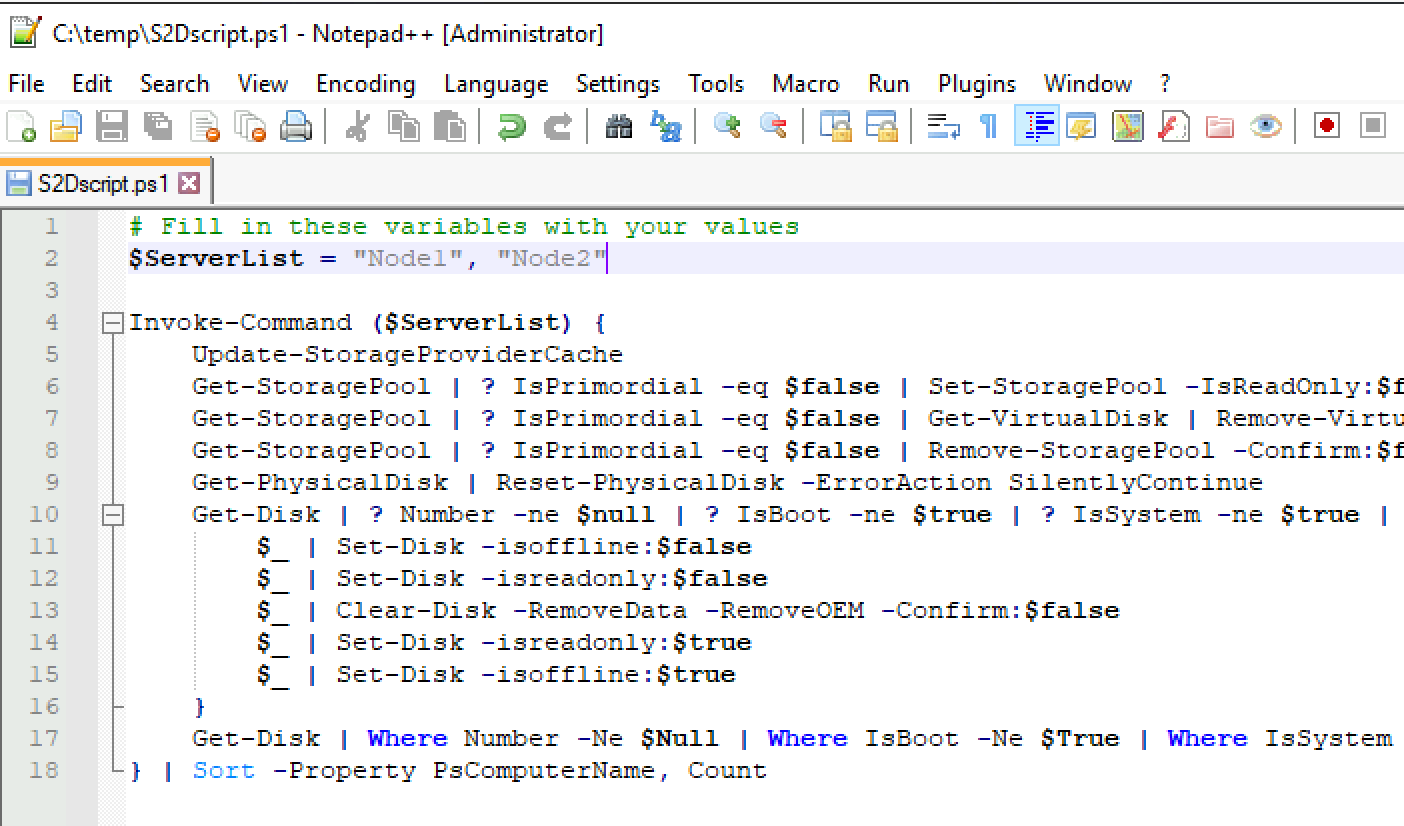
I will run this script in Powershell from Node1. This is the result of my script
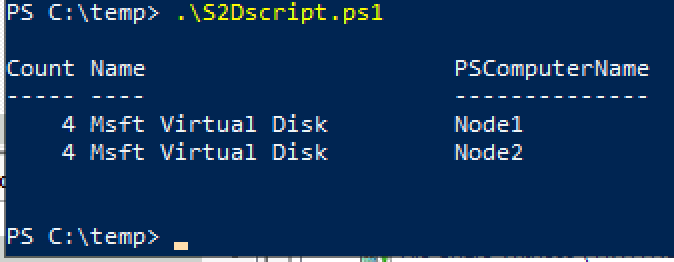
Ok, we can proceed further. Script prepared four disks per node.
Now, we will create Cluster for Storage Direct Spaces. I will run it on Node1 through Powershell as admin.
Enable-ClusterStorageSpacesDirect –CimSession StorCluster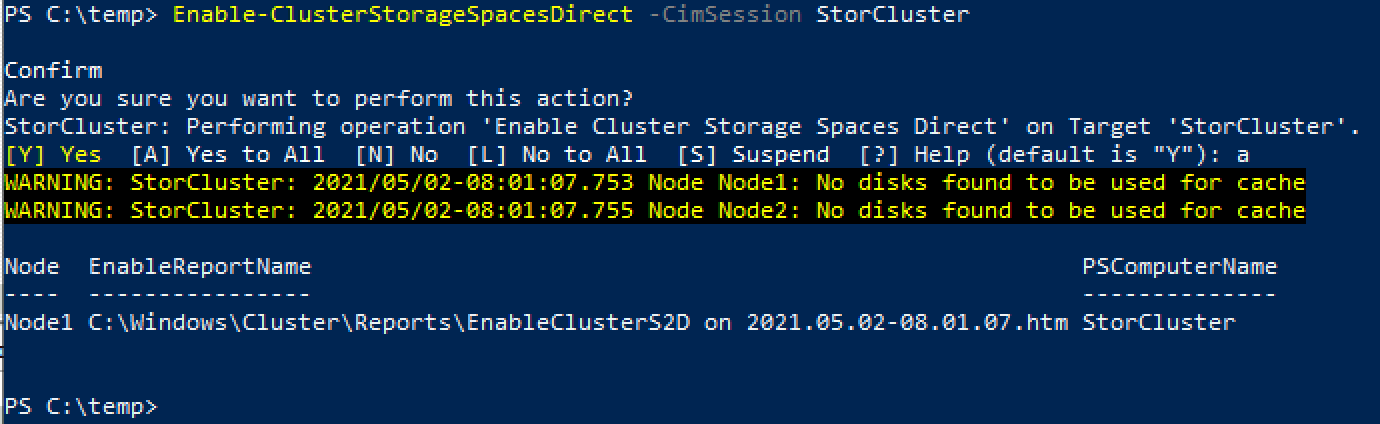
You can ignore warning for cache.
I also installed my servers with GUI for this guide, and Failover Cluster Manager is in place.
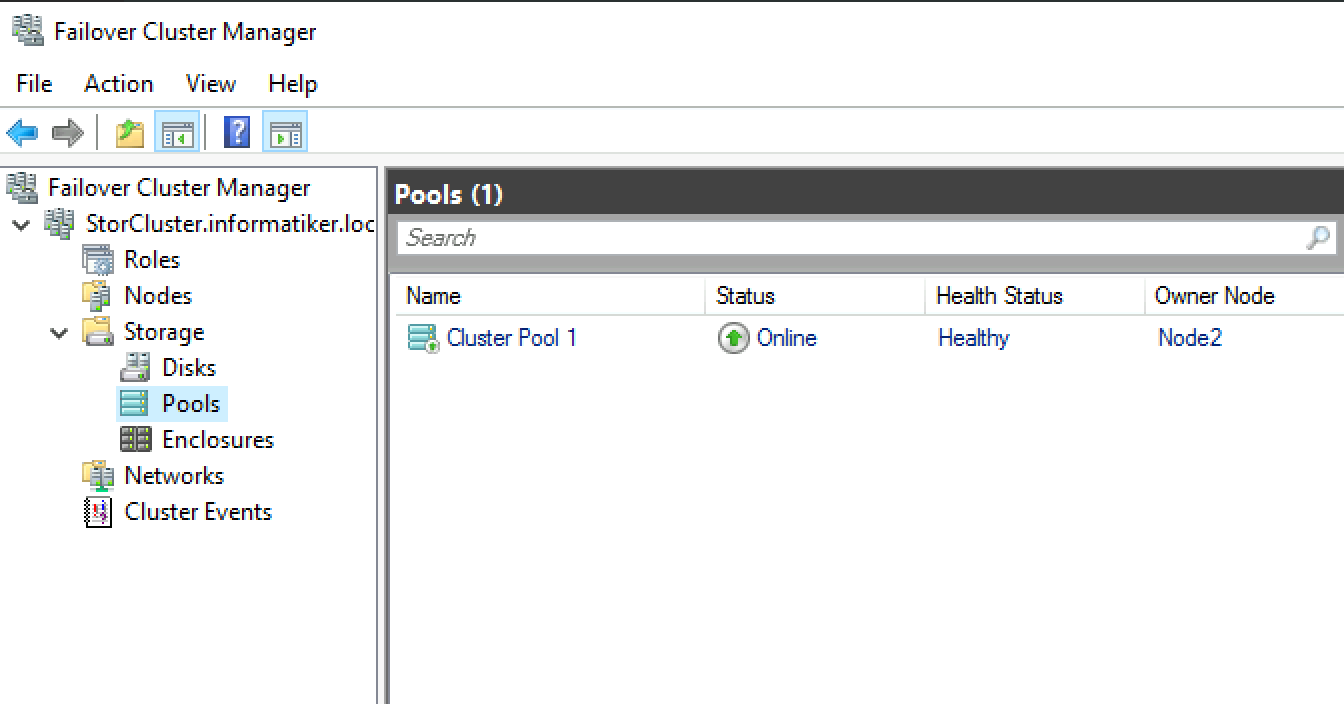
Now, if I look into Failover Cluster Manager under Storage | Disks, this is what I see
Create Cluster Volume
Ok, this is last part of this process – to create volume. Here you can read more about creating volumes – https://docs.microsoft.com/en-us/windows-server/storage/storage-spaces/create-volumes
and this also is useful page – https://docs.microsoft.com/en-us/windows-server/storage/storage-spaces/plan-volumes
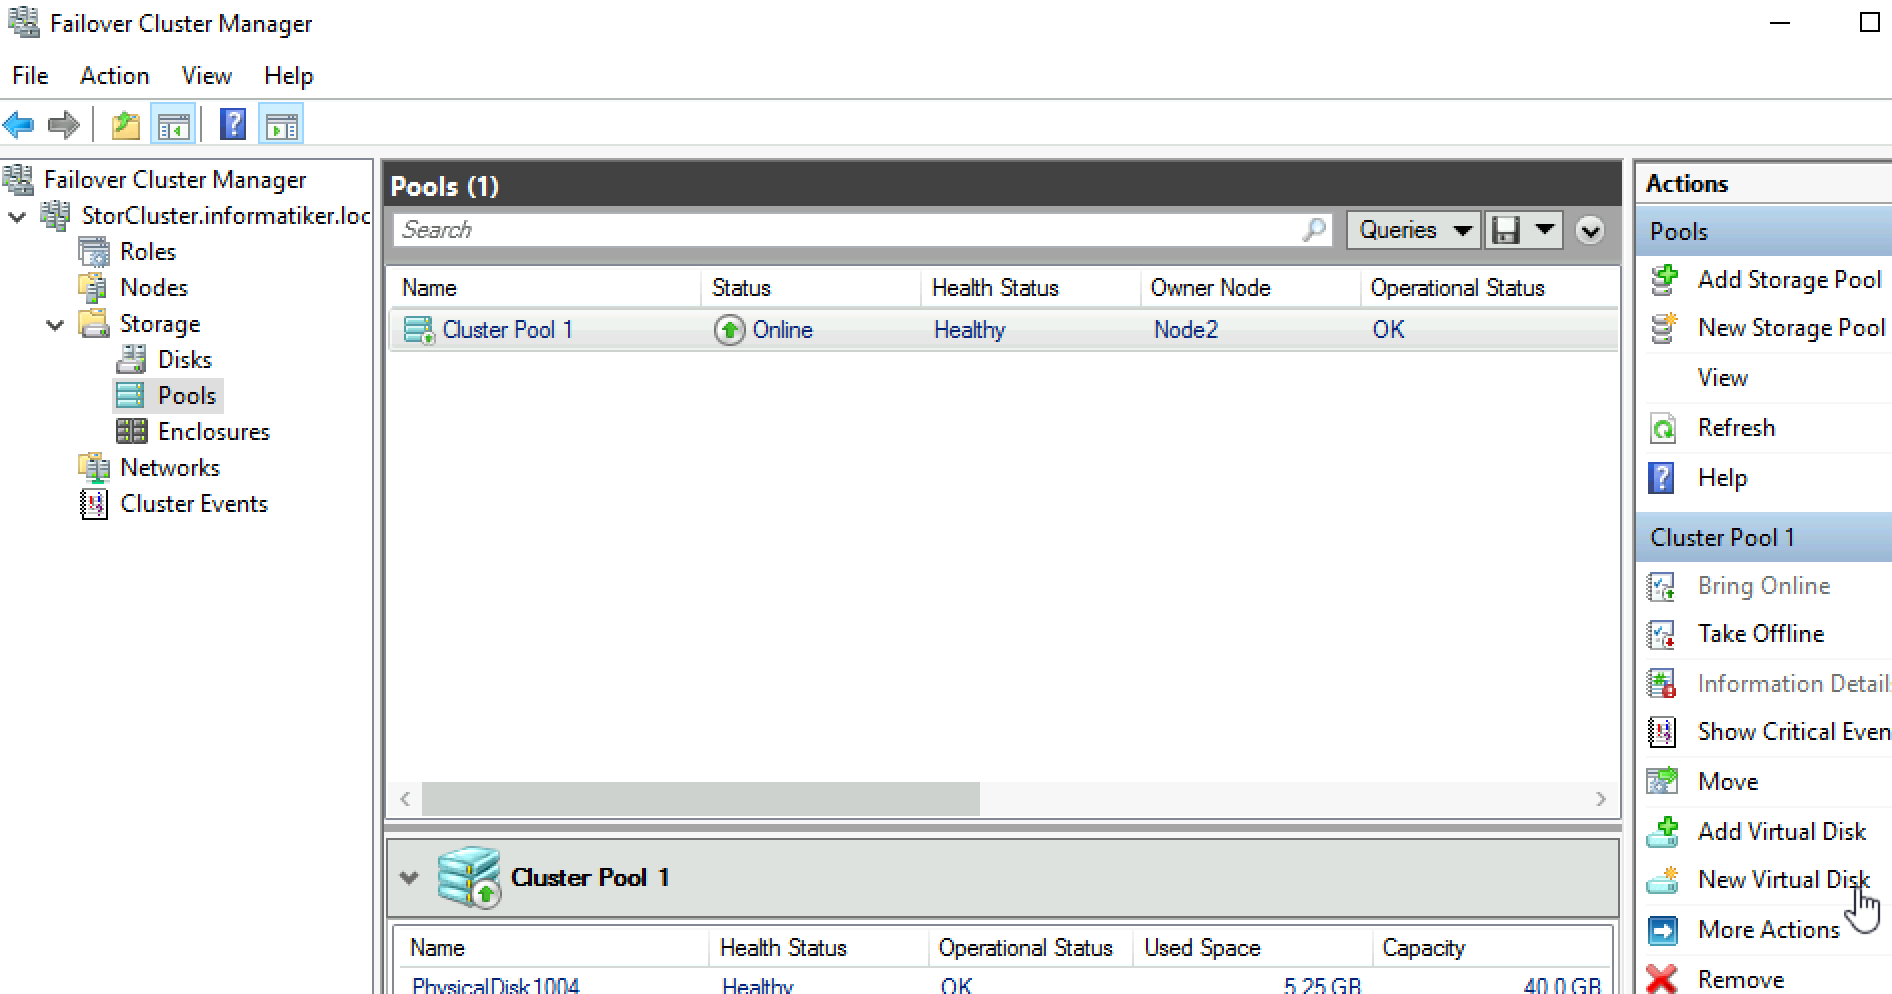
Failover Cluster Manager | Storage | Pools | select created Pool | New Virtual Disk
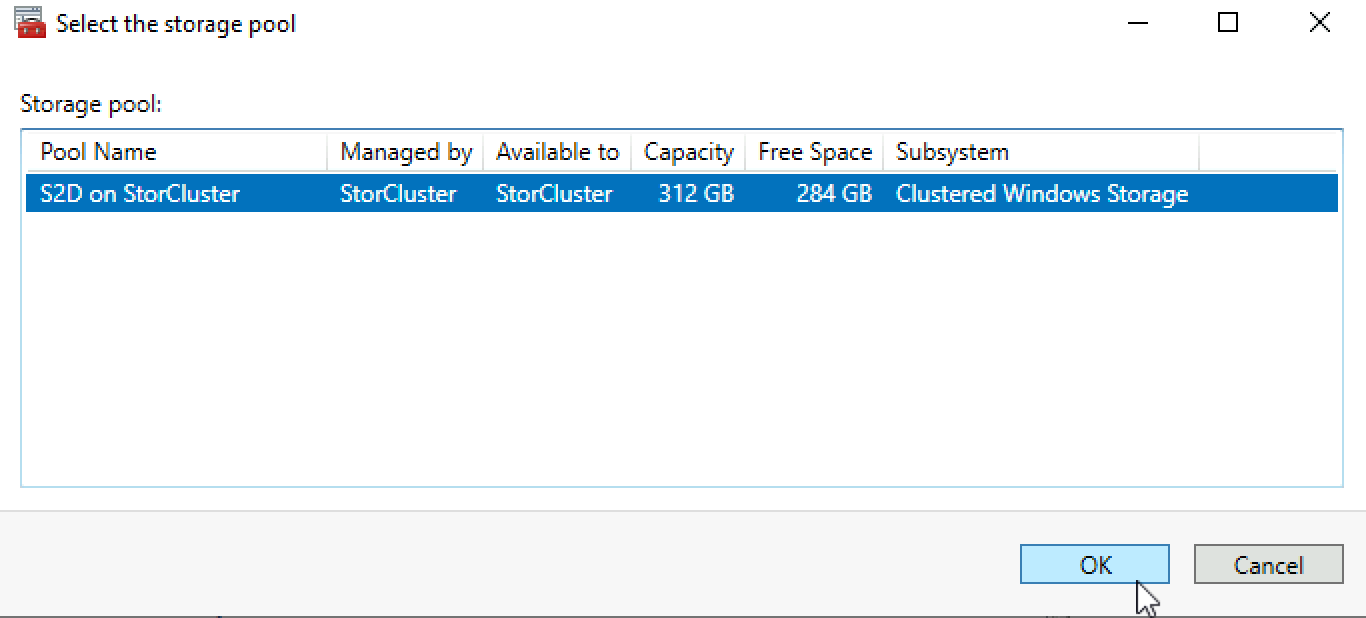
Select your S2D and click on OK
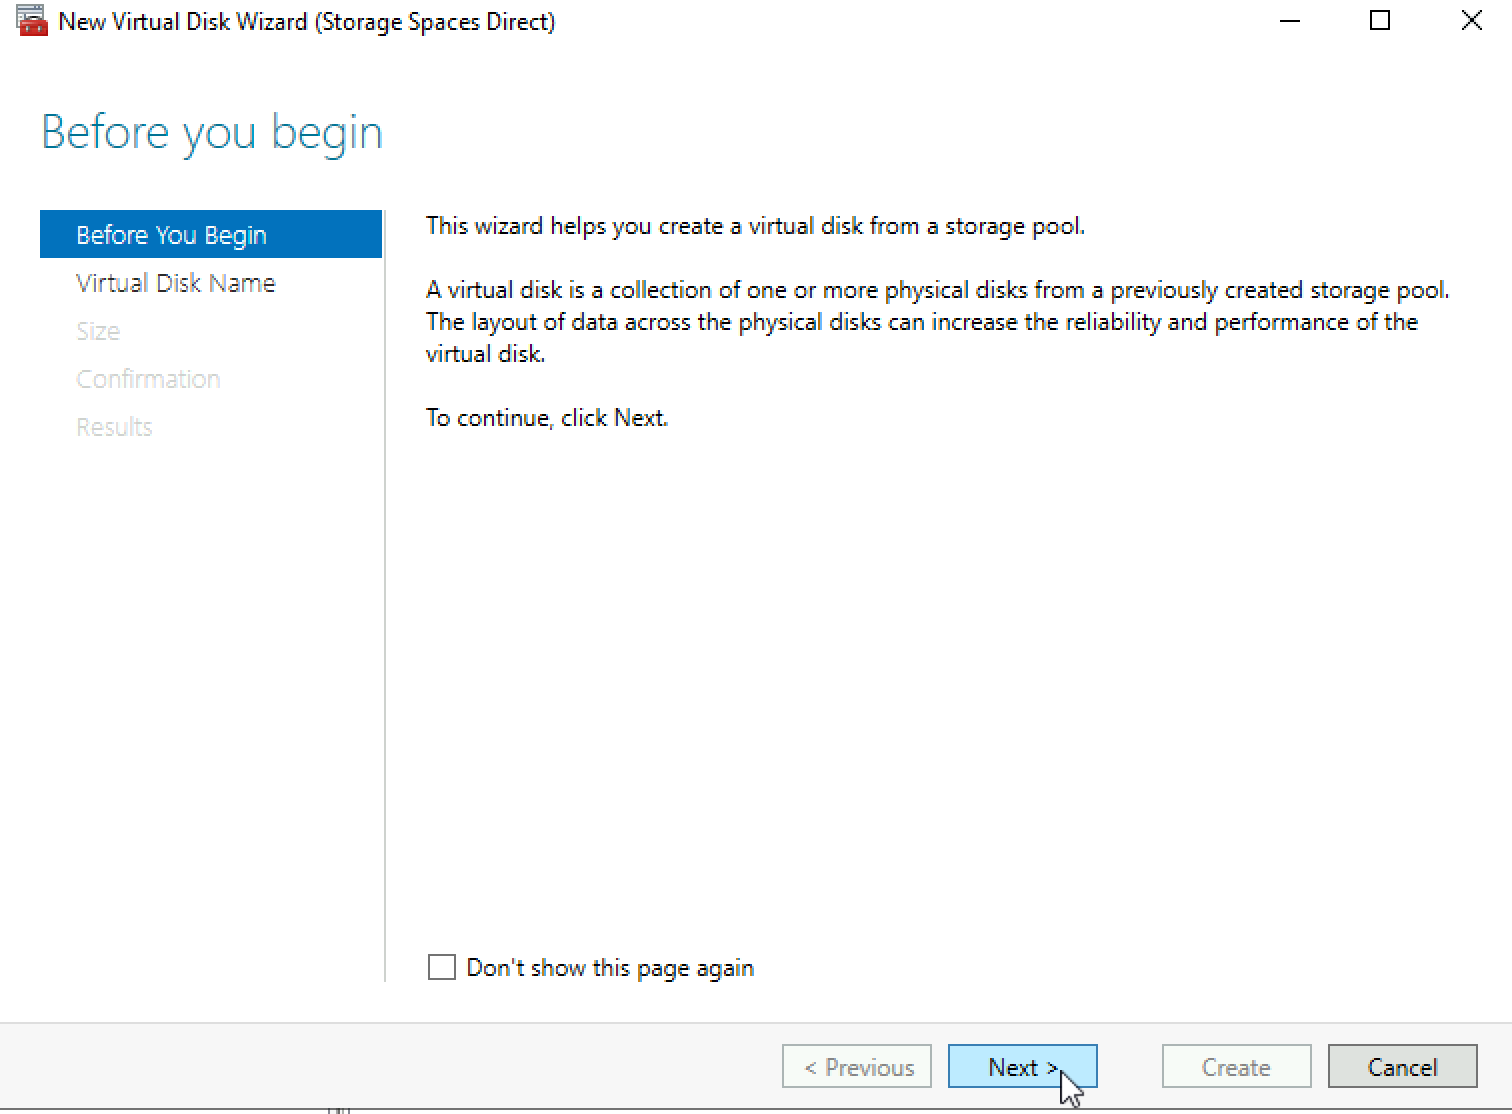
Next
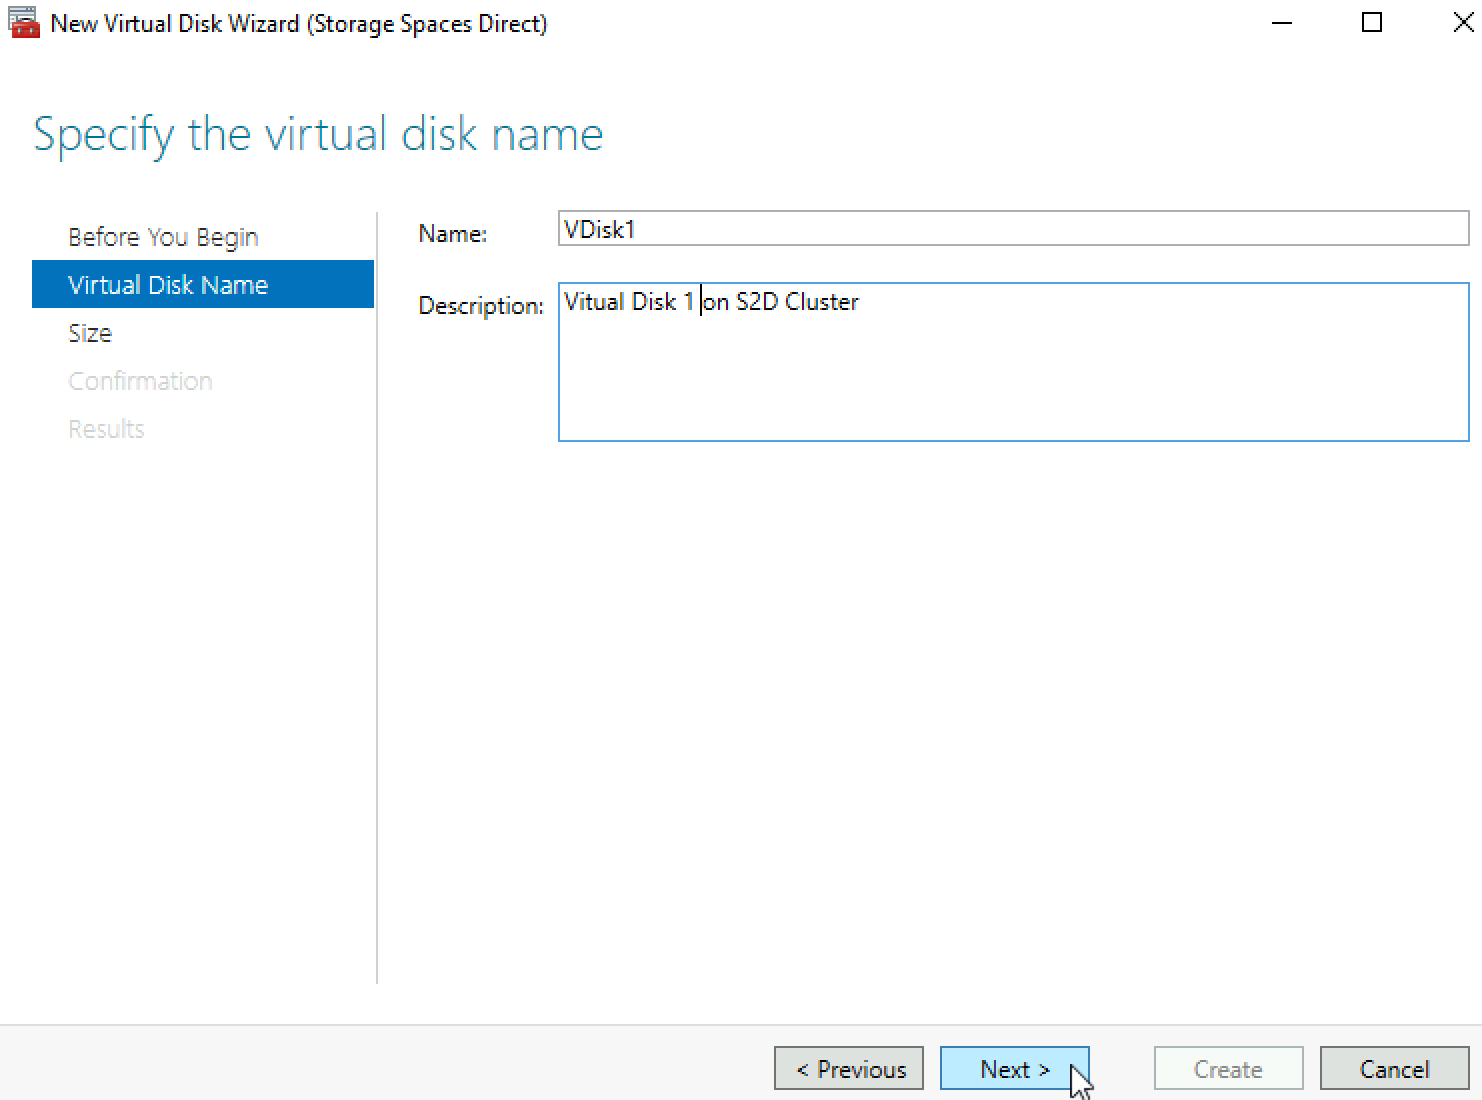
Enter name for your Virtual Disk and select Next
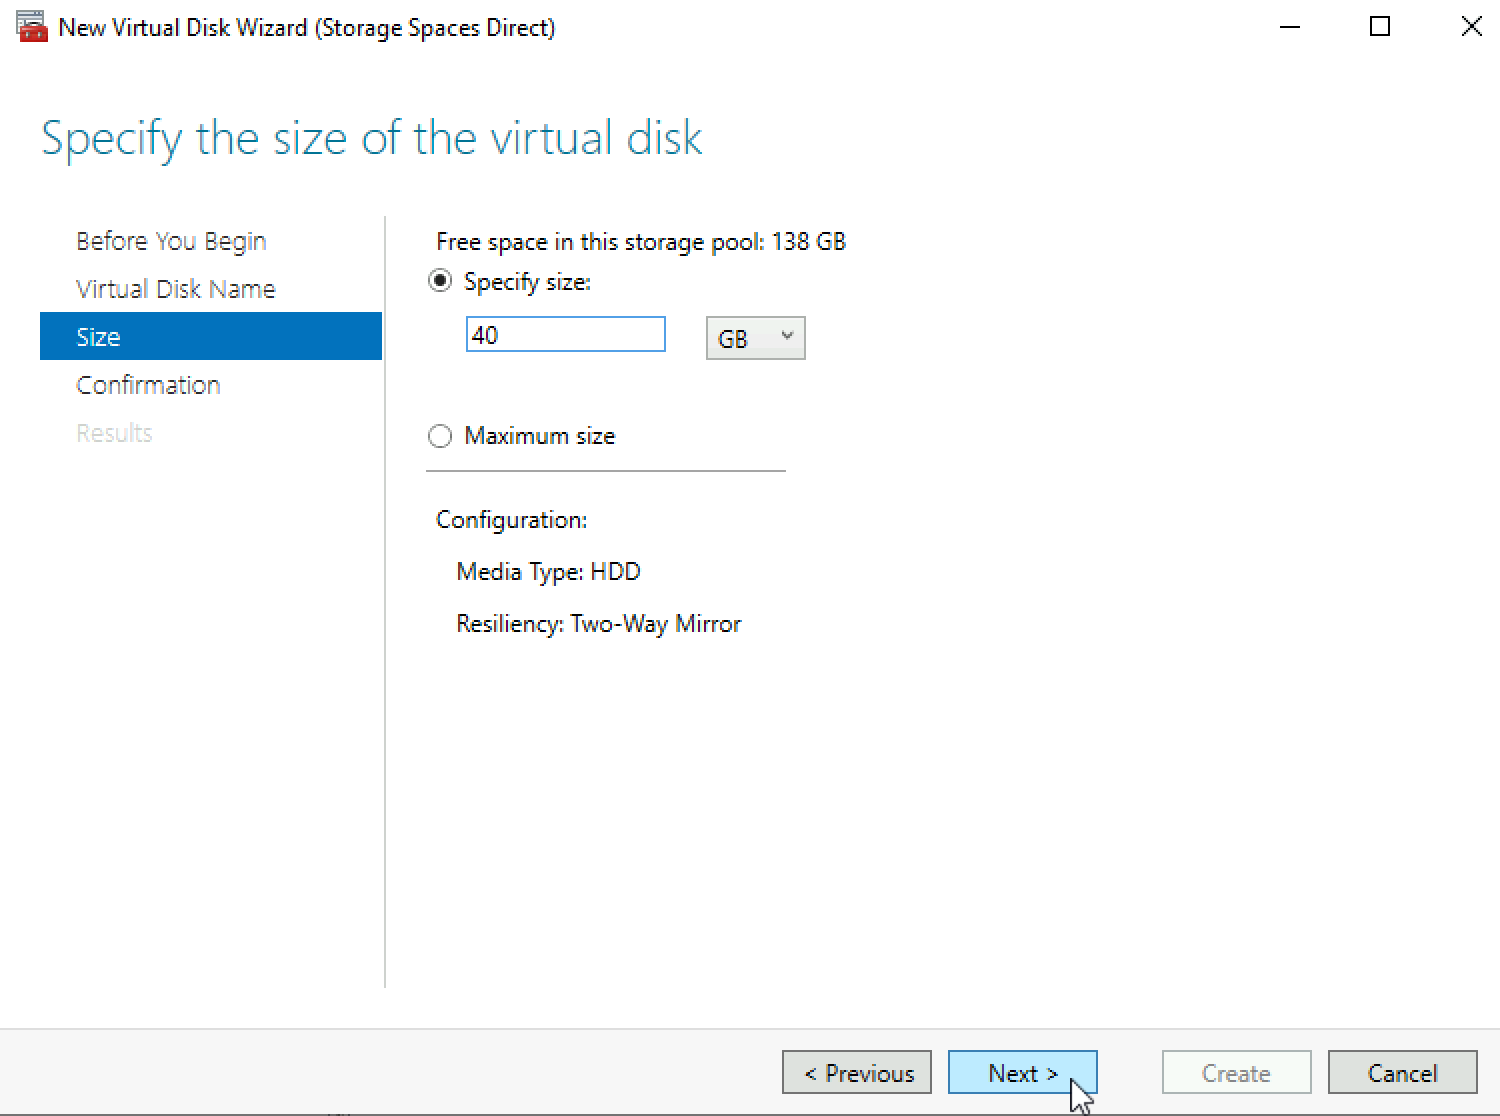
With two nodes you only have one option – Two-Way Mirror | Next
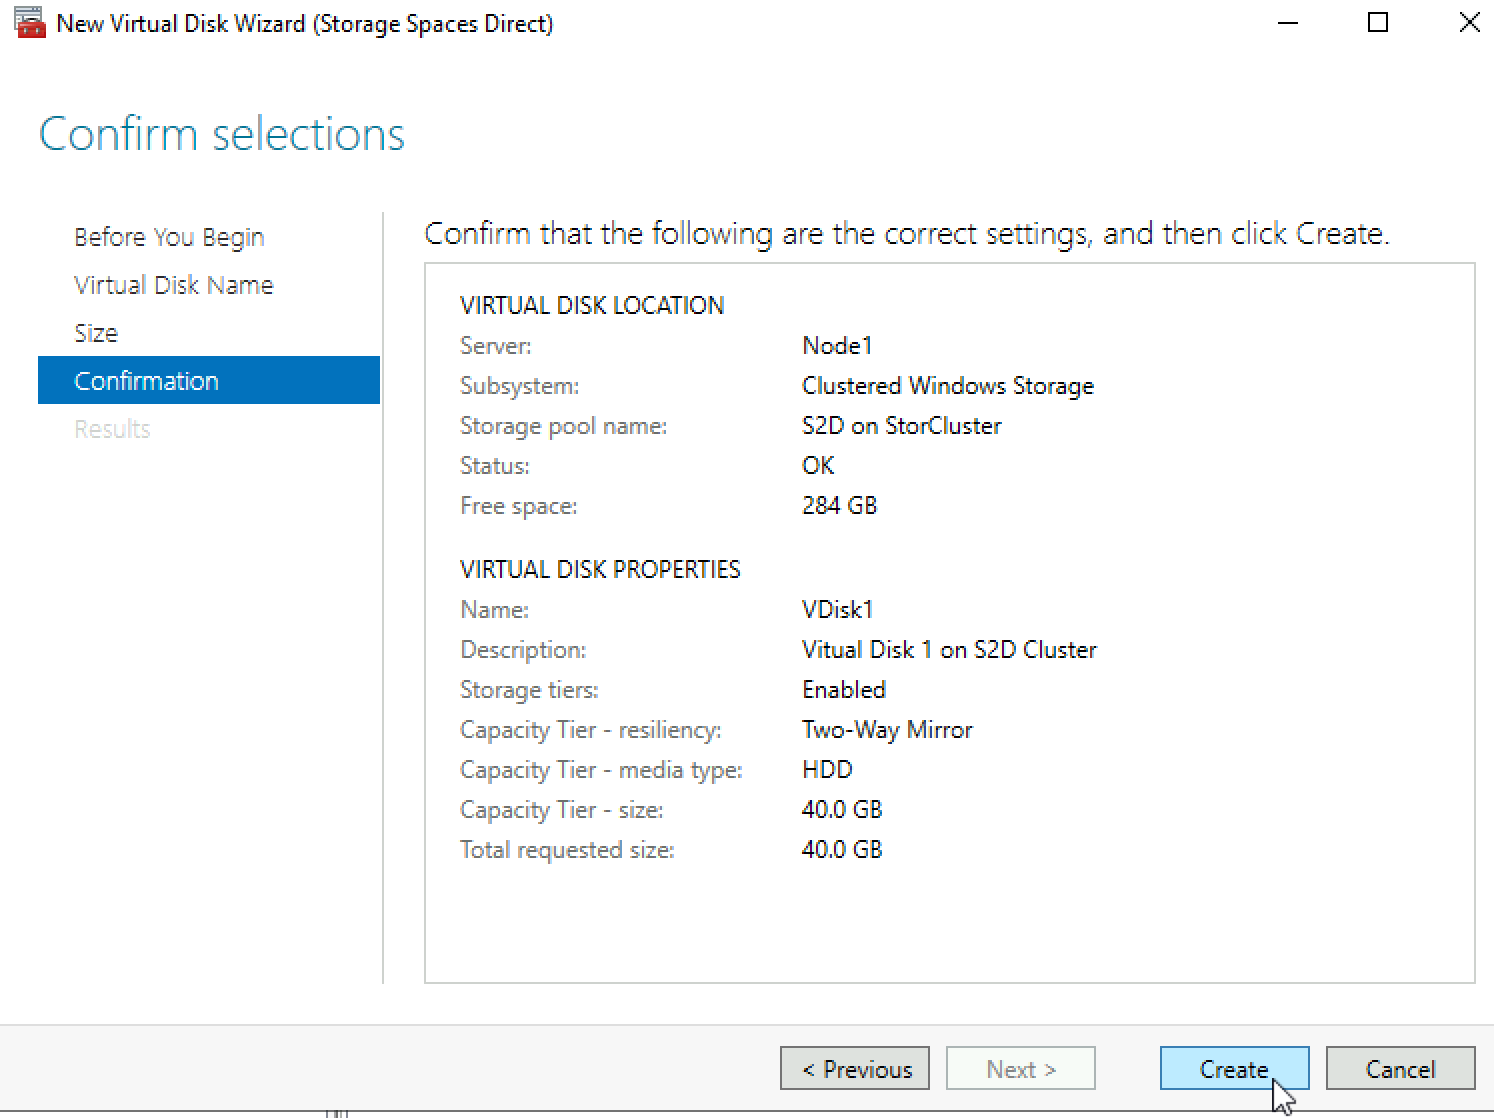
Check your settings | Create
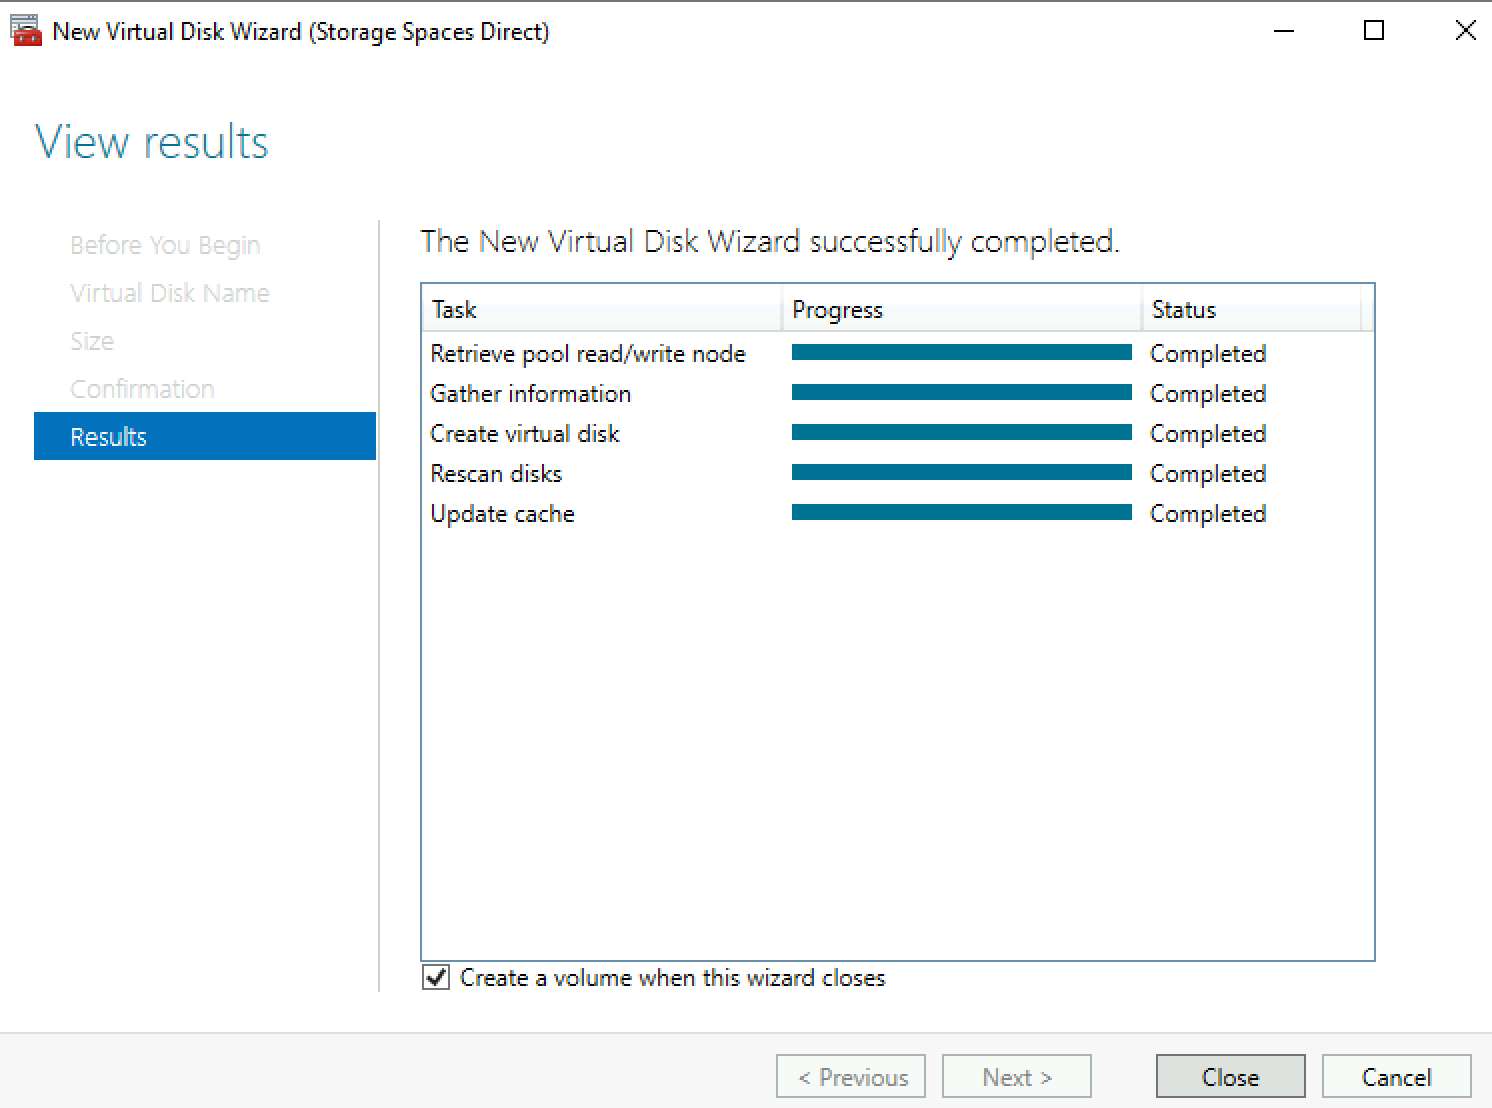
Everything went fine. Close
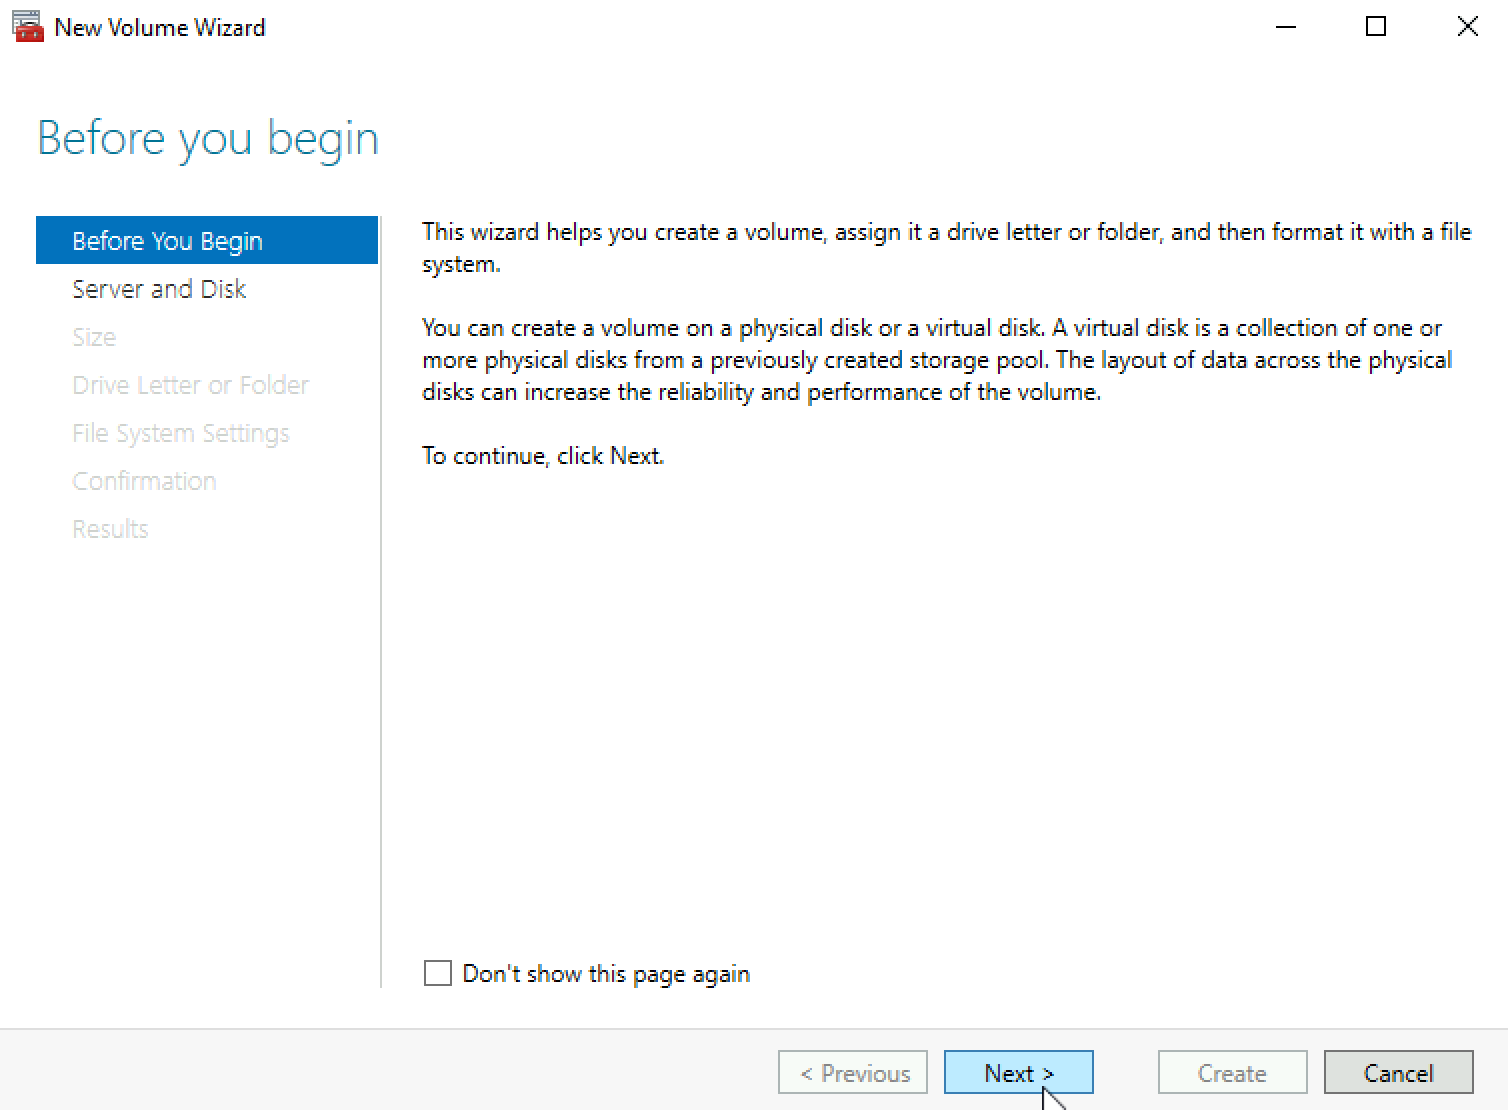
New Wizard will immediately pop-up, we will need to create volume on newly created Virtual Disk.
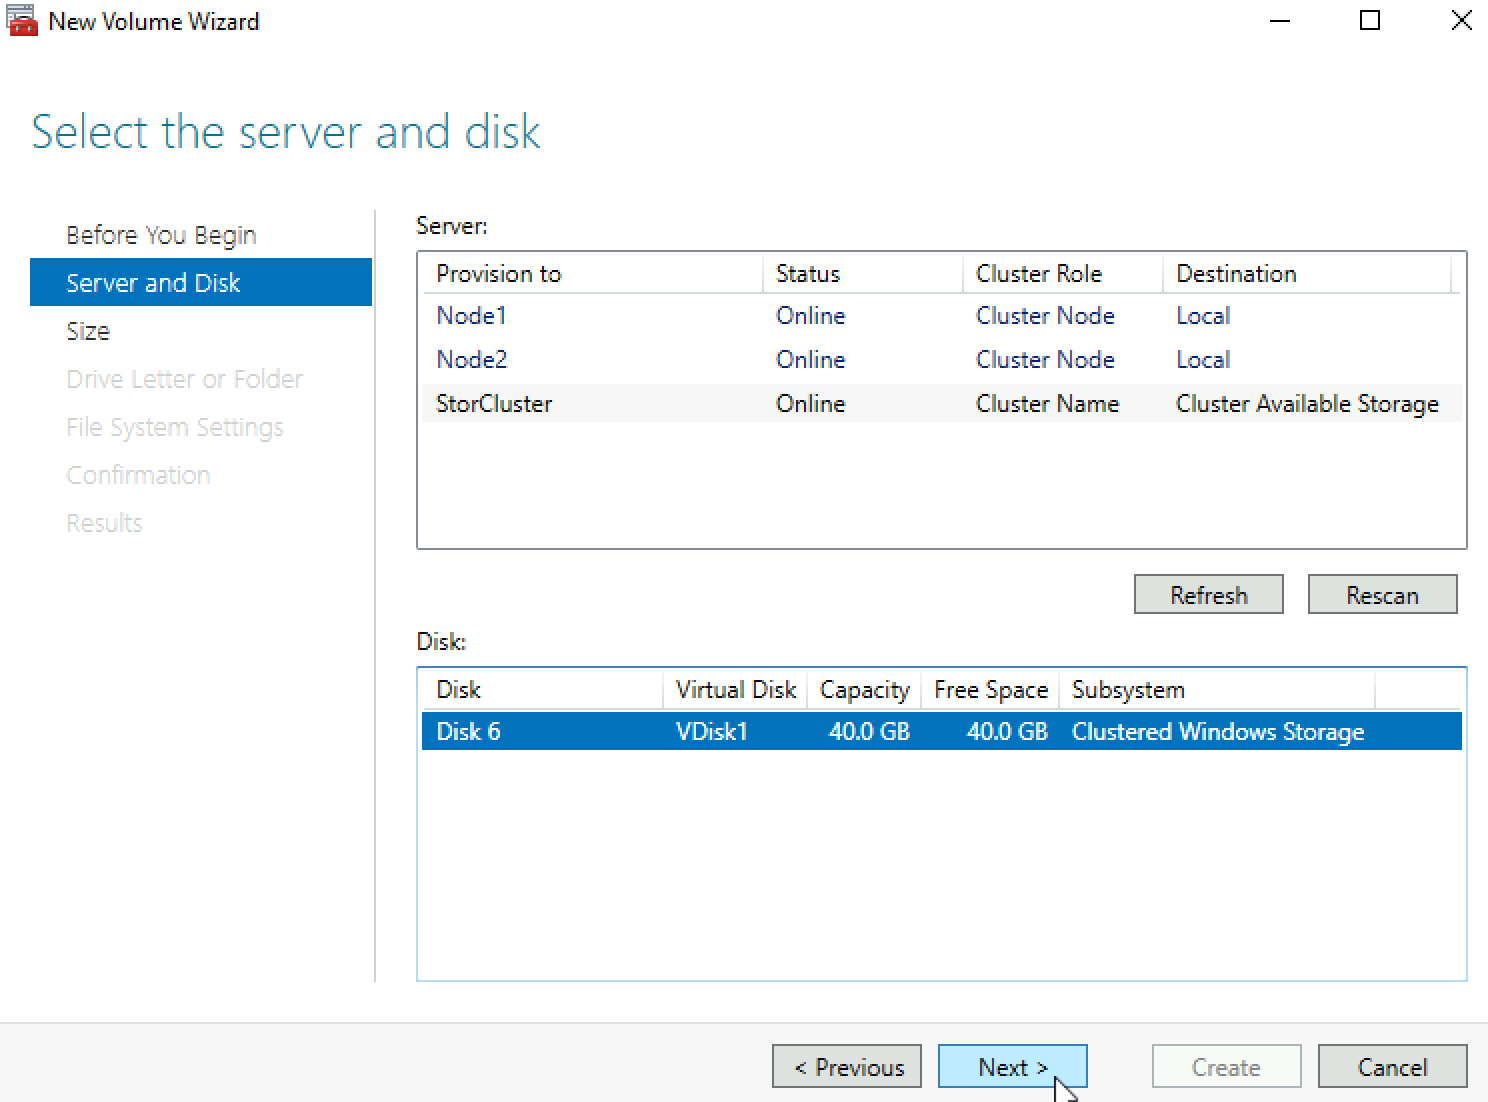
We will select newly created VDisk1 from our S2D cluster (StorCluster). Next
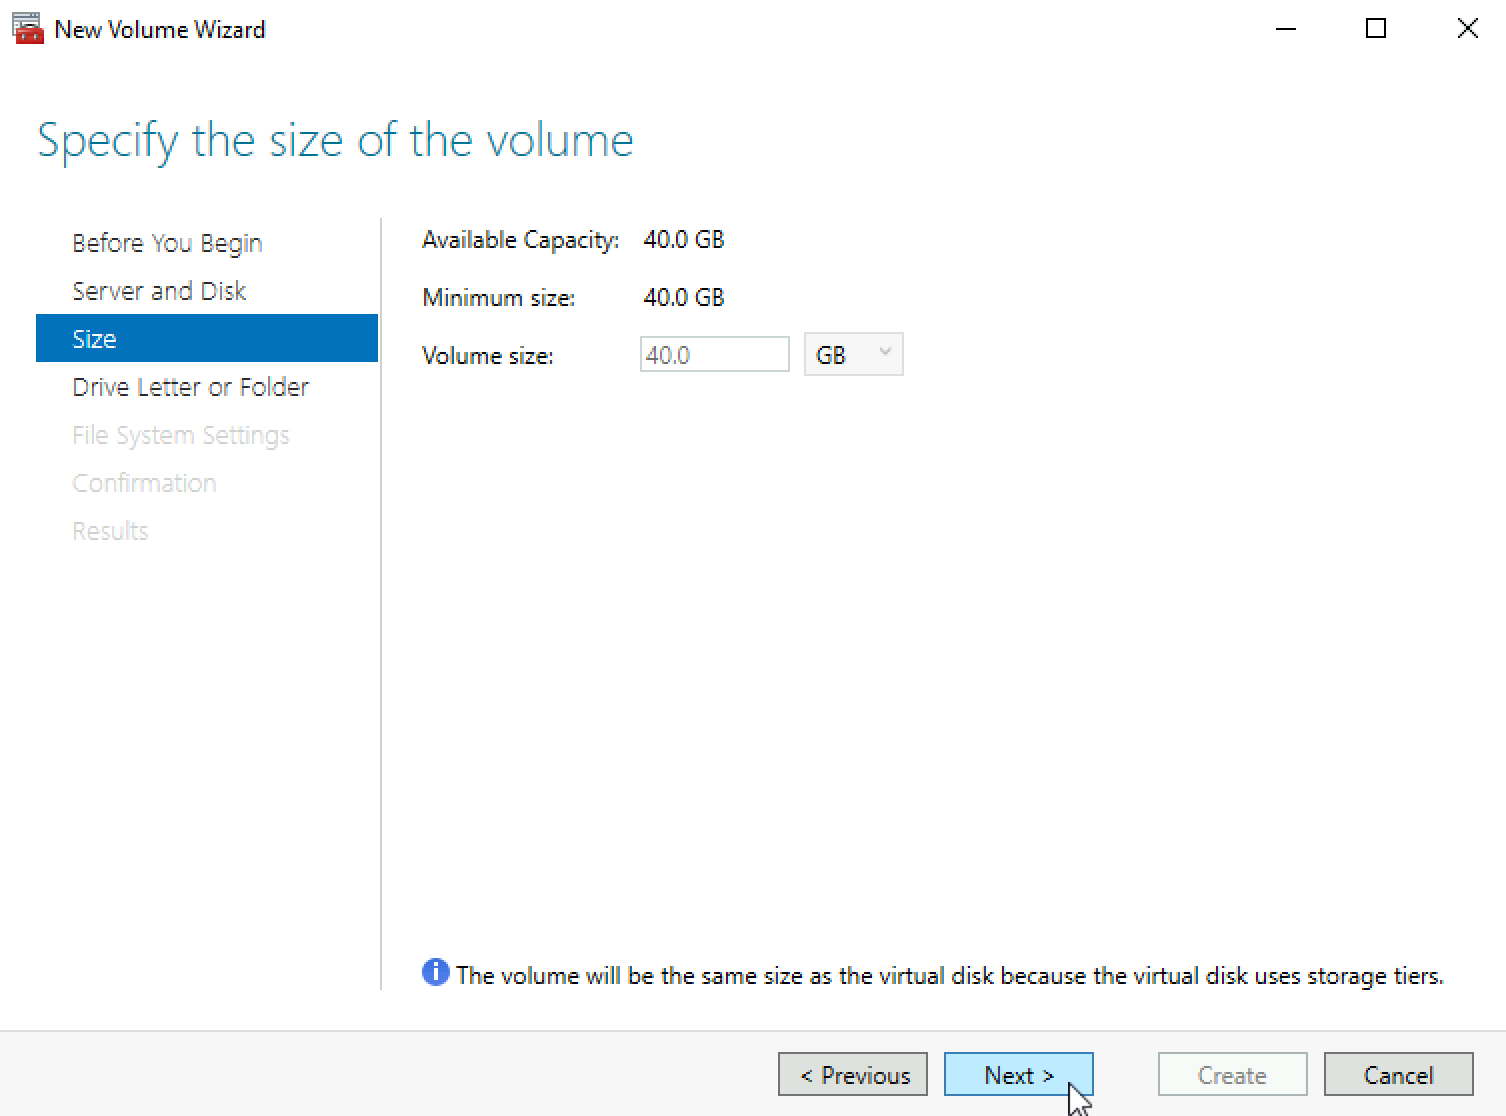
Volume size will stay as is. Next
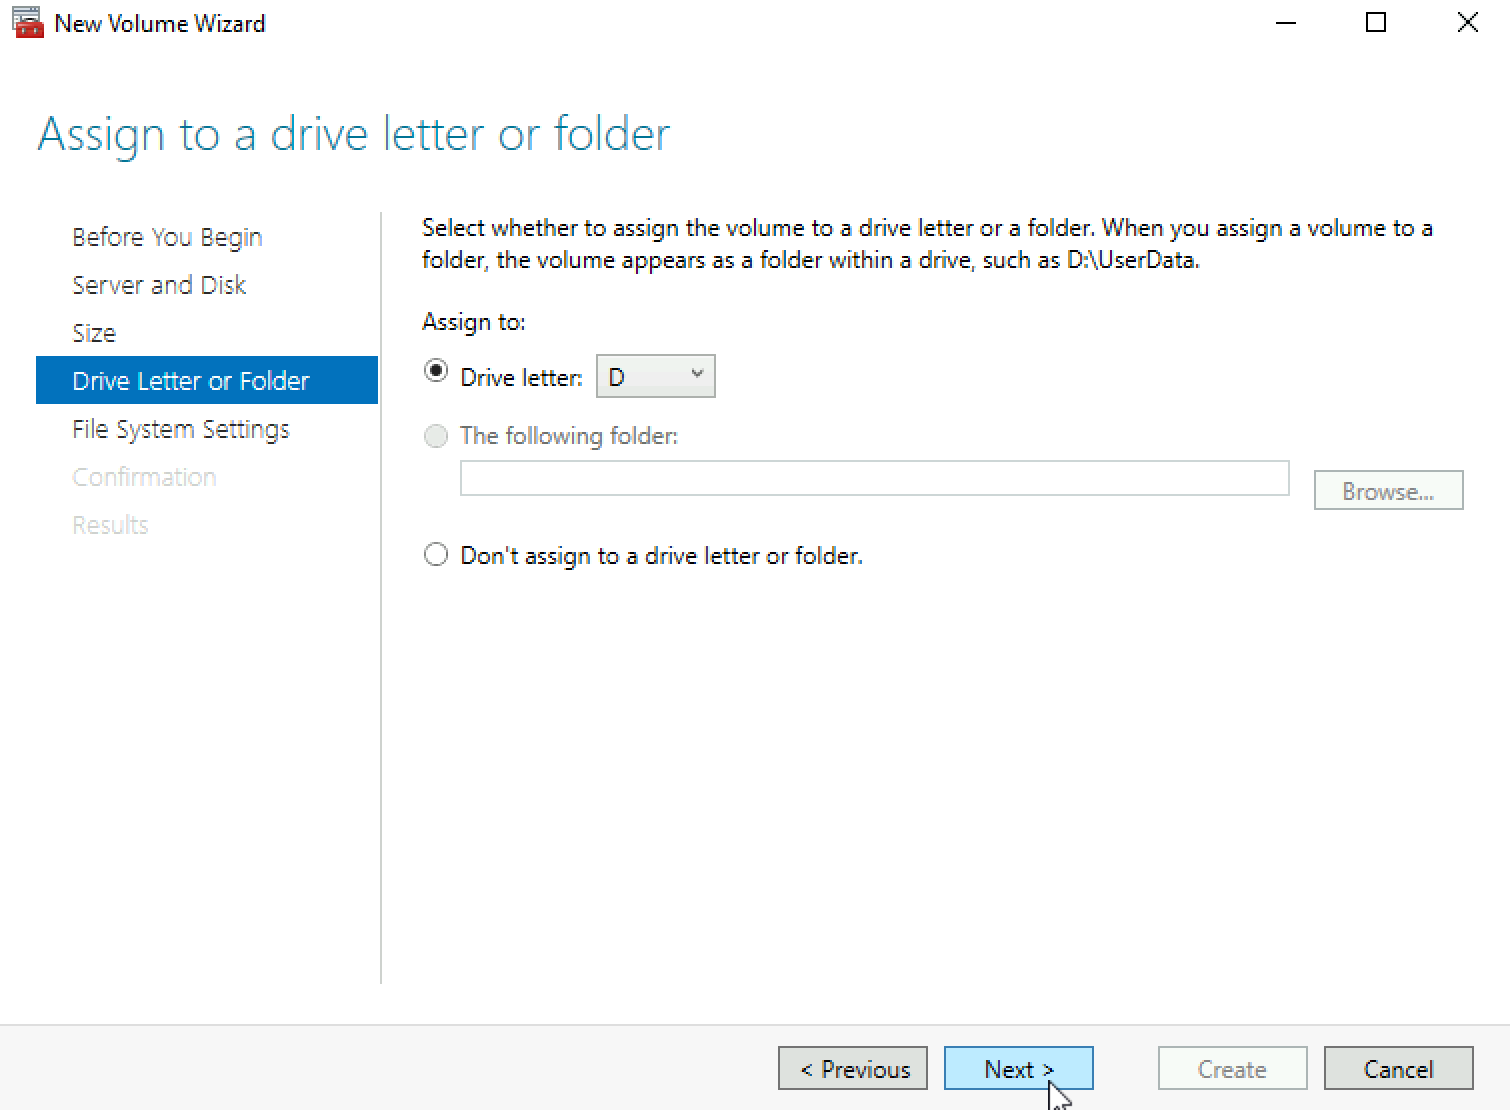
I will let it assign disk drive. Next
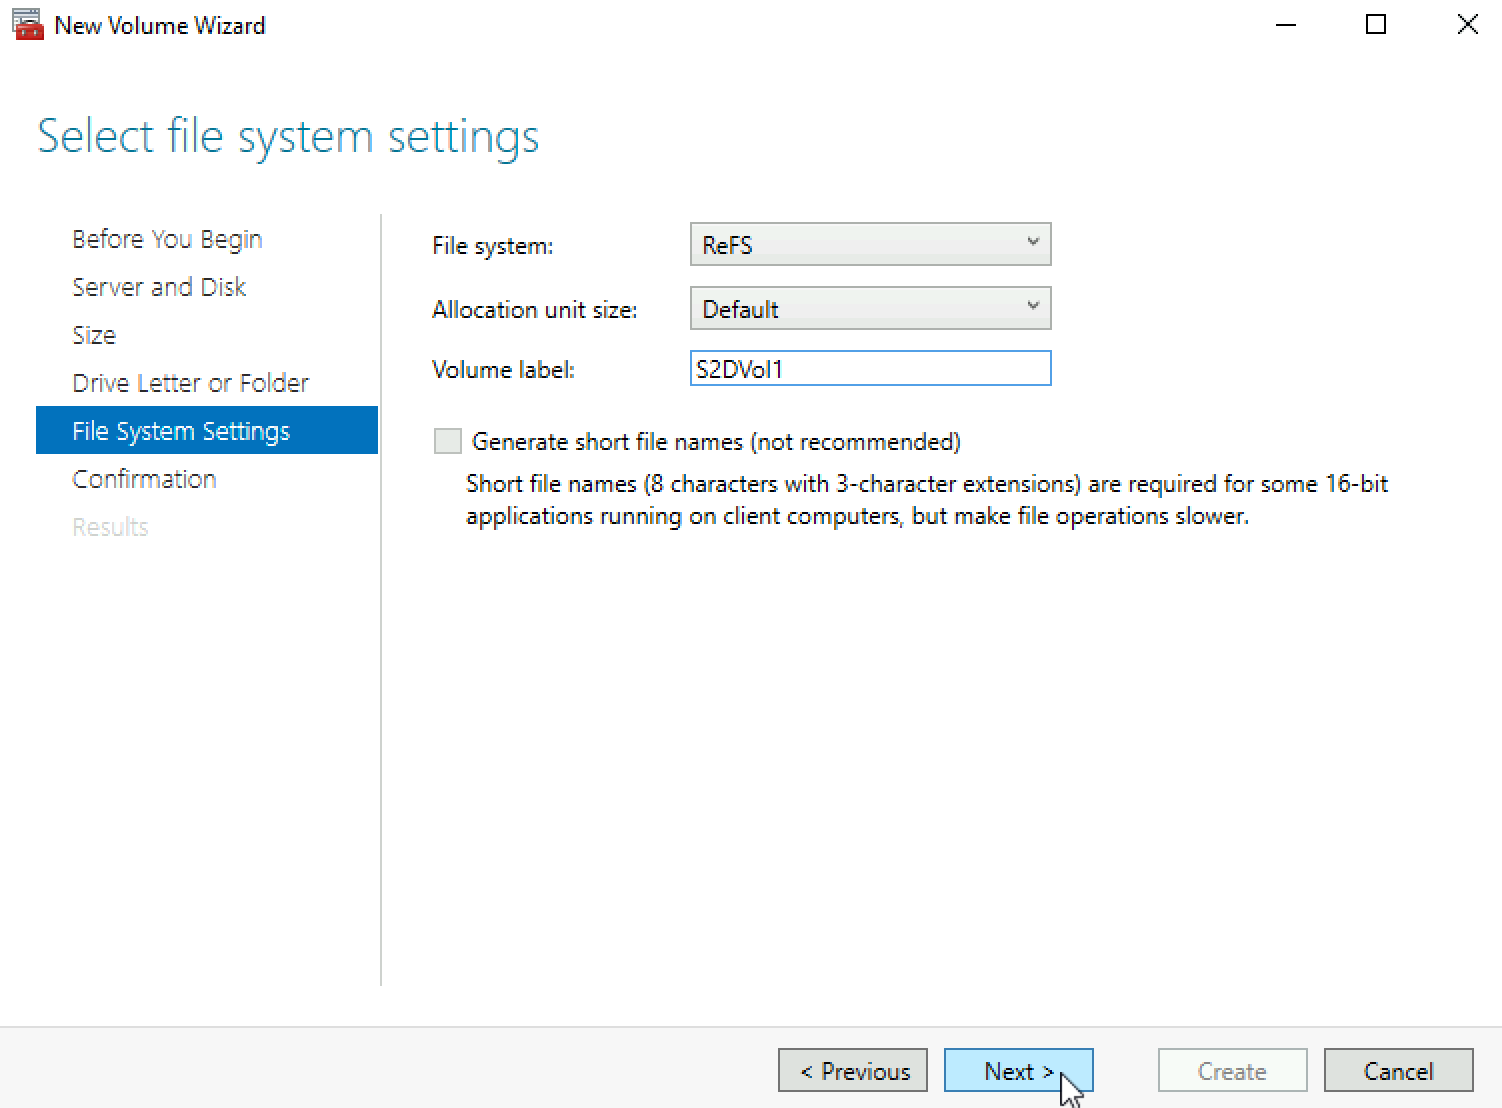
We don’t have many options here, ReFS is file system, Allocation size unit – change if you have special assignment for the volume. Create volume label and click on Next
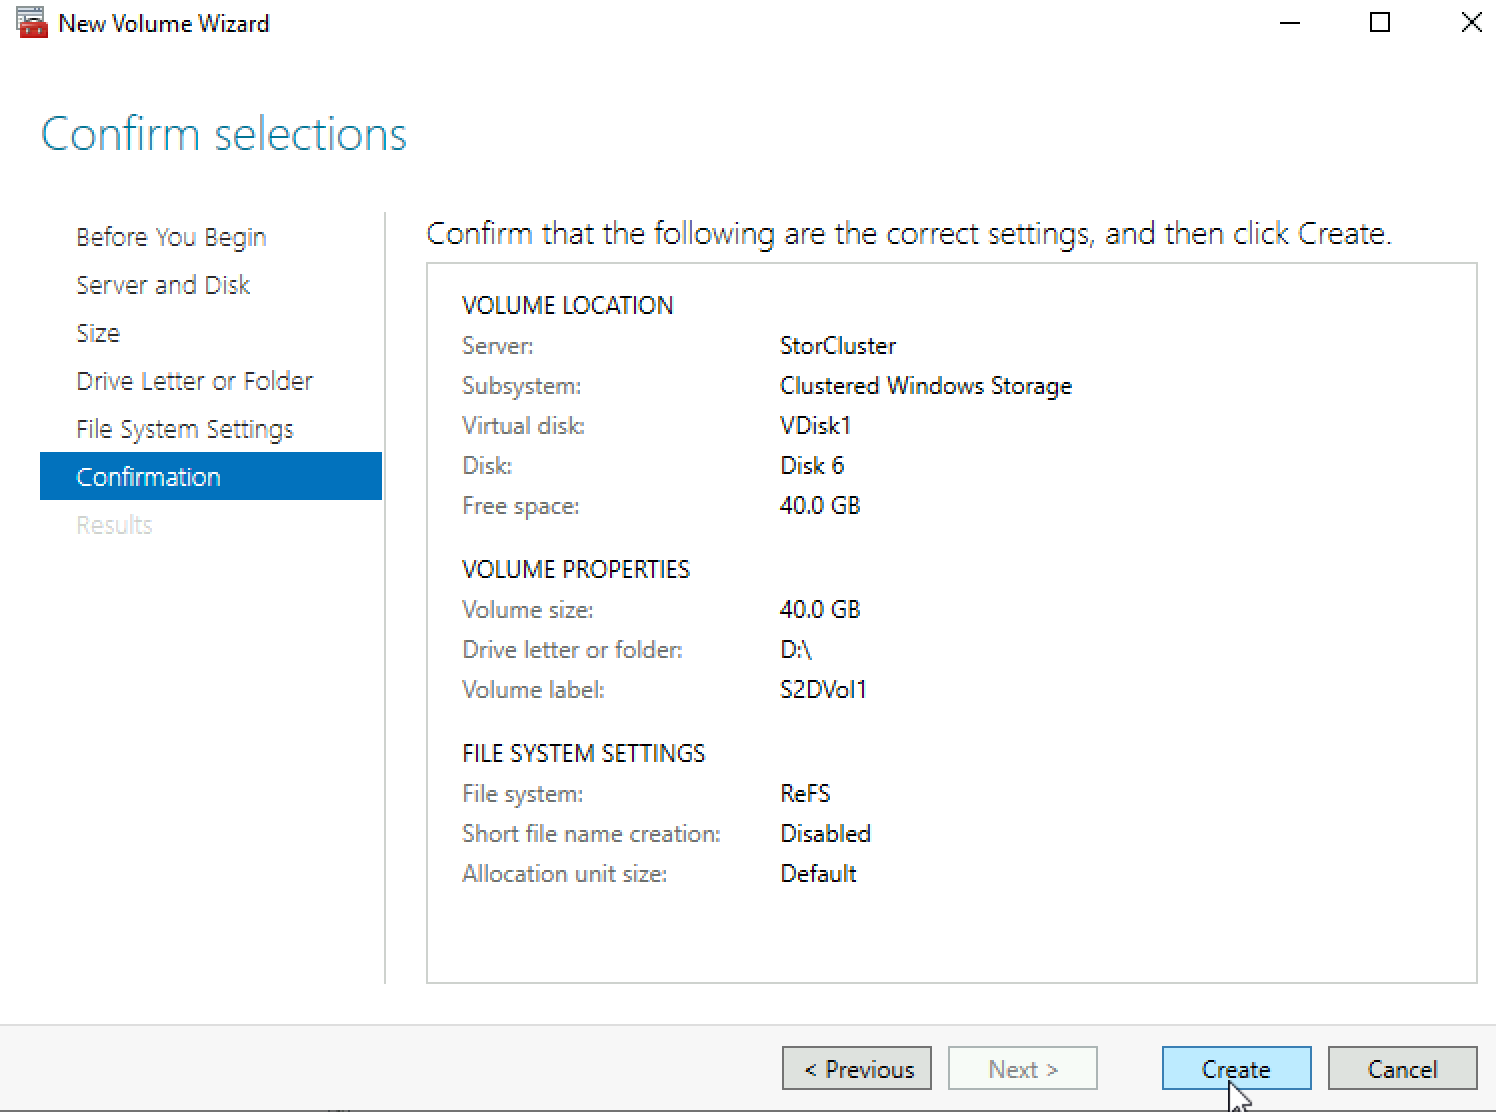
Check your settings and click on Create
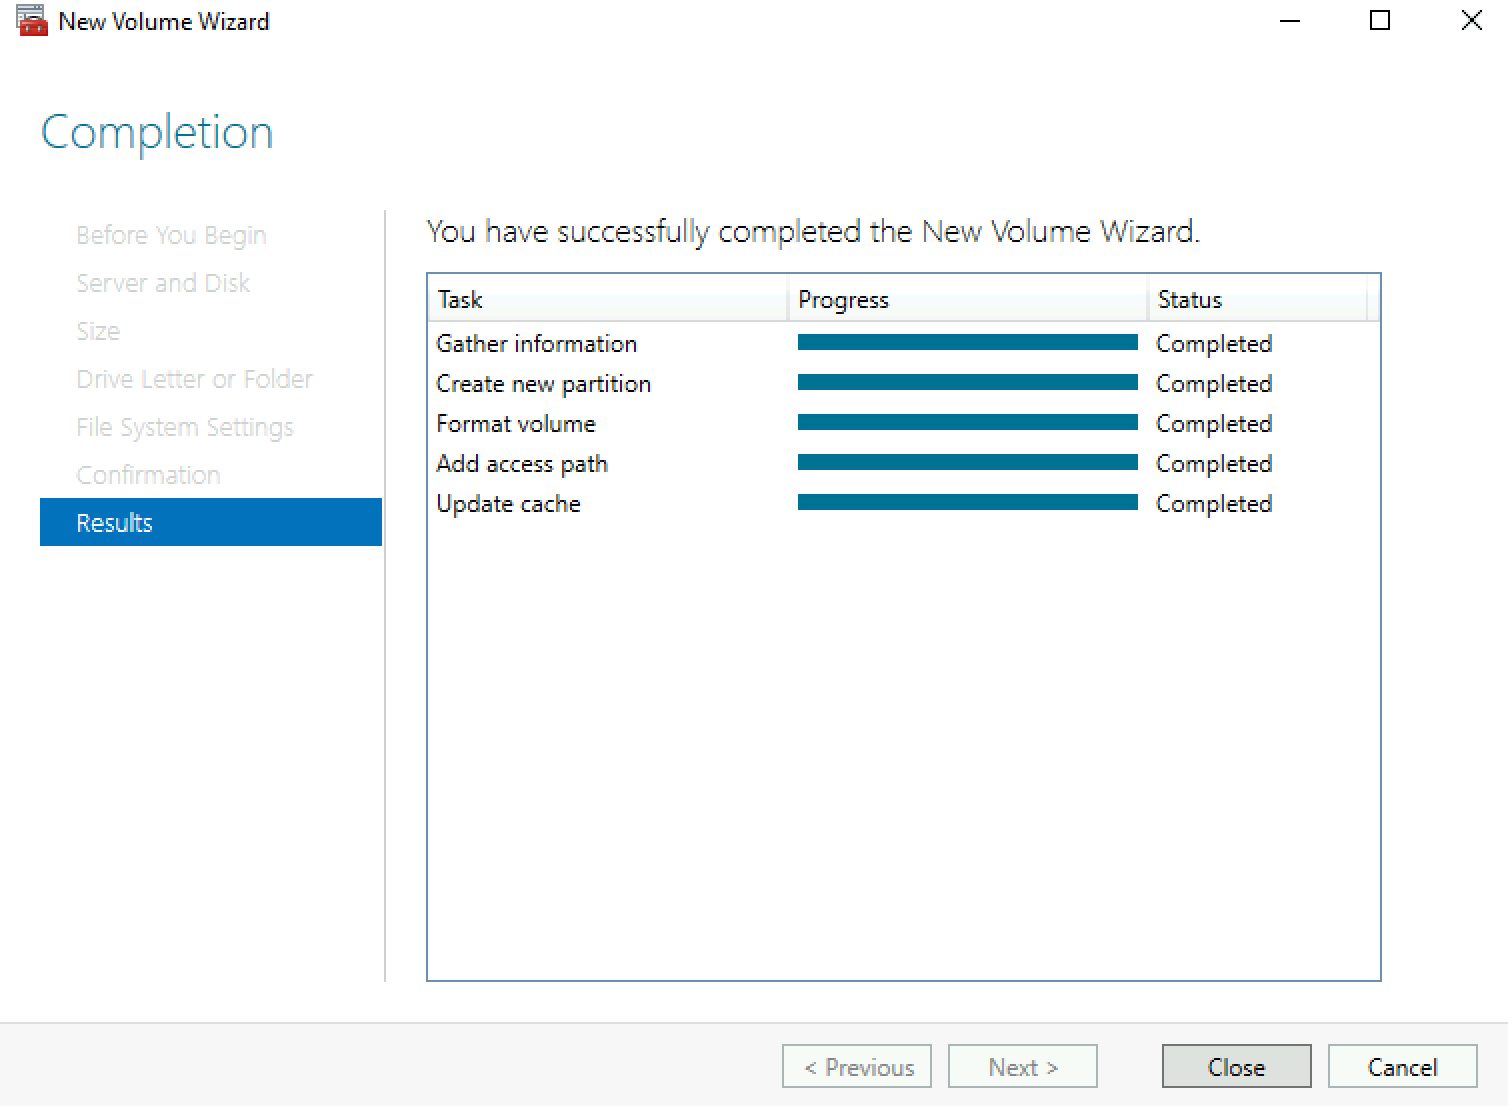
Everything is ok. Close
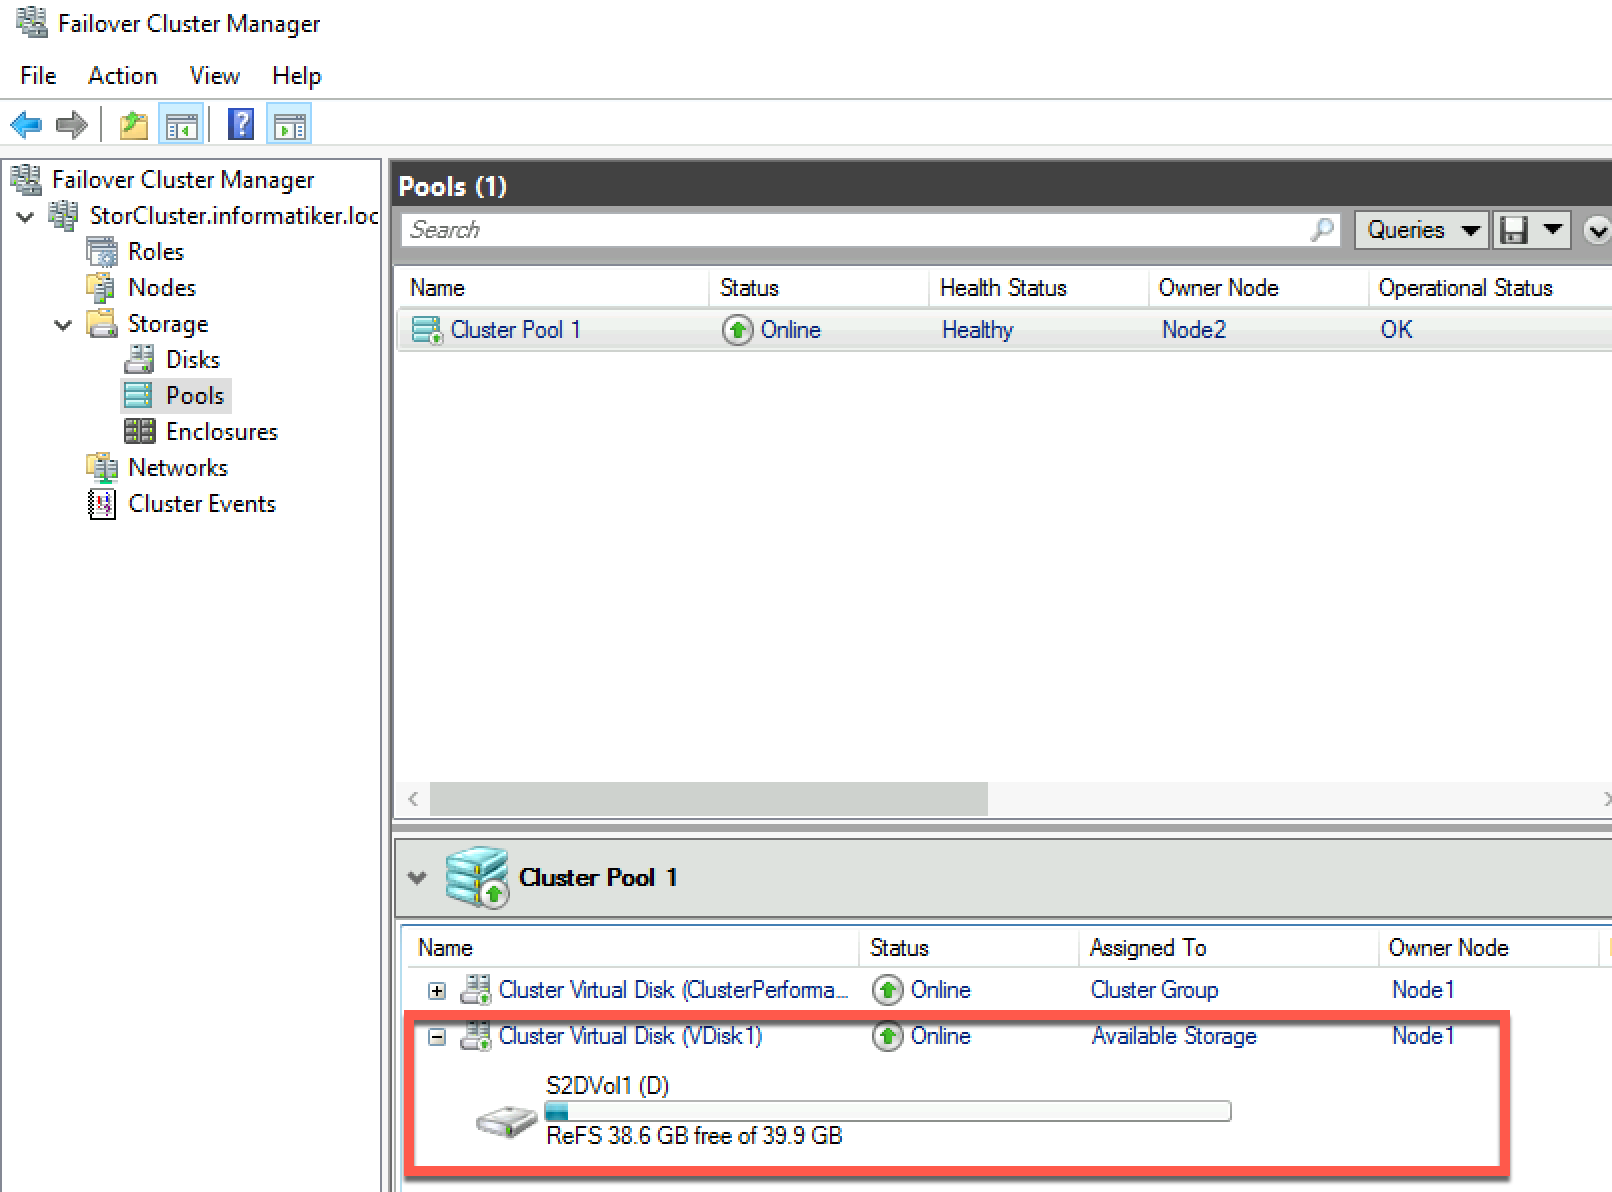
In Failover Cluster Manager under Storage | Pools you can see that new virtual disk VDisk1 is created and Volume named S2DVol1 exists on it.
Quick Testing
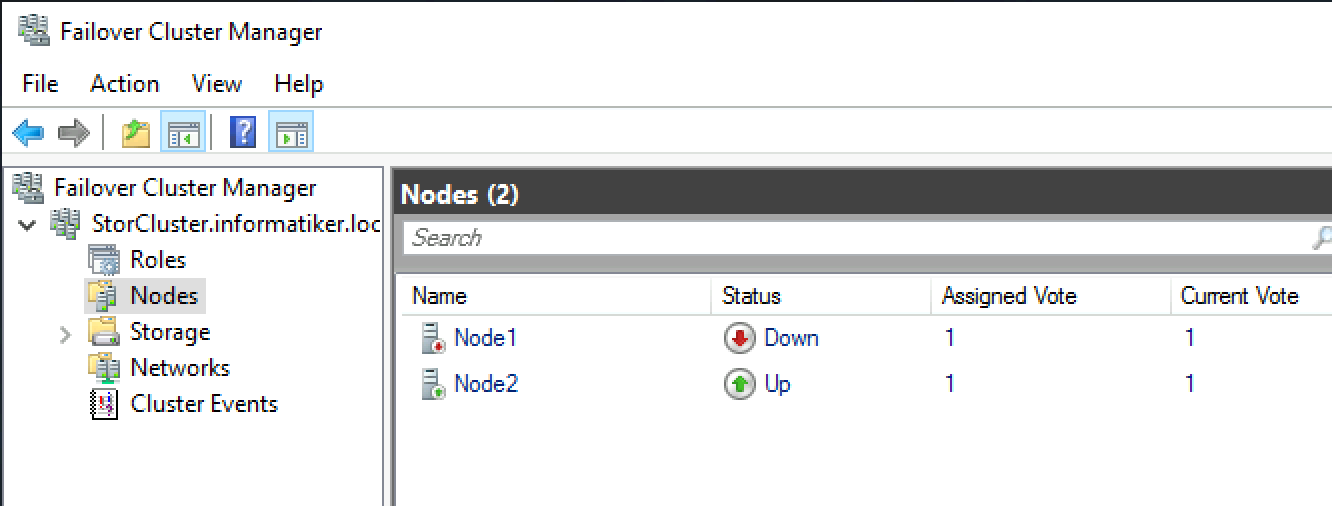
Because I implemented Cluster Witness, I’m able to turn off one cluster node and still have S2D functional.
That is it more or less.
This scenario can be useful in simple scenarios in cases you don’t need top performance.