In first part we made a high overview of the versions and important bits, and we dived into important pieces of installation process, first steps after install, and personalization. In this part I will be covering File Explorer setup and tips, and also System setup.
We will jump right in, and first with one important component that we use everyday – File Explorer.
Again, before we start tow important bits:
Look at this guide as a checklist.
Next important thing – you don’t have to do everything as I did here – this is my best practice guide, and maybe you like some bits of the system set in different way. Feel free to use this as reference and modify system to your needs and workflow.
File Explorer
Open File Explorer
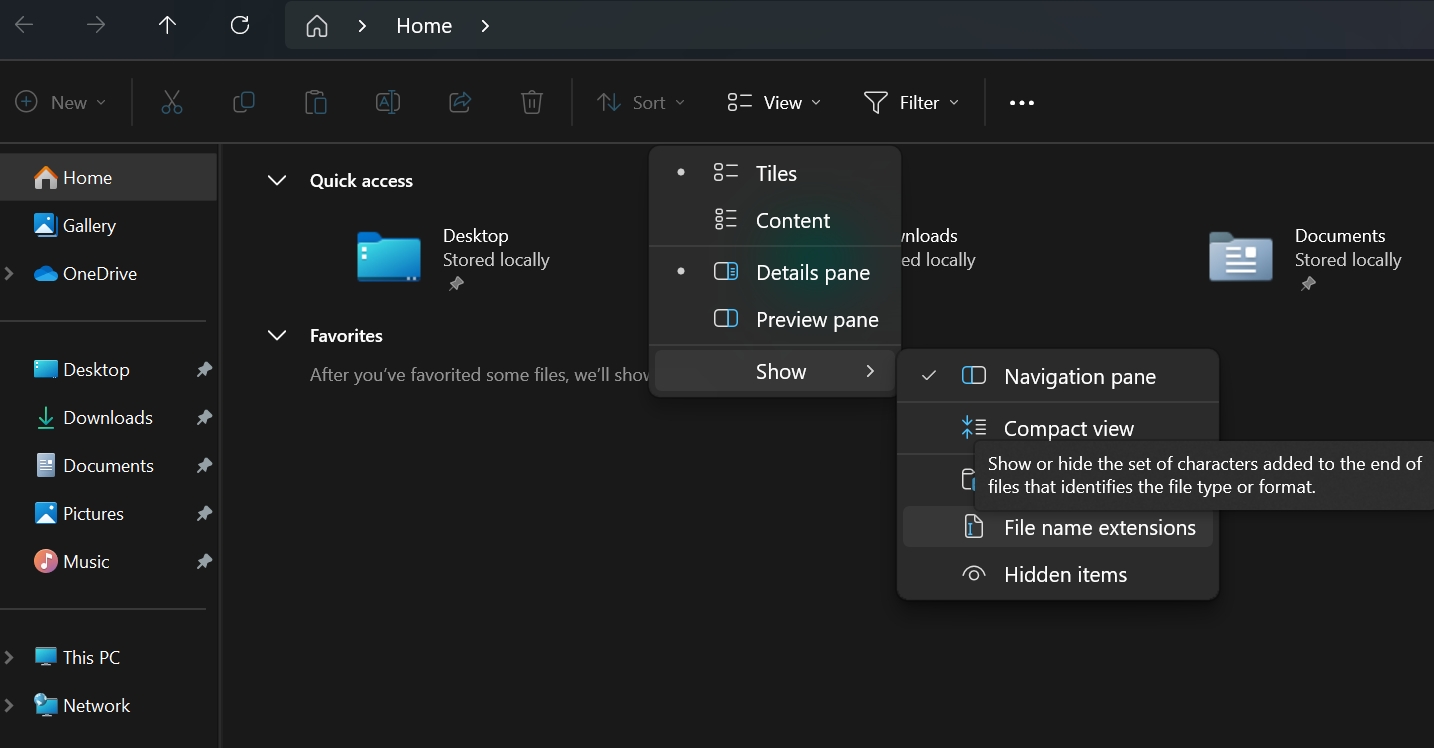
– Click on View | Show | File name extensions
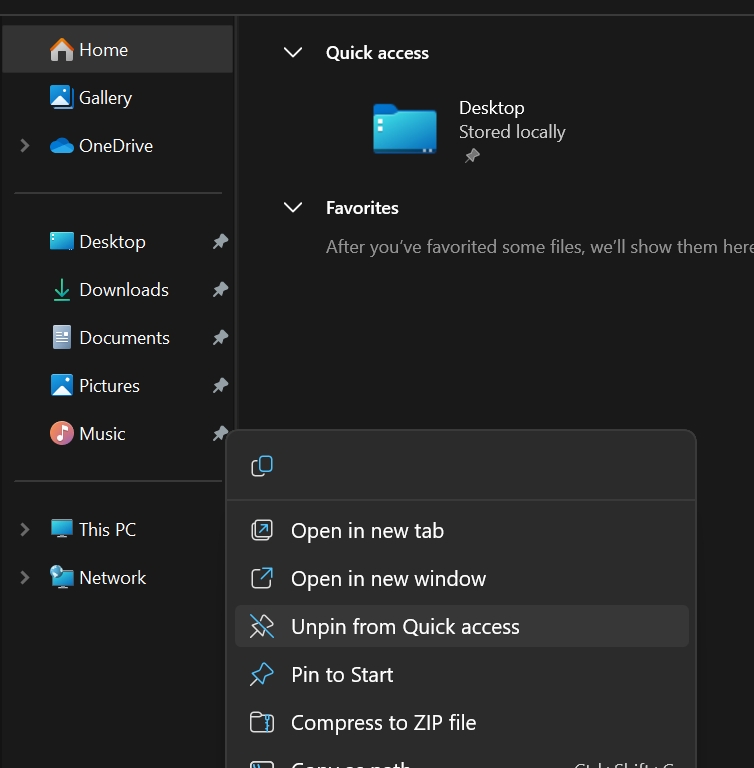
– Unpin folders from quick access you don’t need (Pictures,Music,Video…)
– Click on three dots (end of top bar in File Explorer) | Options | General | Privacy – unclick all
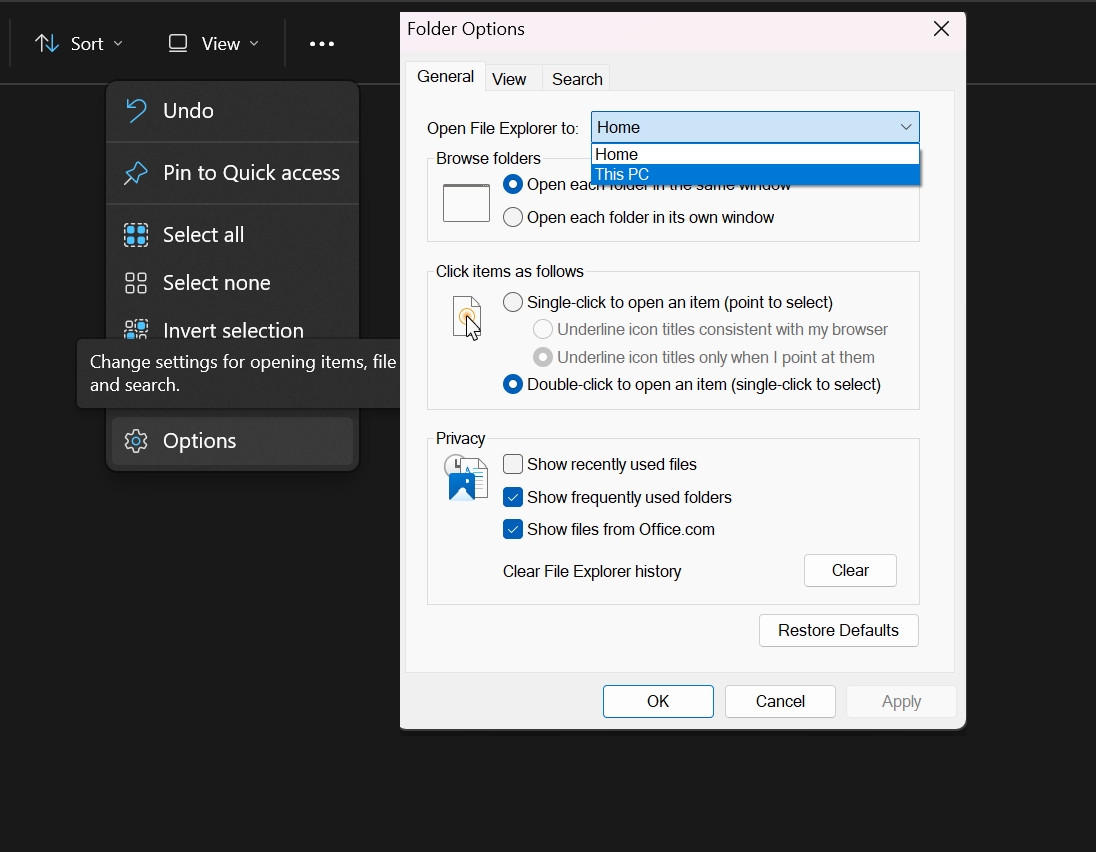
– Click on three dots (end of top bar in File Explorer) | Options | General tab | Open File Explorer to: select This PC (or you can select Home)
– Click on three dots (end of top bar in File Explorer) | Options | View tab | Show hidden files/folders/drives, uncheck Hide protected operating system files (you may also leave checked Hide protected operating system files, one of the reasons is – your desktop will look nicer).

Handy File Explorer Shortcuts
– CTRL + T open new Tab in File Explorer
– CTRL + TAB to switch to next tab, or CTRL+ SHIFT+TAB to switch to previous tab
**Move files between tabs**
To move/drag files between tabs, just select with left click and hold the click on file or folder you wish to move, move it to the tab you wish to transfer it to, when the tab is highlighted and opened, release file/folder you are holding into empty space on new tab. Item will be moved.
**Copy files between tabs**
If you wish to copy file only – not move or drag it – right click on file and hold the right click on file or folder you wish to copy, then again hover over opened tab, when the tab is opened, release right click somewhere in the space and select Copy here
or you can always use classic copy/move/paste…
Ok, these were few tips on File Explorer, we are now moving to System part
System
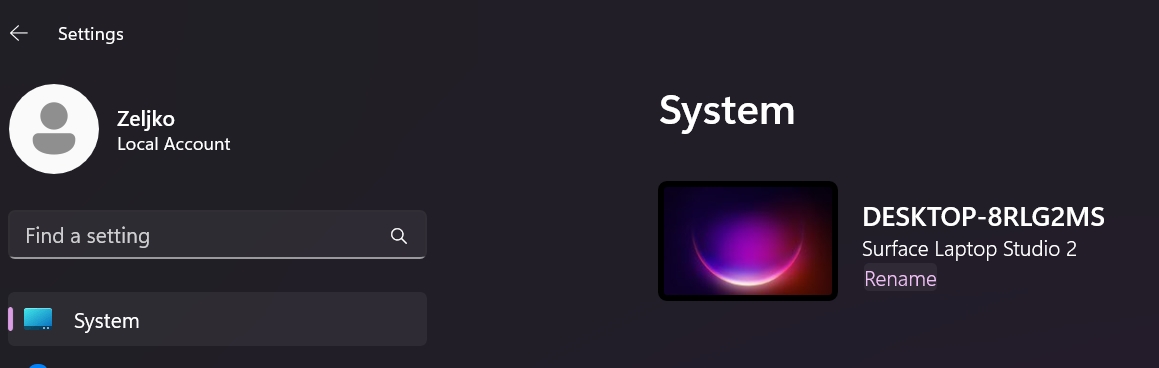
– RENAME PC – Settings – System – top of window – Rename – enter name you would like for your PC – if you can, reboot your PC right away
– Settings – Windows Update – check for, and install updates – this is important. Every second Tuesday in a month new updates arrive (you can skip few days if there is nothing critical, to check if the updates are stable)
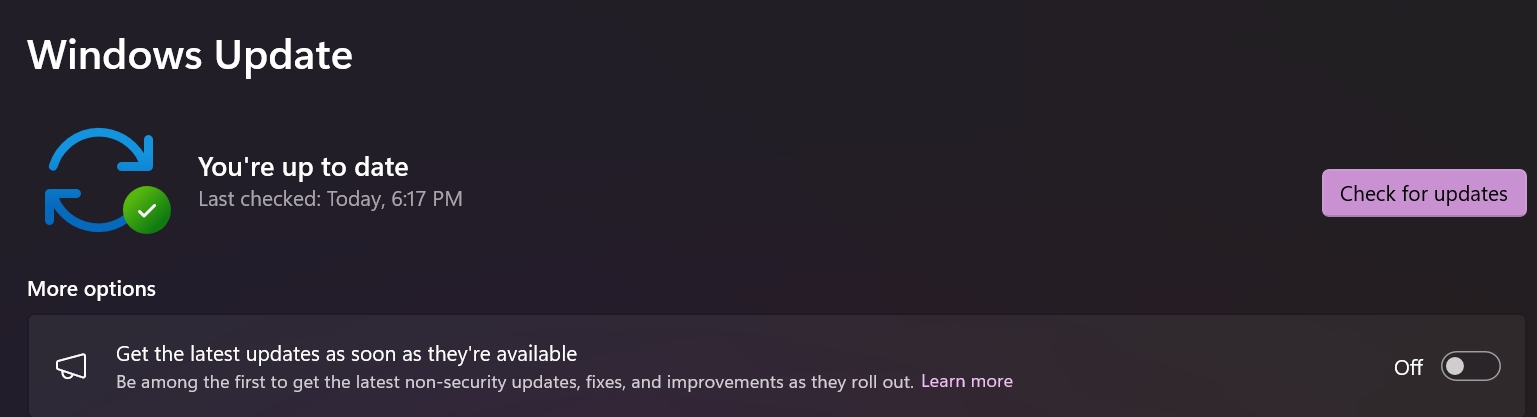
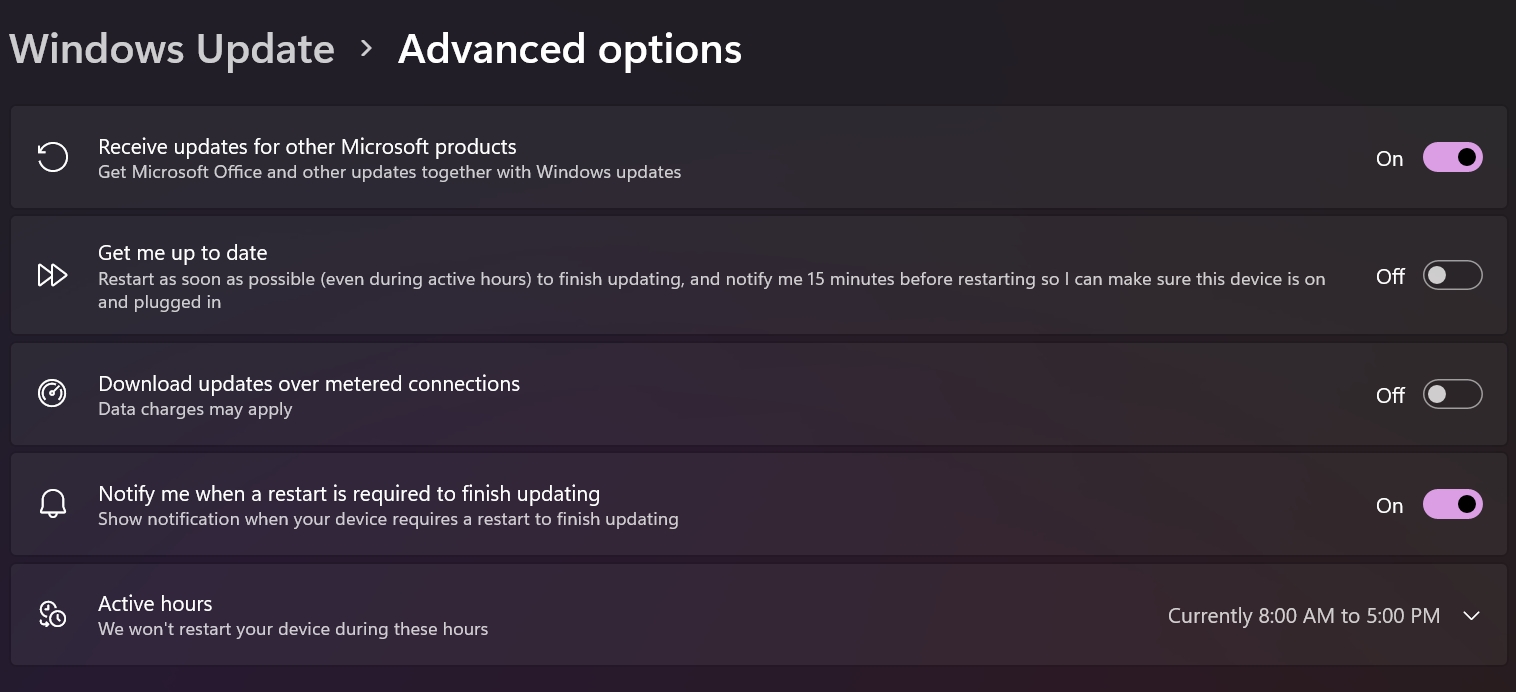
– Settings – Windows Update – Advanced options – turn on Receive updates for other Microsoft products
– Settings – Windows Update – Advanced options – turn on Notify me when a restart is required to finish updating
– Settings – Windows Update – Advanced options – define Active hours to prevent reboots (no universal good practice, you know at which time you need a pc without interruptions).
On topic of updates, I mentioned it already in first part – Install manufacturer app to keep your PC up to date with drivers and firmware (for Lenovo it is Vantage in Microsoft Store). PCs with Intel CPUs, additionaly install Intel Driver and support assistant
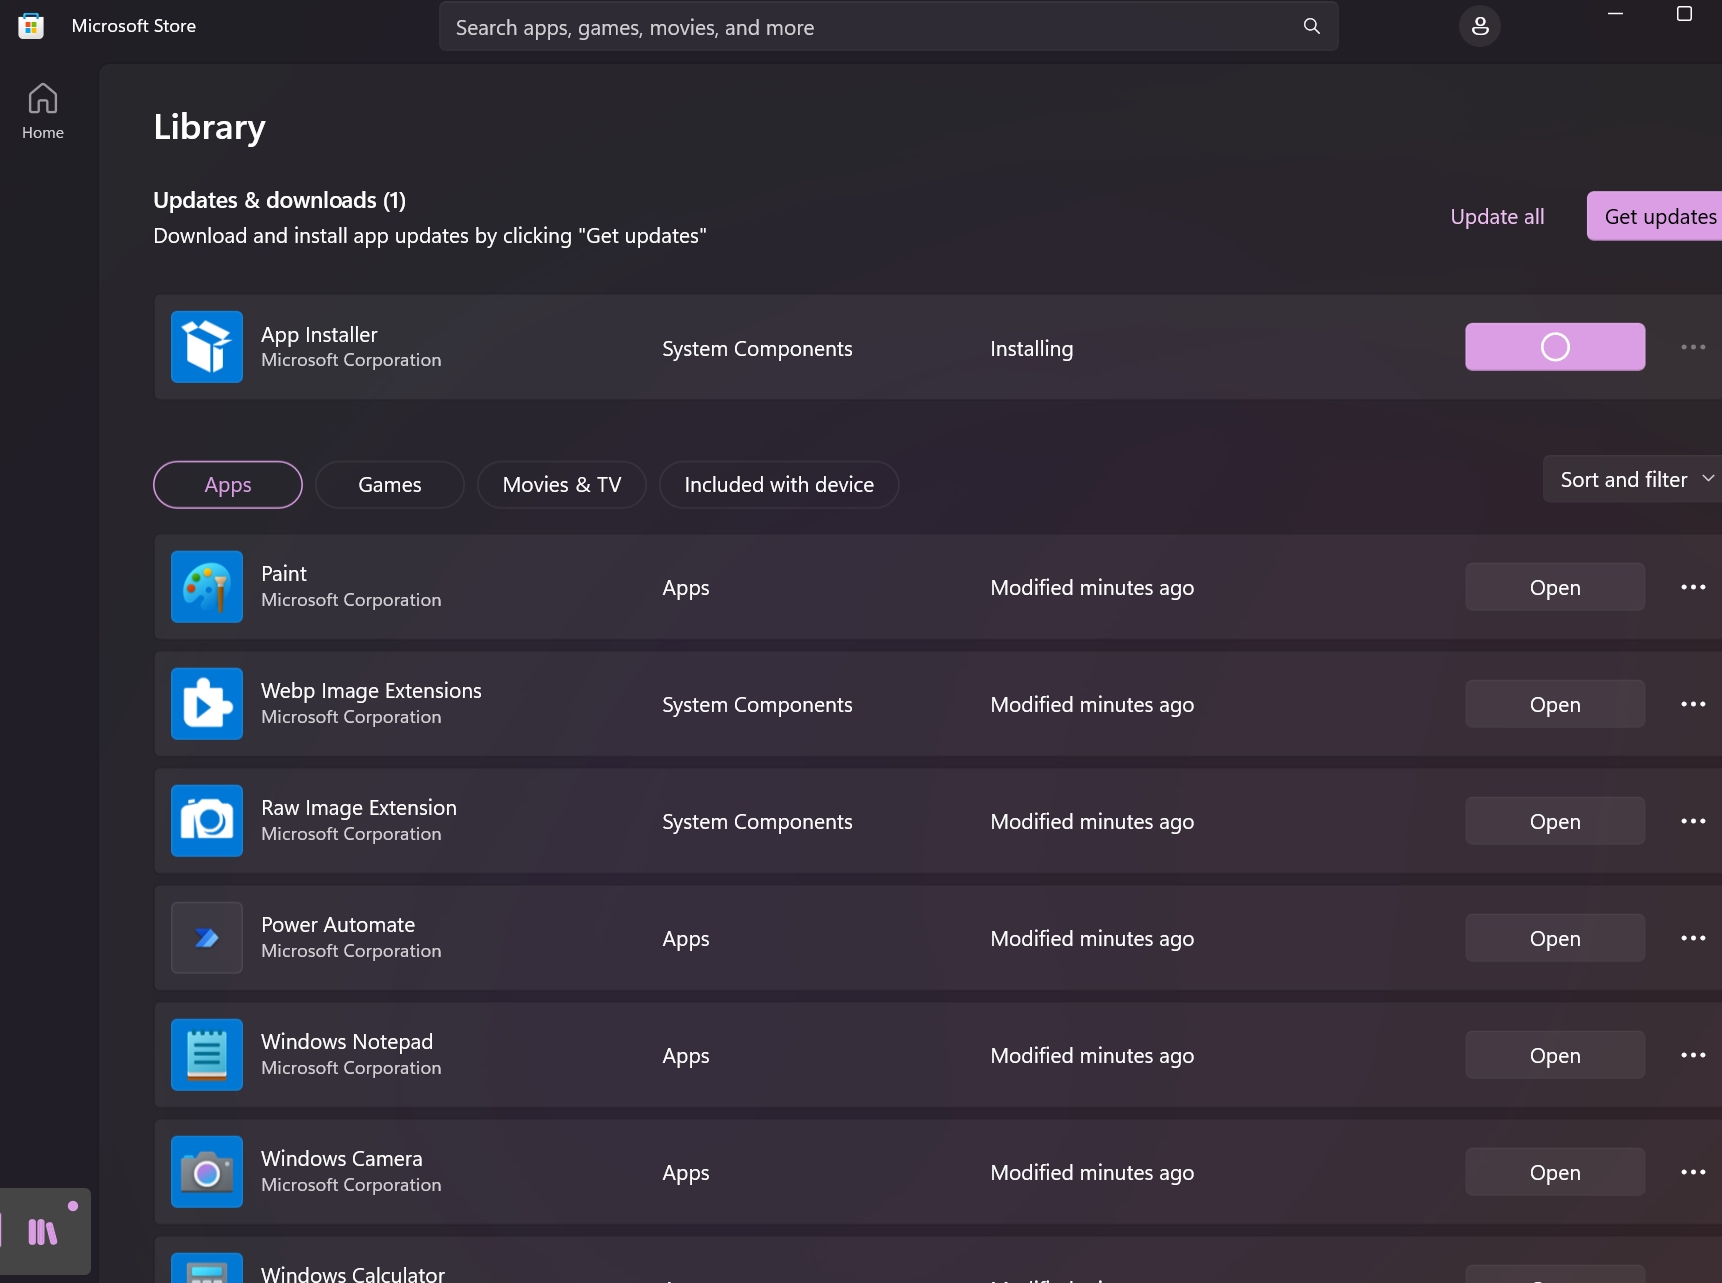
Update Microsoft Store Apps – click on Microsoft Store – Library – click Get updates under Updates & downloads (Before you do this for the first time, after you installed WIndows, be sure to first uninstall all the apps from Start menu that you won’t need. Microsoft Store will pull those apps and update and install them)
We will now quickly jump from modern Settings to old Control Panel
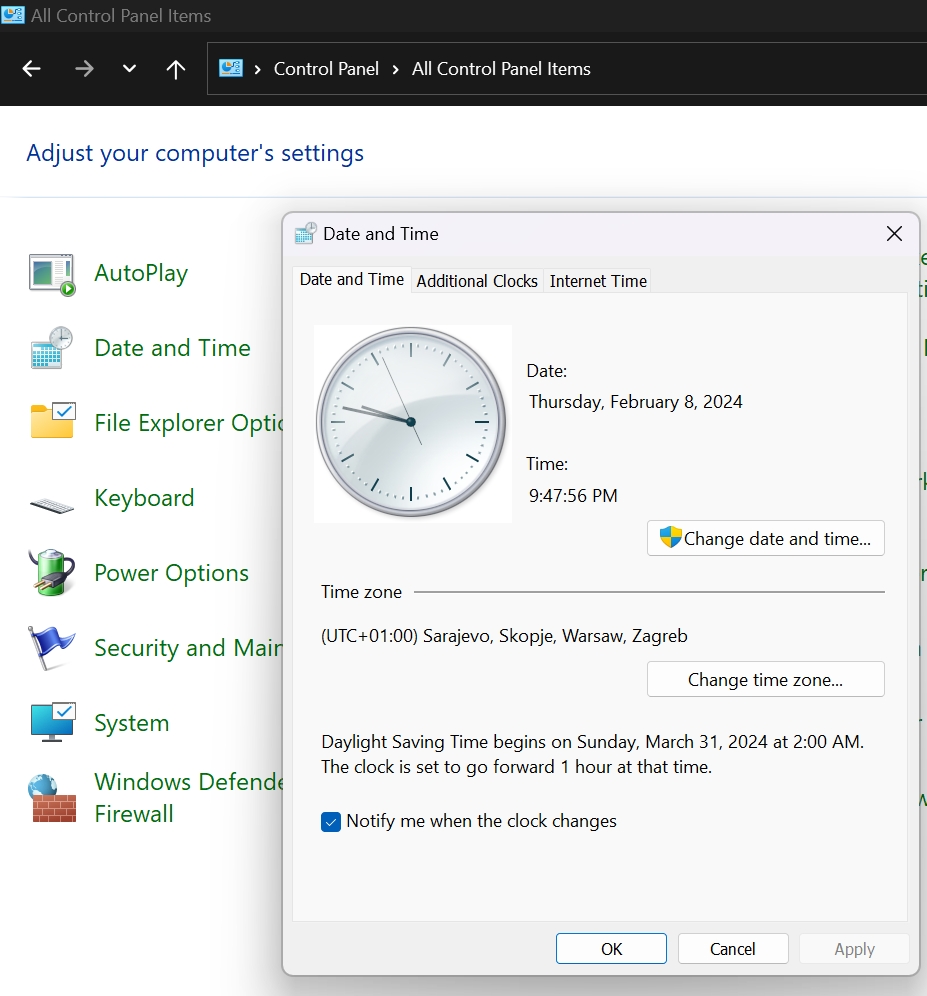
– Control Panel – Date/Time – Time zone is often in Pacific Time, change to your local time zone
– Control Panel – Region – Formats – Format “Match Windows display language” – I use English as display language, but would love Croatian for Format – because date and time and other formats are different
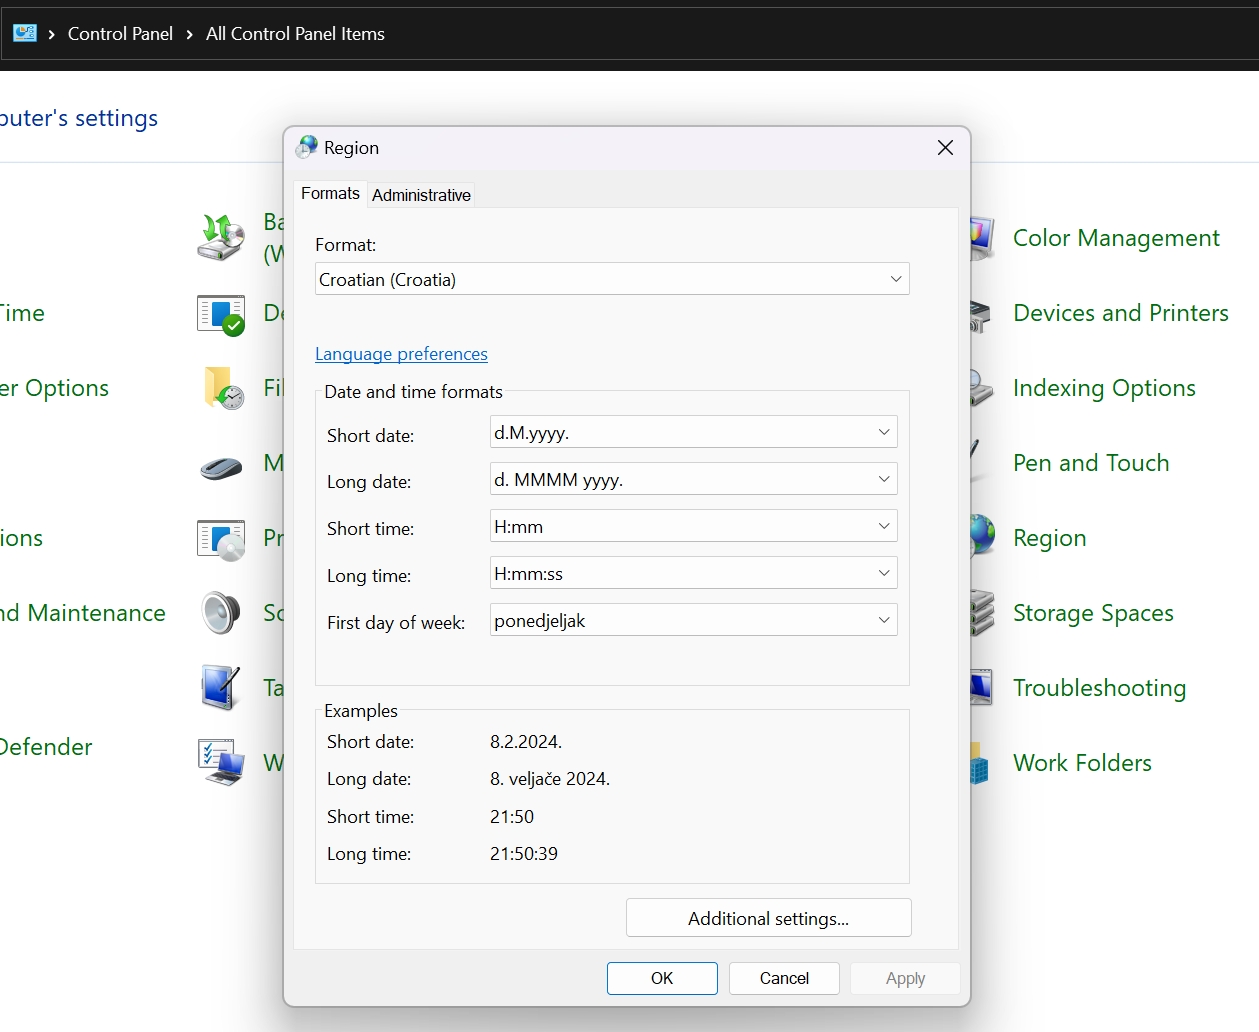
– Control Panel – Region – Administrative – Change system locale – set your language if differs from current settings
And now back to Settings
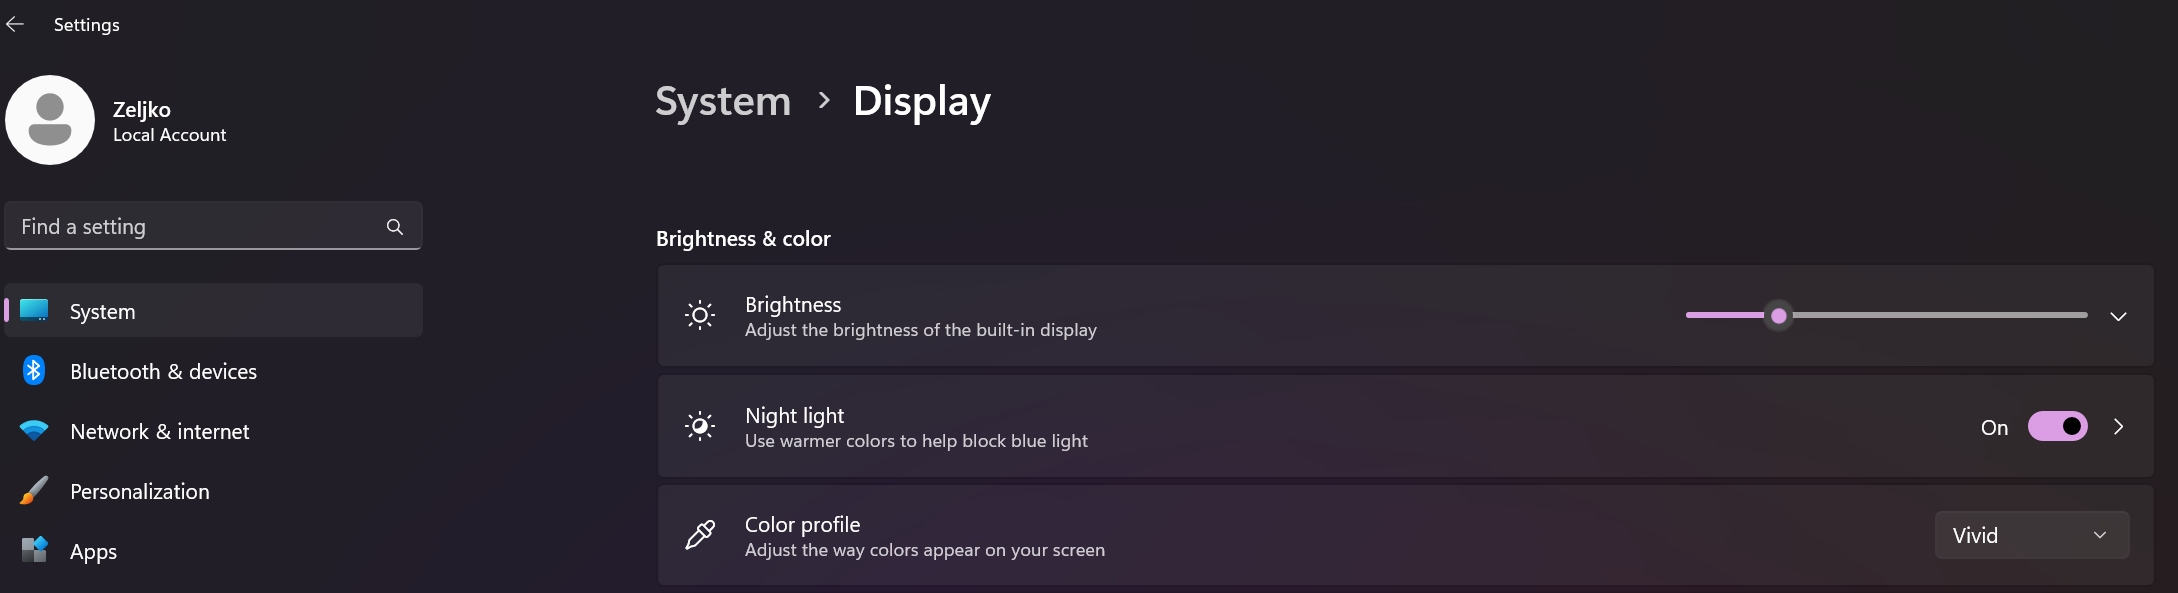
– Settings – System – Display – Brightness & color – Night light – on
– Settings – System – Display – Scale & layout – Scale – select size of text, apps, icons – if 4K large display I set for myself 150 to 200% (this is very subjective, scale to your needs)
– Settings – System – Display – Scale & layout – Display resolution – set something else if you don’t wish to use native.
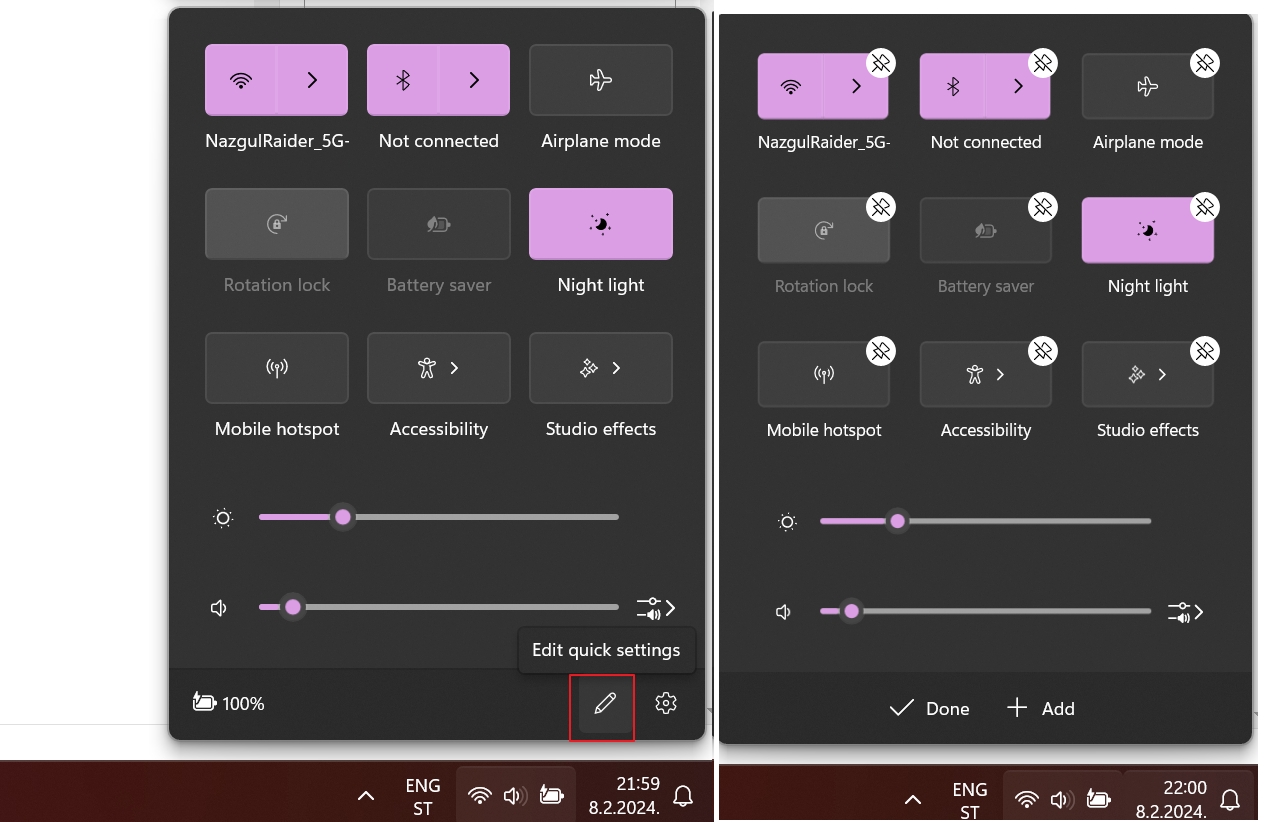
– Taskbar area – area with network and volume icons – if you click on them you get Quick Settings interface which contains network, accesibility, volume, brihtness settings – if you click on little pen at the right bottom of the Quick access area you can pin/unpin settings you need here.
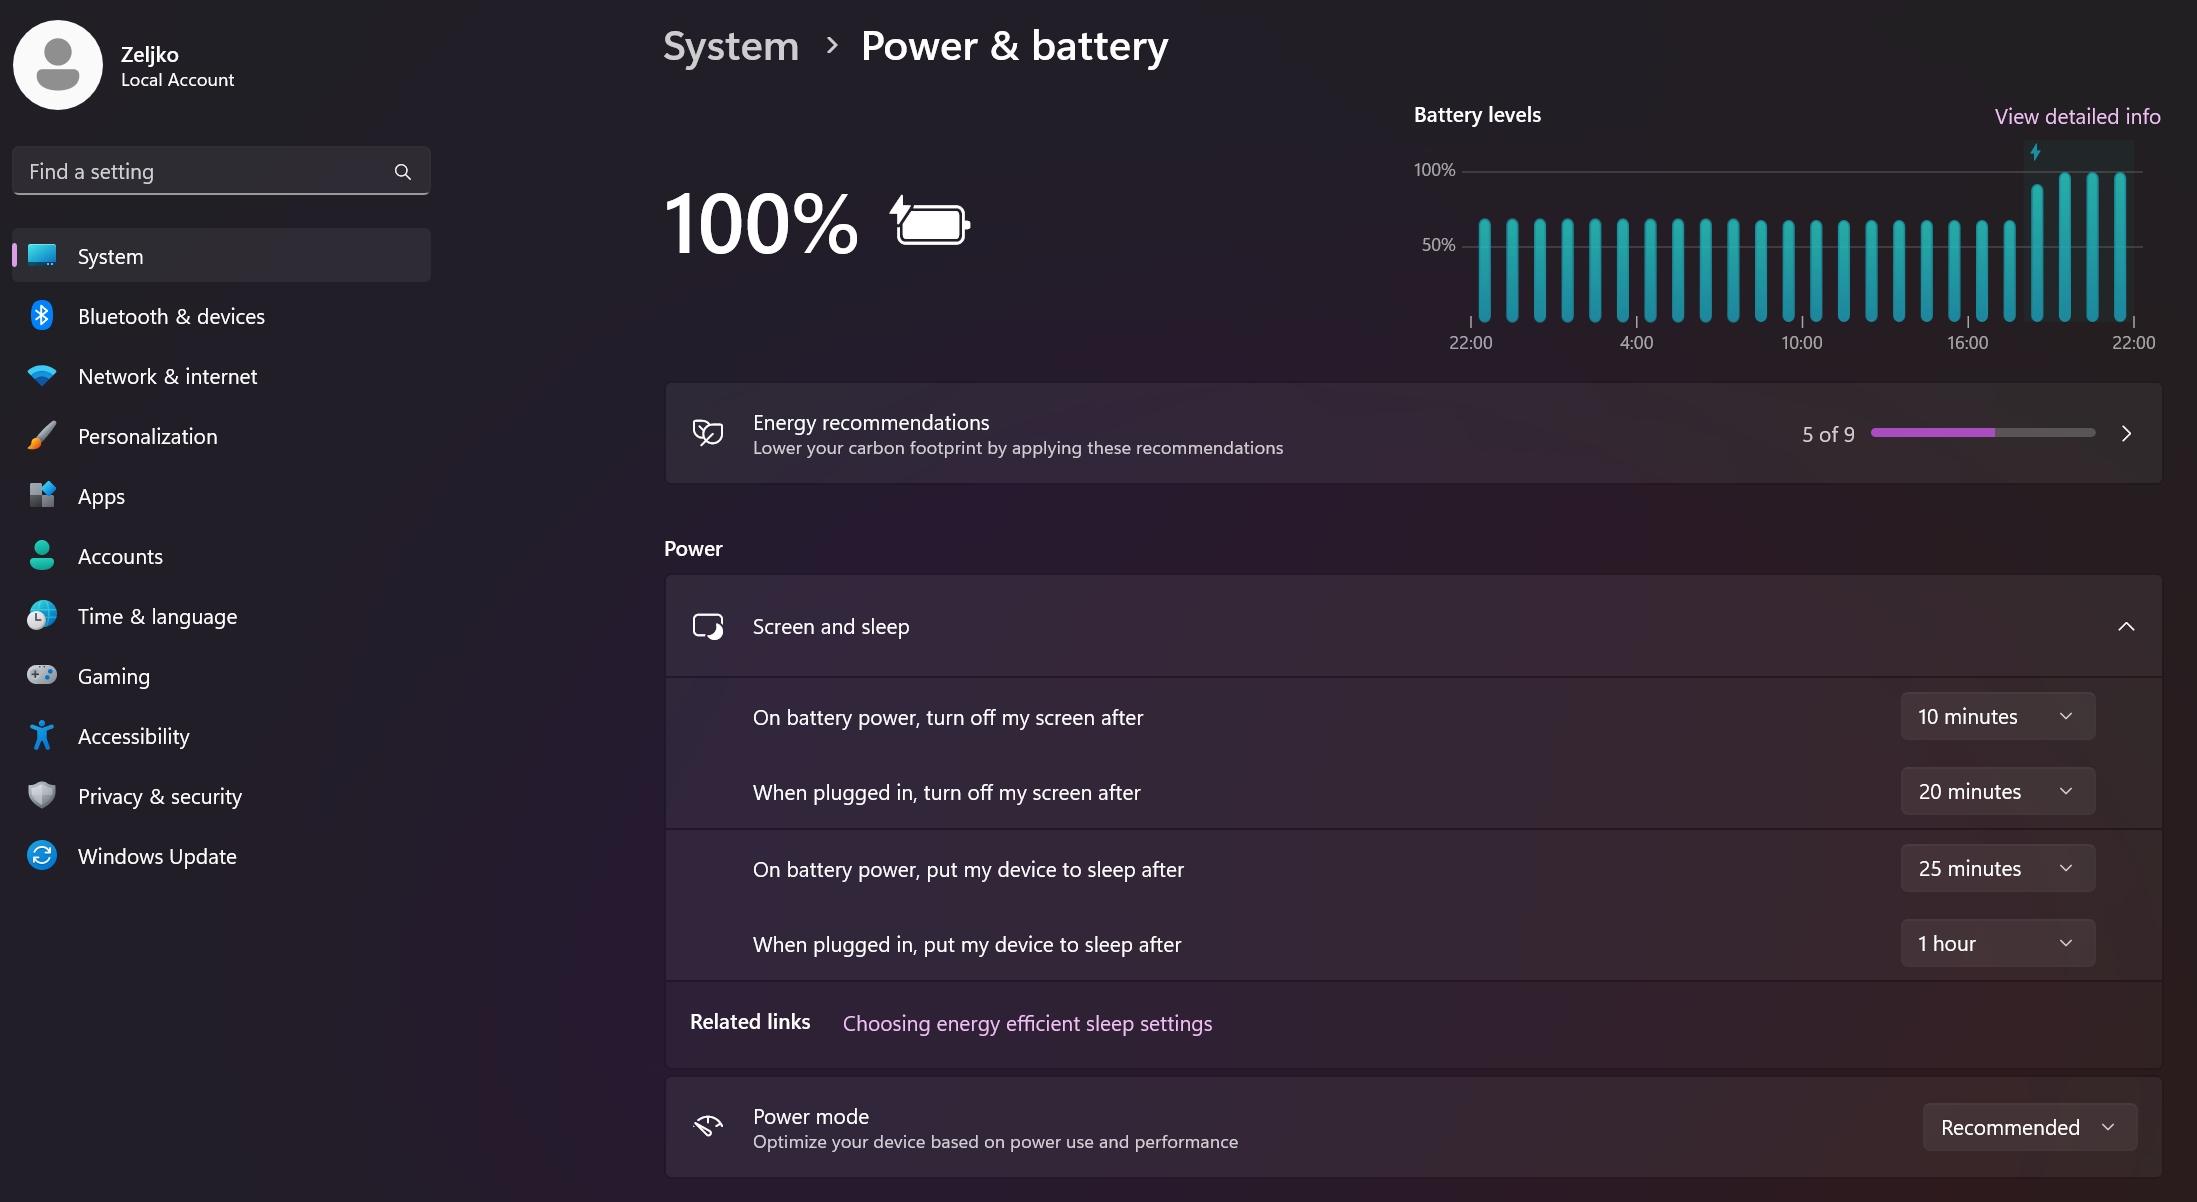
– Settings – System – Power & battery – depending on machine under Screen & sleep I set shorter or longer values. Also under Power Mode depending on machine purpose I select Performance or Recommended/Balanced mode
** Power options should be also checked in Control Panel**
– Control Panel – Power Options – only Balanced power plan is displayed in new installs, You are maybe missing some piece of software from laptop/desktop manufacturer taht will enable other Power Options. If you have everything installed, and Power modes from Settings don’t work for you, you can try running Command Prompt (as admin) and type in:
**powercfg /s SCHEME_MIN**
You’ll get High performance Power plan back
Here are commands to run to restore other power plans
Power Saver:
powercfg -duplicatescheme a1841308-3541-4fab-bc81-f71556f20b4a
Ok, that is it for second part, we are again too long with text, so we will continue in next part
Windows Configuration / Tips and Tricks – Part 1
Windows Configuration / Tips and Tricks – Part 2
Windows Configuration / Tips and Tricks – Part 3
Windows Configuration / Tips and Tricks – Part 4
Windows Configuration / Tips and Tricks – Part 5
Windows Configuration / Tips and Tricks – Part 6