We will look at the Desktops, Desktop organizing, File History and Clipboard settings/tips and tricks in this part.
Let’s see some tricks for Windows 11 in parts I mentioned above.
Task View
I leave it on the Taskbar, it can also be opened with Winkey + Tab. You can change between windows by pressing right/left arrows or open a new Desktop. Desktop feature I will cover separately – because after years of using this feature on Linux and MacOS, this is huge for me.
Snap
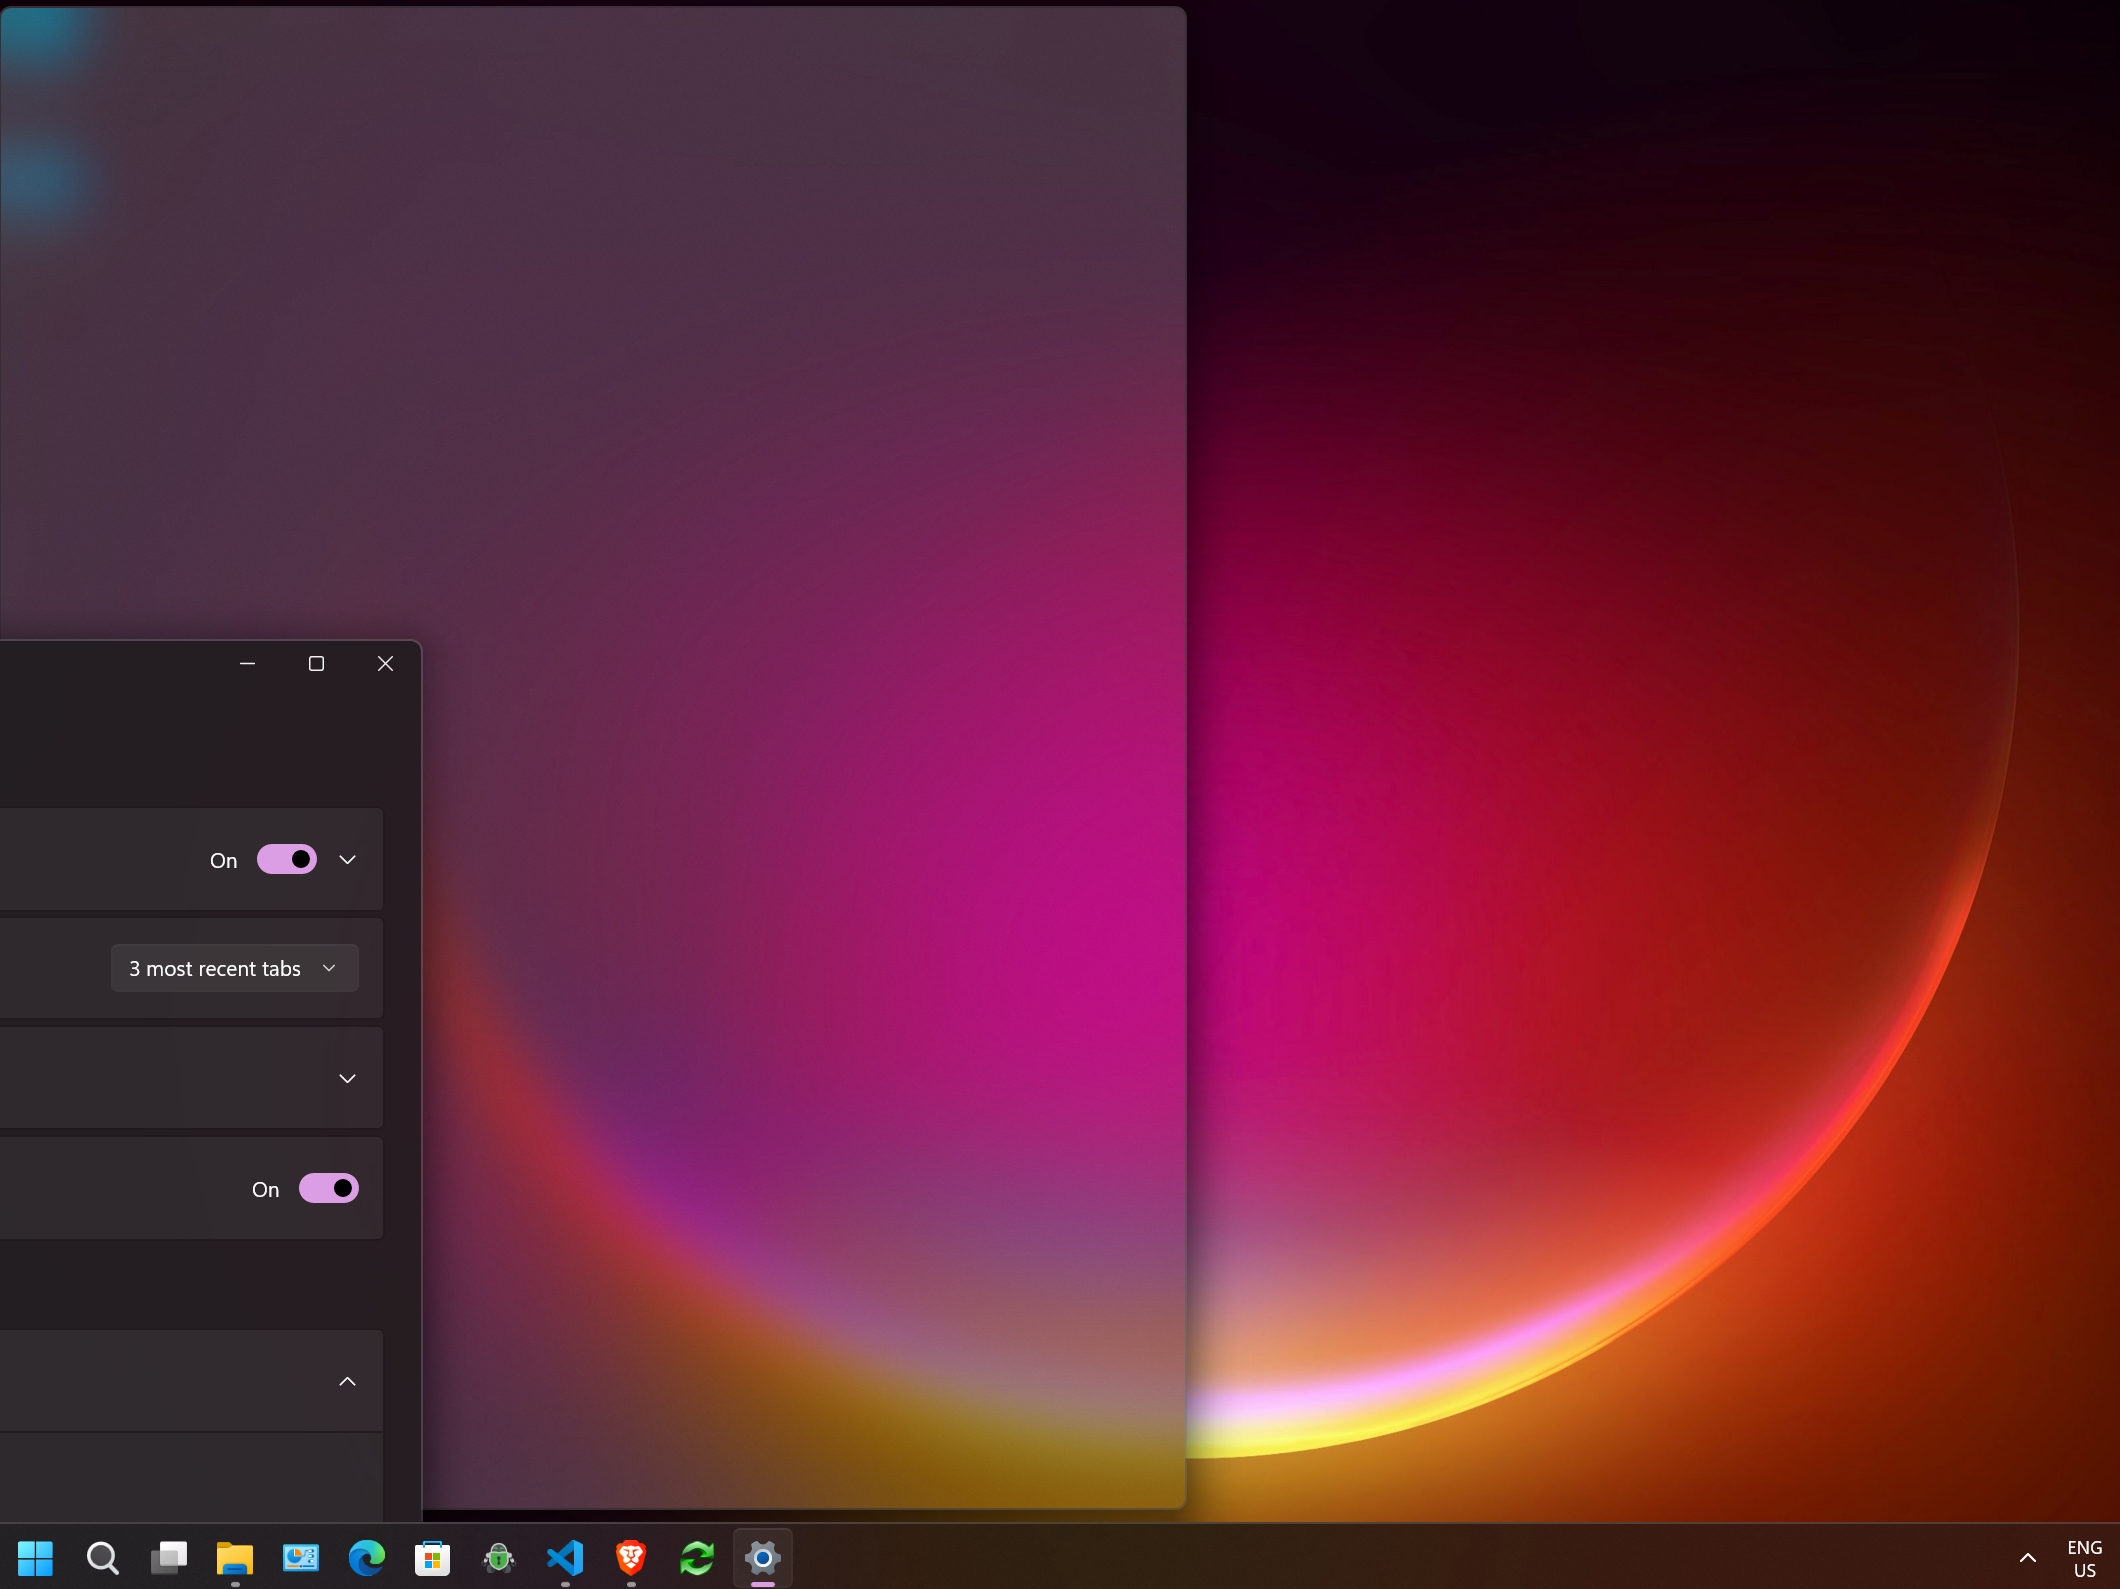
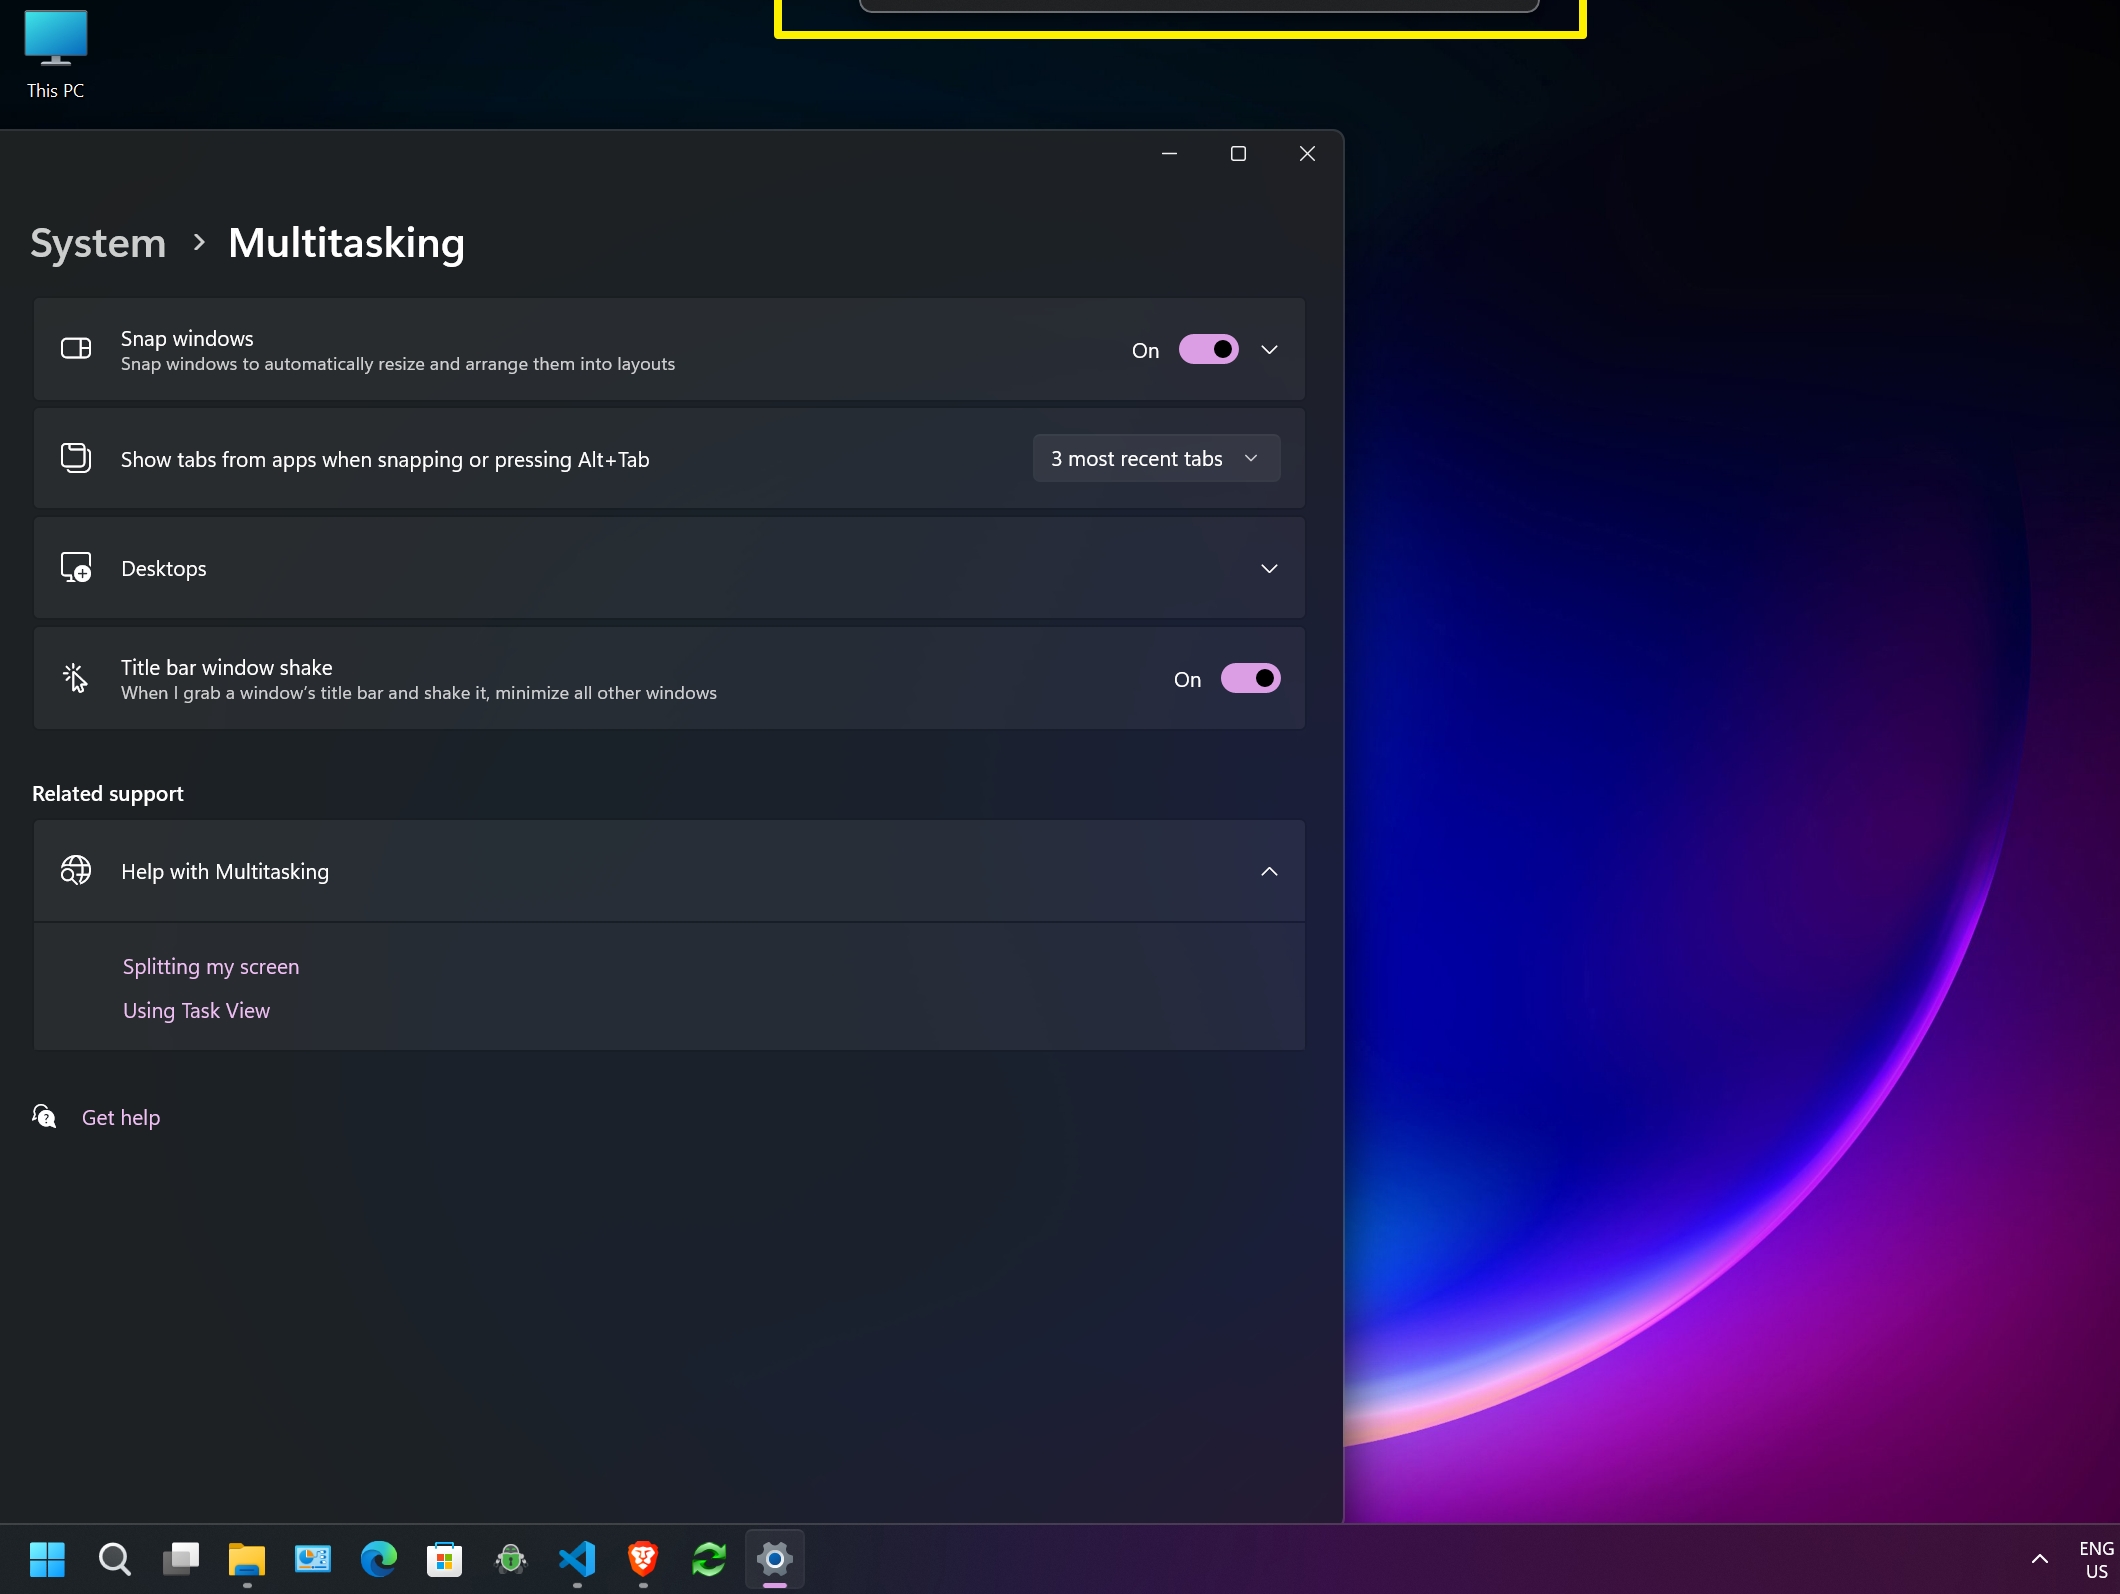
Settings – System – Multitasking – Snap windows (click on arrow to extend options) – I leave it to on – very useful.
Snap function lets you arrange windows on the screen. If you have multiple windows opened, you can arrange them side by side – lets say you have Settings and Firefox opened – and you want to see them side by side. Grab Settings window and move it to the left (hold the mouse and move window) and you will see left portion of the screen selected – release it, now in the right portion of the screen you will be offered to open another app – since Firefox is already opened – I will select it. Now screen is split 50/50. You can also snap four or more windows, all depending on your screen size, resolution.
You can also Snap windows by using Winkey + left/right arrow – it will offer you to arrange apps.
**Snap layouts** if you grab and hold a window, a small bar will appear at the top of the screen (marked inside yellow rectangle)- drag your cursor and window you selected towards that bar on the top – that bar is snap layout – it will offer you then various options to position your window in various combinations.
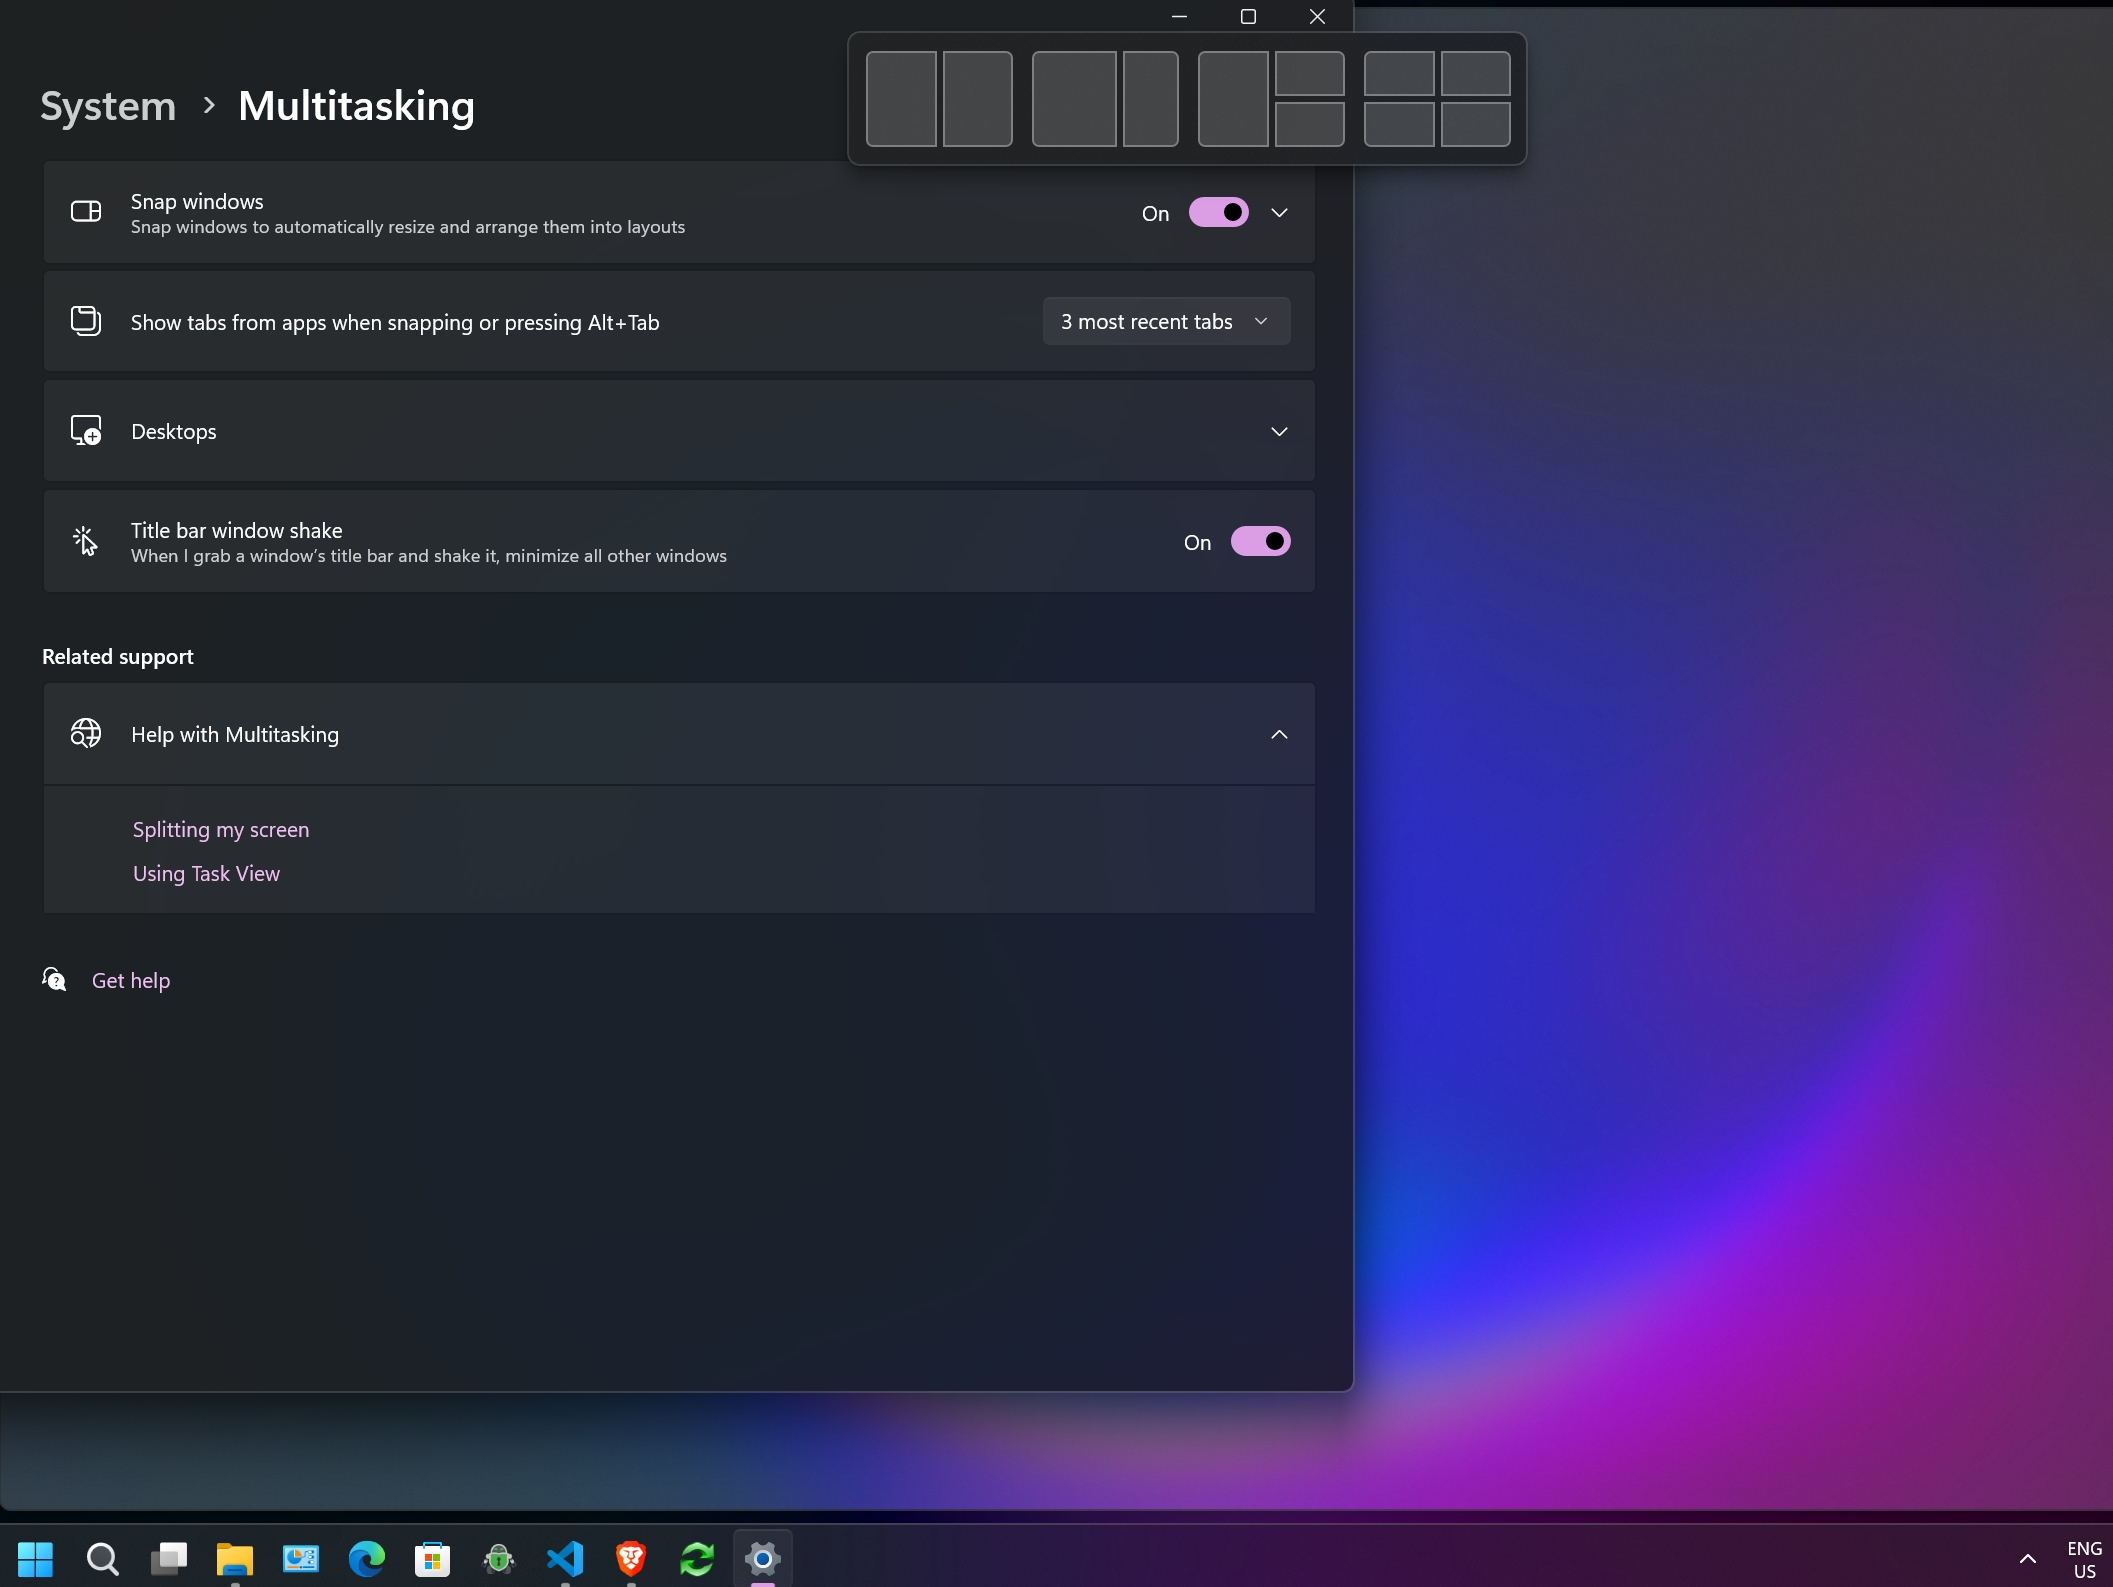
You can also invoke this setting by just holding cursor on Maximize/Restore button inside opened window.
Desktops
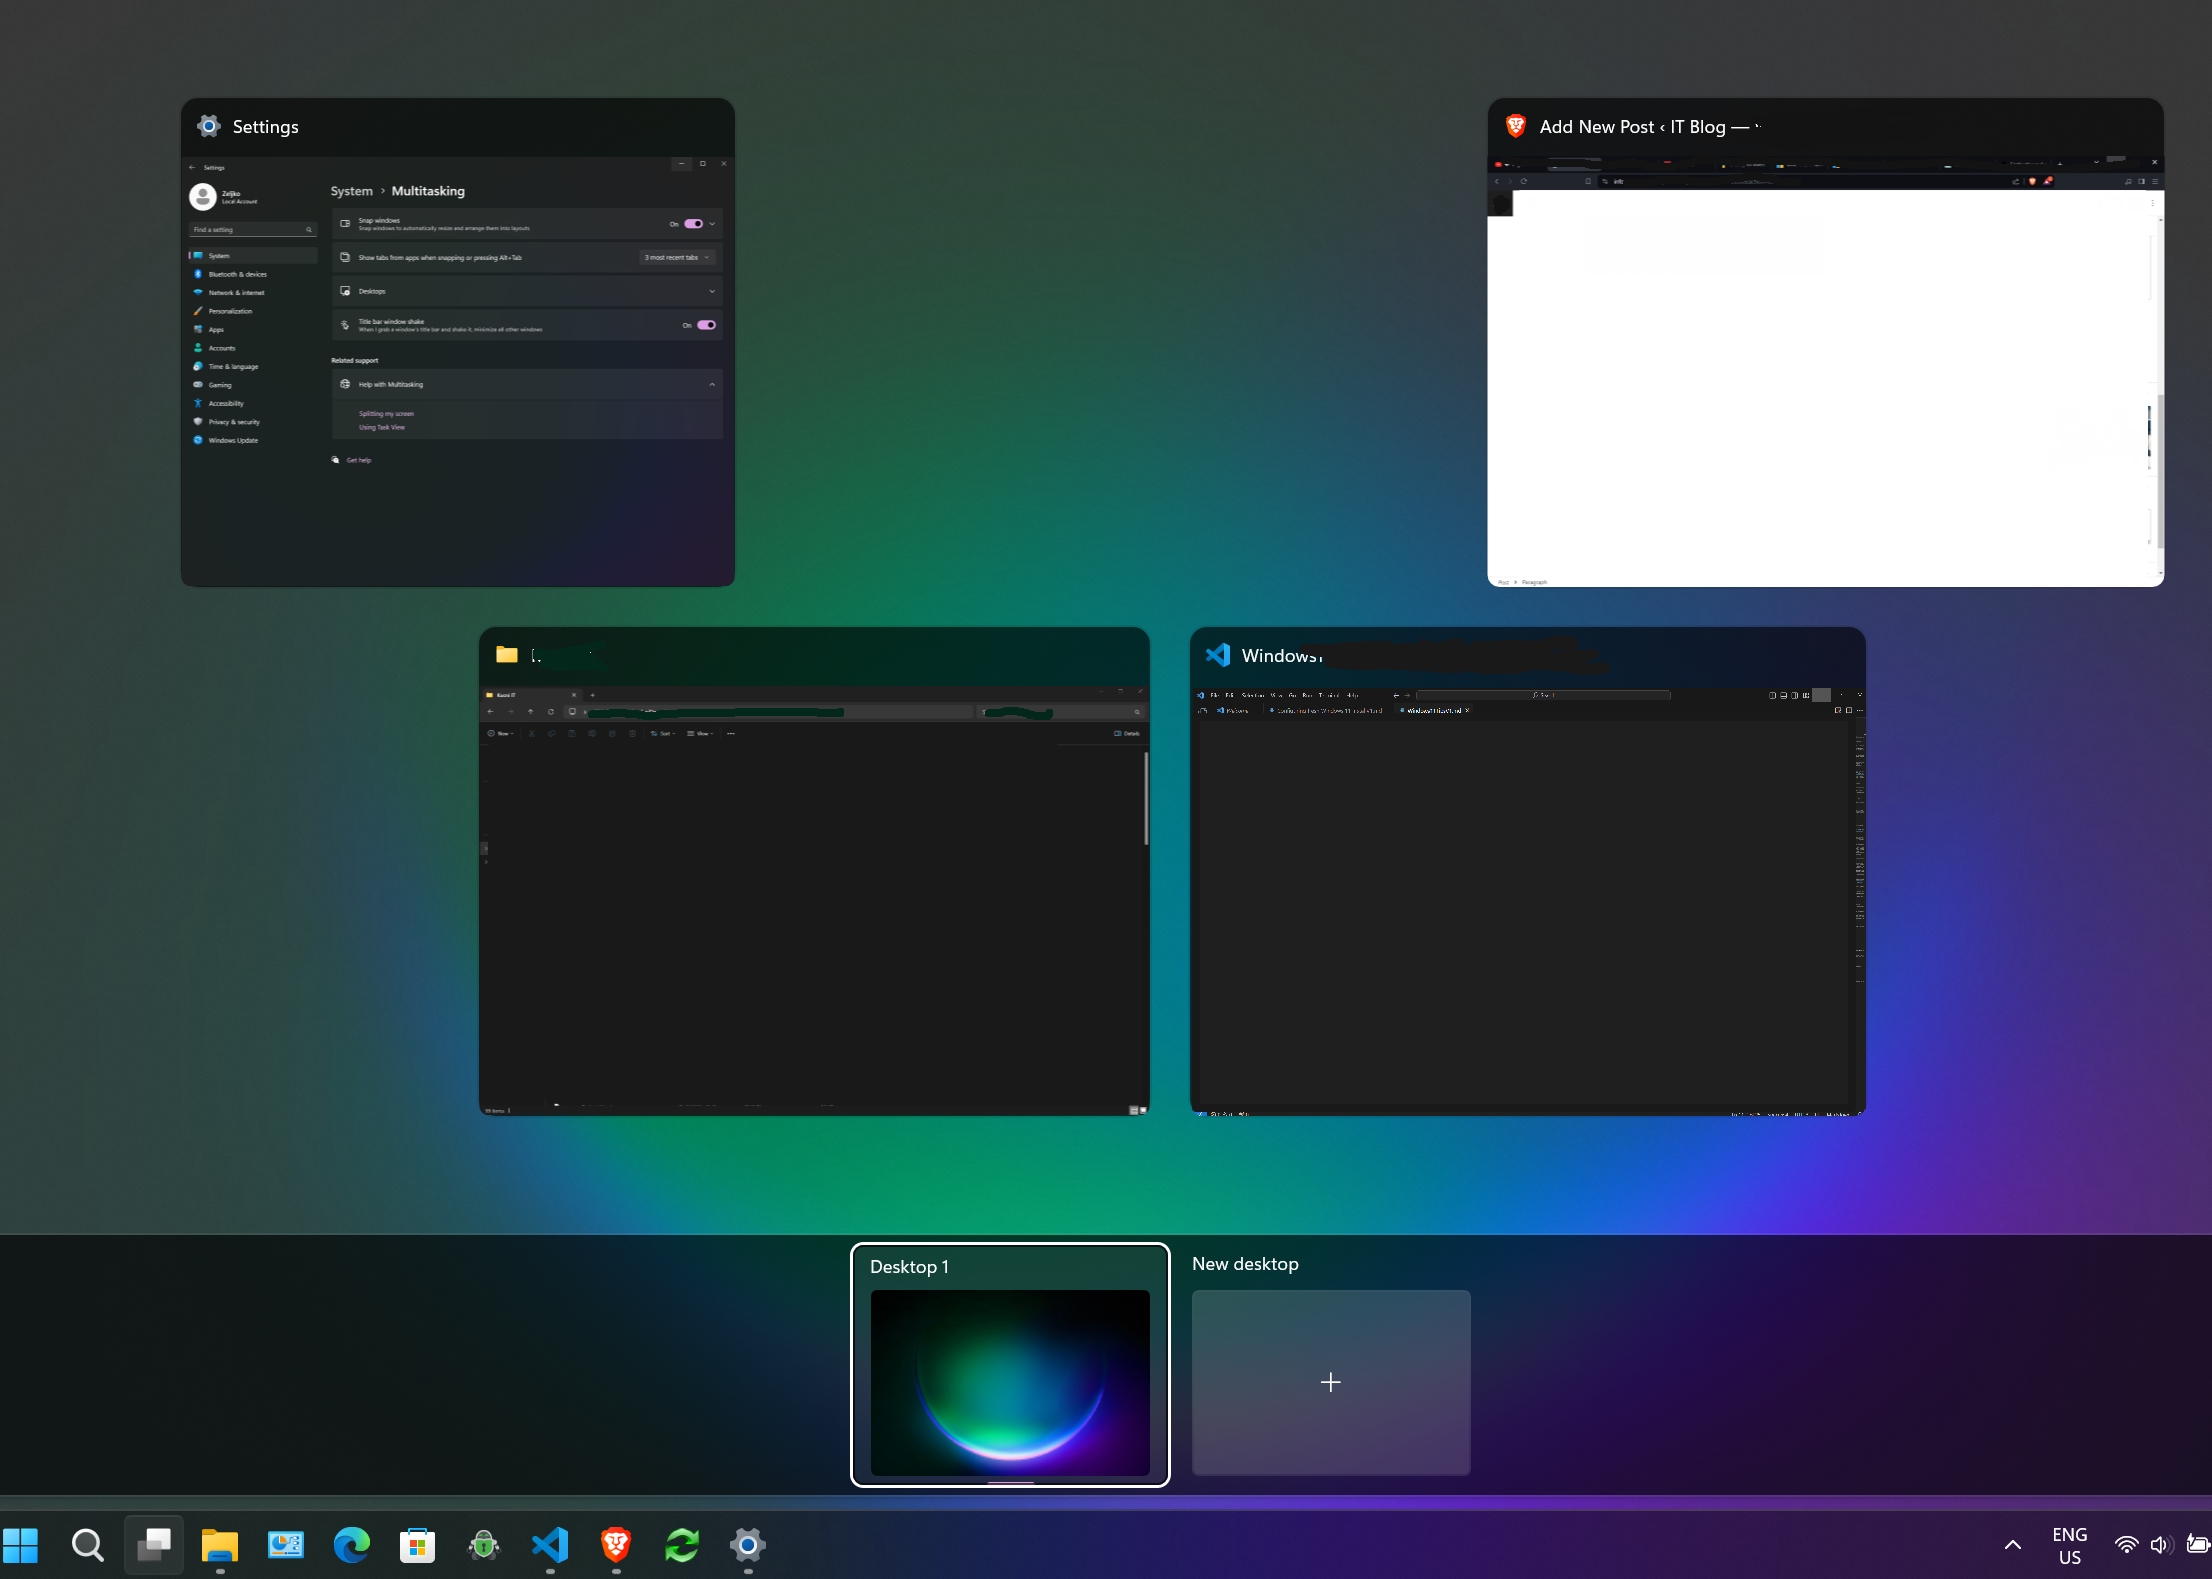
You can now create multiple virtual desktops inside Windows. Different Desktops can be modified with backgrounds and they are persistent after reboot (App opened per Desktop are not persistent after reboot)
Taskbar – click on Task View (or just Winkey + TAB ) – click on + (New Desktop)
Desktops can be renamed from Desktop 1 / Desktop 2 to something of your liking, just click on Desktop name inside Task View and it can be changed. It is best to rename according to the Desktop purpose (writing, coding, media, virtualization…)

Create New Virtual Desktop – Win + CTRL + D
Switch Between Virtual Desktops – Win + CTRL + LEFT/RIGHT ARROW
Best way to distinguish between Desktops is to rename them, and to change Background on each of them. I already described how I rename, now – how to change the Desktop background.
Right click somewhere on the empty Desktop surface – select Personalize – Background – Personalize your background – I select Picture instead of Slideshow and select a picture you will distinguish your Desktop by.
To move opened apps between Desktops – open Task View select window of an app you wish to move, and drag it to another desktop icon at the bottom.
To close Virtual Desktop – open Task View and simply select X when you click on the Desktop you wish to close.
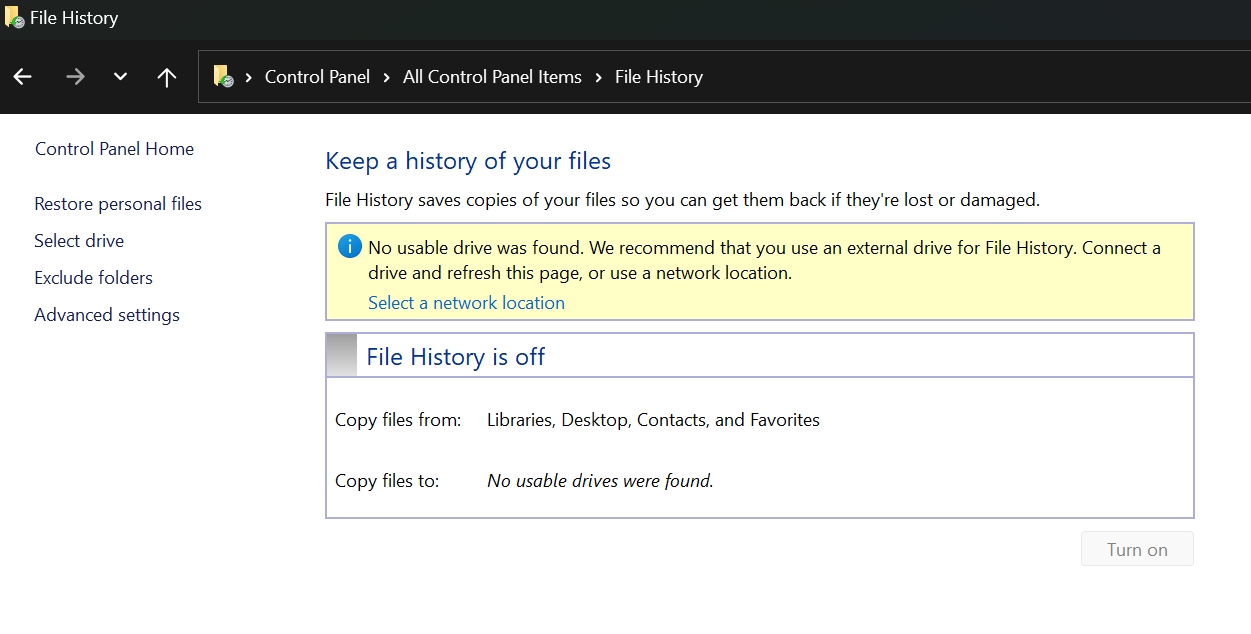
File history
Useful tool, if you wish to restore earlier file you made, or file is corrupted or lost.
Control Panel – File history – by default it is off. Also, by default it only uses default library folders (Documents, Videos, Pictures, Music).
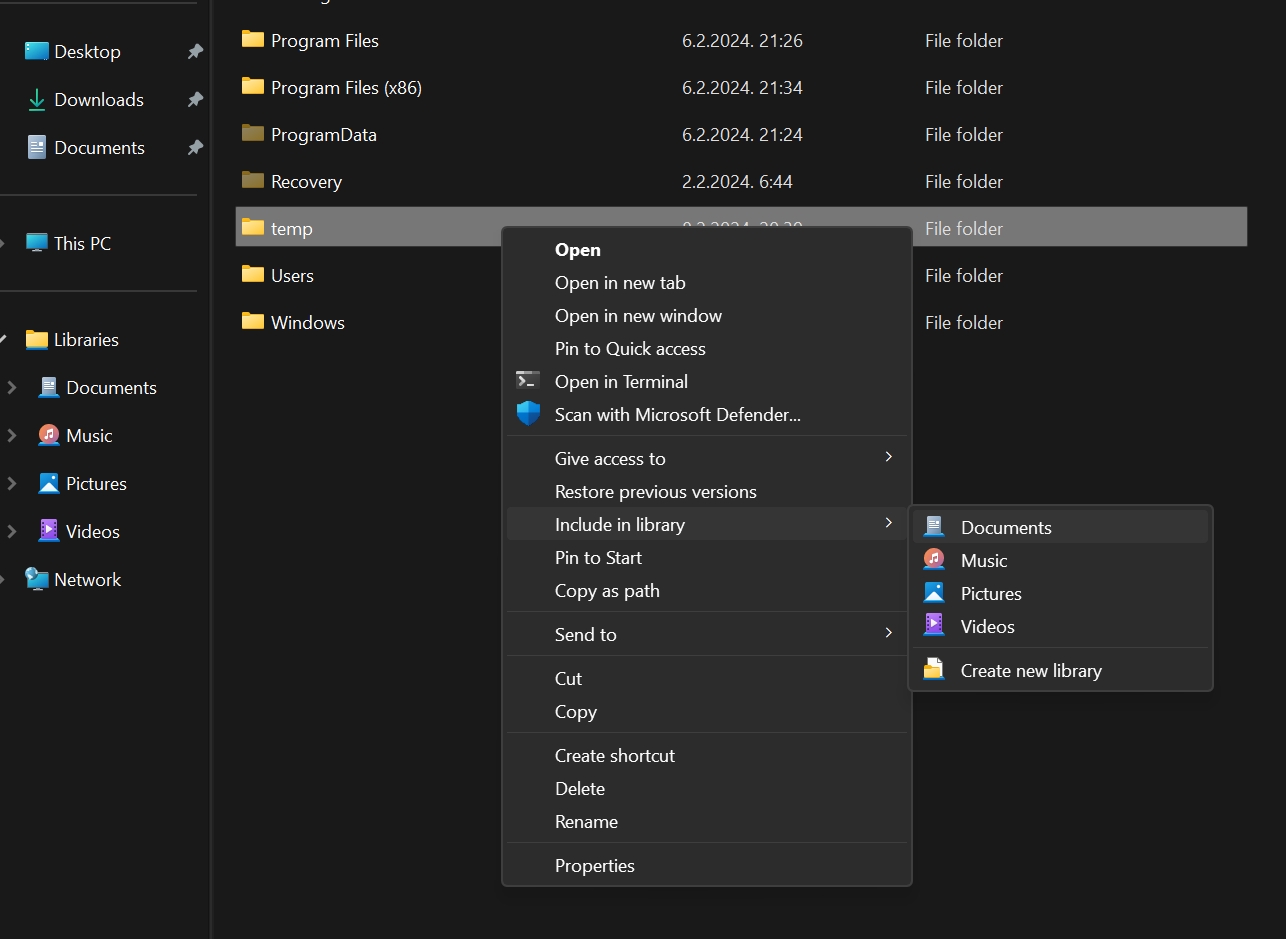
You can add folders you would like to have file history for, to Libraries. There are four Libraries by default – Documents, Music, Pictures and Videos. I created C:\temp folder. By right clicking on it, select Show More Options, and then select Include in library – select Documents (you can also create your own). Now, temp folder will be part of Documents library, and will be included in File History.
Under Advanced settings in the side menu you can define how often copies should be saved and for how long should be kept.
Define network location (create shared folder and make sure your machine can access it) or external usb drive you will keep File History on.
To see exact structure of backup and what else File history backups – we need to wait for first backups to be done.
Clipboard
In Windows 11 you can have clipboard history so that Windows remember more than one thing you copied. To enable it go to:
Settings – System – Clipboard – Clipboard history – On

Now, if you copied multiple items, by pressing **Winkey + V** clipboard dialog (clipboard history) will open and you can select what you wish to paste.
You can also pin items you wish to reuse in clipboard history. **Pinned items are persistent across reboot**
If item has formatting, and you paste it, to lets say Word – open clipboard history – click on three dots (…) next to item you wish to paste – select “Paste as text”. **The same way you can delete item from clipboard history** or just select Clear all from the top of Clipboard history.
CTRL + V will paste last item
Winkey + V will open clipboard dialog (clipboard history)
Very useful, but also potential security issue. I use it only on some, mainly media/documentation writing machines.
This feature can store up to 25 items up to 25MB in size(per item).
We are done for part 4, I’m trying to keep these short.
Windows Configuration / Tips and Tricks – Part 1
Windows Configuration / Tips and Tricks – Part 2
Windows Configuration / Tips and Tricks – Part 3
Windows Configuration / Tips and Tricks – Part 4
Windows Configuration / Tips and Tricks – Part 5
Windows Configuration / Tips and Tricks – Part 6