Here is in short initial setup for the HP StoreVirtual 3200
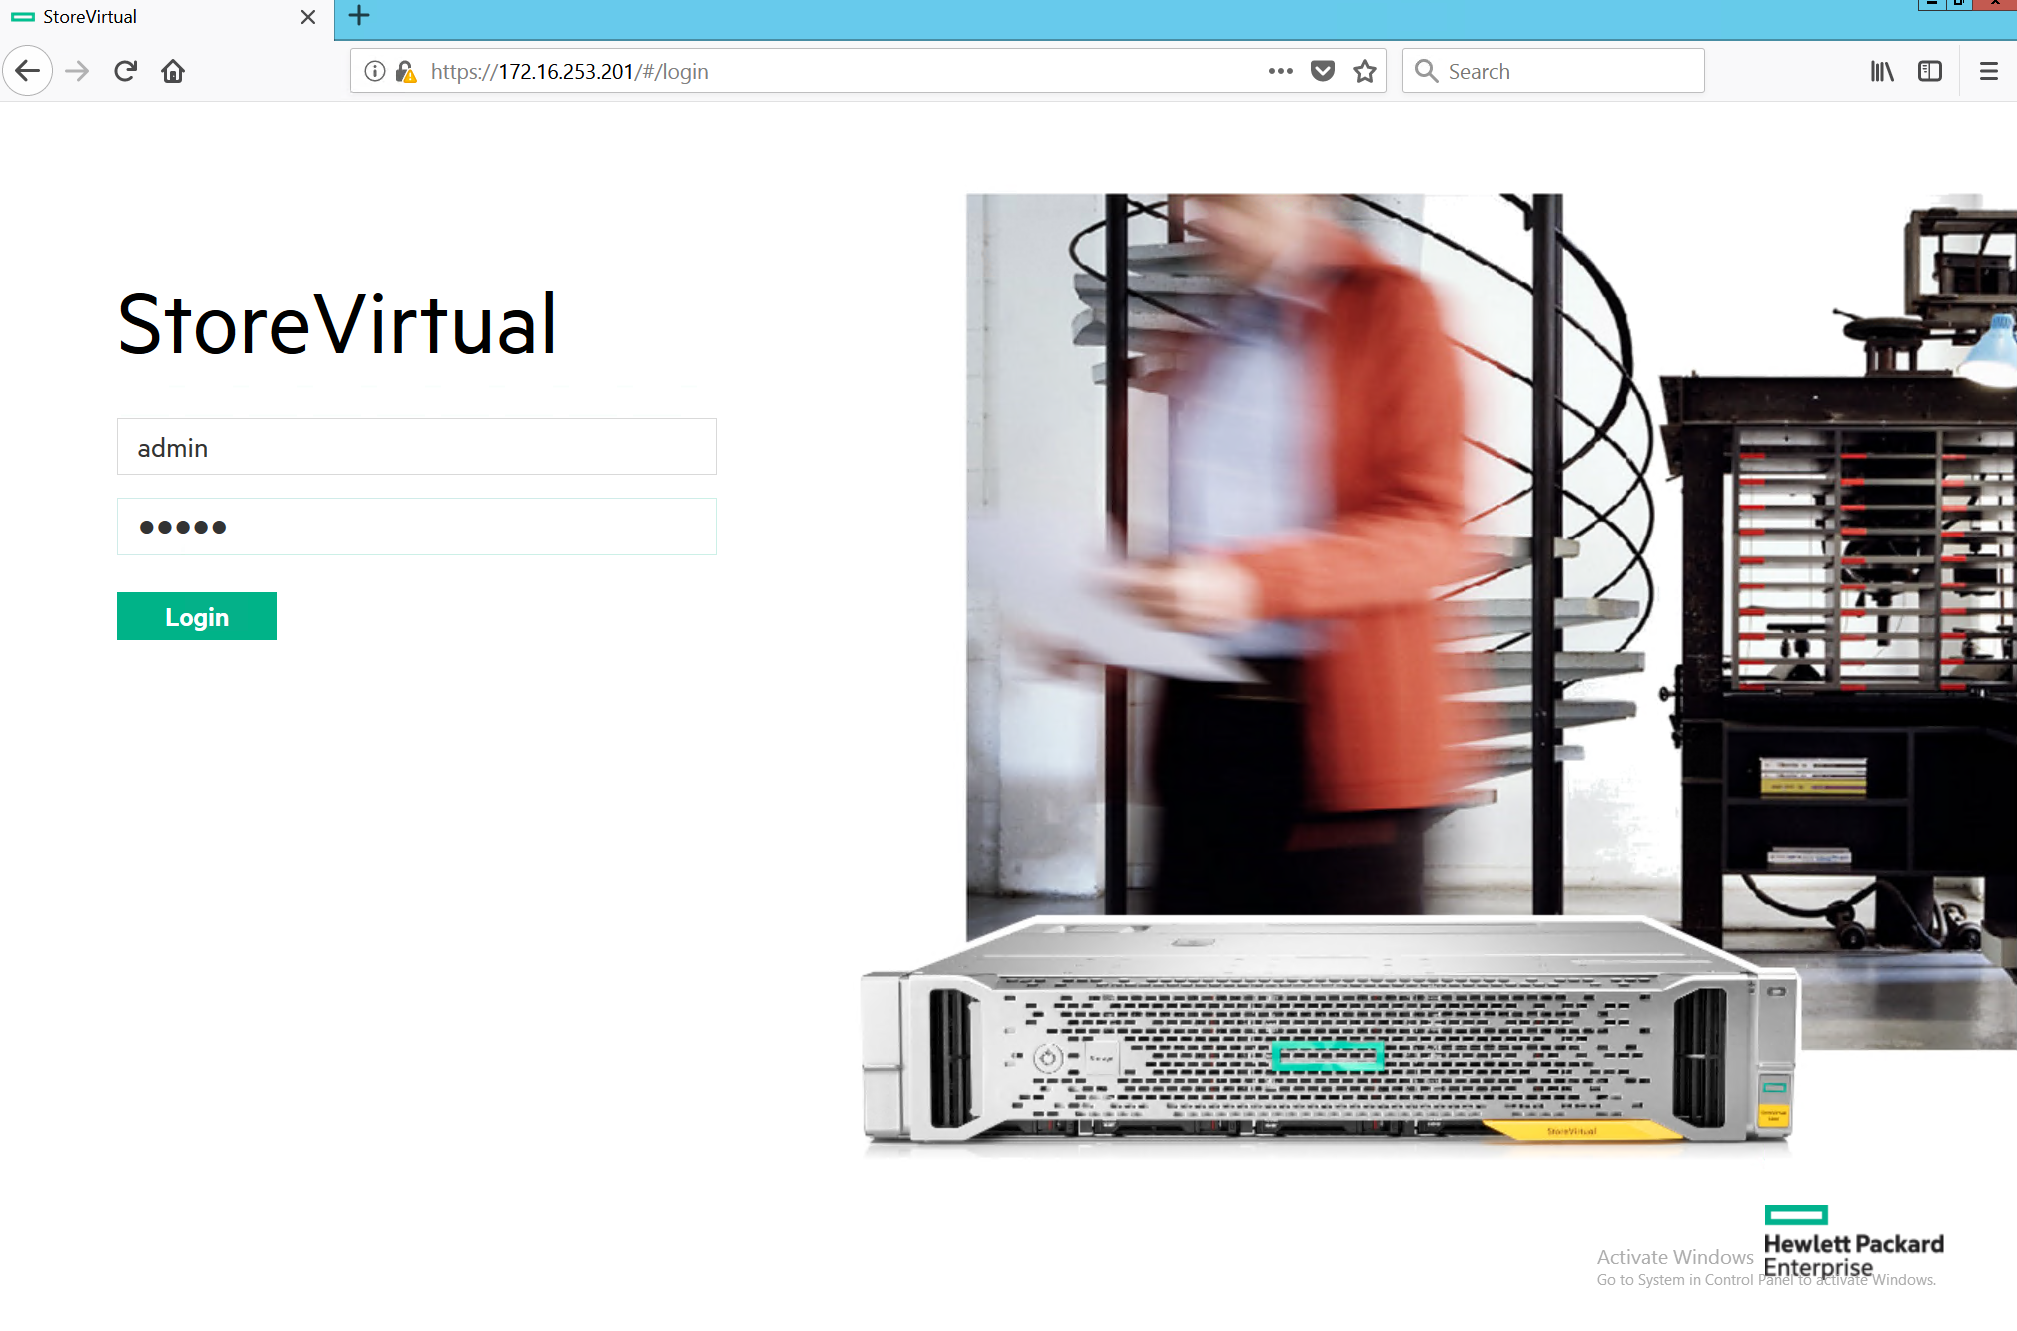
If you are first time on the login screen, you are probably at IP https://172.16.253.201/#/loginand you’ll need username and pass which are both – admin
Configure Setup
License Agreement
I accept the HPE End User…
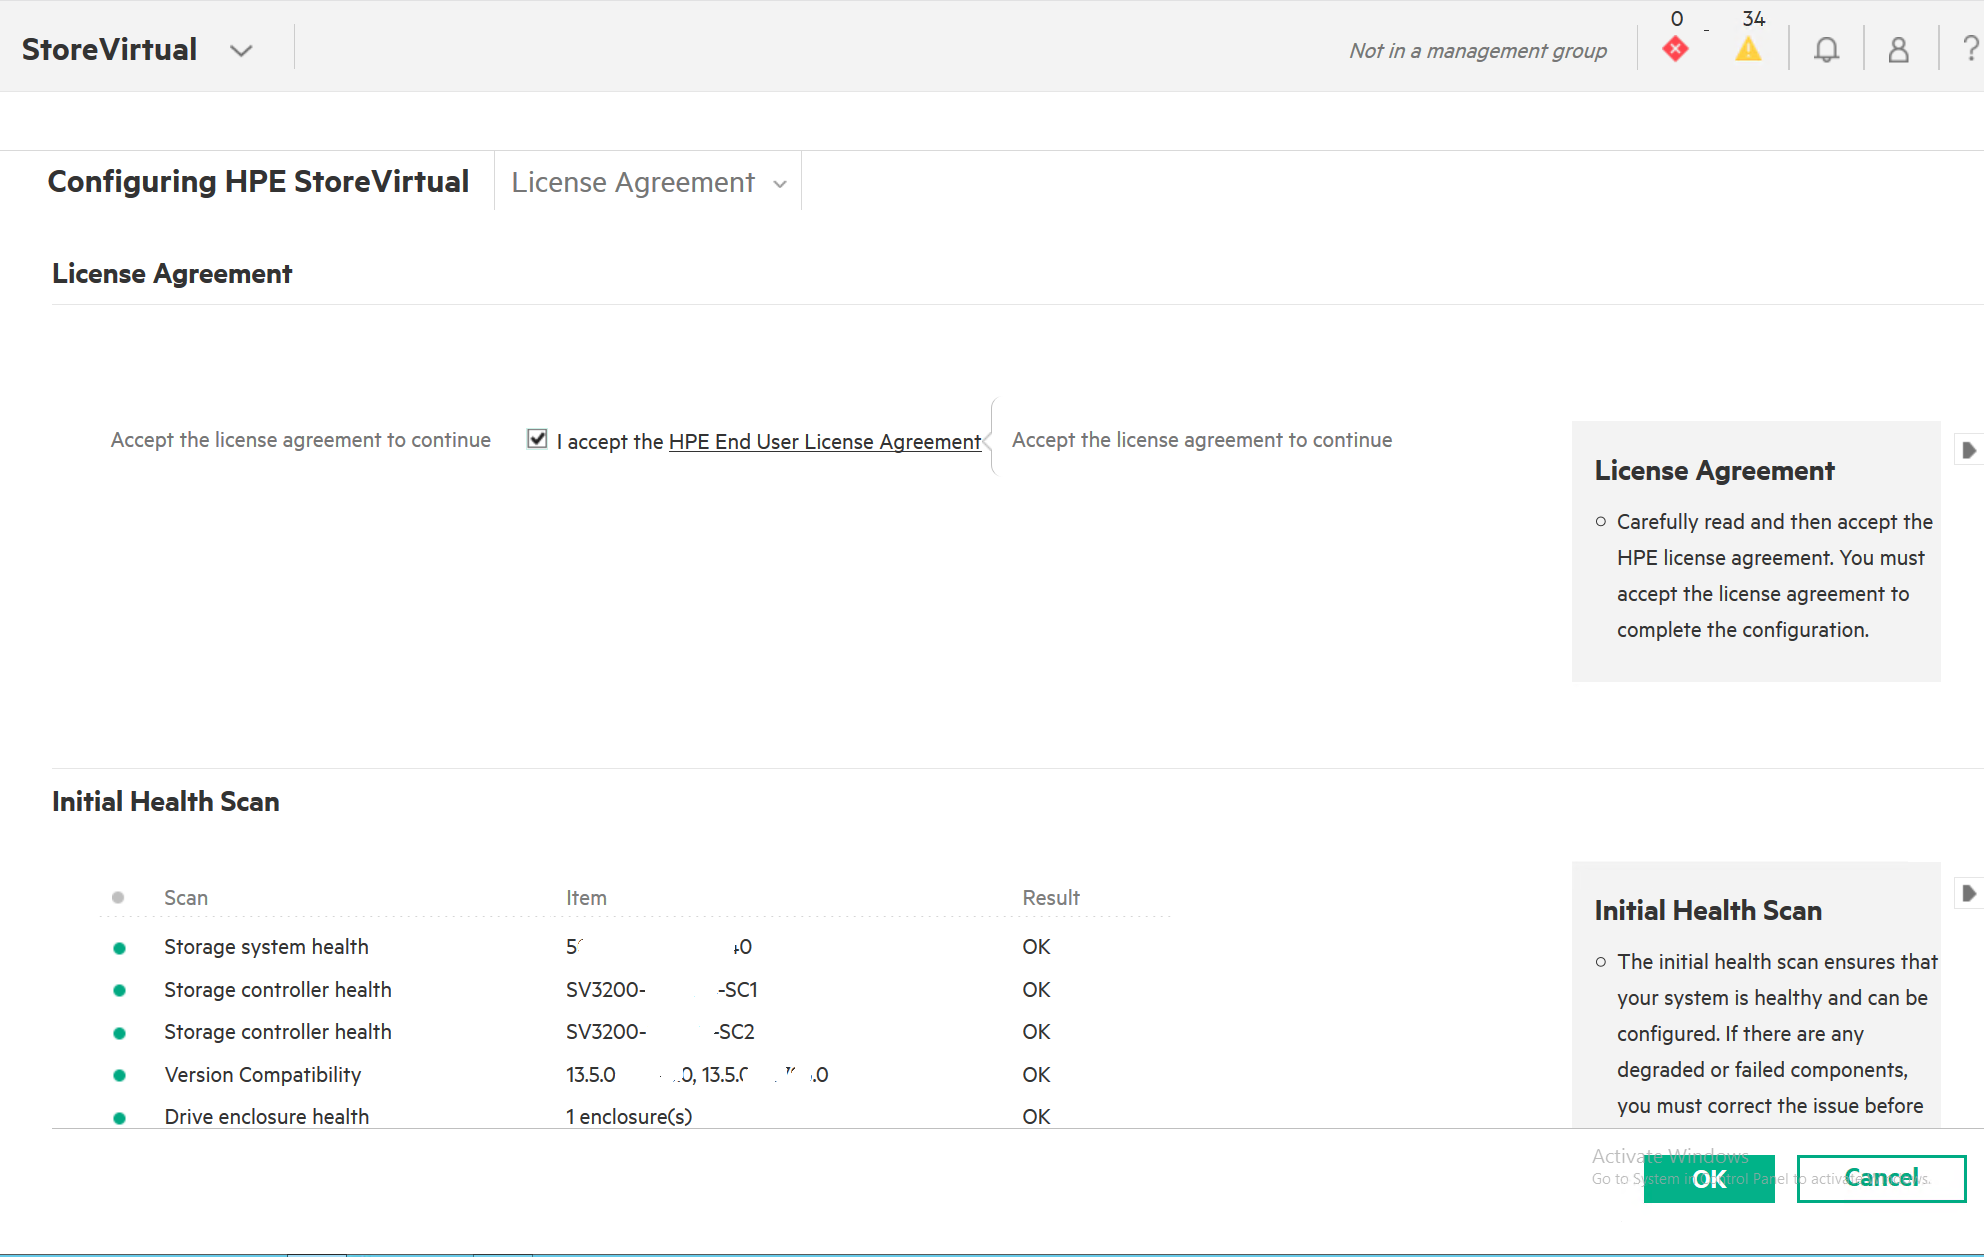
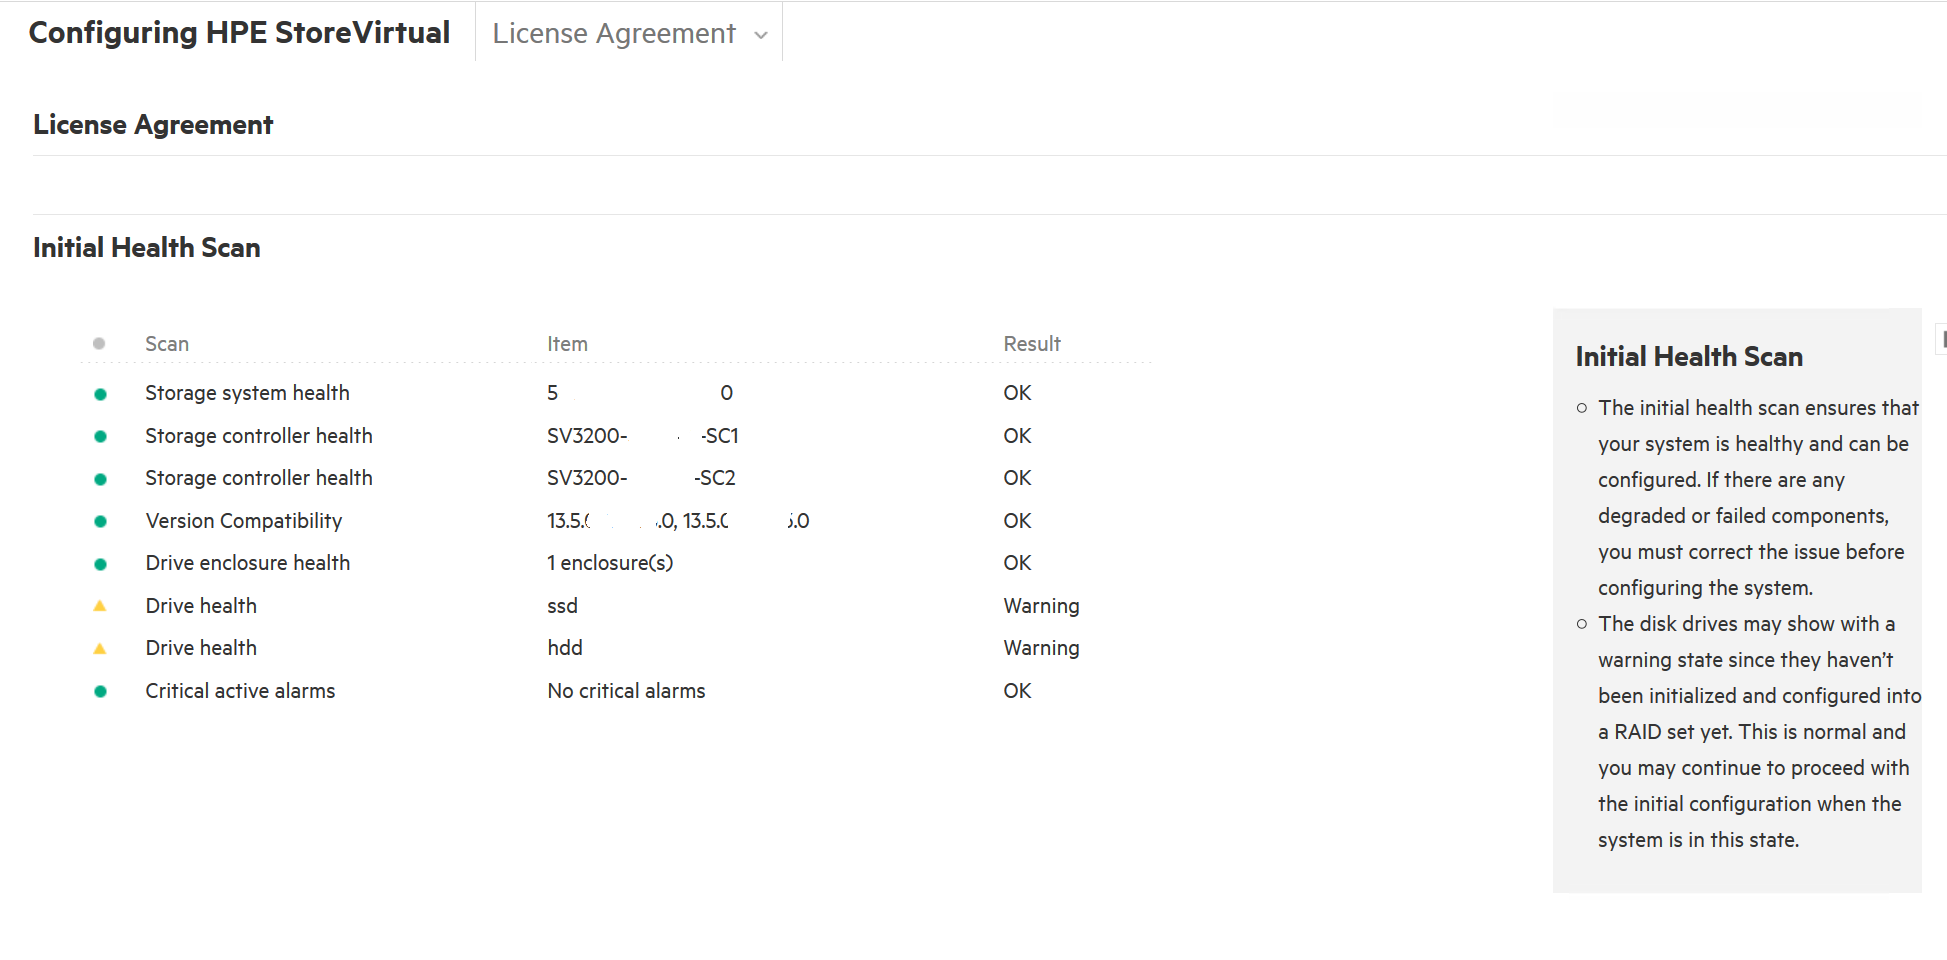
Initial Health Scan
Warning on the drives part is normal, that’s what HP says. Drives are not initialized yet, so warning status is ok.
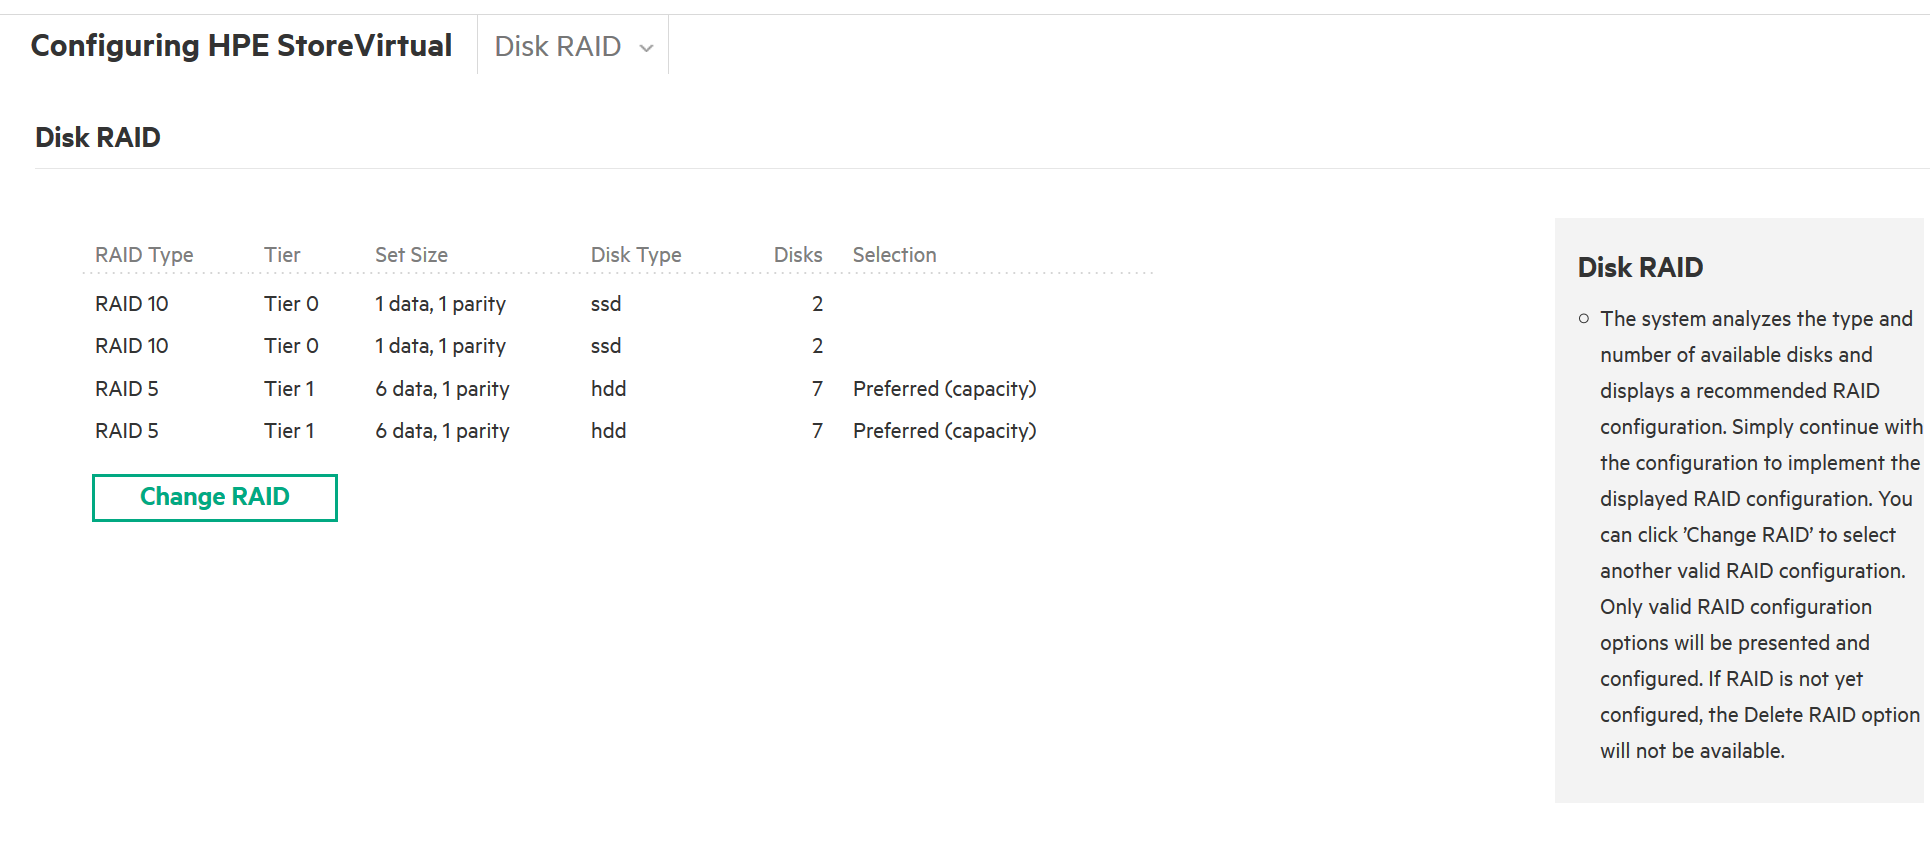
For Disk RAID there were not much options in my case. Only RAID 10 for SSD part (4x 400GB SSD drives) and RAID 5 or 6 for SAS disks (14x 1.2 12G SAS disks)
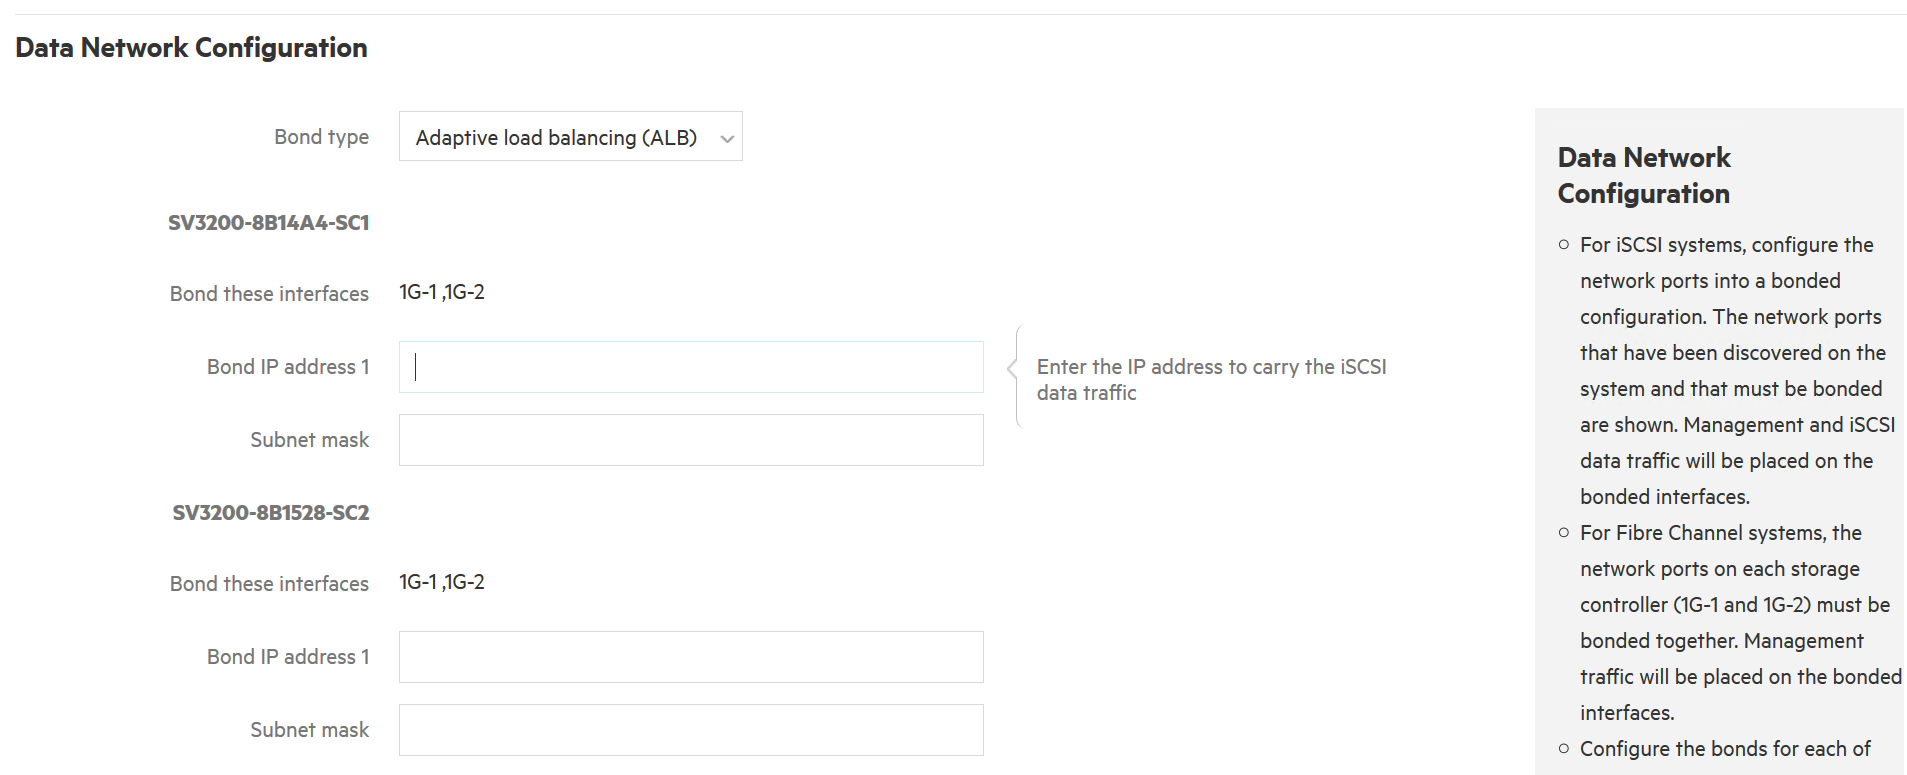
Data Network Configuration.
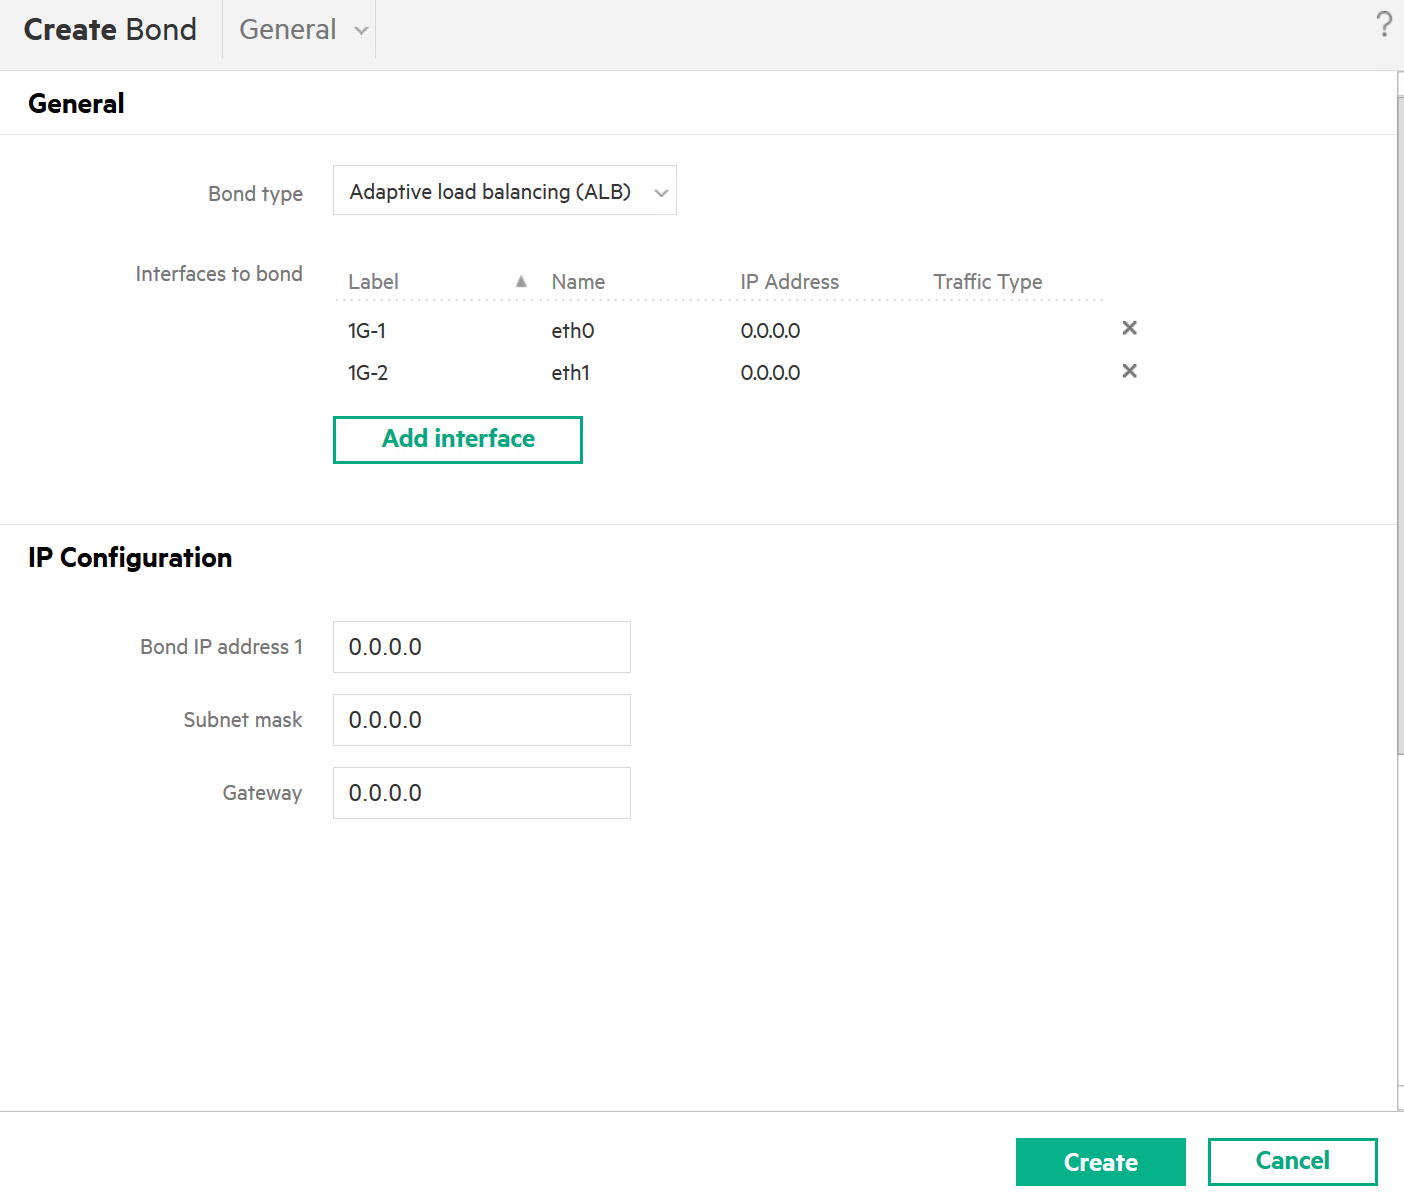
You can choose from the three options: Adaptive Load Balancing (ALB), Active-Passive or Link aggregation dynamic mode (802.3ad)
Here is short description from HP
https://support.hpe.com/hpsc/doc/public/display?docId=emr_na-c04855043
Active-Passive:Bonding two interfaces for failover provides fault tolerance for network communication at the local hardware level. Failures of NICs, ethernet cables, individual switch ports, and/or entire switches can be tolerated while maintaining data availability. When configuring an Active-Passive bond, you specify a preferred NIC for the bonded logical interface to use. If the preferred NIC fails, then the logical interface begins using another NIC in the bond until the preferred NIC resumes operation. When the preferred NIC resumes operation, data transfer resumes on the preferred NIC.
- Link aggregation dynamic mode:Bonding two interfaces for aggregation provides bandwidth aggregation and localized fault tolerance. The logical interface uses both NICs simultaneously for data transfer. This configuration increases network bandwidth, and if one NIC fails, the other continues operating normally. To use link aggregation dynamic mode, your switch must support and be configured for 802.3ad.
Link aggregation dynamic mode requires plugging both NICs into the same switch. This bonding method does not protect against switch failure.
- Adaptive Load Balancing (ALB):Bonding the interfaces for load balancing provides both load balancing and localized fault tolerance. The bonded logical interface balances data transmissions through both NICs to enhance the functionality of the server and the network. ALB automatically incorporates fault tolerance features as well and does not require additional switch configurations.
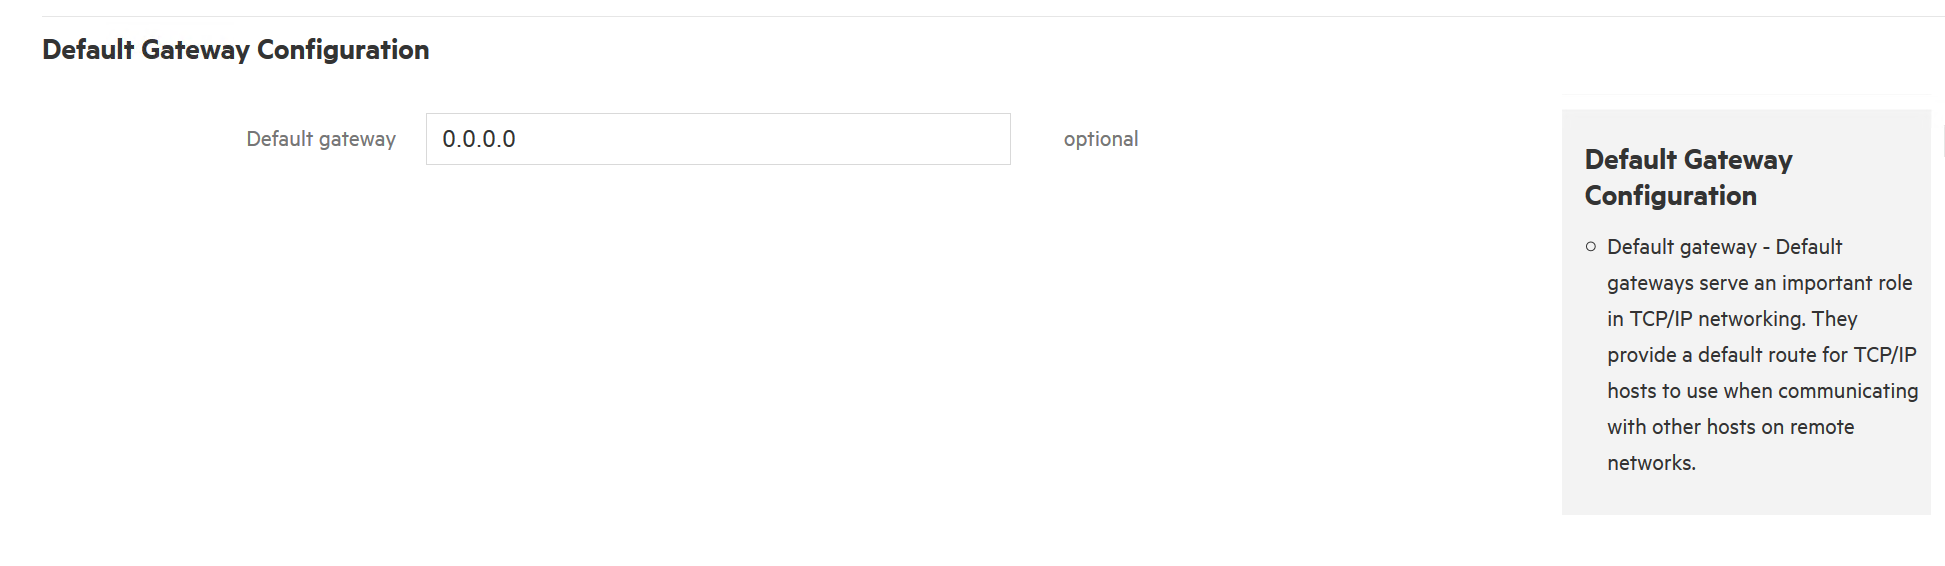
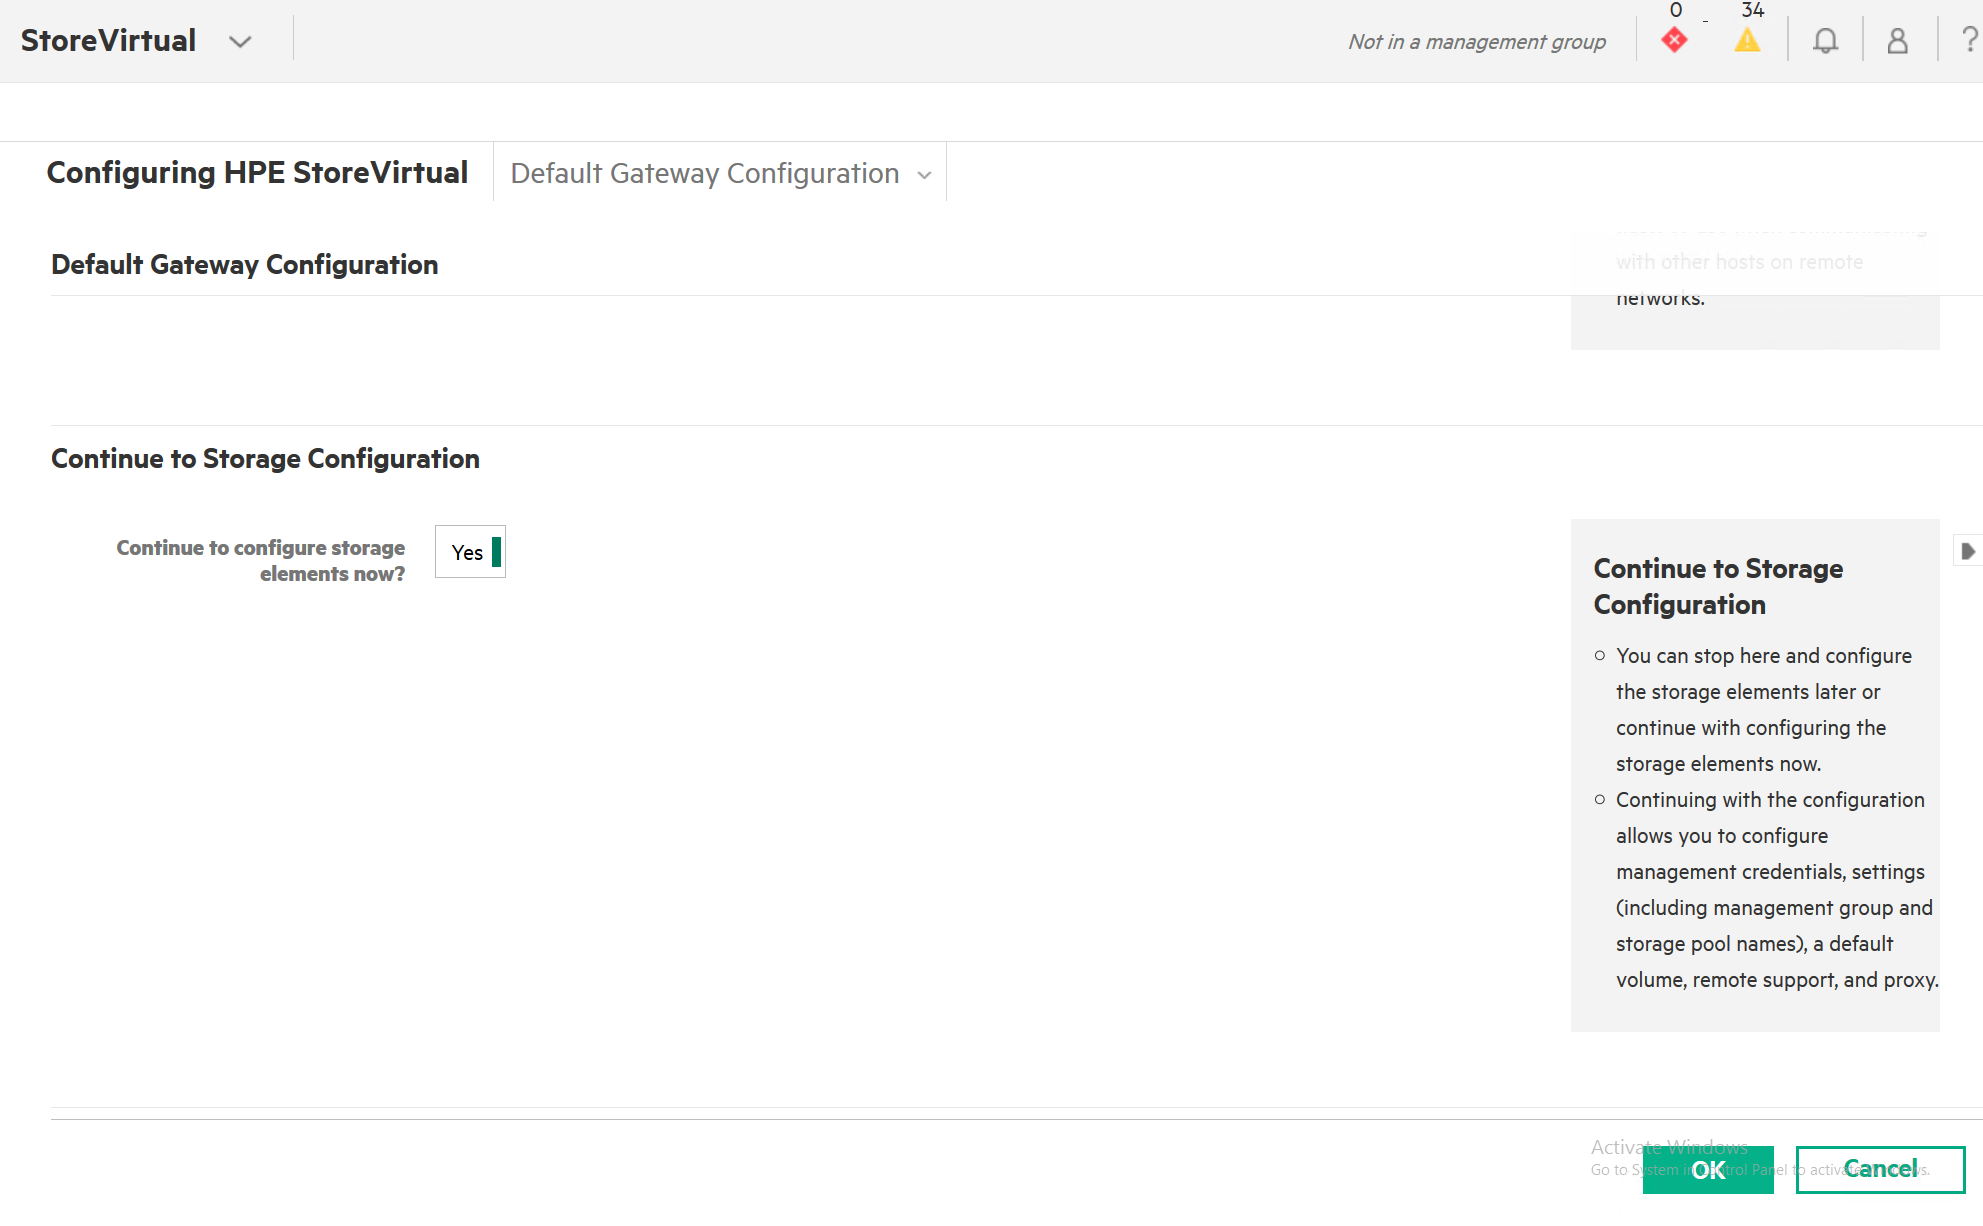
Default Gateway Configuration
Optional part that I will not be entering now.
Continue to Storage Configuration
Yes
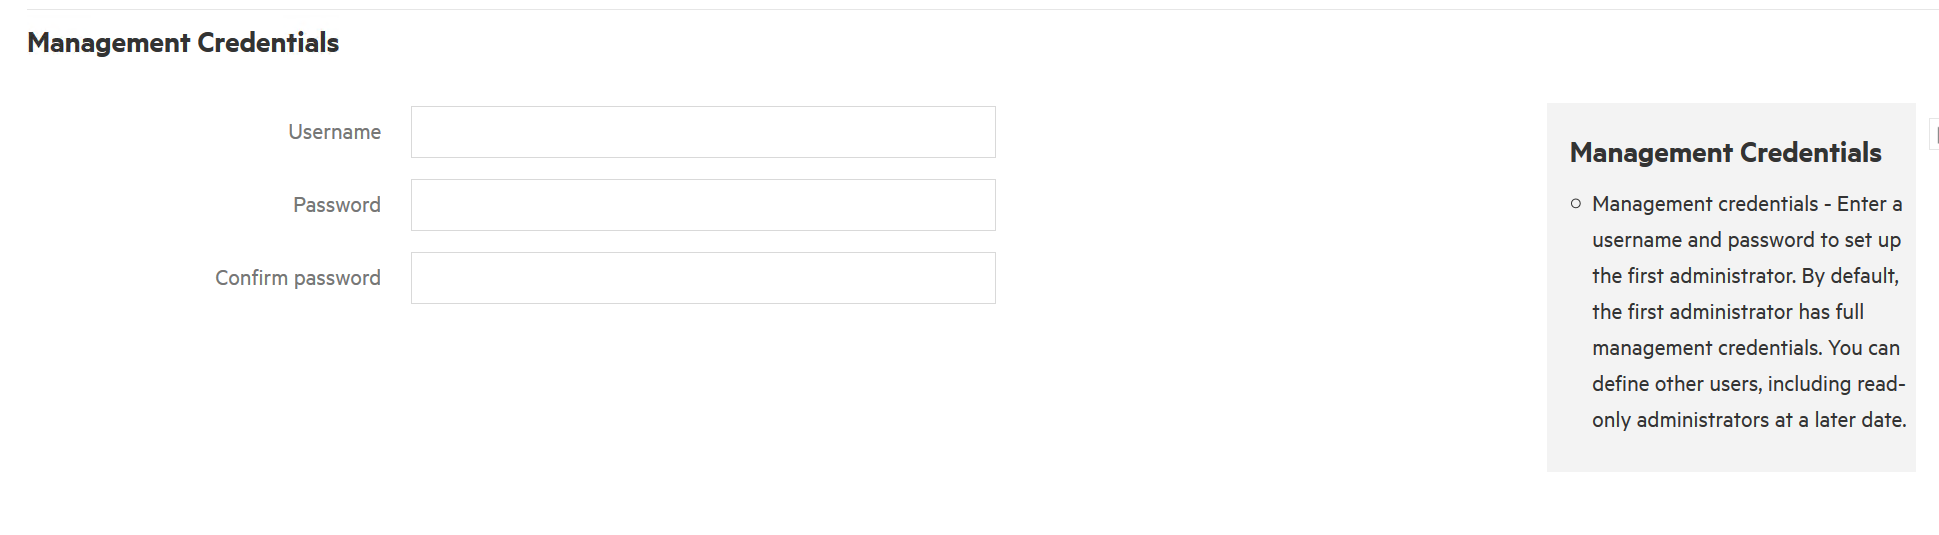
Management Credentials. It is not wise to leave admin;admin as login, enter desired username and password
Settings
Here is a description from the Settings section.
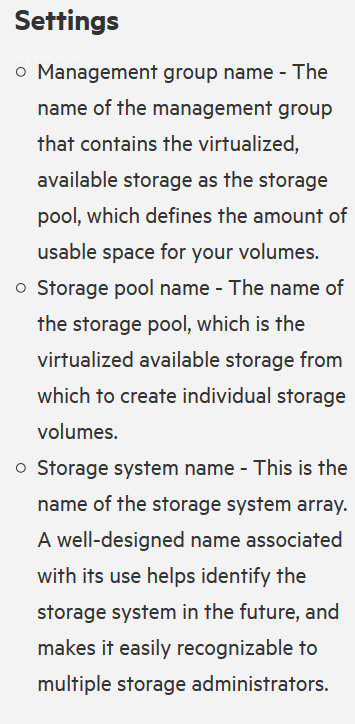
Choose names that will best describe what you will do with the storage
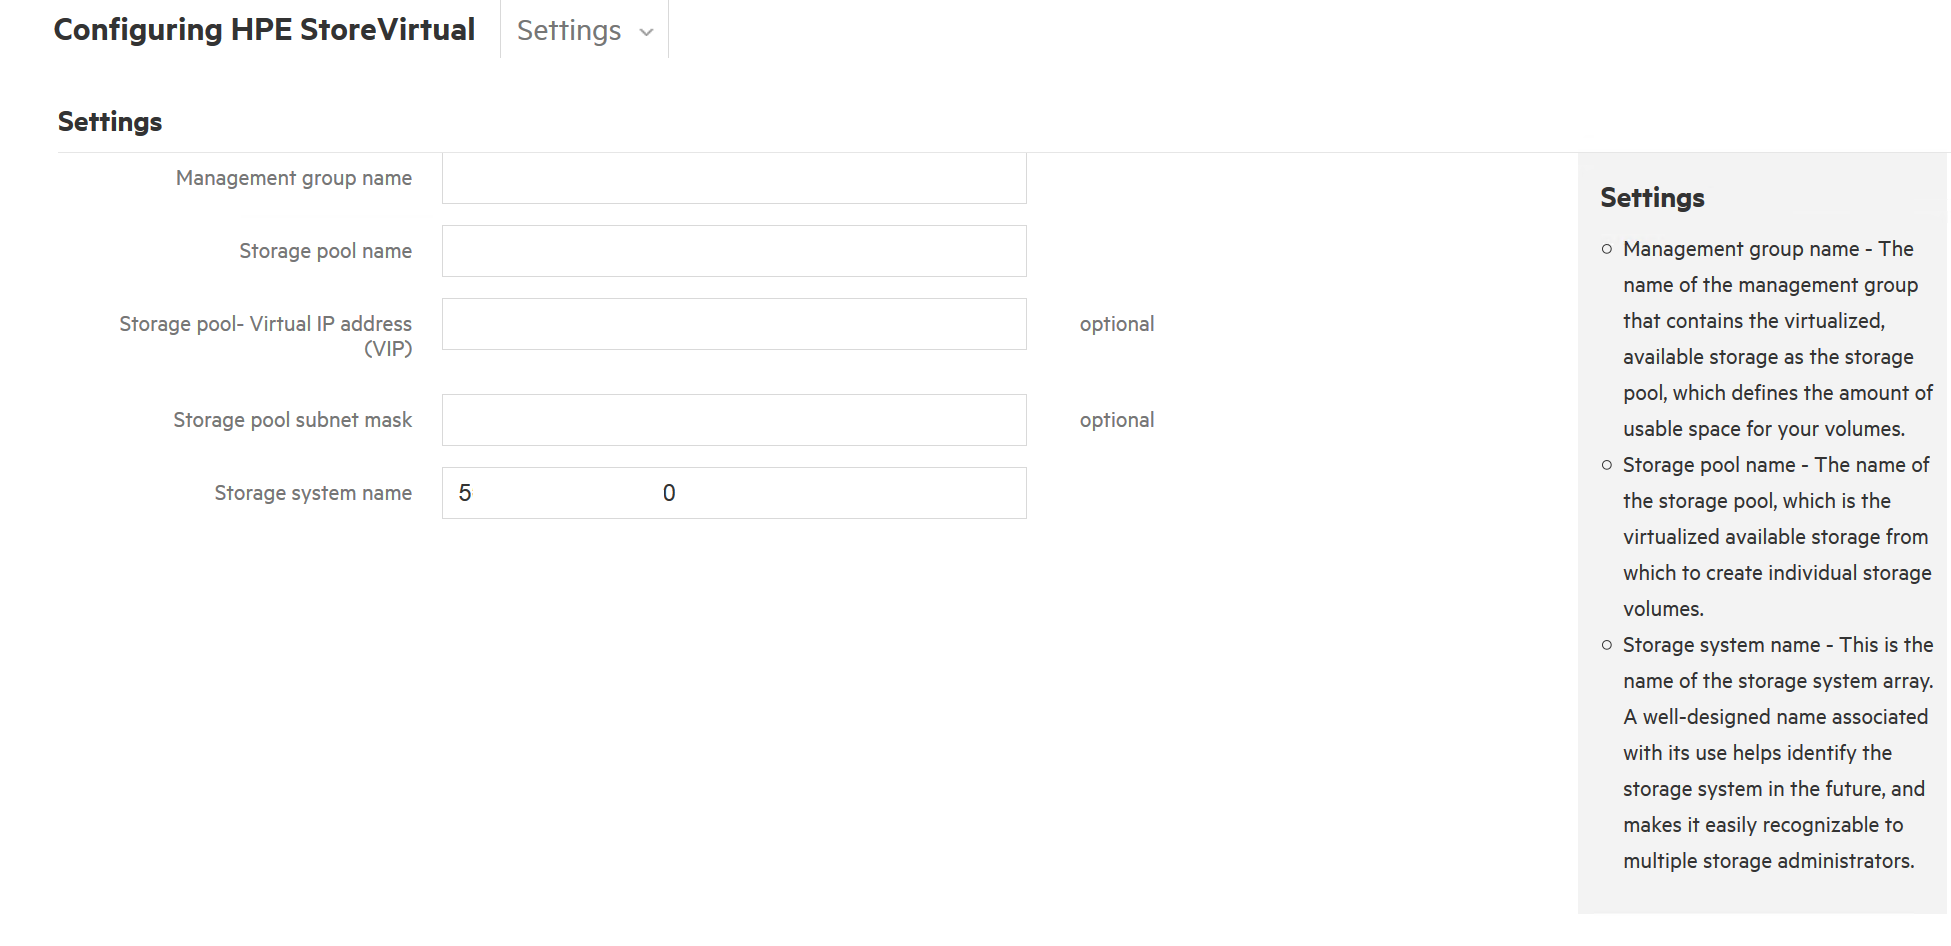
I will configure Volumes later so I will choose No to Default Volume
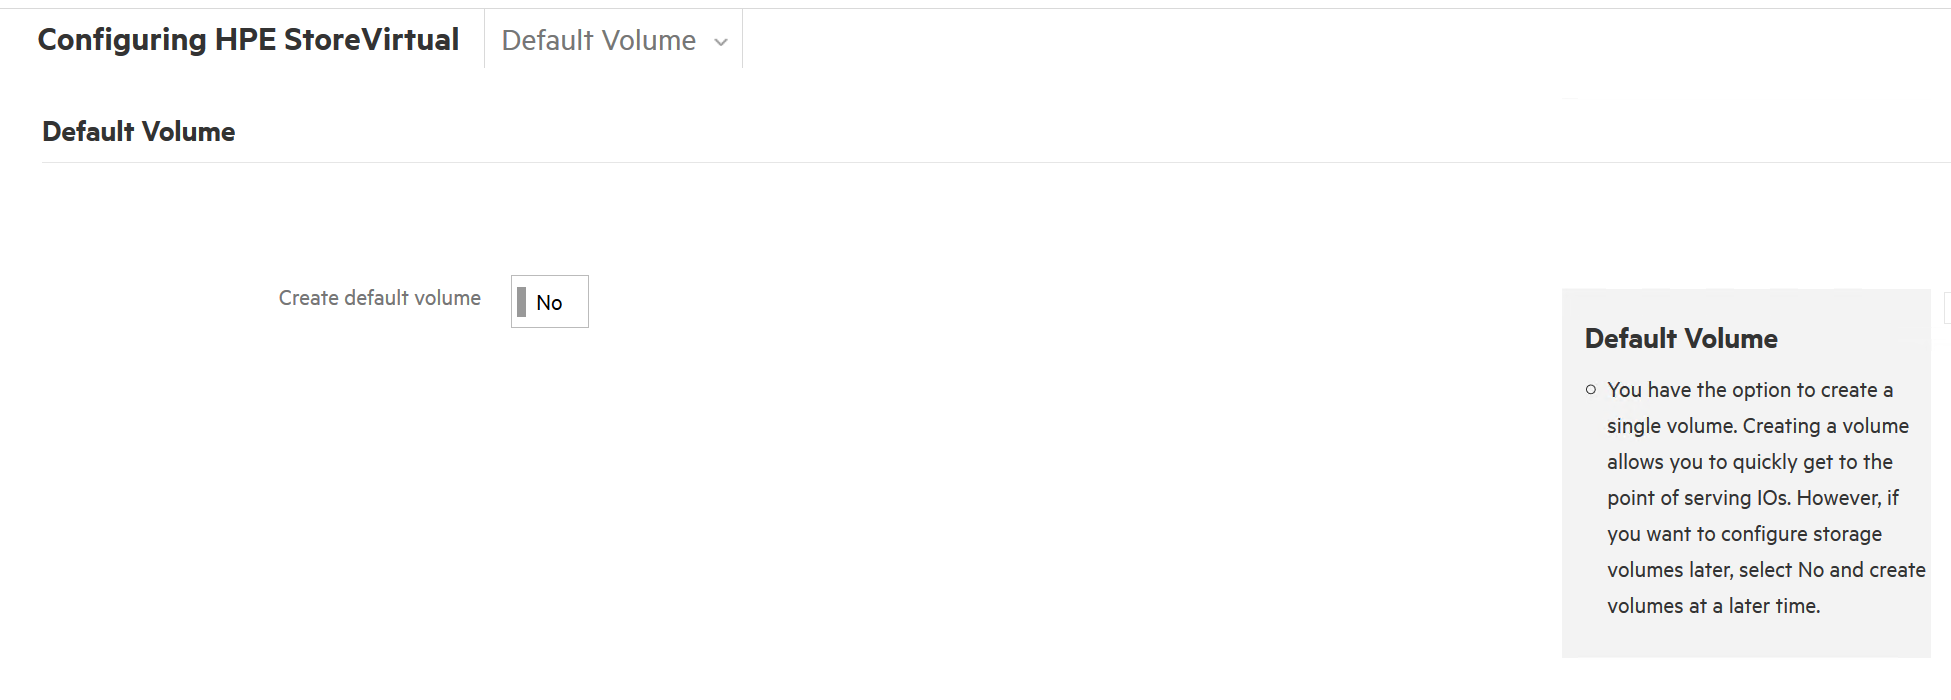
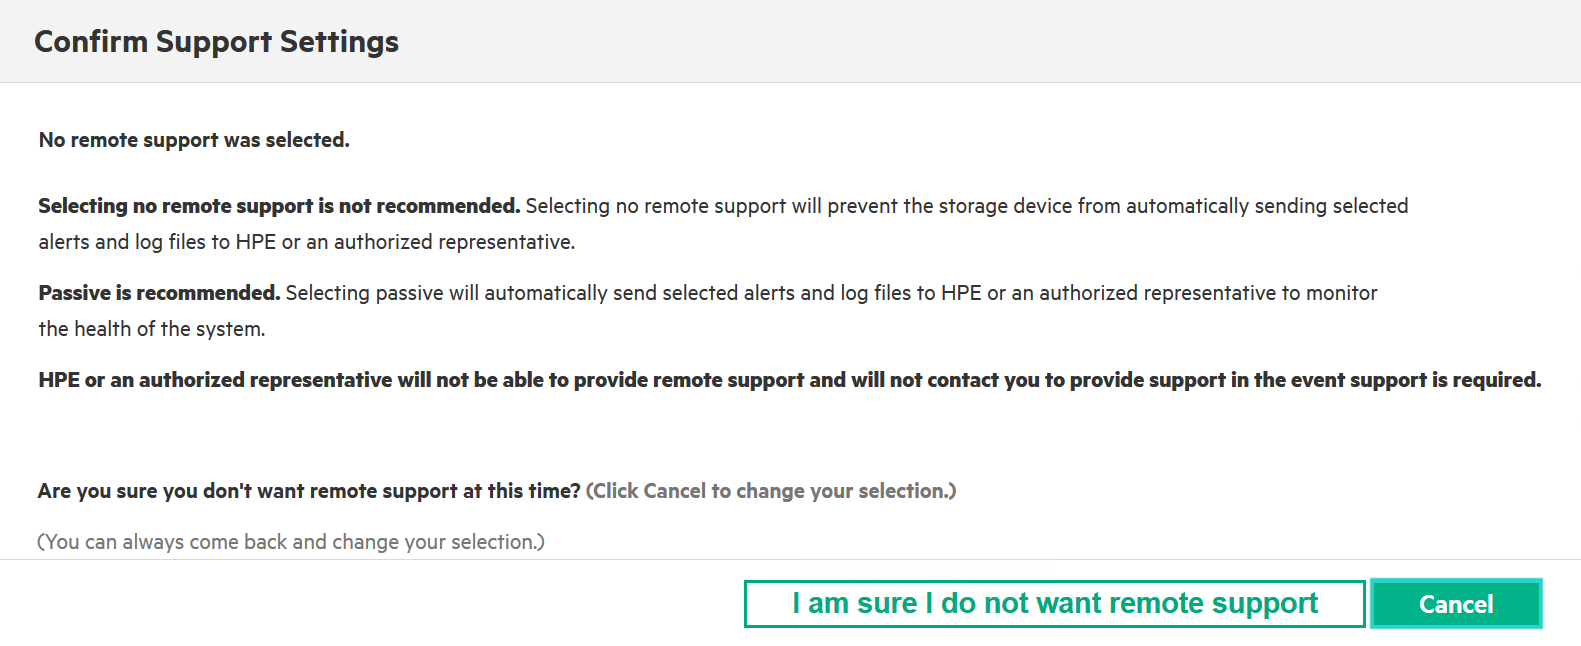
Remote Support, I will select No support
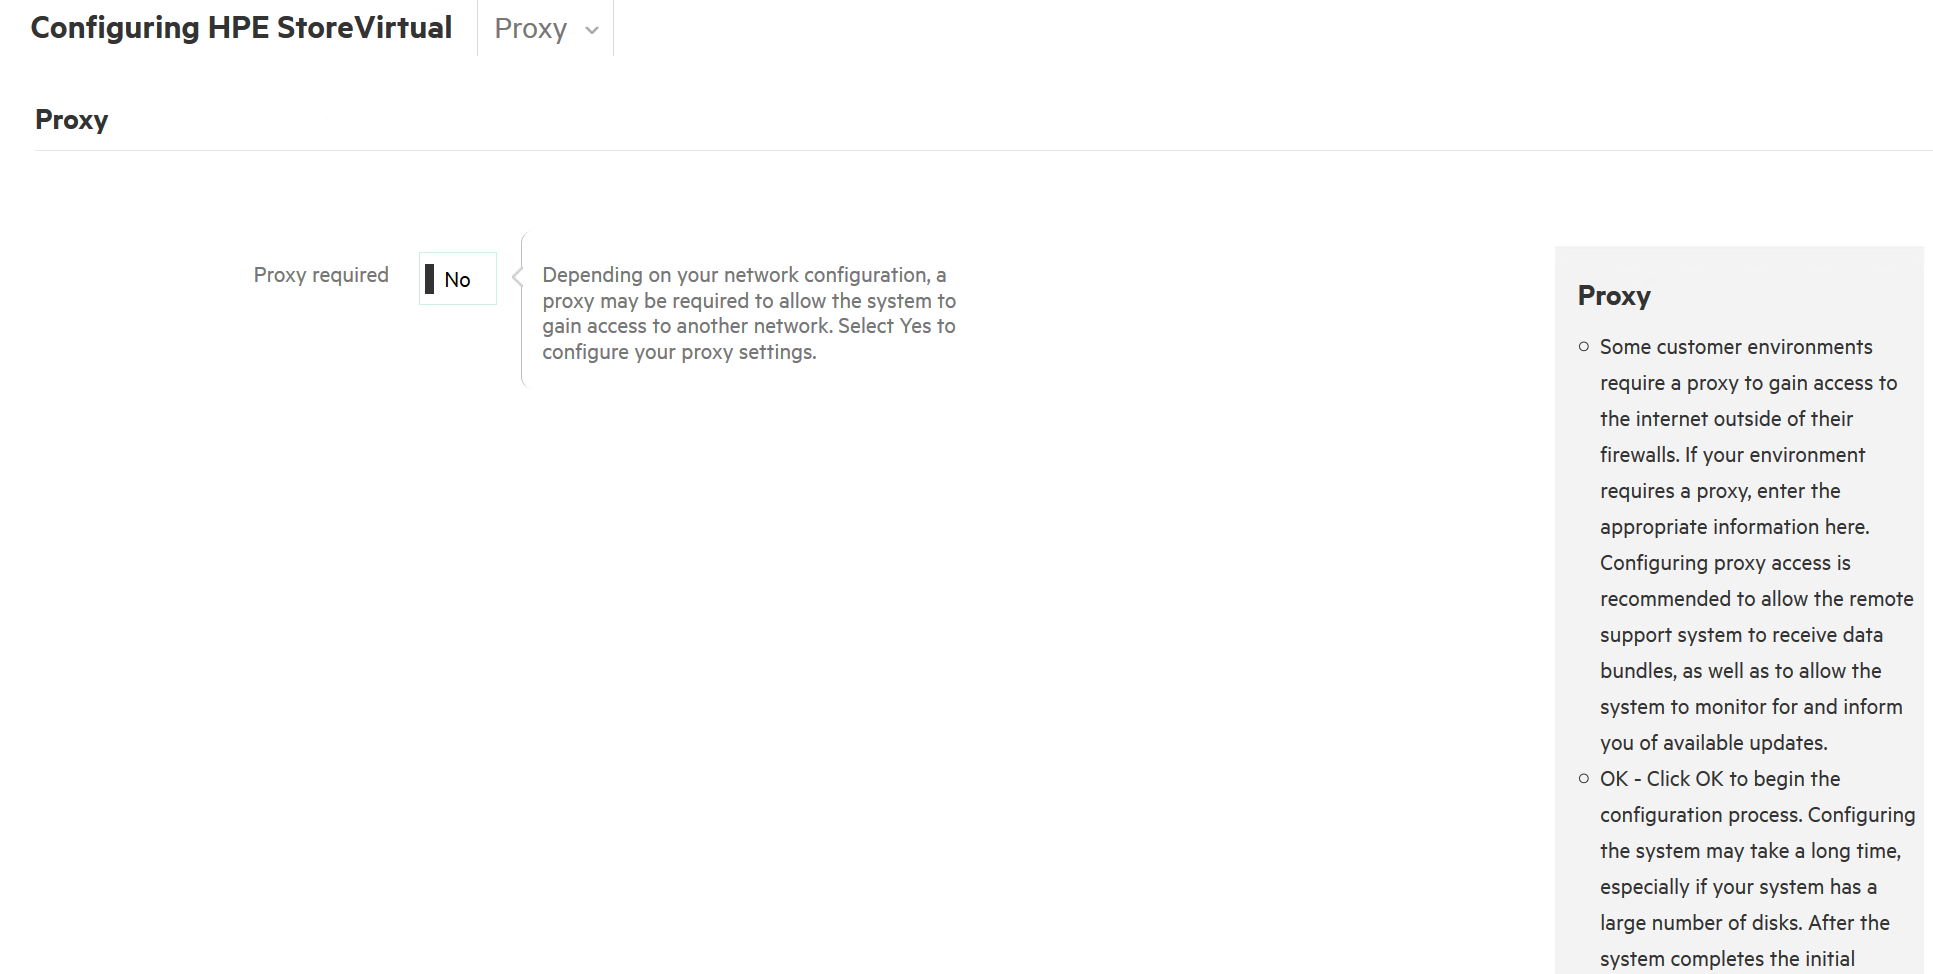
I dont have proxy in this LAB so I will select No
And that was the last section on the Initial Setup Wizard, I will now select OK on the bottom of the screen
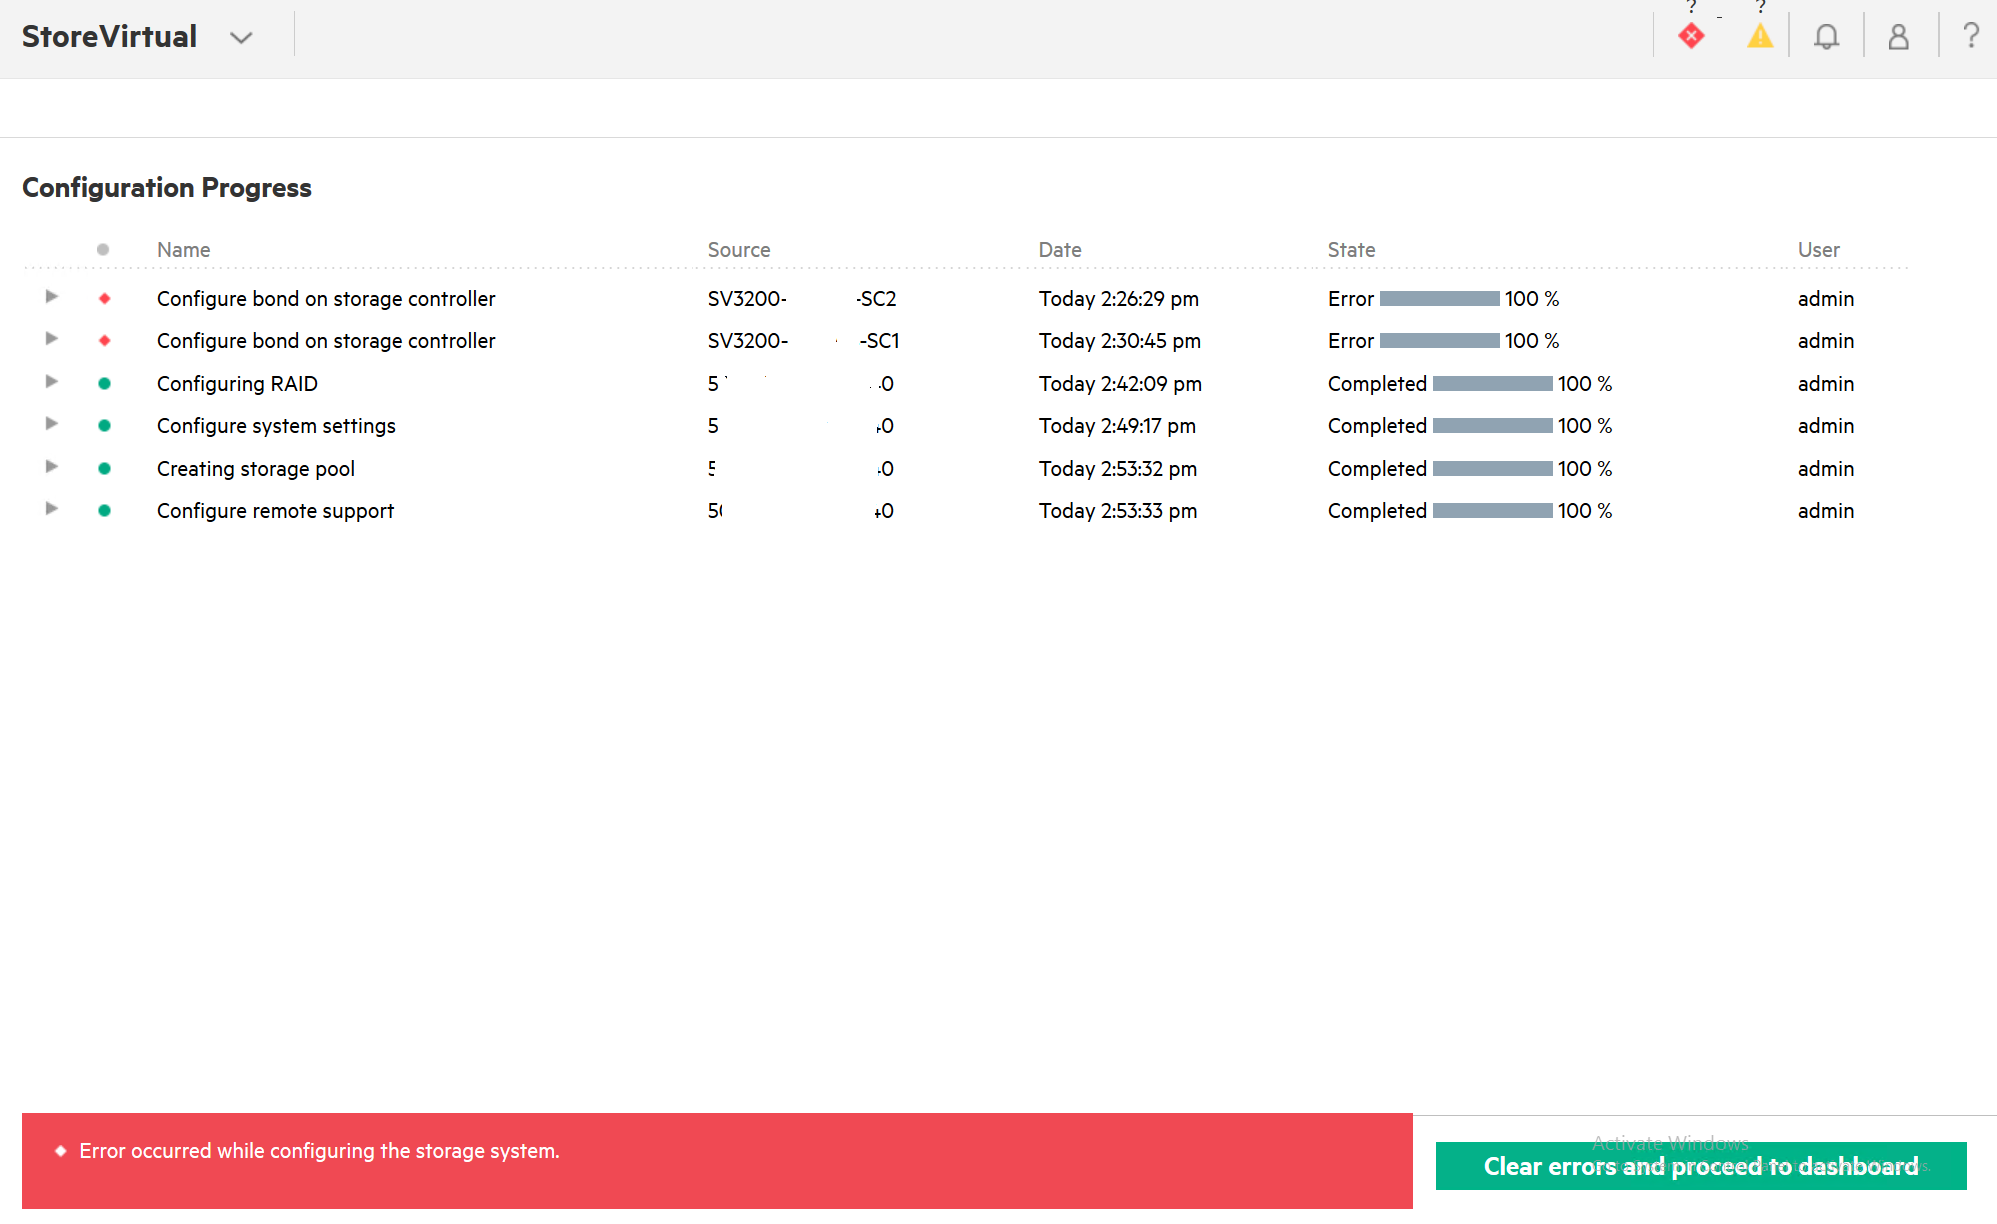
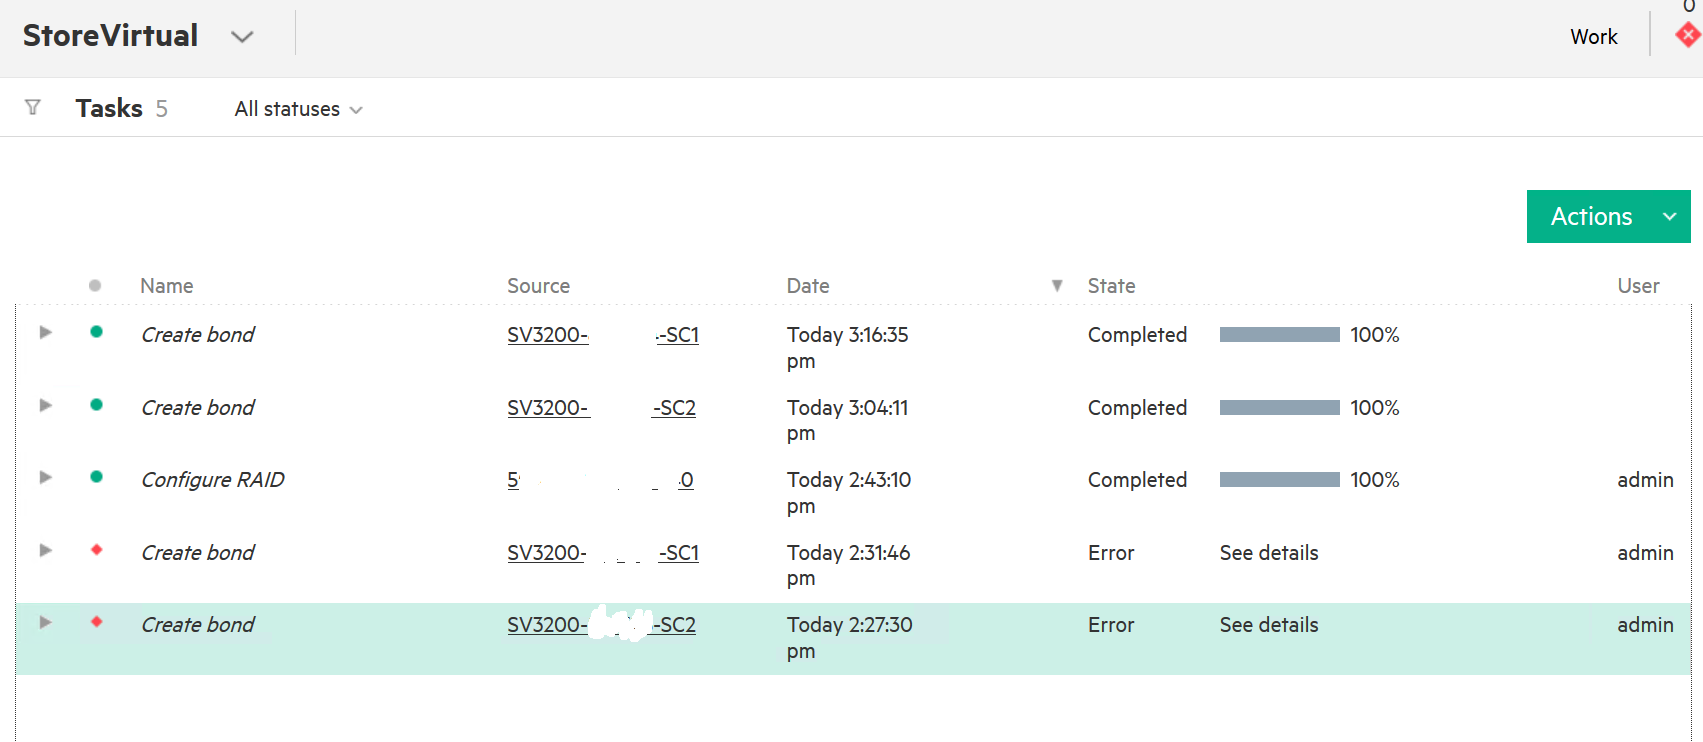
If this part went ok for you, congrats – you are done with the initial configuration. I got errors on Configure bond on storage controller
I selected Clear errors and proceed to dashboard.
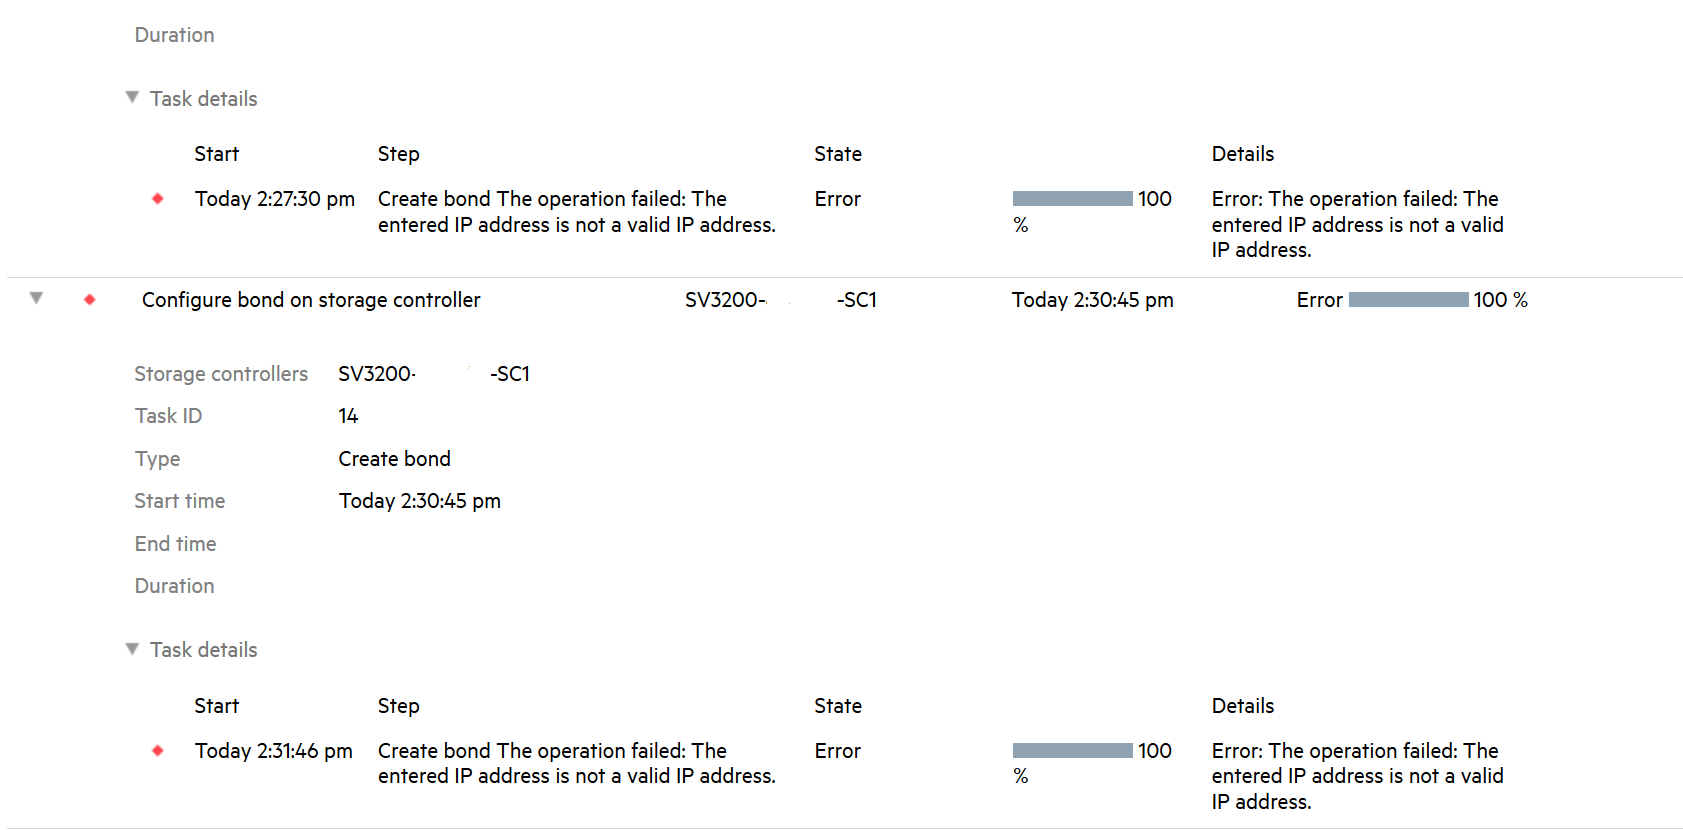
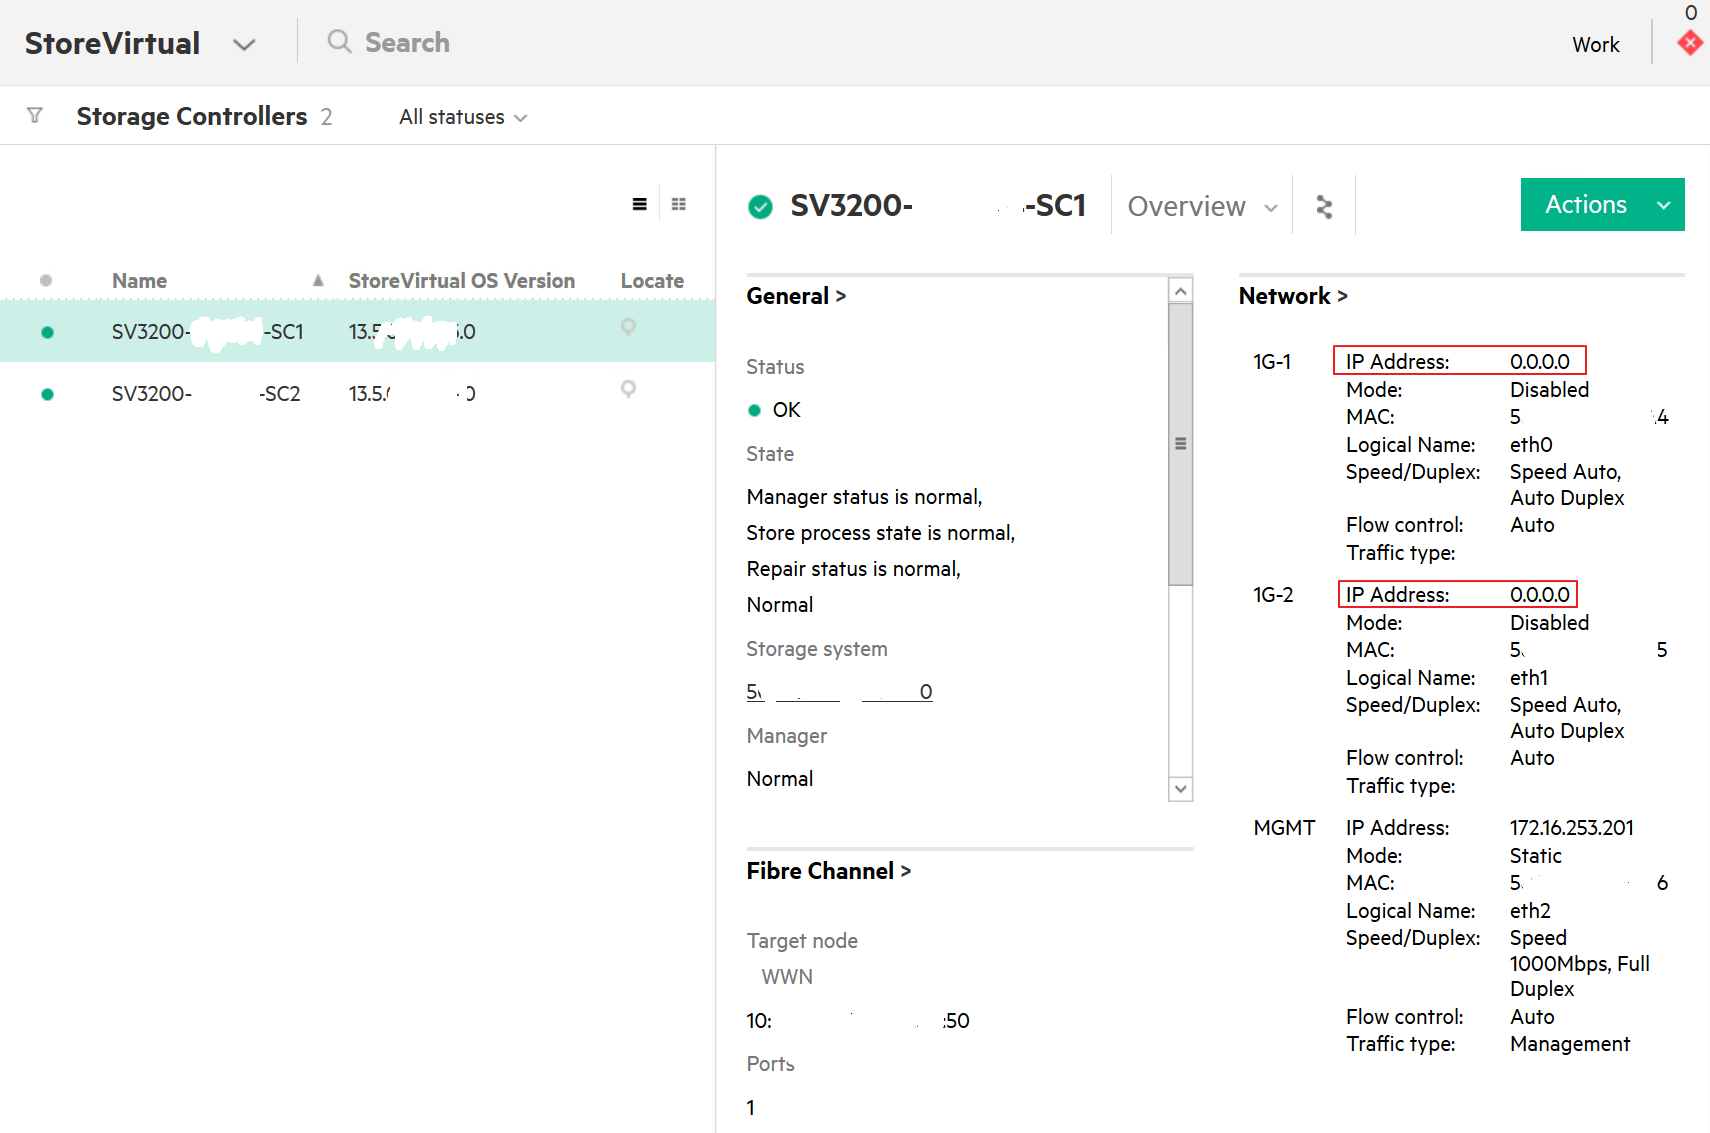
So, there is Create bond error for me on both controllers.
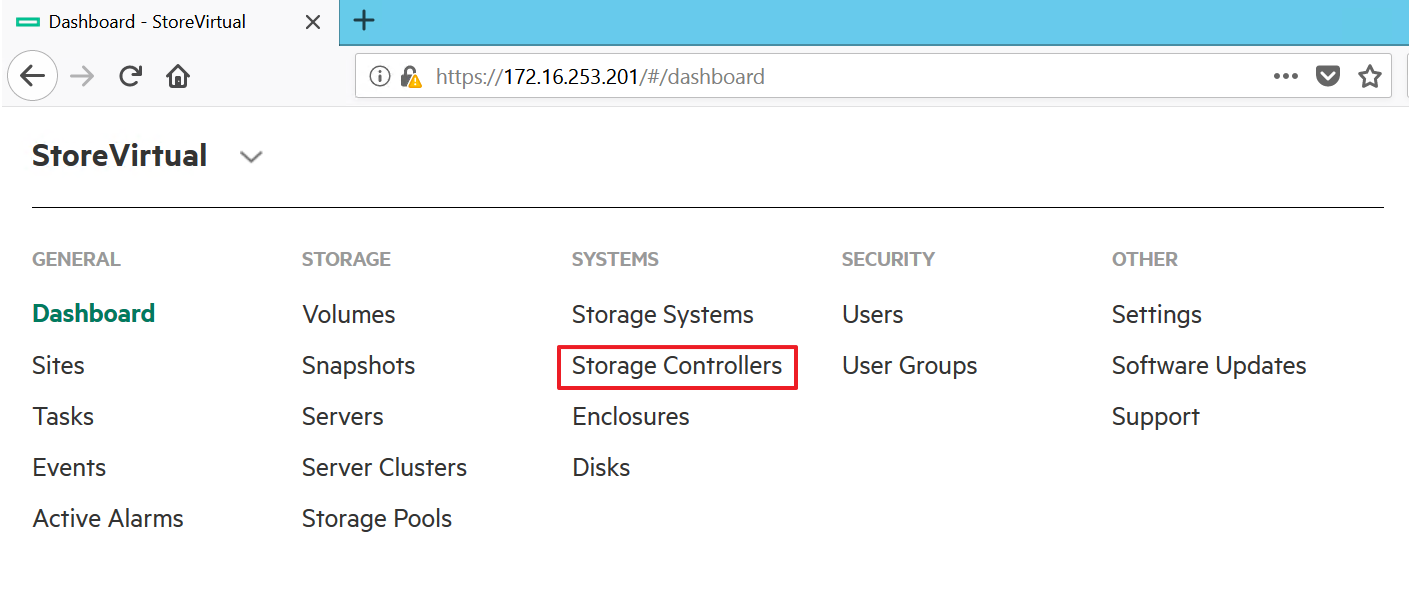
I selected StoreVirtual | Systems | Storage Controllers
I selected first storage controller on the list. On the network part it can be seen that there is no IP addresses assigned to the interfaces.
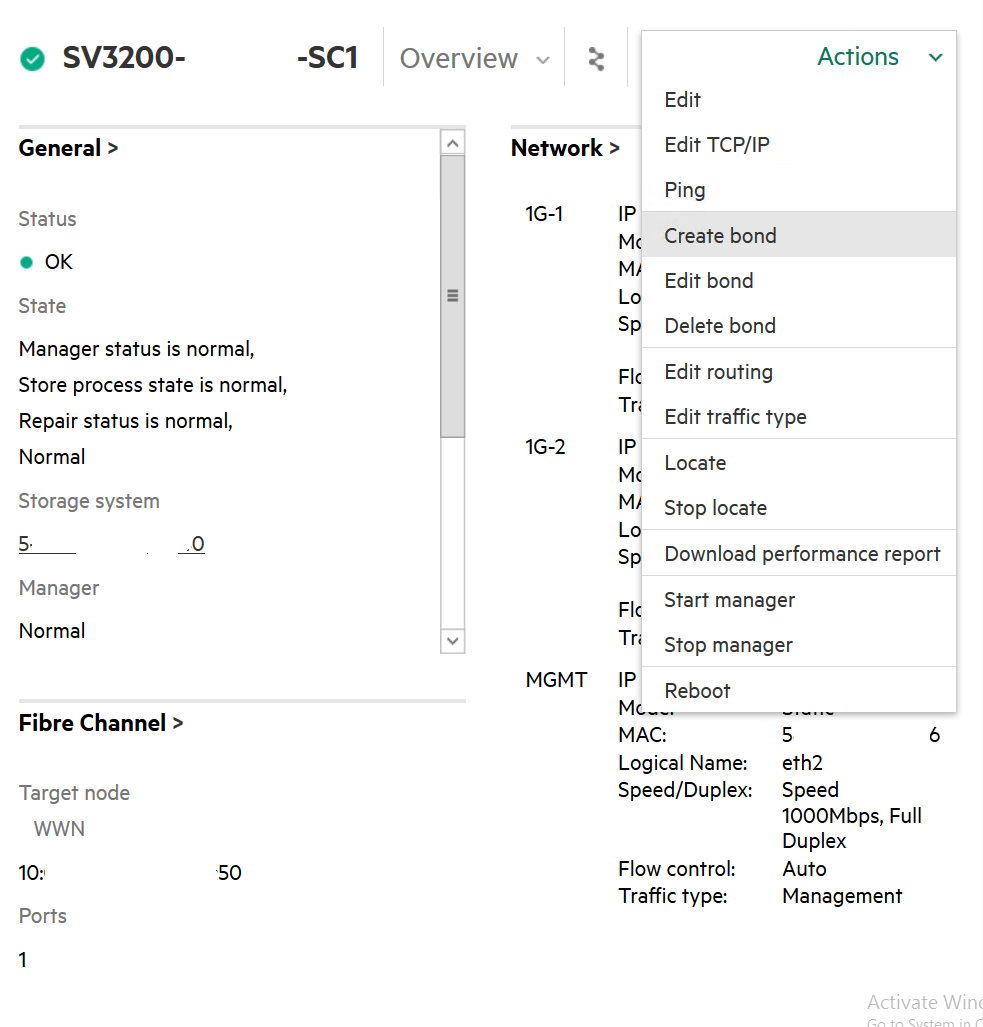
Select Actions menu from the Right top corner, and select Create Bond
I selected both ethernet interfaces from the controller, selected Adaptive load balancing again, entered IP settings and selected Create
After initial errors, second try to create bonds was success
With this step we are done with the initial setup.