One of the main components of every serious company is database server – there will be a lot of applications that make use of database, so you will need to know at least basic things about databases. Today – we will install Microsoft SQL server, and go through that process. I will go through installation of SQL Server 2017, but the process is similar for newer SQL versions.
Before we begin
Databases and SQL are world for itself, and today we will make only a dent on a surface of that world.
We will simply go through installation and basic configuration of the SQL server today. There will be other guides for SQL on my blog, so be sure to check them out.
Here you will find all the in depth information if you need something additional – https://docs.microsoft.com/en-us/sql/database-engine/install-windows/install-sql-server?view=sql-server-ver15
Prerequisites
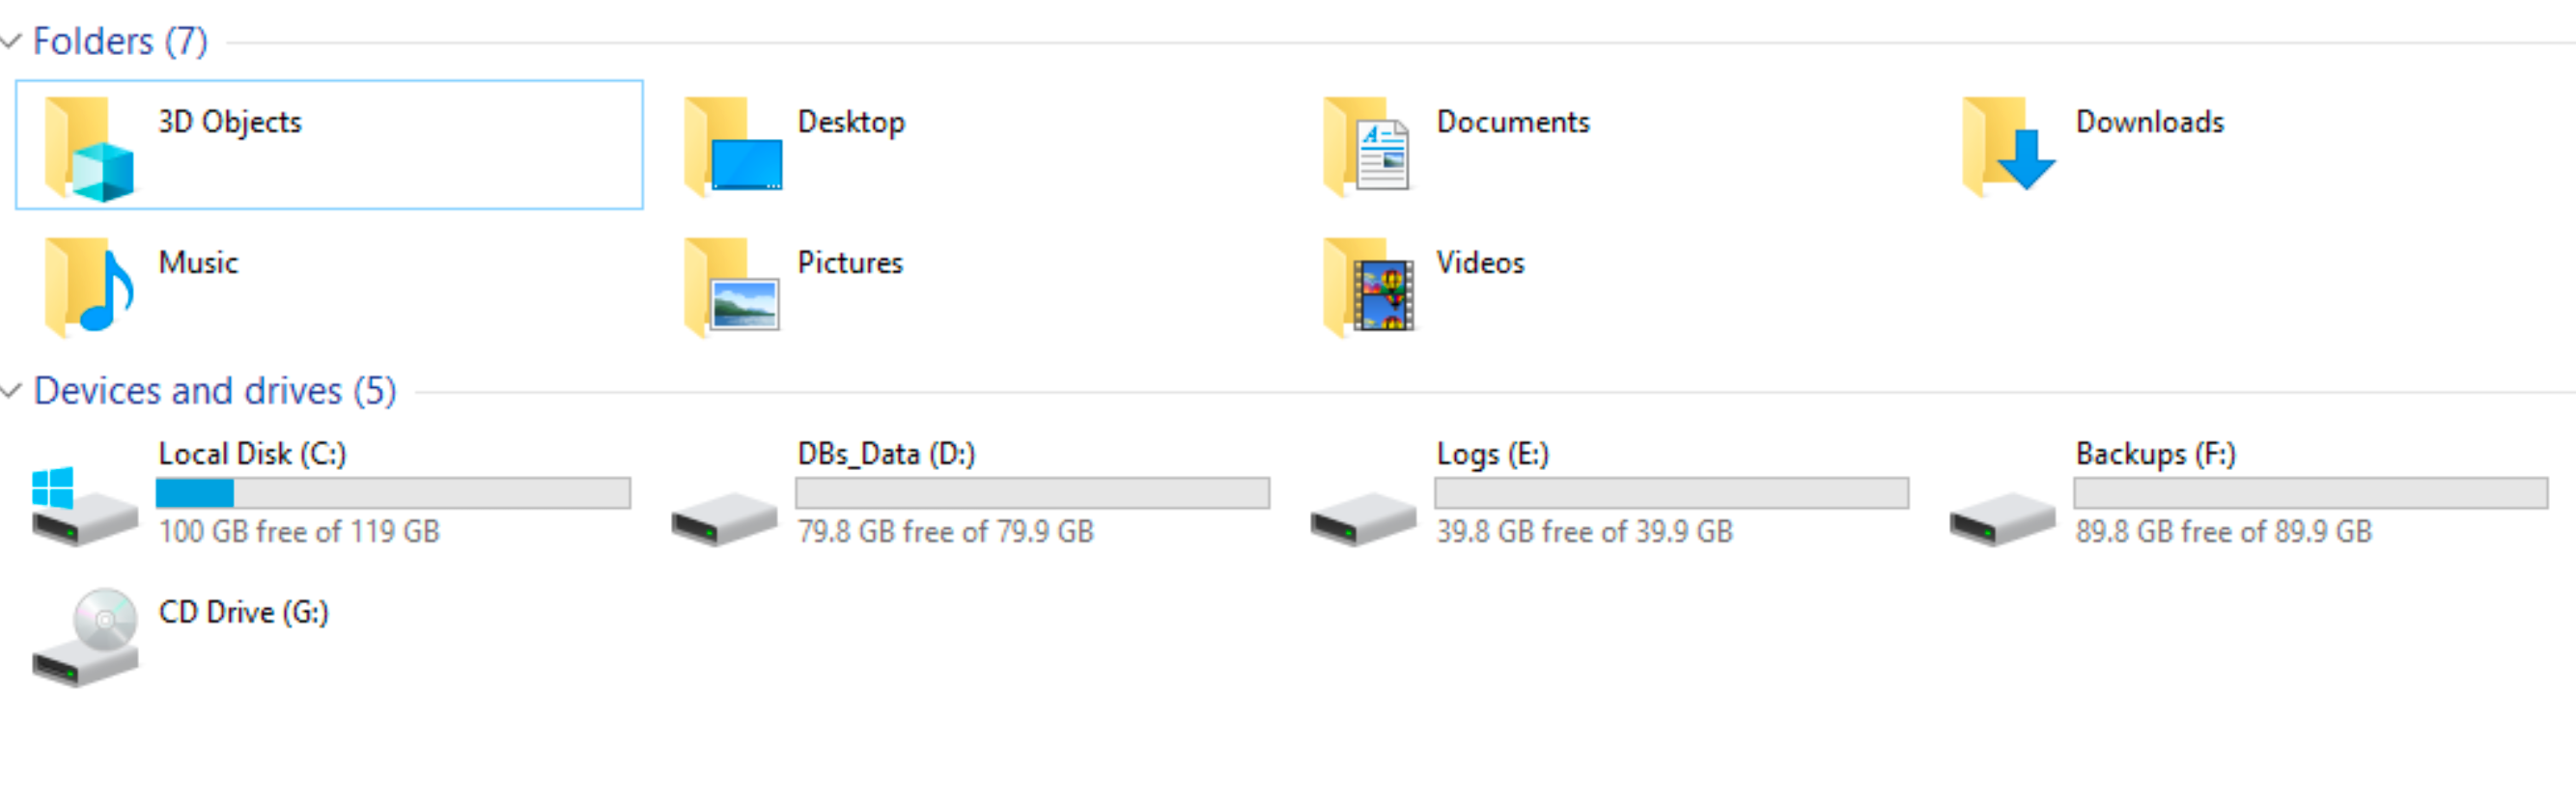
I created new VM called SBDB1, machine is part of the domain we already created for this series.
VM will reside on IP address 10.0.0.37
I also assigned three additional drives for this VM.
Disk config
I created D drive with 80GB of size, E drive with 40Gb and F drive with 90GB. You will have to make sure you assign disk space to be enough for your database, backup is additional in this case. It would be advised to use additional software and separate system for backup. But in this scenario we are doing it on this machine.
In production make sure that all these drives are separate disks or raid fields/disk enclosures…
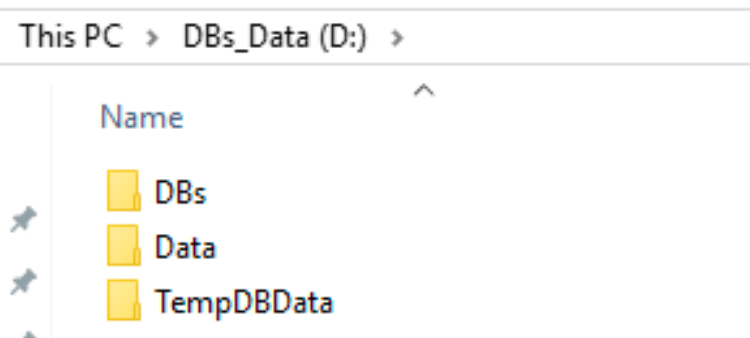
D drive will host DB and various data directories
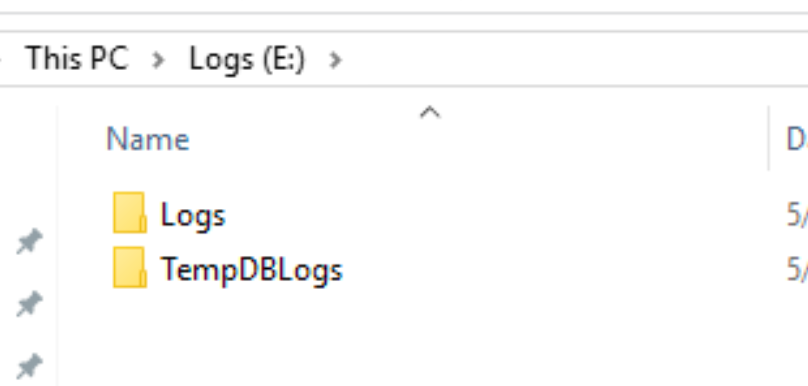
E drive will host logs
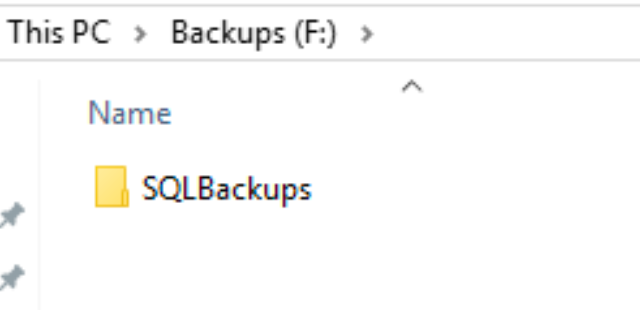
F drive will host backups
On D drive I created three directories
D:\DBs
D:\Data
D:\TempDBData
On E drive I created following directories
E:\Logs
E:\TempDBLogs
On F drive I created following directories
F:\SQLBackups
User config
Inside AD I will also prepared new organizational unit named SQLAccounts and created inside following users
sqldbengine – account for Server Database Engine service
sqlagent – account for Server Agent Service account
I also created two additional accounts
sqldbadmin1 – which will be “admin” account for SQL
I also created additional account named
aw2016db – this will be DB owner for AdventureWorkd database we will import later.
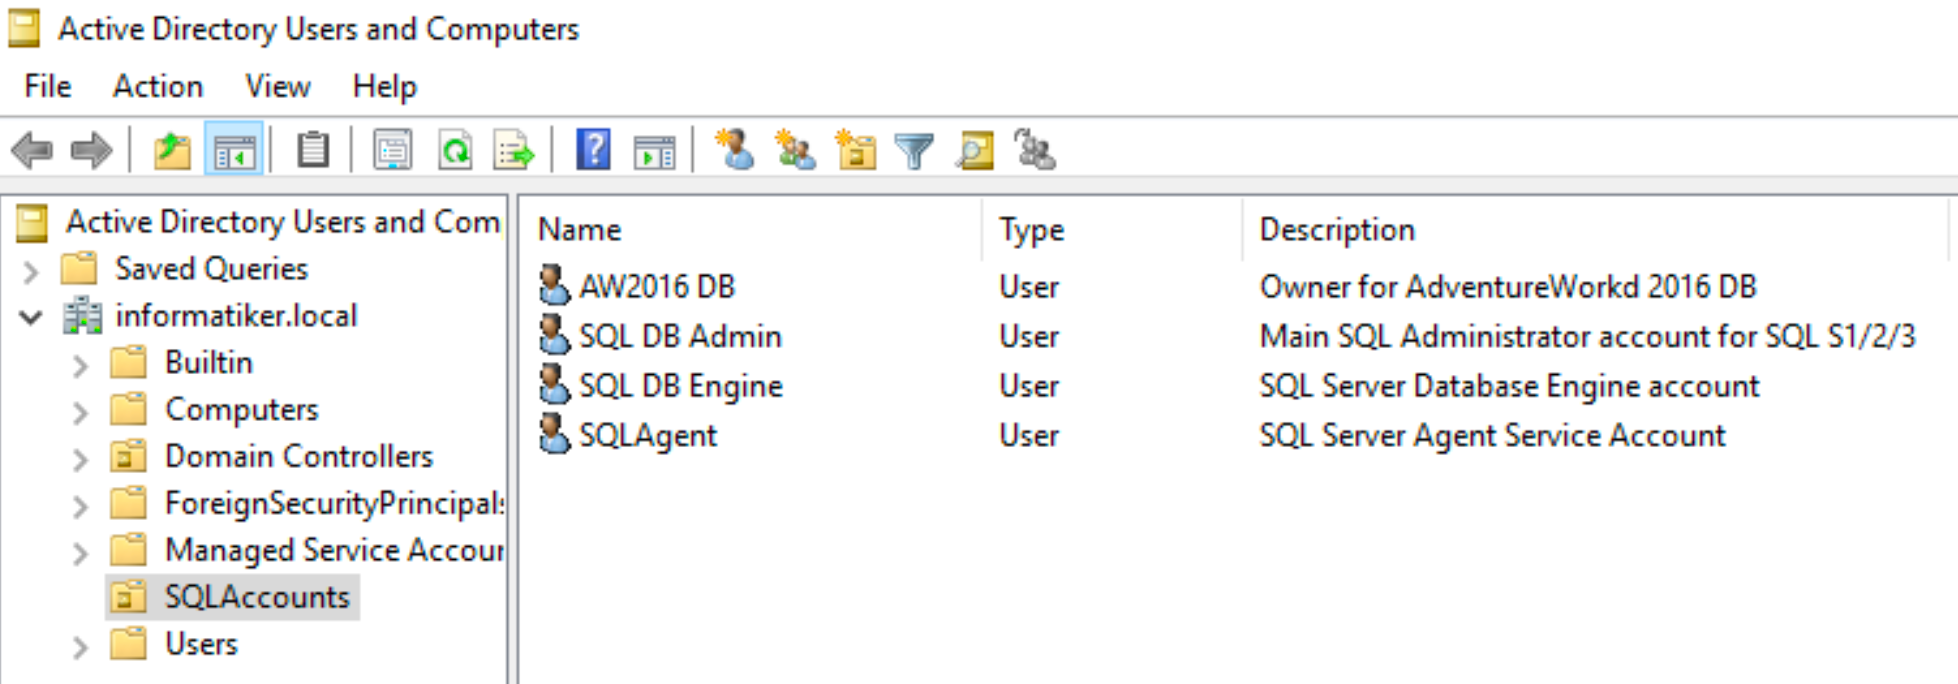
All the accounts are simple domain users without any special permissions.
Downloads
I’m going to download SQL Server 2017 from here:
https://www.microsoft.com/en-us/evalcenter/evaluate-sql-server-2017-rtm
We will also need SQL Management Studio which I got from here:
If the link is changed, have a look here for a new one:
I will also install database sample from here:
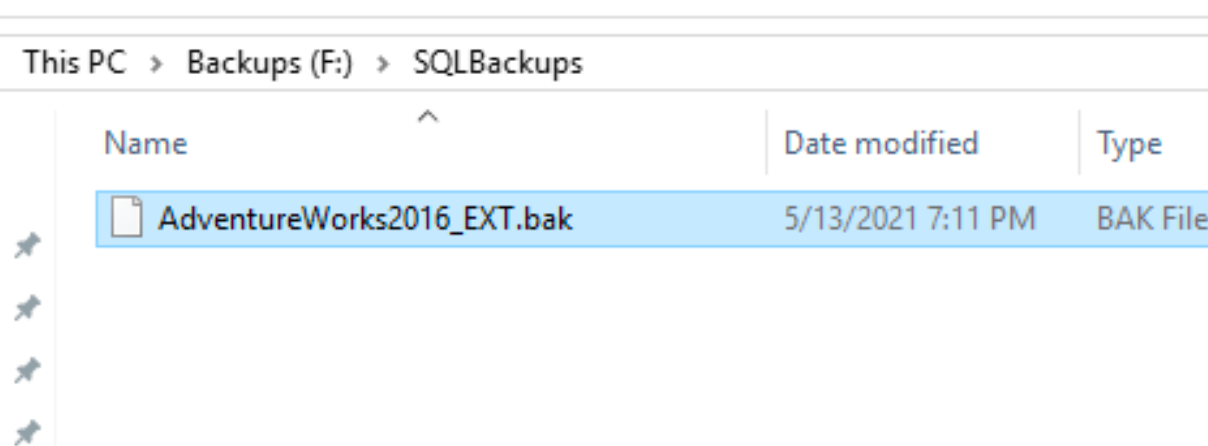
File downloded on the link is AdventureWorks2016_EXT.bak
You can find more details here – https://github.com/microsoft/sql-server-samples/releases/tag/adventureworks
Bonus words of advice
With all prerequisites deployed, few more words – if you run this in production, you will need to assess hardware specs you need for your DB to run without hiccups – amount of RAM and drive configuration can be database specific, so make sure you check requirements for your database before you proceed. and run some performance tests and configs before deploying to production.
Make sure you define limits for the RAM inside SQL, so your system and sql don’t crash, or perform poorly because lack of memory. There is a tip for this at the bottom of this quide, so be sure to go through it.
Also, for the user config part. I will be using Windows Authentication in this scenario, since it is considered safer. In real world, especially with older apps, you will maybe have to setup mixed authentication and use SQL sa account. If you have to do it that way – make sure it is properly secured, because sa account is heavily targeted in all kinds of attacks.
I’ve seen a lot of issues with sa accounts through years, so, if you don’t have to – don’t use it.
Ok, let’s proceed to install
Installation
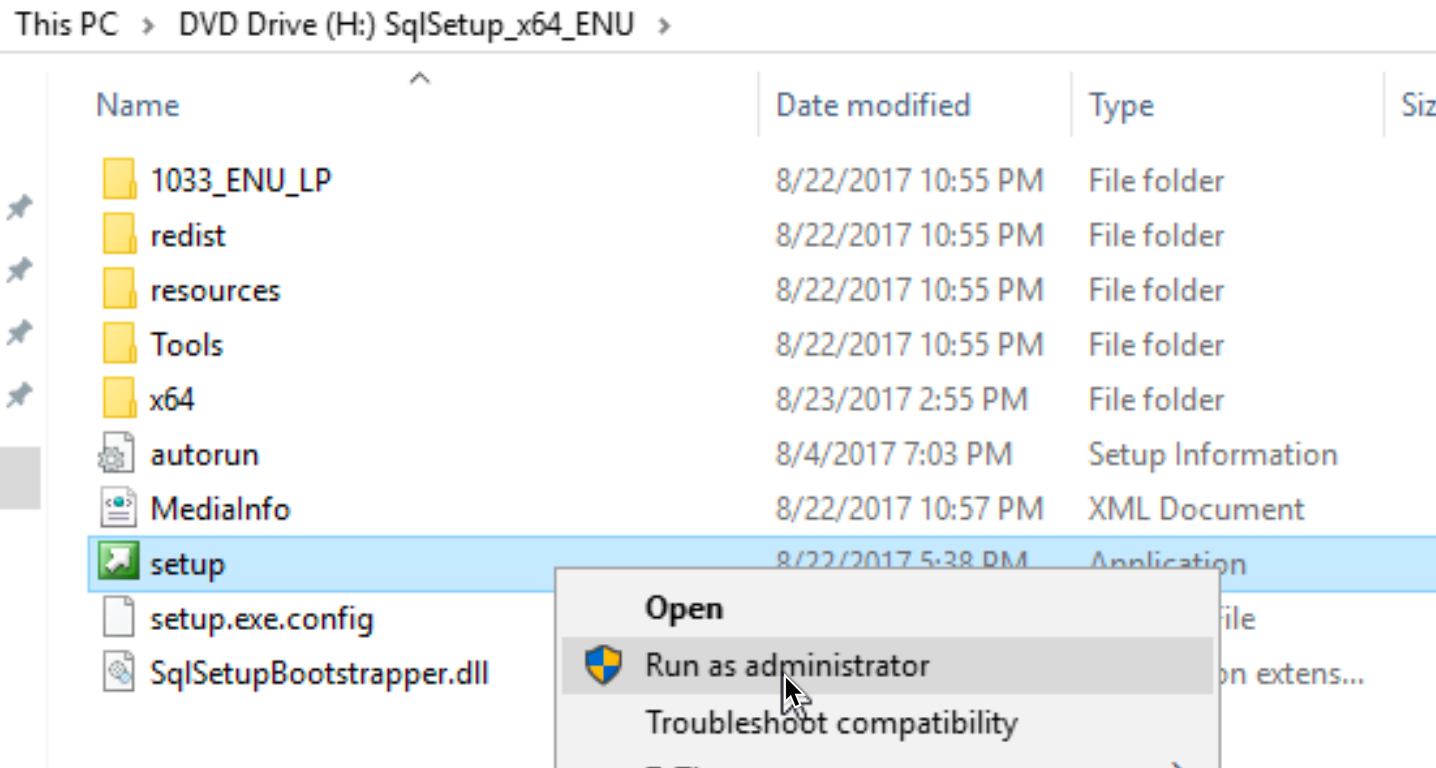
Mount your downloaded ISO or start EXE file. I mounted .iso file and run setup.exe. I run it as administrator
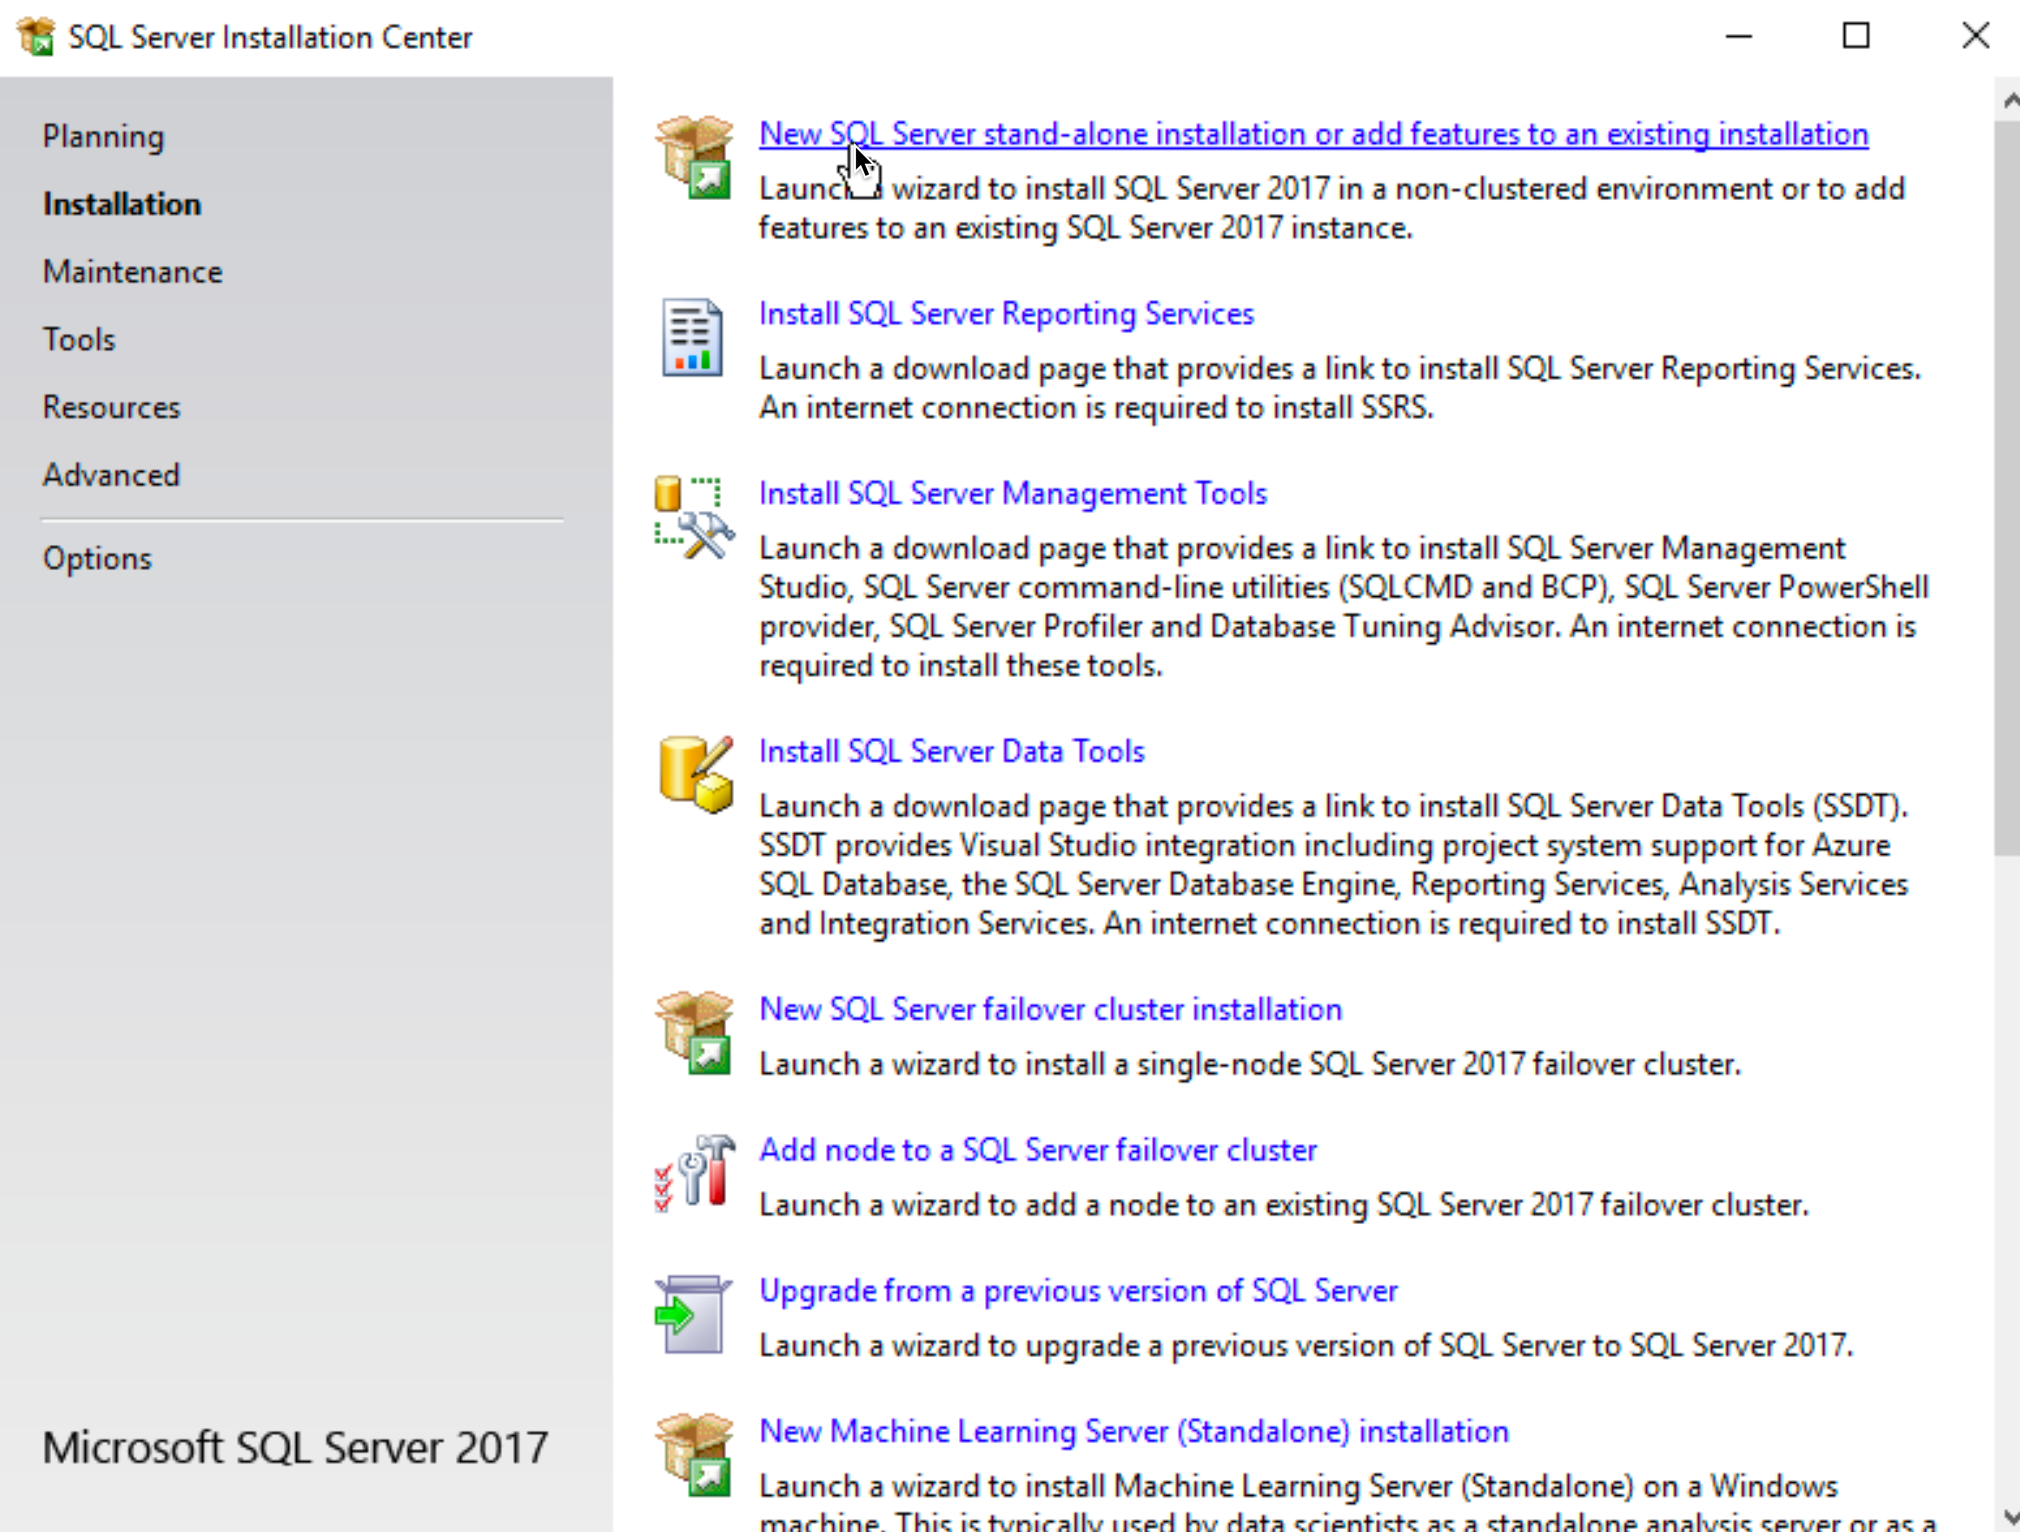
I selected Installation from left part of the screen and then selected “New SQL Server stand-alone installation or add features to an existing installation”.
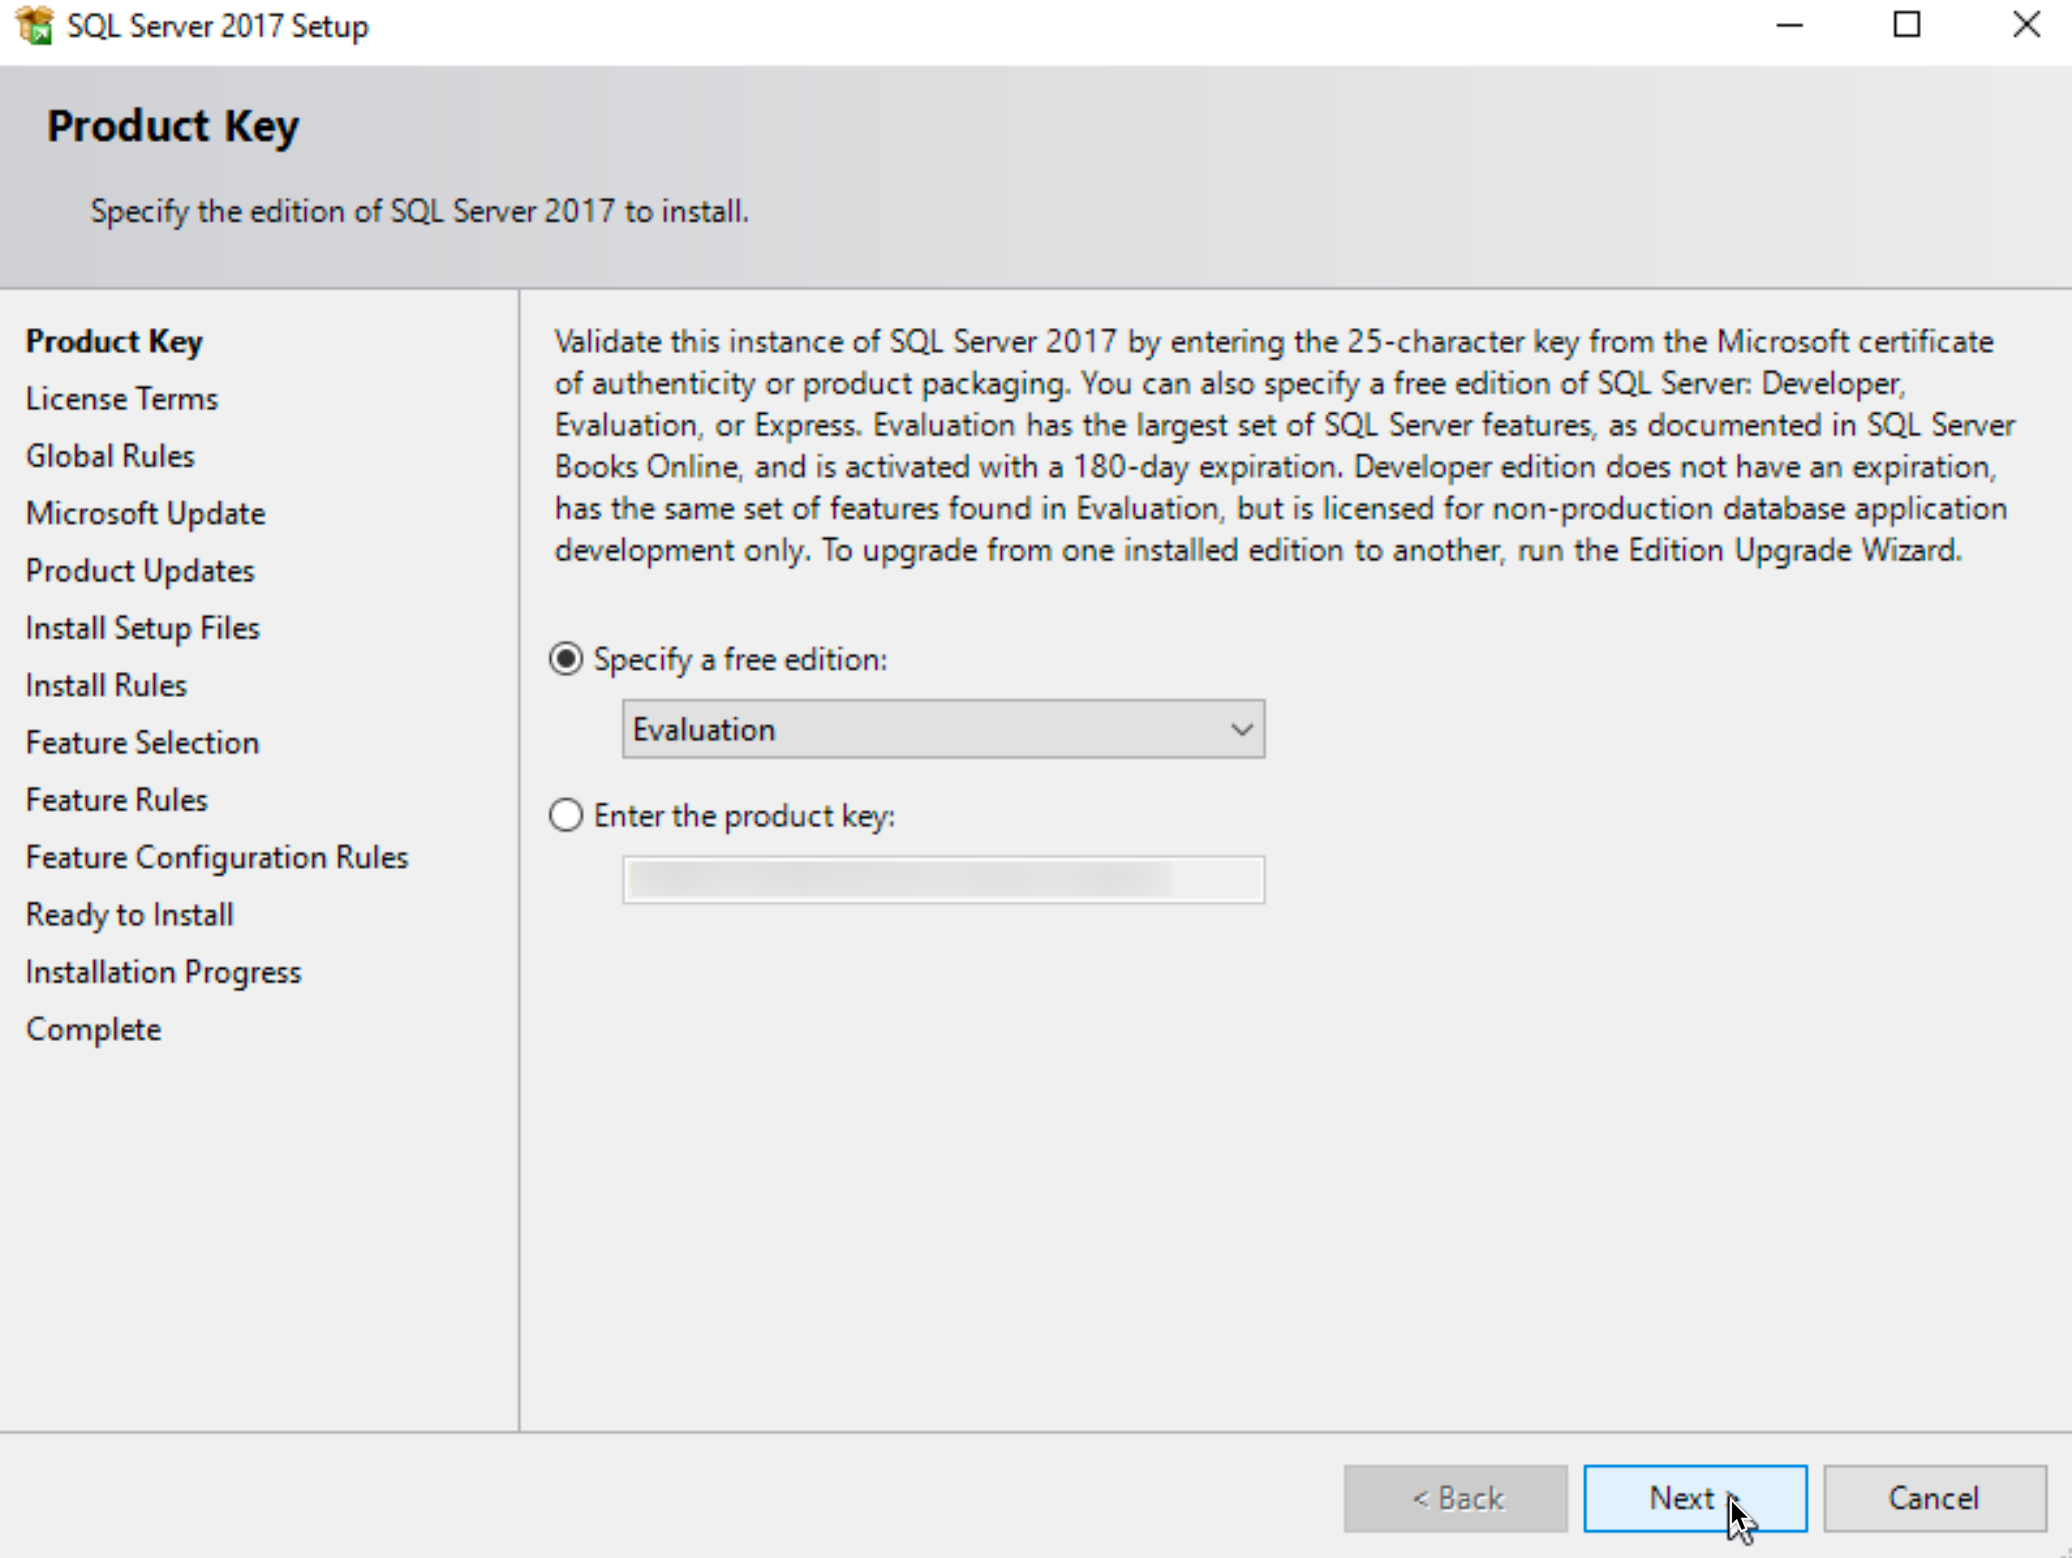
We will use Evaluation for this scenario – Next
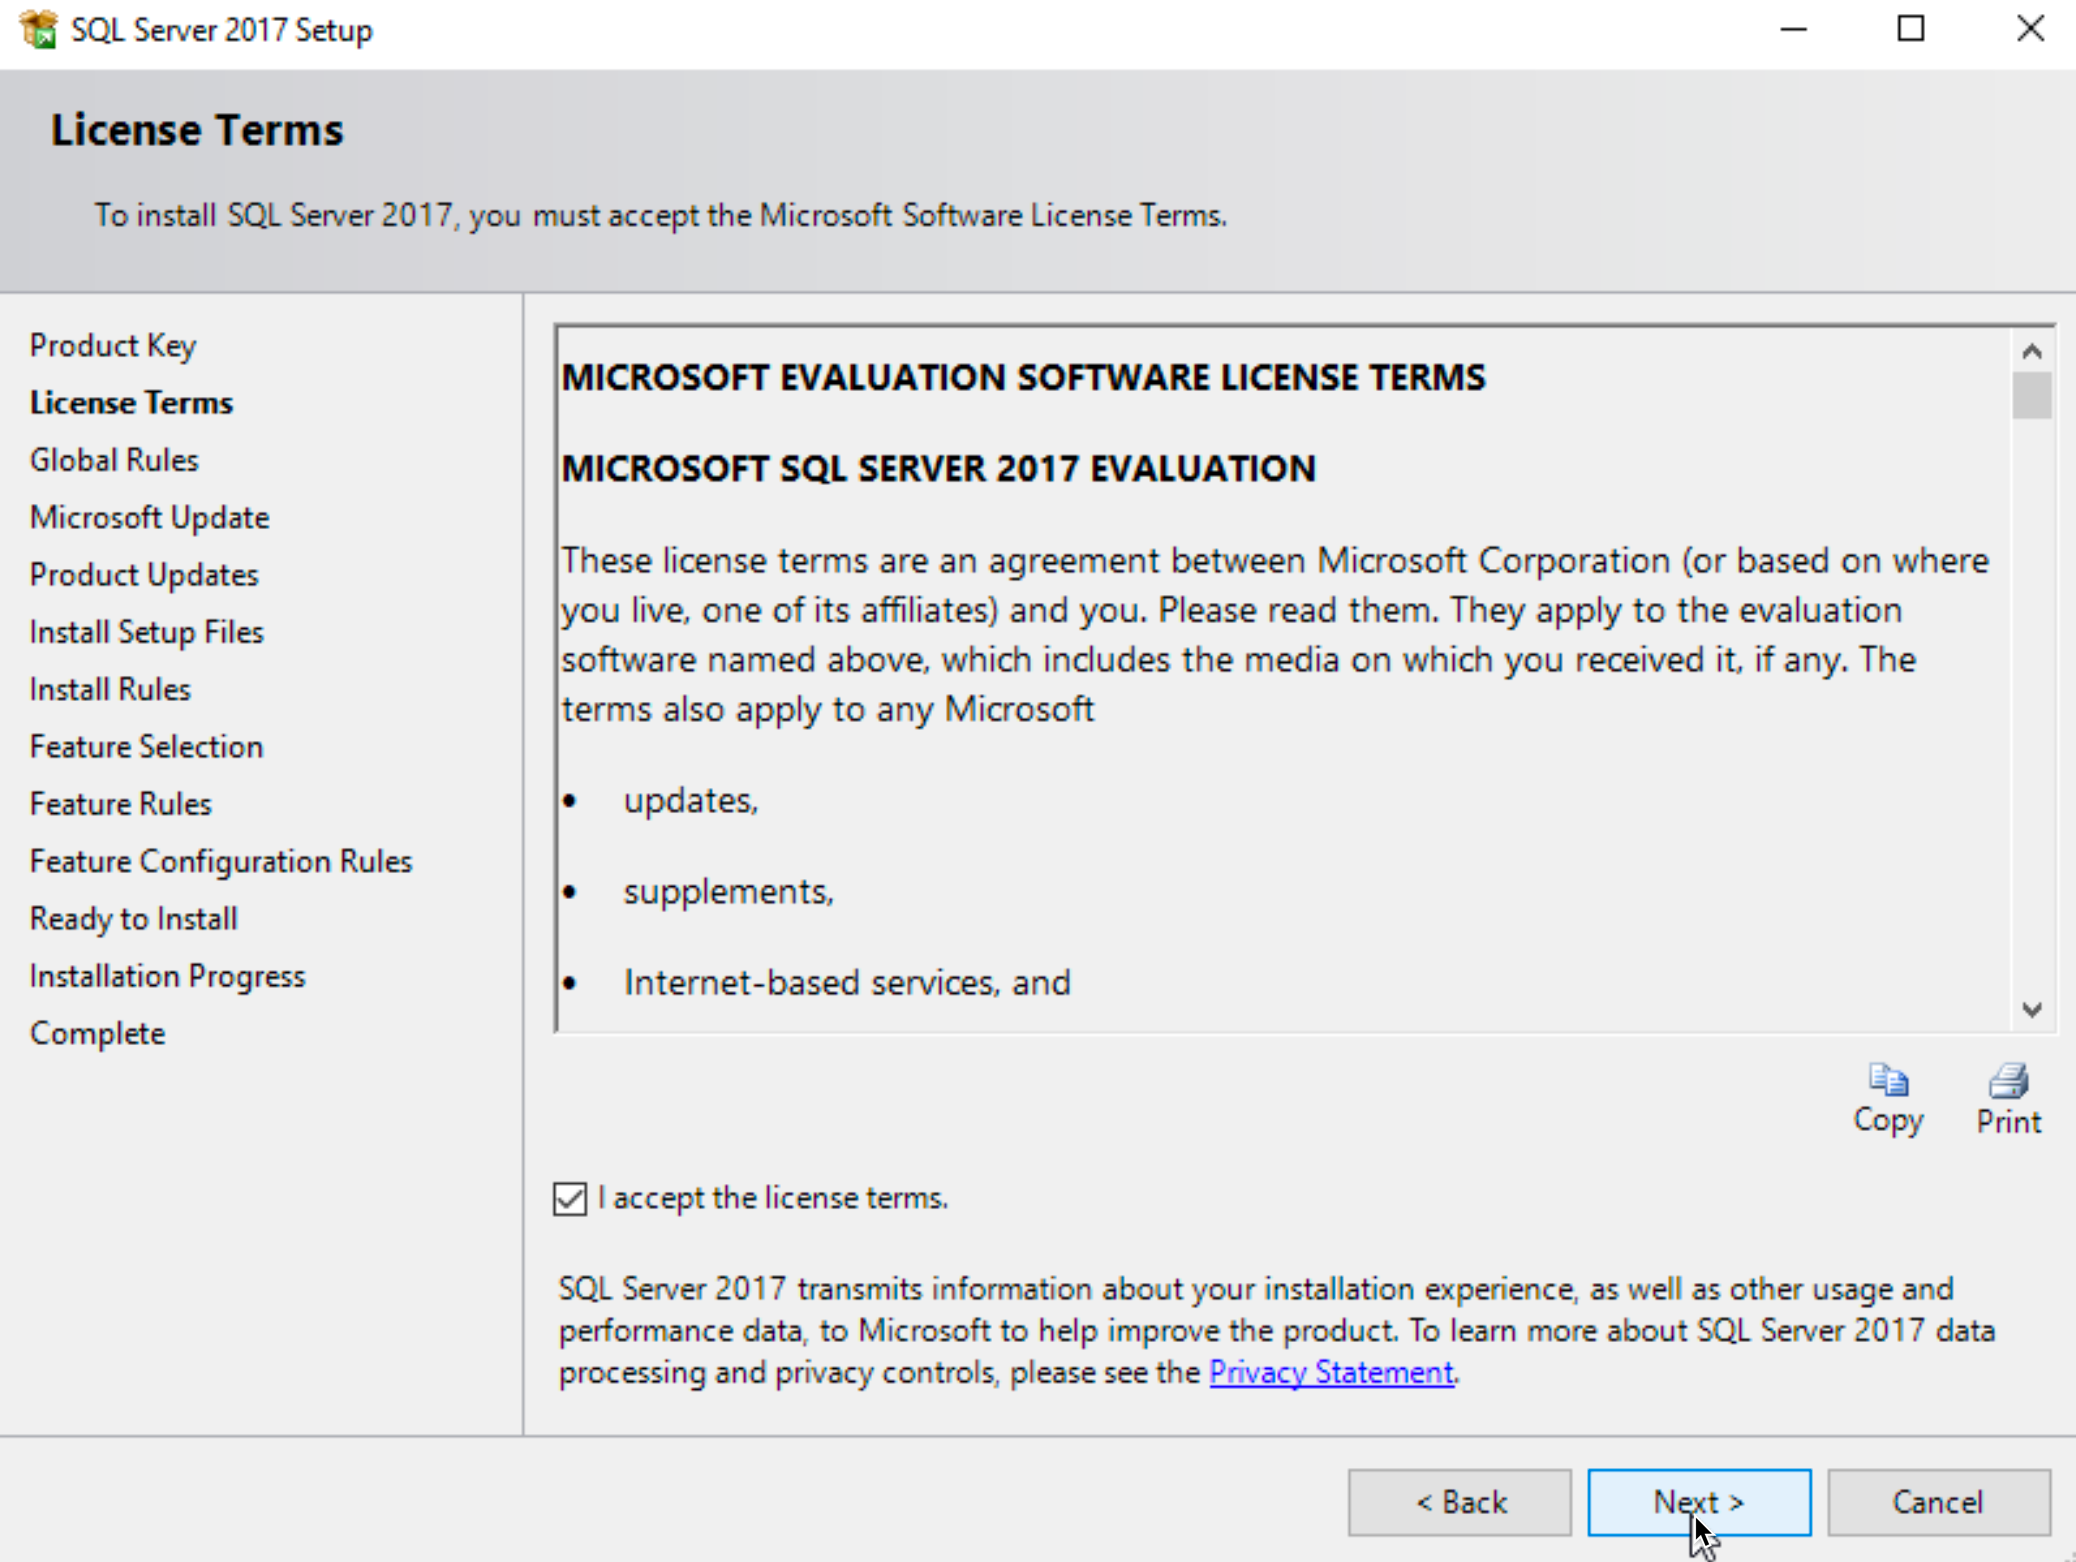
Read agreement, select “I agree” if you agree, and select Next
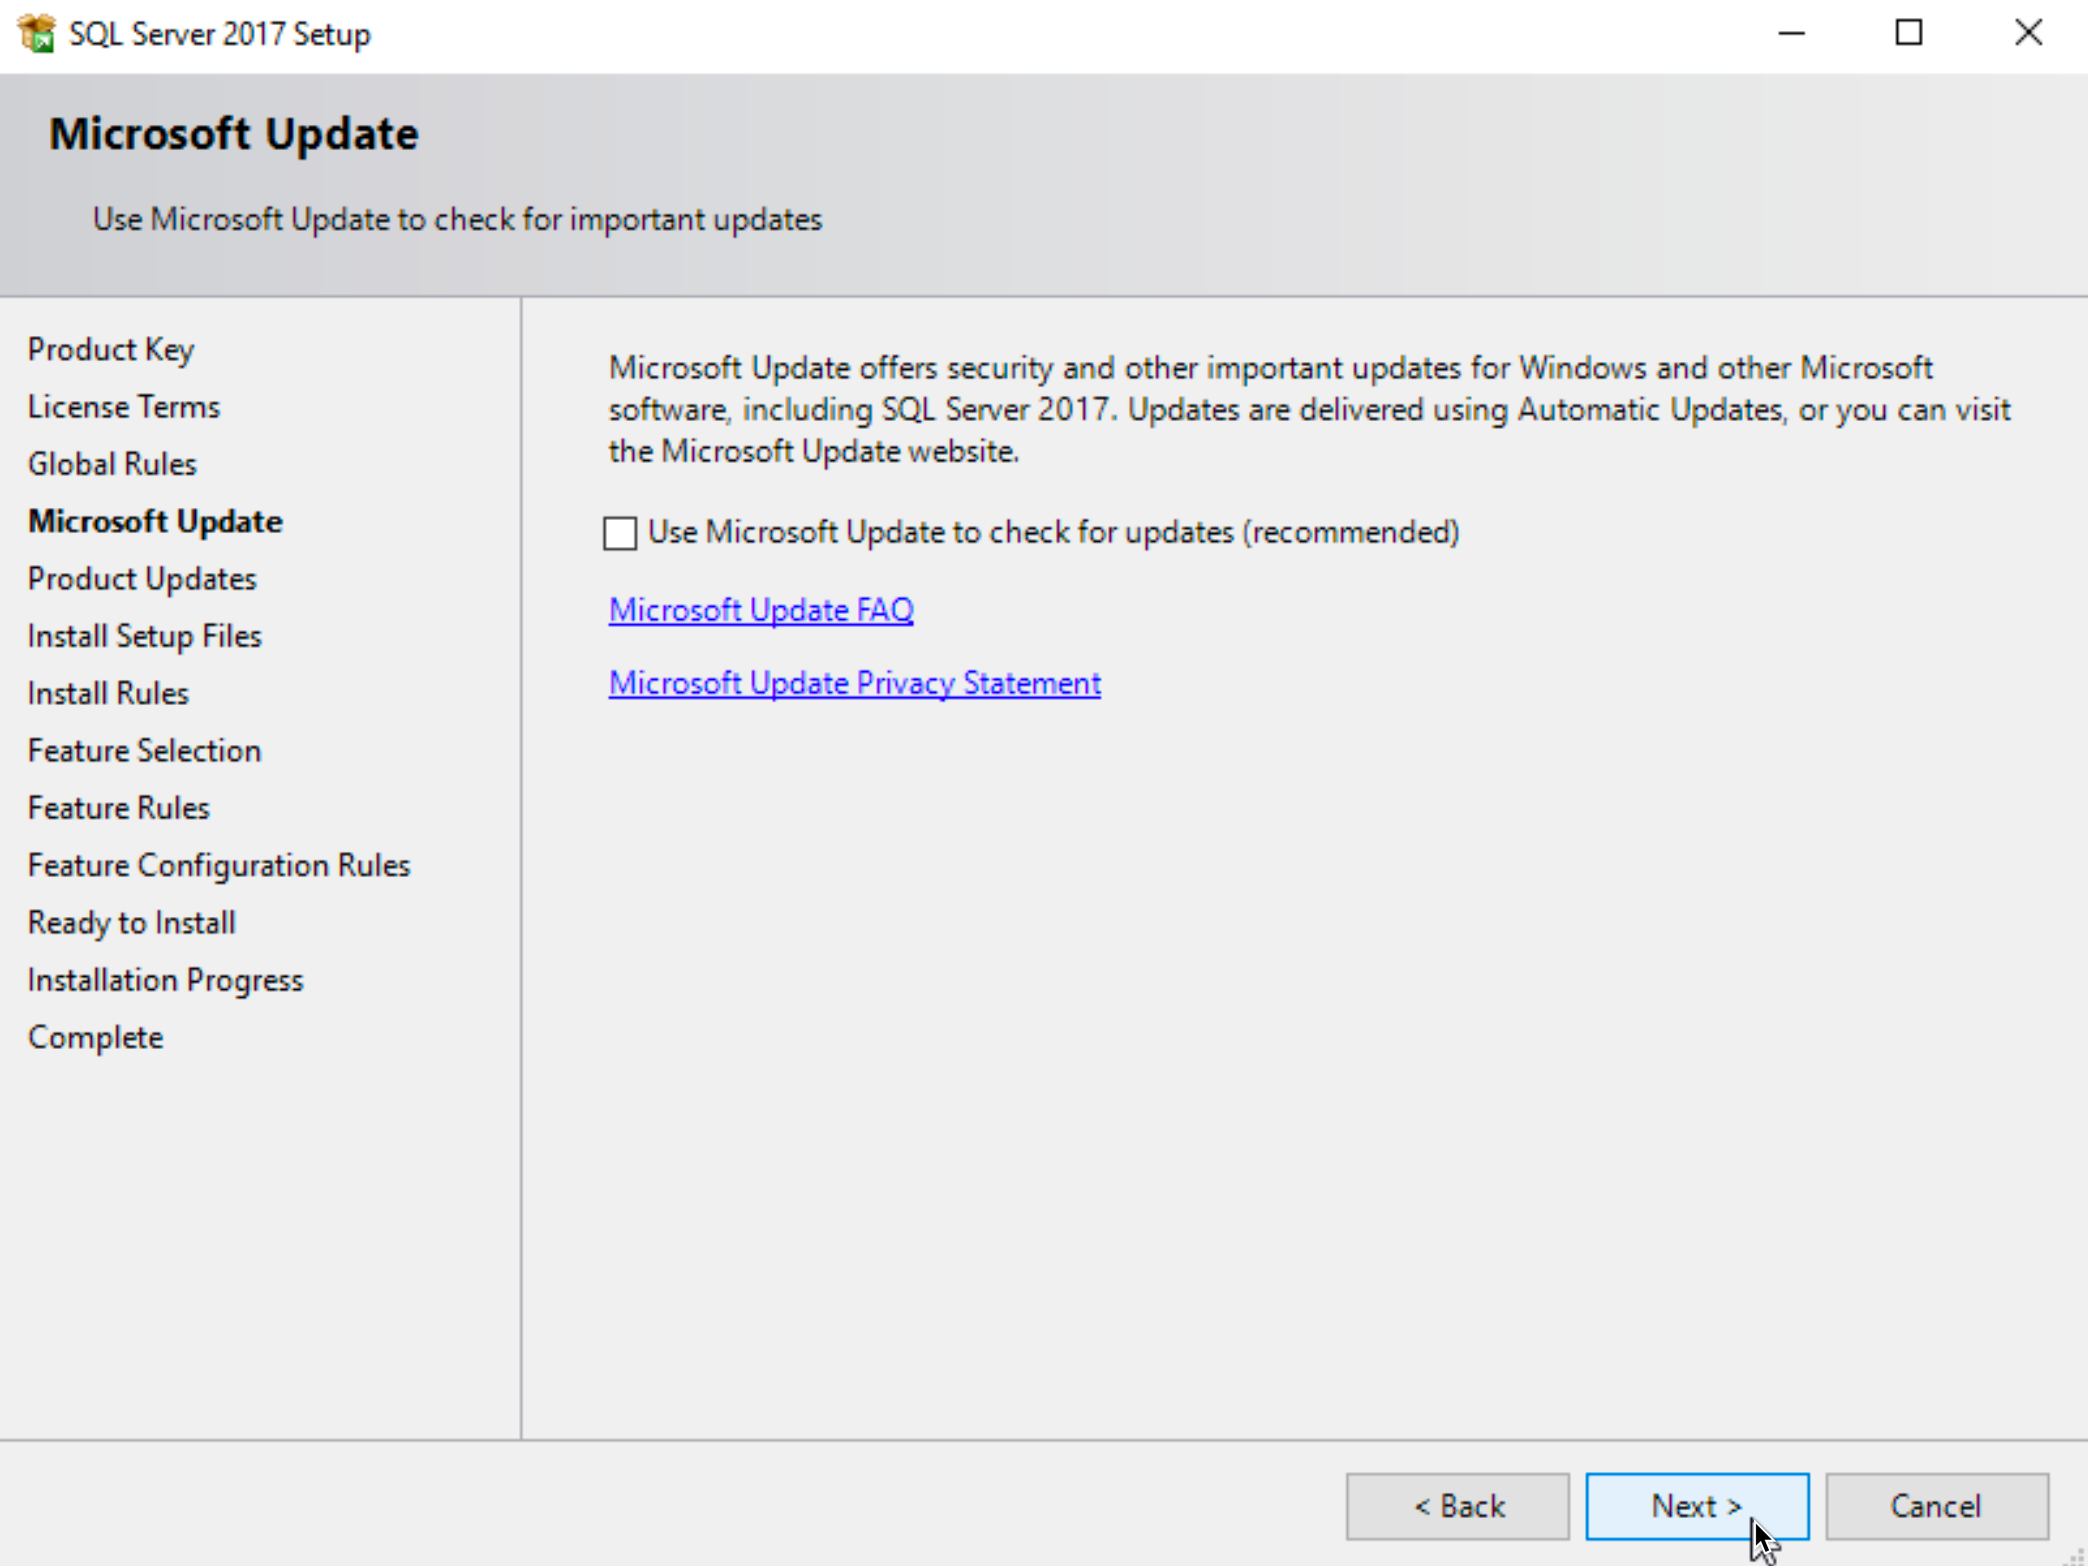
It would be nice to use Microsoft Update to check for updates, and that would be a smart step, but since this is test guide, I will skip it and select Next
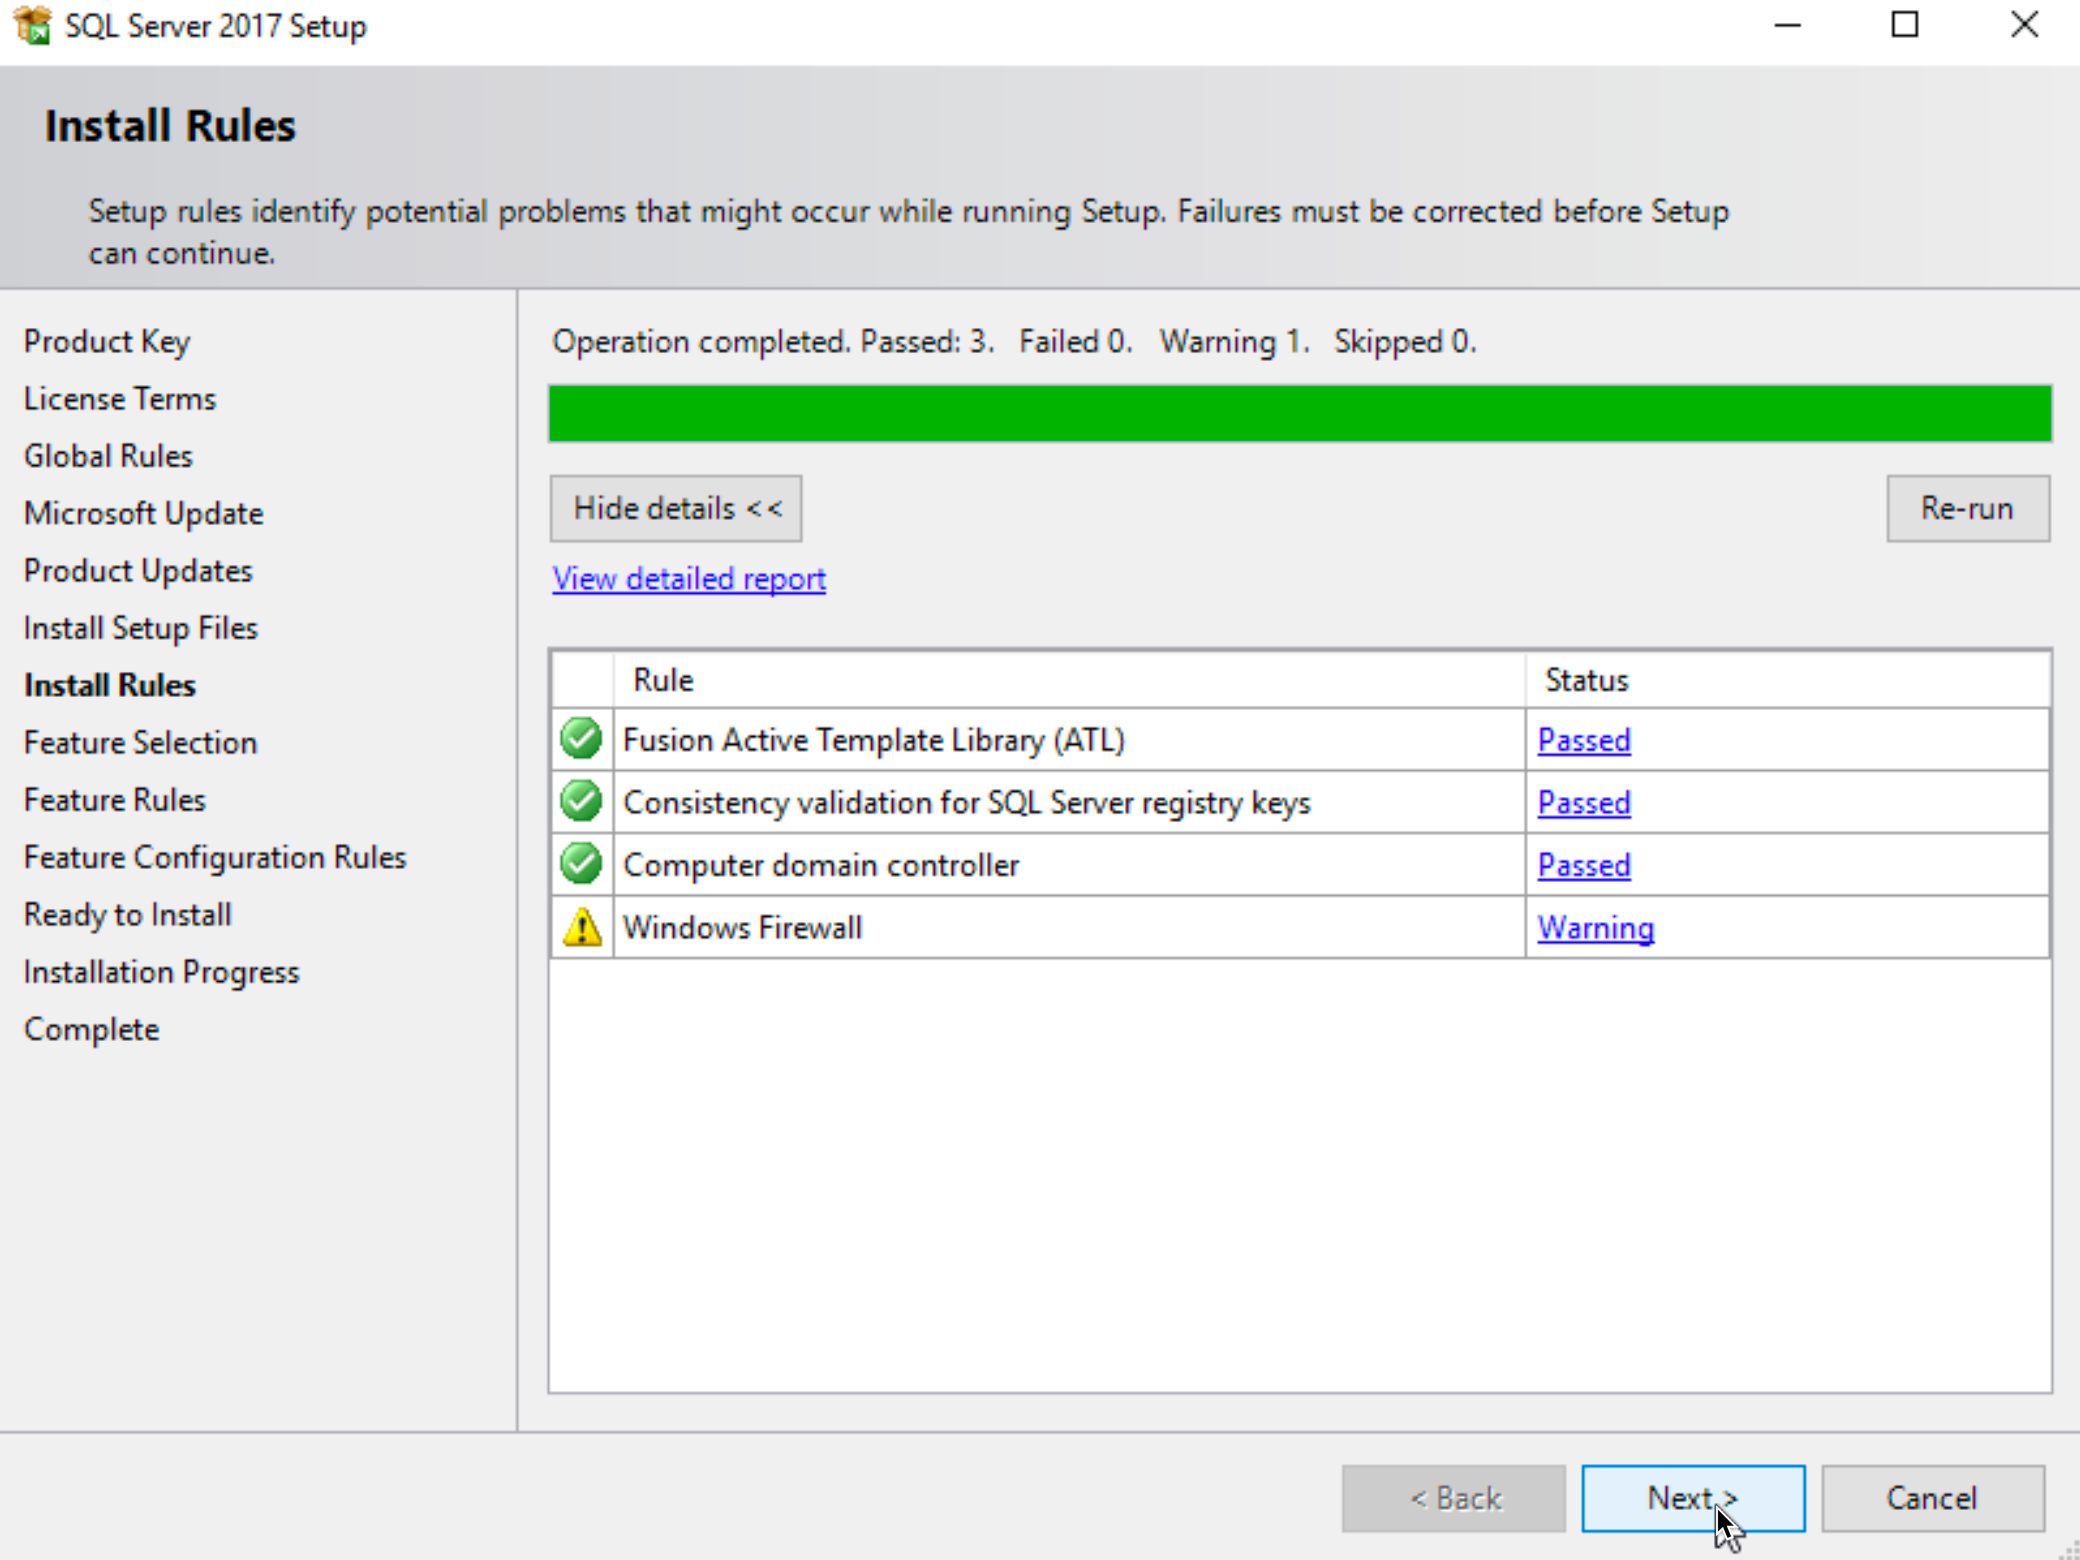
Report will probably show warning on Windows Firewall – if you wish to use SQL network wide, you will need to configure Windows Firewall properly. We can safely ignore this warning and select Next
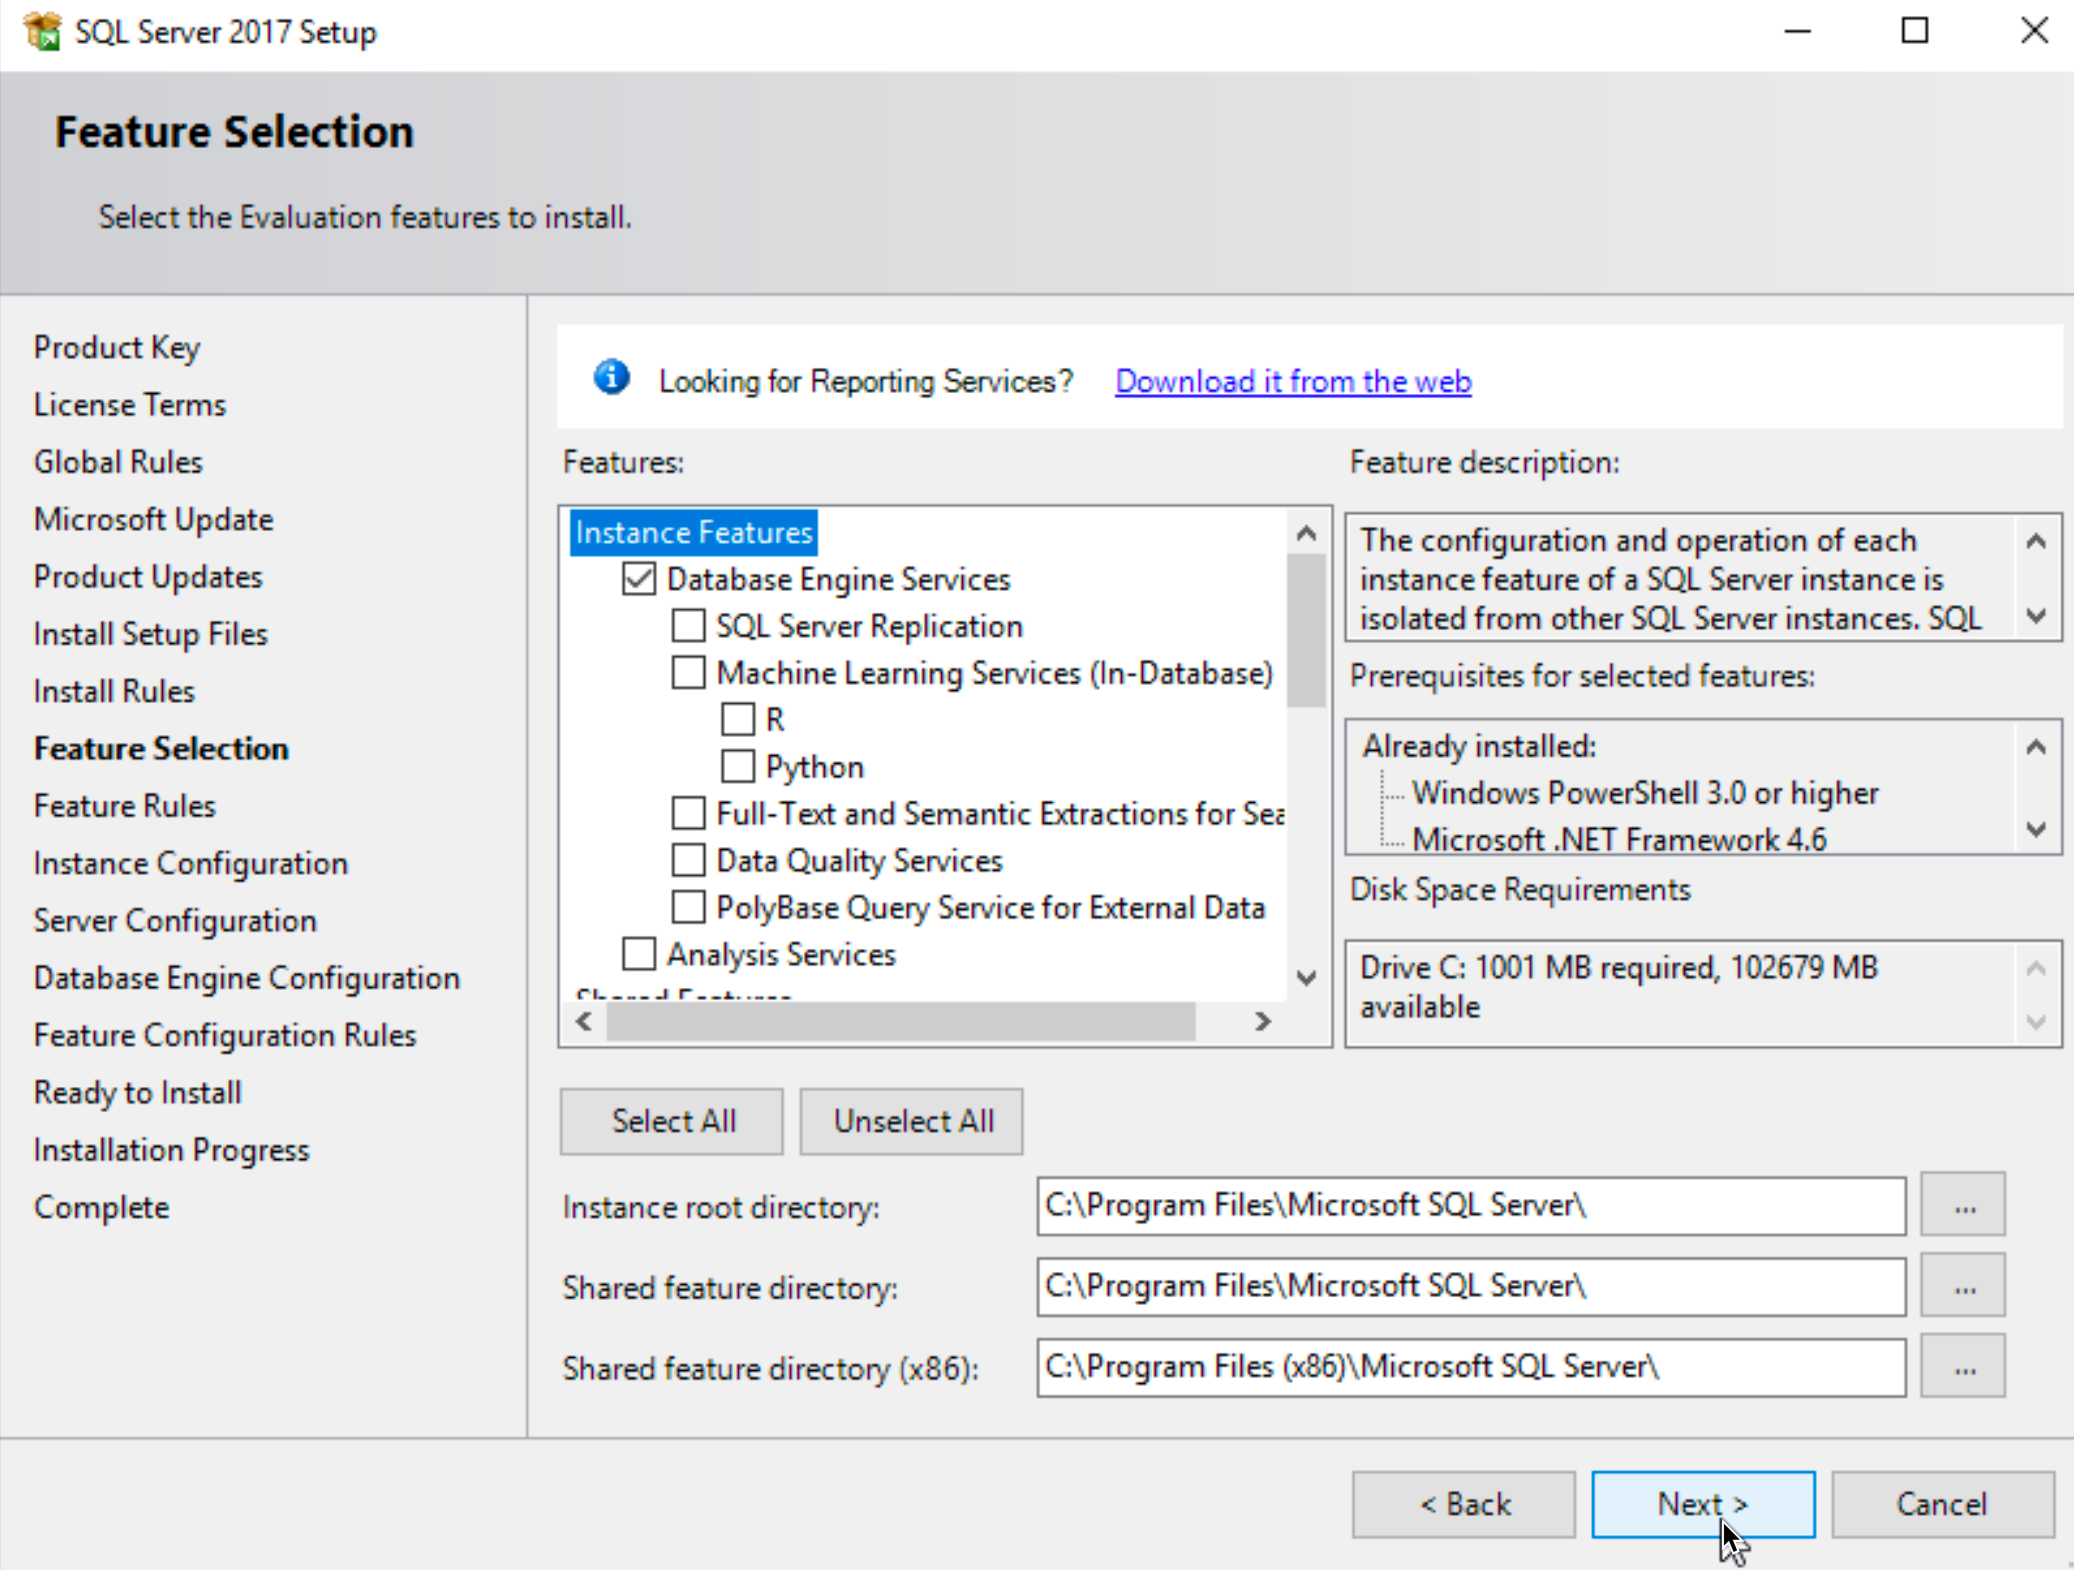
In feature selection screen, good security practice is to install features you need – nothing more, nothing less. We need “Database Engine Services” and we are going to install that. We will leave default installation paths. Next
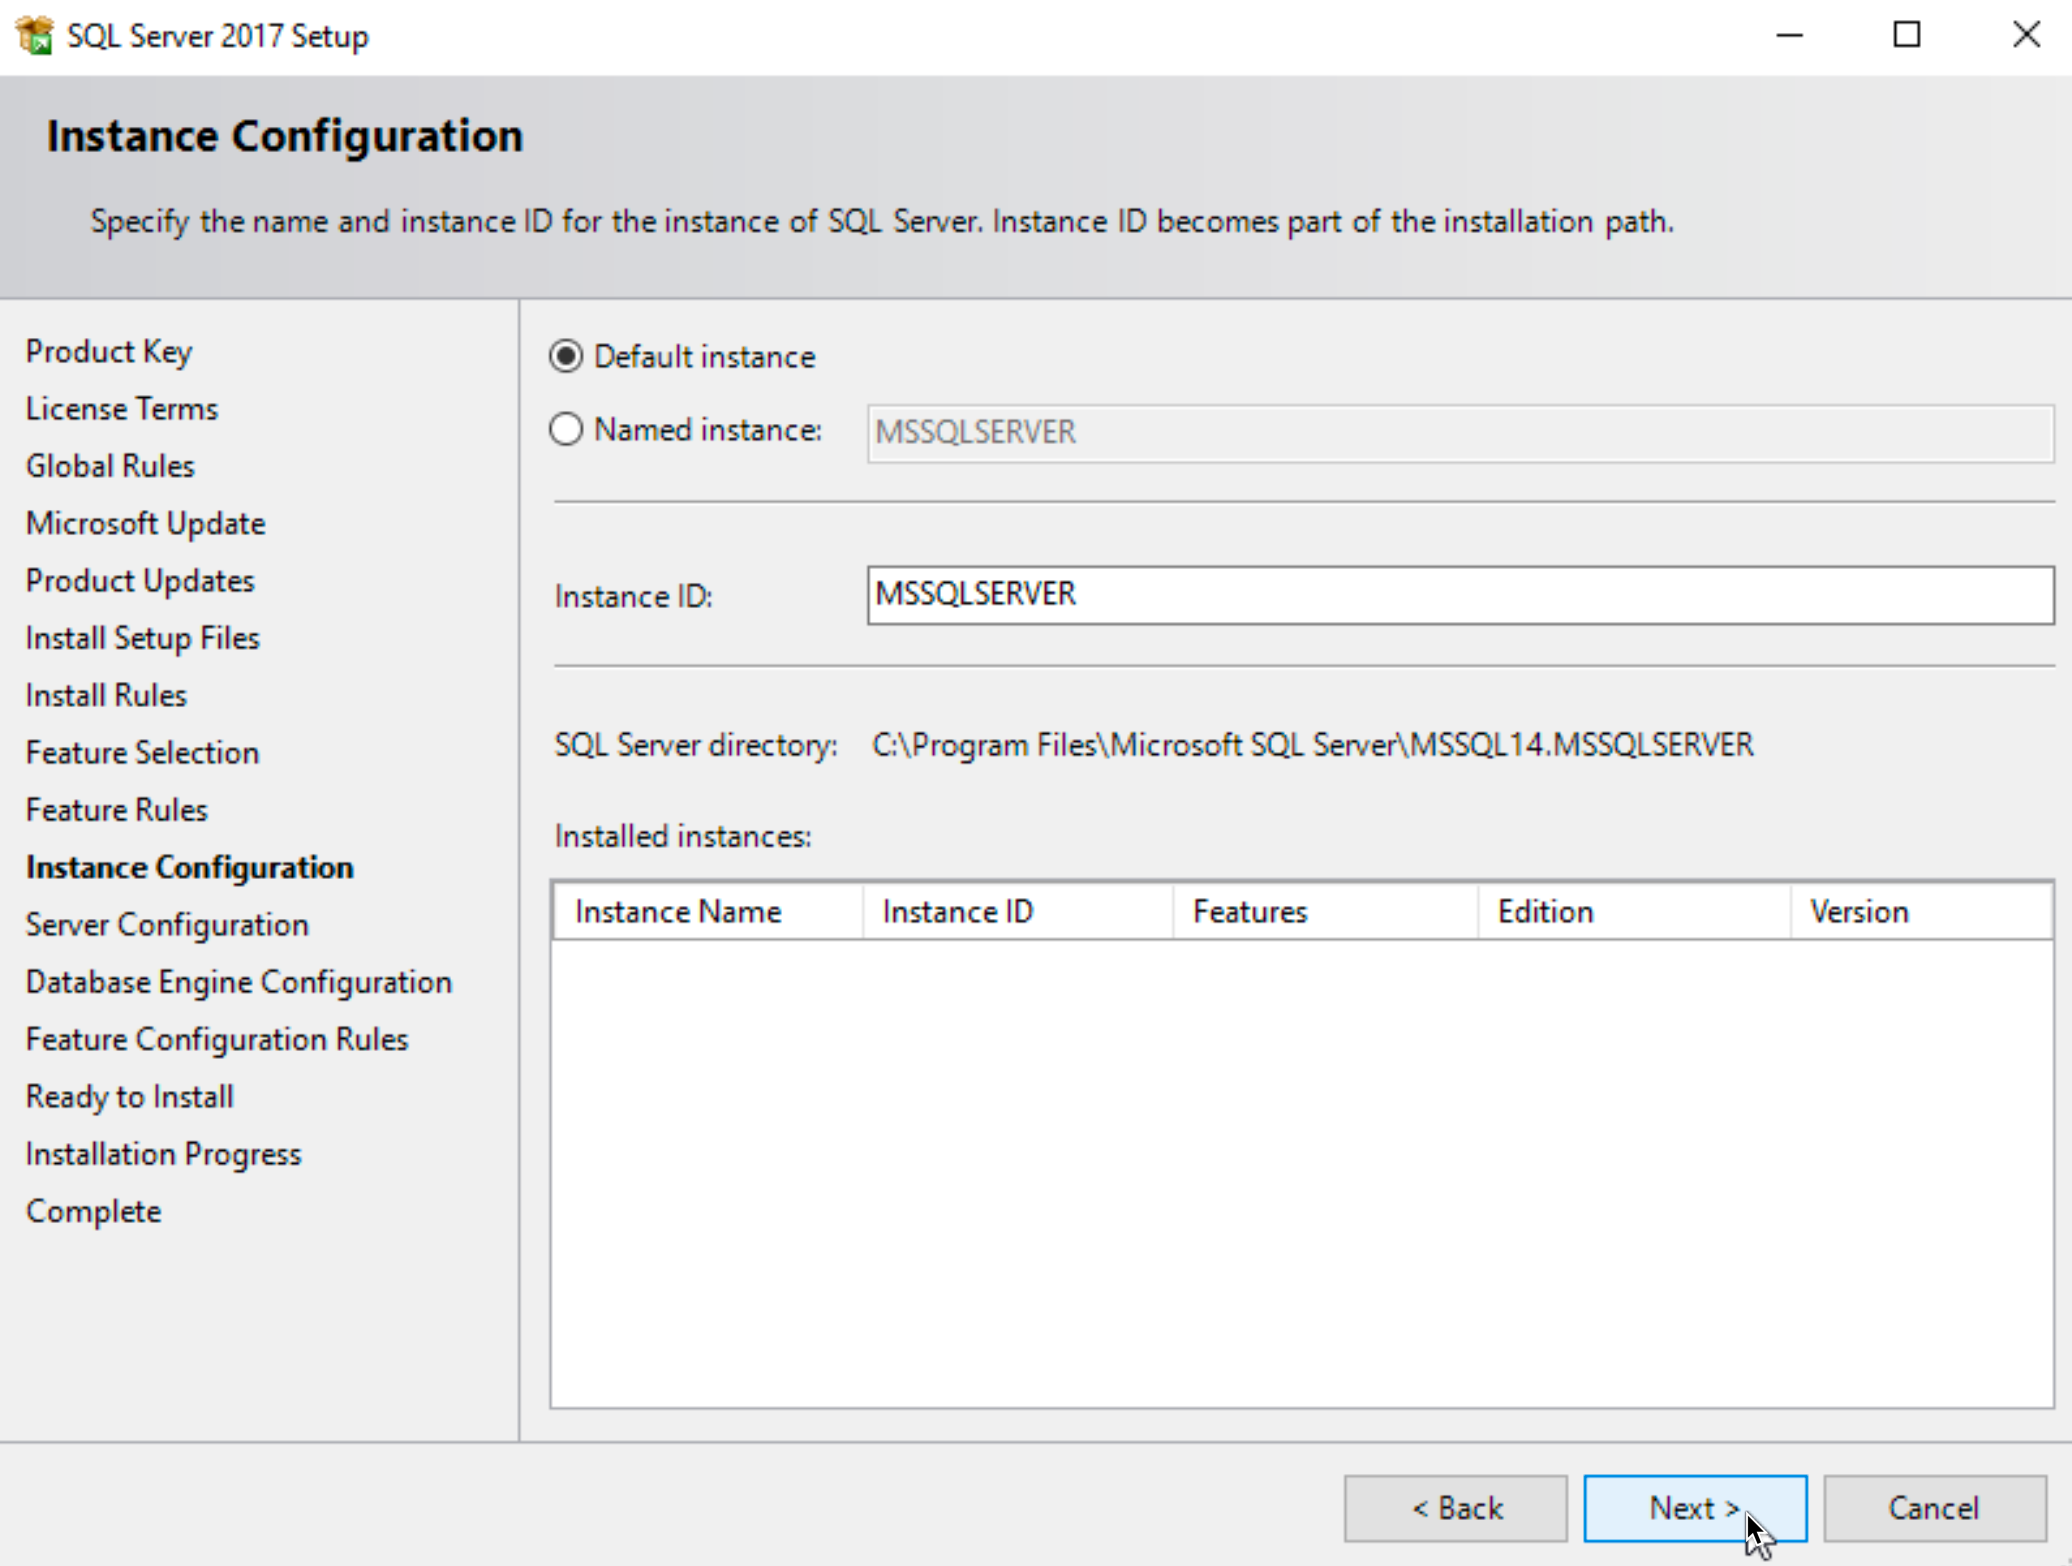
We will leave default naming here and select Next
erver Configuration screen has two tabs – on Service Accounts tab specify accounts (or leave default if you wish) we created earlier in AD. Also enter password you defined in AD for them. Click on Collation tab
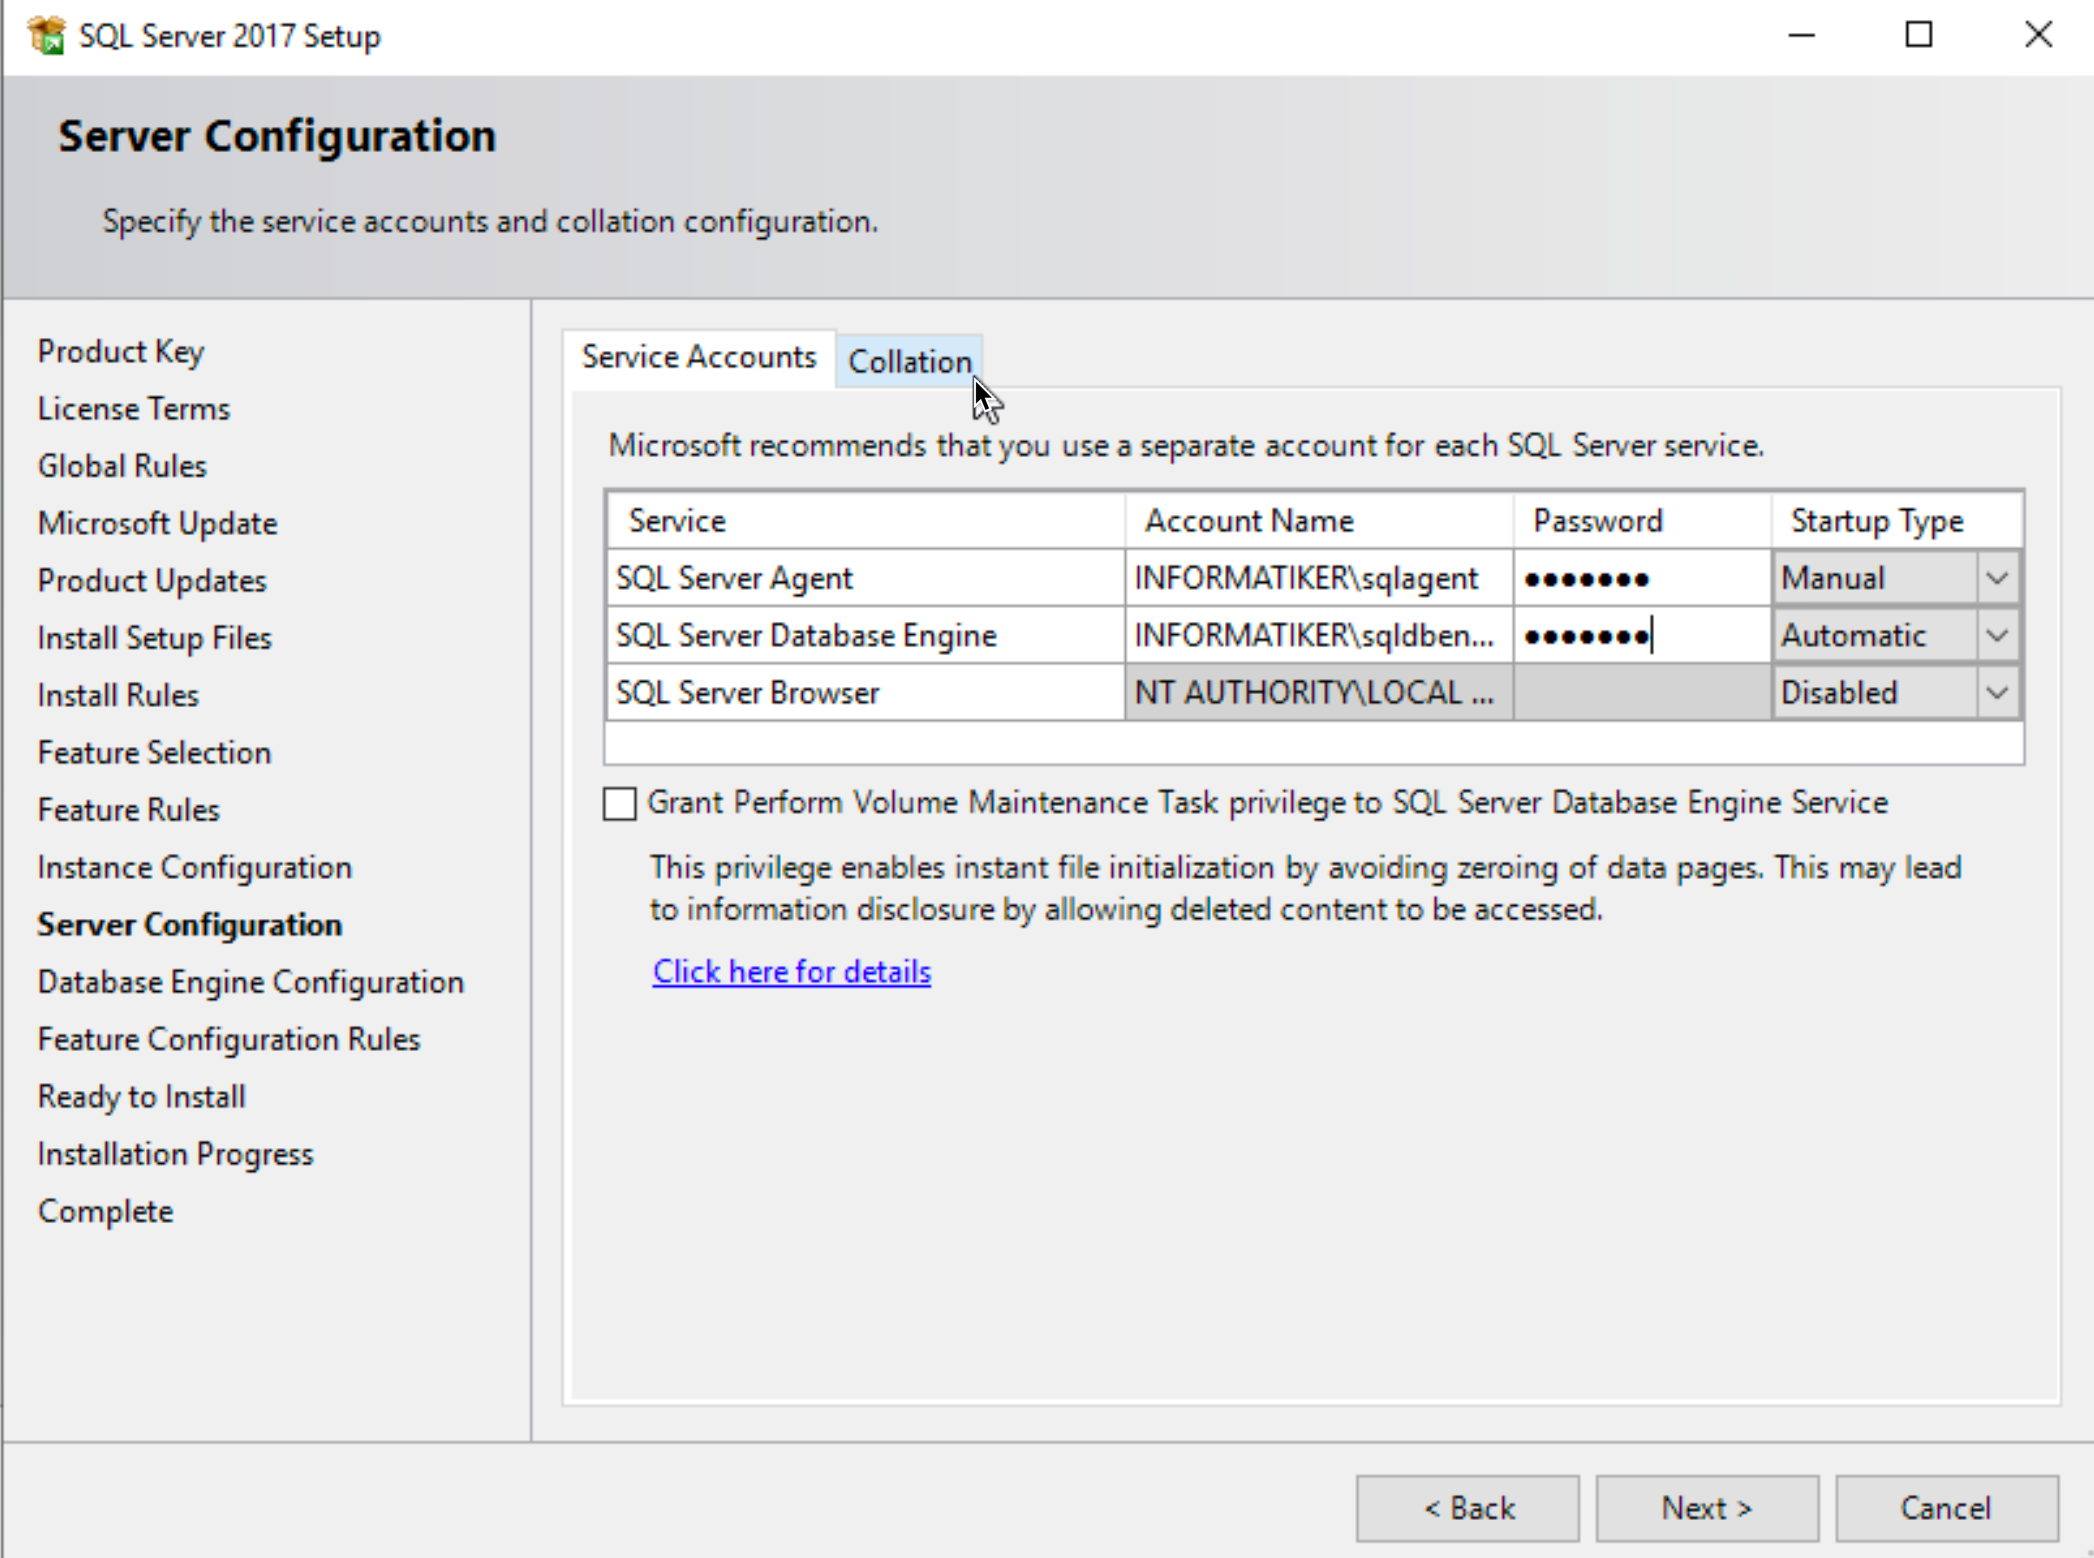
On Collation tab, select collation you need for your database. I will leave it as is, but in production environment, you will usually need to specify DB Collation, especially in non english databases. Check with DB people which collation should be set, prior to installing. Next

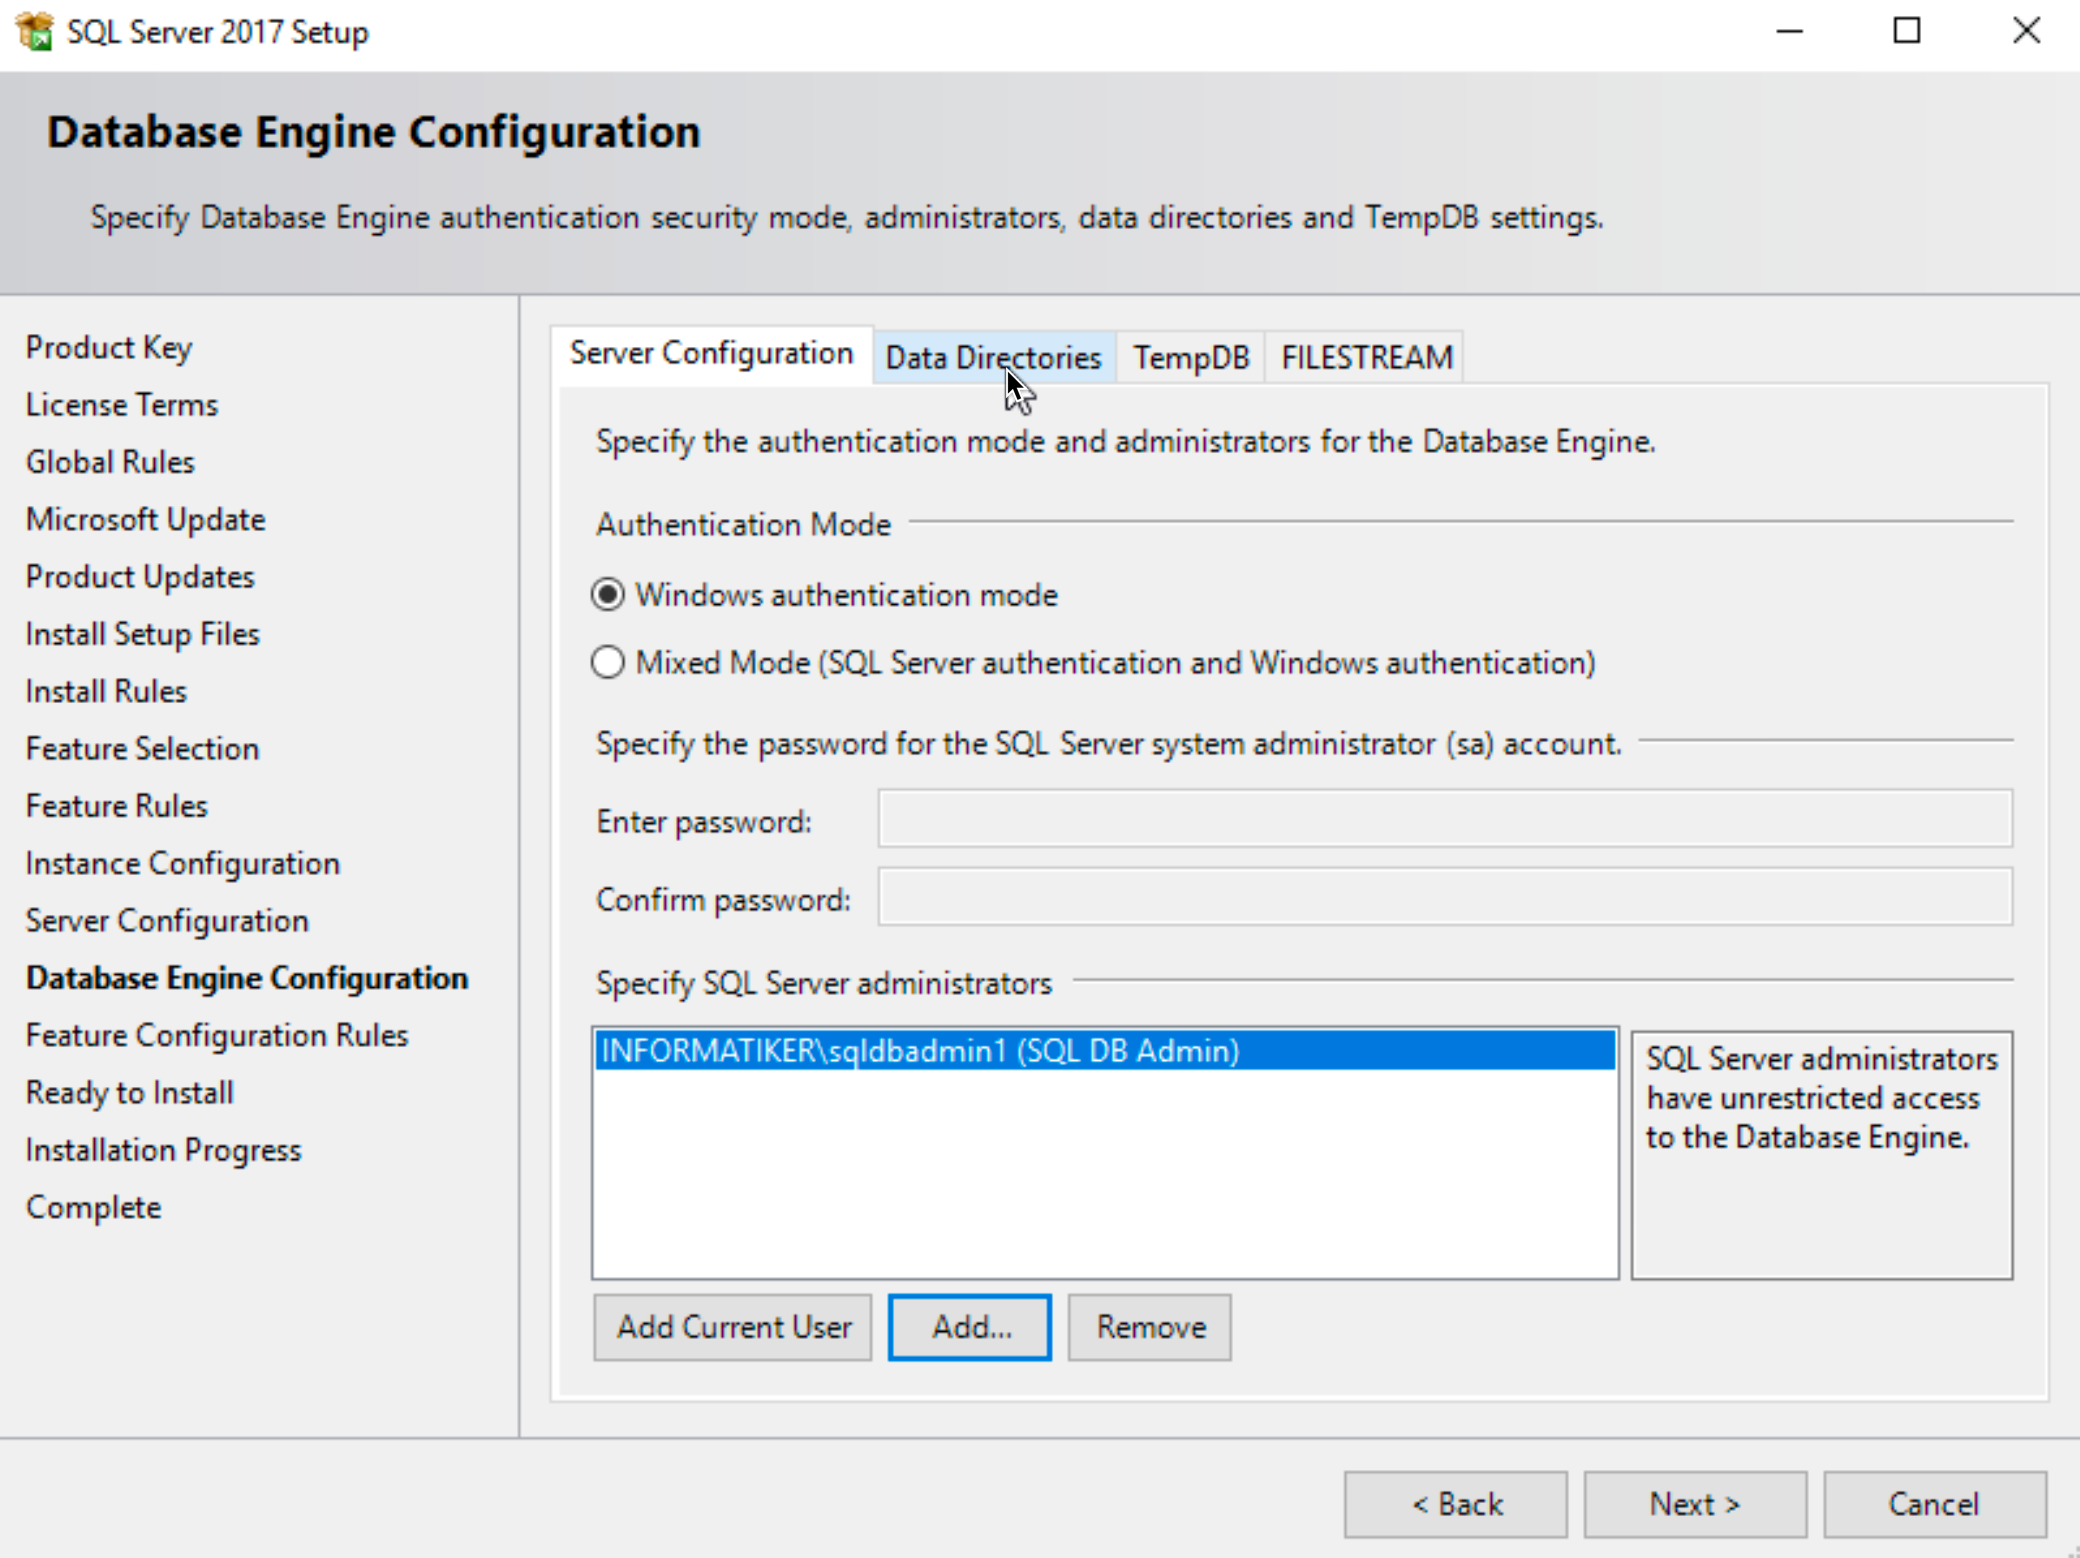
In next screen – Database Engine Configuration, there are also couple of tabs we need to configure. Server Configuration tab is going to make us select authentication mode. I will select Windows authentication mode – it is more secure, especially in domain environment. I will select created sqldbadmin account as SQL server admin.
Again, in production environment, consult with DB people before you do this. With older databases you will probably need to select Mixed Authentication and define sa account password. Make sure you secure your SQL properly if this is the case. We are going to Data Directories tab
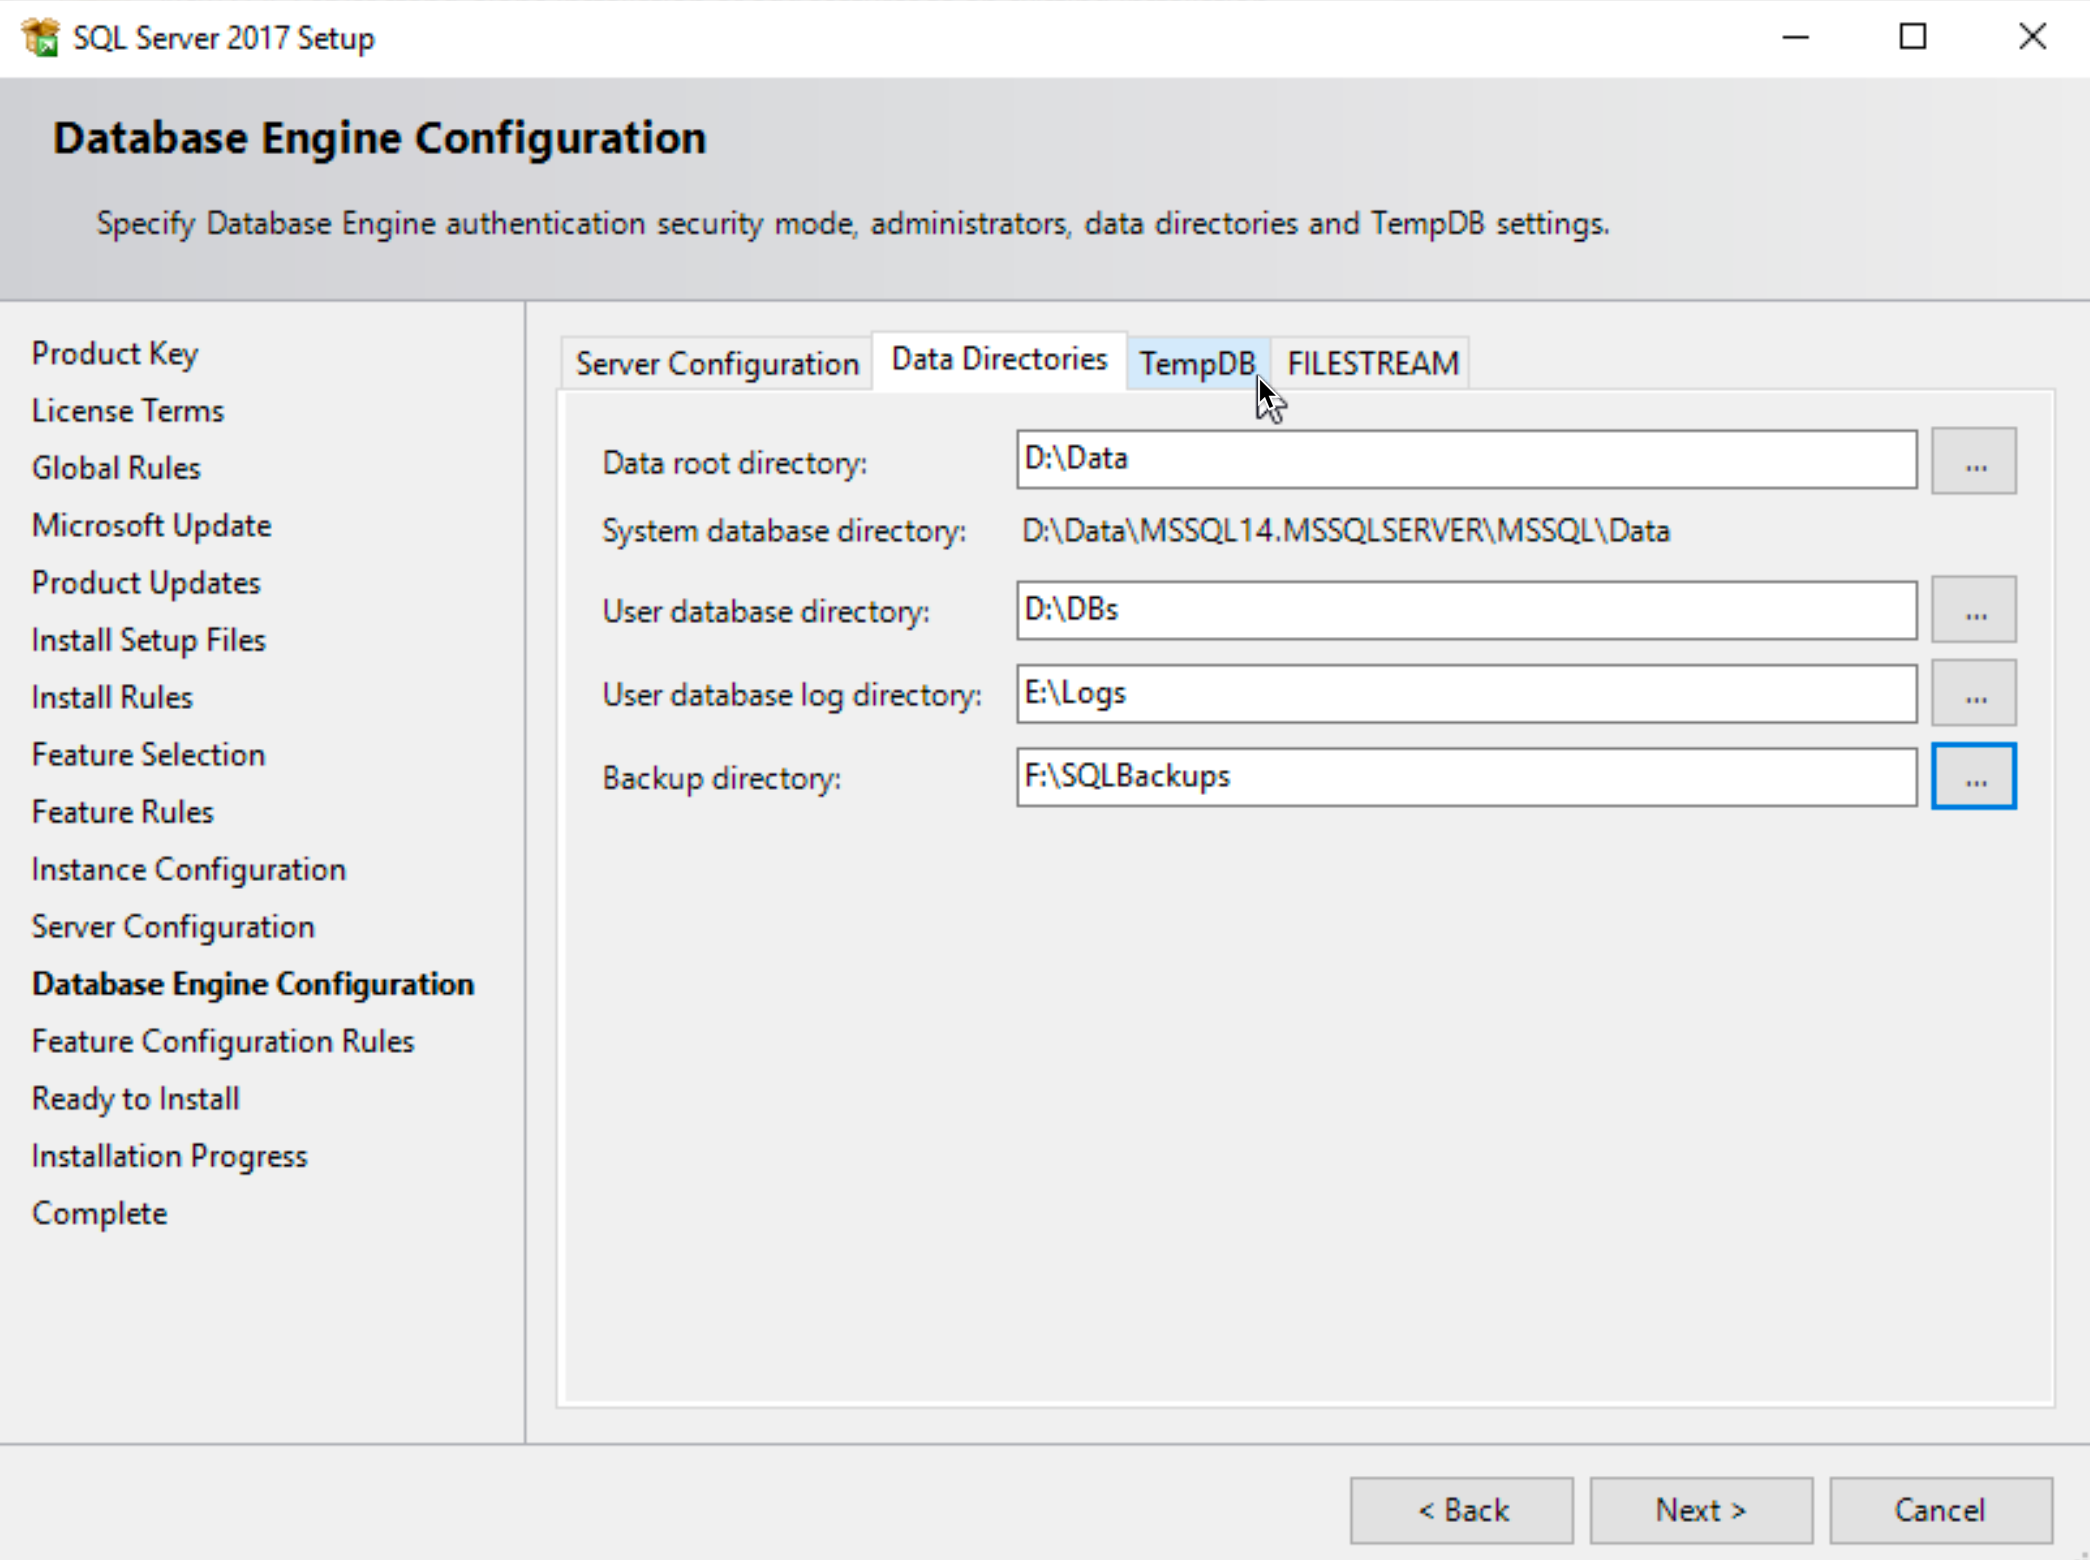
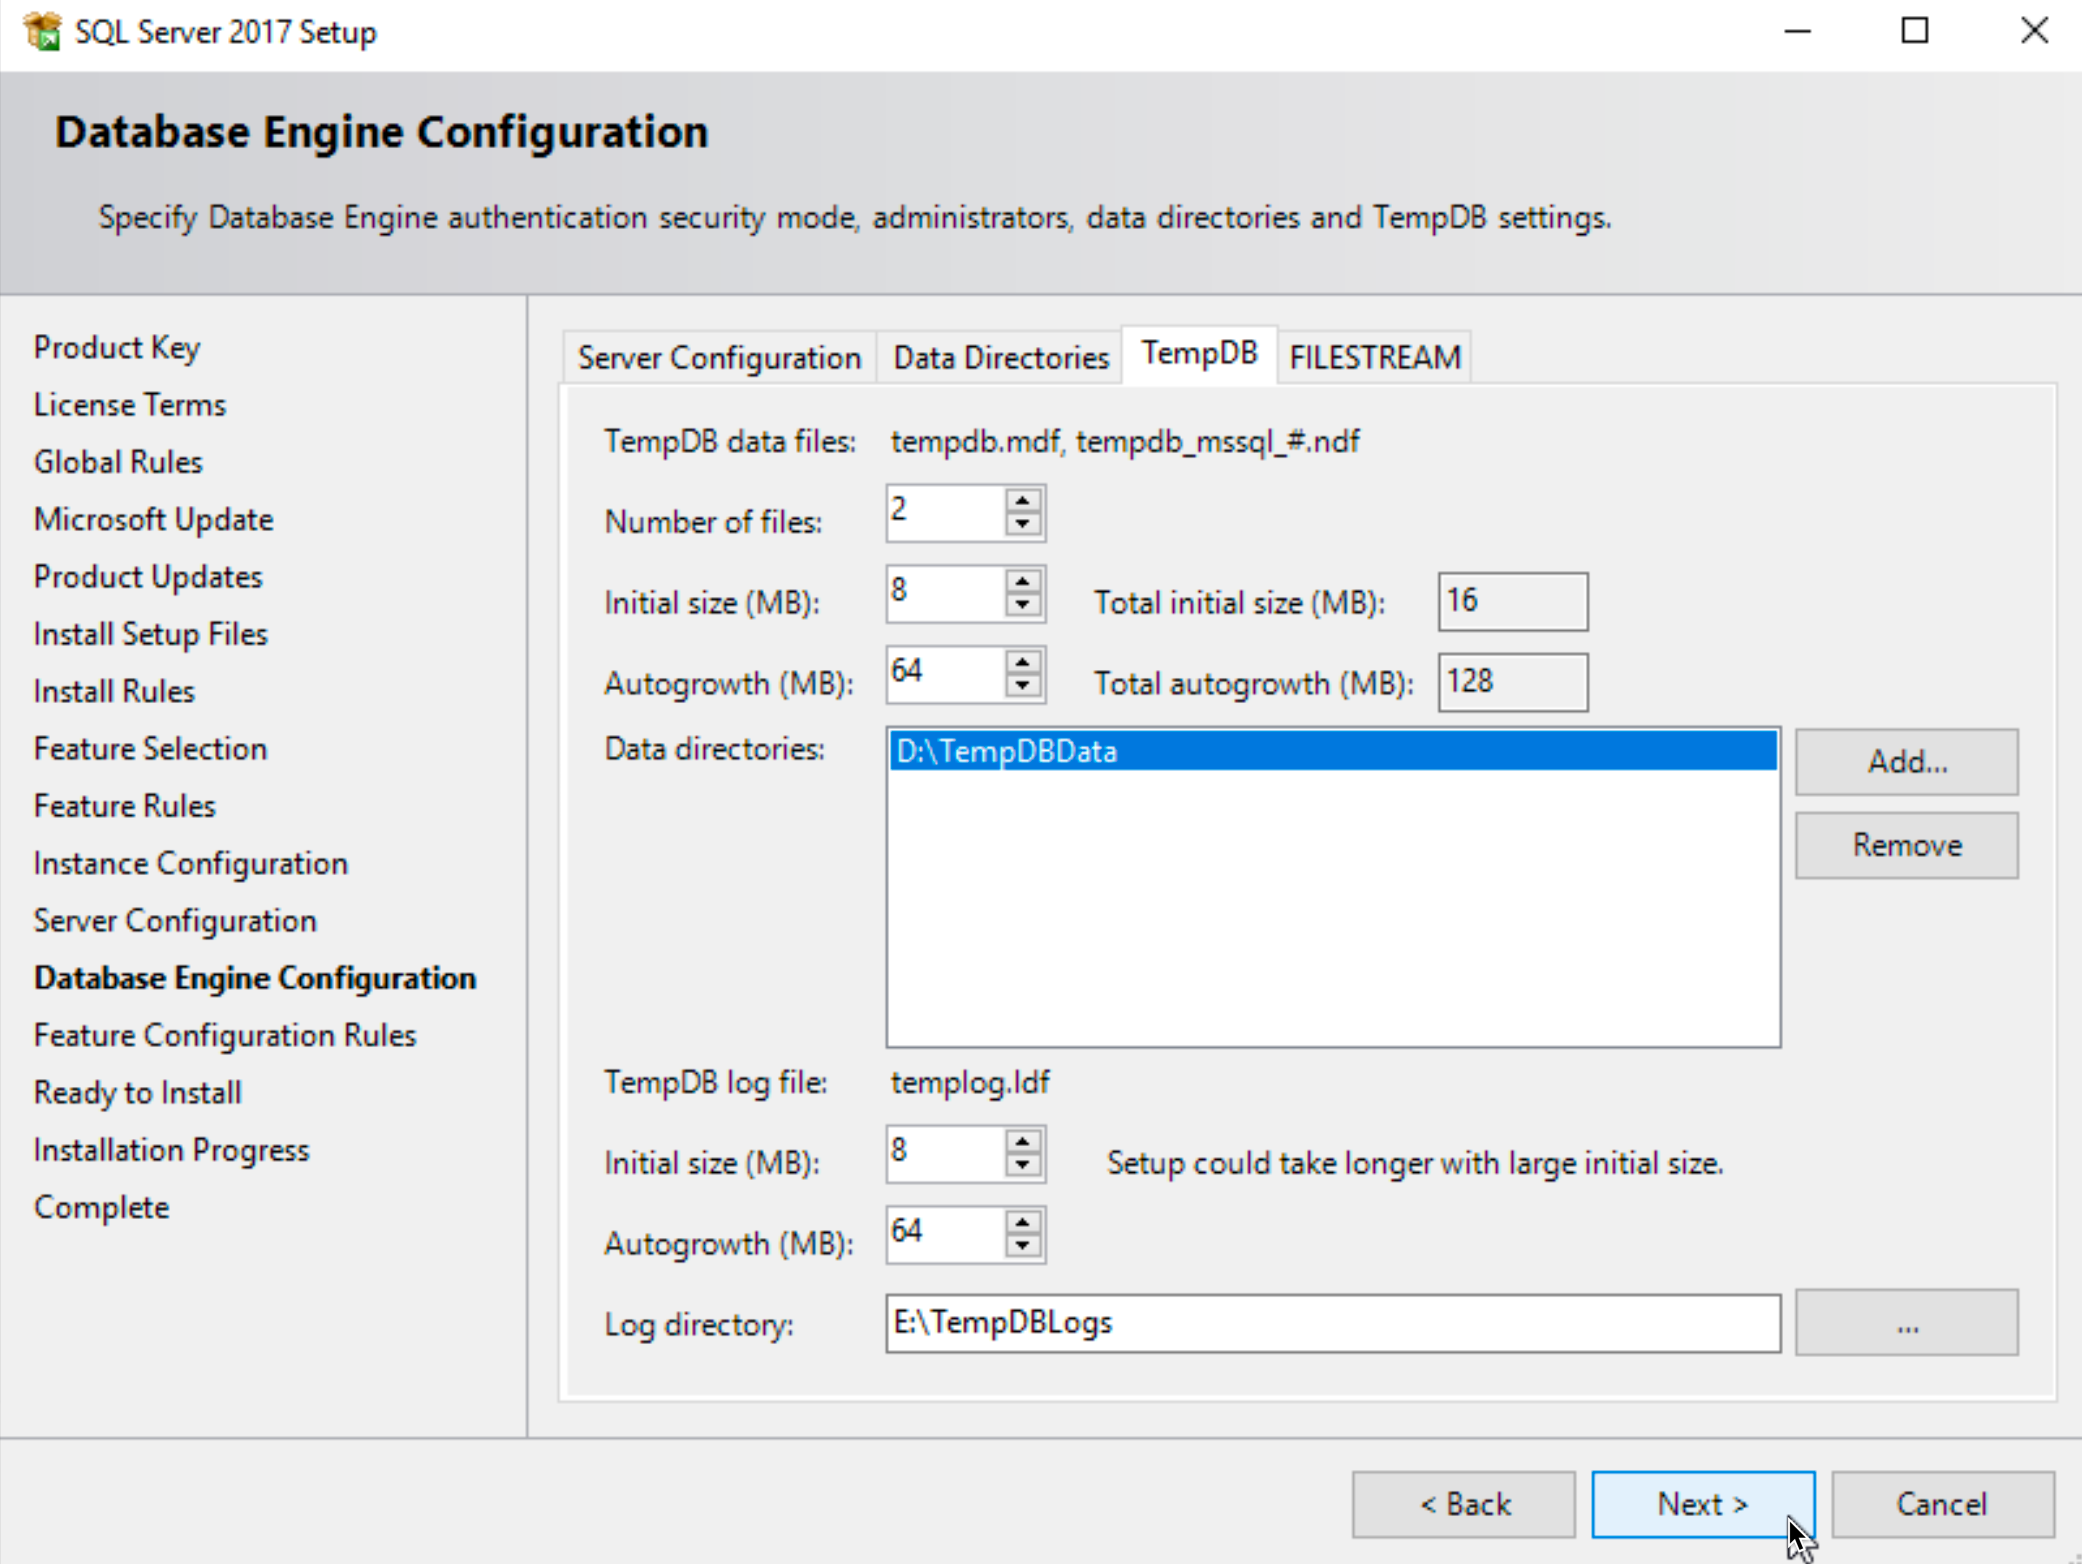
Data Directories | as you can see on the screenshot below, this is the place we are going to define our custom directories on additional disks we created earlier. Next step is TempDB tab.
Again, I’m going to define custom data and log directories as we can see below. I’m not going to define anything else, since default values are fine for this guide. We will click on Next, there is nothing we need on Filestream tab in this guide.
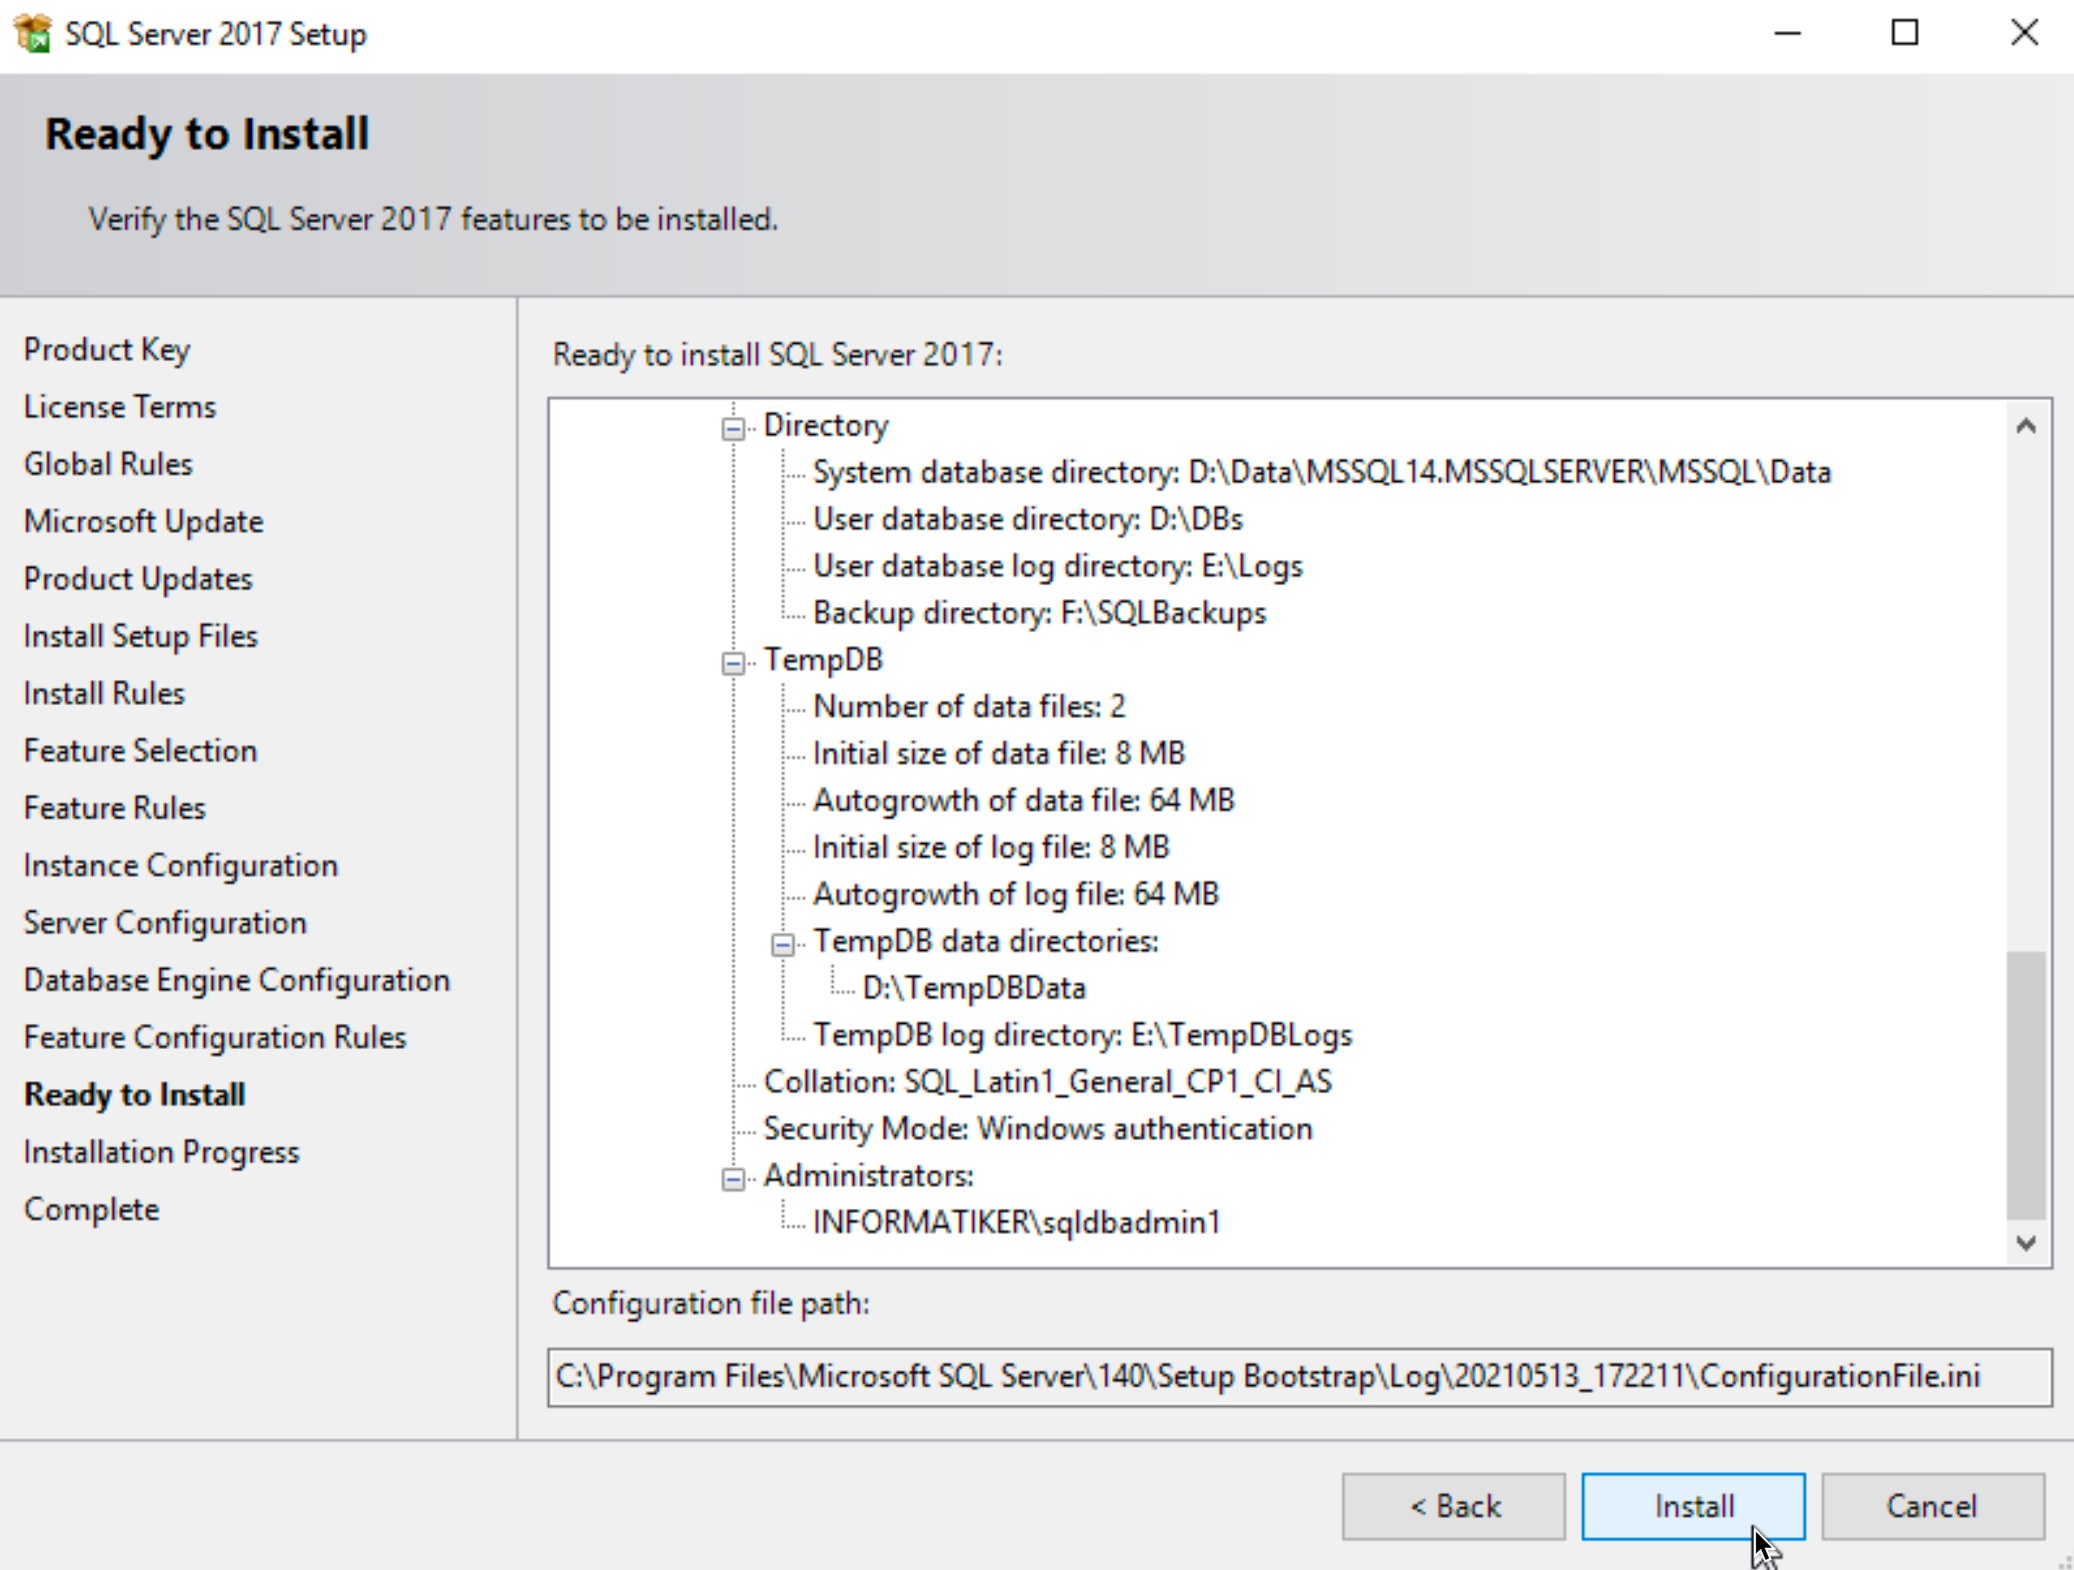
Go through your installation and check if everything is correct. If it is, click on Install.
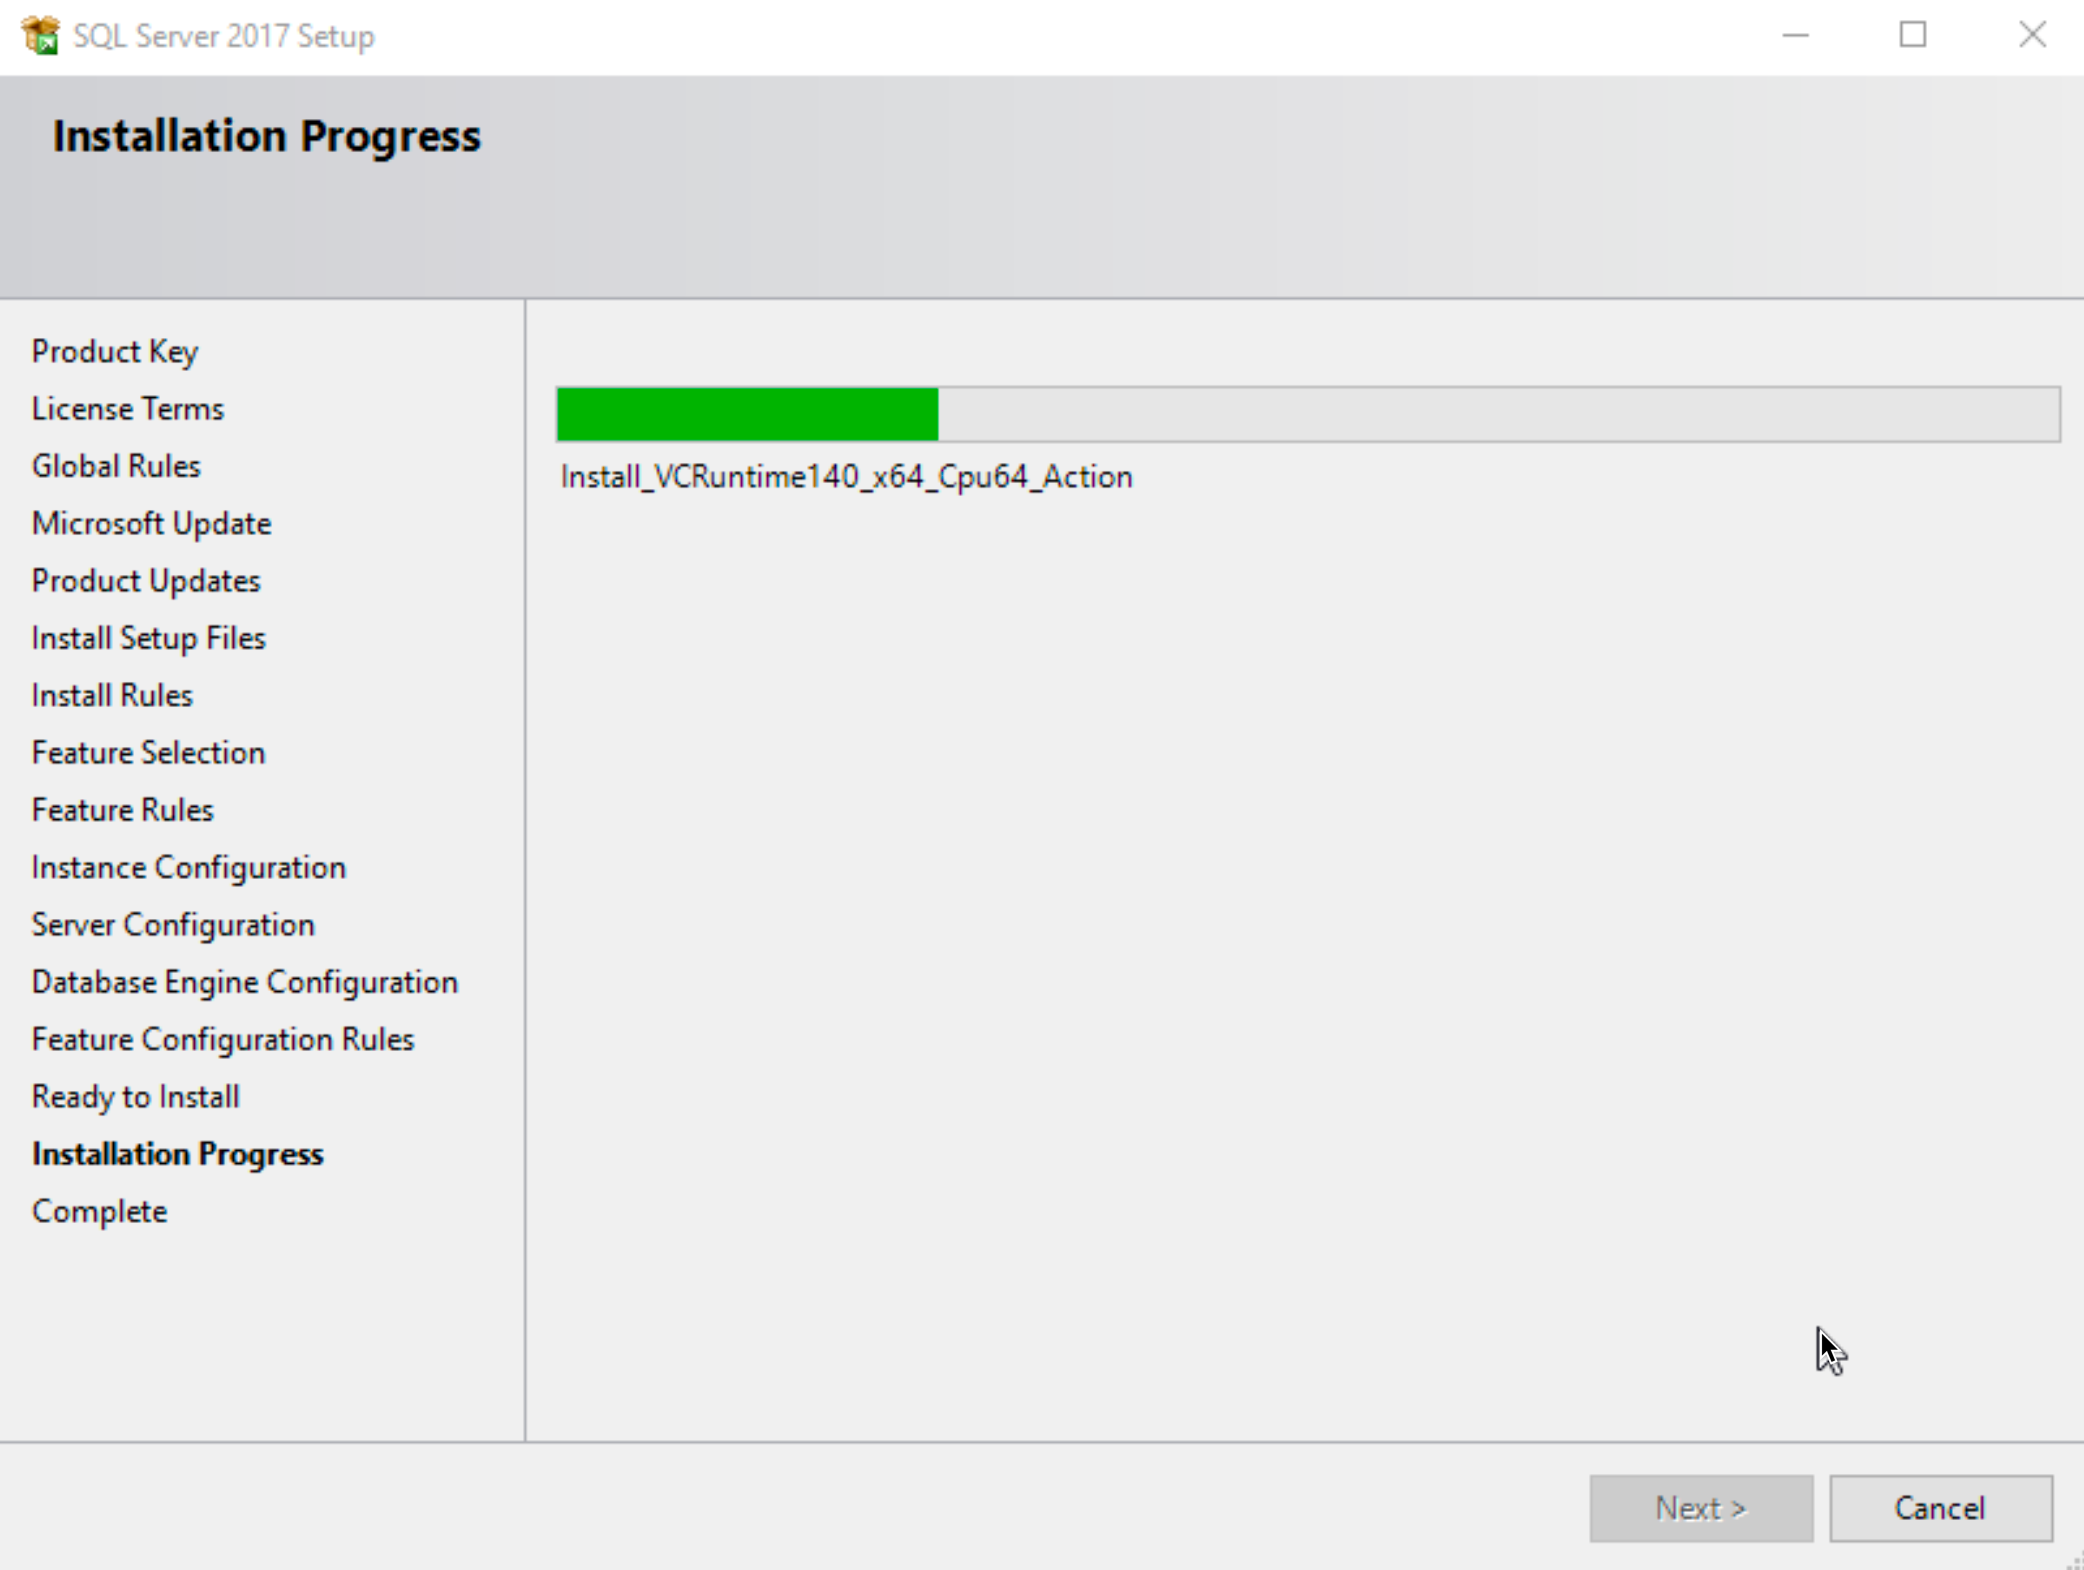
…
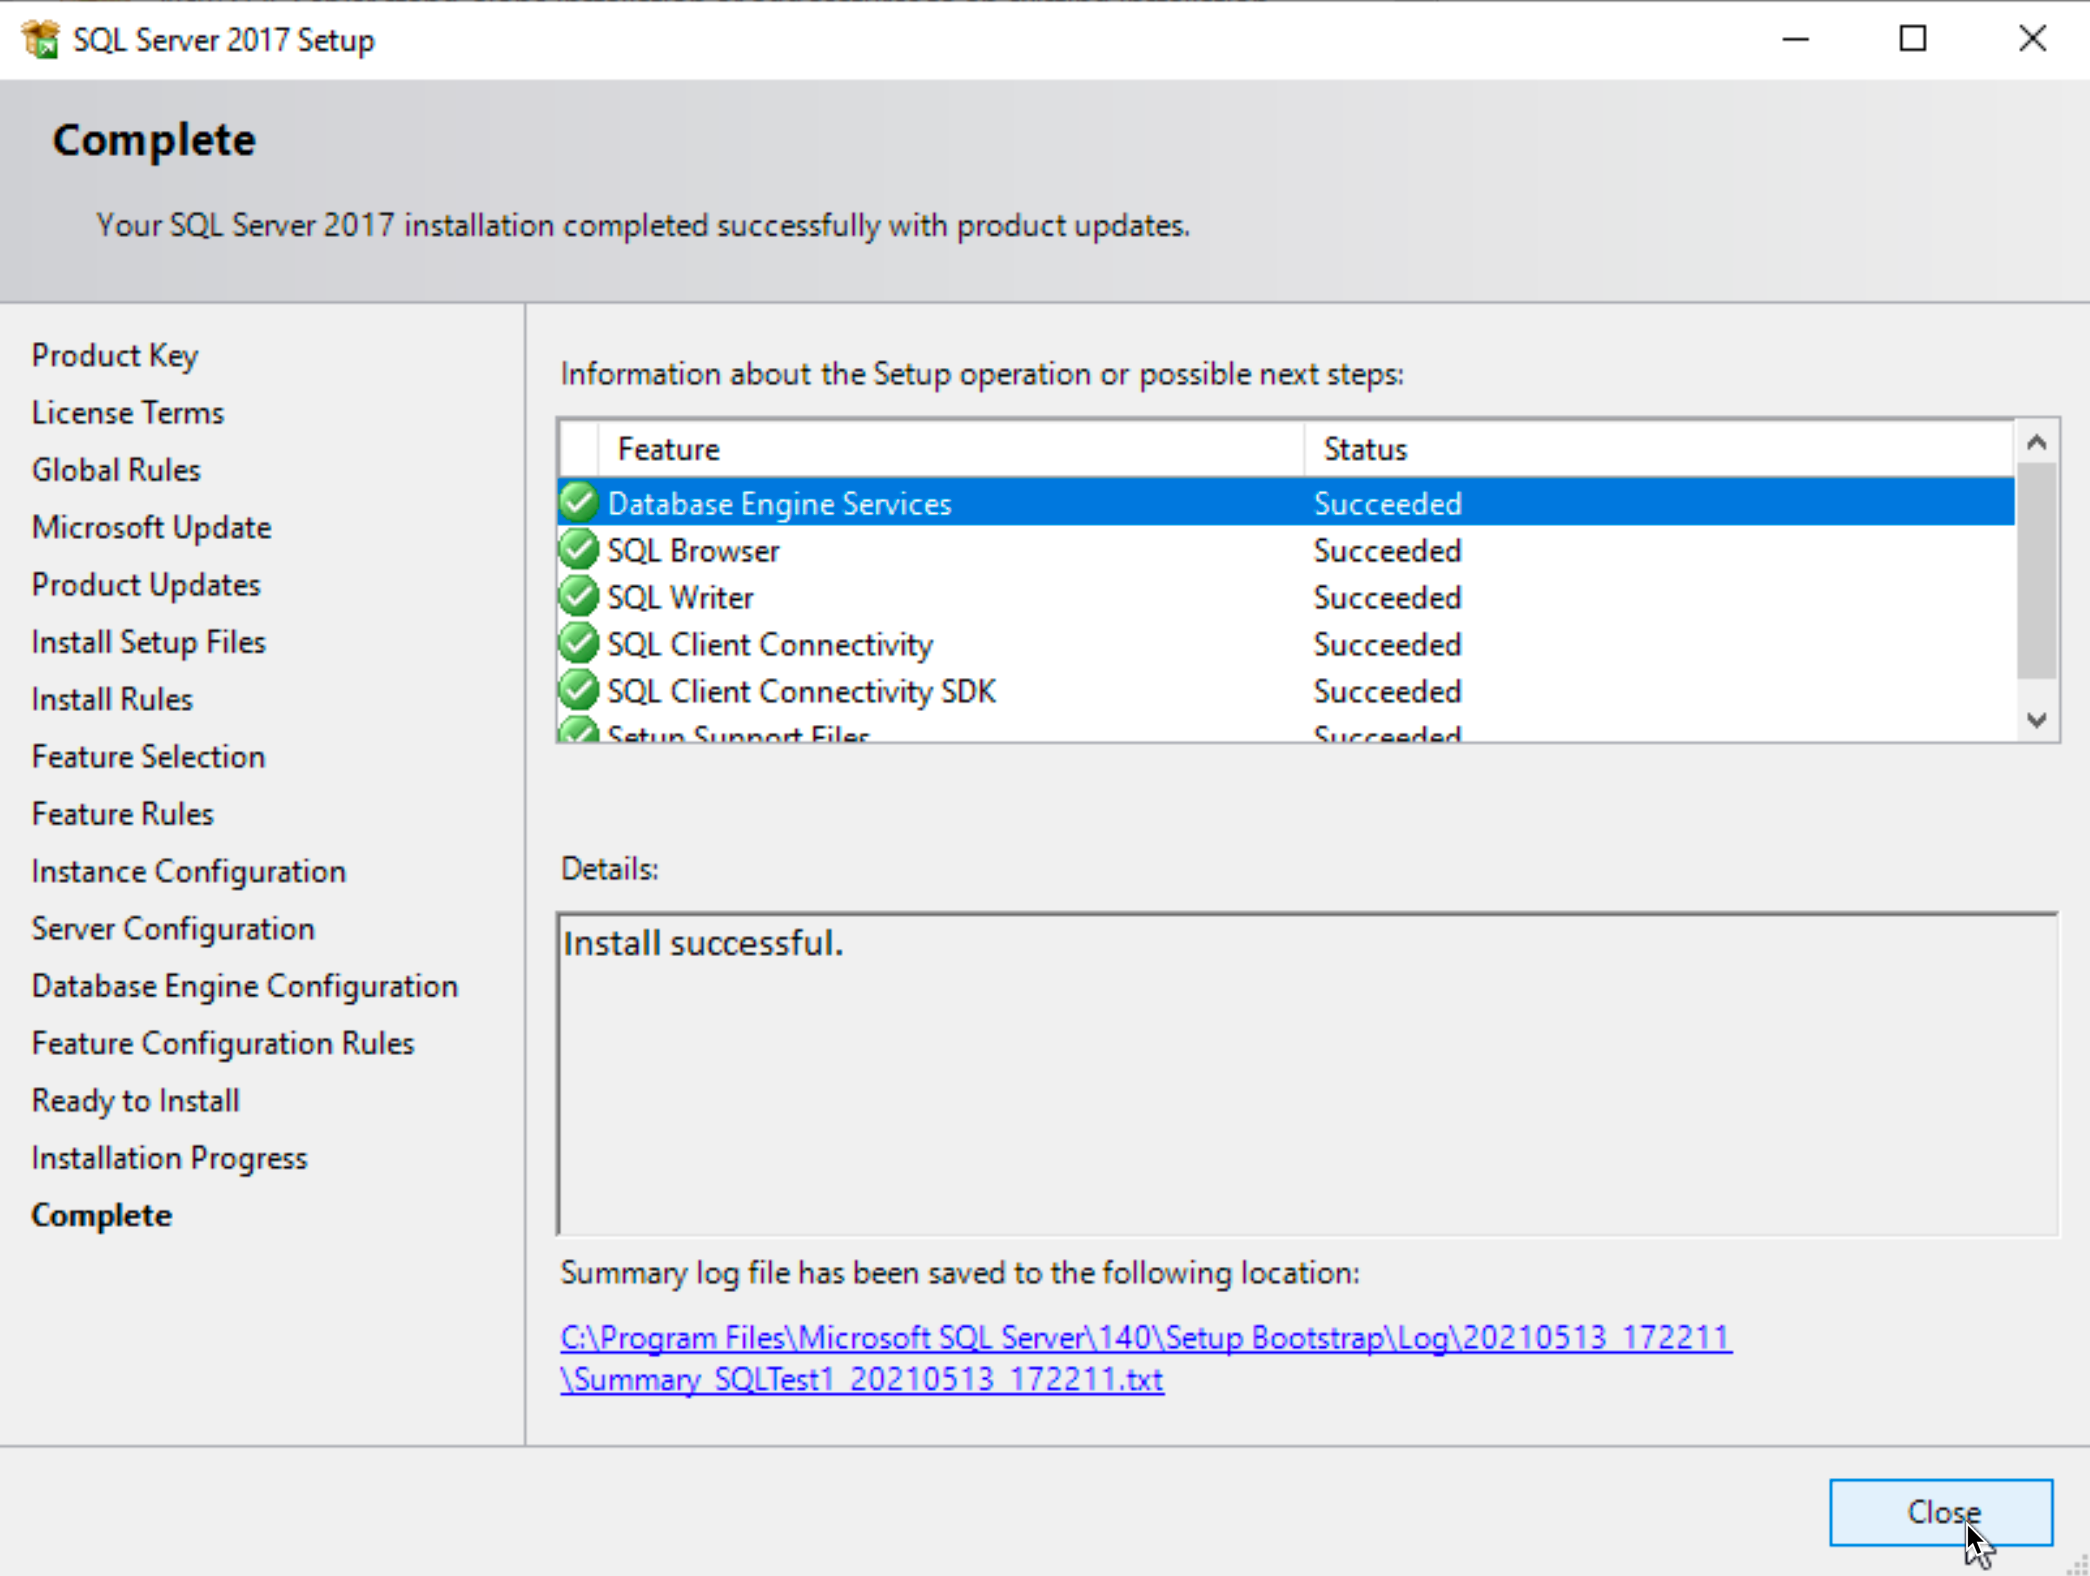
Installation was smashing success! We can close the wizard now.
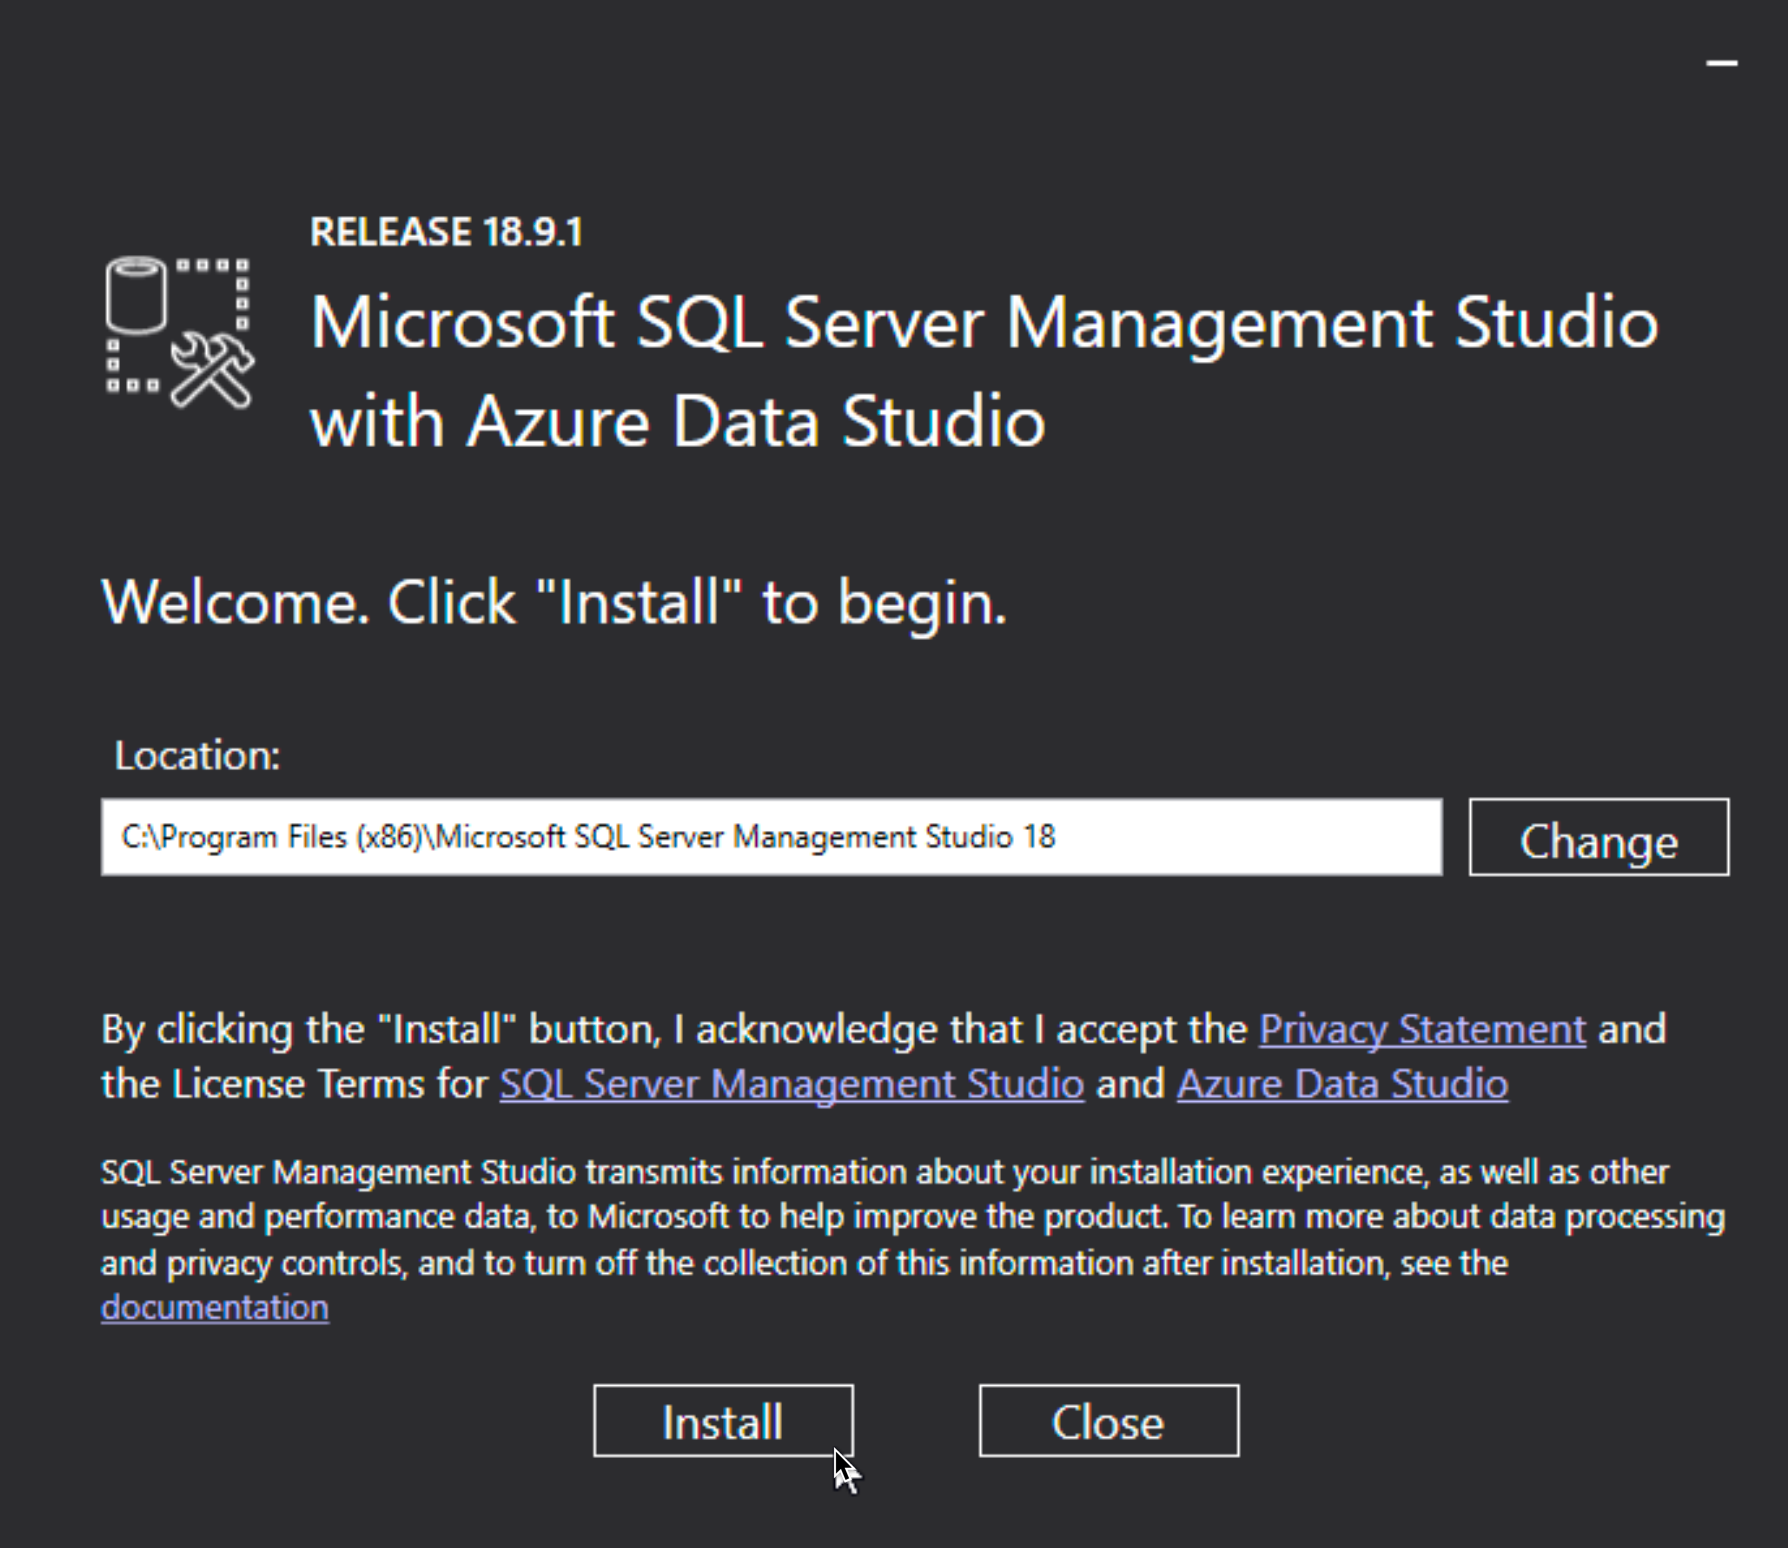
SQL Server Management Studio installation
Since we are only beginners with SQL, graphical tool for administration is more than welcome. We will now install SSMS.
Run SSMS-Setup-ENU.exe as admin
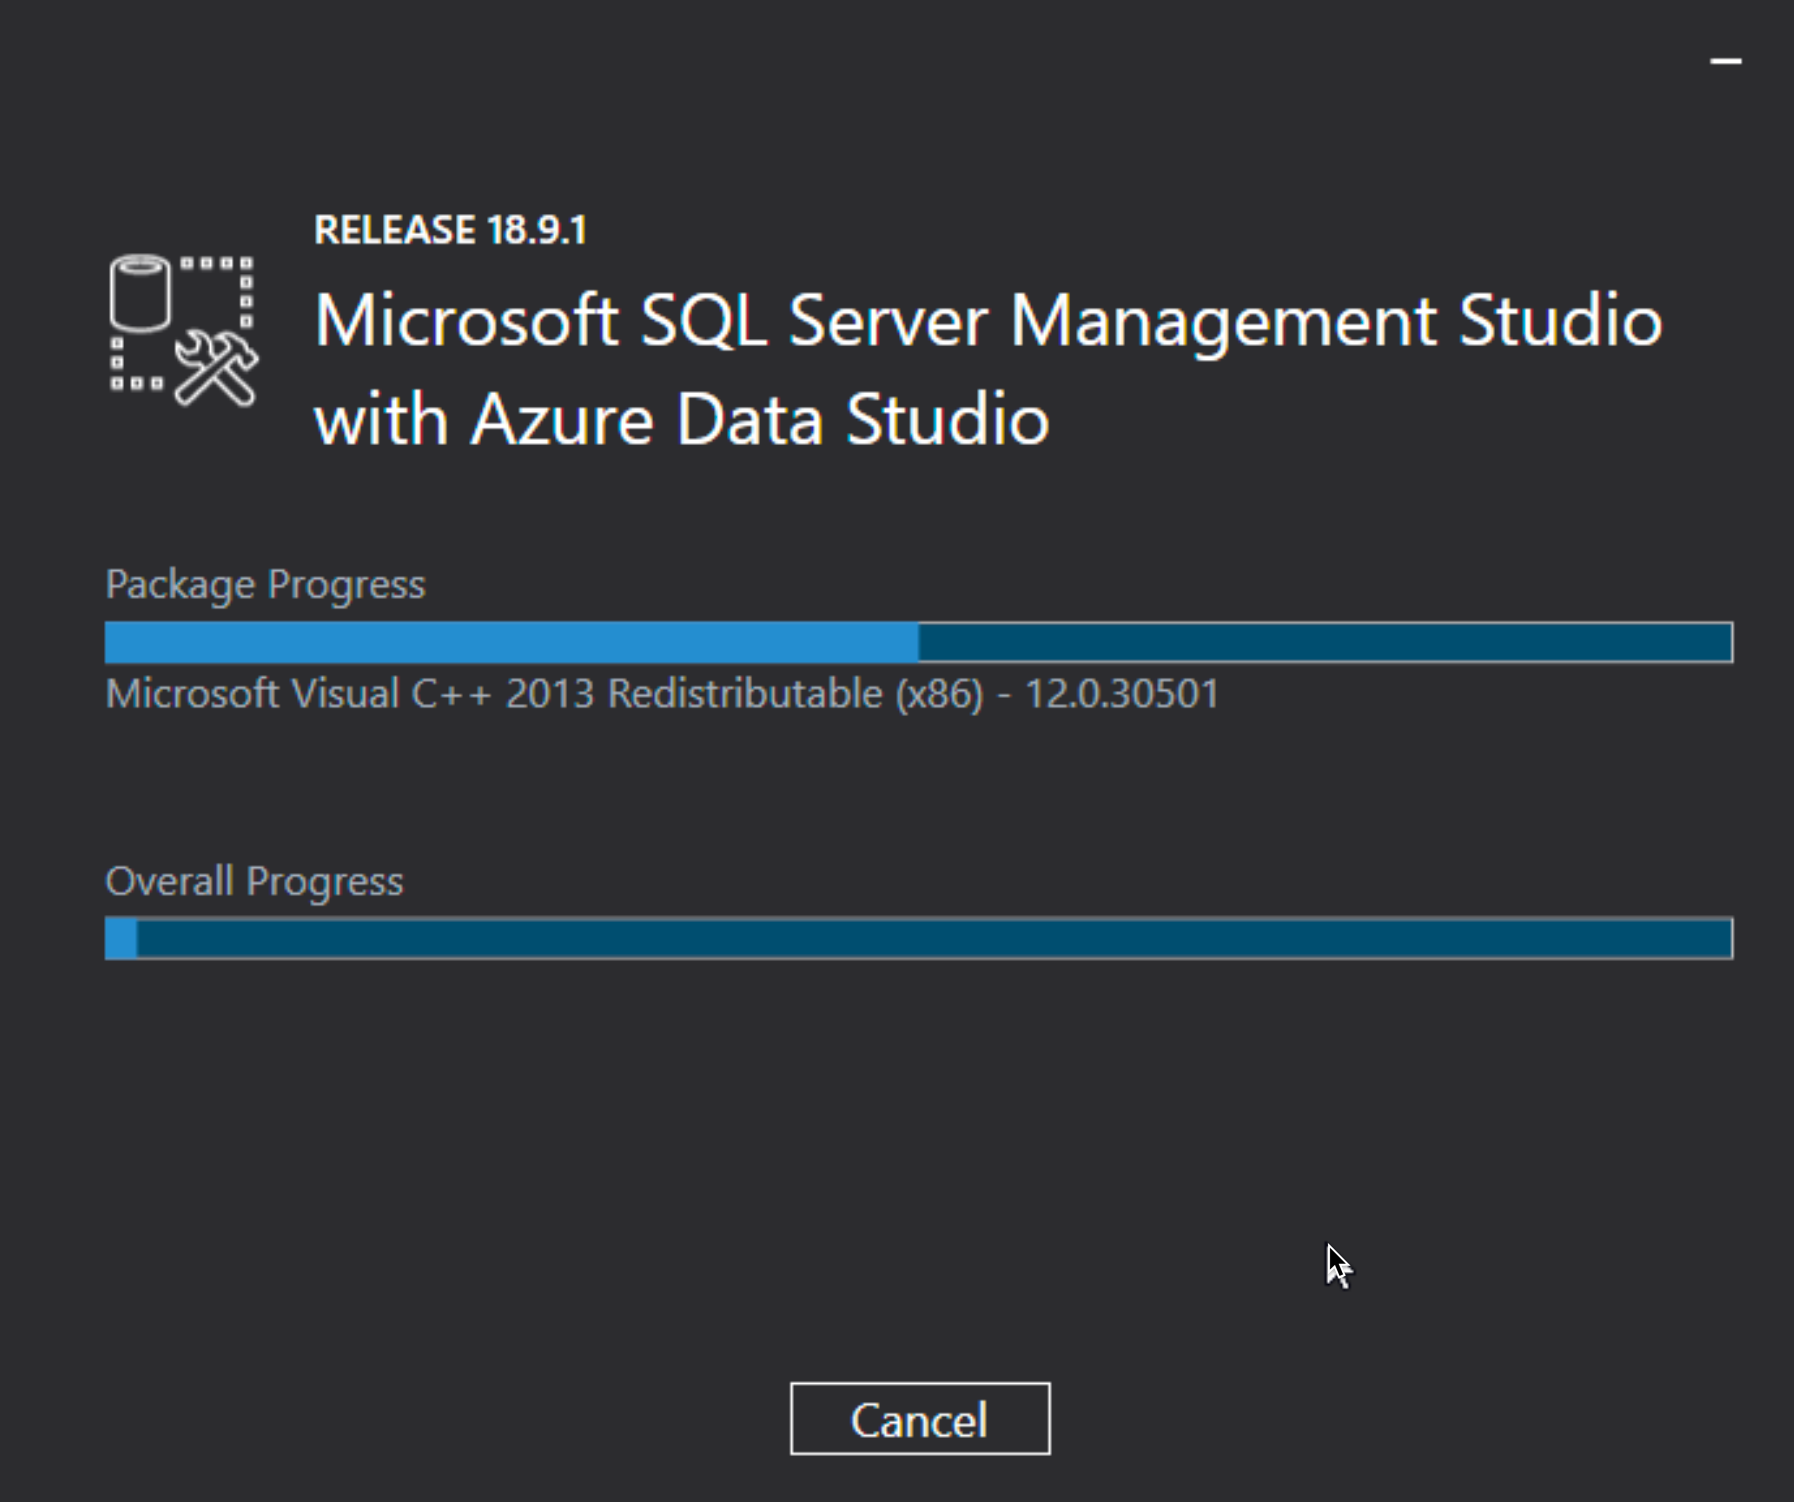
Select Install
…
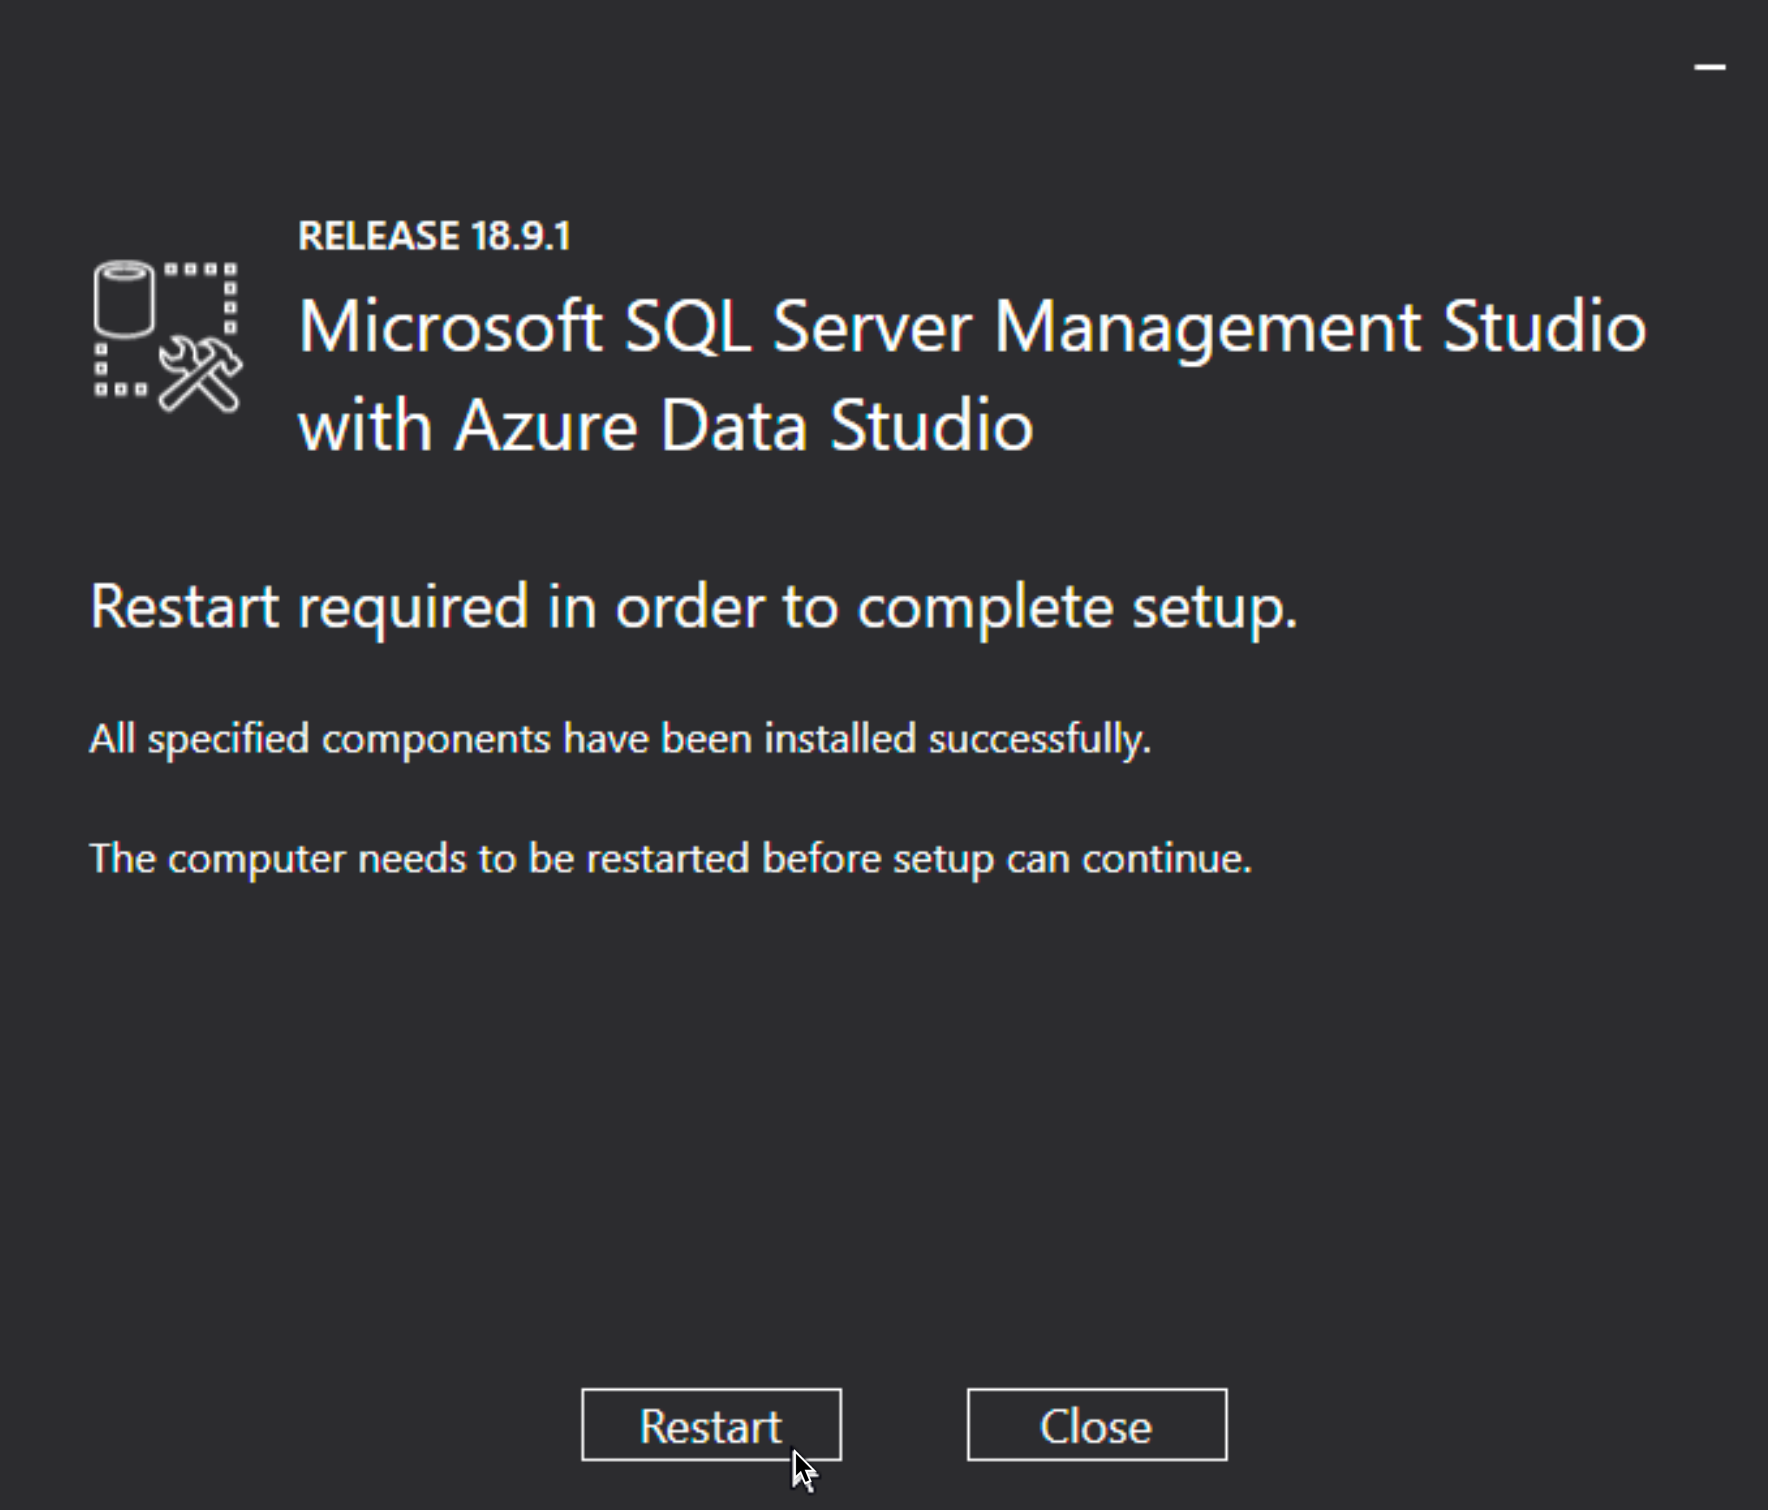
Reboot your server after install… | Select Restart
Login To SQL Server Management Studio / Sample Database import
Before you continue with this section of logging in, I wrote it the way I did, because if you have separate domain account for SQL (and I strongly advise you do) you will run into problem I described below. There is an easier way you can resolve the procedure below, just login as sqldbadmin account on the machine you will be using SSMS on, and that is it, end of story. You can also read about logging in to SSMS below.
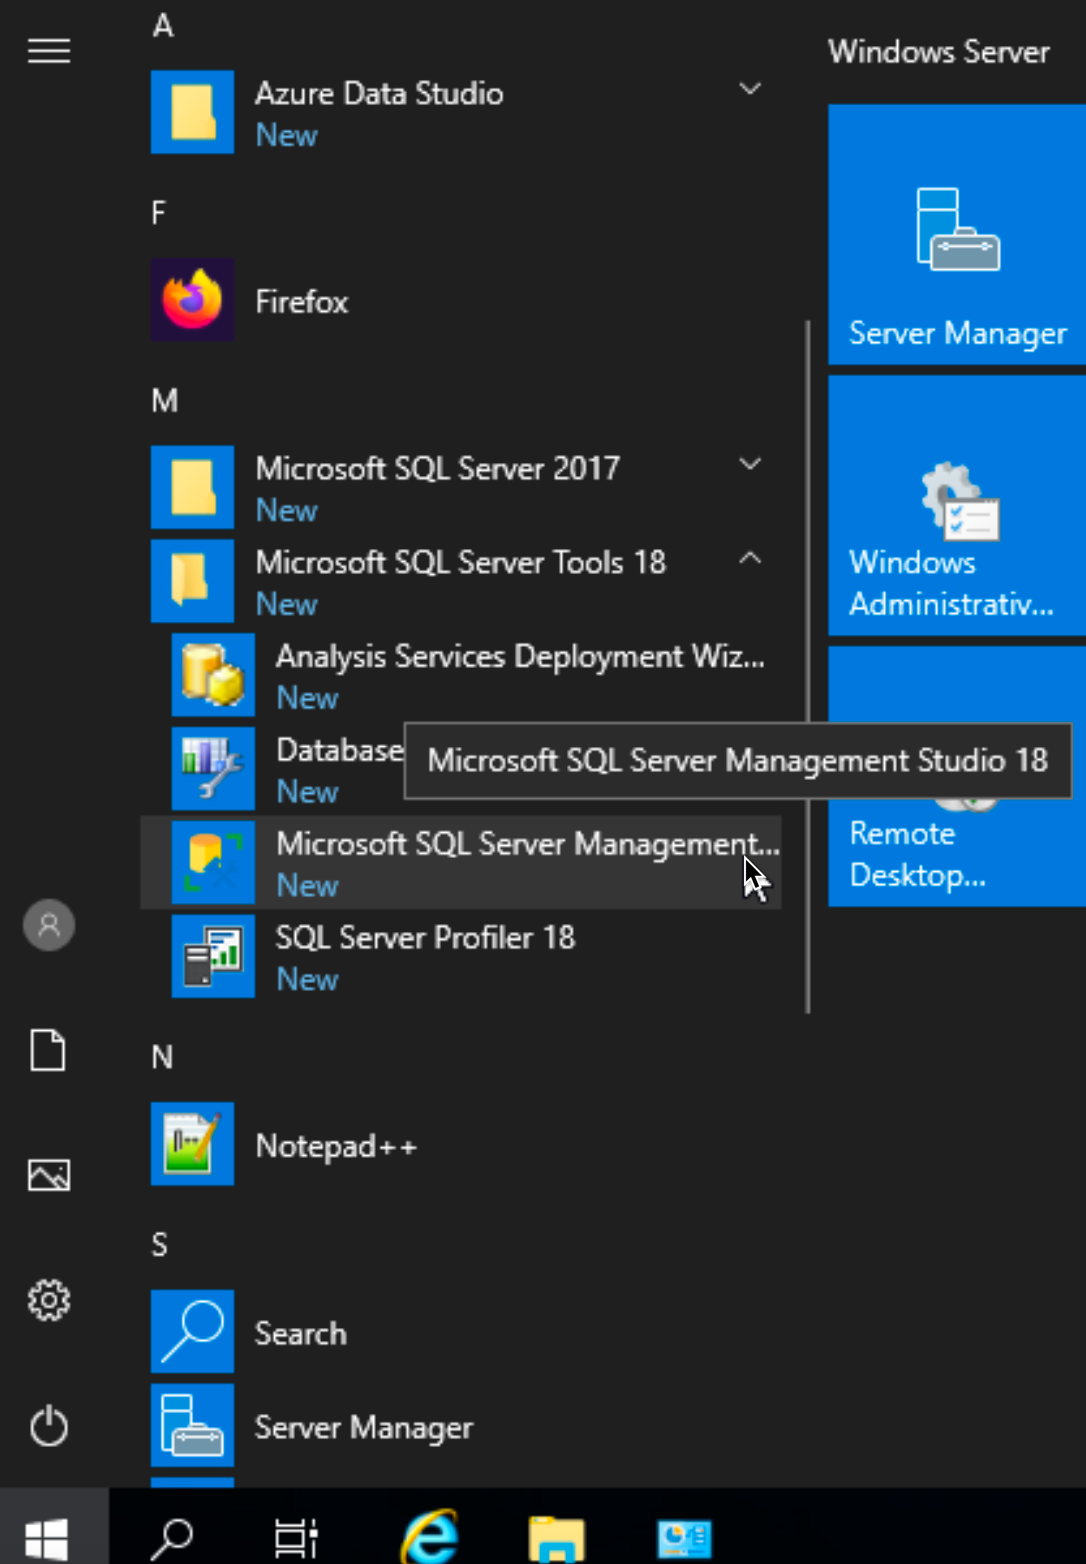
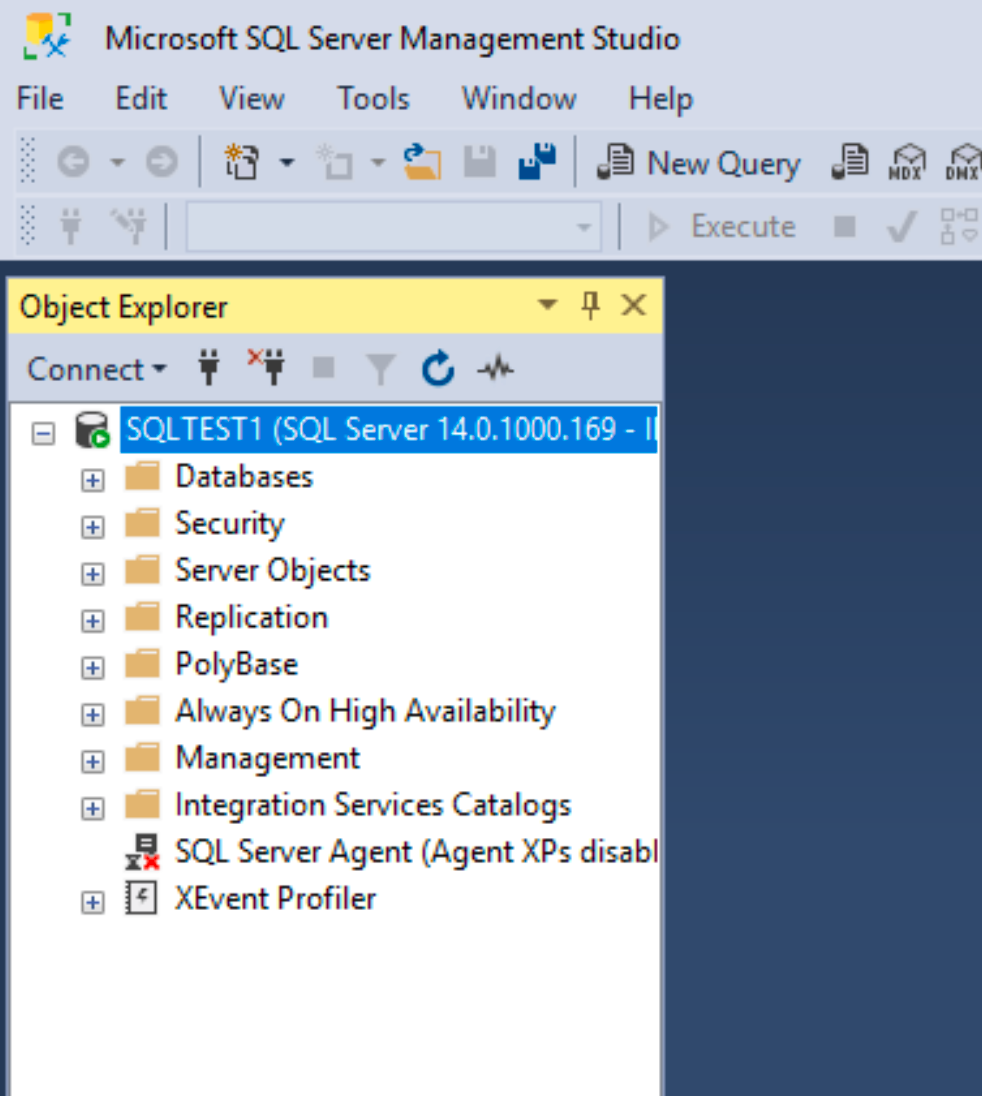
Ok, after reboot click on Start, go to Microsoft SQL Server Tools 18 and select Microsoft SQL Server Management Studio 18
We already have a problem and we haven’t even logged in. System is offering me Administrator as a user to login, and username and password fields are greyed out, so I cannot change login. I cannot login with Administrator, since SQLDBADMIN1 is username I defined for SQL administration.
I’m logged into Windows Server as Administrator, and SQL Server automatically picks up that as SQL Server user, but Administrator is not my SQL server admin. I defined separate account for that – and that is great security practice.
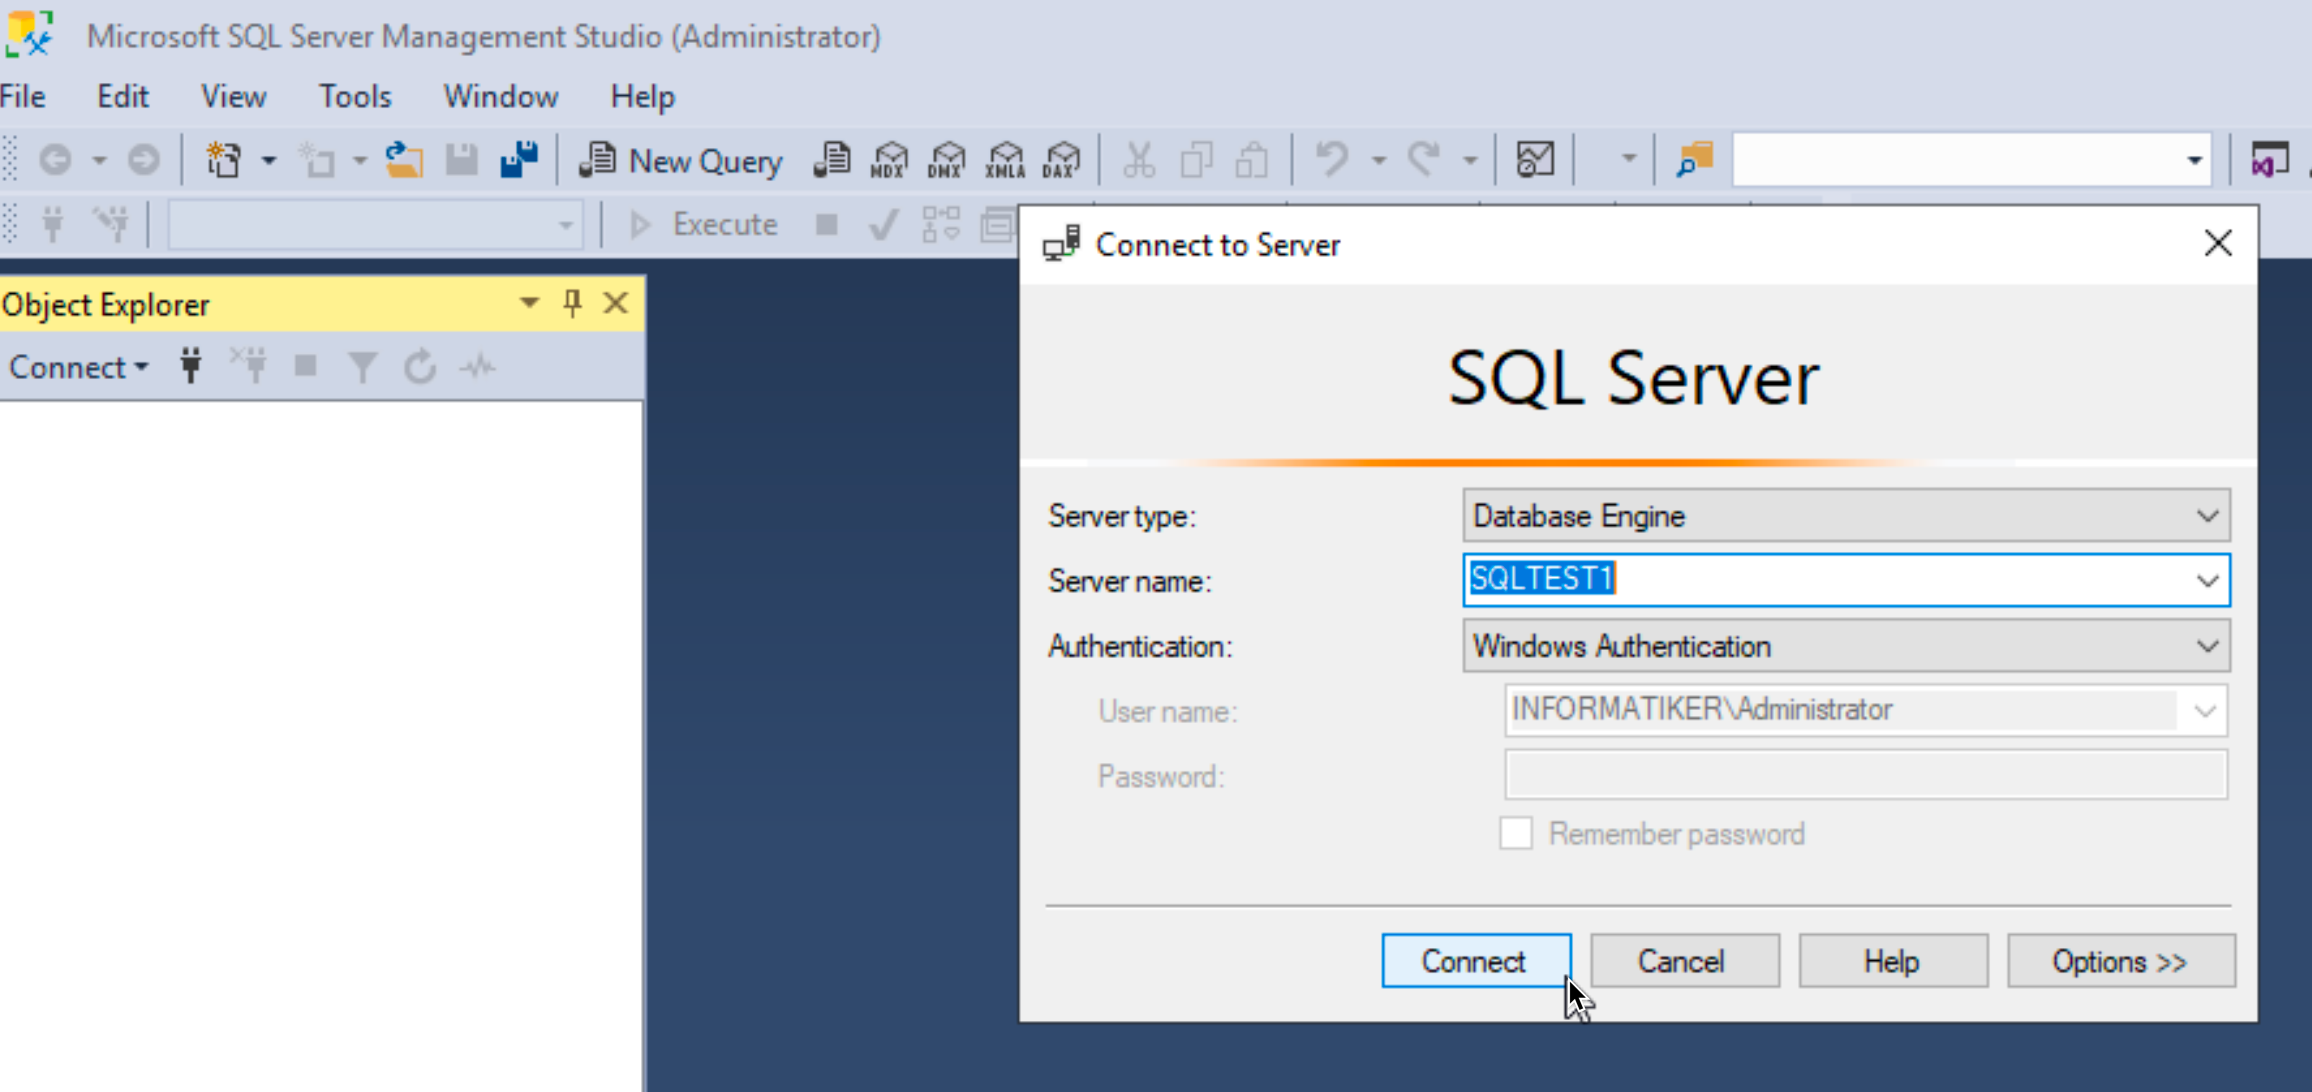
Ok, close SSMS and back to start menu.
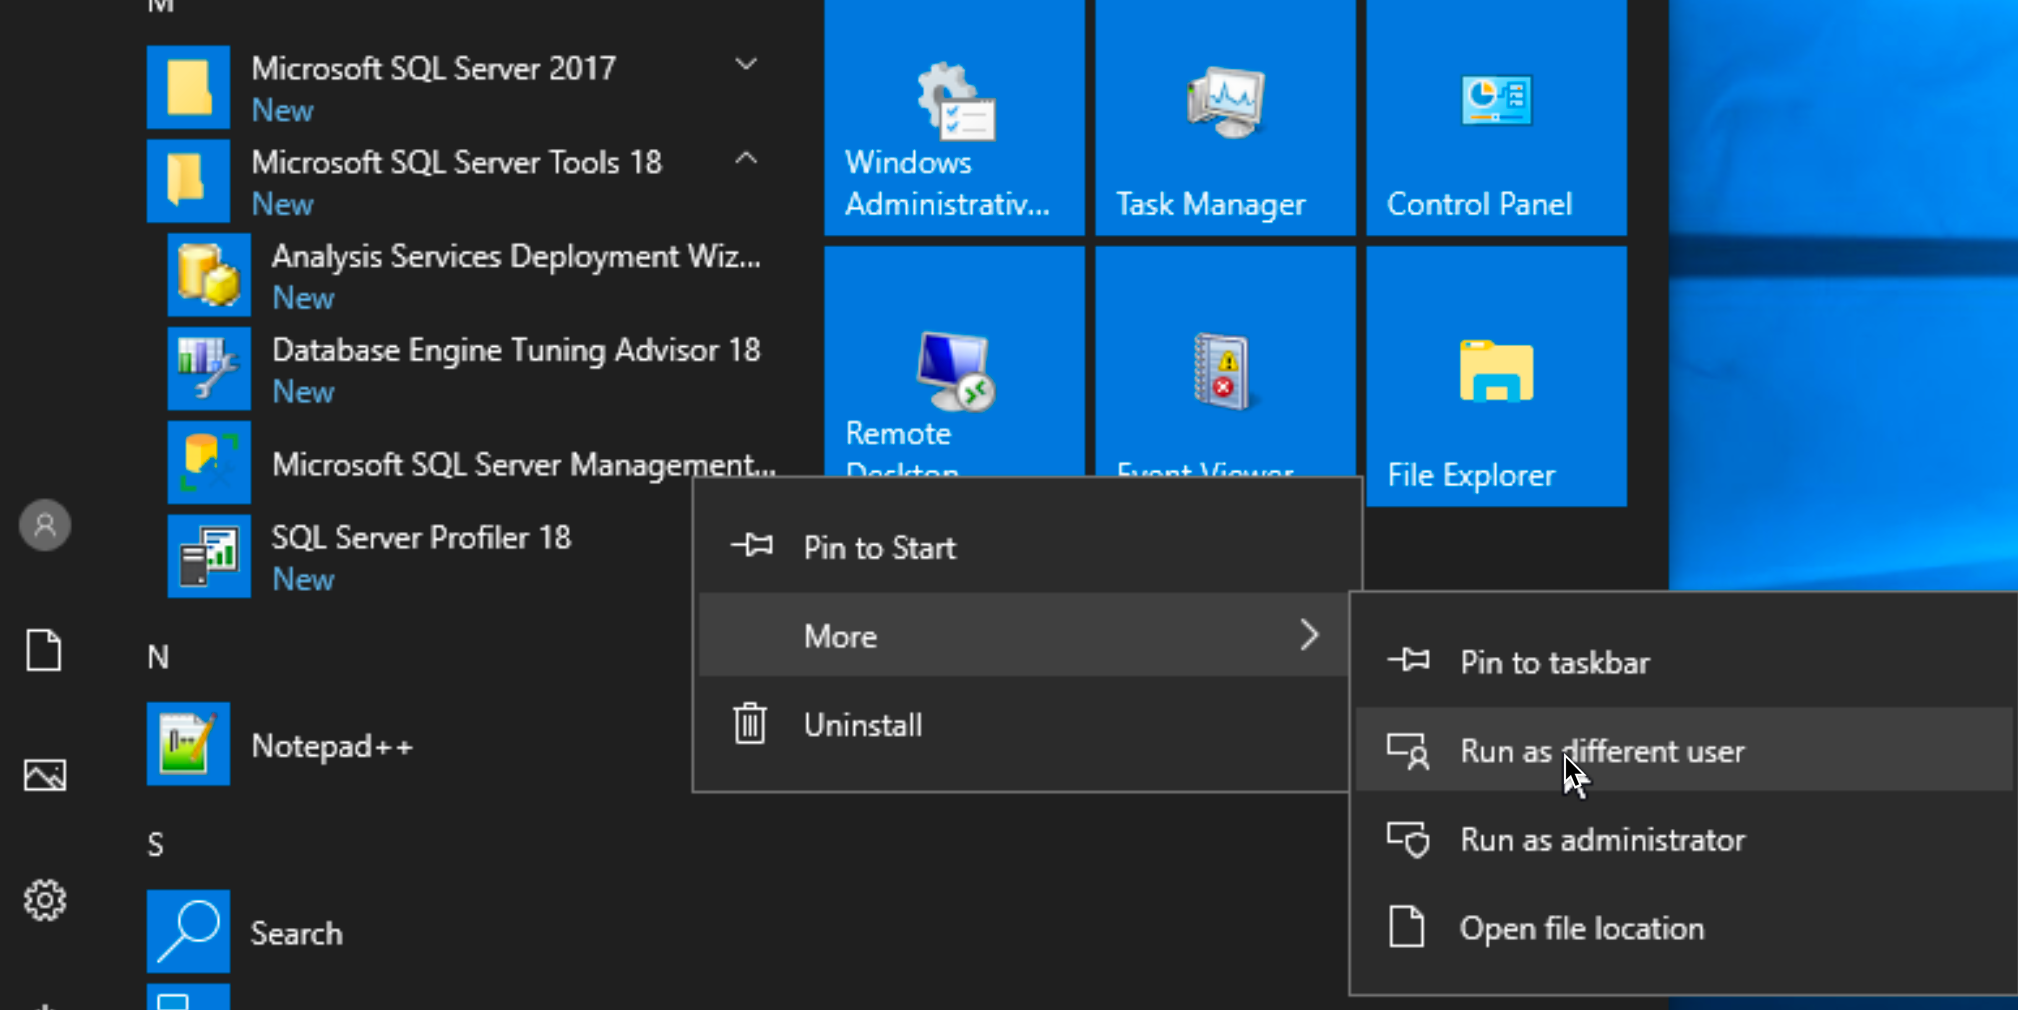
There are many different ways you can resolve this annoying problem, and I will show you one.
Click on Start, go to Microsoft SQL Server Tools 18 and right click on Microsoft SQL Server Management Studio 18 | select More | select Run as different user
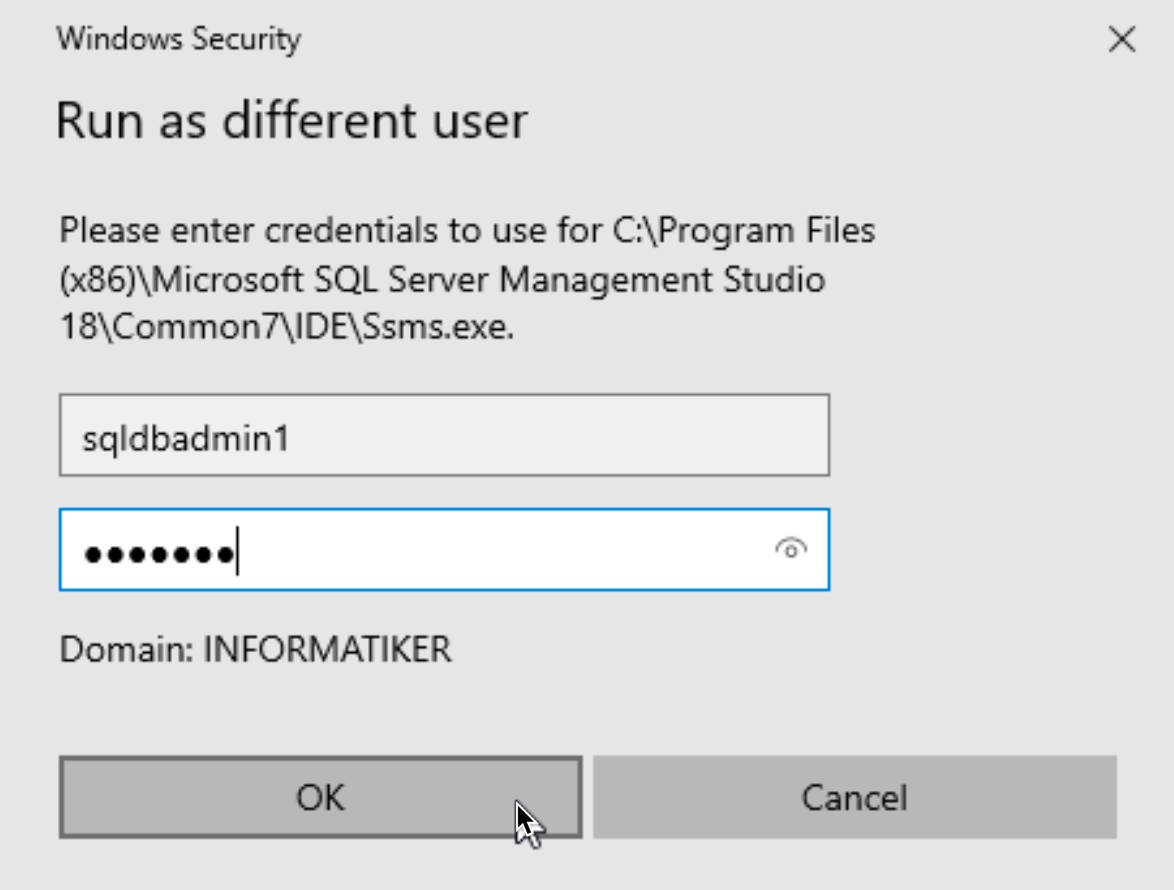
I will enter sqldbadmin1 in username and password for the user in password field. OK
Surpriseee! We now have (although greyed out) sqldbadmin1 in user name field. Click on Connect
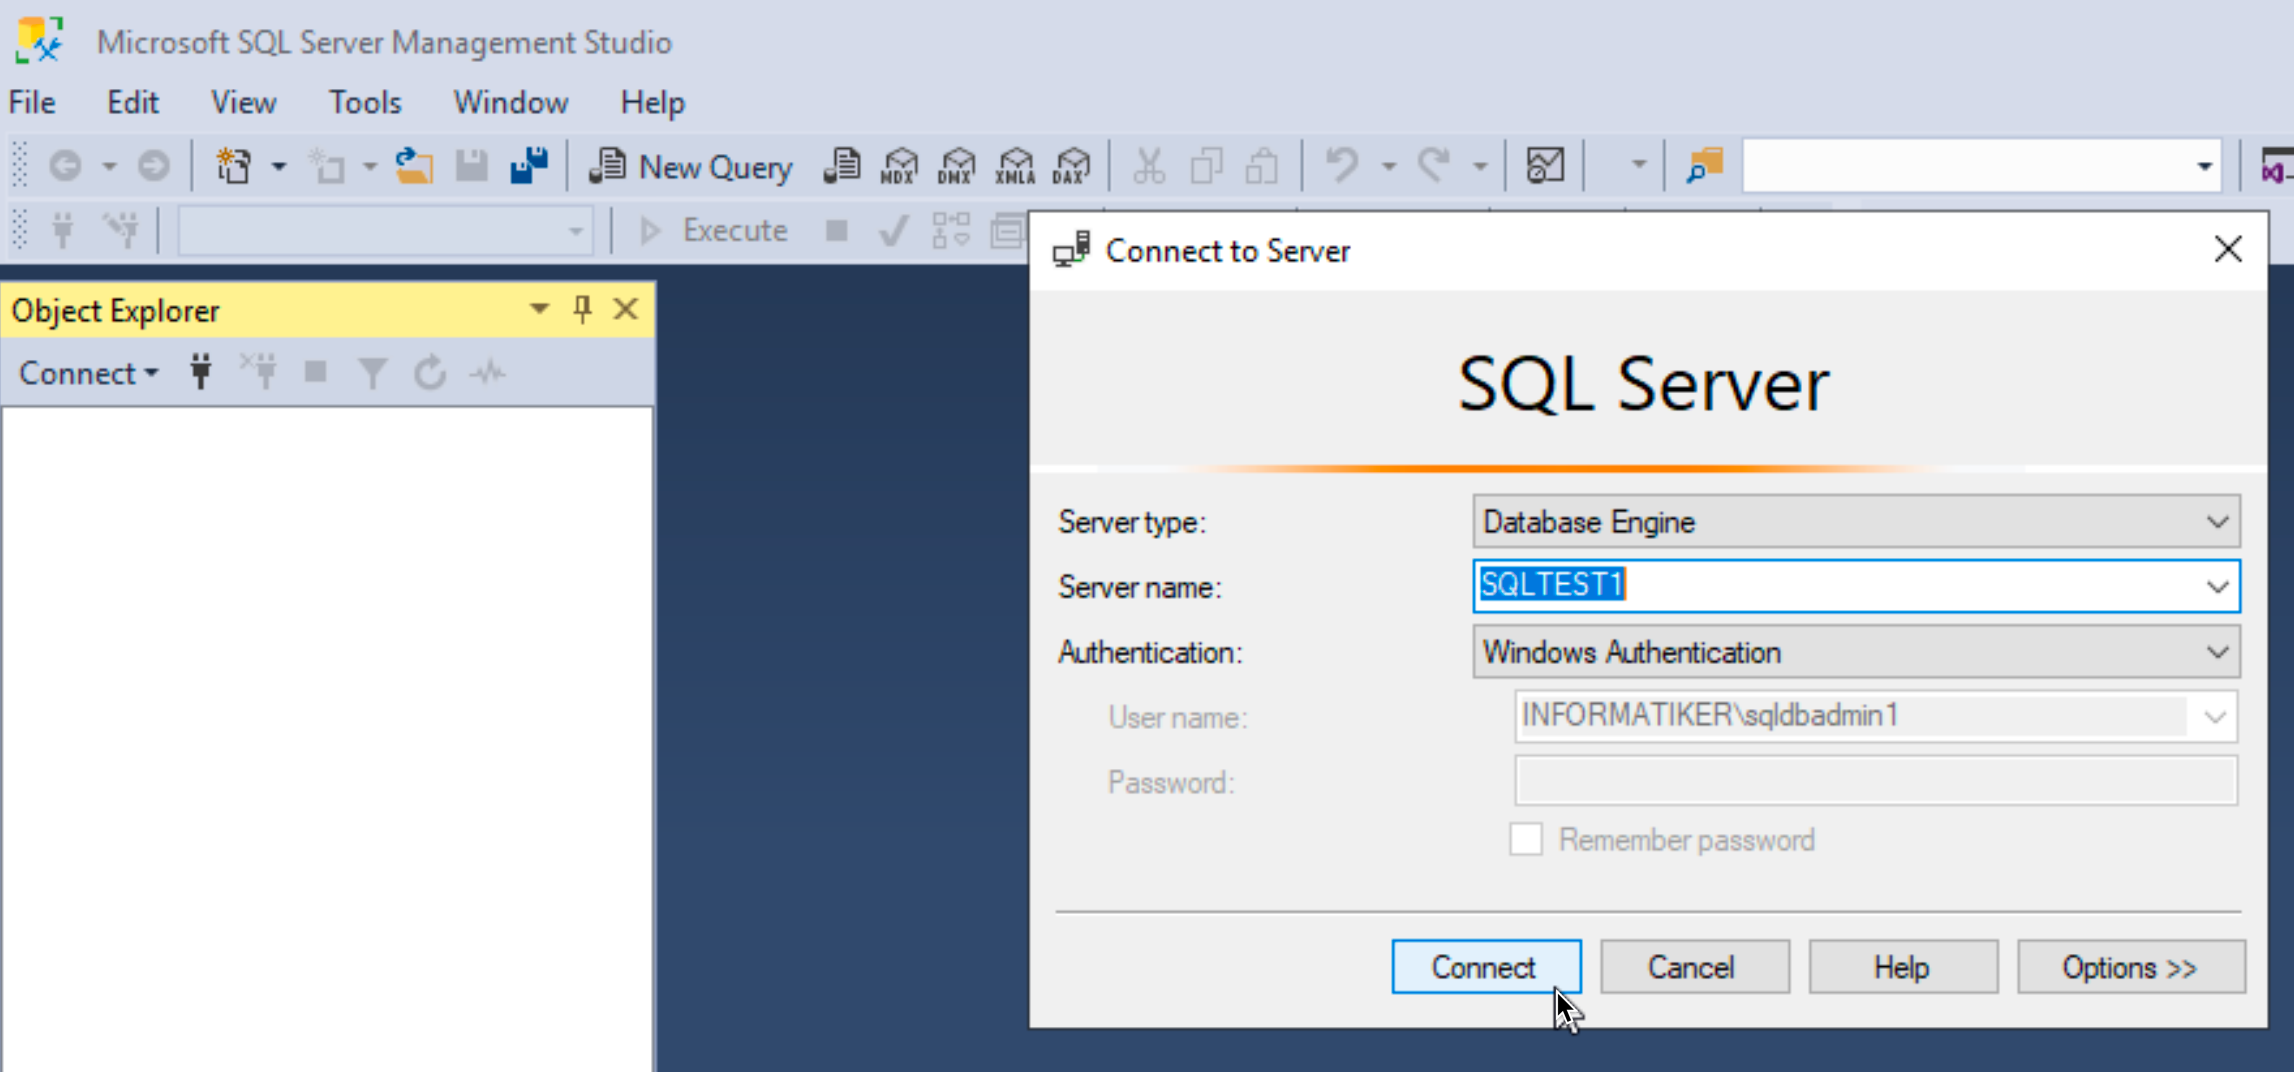
Congrats, we are in, we can start administering
Restore downloaded AdventureWorks2016_EXT.bak database
Now, before we restore AdventureWorks2016_EXT.bak we downloaded earlier, we need to do few things.
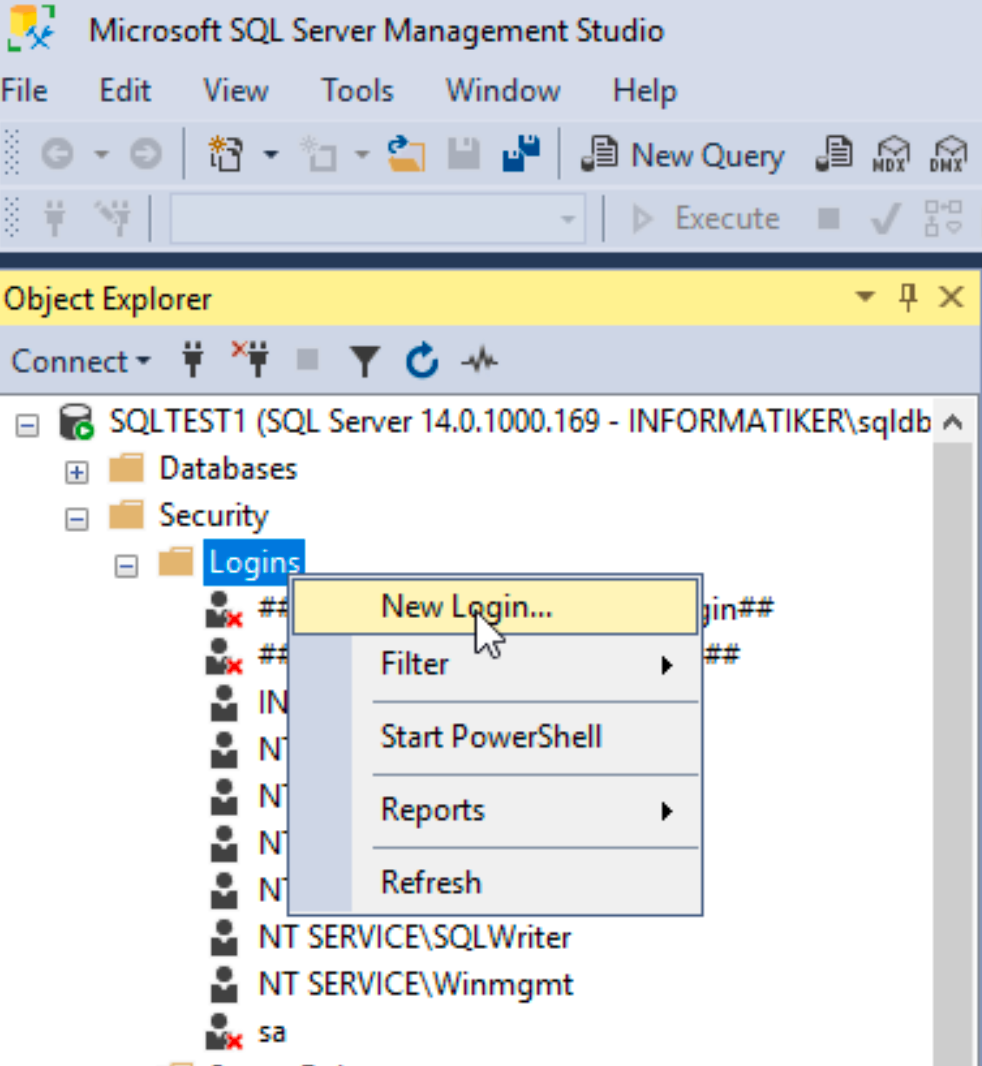
First, in SSMS, go to Security | Logins – right click on Logins and select “New Login…”
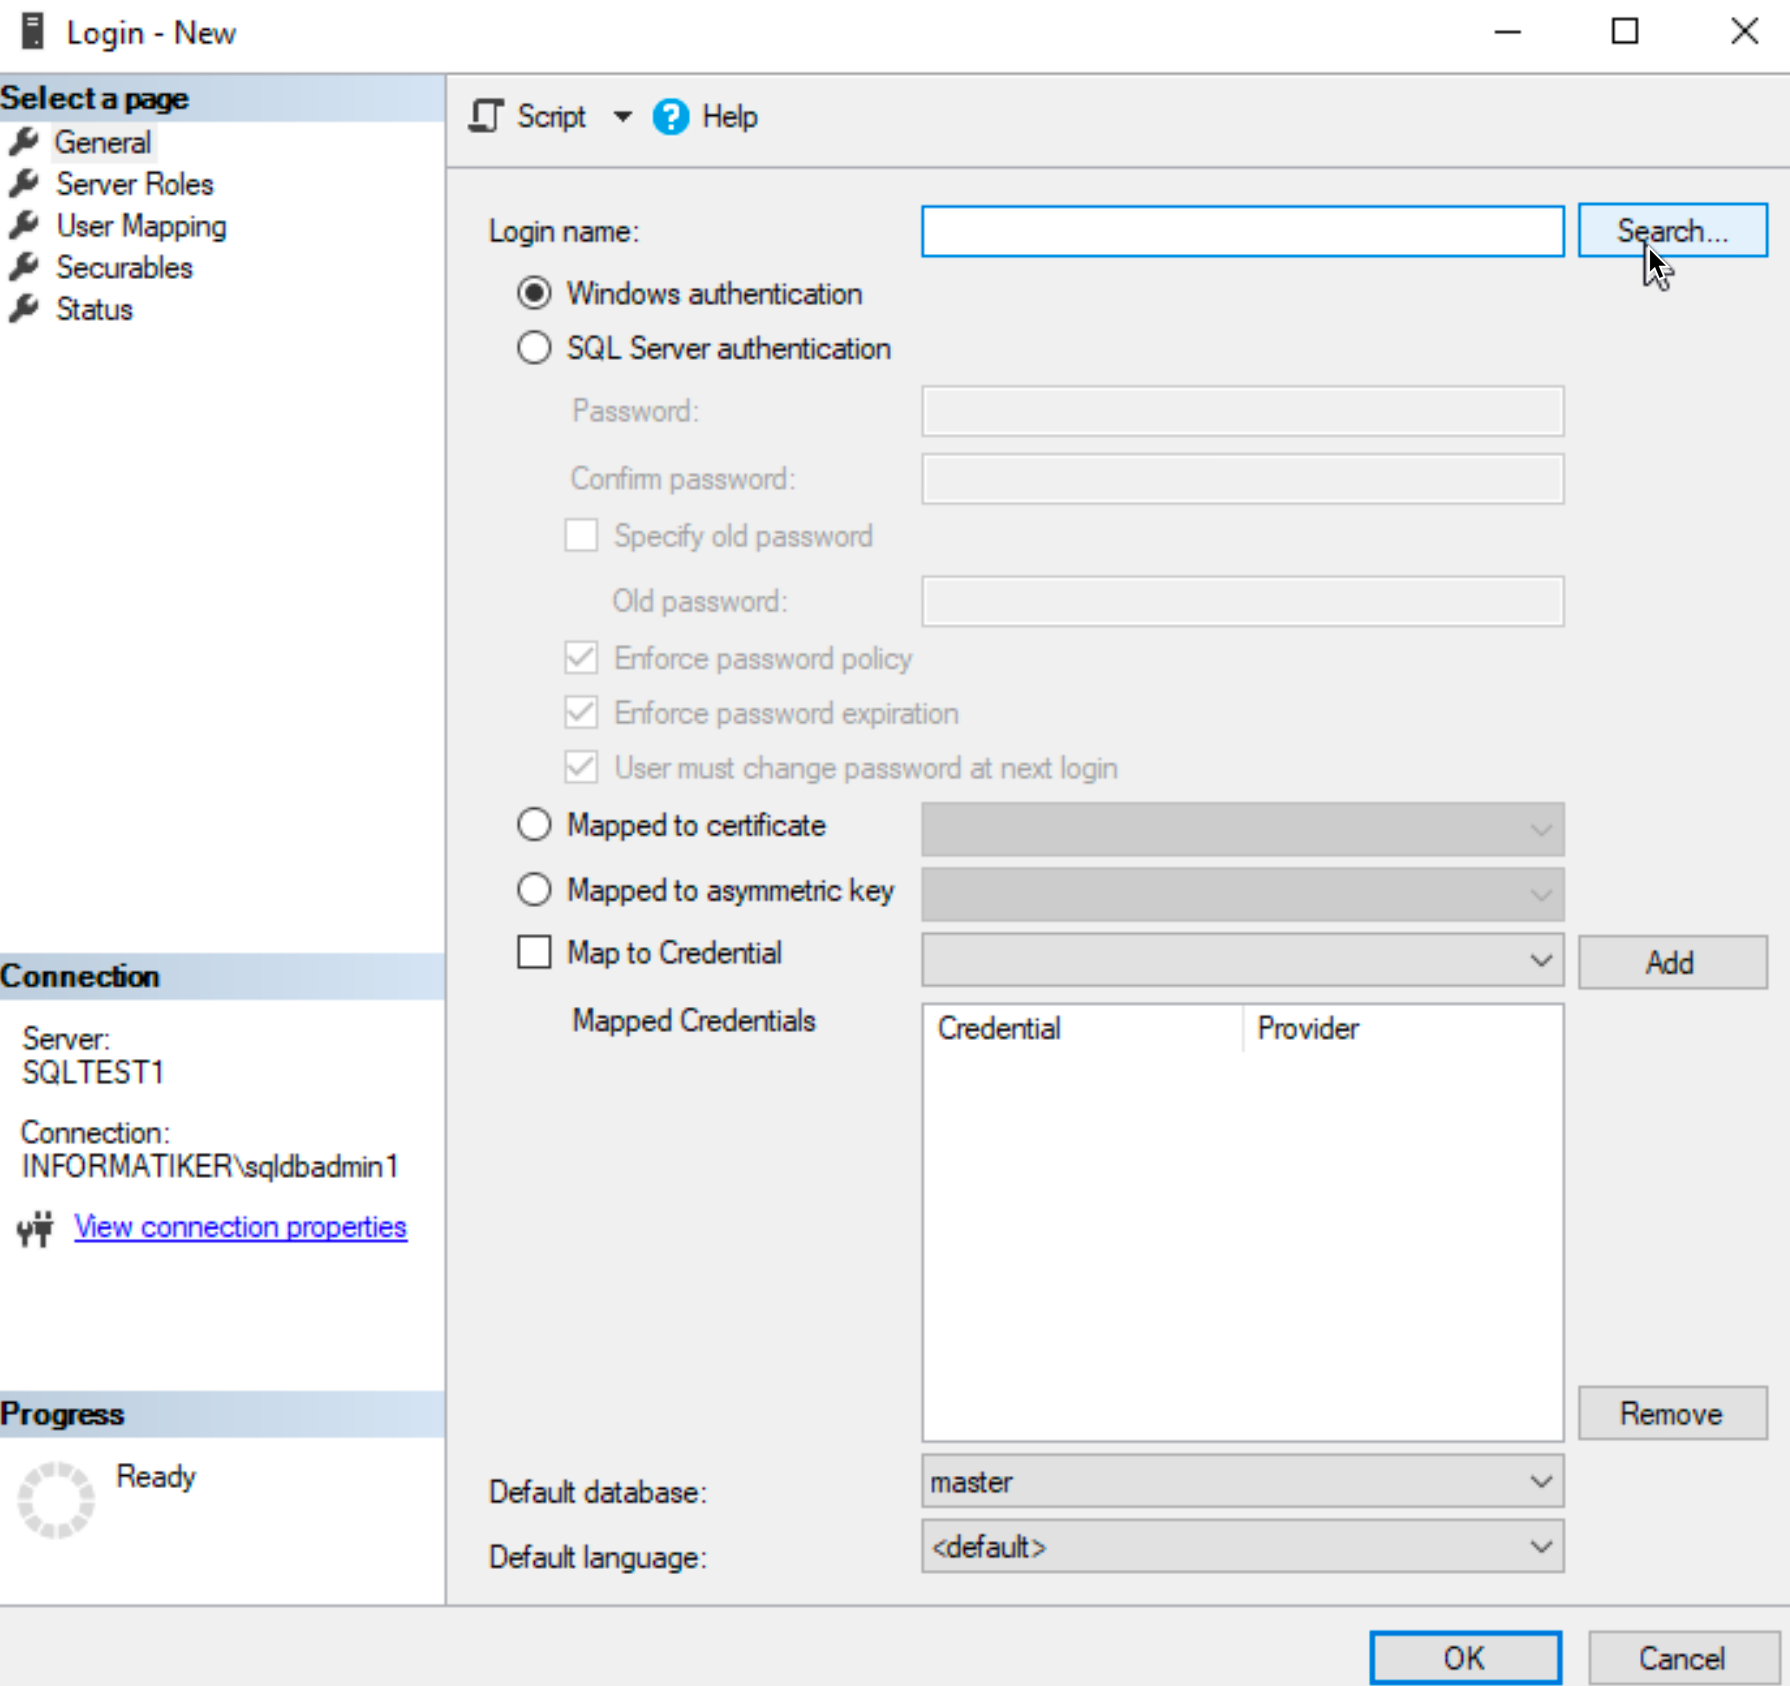
Under General | Login name click on Search
First change Locations to “Entire Directory”
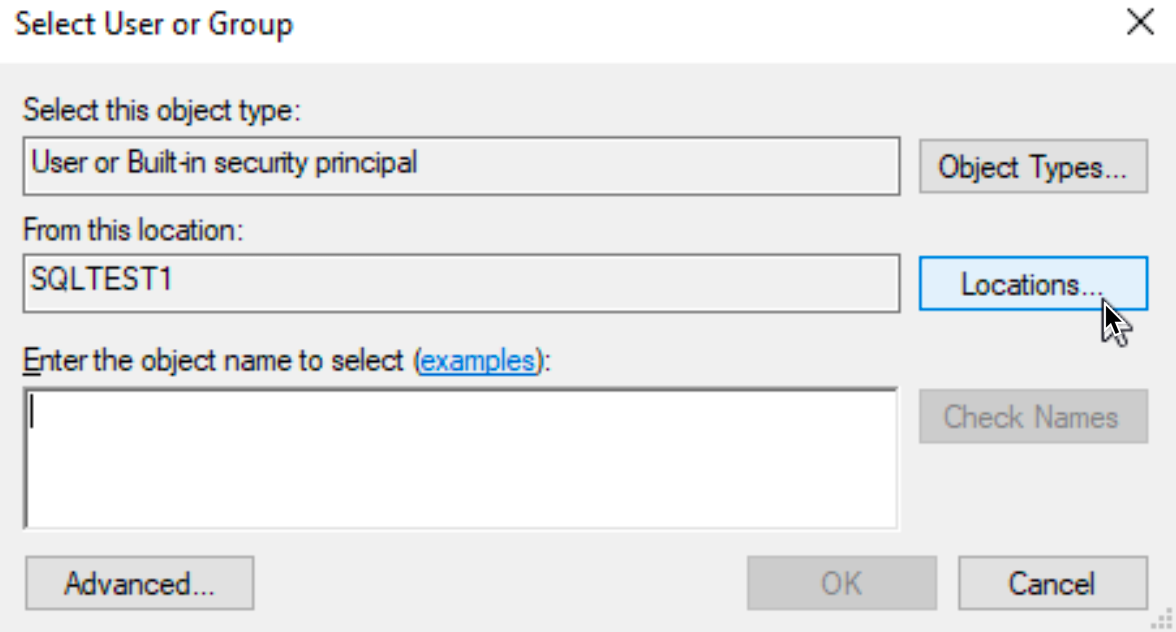
In enter the object name… enter AW2016 and select check names, you should be offered aw2016db user we created earlier. OK.
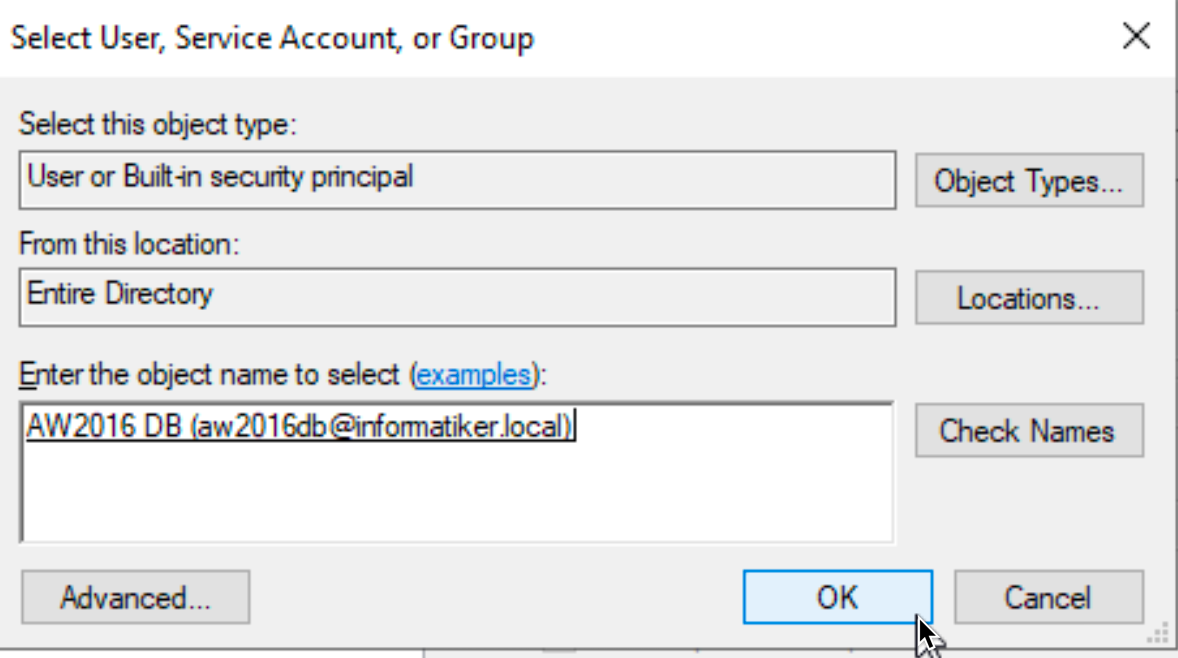
We will leave everything else, as is – and select OK.
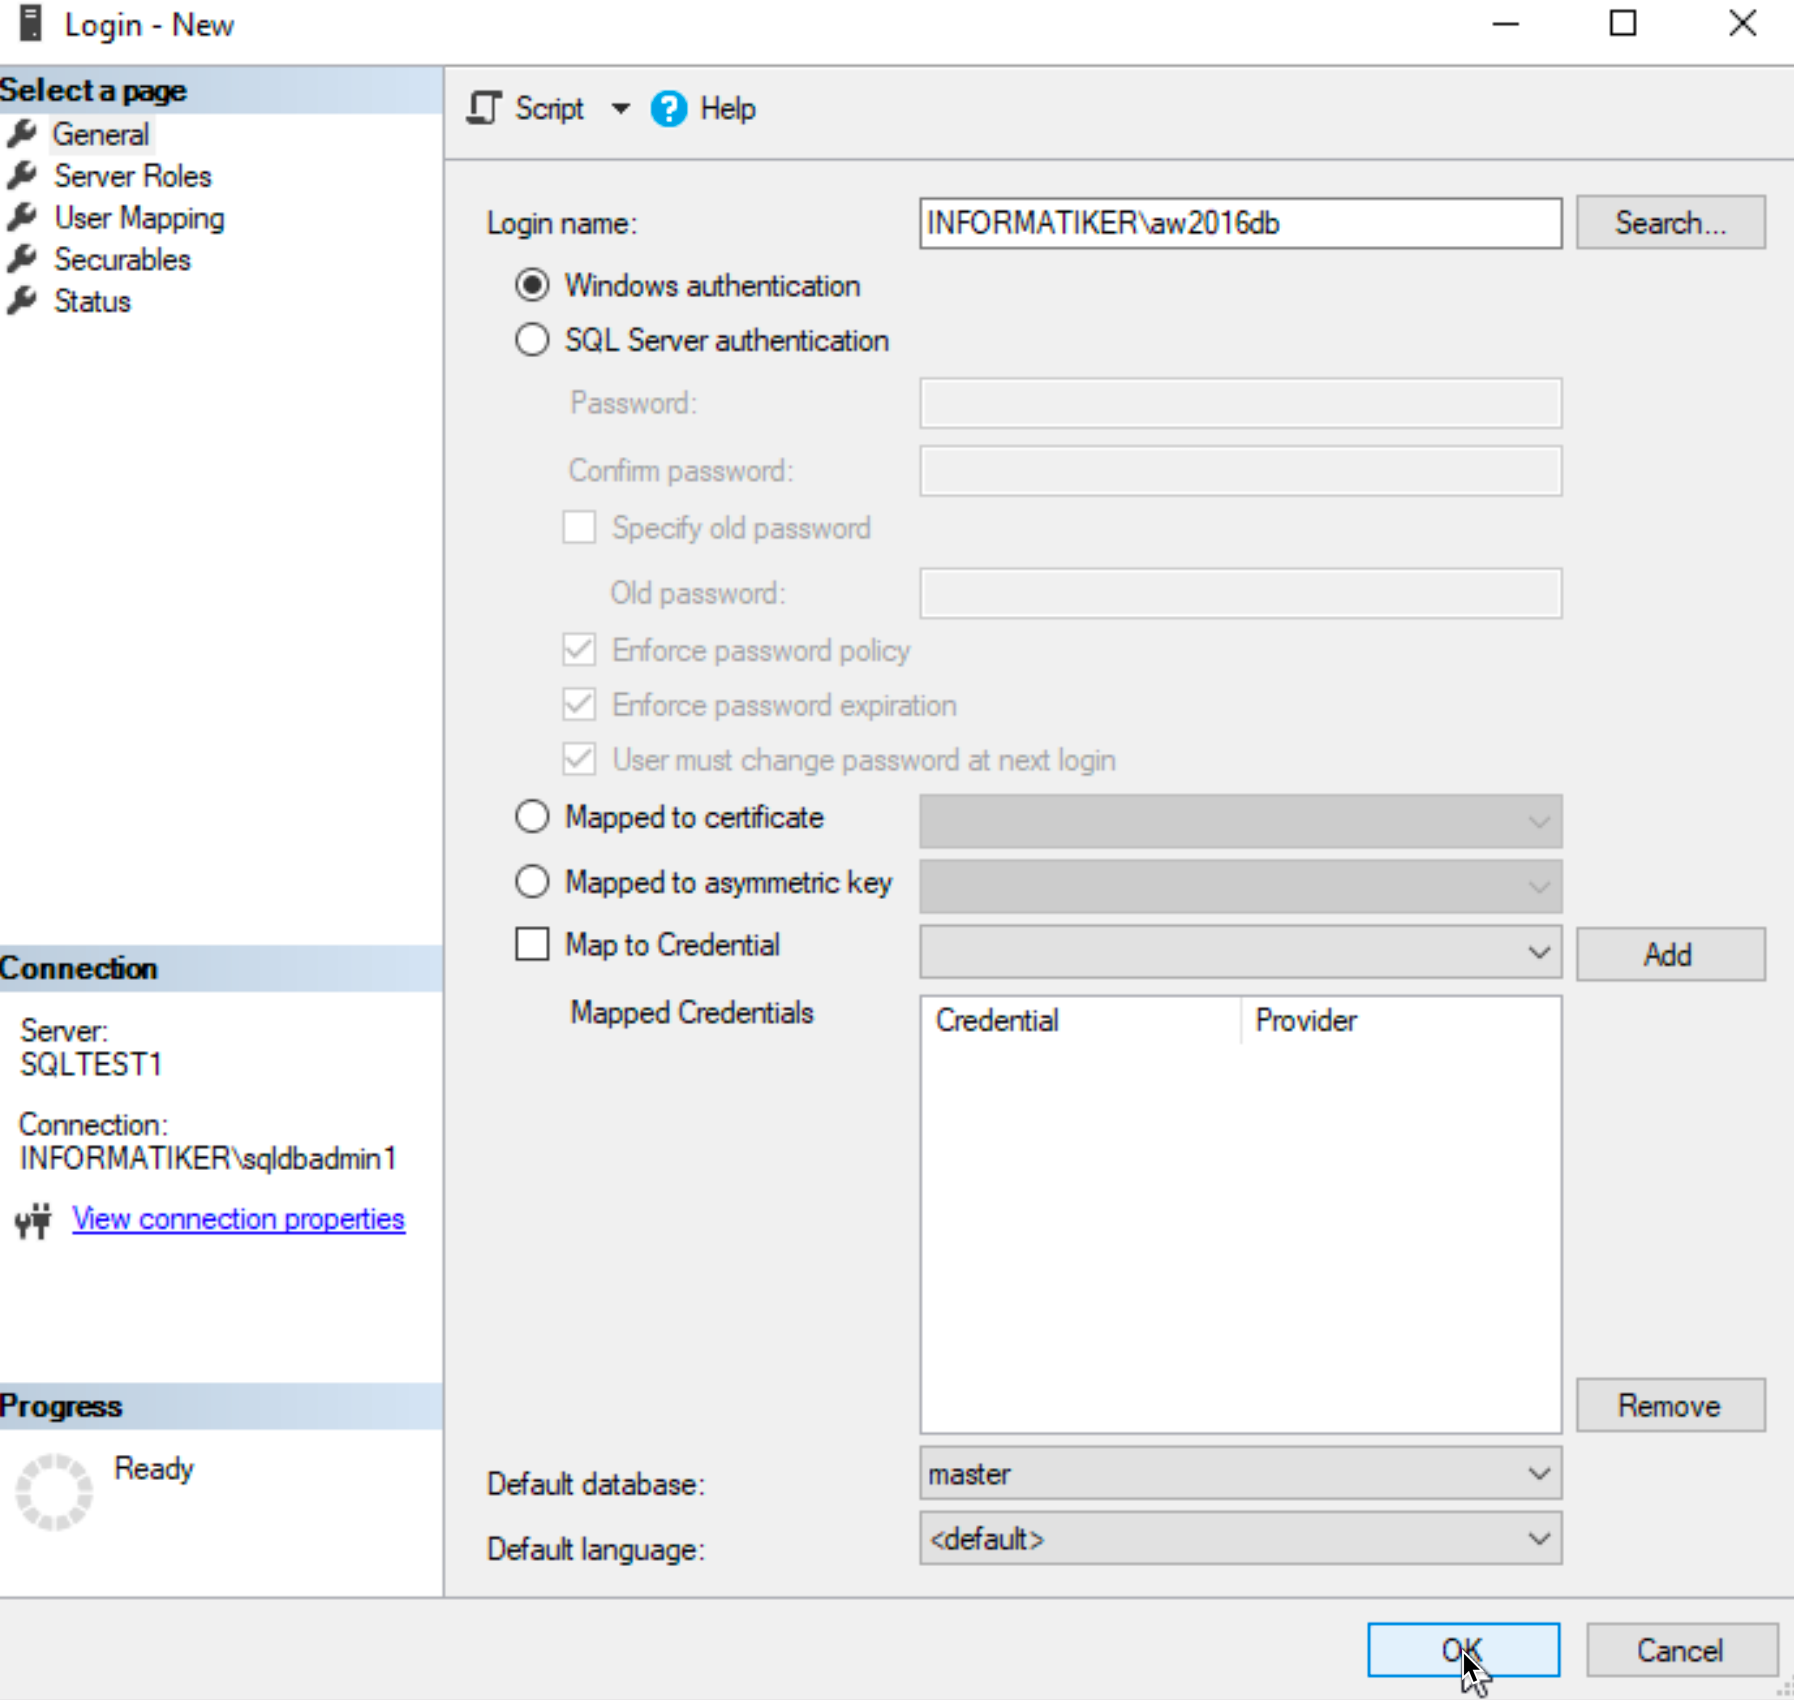
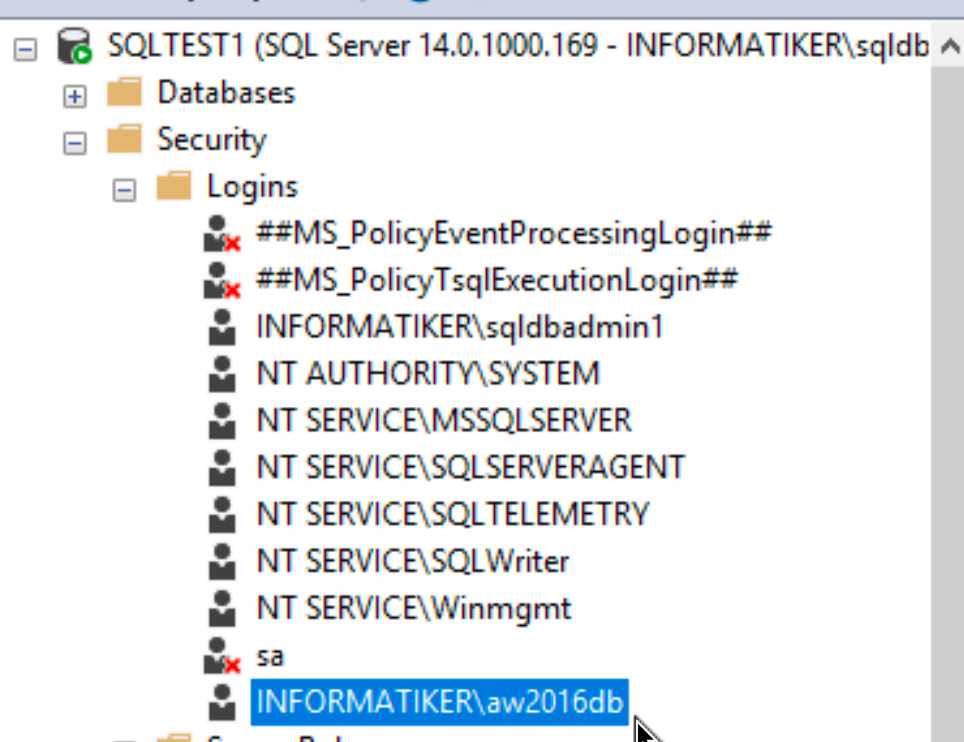
Our new user is imported.
You will maybe also have to do this procedure for existing databases if you import them into new SQL installs. You will maybe also be instructed to do some additional configuration for the user… It depends on the environment.
Copy downloaded AdventureWorks2016_EXT.bak to F:\SQLBackups folder. If you need additioanl info about Adventure Works sample, you can find plenty of info here – https://github.com/microsoft/sql-server-samples/tree/master/samples/databases/adventure-works
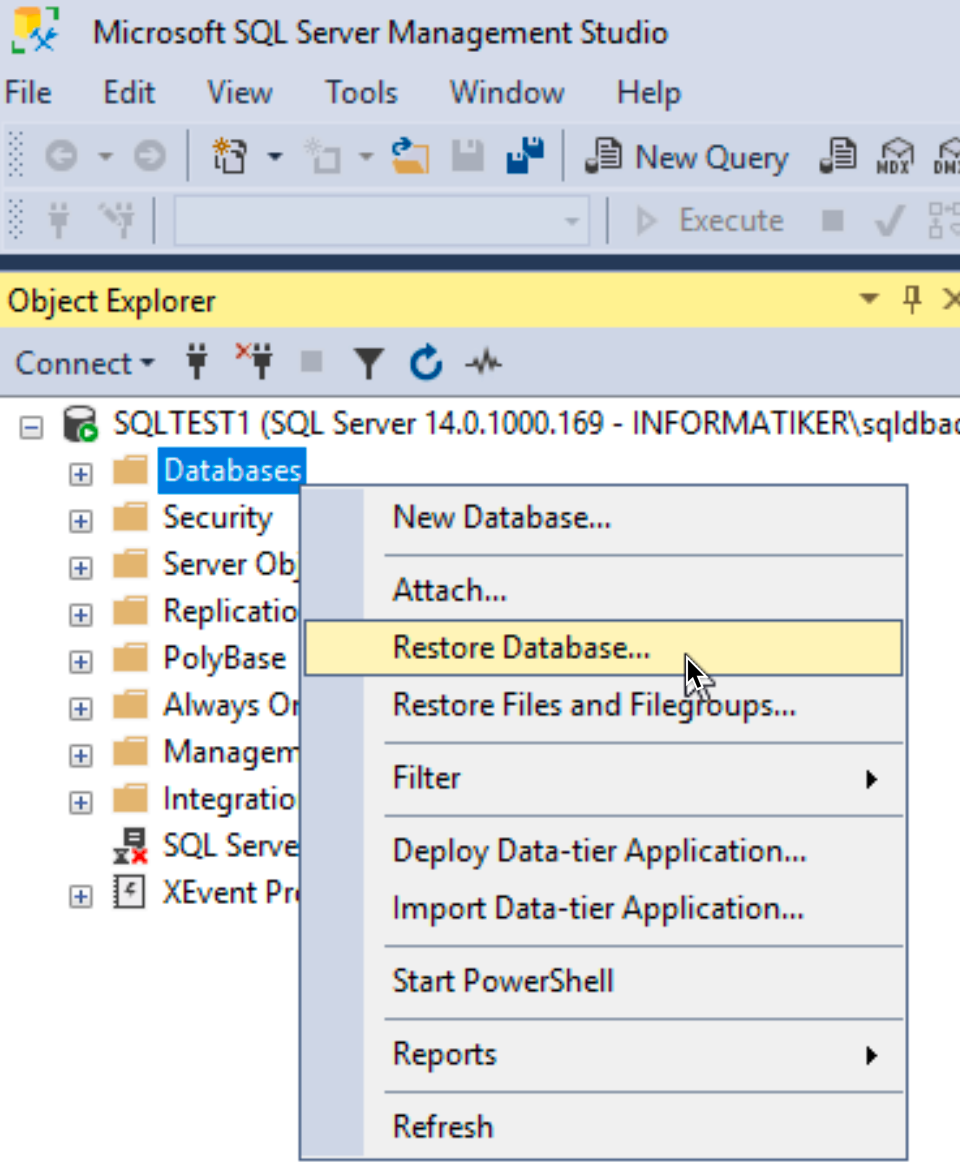
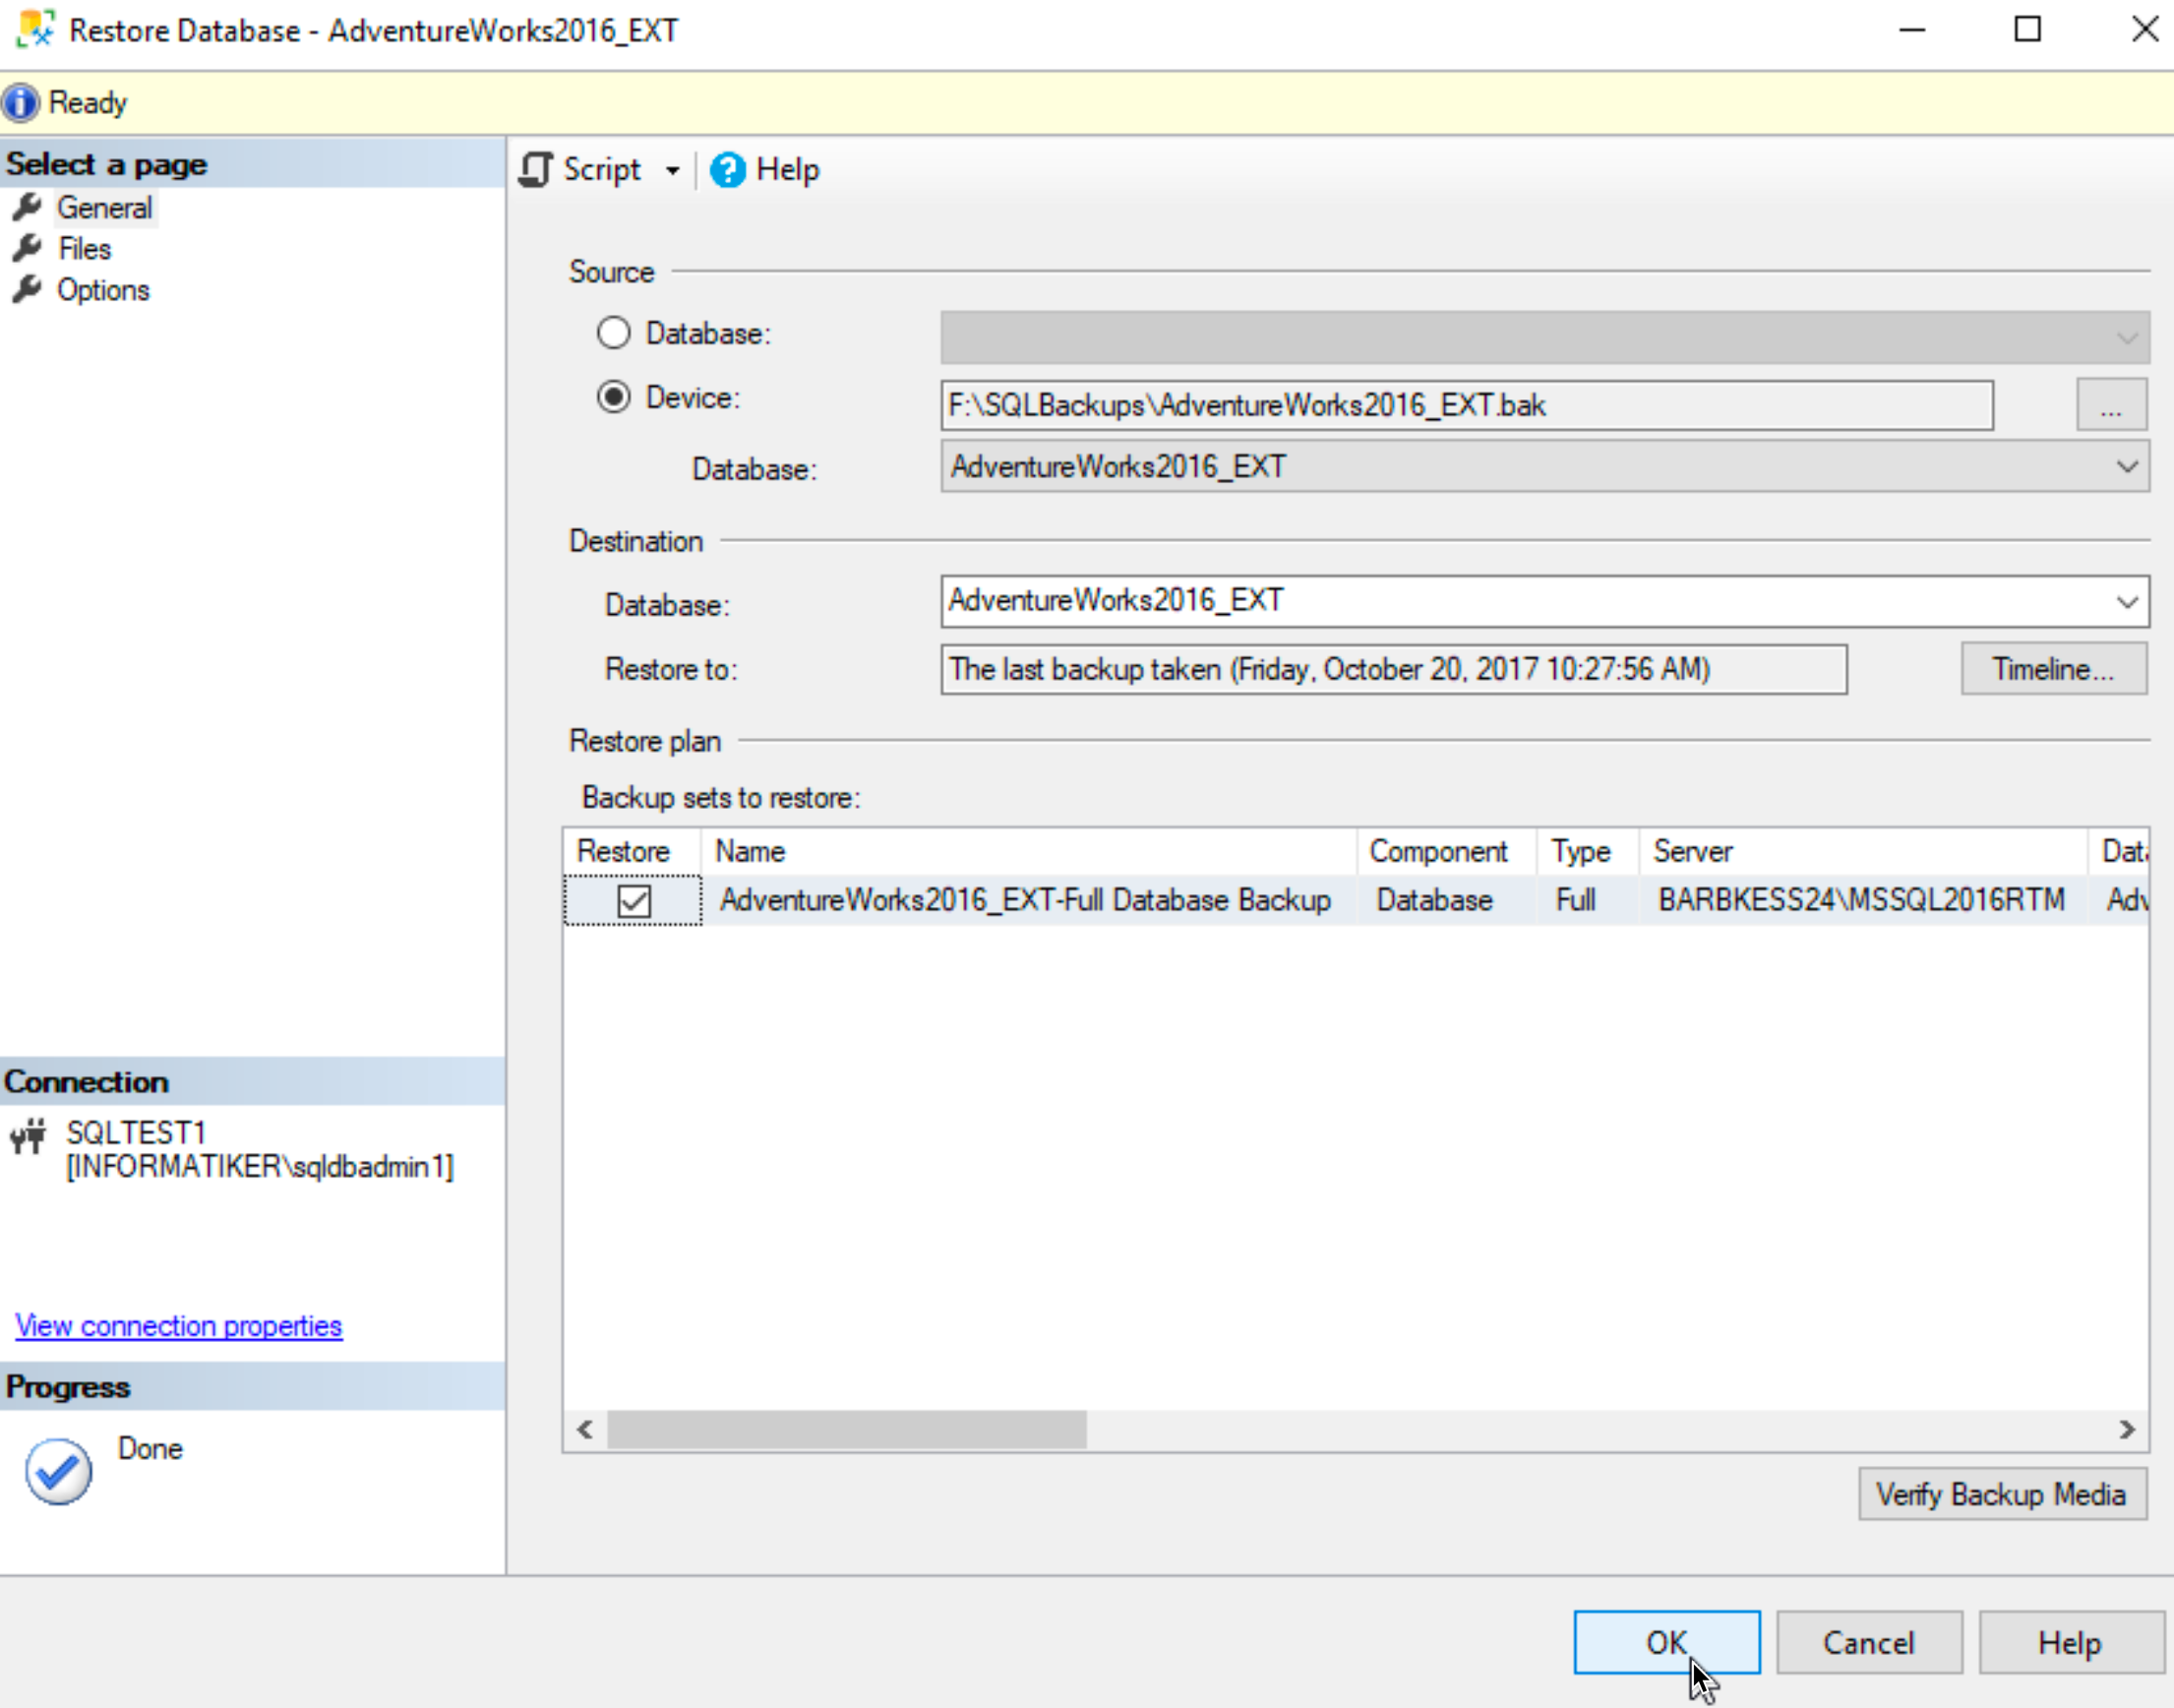
Ok, back to the SSMS. Right click on Databases | select Restore Database…
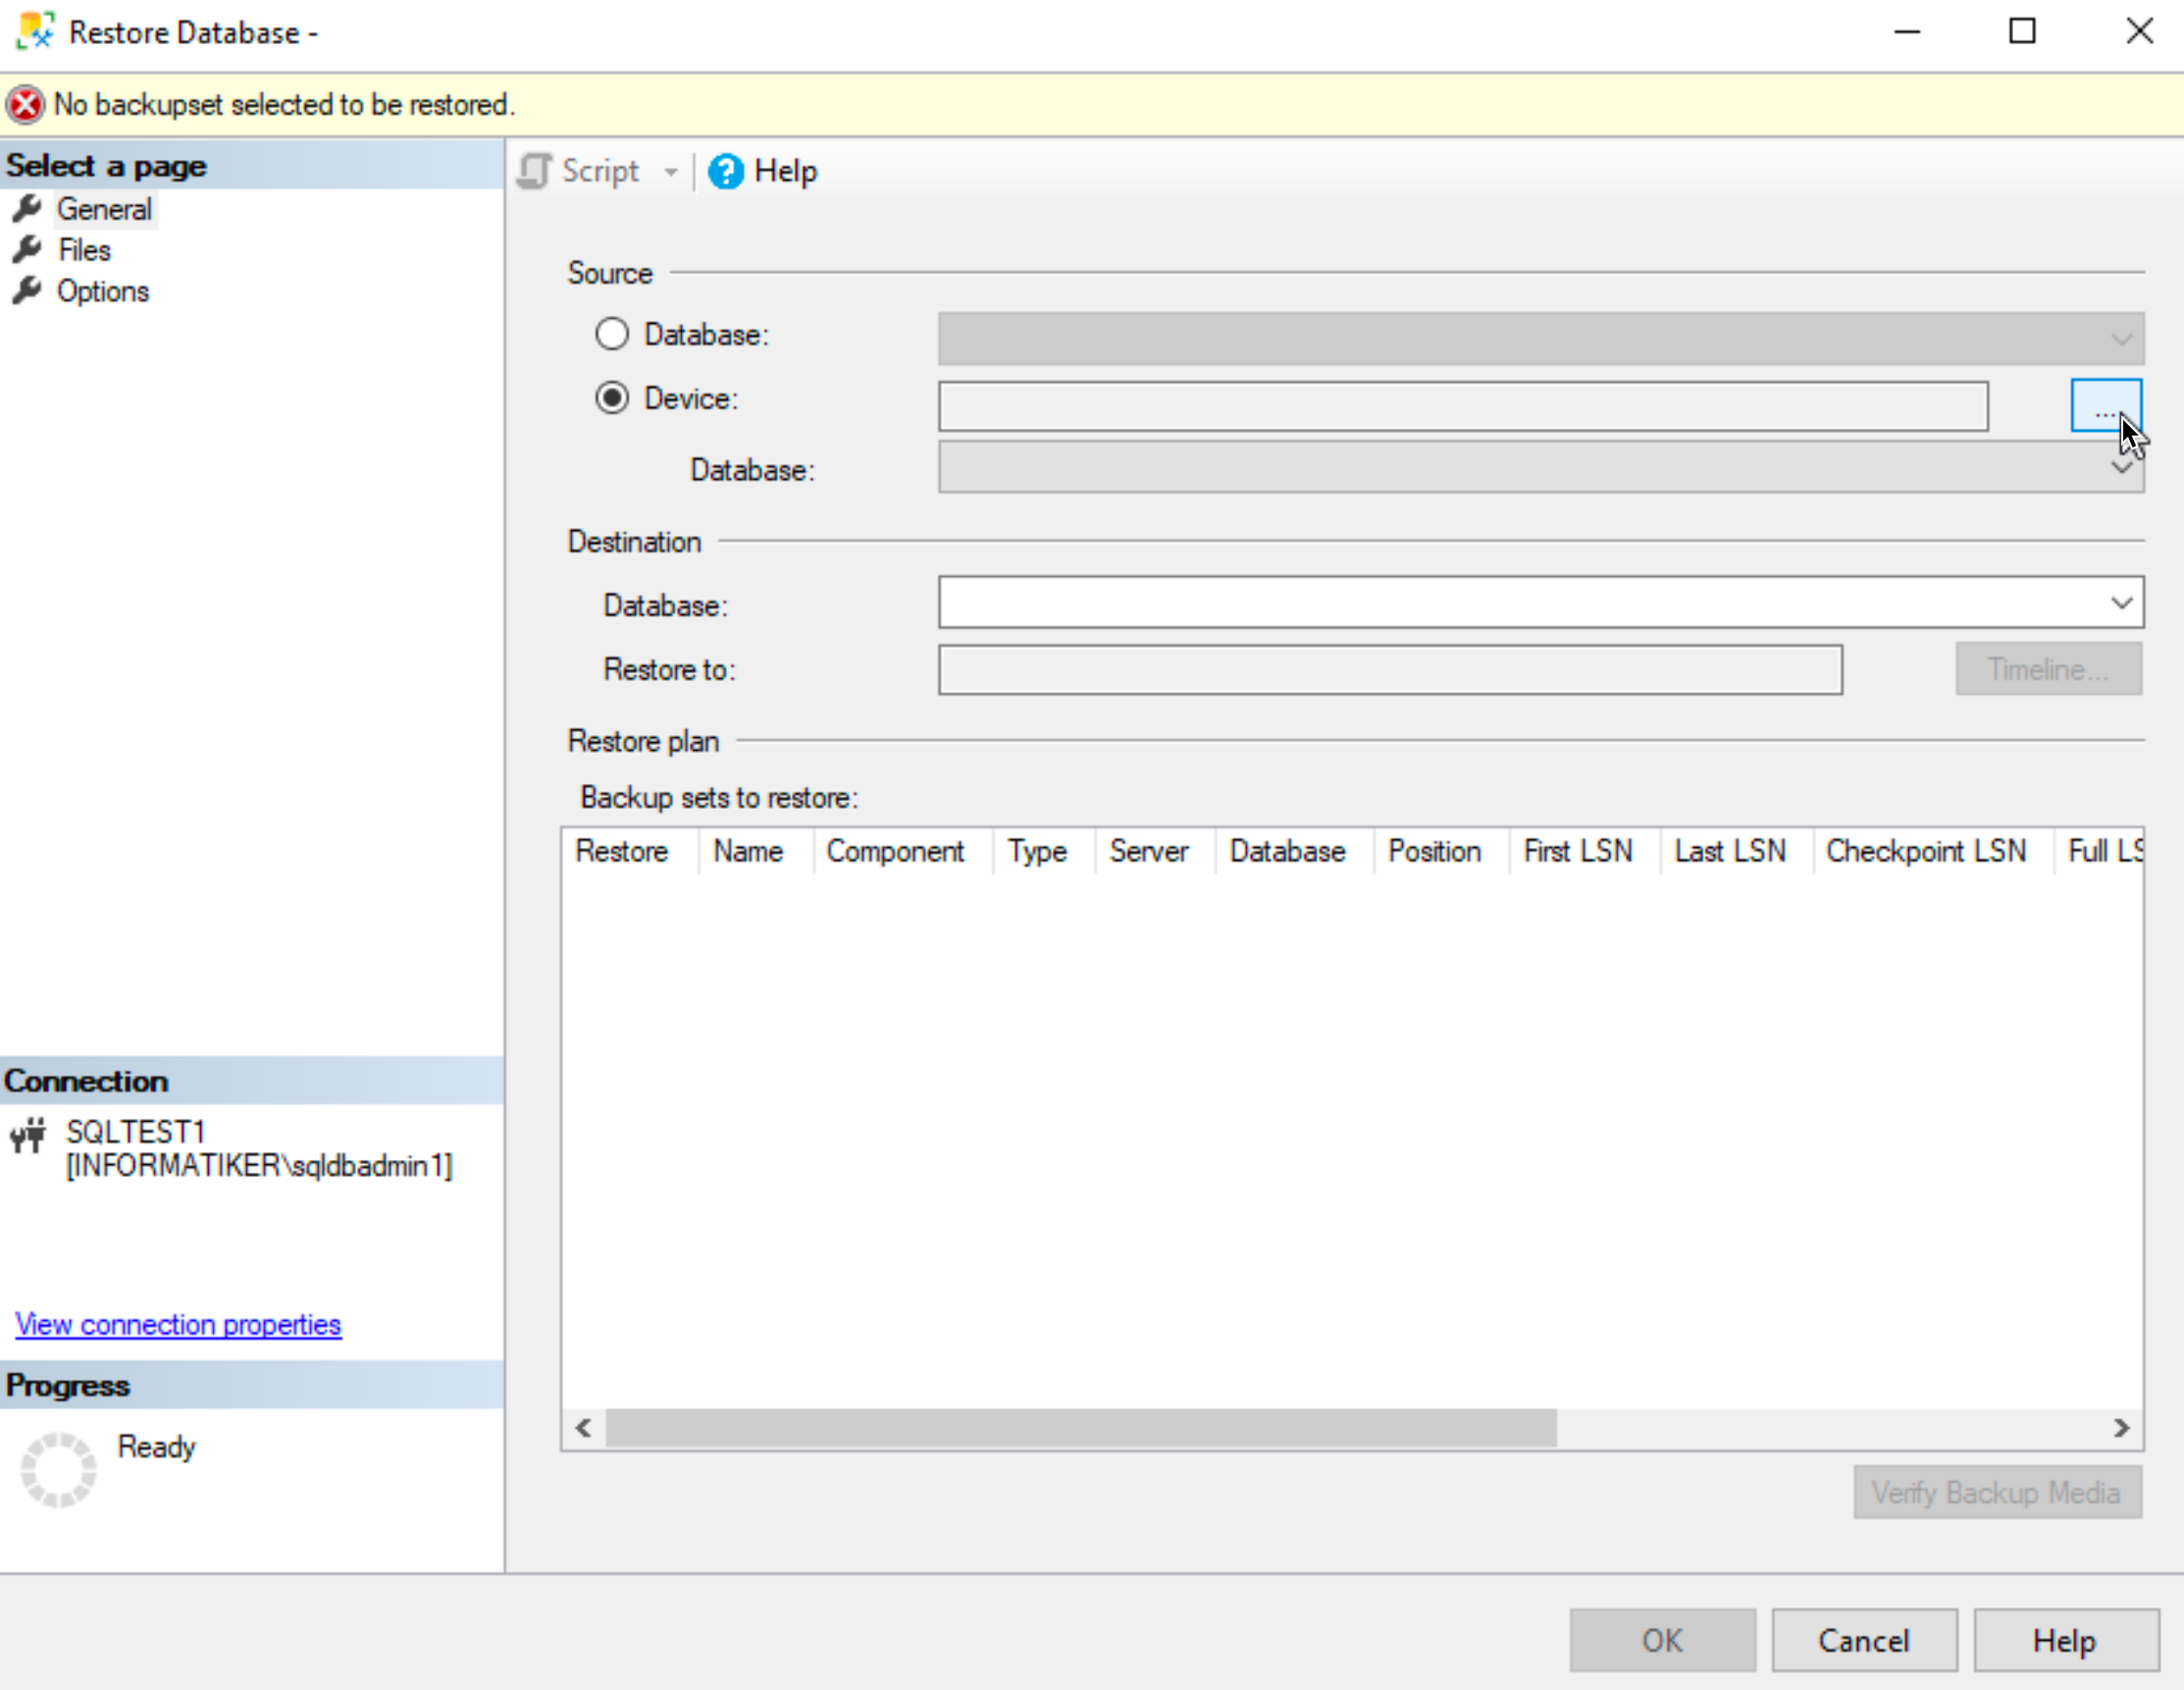
Select Device, and click on a button with three dots …
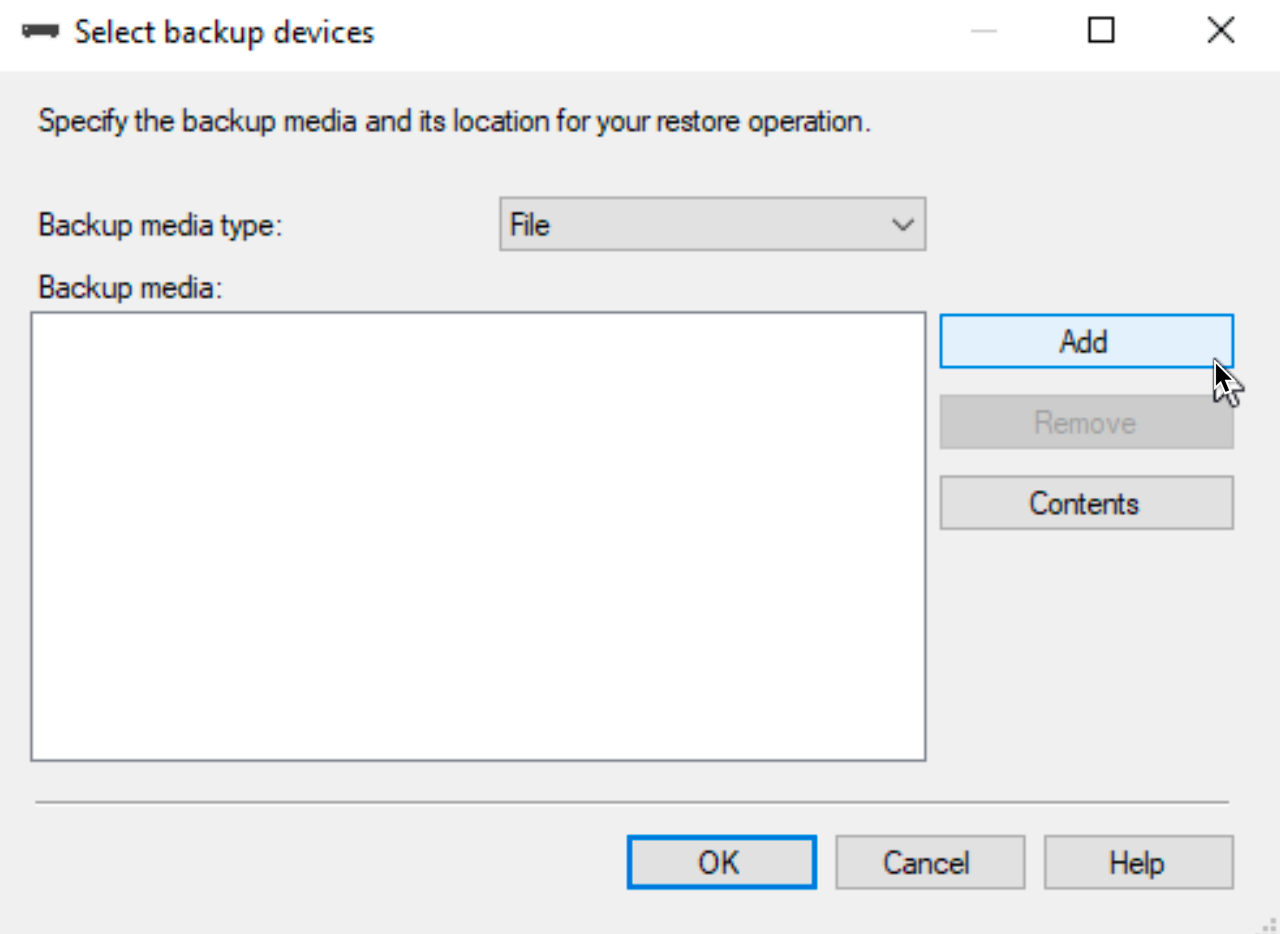
Select Add
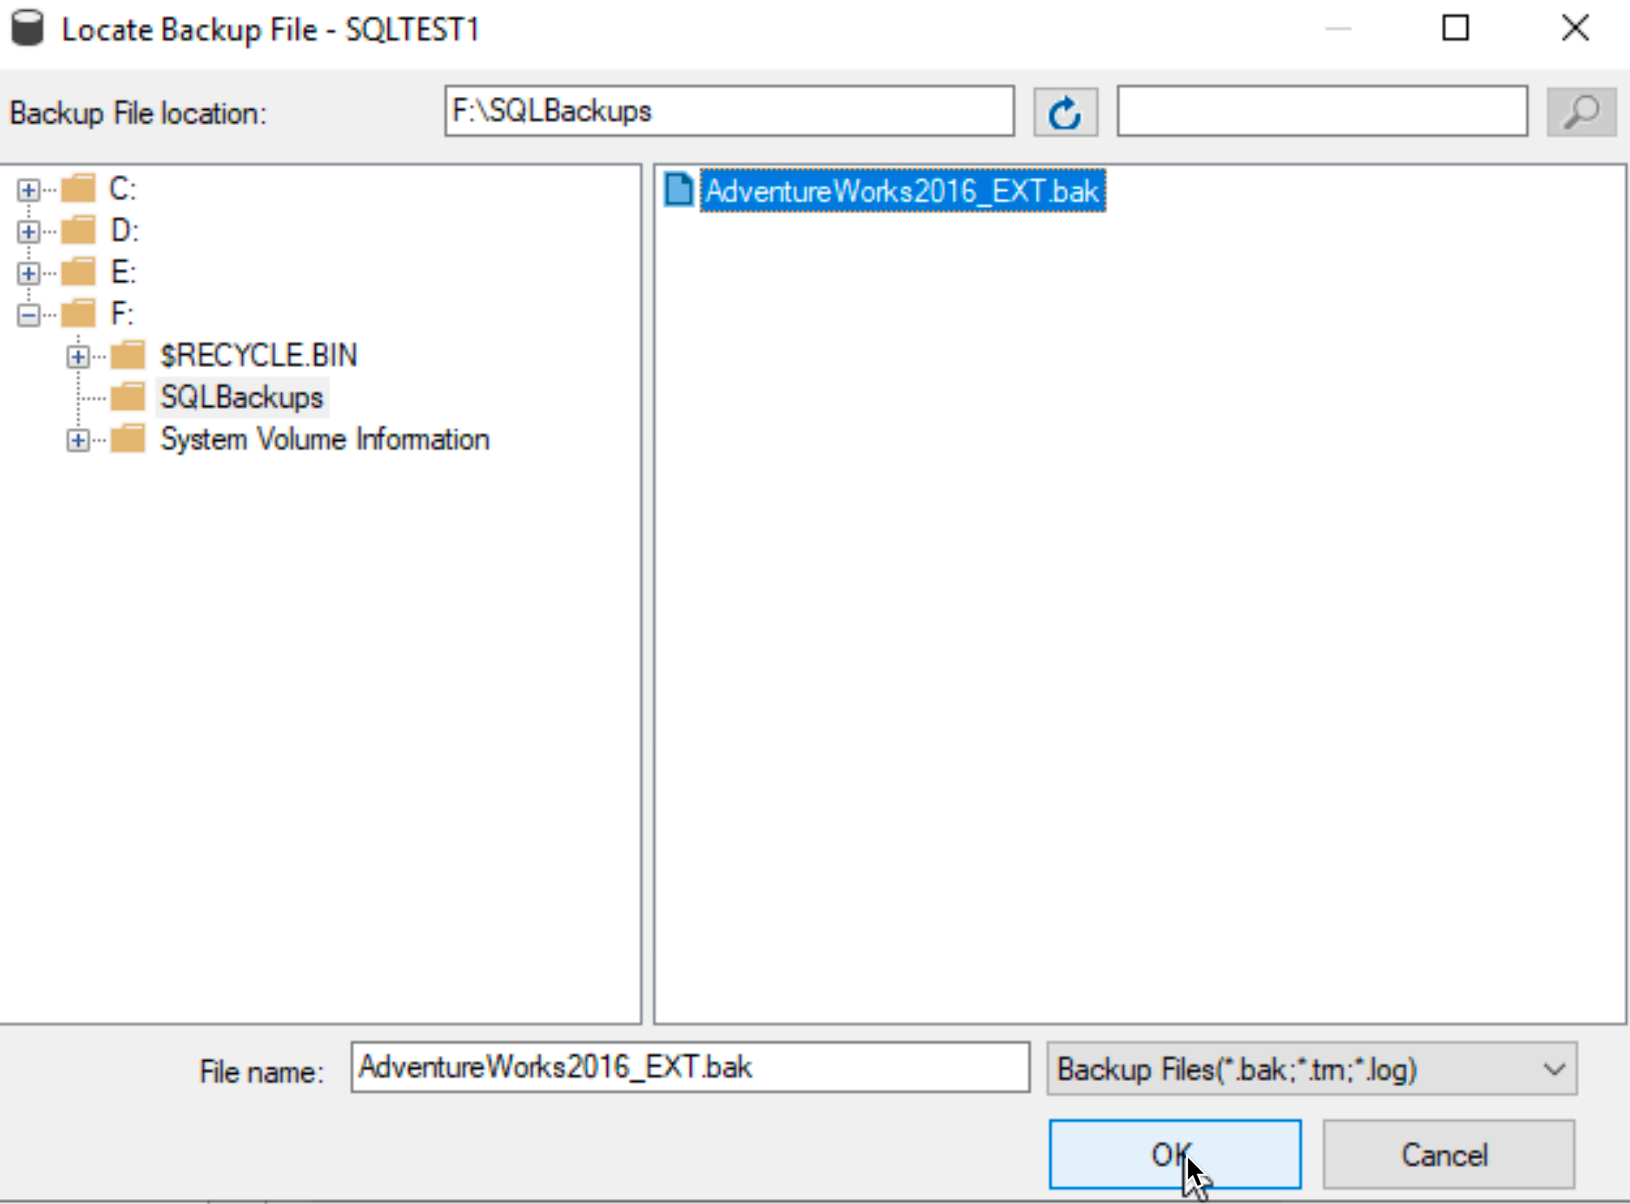
Select F:\SQLBackups and backup we copied earlier – AdventureWorks2016_EXT.bak Confirm OK two times.
Check the data and select OK
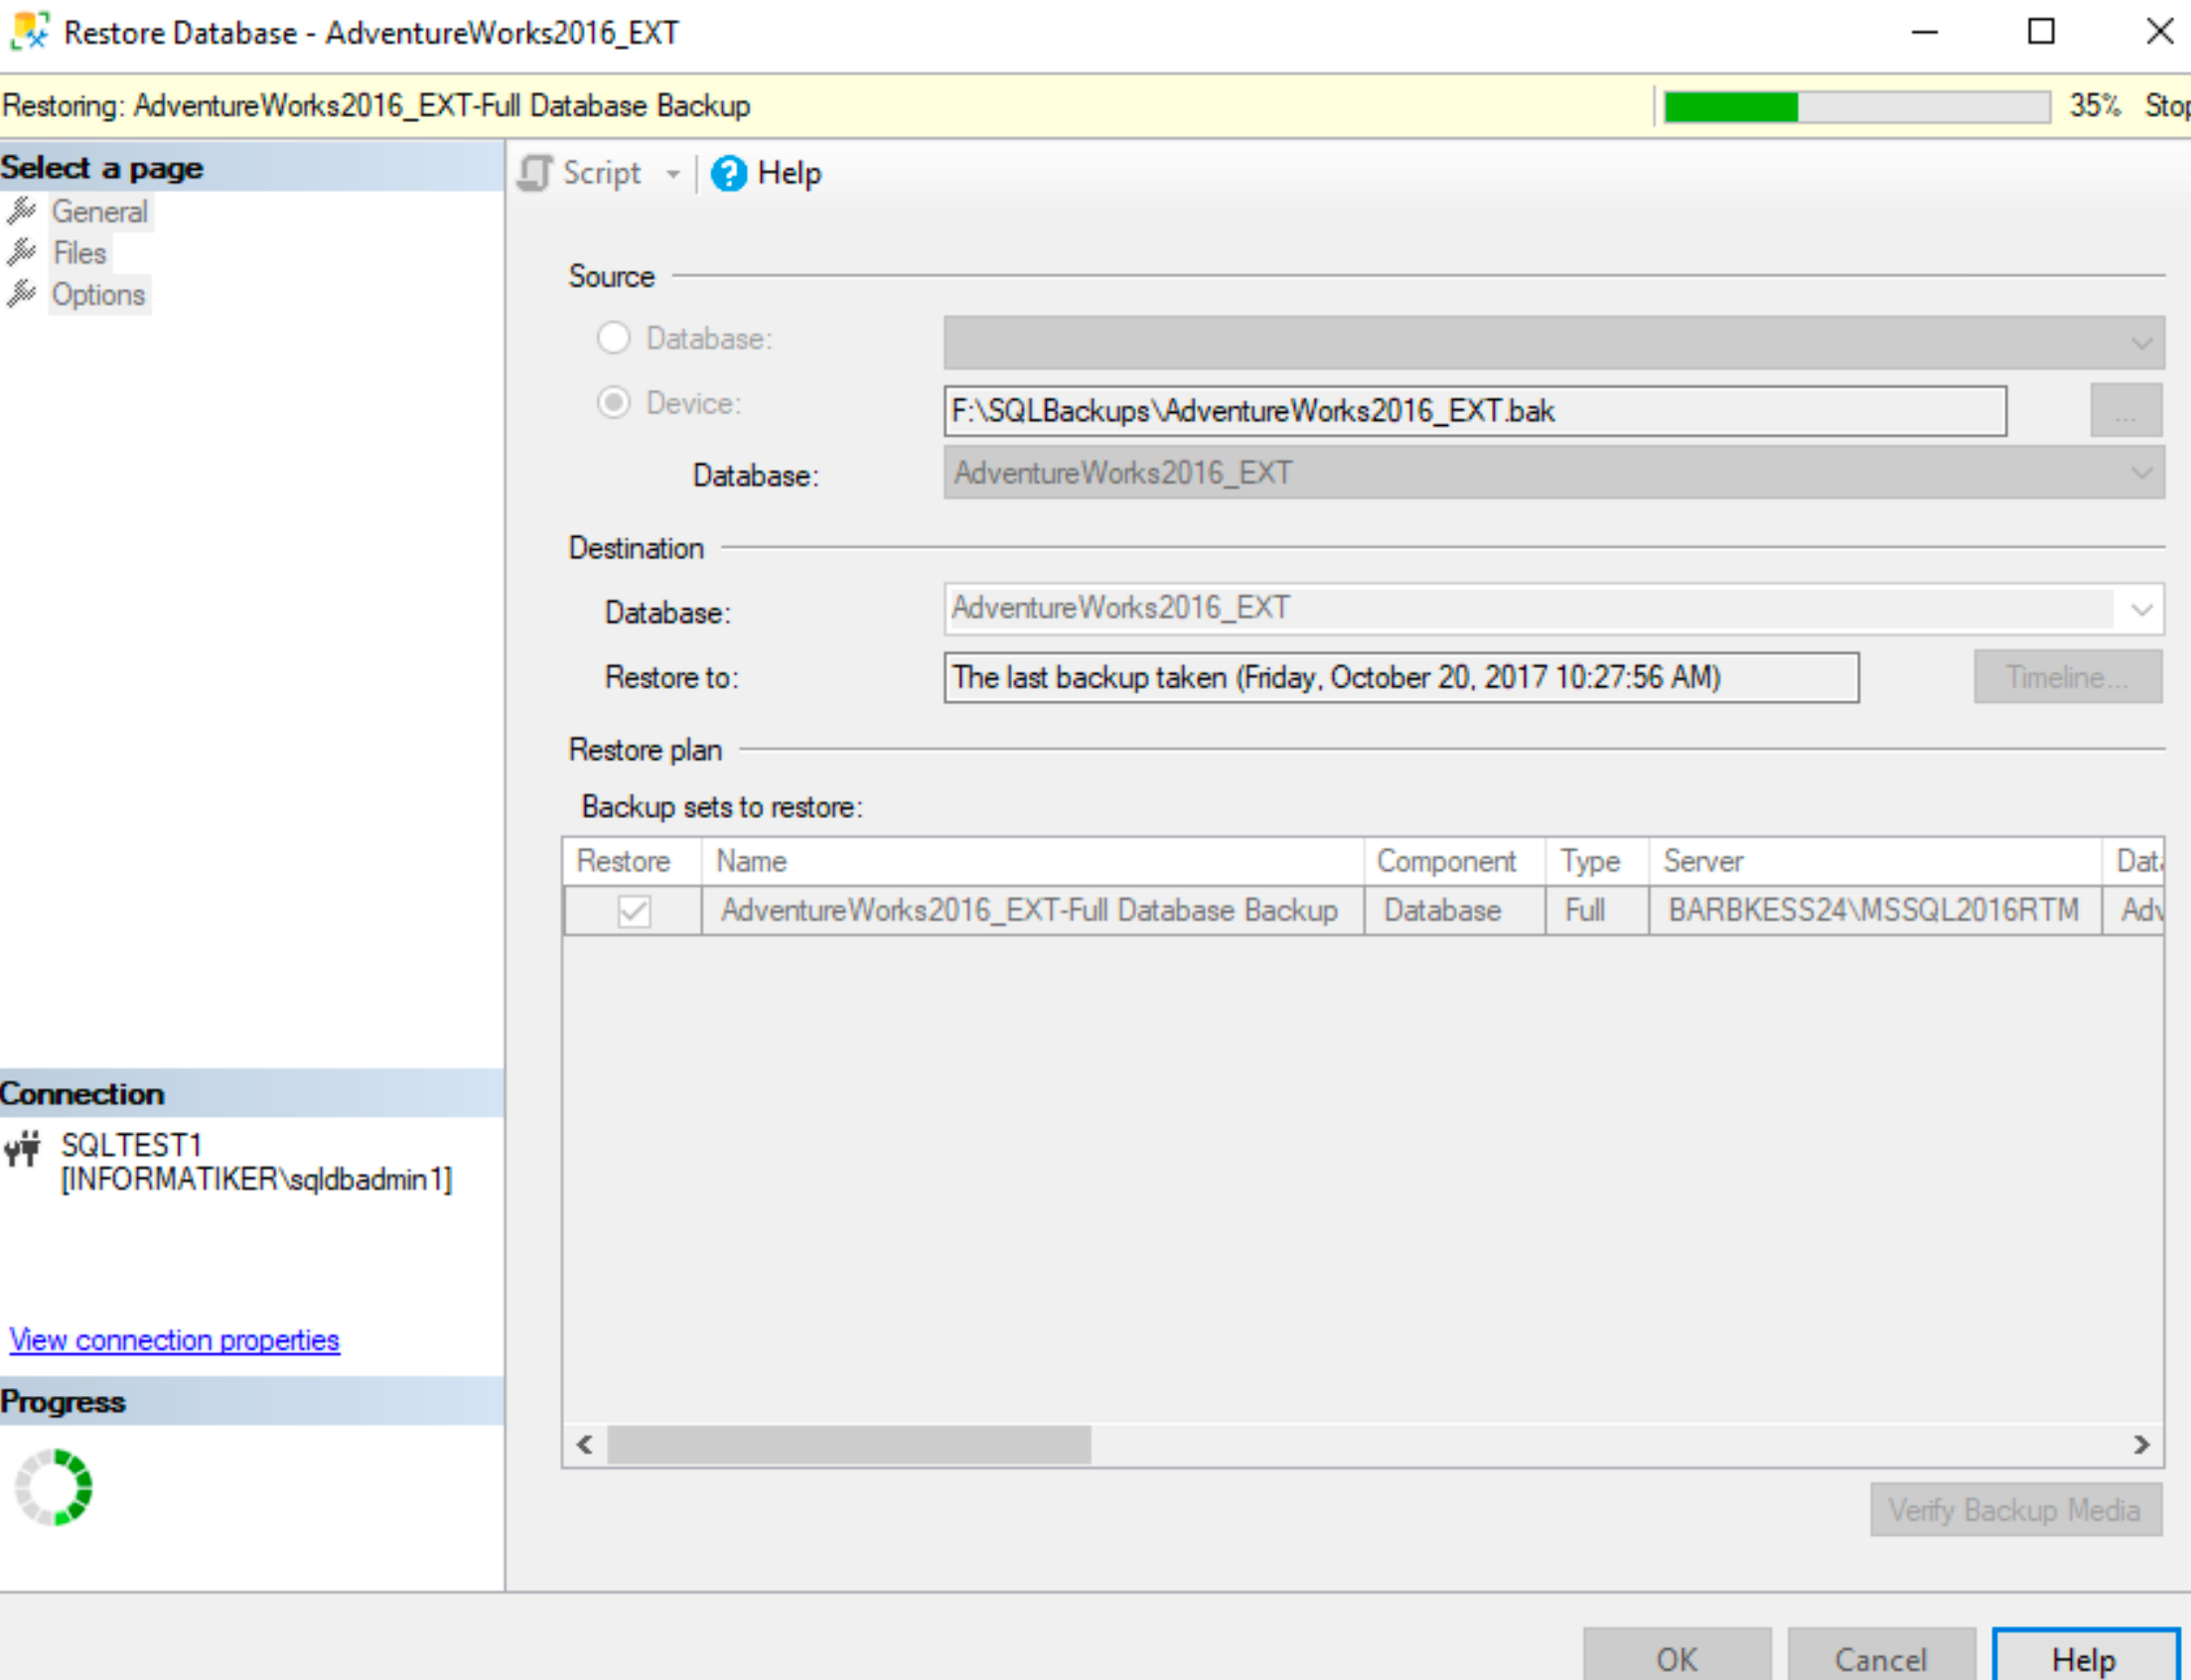
Restoring will appear
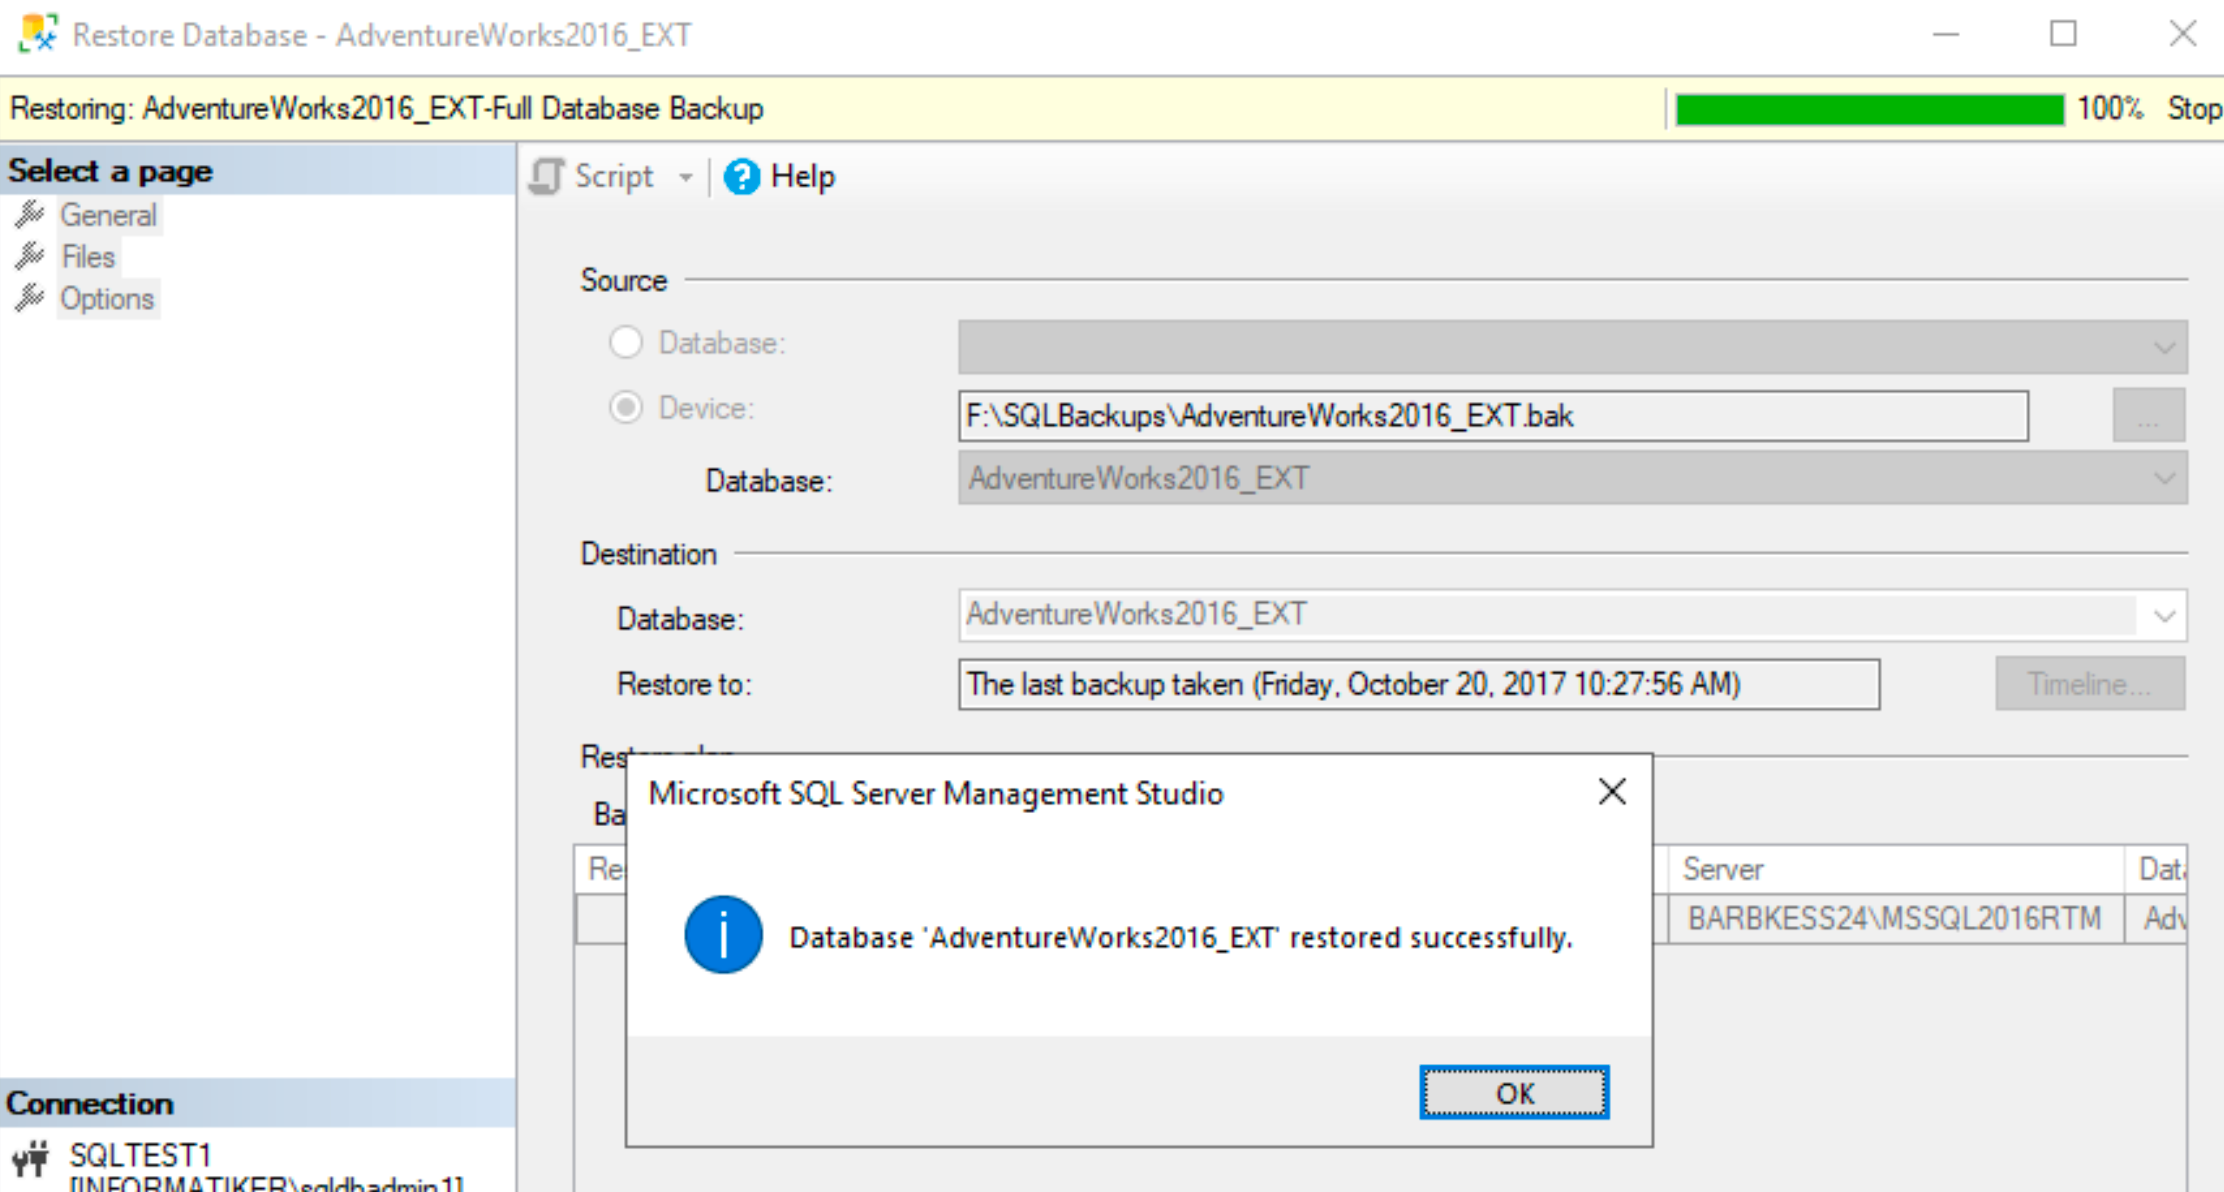
We did it | OK
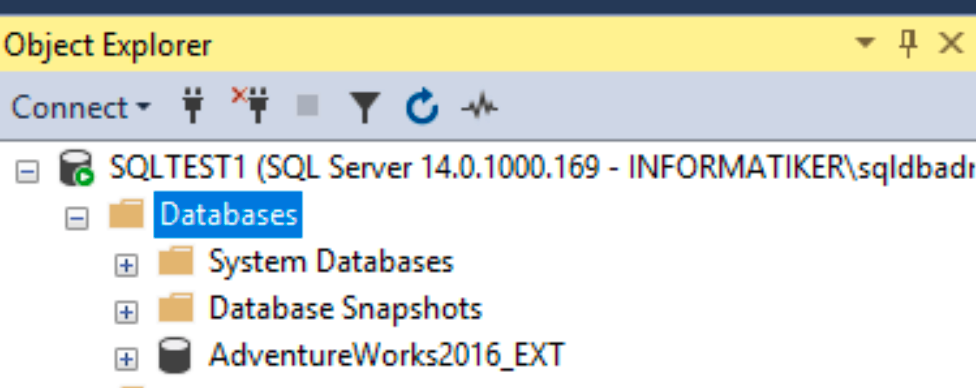
If we expand Databases, we can see that AdventureWorks2016_EXT is imported.
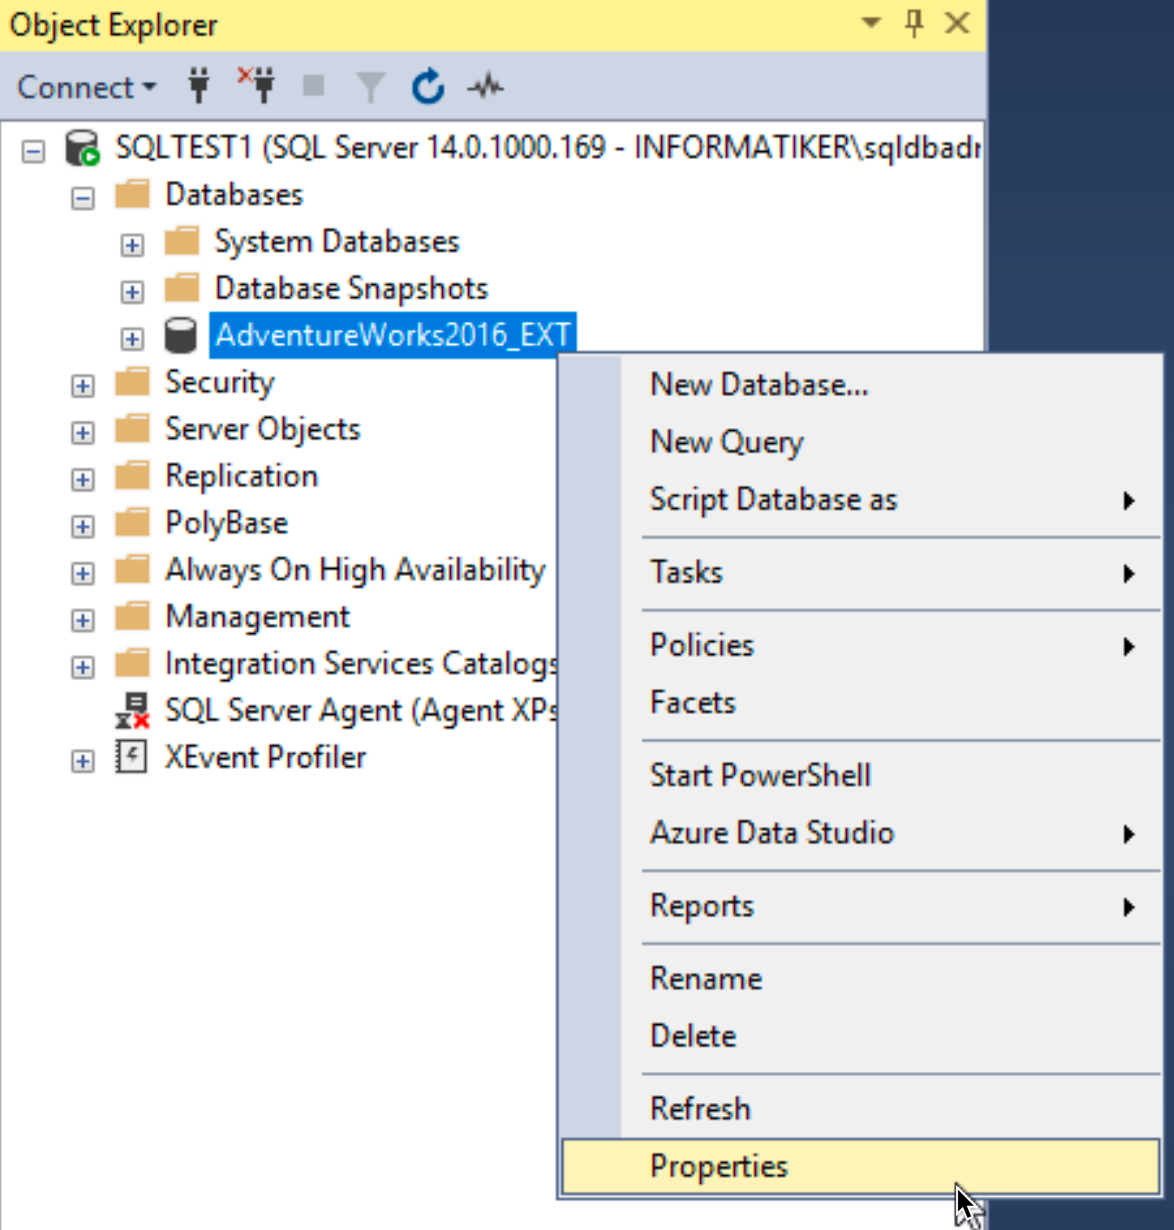
Right click on restored database, select Properties
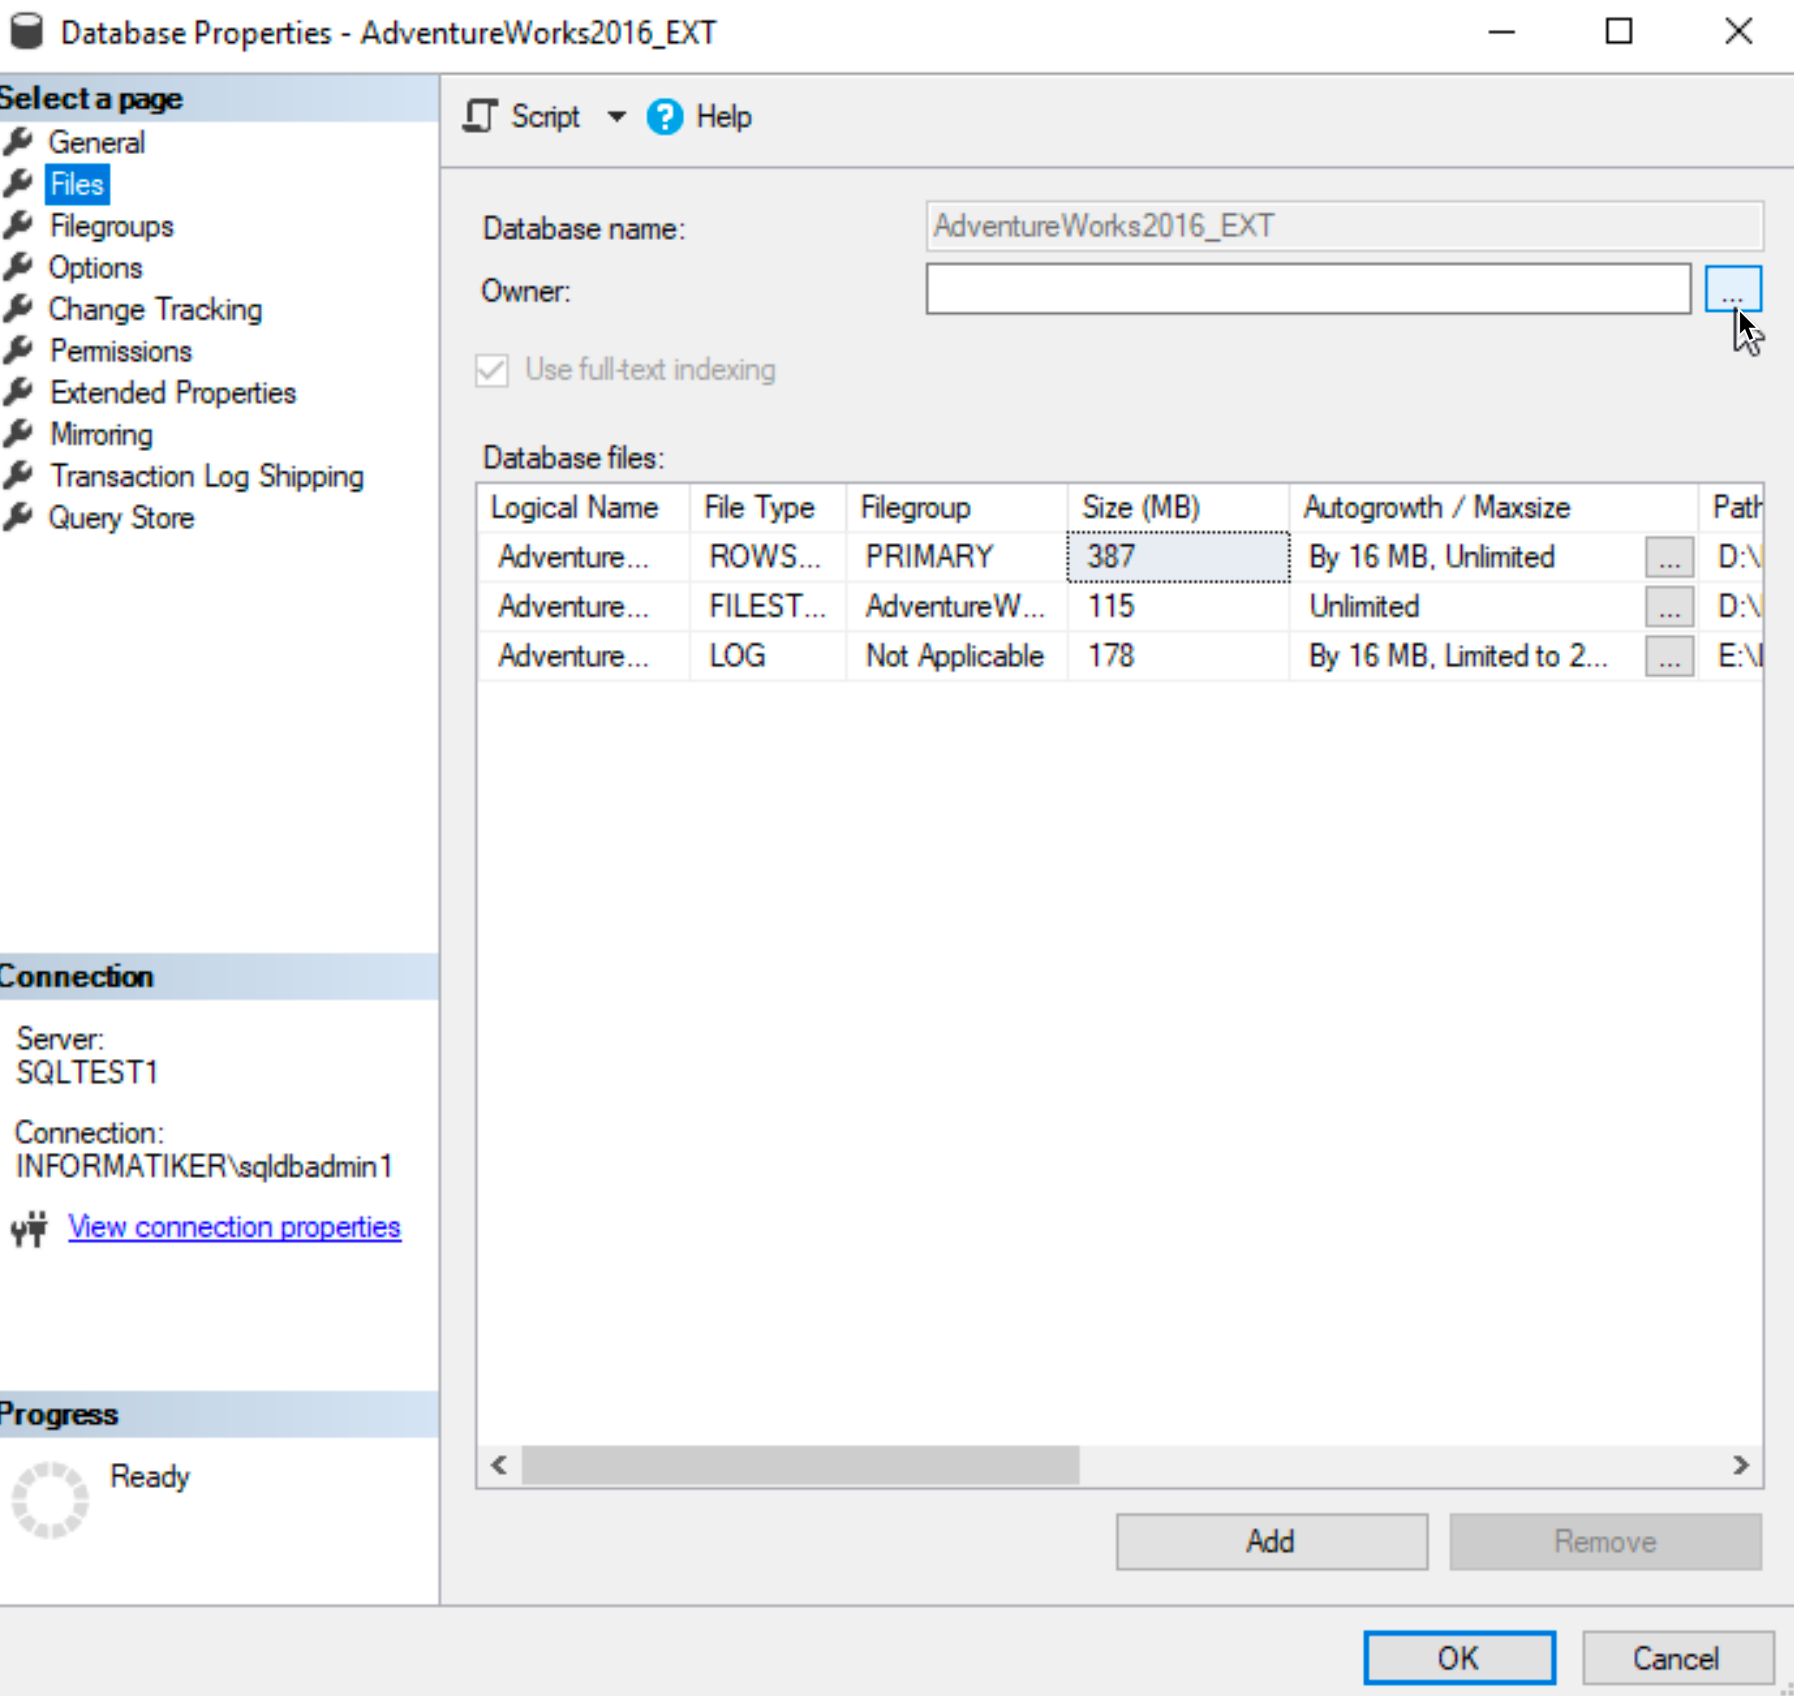
Click on Files menu, and besides Owner field click on three dots…
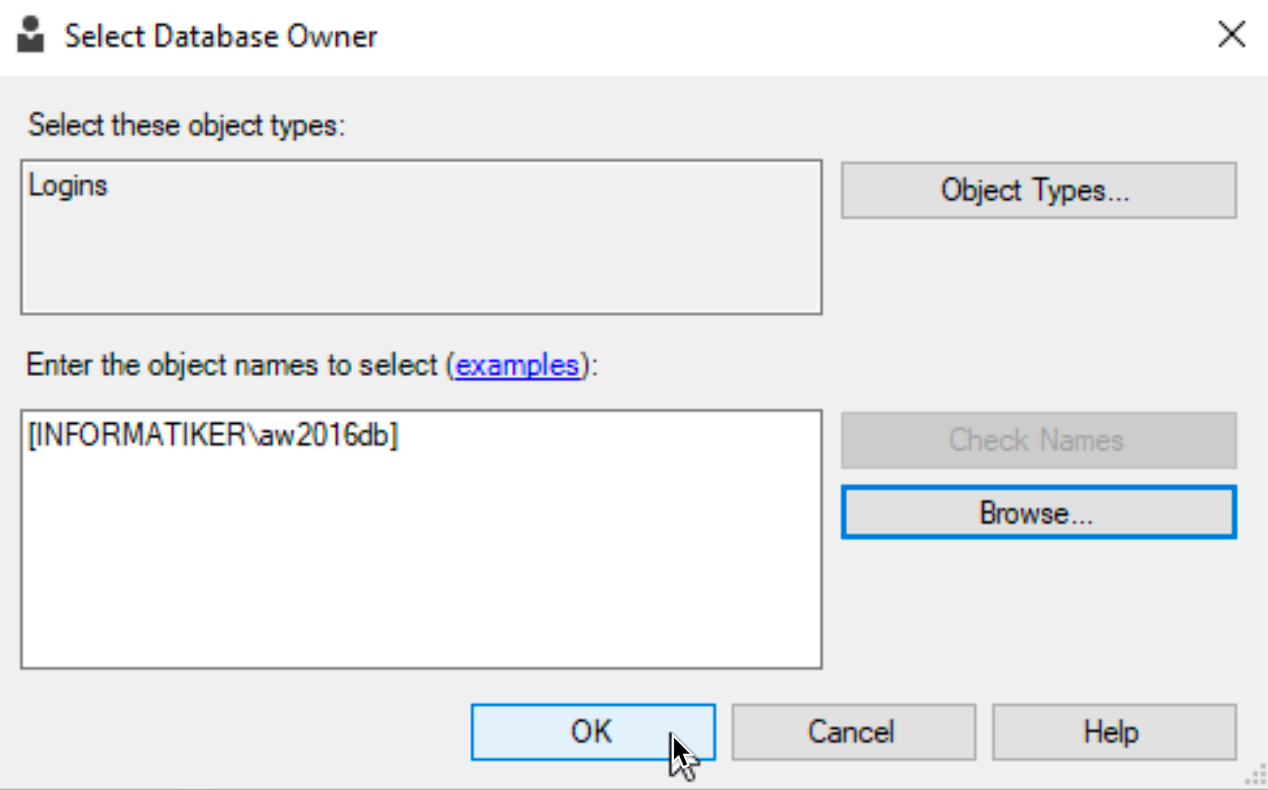
Enter aw2016db user we imported from AD into SQL earlier. OK
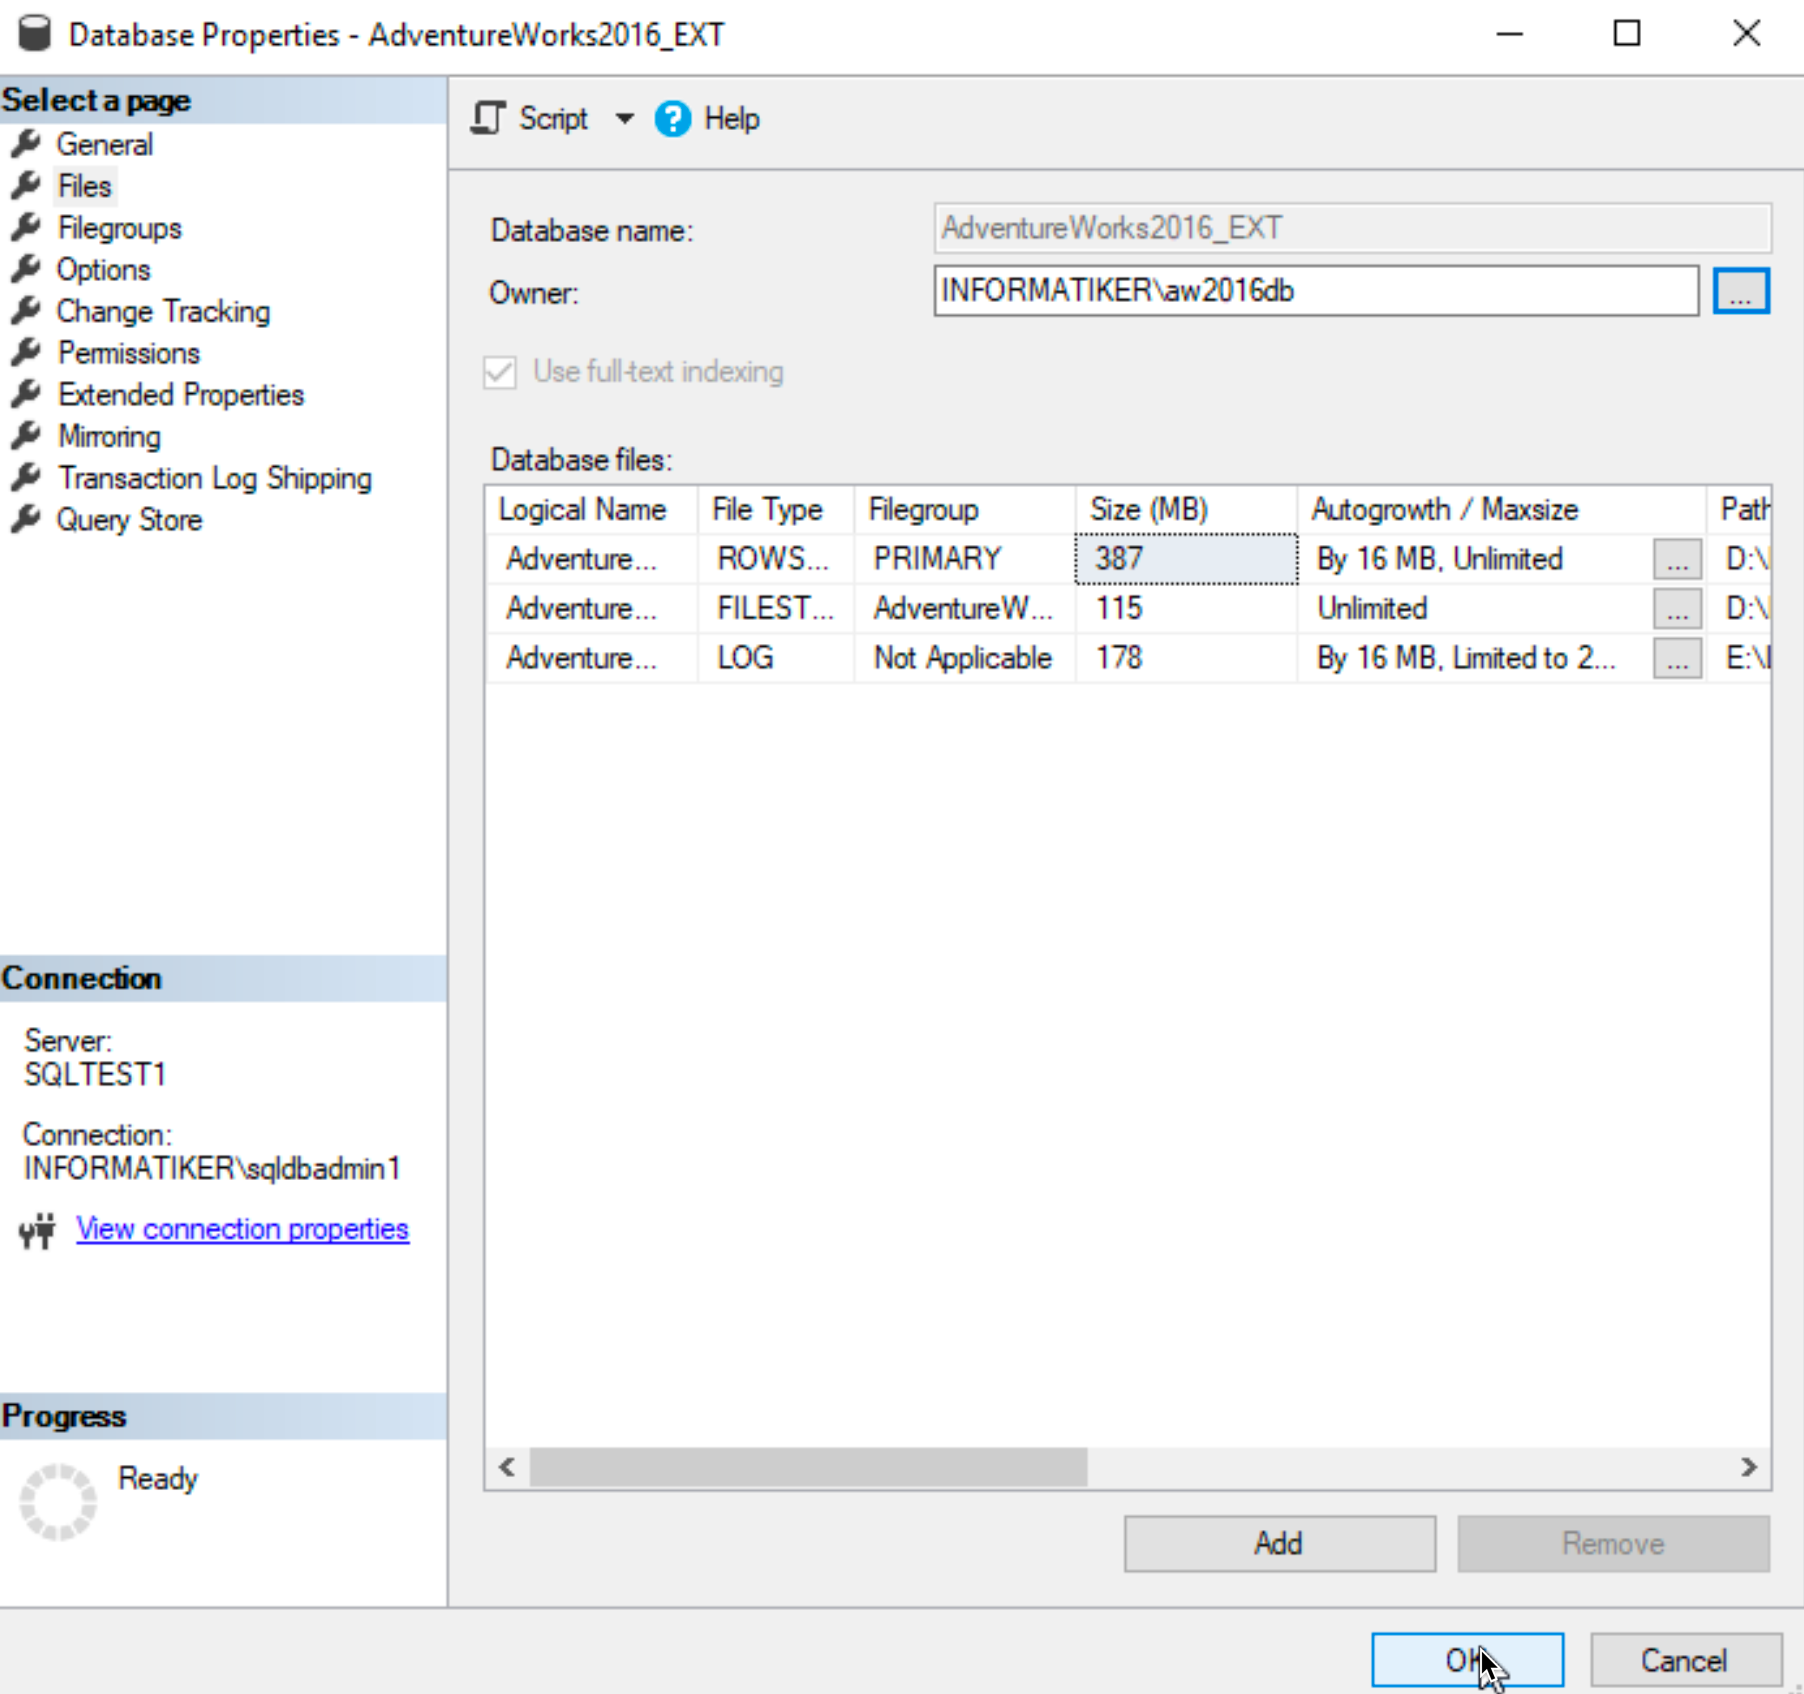
After we select OK, aw2016db will become owner of AdventureWork2016_Ext database.
If we go to Security menu in SSMS and click on Logins | aw2016db user – under User Mapping we can see that aw2016db user is now db owner of adventure database.

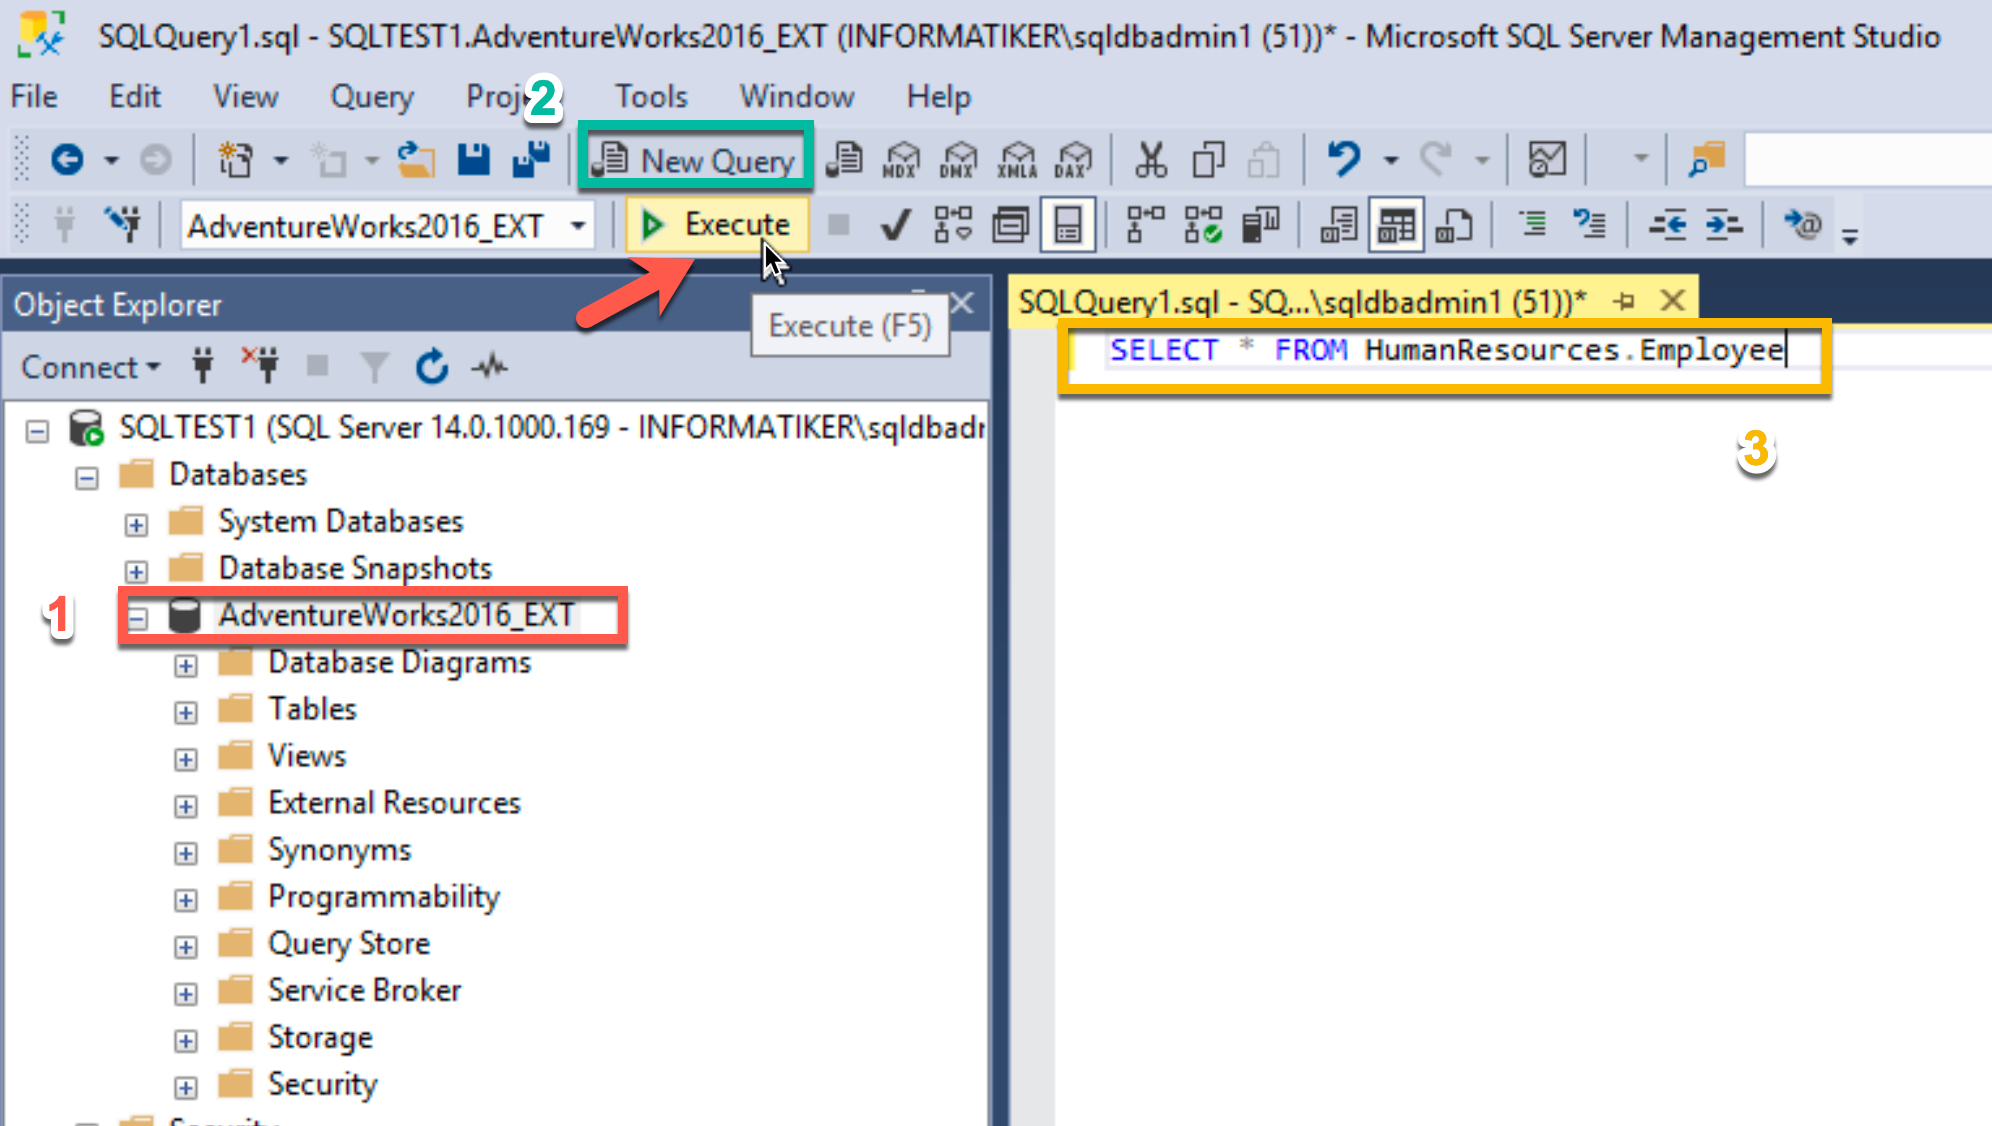
We will now click on 1.AdventureWorks2016_EXT database, just to select it. Then 2. click on New Query, then in step three enter following command
SELECT * FROM HumanResources.EmployeeThis command will pick up all fields from humanResources.Employee database.
Click on Execute
We got some data like – loginID, Job Title… from table HumanResources.Employee table.
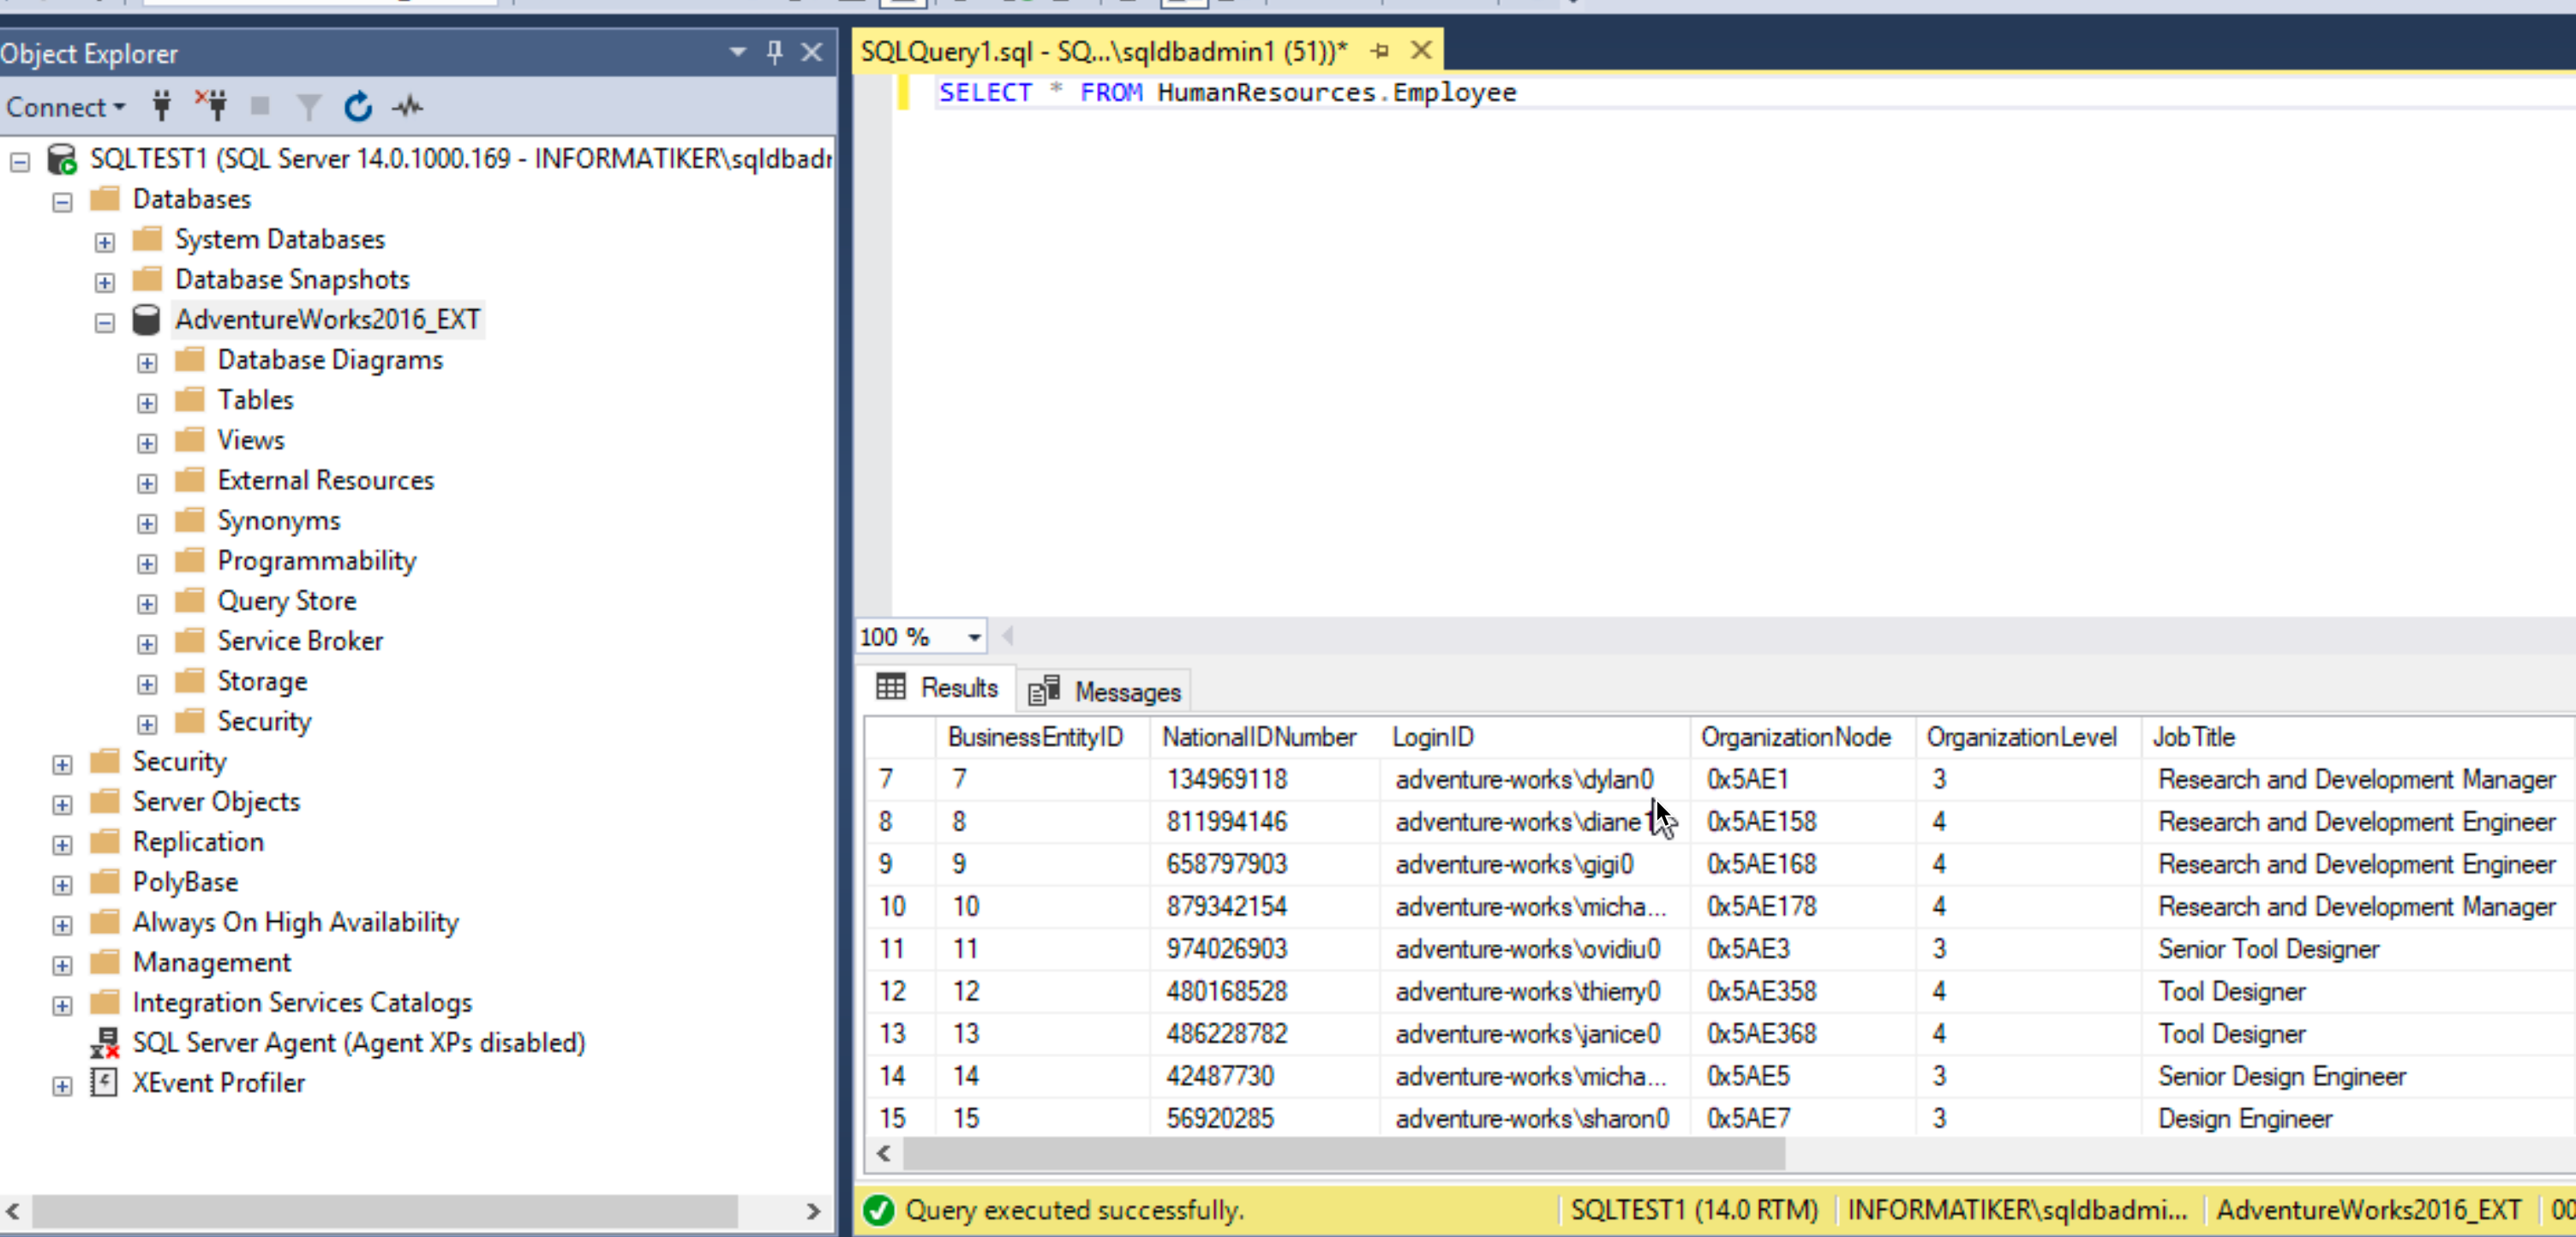
This was just to test that import was ok.
Conclusion
We done quite a few things today – we installed SQL and Management for it, we created users for SQL, restored database and executed our first query in SQL.
When creating database server, if there are existing DBs, make sure you know prerequisites they need in order to work smooth. Make sure you inquiry if the database is read/write intensive how much ram it uses, and prepare your systems accordingly. Also, things like RAM can spell doom on your systems if not configured properly. I’ve often seen system perform poorly, or crashing, because SQL consumed all the RAM. Be sure to examine RAM prerequisite and make sure that system and SQL have enough.
In the end, make sure you set collation and authentication correctly for existing databases, so everyone is happy and productive.
These are some quick tips, on top of my head that you need to know when starting. There are many other things you need to look out for, but for the start – this is something.