In this article we will go through configuration of Remote Desktop Shadowing. We will also discuss pros and cons of this approach, since it is not without the problems.
Remote Desktop Shadowing enables administrators to remotely connect to users session. This can be very useful feature, especially if you maintain specific networks.
Let’s get to work, and configure Remote Desktop Shadowing.
This test is done on Windows 11 Enterprise with 23H2 installed.
Enable Remote Desktop Shadowing on Windows
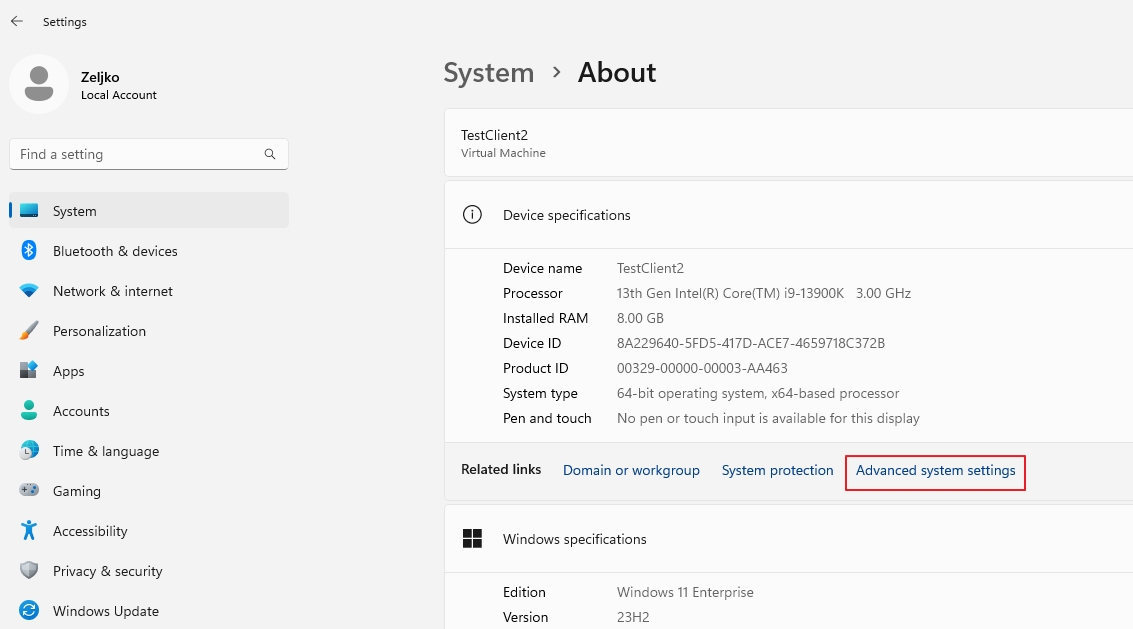
First, on a machine you wish to connect to – Settings – System – About and under related links select Advanced system settings
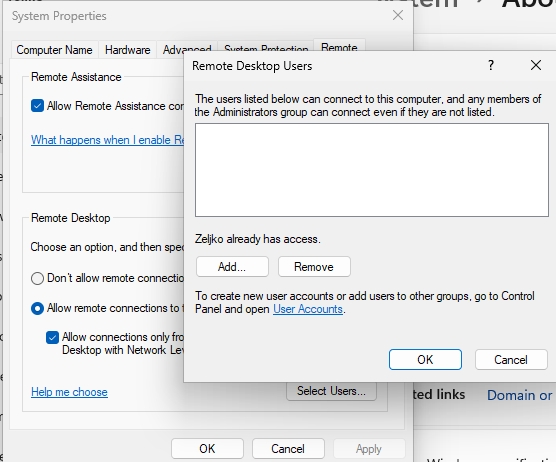
Navigate to Remote tab, and under Remote Desktop enable Allow remote connections to this computer. Before we click on Apply | OK click on Select Users and make sure that user you plan to use for RDP has the rights to connect! I’m using same user on both machines with same password in this lab!
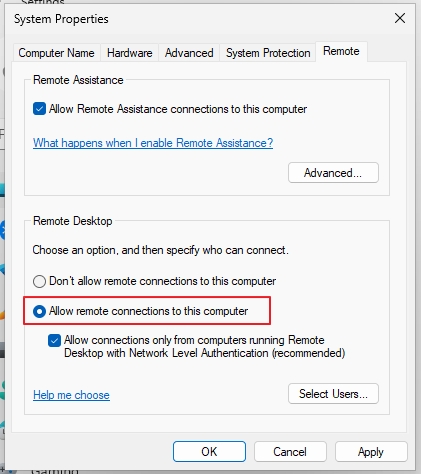
When done click OK | Apply | OK
Group Policy
Now, in search type Run – when run opens, inside it type gpedit.msc and press OK.
Group Policy editor should open.
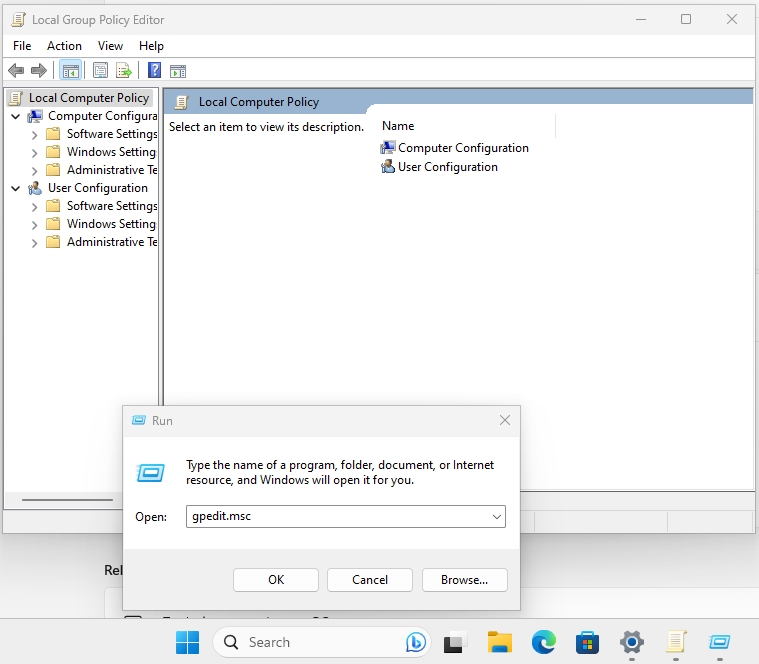
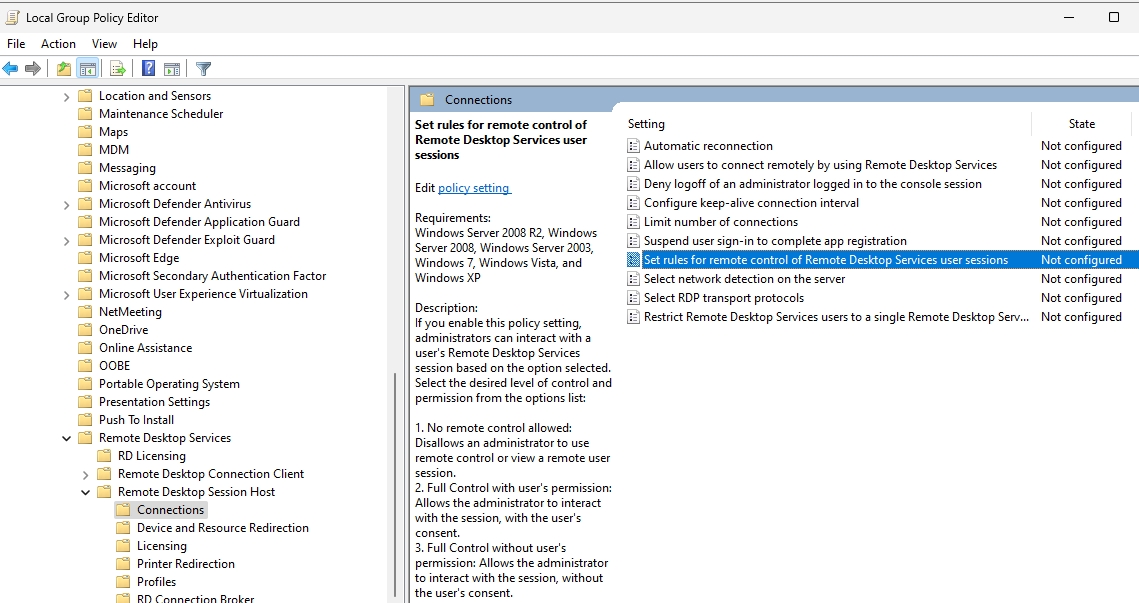
Navigate to Computer Configuration -> Administrative Templates -> Windows components -> Remote Desktop Services -> Remote Desktop Session Host -> Connections and double click on Set rules for remote control of Remote Desktop Services user sessions
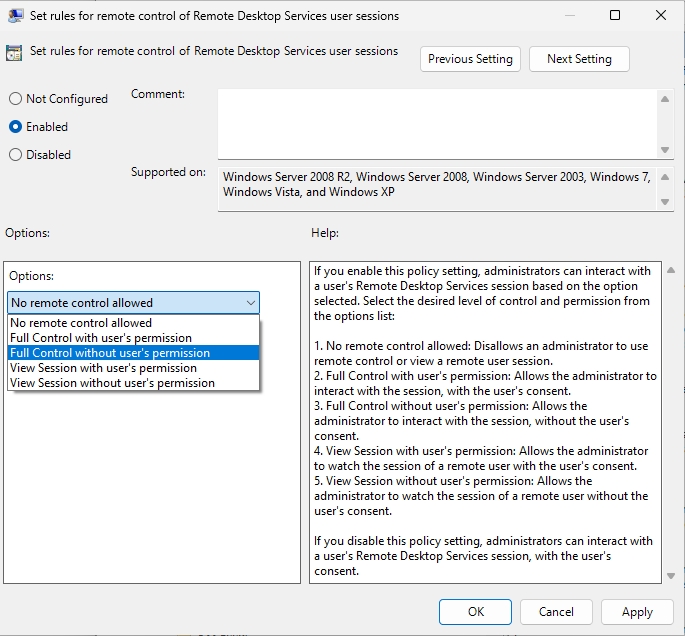
Select Enabled and from the options list select Full Control without user’s permission. Apply | OK
Optional: Do the same through registry
You can achieve the same through registry by opening elevated command prompt and typing
reg add "HKEY_LOCAL_MACHINE\SOFTWARE\Policies\Microsoft\Windows NT\Terminal Services" /v Shadow /t REG_DWORD /d 4If you wish to remove the registry key at one point you can use
reg delete "HKEY_LOCAL_MACHINE\SOFTWARE\Policies\Microsoft\Windows NT\Terminal Services" /v Shadow /fFirewall
Now, the scary thing is, RDP shadowing doesn’t use RDP port 3389, it uses 139/TCP, 445/TCP (yes, those are SMB ports) and RPC ports in range 49152-65535
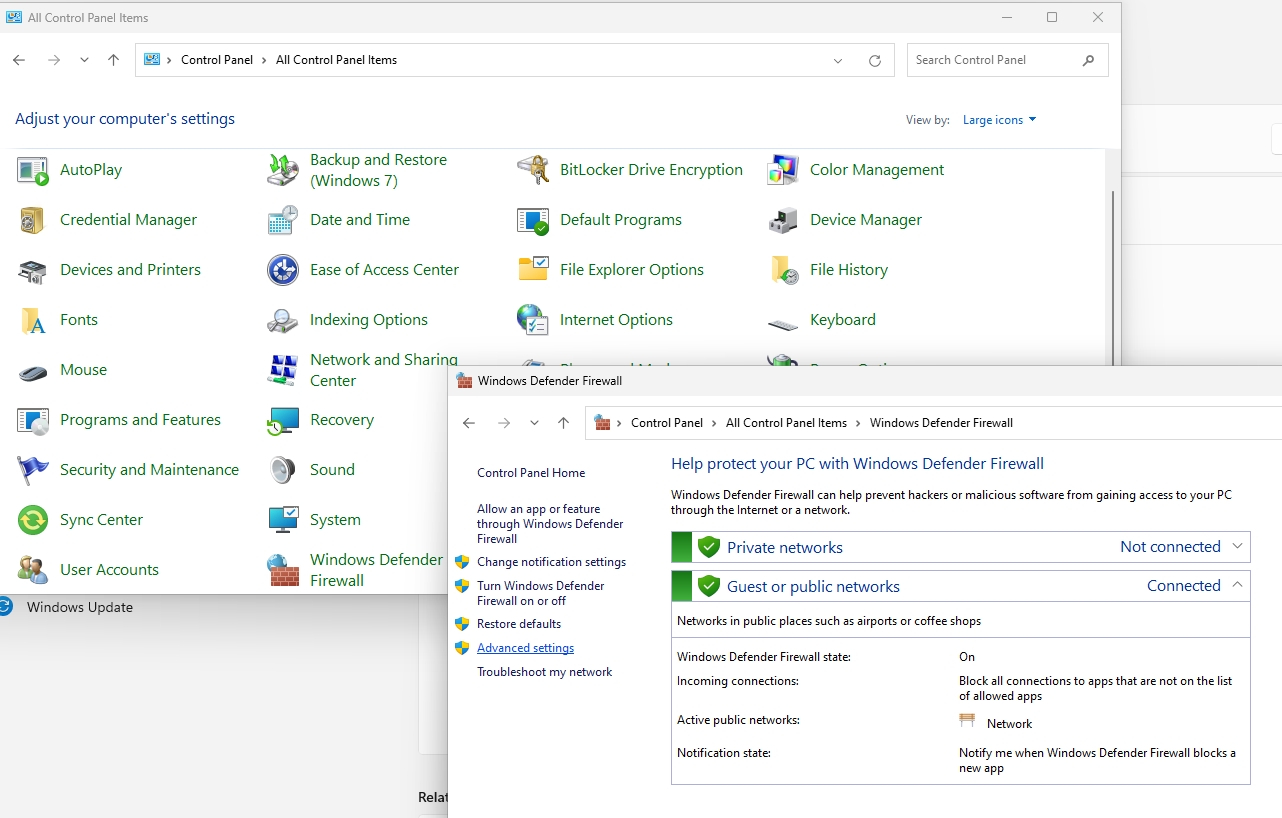
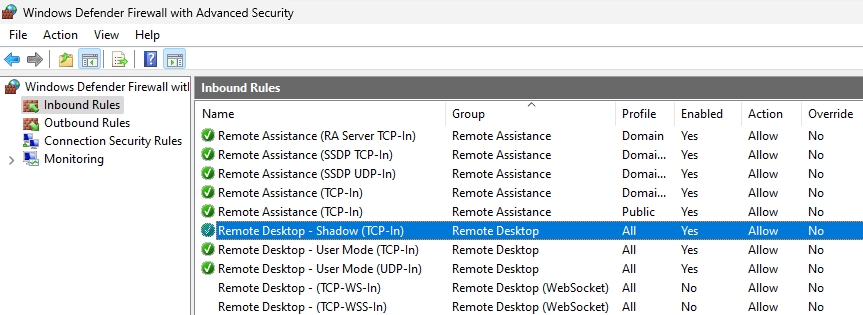
Control Panel – Windows Defender Firewall – select Advanced settings
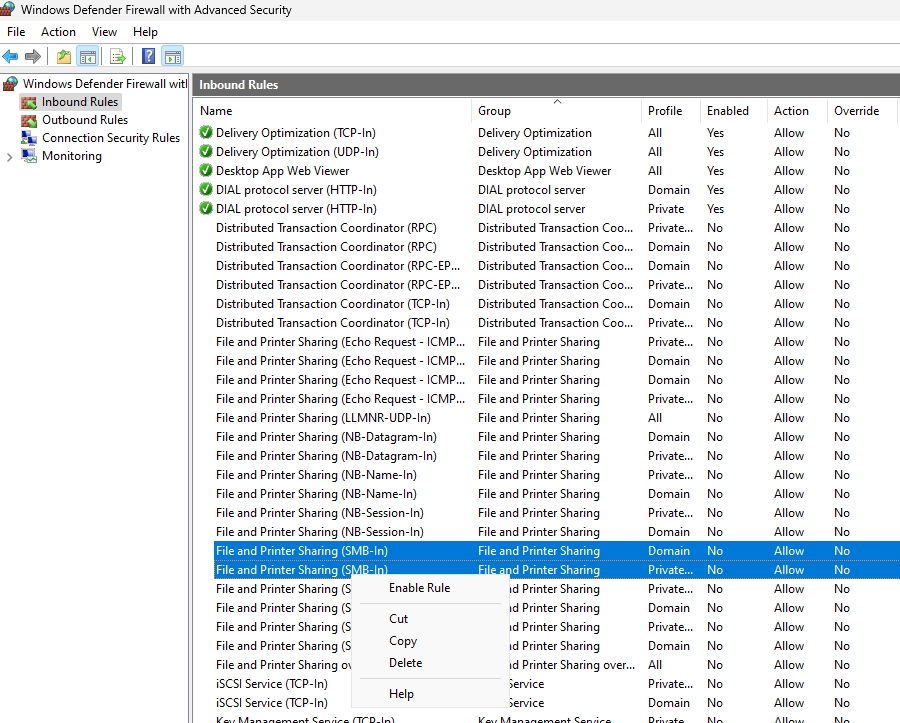
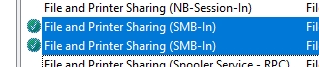
Two rules need to be enabled in Inbound Rules – File and Printer Sharing (SMB-In) and Remote Desktop – Shadow (TCP-In). You may optionally create a new rule and open RPC port range I mentioned earlier if
If a rule doesn’t have white checkmark in green orb, then right click on it, select Enable Rule as depicted below.
Services
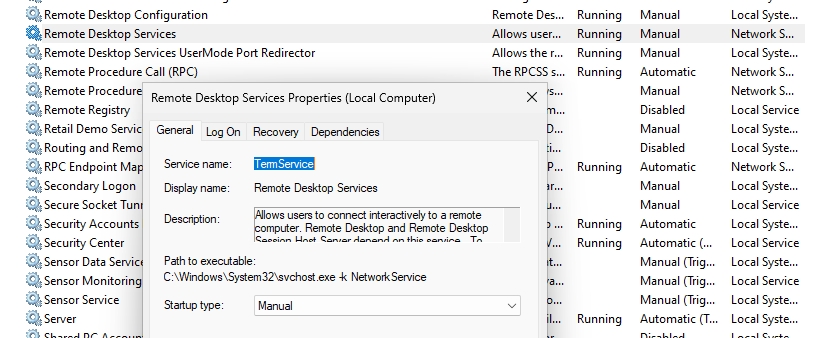
Before we proceed, make sure that Remote Desktop Services (TermService) is Running on the computer you wish to connect to (Control Panel – Windows Tools – Services)
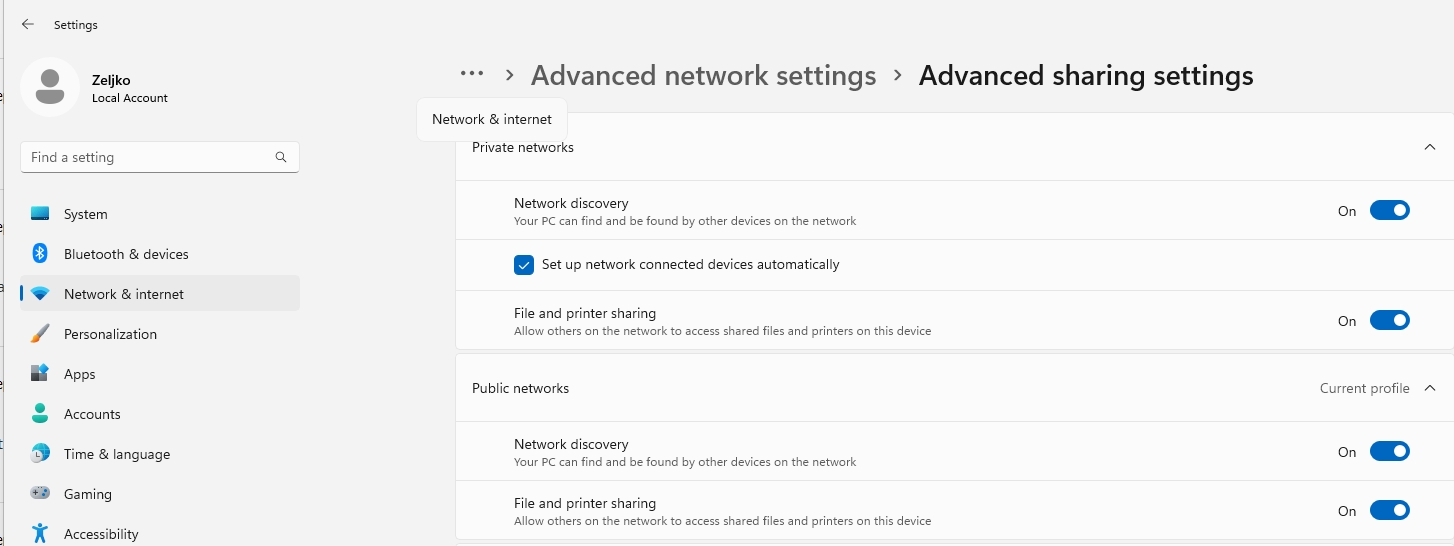
For me, Shadow RDP worked even without these enabled in my LAB, but if you have problems connecting to remote desktop, open Settings – Network & Internet – Advanced network settings – Advanced sharing settings and make sure that Network discovery and File and Printer sharing are on. As I said, in my lab, File and printer sharing was off, and Shadow RDP worked, until it at once didn’t – this setting helped. Set this to on, only for your current profile.
Connect to Shadow RDP mode
To connect to shadow RDP command goes as follows
Mstsc.exe /shadow:<Session ID> /v:<Computer name or IP address>Now, following switches can be added to the command
/prompt – request a users credential, /control – you’ll be able to interact with user session. Without this switch, you will be using view only mode.
/noConsentPrompt – user will not be notified to allow connection.
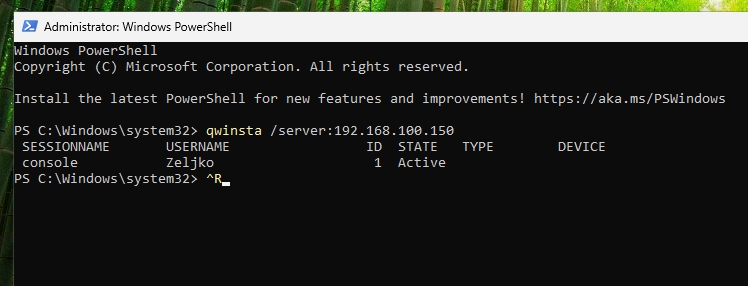
Now, you will ask yourself, yes, but how do I know user session id? Usually if user is logged into computer, session ID is 1.
we can confirm that through Powershell (elevated) from remote computer which we will use to connect to shadow RDP by typing in following
qwinsta /server:IPorNAMEOFPCYOUWISHTOCONNECTTOWe can see that on remote pc we wish to connect to on IP 192.168.100.150, there is console session 1 active with user Zeljko logged in.
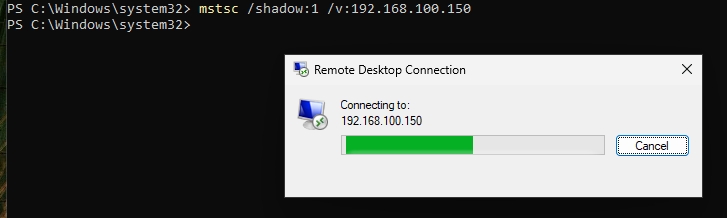
Ok, let’s test Shadow RDP
Now, if we run mstsc command from the beginning now that we have Session ID parameter, it will look like this.
Connection will start, and it will wait for user input, to confirm that you can connect
On user screen you will see this confirmation screen
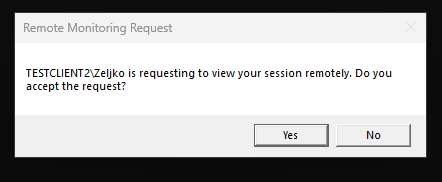
If you use some of the switches we mentioned before, like /noConsentPrompt you will be able to connect to remote session without user approval.

Security aspects
While this is very useful in some scenarios – let’s say you have a delicate app that cannot change session or will break (there are apps that are written in strange way) or you wish to assist directly user with the problem he/she is having, this is huge security issue. Especially connecting without consent.
So, in the process of configuration you already saw, what you can do to mitigate this in your network – disable some firewall services, group policy or registry changes.
You can also notify user by setting following script as windows service. It will notify user by simple beep when somebody connects to their session
while($true){
if (Get-Process -Name "RdpSa" -ErrorAction SilentlyContinue){[console]::beep(1000,500);Write-Host "RdpSa is running at $(Get-Date)"}
Start-Sleep -Seconds 1
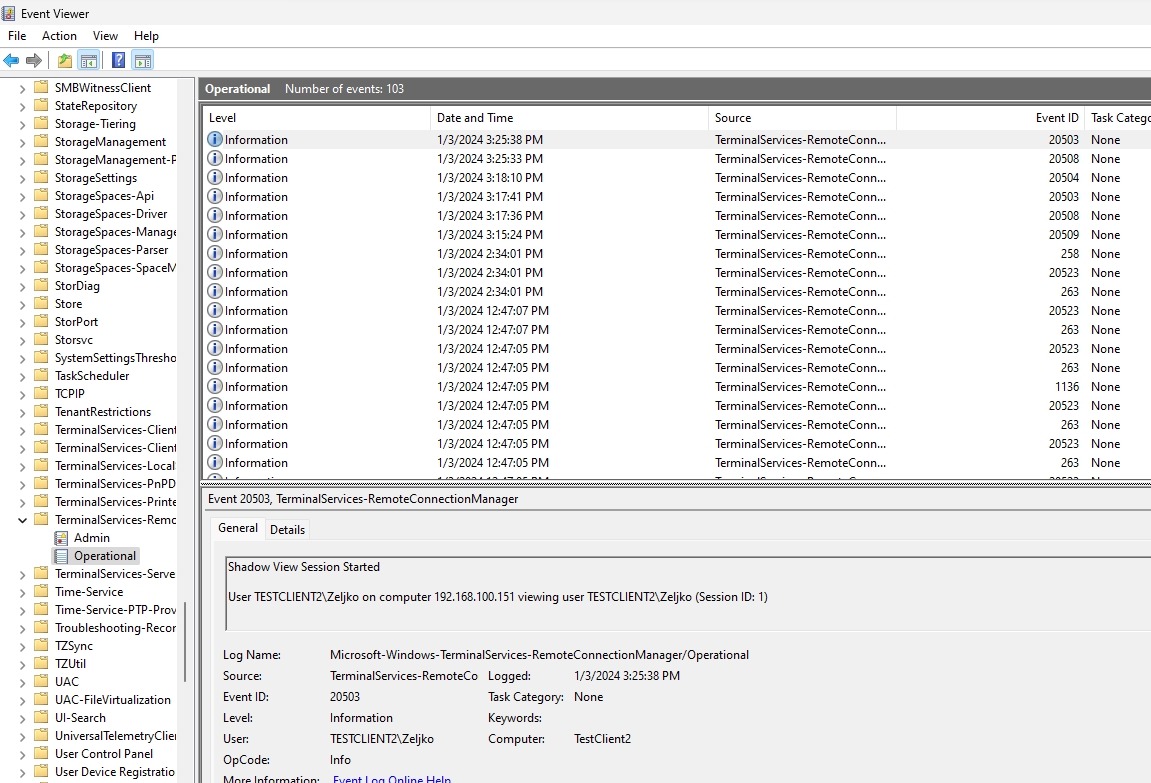
}You can also monitor Event Viewer and event IDs 20503,20504,20508. You can find these in following section of Event Viewer – Microsoft | Windows | TerminalServices-RemoteConnectionManager | Operational
Conclusion
We learned how to configure Shadow RDP, but we also learned that it can be potential security issue, and through configuring it, we learned how to mitigate it, if it is dangerous for our environment.