I have done a lot of Proxmox installations inside my lab, but one with the NUC 11 was toughest I ever did. I had a lot of issues and one of them was “installation aborted – unable to continue” on every Proxmox installation I started.
Before we begin
I have a small lab which consist of various Intel NUC machines, I love them because they don’t take a lot of space, they are pretty powerful for the size and a lot of “enterprise” software works on them without a lot of fiddling.
So far, my Proxmox installations on these NUCs went mostly trouble free, but the last one was – well troublesome at best.
- Installation would end with “unable to continue”
- I also got “failed to prepare EFI boot using Grub” error
- Not all of my network adapters would work
I lost cca 8 hours in the end to get everything to work, and it was pretty frustrating, because I planned other things to do on these machines, but instead I was wrestling with the Proxmox.
In the end I managed to get everything to work, I found some bits on the internet, a lot of parts I figured myself after I did some diagnostics.
I can see that other people are struggling too with the NUC 11 configurations.
Here is what I have:
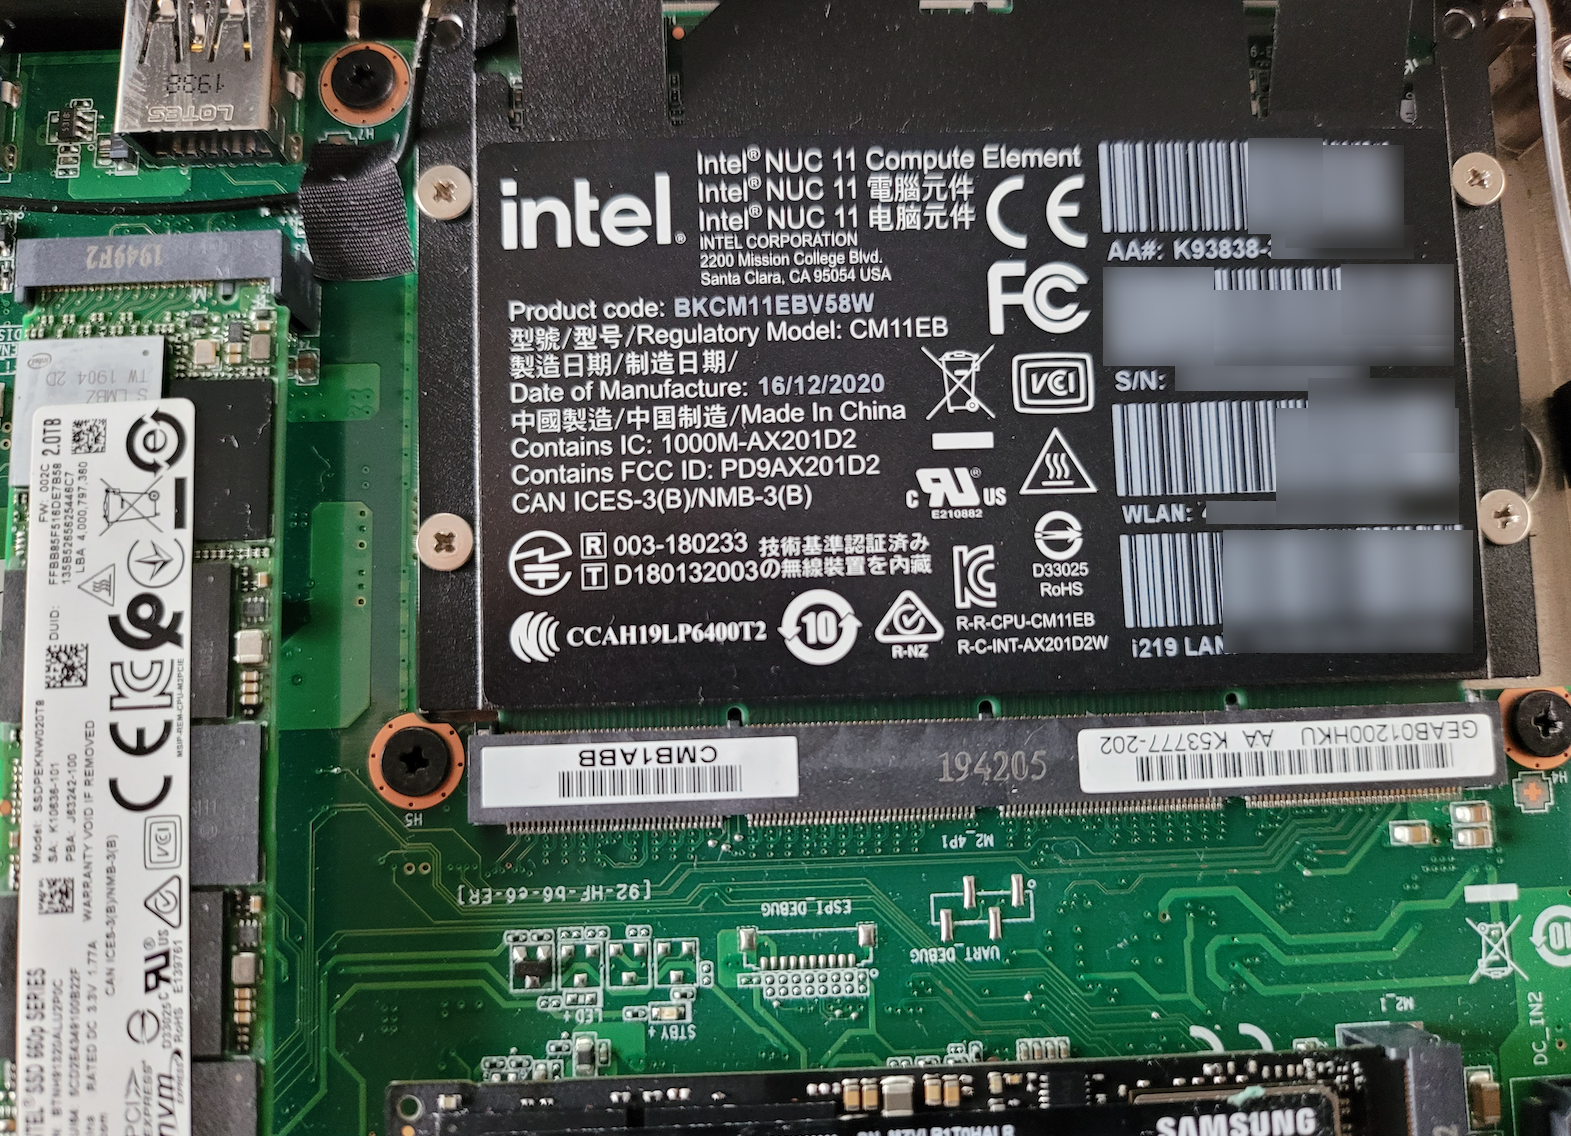
Intel NUC Rugged Chassis Element BKCMCR1ABB2 – that is chassis with board in it – board itself has two network cards on it (Intel I219-LM and I211-AT). Great for my needs, it also has two NVMe slots.
On that board I plugged in Intel NUC11 Compute Element – it has Intel i5 1145G7 CPU on it with 8GB of RAM
I can see that people with various other NUC11 configs have problems with Proxmox installation.
Installation errors
Installation aborted – unable to continue
I downloaded latest Proxmox 6.4.4 install from the Proxmox website (for the first time, I have older 6.xx installers).
I prepared ISO on USB drive with Rufus and made UEFI install in DD mode.
I also disabled Secure Boot on the new NUC11.
After the first installer boot, it would try to get address from DHCP, but would fail and after that I got “installation aborted – unable to continue”
Sorry for the poor screenshots, it was late and I wasn’t really in the good mood.
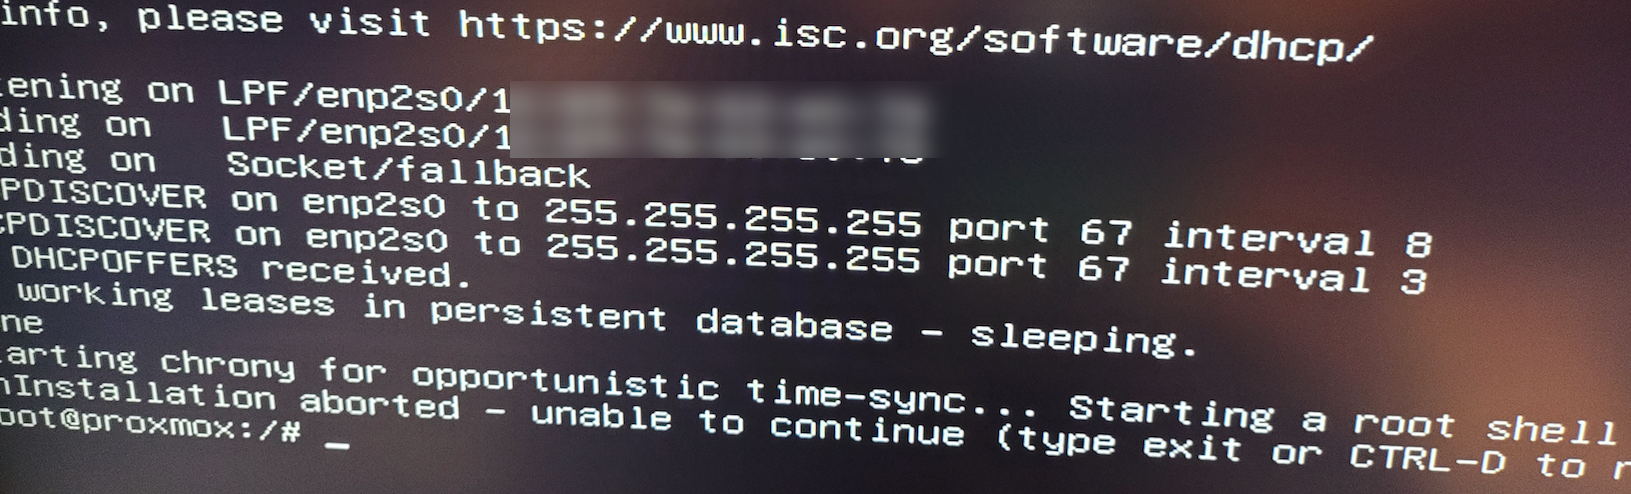
I tried with older Proxmox installs and on both ports on my NUC – but no luck. I would stuck here every time.
If you want to use network during install you can use USB dongle (you should also have DHCP available on your network).
Let’s now resolve the error above.
After you get the “installation aborted – unable to continue” error press ALT + F3 to switch to TTY3 console
Enter following commands
Xorg -configure
mv /root/xorg.conf.new /etc/X11/xorg.conf
After that we need to edit xorg.conf file
nano /etc/X11/xorg.confFind value Driver “modesetting” in that file.
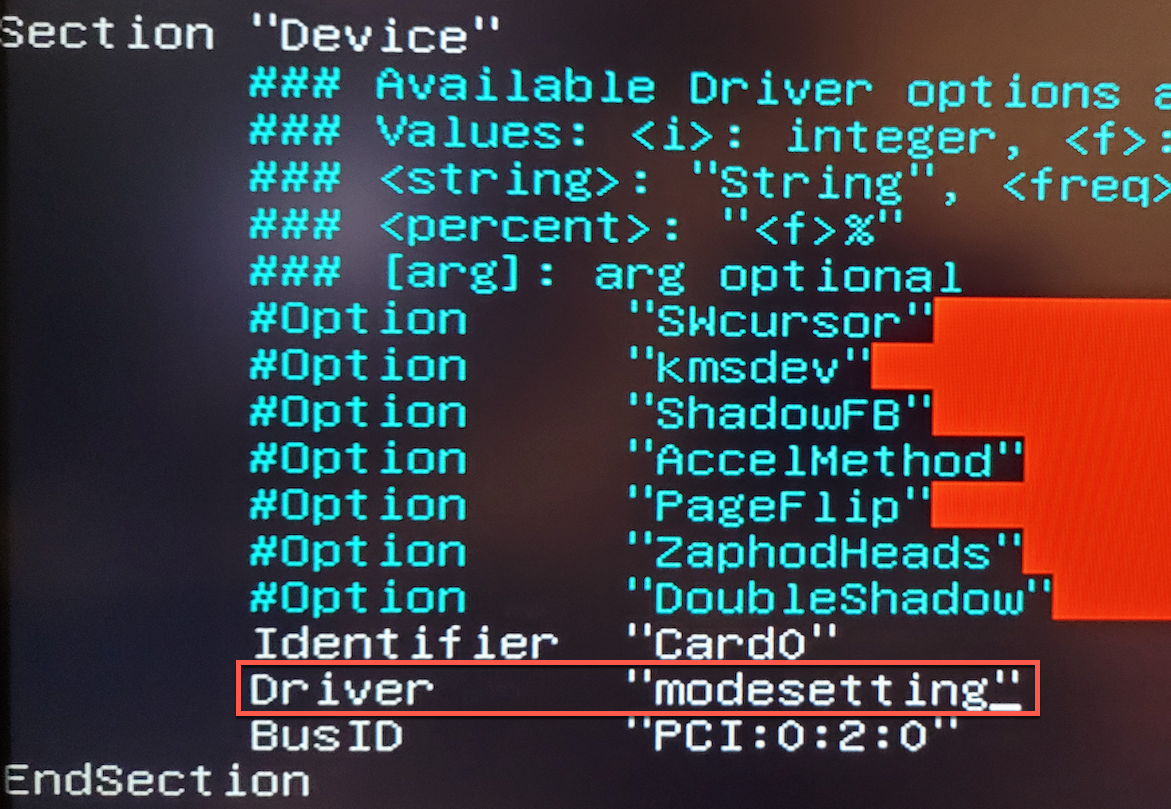
Change it to “fbdev”
Save and exit file
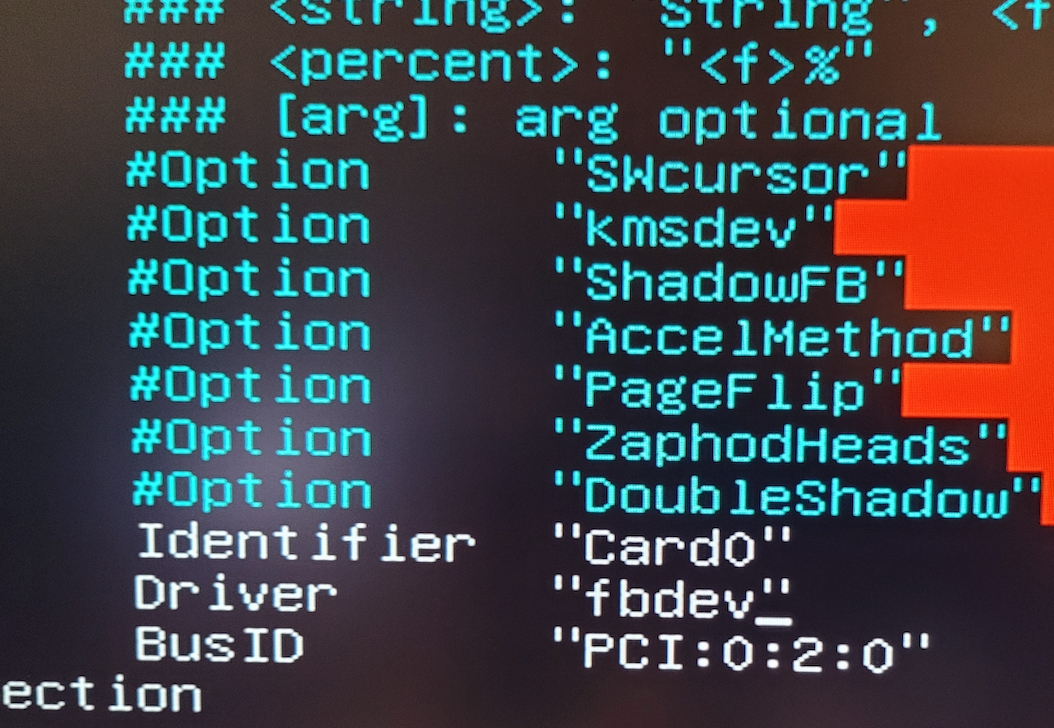
Type in following command in order to exit TTY3
exitGo back to TTY 1 by pressing ALT+F1.
Type in following command to start your installation
startxIf you only have this error, that will be the end for you.
In case this procedure above does not work for some reason for you (lack of rights…), after you get error just type following commands
Do this only if the above procedure does not work!
chmod 1777 /tmp
apt update
Xorg -configure
mv /xorg.conf.new /etc/X11/xorg.conf
nano /etc/X11/xorg.conf
After you enter xorg.conf change driver value to fbdev, like depicted above. Save and exit file
Type in
startxFailed to prepare EFI boot using Grub
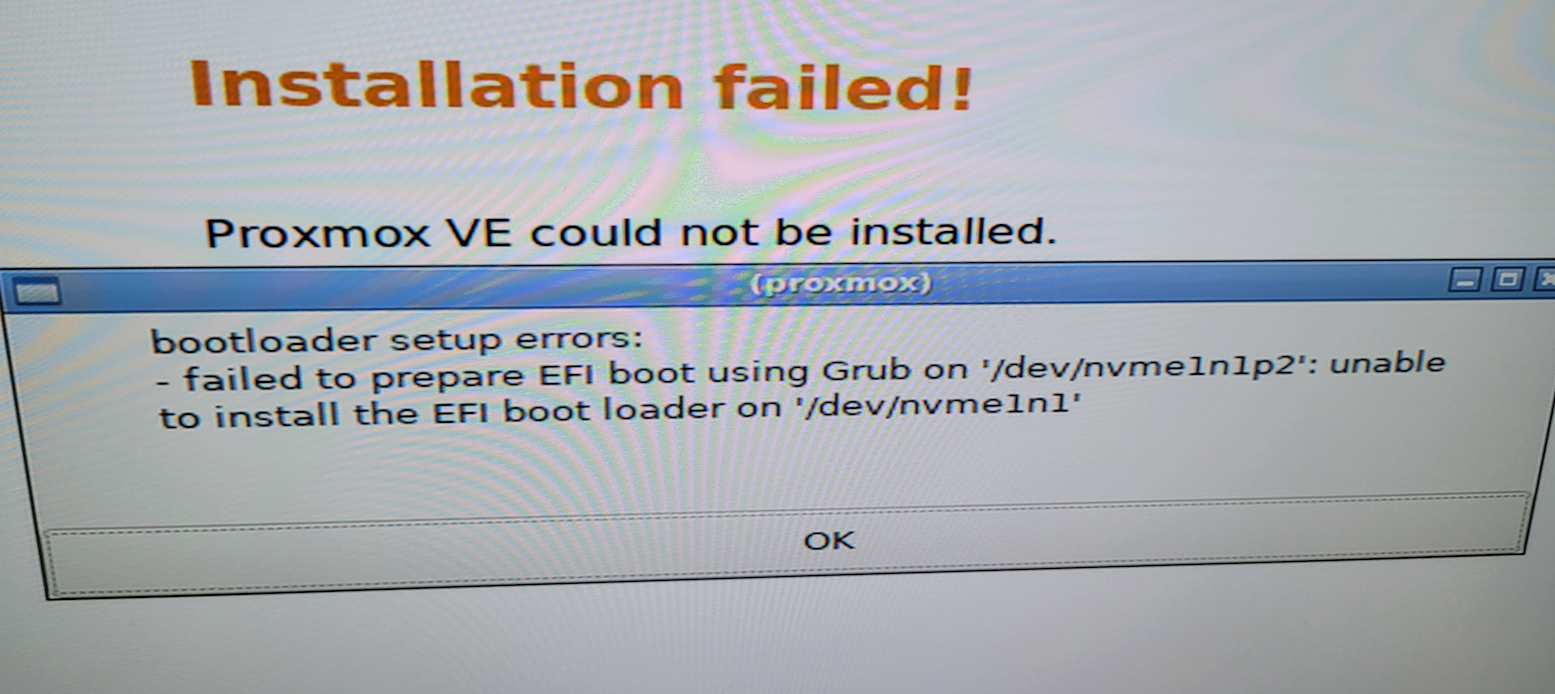
I was able to start installation procedure, but in the end, on 99% of the installation done, I got following
“bootloader setup errors: failed to prepare efi boot using Grub”
“unable to install the EFI boot loader on…”
I really tried a lot of thing the get around this.
One of the things to get around all these issues was to use Debian and then Proxmox on top of it – but I was stubborn to do that. ?
On new NUCs there is no more “legacy BIOS” and trick to Disable Secure Boot and Modern Standby in NUCs BIOS to get “legacy BIOS” does not work.
I tried different drives, repair procedures, setup tricks, but I couldn’t get past this error.
What I did in the end is that I used older NUC8 Compute Element inside my new chassis to install Proxmox.
So, I unplugged mu NUC11 Compute Element
And installed NUC 8 Compute Element I got at hand
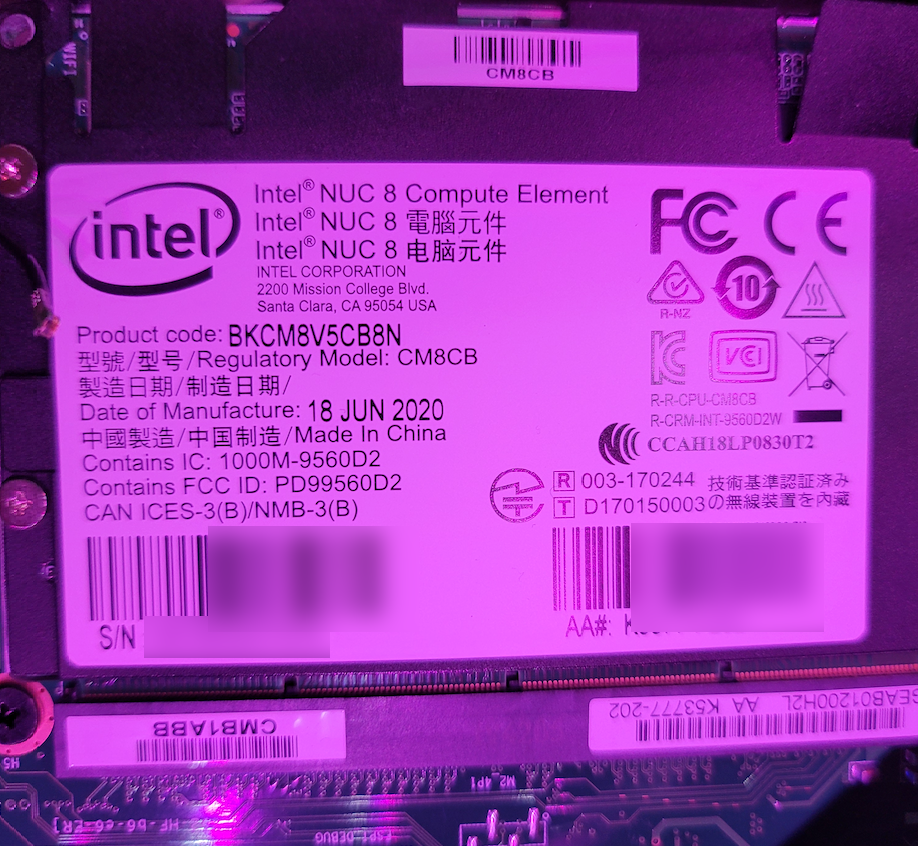
With NUC 8 Compute Element everyhing went smooth – no errors, no hickups, and I got past the boot error.
After installer was done and I was into Proxmox GUI – i turned it off and put my NUC 11 card back into the Chassis.
It was able to boot and I finally was able to have working installation of Proxmox
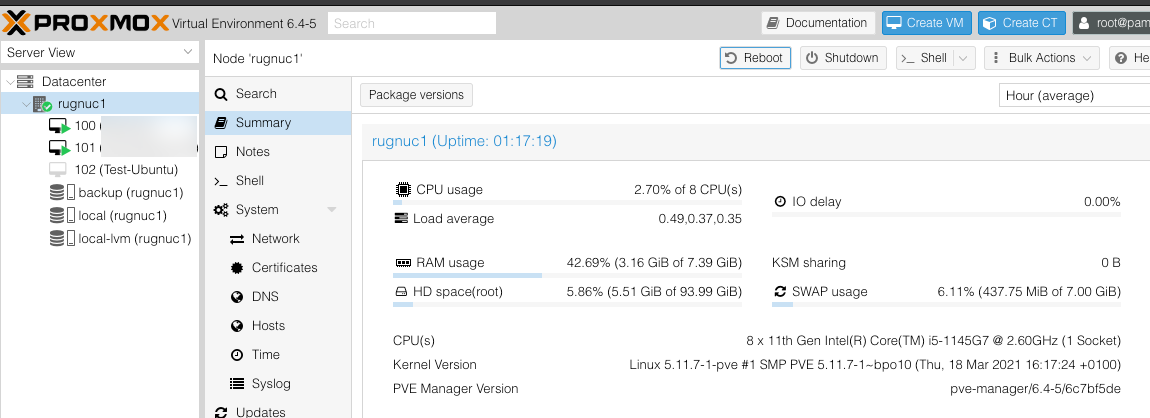
But, not all was great. I have two network adapters. Only one was working – I211-AT.
Networking issues
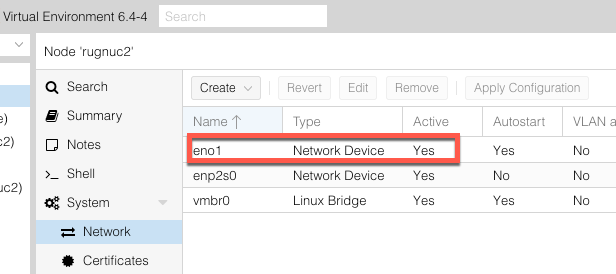
Interface eno1 would not go up (be in active mode) whatever I do.
Second card enp2s0 (Intel I 211) was working ok, and I was using it to manage my Proxmox install. But, it is crucial for me to have both card working, and I didn’t want to use USB network cards.
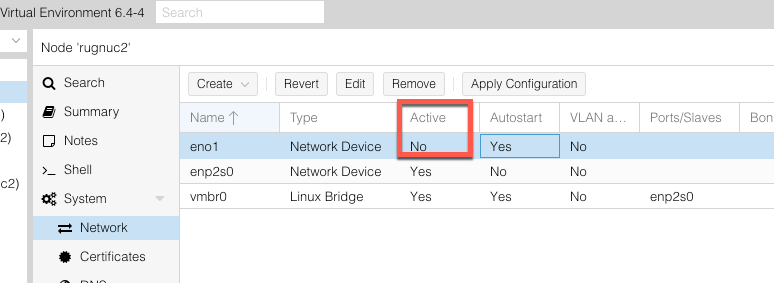
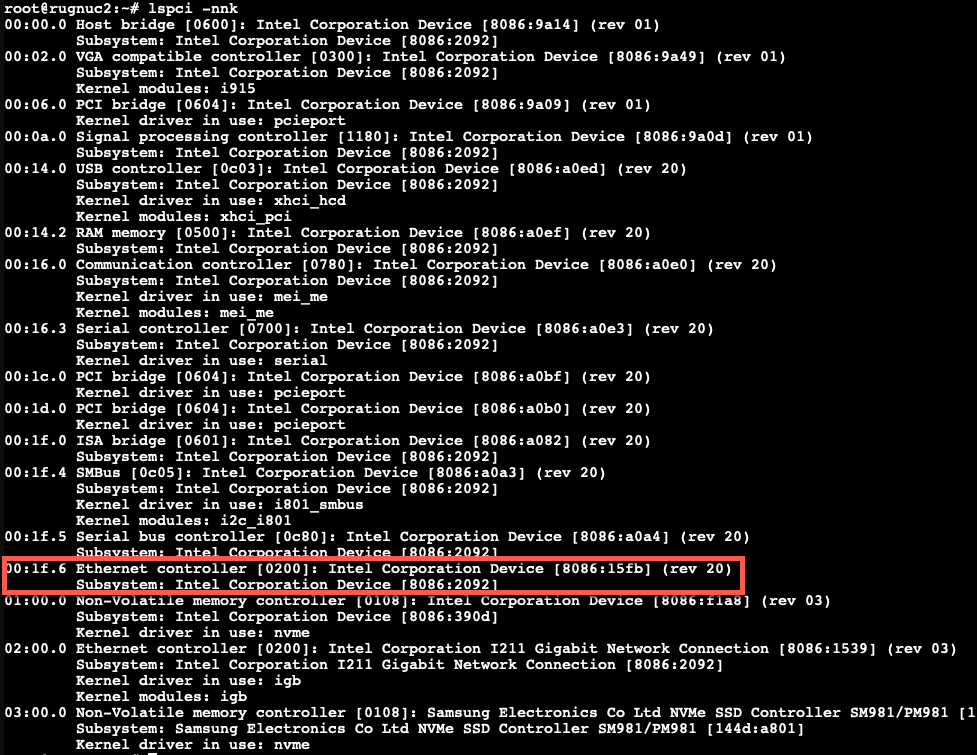
In shell after I executed lspci -nnk command, I could see that 00:1f:6 which is my dirst NIC, does not have proper drivers displayed.
I know for a fact that Intel I219 is recognized inside Proxmox 6.xx, so this is another weird glitch.
To resolve this I run first (you need to enable pvetest repos before you do this). Here is how to enable repos on Proxmox
apt updateand then I run following
apt install pve-kernel-5.11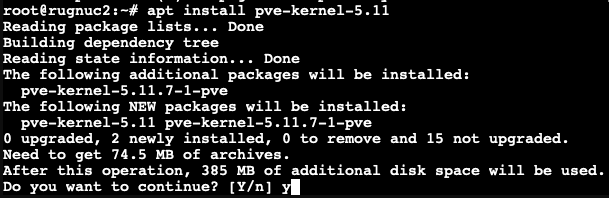
After installation reboot your Proxmox install
After reboot, again open shell and type in
uname -rYou should be running 5.11 kernel

and now my network interfaces are working
To be honest, if I put network adapter in passthrough mode and assign it to VM, it still doesn’t work, but as a workaround, I create Linux Bridge and assign it to VM.
That is it, we now have functioning Proxmox on NUC 11
Disclaimer