While preparation and generalization of the Windows Server VM for Azure is simple and straight forward, Linux has a few more steps that needs to be done in order to prepare it for Azure.
This tutorial will cover CentOS 8, there is also great documentation on Microsoft, and you can find all the details here – https://docs.microsoft.com/en-us/azure/virtual-machines/linux/create-upload-centos
My tutorial will be different and I will be prepping my machine a bit different from the Microsoft one, since I found what works best for me. Be sure to check out Microsoft documentation on this also.
Prerequisites
Before we start with the preparation, there are some prerequisites in installation phase that you must consider.
- Fixed VHD drives can only be uploaded. Accent on Fixed.
- There are some conflicts with LVM naming in cloned VMs, so it is recommended that you use some other partition scheme.
- Kernel support for mounting UDF is required.
- There are some issues with NUMA, but mostly with RHEL 6.x versions.
- Swap partition cannot be configured on OS disk.
- All VHDs on Azure must have a virtual size aligned to 1MB.
All the points above are more detailed on the MS link I posted above.
Preparation
Let’s go to the preparation phase
This tutorial will assume you have knowledge on basic Linux commands, and I will not explain Linux commands here.
All the steps below are done on the CentOS 8 machine which I was prepping for Azure.
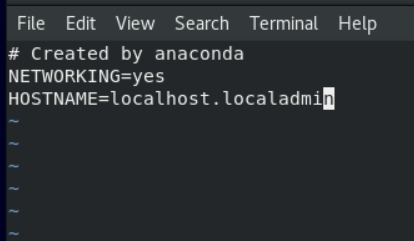
First, edit network
vi /etc/sysconfig/network 
Add following lines
NETWORKING=yes
HOSTNAME=localhost.localdomain
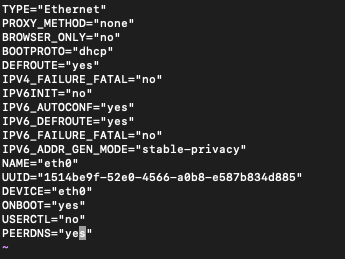
Next, we will edit file ifcfg-eth0
vi /etc/sysconfig/network-scripts/ifcfg-eth0
Edit, or enter missing commands in it, here is what we need
DEVICE=”eth0”
ONBOOT=”yes”
BOOTPROTO=”dhcp”
TYPE=”Ethernet”
USERCTL=”no”
PEERDNS=”yes”
IPV6INIT=”no”
!!! I would lose all network connectivity after entering NM_CONTROLLED=no which is in official MS documentation, so I left that out of my final configuration.
Next command we will execute into terminal is about modifying udev rules so that these rules won’t cause problems when cloning VM in Azure
sudo ln -s /dev/null /etc/udev/rules.d/75-persistent-net-generator.rules
Next part is also a bit different, I do not need Microsoft Openlogic REPOs, and EPEL has everything I need for the successful install. So, instead I installed and used EPEL repo. You can find tutorial on how to add EPEL repo here – https://www.informaticar.net/3633-2/
If you need Openlogic REPOs (Microsoft supports it inside Azure) please refer to the Microsoft link at the beginning of the tutorial.
Now, we will clean current yum metadata and install any updates
sudo yum clean all
sudo yum -y update
If you have a lot to update, reboot after update would be nice.
We will now modify /etc/default/grub kernel boot line in grub in order to include additional parameters for Azure. We will edit GRUB_CMDLINE_LINUX parameter
vi /etc/default/grub
We will add following to grub, so that the final result looks like this (delete all that is currently inserted under line GRUB_CMDLINE_LINUX, and insert just commands which are below)
GRUB_CMDLINE_LINUX="rootdelay=300 console=ttyS0 earlyprintk=ttyS0 net.ifnames=0"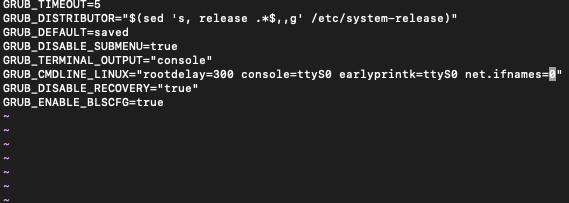
After this, we will run command to rebuild the grub configuration
sudo grub2-mkconfig -o /boot/grub2/grub.cfg
I also rebooted after this command, just in case, to be sure everything went ok, and I still have bootable installation.
/ !! Next section is only for VMWARE / VBOX users !! / if you are preparing install in Hyper-V you can skip this (or just check to be sure)
If you are rebuilding from VMware, VirtualBox or KVM be sure that Hyper-V drivers are included in the initramfs:
Edit /etc/Dracut.conf , add following content:
vi /etc/Dracut.conf
add_drivers+=" hv_vmbus hv_netvsc hv_storvsc "
Rebuild initramfs
sudo dracut -f -v
Let’s check if the Hyper-V modules are loaded
lsinitrd | grep hv
All Hyper-V modules are now loaded.
/ !! End of section for VMWARE / VBOX users !! /
Install Azure Linux Agent
Next, we will install Azure Linux Agent and dependencies. Again, I’m going to use EPEL Repo since OpenLogic from Microsoft original document doesn’t work well for me.
sudo yum install WALinuxAgent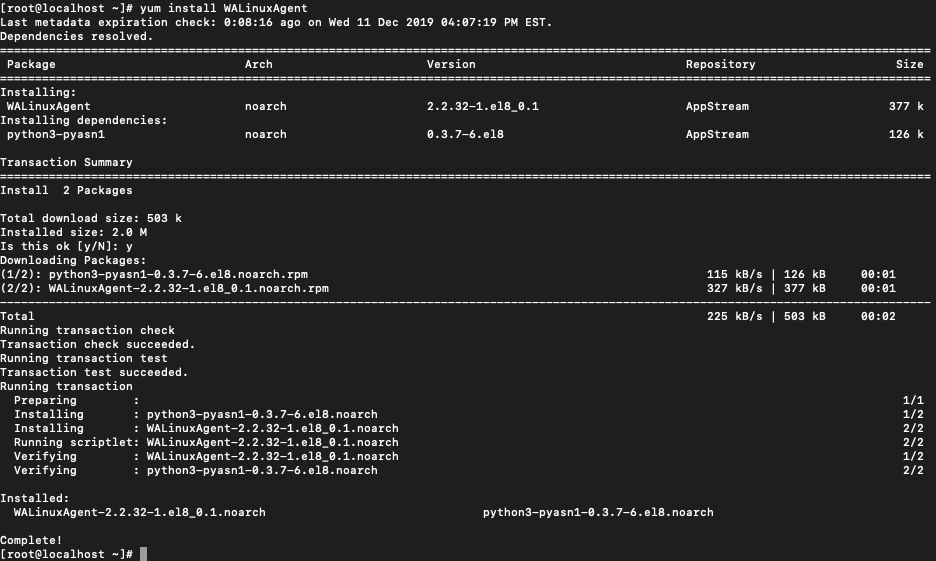
sudo systemctl enable waagent
chkconfig waagent on
Swap Space Management
In the end, as I already mentioned in the beginning, do not create swap space on the OS disk.
The Azure Linux Agent can automatically configure swap space. After installing the Azure Linux Agent, modify parameters in /etc/waagent.conf, like the lines below:
ResourceDisk.Format=y
ResourceDisk.Filesystem=ext4
ResourceDisk.MountPoint=/mnt/resource
ResourceDisk.EnableSwap=y
ResourceDisk.SwapSizeMB=2048    ## NOTE: set this to whatever you need it to be.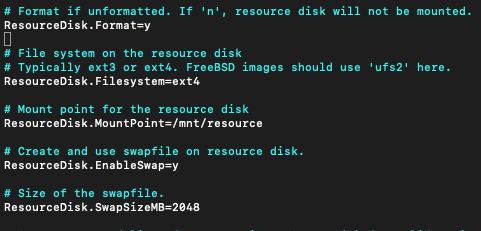
In the end, run following commands to deprovision the VM and prepare it for Azure:
sudo waagent -force -deprovision
export HISTSIZE=0
logout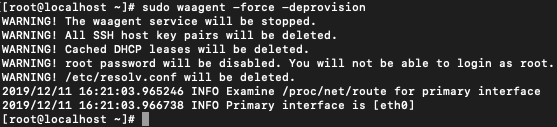
Click Action – Shut down. That is it, machine is ready for Azure.
If you are interesting to see how to upload and the publish your VHD in Azure Stack – https://www.informaticar.net/?p=4176