Before we even start – HUGE WARNING: with this mod, you are voiding your warranty. Also I will not be responsible for any kind (material, physical, mental) of damage you do by following this tutorial.
Now, let’s do the work, I’ll demonstrate you my trip to silent Netgear switch. JI’ve got few Netgear 10Gbit switches for testing and for some scenarios even a production purpose. Mostly I don’t care about noise of the switches because they are in the server room, and they are supposed to be loud because it is very hot and tight in the server racks and hot air needs to be pushed out of the switch.
But I got one of the Netgear (XS728T) switches in the office for testing and lab purposes. It was extremely loud, it sounded like fighter jets at military parade. Obviously, it was unbearable to work in these conditions, so I had to do something about it.
Switch has 4 fans and the initial idea was to exchange them with Noctua fans. I love Noctua products because they are great quality and thought out to the detail.
At first, idea was to exchange them with Noctua NF-A4x20 PWM fans. That didn’t work, fans just wouldn’t spin up.
All the PWM fans I tried didn’t work on this switch.
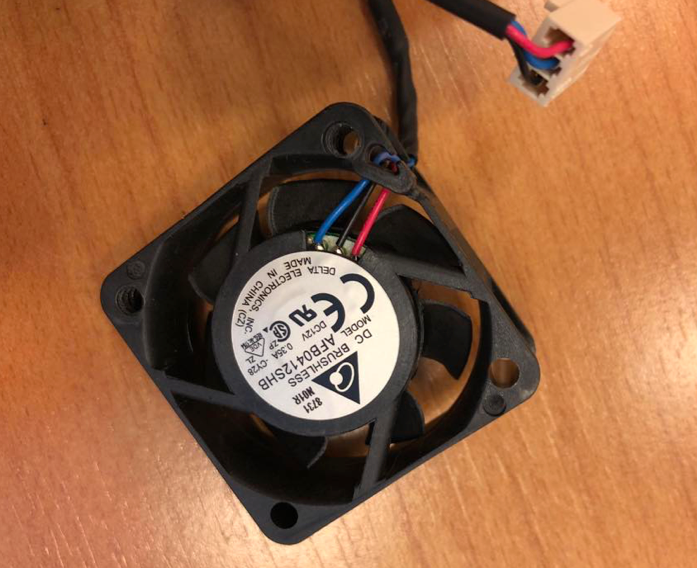
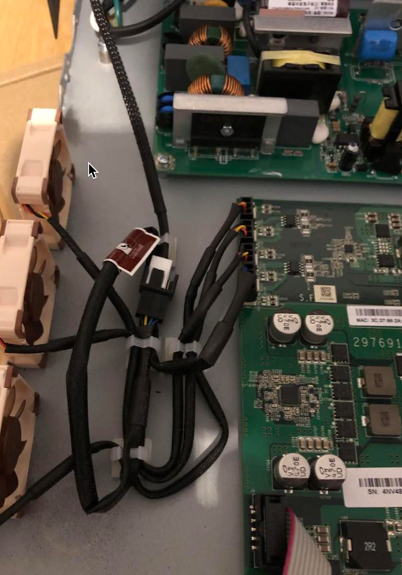
Default fans in this Netgear switch were Delta AFB0412SHB with 3pins. Pinout of the connector is black-blue-red
I tried to rearrange 4 pin PWM connector on Noctua NF-A4x20 PWM fan but it just wouldn’t work.
You can easily push out pins from the fan connector by using a needle. It takes some time and patience, but it is doable.
Also, I had some Noctua NF-A4x10 FLX 3pin and Noctua NF-A4x10 5v 3pin fans at hand, so I decided to try these.
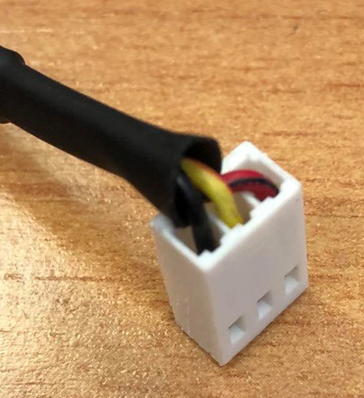
I had to redo the pins in the connectors of Noctua fans, and I done them in black-yellow-red order as can be seen in the pictures below.
At the first picture below you also can also see one 4pin connector in the fan header since I was still trying to spin up Noctua PWM fans but in the end I gave up.
Here is the connector sample of Noctua 3pin fan rearranged in the up close shot.
In the end I replaced all four fans first with Noctua NF-A4x10 FLX 3pin and then with Noctua NF-A4x10 5v 3pin fans – for the test.
They were spinning – yeeii. It was a step forward, but not huge step forward.
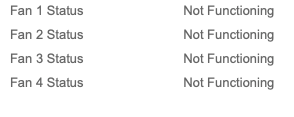
Fans were again very loud, and the temperature was high. Also, after logging into the Netgear web interface, under System Information – Fan Status of all fans was shown as – Not Functioning
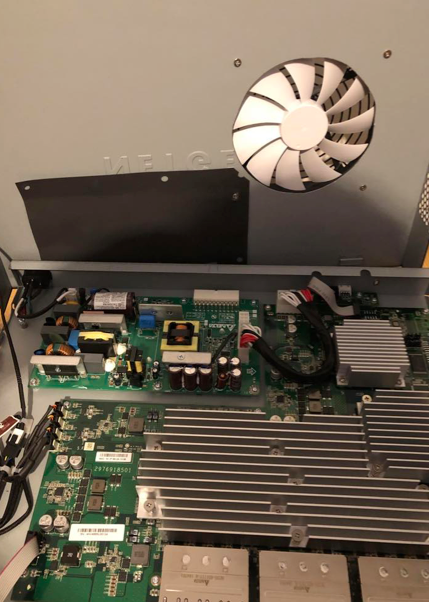
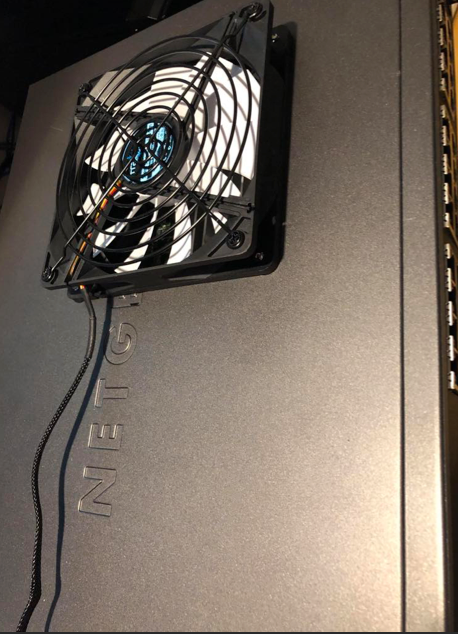
So, I got one more idea to try. I put 140mm fan on top of the passive coolers on the switch.
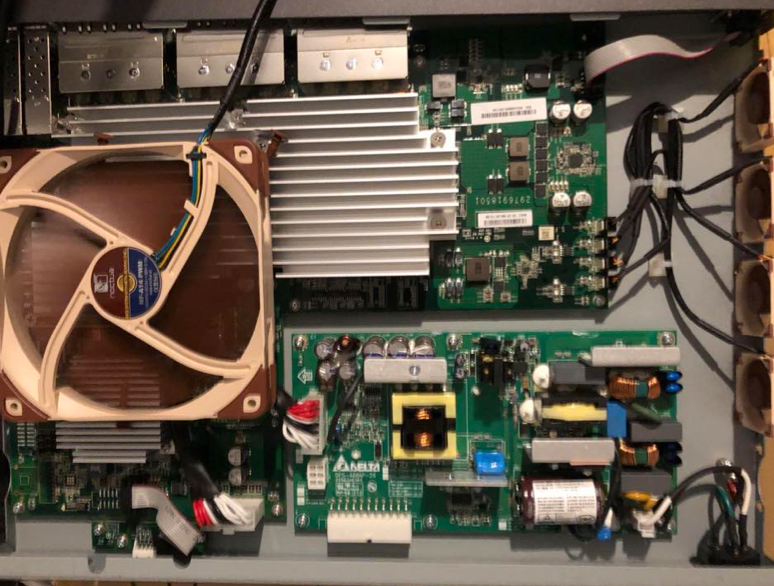
I left all for 40mm fans connected and working and then connected additional external powered Noctua NF-14 PWM fan on top of the passive coolers on the motherboard.
140mm fan was spinning at 1500RPM since I was not able to regulate speed of it. I left it that way for a week.
Temperature of the switch was great (low 50 degrees C) and the small 40mm fans on the side were spinning nice and quiet.
Again, If I connected Noctua NF-14 PWM 4pin fan to the fan header on the Netgear switch motherboard – it wouldn’t work.
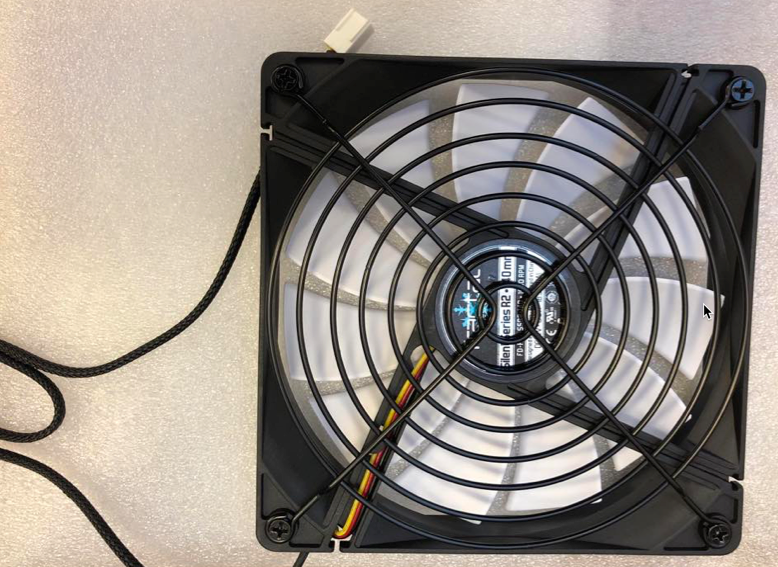
So, I have a few spare Fractal Design Silent Series R2 140mm 3pin fans laying around. I decided to try with one of those.
I had to rearrange pins on the fan connector to black-yellow-red order and the fan successfully spun up from the Netgear switch motherboard fan header.
So I knew what I have to do and I also was aware that I already voided my warranty for this one Netgear switch. But since it will sit in the office for years, and we need 10Gbit solution for lab and tests, this is at the moment the only solution with which we can stay sane and work.
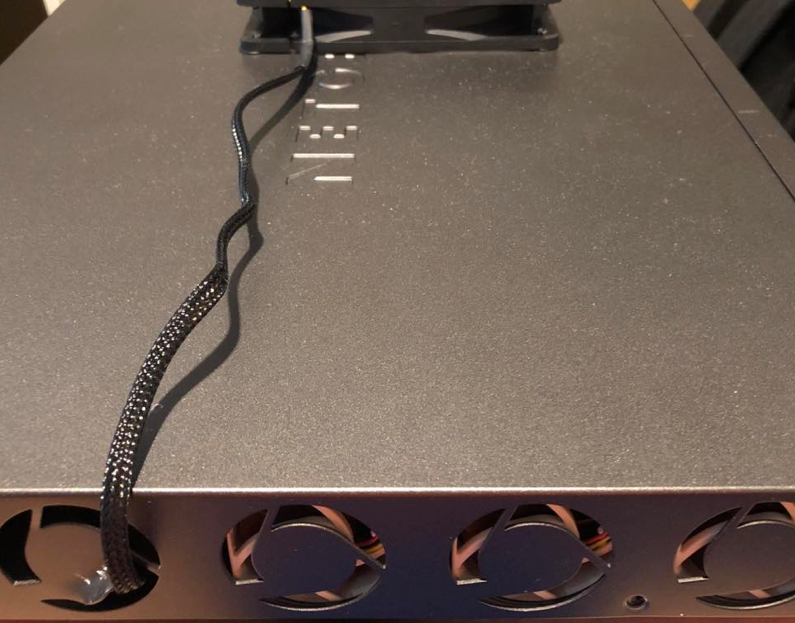
I checked the hottest parts of the motherboard with Flir thermal camera (touching passive coolers with bare finger is also good temperature indicator in this case) so I can see what good fitment for the 140mm fan would be. Then I measured top cover and motherboard distances, so I could cut and screw fan through top switch cover (one with NETGEAR engraved in it.)
In the end my colleague which is much handier than me with power tools did metal cutting for me.
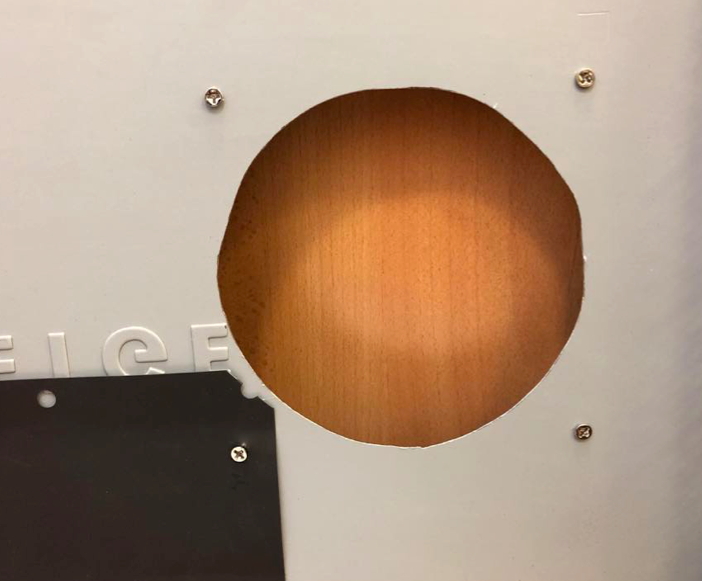
This is how the hole looks from the inside of the switch top cover.
And this is from the outside
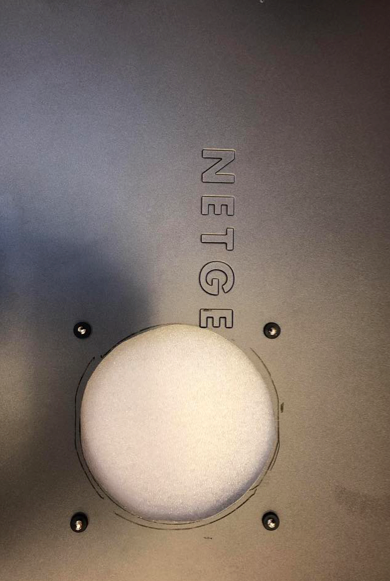
Four screws that are seen on the picture above are standard screws that you get with 140mm fan and are used to screw fan in the PC case. I also put small pieces of rubber around screws so it would dampen the vibration of the fan.
Since metal was cut and then edges were filed so they are not sharp, switch cover was full of small metal dust. I washed and thoroughly cleaned it so there is no metal debris left on the cover.
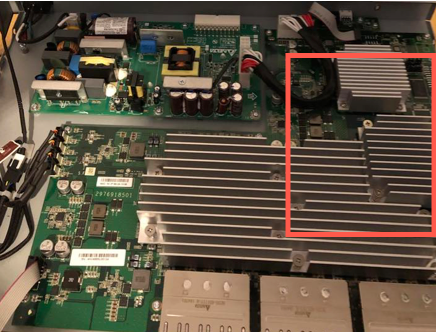
I won’t give exact measures for the 140mm fan hole because it is more matter of individual judgement and type of fan you will use (some use 120mm, some use 200mm fans). Only thing that matter is that it is right above small cluster of passive coolers on the motherboard.
So, placement of the fan would be nice somewhere in this vicinity in red square.
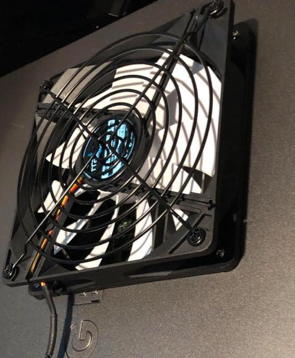
Fan is screwed in, and I placed it in the way that it pulls air out from the motherboard (there are arrows on the side of the fan which mark direction of the air flow). Direction of the airflow is also your decision depending on your environment, you can try to direct airflow to the motherboard or from it. Best way is to test and see with which scenario you get lower temps.
On the outside part of the fan I put protective fan guard to protect fan, switch and surroundings from accidental damage.
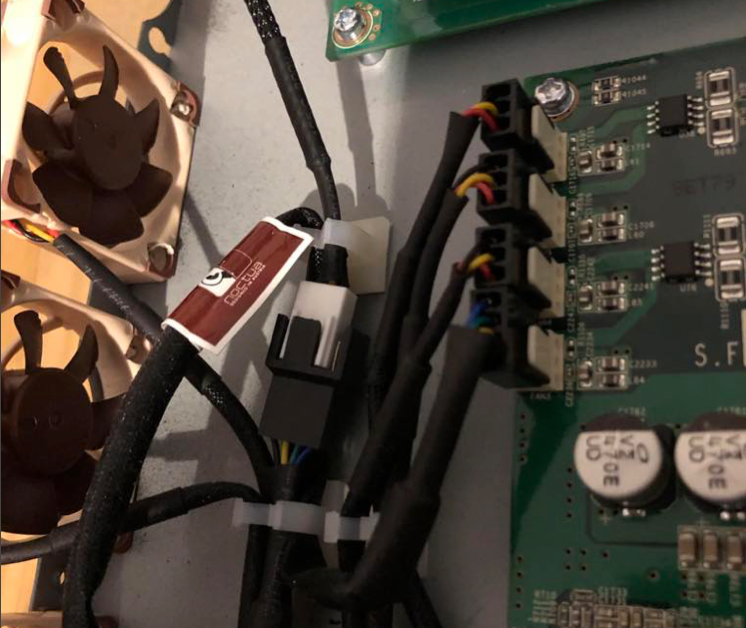
Also I left three Noctua 40mm NF-A4x10 FLX 3pin fans connected to the motherboard, and used fourth fan header on the motherboard to connect the outside 140mm Fractal Design Silent Series R2 140mm 3pin
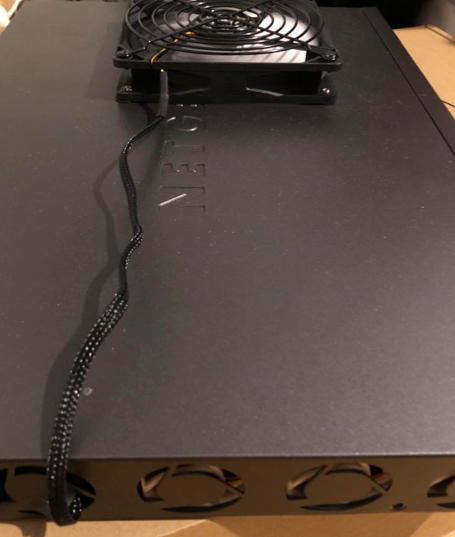
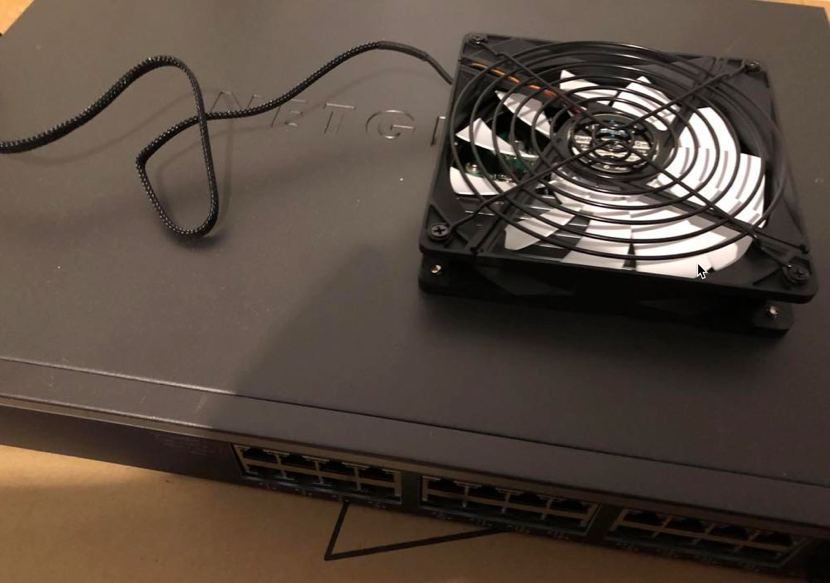
In the end setup looks like this.
Conclusion
This setup works for the last 8 months 24/7 in various workloads without any problems or errors. In place of the original 40mm internal fans I placed three Noctua 40mm NF-A4x10 FLX 3pin fans. Since motherboard fan header has four places, I used three of them for 40mm fans and one for the external 140mm Fractal Design Silent Series R2 140mm 3pin fan.
You can see how I done it in the pictures above. I still get Fan Status – Not Operating software error, but as I can see, it is only software warning without consequences.
All fans are very quiet, and we are very pleased. Temperatures are constantly in the 50 C range, depending on the environment temperatures.
This configuration is hardly suitable for crowded network equipment racks since it needs more space now and has weird fan placement.
Other than aesthetically unpleasing look, this setup work great, is efficient in heat dissipation and very quiet.