In this short guide we will learn how to connect machine with Ubuntu (20.04) installation to Active Directory.
Before we begin
Domain data:
I already set Active Directory on Windows Server 2019 Standard.
Domain name: winlin.local
Domain Controller name: WinLinDC
Domain Controller IP address: 10.0.0.31/24
Active Directory DNS IP: 10.0.0.31/24
I installed DNS on the domain controller itself.
I also created domain user named: zeljko.m@winlin.local
Ubuntu client data:
I used Ubuntu 20.04 as a client for this guide.
Machine name: winlinubcl2
Machine IP address: 10.0.0.34
Prerequisites
Updates
First, we will start with updating
sudo apt update -yHostname and DNS
Since we want to join Ubuntu machine (name winlinubcl2) to Windows domain named winlin.local, we need to change Ubuntu machine name to match active directory (AD) naming…
sudo hostnamectl set-hostname winlinubcl2.winlin.localWe will check machine name by entering
hostnamectl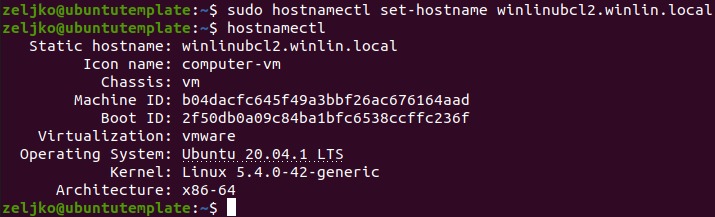
For the DNS part, like with Windows client machine you wish to join to AD – linux machines also need to have domain controller (or separate DNS server for domain, if configured) IP address under DNS.
In my case, DNS server IP is same as my domain controller ip – 10.0.0.31.
There are a couple of ways to do this.
If your Linux machine is getting IP address and DNS from DHCP server, make sure that you are in the same network, and that DNS IP is already in domain or on domain controller.
I’m doing this manually on Ubuntu 20.04 that has GUI.So this is how my settings look like. I set everything manually.

If you are doing this on a machine without GUI, only in shell you will have to do it through netplan.
Again, check your IP settings by entering
ip aThen check DNS settings by entering
systemd-resolve --status | grep Currentand you can also check default gateway by typing in
ip r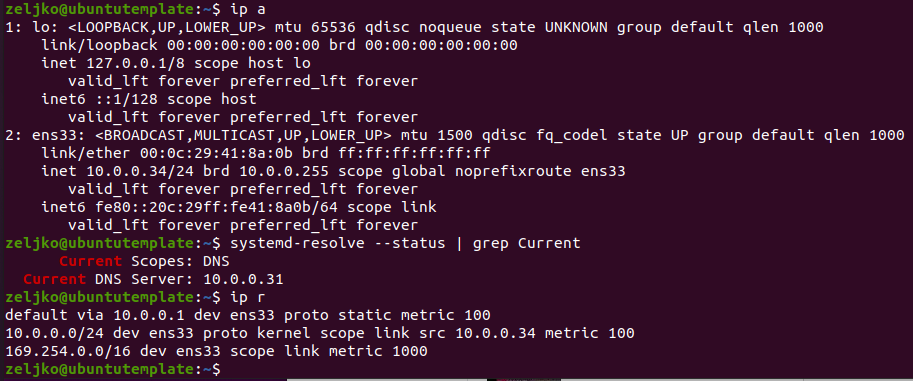
If there is a need to change IP and DNS settings, do following
First we need to find out how your netplan file is named. To find out type following in
ls -la /etc/netplanMy file is named 01-network-manager-all.yaml. Your may be named differently, so mark that.

Next, we need to edit that file (change 01-network-mananger-all.yaml to your filename.
sudo nano /etc/netplan/01-network-manager-all.yamlYou should enter something like this. Be very careful about indentations, because yaml files are very picky on that front.
If you want to check your indentation to be sure it is ok, you can install tool like yamllint.
network:
  ethernets:
    ens33:
      addresses:
      - 10.0.0.34/24
      gateway4: 10.0.0.1
      nameservers:
        addresses:
        - 10.0.0.31
  version: 2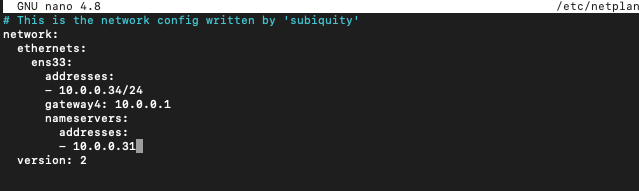
To apply changes type in
sudo netplan applyOk ,that is it for the hostnames and DNS, I like to reboot machine after these settings to be sure everything is fine.
Installation
We will now install all required packages for our domain join adventure
sudo apt update -y

sudo apt -y install realmd libnss-sss libpam-sss sssd sssd-tools adcli samba-common-bin oddjob oddjob-mkhomedir packagekit
Discover domain
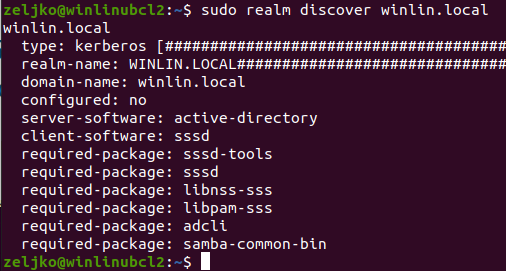
We will now check if we can discover our windows domain. Change winlin.local for your domain name.
sudo realm discover winlin.localThe information we got back is good, we can proceed further.
Add Ubuntu machine to Active Directory
Finally, we will join our Ubuntu machine to our windows domain.
Change Administrator if the account name of your domain admin is different. Change winlin.local to your domain name.
The command is
sudo realm join -U Administrator winlin.local
If everything went ok, you will be asked for your domain admin password, and that will be it.
Let’s check if the authentication is working and we can get id of domain users. I will use domain user named zeljko.m@winlin.local, change that for your domain user and domain name.
id zeljko.m@winlin.local
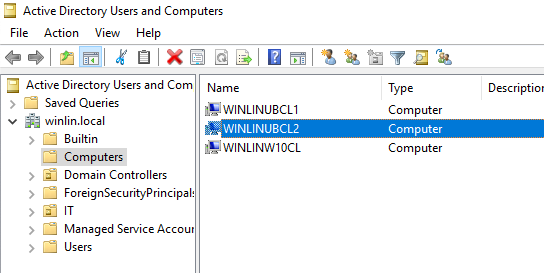
If we go to the Windows Server 2019 that serves as a domain controller for winlin.local domain, under Users and Computers in Computers container we can see that winLinUbCL2 machine is added to the domain. That is great.
Before we do a first login from Ubuntu to Windows Domain
First, we will set creation of home directories for domain users.
We need to edit
sudo nano /etc/pam.d/common-sessionand enter following to the end of the file
session optional pam_mkhomedir.so skel=/etc/skel umask=077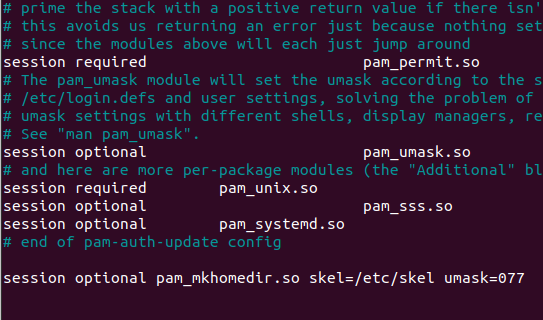
Optionally, you can set your system to login only using name without domain part. So, I could login to my Ubuntu install by only using zeljko.m instead of zeljko.m@winlin.local.
If you wish to enable this:
sudo nano /etc/sssd/sssd.confChange line use_fully_qualified_names = True to
use_fully_qualified_names = False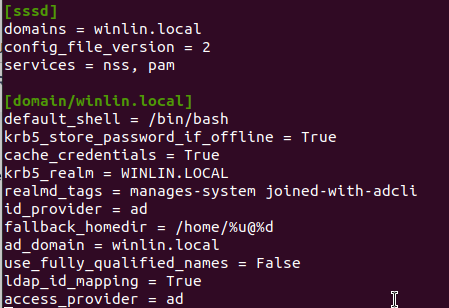
Ok, let’s now try and login with our domain user to our Ubuntu machine.
su - zeljko.m@winlin.localIf we done everything correctly, we should be prompted for domain users password, and there should also be message that home directory for the user is created.

Limit access for domain users to ssh/console
If you want to permit user to access ssh or console, you will use following command. By the way, on my Ubuntu 20.04 install domain users can login via ssh to Ubuntu install by default.
To permit access to user, use following
sudo realm permit zeljko.m@winlin.localTo permit access to group, type in following
sudo realm permit -g 'Domain Admins'Practical way would be, to deny login to all, and then add permits to exceptions, so that would look like this
sudo realm deny --all
sudo realm permit zeljko.m@winlin.local
sudo realm permit -g 'Domain Admins'
You can also permit all, and add multiple user or groups using one line, so that would look like
sudo realm permit --all
sudo realm permit zeljko.m@winlin.local mario.l@winlin.local
sudo realm permit -g 'Domain Admins' 'Users'
On winlinubcl1 I entered deny –all command and then tried to access that machine from winlinubcl2.
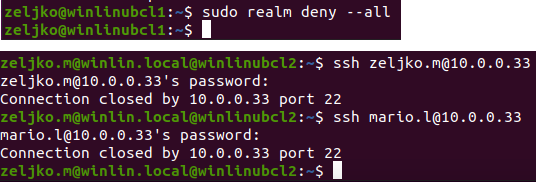
Deny works, nobody from domain can log in into winlinubcl1 machine.
After I entered permit command for user zeljko.m, he was able to login, while user mario.l was still unable to login.
Add domain users/groups as local sudoers on Ubuntu
And, the last one for this guide, domain users are unable to execute sudo commands on Ubuntu.

To change this we will have to edit sudoers file, there are a couple of ways to do it, I will show you one.
You will have to do this obviously as a local account on Ubuntu, not the domain one.
sudo usermod -aG sudo zeljko.m@winlin.local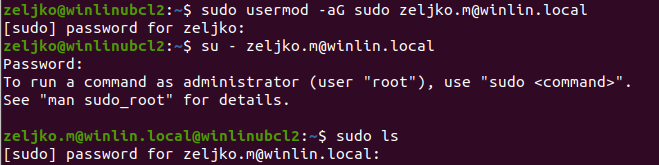
In case you defined in sssd.conf that you don’t use domain extension then you will have to run above command without winlin.local domain extension.
Option number 2
Everything works after executing command. You can do this by also editing /etc/sudoers file.
If you do it that way, you will have to execute it with visudo
sudo visudo -f /etc/sudoersTo add sudo permissions to a user, you will have to edit
zeljko.m@winlin.local ALL=(ALL) ALLIf you wish to add a group, you will enter (in section for groups in the file)
%group1@winlin.local ALL=(ALL) ALLThis can also be done via /etc/sudoers.d/somefilename, but I haven’t managed to get it to work in Ubuntu 20.04 I have installed (I haven’t used . or ~ signs in files, or comamnds…)
Conclusion
That is it, we have basic setup for Ubuntu machine on windows domain.