In this guide we are going to setup and configure DMZ on our pFSense. DMZ (Demilitirized Zone) is helping you expose your web services and giving your relative safety for those services. DMZ is separated from LAN, so you are keeping your LAN resources safe at the same time.
Basically, DMZ is just another (but separated) local network on your router, except you are exposing that network to the internet.
Before we begin
Here is the DMZ diagram I copied from very good pFSense presentation that can be found here – https://www.netgate.com/resources/videos/creating-a-dmz-on-pfsense.html It is detailed and explains every aspect of DMZ very well…
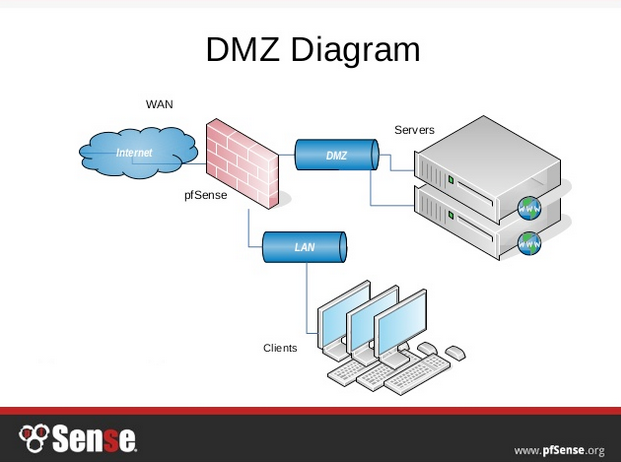
Let’s take for example web server from the above picture for this guide. So, you wish to host and expose your website to the internet from your network.
It would be very bad if you just deploy that web server in your lan and let access to it from the internet. If you have a security breach on your web server, or misconfiguration on web server, your lan pcs/servers (file server, apps, databases) would also get exposed.
Here is where DMZ comes to play. We will configure LAN interface at 192.168.1.0/24 and this is where our internal network and services reside. We will also configure another/separate lan, which we will call DMZ. DMZ will have address range of 10.10.1.0/24. DMZ and LAN are separated with firewall.
In every scenario these network should also be separated physically, so not on the same switch. Router should be the only point where these two networks meet. Neither of the machines should have two NICs on it to connect to the both networks, because it defeats the purpose.
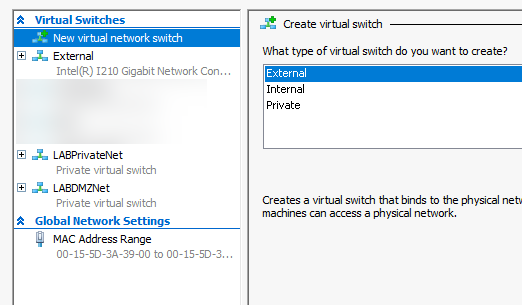
I’m doing it inside virtualization (Hyper-V), so I created two virtual private switches. One is called LABPrivateNet – and is dedicated to local LAN, and the other one is LABDMZNet – also private switch dedicated to DMZ.
Also I have External switch which is connected to WAN, and this switch is only assigned to pFSense with public IP on it.
Typically you don’t want any access from DMZ to LAN. There are specific situations in which you want to do that, and that is if you receive some data on the frontend which is in DMZ and that data needs to get to backend. For example sending/receiving email or data from customer portal… But in these situation you will just let through port you need to the server on the lan that needs to communicate.
Configuration
I will do this inside Hyper-V since we already installed pFSense there.
Virtual switches
Virtual switches on Hyper-V (you can replicate this to any other virtualization solution)
External switch – only on pFSense – access to the internet (fixed public IP)
LABPrivateNet – private networks for the VMs only – internal LAN
LABDMZNet – private network only for machines inside DMZ.
NIC (network interface card) assignment
pFSense has three network cards which are connected to the following switches – External, LABPrivateNet and LABDMZNet
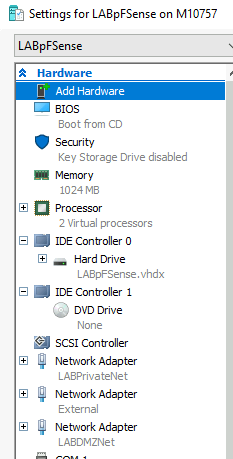
LABPrivateNet is on 192.168.1.0/24
LABDMZNet is on 10.10.1.0/24
External network has fixed public IP address.
Machines on Networks
Internal LAN
Inside LABPrivate Net I have two machines – Windows 10 Pro which is network client and LABDC which is Windows Server 2019 machine.
Both machines have only attached LabPrivateNet network
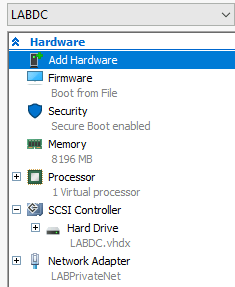
LABDC has IP 192.168.1.2 and Win10Client machine has IP 192.168.1.3
DMZ
A have only one machine on DMZ network and that is LABWeb1 which is based on Windows Server 2019
That machine has only one network adapter placed into LABDMZNet and has IP 10.10.1.2/24
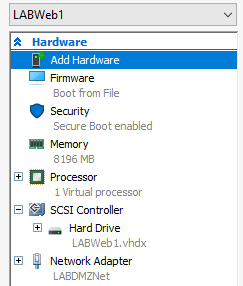
I have simple web server on it, so we can test it.
We will also test file shares between LAN and DMZ so you can see how blocking/allowing traffic between LAN and DMZ functions.
Ok, let’s get to work.
DMZ Configuration
I already did installation and configuration tutorial for pFSense, so I will not be going again through entire interface configuration. I assume you have pFSense installed and WAN and LAN interfaces configured.
In configuration part I already mentioned that I created DMZ network for the pFSense VM.
We are now going to configure that inside pFSense.
In LAN interface pFSense is on https://192.168.1.1 so we will login there to administer our pFSense
Go to Interface | Assignments
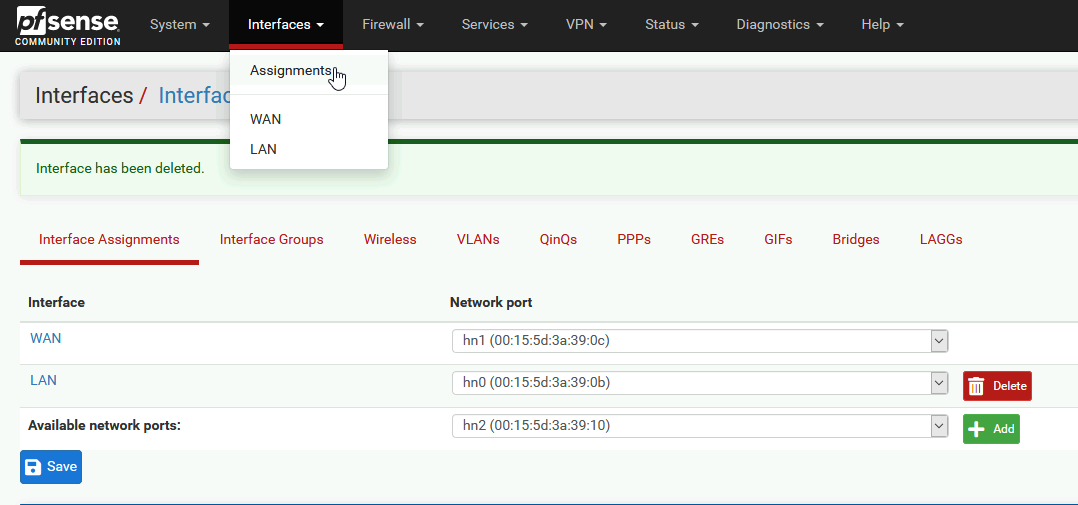
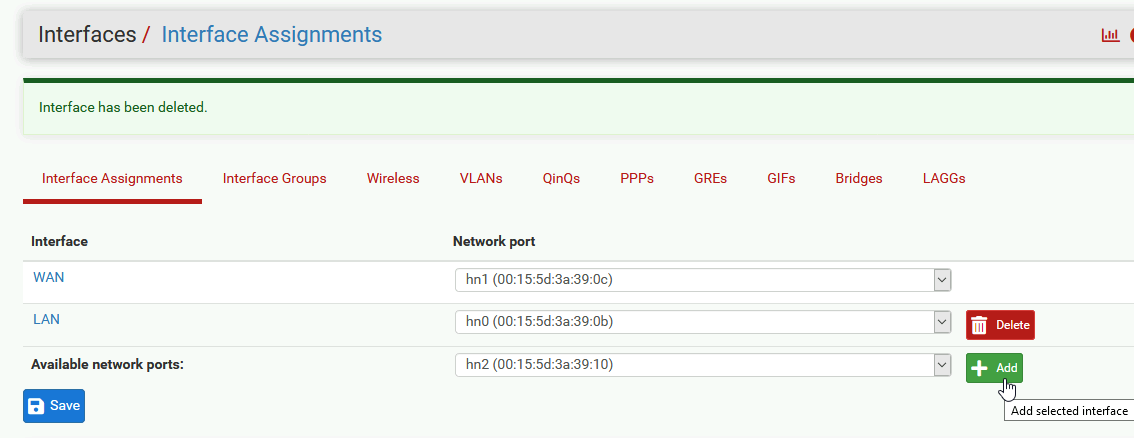
You should see that besides WAN and LAN port you now have one more available port, click on Add

Click Save
And now click on created OPT1 interface
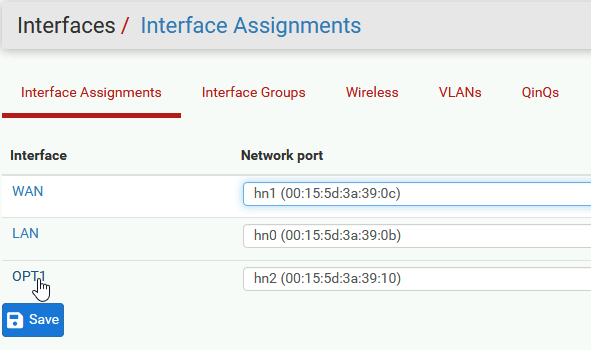
We will enable interface, change the name from OPT1 to DMZ, under IPv4 Configuration Type select Static IPv4 , and uder static IPv4 Configuration I will add IP 10.10.1.1 with 24 bit subnet mask
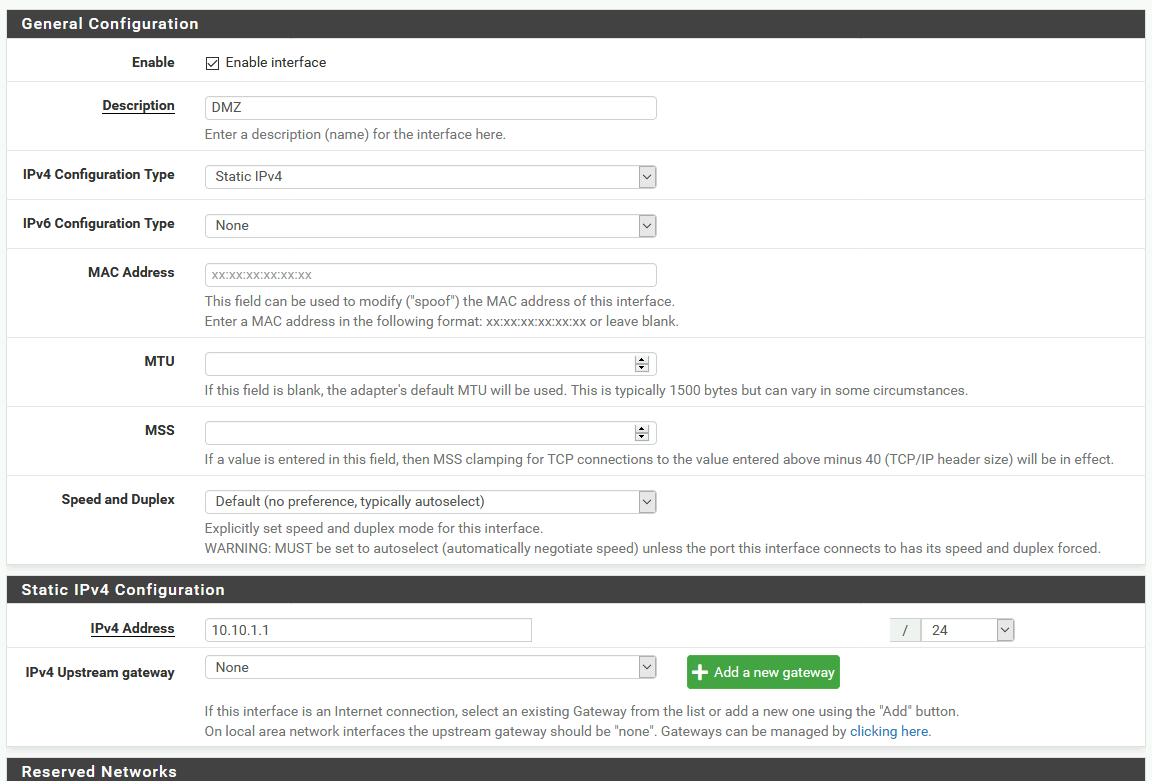
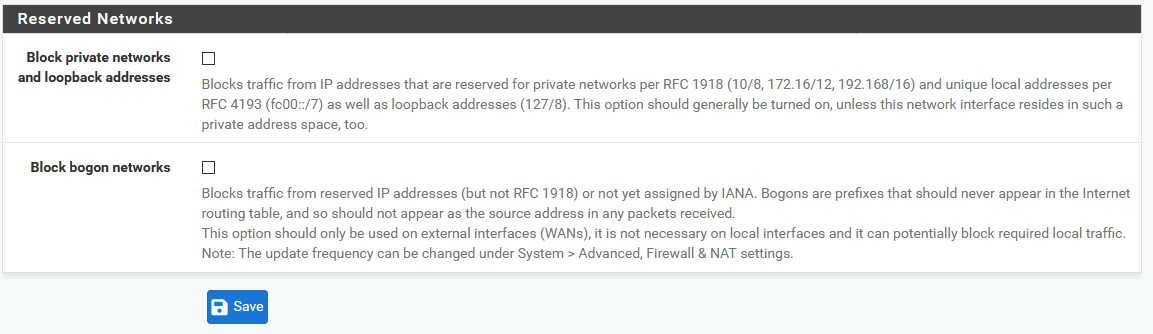
At last I will leave unchecked everything under Reserved Networks, although we could block bogon networks, and even private networks, but only if you have no need to access DMZ from LAN. This should stay enabled if you plan to access services from LAN to DMZ, especially if you have only one public IP. You will need to configure split DNS and access from LAN to DMZ via local network (this is in scenario where you have only one public IP through which both networks go to the internet)
Save
After you click on Save, on top of that screen there will be Apply Changes button

Creating Firewall Rules for DMZ
We created now DMZ network, but LABWeb1 machine which is inside DMZ network cannot access internet/search for updates…
All of these configurations are up to you, and depend on your needs. I would advise against letting all ports to the internet, but instead, define exact ports and let them pass through the firewall.
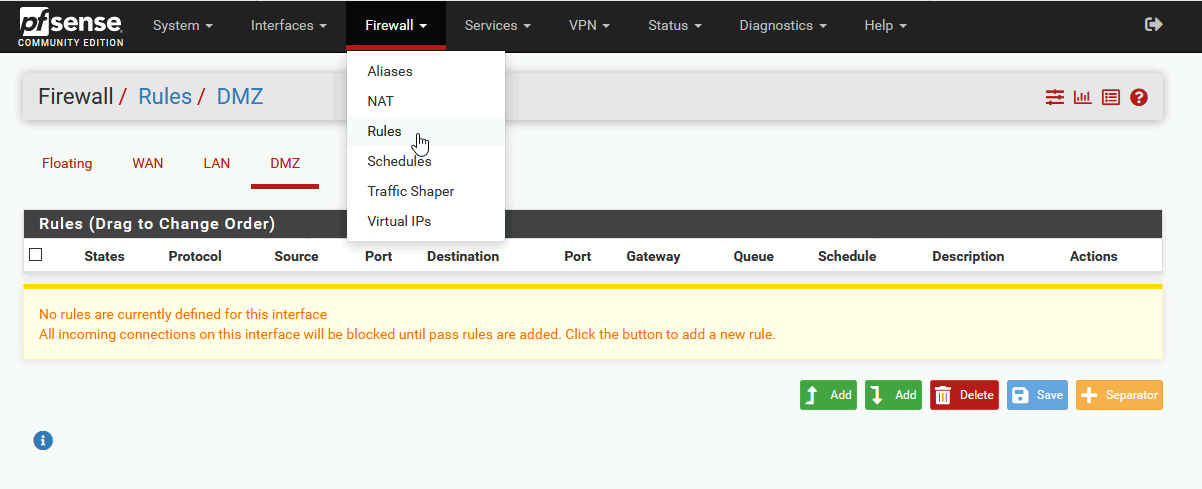
Firewall | Rules |DMZ
List is empty and you cannot do anything on the network from the machines inside DMZ.
Here are few good configuration recipes for LAN/DMZ firewall configuration – https://docs.netgate.com/pfsense/en/latest/recipes/example-basic-configuration.html#setup-isolating-lan-and-dmz-each-with-unrestricted-internet-access
We will simply allow traffic to the port 80, 443 (HTTP, HTTPS) and 53 (DNS) if we want to access internet, windows update…
Select Add at the bottom of the Firewall | Rules screen
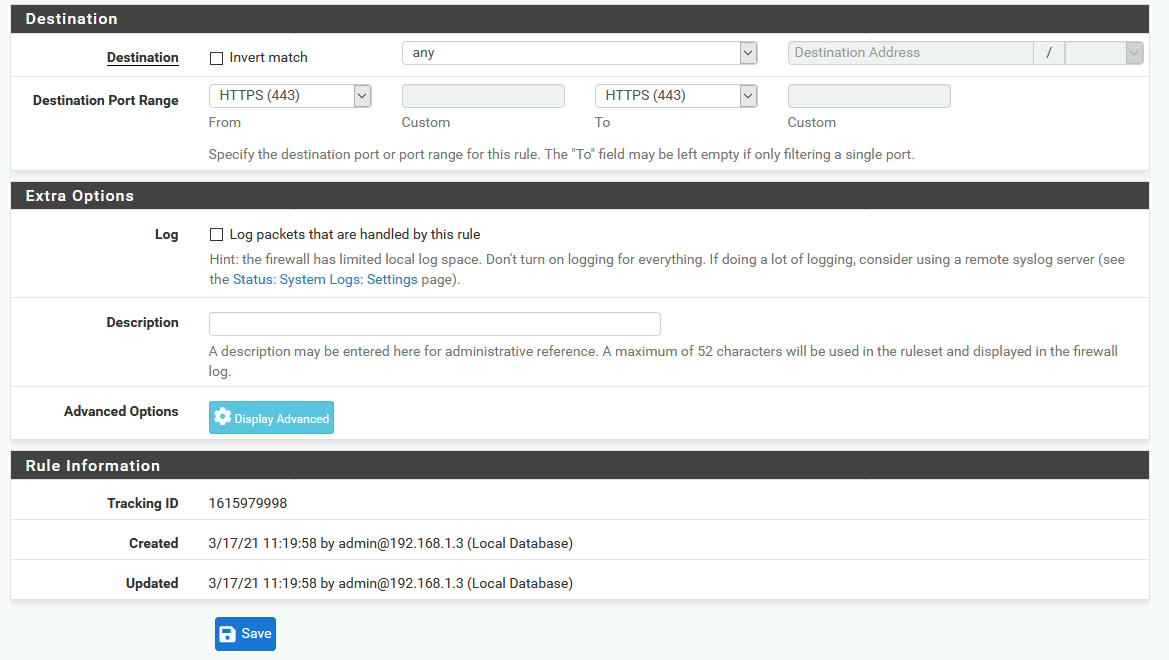
We will go through together for the HTTPS 443 rule, rest is the same, you just select different port
We will let this rule pass, select DMZ as interface, we also ned IPv4 and TCP.
Under source we will select DMZ net
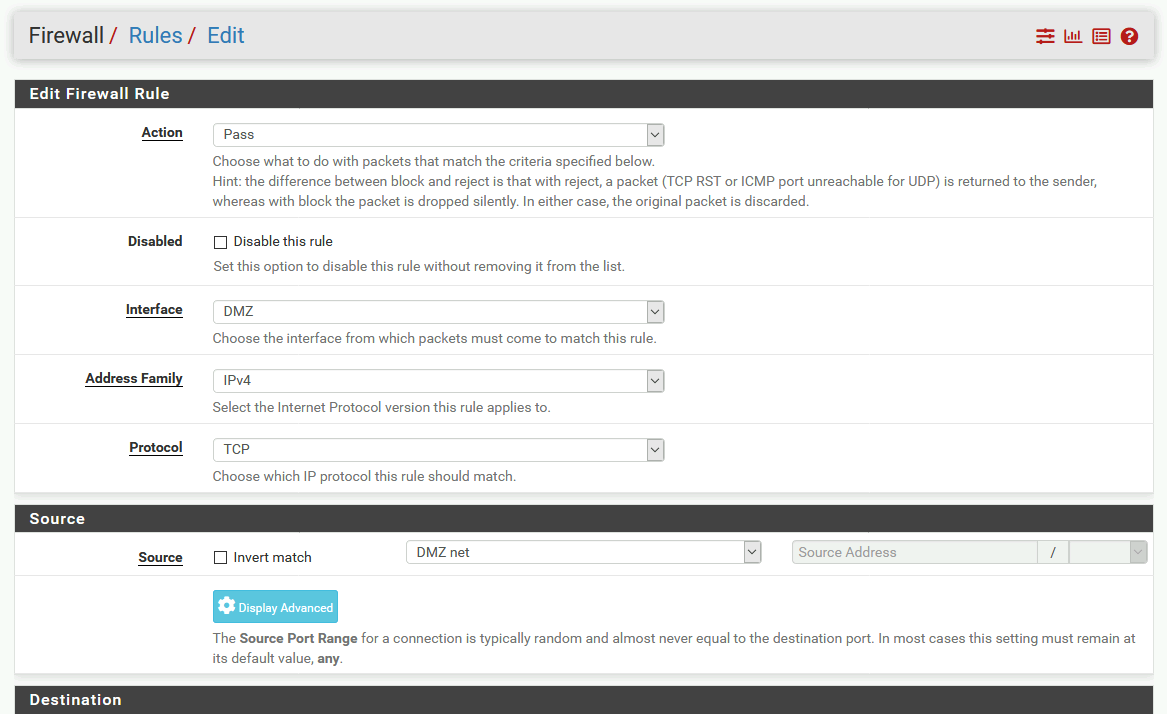
Under Destination we will select any and Destination port range HTTPS 443. All the other options I left as they are and clicked on Save
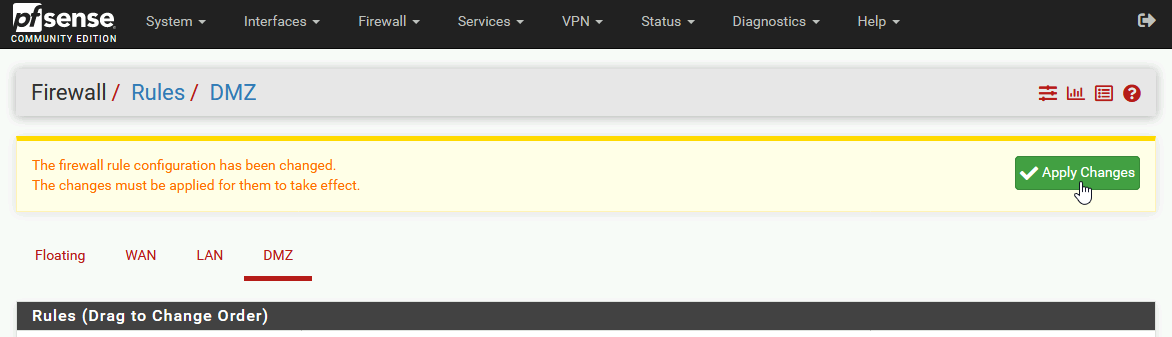
Apply changes
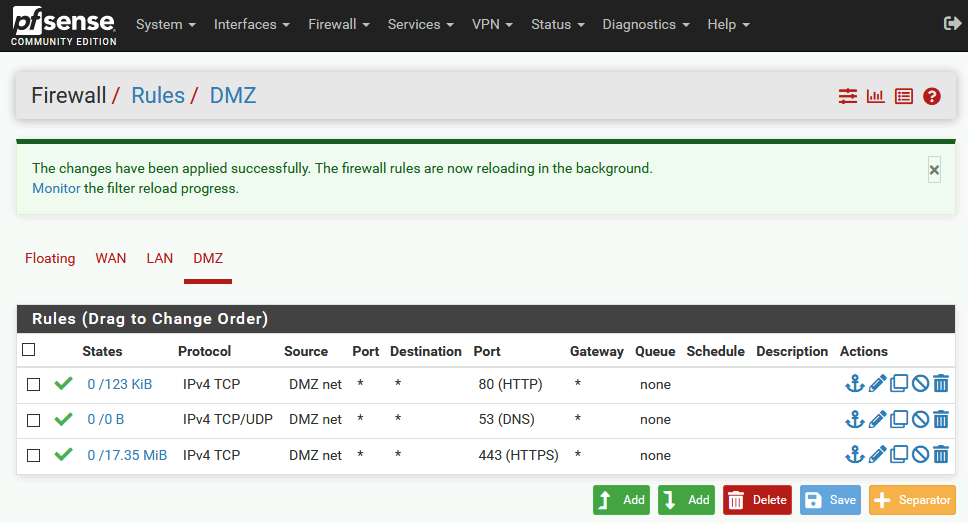
You can repeat that for port 80 and 53. For DNS (port 53) you will haveto select TCP/UDP! Here is how my rules for DMZ look so far, and now my web server can go to the internet.
You don’t have to do these rules, it is all up to you, this was more to show you how it is done, and where it is done if you want machines inside the DMZ zone to access the services outside DMZ network.
I would definitely not recommend allow all rule, instead let the services you need through the firewall of the DMZ.
Setting web server inside DMZ zone
Ok, so I brought up a web server inside DMZ.
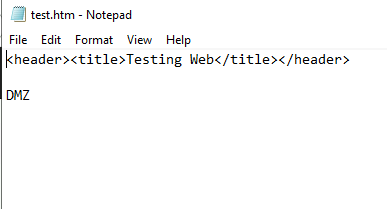
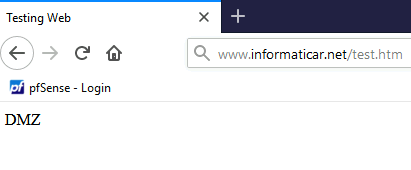
I created simple test.htm “page” which says “testing Web” and has content of one word – DMZ
I also already assigned public static IP of the pFSense to my public DNS, so that internet can reach my website and my test.htm by name.
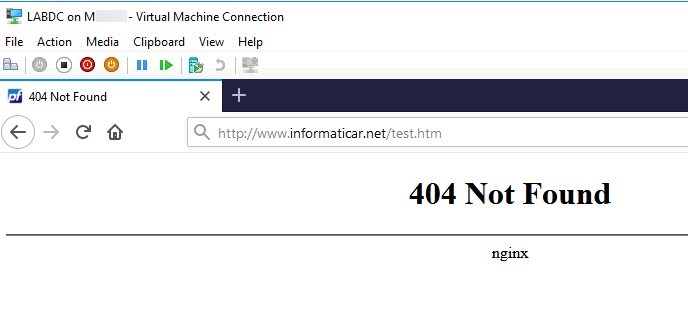
And if I try my domain with test.htm – no luck
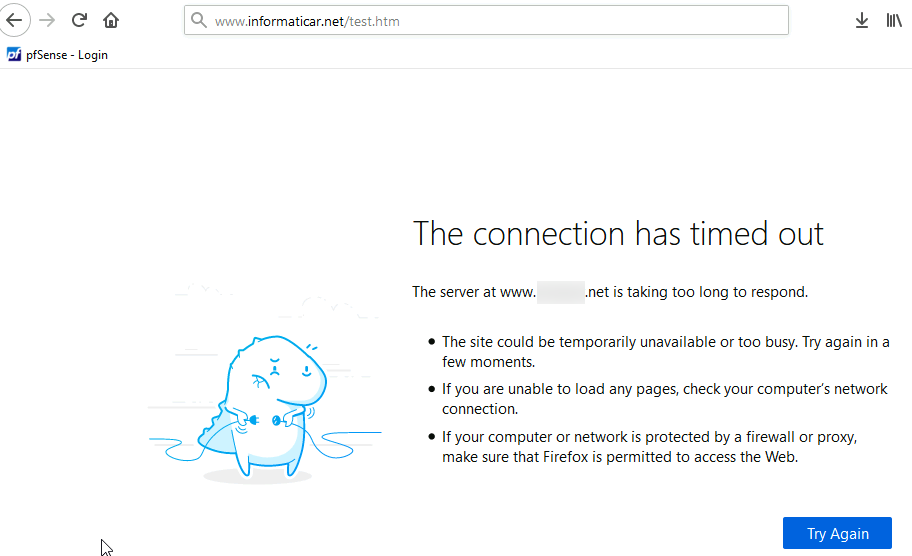
Of course, because we have to let web traffic from the internet pass to our web server inside of DMZ.
Ok, before we do that, we are going to do one other thing first.
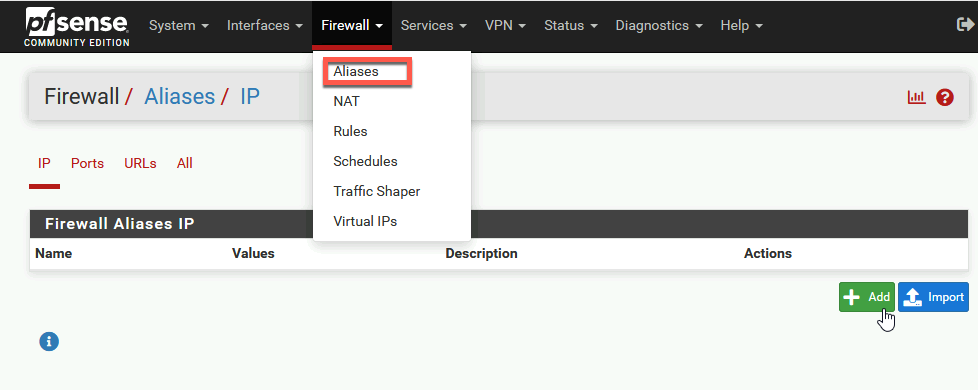
Head on to Firewall | Aliases and under IP select Add
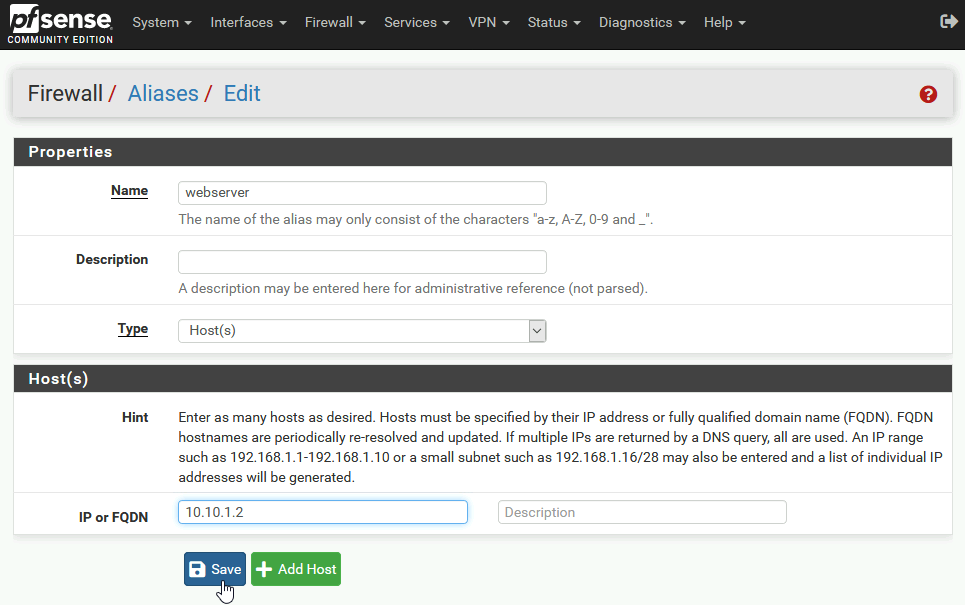
Under name I entered webserver (since this will point to my webserver) type is host and under IP I entered 10.10.1.2 (IP of my web server inside DMZ). YOu can also fill up Description, after you have few things it here it will help you recognize what is what.
Save and Apply
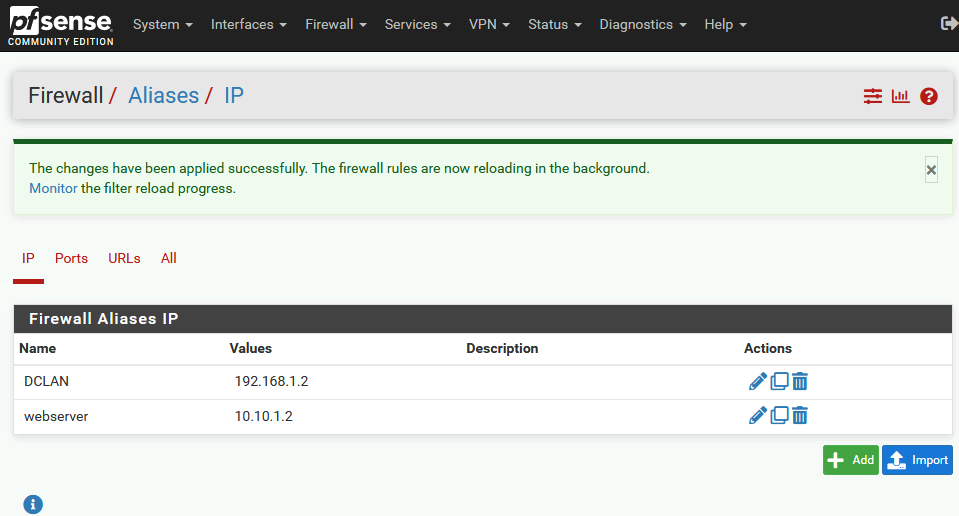
I did the same for the LABDC VM which is inside LAN with IP of 192.168.1.2. We will need it later.
Here is how my IP aliases look in the end.
You can also make aliases for IPs, URLs… It will make your life easier later when you create rules.
Ok ,after we are done with Aliases, back to Firewall menu | select NAT
Select Port Forward | Add
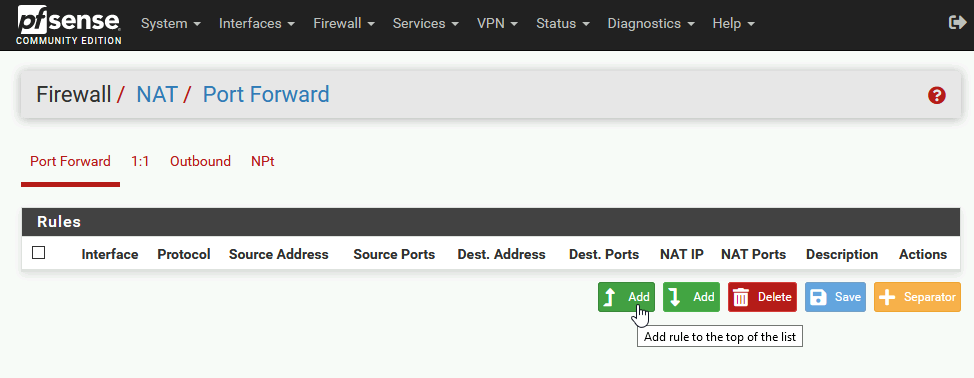
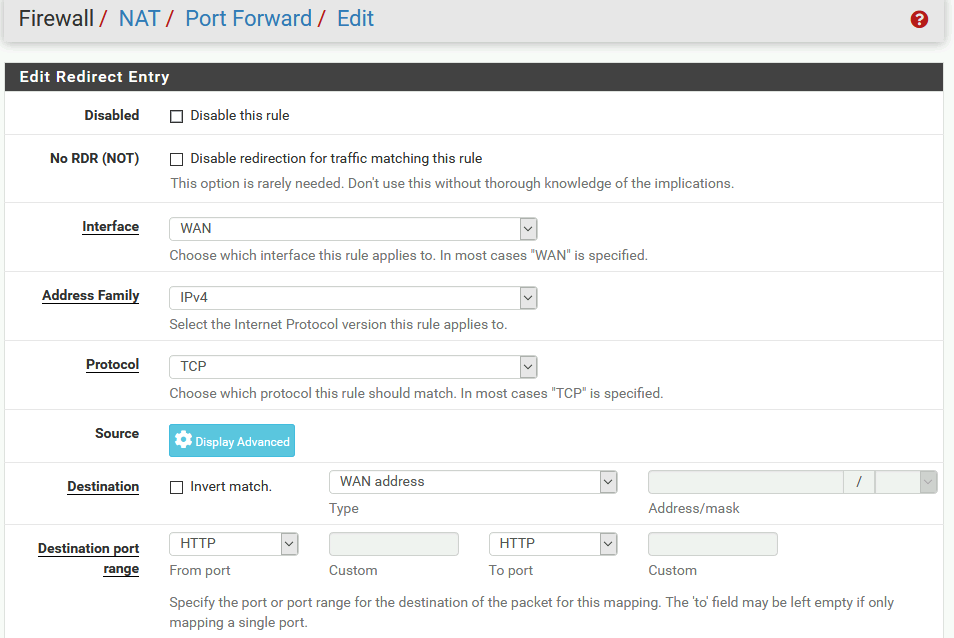
Interface: WAN, Address Family: IPv4, Protocol: TCP, Destination: WAN address, Destination port range: HTTP
We can leave source empty since we want our website to be accessible from entire internet
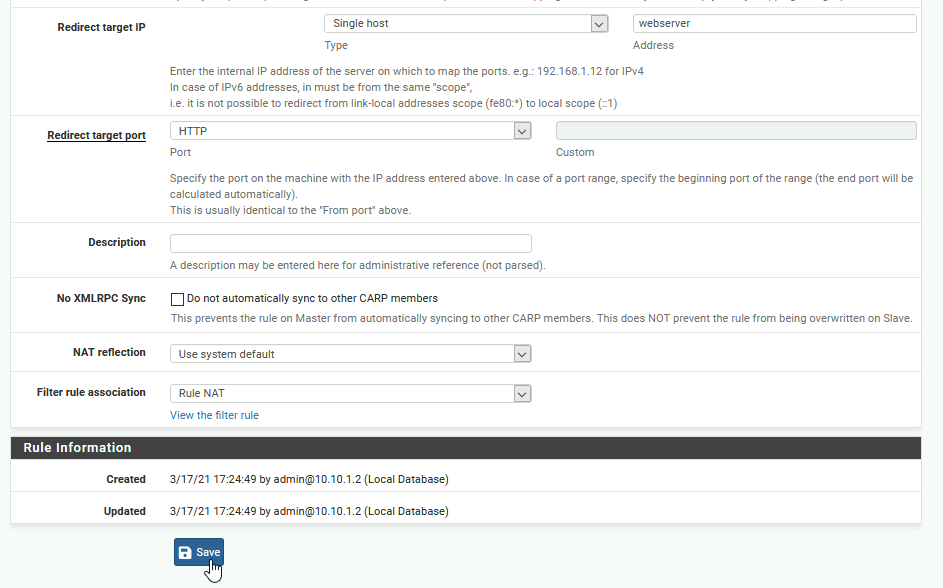
Redirect target IP: Single host, then in the Address filed start typing in webserver (alias name we entered earlier) – it should offer you alias name you entered. Redirect target port: http
I will leave everything else default and Save | Apply
This is how our rule now looks like
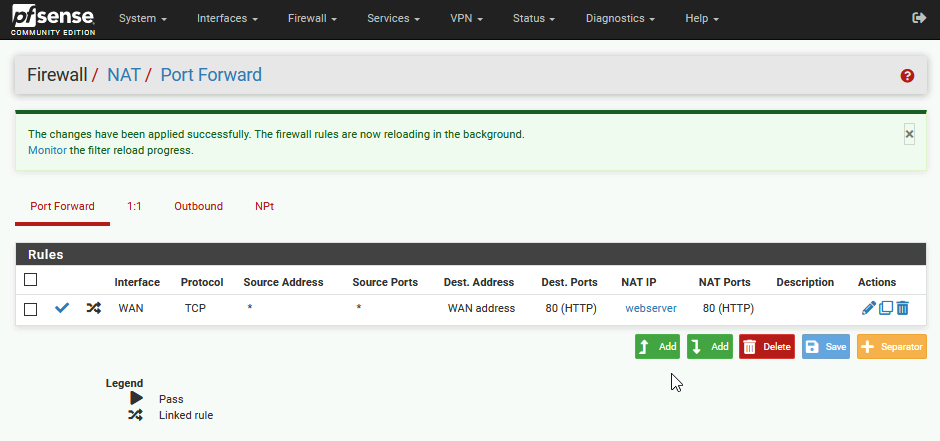
By creating NAT rule for port forward we automatically also created firewall rule for this on WAN interface

With this rule, everything that comes from the internet in search of website (HTTP 80) will be directed to our machine on 10.10.1.2 (webserver). So far, so good.
Let’s check if this now works
It does, my simple web is reachable from the internet!!
That is great.
However there is slight problem. This web page will not be reachable from our LAN network. It will not be reachable because both LAN and DMZ use same public IP in this scenario, so by pointing LAN to the www.informaticar.net/test.htm we are pointing it LAN to the same public IP it is using and it will not work.
So, DC inside LAN is pointing to the firewall after I entered www.informaticar.net/test.htm . It does not what to do.
There are many ways you can resolve this situation – from assigning multiple public IPs, doing all kind of DNS stuff (on pFSense, on machines with hosts files…)
I’m going to resolve this by the method called Split DNS.
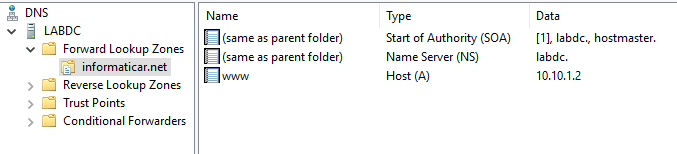
In the LAN network on the LABDC machine I have installed DNS service. Inside DNS server on LABDC I created new Forward Lookup Zone named informaticar.net
Inside that zone I added new A record named www with IP address 10.10.1.2
Also, for this to work, you got to change DNS server setting of the NIC, so now inside my LAN every machine has DNS setting of 192.168.1.2.
Depending on the configuration of the pFSense you have, you will maybe have to open port on LAN firewall rules for DMZ to port 80.
After DNS setting change I was able to reach my web server even from LAN. It may take some time for DNS to catch up, so be patient.
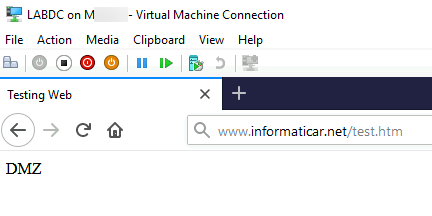
Ok, so we resolved that.
Testing isolation between DMZ and LAN
I will create simple file share on webserver in DMZ so we can test and see how is this working and can DMZ access files in LAN and vice versa…
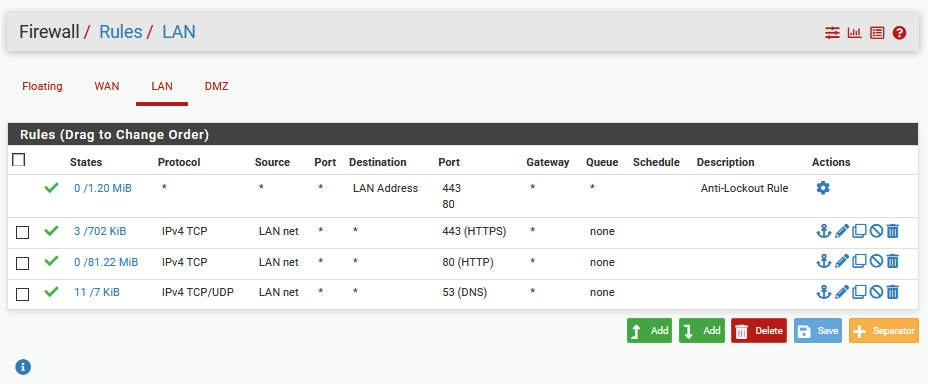
These are mine Firewall Rules
WAN interface

LAN Rules
DMZ Rules
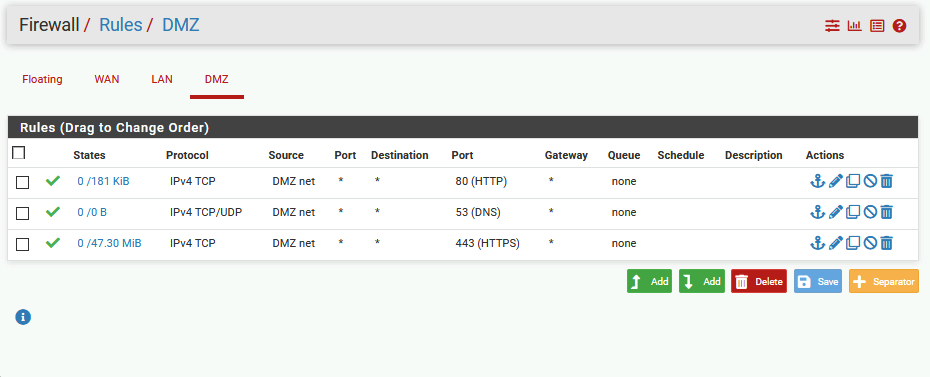
So with these rules, both LAN and DMZ can reach internet, and webserver which is inside DMZ can be reached from the internet.
Also, LAN network is able to connect to HTTP and HTTPS inside DMZ.
In practice and in production systems, this way is a good way, there is not allow all rule, and with this you can easily control what goes between networks.
Ok, let’s open simple file share on DMZ, I will share c:\temp directory.
So share path is \\10.10.1.2\temp
Let’s try and access it from the LAN network.
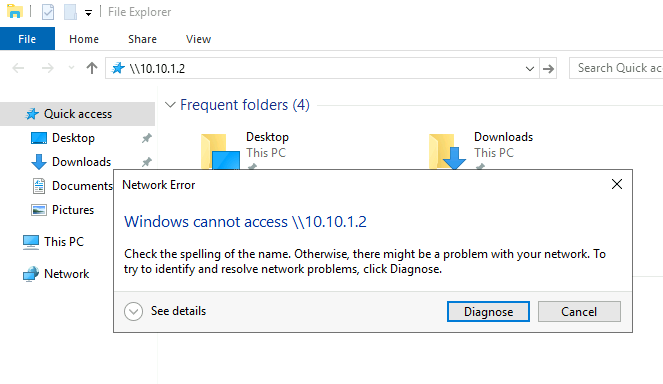
Not accessible – this is good.
Let’s now create two rules on the LAN side of the network.
So, I created two simple rules on the LAN side.
I added rules for port 445 (TCP) and 139 (TCP/UDP) from LAN network to the webserver (10.10.1.2). So this rule will not even work for other machines inside DMZ network. Machines form LAN will be able to access file shares only on webserver (10.10.1.2) inside DMZ

Let’s test it.
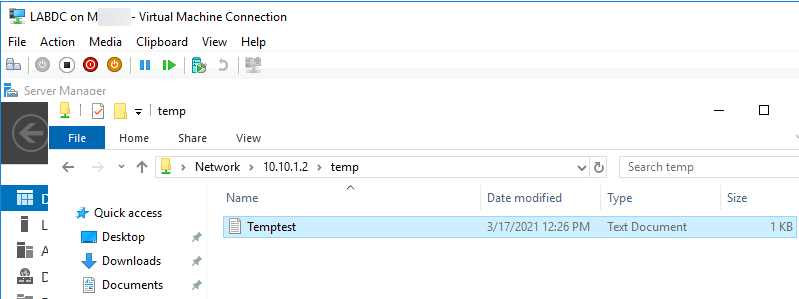
Works! I’m even able to create file, since everyone can write to this file share.
I did this also vice versa. I created shared dir inside LAN on LANDC, and tried to access it from webserver in DMZ – I was not able to.
That file share worked if I accessed it fro mwithin LAN network.
So, that is it. Simple test if your firewall is holding and if you separate traffic good enough between LAN and DMZ.
Because if these two networks can access each other without restrictions, then DMZ does not make sense.
Conclusion
We configured simple DMZ for our web server – it works. We are able to access it from the internet and also from the internal LAN with split DNS. LAN and DMZ are also controlled and separated without possibility to DMZ or LAN network access all resources between each other without configuring proper firewall rules.