I’m in virtualization since Windows Virtual PC, and I really cannot imagine my work without virtualization. VMware and Hyper-V are my go to platforms for many years now, but there is a new sweetheart that I have for some time now, and I’ve been hiding it from you – Proxmox.
There is a lot to like about Proxmox, and it is getting extremely popular in homelabs and enterprises.
I really like it (and use it) a lot, so I was thinking – why not make a series about Proxmox, since Proxmox documentation isn’t always up to its game.
We will start by installing it.
Before we begin
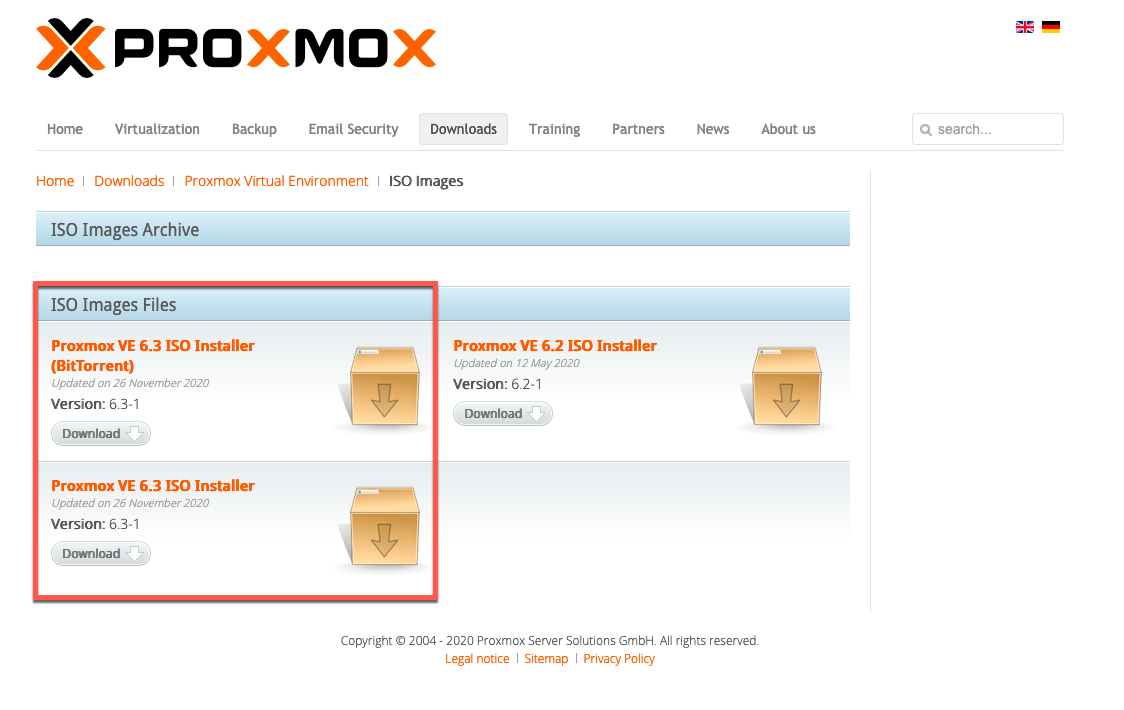
You can get Proxmox VE here – https://www.proxmox.com/en/downloads/category/iso-images-pve
Current version in time of writing this is 6.3-1
Select torrent or direct download and – download it.
Proxmox is Open-Source project and is available completely free for you with full functionality. However, if you work for a company, and can be decision maker – I would suggest to buy support for Proxmox. That way we are helping project to stay alive and advance in the future.
Installing on bare metal (server, desktop)
You will probably install Proxmox on bare-metal, be it server or desktop machine. So, you will need to “burn” iso to USB stick (use Rufus on Windows) and select from the BIOS of the machine to boot from USB drive, and start installation (few steps forward into this guide)
Installing on VM
I will be setting this lab on virtual machine. I will use VMware Fusion, but you can replicate this to VMware Player, Workstation or VirtualBox…
Prerequisites
Bare minimum for Proxmox would be two core CPU, 8GB RAM, 20GB disk drive and one network card.
Of course, that is not enough if you plan to do some testing and practicing on your Proxmox install.
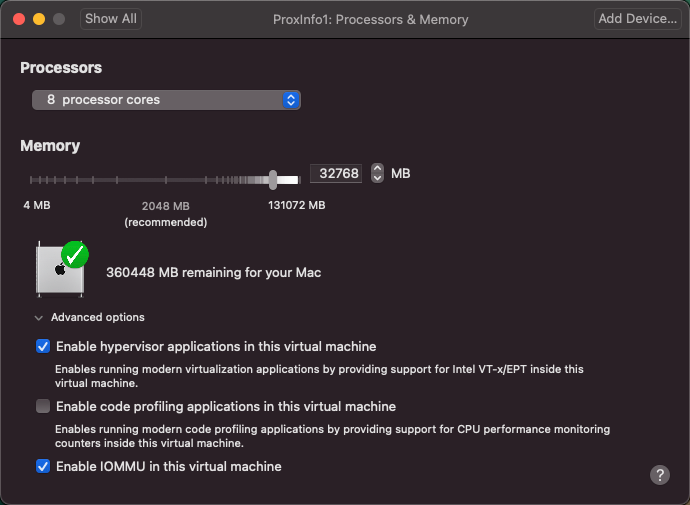
I will be creating Proxmox VM with 8 CPU cores (make 4 a minimum for you), 32GB of RAM (make 16 your minimum) 2 hard drives each 120GB (also, that would be my minimum for disk space) and 2 network interfaces (NICs).
I will name my Proxmox install ProxInfo1 and give it network settings of:
NIC1 : 10.0.0.90
NIC2: for this guide – empty
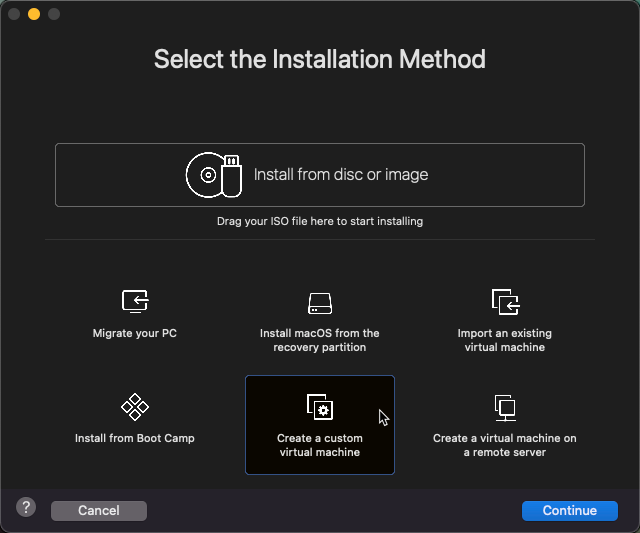
Create a VM
I will create new custom VM
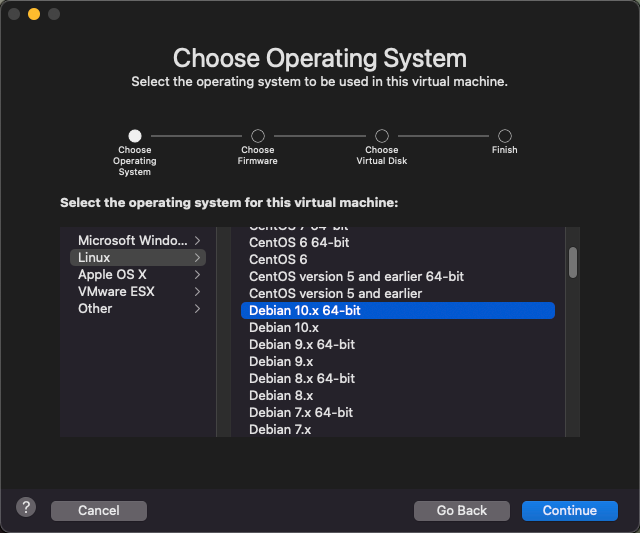
I will select Linux – Debian (x64) | Continue
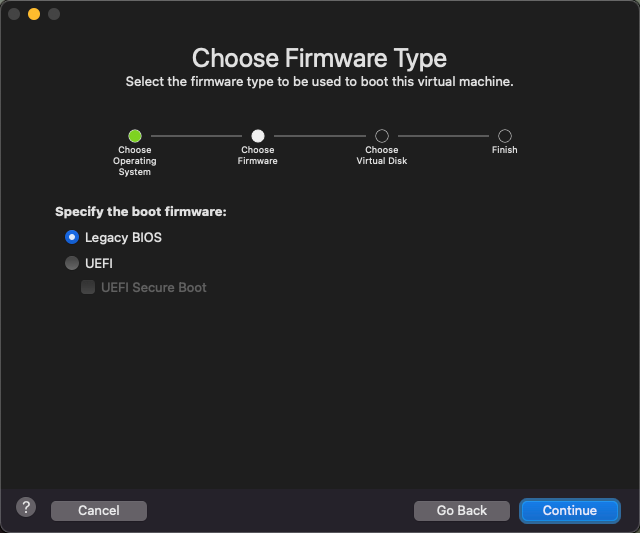
I will select Legacy BIOS (UEFI should also work) | Continue
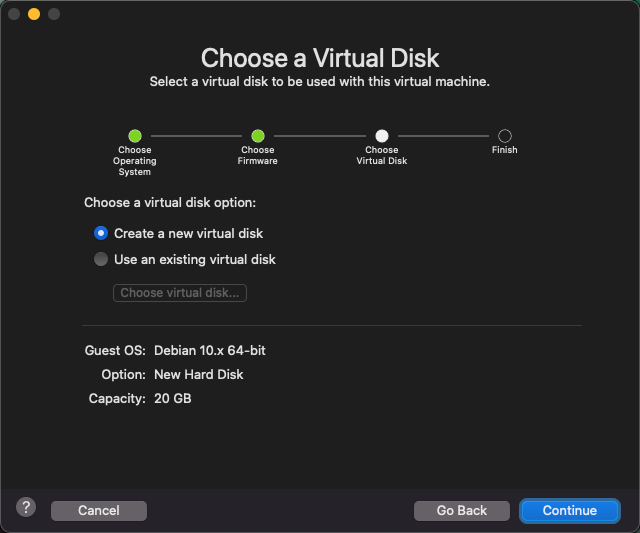
Create a new virtual disk | Continue
Before I click on Finish, I will select “Customize Settings”
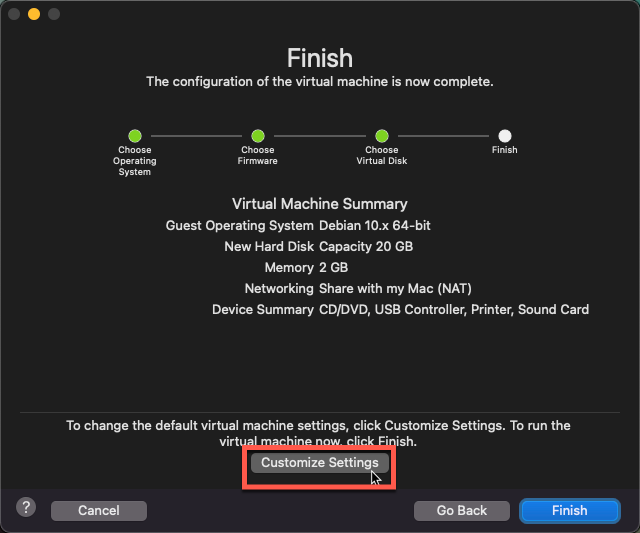
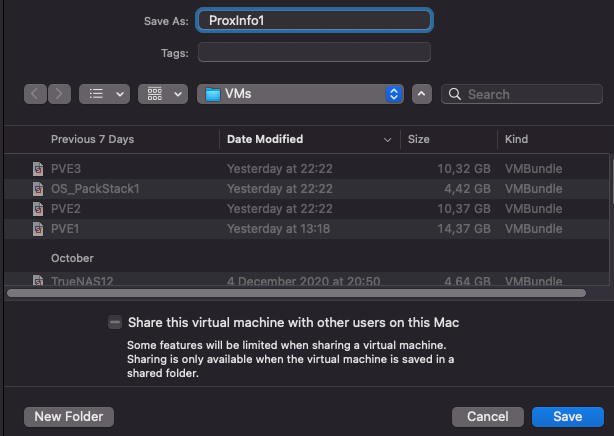
I will save and name that machine ProxInfo1
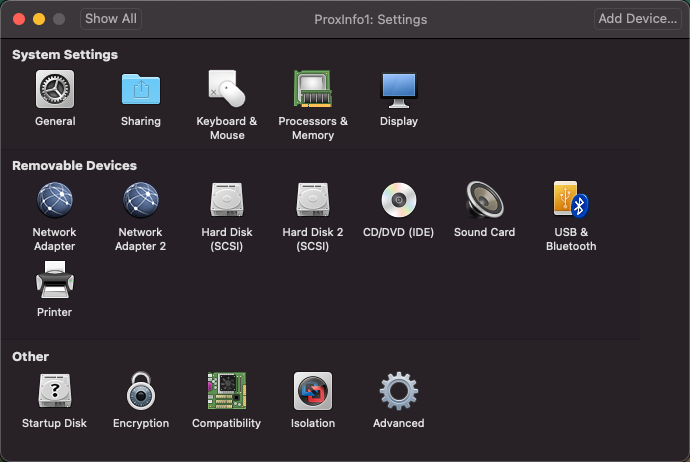
Ok, dialog will Finish, you will get new screen with Settings opened. I will not get through all, just important things
I disconnect immediately Printers, Sound card and also select USB to attach to my Mac, not this VM.
This part is extremely important if you plan to install Proxmox into virtual machine. Youre virtualization software (and CPU) has to support nested virtualization. I set 8 CPU cores, 32GB or ram and selected Enable hypervisor application… and Enable IOMMU…
I also attached two network cards and two hard drives (each 120GB in size)
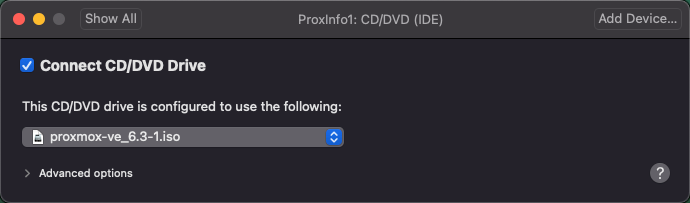
Under CD/DVD I selected downloaded Proxmox ISO image…
And last, but not least, make your CD/DVD drive first boot device for the VM.
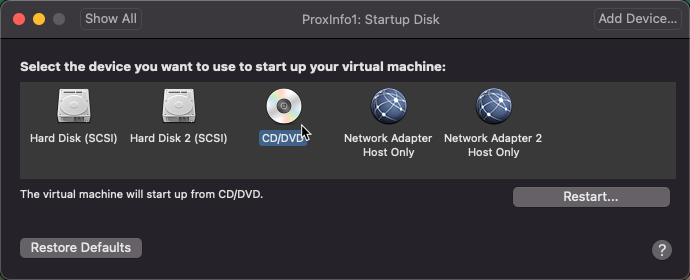
Ok, time to start the machine.

Proxmox installation
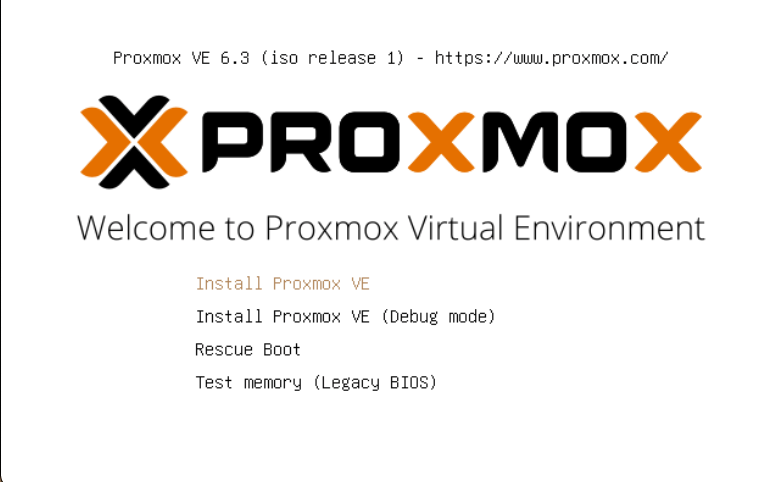
So far, if you done everything correctly, you should be greeted with this screen.
Select Install Proxmox VE
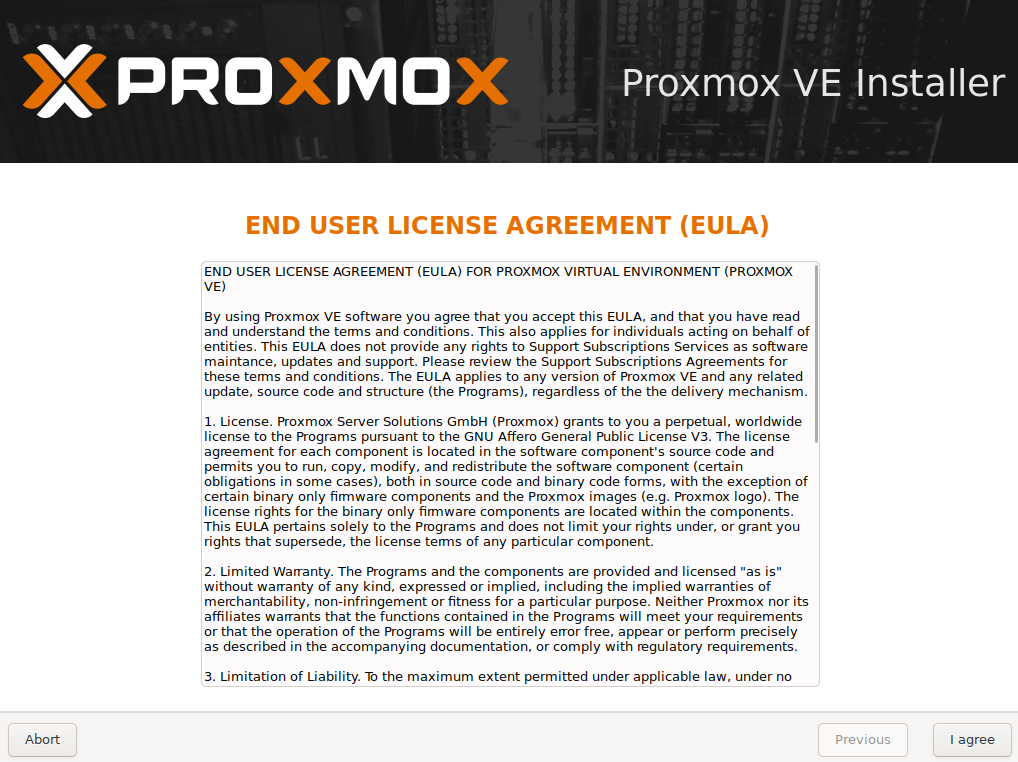
Read license agreement… | I agree
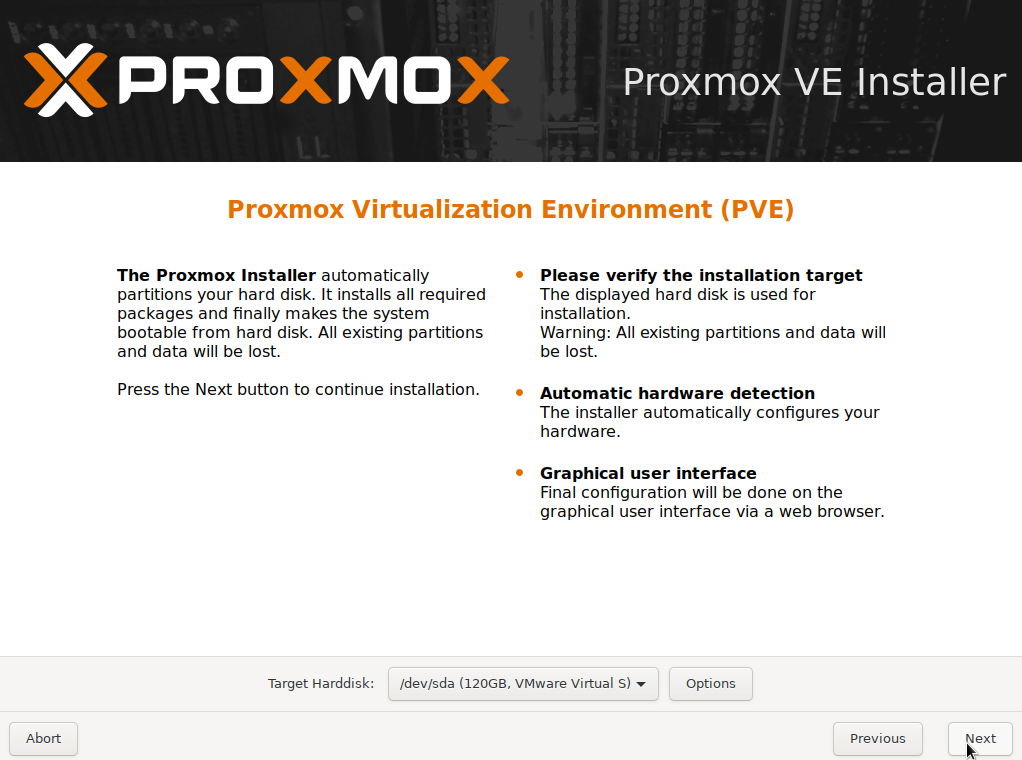
I will install Proxmox on first available disk | Next
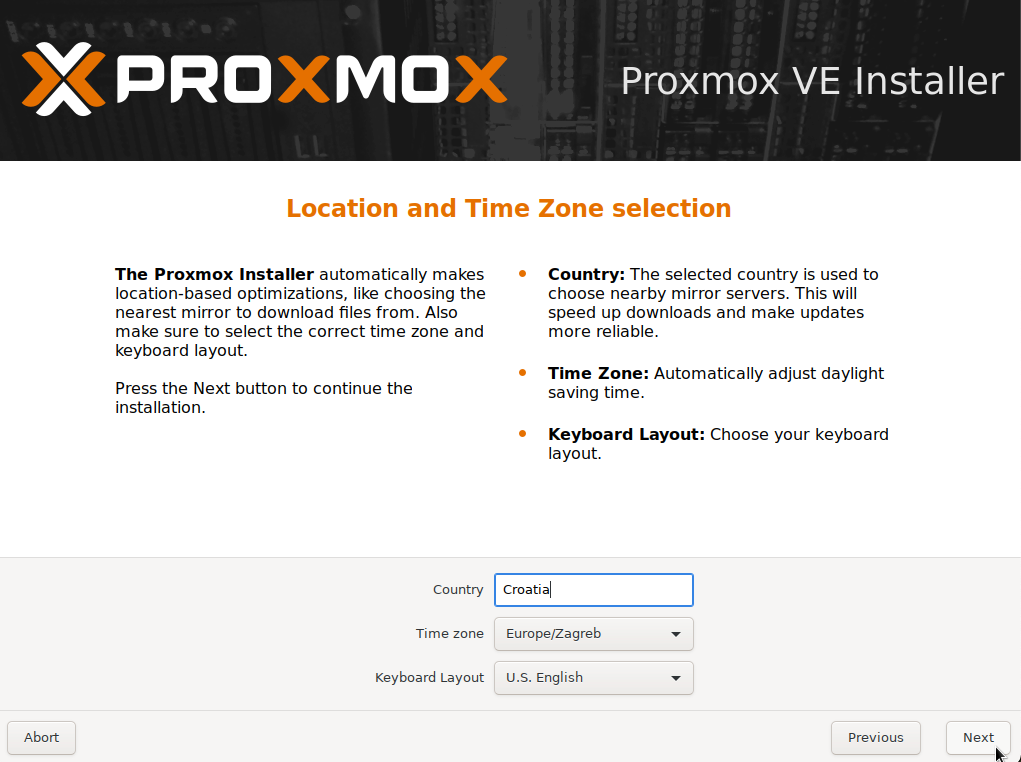
Select Country, time and keyboard layout | Next
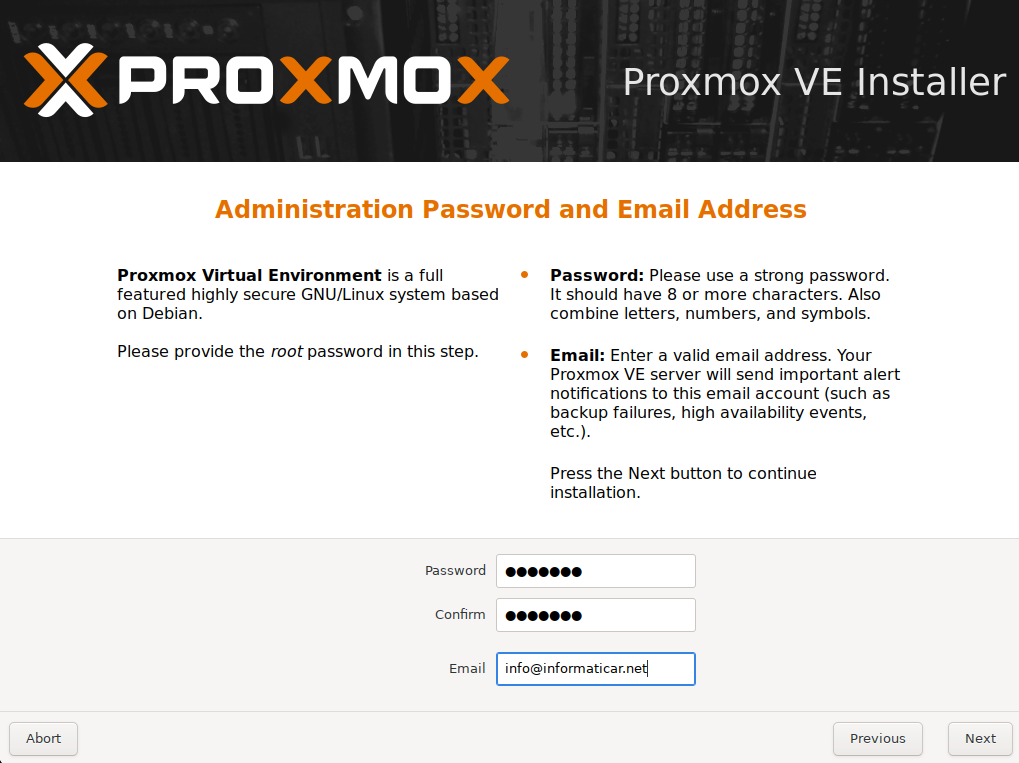
Enter (and remember) password for your Proxmox install. Make sure you have strong, good password. Enter email (it will serve for informational, warning, error messages from your Proxmox install)
Next
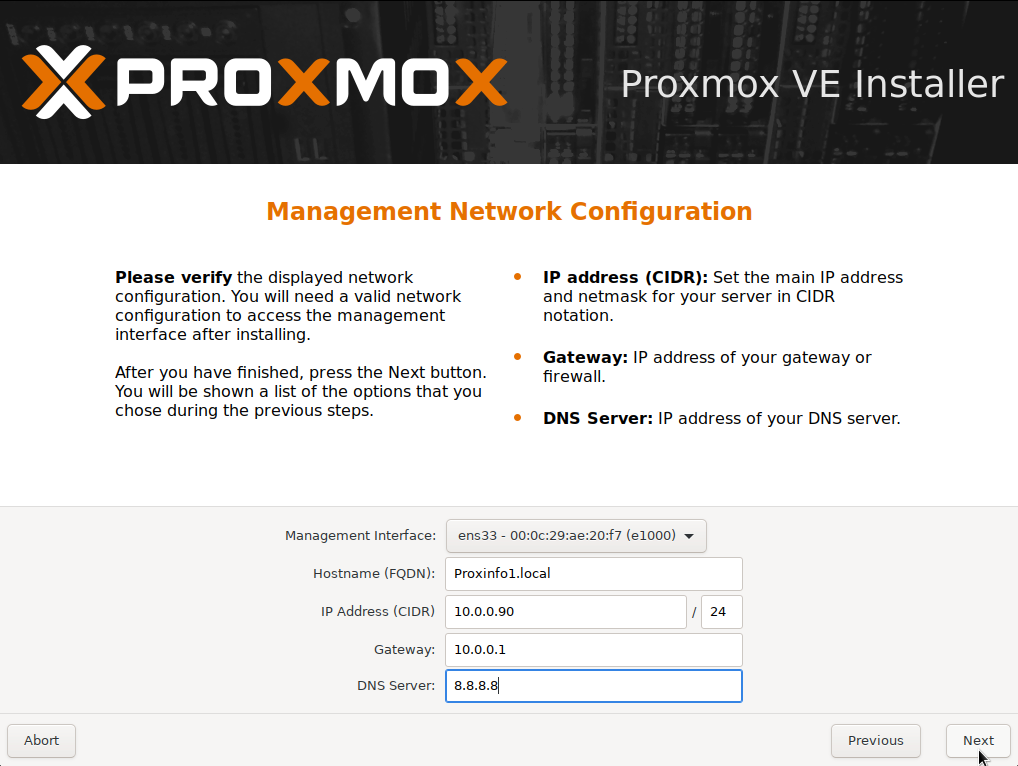
Set name for your Proxmox install – mine will be Proxinfo1.local, and IP settings will be 10.0.0.90/24, with gateway 10.0.0.1 and DNS 8.8.8.8
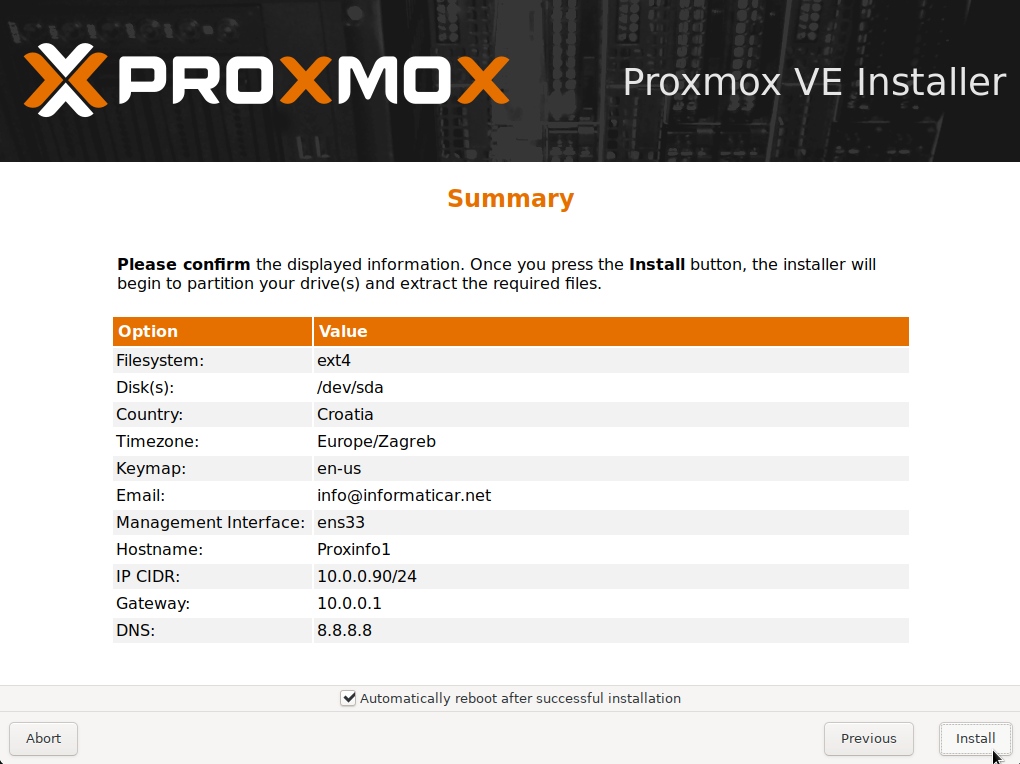
Check your settings, if everything is fine, select Install
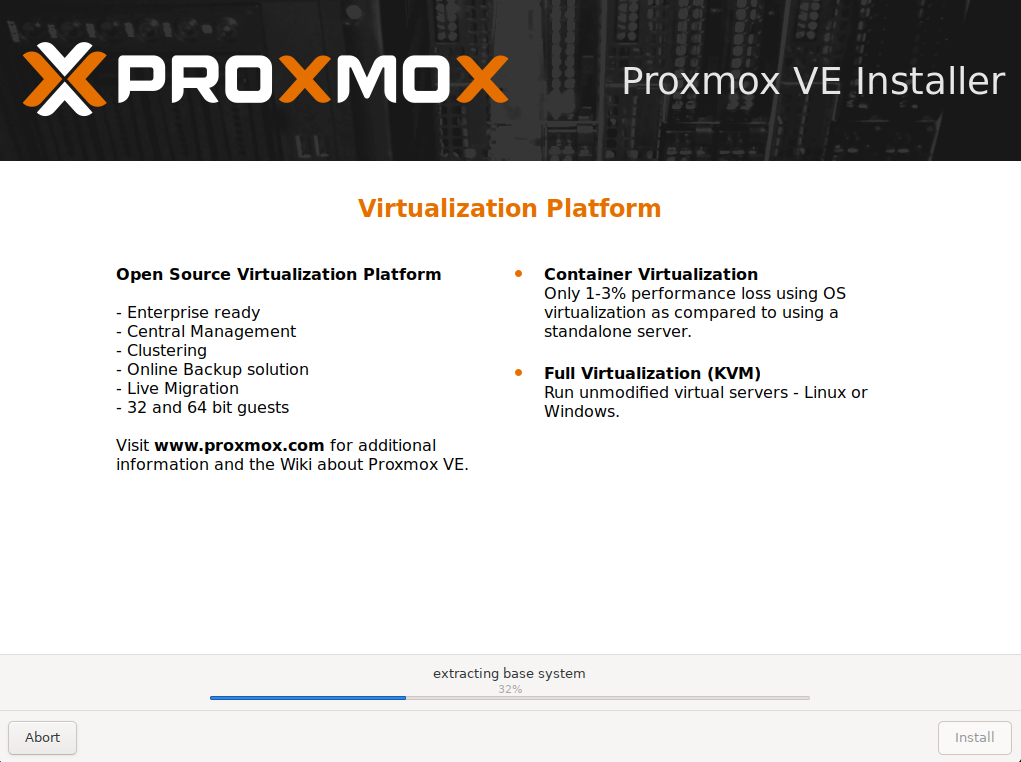
Wait a little bit…
After process finishes, machine will reboot (make sure you remove CD/DVD drive or usb)
And the next screen you will be greeted with is this one:
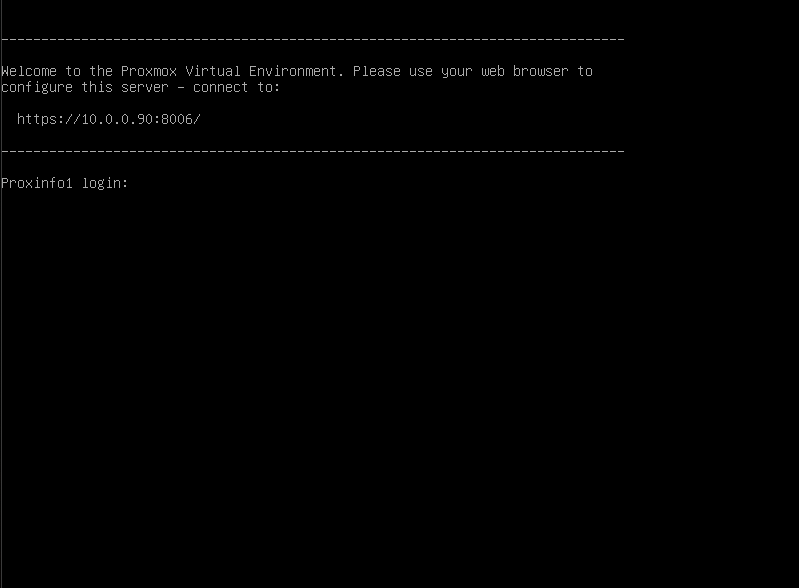
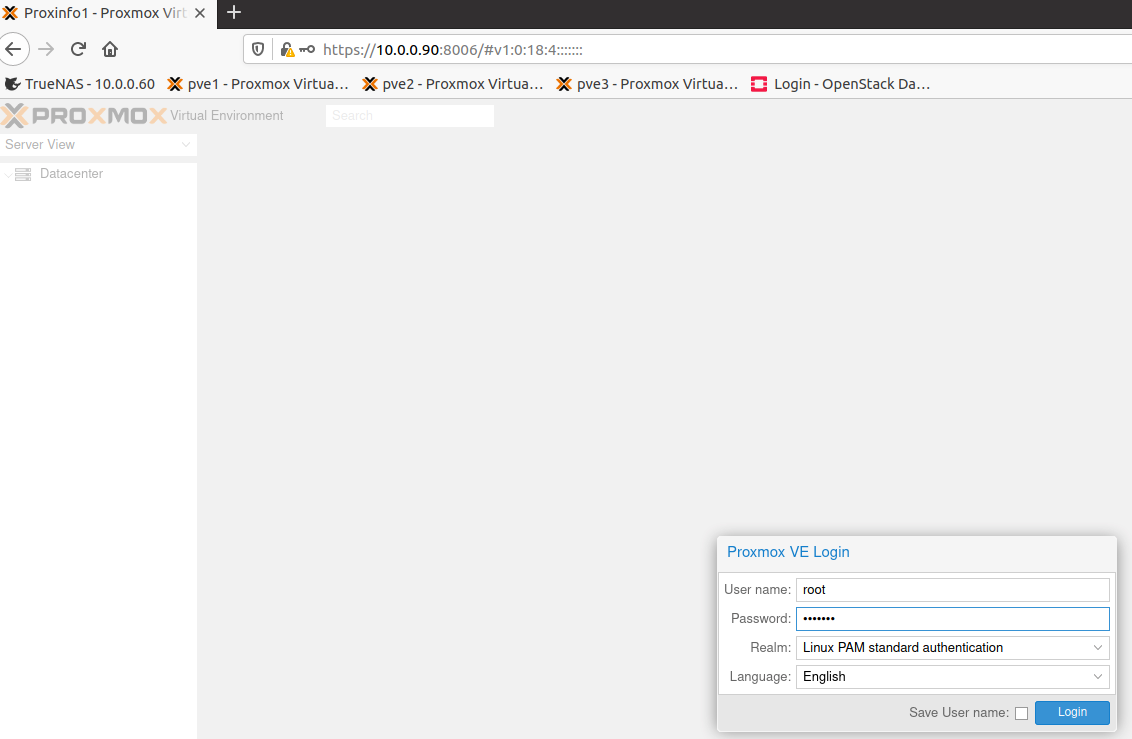
Go to the client machine you have in the same network and enter into browser IP of your Proxmox installation
https://10.0.0.90:8006
User: root
Password is the one you defined during setup…
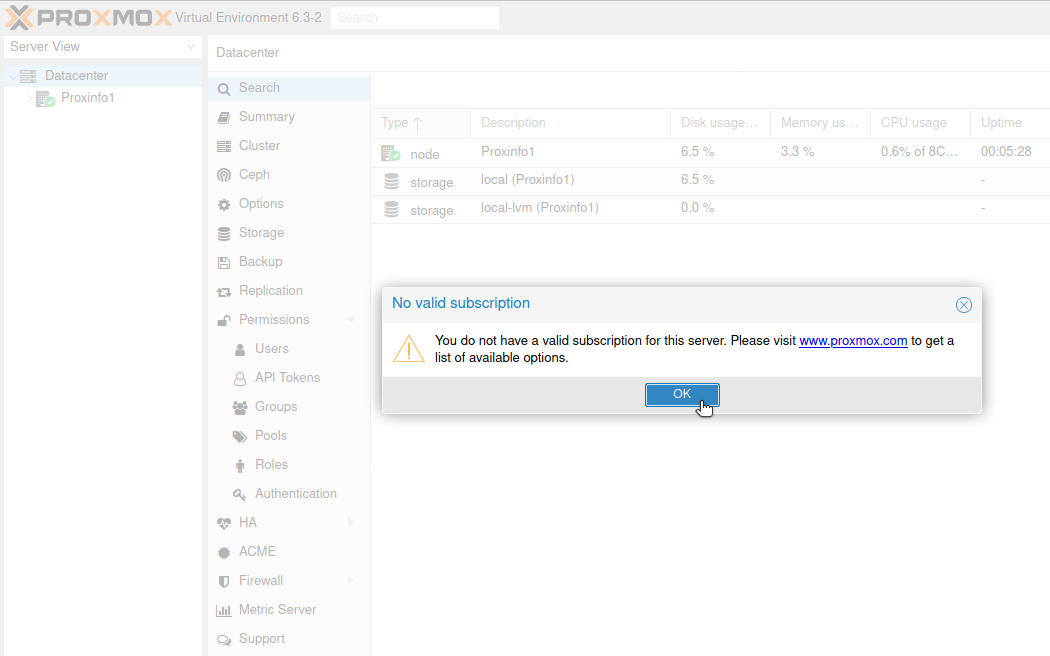
You will be warned that you don’t have a subscription | OK
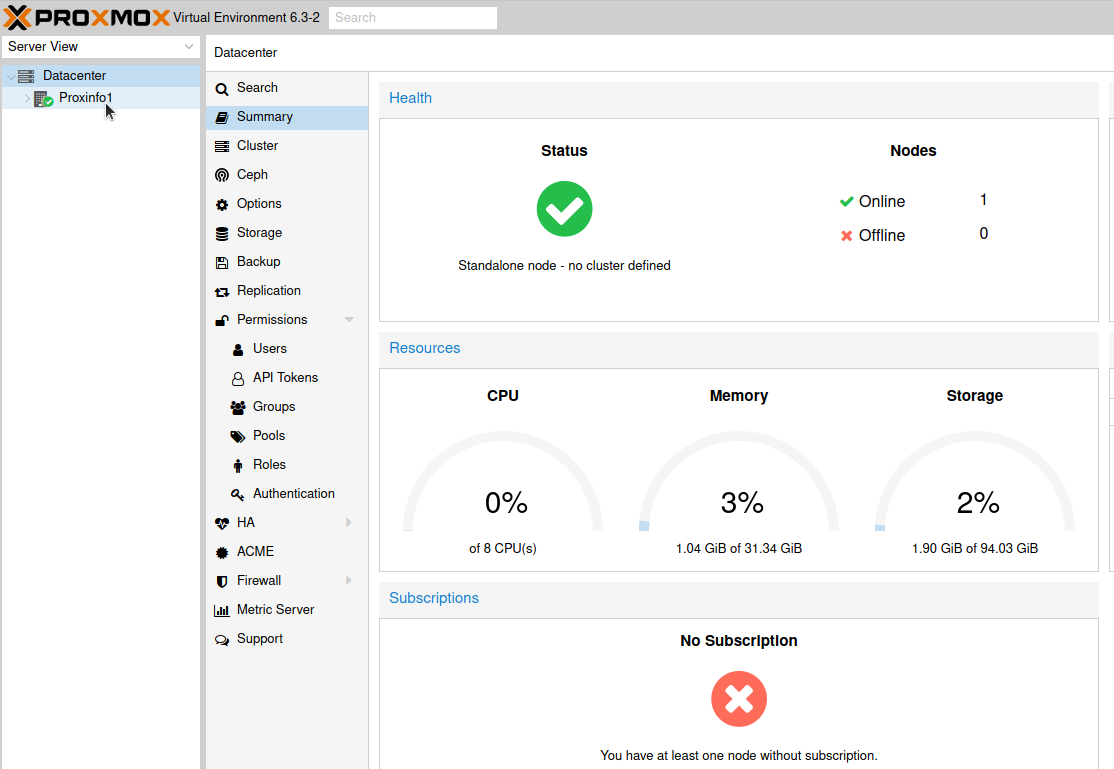
Congrats, we have installed Proxmox virtualization platform.
Conclusion
That was it, simple and easy, new hypervisor is up.