Ok, so in my previous guide we made Exchange OWA/Autodiscovery highly available via ARR which is module inside IIS. We installed ARR inside separate VM in DMZ and everything is working nice. But, now we have machine with IIS and ARR on it as single point of failure. We now need to make our IIS highly available, so if we need to for example apply patches to it, our Exchange services don’t go down.
Before we begin
This guide assumes you followed my previous guides on Exchange, so you can make sense of this. I already installed two instances of Exchange server with the DAG enabled. These two machines have their client services (owa, activesync, autodiscover…) handled via additional machine with only IIS and ARR installed. That way when one Exchange node goes down, clients can still access Exchange services.
Now, we have another problem, we have two Exchange machines which are highly available, but access to them is done through only one machine (ARR) and that is now our single point of failure.
In this guide we are going to add another ARR machine into play to make this service highly available.
We are going to do IIS high availability with IIS shared configuration and Network Load Balancing. This is the way Microsoft prefers it to be done.
Before you go any further, check that your network equipment works with Microsoft Network Load Balancing.
Network setup
Lab is setup the following way. I have LAN and DMZ networks in my Exchange LAB.
LAN setup
Domain controller – DC1 – 10.0.0.31
Exchange server 1 – SBEX1 – 10.0.0.36
Exchange server 2 – SBEX3 – 10.0.0.37
SBEX1 and SBEX3 have DAG established with DB1 in DAG. All machines are part of the domain informatiker.local.
DMZ setup
edge role server – edge – 192.168.50.3
Edge role is not mandatory, but if I can, I will set it up. I have firewalls in place and edge role is in charge for my mailflow. I also covered this in my previous Exchange guide. Edge role is not mandatory and needed for this guide.
IIS machine ARR1 – 192.168.50.6
Machine that acts like reverse proxy for SBEX1 and SBEX3 and makes sure owa/autodiscover inquiries get to the one of the Exchange nodes, which ever is up and running.
Both of these machines are not inside domain.
Prerequisites
Create ARR2 VM
We need to bring up one more virtual machine (ARR2 – Windows Server 2019) into our DMZ environment. On that new machine we need to install IIS role and ARR module (follow my previous guide on IIS ARR). Follow that guide until installation part (including installation part, we need ARR installed).
ARR2 – 192.168.50.7
That machine is also not going to be in domain.
Install Network Role Balancing Feature
On both existing and new ARR machine install Network Load Balancing Feature
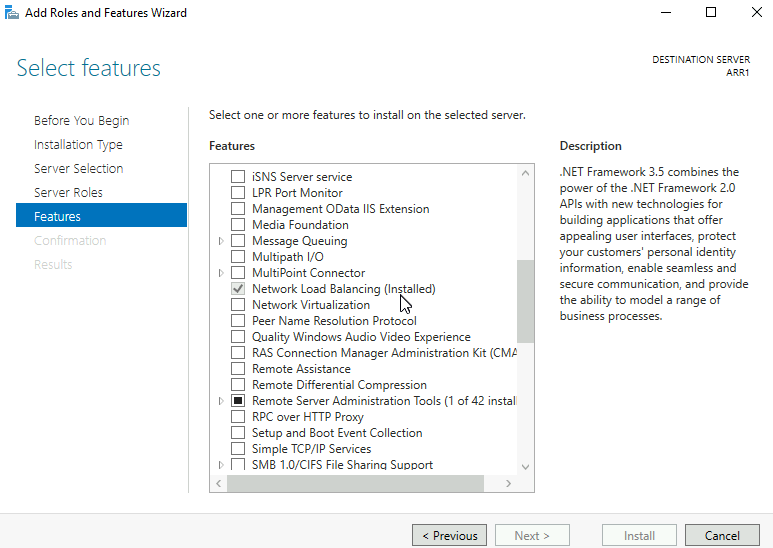
Network Load Balancing will have virtual IP 192.168.50.8
We are going to do this scenario with only one network adapter for both ARR1 and ARR2 VM.
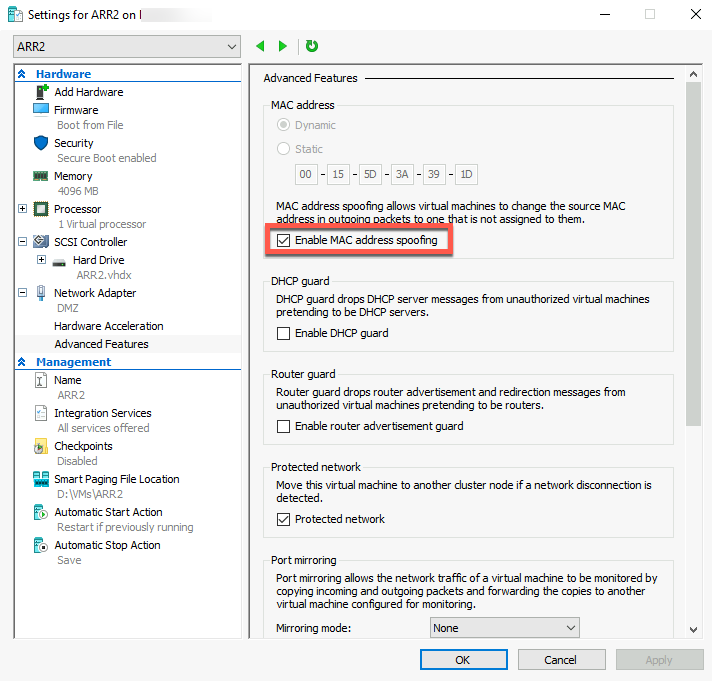
Hyper-V setup
For both VMs – ARR1 and newly created ARR2 go to the Settings of the VM, to the Network Adapter | Advanced Features and click on Enable MAC address spoofing. It will be needed for Microsoft Load Balancing.
Create user and fileshare on the third machine inside DMZ (not on ARR1 or ARR2)
On the third machine, it can be part of your DMZ or LAN if you wish to allow access to LAN, we need to create one file share for our ARR1 and ARR2 VMs.
I’m going to place that file share on my edge role machine (192.168.50.3) for the purpose of this LAB. I would not advise putting this file share on anything that has to do with Exchange server – build special machine for this – Why? Becuase, you will let’s say patch your edge role server (on which my file share currently is) and reboot it – catastrophe will ensue, your owa, activesync and other services will stop working because they will not be able to find config files on file share!
On the role edge machine I created fileshare on C:\ named IISShare
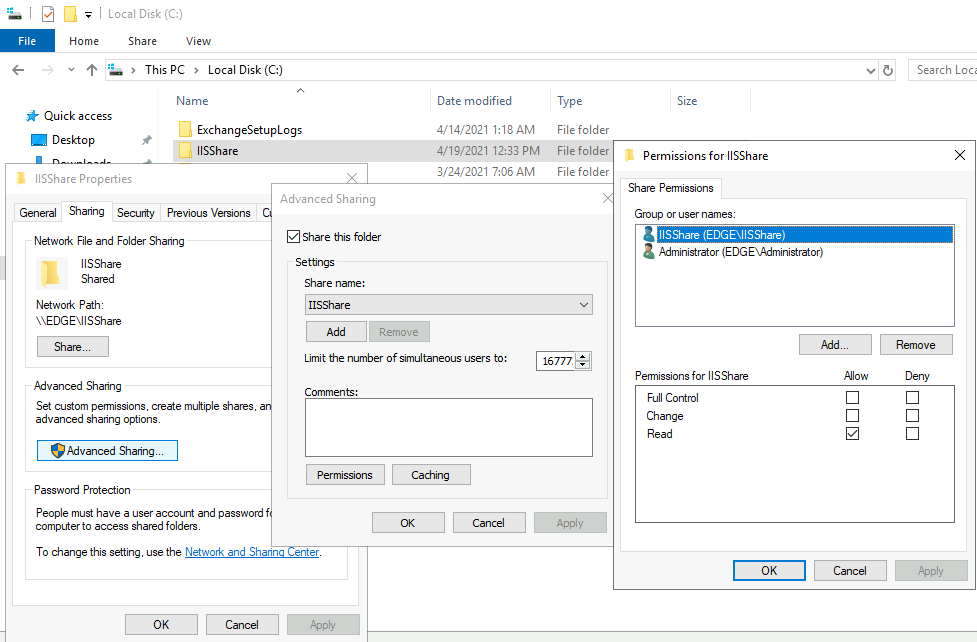
I created user IISShare user on edge, ARR1 and ARR2 VM.
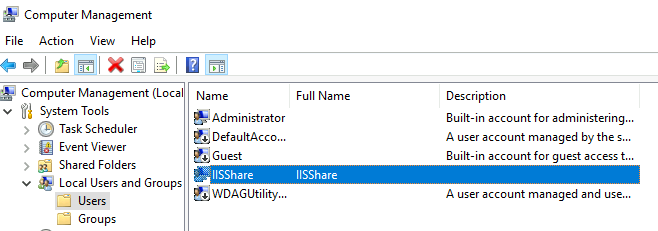
User has to be named exactly the same on all three machines with the same password, so that these machines can access created IISShare folder on edge role machine.
I gave read right to the IISShare user to the IISShare folder.
All of this can also be done in domain, you can create domain user and make everything work. I have DMZ setup without domain, so that is the way I’m going with this.
Create IIS Shared Configuration
This will be the first concrete step. This step assumes you have ARR1 machine completely set with Server Farm and Rewrite Rules inside IIS.
ARR1 machine (existing machine with config on it)
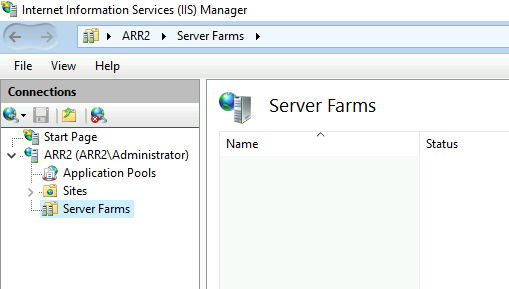
ARR2 machine should have installed IIS role and ARR module without any configuration on it.
We are going to start this process on ARR1 since that is the machine from which we need IIS configuration.
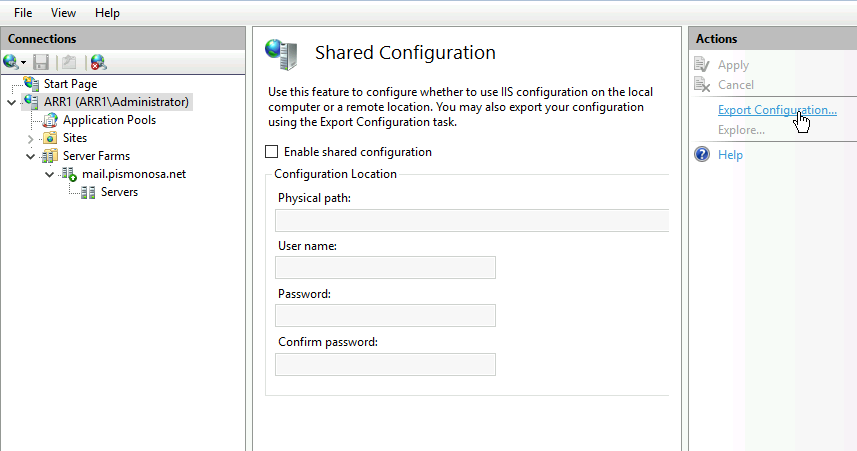
Click on Server name in IIS and select Shared Configuration from middle menu
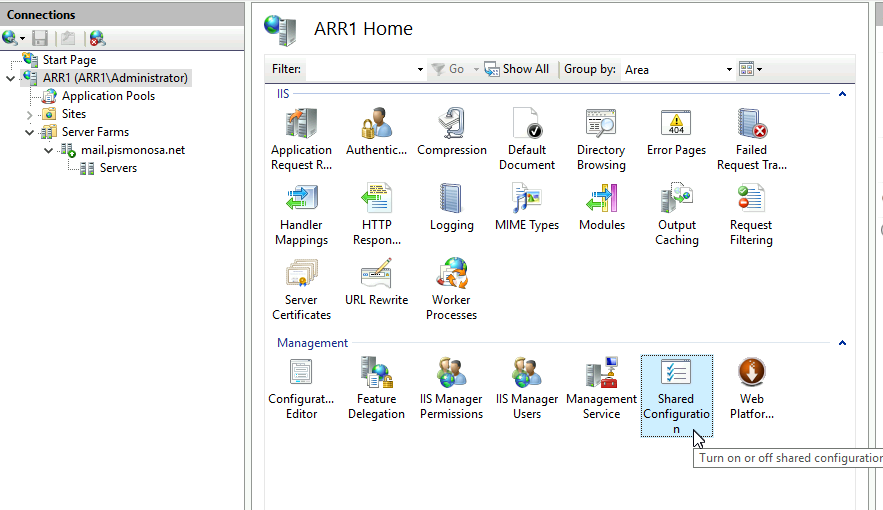
Select Export Configuration
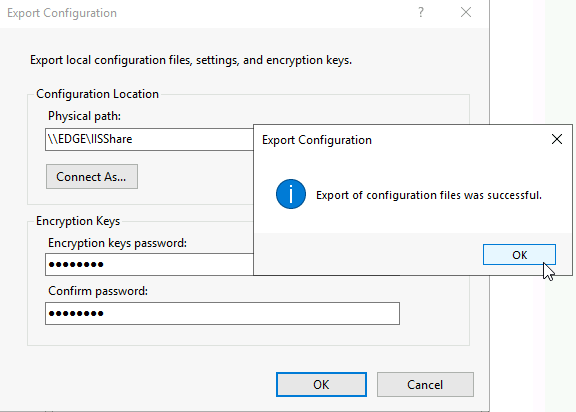
Under physical path, I selected fileshare we created earlier (IISShare) on edge VM (192.168.50.3). I also clicked on Connect As… and selected Administrator user (not IISShare user) and entered password for the administrator user. Under Encryption Keys, enter strong password and WRITE IT DOWN and REMEMBER it! OK

I done everything ok, and export was success.
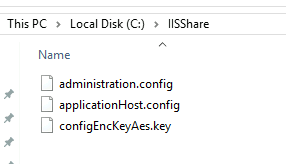
If I check into created IISShare folder, I can see that there are three files in it, so that is great.
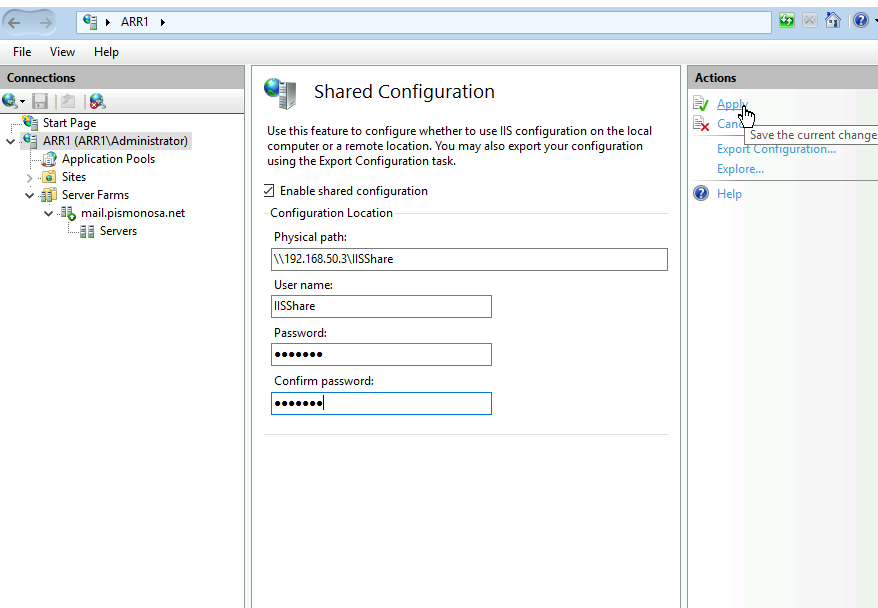
We are still in Shared Configuration menu on IIS on ARR1 machine.
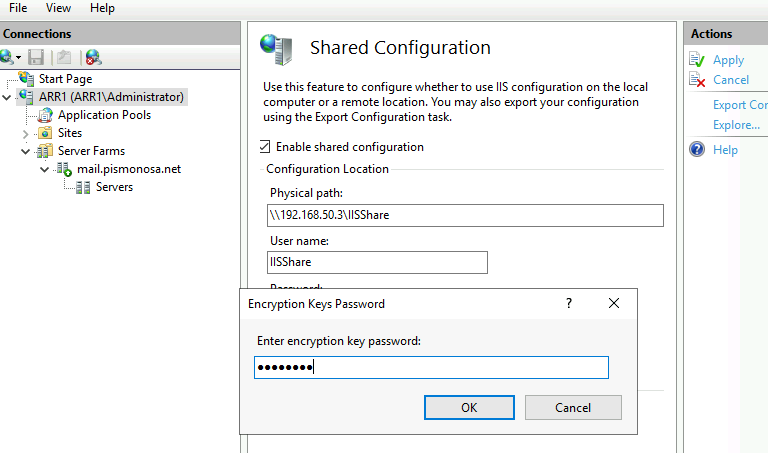
We are going to click in Enable shared configuration. Inside physical path, I’m going to type in address of the my fileshare where my IIS config files are – \\192.168.50.3\IISShare.
Here you will have to enter IP address for file share, name in my experience does not work and results in error be it inside or outside domain.
For username, I’m going to enter username and password of the user we specially created for this – IISShare user. Remember, if you are doing this on a system that has no domain, you need to create this user on all three machines. (If we were to do this with domain system we would then enter username as informatiker\iisshare – informatiker being name of my domain).
Apply
You will again be asked for encryption key you defined earlier – enter it.
Make sure you read the dialog and then click OK
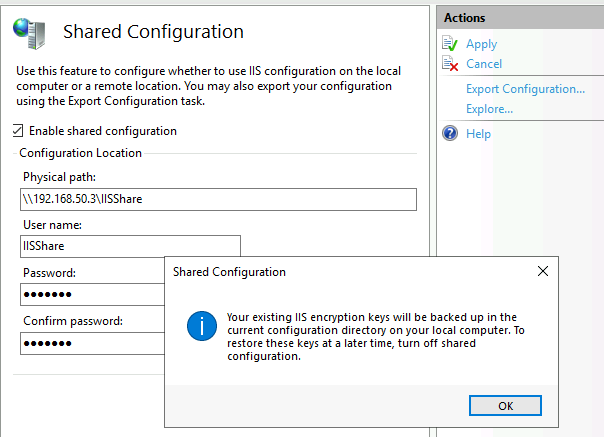
Success. Restart IIS for this too take effect. I’m going to reboot ARR1 VM.

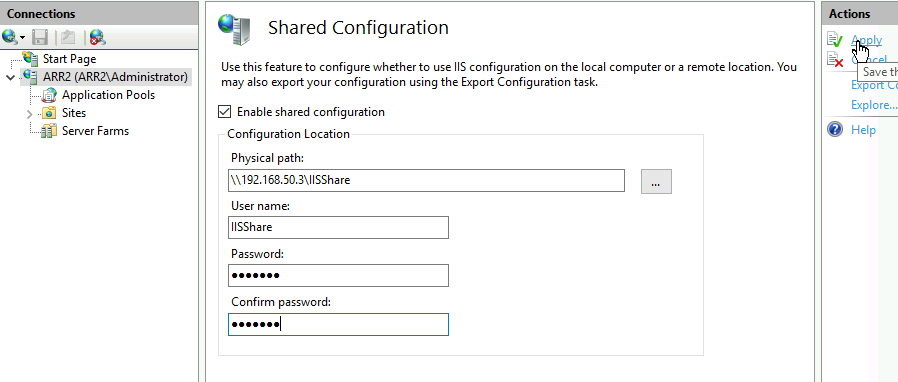
ARR2 machine (new machine).
Now that we are done with ARR1 machine, we are going to go to the ARR2 machine.
We don’t need to export configuration i ncase of ARR2 because it is blank machine. We only need to enable shared configuration.
Enable shared configuration and repeat the rest of this procedure the same way you did on ARR1
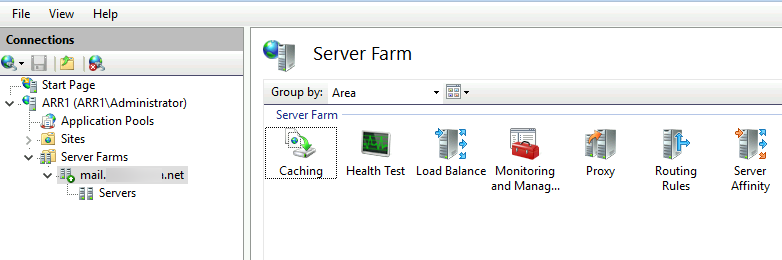
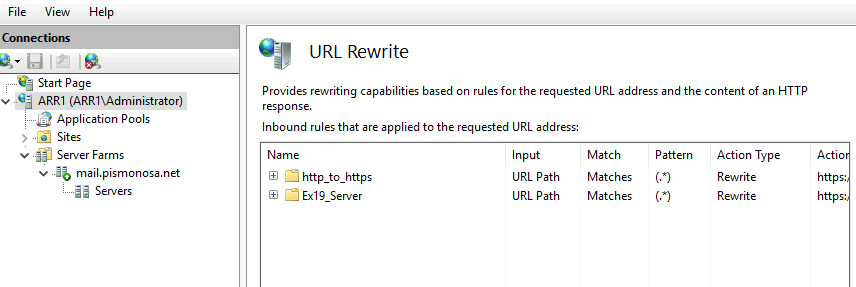
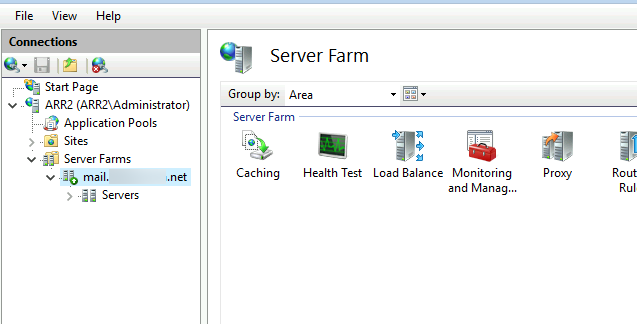
So, after I rebooted ARR2 machine and opened IIS second time, my Server Farm from ARR1 and URL Rewrite rules were there. Great!
Ok, so now we have identical IIS ARR configuration on two IIS machines. But, ARR1 has internal IP of 192.168.50.6 and ARR2 has internal IP of 192.168.50.7.
I only have one public IP which is currently NATed to ARR1. SO, still, if I shut down, or reboot ARR1, my Exchange client services will become unavailable.
Yes, and this is where we need next step of this puzzle – Network Load Balancing.
Network Load Balancing
We already done some preparations in prerequisites part for this.
You can do this scenario by assigning two network cards to your VMs, I’m going to do this with only one NIC per VM. If you are doing this in Hyper-V make sure you enable MAC spoofing for your VMs.
If you wish to do this on some other hypervisor, check if Microsoft Network Load Balancing works on it, and are they maybe some other prerequisites.
Also, check you switches if you are doing this in some other scenario, and last of all, check if your router/firewall handles well Microsoft Network Load Balancing.
Not all network equipment plays well with Network Load Balancing provided by Microsoft.
Ok, now that this into is out of the way, let’s get to business.
We are going to “bond” ARR1 (192.168.50.6) and ARR2 (192.168.50.7) into one virtual IP (in my case 192.168.50.8) which is hanled by Network Load Balancer installed on both of these VMs.
192.168.50.8 is IP address I’m going to present to my router/firewall and NAT my traffic for the Exchange services to.
Lets, start.
We are going to make Active-Passive scenario here.
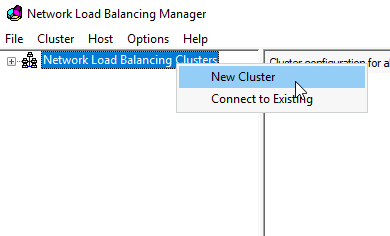
Open Network Load Balancing Manager on ARR1 VM.
Right click on Network Load Balancing Clusters and select “New Cluster”
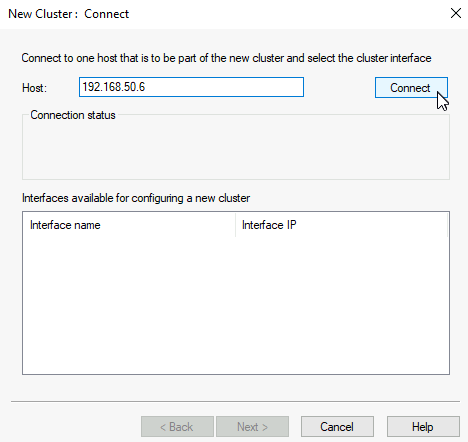
Under host I’m going to enter IP of ARR1 and select Connect
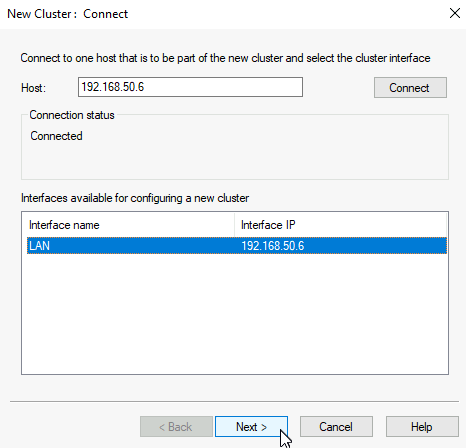
All is ok, I managed to connect. Next
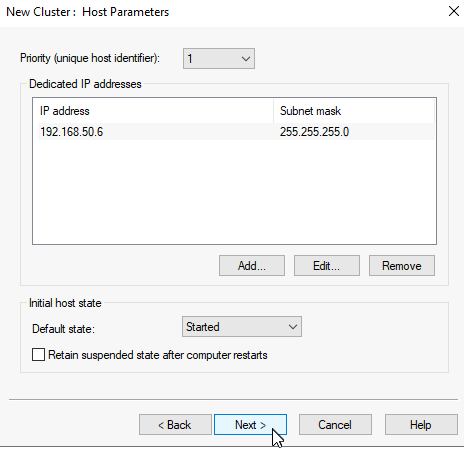
Priority of this node is 1, Next
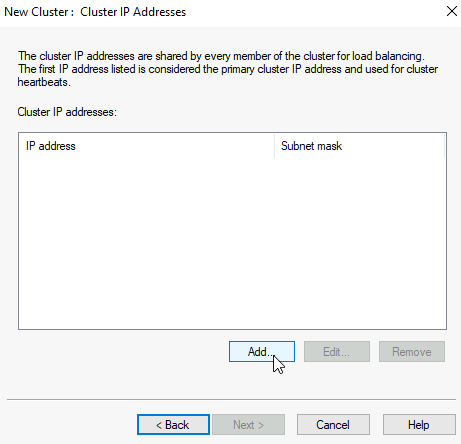
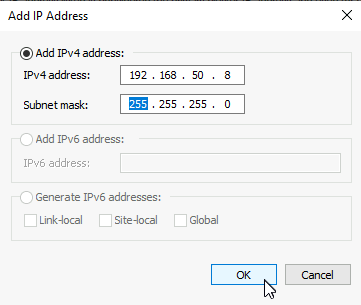
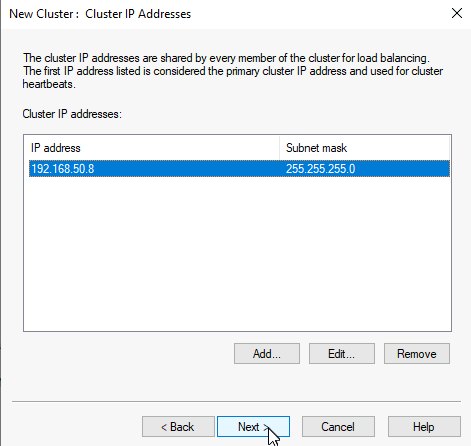
On next screen we are going to create cluster IP. Click on Add, define IP for the cluster (mine is 192.168.50.8), confirm it, and select Next
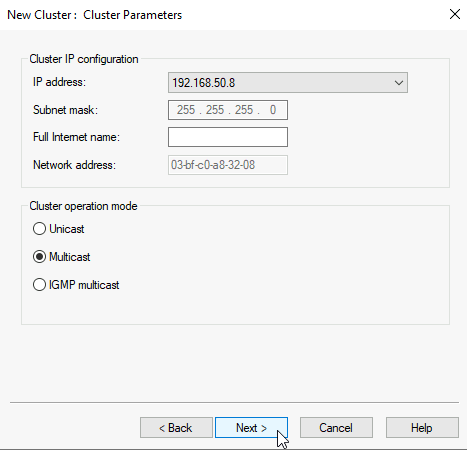
Network Load Balancing Manager won’t play nice with Unicast setting, especially if you have only one NIC per VM. Select Multicast. This is the place where you also should make some considerations if you are using Network Load Balancer connected to physical switches. Next
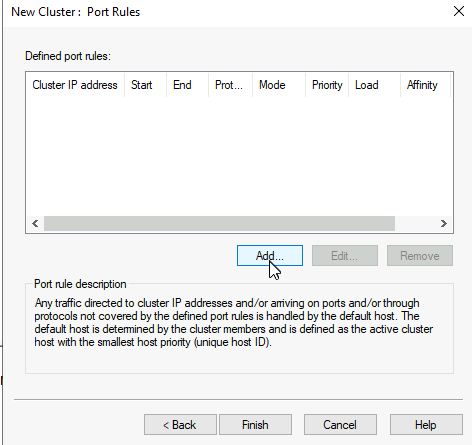
On the last screen you will be offered with default port rule. I’m going to delete default port rule and add a new one
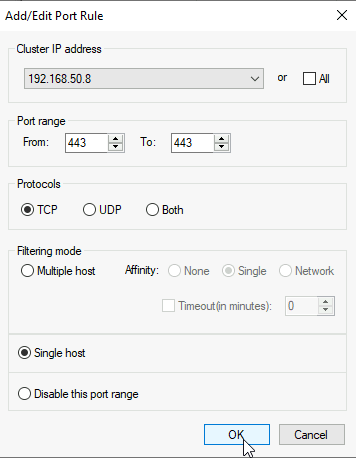
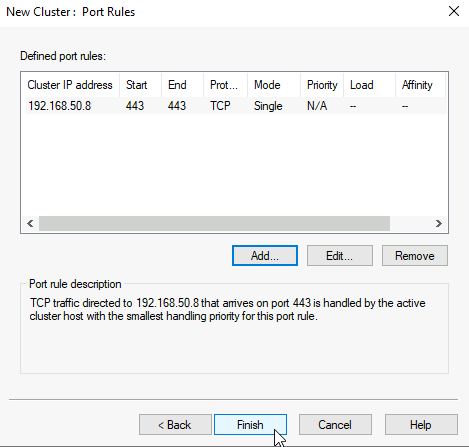
I will define it to use Cluster IP address, port range of only just 443/TCP, and as Single host (Active – Passive mode)
OK
Finish
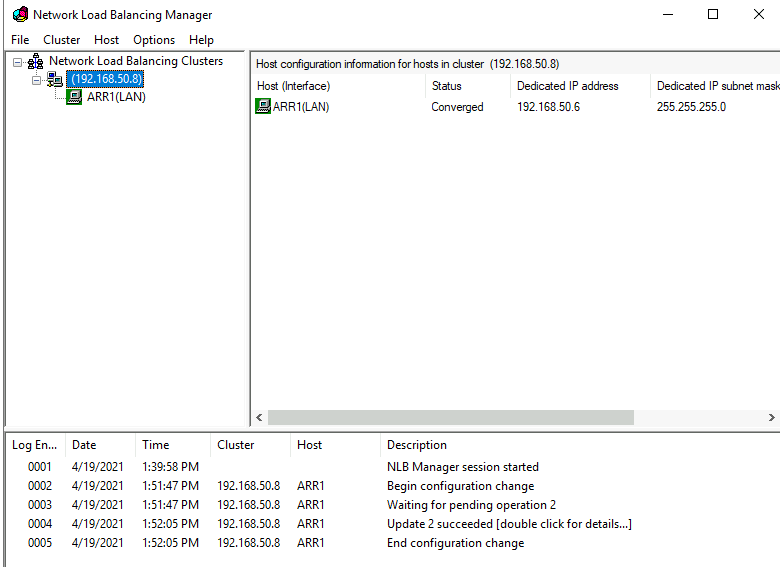
Ok, cluster is created and ARR1 is green and has converged status.
Add ARR2 to Cluster
We will now add ARR2 (192.168.50.7)
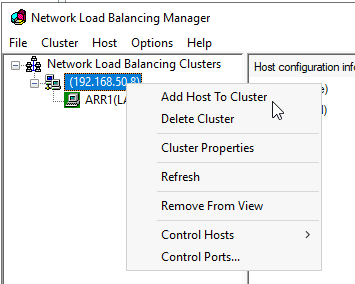
On ARR1 inside Network Load Balancing Manager right click on created cluster, and select Add Host To Cluster
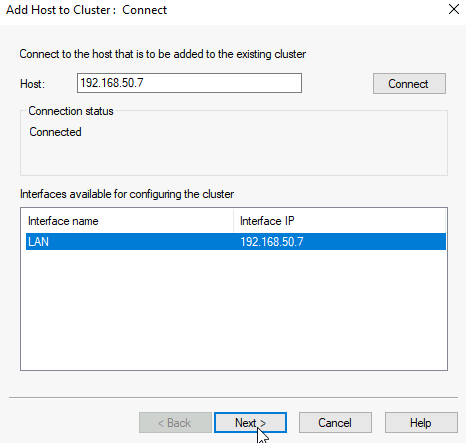
This time we will enter ARR2 IP address – 192.168.50.7 and connect to it. Next (on this screen in couple of setups I got authentication pop-up and access is denied error even after I entered account with administrative rights – this was in workgroup environment where I would use let’s say “InfoAdmin” account as main administrator. I just could not add second node. Only after I enabled built-in administrator and logged in with it – it worked.)
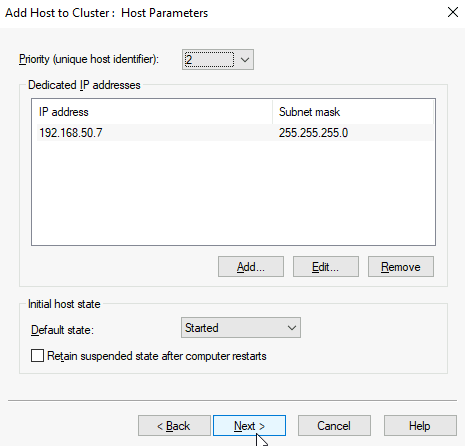
Leave everything as is – Next
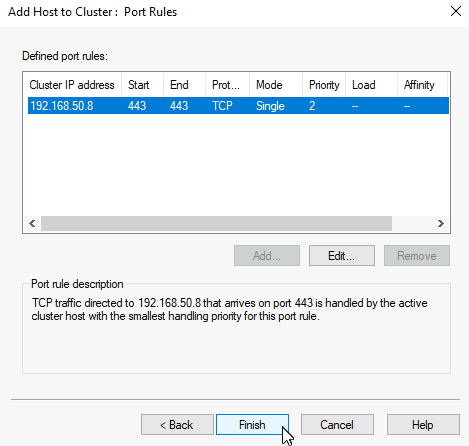
Leave everything as is. Finish
If everything is ok, you should now have both machines in cluster
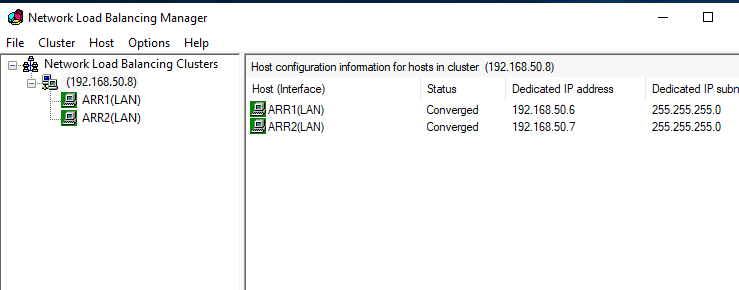
Now, after this is done – reboot both machines, first one, then another.
Ok, we have now set Network Load Balancing Cluster
Network/Router setup
In this part I can only show you what I have for this LAB, your network setup of course may vary, so you should find solution for your situation. My setup is perhaps going to give you a clue what or where to look.
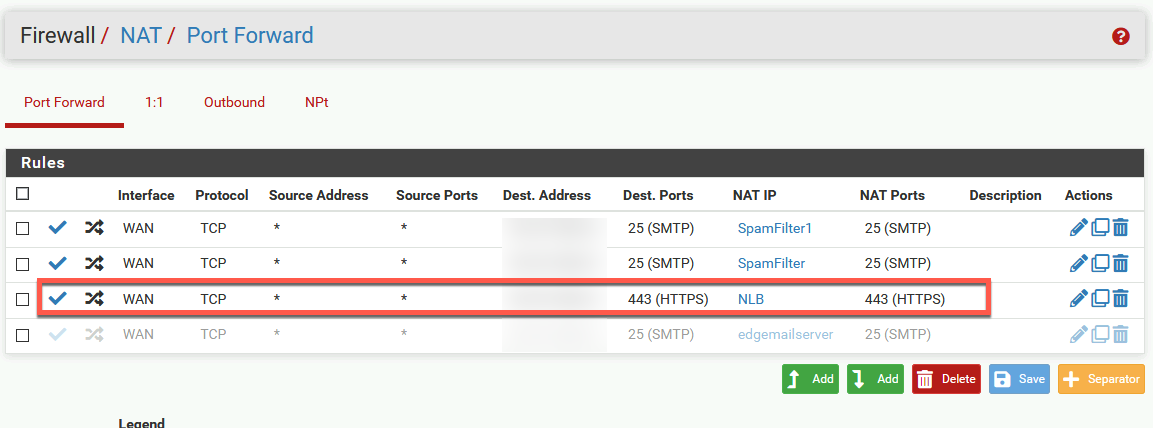
I’m using pFsense in this LAB. I already have NAT rule for port 443 from internet to my DMZ.
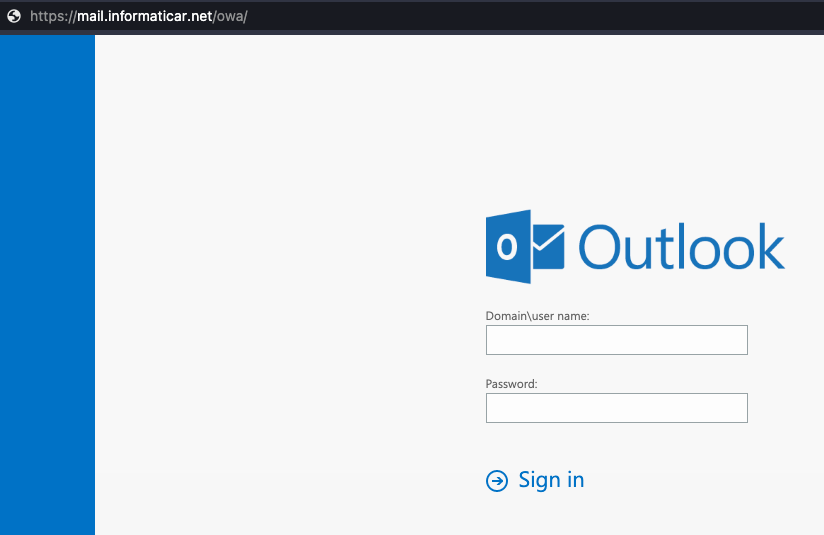
I’m going to point now my public IP (which hosts mail.informaticar.net) and port 443 to my network load balancer virtual IP (192.168.50.8)
I created alias named NLB with IP 192.168.50.8
That NAT rule automatically created WAN rule on my firewall.
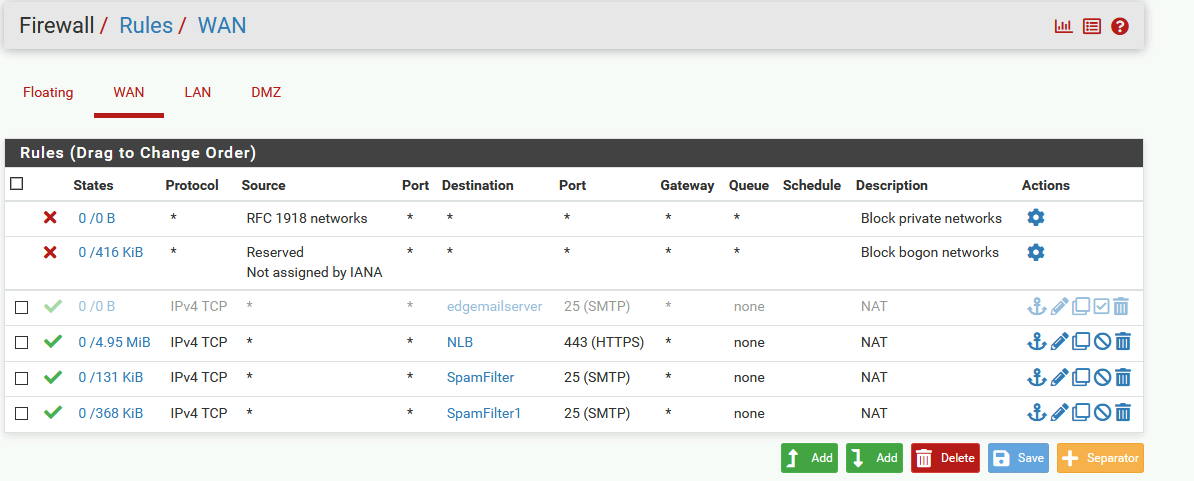
BUT, simply modifying NAT rule for my Exchange service didn’t get me any results.
In System | Advanced | System Tunables I had to add new item named net.link.ether.inet.allow_multicast with value of 1
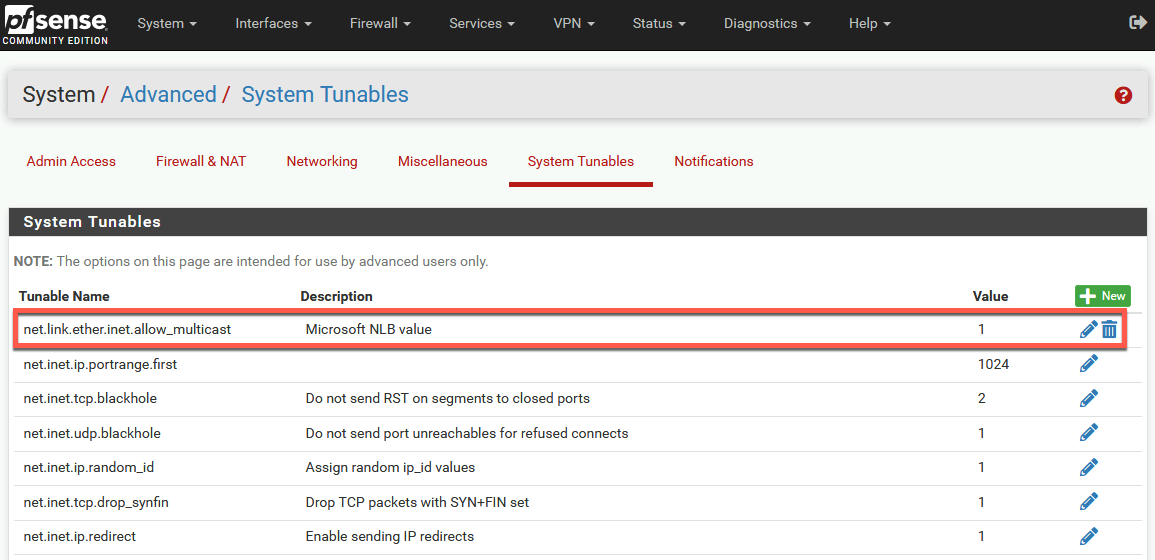
After that I applied changes, rebooted pFSense for good measure, and I got the result. This can be a little fiddly – if you set everything correctly, this still might not work. After few reboots of both ARR1, ARR2 and pFSense, thing got settled and it worked).
All is done.
Testing/troubleshooting
Testing
I won’t go into much details. I simply tested by shutting down ARR2 – all worked.
After that I booted up ARR2 and shut down ARR1 – all is still well.
I received emails, and was able to use OWA, or mobile clients…
All is going well and fast.
Troubleshooting
Be prepared on issues with Network Load Balancing, and research if it even fits in your network. Maybe you need to research other solutions.
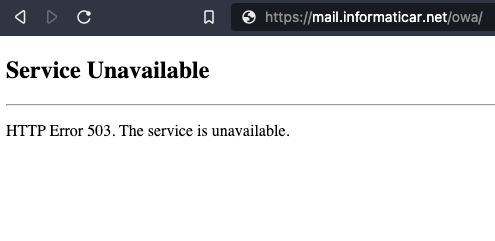
I see that many people had issues with Error 503 after setting everything up. In my case (and with lots of other people) it was simply matter of rebooting both nodes of network load balancing after you set cluster. So, reboot both of your machines, make sure you set your router correctly and try again.
Conclusion
After making our Exchange redundant, we now also made our IIS redundant. However, we now again have new single point of failure and that is file share, we placed it on one machine – you can resolve it by using Microsoft DFS for cbackup, or simply making backup of that config so you can restore it somewhere else if needed.