You can administer your ASDK host via RDP or VPN connection. RDP is simple – you enable RDP on ASDK host machine, while VPN has few more steps that I will quickly describe here.
[! There is also a third option, to remove NAT so you can integrate your Azure Stack to your local network without VPN connection (not Microsoft supported method) – https://www.informaticar.net/integrate-azure-stack-to-your-lan-remove-nat/ ]
First of all, you will not be able to RDP into Azure Stack while connected via VPN.
There are some prerequisites for the local PC in order to be able to connect to ASDK. You can find all the latest steps on this link – https://docs.microsoft.com/en-us/azure-stack/asdk/asdk-connect?view=azs-1908
Azure Stack Compatible Powershell
First – Azure Stack Compatible Powershell (on your Windows Client)
I will run following command as admin in Powershell ISE:
Get-Module -Name Azs.* -ListAvailable | Uninstall-Module -Force -Verbose
Get-Module -Name Azure* -ListAvailable | Uninstall-Module -Force -Verbose

# Install the AzureRM.BootStrapper module. Select Yes when prompted to install NuGet
Install-Module -Name AzureRM.BootStrapper

# Install and import the API Version Profile required by Azure Stack into the current PowerShell session.
Use-AzureRmProfile -Profile 2019-03-01-hybrid -Force
Install-Module -Name AzureStack -RequiredVersion 1.8.0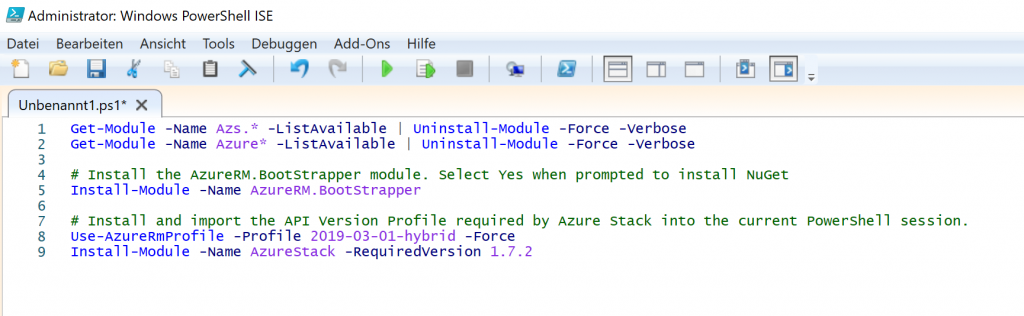
If propted for NuGet, confirm with Yes (or in my case JA)

You will also be asked to install modules from not trusted repos – I will select Yes to all

If prompted once more – confirm.
Install will continue…
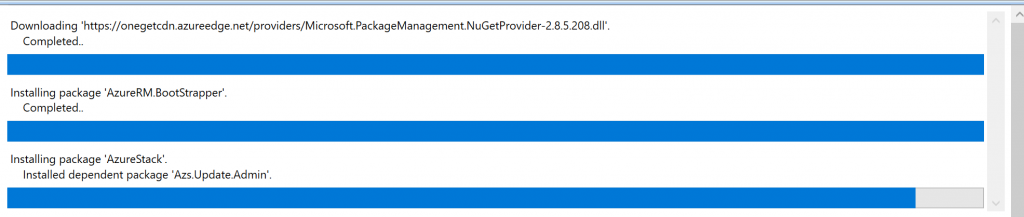
And at some point, it is done.
Azure Stack Tools
Next step is Azure Stack Tools
Again, Powershell ISE on client PC with admin rights
# Change directory to the root directory.
cd \
# Enforce usage of TLSv1.2 to download the Azure Stack tools archive from GitHub
[Net.ServicePointManager]::SecurityProtocol = [Net.SecurityProtocolType]::Tls12
Invoke-WebRequest `
-Uri https://github.com/Azure/AzureStack-Tools/archive/master.zip `
-OutFile master.zip
# Expand the downloaded files.
Expand-Archive -Path master.zip -DestinationPath . -Force
# Change to the tools directory.
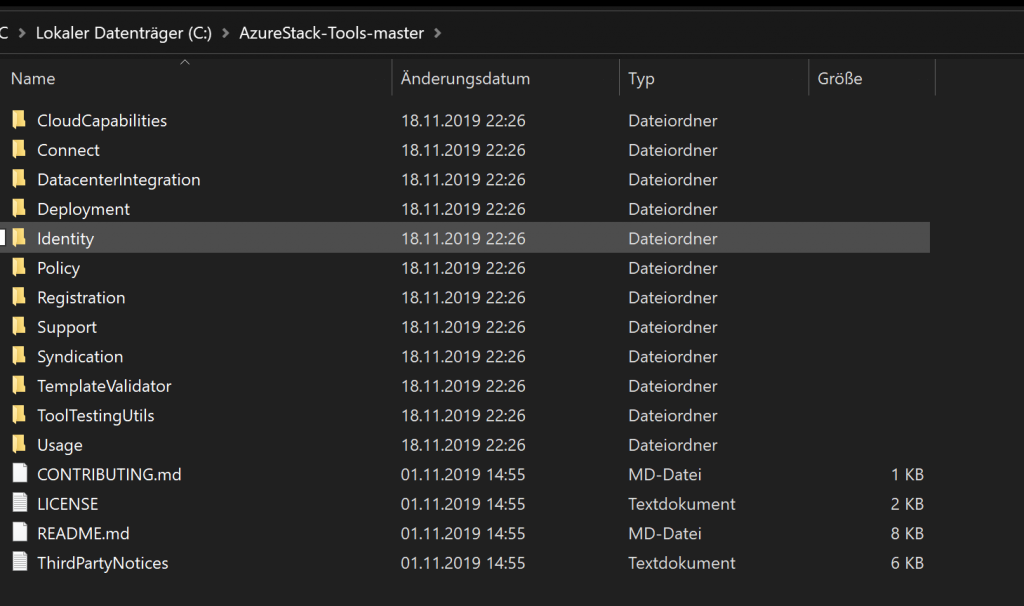
cd AzureStack-Tools-master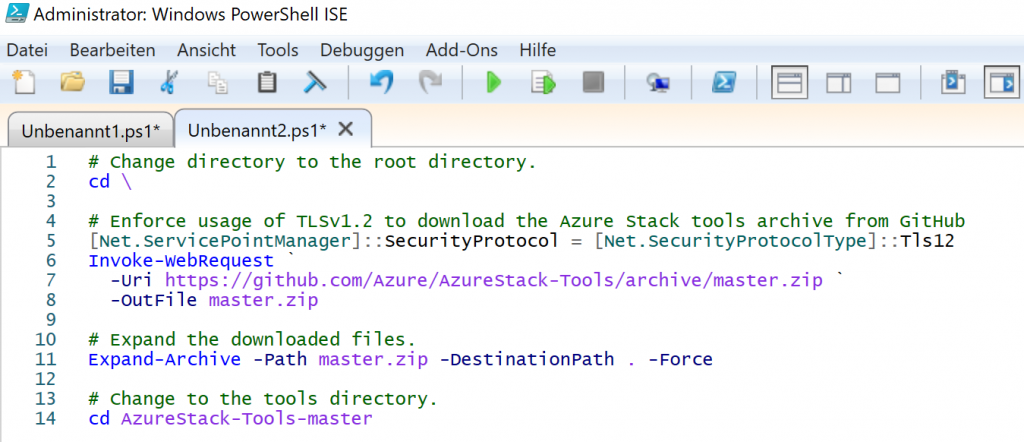
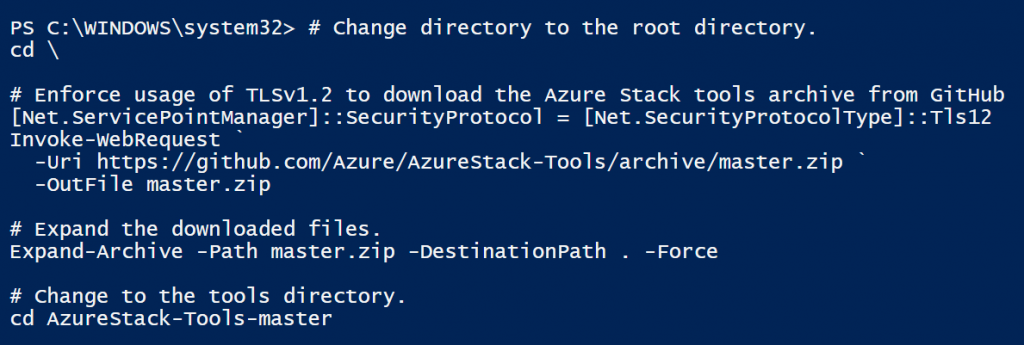
Download and install into C:\ should be quickly done.
VPN connection creation
Last step should be creation of the VPN connection on your client PC, and we will be using following command (once again in Powershell ISE as admin on):
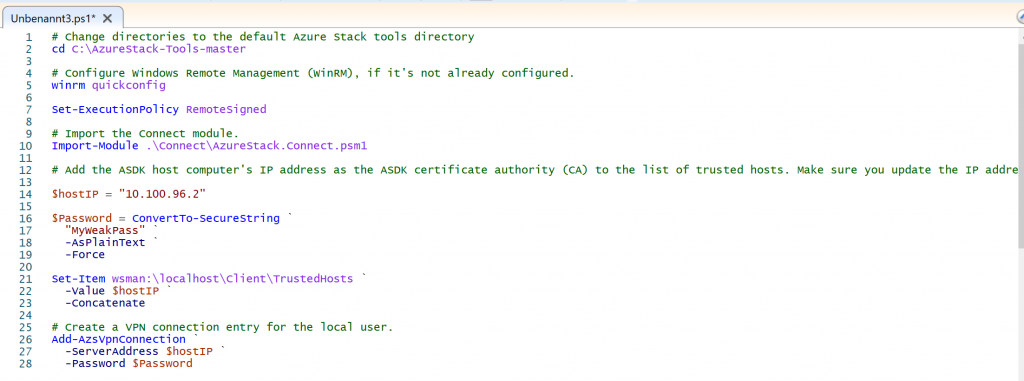
# Change directories to the default Azure Stack tools directory
cd C:\AzureStack-Tools-master

# Configure Windows Remote Management (WinRM), if it's not already configured.
winrm quickconfig

Set-ExecutionPolicy RemoteSigned

# Import the Connect module.
Import-Module .\Connect\AzureStack.Connect.psm1

# Add the ASDK host computer's IP address as the ASDK certificate authority (CA) to the list of trusted hosts. Make sure you update the IP address and password values for your environment.

$hostIP = "<Azure Stack host IP address>"

$Password = ConvertTo-SecureString `
  "<operator's password provided when deploying Azure Stack>" `
  -AsPlainText `
  -Force

Set-Item wsman:\localhost\Client\TrustedHosts `
  -Value $hostIP `
  -Concatenate

# Create a VPN connection entry for the local user.
Add-AzsVpnConnection `
  -ServerAddress $hostIP `
  -Password $Password
As you can see from the screenshot below, in line 14 I entered IP address of my ASDK host machine, and in the line 17 I entered my password that I’m using on ASDK host machine for Azurestackadmin account.
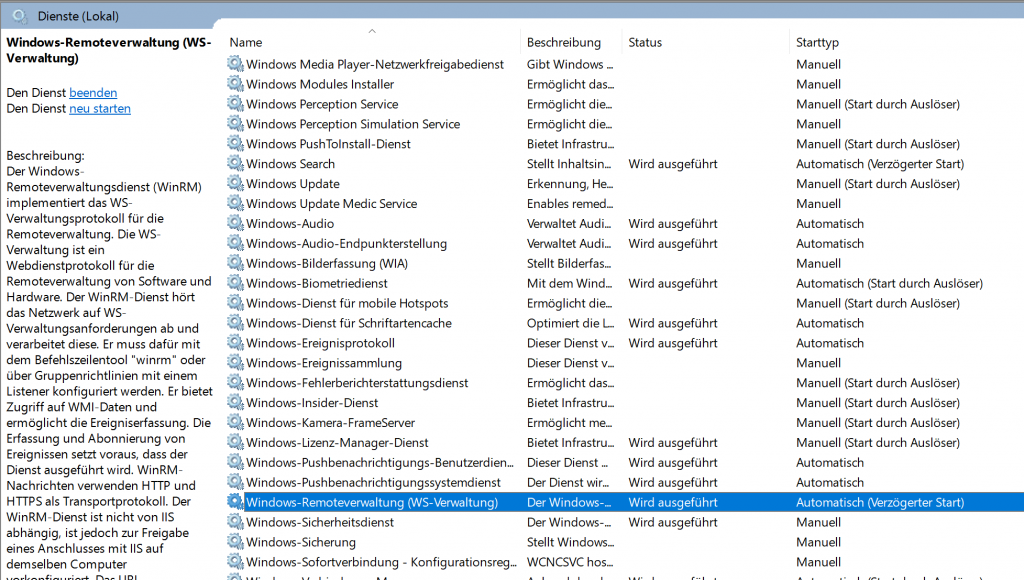
Before you start the script, open Control Panel | Administrative Tools | Services and find Windows RM service – start it and set it to automatic (delayed) start
If prompted for approval of scripts and services, confirm, and installation should soon be over.
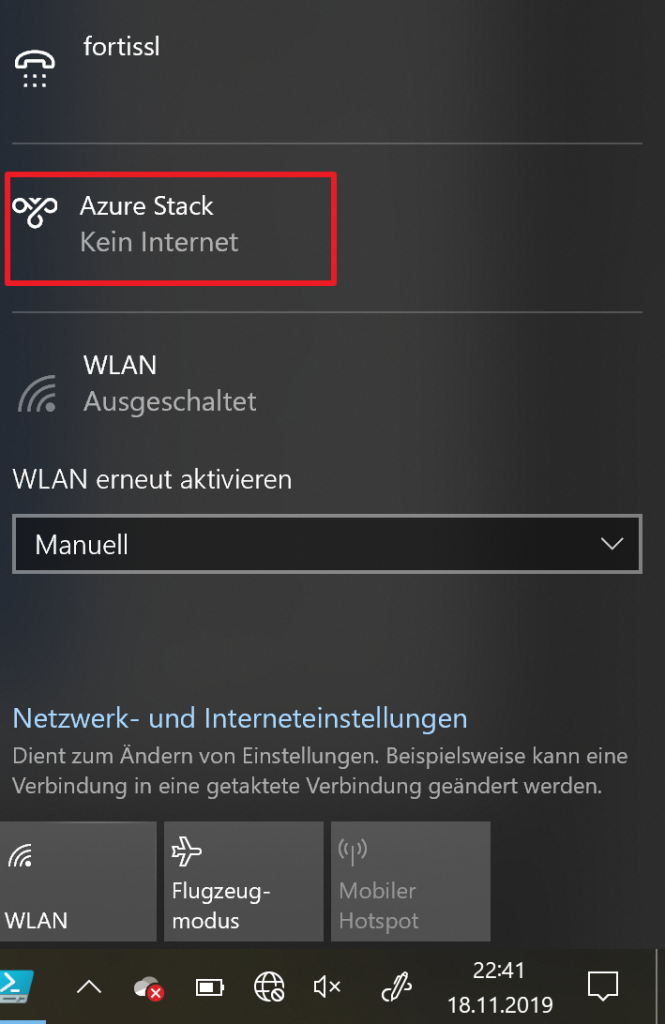
In the end in your network connections you should see AzureStack VPN
Connection and Test
For the first time, I connected via Powershell ISE with following command, and it is important for you to connect first time to VPN via Powershell, and not from gui depicted above.
Connect-AzsVpn `
  -Password $Password
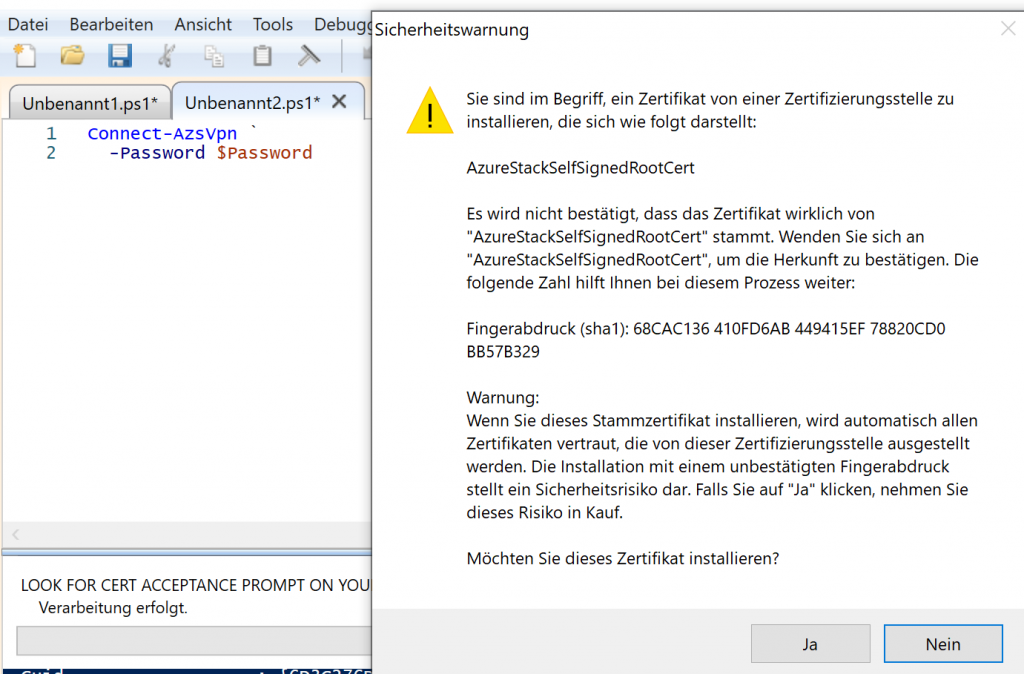
You should be prompted for password, and domain (AZURESTACK) and username (Azurestackadmin) should be entered already within prompt…
You will be also prompted to accept certificates with this connection. For some reason I wasn’t prompted for this cert when connected through GUI for the first time.
I also experienced problems on Azure portal without this cert imported (blank dashboard…)
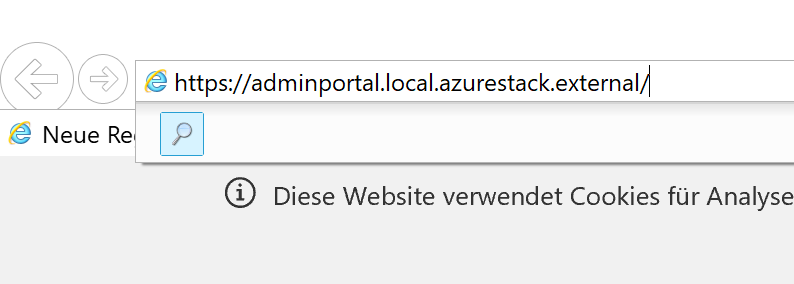
At last, lets open Internet Explorer and enter following address:
https://adminportal.local.azurestack.external/
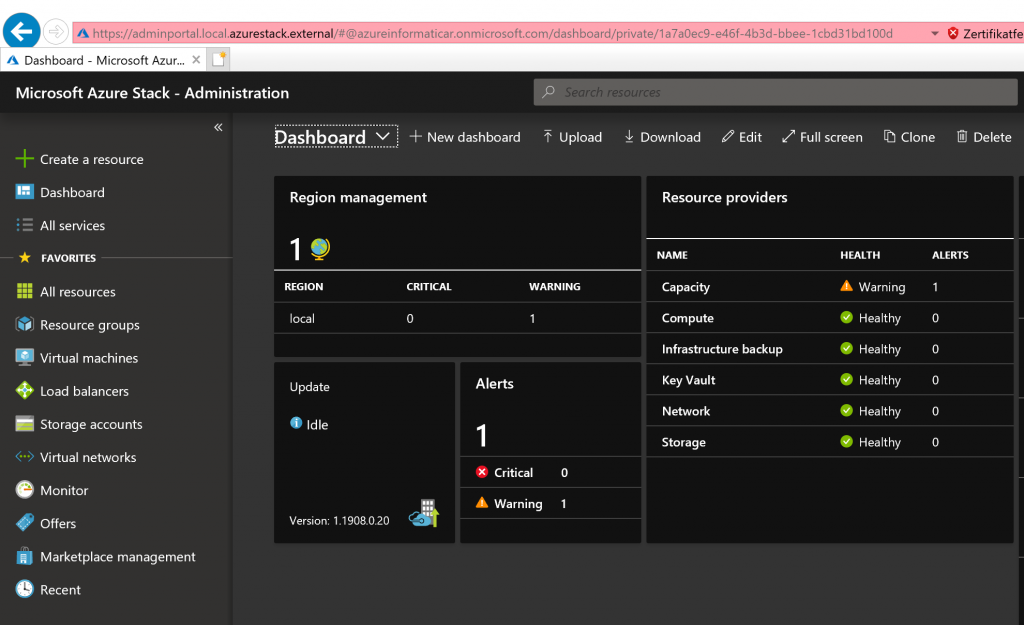
It works, congrats ?