Recently we installed MAAS (Metal As A Service) and now we are going to do first login into web interface and we are going to do initial configuration.
We finished our installation guide with the web interface login screen. We will continue there and make first login.
We are doing this on a MAAS 2.9.1
My MAAS install is located on http://10.0.0.101:5140/MAAS
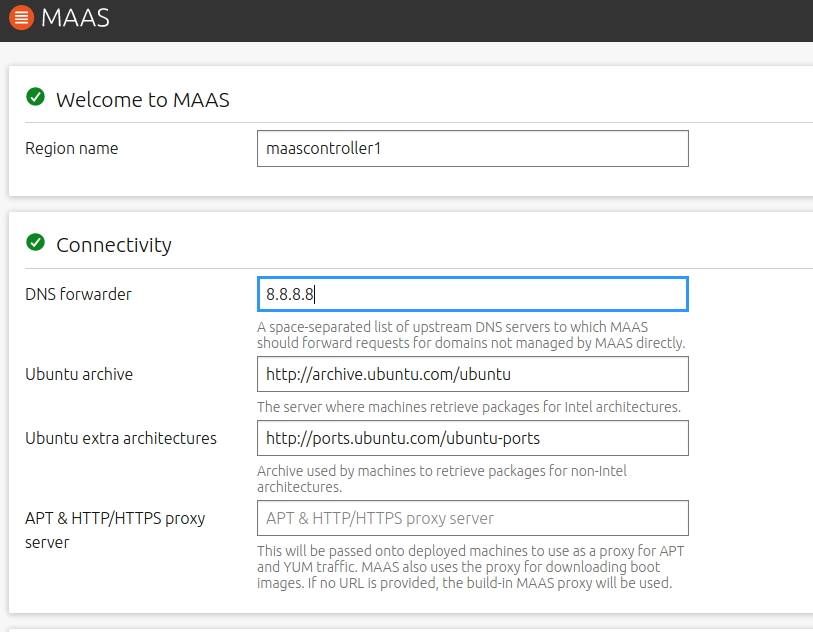
After first login, this is the first screen you will be greeted with. I named my region maascontroller1, you will name yours as you see fit.
Under connectivity, I only entered DNS Forwarder 8.8.8.8 and left everything else as it is. I don’t have proxyes, so I also left that one empty.
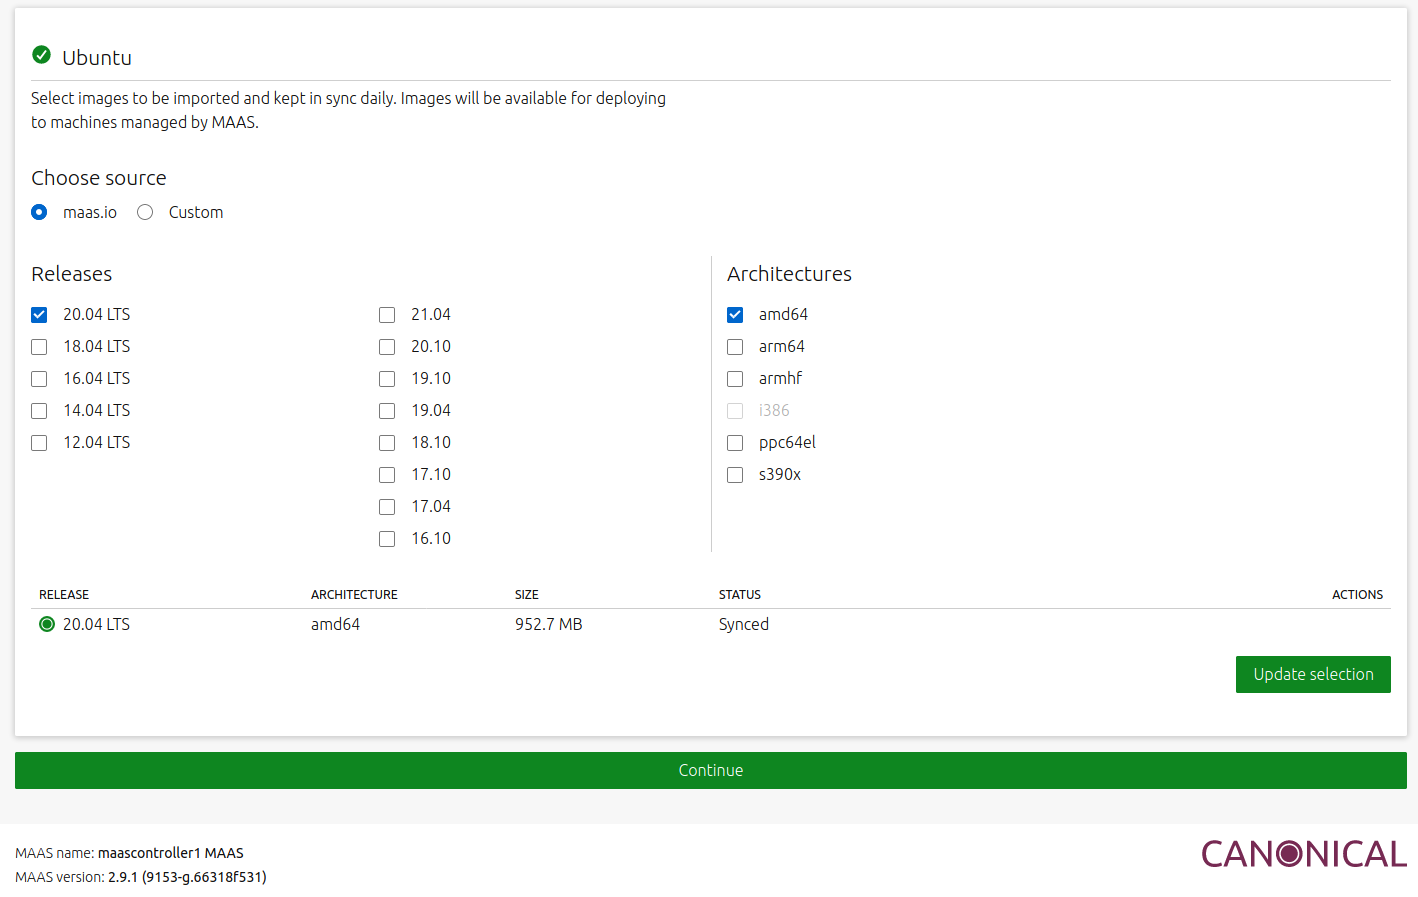
After I scrolled down a bit, I was offered to select images to be imported. Ubuntu is only offered by default. You can select custom to import your images from other links, for now, I will leave this as it is, you can always import images later.
I selected Continue at the bottom of the screen.
Configure SSH
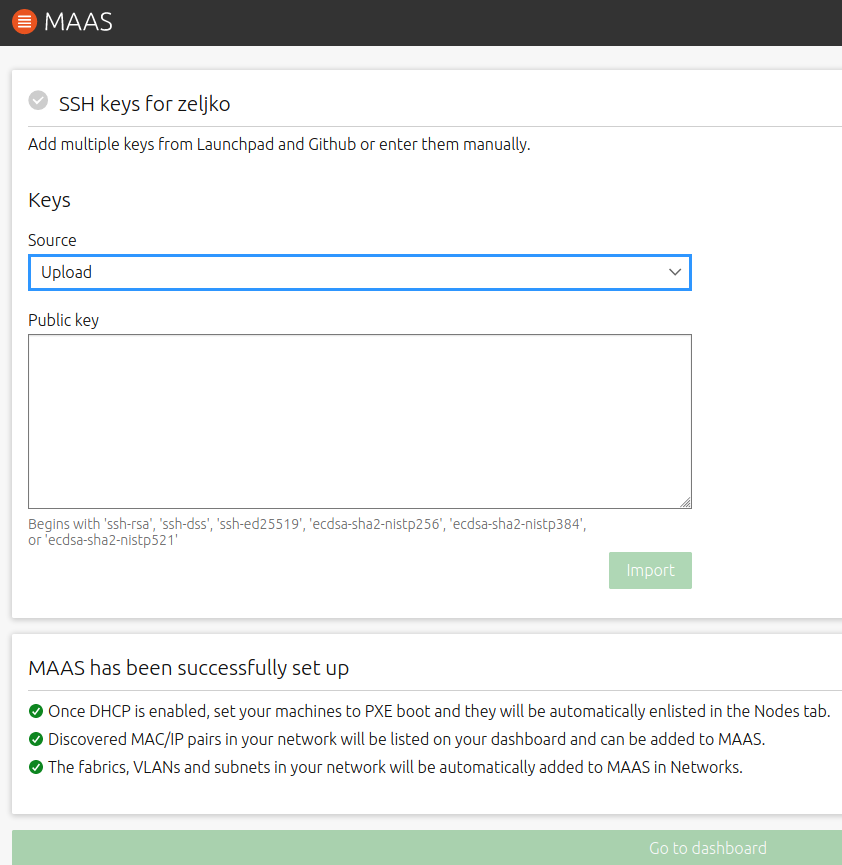
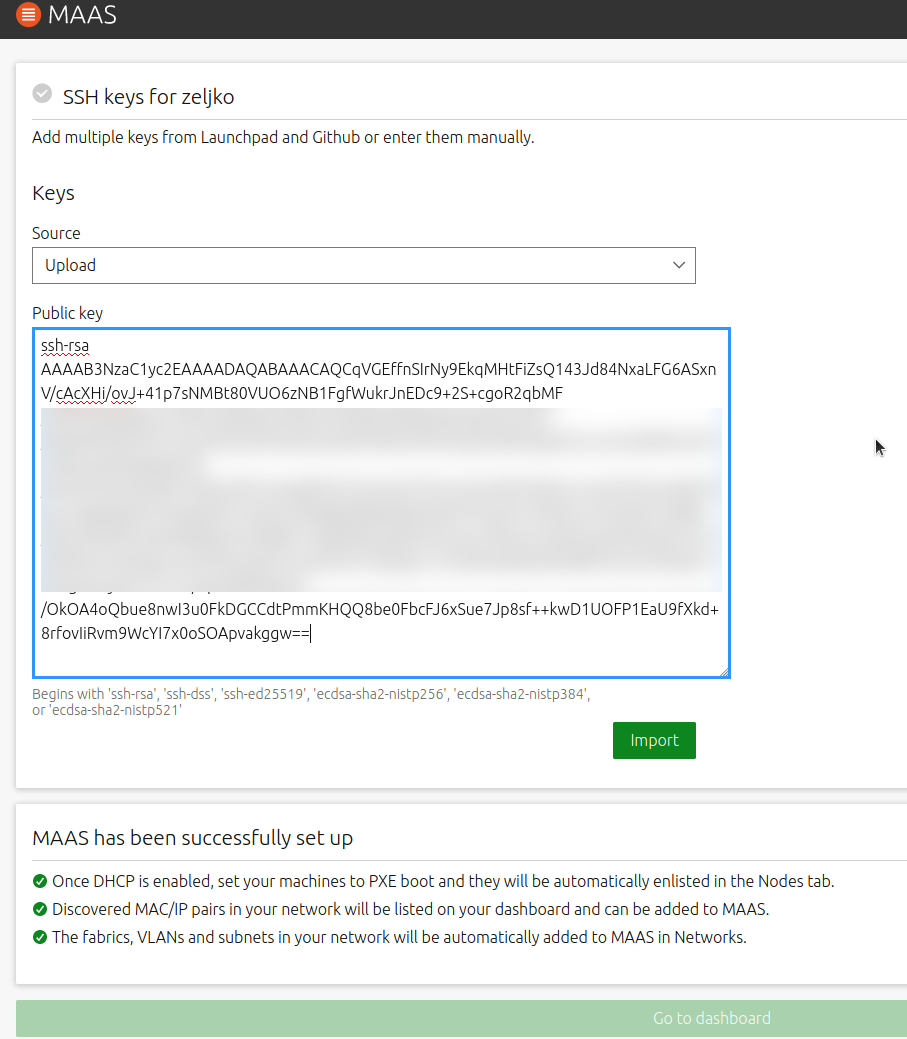
This screen is extremely important, don’t skip it. If you don’t import your SSH public key here, when you deploy new machine, you will not be able to access it. There is no default username/pass combo MAAS deploys machines with, so, only way you can access your Ubuntu deployed machines is via SSH public key.
You can also import your Launchpad or Github public key, but here I will not use those, we will create new SSH keypair and import public key into the screen in the end.
Create SSH keys
SKIP THIS PART IF YOU HAVE LAUNCHPAD OR GITHUB key, or you ALREADY HAVE SSH KEY CREATED…
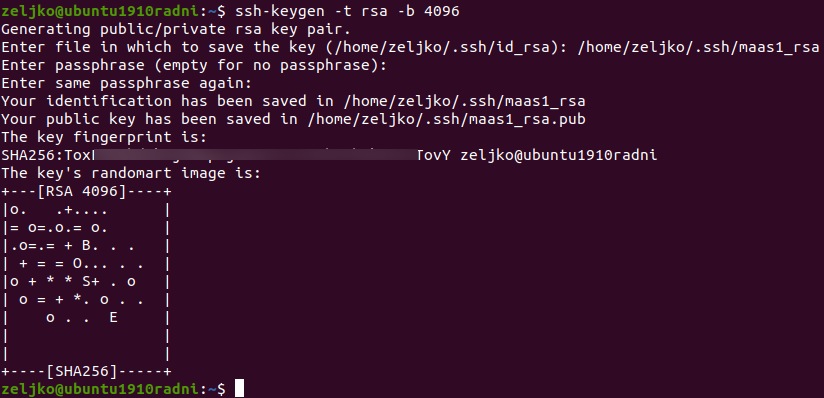
I will create ssh key pair on the Ubuntu machine in the network from which I’m connected to MAAS and from which I will be managing all the machines deployed with MAAS.
Once again ,this is done on a client machine (Ubuntu 20.04) through which I’m accessing MAAS and MAAS deployed machines.
ssh-keygen -t rsa -b 4096I will name key maas1_rsa and it will be saved into /home/zeljko/.ssh folder.
For this tutorial I skipped passphrase definition.
If you wish to copy created key to your MAAS controller installation, you can do so by entering following command.
Change username for your MAAS controller Ubuntu account and change xxx.xxx.xxx.xxx for the IP address of your MAAS controller.
ssh-copy-id -i ~/.ssh/maas1_rsa.pub username@xxx.xxx.xxx.xxx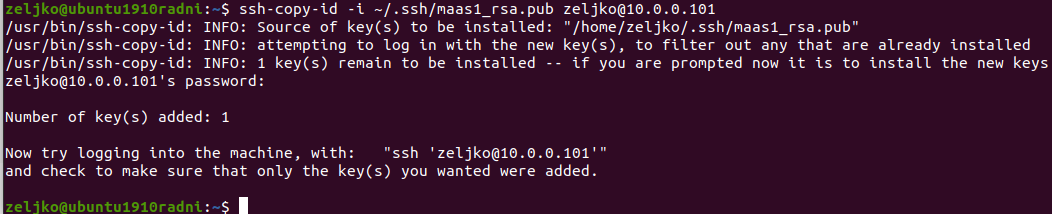
Now, last part of this puzzle. Because I didn’t use default name dor my rsa keys (id_rsa) we need to do few extra steps so that our local machine knows which ssh key to use.
Check if ssh-agent is active with following command
eval `ssh-agent`Run following command to add your SSH key
ssh-add ~/.ssh/maas1_rsaWe now need to confirm that our custom key is added
ssh-add -lThe command should return key fingerprint that you got when you created your SSH keys. Mine is visible in the screenshot above, and it is the same one as I got with ssh-add command.

In the future, when you connect from the machine you created your SSH keys to the machine deployed by MAAS, you will need to connect like this
ssh -i ~/.ssh/maas1_rsa username@xxx.xxx.xxx.xxxOk, that is that for the extra part.
________________________________________________
Copy your SSH public key. Mine is located in /home/zeljko/.ssh/maas1_rsa.pub, so I will copy from there.
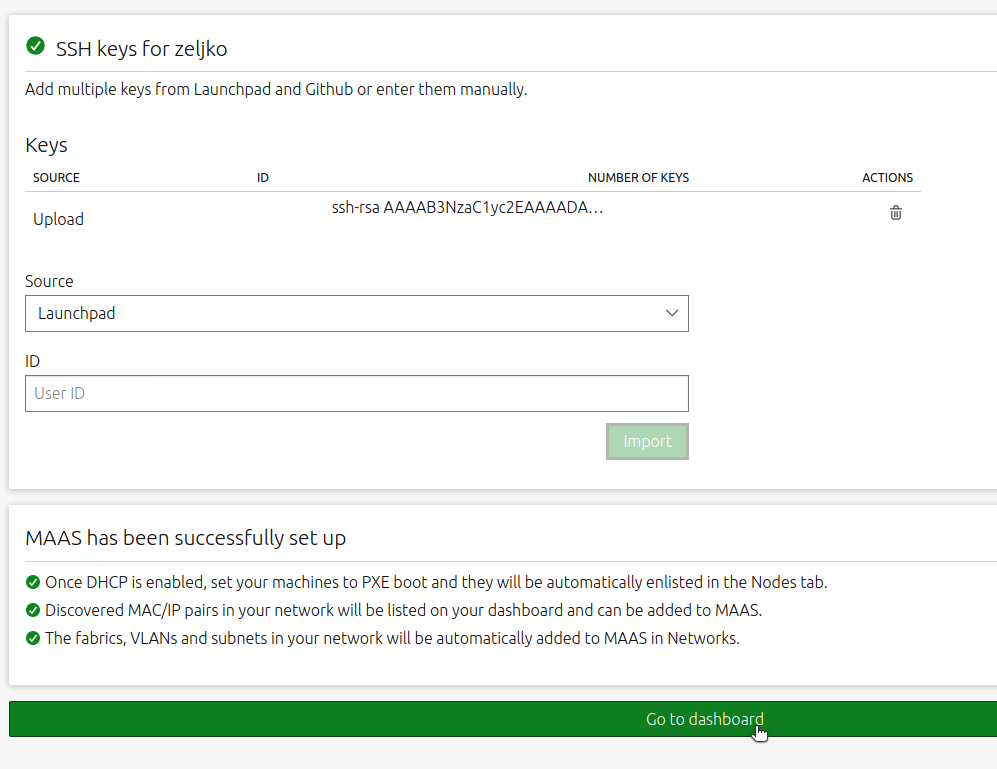
Click on Import
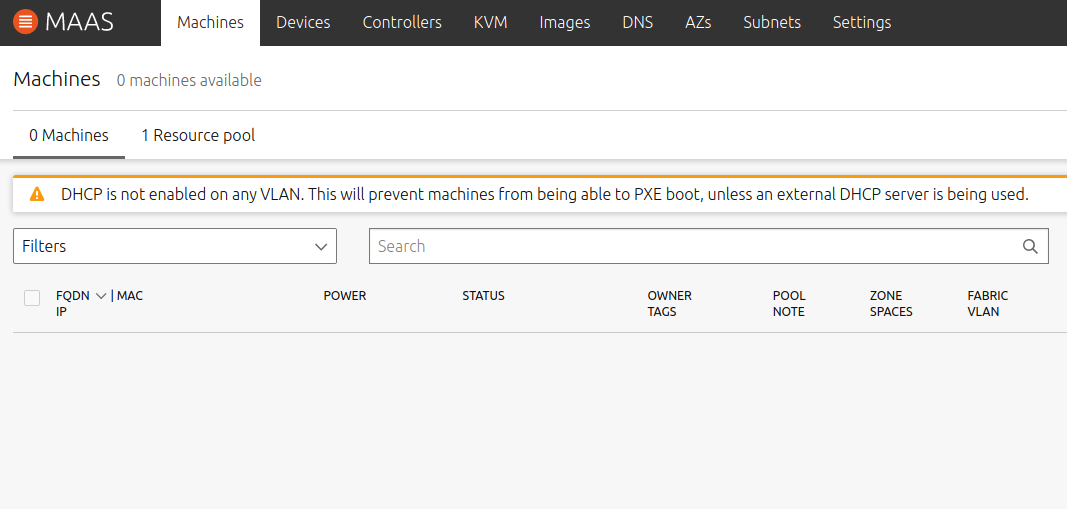
Go to Dashboard
We are at the Dashboard
The rest of the configuration is more or less up to you, your needs and preferences.
Enable DHCP
I will enable DHCP via MAAS, because it is a good way for a machine that is booting over network to be recognized by MAAS controller.
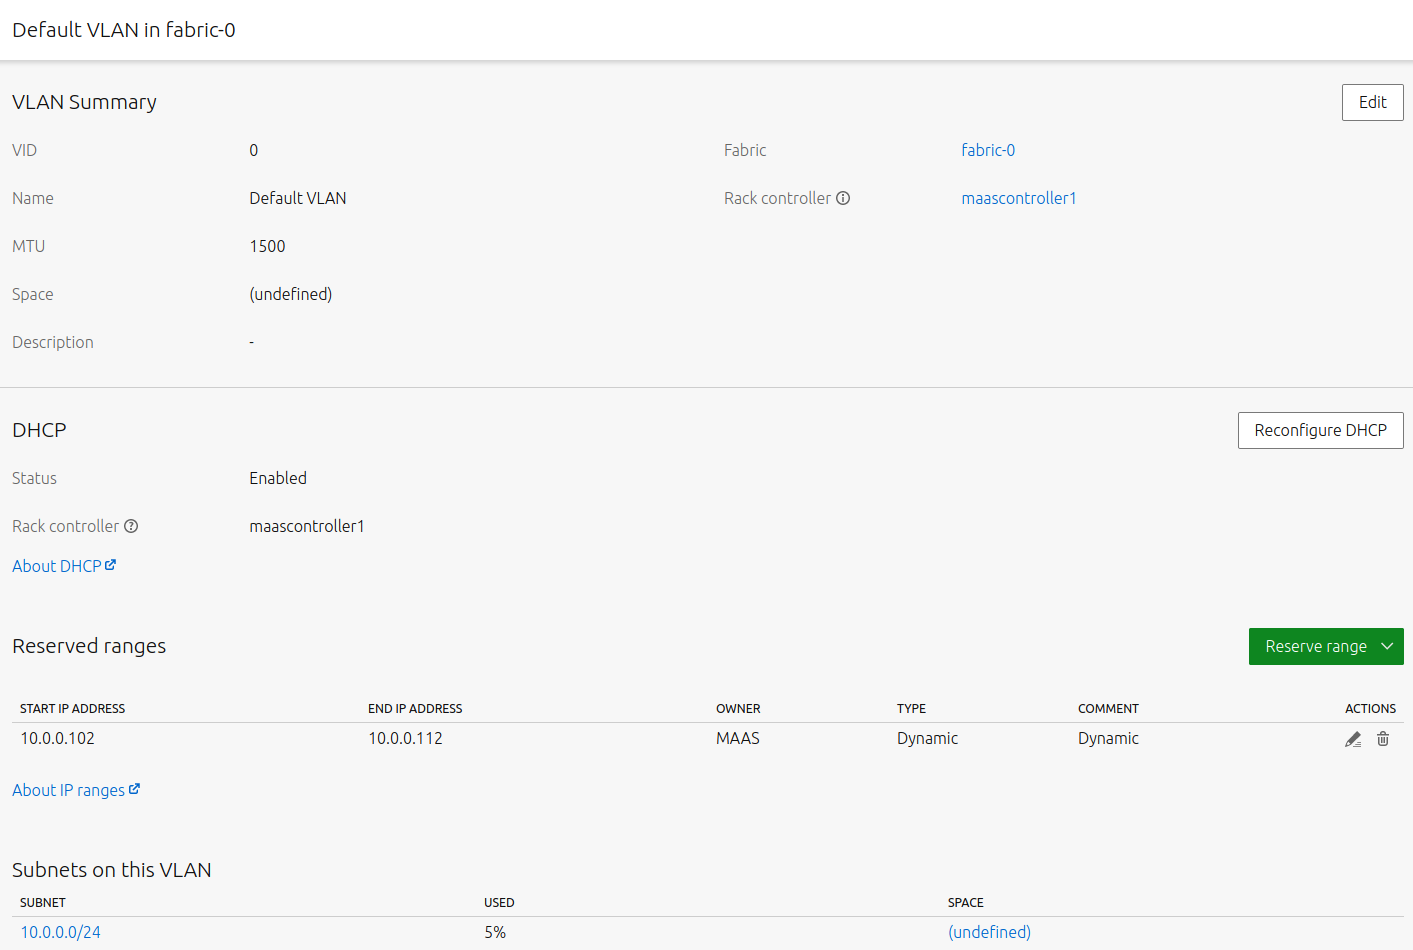
To enable DHCP, click on Subnets menu at the top, then click on your network interface under fabric. I have only one named fabric-0 so I will click on that.
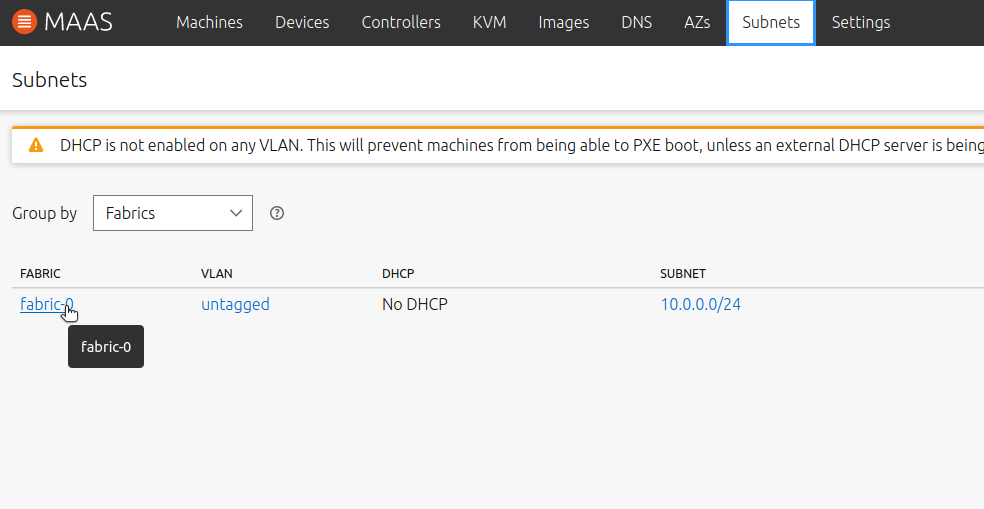
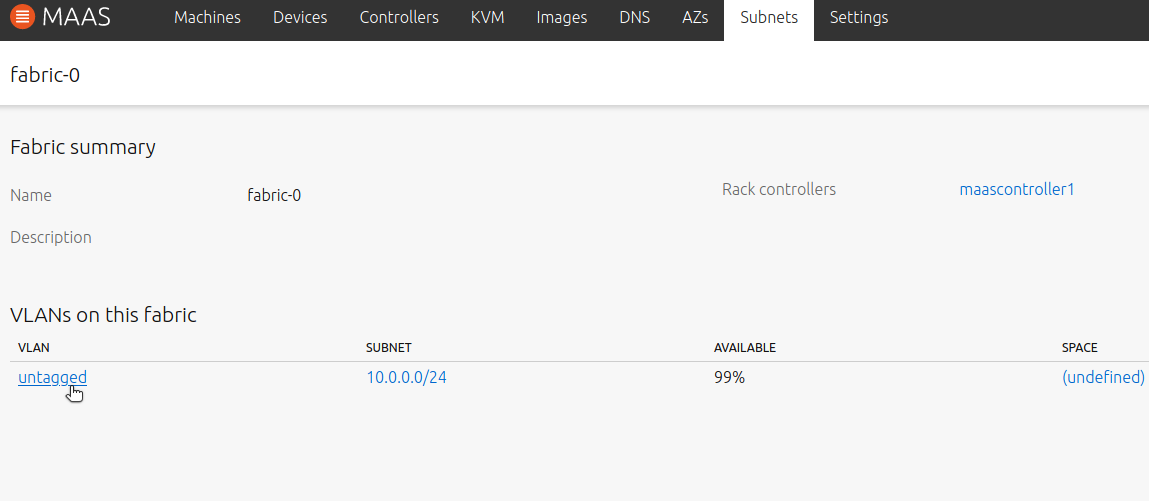
New screen will be opened. Click on untagged under VLAN
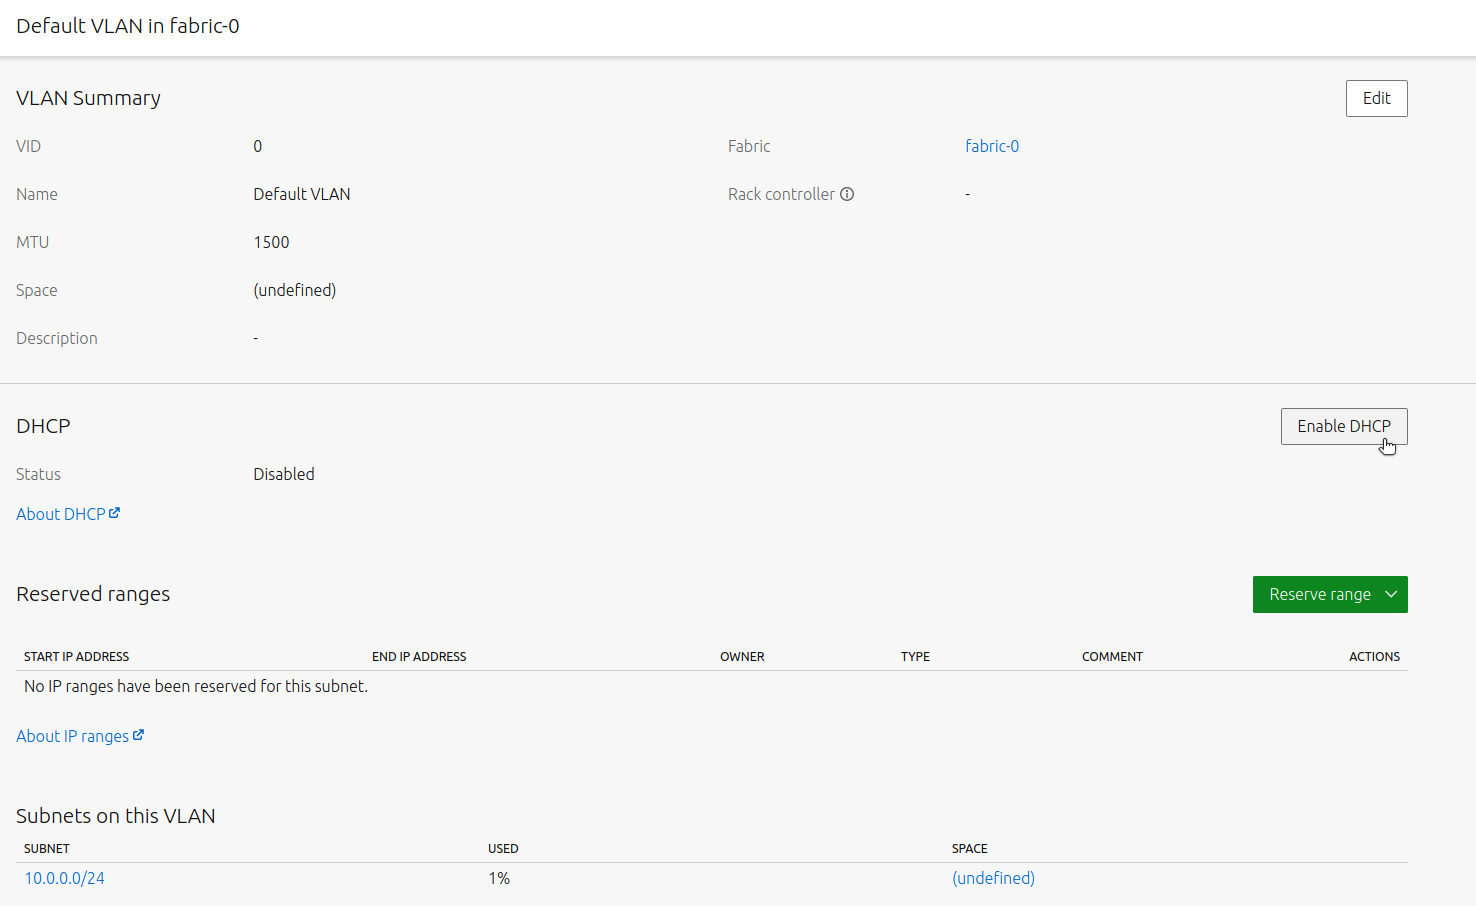
On the new screen click on Enable DHCP
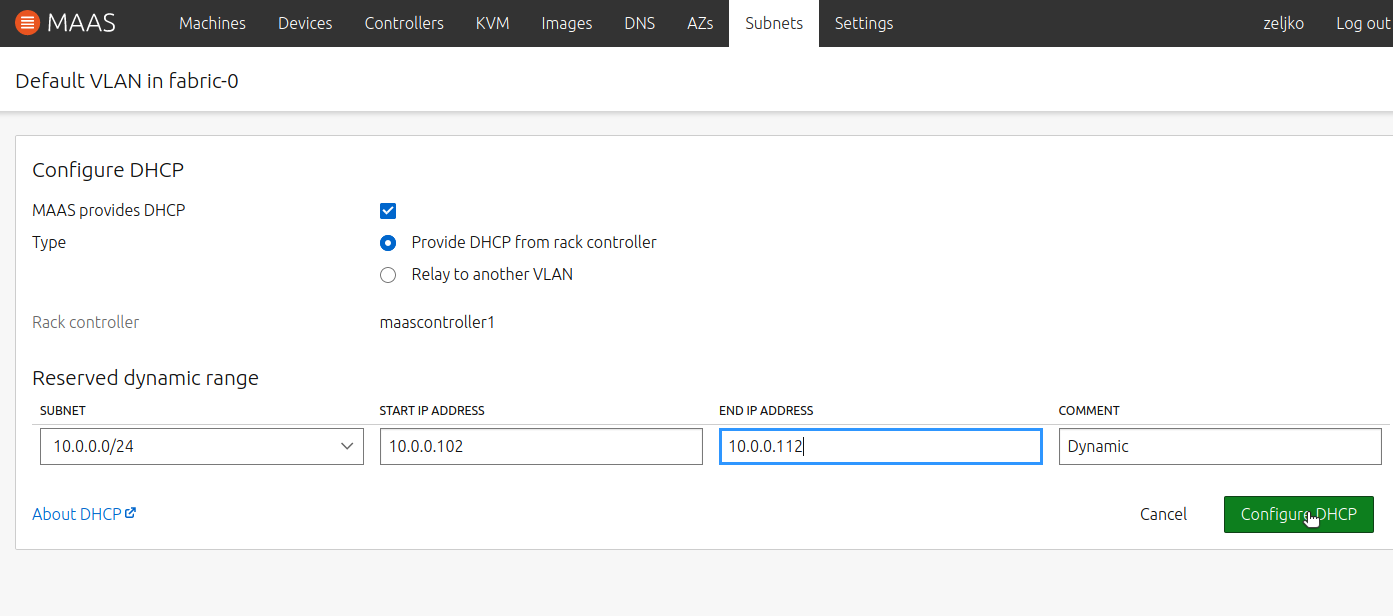
Feel free to define range the way it fits you. I defined 10 ip addresses for MAAS DHCP range.When you are done, click on Configure DHCP.
We have DHCP enabled now.
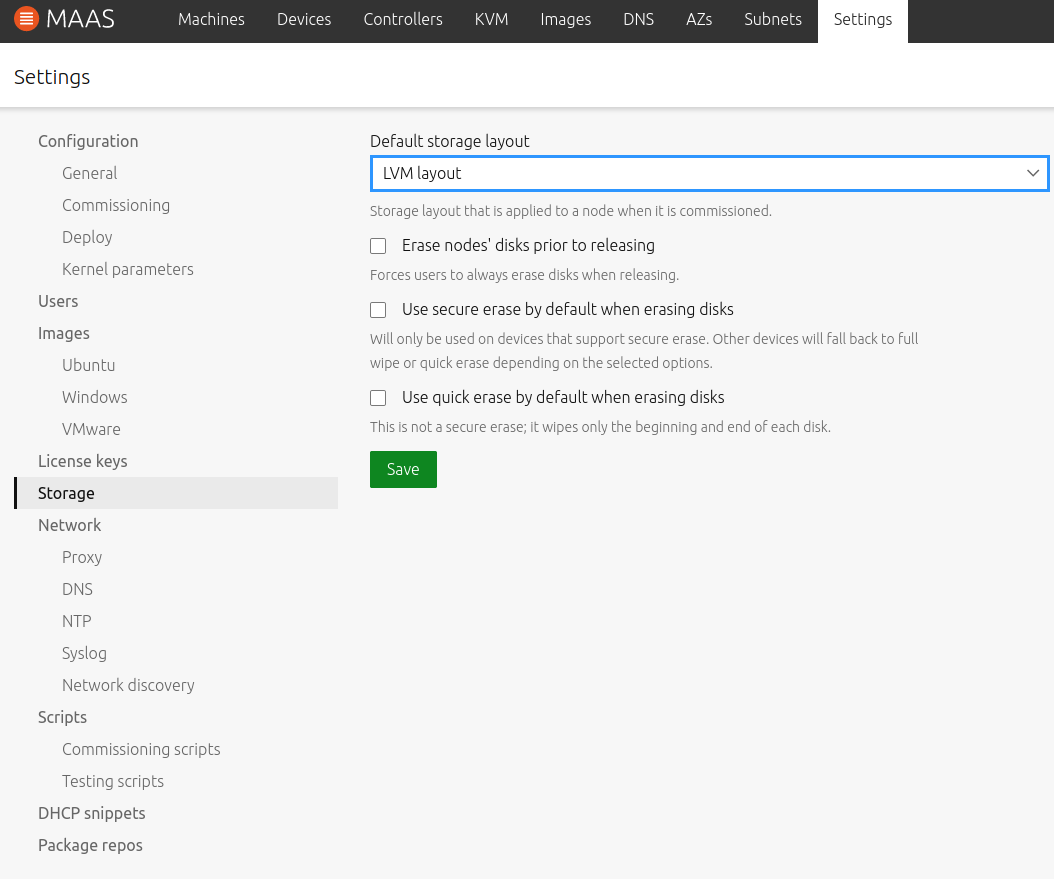
Under Settings at the top of the screen you can tune more your MAAS controller. Again, it is more or less up to your needs. Under Storage section I selected LVM layout, and deselected all the boxes below. Save
Again, you define all the Settings here according to your needs, it is really hard to do “best” pratice with this, because everyone have some preferences or needs.
In case you are not sure what you should define – default settings should work also.
That is it for the configuration part.
In the next blog post, I will be deploying machine with maas.
Disclaimer