We are done with installation of mailbox role and I also covered installation of Edge role. Now that we are done with Exchange Server 2019 installation, the fun part begins – configuration. This guide will cover some basic steps to get your mail flow going.
Before we begin
This guide assumes you already installed your mailbox (and optionally edge role server), that you have your domain name in place (I will use informaticar.net for this example) and that you have valid certificates from world wide recognized certificate authority.
Also, before you begin, you should set public DNS records for your Exchange.
I’m going to configure basic mail flow here (so no spf, dkim, dmarc in this tutorial)
You should have A record for your exchange set – I’m going to use mail.informaticar.net and you should also have MX record set – I have mail.informaticar.net with weight 10 in place.
This guide also will not cover antispam/blacklist measures, it is topic for some other time.
This guide also assumes from hardware aspect that you have three disks attached to your VM – one for the system/exchange installation, second one for Exchange database (DB) and third for logs. We are talking about installation that holds mailbox role (in case you have also edge role installed).
While we are at the topic of storage, best scenario would be to have separate disks (not partitions) for databases and logs.
Also, plan your storage accordingly and make sure you have some overhead, otherwise you may end up with a database that ends in dirty shutdown for filled up disk, and you don’t want that to happen.
Let’s start
Create new database/logs and deploy it to separate DBs/Logs disks (and delete default Exchange DB)
Head on to https://127.0.0.1/ecp (we are going to do this from the exchange server itself)
This step assumes you still don’t have any users, besides admin, or any mailflow in your DB, we are going to do this on fresh install!
There is a couple of ways you can do this. I’m doing database thing this way, you can just rename default database, you can move it… I create new and transfer all default users to it.
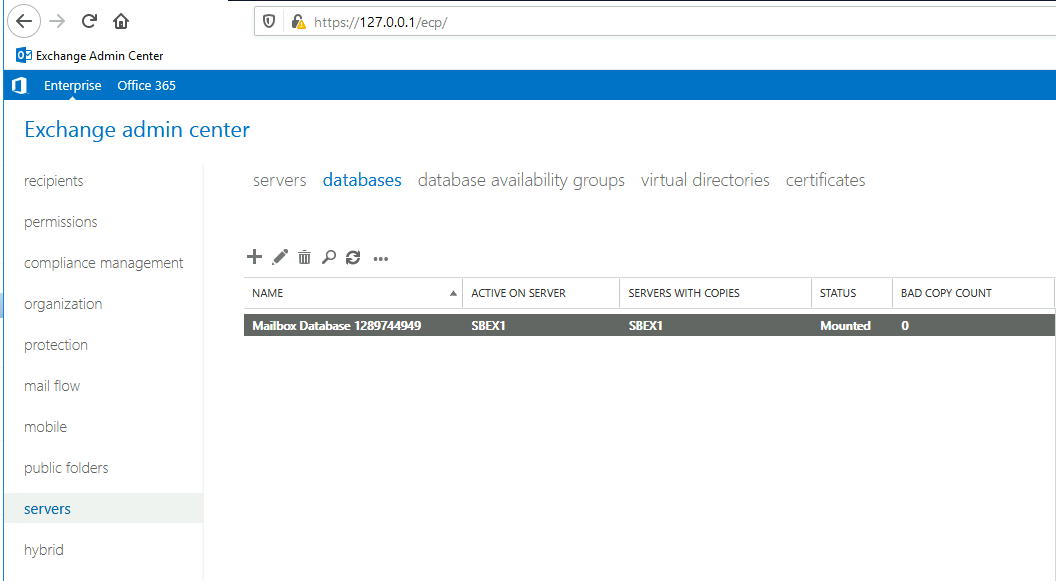
When you are logged into exchange admin center head on to servers menu and select databases tab. You will have your DBs listed there. By default you will have a random DB listed, which Exchange created during install. We are not going to mess too much with that database, we are going to create new one, and then transfer our admin user to new DB so we can delete this random one.
Click on plus at the databases tab, it is located above name section of the database.
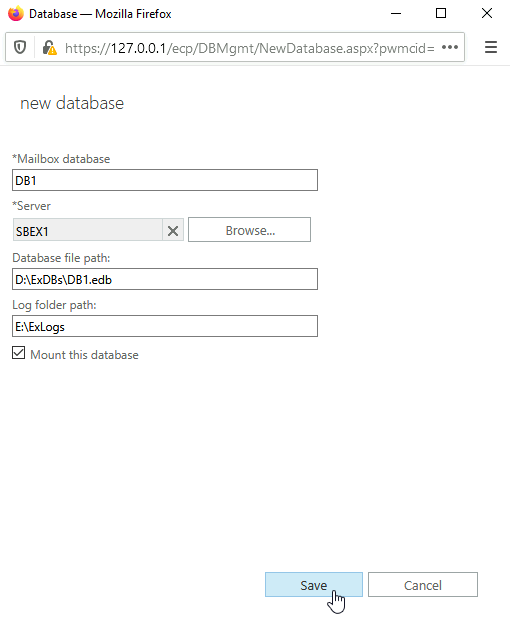
I will name database DB1, I will put it on only one exchange server I have (SBEX1) and set database path to D:\ExDBs and name the database DB1.edb. Logs path is E:\ExLogs. I will also select to mount new database and select Save
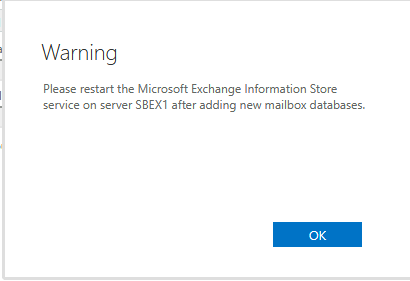
You will get message that you need to restart Microsoft Exchange Information Store service, and you can do it by going to Control Panel | Administrative Tools | Services and find Exchange Information Store Service and restart it. I just reboot the server at this stage usually to check everything out.
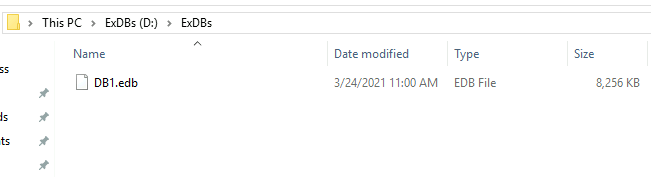
If I visit D drive I see that DB is created
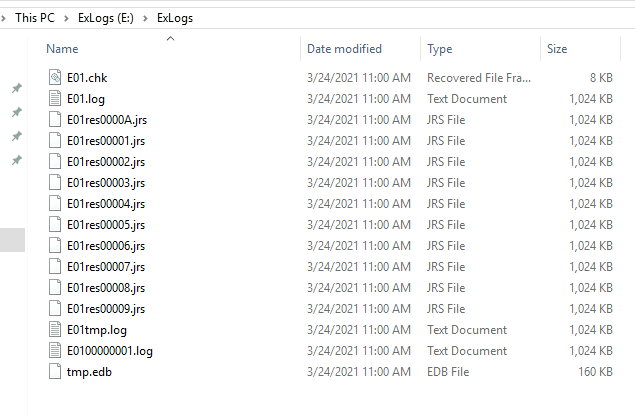
and logs are located on E drive
All is well.
After reboot I can see that DB1 is mounted

Ok, we are done with that. Let’s now select recipients from the menu and go to tab mailboxes. I have one user, that is InfoAdmin, and he is attached to Mailbox Database 12897… We also have a few default users that are needed by Exchange. I want to transfer users to the new create DB1 database.
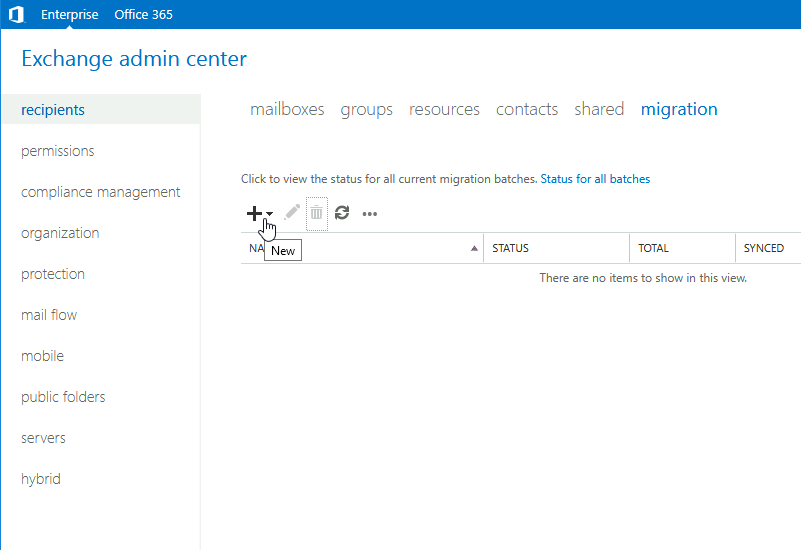
Go to the recipients menu and select migration tab, click on +
Move to a different database

New window will be opened. Select the users that you want to move – select +
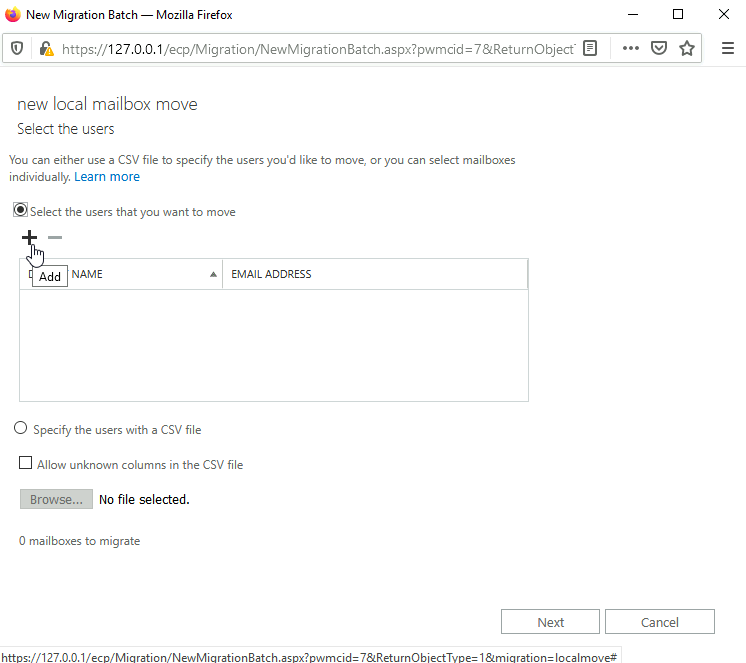
You can see that InfoAdmin is already transfered, but other accounts are not. Select all and click on add. Ok
Your list of users should now be populated. Next

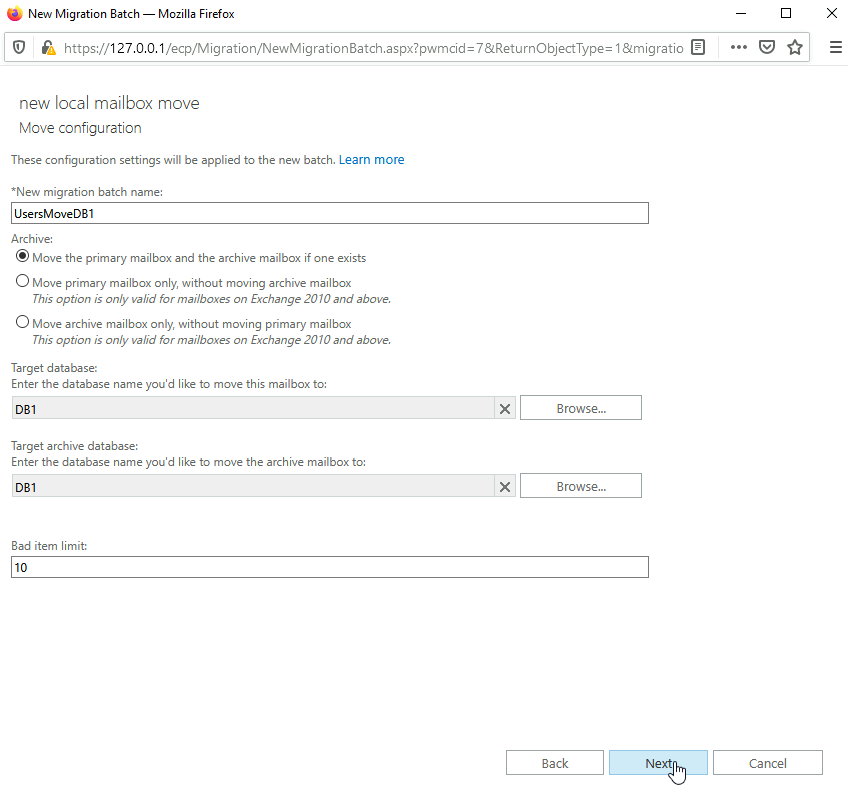
Give your job a name, select Move the primary mailbox and the archive mailbox if one exists. Select new DB and click on next
I left everything on automatically – new
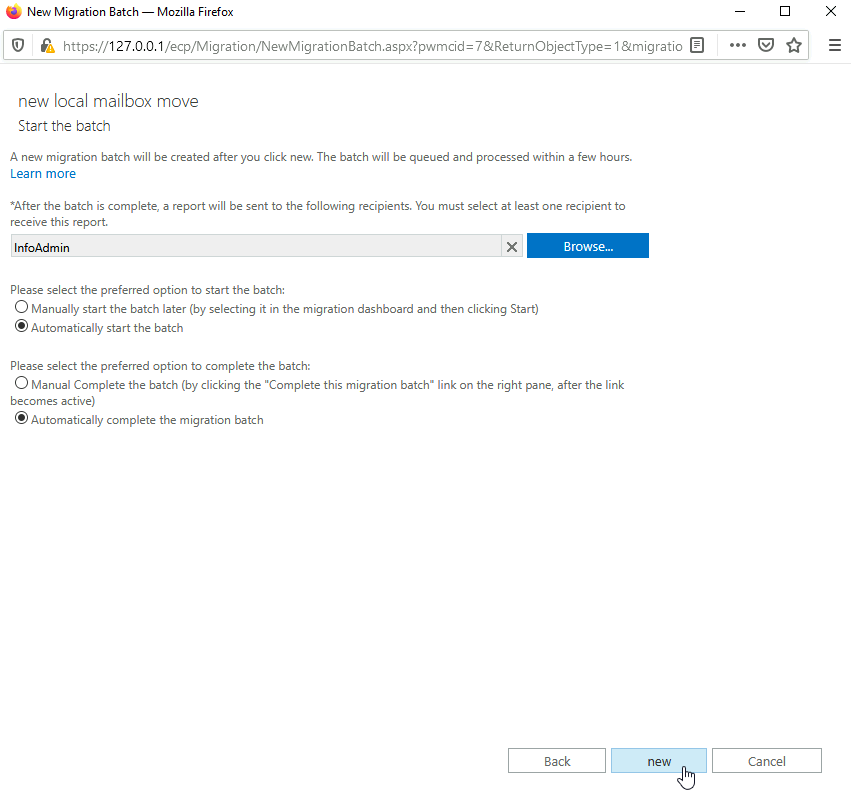
Syncing started
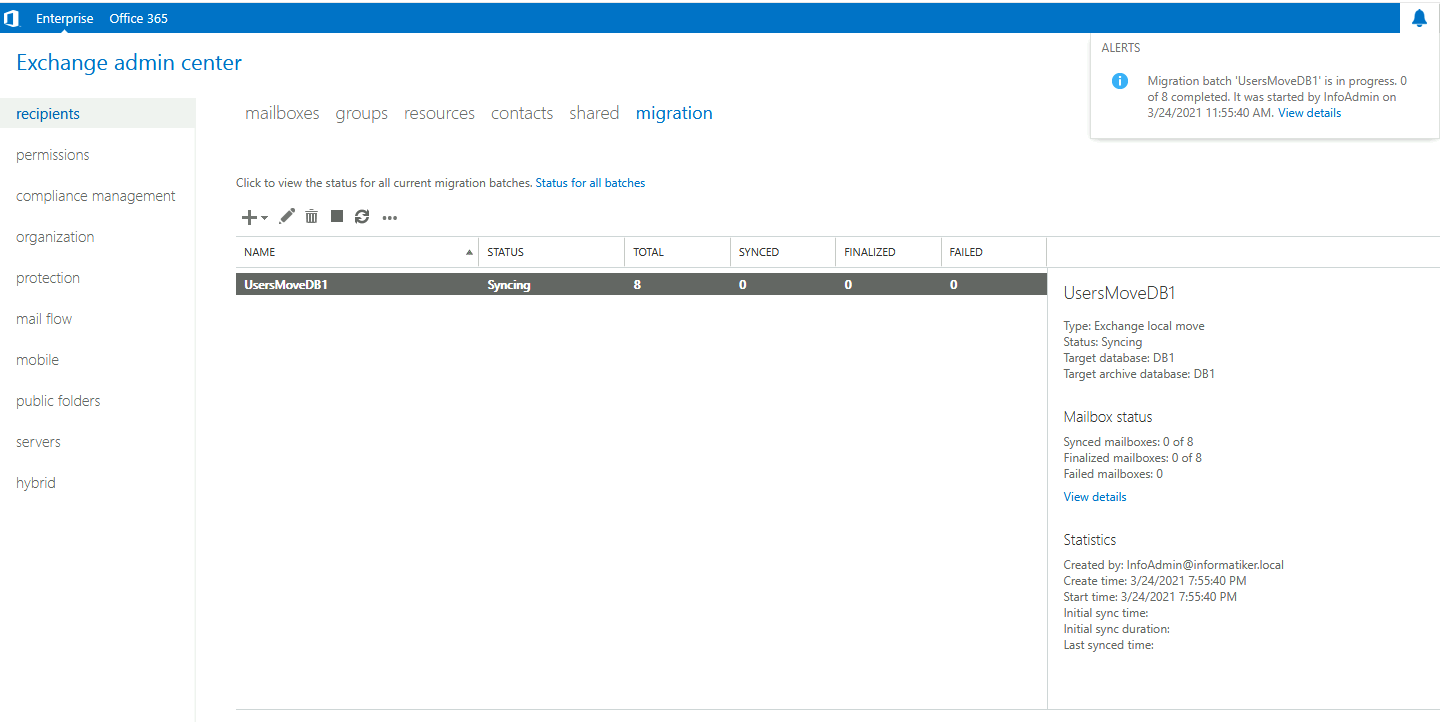
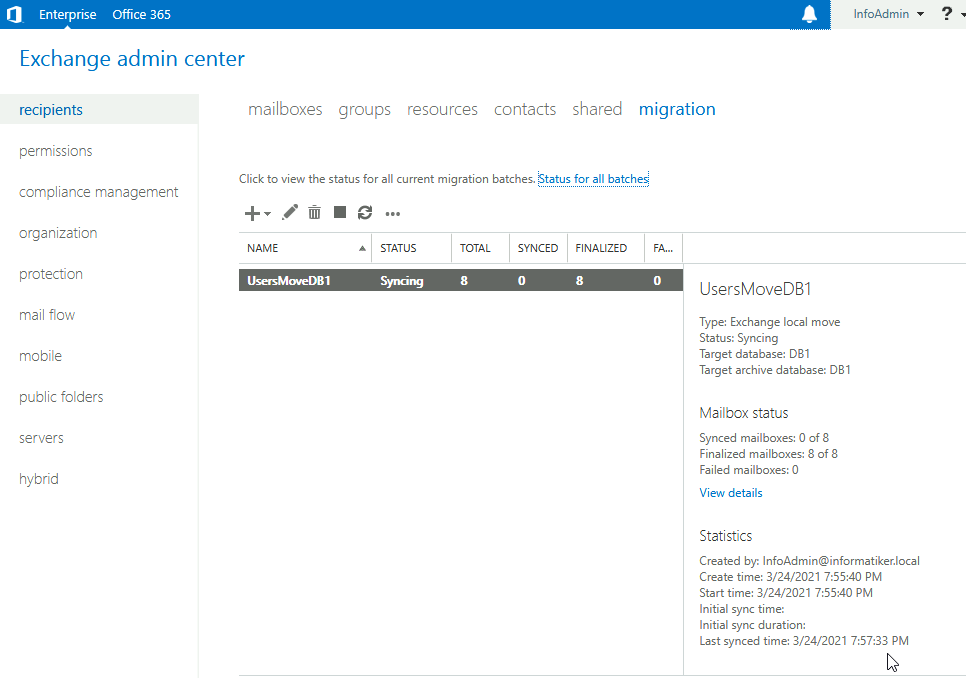
Although in the end status said it took 2 minutes to sync mailboxes, in reality I waited 40 minutes for screen to turn to completed. Be patient with this is all I have to say.
Before we proceed and remove default database, let’s just check a few things.
My default database is named “Mailbox Database 1289744949”
Before we delete this database we will check if following mailboxes exists – archive, arbitration, publicfolder, monitoring, auditlog…
Run following command in Exchange Management Shell (replace DB name with your database name, mine is “Mailbox Database 1289744949”)
Get-Mailbox -Database <DB Name>

Get-Mailbox -Database <DB Name> -Archive

Get-Mailbox -Database <DB Name> -Arbitration

Get-Mailbox -Database <DB Name> -PublicFolder

Get-Mailbox -Database <DB Name> -Monitoring

Get-Mailbox -Database <DB Name> -AuditLog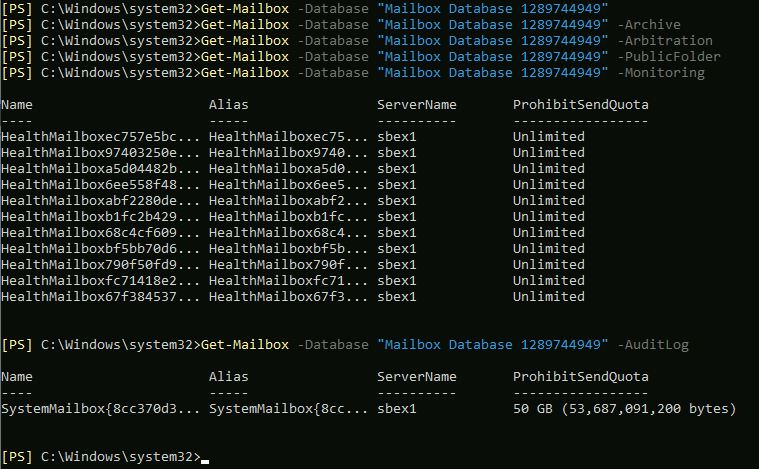
Ok, to move for example -Monitoring and -AuditLog to new database we are going to use
Get-Mailbox -Database <DB Name> -Monitoring | New-MoveRequest -TargetDatabase <DB Name>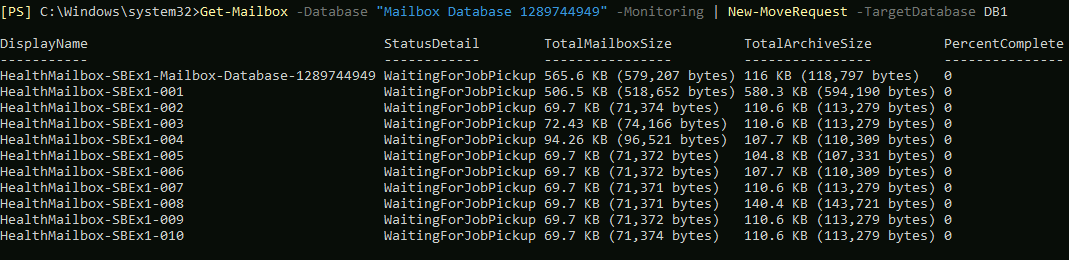
Ok, so we see nothing…
To check status, type in
Get-MoveRequest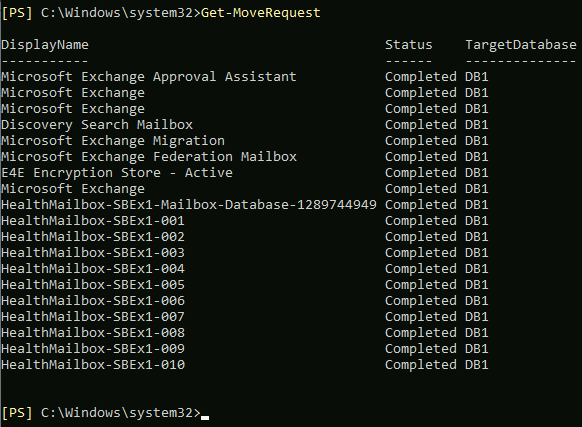
After all is done, you should see no output from Get-Mailbox command for Auditing and Monitoring.

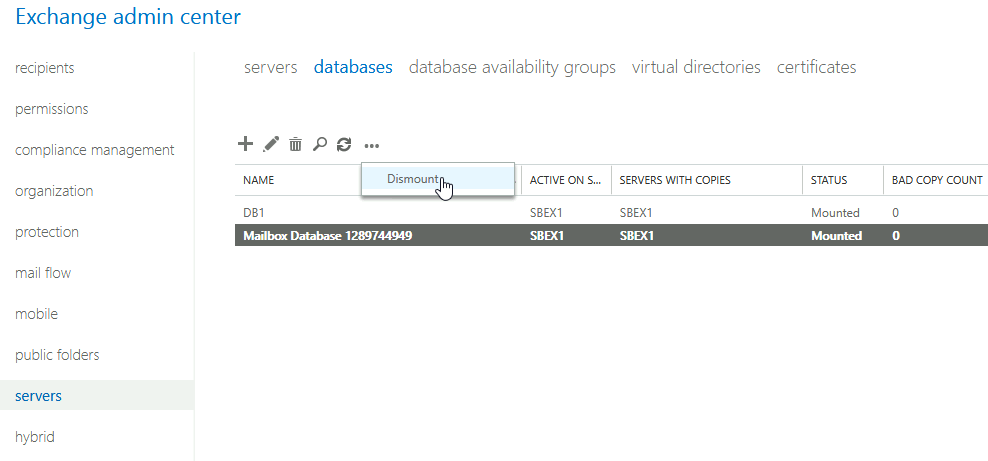
Ok, let’s head back to exchange admin center to servers menu, databases tab
Select default database and select … from the menu – click on Dismount. Confirm dismounting with Yes
Select little trashcan with default exchange database still selected
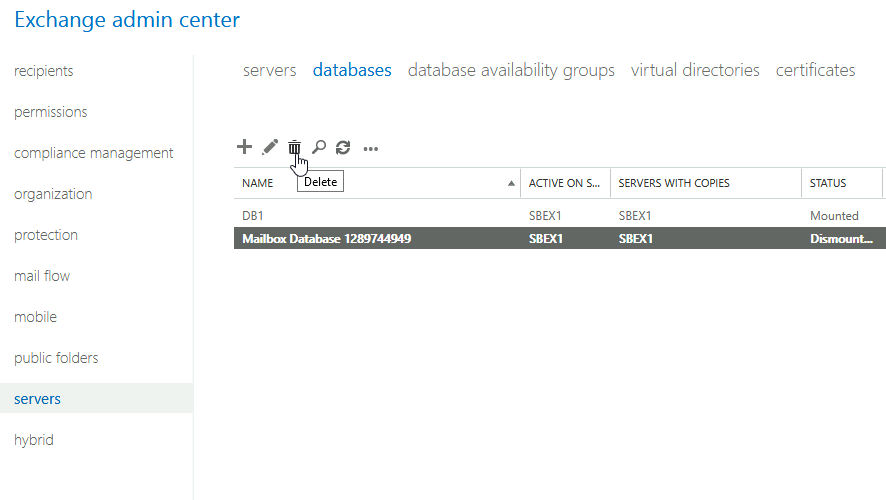
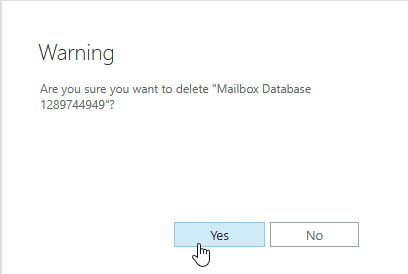
Yes, I want to delete Mailbox Database …
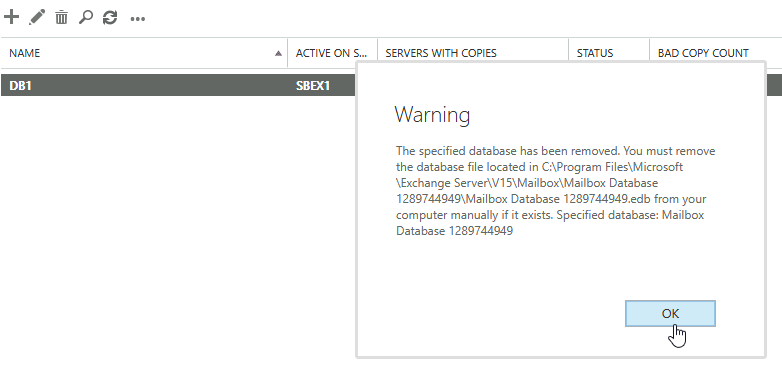
Success, database removed with no errors. As the dialog says, you should also remove .edb file from C:\Program Files…
I deleted mine right after closing that dialog.
Now, that is done, we are on a new database in new path.
Create Send Connector
Our goal for this short config tutorial is to be able to send and receive emails, so our next step is going to be creation of Send Connector.
I already have mine, since I have Edge role installed (search my blog for that guide).
For this guide I will pretend that I don’t have edge role (because it is optional feature) so we will configure send connector on mailbox role.
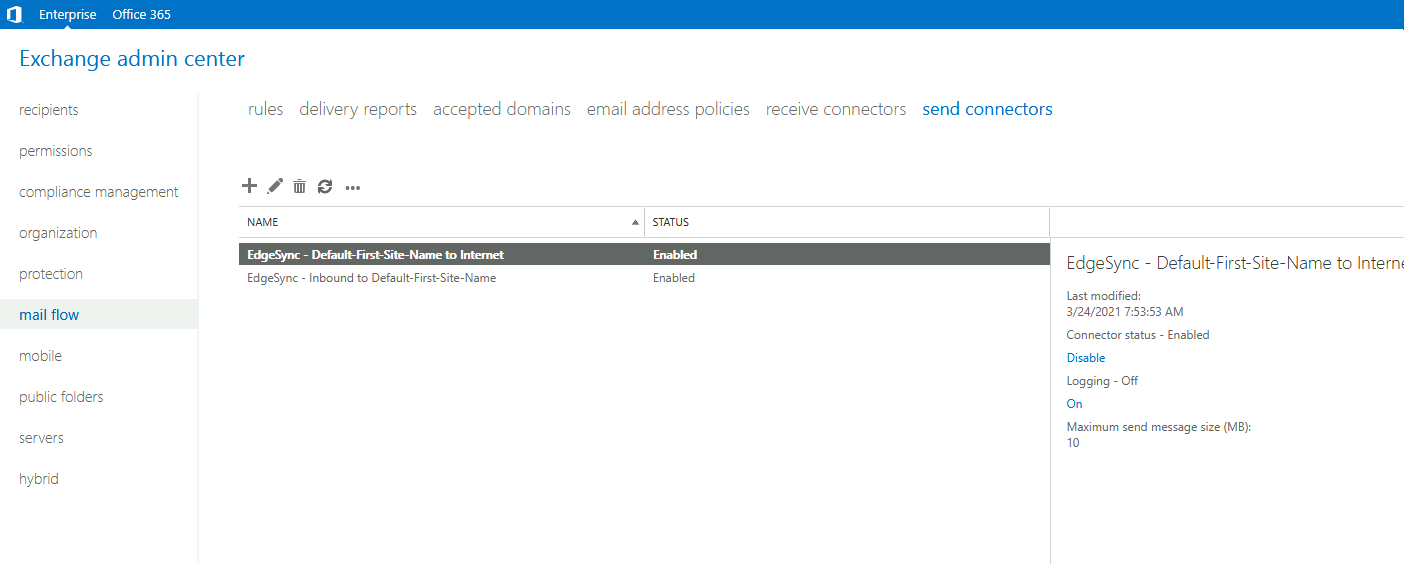
Go to mail flow menu and select send connectors. On Send connectors tab select + sign
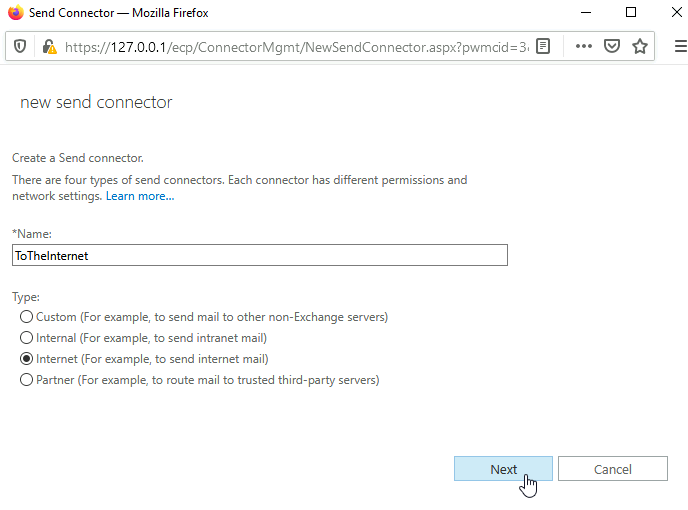
I will name mine “ToTheInternet”, you can select name as you wish – type should be – Internet | Next
Select MX record associated with recipient domain
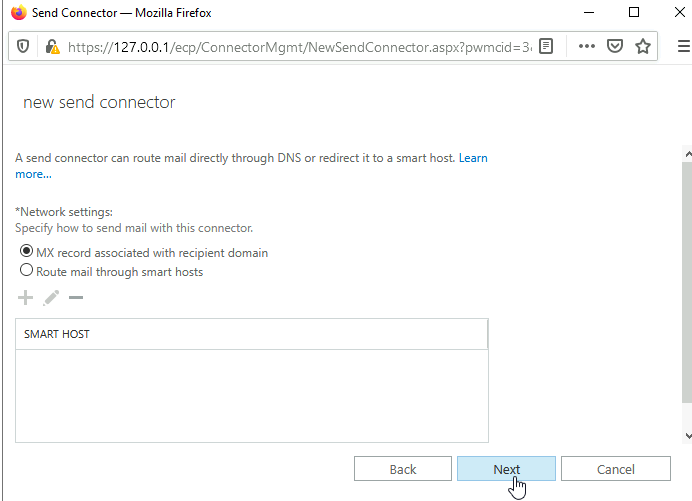
! A small reminder – for this to work you should already have your public DNS set and also, port 25 should be pointing to the machine on which mailbox role and send connector we are configuring is installed.
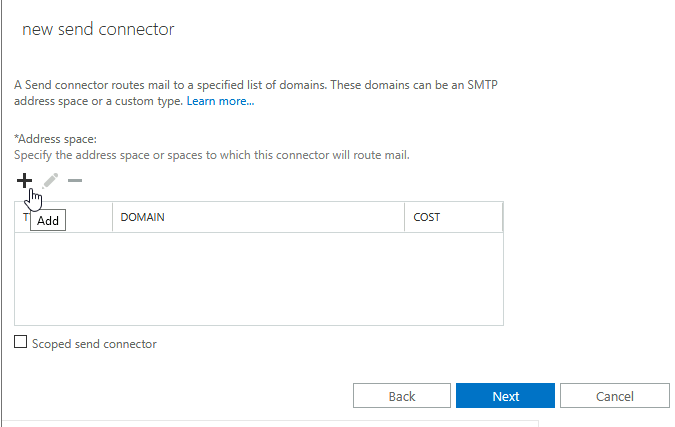
On address space screen you should click on + to add address space
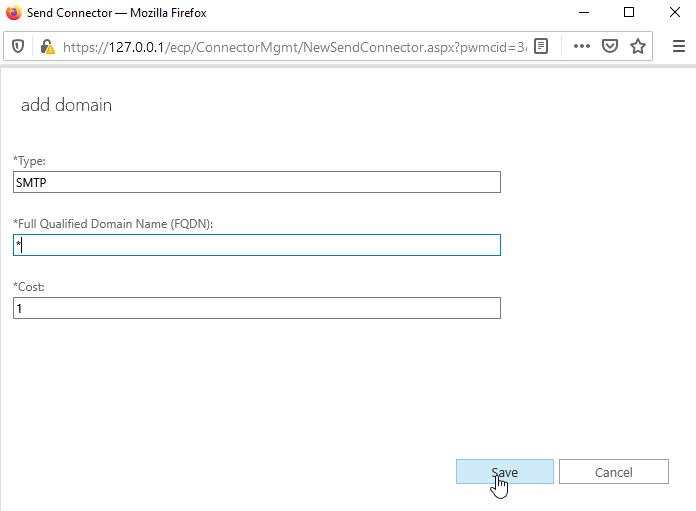
In fully qualified domain name (FQDN) just enter * (asterisk sign). Leave everything else as is.
Click Save
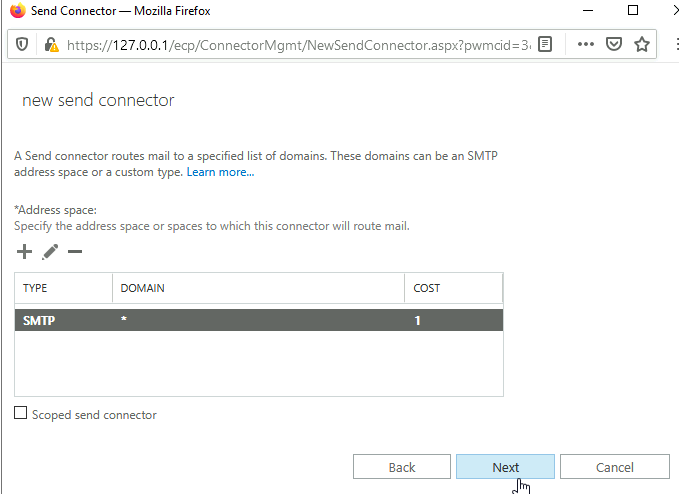
This is how it should look like. Click on Next
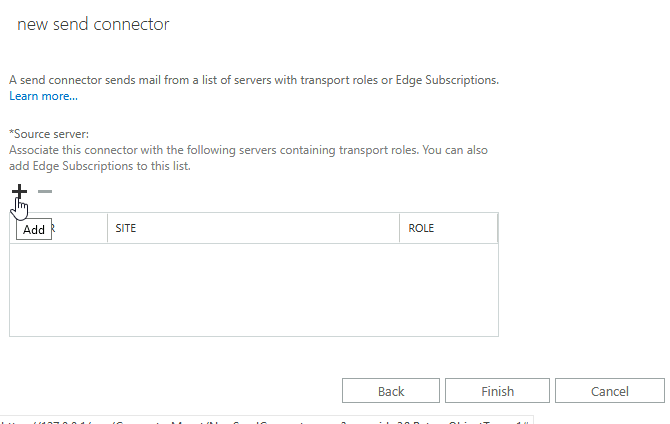
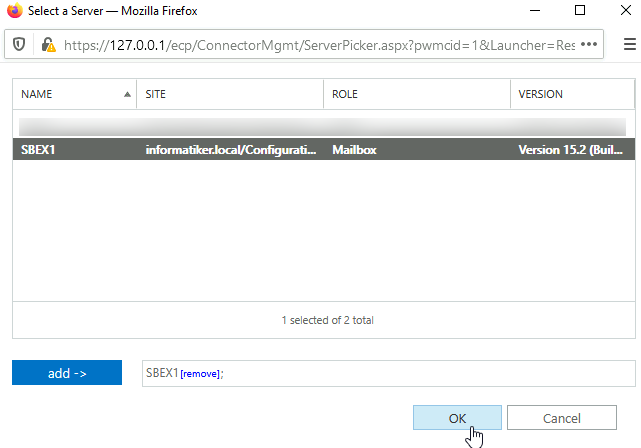
In the source server screen again click on + sign and add server you wish to send email from. We only have one server in this scenario.
Confirm with OK
Finish
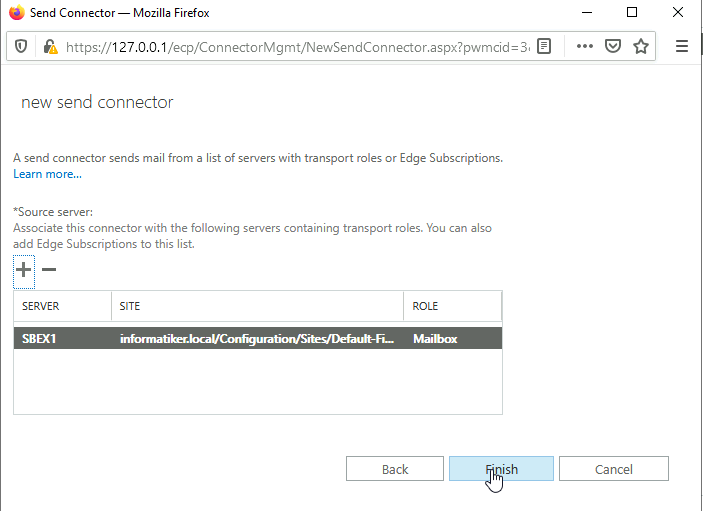
It is done

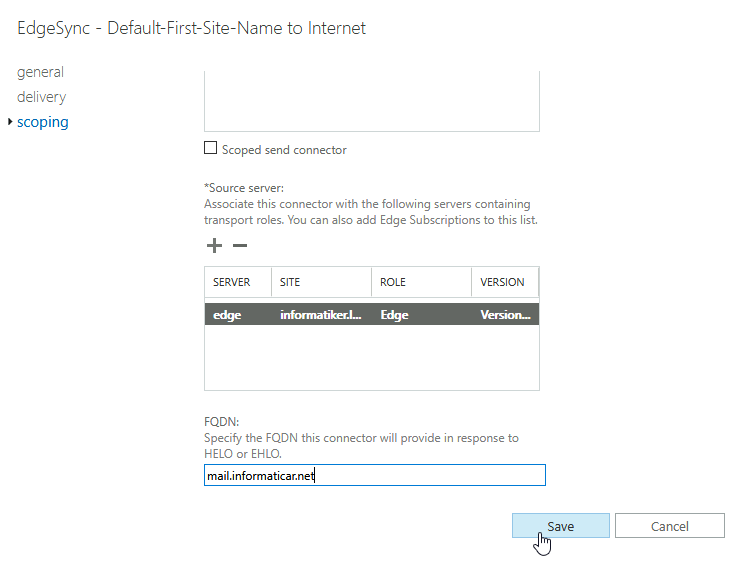
Additionally, you can now select created Send Connector, add click little pen in the menu above to edit it
Under scoping you can define FQDN for the domain.
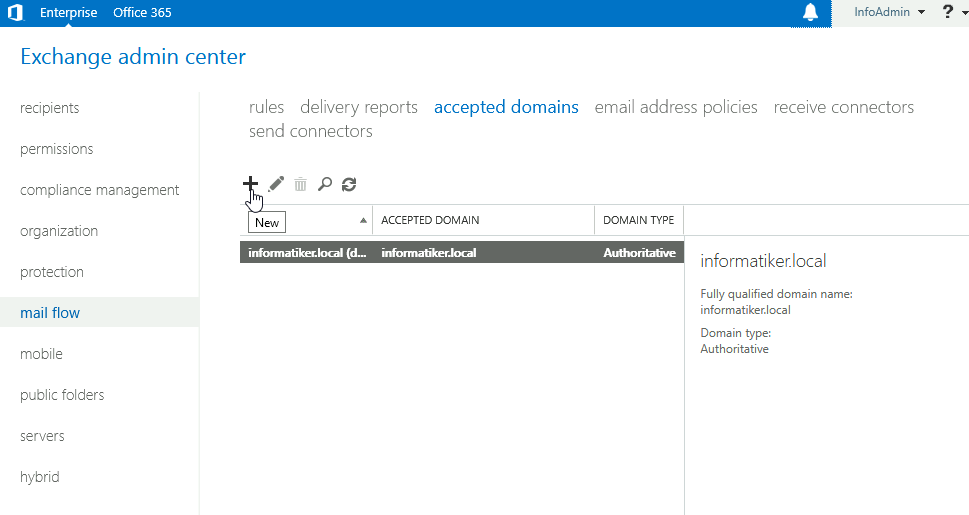
Set Accepted Domains
By default I have only one accepted domain, my internal informatiker.local domain
We are going to add our external domain (informaticar.net) to this
(of course, you will specify your domain name in this, not informaticar.net)
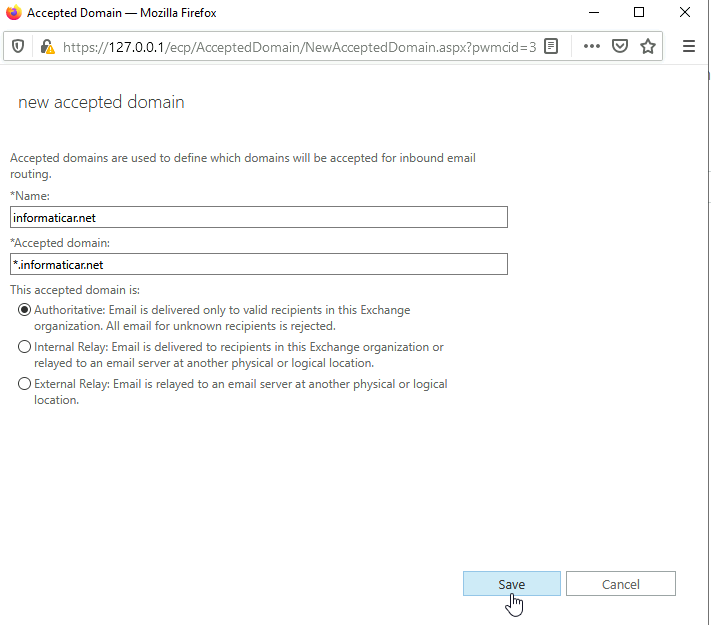
Click on + sign
Define your domain name and accepted domain. In accepted domain I usually enter as *.informaticar.net, in wildcard format. As I know it is not mandatory, but I do it this way.
Save
Ok ,now we have also our external domain as authoritative
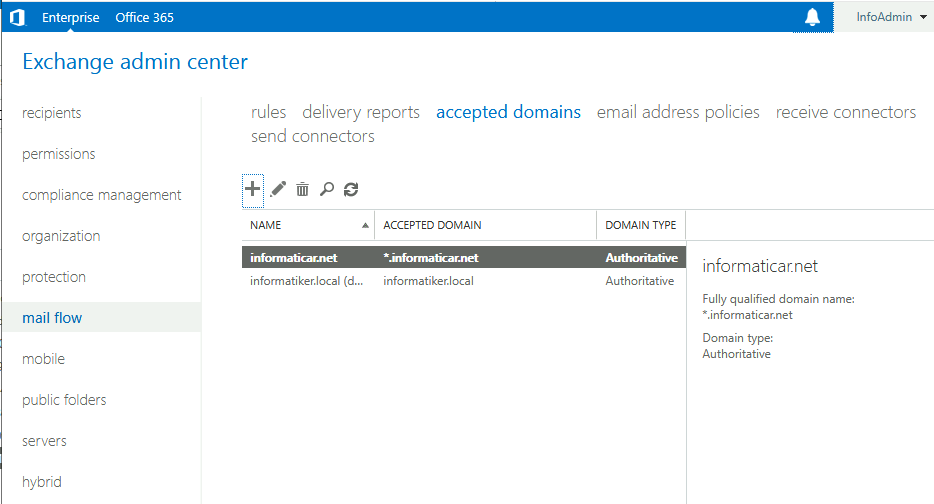
While we are here, let’s create email address policy
Create email address policy
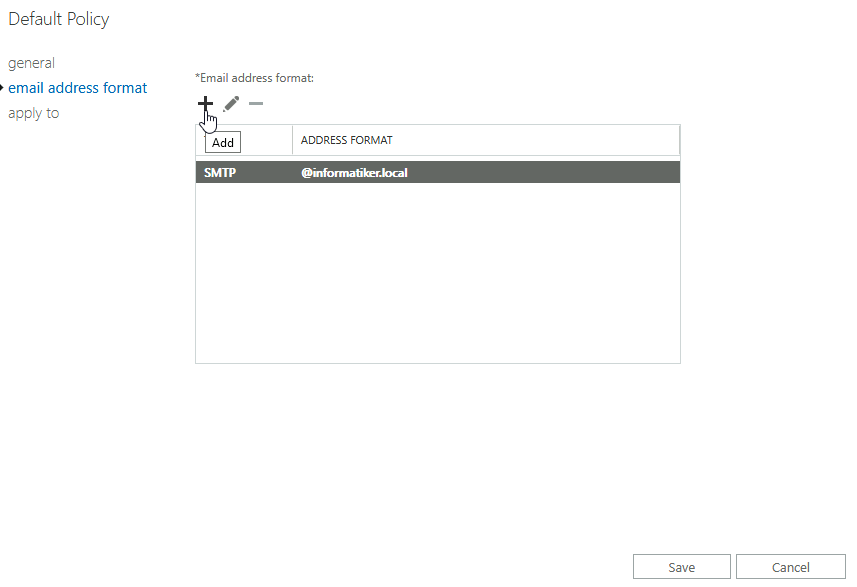
Stay at mail flow menu and click on tab email address policies. Select Default Policy and click on little pen to edit it
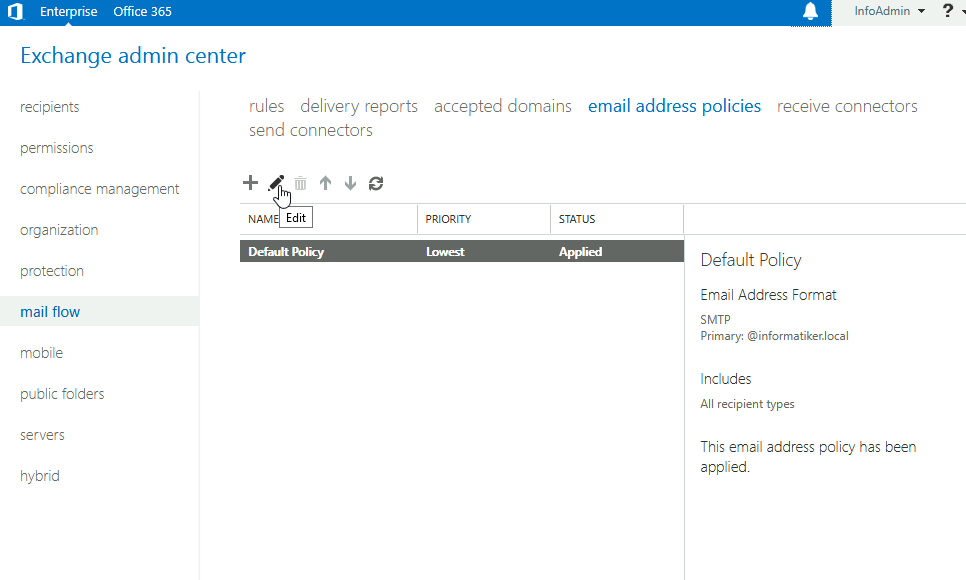
Click on email address format tab and select + to add new email address format, since we need to define email address format for the informaticar.net domain.
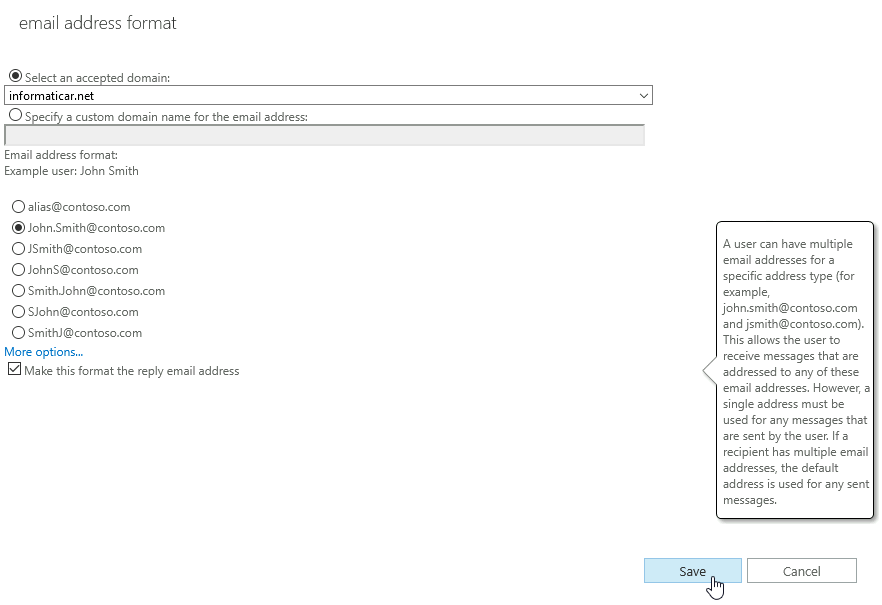
Select your external domain under “Select an accepted domain” and select email format you like. You can also make it default reply address. This is really up to you. I would advise first and last name format, since it is easier to handle, especially if you company grows, and few people with same name appear…
Save, Save, OK to exit the dialog
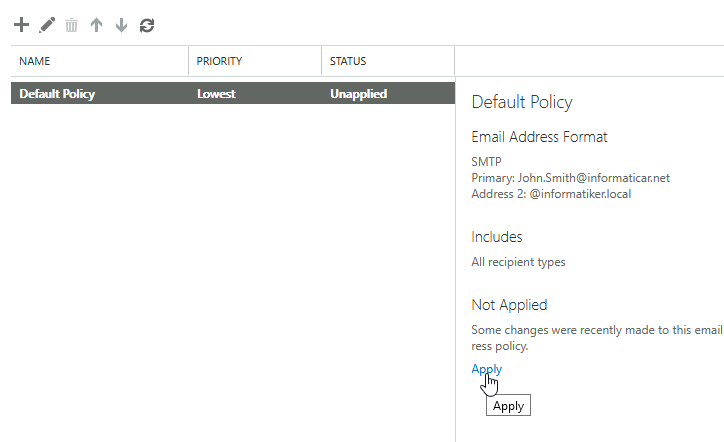
Apply the policy
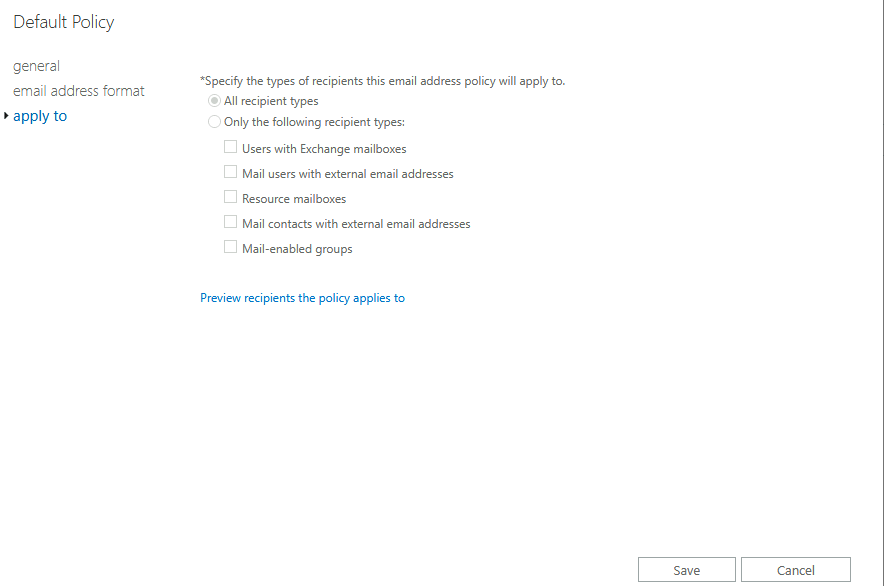
Also make sure that policy applies to all recipient types
Certificates
I will not go through the whole story of certificates, you will need certificate from the third party recognized certificate authority. Especially if you are planning to use autodiscovery, owa…
Self-signed certificates will not work with these services and you will have hard time setting that up on Android or iOS…
So, I assume you bought certificate (wildcard preferably) and you already created certificate request either through IIS or Exchange and got back valid certificate.
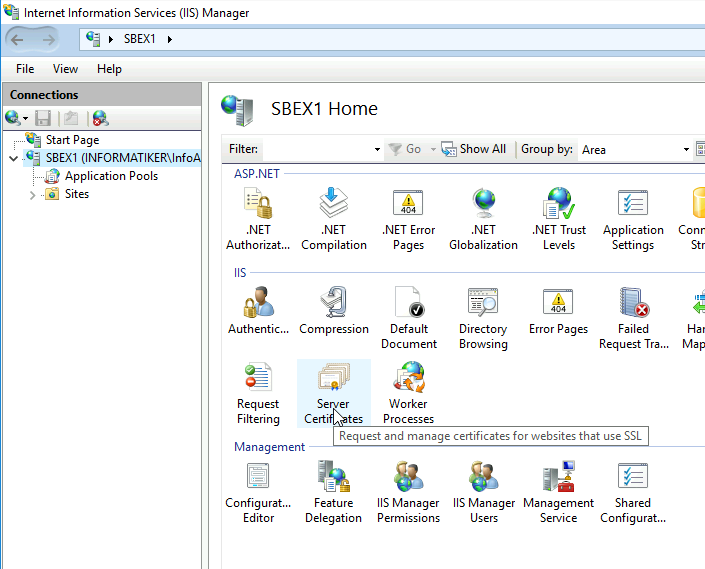
I usually import certificate through IIS (Internet Information Services)
Open IIS (it is installed with Mailbox role) and click on server name. From the middle menu select Server Certificates
So, I created my cert request here in IIS, uploaded request to the certificate authority and after validation got valid certificate for my domain which I will also use with Exchange. (That is long story short). I gave you hints, so please search through internet if you need help with this process. I also bought wildcard certificate for my domain. Wildcard certificate means that my certificate is not only valid for www.informaticar.net but also for all the subdomains – for example – mail.informaticar.net, owa.informaticar.net…
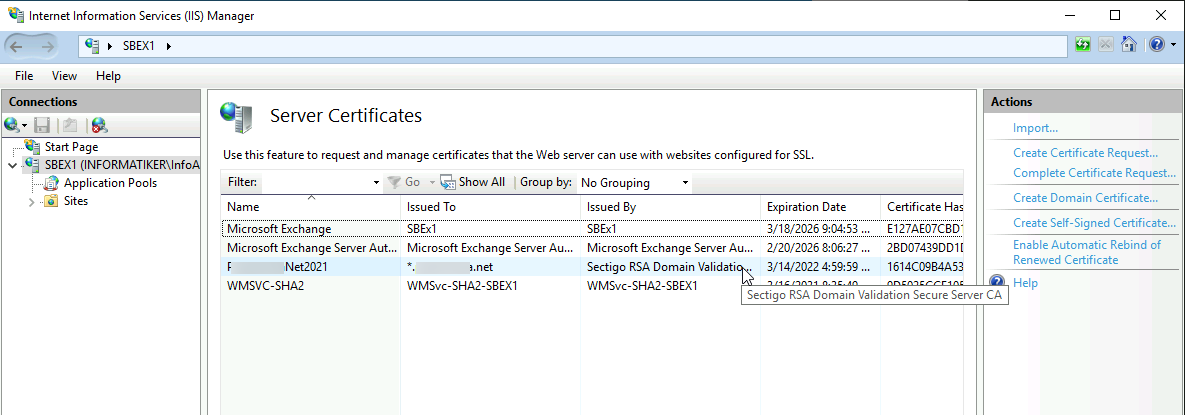
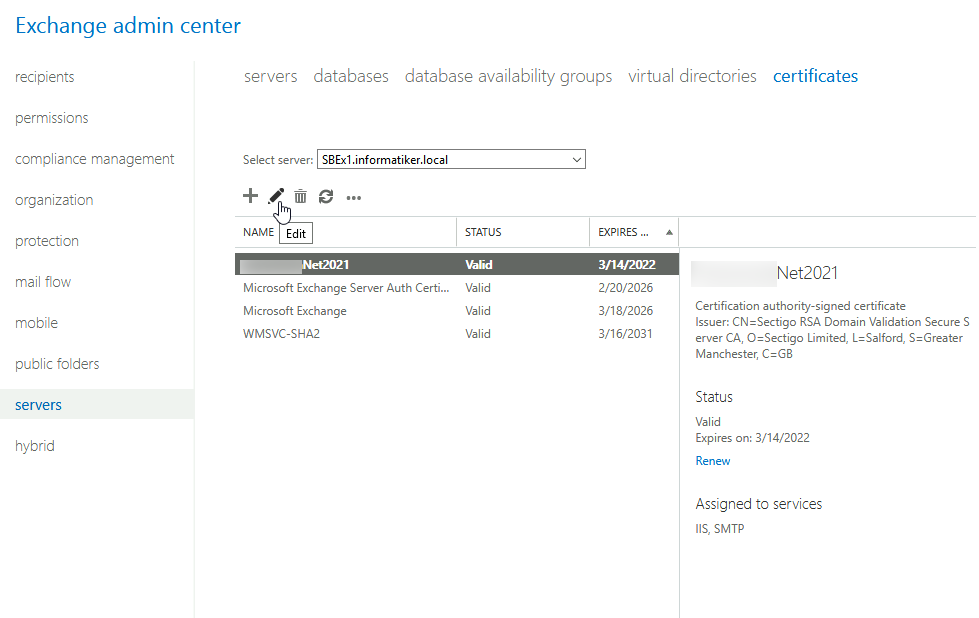
Let’s no go back to the Exchange Admin Center. Go to servers and select certificates tab
As you can see, my certificate is already in here. All the procedure I described above also can be done through admin center.
Anyways, I have already my certificate in here. Select it and click on little pen (edit)
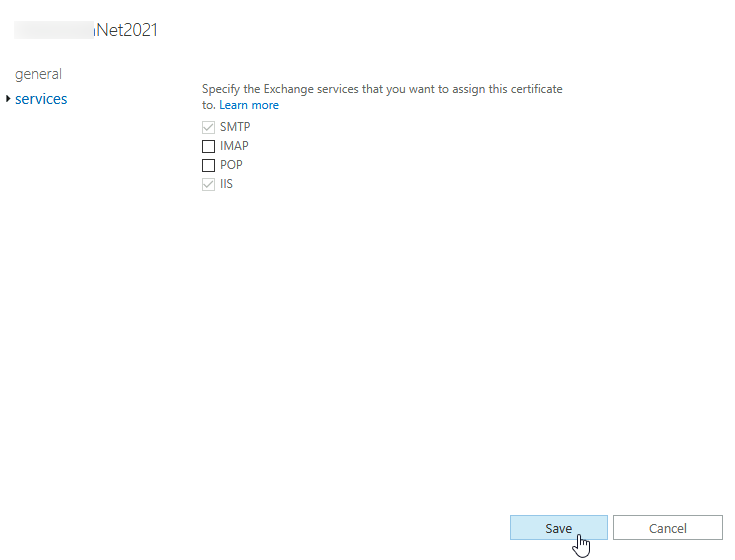
Under Services tab click on SMTP and IIS, we need our certificate to handle these for us. Save when you are done.
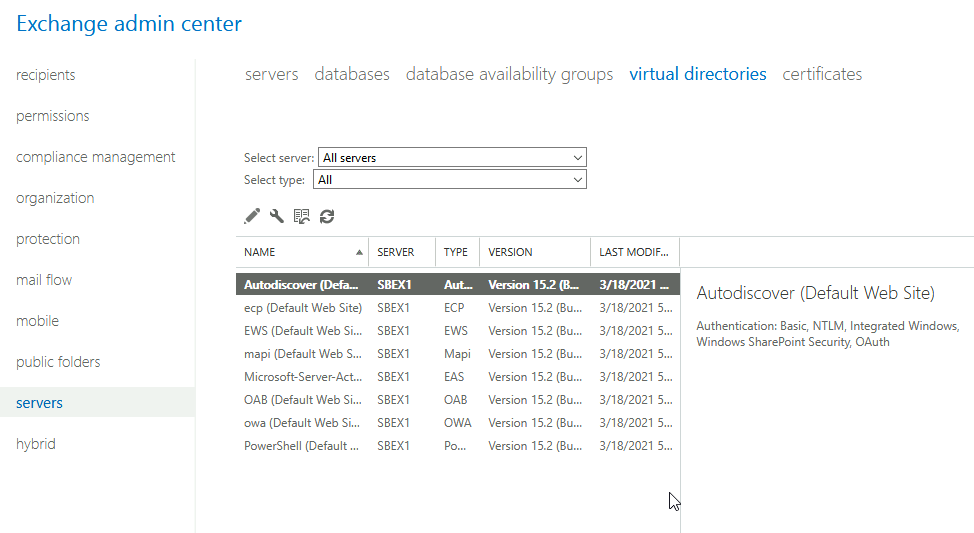
Configure virtual directories
While we are in servers section of the exchange admin center let’s visit virtual directory section
For these services to work from outside you will have to let port 443 from outside to your Exchange mailbox role server (make sure you do it on your router and mailbox role firewall)- https://docs.microsoft.com/en-us/exchange/plan-and-deploy/deployment-ref/network-ports?view=exchserver-2019
Here you will define your external links for services you wish to expose.
Lets take owa for example. I do it usually like this –
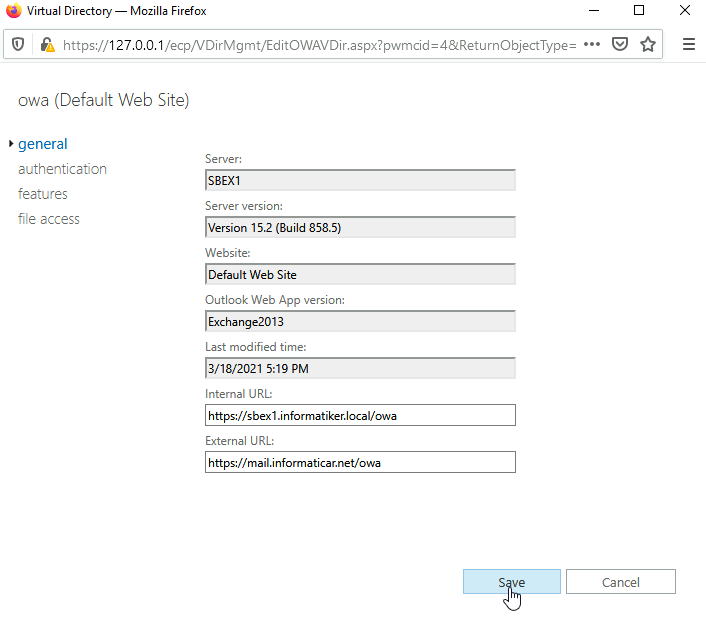
Select owa from the virtual directories list and click on edit
Under general select External URL and enter it
https://mail.informaticar.net/owa would be my example
Save the change after you are done.
Although, you might think which service you want to expose especially after ProxyLogon event for the Exchange in March 2021. So, think about which services you need on the internet for your Exchange.
You can repeat procedure for other services you wish to expose. Here are also examples for Exchange Management Shell
Configure OWA external links
For namespace enter you domain name (replace mail.informaticar.net).
Be sure to change HOSTNAME to your Exchange machine name (mine is SBEX1) and also, you can leave out -InternalUrl part of the command if you don’t wish to change it.
$namespace = “mail.informaticar.net”
Set-OwaVirtualDirectory -Identity “HOSTNAME\OWA (Default Web Site)” -ExternalUrl https://$Namespace/owa -InternalUrl https://$Namespace/owa
We can check result by typing in following
Get-OwaVirtualDirectory | Select Server,ExternalURL,InternalURL | fl
Ok, that is the example for OWA, all the command below go by the same principle.
Configure ECP
To be honest, I’m not huge fan of exposing OWA and ECP (and these services cannot be separated) to the internet, I’m more for blocking outside access. But that is a topic for another time, this is more convenience vs security matter, so it is up to you to decide.
Set-EcpVirtualDirectory -Identity “HOSTNAME\ECP (Default Web Site)” -ExternalUrl https://$namespace/ecp -InternalUrl https://$namespace/ecpCheck ECP configuration
Get-EcpVirtualDirectory | Select Server,ExternalURL,InternalURL | flConfigure Outlook Anywhere
Set-OutlookAnywhere -Identity “HOSTNAME\RPC (Default Web Site)” -ExternalHostname $namespace -InternalHostname $namespace -ExternalClientsRequireSsl $true -InternalClientsRequireSsl $true -DefaultAuthenticationMethod NTLMCheck Outlook Anywhere config
Get-OutlookAnywhere | Select Server,ExternalHostname,Internalhostname | flConfigure ActiveSync
Set-ActiveSyncVirtualDirectory -Identity “HOSTNAME\Microsoft-Server-ActiveSync (Default Web Site)” -ExternalUrl https://$namespace/Microsoft-Server-ActiveSync -InternalUrl https://$namespace/Microsoft-Server-ActiveSyncCheck Activesync config
Get-ActiveSyncVirtualDirectory | select server,externalurl,internalurl | flConfigure Exchange Web Services Virtual Directory
Set-WebServicesVirtualDirectory -Identity “HOSTNAME\EWS (Default Web Site)” -ExternalUrl https://$namespace/EWS/Exchange.asmx -InternalUrl https://$namespace/EWS/Exchange.asmxCheck Web Services config
Get-WebServicesVirtualDirectory | Select Server,ExternalURL,InternalURL | flConfigure OAB
Set-OabVirtualDirectory -Identity “HOSTNAME\OAB (Default Web Site)” -ExternalUrl https://$namespace/OAB -InternalUrl https://$namespace/OABCheck OAB config
Get-OabVirtualDirectory | Select Server,ExternalURL,InternalURL | flConfigure Autodiscovery
Change informaticar.net for your domain name!! Also, set CNAME in your public DNS for Autodiscovery – https://docs.microsoft.com/en-us/exchange/architecture/client-access/autodiscover?view=exchserver-2019
CNAME record setup: name: autodiscovery , TTL 14400 , target: mail.informaticar.net (ofcourse change to your domain)
Set-ClientAccessService -Identity <HOSTNAME> –AutoDiscoverServiceInternalUri “https://autodiscover.informaticar.net/Autodiscover/Autodiscover.xml”Check Autodiscovery config
Get-ClientAccessService | fl identity,autodiscoverserviceinternaluriConfigure MAPI
Set-MapiVirtualDirectory -Identity “HOSTNAME\mapi (Default Web Site)” -ExternalUrl https://$namespace/mapi -InternalUrl https://$namespace/mapiCheck MAPI config
Get-MapiVirtualDirectory | Select Server,ExternalURL,InternalURL | flReboot server when you are done.
Create your first user
Before we create new user, we will resolve one “problem”. I want my users to have login in this format: zeljko.medic@informaticar.net
By default my users will have login with local domain (@informatiker.local) so I want to avoid that.
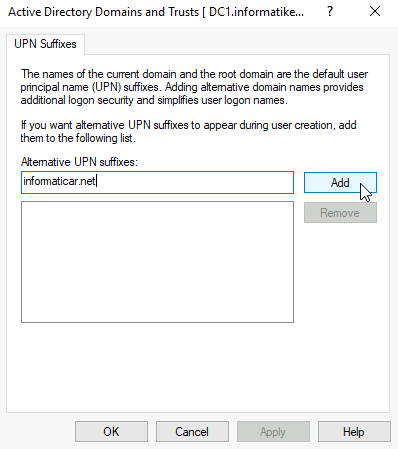
To change this, we need to add UPN suffix to our domain.
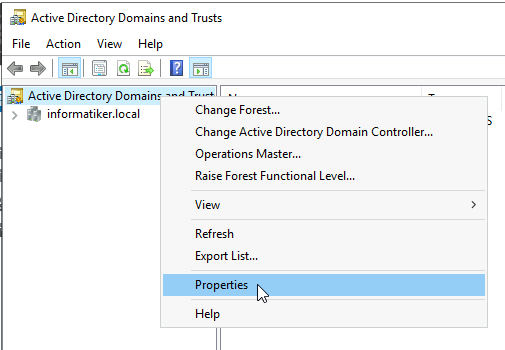
Ok, in your Active Directory server (this is not done on exchange server, but on your domain controller) go to domains
Right click on Active Directory Domains and Trusts and select Properties
Add your external domain name, Apply, OK and close.
Ok ,we are done with the domain controller, back to our exchange server.
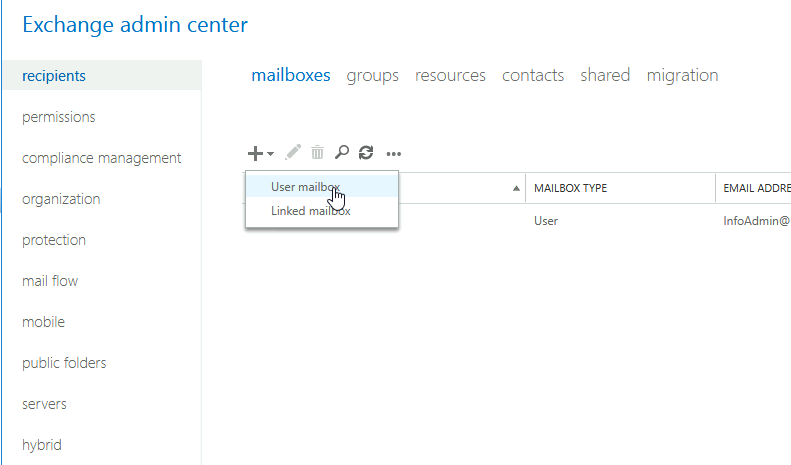
Go to the recipients menu and select mailboxes. Click on + and select User Mailbox
I will select “New user” and enter my first and last name. You can really format this part as you wish.
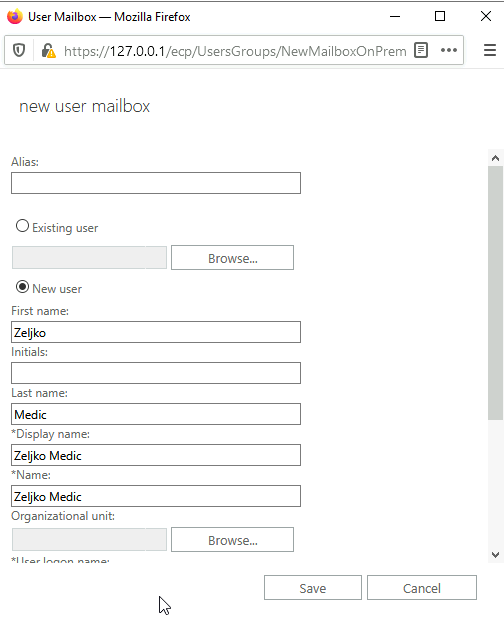
Scroll down through window
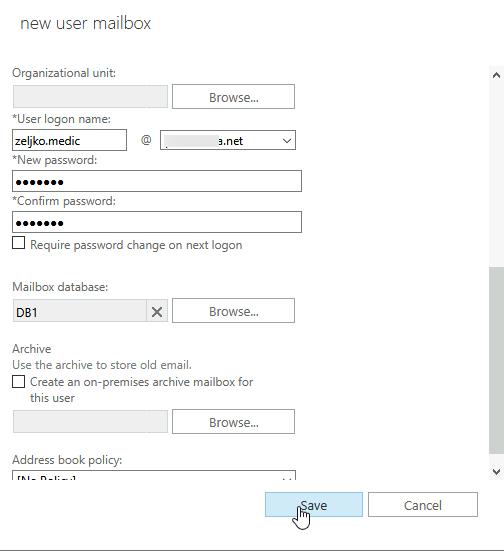
Now, for a username I selected zeljko.medic@informaticar.net. Your external domain should now be available if you configured AD part. I also selected DB we created earlier and defined password (click on more options at the bottom of the window). Save
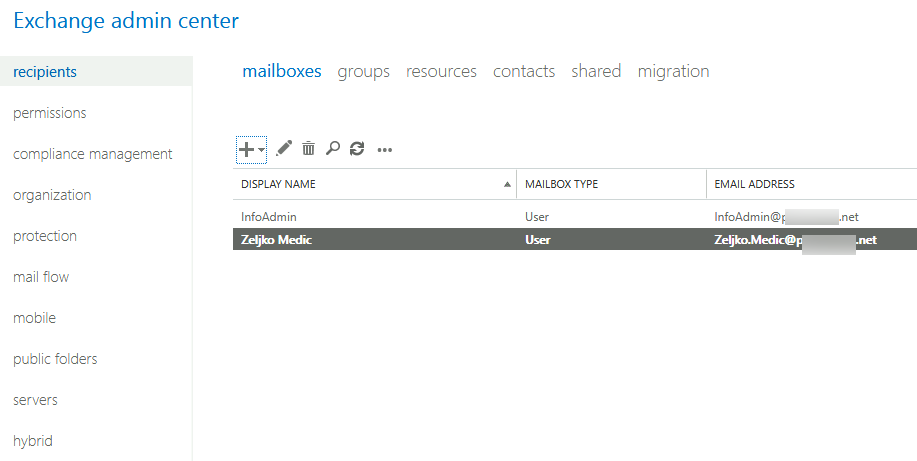
We now have two users
I will login to owa to for my user Zeljko so we can check mailflow
https://mail.informaticar.net/owa
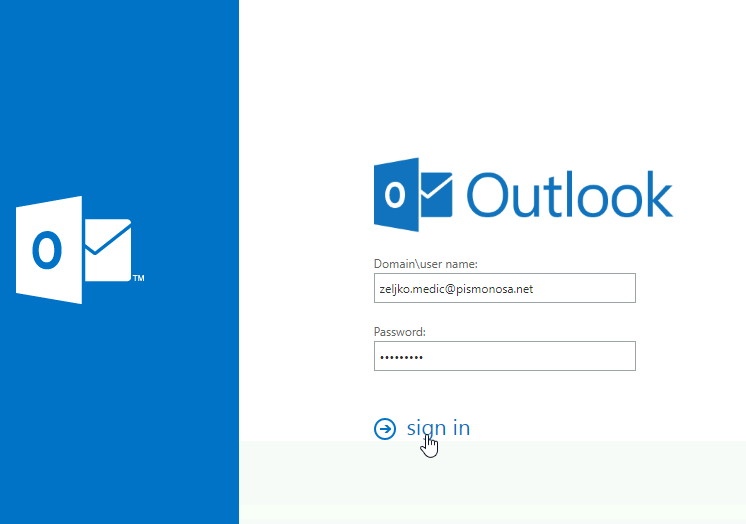
We are at the login screen.
After logging in, we are at the mail screen.
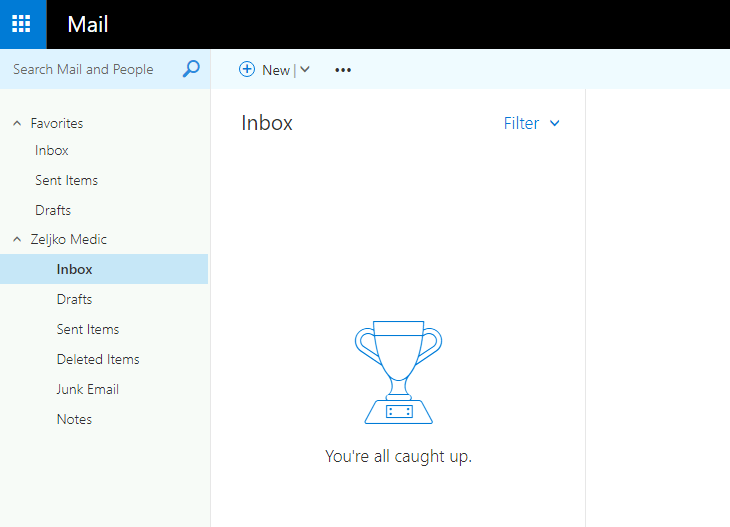
Ok, if you did everything good so far (and routing, public DNS, domain name…) you should now be able to send/receive emails
I successfully received my first email message (I’m using another domain in this test, not informaticar.net, as I’m writing in this guide. Informaticar.net is in this case external domain for me)
So, we can receive email from the internet!!

Reply also went well, so we now have basic communication!!
It would be nice to test everything before you go further and Microsoft Remote Connectivity Analyzer is great tool to test out all your services.-
https://testconnectivity.microsoft.com/tests/o365
Activate your Exchange server
Now that we are done with the initial configuration, we can activate our Exchange installation.
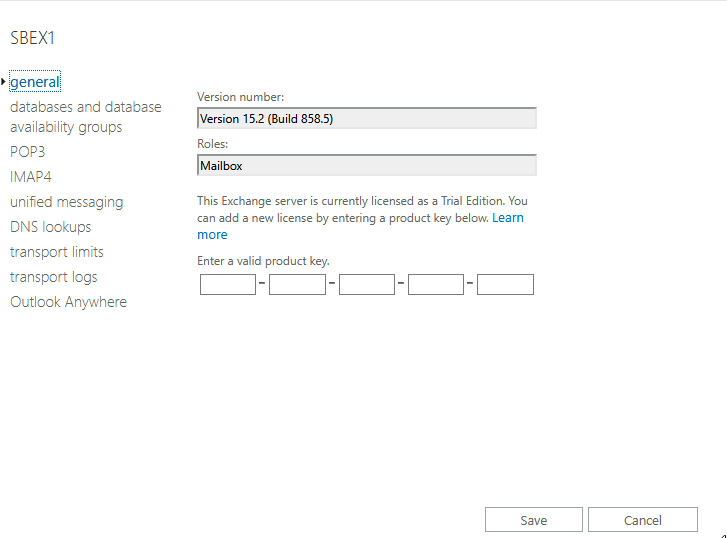
Go to the exchange admin center, select servers from menu, and select servers tab. Select your server and click on “Enter Product Key” from the far right of the screen
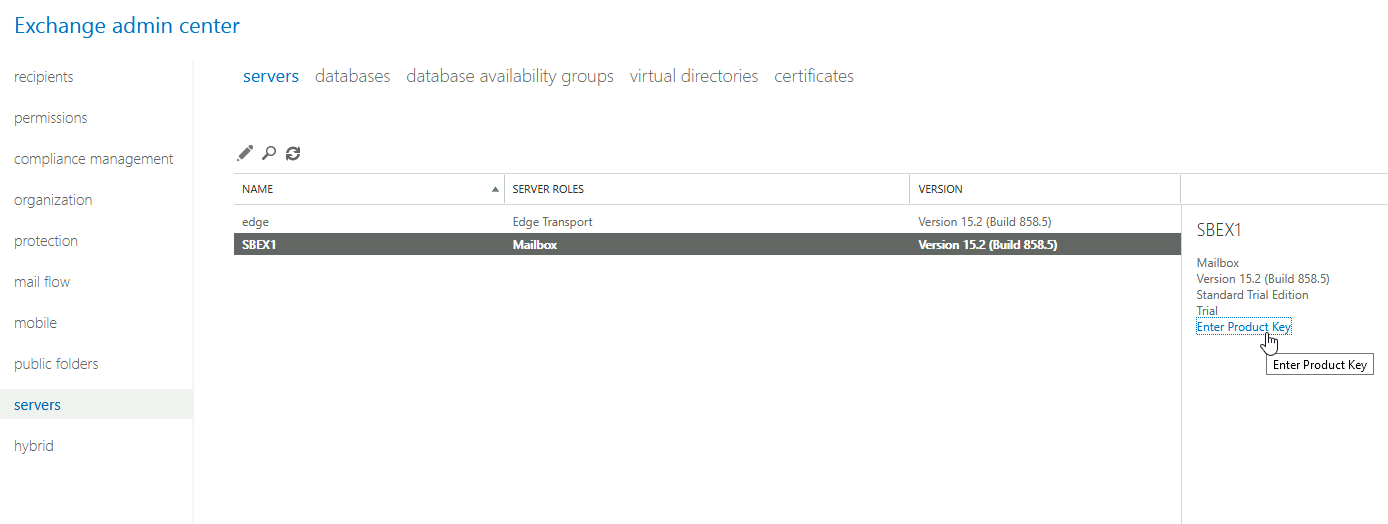
Enter your product key and click on Save
If you have Edge roles you will need to activate them also. You can check the status of the edge roles activation from the ECP, but I find myself activating edge role servers both from ECP and on edge server itself from exchange management shell (as admin)
Here is a command you can activate edge role with
Set-ExchangeServer <ServerName> -ProductKey <ProductKey>This is how my command would look like
Set-ExchangeServer ExEdge01 -ProductKey 12345-12345-12345-12345-12345Conclusion
We have done basic configuration, at this point your mail flow should work, but there is a lot more that need to be done – antispam/malware protection, quotas, send/receive limits…
Security and patching should be your priority in environment like this.