Tutorial on how to install Fresh RSS on CentOS 8.
Prerequisites
This tutorial assumes you know how to install and setup LAMP stack and will not get to details on that. If you need more info about it, look here –
Enable EPEL and REMI repos
sudo dnf install https://dl.fedoraproject.org/pub/epel/epel-release-latest-8.noarch.rpm

sudo dnf install https://rpms.remirepo.net/enterprise/remi-release-8.rpm
Get your CentOS install up to date by issuing
sudo yum update -yInstall and enable PHP
sudo dnf module enable php:remi-7.4Install PHP and needed modules
sudo yum install php php-curl php-gmp php-intl php-mbstring php-sqlite3 php-xml php-zipApache and MariaDB
We will also install Apache and MariaDB as our DB server
sudo yum install httpd mariadb-server mariadb -yEnable Apache and MariaDB
sudo systemctl enable --now httpd.service mariadb.serviceMariaDB config
We will now make initial configuration of our MariaDB
sudo mysql_secure_installationAfter that is done, we will create DB for our FreshRSS, create user and add all rights to that user.
mysql -u root -pCREATE DATABASE freshrss;
CREATE USER `zeljko`@`localhost` IDENTIFIED BY 'pass01';
GRANT ALL ON freshrss.* TO `zeljko`@`localhost`;
FLUSH PRIVILEGES;
exitThats it, we created freshrss DB and user for it.
Apache config
After you are done with db, we will continue with Apache and create freshrss.conf file in /etc/httpd/conf.d/
sudo vi /etc/httpd/conf.d/freshrss.confEnter following (change rss.example.net for your ip or domain) and change /path/to/FreshRSS to your path where Fresh RSS
<VirtualHost *:80>
	ServerName rss.example.net
	DocumentRoot /path/to/FreshRSS/p/

	<Directory /path/to/FreshRSS/p>
		AllowOverride AuthConfig FileInfo Indexes Limit
		Require all granted
	</Directory>

	ErrorLog ${APACHE_LOG_DIR}/freshrss_error.log
	CustomLog ${APACHE_LOG_DIR}/freshrss_access.log combined

	AllowEncodedSlashes On
</VirtualHost>
Here is how my configuration looks like

If you wish to enable HTTPS / SSL – and you definitely WANT THAT in production, you will also need this part for the document. For my production I use exclusively HTTPS:443, without HTTP.
<IfModule mod_ssl.c>
	<VirtualHost *:443>
		ServerName rss.example.net
		DocumentRoot /path/to/FreshRSS/p/

		<Directory /path/to/FreshRSS/p>
			AllowOverride AuthConfig FileInfo Indexes Limit
			Require all granted
		</Directory>

		ErrorLog ${APACHE_LOG_DIR}/freshrss_error.log
		CustomLog ${APACHE_LOG_DIR}/freshrss_access.log combined

		<IfModule mod_http2.c>
			Protocols h2 http/1.1
		</IfModule>

		# For the API
		AllowEncodedSlashes On

		SSLEngine on
		SSLCompression off
		SSLCertificateFile /path/to/server.crt
		SSLCertificateKeyFile /path/to/server.key
		# Additional SSL configuration, e.g. with LetsEncrypt
	</VirtualHost>
</IfModule>
After you are done with this config, we need to restart Apache
sudo systemctl restart httpdFresh RSS installation
First, we need to install git.
sudo yum install gitChange to /var/www directory
cd /var/wwwClone git repo
sudo git clone https://github.com/FreshRSS/FreshRSS.gitChange permissions on your FreshRSS directory
sudo chown -R apache:apache /var/www/FreshRSSEnter FreshRSS directory by entering
cd FreshRSSWe need to give web server write permissions for data directory and subdirectories.
sudo chown -R :apache . && sudo chmod -R g+r . && sudo chmod -R g+w ./data/Optionally, if you would like to update FreshRSS from web interface, you will also need
sudo chmod -R g+w .One last thing on CentOS, I haven’t found a way to force exceptions for FreshRSS in SELinux – everything I tried didn’t work for me (please let me know if you have working solution). You will have to put SELinux in permissive mode. Command below will put SELinux in permissive mode temporarily, until reboot. Look through other tutorials to put SELinux permanently into permissive mode.
sudo setenforce 0

03.05.2023 - thanks to Pim Aarts who was kind to let me know working solution for SELinux. We have working SELinux for FreshRSS on Rocky Linux 9 (in case settings down don't work for you, you can always use "setenforce 0" command I wrote above)
sudo semanage fcontext -a -t httpd_sys_rw_content_t "/var/www/FreshRSS/data(/.*)?"
sudo restorecon -R -v "/var/www/FreshRSS/data”
sudo setsebool -P httpd_can_network_connect onWe also need to allow traffic through firewall
sudo firewall-cmd --add-service http --permanent
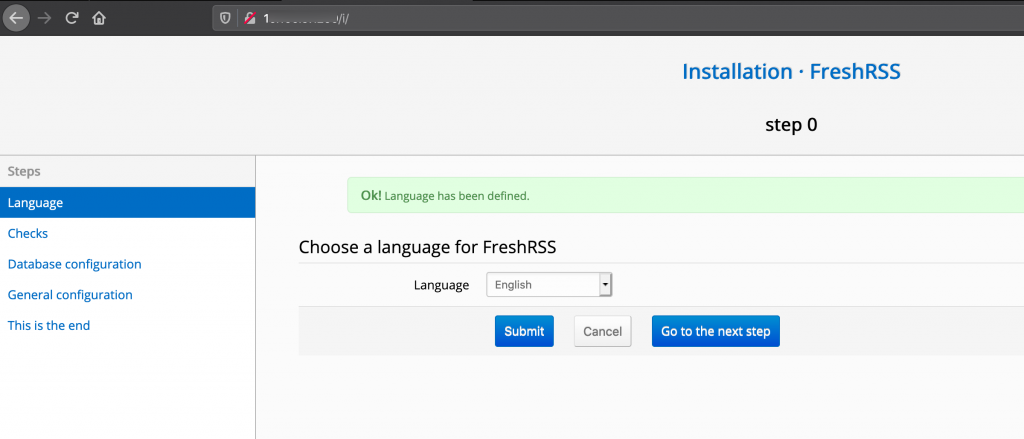
sudo firewall-cmd --reloadIf you done everything correctly, when you enter your ip or name in browser mine is (http://192.168.2.22) you will get following screen
Ok, I will select English and go to the next step
Next step will check all the prerequisites for successful install. If you followed this tutorial correctly, you should be in green. Go to the next step

Select DB you want to use, you can stay with SQLite, or you can select MySQL and enter data from the DB we defined earlier – Submit
SQLite
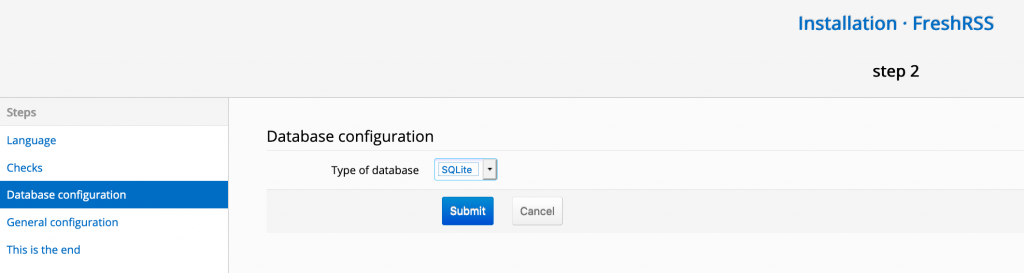
MySQL
You can use localhost instead 127.0.0.1 if it for some reason doesn’t work for you.
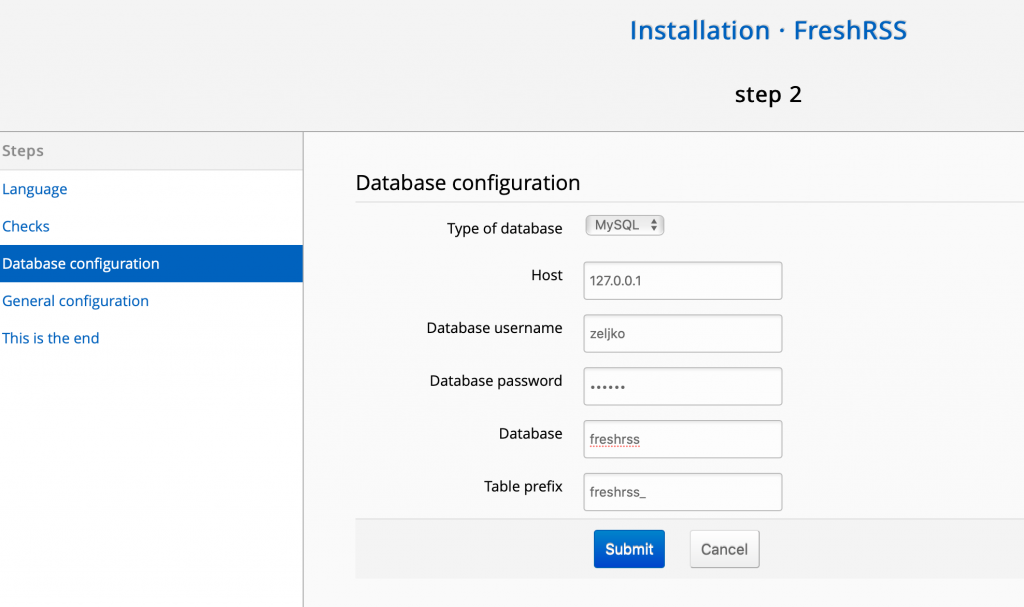
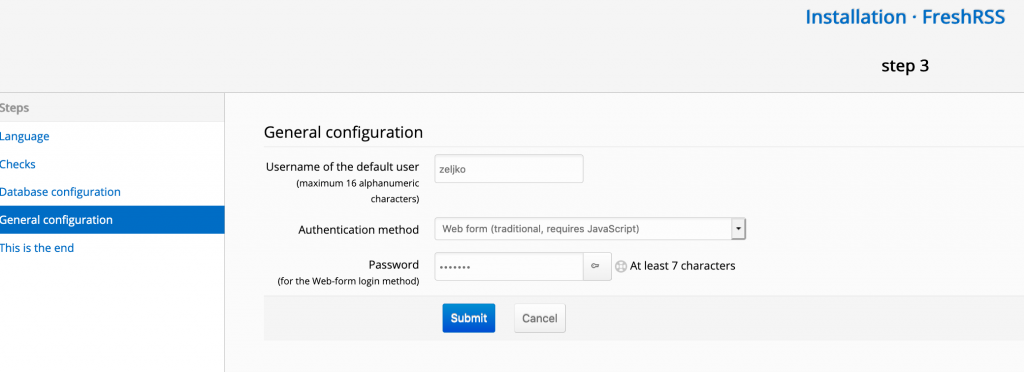
You need to enter new user and pass and select Submit.
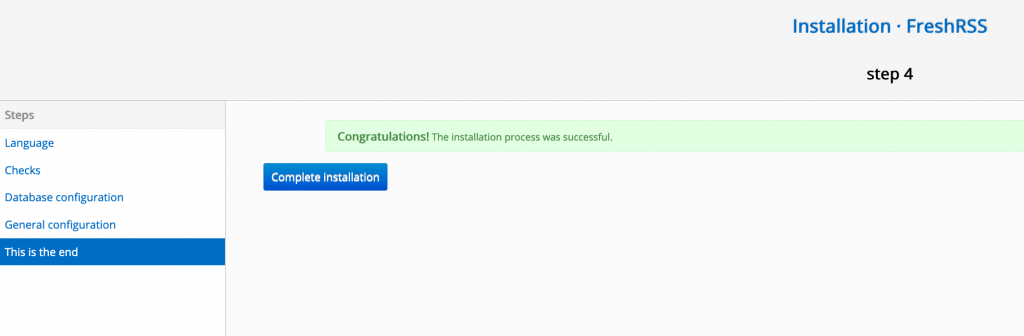
It looks like we are done – Complete installation
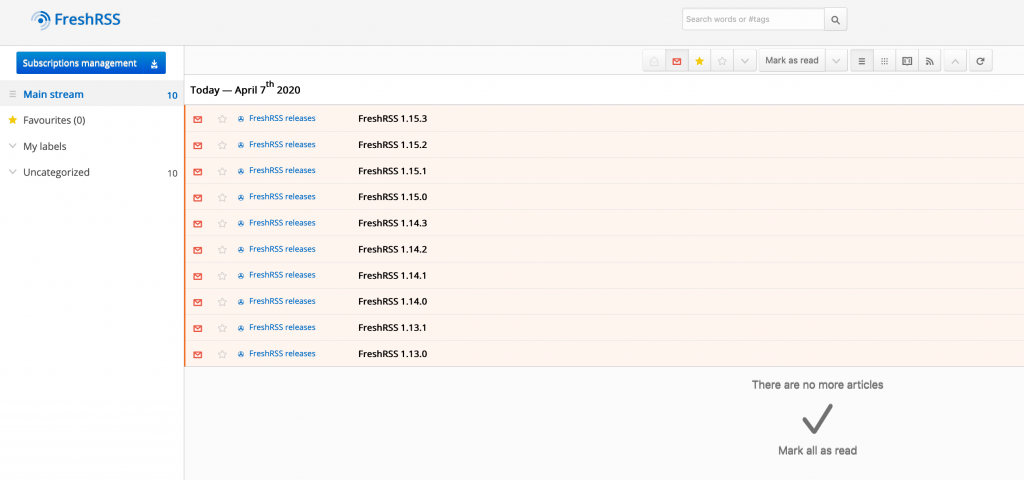
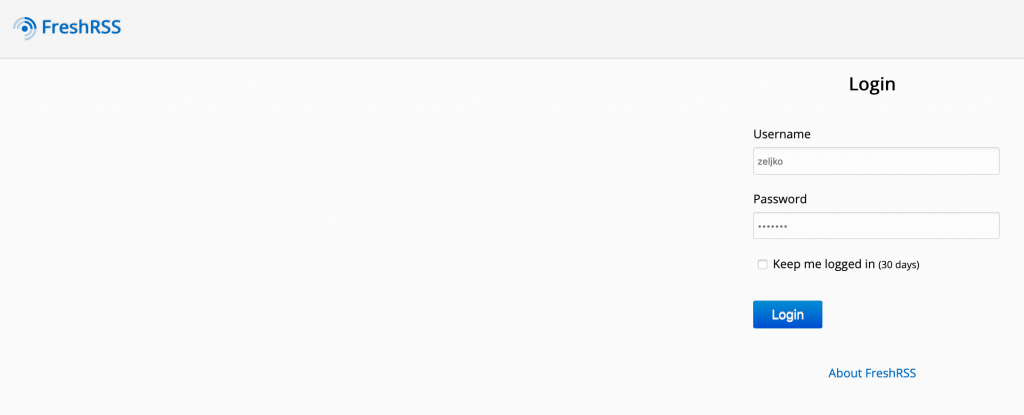
You will get login screen after this one. If you enter your user and password, you should be able to login.
Success :)